The time to pack up and hit the road is approaching and so I decided to pack away the five months of creative chaos that has accumulated on my bedroom floor…pattern charts, sticks of various sizes and lengths, swords, shuttles, cable ties, metal rods, pick-up tools, heddle string, sewing thread, yarn, cardboard strips, needles, string. Everything went back in its proper place and I could see the rug again and I didn’t need to play hop-scotch on the way from my bed to the door.
But then I decided that there was still time to weave some tiny projects and I started planning a lanyard that a friend has been asking me to weave for her for some time. I also want to weave a strap for a pouch that I have been thinking about for years as well as a bookmark that I promised another friend. And, with just that, wouldn’t you know it, I am back to Square One and can’t see my rug any more! The books, and charts and yarn and worksheets are all over the place along with the shoulder-bag project that I continue to sew.
This is where I was with the bag project when I last posted. The zipper is in place and sides have been installed. On my weekly visit to the supermarket I was happy to find a long table runner that I could use as the lining material. It looked like it was just the right width and I loved the color and subdued pattern. This seemed to be a safe bet for me who knows nothing about fabric and I was happy to pay a bit more than it would have cost me to just buy fabric in the street market. I doubt that I would have found anything that I liked as much in the market stalls.
That un-ripping tool got a workout as I sewed and re-positioned over and over. Now it’s done. This is the opening for the quirky pocket…the one that sits on the outside but is accessed from the inside. I got to use a beautiful button that one of my students made by hand as a closure for the pocket. The loop around the button is an eye-pattern tubular band that I wove.
I edged the pocket and the sides with plain-weave tubular bands in blue. Tubular bands are such wonderful finishes. The pocket and sides are so sturdy with those nice firm bands in place. And that is where this project sits until I can get more blue yarn for the straps. I was hoping to use this bag on this trip but that won’t be happening. I’ll come back home with the yarn and weave some nice sturdy straps in the intermesh structure.. The bag is the perfect size for my books!
As for the tiny tape projects, a friend asked me to weave a lanyard for her name tag using the cat motifs that I designed for my book of 100 Patterns.My online weaving friend Andrea had designed cats with intertwined tails which she allowed me to adapt to more closely match my own three cat motifs. All four motifs are charted in the book. The lanyard needs to be 3/4”- 1” wide.
Here’s the first little guy on my width-sample warp which confirmed that I had enough ends to get 3/4”. I am going to continue weaving this sample and make it into a wrist band for myself while I plan the layout of the lanyard. I’ll probably mix the cat motifs with some paw prints, the charts for which are also in the book of 100 patterns.
At the same time, I am getting a start on another band that has been on my mind for several years. I have been collecting the word “weave” in various languages which I would like to weave into a strap for a pouch. Many years ago I wove and constructed a carry bag for my backstrap bits and pieces and I used weft twining to decorate the strap with just a few words in different fonts.
I am using the intermesh structure this time and using just the one font to weave my words.
I have about twenty-four words collected now from online friends ranging from Cherokee to the Yoruba language of Nigeria.
Here are the cats in guitar-strap size woven by Julie Beers for her husband’s guitar…
Kathy King combined patterns from the book of 100 patterns (Complementary-warp Pattern Book) and my very first book, Andean Pebble Weave. She calls her band The Birds and the Bees. I love the blue and brown together.
Margo wove this wrist-cuff combining various patterns that are charted in my books, as well as designing some of her own and giving it all an original twist to create a cycling-inspired theme for a friend. I love this!Colleen Turner added a strap that she wove on an inkle loom to a shoulder-bag. The pattern is charted in the Complementary-warp Pick-up book which also gives step-by-step instructions for those who use any kind of loom to weave warp-faced bands.
Marsha’s band in 20/2 silk is spectacular. The red and blue are her own hand-spun threads. She has combined patterns from two of my books and the result is gorgeous!
And here is Kristin’s latest piece of awesome-ness in her own hand-spun wool. She has named this “Celestial”. The star pattern is one that was created by Kurt Laitenburger for tablet weaving and which he allowed me to adapt to the Andean Pebble Weave structure for my More Adventures book. I like to call the smaller pattern that Kristin used on the sides “Sunrise, Sunset” and this piece makes me think of a sunset with the evening star rising. The red, orange, blue and yellow all come from natural dyes. Kristin is going to sew this into a long zippered bag for for her backstrap loom.
One of my weaving teachers, Maxima, took a liking to this same star pattern when I was up in the highlands. Of all the samples that I took to show her, this was the one that she wanted to learn. We wound a warp and Maxima took over after she watched me weave a few rows. I was able to show Mr Laitenburger how his pattern was being enjoyed on the traditional leaning loom in the central Bolivian highlands. He was very pleased.
Kurt Laitenberger does beautiful work with tablets and I really appreciate his allowing me to adapt some of his patterns to the Andean Pebble Weave structure for my books.
Speaking of tablet weaving, I was looking through some of my old folders on my desktop about which I had almost completely forgotten and I re-discovered some awesome pictures that Taylor had sent me of tablet weavers in Bhutan. Taylor and I had been corresponding by email while she was living in Bhutan and we were able to meet up once in the USA when I was on a visit. She gave me an incredibly fine and stiff tablet-woven band and told me about how some of the tablet weavers use x-ray film to make the tablets for the extremely fine thread that they use. After our get-together, she sent me these photos that she had taken f a family of tablet-weavers.
It’s fascinating to see a classic backstrap loom set-up being used with the tablets. I am guessing that the structure that is used for the bands that are woven using this set-up is one in which the weaver does not have to deal with built-up twist in the warp threads.
Taylor had been working on a project teaching women to construct tote bags from strips of plastic cut from soda bottles. I think that you can just make out the green handle of one of the bags in the foreground of this photo in which the weaver is preparing her warp with the thin film tablets.
I love the rocks and the weights that she is using to hold her stakes in place. I managed to scavenge an old paint can filled with cement that I sometimes need to use when I warp using certain set-ups.
Until next time, let me leave you with this message: A limited number of hard copies of all my books in Englishwill be available while I am traveling. Please leave a comment on this post, if you are interested, and I will get back to you.
HOME! While I am settling into my visit to my “other home” here in Australia, I would like to share with you three cool websites I found while on my US trip.
1. PROJECT GUTENBERG: Perhaps I am one of only a few people who knew nothing about the Project Gutenberg site and its thousands of free e-books. It seems that everyone I excitedly tell about it discovered it a long time ago. I ran across it while looking for a used copy of Silas Marner to buy. There it was free to enjoy as part of the Gutenberg Project.
As is The Wind in the Willows andthat was meaningful to me because…
On my final night in the US I spent time with a weaver friend who had a copy of The Wind in the Willows from which she has been reading aloud each evening. I was reminded of the part about HOME that had touched me deeply even as an eight-year old child reading the book for the first time. It seemed so appropriate to re-read that part as my US trip ended and my thoughts turned to the home in Australia that I hadn’t seen for four years (a collection of people, memories and experiences rather than a structure) and the one I had left twenty years ago to venture to South America. I faced the trip with very mixed emotions as my mother, my “anchor”, had died in September.
I wanted a copy of the book so I could sit quietly on my own and read the passages about home. And then Ruth wrote to me later to tell me that The Wind in the Willows too could be enjoyed for free via the Gutenberg Project site.
I’ll quote the part about home here. All you travelers out there will surely have felt like this at some point.
From “The Wind in the Willows” by Kenneth Grahame:
Home! That was what they meant, those caressing appeals, those soft touches wafted through the air, those invisible little hands pulling and tugging, all one way! Why, it must be quite close by him at that moment, his old home that he had hurriedly forsaken and never sought again, that day when he first found the river! And now it was sending out its scouts and its messengers to capture him and bring him in. Since his escape on that bright morning he had hardly given it a thought, so absorbed had he been in his new life, in all its pleasures, its surprises, its fresh and captivating experiences. Now, with a rush of old memories, how clearly it stood up before him, in the darkness! Shabby indeed, and small and poorly furnished, and yet his, the home he had made for himself, the home he had been so happy to get back to after his day’s work. And the home had been happy with him, too, evidently, and was missing him, and wanted him back, and was telling him so, through his nose, sorrowfully, reproachfully, but with no bitterness or anger; only with plaintive reminder that it was there, and wanted him.
The call was clear, the summons was plain. He must obey it instantly, and go.
……………………………………………………………………………………………………..
The weary Mole………soon had his head on his pillow, in great joy and contentment. But ere he closed his eyes he let them wander round his old room, mellow in the glow of the firelight that played or rested on familiar and friendly things which had long been unconsciously a part of him, and now smilingly received him back, without rancour…..
…….He saw clearly how plain and simple— how narrow, even— it all was; but clearly, too, how much it all meant to him, and the special value of some such anchorage in one’s existence. He did not at all want to abandon the new life and its splendid spaces, to turn his back on sun and air and all they offered him and creep home and stay there; the upper world was all too strong, it called to him still, even down there, and he knew he must return to the larger stage. But it was good to think he had this to come back to; this place which was all his own, these things which were so glad to see him again and could always be counted upon for the same simple welcome.
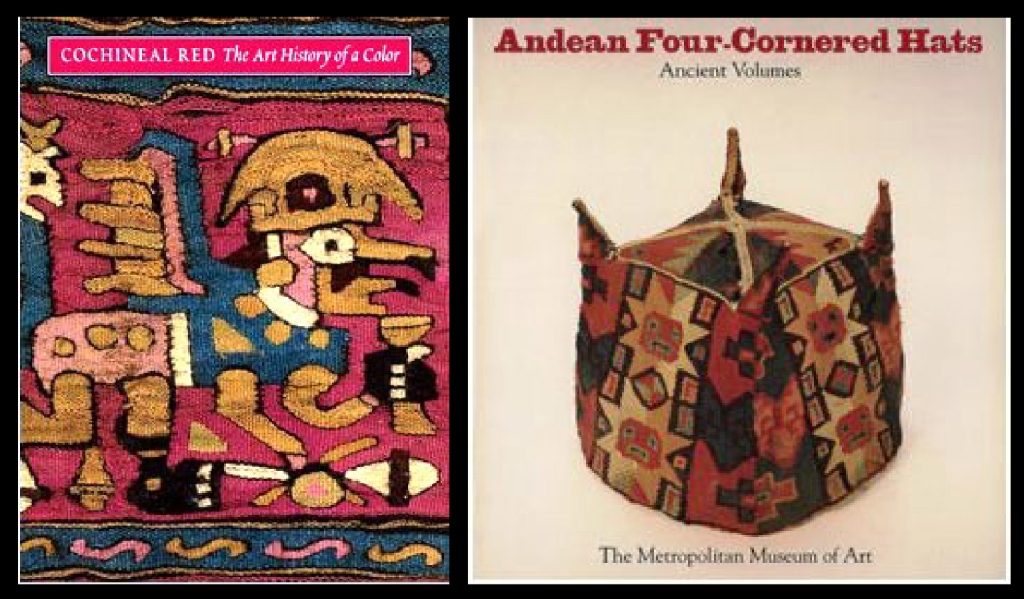
On to the next cool website….2.THE METROPOLITAN MUSEUM of ART’S PUBLICATIONS PAGE…..Many thanks to Kathleen for telling me about this site which has five decades of Met publications on art history, available to read, download, and/or search for free!!! Kathleen had downloaded and was enjoying a book on African textiles. There are hundreds of titles.
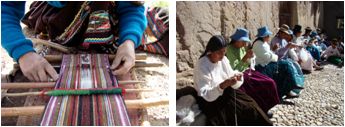
Images byInstituto de Lengua y Cultura Aymara, ILCA, La Paz Bolivia
The Weaving Communities of Practice website is the result of a project funded by the Arts and Humanities Research Council . The project focuses on textiles, culture and identity in the Andes.
I was happy to see that Elvira Espejo, pictured at left, worked on this project as the ILCA’s Textile Expert. I got to meet Elvira at the Encuentro de Tejedores de las Americas in Cusco last year where she was presenting the books she wrote with British anthropologist Denise Arnold: Ciencia de Tejer en los Andes:estructuras y tecnicas de faz de urdimbreand Ciencia de las Mujeres: Experiencias en la cadena textile desde los ayllus de Challapata.
Amongst other things, the site contains video segments of various aspects of backstrap weaving which accompany information about the stages of learning for young weavers-in-training in the Quechua and Aymara cultures. I have only just begun exploring the site and have barely scratched the surface. It is an amazing resource and there we have it at our finger tips,
Image by ILCA La Paz, Bolivia
From the site’s front page…..
The project is based at the Centre for Iberian and Latin American Visual Studies (CILAVS) and the Department of Computer Science and Information Systems at Birkbeck, University of London, with the Instituto de Lengua y Cultura Aymara (ILCA), in La Paz, Bolivia, in partnership with museums in the UK, Bolivia, Peru and Chile.
The principal feature of this website is a database of Andean textiles. There is also a detailed guide to processes of textile manufacture, including images and video clips of techniques, instruments and structures; a glossary of textile-related terms in English, Spanish and Andean languages; an introduction to textile heritage; and bibliography.
And so the sun sank on my final days in Santa Cruz, California. It was time to follow those birds west across the Pacific Ocean to Australia. Time to think back on the six weeks that had passed and “all its pleasures, its surprises, its fresh and captivating experiences” many of which I have already reported here on this blog.
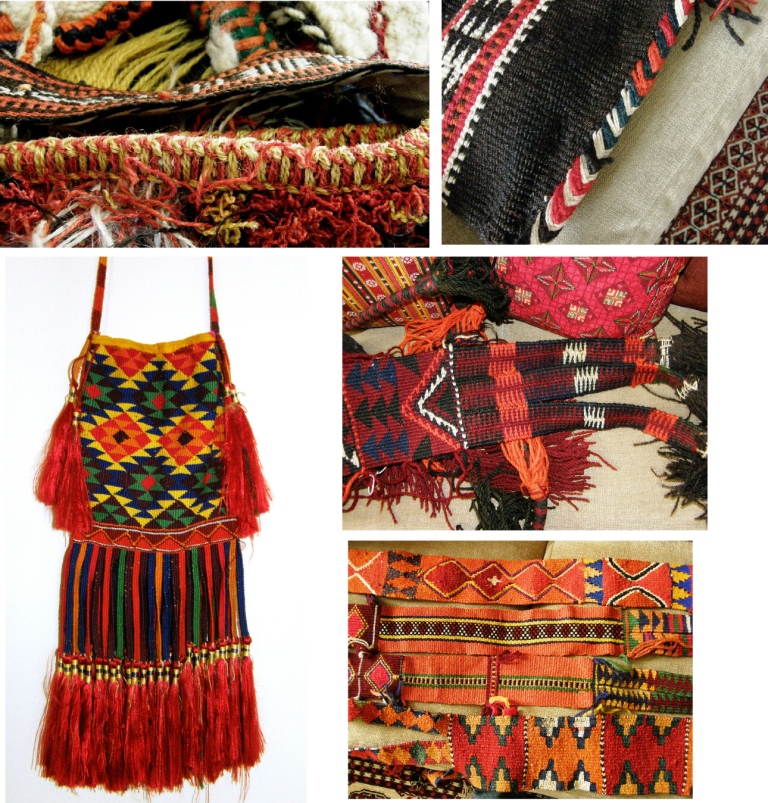
One such captivating experience…Annie and I got to visit with Joy Totah Hilden, author of Bedouin Weaving of Saudi Arabia and its Neighbours, in her home in California.
It was a thrill to be able to meet Joy and sit on the sofa amongst the richly patterned pillows and beneath that enormous woven tent divider listening to her stories.
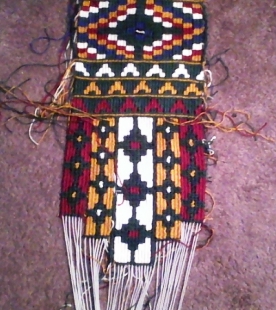
Then we got to touch and examine the textiles that I had been admiring online on her website and in her book…textiles that had inspired me on several occasions to weave pieces of my own (at left) using the traditional Bedouin colors and patterning techniques.
Camel adornments and all kinds of bags decorated the walls of her home. Many more treasures were carefully stored away and Joy was happy to unpack and bring many of them out one by one to show us.
Twining, weaving, braiding, wrapping, stitching…all sorts of bands and tassels and ineresting edgings….colors!!!….heaven! It was particularly interesting for me to be able to examine the pieces from Oman where the weavers cleverly use a second weft to tie down the long floats that are typically created by the warp substitution technique on the back side of the fabric. Having experimented with this with the guidance of images of Omani textiles that Tracy Hudson had provided, it was a wonderful opportunity to at last be able to examine the textiles themselves.
Happy with Annie MacHale and Joy Hilden surrounded by gorgeous textiles.
Moving on….Here are some of the books and publications that I picked up on this trip…
I had my issues of the Complex Weavers Journal all delivered at once so that I could take them back to Bolivia with me.
Bue Eye/Prayer Flags by Miryam-Chavah
After searching online many times over the last years for a reasonably-priced copy of the out-of-print Soumak Workbook, I finally found one and snapped it up. I have been admiring the creations of Julia Miryam-Chavah online, many of which have been done using the soumak technique. She has often named the Soumak Workbook as a resource and so, I am excited to have been able to get a copy.
I got the One Needle, One Thread book from Pam Nadjowski at Textile Treasures in Santa Fe NM when I was there in July but left it behind at my friend DY’s house by mistake. Now that I finally have it in my hands, I will be able to read about some of the wealth of braiding and embroidery techniques used in Chinese textiles that this book covers and maybe incorporate some in my work.
And, finally and surprisingly , I managed to get a copy of Faces of Tradition: Weaving Elders of the Andes by Nilda Callañaupa and Christine Franquemont. The book details interviews conducted with elders from various communities in the Cusco region of Peru. The importance and urgency of this project is underlined by the fact that some of the elders that were interviewed died before the book could be published. And before I could even open the book’s cover I was shocked and saddened to learn of the very recent death of Christine Franquemont in Cusco.
My last days in the US were spent in Santa Cruz, California with some weaving friends. Here are some of the ladies working on decorating their plain-weave bands with supplementary wefts….
This is my fifth visit to Martha’s studio and, as usual, we were dazzled by the interesting pieces in Martha’s collection that she would bring out to share with us….
This double-pocket saddle bag, made from what I am guessing is agave fiber, was collected somewhere in Latin America and given to Martha many years ago. It has an interesting combination of weaving, braiding and sprang work. The sprang and braid work has created a springy, stretchy and open area that would lie over the back of the pack animal. It contrasts with the stiff and rigid nature of the woven pockets. I have not seen anything like this in my travels in South America and I would love to know its place of origin.
I loved the simplicity of the discontinuous-warp piece that Janette brought to show with its combination of natural and dyed colors. The join where the two colors dovetail, seen on the right, was so incredibly smooth.
My final night in the US had me dozing in San Francisco airport beneath stunning woven tapestries which were designed by local artist Mark Adams. These had apparently been stored away for a couple of decades shortly after their creation in the early 80’s and are now on display behind glass. It was a peaceful place to spend the night before my early morning flight to Los Angeles and so unlike many other airports where I have spent the night slumped outside Dunkin’ Donuts!.
Meanwhile, news of backstrap woven projects arrived in my inbox…
Fr Kyriakos and Lausanne sent me pictures of their backstrap weaving pursuits. Fr Kyriakos has a pebble weave pattern in progress and he started his band with a nice bit of weft twining. Lausanne shows how she has set up a comfortable way to weave in her home while still giving attention to her furry companion.
Here is a silk ribbon with pebble weave patterns that Lausanne made for her husband.
Noreen Horak sent me a picture of bands she wove on her inkle loom using a variety of patterning techniques. The darkest one is a sampler of pebble weave patterns that are charted in my first book.
Rosemary Thomas shows that backstrap weaving isn’t only about warp-faced structures.
Joanne’s band is also a nice sampler of the various 4-rev designs that are charted in the Andean Pebble Weave book and shows her experiments with using two and three colors in her designs.
And to finish, I would like to tell you about my friend Wendy Garrity, a fellow Australian weaver. Here I am in Australia and so is she, but it isn’t really a chance to meet up as she is oh, so far far away over on the other side of the country, in Perth!
Wendy has put together a wonderful blog in which she writes about textiles she has encountered on her travels through Asia and particularly about her experience learning to weave in Bhutan.
That is how I found her. I was trying to reproduce Bhutanese patterns based on textiles that I had had the opportunity to examen. Wendy’s site provided some vital information that was missing and preventing me from getting started. Once I had found Wendy’s site, I just had to write and thank her and, with that, we started corresponding across the miles. She was in Bhutan and, later India and I was in Bolivia.
We got to meet in person at last when she came to South America and I taught her some Andean pick-up techniques in my home.
It was during that visit that we discovered that we both had plans to go to the International Folk Art Market in Santa Fe NM….another chance for a fun meet-up and, even better, my friend Annie was there too.
From there, Wendy headed home to Perth. I wonder if she had those same feelings I experienced when she returned home after several years away.
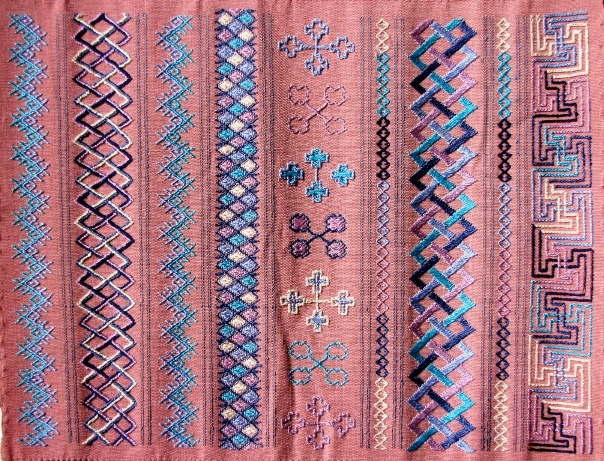
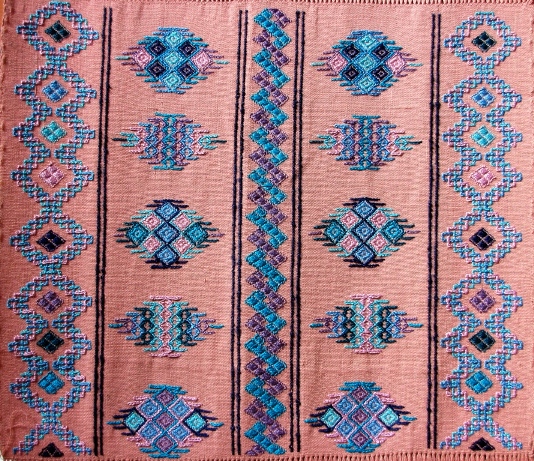
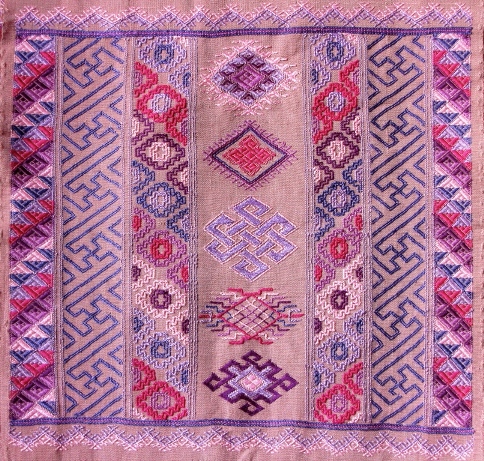
Wendy is planning a trip to the US in the fall of 2015 and would like to share what she learned during her stay in Bhutan. She will be available for workshops and presentations at guilds and I asked her to write a little about what she has to offer for inclusion in this post. All the pictures that accompany the text are Wendy’s own work. These are the samplers that she wove with her weaving teachers in Bhutan.
Hi everyone, I am planning to visit north America in the fall of 2015, and would like to hear from guilds or groups interested in hosting a workshop in Bhutanese kushutara techniques, used to weave gorgeous brocaded festival dresses.
Kushutara means brocaded dress, and refers to cloth decorated with the intricate kushu techniques, involving discontinuous supplementary wefts.
Bhutanese refer to two types of kushu techniques: Thrima and Sapma. Both are woven by lifting selected threads with a pickup stick before inserting the supplementary weft threads in such a way that the stitches only show on the front of the fabric.
Thrima means “to coil” and involves twining the pattern threads around the warp threads. This produces a beautiful textured effect, with the pattern threads creating a raised surface. In fact, when the first Bhutanese textiles were examined by experts in the west, there was much debate over whether their designs had been produced by embroidery or were woven into the fabric!
I learnt to weave kushutara when I was living in Thimphu, Bhutan for a year teaching music. I was given a loom next to a master weaver in the local weaving centre, and for 8 months I went before and after school and on weekends to weave. Word spread, as it does in Bhutan, and I often used to find I had local weavers stopping in to see for themselves the spectacle of the foreigner who had learned to weave as well (if not as fast) as the Bhutanese.
In addition to weaving on a Bhutanese backstrap loom, I have adapted these techniques to western looms, so classes can include weavers more comfortable on rigid heddle or shaft looms. Participants would need to be familiar with their looms and comfortable with plainweave, but the work would also extend experienced weavers who may have experience with weft twining from other cultures such as Guatemala (Bhutanese twining is a related structure, but the techniques of execution differ).
Wendy can be contacted through her blog or through me on this blog. Who knows? I just might get myself over to Perth on this trip to see her.
I don’t have any Aussie pictures to post yet! Imagine…after weeks and weeks of fabulous weather in the US, the weather has not been kind so far here in Sydney. I will hopefully have plenty to show in the next post. See you soon.
Amongst other things, I have decided to do a little tutorial this week on cutting backstrap woven fabric and covering the raw cut edge with a protective band.
This is my latest favorite way to create the flap on a bag and I was given the courage to try this when I saw some of the work of my GuaranÍ weaving teacher here in Santa Cruz. She makes cell phone pouches with rounded flaps. I don’t know the steps that Angela takes to create these and so, have come up with my own. Possibly I am a bit over-cautious in my ways, but my system works for me and I am pleased with the results.
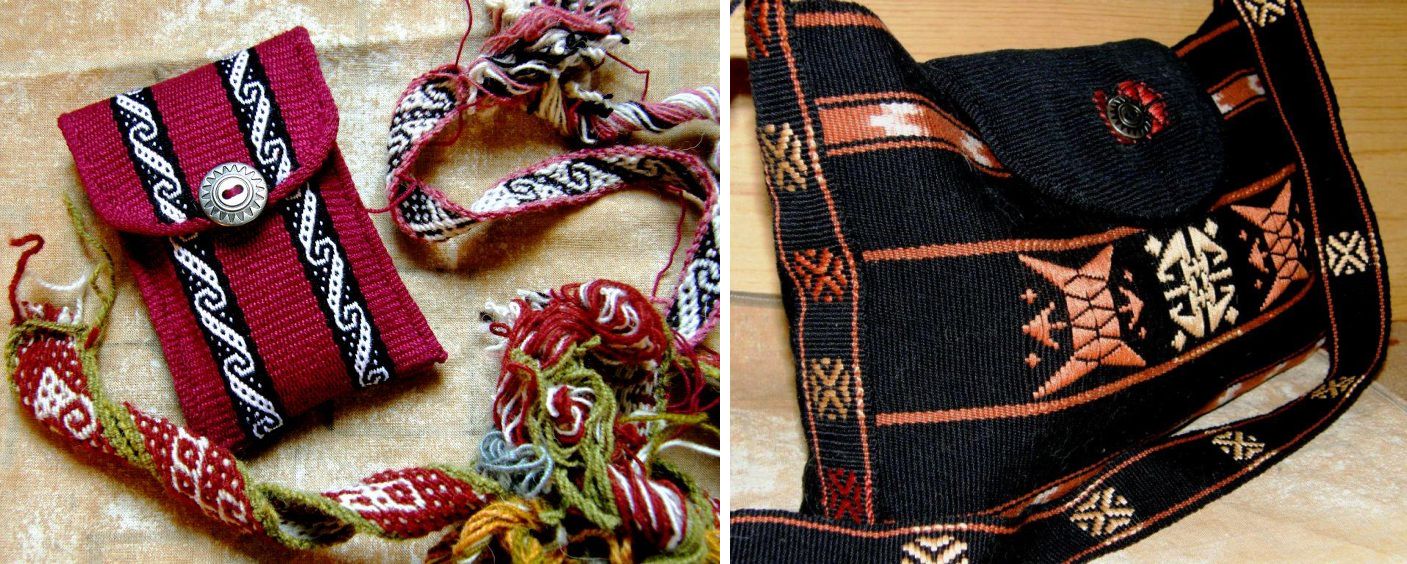
Making cell phone pouches is one of my favorite ways to use a piece on which I have been sampling structures or patterns. You can see the different ways in which I have formed the flaps. This often depends on just how much fabric I have to use. The alpaca sample bottom left, for example, is closed with a drawsting as there was not enough cloth to make a flap. The example at top left has a flap that was cut to shape and then covered with a tubular band.
Here are a couple more examples. The flap on the black bag was woven with quite a lightweight fabric compared to that used for the cell phone pouches. The tubular band, therefore was a bit heavy for it and caused the edges of the black flap to curl inward giving a convex shape. As it turned out that actually had its advantages! When the bag is filled with things and takes on a rounded shape, the flap curves nicely around it.
My latest bag project also has a rounded flap which is edged with a tubular band…
I had been calling this latest project “Tales from the Subcontinent” as it comprises designs from Bhutan and Afghanistan.
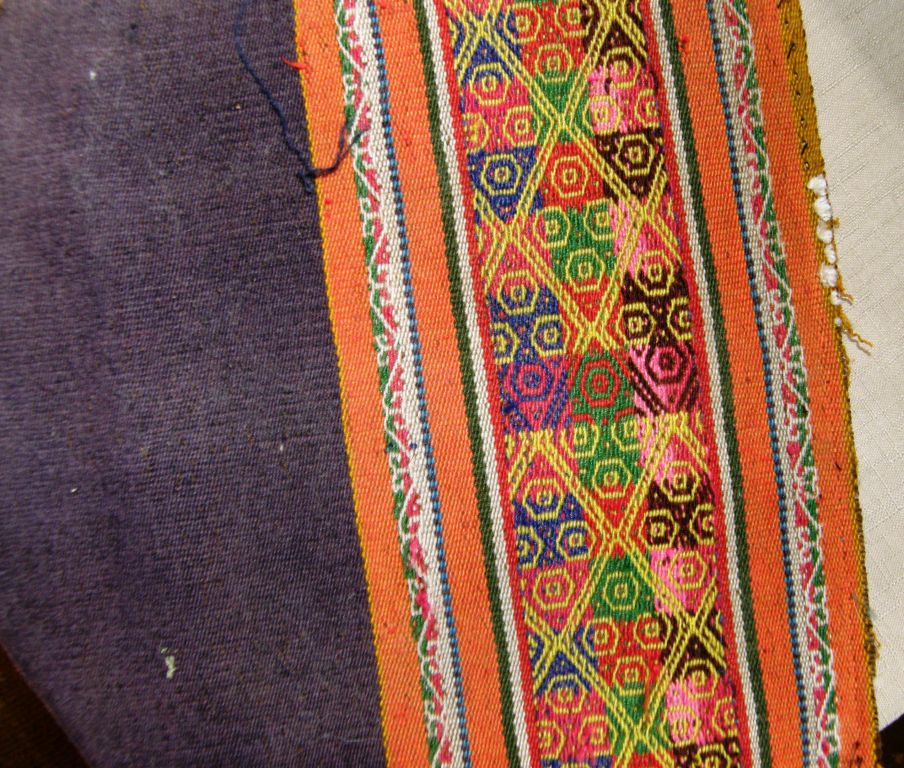
However, now it carries an element which has been influenced by Central Asia. Its closure tab was inspired by tablet- woven trim on Uzbek ikat-patterned robes.
I showed you pictures last week of the Uzbek garments that I saw at the International Folk Art Market in Santa Fe NM with their tablet-woven edging bands.
I give many thanks to Ute for writing to me and sharing what she knows about the Uzbek bands as I was about to launch myself onto the wrong path trying to weave one using threads in 4 holes of the tablets. Ute told me that they are created using only two holes. With my limited tablet-weaving experience, I would have been lost without that valuable tip.
The little wristband that I bought at the market is in the center. I changed things a little in my experiments eliminating the dark outer color and altering the way the red stripe was set up. I made a sample in a medium weight cotton to start and then made the final piece for the closure tab on the left. Originally I had wanted to make the entire strap for the bag in this technique but decided that it was a bit too “busy” to play such a major role in this piece which was already highly decorated.
In this picture I just placed a silver button on the closure tab but I was not all together happy with the way that looked.
And then I remembered that I had coins from my trips to Nepal back in the 80s and 90s.
The smaller one would do perfectly and would be in keeping with the “subcontinent” theme.
I just had to polish it up and then get creative in finding a way to attach it.
You can see the more subdued strap pattern, above, that I used in the end. I used the same pattern as that on the edging band for the flap.
So, “Tales from the Subcontinent” is in search of a new name. I won’t say that it is finished yet as I am now thinking….Wouldn’t it be cool to have some black and white ikat patterned cloth with which to line it?….a sort of “inner bag” with a drawstring top…
So, now we get to “cutting corners” and transforming a straight-edged flap into a rounded one…
I am using the lavender Andean Pebble Weave fabric that I was on my demo loom during my last trip. I really don’t like it much and decided that I could at least use it for a tutorial…
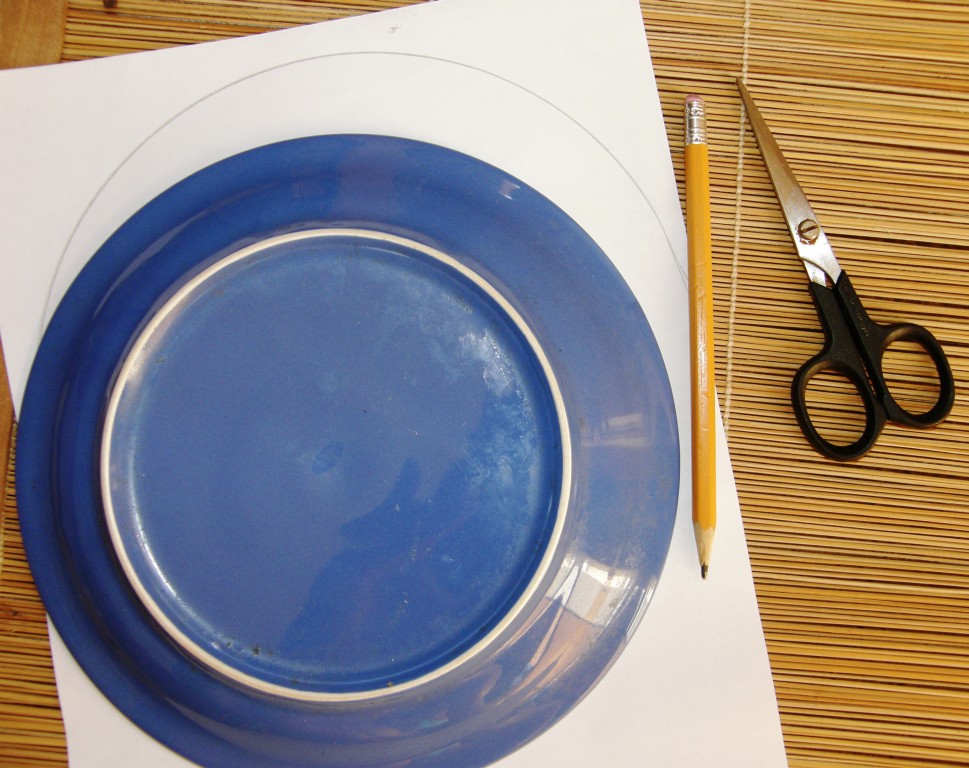
STEP ONE: Choose the curve…
I have a small plate that has the right curve for the width of fabric that I am using. I used it for the black bag and saw that it would also work just fine for the lavender piece.
STEP TWO: Make a template.
I traced the curve on paper and cut it out.
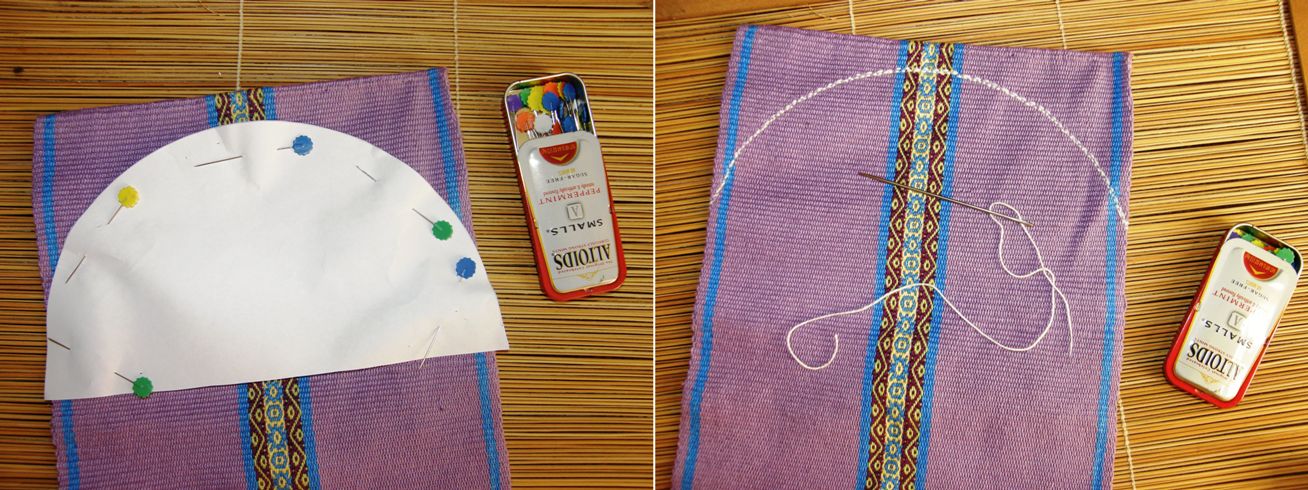
STEP THREE: Pin the template to the fabric and sew along the edge.
I sewed by hand and used crochet cotton for the thread. It’s a good thing that beauty does not count! I backstitched from one end to the other and then returned using a running stitch for extra security.
STEP FOUR: Paint diluted white glue onto the stitches.
I used white glue, or carpenters’ glue, carpi cola , as it is known here. I diluted it with water, painted it onto the stitches on both sides of the cloth and waited until it dried before proceeding.
STEP FIVE: Cut the cloth and glue again.
I cut close to the stitches and then applied more diluted glue along the edge of the fabric. The glue goes on white but dries clear. The fabric I am using is dense and I needed to make sure that the glue got right into the weave. As the glue was drying I pinched the threads along the edge together to seal the edge. Once it was almost completely dry, I gave the edge a final trim (this is easier to do when the edge is still damp and supple). You may need to trim some loose weft ends or tidy up the edge a bit. Once it is dry and stiff, it will be harder to make fine cuts.
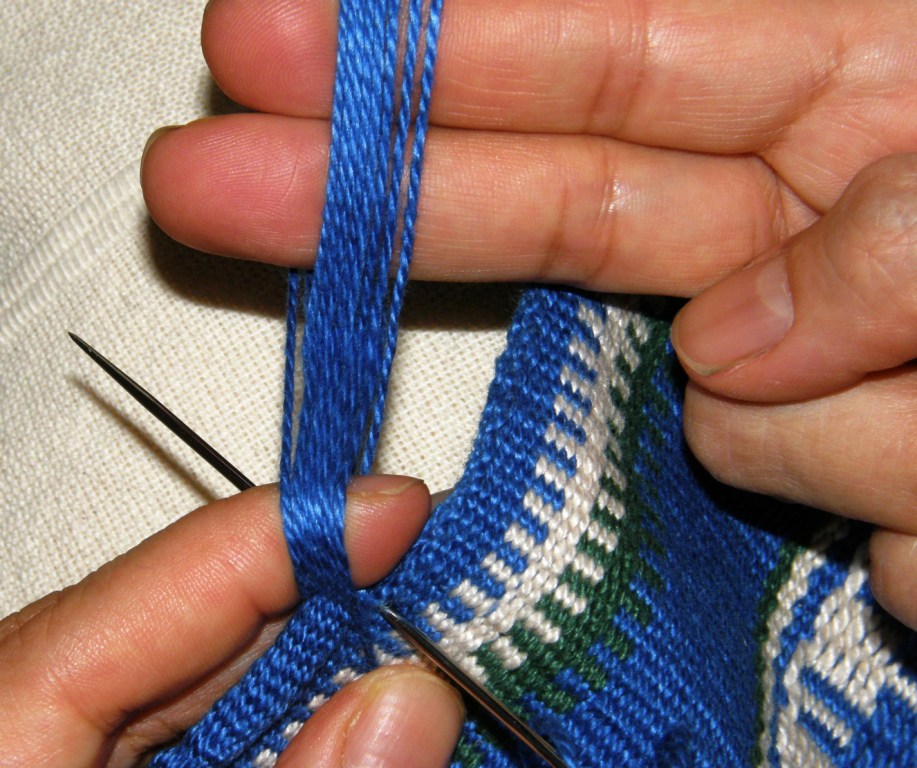
STEP SIX: Weave and sew your band to the edge.
Now you have a nice stiff secure edge to which you can attach a band. See this tutorialfor instructions on weaving and attaching tubular bands.
Judge the width of band needed to bend around the edge and cover the stitches and create a warp accordingly. Note that it is easier and often neater to weave these bands using a heavier yarn and few warp ends than fine yarn with many ends. I used a finer yarn here as I did not have a matching color in my heavier yarns. I used a heavier yarn on my recent black bag project and feel that that band is more attractive.
Make sure that your needle clears the glued stitches on both sides when it pierces the cloth. This way, the stitches will be completely covered by the band. Practice weaving and sewing bands many times on scrap fabric. It takes a while to have them turning out neatly and you don’t want to spoil your good fabric until you feel confident with the technique.
As for what to do with the warp ends when the band is done, I have suggestions for that on the tutorial page.
So, with the black bag finished to the point of being able to use it, I am now supposed to be getting on with the next in the wall hanging series. I had gotten as far as winding the yarn off skeins into balls for warping. And then came a distraction.
I don’t know what it is about arriving home after a trip. I have this urge to get rid of stuff that goes on for about a week. It’s great! It feels so liberating. So, stuff has been given away and ejected. The above piece was the cover of a photo album that I was given.
I removed the album to toss and kept the cloth. It reminded me that it has been a long long time since I last played with three colors in complementary-warp pick-up.
I have done three and four-color pieces (see the header of this blog) which are not double faced.
Here you can see what I mean by “not double faced”. I made this years ago and decided to hang it unfinished on the wall. It also reminds me that I used to get this beautiful fine wool/alpaca yarn when I lived in Chile. I used some leftovers of that yarn when I first came to Bolivia to weave this. How I wish I could get that yarn again.
The piece on the cover of the photo album is double faced. Only two colors show togther on each of the two faces at any one time…color A and B on the upper face and color B and C on the lower one. It is a bright and jolly piece and I love how the weaver flipped colors for just that one small section along the way…you can see how the yellow eyes on the green suddenly change to a red eye in just that one small part. Whether that is the center of the piece, I will never know as it was cut up to make the album cover.
Side ASide B
So, this is what I am playing with and what kept me up past midnight last night. These are the two faces. I wish I could make a smoother transition from the red background to the beige but this defeated me at 12.30am. I suppose it would be easier if my design weren’t continuous. This is a sampler to get my head back around the technique.
#########################################
Some news… Deb McClintock has started setting up her blog again after losing most of her web page content some years ago in some sort of internet glitch…..heartbreaking. It’s all about simple looms in SE Asia and promises to be wonderful. Deb was invited to lecture last month at the Textile Museum in Washington DC about Laos textiles, looms and techniques. Her new blog is entitled Looms of South East Asia.
And, of course, don’t forget my Australian mate Wendy Garrity’s blog about Asian textiles and looms…Textile Trails. Wendy provided a link in last week’s comments to a picture she took of a notched stick on a loom in Nepal that looks very much like the one I was admiring on the backstrap loom from Myanmar at the Santa Fe Folk Art Market. She was also able to extract more information about the tablet woven bands from the Uzbek representatives at the Folk Art Market than I was!
##########################################
More news…..AUSTRALIA!
I will most likely be going back to Sydney for a visit in late November and would very much like to meet other weavers!
The decision to make this trip has been a very recent one which makes getting people together for this a little difficult as it is so close to Christmas.
I haven’t been back in 4 years and am very excited. I’m looking forward to hitching my loom to a eucalyptus tree and weaving while listening to the magpies and kookaburras.
The kookaburra picture at left was taken by my brother.
The black neck wrap is done and I am already thinking about the next one.
I thoroughly enjoyed working with this fine Guatemalan cotton thread (you see how I have forgotten about all the woes in the beginning!). It was fun picking up threads with the delicate Guatemalan pick-up sticks and feeling the silk supplementary wefts slide through my fingers.
This will be the color scheme for the next one…
Maybe I will use some Guatemalan-inspired designs this time or perhaps I will invent some of my own.
I got the black piece off the loom and then I was faced with fringe twisting. Would you believe I have never done this before? I have left fringes on placemats and braided the ends of other pieces. I had read the grumblings about fringe twisting from those who regularly weave scarves in the weaving forums and seen pictures of the gadgets and gizmos that have been designed to make this task less tedious.
I even watched a video I had taken of my Montagnard weaving and twining teacher, Ju Nie (seen at left spinning cotton), twisting the ends of a piece she had recently taken off her backstrap loom. Ju had come to visit at friend Betsy’s house and, rather than sit idle while chatting in the living room, she pulled out a wad of stuff wrapped in paper and a woven piece of cloth and started working. The “stuff” turned out to be mushy, sticky over-cooked rice through which she drew the warp ends before rolling them on her leg and setting them in the twist.
Here is the video. Ju explains that doing it on her pants is “no good” and that it works much better on her bare leg. I am guessing that her bare shin makes the best rolling surface.
So, I twisted my fringe and it wasn’t as slow as I had thought…much faster than braiding, I can tell you! I added weft twining to the ends of the fabric before taking it off the loom. I think that made a nice finish. See the countered weft twining tutorial here.
And then I found that scarves are kind of hard to photograph…way too long and flat and lifeless to try and stretch out in one shot so I gathered it up and threw it down many times, fiddled about and I felt that this was the best “pose” in the end.
And another shot that shows my favorite central motif…
Although I was mad keen to get into the Guatemalan purple thread and warp up another scarf, (especially since I think that I already experienced, hopefully, all possible mishaps when weaving the black one), I decided that there was another project sitting in the closet that needed my attention…(plus I really need to ponder and plan the patterns I want to use on the purple scarf before rushing in and weaving it)…
Remember this guy? I had just started the large main motif when I decided that I would not touch this until I was sure I would have enough time to stick with it and finish it. When doing pick-up, I think it is best to do a pattern all in one go rather than leave it sitting while I travel. If I leave a piece for a long period of time, I can almost see the place where I left off and picked up again. Perhaps I sit a little differently, apply a little bit more or less tension, beat differently…I don’t know…something changes. So, now is the time to get down and finish this piece.
I welcome the opportunity to have my hands in there and full of threads again. I am not a pick-up stick kind of gal, unless a particular technique or yarn really demands it. I like to hold and pick and drop threads with my hands. Perhaps it’s because that is the way my first Peruvian teachers showed me. I have been shown and I have willingly tried other ways but I always come back to just using my hands.
Here is a weaver creating a belt patterned with supplementary warps. It is a narrow piece and so it is easy for her to simply insert her hand between the warp layers to do the pick-up.
I was finally successful in uploading the video of this weaver at work. You can see how she does her pick-up as well as see the two-stick method she uses for opening the heddle shed. She has a forked stick in the warp….one prong is her shed rod and the other prong holds a second cross. Grasping and twisting the fork, while leaning forward to relax tension, helps her to smoothly open the heddle shed.
These are the kinds of textiles she produces…
I watched a gentleman from Chahuaytire also weaving supplementary-warp patterns into a much wider piece of cloth. He uses a pick-up stick to hold all the threads in both the pattern and plain-weave sections as he works his way across the cloth…
This is his weaving…
Both weavers work equally fast, don’t you think?
So, on I go with hands full of threads. This is the third piece in my red-white-and-black wall hanging series. This one has patterns which have been inspired by the si’ira belts woven by the Wayuu people of Colombia and Venezuela. Since starting this project, I got to go to Holland and meet Mirja Wark who spent years studying, collecting and cataloging these belts as well as writing a book describing the weaving, braiding and twining techniques used.
These are belts that Mirja herself wove while studying. You can see the “cow’s nose” pattern at the bottom of the blue, pink and green belt that I used in my wall hanging. The large motif that I will use in the center has been very much adapted to fit my piece and uses just certain elements of the Wayuu patterns as inspiration. There are a lot of threads to pick and, until I things get rolling, I am very much clinging to my pattern chart. Thank you, Terri, for introducing me to removable highlighter tape which works like a dream!
So I will be parked in front of that piece for some time while taking breaks to re-spin the Malabrigo yarn, plan supplementary-weft patterns for the discontinuous-warp piece for which the Malabrigo is destined, ball up that large skein of Guatemalan purple cotton, sketch some patterns for the purple scarf project, plan piece number four in the wall hanging series…maybe ikat??…do I dare?
And I am folding this sampler piece this way and that to see if something useful can be made of it. It’s still on the loom and there is room for more pattern experiments.
Let me show you some things that Ravelry members and students and friends have made. It is a strange coincidence that three people decided to edge pieces of clothing with woven bands. Janet decorated a pair of felted slippers that she made, Laura edged gloves (and also made a camera strap and headbands) and Julia edged a couple of tiny shadow-weave kimonos with a pebble weave band. Three gorgeous projects! (I am in love with that shadow-weave cloth, by the way…it takes four shafts…I would like to try it).
I will leave you with the happy twin recipients of the wee kimonos…Julia’s grand nieces!
######################################
Right before I was about to publish this post, a question was posted in the Ravelry group by a weaver who is trying supplementary-weft patterning for the first time and not getting the rich satin-like finish that she would like in her patterns. Instead, there are spaces and gaps between the rows of her design. I posted a reply in the group but am copying it here as I think that it may be useful for others who feel like trying this lovely technique…
There is no formula that will suit all weavers…that is, “x” number of strands of such-and-such a supp weft material will give sufficient coverage with such-and-such warp thread. All weavers are different in the way they handle their warps.
For example, some weavers put a lot more tension on their warp than others. This means that they have fewer picks per inch than others because the warps are pulled so tight that they can’t bend over and under the wefts as easily as they do for weavers who use less tension. This means that a certain amount of supplementary weft material won’t give the same amount of coverage for those weavers as it does for others who use less tension.
Another case…some people simply don’t beat hard enough when using supplementary wefts. I beat hard and really mash the weft into place…not “wham wham” beating…more like placing the beater right at the weaving line and pushing against the weft hard with a rocking motion.
Other people pull too tightly on the supplementary weft. It has to be fairly relaxed in the shed to allow it to spread and cover the surface. As an experiment, pull your supplementary weft tight once you have changed sheds and see what happens. It will flatten and narrow and not give good coverage. You have to find the balance between thread that is relaxed enough in the shed and bumps at the sides, where the weft turns, that are not too big and loose.
These are all things that come with trial and error and experience. It might be that you need to use more supp weft material or it could be one of the other factors I have mentioned here.
I often use thread that is similar to #3 and #10 crochet cotton. It is Brazilian cotton that I get here in Bolivia. I have used two strands of embroidery floss with the “#3” and one and a half with the “#10”. This gives people an idea of where to start and what to try but, as I said, every weaver is different.
Hope this helps.
ETA My first Guatemalan teacher combed the strands of her supp wefts with the point of her pick-up stick so that they lay next to rather than on top of each other. They didn’t move with handling…the floats are not long enough to cause that to happen. I did the same with the six strands of 60/2 silk on my current project.
I suppose that it is normal to want to look back a bit as the end of the year approaches. This time I decided to jump back to the end of my blog years in 2011, 2010 and 2009 and take a look at what was going on. It is interesting to see that supplementary-weft patterning was a part in some way of all those December posts.
This time last year I was in a downsizing phase and rummaging through my closet to see what could be tossed. That was when I came across this wildly colorful supplementary-weft sampler that I made after having studied some of the patterning techniques in a few different communities in Guatemala. I included it in my blog post…(no, I didn’t toss it!)
You can see that all the patterning elements that I am using in my current supplementary-weft project are present in this piece and this is barely the tip of the iceberg when it comes to all the different ways to create patterns with supplementary wefts that are used by Guatemalan weavers.
In December 2010, I was posting about the practice piece I made after studying with the Montagnard (Vietnamese hilltribe) weavers in North Carolina. While the piece is mostly about the warp float patterning technique that they use, it also includes twined ends and a couple of their traditional motifs woven with supplementary wefts.
And finally, back in December 2009, when I had been blogging only a few weeks, I wrote a post on weaving wider projects which included this…
I included a tiny bit of supplementary-weft patterning in the center of this placemat and mug rug set. I gave the pattern a thin striped look instead of a richer satin-like finish so that it would mimic the stripes in the two outer bands. The simplicity of the outer bands were inspired by a Guaraní textile.
So, this wonderfully fun patterning technique, which allows quite a lot of spontaneity, (the patterns on both the Montagnard and placemat projects were not planned and could have been just as easily cut out and removed if I had decided that I didn’t like them) has been in my weaving skills kit for quite some time.
I remember the first time I saw a Bolivian highland weaver sitting in the street of Santa Cruz making a hatband only days after I had arrived here in 1998. The base weave was off-white sewing thread-weight cotton and she was creating patterns with bright acrylic threads. I crouched and chatted with her, watched what she was doing, and noted the name of the street so that I could return the next day and watch some more. I never found her again nor have I ever seen another weaver making a hatband since! I have seen plenty of beautiful hatbands but never one being woven again.
The hatbands above adorn the hat of a weaver from Potolo in the Bolivian highlands….bright colors on a black ground, much the same as the color scheme I have chosen for my scarf project. I have decided to call it a “neck wrap” as it is not going to be all drapey and flowing as one would normally expect a scarf to be. As long as I don’t have to actually bend and fold it around my neck, I will be happy!
Here it is, a little bit further along from the little I showed you last week, after all the messing around and lesson-learning. I am trying to think if I learned any more lessons from this wicked warp this week….I think I probably just convinced myself even more that I love putting in a second cross stick behind the shed rod and using those two sticks to help open the heddle shed. (Of course, this is just one of many ways that backtrap weavers operate their looms).
Above you can see the second cross stick and shed rod in place. The third shorter stick sitting between them is the pattern stick.
If you watched the video of the Tacabamaba weaver in last week’s post, you will have seen how she places her sword on top of the warp and rolls that together with her shed rod to help open the heddle shed. Below, you can see Montagnard backstrap weaver, Ju Nie, doing the same using a bamboo slat instead of her sword.
I have a video on my page about sticky sheds showing this system in action.
I prefer to have the second stick permanently in the warp. One of the weavers that I met at the recent conference in Cusco used this system, with the second stick permanently in the warp, to open her heddle shed.
Her set-up is so cool. I wish I had a forked stick like that…must go out and look for one. The prong of the fork nearer the weaver holds the stick shed open while the other prong sits within a second cross.
She would simply grip the place on the fork where both prongs join and twist the fork away from her while relaxing tension and pulling up on the heddles.
In the picture above, she is about to slide her sword under the warps raised by the shed rod. She will then turn the sword and clear those threads through the heddles and down to the weaving line. I have wonderful video of this weaver operating her loom and doing very fast supplementary-warp pick-up and I had every intention of showing it to you. Too bad my internet would not behave and allow me to upload it.
So, my warp has been behaving like a dream…sticky threads have been defeated and no more have broken. The odd loose ones here and there have been dealt with smoothly and calmly.
I decided to make the long motif the center of the scarf and work from there on repeating the designs from the first half of the project. However, I am not repeating the motifs in the side bands as there are still plenty of those that I want to try! I have no discipline sometimes!…I should just keep it simple and symmetrical…
Here starts the other half….
I managed to almost squeeze in one more green motif before it was time to stop and write this blog post. It’s addictive and I don’t want to stop! The motifs are new and I am anxious to see how they turn out. Plus, I can’t weave it at night so, I really try to make the most of daylight hours. All that black thread is just too much at night and I am on an economy drive so, no super high powered lamps allowed!
In the evenings, I have been spinning away tightening up the twist on the Malabrigo wool singles I bought while in the US. I am hoping to then ply them and weave a discontinuous-warp piece. As I am not confident about trying any warp float patterns on one of those yet, I will decorate the panels with some wool supplementary-weft designs.
What has been happening in the Ravelry group? ”It’s dead in here!” exclaimed Bobbie recently but she livened things up a little by posting her recently finished guitar strap made for her granddaughter…
This was made using the instructions for the two-heddle intermesh technique from my second book. Bobbie used Annie’s guitar strap kitto convert her beautifully woven band to a guitar strap.
Rob has been using my first book to weave some lovely bands with Andean patterns but we may have lost him to a four-shaft loom which recently appeared in his life. Now he is also turning out beautiful towels on that. Here are some of his latest backstrap, inkle and four-shaft loom projects….
There have also been some mutterings in the group about using the 24 sets of string heddles to weave one of the fabulous fajas saras after I showed a picture of some of the belts of San Ignacio de Loyola Peru…
That could be a fun weave-along but I don’t think I will join them on that one. While I do love making string heddles, I enjoy doing pick-up even more!
On another topic, a couple of interesting ikat resources came my way recently in my internet ramblings…
The book is the result of the author’s two years spent traveling in the Andes researching ikat patterned textiles. There is one section devoted to the pañones of Tacabamba that we saw last week.
From the other side of the world in China, Chris Buckley sent me the link to his recently finished paper entitled Investigating Cultural Evolution Using Phylogenetic Analysis: The Origins and Descent of the Southeast Asian Tradition of Warp Ikat Weaving.
Chris has always been very generous with his resources and, on several occasions, has allowed me to use images of textiles in his collections in these blog posts and for my charting.
Christmas will be done by the time I come to write my next blog post. I don’t do Christmas but I wish all of you the very best for whatever you get up to in the coming week. Now, back to that “neck wrap” thingy….

 This is where I was with the bag project when I last posted. The zipper is in place and sides have been installed. On my weekly visit to the supermarket I was happy to find a long table runner that I could use as the lining material. It looked like it was just the right width and I loved the color and subdued pattern. This seemed to be a safe bet for me who knows nothing about fabric and I was happy to pay a bit more than it would have cost me to just buy fabric in the street market. I doubt that I would have found anything that I liked as much in the market stalls.
 That un-ripping tool got a workout as I sewed and re-positioned over and over. Now it’s done. This is the opening for the quirky pocket…the one that sits on the outside but is accessed from the inside. I got to use a beautiful button that one of my students made by hand as a closure for the pocket. The loop around the button is an eye-pattern tubular band that I wove.
 I edged the pocket and the sides with plain-weave tubular bands in blue. Tubular bands are such wonderful finishes. The pocket and sides are so sturdy with those nice firm bands in place. And that is where this project sits until I can get more blue yarn for the straps. I was hoping to use this bag on this trip but that won’t be happening. I’ll come back home with the yarn and weave some nice sturdy straps in the intermesh structure.. The bag is the perfect size for my books!
 Here’s the first little guy on my width-sample warp which confirmed that I had enough ends to get 3/4”. I am going to continue weaving this sample and make it into a wrist band for myself while I plan the layout of the lanyard. I’ll probably mix the cat motifs with some paw prints, the charts for which are also in the book of 100 patterns.
 At the same time, I am getting a start on another band that has been on my mind for several years. I have been collecting the word “weave” in various languages which I would like to weave into a strap for a pouch. Many years ago I wove and constructed a carry bag for my backstrap bits and pieces and I used weft twining to decorate the strap with just a few words in different fonts.
 I am using the intermesh structure this time and using just the one font to weave my words.
 I have about twenty-four words collected now from online friends ranging from Cherokee to the Yoruba language of Nigeria.
 Kathy King combined patterns from the book of 100 patterns (Complementary-warp Pattern Book) and my very first book, Andean Pebble Weave. She calls her band The Birds and the Bees. I love the blue and brown together.
 Colleen Turner added a strap that she wove on an inkle loom to a shoulder-bag. The pattern is charted in the Complementary-warp Pick-up book which also gives step-by-step instructions for those who use any kind of loom to weave warp-faced bands.
 Marsha’s band in 20/2 silk is spectacular. The red and blue are her own hand-spun threads. She has combined patterns from two of my books and the result is gorgeous!
 One of my weaving teachers, Maxima, took a liking to this same star pattern when I was up in the highlands. Of all the samples that I took to show her, this was the one that she wanted to learn. We wound a warp and Maxima took over after she watched me weave a few rows. I was able to show Mr Laitenburger how his pattern was being enjoyed on the traditional leaning loom in the central Bolivian highlands. He was very pleased.
 Kurt Laitenberger does beautiful work with tablets and I really appreciate his allowing me to adapt some of his patterns to the Andean Pebble Weave structure for my books.
 It’s fascinating to see a classic backstrap loom set-up being used with the tablets. I am guessing that the structure that is used for the bands that are woven using this set-up is one in which the weaver does not have to deal with built-up twist in the warp threads.
 I love the rocks and the weights that she is using to hold her stakes in place. I managed to scavenge an old paint can filled with cement that I sometimes need to use when I warp using certain set-ups.