The Garden Bands are finished and now the question is whether to use them in a project and, if the answer is yes, how?
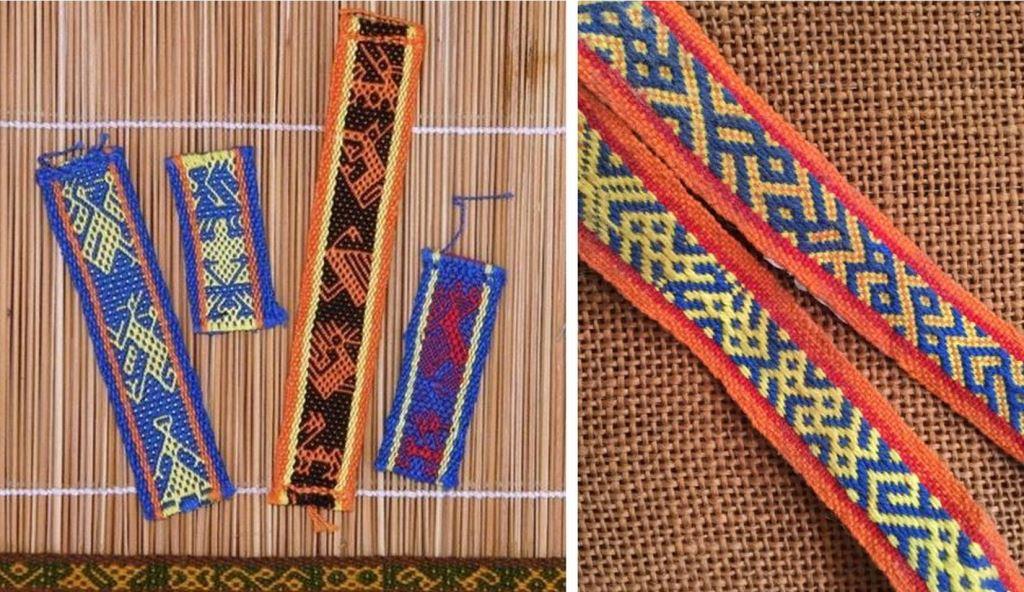
In my last blog post, I showed you the first of the two bands sitting alongside my hummingbird band.

When I had finished the hummingbird band, I had been thinking about cutting it into two or three pieces, placing them side by side and making “something”. Friends in one of my Zoom groups were not enthusiastic and suggested I weave two bands to flank the hummers and use the whole thing as a wall hanging. I liked the idea of not having to cut (and possibly regret having done so). On top of that, weaving accompanying narrow bands meant that I could once again try out the little flower motifs and the subtle color transitions that I had been sampling in 20/2 cotton.
Now both bands are finished and here they are together…..


I am really pleased with them and may never use them for anything at all. I just really enjoyed creating them. I will play around with placing them next to the hummingbirds in various ways to create symmetry or even asymmetry as some of my weaving friends have suggested. I might keep the borders or perhaps fold them back so that they are hidden. I might hang them together so that they look like one complete piece or leave space between them.
Right now, I think I just need to leave them be and think about all that. Put it this way, there won’t be any cutting or sewing happening just yet.
What I would like to do next is sample these motifs in heavier thread. I have some 8/2 tencel that I would like to try. It will be interesting to see how wide the piece will be in this tencel. I have quite a few people asking me if I plan to publish these patterns and I am not really sure how they will look on a larger scale. They are fine and delicate in 60/2 silk. How will they look in 8/2 tencel?
At the same time I am not even sure if I would like to publish the hummingbirds. The hummingbirds have become part of my pandemic experience…they represent my yearning to be out of all this and zipping about freely. My friends in the States tell me that it is time to take in their feeders as the hummingbirds start their migration south. It must be so nice spotting the first ones arriving at the start of the season the following year. I have often thought about doing a similar seasonal change by spending the mild winters here in Bolivia and the summers in Australia but that was a pre-pandemic dream. I am not sure if I can pull that off any more. I, like many of you I am sure, have had to modify plans with the times.
This is the warp I created for the second band…


In this photo, I have finished creating the heddles for one half of the warp in this warp-faced double weave structure (one heddle set for all the light threads, and one for the darks), and have just started creating a third set for the light threads on the other side of the cross. A fourth will hold all the dark threads on that side of the cross. Those of you who have used my book Warp-faced Double Weave on Inkle Looms will have learned a two-shed set-up for this same structure that is perfect for the inkle loom. I only use four sets of heddles when I am weaving with a lot of ends and especially if the thread is fine. The inkle loom is perfect for the more basic two-shed set-up with heavier thread and fewer ends. Bolivian weavers who use this structure will use the method that is traditionally used in their community. Some of them use the two-shed method even when the threads are fine and numerous. This was the way that I was initially taught. Others use a four-shed set-up.
Working with multiple sets of heddles for a warp-faced structure on a fixed-tension loom, like the horizontal ground looms that are used in certain areas of Bolivia and Peru, is challenging.

In my experience, using a loom where the weaver can modify tension at will with his or her body makes the process of using multiple heddles much easier. Of course, I am talking about the backstrap loom. The weaver can control just how much the warp threads are able to rise and bend to form as large a shed as necessary without dragging up any sticky neighboring threads that don’t belong, and without causing abrasion.

When I was first taught Andean Pebble Weave way back in 1996 using narrow warps with quite fine thread, I was shown how to manage two sets of heddles. It took quite some time to figure out what was going on. I would just watch my teachers hands deftly manipulating the heddles, magically and effortlessly creating clean sheds, but at first was not able to replicate the moves. What I wasn’t noticing was how the rest of the body was also involved in the process. It wasn’t only about what their hands were doing. My teachers had to move to slightly relax tension on the warp while working with their hands. I broke a few warp threads in my rough handling before that key piece of information clicked. Those broken threads did not make me popular! You might understand what the title of this blog post is about now.
On narrow warps, I was able to wrap one set of heddles over one hand and roll it away while pulling up on the other heddle with the other hand. The wrapping and rolling tightens all the threads in those heddles. It holds them taut and in place so that they simply cannot grab on to neighboring threads and become part of a shed in which they don’t belong.
Here’s 7-year old Lily doing just that:

This and some of the following images are screen shots from videos that I took and will be blurry as a result. I think they still allow you to see what is going on. You can see how slack Lily’s warp is because she has relaxed tension (more than is really necessary as you can get away with very slight movements when the warp is this narrow). One hand is pulling up the second group of heddles while the other wraps and rolls the first set away.
Here’s my student Berna doing the same: (Hi Berna! I know you read this blog from time to time). She is raising the first heddle while rolling the other away. You can see how her left pinky rests on the warp and acts as the pivot point for the roll. Having placed her other pinky within the shed to save it, her body is on its way to returning to the “neutral” position in which the tension on the warp is no longer relaxed. She had relaxed tension just enough to enable her to save the shed on her finger. She can later replace her finger within the shed with a sword to beat.

Susan learned all this about operating a loom with two sets of heddles on narrow warps from me during my visits in the States. She needed to contact me recently after having set up the beautiful Andean Pebble Weave warp (below) with its two sets of pretty heddles as it’s her first time attempting something this wide. She works with wood and has had to prepare swords that will suit the width of this new project. I hope that she sends pictures of them.
The heddles on their rods fill a narrower space than the width of the warp as some of the heddles hold two threads. This difference in width is expected as the woven cloth will be a fair bit narrower than the width of the warp as you see it here. The fact that this structure uses warp floats on both faces of the fabric means that the fabric will be narrower and thicker than one with the same number of ends in plain weave.

Isn’t this warp gorgeous? I can’t wait to see what she does with this asymmetric layout.
This is Susan’s first attempt at this kind of width having woven several beautiful Andean Pebble Weave guitar straps for friends and family which have given her plenty of practice in winding nicely-tensioned warps and making string heddles. Of course, now her question is how to manage these two sets of much wider heddles. A hand is simply not large enough to wrap and roll these.
For wide warps, I was taught to substitute a sword for the hand….

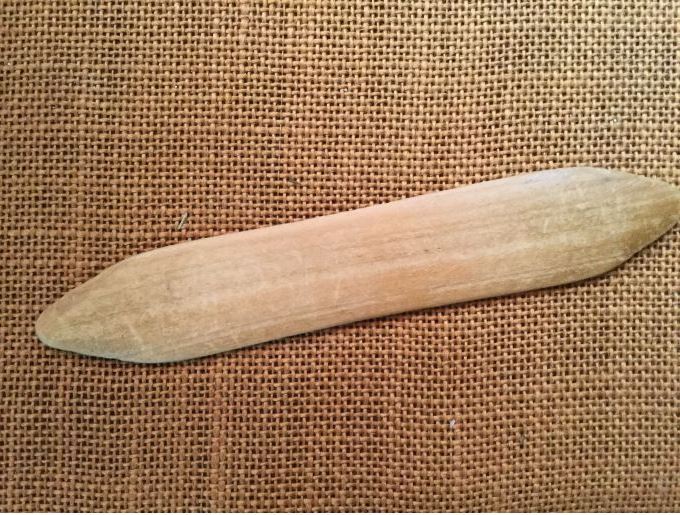
Here I am demonstrating doing this for a group of friends and exaggerating somewhat to show the effect of moving my body forward to relax tension on the warp. The more I move forward, the larger the shed. The edge of the sword rests on the warp and is the pivot point. Once the shed is open, I can let go of the sword in the wrapped-and-rolled heddle, maintain the forward position, keep pulling up on the heddle rod, and save the open shed on a sword. You can see how my sword is completely wrapped within the heddles and rolled. So, an important tip is to take account of the width of your sword when you are making the heddles. If they are shorter than the width of the sword, this move will not work so well. If they are a lot longer, they will be clumsy.

This still-shot which I grabbed from one of my videos, shows a backstrap weaver in Peru positioning herself to wrap and roll her sword away while her other hand lifts the heddle nearest to her. She chooses to use a sword rather than her hand even on this relatively narrow warp. Her sword sits just below the heddle stick which shows that her heddles are the perfect length for this. That is what I always aim for. No doubt she has been doing this for most of her life and doesn’t even need to think about it.

Now you can see her raised heddle a lot more clearly and her forward position is evident.
So, this was precisely what I was doing on my double-weave Garden warp. I would roll Heddle One away with my hand while lifting Heddle Two. And I worked Heddles Three and Four in the same way. It enabled me to work with this fine 60/2 silk without breaking any threads from abrasion and achieve nice clean sheds every time.
When working with just one heddle together with a shed rod, I like to use what I call the “twisty stick” method. You can see this in action in this video clip. Twisting the two sticks tightens that layer of threads so that the threads remain taut and in place while I bend and raise the threads in the other layer. I go into this in more detail (how to set it up etc) in my video class Operating a Backstrap Loom.
You can see me using the twisty sticks a few times in this next video where I am nearing the end of a warp of 60/2 silk…
Of course, it is important to point out that there are many many different methods used by backstrap weavers to operate their looms. I share with you some of my current favorite methods that work well for me with a variety of warp materials. There is no single correct way to do any of this. Some materials, for example, are just friendlier in terms of stickiness and work well with simpler methods. Some materials are so sturdy that the weaver can get away with simply grabbing and pulling up on the heddle while sawing it back and forth along the warp to clear the shed and remove any stray threads that don’t belong.

How I would love to be there with all of you who are venturing into weaving on backstrap looms. Who knows when that will be possible? In the meantime, I hope that some of what you have seen here today is helpful and perhaps interesting even to those who don’t use a backstrap loom.
It’s time to wet finish the Garden and Hummingbird bands and give them a good hard press in order to better enjoy the loveliness of the silk. Right now they could easily be mistaken for cotton. I am looking forward to bringing out their sheen.
Until next time….