Backstrap Weaving – The Long-awaited Book Update!

Rugged up for winter hiking with my Wednesday Walking Women’s Group at Wentworth Falls. Spinning wool for a lap blanket project at the Springwood Spinners and Weavers Group. We meet weekly! Attending a Jane Austen Tea Dance in Sydney…yes, I’m doing English Country Dancing and am quite obsessed! It’s good to add some non-hand activities. as my poor wrist and hand will probably never fully recover from my accident.

SO, HERE’S THE UPDATE….

Demonstrating weaving and spinning at Winterfest Medieval Fair while making new fiber friends.
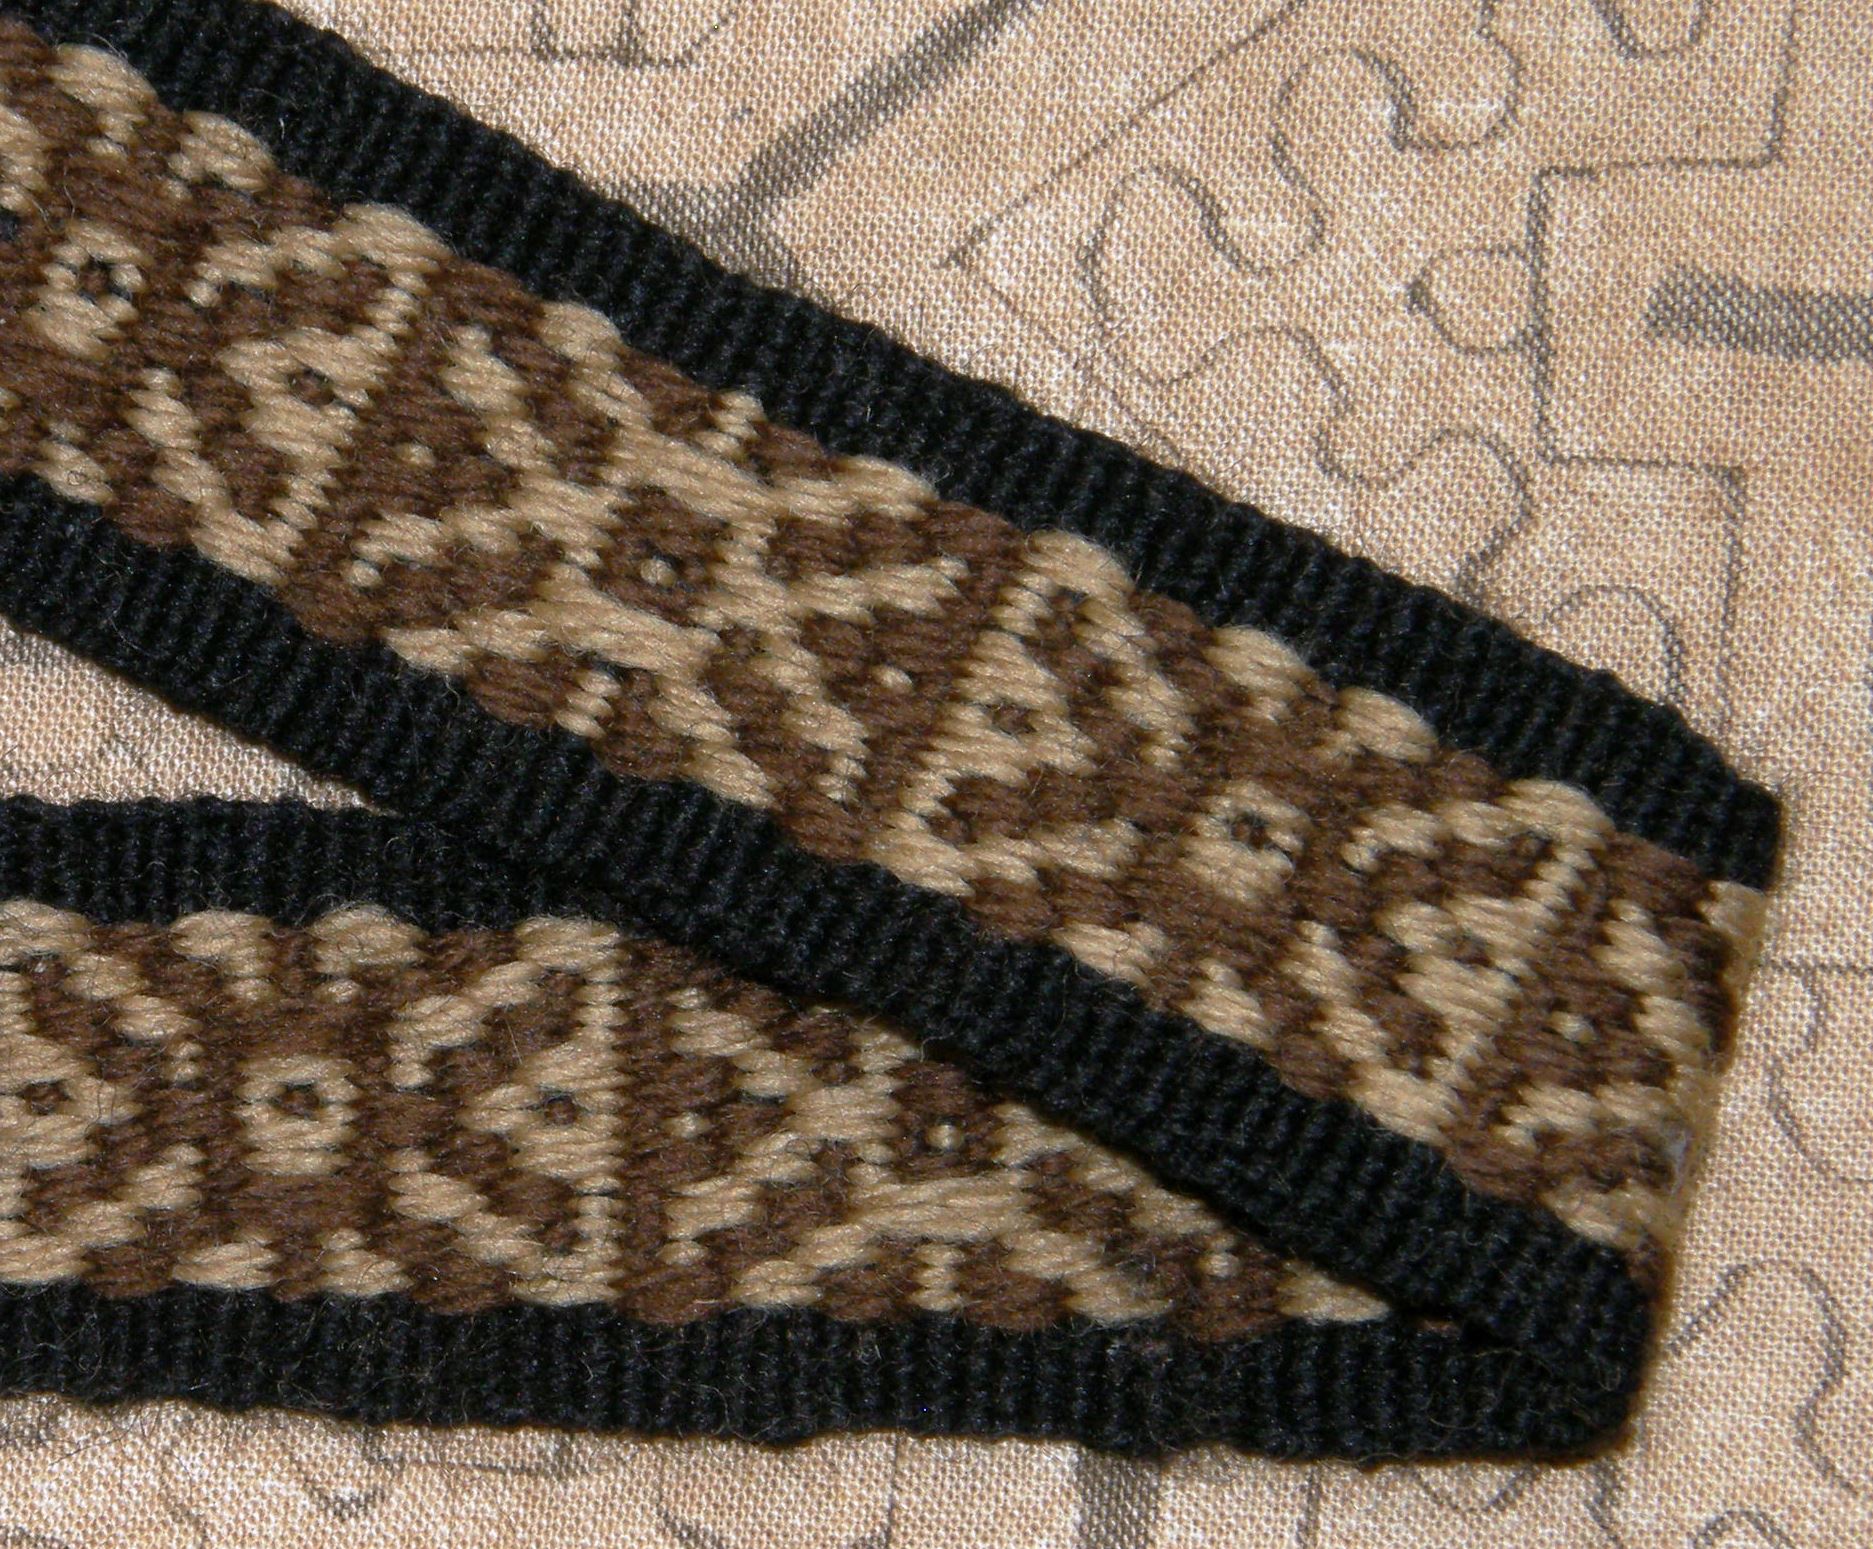
I chose to weave a pattern that I had transposed to the structure that I call Andean Pebble Weave from a historic tablet-woven band for the demo at the Medieval Fair. It has a little dragon-like figure which I thought appropriate. It is charted in the More Andean Pebble Weave Patterns book.

Some of these patterns are charted in this first book.

(More suitable starter books for those who use inkle or other band looms are Complementary-warp Pick-up for all kinds of looms that allow you to weave bands or Andean Pebble Weave on Inkle Looms specifically for inkle looms. See their descriptions below).

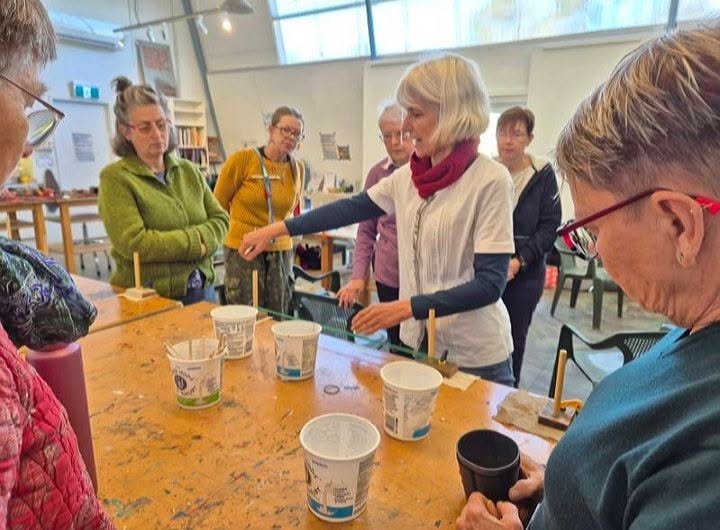
Teaching backstrap loom weaving at the Blackheath Arts Society here in the Blue Mountains. All those serious focused faces turned into smiling ones once they’d settled and started to feel comfortable with the techniques. Some had never ever wove before and can now call themselves weavers!


The colors I’ve been achieving lately in my natural dye experiments perfectly matched the Autumn colors here in my Blue Mountains home. The most recent color came from lichen which gave me the lovely lavender.


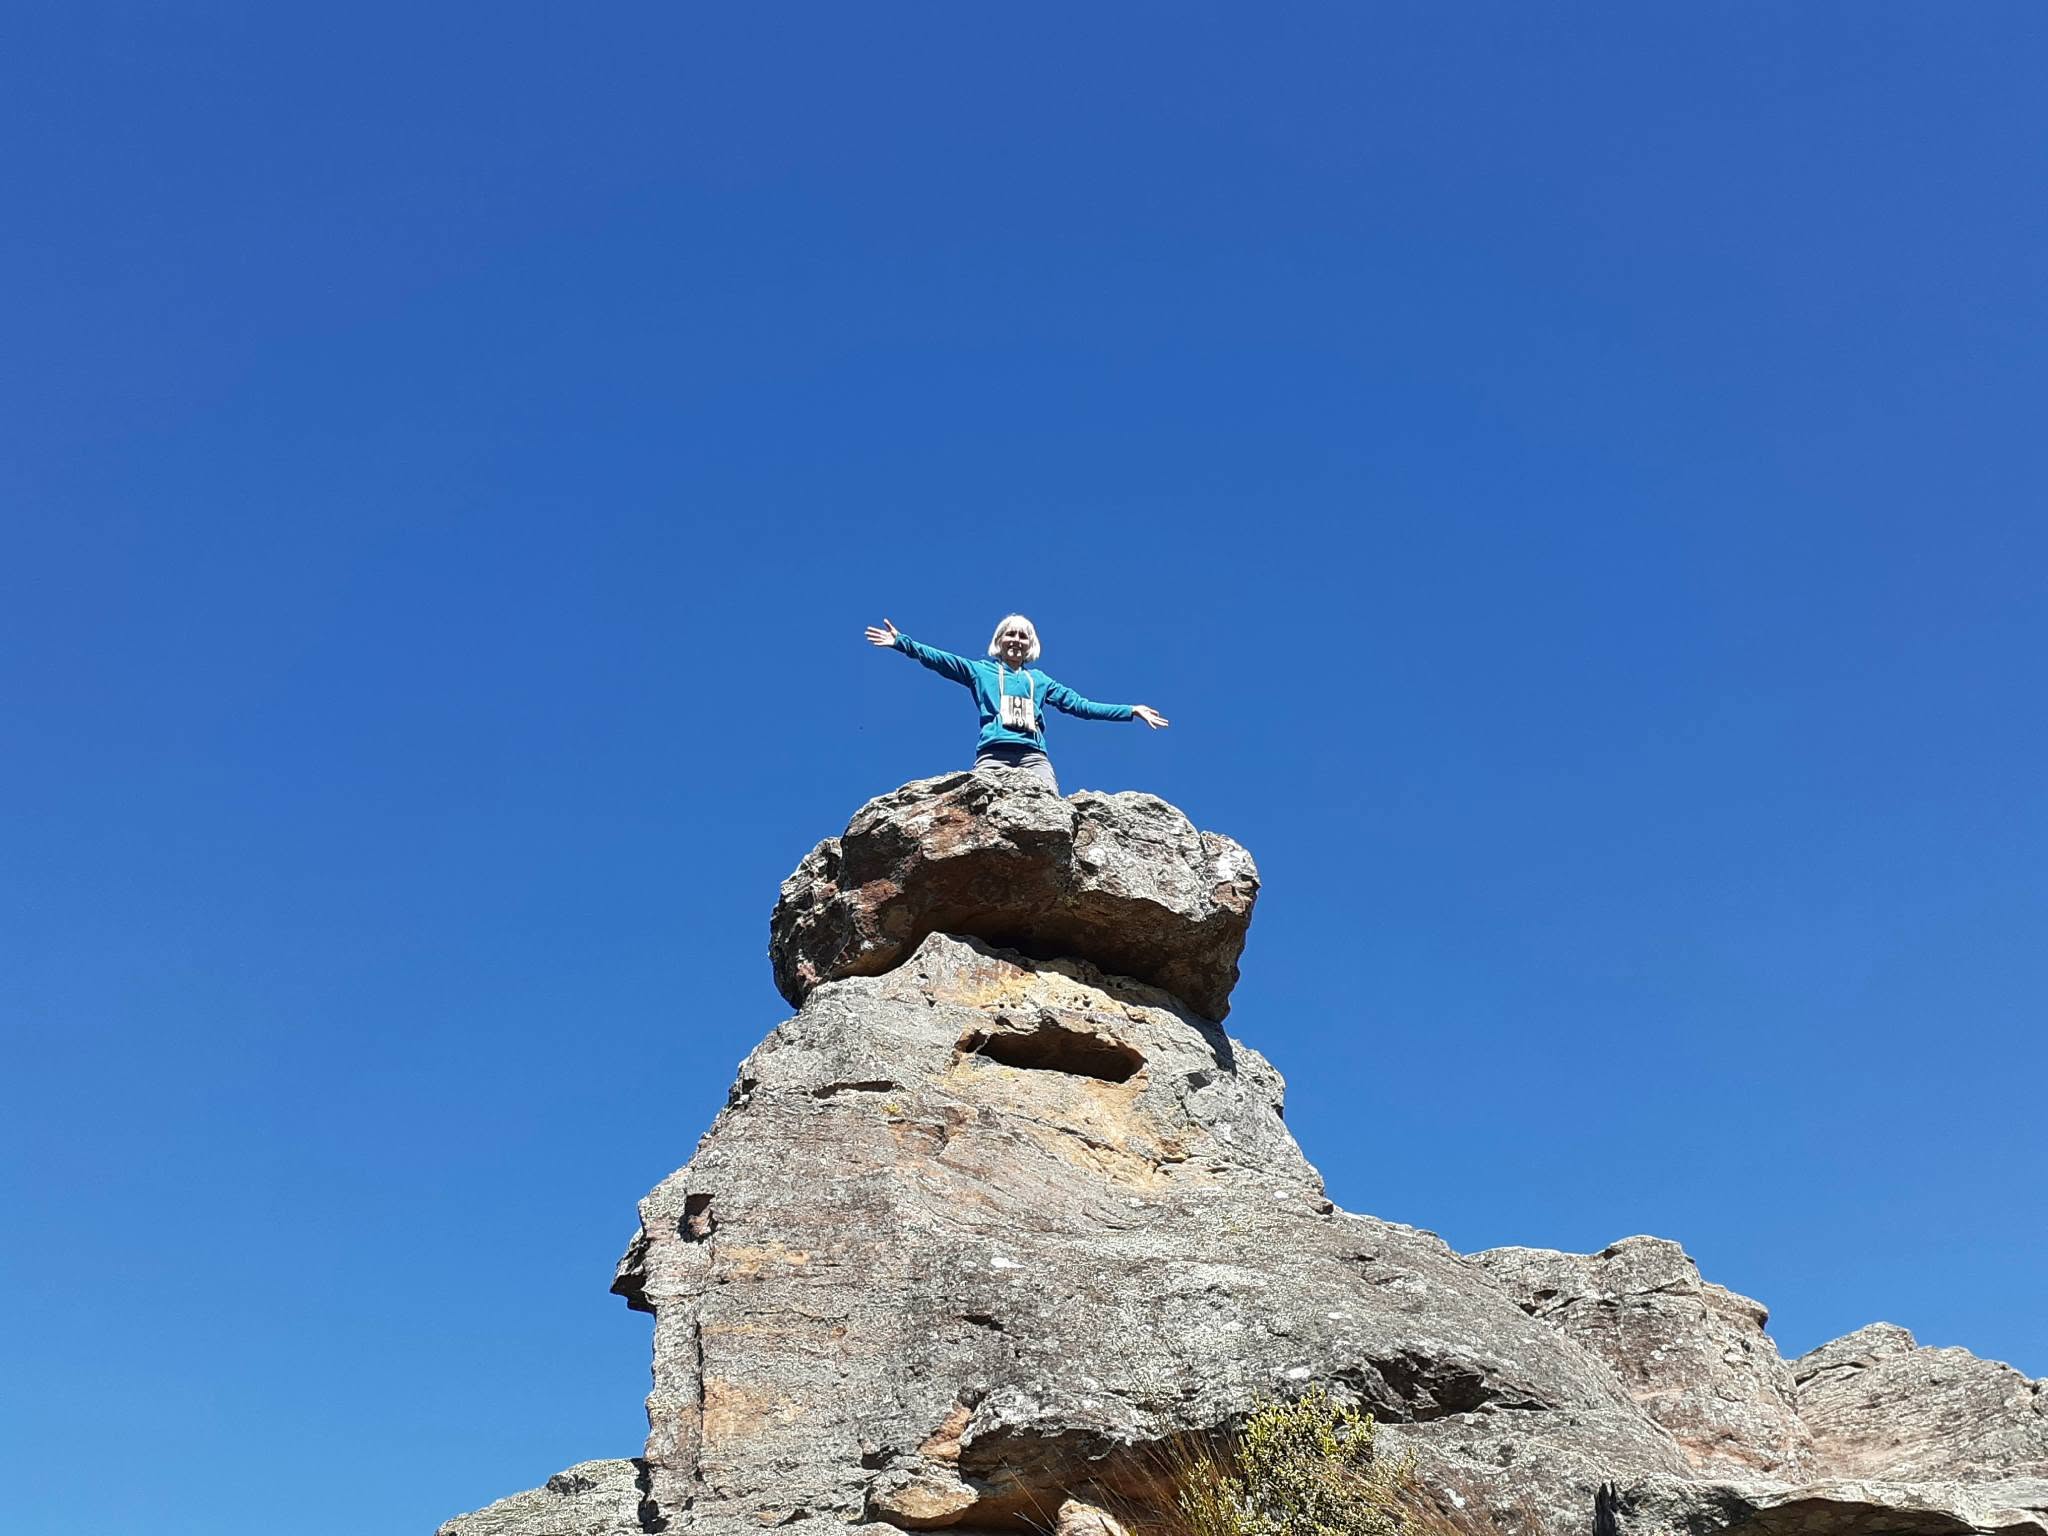
Being King of the World on Ruined Castle deep in the Jamison Valley, Blue Mountains NSW Australia. Day 3 of my three-day birthday celebration a couple of weeks ago…haha. No it wasn’t one of the milestone birthdays but the Beatles thought the age important enough to write a song about!

Backstrap Weaving – My Books!

If you’ve purchased the PDFs that come with supplemental video clips, you don’t need to do anything either. You will continue to have access to the videos by clicking on the link to the folder of clps that you’ll find in the chapter titled Videos. Access to the clips will continue after the Taproot Video website closes.

ACTION NEEDED FOR THE FOLLOWING:

  • Clck on the link.

This a celebration of connections made in what I’ve left behind and where I now find myself. The images depict the four seasons considering that now that I live in a place that truly experiences all four. We had two at best in my tropical home in Bolivia! I’m going to make this into a bag so I can carry those connected memories with me.

Bye-bye Taproot Video and thank you.. Thank you to all those who have purchased my publications over the years and supported me through following my blog as well as leaving me kind comments and reviews here and on my other social media pages.The blog will continue. I have a lot saved up to post! You’ll be hearing again from me soon.

Backstrap Weaving – Bonus Book News

Here’s some news for those of you who have bought either of my books on the eye-pattern tubular band or for those who might be considering buying it. What do we know so far? There are two versions of this book, a short version which is about weaving the eye-pattern tubular band as an independent band and the full version which also teaches how to weave the tube as a decorative edging. It’s a clever technique which allows you to weave and attach the band to the edge of cloth at the same time by using the weft as the sewing thread. The extended version also includes instructions for other decorative sewn finishes and is called The Eye-pattern Tubular Band and Other Decorative Finishing Techniques.
But you already know all that.

That isn’t the news.

Here’s the news…..While preparing material for a Zoom class on this topic, I decided to make a couple of additional video clips to enhance my Zoom teaching. I have now added them as Bonus Videos to the collection of clips that already accompany the books. You will be able to access these clips in the same way that you access the current collection. Instructions for doing so are in the books themselves in a section on Videos near the beginning. As you know, the video clips are accessible to those who have bought the PDF version as well as to those who bought the spiral-bound printed version. The original collection of videos were designed to supplement the dozens of step-by step photos and detailed explanations that are in the books. These two new videos will give you more supplemental material in that they give you a chance to see in action the steps that are laid out in the book, in step-by-step photos, for Sheds R1 and R2 .

I know that different people have different learning styles and I hope that I am able to cater to several of them in these books by providing step-by-step photos, detailed explanations, as well as video clips.. Some people like to see a process frozen into bite-sized steps in step-by-step photos. Others like to read detailed explanations and form visuals of their own. Many people like to have both kinds of instruction side-by side. And then there are others who like to hear the steps being described while watching them on video. Some people have told me that they hear my voice in their heads as they weave. Hopefully that’s a good thing! So, there are now two new opportunities to do just that.

Accessing the two bonus videos will be straightforward if you bought the books at Taproot Video. If you bought them some years ago from Patternfish which no longer exists, you will need to contact me via a comment on this blog post. I will see your comment behind the scenes and it won’t get published. EDITED TO ADD: The offer to share the videos for those who purchased from Patternfish ends on November 5, 2021.

I remember when I first learned to weave tubular bands as edgings….I wanted to edge everything I could get my hands on! I thought that the novelty might eventually wear off but it never has. It’s such a pretty finish to a project as well as being very practical. I doubt that my iPod pouch with the amount of use it gets would still be in such good shape if not for its protective edging. The tube actually encloses the edge of the fabric giving it strength and full protection. It could also be used to hide some questionable selvedges! I have edged bags and pouches in my woven cotton, silk and wool fabric. Here are just a few examples….

And, I was really happy to discover that some cotton fabric that I had bought, perhaps to one day use as lining, stood up really well to the tubular band. Until then, I had always thought that light commercial fabric, as opposed to the heavier warp-faced fabric that I am used to weaving, would not be able to support the spiraling energy of the tubular band. But I was wrong. By the time I had turned in the edges of the cloth to make a pouch, I was sewing onto four layers and they were more than able to support the pretty tubular edging. I love this little pouch with its cotton edging! The mouth of the pouch is decorated with the cross-knit looping stitch which I also teach in my book.

The eye-pattern tubular band was used to dress up a simple pouch made with commercial cotton fabric.

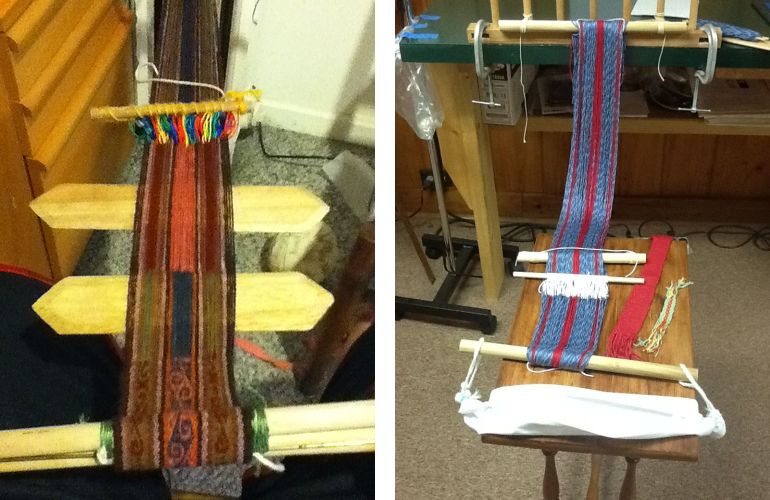
And, of course, there are a multitude of things to do with the tubes when woven as independent bands….cords to hold pendants, eye glasses and ID cards, fobs for keys, scissors and other tools, shoe laces, bracelets, draw strings…. They can be woven using a string in the warp ends which gets tied to your waste as my friend Marilyn is doing here. The other end of her warp is attached to a C clamp on a table.

Or the warp can be placed on a loom such as an inkle loom. Full instructions are given in the books to show how to set up and weave these on inkle looms. One of the many cool things about it is the fact that the warp does not require heddles. Once the warp threads are set-up and the cross is saved on two sticks, as you can see above and below, you are ready to weave. The book explains it all.

Weaving an eye-pattern tubular band on an inkle loom.
Independent tubular bands made into fobs.

I had a bit of fun recently using my own hand spun wool for the first time to create one of these lovely eye-pattern tubular bands. Many years ago, I wove some as edgings in my own hand spun llama and alpaca fiber but this is the first time that I have done so in wool.

A cuff I wove using my handspun llama fiber. It is edged with an eye-pattern tubular band in the same yarn.

I have set myself the task of fishing out every bit of random fleece from my closet and spinning it. It has been slow going as I only do it while I am on Zoom calls. At other times, I would really rather be weaving. But apart from this small indulgence, I have not allowed myself to use the spun and plied yarn. I want to first spin everything, decide which colors I will over-dye and only then plan a project. I did weave some of it right at the start of this project just to make sure that it was suitable for the kind of warp-faced fabric that I weave on my backstrap loom. A couple of wrist cuff projects told me that all was well except that I really wanted to go a bit finer. So that’s what I am doing now.

Of course, the cuff got an eye-pattern tubular edging.
Weaving and sewing a eye-pattern tubular band to a second cuff in my hand spun wool.

So, here is my eye-pattern tubular band in the finer hand spun wool that I have been recently preparing. I wanted to see how well these three colors played together….

I’ll finish this band and continue spinning while planning how I will use these and other colors in what will hopefully be a large-ish project on my backstrap loom. Then it will be time to get back into cotton spinning and another clean-out of the closet. I am still very much in the infancy stage of my cotton spinning.

Here’s an old photo that I recently unearthed from back in 2007 which was taken after I had returned from my second trip to Ecuador. I had had the opportunity to learn about the preparation and spinning of cotton for weaving from a family of weavers and spinners in coastal Ecuador. Here I am practicing the skills that they taught me. The distaff is a miniature version of the kind that they use. I built it while I was there with their help as the full-sized version would have been too difficult to bring back to Bolivia. Yes I know that you are probably distracted by my cat. It’s those eyes…she can burn holes in things with those eyes. She is now a grand old lady of 18 years of age. If I had only continued to practice, I would probably be a pretty decent cotton-spinner by now.

But I have wandered off topic now. This was really just meant to be a quick message about the two new BONUS videos. I hope those who own my books enjoy them and I hope that this post might encourage others to learn how to weave these patterned tubular bands.

Thank you so much for your support and see you next time (with more hummingbirds 🙂 )

A cotton pebble weave cuff with its tubular edging.

Backstrap Weaving – A New Year and a New E-Book!

Happy New Year to all of you! I usually let December 31st slip on by but this time it was a little different because it marked the finish of my latest e-book on the eye-pattern tubular band and other decorative finishing techniques. It really did feel like a big finish and, as the fireworks boomed outside (we tend to only have the noisy ones here and not so many of the pretties), I almost felt as if they were cheering for me. I guess the end-of-year means something different for each and every one of us. This is what it meant to me at that very moment, and on and off until 2am! There are no official public displays of fireworks. People buy them in the market and let them off in their back yards. It can go on all night!

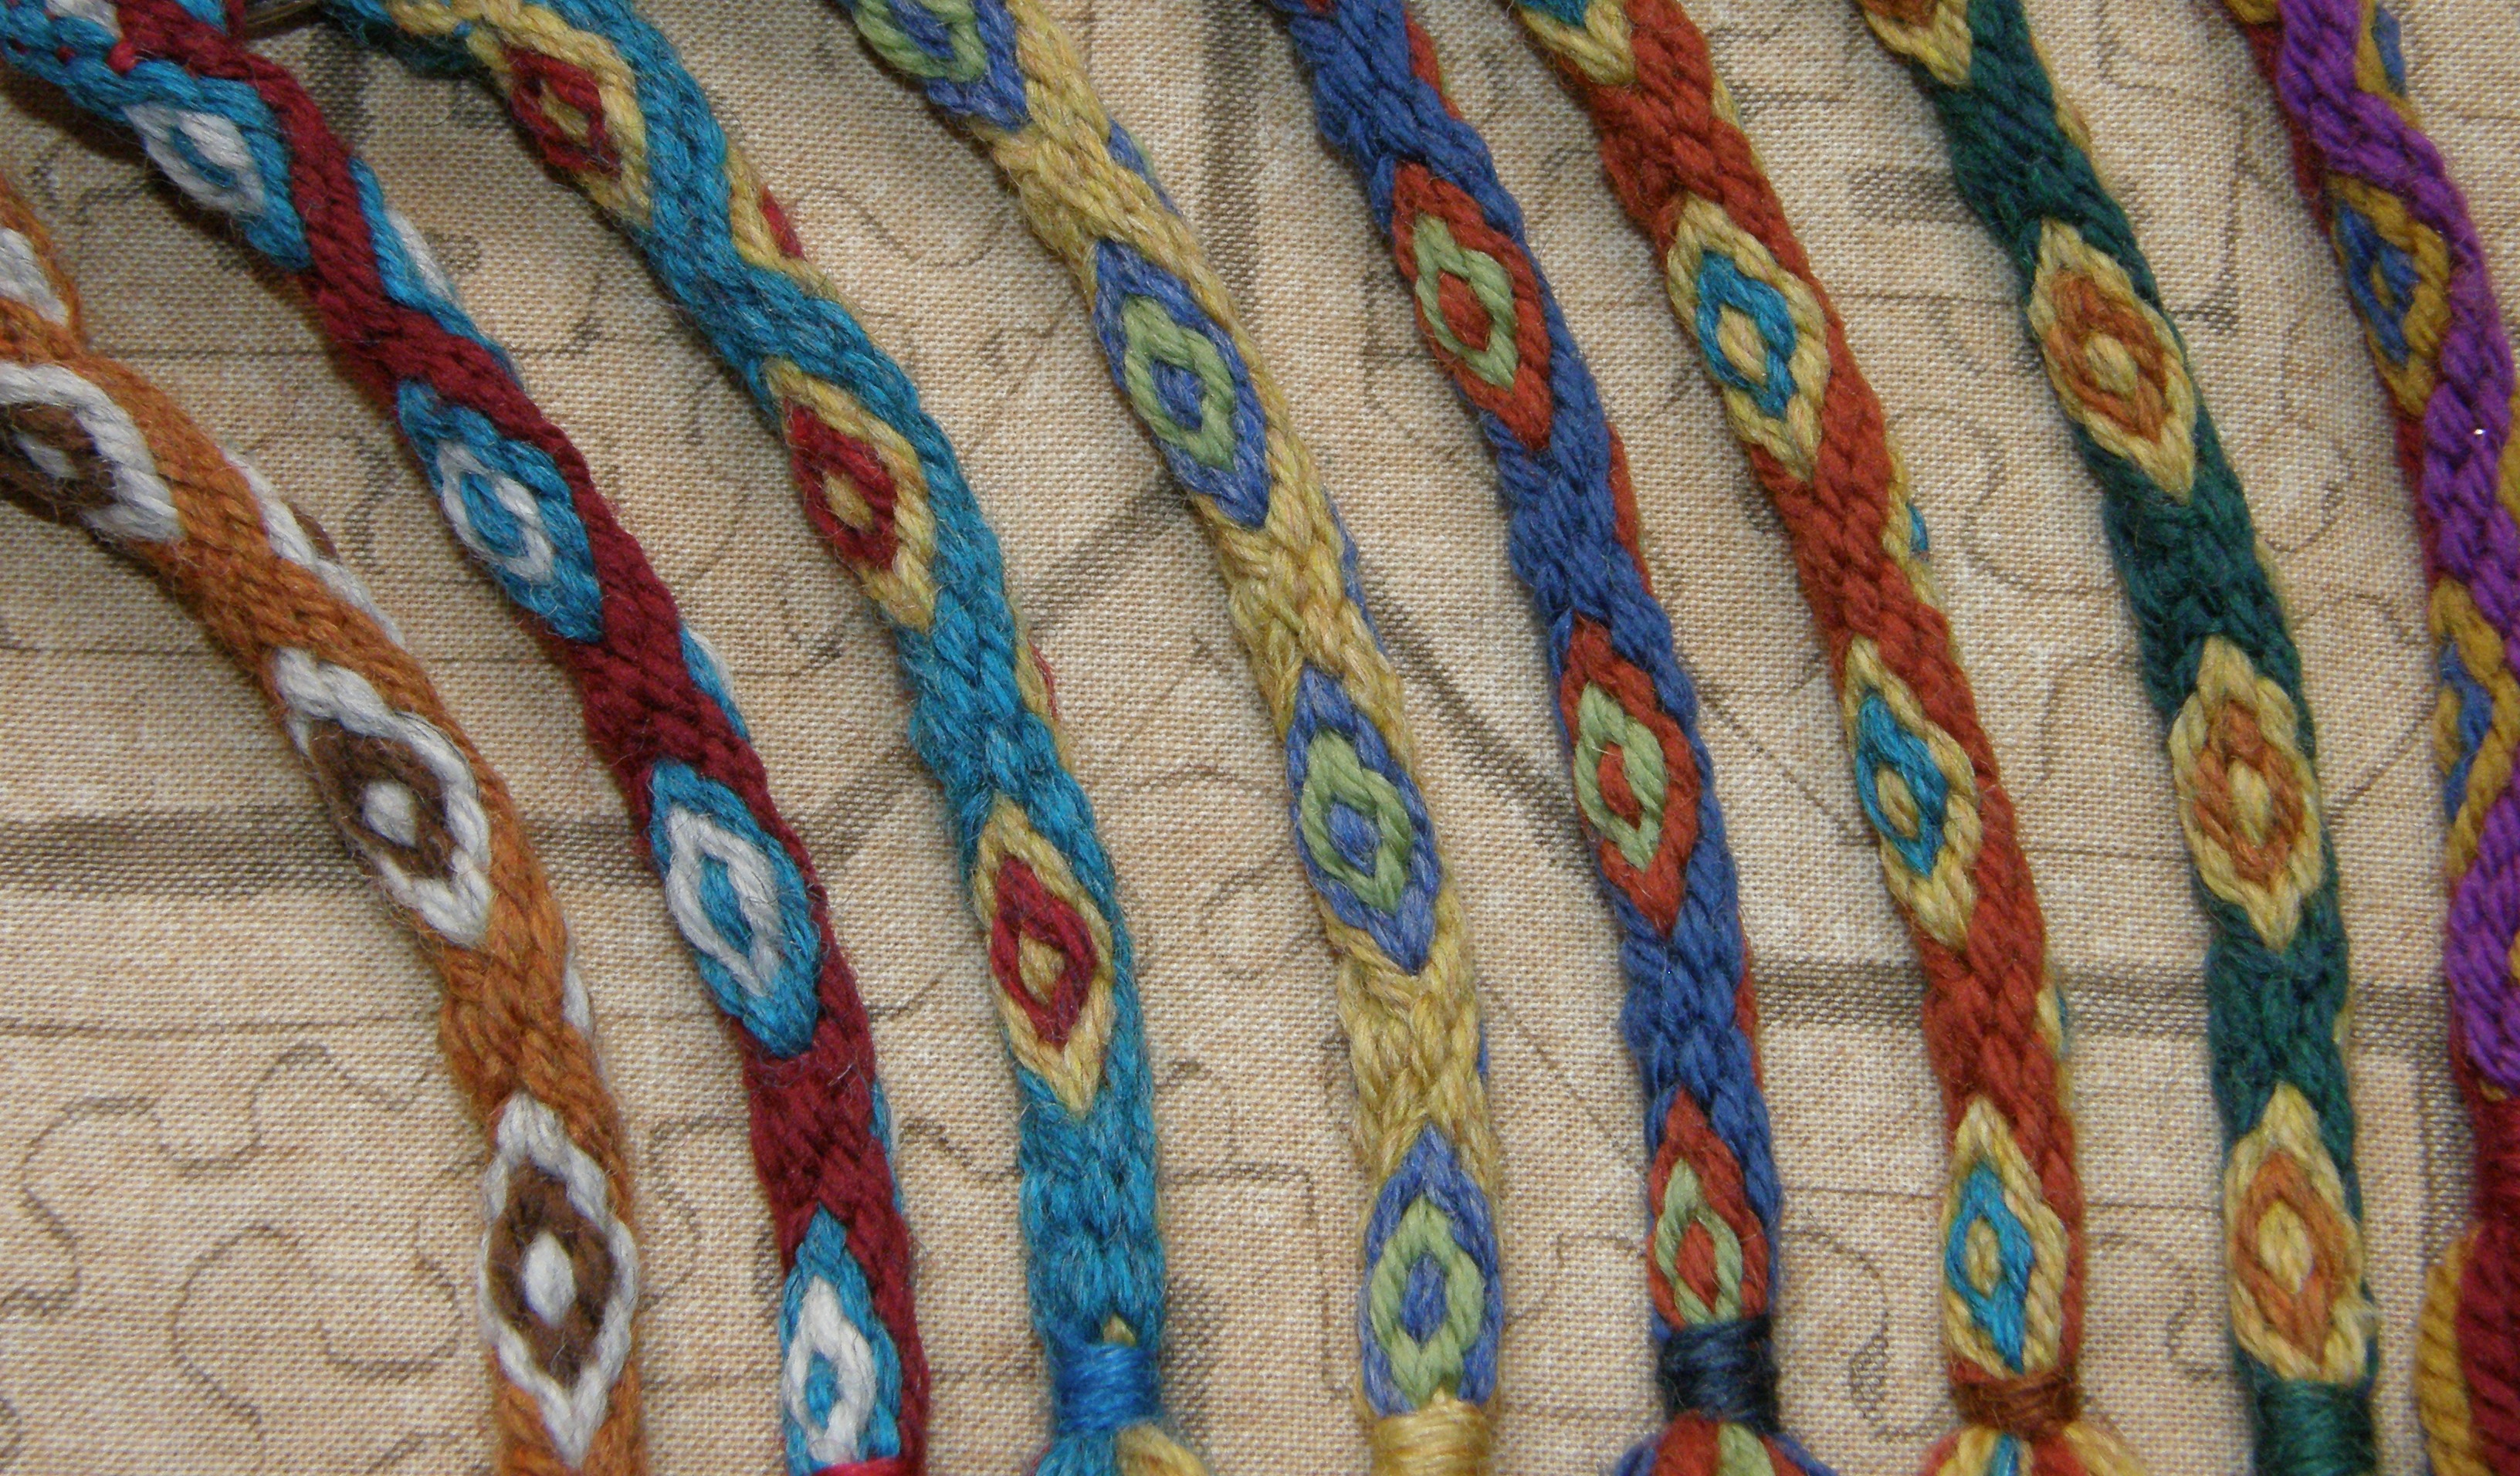
So….about the e-book. You may know this pretty eye-pattern tubular band by its Quechua name, ñawi awapa. I have seen it woven in various places across the highlands of Peru and Bolivia. Because I know of at least one other local name that is used for it, I decided to simply call it the eye-pattern band in my book.

Weaving the eye-pattern tubular band in the central Bolivian highlands.

I have been happily applying it to my small woven pieces ever since I learned it. The novelty of seeing those little eyes appearing along the band never wears off! Used as an edging, it is the perfect finish to my woven pieces. In the highlands it is used for both decorative and practical reasons as it protects the edges of the fabric which are often the first parts to wear out.

Here’s my latest finished project using a simple two-color eye-pattern band as the edging on my Andean Pebble Weave wrist-cuff .

The tubular  band is woven and sewn simultaneously to the perimeter of the cuff using the weft as the sewing thread.

When I was learning to weave a coca-leaf bag with my teachers in Bolivia in 1997, I realized that removing the cloth from the loom did not mean the end of the project. It actually signaled the beginning of a whole new process that involved embellishing the piece with various decorative finishes. I saw that the eye pattern has different levels of complexity in different regions and that the methods used to create it can also vary. These kinds of similarities and differences have always fascinated me.

And, I have since learned that the eye-pattern tubular band is fun to weave on its own rather than purely as an edging. It makes lovely necklaces on which to hang pendants, sweet bracelets and bangles, and can be used in a variety of ways in accessories….fobs for keys and tools, lanyards, eye-glass holders, shoe laces, straps and drawstrings…. From my own experiments, I show you how to create straight, curved and spiraled versions of the tubular bands. They all have their particular charm!

One of the many fun things about this pattern is that you can make it as subdued or as lively as you like. I am generally limited to using only two colors at once in a pattern when I do most of my basic pick-up weaving techniques. The eye-pattern band allows you to use up to five or even more colors in the pattern. My favorite combination is usually with only three but you can make them as colorful as you like!


The traditional way to weave these tubular bands is by having the narrow warp attached to the weaver’s waist or belt with a piece of string. String heddles are not used at all and so the weaver’s body is simply suspending the warp. The weaver is not required to move the body back and forth to add or relax tension on the warp to help operate the heddles.

You should at least be familiar with weaving terminology…warp, weft, beat, shed etc…before you approach this.

Because heddles are not used at all to create the sheds, the warp can be easily set up and woven using an inkle loom or any other loom or frame that allows you to adjust tension for take-up. Full instructions on how to set up and weave the independent band on an inkle loom are included in both versions of the e-book.

Here I am weaving one on my tiny Ashford Inklette.

My e-book is available in two versions. One contains the instructions for weaving the eye-pattern band as an independent tube and then goes on to show how to weave and sew it simultaneously as an edging along the two sides of a project, or around corners, covering all edges.

I used a two-color eye-pattern tubular band to dress up a simple pouch that I made with commercial cotton fabric. The cross-knit-loop stitch decorates the mouth of the pouch.

Other decorative sewn finishing techniques such as the coil stitch, pictured below, are included with dozens of step-by-step photos as well as drawings.

The other version of the e-book is for those who only want to weave the band as an independent tube, perhaps for using it in jewelry and accessories, and aren’t interested in the sewing techniques. Both books provide ideas, instructions and suggestions for finishing the bands and for using them in such projects.

There are links to both versions in each one’s product description on the Taproot Video page.

And, let me tell you about something new for my e-books……

Both e-books include access to supplemental video clips. These are not stand-alone tutorials. They were designed to allow you to see “in action’’ some of the processes. The techniques are thoroughly explained in the books using over 140 photos, drawings and diagrams and so the videos really are optional supplemental material. With these additional materials I hope to be able to cater to a greater variety of learning styles. I had a lot of fun making those video clips and I am thrilled with them! Links to the videos are provided in the ebooks where they can be viewed and/or downloaded, if you like. They are better viewed after you have read each tutorial. Little video camera symbols in the book will let you know when there is a related video clip to be viewed.

For my left-handed weaving friends, I have included instructions in the Appendix on how to adapt the weaving technique to suit. You will notice that I said for my left-handed weaving friends. I am sorry, but for the sewing techniques in the book, I have left it up to you to adapt.  My left-handed students have always been so awesomely good at doing that in my classes!

I will leave you with this picture of me with one of my teachers, Maxima, spending a tranquil afternoon together. I weave as Maxima sews a decorative edging to a small pouch. The pouch on which she taught me to weave and sew a tubular band, lies on the ground between us. This was on my birthday back in 2011….a lovely way to spend it.

So, I hope that you will enjoy the e-book and I look forward to seeing what you create using it!

I wish you all the best for 2019!

(Hair update, for those who are interested…. I now have a blunt-edged chin-length hair cut with a good five months of grey growth!).


Backstrap Weaving – Everywhere an Eye-Eye

Here an eye, there an eye….

I have been casting my eyes over Veronica Cereceda’s beautiful book on the weaving of the people of Tinkipaya, Bolivia marveling at the complexity of the patterns and the use of certain combinations of color to create light and shadow. According to Cereceda, the colors most used, and this is immediately evident from the many stunning photos in the book, are white, yellow, orange, black, light green, dark green, bright blue, bright pink, dark red and purple. I have yet to find any reference to the type of yarn used and whether it is bought in these colors or dyed by the weavers themselves, but as I said, I have only had the time to simply leaf through the book at this point.

I have to say that it is refreshing to find these bright, obviously synthetic colors in use in these gorgeous textiles.

The bright pinks, lime greens and strong yellows so often favored by the women of the highlands can quite often be jarring to our “Western” eyes.

When one sees the dry, bleak landscape of  the high plains, it is easy to appreciate the desire to create brightly colored cloth.

However, I think that it is the certain placement of these colors on the cloth of Tinkipaya to create the bands of light and shade that make these textiles so attractive.

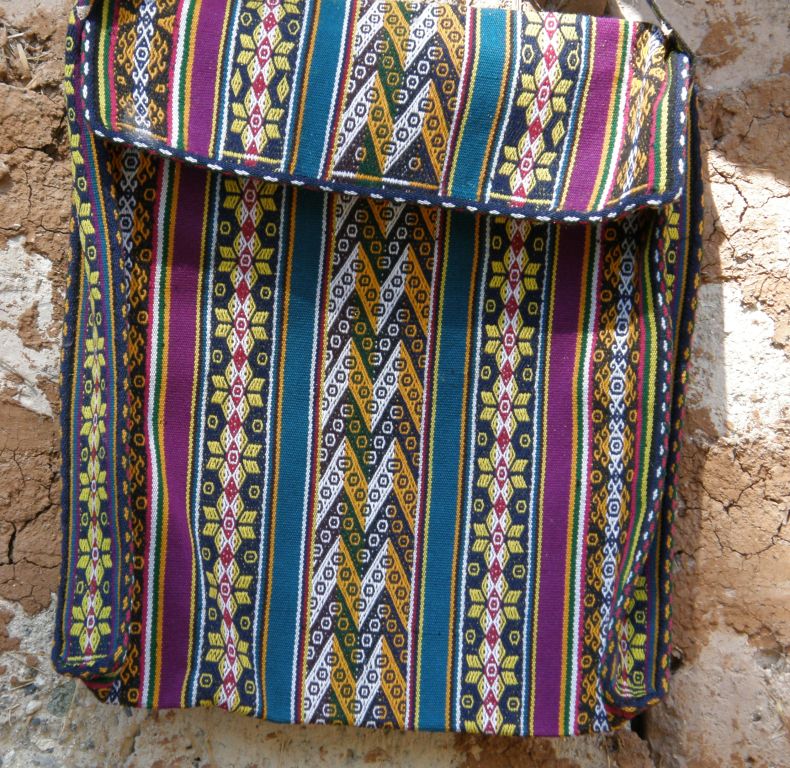
The piece above from Tinkpaya was most likely made for sale to tourists and may have been adapted slightly color-wise for this purpose. I don’t see anything with that particular shade of blue among the many pictures in Cereceda’s book and the colors generally are a little bit toned down compared to the pieces I see on the pages.

I can actually get a little tired of muted natural dye colors in the same way that I get tired of  wandering from booth to booth of hand painted skeins at fiber festivals. I have always said that I am not a “yarny’ person. Don’t get me wrong, I do love the natural dye colors, but it is very nice now and then, just for a change, to see the brighter and more “acid’ colors used so nicely.

When I learned to weave in Potosi, the same province of Bolivia in which Tinkpaya is located, I had my teacher choose the colors for my second learning piece as I wanted to weave something that was to her taste. My teachers were not from Tinkipaya and the placement of the colors in the pieces I wove with them has nothing to do with the style of textile from Tinkipaya. Yet it is interesting to see the kinds of colors, pictured above, that they favor when we in the west are so drawn to the softer earthy tones achieved when using natural dyes.

The design that I wove with my teachers on the ch’uspa, the smaller of the two bags pictured above, is woven in Tinkipaya where it is known as ch’uritos,  spirals. I have been told by other weavers that the pattern represents the swirling waters of a fast running river. It is normal in my experience to hear different interpretations of the same designs from different weavers.

The small “circles” on the Tinkipaya textile are very typical and are called ñawis, eyes, according to Cereceda. Weavers that I have met have generally told me the name in Spanish…ojitos. The zig zags on which the ñawis sit, known as kutinaku, are also very typical and are one of the principal identifying elements of textiles of Macha and Tinkipaya.

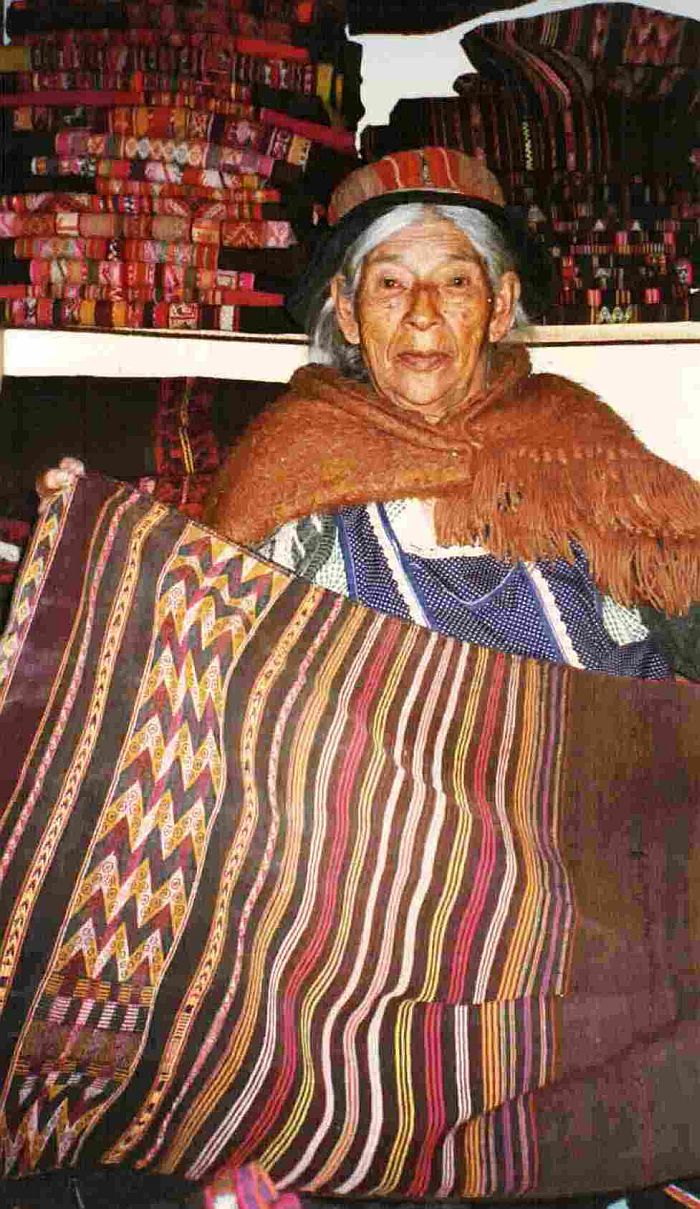
Here is Dona Maxima in her tiny store in Sucre in 1997 showing my friend Ulla and I a weaving from Macha with its kutinaku and ñawis.

I wanted to try weaving  just a small slice of the eye design from one of the Tinkipaya textiles so that was one of my projects this week.

There it is on the purple pouch which has a nice lilac zip from the bag of assorted zips that were given to me by Sharon and Betty. I am always bound to find just the right color in that bag. And I added some more eyes in the form of a ñawi awapa to the perimeter of the bag and braided a zip pull.

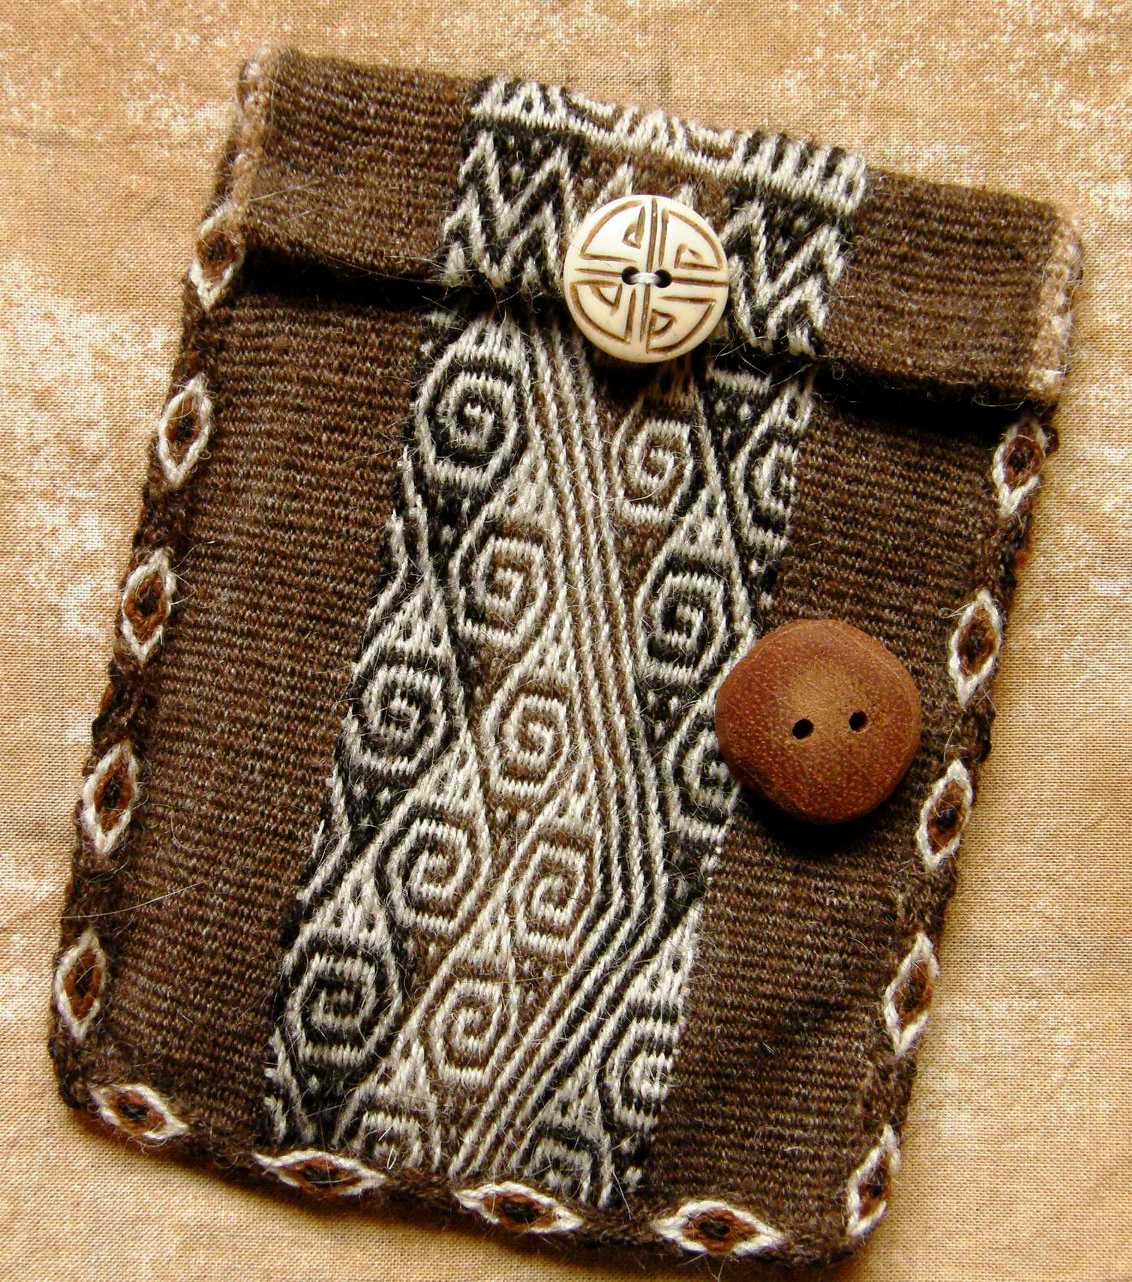
And, as the Tour de Fleece is in full swing over on Ravelry (this is a spinning event run in conjunction with the Tour de France cycle race), I pulled out my handspun alpaca pouch with its spiraly eye-like Tarahumara design (now everything looks like eyes to me!) to remind myself that yes, I can and do spin and weave with my yarn and yes, I should contribute something to the Backstrap Weaving group’s Tour de Fleece team.

So far only Janet and Jennifer are doing their bit.

But I mainly got that alpaca pouch out as I found a nice button for it while I was away….bone with a cool etched design and so I wanted to sew that on and fasten some snap closures to the inside (I had been using velcro on the inside of the flap…urrrgh!)

It was a toss-up between the bone button and the sweet wooden one which was made by a gentleman in the town where my weaving teacher Maxima lives. The wooden one is a bit on the bulky side for such a small pouch but boy, does it smell good!
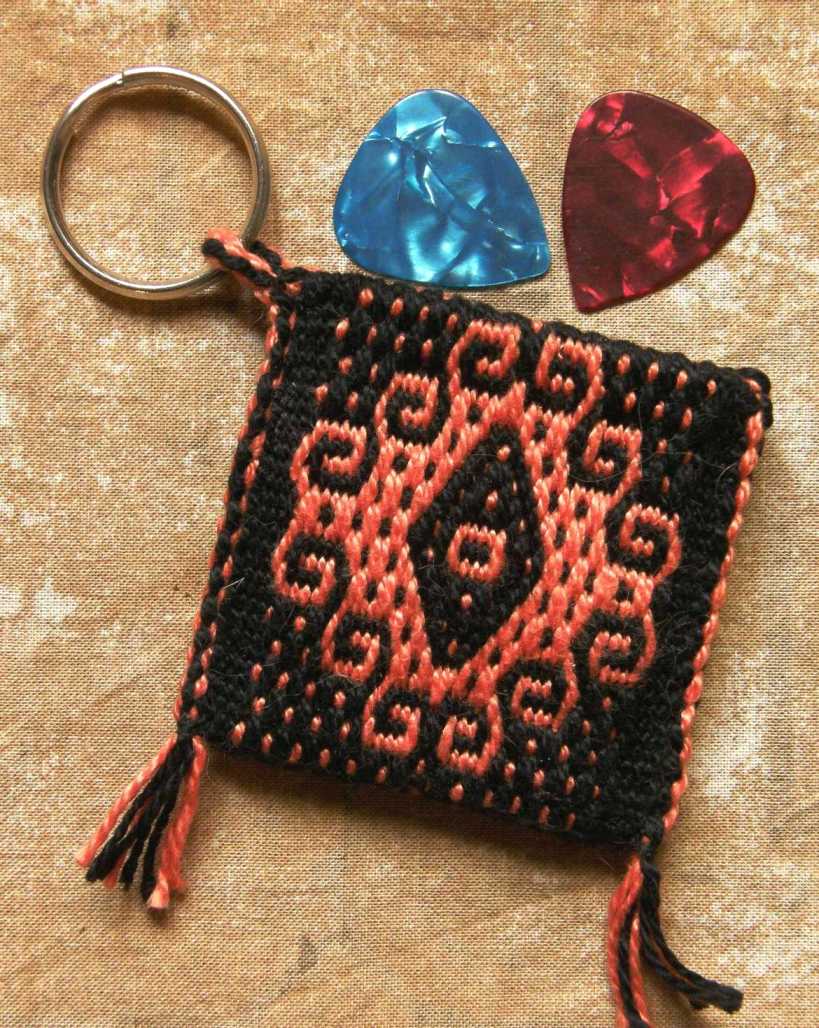
Then there is the wee black and orange bag-let also pictured above…another sample band that got turned into a pouch for guitar picks. My guitar-playing friend spotted it and came up with that idea.

So, a snap closure, braid, tassels and ring was added and off that goes to its new owner.

If you are wondering about the raw edge (I made three selvedges), I had enough band to turn to the inside and all the way to the bottom of the bag.

When I showed the Bedouin bag on Facebook last week, someone said that I should use the brand name CLT (Cute Little Things). Yes, I do like things in miniature and while I still have the eyes for such work I like to go tiny sometimes…

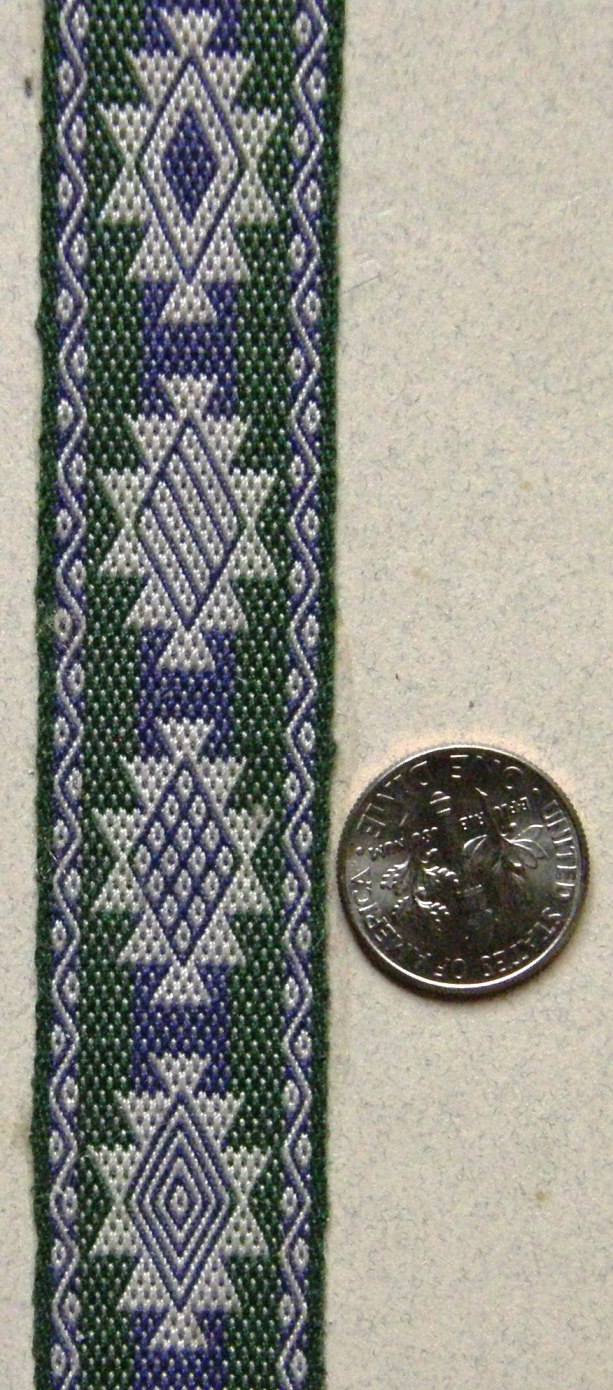
The pebble weave band at left, pictured next to a dime, is made from sewing thread and features stars that were inspired by Bolivian lowland weavings placed within a  highland design.

Poking around among my books is what unearthed the one on the textiles of Tinkipaya which has become a distraction from the other projects on which I have been working…a delightful distraction, I might add. I also came across some other forgotten gems squeezed in between the larger volumes.

I like trying to find locally published books when I am traveling and have a few of those from my collection that I would like to show you…

This is a book on natural dyes that I bought in Huancayo, Peru back in 1996. It is very simply made with very much a hand- made look about it and is full of plant and mordant samples in little plastic packages and dyed wool. The processes are explained with charming drawings making  almost unnecessary the ability understand Spanish or even read for that matter. It’s a treasure. The style of drawings reminds me very much of the style of designs that you find etched on the gourds which are also sold in towns around Huancayo….

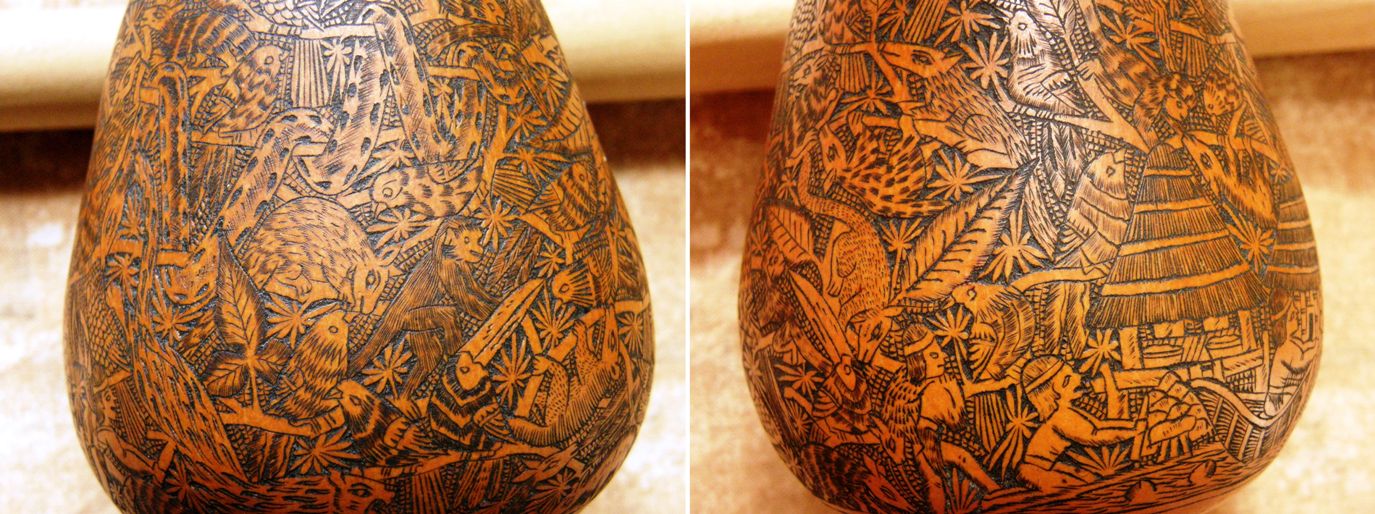
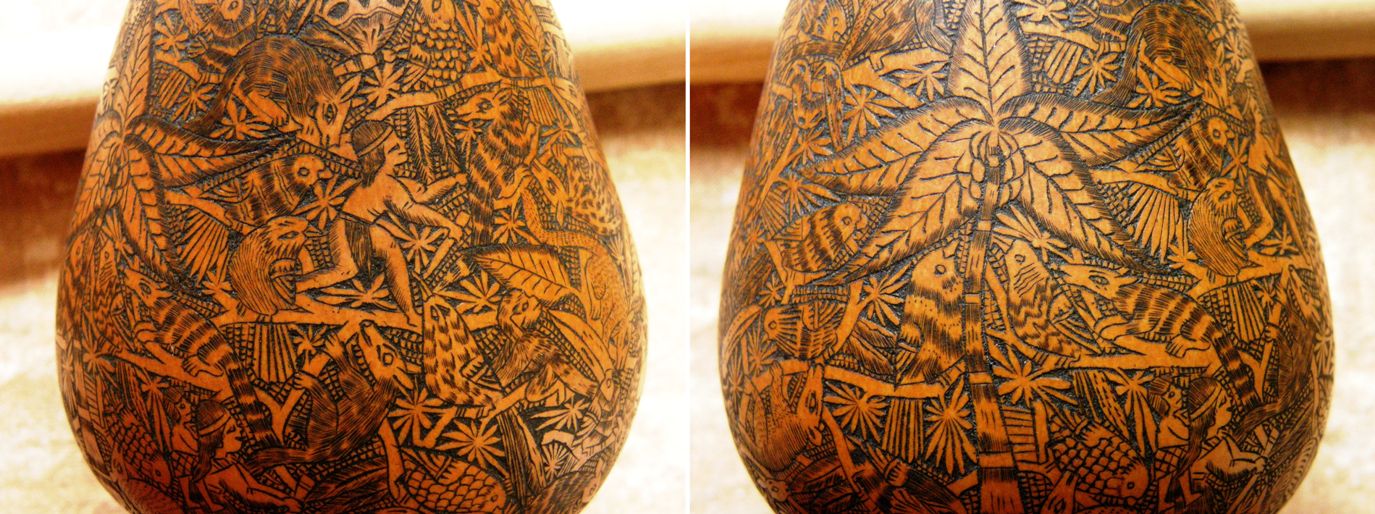
I bought the gourd, pictured below with its scenes of tropical lowland Peru, in a store in Quito, Ecuador and although I know it is from Peru, I can’t be sure that it is from the towns of Cochas Grande and Cochas Chico near Huancayo which are famous for this particular handcraft. But, in any case, I would like to show you the amazing complexity of the designs etched into its surface.

I think every time I pick this up I see something new in it. Today I noticed the thick snake winding its way among the tree limbs for the first time.

But, back to the book…Here is part of one page with plant samples, dyed wool samples, the local names for the plants and a glimpse of the instructional drawings.

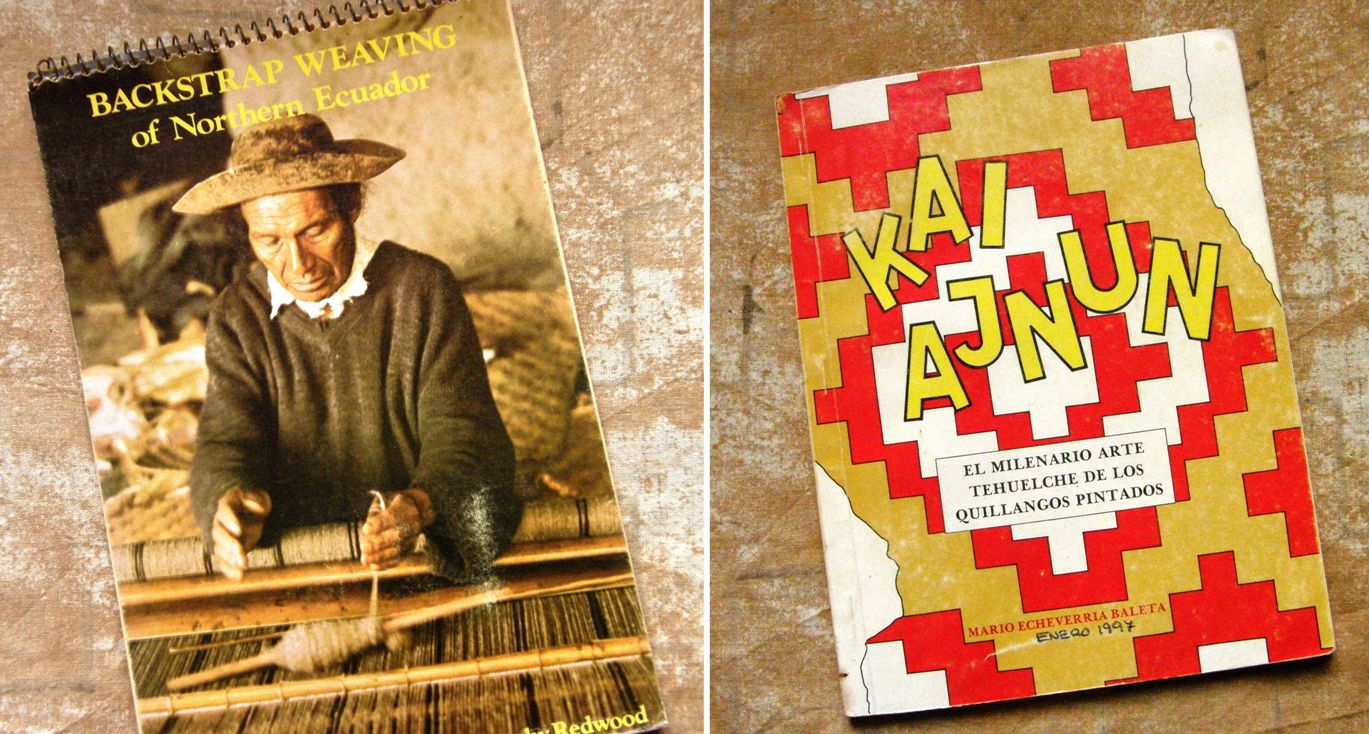
The first book on the left is what I consider a gem of self publishing and was one of the books that most encouraged me to “just do it!”, that is, go ahead and self-publish my own book on the pebble weave structure that I learned in Huancayo. It describes the process of constructing and setting up the kind of backstrap loom used in northern Ecuador and it, too, is filled with hand drawings and even yarn samples.

The differences in the way that warps are wound and looms are set up throughout the South American highlands can be very different…the way heddles are made, the number of crosses that are used, the number of stakes used in warping. These differences are what makes this whole thing so intriguing and interesting to me. It would be ridiculous to think that there is only one proper way to do things.

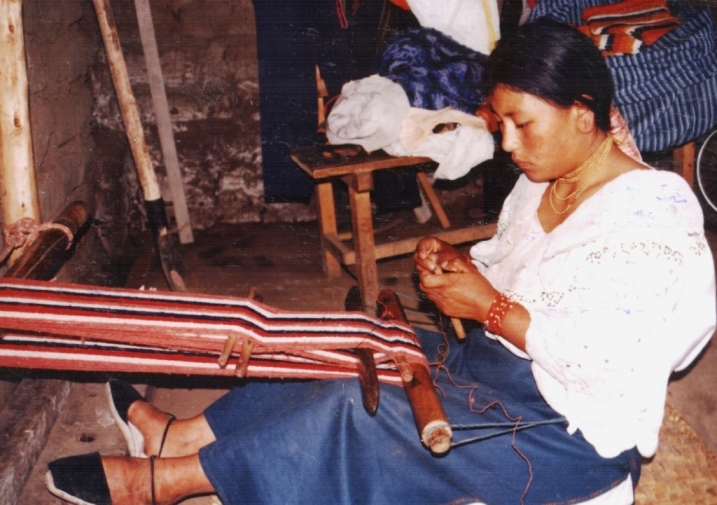
I was fortunate to be able to spend some time with a poncho weaver and his daughter in San Roque, near Otavalo, Ecuador and see the process described so beautifully in Redwood’s booklet, in action. In the picture above the weaver is preparing to make string heddles. Ms. Redwood, wherever you are, I would love to meet you!

The book on the right is not about weaving but catalogs the designs on painted animal skins made by the Tehuelche people of southern Patagonia. This was given to me by a lady from one of the old British families who own many of the large sheep stations on the pampa of southern Argentina. She owned one of the skins described in the book and has donated it to a local museum. One thing is the thrill of looking at the books, another is remembering how I acquired them. There is a a whole rush of memories associated with the visit to that farm on the pampa.

Another wonderfully simple self-published book was given to me by an elderly gentleman in Huancayo who was simply thrilled by my interest in the textiles of his home. The pictures and diagrams are all hand-drawn, it has been written on a typewriter and the paper is grainy and rustic. It includes meticulous step-by-step instructions on the construction of a floor loom and spinning wheel as well as an overview of the weaving tradition in San Pedro de Cajas.

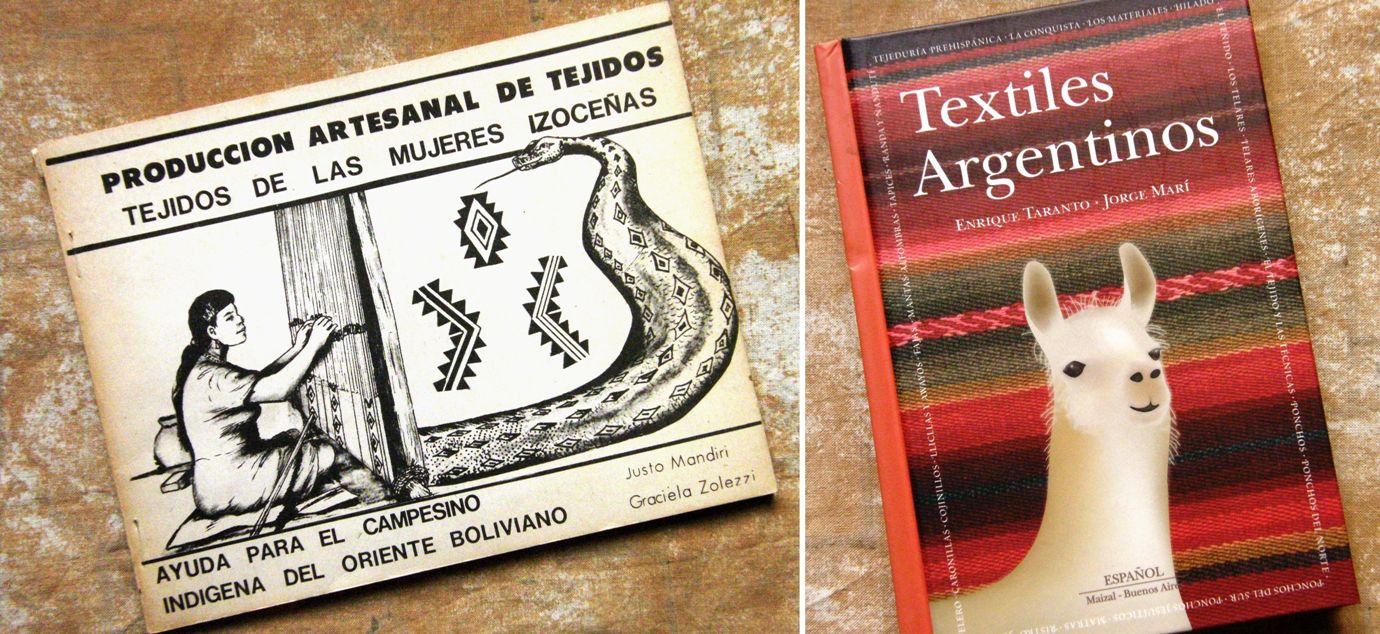
I remember effortlessly finding the book on the left in a store a couple of days after I arrived in Santa Cruz back in 1998. I thought that I must have arrived in a fiber and weaving paradise until I went to the market and had a hard time making people understand that I wanted to buy a spindle…no one knew what that was!  That is the one and only book I have found on the topic and it was only after a few years had passed that I met my first Guaraní weaver from Isoso here in the city.

The other small book above, published in Argentina, is also available in English and can be bought online. It is a lovely miniature book with lots of great pictures of Mapuche textiles and woven items used by the Argentinian gaucho, belts and ponchos from the north and south…many of which I have not seen in other publications. It also includes lithographs and paintings from the colonial period and I love those.

And last of all, at least for this blog post, I want to show you some story books about children that I have collected that describe their daily lives in communities of weavers in South and Central America. One is from Bolivia, one from Ecuador and the other, Guatemala.

Dragging myself away from the book shelves, I will finish by showing you some work by Ravelry and other online weaving friends.

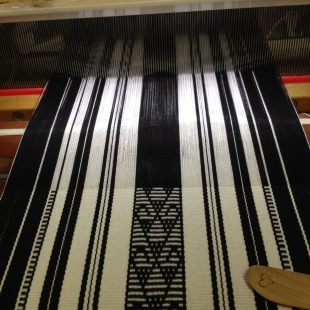
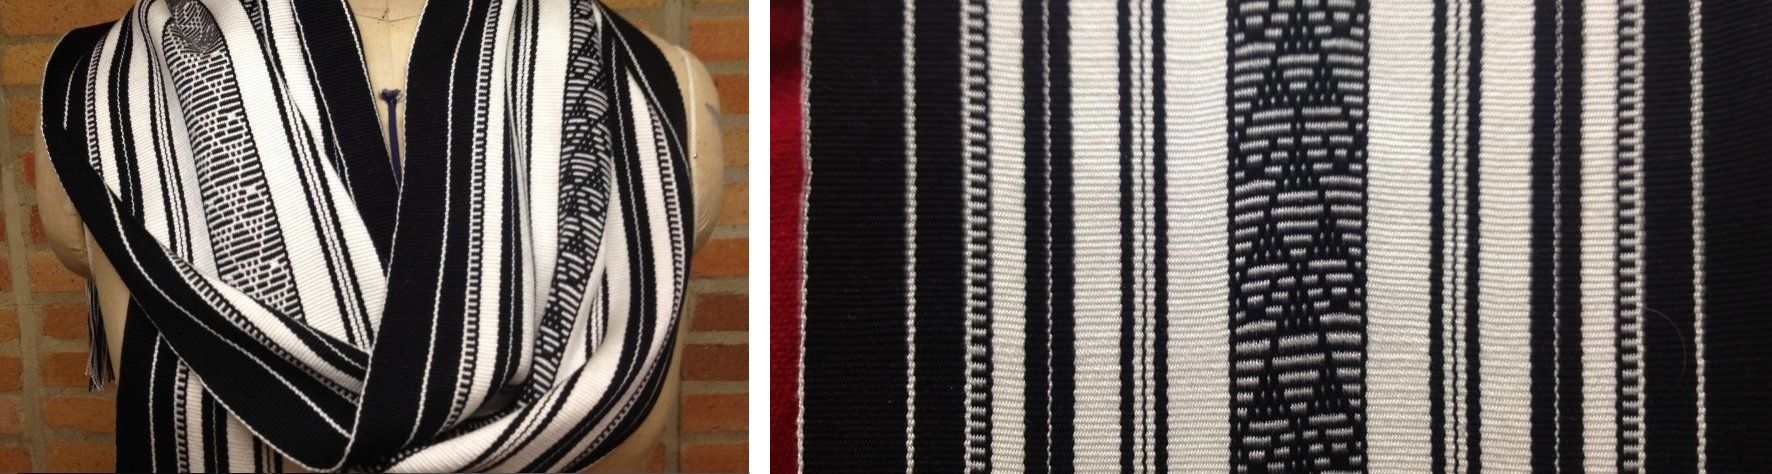
Karren was inspired by a Mexican rebozo to make her own black and white rebozo on her four-shaft floor loom in 8/2 tencel with a  pattern in simple warp floats. The rebozo that inspired her had varying widths of pink and white stripes along with fine horizontal bars that accompany the simple warp float technique. The fringe, like those on many of these rebozos, is a mass of intricately knotted figures.

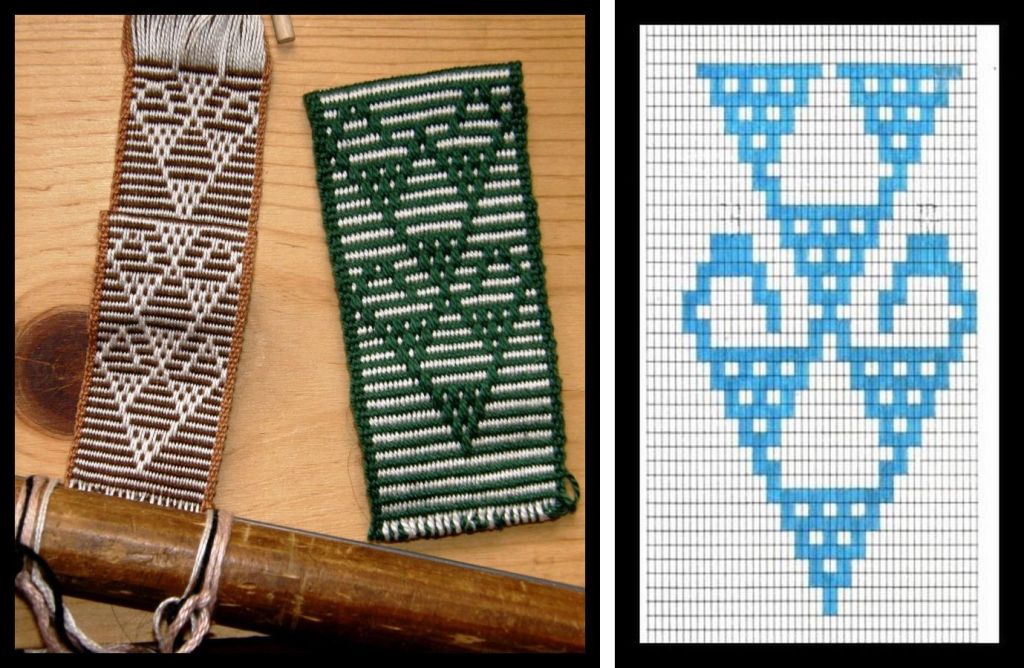
If you feel inspired to try something similar, the pattern chart for this particular design is here…and I am sure you know where to find the tutorial on my blog.

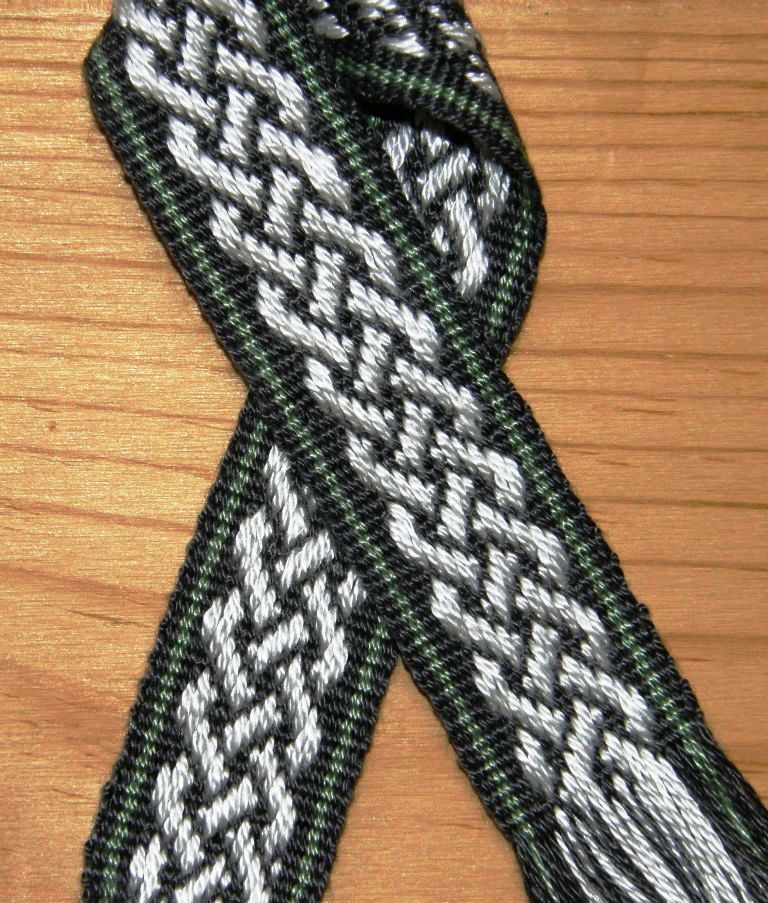
It is hard to believe it’s warp-faced with that beautiful drape. Karren’s project has inspired and encouraged me to use my tencel for warp-faced weaving. I have not been very brave and have only made a small supplementary-warp band with a celtic knot design using my tencel so far.

Jane, who has recently returned from a trip to Peru where she studied weaving at the CTTC in Cusco, showed us the band that she is weaving at home. It was warped for her by her weaving teacher using the wonderful handspun and naturally dyed wool yarn of Chinchero while she watched the process and she made the string heddles herself when she got home. She is using the two swords to create a temporary picking cross which will enable her to pick up the threads for the complementary-warp patterns.

On the right, Isabel sent me a picture of her warp set up to make a backstrap following the instructions in my article on WeaveZine. On the table you might be able to make out her first small pebble weave sample which she made using my book.

So, I am off  now to get my favorite spindle and make a plan for spinning this weekend and put the books that I photographed back on the shelf while trying not to get sucked back into to book browsing land….I have way too many other things that need doing!