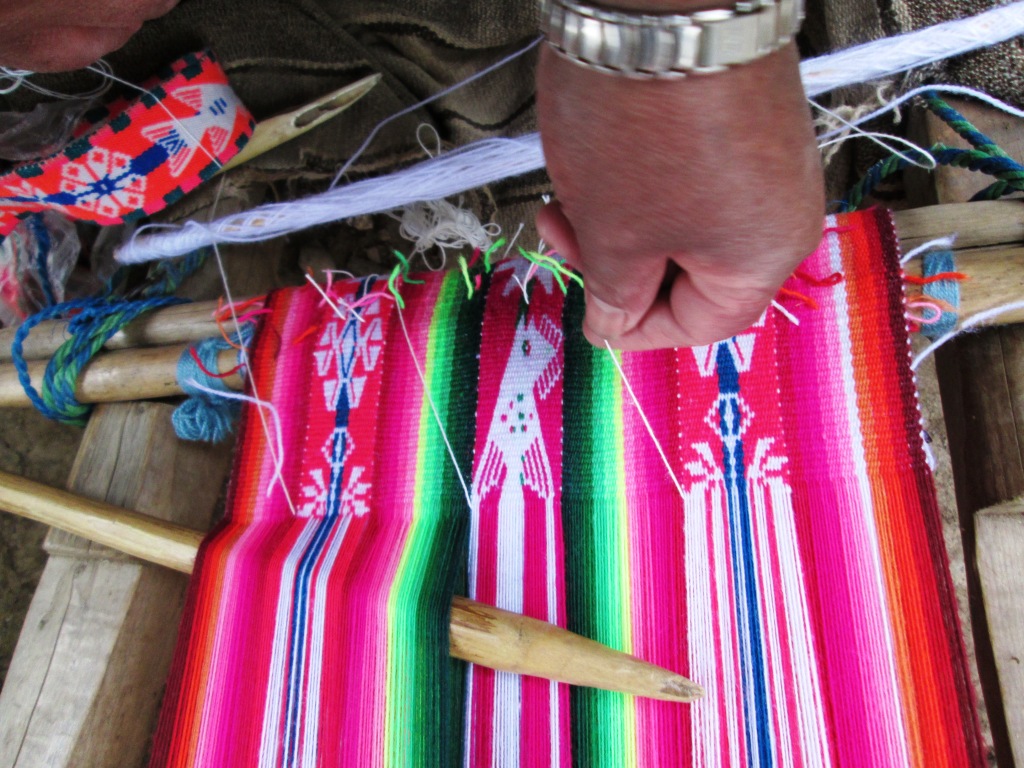
Backstrap Weaving – Bye-bye Traddy

I used left-over scraps of that wheel-spun wool along with some of the wool I used for my Navajo-style weaving in natural dye experiments in Chile. They were wrapped around rolls of paper and coiled into what you see here which I used as the lid for a basket.

I am a “cheap spindler” in much the same way as I am a cheap drunk…it doesn’t take much to make me happy! Don’t waste the good wine on me. I do not have a refined palate. So, it is little wonder that I am content to use my humble Cusco drop spindle when I get the urge to spin. I just don’t have a refined palate for spinning tools.

The Cusco spindle was the second one I ever got, the first being from San Pedro de Atacama in northern Chile. The Cusco one that I got in 1996, being more robust, became my constant travel companion. It was practical. Although I have collected many more spindles on my weaving safaris since then, this Cusco one is the one I always use while the others hang on the wall behind the sofa as souvenirs of places I have been and people I have met.

The spindle I got in Cusco in 1996.
Some of the whorls from the spindles on the wall fell down behind the sofa only to be retrieved later when a friend helped me move it. Here are three that I found there among the cat toys. It’s so interesting seeing the various styles of whorl.

The very first spinning that I did for weaving on my backstrap loom was with some extremely dry, brittle, and filthy llama fiber that I had bought from a farmer while wandering about the back roads of Uyuni in the Bolivian highlands. I cleaned and prepared it. The dust and dirt would have me wheezing and my skin would crawl and eyes run every time I opened the bags to get more. It made for good spinning training. I gave the fiber a tremendous amount of twist because at that time I believed that this was the only way hand-spun yarn could possibly stand up to the abrasion of warp-faced weaving. I have since learned that this is not so. That kind of yarn produces durable, hard wearing cloth and in a tight warp-faced weave can make a garment highly water-resistant. Of course, that isn’t always the kind of cloth I want.

The natural colors of the llama I spun. I was always amazed at how nice it looked when woven. Warp-faced structures are very forgiving in that way.
When I was given a large bag of spearmint leaves by a friend, I decided to use it it to dye some of the llama yarn. One batch gave me a nice neutral taupe color. The second lot my friend gave me produced green. I also had some cochineal for red.
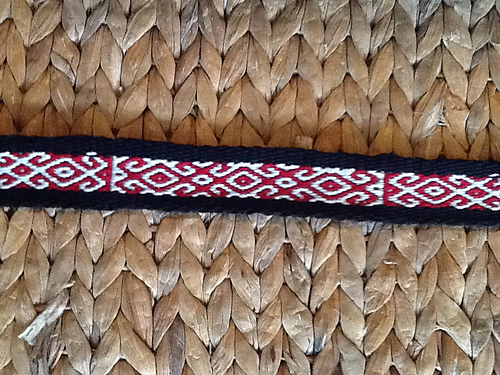
I was able to buy a lovely fine commercial yarn in Chile that was a blend of alpaca and wool and came in earthy colors. I would use my drop spindle to add extra twist as, again, I’d thought that yarn for warp-faced weaving simply must have that tightly spun characteristic. The green in this band I wove with this yarn is actually cotton.
The first time I was given prepared alpaca to spin by my friend Janet, I decided that I simply couldn’t put all that heavy amount of twist into that beautiful fiber. With a bit of extra care in the way I handled it on my backstrap loom, it made lovely warp. The yarn was quite balanced and didn’t kink up on itself.
You can see that this alpaca yarn that I spun lies flat and relaxed when not under tension.
You can see how my teacher Maxima’s handspun wool yarn behaves when not under tension. All the energy from the twist causes the warp lying on the ground to tightly spiral. The yarn will produce hard-wearing cloth.

I really enjoy reading the online group forums about spinners and their spindles. The participants’ love and enthusiasm for their tools is wonderful….I totally get it but I just don’t share it. Some of the spindles they show are beautiful pieces of craftsmanship and I love seeing them. But when it comes down to it, I just want to get the job done. If you like your tools to be uniquely hand-carved pieces of art, take a look at Allen Berry’s work on Instagram (allenrberry). All his fiber tools are amazing.

It seems that when it comes to spinning I am totally product oriented which is kind of strange as it is quite the opposite when I weave.  I just want to get this stuff done so I can go weave with it. In weaving I am all about enjoying the process. I probably would not have been willing to devote any great amount of time to spinning if not for the pandemic. The combination of needing to keep my hands busy during Zoom sessions as well as a dwindling stash had me happily spinning up all the wool I could find in my closet.

Weaving a small tubular band as a test for my handspun wool yarn to see if a) it would be suitable for my warp-faced weaving and b) if there was enough contrast between the three colors for use in a three-color pebble project.
The warp for a three-color pebble project with my handspun “pandemic” wool in purple, pale yellow and a rust.

And then I took on a new adventure…spinning cotton. As with my favored Cusco spindle for wool, I have taken the takli that Elizabeth gave me in Australia as my one and only tool for cotton. It is all I feel the need for right now. It makes for quiet, comfortable, and fuss-free Zoom spinning.

My first lot of Sea Island cotton and the gifted takli spindle. I was pleased with this first attempt but hadn’t known at the time that Sea Island cotton has a longer staple length than other varieties and is therefore easier to spin.

My collection of spindles that I have gathered in my travels includes a few that are used for cotton. Here are two from Guatemala and one that I bought from my Guaraní teacher here in Santa Cruz. The whorl on that one is a piece cut from the sole of a sandal.

Two spindles from Guatemala flank the Guaraní one.
Workshop spindle.
I love the way we are all so focused on our teacher’s demonstration. As it turned out, she is left-handed and we were all righties. She got us all started one by one turning the spindle in one direction and we then proceeded to unspin what she had started for us!
Moving on here to Upland cotton.
The color called Mahogany in the center after being boiled. The pre-boil color is below to the right.

And of course, there is the horizontally-held spindle for cotton spinning that is used by my teachers in coastal Ecuador.

The cotton is draped on a wooden stand called the “rueca” for spinning. It has a notch cut into its top which grabs the cotton and allows the spinner to draw out the fibers under tension. A small basket is woven from plantain fiber underneath on which the spindle sits when not in use. This is a miniature version of the rueca which I made with my teachers’ help so that I could take an example back with me to Bolivia. I need to place something in the little basket to weigh it down because it is so small and light. The typical spindle can be seen at right with its wooden whorl. More often now you will see people using yo-yo halves and metal wheels as whorls.

Here are some tiny whorls from coastal Ecuador that the family had found while ploughing their fields. There were close to forty of them sitting in a bowl on a shelf, just like that.

My very first experience with spinning cotton had been in coastal Ecuador where I got to work almost from scratch, de-seeding, teasing apart, and fluffing up the cotton. It was difficult spinning it on the horizontally-held spindles compared to what I do now with the takli. Unfortunately, I didn’t spend much time on it while there, being much more interested in the weaving part of the process. My teachers already had plenty of spun singles that they doubled for warp so that I could learn how they weave their double-pocket saddle bags and hammocks. We would pass time in the evenings on cotton preparation.

My first attempts with the horizontally-held spindle in Ecuador with my teacher Trini and her mother Luz (rip).

I put in a little practice when I got back home but the loom soon called me away…

My cat got to the point eventually where she paid no attention to my fiber-y pursuits.

I may have never gone back to cotton if not for the pandemic. The loom was always pulling me one way yet my stash of gifted sliver in the closet was growing. Thank you to all those, especially Betty, who were so kind with their gifts when I was visiting in the States.

I have woven with my singles thread. It was an even freakier experience than the first time weaving with my handspun llama yarn all those years ago.I was surprised to see how well it tolerated the string heddles and the close sett on my backstrap loom.

I love the look of all these handspun cotton singles lined up on my backstrap loom.

I’ve used it in plain weave for ikat pieces as well as for pieces decorated with pick-up patterns that I’ve used in small purse and wallet projects.

Wallet project with pick-up patterning in the structure that I call Andean Pebble Weave.

Right now I’m spinning some more brown sliver that I just uncovered in the closet. I’ve yet to use the brown in a project.

Ikat projects in my handspun cotton singles. The lower one uses some of the natural green cotton in both its boiled and not-boiled versions. Most of what you see there is the not-boiled green.

No doubt when I return to Australia I’ll have lots of access to sheep fleeces and will wonder about my Traddy and how it’s being used on this side of the world. I won’t be buying another wheel though, and will slowly work my way through, as is my habit, with my drop spindle. I won’t be displaying my other spindles on the wall either and that might lead me to picking up one of the others for a spin and giving the Cusco one a rest.

See you all next time…

Backstrap Weaving – Spinning Tales

I am a “cheap spindler” in much the same way as I am a cheap drunk…it doesn’t take much to make me happy! Don’t waste the good wine on me. I do not have a refined palate. So, it is little wonder that I am content to use my humble Cusco drop spindle when I get the urge to spin. I just don’t have a refined palate for spinning tools.

The Cusco spindle was the second one I ever got, the first being from San Pedro de Atacama in northern Chile. The Cusco one that I got in 1996, being more robust, became my constant travel companion. It was practical. Although I have collected many more spindles on my weaving safaris since then, this Cusco one is the one I always use while the others hang on the wall as souvenirs of places I have been and people I have met.

The very first spinning that I did for weaving on my backstrap loom was with some extremely dry, brittle, and filthy llama fiber that I had bought from a farmer while wandering about the back roads of Uyuni in the Bolivian highlands. I cleaned and prepared it. The dust and dirt would have me wheezing and my skin would crawl and eyes run every time I opened the bags to get more. It made for good spinning training. I gave the fiber a tremendous amount of twist because at that time I believed that this was the only way hand-spun yarn could possibly stand up to the abrasion of warp-faced weaving. I have since learned that this is not so.

The natural colors of the llama I spun. I was always amazed at how nice it looked when woven. Warp-faced structures are very forgiving in that way.
And here, dyed with coca leaves, spearmint leaves and cochineal.
The first time I was given prepared alpaca to spin by my friend Janet, I decided that I simply couldn’t put all that heavy amount of twist into that beautiful fiber. With a bit of extra care in the way I handled it on my backstrap loom, it made lovely warp.

Prior to that experience, I had spun wool while still living in the Chilean Patagonia in the mid 1990s. I had brought some alpaca back from my first trip to Peru but had made a mess of it. That had me turning to sheep. There were sheep galore down there and I was given a fleece. So, I got experience washing and carding it and my first project was knitting! I can hardy believe it as I can barely knit. But I designed a pattern and fumbled my way through knitting the front of a vest. I wove the back panel in balanced plain weave on my Navajo-style vertical loom…without a reed. I probably didn’t even know that reeds existed back then. The knitting yarn was spun on the Cusco drop spindle and the yarn for the weaving on an Ashford Traditional wheel that my boyfriend at the time had brought back from the Falkland Islands. Spinning yarn that worked well for this knitting and weaving was a complete fluke. I really had very little idea about what I was doing.

Parts of the vest with a triple cross-knit looped edging. The brown part is the woven back. the multi-colored thing on the side is part of a woven bag also edged with the cross-knit looping stitch.

I really enjoy reading the online group forums about spinners and their spindles. The participants’ love and enthusiasm for their tools is wonderful….I totally get it but I just don’t share it. Some of the spindles they show are beautiful pieces of craftsmanship and I love seeing them. But when it comes down to it, I just want to get the job done.

It seems that when it comes to spinning I am totally product oriented which is kind of strange as it is quite the opposite when I weave.  I just want to get this stuff done so I can go weave with it. In weaving I am all about enjoying the process. I probably would not have been willing to devote any time to spinning if not for the pandemic. The combination of needing to keep my hands busy during Zoom sessions as well as a dwindling stash has had me happily spinning up all the wool I could find in my closet. Now I am making a start on the cotton. There’s still some alpaca lurking in there.

And as with my favored Cusco spindle for wool, I have taken the takli that Elizabeth gave me in Australia as my one and only tool for cotton. It is all I feel the need for right now. It makes for quiet, comfortable, and fuss-free Zoom spinning.

My slow-growing hand-spun cotton stash.

My collection of spindles that I have gathered in my travels includes a few that are used for cotton. Here are two from Guatemala and one that I bought from my Guaraní teacher here in Santa Cruz. The whorl on that one is a piece cut from the sole of a sandal.

And of course, there is the horizontally-held spindle that is used by my teachers in coastal Ecuador.

The cotton is draped on a wooden stand called the “rueca” for spinning. It has a notch cut into its top which grabs the cotton and allows the spinner to draw out the fibers under tension. A small basket is woven from plantain fiber underneath on which the spindle sits when not in use. This is a miniature version of the rueca which I made with my teachers’ help so that I could take an example back with me to Bolivia. I need to place something in the little basket to weigh it down because it is so small and light. The typical spindle can be seen at right with its wooden whorl. More often now you will see people using yo-yo halves and metal wheels as whorls.

Here are some tiny whorls from coastal Ecuador that the family had found while ploughing their fields. There were close to forty of them sitting in a bowl on a shelf, just like that.

The cotton sliver that I have been spinning was given to me by my friend Betty. One day while breaking off a length from the bundle in the closet to continue spinning, a label fell out which identified it as the Sea Island variety bought from a place called Straw into Gold. Judging from the yellowed state of the label and the fact that it had been typewriter-written, I am guessing that it was bought quite a long time ago. I had been becoming increasingly pleased with my progress spinning cotton but am less so now after having read a little about this variety of cotton online. Apparently it is known for its particularly long staple which makes it one of the easiest varieties to spin. Darn! It seems that I have started at the wrong end of the learning process. Considering how I struggled through the preparation and spinning of that ugly llama fiber all those years ago as well as going to the trouble of washing and carding the fleece I had been given in Chile, it seems like cheating to be picking up this beautifully prepared long-staple cotton as my (almost) first-ever cotton-spinning experience. I wonder if it will feel like going back to square one when I finish this and then start on the other varieties that I have. My very first experience had been in coastal Ecuador where I got to work almost from scratch, de-seeding, teasing apart, and fluffing up the cotton. It was difficult spinning it on the horizontally-held spindles compared to what I do now with the takli. Unfortunately, I didn’t spend much time on it while there, being much more interested in the weaving part of the process. My teachers already had plenty of spun singles that they doubled for warp so that I could learn how they weave their double-pocket saddle bags and hammocks. We would pass time in the evenings on cotton preparation.

My first attempts in Ecuador

I put in a little practice when I got back home but the loom soon called me away…

But now to the present. After finishing my big bag project, I took a few days off to spin cotton and think about what should be next on my loom.

The finishing touch on the bag project…magnet clasps for the flap and mouth of the bag. I had spare fabric to which I could first attach them.

I decided that I wasn’t quite done with the three-color pebble yet and that I should weave a study in color transitions. Upgrading my camera strap gave me a product to justify the use of my hand-spun for this study. I dyed some of it a rust color so that I would have three colors that would work well together in all possible arrangements.

Small quantities of hand spun wool for the camera strap plus some hand spun cotton singles ready to be boiled.
I got totally absorbed in working on the color transitions and different color alignments and thus forgot that I needed to start weaving the hummingbirds upside down at the half-way point so that they would be the right way up when the strap was worn. Oh well. That’s what happens when the things that are important for the final product get lost in the process.

In the picture above, I was testing shapes for the tabs which I would later cut from leather. I have an old home-made leather backstrap that was just the right color and was willing to sacrifice it for this project. I couldn’t get anyone in the street market to sell me just a tiny off-cut of leather and the available colors weren’t quite right in any case. Hand-stitching the leather was fun.

I used the existing strap hardware otherwise I am not sure how on earth I would have attached the strap. There’s a special kind of clip that I have never seen elsewhere that goes through a tiny hole on the side of the camera.

And here I am wearing the strap with its upside-down hummers on one side! and my “Ta-da!” face.

What’s next? I have started a sample for a wool Finnweave cowl. I am using 20/2 wool and need to see if the proportions of the motifs in my weaving with this material match those of the figures on my chart. But first I had to go through that annoying confusion of trying to figure out Finnweave all over again. You make notes from the last project but they are never thorough enough because you stupidly assume that some things are just too obvious to bother writing down. Not so! This time I will get it right and make sure I write down every single detail.

The other purpose of this sample is as a width gauge. This 20/2 wool is a fair bit thicker than the 20/2 cotton that I have been using for Finnweave lately. I have to get used to the difference between the cotton and wool. Cotton, naturally, gives a much sharper image and the hairiness of the wool makes it easier to produce skips in the lower layer of the double weave.

The other project idea that is waiting its turn is a very, very simple double-ikat pattern using my hand-spun cotton. I would hate to waste this lovely Sea Island cotton on a failed double-ikat experiment but I am so curious to see if I can manage to make it work. I will just have to keep reminding myself to keep it simple.

Backstrap Weaving – Braiding and Thinking

llama fiber and charque

spinning alpacaNo,  haven’t been spinning. I have been braiding and thinking about projects new and old. I am aware from my visits to Ravelry that the great annual Tour de Fleece is underway and, while I am not participating, I was motivated by all the excitement connected with the event to dig through the cupboard and pull out some old handspun projects which I have woven with the alpaca and llama fiber you can see above. If you are wondering what’s in that bowl, it’s llama jerky.

anna-spinningI had bought that llama fiber while wandering around a tiny country settlement in Uyuni, Bolivia back in 2002. It was coarse, dry and brittle but I knew no better.  I was thrilled just to have it as it is impossible to obtain down in the jungly lowlands where I live.

I had already learned to spin but I think that spinning that rough llama fiber was the best spinning training I could have had. It was awful to card. I had a wheezing attack each time I pulled the dusty stuff out of a bag and the memory of the smell of that dust still turns my stomach. The first things I wove with that spun llama fiber still sit framed on my wall. It had been such a business that I never thought I would do it again!

Later, when my friend Janet in the U.S gave me some prepared alpaca fiber, I couldn’t believe how easy it was to spin. It felt like cheating. Here’s one of the alpaca projects on the loom…

alpaca-project-on-loom

natural_dyes_medium2I dyed some of my yarn made from the llama fiber with cochineal and plants.

OLYMPUS DIGITAL CAMERAI ended up making quite a few pieces of coth which I sewed into shoulder bags and pouches. These are the things that I have been pulling out of my closet. They were obviously made in the days before I started weaving tubular bands and embellishing my pieces …there is not a single tubular band or tassel to be seen!
chahuaytire tubular bandThe long pouch had some forgotten tools in them. It was nice to unzip it and discover those. I decided that this whole lot needed some sprucing up. The black bag will get a new strap and have its flap edged with something decorative. The brown bag could also do with a more interesting strap.

I decided to edge the long zippered pouch with a tubular band. This would be my chance to apply the band that is used to edge cloth in the community of Chahuaytire. Although I have sewn this kind of tubular band to pieces of cloth in samples as you can see above, I had never used it in a real project and I had not woven it with wool.

Cloth from Chahuaytire, Peru edged with a tubular band in beautiful natural dye colors
Cloth from Chahuaytire, Peru edged with a tubular band in beautiful natural dye colors.

When I visited Marijke van Epen in The Netherlands in 2012,  I worked with her on figuring out this band from a picture. Almost immediately after that visit, I went to Peru and was lucky to be able to watch one being woven and buy a warp in progress to see how it was set up.

chahuaytire and chichero bandsWhile I have seen the patterned tubular band on the right, which I learned in Chinchero Peru, also woven here in Bolivia, I have never seen what I will call the ”Chahuaytire style’,’ on the left, here in Bolivia at all.

Maxima at the Tinkuy in 2913...photo by Dorinda Dutcher
Maxima at the Tinkuy in 2913…photo by Dorinda Dutcher

One of my weaving teachers in Bolivia, Maxima, has an older sister, Narciza, who knows how to weave the Chinchero style of tubular band and frequently attaches it to the edge of her woven coca-leaf bags.

Dorinda, who works with Maxima, recounted one of Maxima stories in which she told of how her mother did not know the figure on the tubular band to teach them and so bartered corn to have a neighbor teach her oldest daughter, Narciza. The neighbor had recently moved to the area from Oruro (also in Bolivia).

Maxima was not interested in asking her older sister to then teach her the pattern as Narciza was in the habit of giving her a smack when she made a mistake. I always wondered if my weaving teachers sometimes had the urge to give me a wee slap when I was learning! I can remember their frustration with me back in 1996 when I broke my warp threads while trying to operate the heddles.

Maxma is currently weaving items for her husband in his new role as Mayor of Hucarani. There are several items that he and Maxima, as the Mayor;s wife, are required to have. Here Maxima is weaving a ch'uspa with columns of figures in double weave. The woven pieces need to be bright and festive and so she is using store bought acrylic rather than her own handpsun and naturally dyed wool.
Maxma is currently weaving items for her husband in his new role as Mayor of Huancarani. There are several woven items that he and Maxima, as wife of the Mayor, are required to have. Here Maxima is weaving a ch’uspa for her husband with columns of figures in double weave. The woven pieces need to be bright and festive and so she is using store bought acrylic rather than her own handpsun and naturally dyed wool.

And so, it was only in 2013 when Maxima had the chance to attend the Tinkuy de Tejedores in Cusco, Peru, that she had the opportunity to learn to weave the ñawi awapa pattern in much the same way I had in 2010.

However, Dorinda has since told me that Maxima seems to have forgotten how to weave the ñawi awapa band since returning to Bolivia.  She sends her weavings to her sister if she wants them to be edged with a ñawi awapa.

As with everything new like this, if it is not immediately put into practice, it can easily be forgotten. Ask any of my students!

One day I hope I can go out to Independencia and help refresh her memory.

I have had so much fun with the ñawi awapa since learning it, attaching it to so many things and, most recently, using it for jewelry.

nawi awapa jewelryBut, back to the ”Chahuaytire style”. I enjoyed weaving and sewing it to the edge of the pouch. It came out beautifully in wool.

pouch edged with chahuaytire tubular bandI added a braid to the zipper and I think the bag looks a lot more interesting now. There you can see all the swords and shuttles that I will be storing in it.

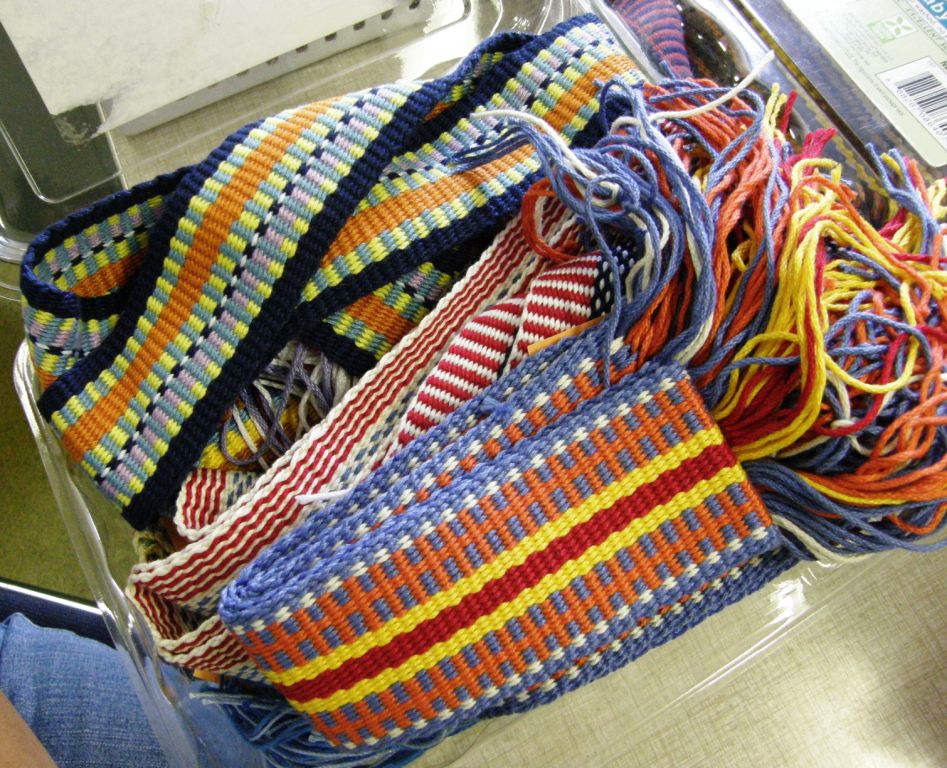
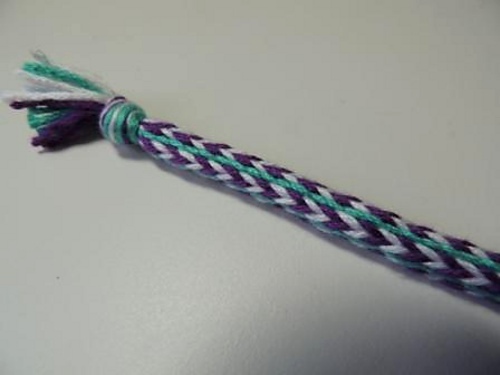
Not all tubular bands need to have pick-up patterns. I have often woven and attached them in just one solid color and have also used ”threaded-in” patterns, that is, ones that are created by the order of the colored threads in the warp rather than with pick-up.

These two pouches have solid color plain-weave tubular edgings.

The blue and green piece has a tubular edging with a simple thread-in pattern.
The blue and green piece has a tubular edging with a simple thread-in pattern. The pattern was warped off center to appear on the upper face of the fabric and show as solid green on the reverse.

Maxima often uses simple Andean Pebble Weave patterns in her tubular edgings using two sets of heddles and I have also seen weavers in Pitumarca weave tubular bands with the pattern set up in multiple heddles.

A weaver from Pitumarca weaving and sewing a tubular band edging
A weaver from Pitumarca weaving and sewing a tubular band edging.

Having learned the discontinuous-warp, or ticlla, technique with weavers from Pitumarca, I used the particular tubular band pattern used by weavers  in their community to edge my workshop piece when I got home and finished it. You can see how the edges of my cloth rolled when I took it off the loom. This was due to the high amount of twist in the handspun alpaca yarn that we were given to use. The cloth lay flat once the tubular band was applied.

discontinuous warp with tubular bandOf course, I didn’t spend my entire week on this one tubular band. As the title of this post implies, I was braiding and thinking…..braiding the enormous number of ends on my wall hangings at four minutes per braid. There are still plenty more to go.

And I was thinking about the shapes I want to weave on my next ikat ”sample”. Yes, I don’t feel ready yet to dive into the real project. I think that just one more sample with curved shapes needs to be done.

I also thought about the new slip cover I need to for my new laptop. This new one is slightly bigger than the notebook I have been using these last five years and so a new cover is needed.

Here’s the one I have been using so far with its pattern taken from Central Asian textiles…

central asoan design backstrap weaving

notebook-coverIt has been on many trips with me.

And, while I think, I pull out books, look online and make sketches. While going through the cupboard, I also pulled out a lot of fiber crying out to be spun. Maybe I will also set myself a wee spinning goal for the next months.

I will leave you for this week with this final picture of an event which is creating a lot of excitement here in Santa Cruz.

11698916_10153439643714530_8322870495067486430_nWe are on holiday today as the Pope is in Santa Cruz where he is celebrating his only Mass during his Bolivian visit. BoA, the Bolivian airline that transported him, has been posting pictures of the visit on Facebook and kindly gave me permission to show one here. Pope Francisco was presented with a handwoven souvenir of his visit when he landed and walks hand in hand with a boy who is dressed in the typical green and white outfit of Santa Cruz with his sombrero de sao.

See you next week…..


Backstrap Weaving – East and West

IMG_0010EAST AND WEST: THE EASTERN CHAPTER

The problem with not blogging…stuff builds up!! But not as much stuff as you might think this time.

Not blogging indicates that I have  been way too busy having too much fun.

But that also means that I haven’t been able to take as many pictures as I would have liked. Can you believe it? There I am with camera in hand ready to shoot anything that moves but, on this trip, I have been moving too much to keep up.

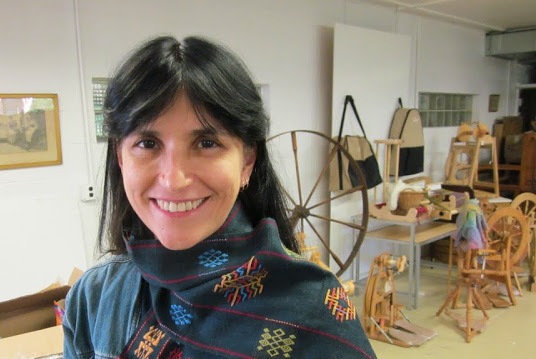
Fortunately people have sent me pictures and allowed me to use theirs. The one above was taken by Marge on a visit. I am modeling the Bhutanese inspired scarf that I wove recently using supplementary wefts to create the patterns.

indonesian textile ikat backstrapEAST AND WEST…the title of this post.

This refers to the fact that I started “back east”, as people in here on the west coast say, in Pennsylvania and then headed over to the west coast, or the “wet” coast, as some people say, to Washington and now, California.

It also refers to the  flow of wonderful eastern textiles that has occurred during this trip into my western hemisphere area of study…textiles from Timor, Laos and Indonesia as well as Central Asia. I have pictures of amazing textiles to show. They have me thinking about tripping off to Asia when next I visit Australia but, every time I think about that, one word pops into my head

 :MEXICO:

and I realize that there is a lifetime’s worth of things yet to be seen on this side of the world.

Above is a picture of a backstrap-woven ikat (yes! that’s ikat) piece from Indonesia, a shoulder scarf from Batuisi, West Sulawesi from friend Judith’s collection. That is just a wee tease and hint of things to come in my next post.

So, here I am in a west coast heat wave on my backstrap weaving friend Janet’s berry farm…

berries

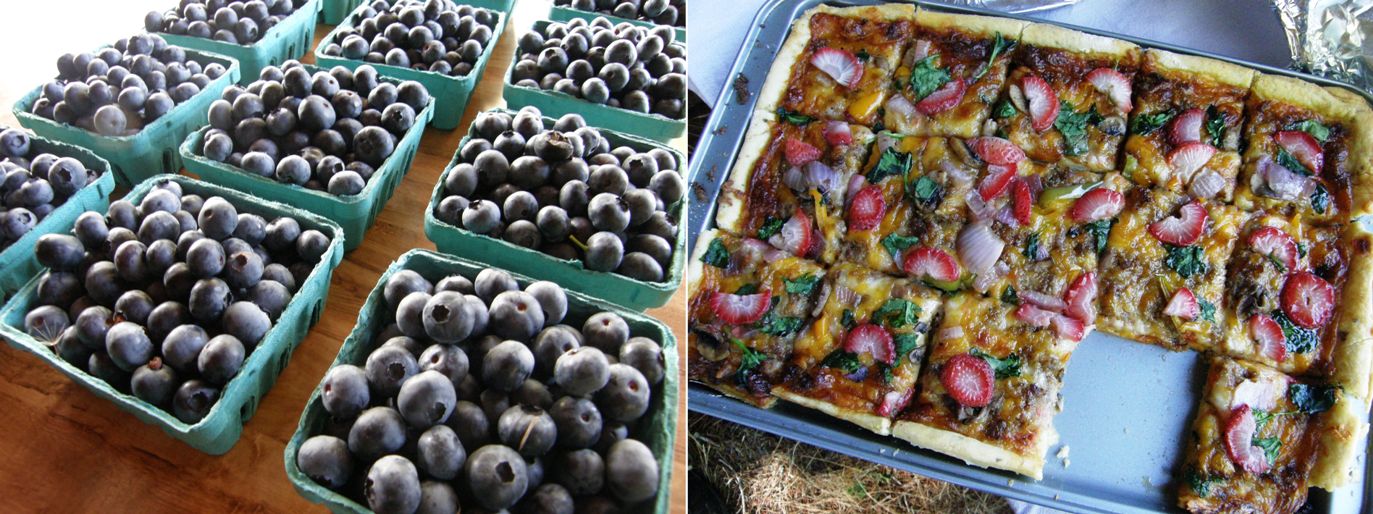
Blueberries! Lovely to be out picking in the cool of the morning. Yes, those are strawberries on top of that pizza. That was brought to the recipe competition by a neighbor who attended the annual Strawberry Jam party that Janet and husband Larry throw. I arrived just in time for that. As you can imagine, there was lots of strawberry based foods and lots of jamming by local musicians. But… more about all that in the next post.

For now, let’s stay EAST.

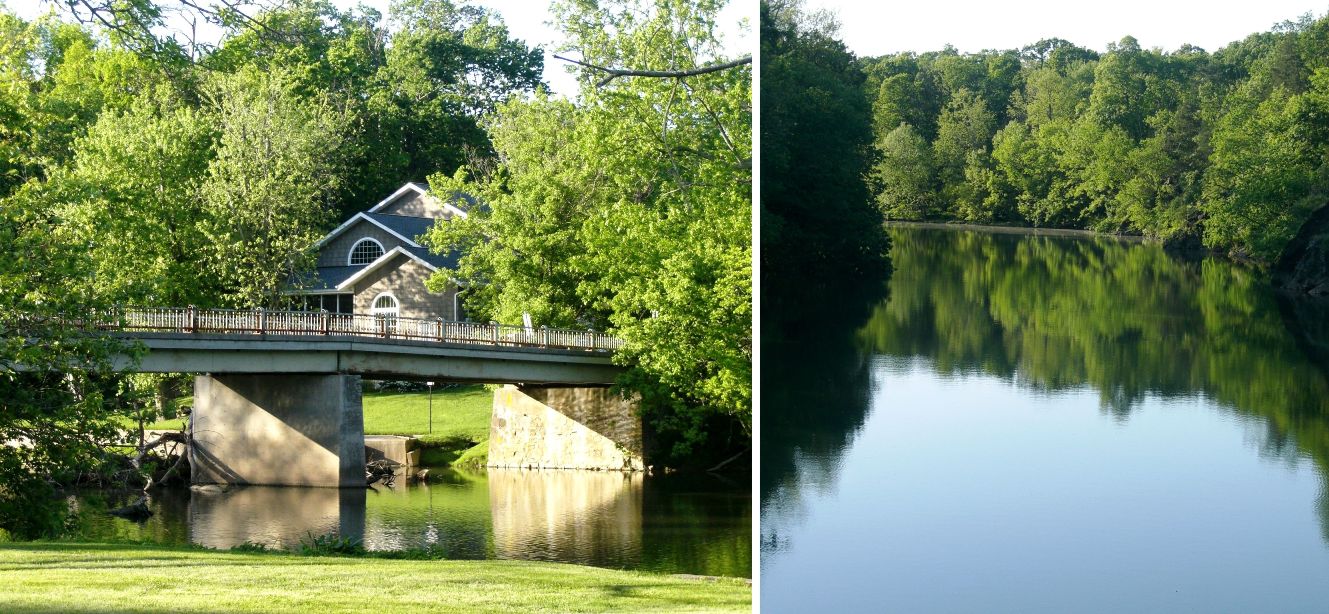
It all started at the Mannings in Pennsylvania with their annual Spinning Seminar…the 45th one, no less!! I have been to the Mannings in the spring….ah, idyllic!

the-mannings-stream

and in the fall….

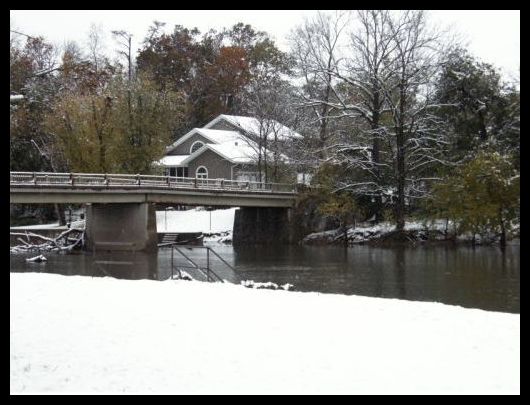
mannings snow borderedwoven inside and outside on the beautiful lawn down by the creek…

backstrap weaving at The ManningsHere was a first…a chance to set up my backstrap loom in a shady spot down by the creek on a lovely summer’s day and just hang out chatting with people.

Ravelry and Weavolution friends dropped by. I have known Trisha, aka Coolsticks, from the early days of Weavolution back in 2009 and we finally got to meet…

trisha and april at the mannings spinning seminarThere is Trisha on the left with guild buddy April .

Down by the creek things were pretty laid back! I had lots of time to spend with people.

amanda backstrap weaving at the manningsThat’s Amanda having a go at the basics of backstrap loom operation on a narrow band. The tree was adorned with straps and bands and one of my wide projects. Several people could be weaving with warps extended spoke-like from the tree. l liked over-hearing hushed comments while I wove on the big warp…”she isn’t using a chart!” (I smile thinking how I have woven items with that particular motif at least 50 times and goodness knows how many repeats of it there are in this one piece I am currently weaving!) And then there was…”Oh. So, it’s slooooow!”

spinners at the creek mannings spinning seminarSpinners set up camp, grabbing shady spots by the cool water to enjoy a day of spinning and conversation.

Picture by Pinar Miski

And for those who wanted to be in the heart of all the action, there was room to park a whole gaggle of wheels on the shaded front porch of the Mannings store.

Picture by Pinar Miski
One of my sample tables. Picture by Pinar Miski

And, at his point, I am going to hand over to the pictures of Pinar Miski who got to visit almost everybody and took the most wonderful pictures. She has allowed me to share them here. It was late in the day when I finally managed to make my way uphill to the shop to see what was going on. Shadows were long over the outdoor demo area at that hour and the crowds had thinned in the dying day. My pictures didn’t come out well. So, thank you, Pinar for sharing your shots!

Things were anything but laid back up at the store…happy shopping and browsing in yarn paradise. Pinar subtitled her photo album …”and then I died and went to heaven”! I think that says it all.

But, apart from the shopping, there were oodles of things to be touched, explored, and experienced with a wonderful selection of fiber artists and educators both indoors and out. I demand a do-over! I didn’t get a chance to see much of it!! But, I was having a lot of fun chatting with people about my passion…the backstrap loom.

It all starts with fiber. There was this…

Photo by Pinar Miski

Ron Bostek demonstrated sheep shearing. He brought Border Leicester and Cormo sheep to the Seminar.

Picture by Pinar Miski

Here is cotton spinner and teacher (and my fun roommate), Joan Ruane, showing one of many implements with which she spins cotton with ease. For me, who goes to the store to buy cotton for my backstrap weaving, Joan’s comment when she saw me at work at my loom was pretty funny…”oh my god, it’s WORSE than tapestry!”…a comment on the slowness of my weaving. And there she is patiently creating cotton thread!

Pictures by Pinar Miski

Yet another fiber on display ..Mandi Elliott Bird used antique tools to show how to process flax to the point where it can be spun.

Picture by Pinar Miski

Ron Tyler spun wool on a Great Wheel or, Walking Wheel, hoping to encourage people to take the beautiful inherited piece that may be sitting and simply decorating a corner of a room and actually use it.

Picture by Pinar Miski

One of my neighbors creek-side was Carol Ireland with her hip spindle.

Picture by Pinar Miski

This table was a-buzzin’ at day’s end when I went for my walk. It seemed that folks were invited to grab a bit of this and that and create their own batt. That looked like lots of fun. It was Sally Jenkins who demonstrated fiber blending with drum carders.

And boy, does this look like fun. I bet there were people jostling to get a position for this…

Picture by Pinar Miski

I am copying and pasting the description from the Mannings’s newsletter for this one…

Tartan, Tweeds & Waulking the Wool – When wool tweed or blanketing comes off the loom, it is not yet ready to use. The traditional Scottish method of finishing woolen cloth was a social occasion involving a group of neighbors, a large table and probably a little whiskey! The cloth was wetted and passed from hand to hand in a thumping rhythm kept going by suitable songs. We will skip the whiskey at our wool waulking but have lots of songs! Melissa Weaver Dunning will also have a display of her many woven tartans and tweeds.

Apparently it takes three songs to finish the process. Here is inspection time after the first song…

Picture by Pinar Miski

Again, Pinar captures a great moment!

Picture by Pinar Miski

Ah, now here is something a little closer to my heart. Susan Weaver brought along a large selection of tape looms on which she encouraged people to weave. I believe that all the tape looms for sale in the Mannings store went home with new owners that day. Susan and I know each other. She wove with me a while ago and lent me a Mexican band to study from her collection. So, I was eager to connect with her to catch up and return the band.

Picture by Pinar Miski

Mushroom dyeing! Hmmm…wondering what kind of aroma is coming from that pot. This is fascinating. Who knew that you could get such a range of colors from mushrooms and now I know that someone who studies mushrooms is called a mycologist. Susan Hopkins’s interest expanded from mushroom identification to dyeing.

Look at the colors…

Picture by Pinar Miski

Picture by Pinar Miski

Susan’s face says it all…she’s passionate about dyeing with mushrooms. Check out her t-shirt.

Anne Marie Decker was probably not around at the particular moment when Pinar went by. As Pinar says in her album caption, she still doesn’t know what nalbinding is, and neither do I! I have to say that it looks like something I would enjoy.

Picture by Pinar Miski

Indoors, Ron Woolcock gathered spinners to tell them how to keep their wheels happy and there was a display of the stages of silk production and processing. Thanks again, Pinar  for the use of your pictures! Take a look at the entire album here. Pinar’s concise captions are fun.

coil stitch ad pom pomsOne day to rest, and then my Ravelry friend, Julia, came by to weave and sew..

We wove a lot!. I was starting to crash by 4pm with all the things we got into. It’s so much fun putting those finishing touches on things!

We wove tubular bands, sewed and wove tubular bands to edges, sewed coiled stitches, edged and lined pieces with decorative stitches, warped for more bands….phew!

But, rather than get into all that now that she is home, Julia has been practicing the supplementary-weft inlay techniques which I show in tutorials on this blog.

Here are a couple of her projects…

julias supp weft backstrap weaving

The butterfly is one that I charted from an inlay motif on a Huave weaving of Mexico. The pattern on the right is one that I adapted from a motif woven with weft substtution, if I remember correctly, on a textile of Central Asia. I think that it is charted here on my blog. Loving the soothing colors Julia used.

Caroline also used weft inlay techniques to decorate her backstrap. I love how people are taking to this technique!

caroline sacramento supplementary weft inlay backstrap weavingI adapted this particular motif from one on an Indonesian piece of fabric. The backstrap itself is beautifully woven and put together!

More fun weaving with friends that I have met online…Bands got finished with ends braided and all.  Here’s Kathy practicing the four-strand braid on her warp ends.

Kathy braiding backstrap weaving class the mannings

If you have been following my blog, you will know about my recent experiments with weft inlay where I have been filling negative spaces with weft to outline patterns in the ground cloth. Some of the weavers were keen to try this. Another fun thing was combining strands of different colors for the supplementary weft which created interesting effects. Kathy and Bettes put together blues and other jewel-like colors while Nancy put together a very festive, sunny Mexican type of combination.

supp weft class mannings backstrap weaving

Marge came over for a day to weave and try a bit of double weave on her inklette and a touch of intermesh on the backstrap loom…

She brought her band box to show some of the things that she has been weaving on her inkle loom…straps for her musician friends. She plays in a band called Tater Patch and gave me a cd!

Marges bands

marge and her bands backstrap weaving class manningsThere’s the double weave band that we started on the inklette next to a nice knot-work pattern in pebble weave. And then we did a wee bit of intermesh.

Marge went home to finish that double weave sampler with some of her own designs. Guess what instrument she plays in Tater Patch?!

marges double weave bandMeanwhile over in Tom Knisely’s Mannings teaching studio, there was lots of overshot loveliness coming off the looms. Here are a few examples. It is nice to be able to stay on the premises and get to see the weavers working late at night on these pieces.

overshot class manningsSpeaking of Tom, he gave me a wee gifty. You may have seen this before on this blog. Tom showed me this on one of my visits last year and  has now decided that it really needs to belong to me :-)!!

sword

More Ravelry group projects to show…

Cindy tried out the “palma” braid…nice job!

cindyI finally got to meet Cindy on this trip. More about that next time…that’s a “west side story”.

Laura has been practicing pebble weave…

lauraI love the color flips and how she has joined the three single motifs into one long continuous one.

And just to finish and lead into Chapter 2: “West Side Story”, which is largely based on the ANWG conference in Bellingham, Washington followed by fun with my friend Betty at her home in WA and then with my friend Janet in northern CA, let me show you the weavings that I submitted to one of the conference exhibits.

This series is a work in progress. I have many more panels in mind to add. It is entitled “Textile Trails” and each has its little “traily” story to tell. It won the Committee’s Choice Award at the conference. I was thrilled! Thank you to Linda for taking this picture. The beautiful black wooden hangers were made by Terri of Magical Moons. Terri makes the custom swords and other implements that I often show on my blog. By the way, she is making spindles now. They look exquisite.

backstrap weaving Laverne WaddingtonThe fact that I am wearing a black top and a red jacket is just a happy coincidence, I swear!

Here’s the lovely handwoven ribbon…

hangings backstrap weaving Laverne Waddington

See you next week. I am back on top of the blogging now…I hope!

Backstrap Weaving – Hands Full of Threads

The black neck wrap is done and I am already thinking about the next one.

I thoroughly enjoyed working with this fine Guatemalan cotton thread (you see how I have forgotten about all the woes in the beginning!). It was fun picking up threads with the delicate Guatemalan pick-up sticks and feeling the silk supplementary wefts slide through my fingers.

This will be the color scheme for the next one…

colors for next backstrap woven scarf

Maybe I will use some Guatemalan-inspired designs this time or perhaps I will invent some of my own.

cotton-spinnersI got the black piece off the loom and then I was faced with fringe twisting. Would you believe I have never done this before? I have left fringes on placemats and braided the ends of other pieces. I had read the grumblings about fringe twisting from those who regularly weave scarves in the weaving forums and seen pictures of the gadgets and gizmos that have been designed to make this task less tedious.

I even watched a video I had taken of my Montagnard weaving and twining teacher, Ju Nie (seen at left spinning cotton), twisting the ends of a piece she had recently taken off her backstrap loom. Ju had come to visit at friend Betsy’s house and, rather than sit idle while chatting in the living room, she pulled out a wad of stuff wrapped in paper and a woven piece of cloth and started working. The “stuff” turned out to be mushy, sticky over-cooked rice through which she drew the warp ends before rolling them on her leg and setting them in the twist.

Here is the video. Ju explains that doing it on her pants is “no good” and that it works much better on her bare leg. I am guessing that her bare shin makes the best rolling surface.


So, I twisted my fringe and it wasn’t as slow as I had thought…much faster than braiding, I can tell you! I added weft twining to the ends of the fabric before taking it off the loom. I think that made a nice finish.  See the countered weft twining tutorial here.

And then I found that scarves are kind of hard to photograph…way too long and flat and lifeless to try and stretch out in one shot so I gathered it up and threw it down many times, fiddled about and I felt that this was the best “pose” in the end.

bhutan scarf with border

And another shot that shows my favorite central motif…

finished bhutan scarf backstrap loom

Although I was mad keen to get into the Guatemalan purple thread and warp up another scarf, (especially since I think that I  already experienced, hopefully, all possible mishaps when weaving the black one), I decided that there was another project sitting in the closet that needed my attention…(plus I really need to ponder and plan the patterns I want to use on the purple scarf before rushing in and weaving it)…

wayuu_motif_with_twining

Remember this guy? I had just started the large main motif when I decided that I would not touch this until I was sure I would have enough time to stick with it and finish it. When doing pick-up, I think it is best to do a pattern all in one go rather than leave it sitting while I travel. If I leave a piece for a long period of time,  I can almost see the place where I left off and picked up again. Perhaps I sit a little differently, apply a little bit more or less tension, beat differently…I don’t know…something changes. So, now is the time to get down and finish this piece.

Usig a forked stick in the warpI welcome the opportunity to have my hands in there and full of threads again. I am not a pick-up stick kind of gal,  unless a particular technique or yarn really demands it. I like to hold and pick and drop threads with my hands. Perhaps it’s because that is the way my first Peruvian teachers showed me. I have been shown and I have willingly tried other ways but I always come back to just using my hands.

Here is a weaver creating a belt patterned with supplementary warps. It is a narrow piece and so it is easy for her to simply insert her hand between the warp layers to do the pick-up.

I was finally successful in uploading the video of this weaver at work. You can see how she does her pick-up as well as see the two-stick method she uses for opening the heddle shed. She has a forked stick in the warp….one prong is her shed rod and the other prong holds a second cross. Grasping and twisting the fork, while leaning forward to relax tension, helps her to smoothly open the heddle shed. 

These are the kinds of textiles she produces…

O

I watched a gentleman from Chahuaytire also weaving supplementary-warp patterns into a much wider piece of cloth. He uses a pick-up stick to hold all the threads in both the pattern and plain-weave sections as he works his way across the cloth…


This is his weaving…

chahuaytire backstrap weaving

Both weavers work equally fast, don’t you think?

So, on I go with hands full of threads. This is the third piece in my red-white-and-black wall hanging series. This one has patterns which have been inspired by the si’ira belts woven by the Wayuu people of Colombia and Venezuela. Since starting this project, I got to go to Holland and meet Mirja Wark who spent years studying, collecting and cataloging these belts as well as writing a book describing the weaving, braiding and twining techniques used.

si'ira belts wayuu mirja wark

wayuu project in progressThese are belts that Mirja herself wove while studying. You can see the “cow’s nose” pattern at the bottom of the blue, pink and green belt that I used in my wall hanging. The large motif that I will use in the center has been very much adapted to fit my piece and uses just certain elements of the Wayuu patterns as inspiration. There are a lot of threads to pick and, until I things get rolling, I am very much clinging to my pattern chart. Thank you, Terri, for introducing me to removable highlighter tape which works like a dream!

So I will be parked in front of that piece for some time while taking breaks to re-spin the Malabrigo yarn, plan supplementary-weft patterns for the discontinuous-warp piece for which the Malabrigo is destined, ball up that large skein of Guatemalan purple cotton, sketch some patterns for the purple scarf project, plan piece number four in the wall hanging series…maybe ikat??…do I dare?

And I am folding this sampler piece this way and that to see if something useful can be made of it. It’s still on the loom and there is room for more pattern experiments.

O

Let me show you some things that Ravelry members and students and friends have made. It is a strange coincidence that three people decided to edge pieces of clothing with woven bands. Janet decorated a pair of felted slippers that she made, Laura edged gloves (and also made a camera strap and headbands) and Julia edged a couple of tiny shadow-weave kimonos with a pebble weave band. Three gorgeous projects! (I am in love with that shadow-weave cloth, by the way…it takes four shafts…I would like to try it).

christmas_projects__2012_006_medium

laura xmas projects

kimono_baby_black___white2_mediumI will leave you with the happy twin recipients of the wee kimonos…Julia’s grand nieces!

ZellaHattieinKimono_medium2

######################################

Right before I was about to publish this post,  a question was posted in the Ravelry group by a weaver who is trying supplementary-weft patterning for the first time and not getting the rich satin-like finish  that she would like in her patterns. Instead, there are spaces and gaps between the rows of her design. I posted a reply in the group but am copying it here as I think that it may be useful for others who feel like trying this lovely technique…

There is no formula that will suit all weavers…that is, “x” number of strands of such-and-such a supp weft material will give sufficient coverage with such-and-such warp thread. All weavers are different in the way they handle their warps.

For example, some weavers put a lot more tension on their warp than others. This means that they have fewer picks per inch than others because the warps are pulled so tight that they can’t bend over and under the wefts as easily as they do for weavers who use less tension. This means that a certain amount of supplementary weft material won’t give the same amount of coverage for those weavers as it does for others who use less tension.

Another case…some people simply don’t beat hard enough when using supplementary wefts. I beat hard and really mash the weft into place…not “wham wham” beating…more like placing the beater right at the weaving line and pushing against the weft hard with a rocking motion.

Other people pull too tightly on the supplementary weft. It has to be fairly relaxed in the shed to allow it to spread and cover the surface. As an experiment, pull your supplementary weft tight once you have changed sheds and see what happens. It will flatten and narrow and not give good coverage. You have to find the balance between thread that is relaxed enough in the shed and bumps at the sides, where the weft turns, that are not too big and loose.

These are all things that come with trial and error and experience. It might be that you need to use more supp weft material or it could be one of the other factors I have mentioned here.

I often use thread that is similar to #3 and #10 crochet cotton. It is Brazilian cotton that I get here in Bolivia. I have used two strands of embroidery floss with the “#3” and one and a half with the “#10”. This gives people an idea of where to start and what to try but, as I said, every weaver is different.

Hope this helps.

ETA My first Guatemalan teacher combed the strands of her supp wefts with the point of her pick-up stick so that they lay next to rather than on top of each other. They didn’t move with handling…the floats are not long enough to cause that to happen. I did the same with the six strands of 60/2 silk on my current project.