Backstrap Weaving – Woo hoo! Going Wide!

Some people have noticed the lack of recent blog posts and commented with concern. Others know to expect a period of silence once I mention that I am about to travel. Some may even be relieved to perhaps have a chance to catch up on some older posts.

I took my new weird two-tone hair look out of the hat and boldly faced the public! I’ve had some twenty-something-year-olds tell me that it is a cool look. I would actually like to keep the two-tone look. It has taken nine months to get to this point and I quite like it! I have also had some weaving friends tell me that they have decided to join me in this cold turkey trip from dyed hair to natural grey.

There’s plenty to tell but I will limit this post to sharing with you what some of my particularly hard-core backstrapper friends did when we spent a weekend together.

We decided to try going wide together.

Everyone wove samples in preparation. Realistic expectations also needed to be set. This weekend was not going to be about weaving the super-wide project of our dreams. It would be about  warping, setting up and beginning a project that was significantly wider than the bands that we had previously been weaving together, yet not so wide as to take all weekend just to set up! The new skills could later be transferred to even wider pieces.

Some of the samples that were created before the gathering.

The samples were essential. From those we would take measurements and make calculations for the ”real” project. We had samples in the pick-up structure that we wanted to weave. All except Tracy went with complementary-warp pick-up. Tracy chose a structure that creates warp floats on only one face of the band so that she could replicate some beautiful patterns that are woven into yurt bands in Central Asia. Aunt Lydia’s size 10 and size 3 crochet cotton were the yarns of choice with a beautiful range of colors (there are a lot more colors in size 10 than in the thicker size 3). Tracy again was the exception in that she chose to weave with her hand spun wool. The other required sample was a piece in plain weave.

Tracy’s hand spun wool alongside one of Allen Berry’s gorgeous swords.
Nancy’s ”samples” were awesome in their own right! and enabled us to calculate the number of ends she would need for her project and plan layout.

Nancy was planning a woven cover for her daughter’s journal and it needed to be a precise width. We took measurements from her pebble weave and plain weave samples to calculate the number of ends she needed as well as the layout of the pick-up patterns and areas of plain weave.

Number-crunching with Tara for her wide project calculating warp requirements based on her samples. She planned a length of patterned fabric that could be folded into a box shape.

The wide warps were wound in sections as they were too wide for our warping stakes. I often choose to wind in sections as I don’t like having my warps climb too far up my warping stakes. I have found that even the sturdiest of stakes can lean when they are holding many bouts of yarn. Good, even tension on the warping stakes is critical. These warps will not be cut and threaded through heddles and then re-tensioned as they would be for floor and other kinds of looms. We are basically dressing the loom as we warp and the tension we create while doing so is what we must live with for the life of the project.

Ann removes one of sections from the stakes . She placed each section on loom beams and cross sticks that waited on the floor in another room…out of the way of feet and curious kitties!
Off comes one of Tracy’s sections. Each person decided how large they would make their sections depending on how far they trusted the sturdiness of the warping pegs under their particular warp tension. Some people wind tight warps, others not so much.
Nancy stops to check her count. Her notebook lies nearby with warping plan. There was much chatter and laughter which made me nervous. No one can come anywhere near me when I am warping and I need silence!
I stopped now and then to amuse myself with the cats and take pictures of the projects that the ladies had brought to share.

Above you can see the spindle bag that Tracy made using some of the beautiful pieces of fabric from the Bolivian co-op that we all support. Tracy covered the seams with cross-knit looping stitches and added a round base. On the table you can see a collection of spindles also made by the talented wood-working friend Allen Berry.

This is the band that Ann had been weaving the last time I saw her. She used my favorite leaf motif in spring-to-fall colors.

And here are some lanyards for name tags woven by Tara and Nancy. They combined patterns that had been woven into Bolivian bands that they own.

Lanyards in cotton and tencel made by Nancy and Tara.

Here are more amazing swords by Allen Berry. The ladies knew that they would need longer swords for their wide projects and Allen Berry created these. Each has its own unique pattern.  You can  view his products via his allenrberry Instagram account and make direct contact with him there.

Tracy was using this shoulder bag. I had last seen this as fabric on the loom made from Tracy’s own handspun wool a year ago. It was great to see the finished product with its eye-pattern tubular edging and strap. It feels gorgeous!

And, as I photographed all these beautiful projects and played with the cats, completed warps started appearing!

Phew! The warps are on the looms and they look great! Now to make heddles.

Tracy’s hand spun wool is even more stunning all stretched out like this!

Aunt Lydia’s size 10 crochet cotton has some bold and beautiful colors and Ann has combined them so nicely.

Stacy starts her heddles on a beautiful red, black and white piece for which she planned a knot-work pattern in pebble weave….

Some moments of hush while heddles are made. It’s funny because that is the part of the process when I can actually talk to people. These ladies, on the other hand, got very quiet during this part.
Tara’s warp with heddles in place. She included some sparkles in the warp which unfortunately don’t show up in the picture. This piece will be for her daughter. It is beautifully tensioned…so exciting to see a fresh warp on the loom!
Are we done yet? Getting there slowly with the heddles!
Woo hoo…time to start weaving!

Stuff happens when big projects like these are warped and set up. I won’t say that every warp came off the stakes ready to roll. Some threads had to be removed when the count was wrong. Some threads needed a little adjustment for uneven tension. That’s all to be expected. I remember sitting with my teacher in Ecuador and learning how to wind a dove-tailed warp for a hammock while her family watched. She made three errors in the warping and how she laughed and laughed when she discovered them. Everyone joined in! Maybe it’s not so funny when you are on your own but we were all there to help each other. With my Bolivian teacher we chatted as we rolled the balls of yarn back and forth to each other as we warped. Only when we finished we discovered that the stripes we had warped were totally asymmetric. Hilda laughed it off but I was determined to fix it!

Consulting with Nancy above as she throws her first passes of weft.

Tracy is counting out her first row of pick-up. The first row is critical as all other rows will be picked relative to that foundation. It’s always a relief to get that first row and in and confirm with subsequent rows that all is well.

Getting each and every warp end settled in its place at the very base of the warp is something I like to do.  Tara shares my feelings about this and is using a pointed stick to separate the ends and create as neat a start as possible. In some projects this selvedge will end up hidden in a seam and this much attention to neatness may not be necessary.
Tracy’s yurt band pattern takes shape.

Classic Andean hooks start to appear in Ann’s turquoise beauty … with another Allen Berry sword.

Nancy’s journal cover will include bee and hive motifs among others. She wove in her daughter’s initials in supplementary weft using lettering of her own design while I was there. You can just make out part of the lettering in progress below her right hand.

Margarite was not part of this group of friends but she did show me this weaving when I visited with her. She had started it back in the 1970’s when she was learning Guatemalan-style patterning. It had the two patterning sticks in place that I know well and we were able to set it up to finish off the motif she had started working on all those years ago. I was able to show her how to continue and put the pattern sticks to good use for creating other motifs. This is one of my favorite things to do…reviving a long forgotten warp that has been languishing in some dark corner unfinished. This one is between forty and fifty years old!

Let me leave you with an important announcement about Patternfish, home of my e-books….

IMPORTANT ANNOUNCEMENT: Some of you may have heard about the fact that Patternfish.com that hosts my ebooks is planning on closing at the end of May. Patterns, e-books etc that you have bought along with any accompanying videos will be available for downloading and saving until the END OF JUNE and I urge you to do so. I will be making a separate blog post about this in the near future once I have investigated my options. In the meantime, if you have concerns about your ability to save your purchases, please contact me via a comment on this blog post or via private message on Facebook or Ravelry. I have an awesome team of customers who have been willing to provide technical help to those who may be having trouble downloading or finding places to store their purchases. Let’s work through this together. We have two months to get your purchases safely tucked away. It’s sad news. Patternfish has been a wonderful home for my ebooks but it’s time to move on and new things are coming!


Backstrap Weaving -Twisting, Coiling and Rolling

There is no single correct way to do things when it comes to backstrap weaving. I love seeing the similarities and differences in the ways weavers wind warps, set up their looms and  operate them as well as the differences in the materials that they use…from pvc pipe to rebar to bone and worn wooden pieces that have been passed down from one generation to the next. Backstraps can be made from braided straw, plastic rice sacks, leather or woven wool and cotton. Warps can be angled upwards ever so slightly or steeply. Heddles can be applied during warping or after. I love the different shapes of tools and materials that I have in my collection. It is not really a ”collection” accumulated simply for the sake of collecting. I have used all these pieces at some time or other and continue to do so. You can see a leather backstrap from Guatemala, a bone sword and pick-up tool from Peru, loom beams from Burma, Guatemala and Peru and a sword from Ecuador…all sitting on a Bolivian weaving.

The thing I want to talk abut in this post is the corrugation or ridging that can occur when weaving a cotton piece in plain weave and the different ways I have found to deal with it. I have covered this in several posts as I struggled to figure out what was causing it and then found out how to prevent it from happening. I now use a coil rod if I am doing plain weave with a material that has little, if any, stretch or ”give”, like cotton or silk, for example. Probably the worst case of corrugation I have ever produced is out there for everyone to see in my tutorial on supplementary weft patterning…

You can see that the surface of the weaving is not flat and smooth . It looks a lot like corrugated cardboard…bump, flat, bump, flat, bump, flat. I finally figured out that when my warp passed around and was suspended by a large dowel at the far end, the entire warp was free to swivel back and forth around the dowel as I made the movements to operate the loom. This is what was causing that bump to form and it was just a matter of somehow stopping that swiveling from happening.

The corrugation only shows up when I do plain weave. Warp-float structures do not suffer from these annoying bumps.

You might be able to make out the difference in these two bands. The one on the left has a nice smooth surface while the one on the right is corrugated.


I had been given the know-how to combat the corrugation by my various indigenous weaving teachers without even being aware of it. One of the few places where I have studied plain weave in cotton with backstrap weavers was in Guatemala. There, my weaving teachers would weave an inch or so at one end of the loom and then turn the loom around and weave from the other end. The weaving at the far end of the loom locked the two layers of warp together so that the threads could not swivel back and forth as the weaver operated the loom…result: nice smooth cotton cloth..no corrugation.

The picture below of my teacher is too small to show detail but you will notice that the warp layers at the far end of the loom are squeezed together right at the loom bar rather than being open as they pass around the beam. That is because an inch or so has already been woven at that far end.

So, anything that locks the layers of warp threads together rather than allowing them to be open and swiveling freely around the loom bars will work as a way to prevent corrugation.

Lashing the warp to the near and far beams is another way to lock the layers together…

This weaver in Peru is lashing her alpaca warp to the square loom beam. A header weft was placed within the open shed and then lashed to the beam. The primary reason for doing this is to allow her woven piece to have four selvedges. But, this technique would also stop a cotton piece from developing corrugation. You can see a very nice video of the lashing process here.

Here, my weaving teacher in Potosi, Bolivia is lashing one end of the warp we just wound to the beam…

My cotton warp in the following picture is lashed to the beam at both ends by way of a metal rod rather than a header weft. This is the way I choose to do it and it gives me nice smooth plain-weave cloth without ridges…

The red cotton cloth beneath the white sample was also woven on my backstrap loom. It’s plain-weave cotton and is smooth because I used a coil rod.

Some weavers turn their warp ends around a header weft as they wind the warp rather than inserting it later when the warp is off the warping stakes. It is always exciting to see the different ways backstrap weavers do things…

Of the three methods for locking the warp layers together that I have learned so far…1. weaving at both ends of the warp 2. lashing both ends of the warp to the beams and 3. inserting a coil rod…..the coil rod is my favorite. I am not quite sure why I favor this one. I think it might be because I like to take my warp off the warping stakes and then sit, set up and weave. I can sit and make my heddles, insert the coil rod and weave. I don’t need to be turning the loom around to lash both ends or turning the loom around and rearranging the sheds so I can weave at both ends. I want to just sit and stay put! I feel that the less I handle the loom in terms of moving it around and about, the better.

But, as always, it is nice to have a set of options from which to choose.

There’s nothing I like better than being seated in front of my warp with heddles, shed rod and coil rod in place, ready to throw that first weft! This is a warp of fine Guatemalan cotton that I wove in plain weave with supplementary weft patterns.

A coil rod has kept all my silk plain-weave projects just as they should be…”smooth as silk”!

Even though this next project was in wool, I inserted a coil rod. Sometimes, I just like to use one as I like the way it maintains the width of the warp beyond the shed rod.

My Montagnard (Vietnamese hilltribe) backstrap weaving teacher uses circular warps and inserts the coil rod as she winds her warp. This is the colorful fine cotton warp she created with coil rod in place when she was teaching me how to do this…

This next picture is probably one of my all-time favorite backstrap weaving images and I am showing it here courtesy of Jaina Mishra…

Weavers in Arunachal Pradesh use the traditional back strap loom to weave  skirts, shawls and loin cloths.

A backstrap weaver is warping directly onto her loom with the help of a friend. It looks to me like a single-plane rather than circular warp and the fun part is that they are installing the coil rod as they go. This would be ultimate for me who likes to sit at the loom and do everything in one go! They are making heddles installing the shed rod and coil rod all at once! I love the backstrap she is using for those very long beams…see the pockets that slip over the ends of the beams? There is so much to love about this picture! The weaver can start weaving straight away without ever having to move.

What I have finally done, for those of you who think that you might like to try using a coil rod yourselves, is make a couple of videos showing you how I go about inserting one. I am afraid that we are back to the bedroom-floor amateur videos of my past with these ones! but I am sure that you will see all you need to know.

What I usually do is sit in my loom and make my string heddles. Then I decide if I am going to use a loop or shed rod/s for the other shed and get that set up. I leave the cross sticks in place and then insert the coil rod. It’s something I enjoy doing…just like I enjoy making string heddles. I am a little crazy that way!  You can see Sara, above, inserting  the coil rod in her beautiful silk plain-weave warp. She has made her heddles and is using a shed rod with a second cross stick….the so-called ”twisty sticks” that I talk about in my dvd.

So here are the two videos. I had to make two segments for ease of uploading.


Now you will know why the coil rod is often also referred to in publications as the ”rolling stick”. I like the way it can sort of iron out small tension differences as it is being rolled to the back of the warp. I use wood rather than metal as I like the grip of the wood as opposed to smooth metal.

And, if you really would like to set up the coil rod as you wind your warp rather than after, I am sure that you will be able to see how to do that now that you know exactly how the threads turn around the rod. In past posts about the coil rod, I have shown how to install one while winding a circular warp.

I am going to finish by showing you a few projects by online weaving friends….

My new Operating a Backstrap Loom dvd traveled over the ocean to Maja in Germany. She was curious about learning new ways to set up a wide warp and has chosen the ”twisty-stick” method from the options I give in the dvd. She has already put it to use on her latest warp and I am thrilled about that. Look at her beautiful project!….

Collyer had woven tubular bands and learned about sewn embellishments with me. We decorate a piece of woven cloth made by my weaving friends in Bolivia. Collyer has applied the coil stitches to the flap of the pouch she put together with the cloth and has added a flat strap which she turned into a tubular edging along the sides….

Julia in Australia designed and wove a bee in the Andean Pebble Weave structure as the logo for her local beekeepers association…so striking!

Carmen sent this picture of the piece she has been working on using motifs from my second book...

Also from my second book is this pattern that David in France used for his gorgeous Andean Pebble Weave band woven on an inkle loom…

For those of you who have my Andean Pebble Weave book and would like some suggestions for how to set it up on an inkle loom, I will be writing about this in a future post. Many weavers, Like David, have figured out a way to do it. I know of several ways it can be done so I can offer you some options.

I love Terri’s very relaxed and cozy backstrap set-up on her son’s bed…

Kathy showed me what she has been doing with the beautiful two-heddle intermesh technique I teach in my second book

Lieve in Belgium has been weaving pictures and words in warp-faced double weave on her inkle loom. Charts for the figures and letters are in my free tutorial here

Jennifer in the USA took a break from Andean Pebble Weave andhas now returned to wind a narrow warp so she can wisely start again at Lesson 1. She is showing the band that she wove with various figures before she took a break to pursue her other fiber activities…you should see her beautiful embroidery! She later said that she got back into pebble weave in no time.

Speaking of Andean Pebble Weave, I finally got the Spanish translation, Tejido Andino ”Pebble” laid out and up for sale on Patternfish.com. Many thanks to Isabelle Marmasse for the hard work she put into it.

As for my weaving, I guess I am about three-quarters of the way along my silk wrap piece. It is getting quite exciting. It really feels like a good length of cloth now and I can see it working as the shoulder wrap that I have planned. I really can’t wait to wash and iron it. However, the most intensive apart of the patterning is still to come…where I have to repeat the 3-color pebble pick-up that I wove at the start. So, while I might be three-quarters of the way in terms of length, that is probably not true in terms of time.

My dvd on Operating a Backstrap Loom continues to wing its way across the world!

Marilyn at Taproot Video has been keeping track and tells me that Norway and France have been added to the list of countries.

Many thanks to everyone for your support and I have been very happy to receive feedback from a lot of you about the wonderful ”aha” moments you have experienced.

I like to think that people are putting some of the techniques to immediate use just like Maja in Germany has done.

Here’s a sweet way to end this post…

I have another thank-you card that the young ladies in the highlands sent me after my visit. Maxima and I are winding a very colorful warp and there  I am in the corner weaving at the leaning vertical loom…such a lovely souvenir of my visit.


Backstrap Weaving – Circles

circle 1I just learned how to cut out circles in my simple drawing program and have been messing around with that with some photos of my weaving.

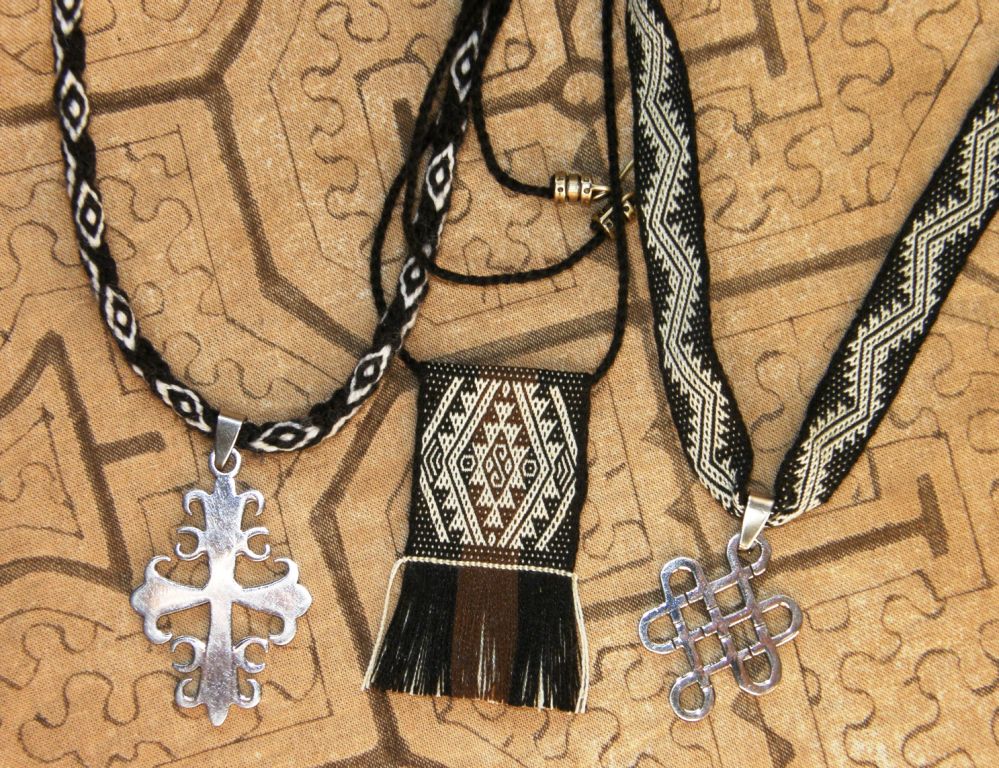
The pattern at left is one I used for a new necklace idea. This time I wove the actual pendant rather than just the cord or band on which pendants hang. It’s 60/2 silk and the pattern is an adpatation of the one that appears on a scrap of belt fabric that I bought in Cusco in 1996.

I wove this and will weave others as something to give me a bit of a change of pace as I sit for hours and hours applying ikat tape for my latest big project. I am hoping to make this ikat project a ”two-fer” ….a chance to practice creating circles and, if it is successful, a piece of fabric that can be made into a travel cover for my new laptop.

Making the photo circles in the drawing program was easy enough. If only it were that easy to create smooth curves and circles in warp-faced weaving. Choosing the right structure and using fine enough yarn does play a large role.

silk cuffs front and backIn the band in the center, I was trying to replicate the pattern on a button I had bought. It took a few attempts before I could get the proportions right and create a somewhat circular motif.

Here are the necklaces that I have made so far. The latest one with the pattern I placed in the round photo above is in the middle…
woven necklaces backstrap weavingThe cord is a cotton 4-strand braid. It was challenging putting that bit of weft twining along the bottom of the pendant using the 60/2 silk. It came out very sweetly.

Before settling down to tearing strips of plastic and wrap, wrap, wrapping for the ikat project, I made a bag with the wool fabric I showed you last week.

backstrap weaving woolI wanted to decorate the sides of the bag with a tubular band and planned something that would complement the twill lines in the main motif.

tubular band on wool bagI am fond of cutting bag flaps into curves and edging them with tubular bands but I decided to leave this one uncut and edge it with coil stiches instead. They are little coil-wrapped circles, or rings, that extend from the upper surface of the flap over the edge and to the inside. These decorative stitches are sometimes used by weavers here in Bolivia along the bottom edges of their woven ch’uspas…the small pouches in which they carry coca leaves. It’s a bit of a fiddly business.

I wove a simple, brown strap and used orange weft to liven it up a little and better match the bag. And this is where circles came into play again. I planned a 75-inch warp to be on the safe side and, as I simply do not have the room to stretch out a 75-inch warp in my room and am not a fan of rolling up the far end of the warp, I wound a circular warp instead.

circular warpingI ended up with 67 inches of woven band and 3 1/2 inches of unwoven warp. I didn’t really have to change my sitting position to scoot closer and closer to the back beam as the weaving rapidly progressed. That is one of the nice things about the circular warp. The distance the weavers sits from the end beam barely changes at all and so, something against which to brace one’s feet can be easily set up. Being so very narrow and in plain weave, the band was very quick to weave. It was fun watching the band turning over the front beam and growing below, then stretching itself out toward the back of the loom, turning up over the back beam and then inching its way back towards me to make a full circle.

Here is the finished bag…

I really like the look of the tubular band along those edges. The pattern reminds me of the carved wooden columns that are used here in Santa Cruz in the centuries-old Jesuit mission churches. They have thick jungly vines encircling their length. The piece was an exercise in several things which included creating a new tubular band pattern and applying coils stitches with very fine wool

This can now join the rather small collection of items I have woven using industrially-spun wool. Each time I have used wool, it has been with more than one goal in mind. The two pieces below were woven with the same kind of wool. I wanted to see how it would stand up to string heddles and warp-faced weaving as well as practice the discontinuous-warp technique that I had studied in Peru.

wool backstrap weaving discontinuous warpThis next wool piece was a chance to practice creating a fourth selvedge and use wool supplementary weft with wool warp…

This last one is an old piece that I wove back in 1997 just after I came back to my home in Chile from Peru where I had studied a supplemental-warp technique for the second time as well as the creation of four selvedges. I had also recently visited a sheep station in southern Argentina where the owners showed me a belt that the Mapuche wife of one of their former farmhands had woven and this had inspired the patterns and colors…

mapuche-bag-front-and-backSo, I haven’t done a whole lot with store-bought wool. Living in the tropics where wool cannot be bought just might have something to do with it.

I have more pendants in mind to weave this week and, if things go well, I will get to dye the ikat project.

Let me leave you here with some projects from friends and online weaving buddies Cheryl, Jan and Jane…three of the weavers who are taking part in a guild group project to create a bag for their county fair. Each weaver is to create a band of specified dimensions in red, black and white which will be put together to make a bag.  Jan’s (on the left) and Jane’s (on the right) bands were woven using backstrap looms and the Andean Pebble Weave structure. The patterns are in my books. Cheryl’s tablet-woven piece, with her own pattern, was created using a loom with weighted warps.

jan jane cherylHere’s the finished bag which, after the fair, will be raffled off amongst the contributing weavers. It was really hard for me to imagine how this bag was going to turn out. I think it’s amazing!11742664_10206985393054367_1959968408212876236_n

pick-up within an ikat circleAnd so, for me, it’s back to the ikat frame and those circles. I successfully created a nice small circle in ikat in my very first attempt some time ago. However, I am not entirely convinced that this was not just a fluke.  I’ll let you know how it goes.


Backstrap Weaving – Long Time no WAL

It has been a long, long time since we ran a Weave-Along, or WAL, over in the Ravelry Backstrap Weaving group….too long!

jenI don’t know what the person who first created the idea of ‘weave-alongs’ had in mind but, for me, a weave-along means gathering a group of weavers together to explore structures or create projects based on a chosen theme. While I have lots of weave-alongs with friends as I travel, many of them tend to take place online.

The ‘theme’ could be a structure, like Andean Pebble Weave, which was the theme of the first WAL we ran online back in January 2011. You can see one of Jennifer’s Andean Pebble Weave bands from that WAL at left.

We ran a plain-weave WAL in which we were challenged to design with color rather than complex structures.

We had a Year of the Snake themed WAL in which we made something snake-like in any structure we liked and then, in another, we focused on a particular technique in plain-weave…warp ikat.

So, the new theme for this latest WAL is Key Fobs…lots of key fobs.

key fobs backstrap weaving???????????????????????????????The idea is to make short and narrow warps over and over again and turn out lots of key fobs. There may be the temptation to create one long warp and cut it into several fobs. Of course that would be more efficient, but the idea, as far as I am concerned, is to have people warping and setting up a loom over and over again. I can’t place enough emphasis on the importance of warping practice and it is the lack of confidence with this part of the process that tends to stop people from trying backstrap weaving or advancing beyond the basics. So, rather than weave one long band, I propose making many short ones.

The fobs can be in any structure…with pick-up patterns or plain-weave…a single solid color or a riot of stripes. Weave one and then another…warp, make heddles, weave…over and over again until you are winding those warps smoothly and efficiently and not dreading the heddle-making process because it will have become so easy… and maybe even enjoyable?

??????????????????????We can take advantage of the fact that  we can weave on the tiniest of warps using a body-tensioned set-up…

keyfob-loomThe other advantage of weaving individual key fobs, each on its own warp, is that each one can be started with a third selvedge. The selvedge is the edge of woven cloth that will not unravel. The two sides of a woven band are selvedges. You can create a third selvedge by starting to weave at the very end of the warp rather than having a fringe there. The starting end of the warp is the uppermost one in the above picture. That will be the end that gets passed through the metal ring of the fob, folded and sewn down…no need for hemming or extra folds as that end will not unravel.

??????????????????????I use some kind of metal rod at the start of my weaving and lash that to the loom bar. Depending on the weight of yarn or thread that I am using I use piano wire, a bicycle spoke or fine double-point steel knitting needles.

OLYMPUS DIGITAL CAMERA3651631230_0ffe08c581_zNote that this is not the way that backstrap weavers traditionally do this.

None of my indigenous weavers use such a metal rod. The use of the metal rod is just one of my ‘things’.

Backstrap weavers here generally use a piece of yarn in place of the metal rod that I use and lash that to the loom bar all the way across the width of the warp. You can see my teacher in Potosi preparing a warp below. She is in the process of lashing the header thread to the loom bar. The bar will then be dragged to the start of the warp and the heavy stake that was used for warping removed.

LASHING EGDE CORD_0And below, you can see a Peruvian weaver tightening the cord which she used to lash the header weft to the loom bar.

tightening the lashing cordAs for me, I like my metal rods. When I have finished weaving and remove the metal rod, I  fill the space that it once occupied with the tail of the first weft shot. I thread the end on a tapestry needle and pass it at least twice through the space. Therefore, when you start weaving, it is important to beat the first weft passes well against the metal rod so that the space the rod occupies is as small as possible.

third selvedgeI am going to use this key fob WAL as an opportunity to sample some yarn. I have some Guatemalan cotton that I want to use to weave a scarf and I think I will use that for the first fob to see how this thread behaves. Such small projects can be good for sampling your handspun too if you do not want to risk possibly wasting it on an unsuccessful larger project. I know that Janet, who uses her beautiful handspun in projects of all sizes, will most likely weave her fobs with handspun yarn. Here’s is her latest Andean Pebble Weave project using her handspun hemp and bast bamboo…

Janet finch ebble weave backstrap handspun hemp bambooShe created the dog paw and cross bone motifs herself…the paws are adorable!

In the meantime, in the Backstrap Group there have been questions about edges and how to make them neat. I know that this kind of response can be maddening, but the truth is, it really just takes practice!

Using a weft color that contrasts witthe color fo the edge warps can help you see better what is going on there.
Using a weft color that contrasts with the color of the edge warp threads can help you see better what is happening there.

I do tell people who have the chance to weave with me, that about 25% of it is being able to watch a demonstration and then doing your best to imitate the moves.

The other 75% is about experience and ‘feel’. A lot of it really is about ‘feel’ and that will come without your even realizing it.

Weavers of warp-faced cloth have different ways of handling their weft. Here are a few tips based on what I do.

Two problems I see with edges are….

1. Wobbly ones…the width wanders frequently from narrower to wider and back again with sudden and frequent indentations.
2. Loose ones…there is exposed weft between the last few warps and along the edge caused by excess weft in those areas.

1.Wobbly edges are usually caused by the weaver being erratic with the way he or she pulls the weft through the shed….getting into a rhythm and pulling it with a certain amount of tension and then suddenly losing it. That’s just all about practice.You can try pinching the edge of the cloth (on the side where your shuttle entered the shed) as you pull the weft through. As you do this, the weft itself is also trapped between your fingers and you will feel it sliding through. This will give you better control and can help stop you from pulling the weft through too hard and distorting that edge. You will be holding that edge firmly and not allowing it to be pulled out of line.

OLYMPUS DIGITAL CAMERAThe second problem with excess weft and spreading warp ends is best explained in video and I will try to add that to the FAQ page on this topic. This topic has been on the FAQ index list for years and I have never made the page for it.

arrow motif red on red panelsA big part of creating straight neat edges, for me, is knowing my yarn and, therefore, knowing exactly what width I can expect from the number of warp ends I have wound with that yarn. And I mean ‘exactly’. I measure down to the millimeter and spend a long time fiddling with my warp and pushing threads around before I pass the first weft.

Knowing my yarn means having woven several samples with it and having taken measurements from those. Samples need to be updated as your weaving changes and improves. If I am simply guessing the width, I might start weaving cloth that is too narrow. The band will want to widen and I might start to have to fight it to keep that initial width consistent. I might fight it harder and more successfully at some times than others and, as a result, the band edges get wobbly.

I believe that there is a place where the threads want to sit and a width that they want to create and, if you know that width and start off there, you should never have to fight the cloth’s urge to widen or contract. In this way and as long as you have a rhythm and are handling the weft in a consistent manner, you will be able to avoid wobbly edges . And that comes down to practice and experience.

I know very well the Clea cotton thread that I used in the red panels above and have been using it for years. This means that I know exactly what width I can expect from a certain number of warp ends in each of the structures that I weave.

As for progress on Panel 3 in the ‘bird’ project…

two of three pre columbian bird panels backstrap weaving…it has been a long week of tying ikat tape and sampling.

I have been tying tape over very long stretches of warp and seeing how different methods affect the amount of dye seepage. Some methods worked better than others but the worrying thing is that there does seem to be a certain amount of luck involved! There are times when I feel that I wrapped two sections in exactly the same way yet they give me different results.

3 color pebble weave samplesI have come to the conclusion that I am not yet willing to risk this on the large white bird panel that I wanted to create where very long sections of warp will need to be wrapped in tape. While the seepage in the first black panel and resulting staining kind of added to the fade-in/ fade-out character of ikat and actually got quite lost in amongst the black and white pick-up pattern, I don’t think that random grey stains on what are supposed to be large areas of white background will look quite as attractive.

So, I have come up with another idea for that third panel…birds patterned with three-color pebble weave. I’ll have the same all-black background as the first panel and tie the same sections to create the bird shapes. For the pick-up pattern, I’ll be adding a third color…no prizes for guessing what that third color might be. This means that it would be nice to have some red in the other two panels as well. I guess some red weft twining along the bottom might look good.

Here I am sampling for that. If only I had made the samples narrower, I could have turned them into keyfobs for the WAL and had a two-fer 🙂

See you next week…


Backstrap Weaving – Fancy Footwork

I got distracted again this week. I  love getting distracted. It’s always good and it’s almost always related to weaving. Between the delightful distraction and a lot of warping, I did manage to find some time to spend at my loom…

ikat and brocade on backstrap loomI ended the brocaded part with seven little stepped peaks and will now weave the rest as seven separate brocaded tabs. I am doing this because I want this panel to match the central panel of my Shipibo-inspired piece which also ends with seven woven strips. The other end will have a weft-twined pattern, probably something that is based on those stepped peaks.

Now, about that distraction…

All of you who have Facebook accounts will know the feeling when you receive a friend request from someone whose name you do not recognize….do I actually know this person, are they a friend of friend, what is the possible connection, is this just someone who likes to collect friends? I take a look at their page to see if there’s any weaving or fibery content and look for mutual contacts. Very rarely, the person who sent the request will also send a message. In case you didn’t know, there is a message inbox entitled “other” in the message section of your account to which people who are not your Facebook friends can send messages. Facebook does not send notifications for these and you have to go and look for them yourself. When I was first told about this inbox, I found a pile-up of messages dating back to 2010!…ex-boyfriend, old neighbors, requests to meet and weave with me!

Anyway…Yen-Chi Sun sent me a message. Yen-Chi Sun tells me that he is Taiwanese and that he is working with others to revive, document, and re-learn traditional backstrap weaving techniques. He had found my blog and thought that I might be interested in what he is doing :-). He shared pictures which he has allowed me to show here.

10588723_1675462386011227_1421427335_nThe language barrier makes our communication brief and a little disjointed but, from what I gather, Yen-Chi Sun’s group has been studying textiles in museum collections as well as discussing and observing techiques with elderly people who are still weaving in the places where these practices originated.

What a fabulous sight to see in the picture above…all those young people learning to use the newly-built versions of the traditional loom with its unusual tipping footbrace box (what else am I to call that thing!) You can see how the man in the picture is relaxing tension on the warp so that he can open the heddle shed. He does so by moving his feet and allowing the box to tip forward.

This next picture shows warping in progress in what Yen-Chi Sun calls the “five columns warping method”. Heddles are applied, as they are in many places in Asia and Southeast Asia, while the warp is being wound.

10615873_1675462382677894_1084265123_nI love those sturdy forked sticks used as the cross posts and end stake. I am not sure why the end stake is also forked but I think it might have something to do with the placement of threads for the coil rod…just my guess. My Montagnard weaving teachers have a stake in their warping set-up that creates the space for the coil rod. You can see the coil rod as it sits in the warp behind the box on the red warp in the above picture.

supplemntary weft inlay cotton scarffI have created a few circular warps myself, like the one at left,  and was surprised while weaving on them to find that I had a definite urge to have my feet braced against something, much more so than when I weave a piece that has been warped in a single plane. I love how the foot brace in the traditional Atayal loom of Taiwan can be used not only to help the weaver apply tension the warp but also to allow the weaver to relax tension.

Yen-Chi Sun also sent me the following picture from a demonstration in which the parts of the loom have been labeled (unfortunately for us, in Chinese) and so I will have to keep using silly names of my own invention like “tipping footbrace box”.

The following video is wonderful. All the speaking is in Chinese but. honestly, it doesn’t matter. The observers are asking  questions about all the things that I would want to know and you can tell exactly what is going on. It is a delight! Watch that fancy footwork!

The webpage of Taiwan Pictures Digital Archives has many old images of weavers and spinners in Formosa at work like the one below:

taiwan formosa history aboriginal weavers taipics022

John G Kreifeldt, whom I met recently online because of his interest in Asian art, allowed me to show a picture he took of an Atayal woman weaving during one of his visits to Taiwan.

a_modern_atayal_woman_weaviHere you can very clearly see the shed rod (with which I am in love!) Those of you who use a pair of sticks or a forked stick  in a second cross in your backstrap warp which you  grasp and twist to help open the heddle shed, will understand immediately what is going on with that stick. I put together something similar in my ikat piece right now so that I could try it out. But, more about that next week…

As for the kinds of textiles that are produced by these weavers and their traditional uses, I am trying to gather information about that for a future blog post.

1526640_771375512876288_903590434_nAbout that fancy footwork…when I think about it, I have been using similar foot movements to operate warps that I attach to my big toe, that is, a movement which relaxes the tension on the warp. I found that while I was weaving with such a set-up, rather than moving forward to relax the tension on the warp, I would simply flex my foot. It was done unconsciously and was such a natural and logical movement.

Now, I am not saying that tipping and controlling that big and heavy looking box  with one’s feet is natural and easy. I imagine that the feet must go through a long period of training to get to the point where they can manage the moves well.

Which is precisely what Tracy Hudson told me when I asked her to describe her experience weaving in Laos with looms that require some fancy footwork.

tracy hudson

In Tracy’s words:

I encountered this weaving method at the Ock Pop Tok Living Crafts Centre in Luang Prabang, Lao PDR in 2013, where I spent six weeks on an internship, working with the traditional textile collection.
Katu weaver LaosOne photo shows me using Keo’s loom. My feet are flexed to release tension as I open the heddle shed, holding a bar wrapped behind the other shed sticks to assist the process.
The other photo is Keo, a Katu weaver from Salavan Province, my teacher & friend. You can see how all her toes are involved in the adjustment of tension. This complex use of the whole foot & toes was the most inaccessible part, since my feet are completely untrained!
When releasing tension, Keo can hold the bars high in her toes while flexing back with her feet. When I do this, there is a danger of losing my grip on the loom bar and it pops over my toes toward my body. So I tend to bend my knees a bit to loosen tension. But the bar still has to be propped high on the toes, so that it doesn’t drop to the ground beyond the feet.
Tracy has made a video available on Youtube of a Katu weaver at work which includes their beadwork and you can read more about her experience in Laos on her blog.
The pieces that make up the backstrap looms used by the Li weavers of Hainan Island are beautifully constructed and include bars with decorated paddle-like ends against which to place the feet…
OLYMPUS DIGITAL CAMERA
A Li weaver demonstarting at the Santa Fe International Folk At Market. Picture by Pam Najdowski.
A Li weaver demonstrating at the Santa Fe International Folk At Market. Picture by Pam Najdowski.
I love seeing experienced toes and feet in action with the dexterity of hands and fingers. I found that my pathetic gringa big toe got sore and chafed with the rubbing of the tightly twisted handspun wool when I was weaving with my teacher Maxima in Cochabamba, Bolivia. After a couple of hours I transferred my warp to her big toe and we both wove attached to hers!
???????????????????????????????
Toes can be used to tension the warp while making heddles or weaving or even to tension the heddle string. Below you can see my teacher Hilda using toes to hold her kinking overspun yarn taut as she makes heddles…
hilda making heddles
A big toe makes a fine warping stake but toes can  be employed in other ways during the warping process…
Dennis Penley collection C Philip Willet
This picture of a gentleman in Ecuador winding a circular warp was taken by Dennis Penley in the early 1960s and is used with the permission of C Philip Willett.
The first time I got to use a foot brace with a circular warp was when I was visiting with Ju Nie, a Montagnard backstrap weaver, in North Carolina. When you don’t have the traditional items on hand, like a nice hefty piece of bamboo, you have to improvise. Here Ju Nie is using a cardboard roll. The ability to brace the feet is so essential that Ju Nie and her fellow weavers would be unwilling to demonstrate their backstrap weaving if a foot brace could not be set-up at the venue.
me-at-the-loom
cardboard foot brace
Here is another Montagnard backstrap weaver with an improvised set-up outside her home…
From Betsy Renfrew's webpage blackstrapweavers.blogspot.com
From Betsy Renfrew’s webpage backstrapweavers.blogspot.com
A Burmese weaver that I visited  in Massachusetts had not yet found a way to set up a foot bracing bar in her home. She had her circular warp placed around a rod that was fixed to the window frame and sat at a distance away from the wall that did not allow her to push against anything. As I watched her weave, I noticed her idle feet stretch and flex as she unconsciously worked them against a non-existent foot brace. Such is the training and the muscle memory.
Backstrap weavers in Ecuador can weave indoors all year round if they please. They use circular warps which take up little space within the home compared to the amount of space needed for a warp created on a single plane at full stretch. Weavers that I spent time with in San Roque have a permanent weaving area in the home, in fact they had two, with blocks of wood stacked against the wall to accommodate the varying leg lengths of the different weavers in the family. This meant that each person could sit and comfortably brace their feet.
fluffing the woven fabric with thistles Ecuador
And just for fun…
Sometimes backstrap weaving doesn’t involve the feet at all. It is just about kicking back, putting the feet up and relaxing. Here’s one of my weaving friends in Texas…
austin class
Enough about feet. Next week I want to talk more about the Atayal shed rod and nifty ways for opening heddle sheds.
I’ll finish with some great projects from Ravelry and Facebook friends and students…
emerald
Emerald has put together a gorgeous warp with three sections for Andean Pebble Weave. This will be a Christmas gift pouch for her sister.
Julia is practicing motifs from the Peruvian highlands that I have charted in my second book…this is simply beautiful weaving…
CuscoBand_2_medium2
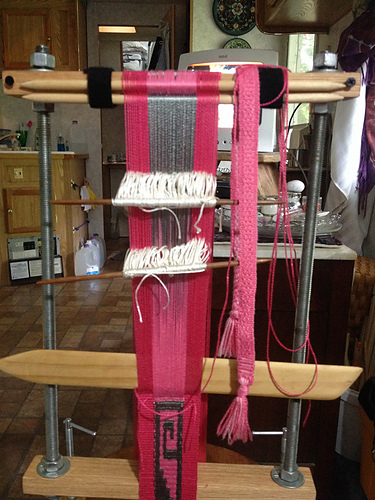
And Marsha is back at the loom, this time with an adjustable vertical frame loom that she built herself. She is using the intermesh technique that I teach in my second book and cleverly combining it with plain weave. The frame is fixed to a piano stool so that it can be raised or lowered as needed.
image_medium (1)
Back to the loom, back to the warping board, and here’s hoping for another week of weaving distractions.