Backstrap Weaving – Tying and Stitching

I have been enjoying some stretches of quiet time in which I have been sewing and tying tape onto a new ikat warp.

The sewing part of my reward time was about converting the long strip of cloth that I recently wove on the Karen backstrap loom into a table square. I cut the strip into five pieces so that they could be joined side-by-side into an almost-square piece of cloth, roughly 24″ x 24″. I think that it is something I can use on tables to display my workshop samples.

I wanted to lay the strips side by side and join them edge to edge using one of the decorative stitches that Bolivian weavers use when they join their woven panels. There are many varieties of these joining stitches and I chose one of the simplest one. The needle and thread follow a basic figure-eight path. The needle emerges from bottom to top a certain distance away from the edge of panel A. Then it dives down in the gap between the two edges of the panels and emerges from bottom to top the same distance away from the edge of panel B. Then it once again dives down in the gap between the edges of the two panels and starts again from the beginning.

I used this joining stitch a couple of times before when I connected wool panels to make lap blankets. Here’s one of the two panels of the purple blanket on the loom…

And, here it is connected to its partner with the decorative stitching…

I took care of raw edges by eventually covering the perimeter of the blanket with the woven band you can see below…

The red and brown blanket got the same treatment. Above you can see the two panels sitting side by side before I sewed them together.I used a contrast color for the join which made the stitching practical as well as decorative. This blanket also had its perimeter covered and raw edges protected with a woven band.

I guess the hardest part is making sure that the needle always pierces the cloth the same distance away from the edge. Cotton seems to demand a higher level of accuracy and I wasn’t confident enough to go with a contrast color for the stitching.  I matched the color of the sewing thread to the cloth and the little inaccuracies give my stitching a fairly ”rustic” look.

Stitching in progress. There were four joins to cover.
A close-up of the joins.

I covered the two raw edges with cross-knit-loop stitches and left the two selvedges uncovered….

I kept the cross-knit-loop stitches as close together as possible. This gave good coverage and meant that I could just turn the raw edge over once and feel confident that the stitching would cover and protect it.

My other non-weaving activity was time  spent tying a new pattern into my next ikat project. It’s another short warp as I am still at the stage where all I am hoping to do is learn and improve my skills before I launch into a ”real” project.

The base colors show against black in the last silk ikat project.

I again used the naturally dyed silk sample skeins that I had been given.

This warp is made of a different kind of silk to that which I used in my last ikat project. It is different in that it is finer, more slick and has a higher twist. I guess it more closely resembles the silk that I eventually hope to use in the real project, whatever that might be.

A major difference is that this kind of silk absorbed the natural dyes in a very different way too. The colors in my last warp were more muted and “sad” I suppose you could say. These colors are brighter and clearer….almost too bright for my liking and I might over dye the project later to sadden the colors if the contrast against the black dye is too high.

It’s the differences in this thread that are of interest to me. Will the fact that it is finer and slicker make it more difficult for me to achieve good firm ties when I apply the ikat tape? Will the black dye bleed under the ikat ties? Will the threads shift more freely out of alignment when I weave because they are more slick than those I have tried in other experiments?


To make it all a bit different to the last ikat experiment, I plan to add two panels to either side of this piece when the time comes to weave it. I hope to be able to weave motifs with supplementary weft in those two panels that resemble the ones I have created with the ikat tape.

When I posted pictures of my last experiment in online forums, questions arose about the tape I am using. It was given to me years ago by my weaving friend Betty. You can see a roll of it at left.

I don’t know where she got it from but the only place that I have seen selling anything that seems to be specifically designed for ikat is Maiwa in Canada.

I used cassette tape with some success before I was given the ikat tape. It worked very well when I was using cold water dyes on cotton. It failed in hot water, though. It held knots well but you had to be careful when pulling knots tight as it could snap. The ikat tape has never snapped.

Others in the forums have mentioned using flagging tape and cut strips of plastic grocery store bags when they have taken ikat workshops. One of the features I like a lot about the ikat tape is that it can be split and torn vertically into strips as fine as you like. I am not sure if that is a good thing if you are trying to use the entire width of the tape to wrap a very large area. I think it in that case that it may have a tendency to split when you don’t want it to.

This is probably one of the last ikat experiments that I did using cassette tape….

I know that you probably can’t make out anything here but this is the pattern that I am currently tying. I  mark the pattern with a charcoal pencil and I use a paint brush with stiff bristles to “erase” mistakes in my marking.

I am finding straight horizontal lines the hardest thing. I tie each bundle separately and just hope that the plastic wraps line up well enough to give a smooth horizontal. I have been tempted to put several bundles together and bind them all at once but I know that if I were to grab my bangs in a bunch and cut straight across, I wouldn’t end up with a straight line.

The other thing I did in my reward time was to cover the journal with the last ikat piece and add it to the collection of little books with hand woven covers.

I was pleased that the three motifs in the middle ended up nicely seated on the spine of the book.

I have actually finished all the tying part of the latest ikat project. Now I just need to carefully inspect it and make sure that I didn’t forget any parts. You can see in an old experiment in the picture below that the top left motif is missing one wrap on its extreme left. It went into the dye bath like that. So, I will be looking very closely over my current pattern to make sure it is complete!

It will go into the dye bath tomorrow. Fingers crossed that all goes well!


Backstrap Weaving – Wool Weather

Finally….I am weaving with the right material to suit the season. It’s winter here in Bolivia and, although I am back in a tshirt and shorts today, we have had a couple of weeks of rather chilly weather. I wove with 20/2 wool as I finished the second of two purple panels that I plan to sew together. While doing so, I used the joined brown wool panels that I recently wove as my lap blanket. It was just the right weight for the cool-ish temperatures that we sometimes experience here in our tropical winter.

two purple wool panels backstrap weavingHere are the two finished panels that have been washed and pressed. The one on the left is actually showing its ”wrong” side so you can see how the narrower of the two patterns looks on the reverse. When both ”right” faces are showing, the wider strips of hook patterns on the two panels are mirror images. I created the patterns using black supplementary warp threads. I now have to decide which kind of joining stitch I will use to connect the panels and what I would like to apply to the edges.

My brown wool piece has been sitting by waiting for its edging. I have not quite made up my mind about that but I now have the brown wool that I need and just need to make some sketches and plan out the pattern. I am thinking about applying a flat band to the edges rather than a tubular one.

brown wool panelsl backstrap weavingIn the meantime, I have warped a sample using the same wool I used for my panels for my next project. The item itself is small but there will be quite a lot of time involved as I hope to weave the piece with four selvedges as well as include a tiny pocket and lots of decorative stitching and other embellishments. My short, narrow sample will simply show me how my pattern will look in my chosen colors of 20/2 wool.

sample warp for wool chuspaI want to make a 4-inch wide pouch…the kind people often wear around their necks at conferences. All participants were given one at a conference that I attended and it turned out to be the handiest thing for storing room key cards, meal passes, the business cards of people we had met along with other bits and pieces. So, I want to weave one of my own and I want it to look like a mini ch’uspa….the woven pouch in which people here in Bolivia carry their coca leaves.

chuspa I wove in Potosi 1997Here’s the acrylic ch’uspa I wove with my teachers in Potosi, Bolivia back in 1997. Using her drop spindle, my teacher Hilda added twist to the acrylic yarn that we had bought in the market. The piece has four selvedges and I wove it down on my knees using a horizontal ground loom.

Hilda showing me how to finish a four-selvedge piece.
Hilda showing me how to finish my first piece with four-selvedges.

I wove a few inches at both ends of the loom and then, when the space in between was too small to allow me to continue weaving the pick-up pattern, I changed to weaving just horizontal bars. Eventually, the space was too small to allow me to continue using the shed rod. It was removed and I continued using only the heddles for one shed while needle-weaving the other.. I finally had to remove the hedddles and create both sheds using a needle.

A shed is created by picking up every other warp end on a needle and then transferring the ends to a very narrow wooden sword or metal rod. Then the weft is passed.

It is a slow, slow process. Hilda had helped me finish my first piece this way but for this, my second piece, I was on my own!

While Hilda wove a band on a backstrap loom and her sister Juliana cut wool to spin, I wove the fabric for the little pouch on a ground loom.

The pouch has the little outer pocket that is typical of many of the Bolivian ch’uspas. I had asked to be shown how to weave a ch’uspa and Julia and Hilda had to consult about how exactly to wind the warp to include the pocket as neither had woven one for many years.

warping-for-chuspaSetting up to weave this odd-looking warp is easy enough when using a ground loom. You simply pound stakes into the ground to hold the extra warp-length for the pocket section under tension.

It’s a bit more fiddly when using a backstrap loom. Some years ago, I tried it here at home using cotton. The warping and set-up went smoothly but I came to the conclusion that cotton was not a good material for this particular technique….at least not in my hands. So, I am looking forward to trying again with wool. It seems to me that a stretchier material would make things a lot easier.

chuspa experiment in cottonThe little pocket sits on the outside of the pouch and is accessed from the inside…

chuspa-inside-outI have turned my woven ch’uspa inside out in the above photos and you can see the little pocket opening.

When I had finished weaving the pouch, after having struggled through the final rows of needle weaving, Hilda and I set about decorating it. She taught me to weave and sew a patterned tubular edging. We edged the pocket with a tripled cross-knit looping stitch and then added a finger-loop braided strap.

This is the pattern  that I hope to use (it is charted in my 2nd book) and my sample will tell me if it is going to look too small in the 20/2 wool. I charted these birds from a small fragment of pre-columbian cloth that Tom Knisely once brought to show me when I was visiting the Mannings.pre columbian bird patternI’ll be embellishing my little pouch in almost every way I know using patterned tubular bands, coil stitches and other decorative sewn finishes, braids and pompoms …it should be a fun project.

finishes


Backstrap Weaving – Two-fers

One of the things I like about the discontinuous-warp technique I have been playing with lately is that it gives me not one, but two opportunities to practice creating four selvedges….a two-fer. So, with the new piece that I warped this week I get two more chances, which makes five in total these last few weeks. I think my skills are improving. At the very least the process is becoming much less intimidating to me. I wonder if one day I will shrug it off and say that it is “normal” as my young teacher  from Pitumarca, Peru did.

Four-selvedge bands woven by Bolivian teenagers-in-training.
Four-selvedge bands woven by relatively new weavers…Bolivian teenagers-in-training.
The first piece on which I learned the four-selvedge technique in Potosi, Bolivia
The first piece on which I learned the four-selvedge technique in Potosi, Bolivia.

discontinuous warp ticlla closing the gapHere’s where I was at last week when I wrote my blog post. I still had the heddles in place and and had just removed the shed rod from the left hand side.

??????????????????????And here is the piece with the gaps closed. There are a few wobbles here and there but I am pretty pleased with it. Next came the tubular edging band and it took me five attempts to settle on the pattern and size. Part of the problem is that I don’t have much of a wool stash and the colors are very limited so, in the end I had to go with a heavier tubular band than I would have liked.

sewing tubular bandLate night weaving and sewing with poor lighting…not a good idea! I had to unpick a fair bit next day. You can just see near the upper left corner the end of the tubular band. I was left with the problem of what to do with all those warps ends. They are easier to deal with when you sew a tubular band to a bag. The band can be continued down into the bag, its end sewn over and hidden away inside. When you look at an Andean textile that has been finished this way, you have to look  hard to find the start and finish of the tubular edging. On all the pieces I have seen, the end has been sewn over and over and the unwoven warps cut. It has been done so neatly that you can barely tell that the resulting blunt end is there. This is something on which I need to work!

So, I wrapped the place where the start and finish of my band collided. It was obvious and ugly and I wanted to hide it. The small bit of  wrapping looked pretty awful. My solution was then to extend the wrapping to about an inch and wrap all four corners  the same way. This would  transform the wrapping into what we weavers like to call, with tongue in cheek, a ”design element”. You can see two of the wrapped parts below.

threaded in tubular band patternI created a threaded-in pattern for the tubular band rather than do something with pick-up. I warped the pattern off center so you can see the whole design sitting next to the upper face of the cloth rather than having to tip the edge to view it. The band on the back side of the cloth is in a solid color. Underneath all  that you can see this week’s new discontinuous-warp project…another two-fer.  It looks like I will be able to use that discarded tubular band warp from last week after all. I think the colors match this new project well.

What am I going to do with these pieces? Nothing! They are samples, practice pieces, notes and lessons in cloth. I would like to have one of the pieces in my wall hanging series represent the ticlla, or discontinuous warp technique, and so, the pieces I am currently weaving are part of my warm-up for that.

???????????????????????????????I so love sitting in front of a fresh warp like this!…terracotta and natural discontinuous warp in the same Navajo wool warp yarn that I used for the Four Seasons piece. This time I warped for a tiny strip of simple pick-up down the center and re-spun some brown wool to match the twist of the Navajo warp to use as the border color. I wanted to use a complementary-warp technique.

I wanted to decorate this one with supplementary-weft patterns again but I chose a “discontinuous” method this time in that the weft does not travel all the way across the warp to turn at the edge. The weft-turns shadow, or outlines, the motif.

discontinuous supplementary weft weft turnsThe terracotta supplementary-weft yarn that I used could have been thicker. I didn’t get as good  coverage with it as I did with the lighter color. The light bumps at the edge of the terracotta half of the cloth are the main weft turns. I had to go back and forth between white and terracotta weft as I didn’t have enough of either alone to complete the project. Those contrast color weft-turns will get covered by the tubular band later. The turns of the supplementary weft lie beside the motifs in a nice outline.

I wove the pick-up pattern wondering if there was a way I could close the gap between the two woven ends without interrupting the pattern. It was a four-shed pattern and I hoped that I would be able to fix things so that I would be in just the right shed for the last weft pass. I think a lot of it came down to luck in the end. The weaving fairies were with me :-).

gap closed on oe side of discontinuous warpIt worked! Now, let’s see if I can manage it on the other side. Hey, weaving fairies, don’t go away yet. I am disappointed with how noticeable the change from white to terracotta weft is in the white section…oh well.

I am very happy with my wee bit of pick-up on this piece but, before I get too carried away, here’s a reminder of what the Pitumarca weavers achieve as far as pick-up is concerned….

Pitumarca ticlla with supplementary warp pick upGranted it is a little easier to weave supplementary-warp pick-up in the small space at the finish of a four-selvedge piece but, oh my gosh, look at that! I would say, and this is just my guess, that the weaver closed the gap at the outer edges where you can see the tiniest fraction of an inch that is without pattern. The natural alpaca colors are so gorgeous. I don’t remember where the start and finish of the tubular band is located on this piece but your eye is certainly not drawn to any obvious spot where the weaver may have finished.

finishing-backstrap-weavingsAbove you can see a weaver from Pitumarca, Peru nearing the end of the warp. You can see how small the space in which she  picks up the patterns and operates the heddles is. One the right you can see how a four-selvedge piece with supplementary- warp patterns (part of a discontinuous-warp piece) has been finished.

While waiting for the brown yarn to dry and have its twist set, I thought about other possible ways to hide the join in tubular bands on these flat woven pieces. Maybe some cross knit looping? I practiced on one of the braided keyfobs that I have been making, the first one which was bit on the loose side. It could be sacrificed for this experiment.

OLYMPUS DIGITAL CAMERAI am not convinced but I will keep it up my sleeve just in case. I think it looks cute, as if I had knitted a wee wool sweater for the braid! I added another Margarita braid to the collection in red and black. 

Jennifer finished her stunning hemp piece with pick-up patterns of Chinchero, Peru. I have charted these in my second book. I like to think of complementary-warp structures as two-fers…one weft shot produces pattern on two beautiful faces.

jennifers chinchero pattern finishedNow she has to choose which face with be the outside of the bag she is planning. I am afraid that none of us in the Ravelry group were helpful when she asked us for opinions. We all liked both sides equally, of course! 

And speaking of bags, Julia once again wowed us with her weaving, piecing together and sewing skills….her creativity!

Julias bag with tubular band strapThe main fabric was woven on her floor loom and is stunning in itself. CindyQ, also in the Ravelry group, wove the blue supplementary-warp pick-up band and had given it to Julia as a gift. Julia’s idea for making a shoulder pad for the slim tubular band strap is so clever. She wove the band for the strap in tubular form and then wove it as a flat band for a while. She braided the flat band  to form the shoulder pad. How cool is that?

Kim varland rabbitbrushstudio dot blogspot dot com(2)Kim Varland, yet another Ravelry weaving buddy, has been playing with the yurt band border pattern that I have charted and explained in one of my tutorials. I love her color combination and she shows more examples on her blog.

Kim has used what I call a simple warp-float technique. While the pattern on the back side of the band is attractive and interesting, it is not truly double-faced. I have shown these patterns to weavers who all love the way it looks on the back.

The other day I was explaining to one of our new Ravelry group members what was meant by a “complementary-warp structure”. I was thinking that surely I had put a description of this somewhere on my blog with lots of pictures. I found it in a post back in 2011 which I had written just before going to Cochabamba to weave with my teacher Maxima. I had promised to start a tutorial page on my return which explained some of these terms which are used for some of the common structures woven by backstrap weavers here in South America.

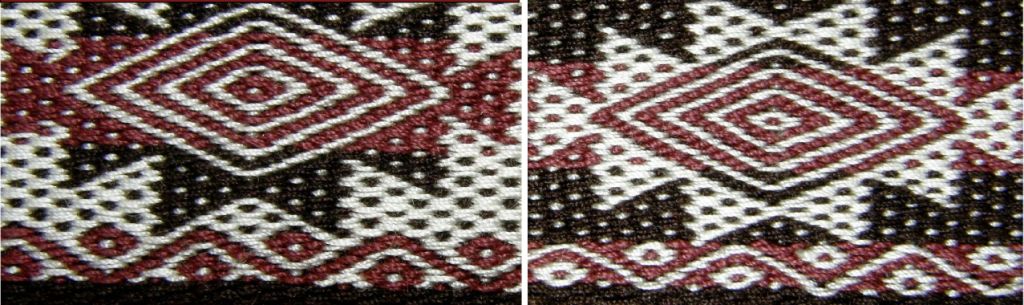
pebble a and bIt turns out that I never did and so , I will copy that portion of the blog post to a new page and will add some other structures to it this week….only two and a half years overdue! Above you can see the double-faced, or two-fer nature of complementary-warp structures.

Backstrap Weaving – The Plain Parts

I live right in the heart of Santa Cruz city. It is a crazy jungle of tangled electrical wiring, crumbling adobe and sagging red rooftops. Even when I am alone in my little condo I can sense the beat of the city as people go about their daily lives…booming tropical rhythms, car horns constantly blaring, the scratching scraping sound as the washer woman in the building next door scrubs the heck out of the clothes. And then there are the smells. At any hour of day or night someone somewhere in the neighborhood is having a barbecue. I live within a stone’s throw of one of the city’s largest street markets. That brings its own collection of interesting aromas.  The football stadium is four blocks away….faint cheers, chants and whistles on weekends and, if the wind is blowing the right way, I get to hear all the concerts for free.  It is colorful and somewhat joyful…nothing “plain” about it, that’s for sure.

I have been going through old pictures. Here’s a reminder that there are some simple, “plain” places to which one can go to escape all the man-made mayhem. Right here in the city there is a very odd and very large and unexpected stretch of sand dunes. Go there mid-week and you can have it to yourself. On weekends it becomes yet another venue for salsa music and barbecues.

OLYMPUS DIGITAL CAMERA???????????????????????????????I am weaving the black panel of my wall hanging project. Nothing plain about this. In fact, I have to keep stopping and checking myself…how much pattern is too much…have I gone too far? Is it too much, overdone?

The thing is, I am still learning LOTS of lessons from weaving this piece and so I won’t be using it for the wall hanging. I will finish it and keep learning from it.

There are definitely some things I would do differently a second time around. Luckily I have a whole lot of green Guatemalan cotton that I can dye black for a second attempt and I think that my silk supply will hold out too.

I can probably make something nice from what has now become another “sample” and I will start again on the wall hanging panel.

I will tell you just one of the lessons I learned. If you are doing plain weave and using black warp and weft it really doesn’t matter if some parts of your piece are a little less warp-faced than others. You won’t be able to notice that fact.

However, when you are using a white continuous supplementary weft, it DOES matter. The smart thing to do is to put that white weft in as a tester right at the beginning. That way you will be able to tell if some of the black warps have a slightly different spacing to others as the white weft will show through. You can then go about shifting and settling the warps so that their spacing is consistent and completely hides the white weft.

At the same time I have been doing a little study of some of the different ways that indigenous weavers here treat the plain parts of their woven pieces. By plain parts I mean those that do not have any kind of pick-up patterning.

???????????????????????????????

Here are some examples…from left to right…

Sample 1: A rolled edge. There are actually 18 brown warp ends there on that border that have been woven and rolled to form a sort of tube edge. The edge is good and thick and would provide very good protection for the sides of a belt. The weavers from San Ignacio de Loyola use this kind of edging for the plain weave that borders their belts.

weaver san ignacio de loyolaSample 2: Two-weft-span borders. I learned this method from my teacher Maximia in the Bolivian highlands. Look at difference in the yellow edge on sample 2 and the green 1/1 plain weave border on Sample 3.

??????????????????????Maxima makes a cross with her fingers while she picks the various colors needed to create her pebble weave pattern. She first takes the borders from the far side of the cross, then works her way across the warp picking her pattern , She finishes by taking the borders from the near side of the cross. This is what enables her to form the two-weft-span borders.

Sample 3: 1/1 Plain Weave. Using  1/1 plain weave  as the border gives the  pattern area another dimension. The border remains “flat” and the pattern area is raised. This is a very nice effect.

Sample 4: Intermesh border. This is the “thick border” that I explain in Andean Pebble Weave and was taught to me by weavers in Ayacucho. Because it is a three-shed structure, it is the perfect companion to the two-heddle pebble weave set-up. The plain borders match the thickness of the pebble weave sections.

intermesh borderIn this pebble weave piece from Ayacucho, the red plain area on the left is woven using the intermesh structure.

pebble weave cell phone pouch backstrap weavingHere are some of the sample bands that Maxima and I wove using the border method in Sample 2. My cell phone pouch uses the method in Sample 4 for the plain red sections.

The method I most use is that in Sample 4…intermesh.

Oline friend Larisa sent me pictures of her project using intermesh using scrap yarn for learning purposes and so the piece does not have as good a contrast in colors as she would have liked. She says that she believes that intermesh is good for “bold statements”.

larisa flowersLarisa tells me that her rosebud motif is based on one from Palestinian embroidery.  Gorgeous!

Julia used Plymouth Yarn Fantasy Naturale to make the pebble weave band, below. This yarn, for me, is the perfect weight for making a backstrap and I have used it often for that purpose alongside some doubled Tahki Cotton Classic for additional colors. You will need two skeins of Plymouth for a backstrap in the dimensions I give in my WeaveZine article.

julia plymouthYou can see one of the beautiful swords in the picture from Magical Moons.

,y backstrap s made from Plymouth Yarn Fantasy Naturale and doubled Tahki Cotton Classic.
My backstraps made from Plymouth Yarn Fantasy Naturale and doubled Tahki Cotton Classic.

Julia wove with me one day and we played with the finishing techniques shown below in which we worked with tubular bands, coil stitches and cross knit looping.

finishing techniquesI gave Julia a piece of wool woven cloth made by Maxima and weavers in her cooperative in Cochabamba so that she could practice her new skills. Here is her finished bag:

julia bag tubular class (2)The broader part of the strap is two tubular bands edging a piece of linen. Beautiful work and she had just the right colors of yarn for this project.julias bag of finishes

~~~~~~~~~~~~~~~~~~~~~~~~~

4mum

~~~~~~~~~~~~~~~~~~~~~~~~~~

Backstrap Weaving – The Positive and the Negative

I have been working a lot with wool this week as I sew pieces of woven wool bands from Cochabamba into little pouches and dress them up with all kinds of pretty finishing techniques. Some of the finishing stitches are easy but they require precision and doing this work increases my admiration for those who do fine embroidery work. I am using wool for my stitching thread.

Working with wool is wonderful but, above all, working with wool is forgiving! This is one of this fiber’s big positive features for me. It fluffs out happily and fills in tricky spaces. Never mind if you didn’t insert the needle the exact same distance from the edge of the woven piece every single time…wool will forgive this…it has a certain rustic look that forgives even if it doesn’t always hide the imperfections. I love it. I am glad that I have spent years getting my “training” using cotton for these sewing techniques. When you switch to wool, it is all so much easier. My indigenous teachers used acrylic when they taught me these things.

??????????????????????I added multi-color cross knit looping to the top edge of this little pouch and wove a strap. You can just see the grey cross knit looped stitch along the right hand edge.

??????????????????????Here you can see the bottom edges of the two pouches on which I have been working this week. The one on the right has been edged with a tubular band and I added what I am calling a “coil stitch” to the bottom of the other…lots of fun to do albeit rather fiddly. I made a braid with a couple of pom poms for one pouch and added tassels to the other. It was fun weaving the strap. I am using just regular knitting wool for these finishes and am not re-spinning or treating it in any way. It stood up wonderfully well for weaving the straps which were woven on 72-inch circular warps.

Note to the pebble weavers out there: can you see the “blip” in the pattern on the pouch on the right? The weaver used the same pebble shed twice instead of alternating them. You see, even the experts get caught sometimes!

finishing techniques on bolivian pouchesAnd then I played with some decorative joining stitches on some of the left over pieces. That’s where wool really was my friend. It was really hard to count the warps and place the needle accurately on that variegated grey wool. If I had tried this with cotton, it would have looked awful. Wool is Cool! (Too bad that doesn’t really rhyme. But try making it rhyme…it’s kind of funny. Ah, the English language!)
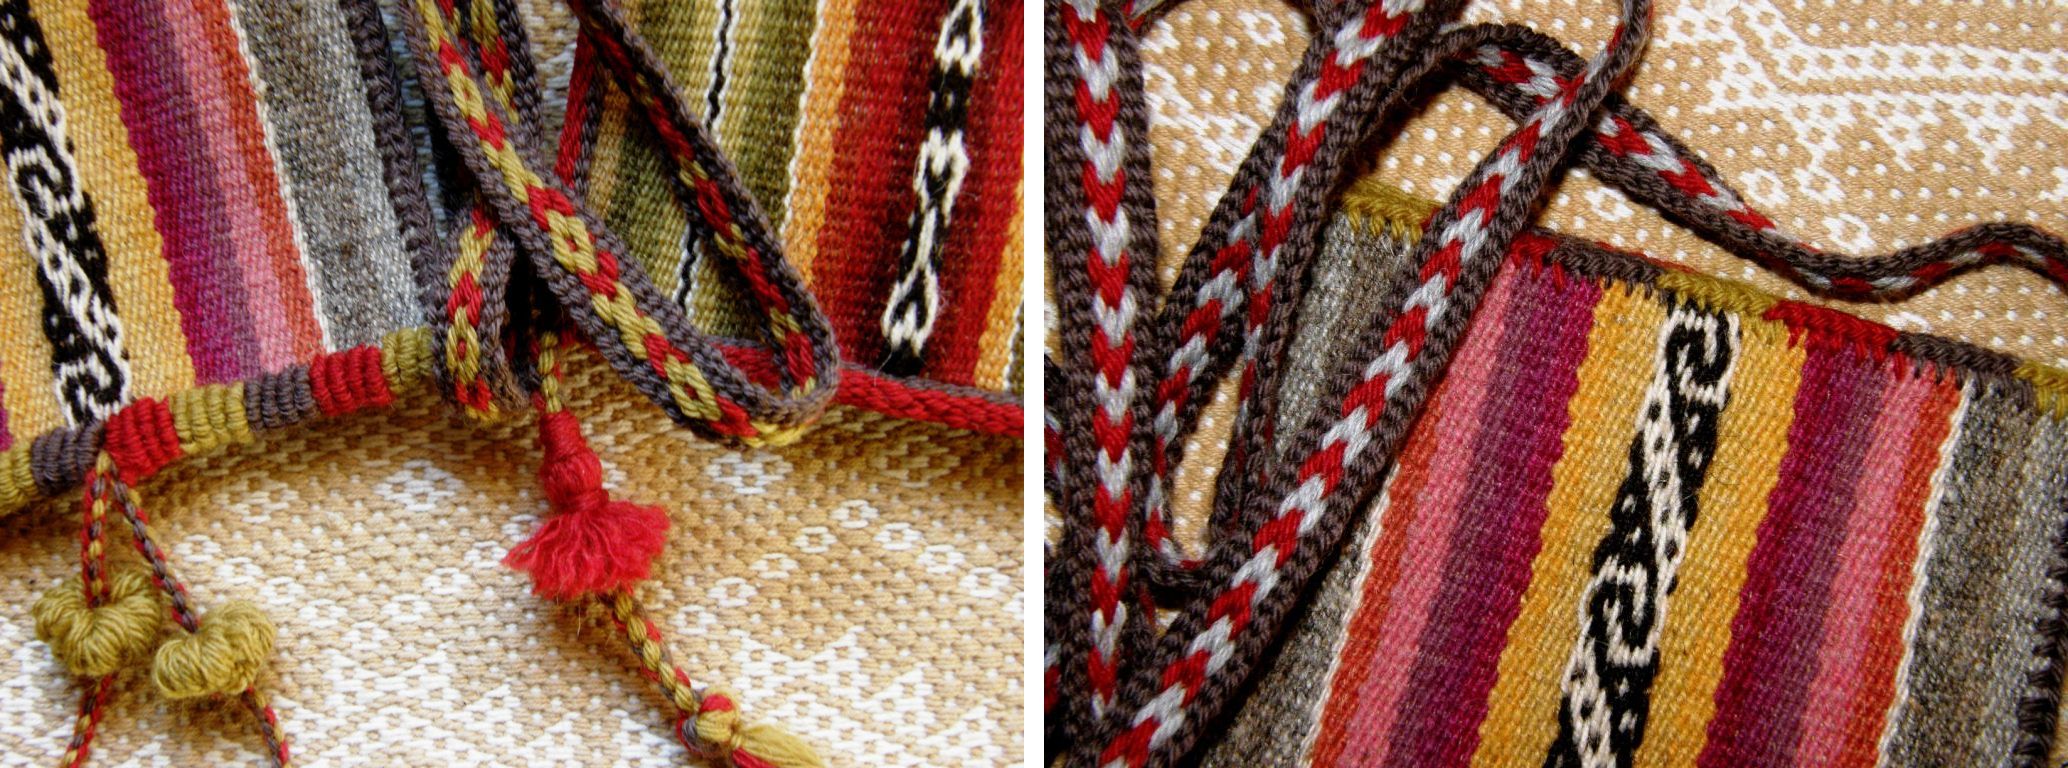
tinkuy 2010Weaving with wool, on the other hand, is a different story. It can be rather unfriendly depending, of course, on your level of expertise in preparing wool for warp-faced weaving.

If not well prepared, each warp will extend its little hairy fingers to grasp its neighbor and protest loudly as you try to open a shed. Worse still, they will start to break. But, you can learn to deal with that stickiness.

Even if you haven’t learned how to prepare the wool to the state of fine, smooth, even, perfection like the spinners in Chinchero do, there  are strategies for dealing with those sticky warps. It can slow things down, and I guess you could call this one of this fiber’s negative aspects. The results, however, are always worth the effort.

Maxima in Cochabamba adds extra twist to her hanspun yarn before winding a warp for a pebble weave band.

Connie's pebble weave1Speaking of beauiful handspun, Janet, Ace, Connie and Gina from the Humboldt backstrap weaving gang got together at Ace’s place in amongst the gorgeous redwoods for a weave-along.

It was a chance to practice among friends and lend a hand to those with a little less experience.

Janet and Connie helped Gina and Ace remember how to make string heddles. Ace is working with his own handspun wool and Gina is using Tahki Cotton Classic to make a backstrap. Janet gave Ace tips on how to handle the wool warp and open the sheds smoothly.

Janet and Connie worked on pebble weave projects. Janet, of course, is using her handspun while Connie used 8/2 tencel to make the lanyard for her name tag for CNCH (pictured at left). I imagine that must feel gorgeously silky in that tencel.

And there they were on Ace’s balcony with their warps attached to the railing calling me to join them from Bolivia via Skype! How cool is that?

Ace and ConnieAbove you can see Ace with his wool warp and freshly installed heddles next to Connie’s latest tencel warp…yummy colors!

Jnet weaving her handspun wool1Janet gets to work on her wool warp while Gina installs heddles on her cotton one. I love that this group is finding time to get together and do this and support each other and I hope that they Skype me every time!

Back at my own loom, I have been sampling supplementary-weft inlay while playing with positive and negative spaces. I showed you in the last blog post how I want to try covering the negative space on a band with supplementary wefts leaving the ground weave exposed to form the motif. So, I have been sampling away and have made some useful discoveries about the changes in weaving width that happen when you do that. This will be something to keep in mind when planning bigger projects later. I have to say that I am loving the way this looks! I am using the 60/2 silk on the Guatemalan cotton warp.

suppleemntary weft in negative spaceI think I will still try to sew this in to something despite the width inconsistencies. I will just keep on sampling and see when I am done what can be made with it. I am keen on dressing it up as I did the wool pouches but I will use cotton instead of wool for that.

positive and negative space inlay in supplementary weft inlay??????????????????????I continued and added a bit of “positive” pattern just to compare.

Now I would like to adapt some Andean warp patterns where both the positive and negative spaces form the same motif and weave those with supplementary wefts.

There are certainly many of those to choose from and I am sure that I can find many on textiles from other cultures too. If you are not sure what I mean, take a look at the motif at left which is from the edge of a belt woven and used by Russian Old Believers.

I will leave you this week with a couple of pebble weave projects.

Larisa has been writing to me via my Andean Pebble Weave Facebook page and sent me pictures of her first pebble weave band using some of the 4 rev patterns from my first book on a wider band. I like the way the hearts look with the border around them. She is going to use this band as the tie for her end loom bar.

larisa pebble weaveAnd Julia continues to adapt traditional Japanese embroidery patterns to pebble weave. She uses the spotted charting system that I show in my second book to sketch the patterns ready to be woven using the pebble weave structure. Inspiring! Background, pattern, positive and negative spaces merge into a spectacular pattern.

julia pebble weave adaptation japanese embroidery

See you next week….