Backstrap Weaving – Smoothing out the rough.

SMOOTHING OUT THE ROUGH.

SAMPLE! My own words are ringing in my ears….if you are using a new yarn or a new technique on your backstrap loom….sample, sample, sample. And don’t trust your first samples for making width measurements for future projects. You have yet to settle into the new technique and things are still bound to change. Keep practicing while you slowly smooth out the rough bits. Sample away happily knowing you can probably make something from the samples, no matter how small or silly! If not, put it in your notebook with lots of notes beside it…believe me, you will forget if you don’t write it all down.
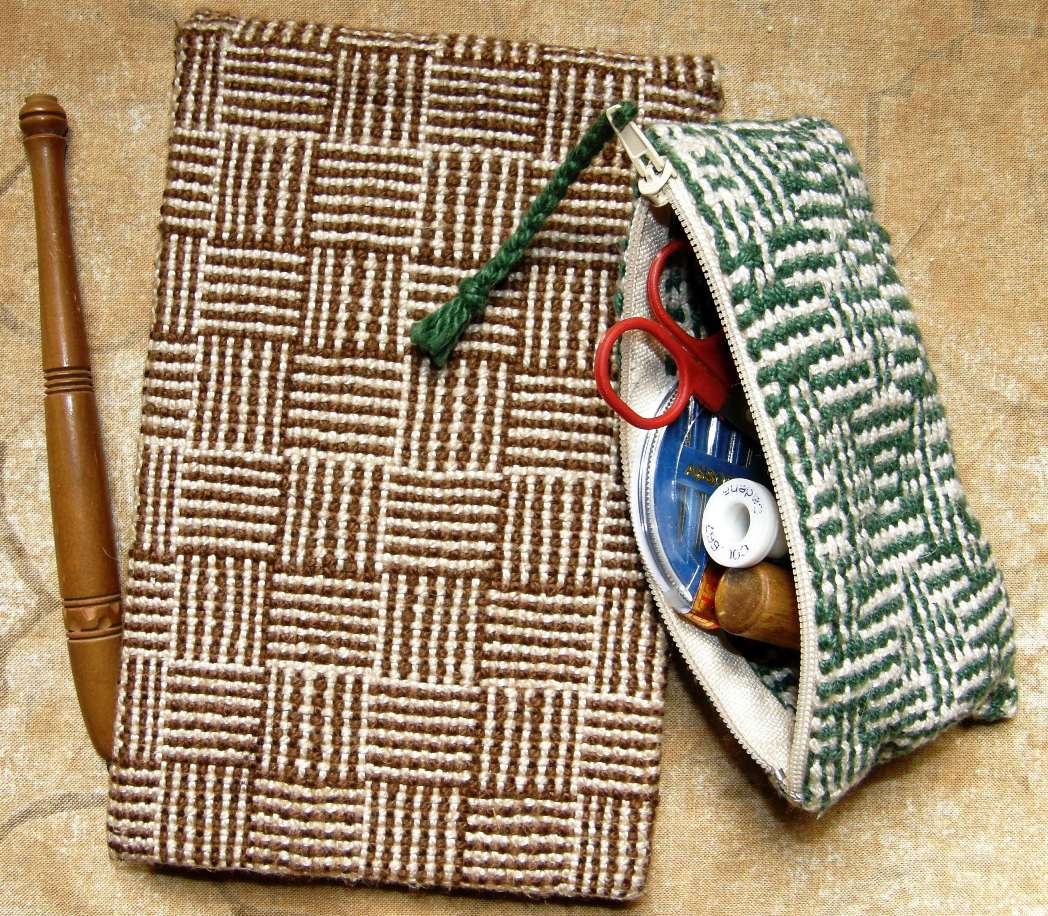
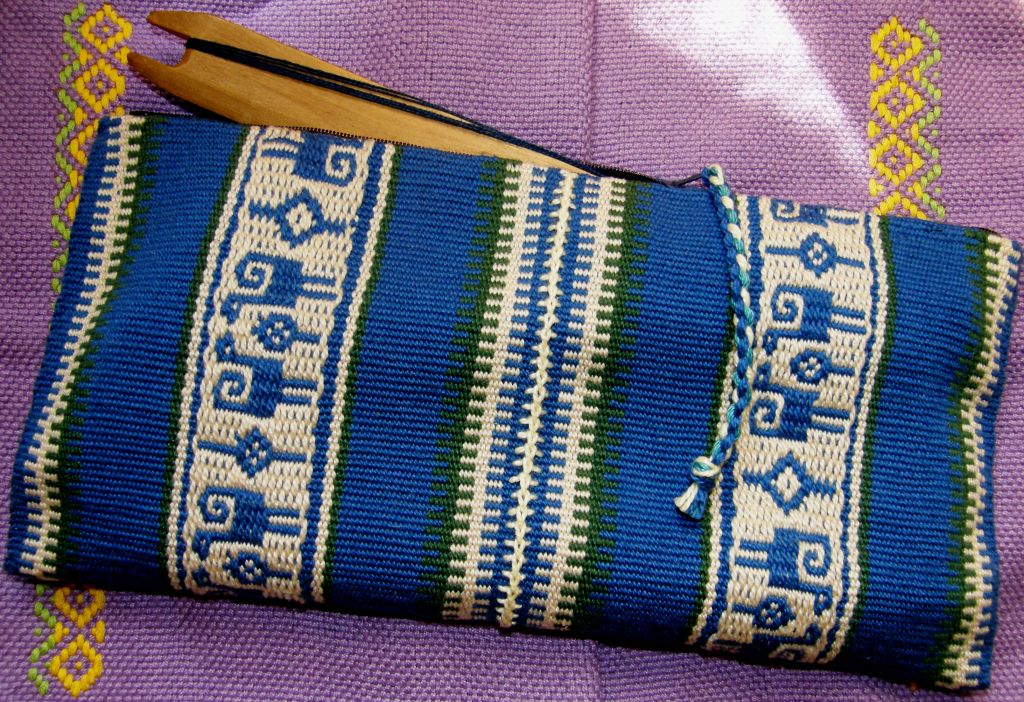
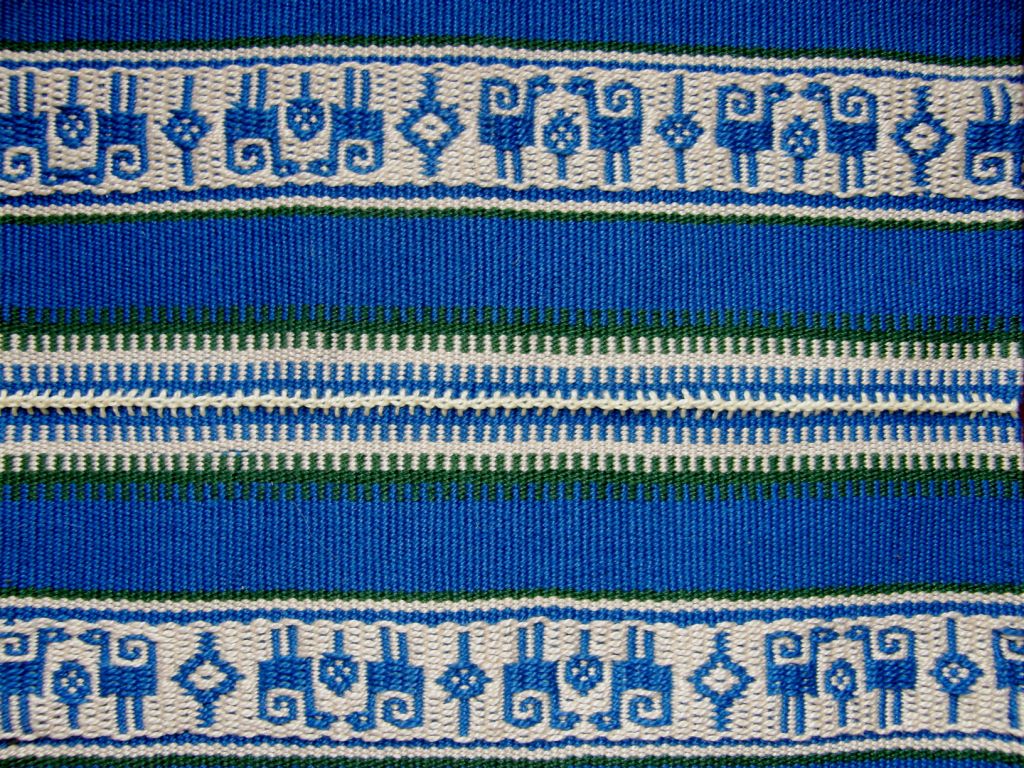
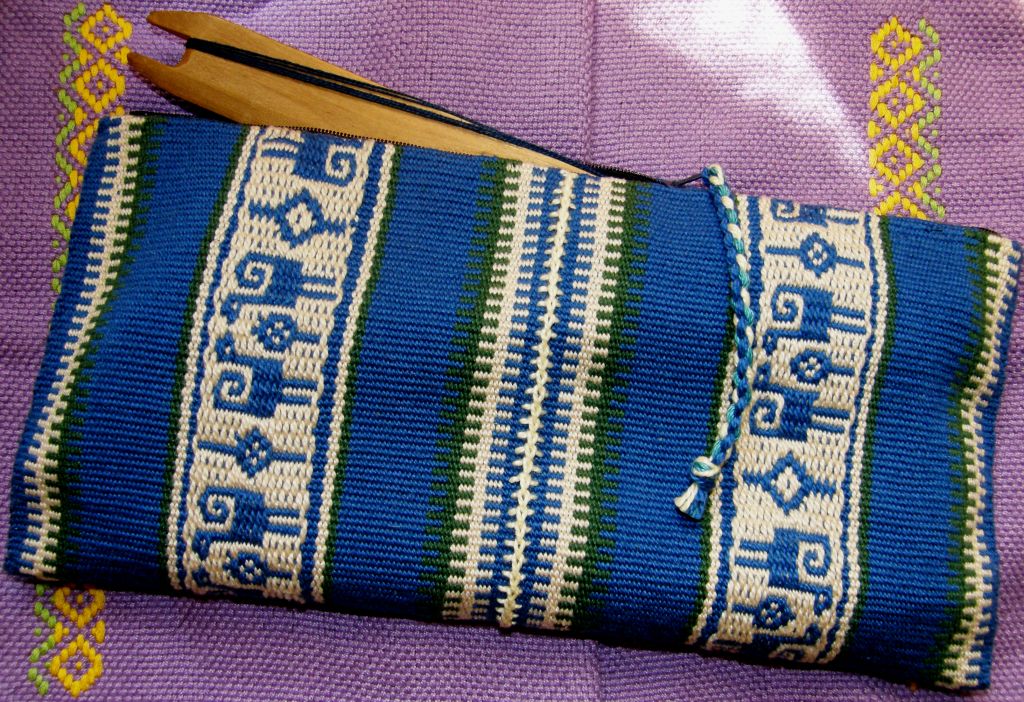
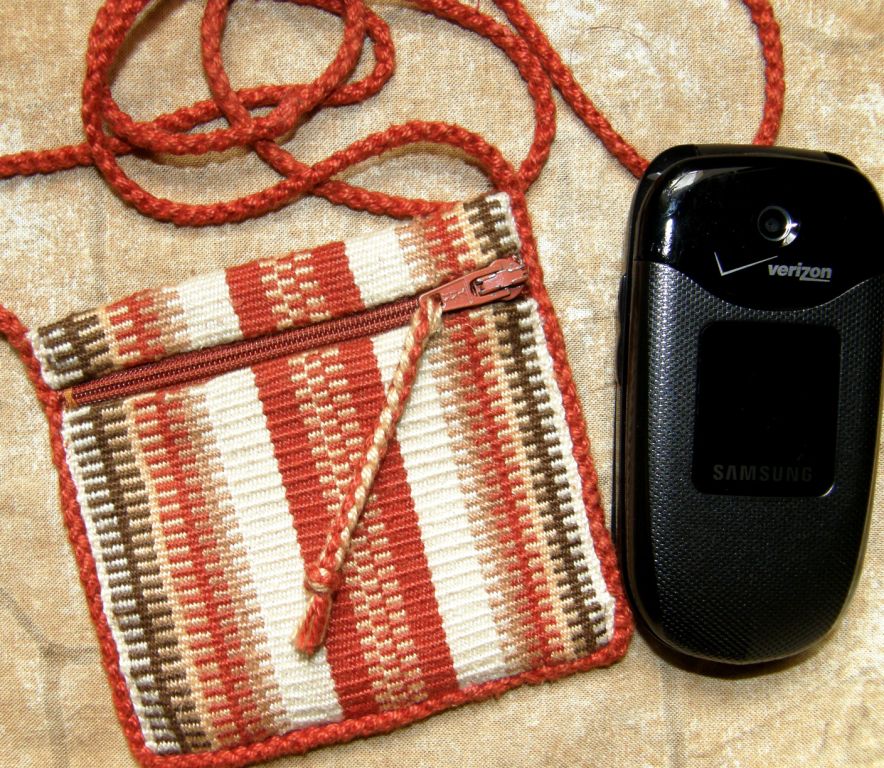
Here are a couple of small samples that I managed to make into decorative and useful things. My log cabin sampler got used as the cover of a flip notepad that always goes with me on my travels. This notebook is now full and I need to get the cover off so I can somehow fix it to another notepad. My first ever shadow weave sample got pulled off the loom as I was satisfied once I saw that it was working and I didn’t really care for the color combination. It got made into a small sewing kit purse which also goes traveling with me.

And never mind if your sample ends up with wonky selvedges and you don’t know what to do with  those pesky raw edges. There is usually a way around all that. The edges of my log cabin piece were turned around the ends of the notebook cover and glued down. Another piece of fine cardboard glued to the inside covered those edges for a neat finish. The zip took care of hiding and protecting the raw edges of the shadow weave piece.

I thought I would show in this blog post some of the finishes that I have used for my pieces, uses I have found for samples and different ways that I have dealt with raw edges.

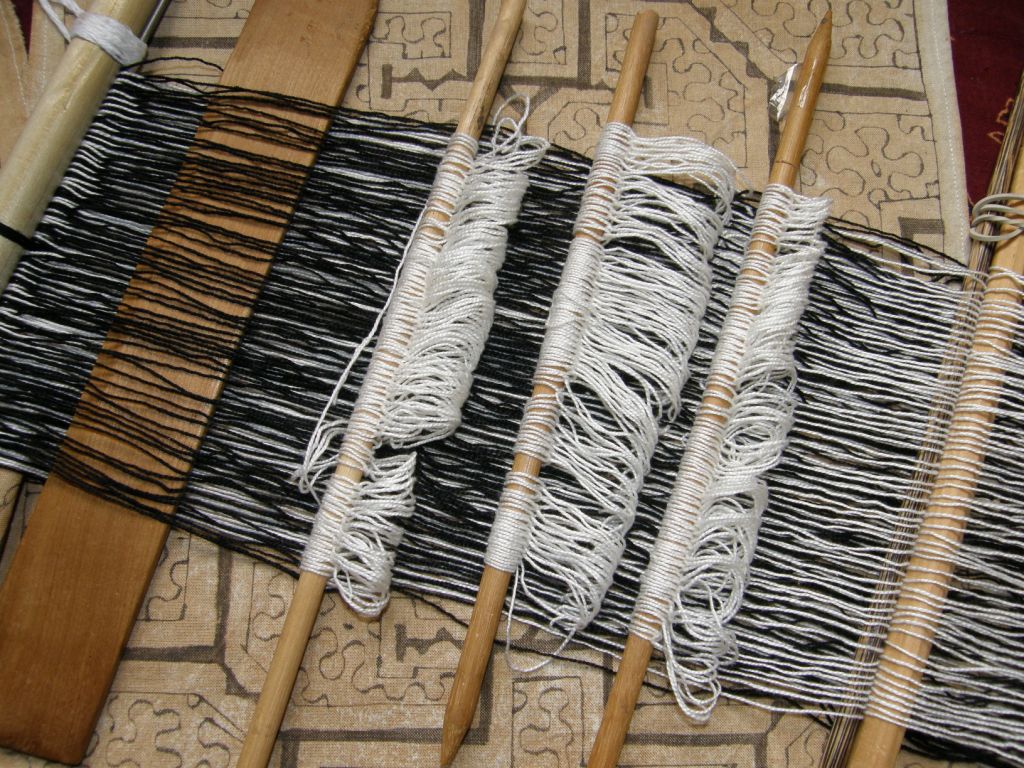
You may remember from these previous posts here and here that I have been trying out finnweave on my backstrap loom. My first samples did not prove trustworthy for calculating the dimensions of my next project and so, what I had hoped would turn out as squares, ended up being more rectangular. Here is my warp set up for my square design samples…
And here are the rectangular results…
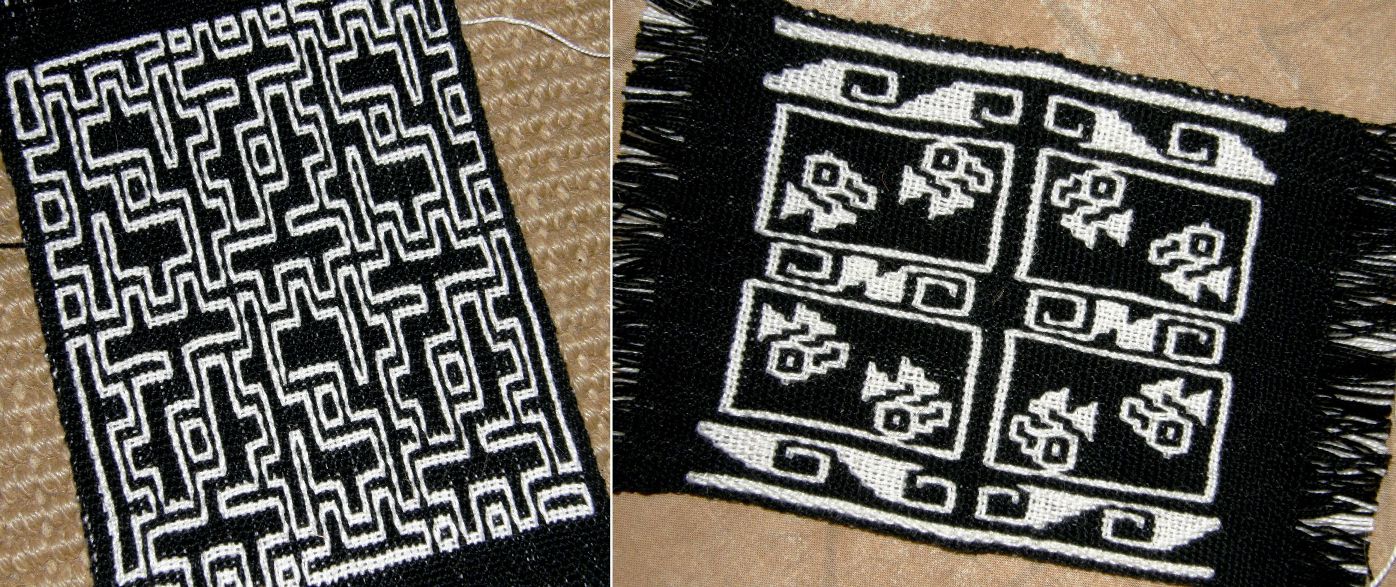
Width needed some adjustments and I learned to beat a bit harder as I progressed. I learned a lot about how to read from the weaving rather than from the chart with the design on the left. This is from one of the Prairie Wool Companion 1982 issues. There is a Chinese lattice work design charted and then three variations provided so that one can weave a set of four placemats. The version I chose is the one furthest removed from the original Chinese design. The design on the right is one I invented using the little pre columbian birds that I wove before and gave me more practice with filled-in shapes.

I was able to make something cute from the two samples…
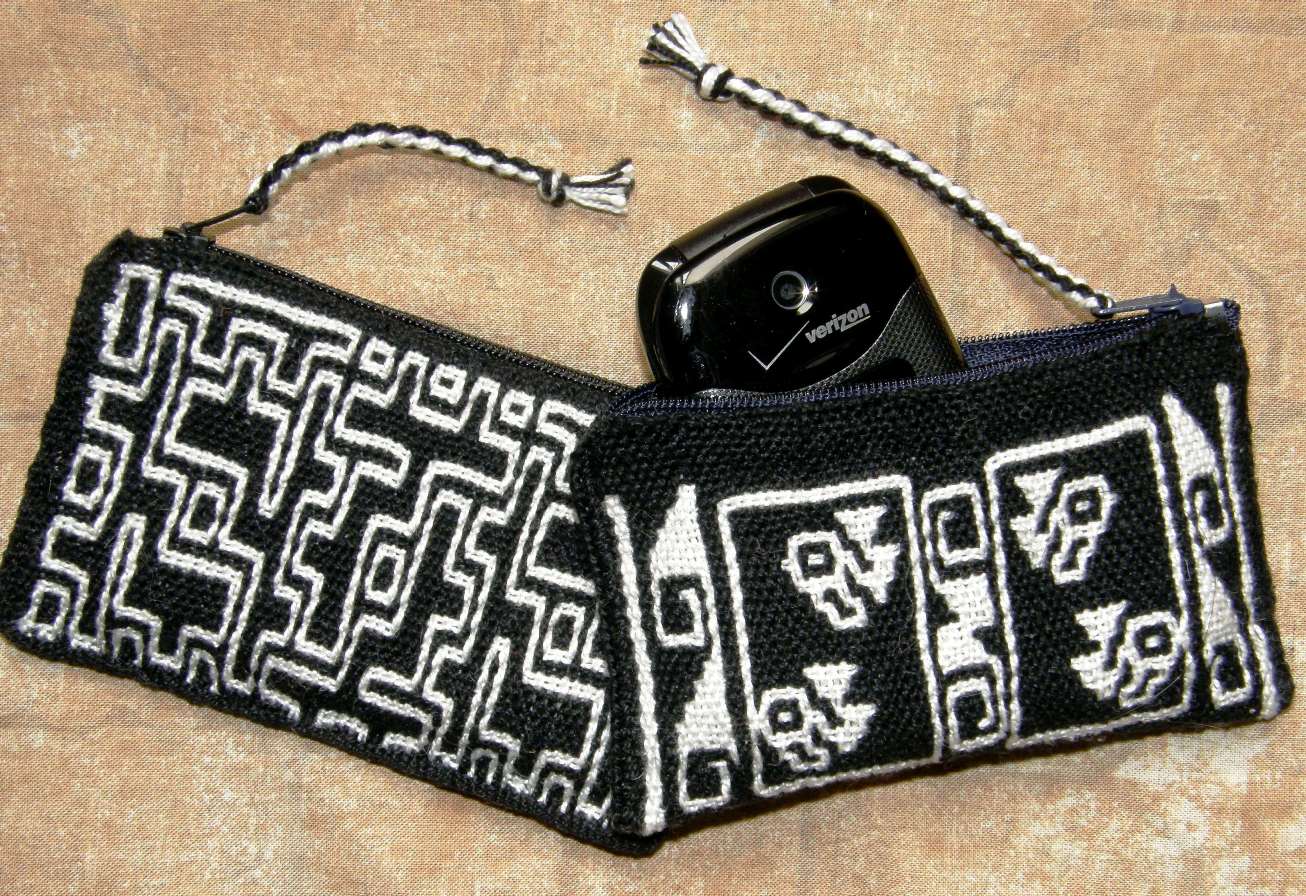
This is a double weave and it is particularly tricky dealing with its raw edges. Folding over two layers to hem is bulky and unsightly and so I followed the advice that I read in an article and wove the start and finish of each piece as two separate layers with open edges.


The idea is to turn both edges inward and sew them together like that. However, I didn’t do that. As I was going to sew in a zip, I cut the white layer back as far as I could and then simply turned the black layer over it. The black turned edge got sewn down and hidden under the zip so all is well and protected and nice and neat to boot.

One thing I was not so happy about was the edges…
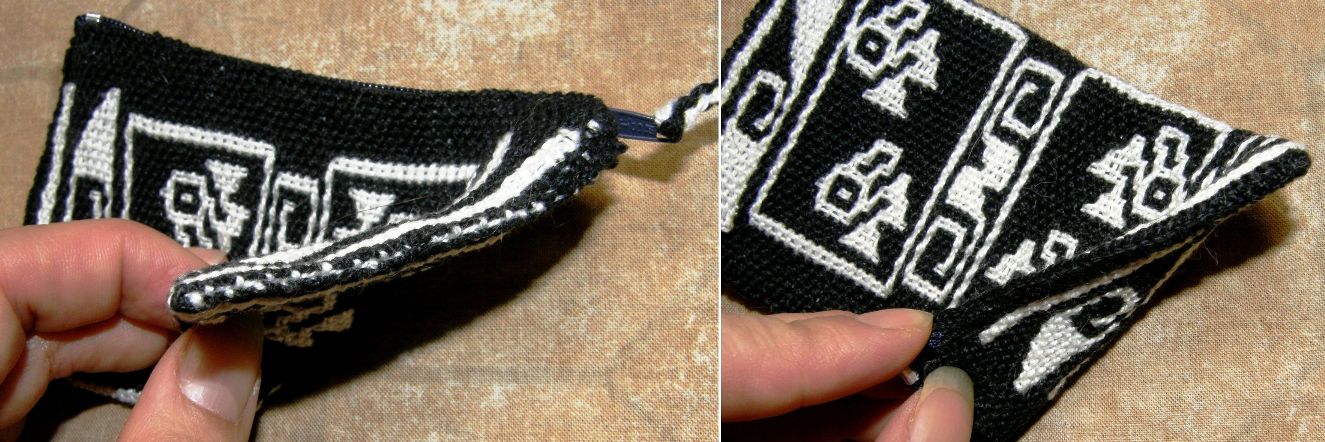
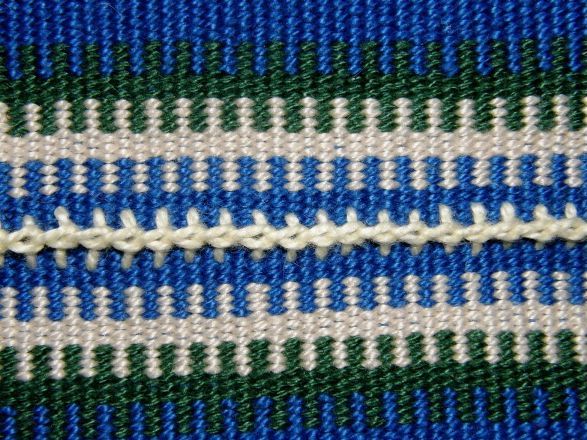
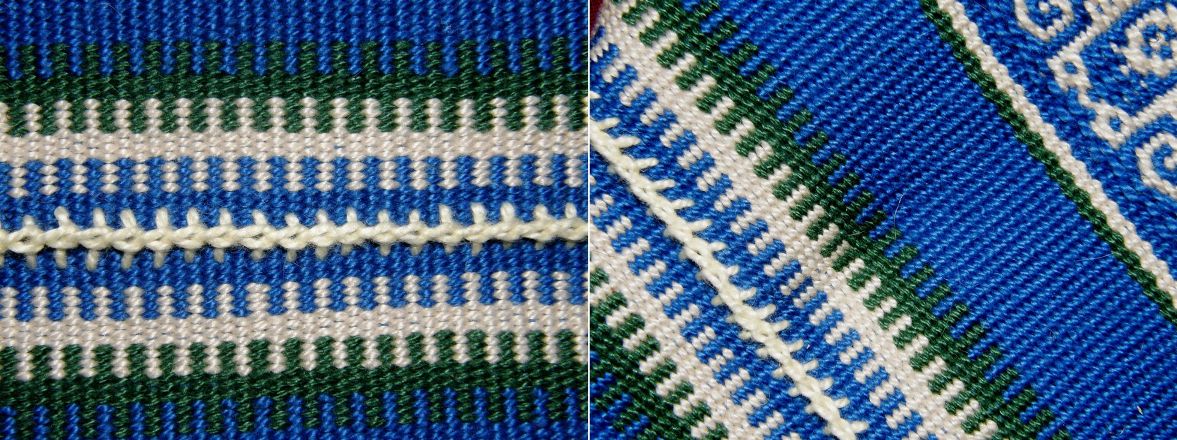
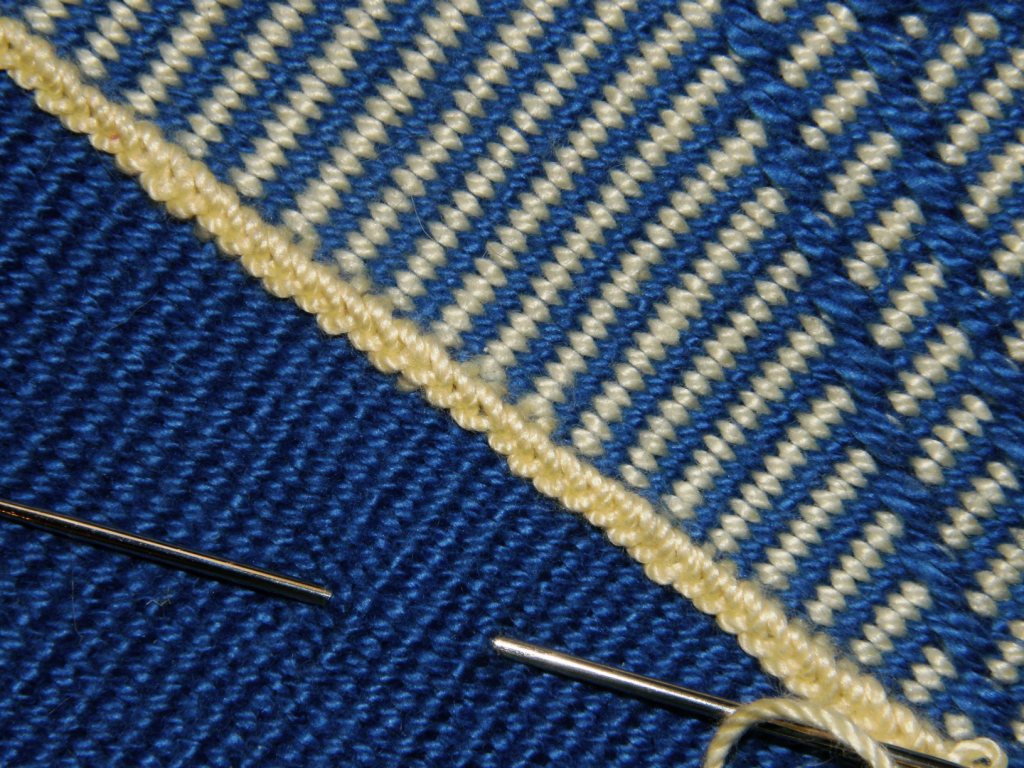
This may just be something that I am goofing up, but to my eye, the edge is ugly as you can clearly see how both layers of contrasting colors come together. A row of single cross knit looping covered that up nicely as you can see on the right. However, my eyes just about fell out…black on black. I had to stand right by the window in good light to do this.

So that was one solution to the ugly edges. On the other little bag, I added one of those woven bands that are woven and sewn simultaneously using the weft as the sewing thread. I used it down the side and along the bottom and it broke the design up nicely between the two faces. A four-strand braid for the zipper-pull was the finishing touch.

Speaking of braids I made the zipper-pull for my loom bag project…remember? – woven bag, braided zip-pull and twined strap.
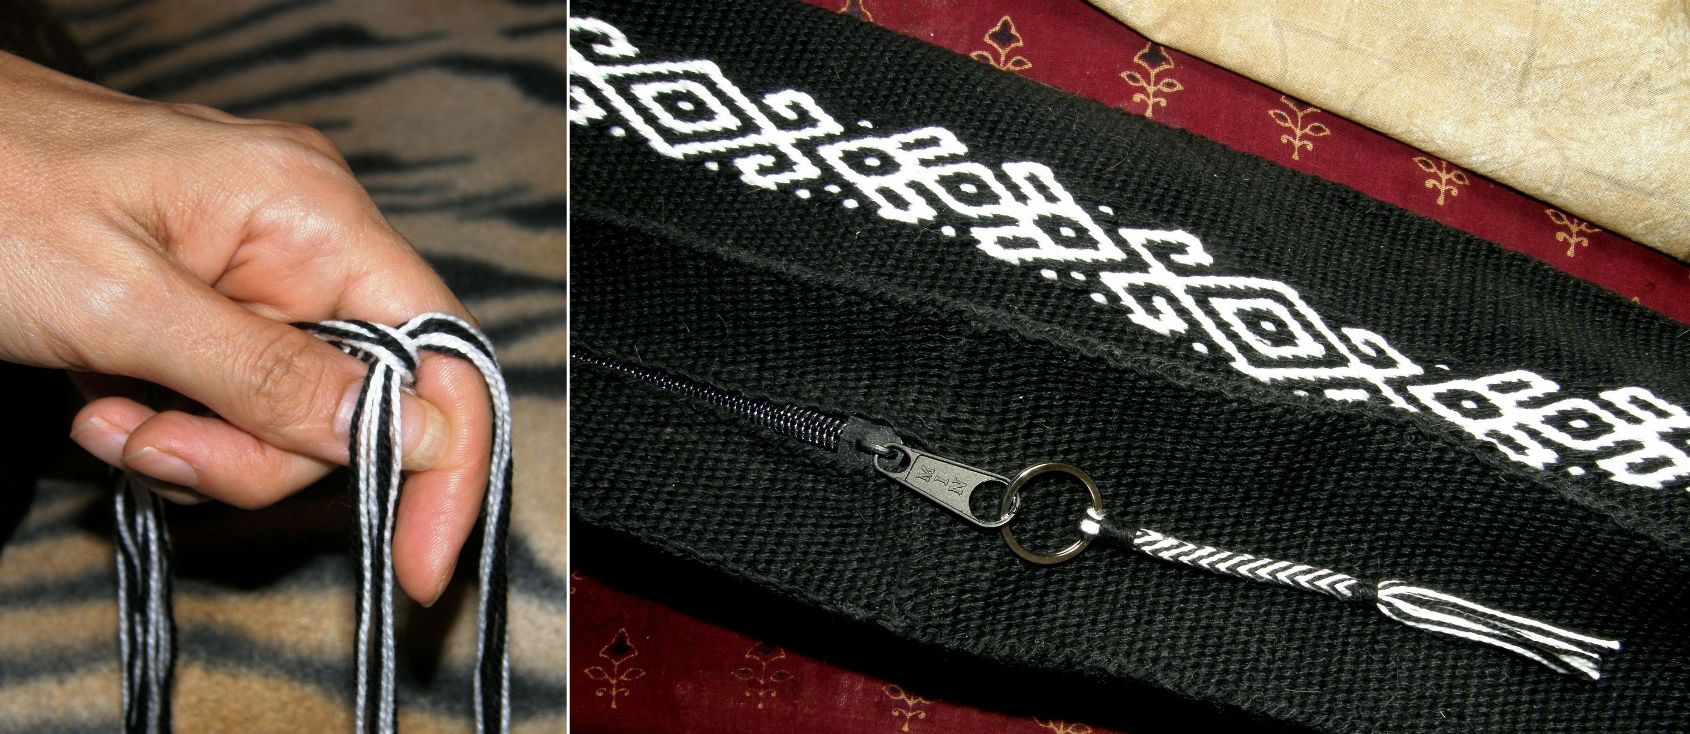

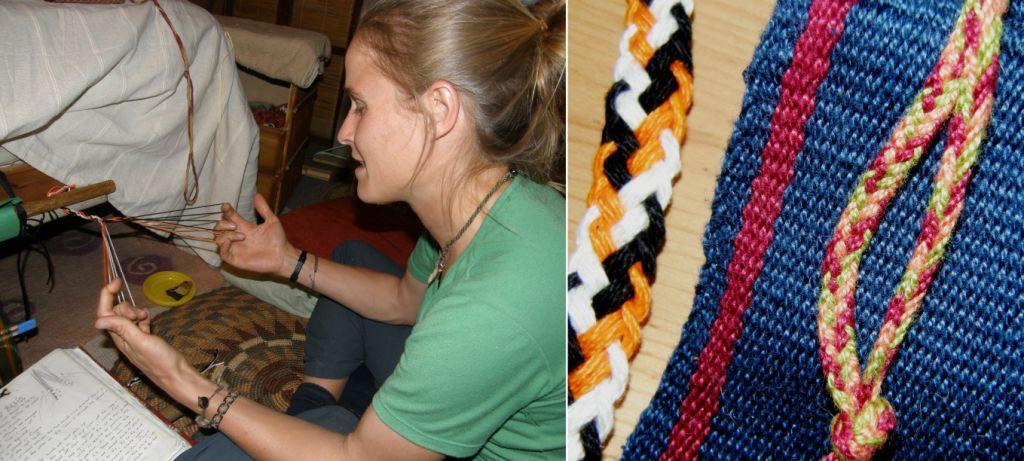
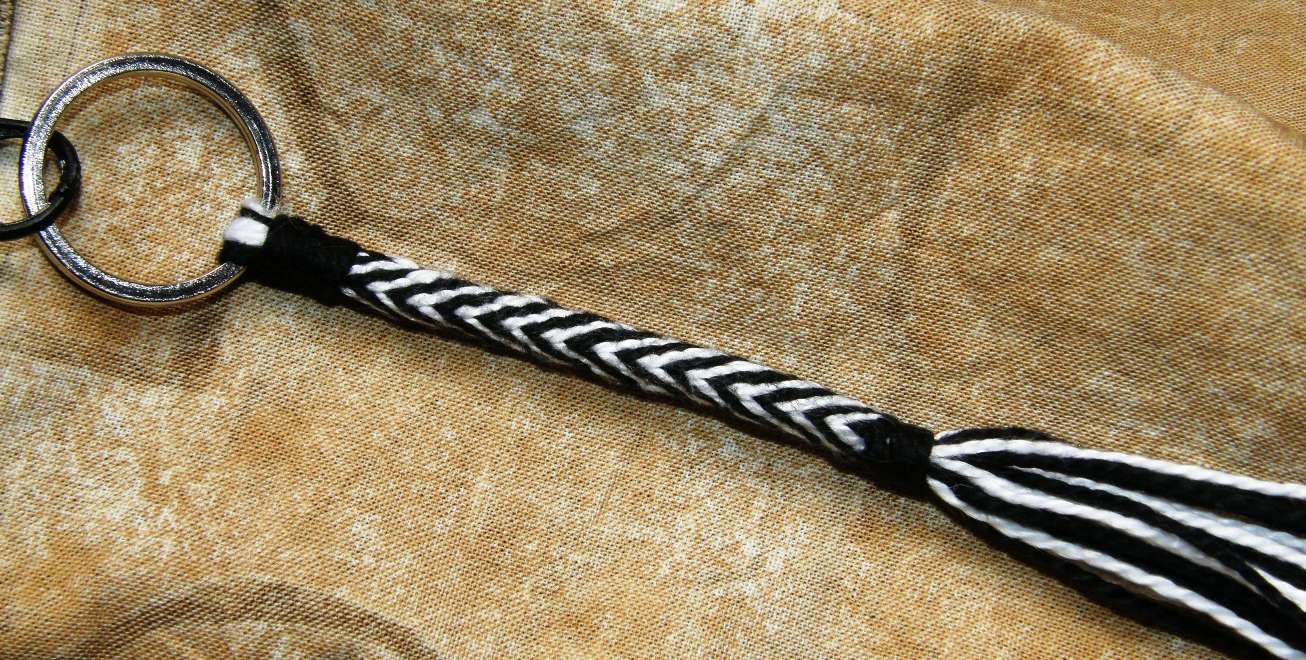
It’s a 24-strand braid worked in the hand as my Peruvian sling braiding teacher had shown me.

I had not done this kind of braid in this size yarn before and so it was a bit of a challenge.

This is the base of the Margarita braid but as, I was so focused on just keeping everything in order while muttering the moves to myself, I did not venture into doing the changes in sequence that produce the diamond designs on the Margarita-style braid.
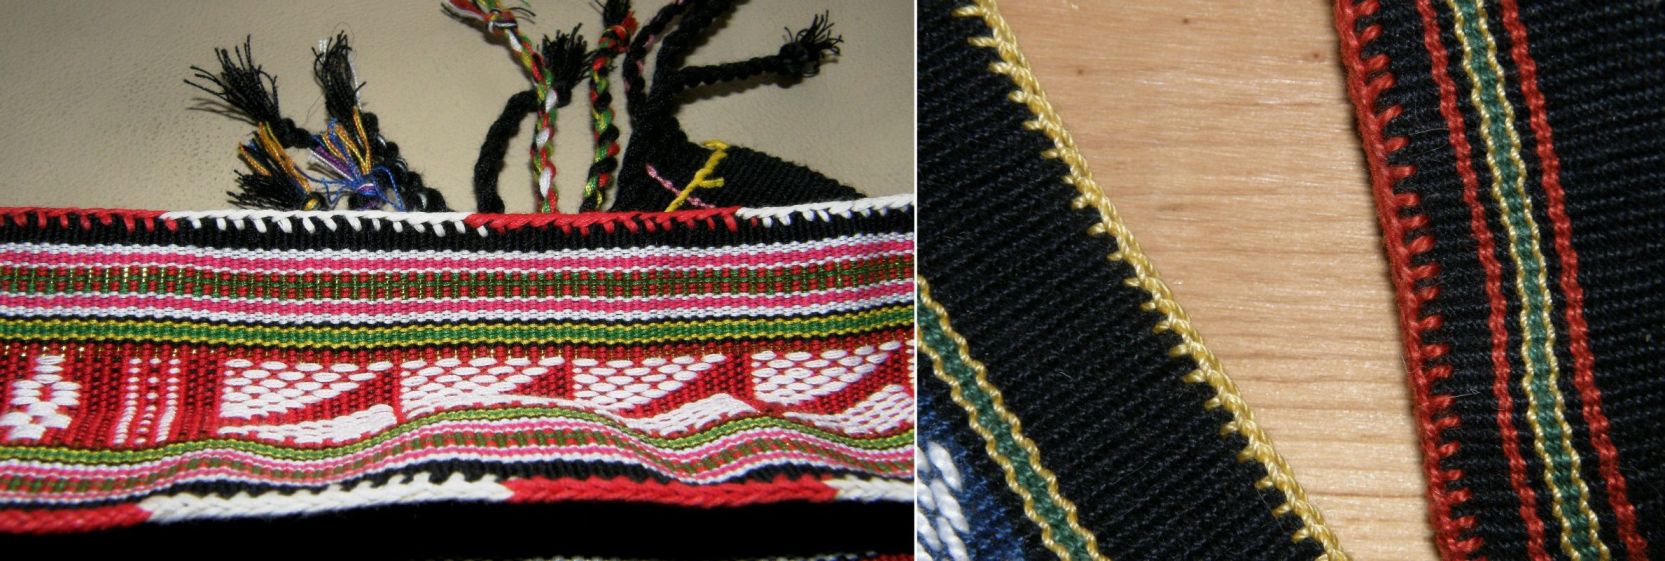
The cross knit looping that I used to hide the ugliness on my finnweave piece can sometimes be added to perfectly good looking selvedges as an extra decorative feature or it can be used to draw attention to or hide the place where two pieces of fabric are joined. This is also known as Van Dyke stitch in embroidery (see the video embedded in this blog post).
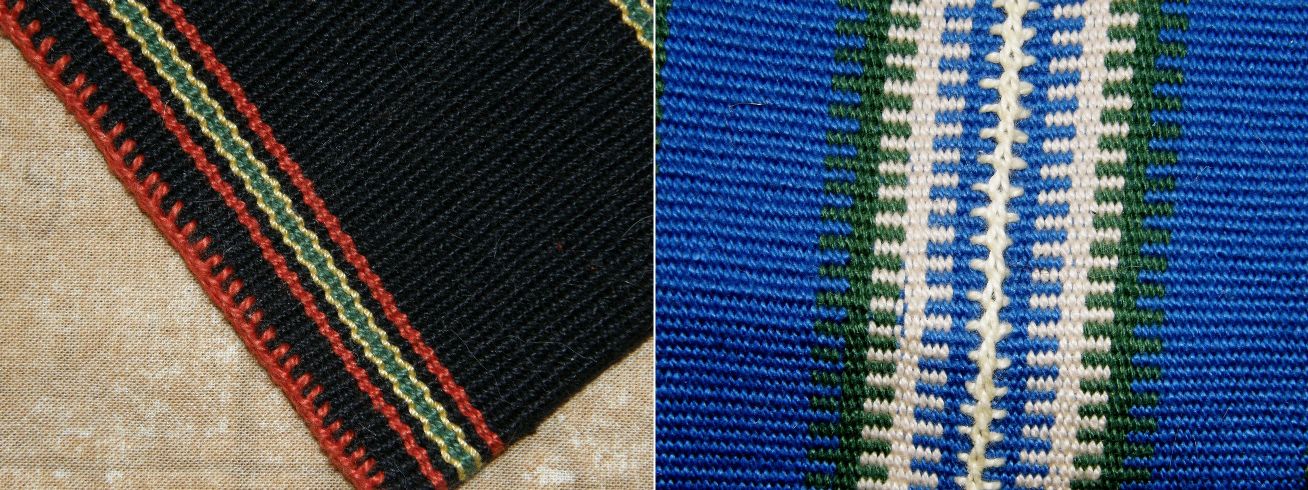
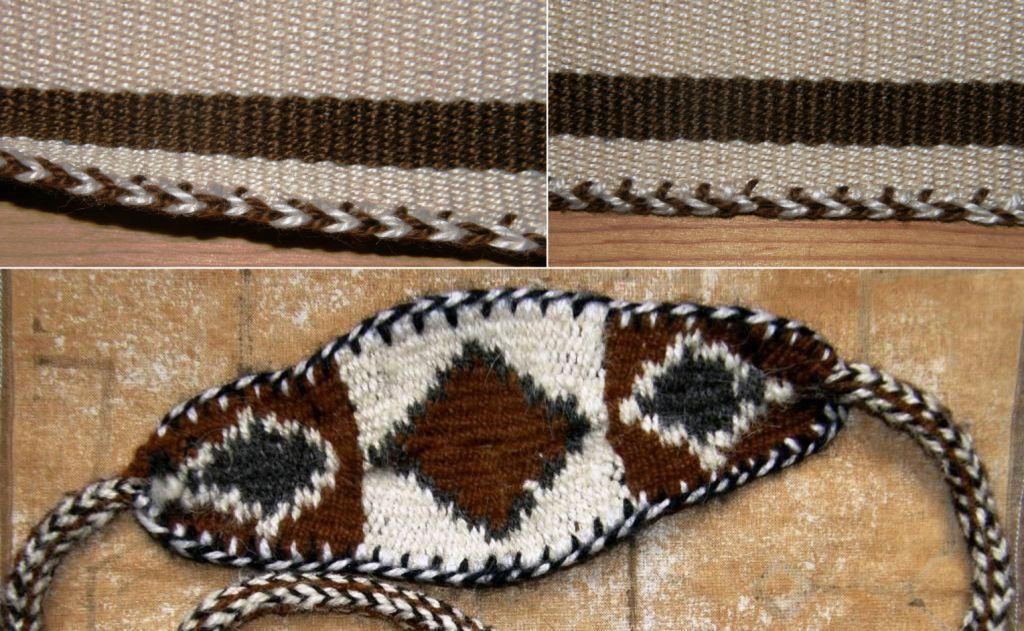
Other things that can be used to disguise a less-than-perfect edge or brighten something that is a little too plain are braids.

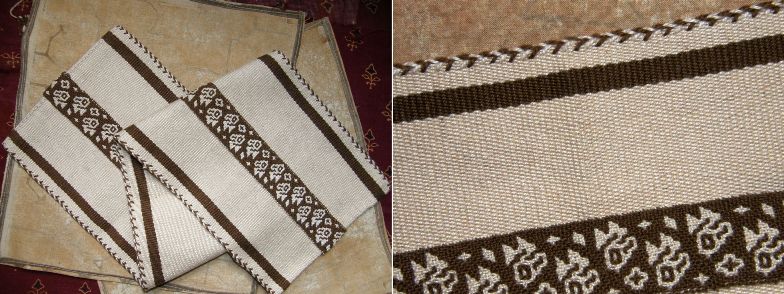
A two-color stitch can look good on the edge of a very plain one-color piece or hide its wonkiness if necessary!
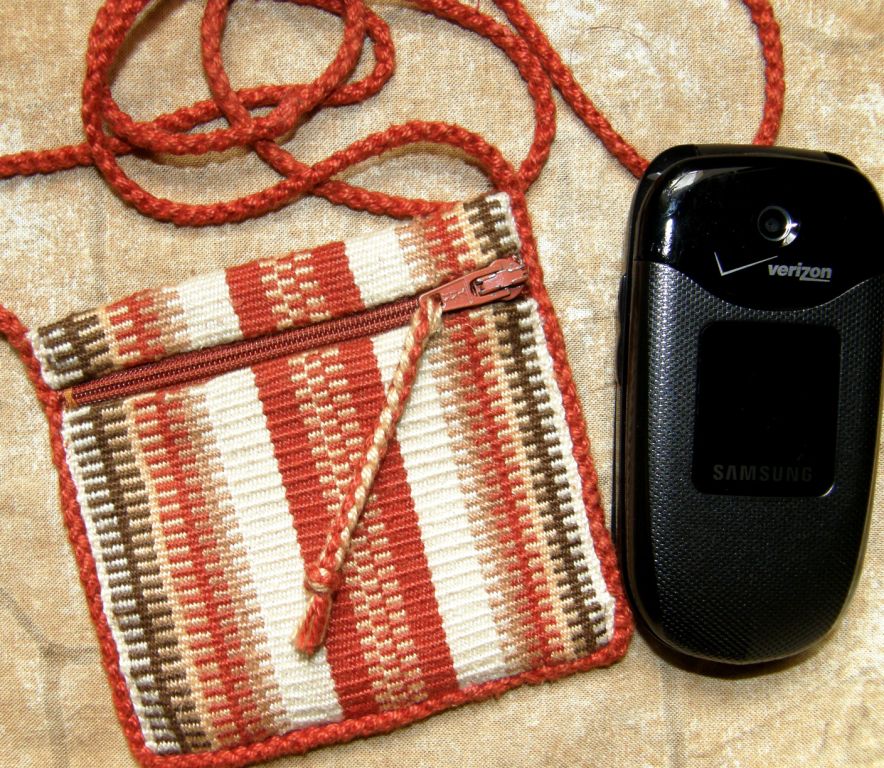


This was a sample I made for a plain warp-faced weave weave-along. I sewed a four-strand braid around the edges which also served as a strap. Again, the zip handily hides and protects the raw edges.

This little pouch was started with a third selvedge which you can see on the right. I sewed across the raw edge with very visible stitches as neatly as I could by hand and then sewed that edge down.

Then there’s good old hem stitching which I only learned fairly recently from this video. I got such a kick out of learning and doing this the first time, I wanted to go around and hem stitch everything!
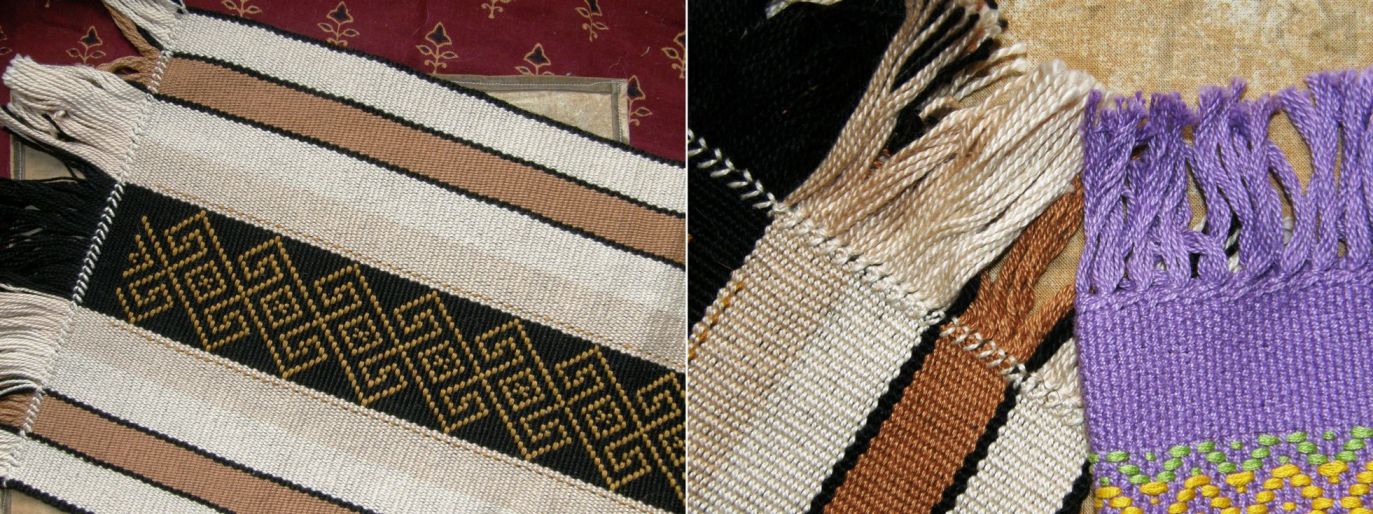
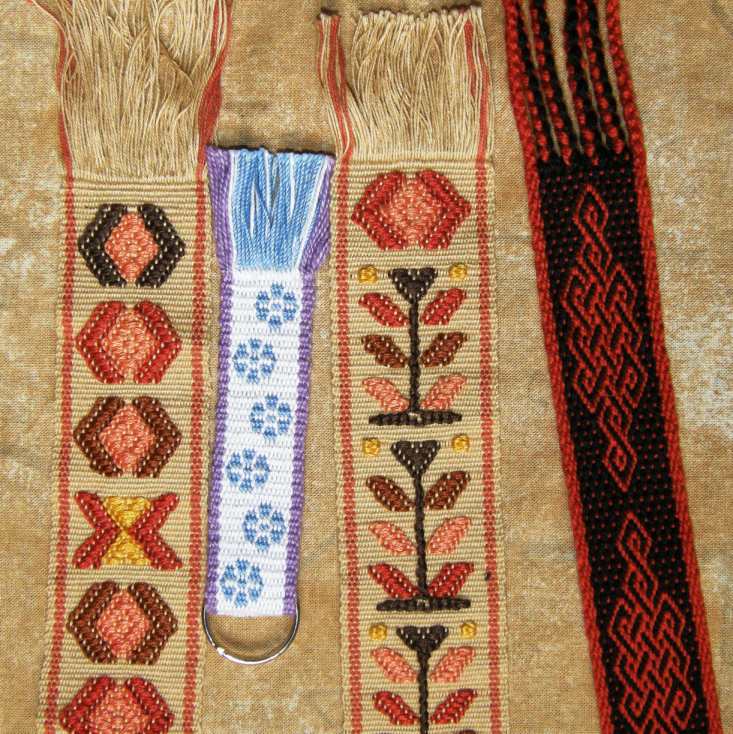
Teeny tiny “invisible” hand stitches seem to work well at the bottom of book marks and keyfobs. Warp ends can also be braided. I like to dab the ends of the braids with diluted white glue and squeeze them into a tapered shape as they dry. I think it looks better than having knots in the ends.


Above are some bookmarks decorated with Guatemalan supplementary weft designs, a double weave key fob and a pebble weave Celtic knot pattern.

I am not so convinced about the way that I chose to deal with the raw edges on these very thick double weave mug rugs.

This came after many attempts to sew them neatly and invisibly. They are too thick for the method I suggested earlier where you weave the two layers separately and turn them in on each other.

I figured if I couldn’t make the stitches invisible I would go for very visible and decorative, and something in keeping with the ethnic nature of the design.

This is the back side. The brown thread cannot be seen on the front.

I sewed these while they were still stretched out on the loom and had to put a mirror in my lap so I could see how the stitches were being placed on the back.

I am open to suggestions for improving this!


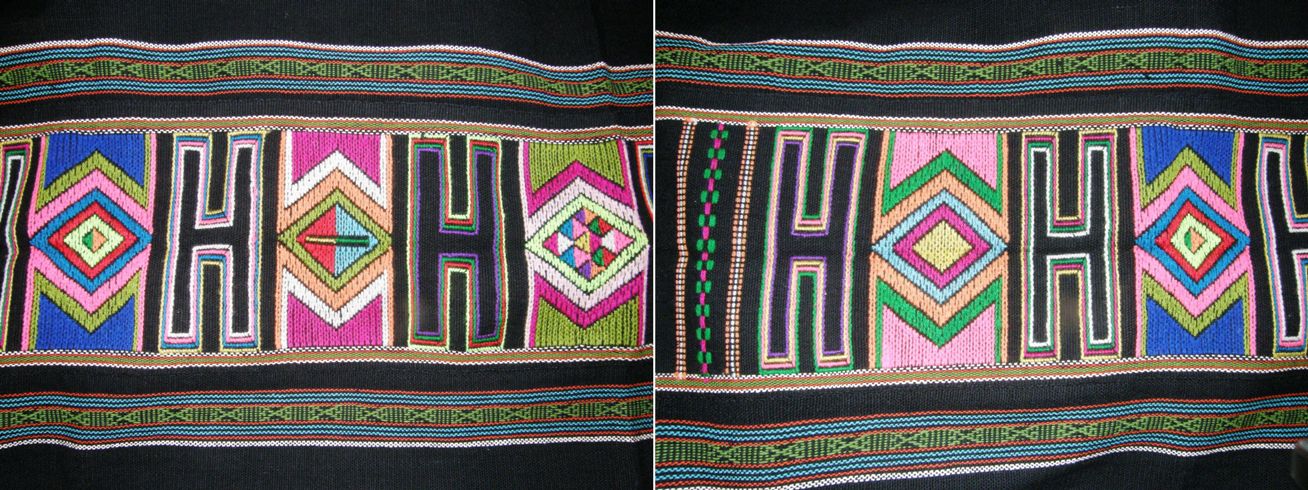
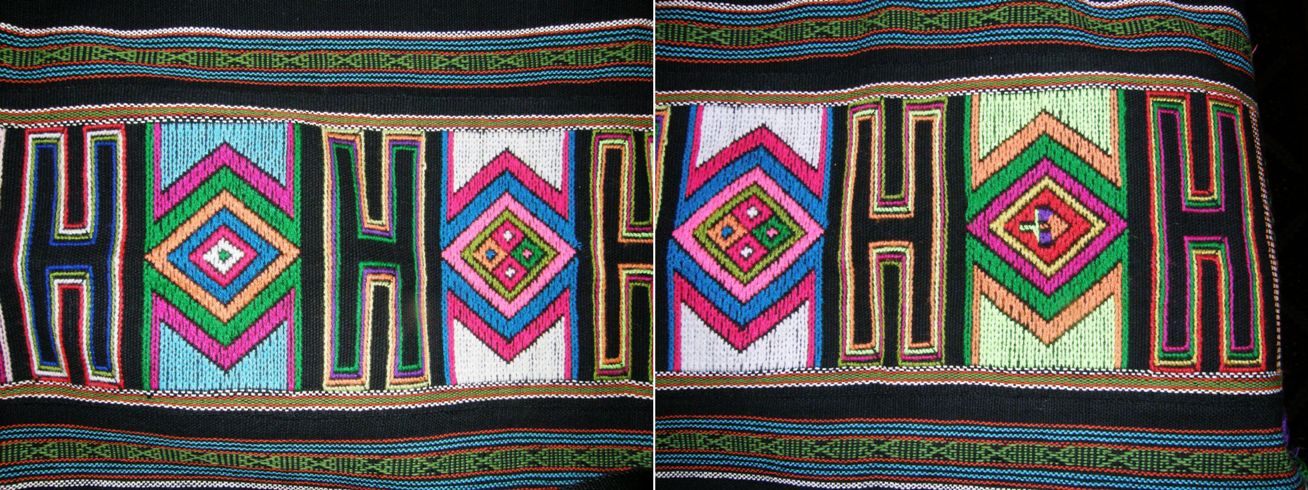
Montagnard (Vietnamese hilltribe) weavers often finish their weavings with weft twining. They then add beads and often a few more rows of weft twining. I wasn’t convinced that the weft twining would stand in place on its own and sufficiently “finish” a piece until I tried it myself. It is firm and sturdy and there is no way those twined wefts are going to work their way loose. Here is some twining I did in a traditional Jarai design on the end of a warp-faced piece…

On the Bedouin design wall hanging that I did on the right I also twined the edge and finished it off with wrapped warps.

Warp wrapping, braiding and other finishing techniques are covered in Finishes in the Ethnic Tradition by Karen Searle and Suzanne Baizerman.

My latest favorite edging which I learned at the tinkuy de tejedores in Cusco last November is the tubular woven band which is woven and sewn simultaneously to edges shown below on the right. This is another one that totally grabbed me. I had to stop myself from tubular banding everything in sight!

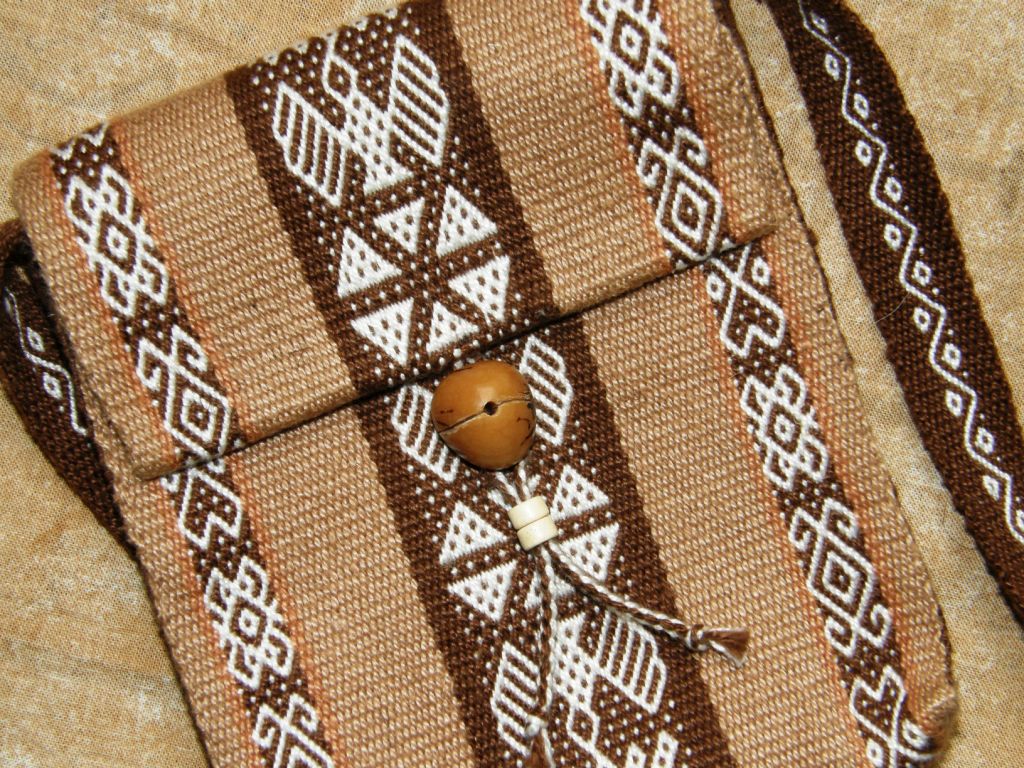
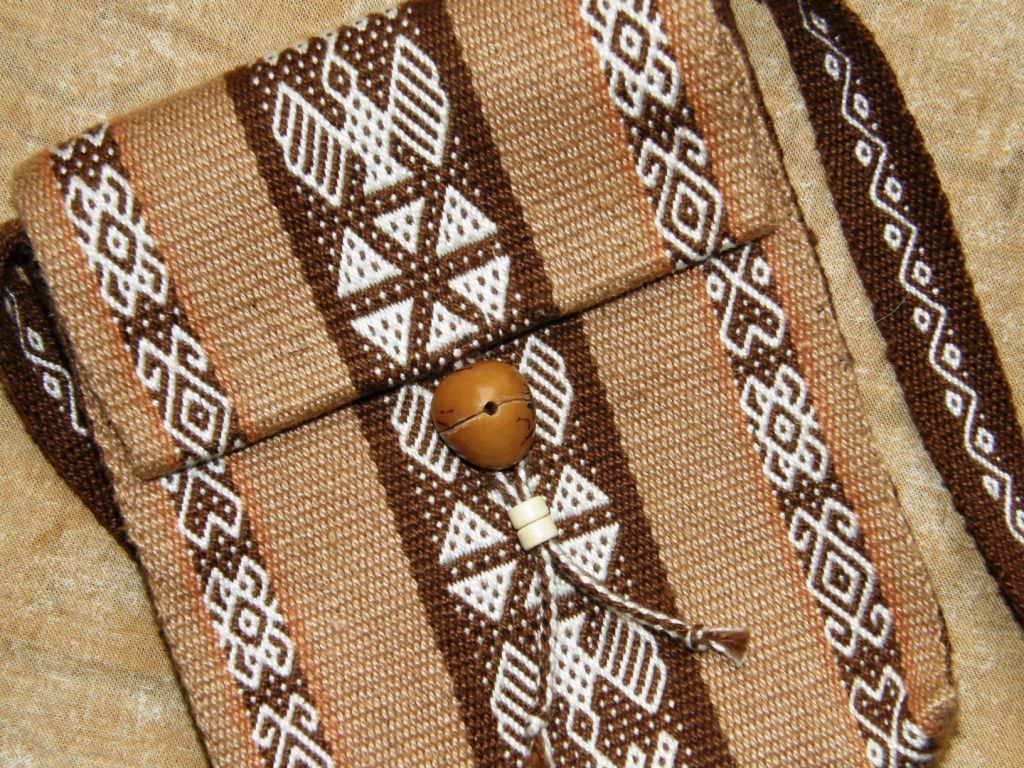
I decided to try a plain weave single-color band as an edging after seeing how Guarani weaver Angela edges her pieces and I used it on the cell phone pouch above. It very nicely covers and protects the raw edge where I cut and shaped the flap.

Well, enough about smoothing out the rough, brightening the plain and taming those wild warp ends. Back to finnweave. I am still enjoying the Cora and Huichol pieces and traditional Scandinavian patterns and have just learned that another Mexican group, the Otomí, also practice this technique. However, I am returning to my original goal now and am about to chart my first pre columbian design based on one of my textile fragments. This will be another sampler and I will wet finish this one.

#############################################

What have the weave-alongers been up to?

Linda wove her first band with horizontal bars getting warmed up for simple warp floats. She also made supplementary weft samples so she could learn about the scale of her charted designs against the woven fabric before launching into a project. Bobbie finished her piece with the central supplementary weft pattern. The chart for this design is here. I really like the effect of the different colored horizontal bars design that she used on the edges.

After finishing another pebble weave piece, Jennifer shifted to double weave and enjoyed sampling the technique in #3 crochet cotton. The llamas are charted here.


Tracy is back from her trip and back at the loom doing pebble weave.

Tracy’s latest band is on the left and Jennifer’s finished piece is on the right. You can see that her knitting needle is not standing up to the task of creating her third selvedge. You can read some tips about starting with a third selvedge here.


Both Marsha and Jennifer tried double weave in #10 thread but decided it was too fine to tackle yet. Marsha is doing a double weave band, her first with a pattern, in #3 thread. She is writing the name of her roommate on what will be the strap for a camera bag. Jennifer made a keyfob as her first attempt with #10 thread and is happy to continue sampling with #3.

And just wait until you see this…
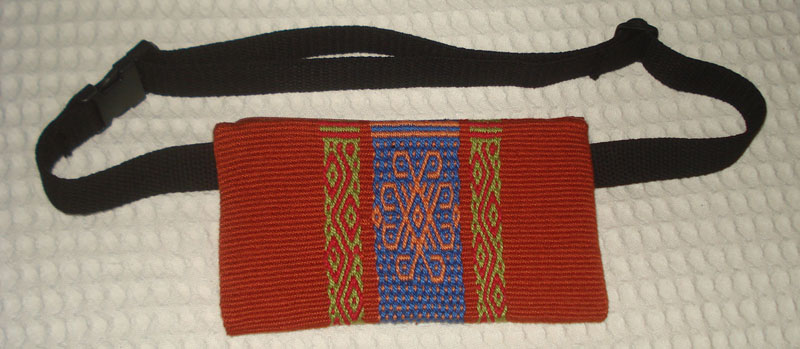
Helena in Brazil finished her pouch and has attached an adjustable band with buckle for her sister to use on her trip to Australia. I love that orange! There are ideas here for fun ways to combine colors, right?

The central design is one I invented and include in my book. I made it to go in a wall hanging along with the adaptation I made of a Huichol motif. This design includes the diamonds, spokes and curls that were also elements in the Huichol pattern.

I will leave you with our Weave-Along group’s learning mantra:

Short, Narrow Warps and Sample, Sample, Sample!


Backstrap Weaving – Three Tips, Twining and a Tutorial


Central Asia, Mexico, Vietnam and the Middle East were new weaving territories for me this year.

I am not one for making New Year resolutions but I got caught up in the moment last year at this time and went public with three weaving resolutions in one of the online weaving groups. I am happy to say that I did not even come close to fulfilling them. I say “happy” because my weaving path for the year took me off on several tangents and led me to interesting and unexpected places.

I am not going to make new resolutions. I do have  two or three things mapped out for the coming year and I will happily allow the gaps in between to be filled with whatever comes my way. I have to say that a lot of those gaps are being filled by you guys, my blog readers, who email me with video links, images and ideas from all corners of the world.

What was on the loom this week?…firstly, I will show you what was on the weaving

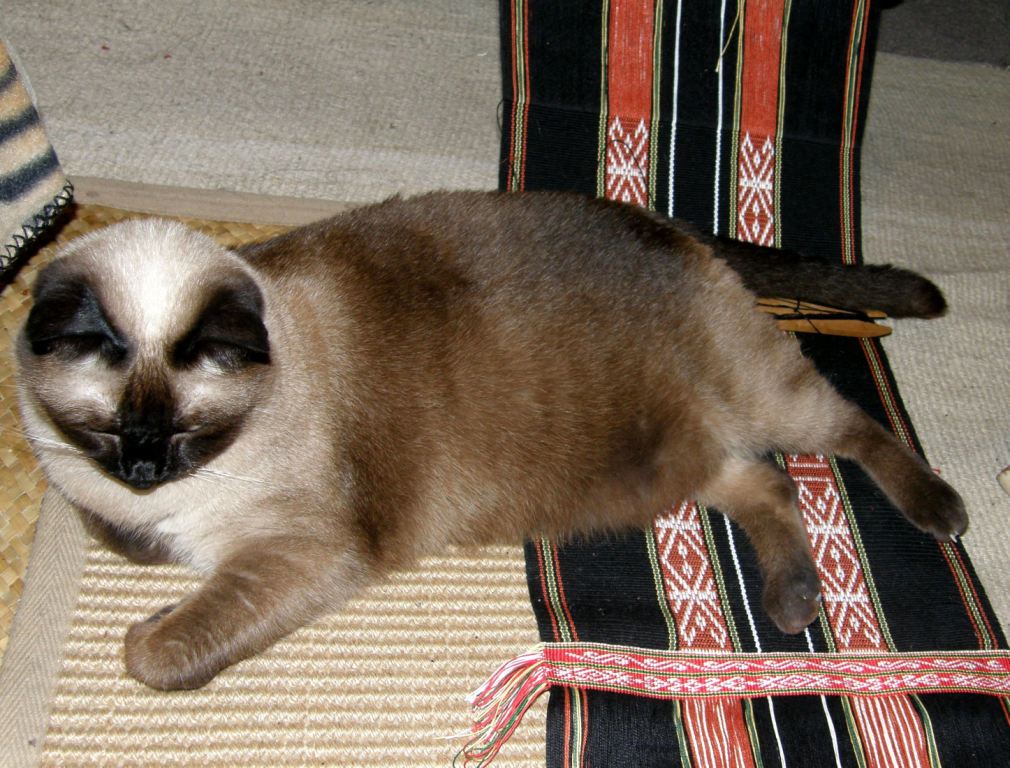
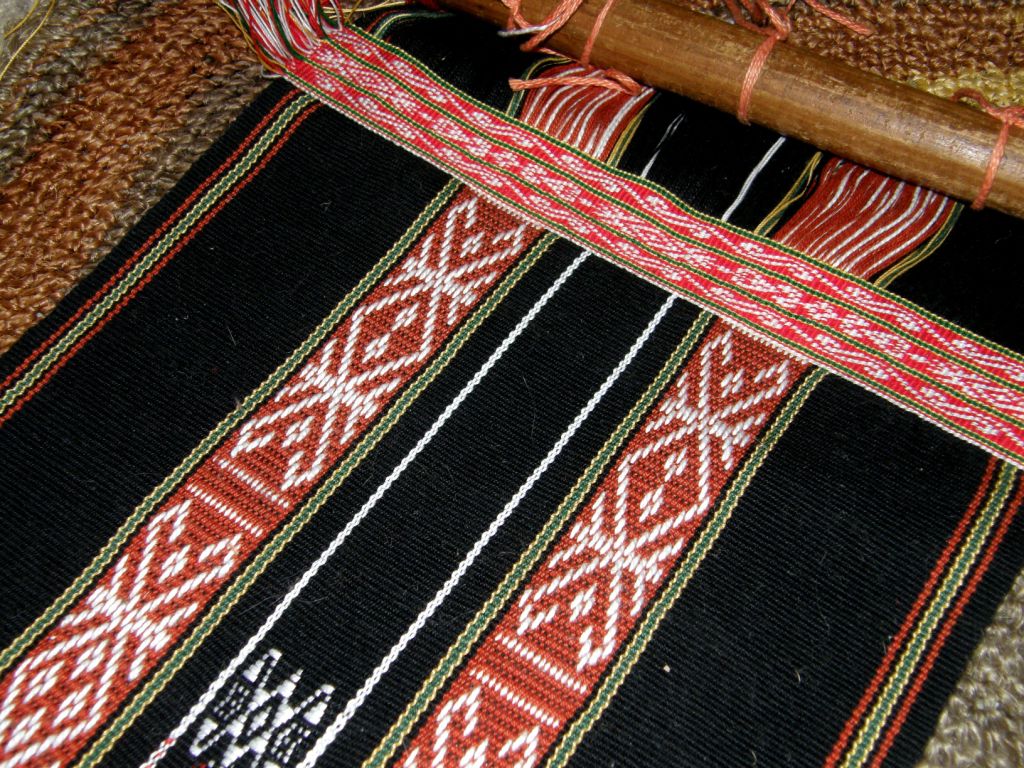
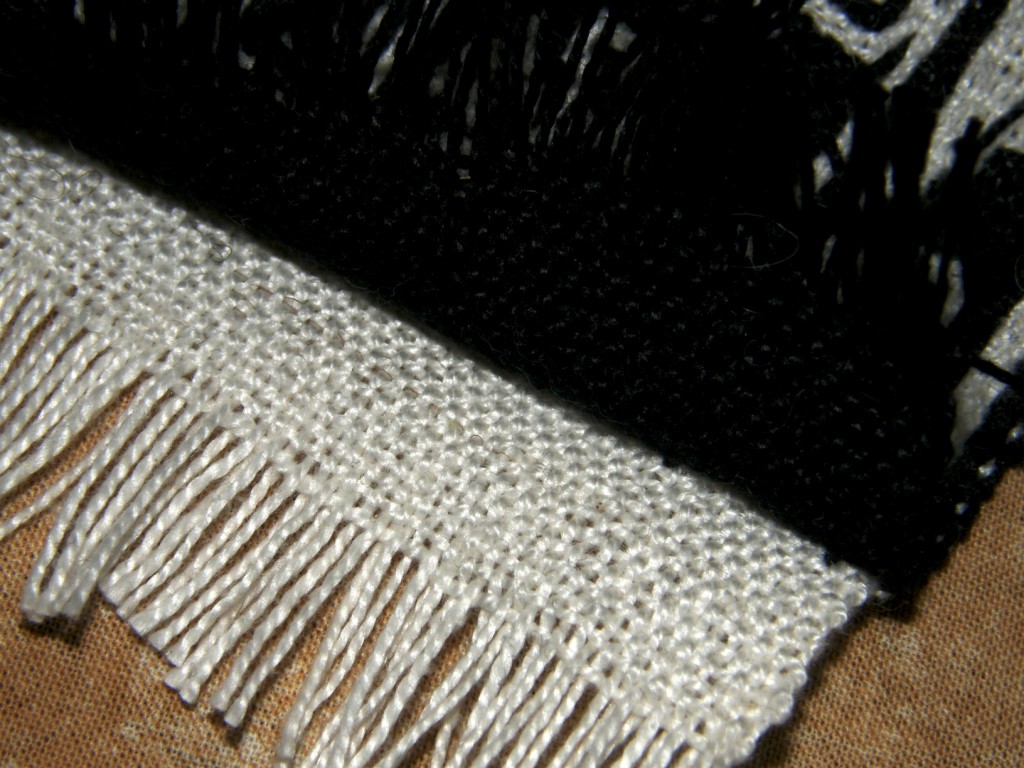
My cat loves to leave all her little beige colored hairs on my black weavings. You can see the twining at the bottom of this piece where I have finished the second part of the design.

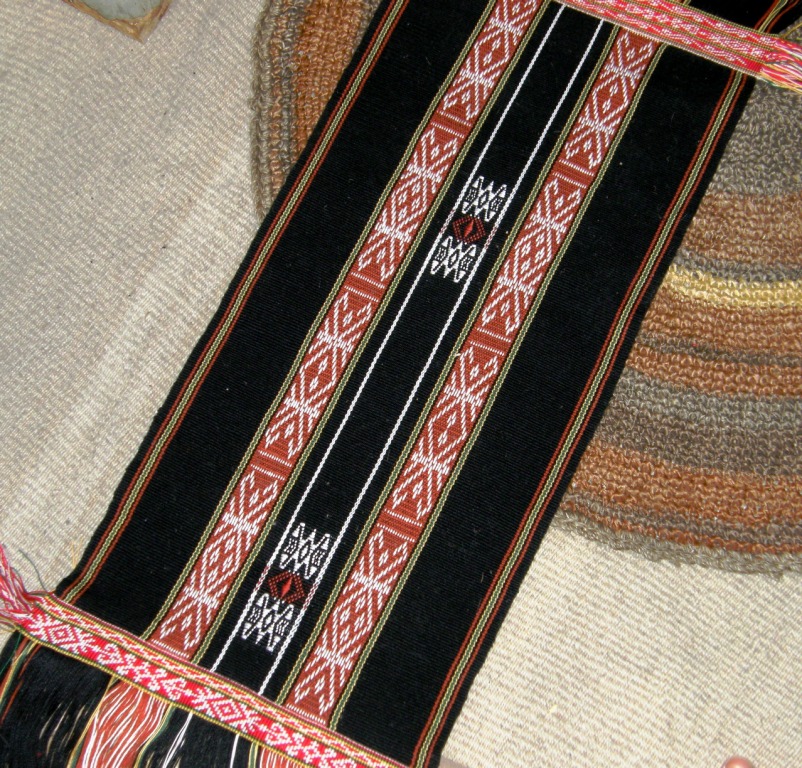
Above you can see the three parts finished. I was still debating at this stage what to do with this piece. You may remember my mentioning table runner and then center piece. Who am I kidding?

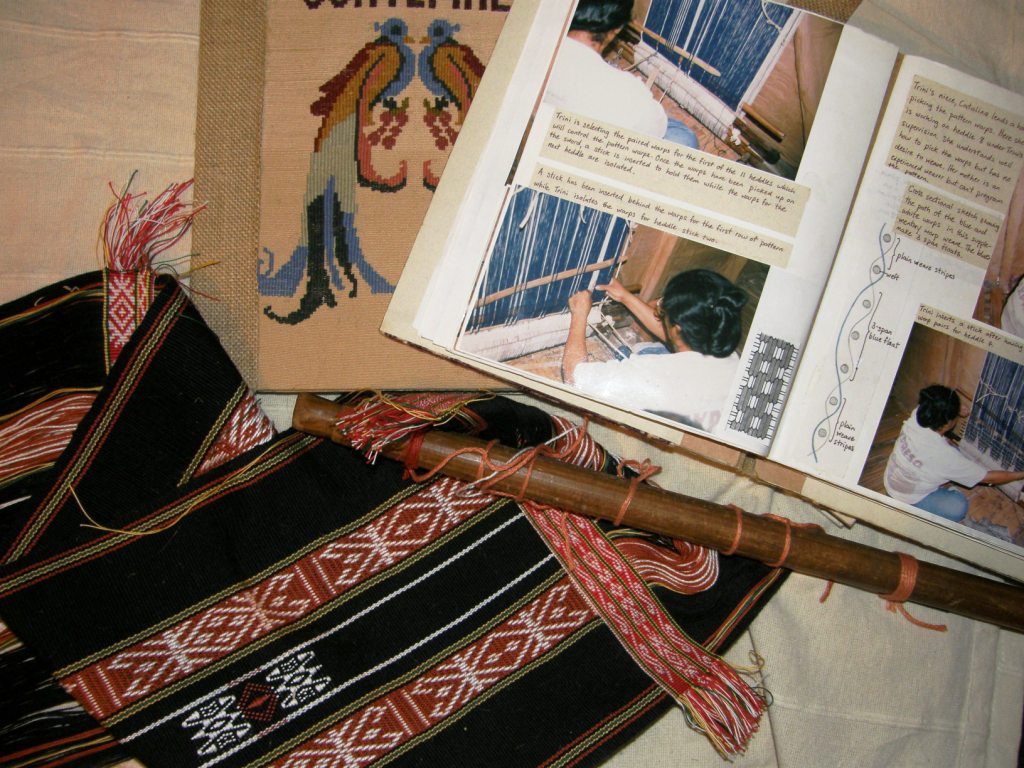
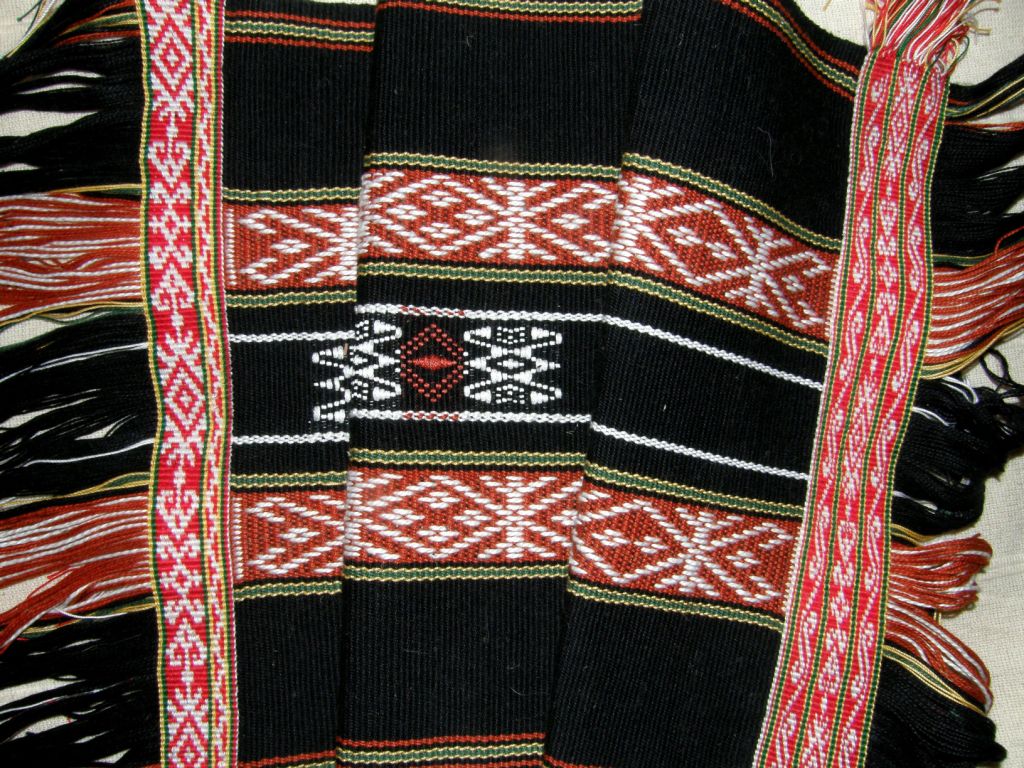
This was never about the product. I just wanted to weave something to put the various Montagnard weaving techniques into practice. So I finally decided that the piece would be cut in two and used as the cover for the journal in which I will document the processes. I have over twenty supplementary weft motifs to chart from photos I took when I visited the Montagnard weavers as well as their warp float designs and twined motifs which I will put in the journal along with step-by-step photos.

Above left are a couple of my finished journals from other weaving trips. One has a woven cover which I made to practice the double faced supplementary weft patterning that I was taught in Guatemala and the one on the right documents all I learned in coastal Ecuador.

But first I had to twine the other end of the piece. I needed to weave some more in order to have enough fabric for the book cover and then I twined the edge using one of the same patterns from the other end but doubling it, that is, I twined two rows for every row of pattern. What a difference that made!

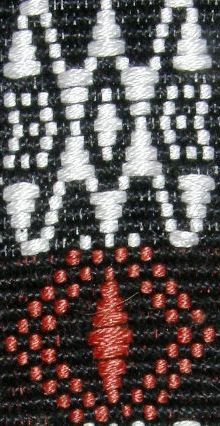
You can see that the design on the center strip of twining on the first end is the same as that on the second end.  A closer look…

I have the pages, now I just have to get the cardboard for the journal’s cover. I stitch and bind everything together myself. Then I have to get the scissors out, take a deep breath and cut the weaving in half  – yikes.


An interesting thing about the supplementary pattern on this piece…usually I don’t recommend having weft floats of less than two warp spans as they barely show up on the fabric but I had to have floats that only spanned one warp on this piece in order to faithfully reproduce the Montagnard motif and, to my surprise, the design shows up very well. My base warp and weft are number 10 crochet cotton and I used one and a half strands of embroidery cotton as the supplementary weft. The white thread for the warp floats is number 3 crochet cotton and the twining was done with number 20.

Staying on the topic of Montagnard pick up weaving, I have put together a tutorial on the woven letters that some of the Montagnard weavers are using to weave biblical phrases on their woven bag straps. I really like the shape of these letters and it is quite a simple pick up technique. The drawback is that there are some longish floats on the back of the piece which doesn’t bother me too much as bands with letters are essentially single faced anyway with the letters being reversed  and unreadable on the back. The technique does not produce an entirely warp faced fabric.

You can see the tutorial here.

One weft double weave can also be used to weave letters which don’t have long floats on the back. The one weft double weave tutorial is here and the chart with some basic stick letters is here.

These letters, which were woven by Guarani weaver Angela, are the ones that I really want to learn…

These are woven with the same technique that I used to weave this copy of Angela’s cell phone pouch design…

I would like to have Angela weave a complete alphabet for me to use. I really like the solid “blocky” nature of these letters.

Other beautiful, fluid and non-blocky letters can be found in Linda Hendrickson’s book Please Weave a Message with charts designed by Linda as well as adapted by her from the work of Michael Cook for card weaving. I have just set up warps to make my first attempt at twining Linda’s lettering. Her charts don’t work for the double weave pick up that I like to do on my backstrap loom but should work perfectly for twining. Hopefully next week I will have some progress to show and I will try to make something useful from the sample!

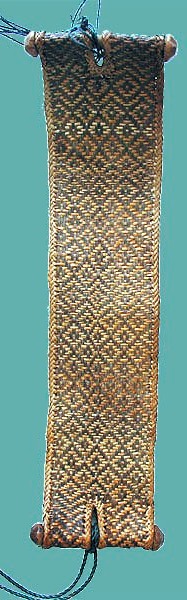
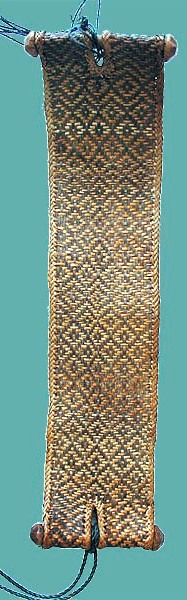
You may remember in last week’s post I showed you pictures of Li weavers from Hainan Island and their looms. I have since found someone else who owns one of these looms who also has the backstrap. I don’t remember seeing one at Pam Najdowski’s stand. Susan Stem of Tribal Trappings has this photo of a Li weaver’s backstrap…

The one on the extreme left is the Li backstrap, made from fiber, which is believed to be from the weavers who speak the Meifu dialect according to collector Pamela Cross. The one on the right is probably from a completely different part of the world. This was gifted to Tracy who lives in Qatar and who unfortunately does not know anything about its origin. I love them both and wish that the weavers here in Bolivia had such interesting ones! Most weavers I have met here have had no interest whatsoever in constructing any kind of special backstrap and have been quite content to use any old piece of sacking that is lying around.

I find backstraps almost as interesting as the textiles that are being made on the looms. I really like the way the two backstraps above have been constructed with the pieces of wood on the sides. So, I dug around and found a weaving that has been sitting neglected at the bottom of the basket. Another one of those things that I wove for my interest in the process rather than for any real interest in the finished product…


It started off as an experiment on my friend Lisa’s four-shaft loom. I wanted to weave a long Andean pebble weave piece after having made only tiny sample bands in order to put the draft together for my Andean Pebble Weave book.  It came home with me to Santa Cruz and went onto my backstrap loom to be finished…

When it was done, it was too wide to be a guitar strap and too long for anything else that I could think of. So, it got shelved to be later made into a loom bag of some sort…again, I was kidding myself.

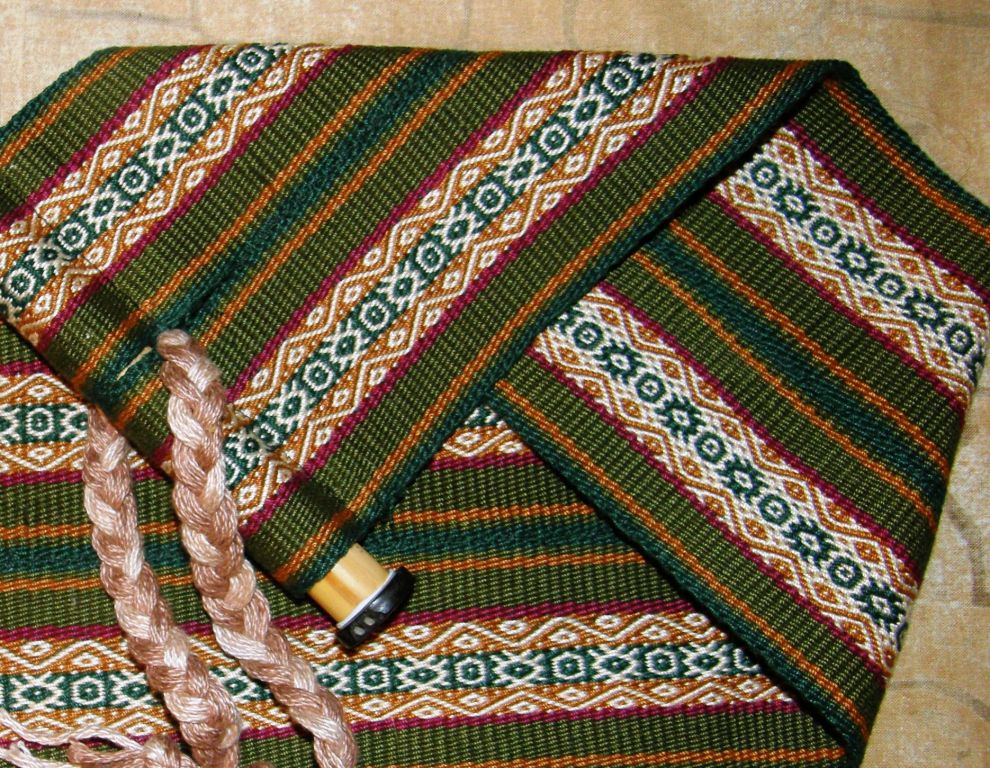
Now here it is resurrected as….my new backstrap…

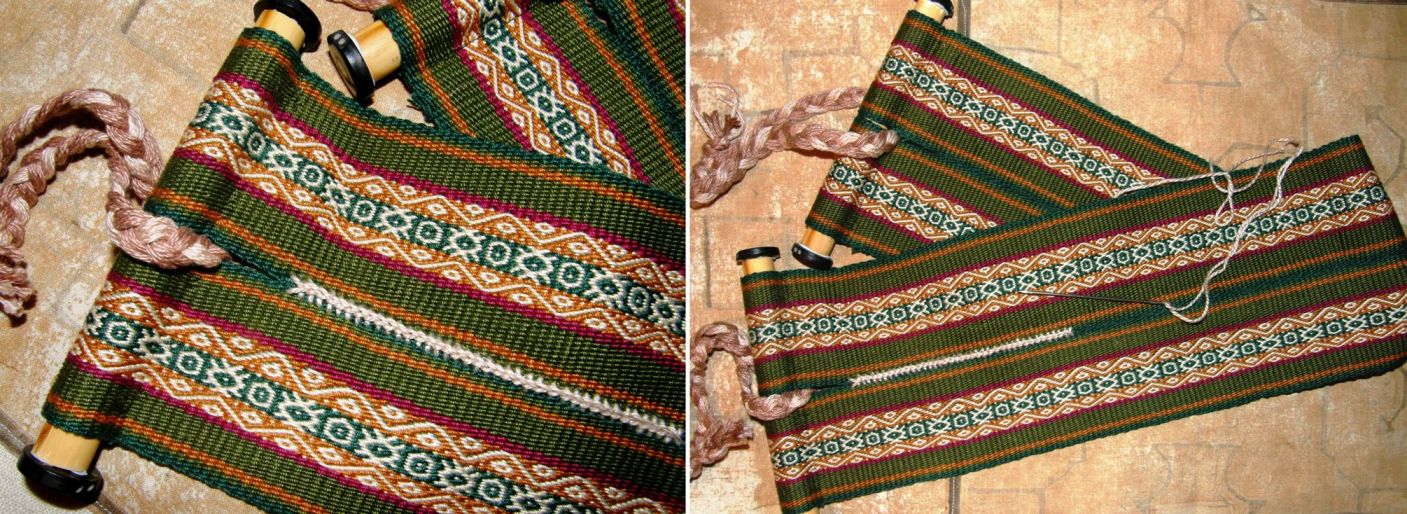
It isn’t quite finished yet. I have just joined the two pieces together with rough tiny stitches and am now using the cross knit looping or Van Dyke stitch to make a stronger and more decorative join. You can see a video on the Van Dyke stitch in this blog post. I used bamboo sections on the ends of the strap stolen from a cheap set of panpipes and the dark ends on the bamboo are pieces of tagua nut that I bought in Ecuador which are only held on with Blutack until I can get some strong glue.

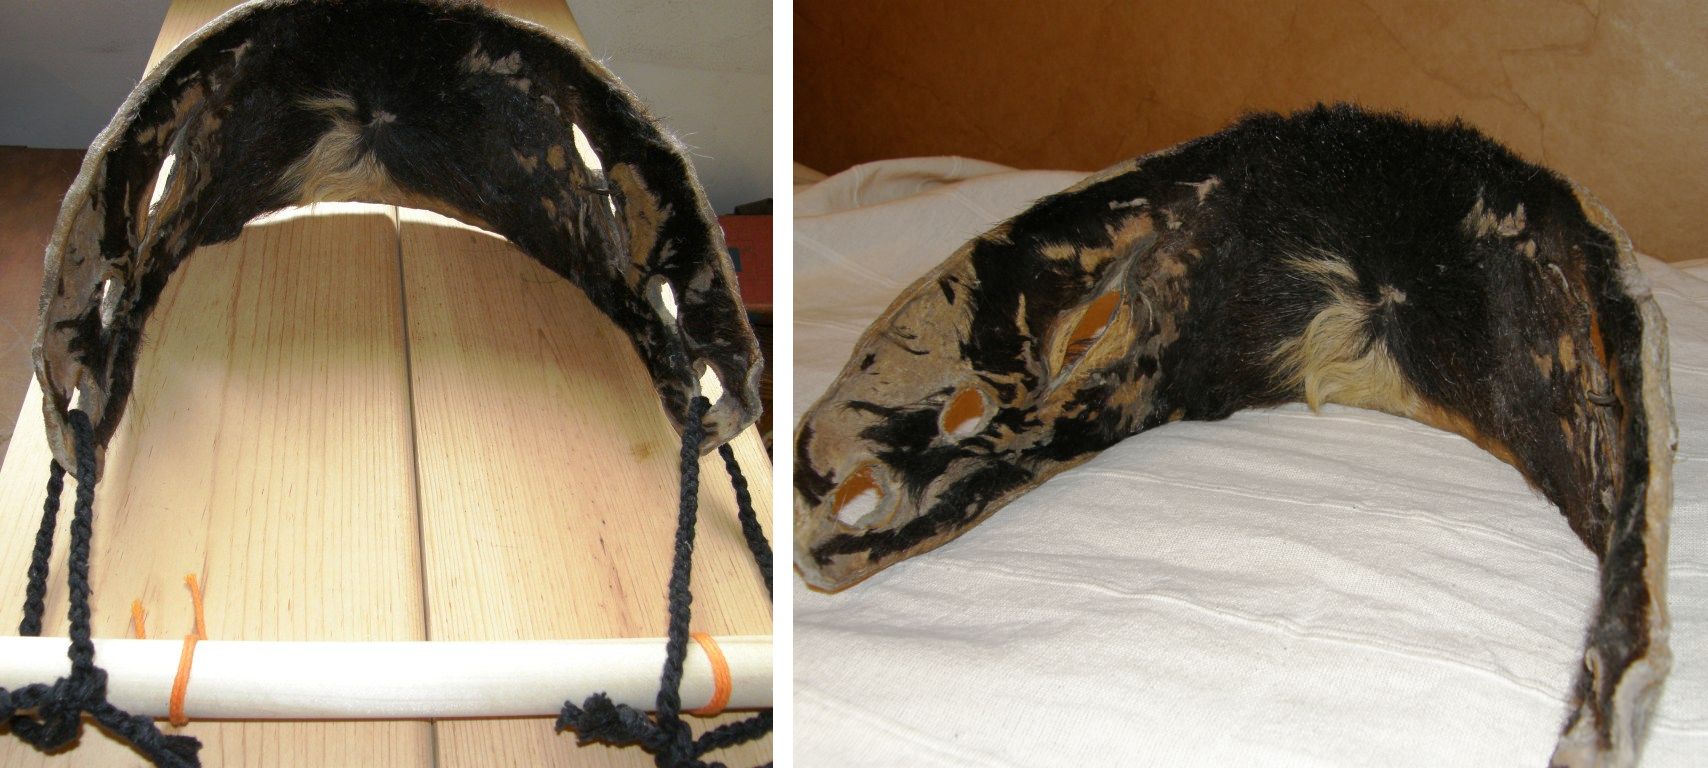
I have collected nice backstraps from a few other countries – a fiber one from Peru, a leather one from Guatemala and a very unusual hide one from Ecuador but nothing interesting from Bolivia.

A nice sturdy hide backstrap from Otavalo, Ecuador. The hairs tend to tickle while you are weaving.

I found the image at left on this site about backstrap weaving in Timor.

Timor is so close to my former home in Australia. I am seriously thinking about making a trip there the next time I go back to Sydney.

In the picture it looks like the weaver is making two pieces at once side by side as Montagnard weaver Ju Nie often does.

I love the backstrap. Ju uses a large pad which I think is stuffed with some kind of fiber. She just passes a rope behind it to hold it to her back which she then loops around her loom bars. It is very comfortable. You can just make it out in this picture…

Some blog readers, Weavolution and Ravelry members have made backstraps this last week…

Claudia from Weavolution finished her backstrap (on the left) and found a good place to tie up her loom in the process…to the bottom of the sofa (but with her back to the tv!). Anna who you may remember is cycling down to Tierra del Fuego wove her own backstrap while on the road. She has been weaving pebble weave and double weave until now and told me how lovely it was to cruise along with plain weave for a change. Anna does not, of course, have a regular tie up spot for her loom and I always look forward to seeing where she is weaving. You may remember seeing her warp tied to her bicycle on the Uyuni salt lake in a previous post.

Jennifer has her backstrap on the loom right now and I caught this image of Melisende’s “ceinture” on a French forum called Tricofolk. I didn’t ask her permission to post this here and hope she doesn’t mind!

Bonjour et bienvenue aux tisserands de la France!

I know that at least Jennifer is getting ready for a backstrap Weave Along that was proposed in the Backstrap weaving Group on Ravelry some weeks ago. We all agreed that post holidays would be the best time to start and we should be underway in January. The exact date is yet to be announced.

This will be a chance for beginners to make their own bands and backstraps with lots of support and advice on the forum. Those who have already woven their first pieces on a backstrap loom can try their hand at a project or two. I will be putting several proposals and ideas in the forum based on the tutorials here on this blog. A few weavers have asked about forming a group to work through my Andean Pebble Weave book too. So, all levels are welcome to join in.

As the WAL (weave along) approaches, I have three tips for you as you prepare…

1. Think about how you are going to wind your warp…

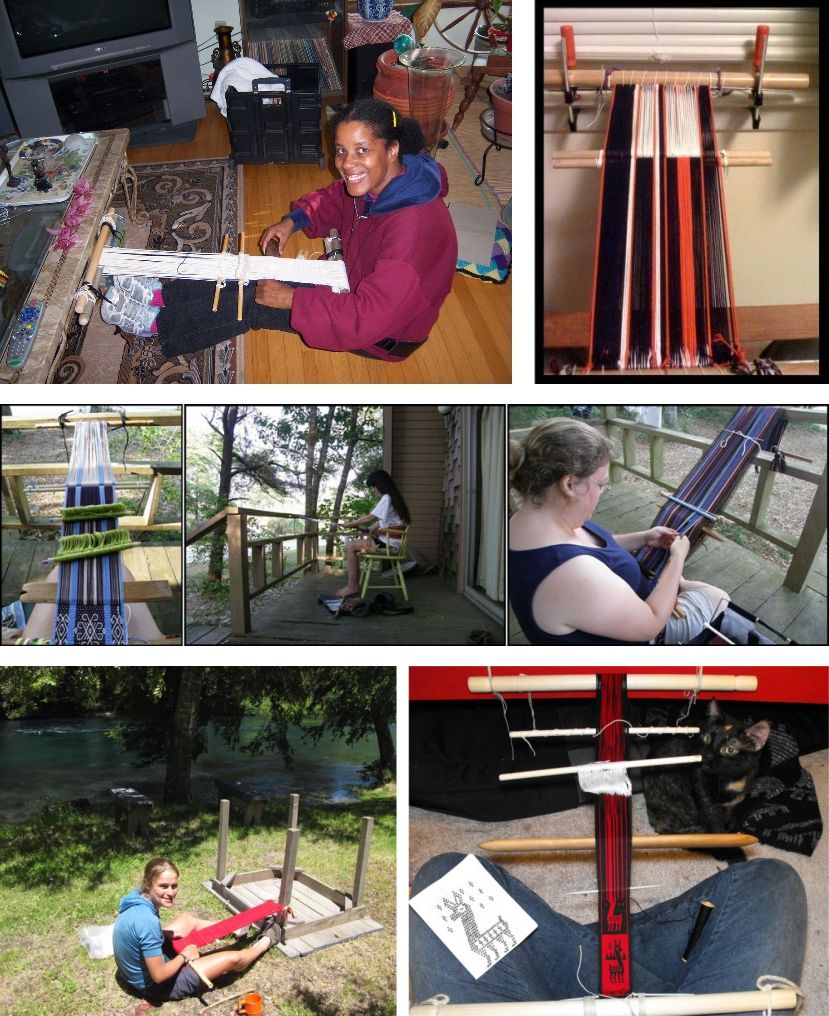
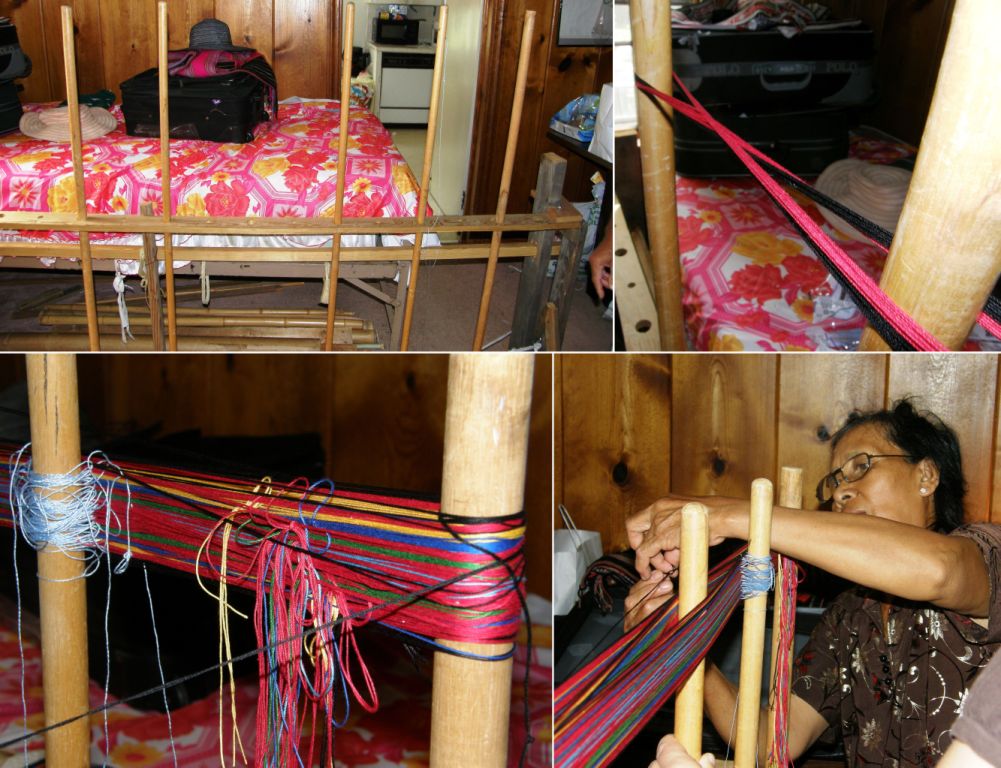
An evenly tensioned warp is essential. The warp will not be cut, threaded and retensioned once it comes off the warping stakes so you need to get it as evenly tensioned as possible while you are winding it. Beware of using stakes that are loose and may lean in as you are warping. The photo above right is from Franco’s blog. I am sure that Franco made sure that those stools were heavy enough to not move during the warping process. You can read more about warping and see videos here.

2. Find a strong and secure place to tie up the far end of your loom. It is always better in my humble opinion to lash your entire loom bar to something rather than have it swinging in space. Experiment with the angle of your warp and find what is most comfortable for you.

Read more about this here.

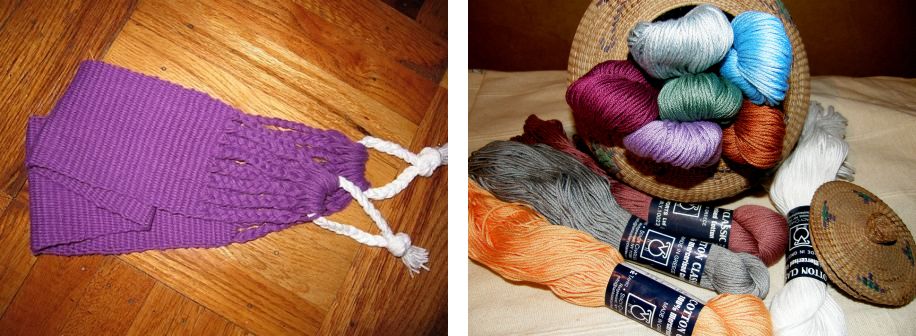
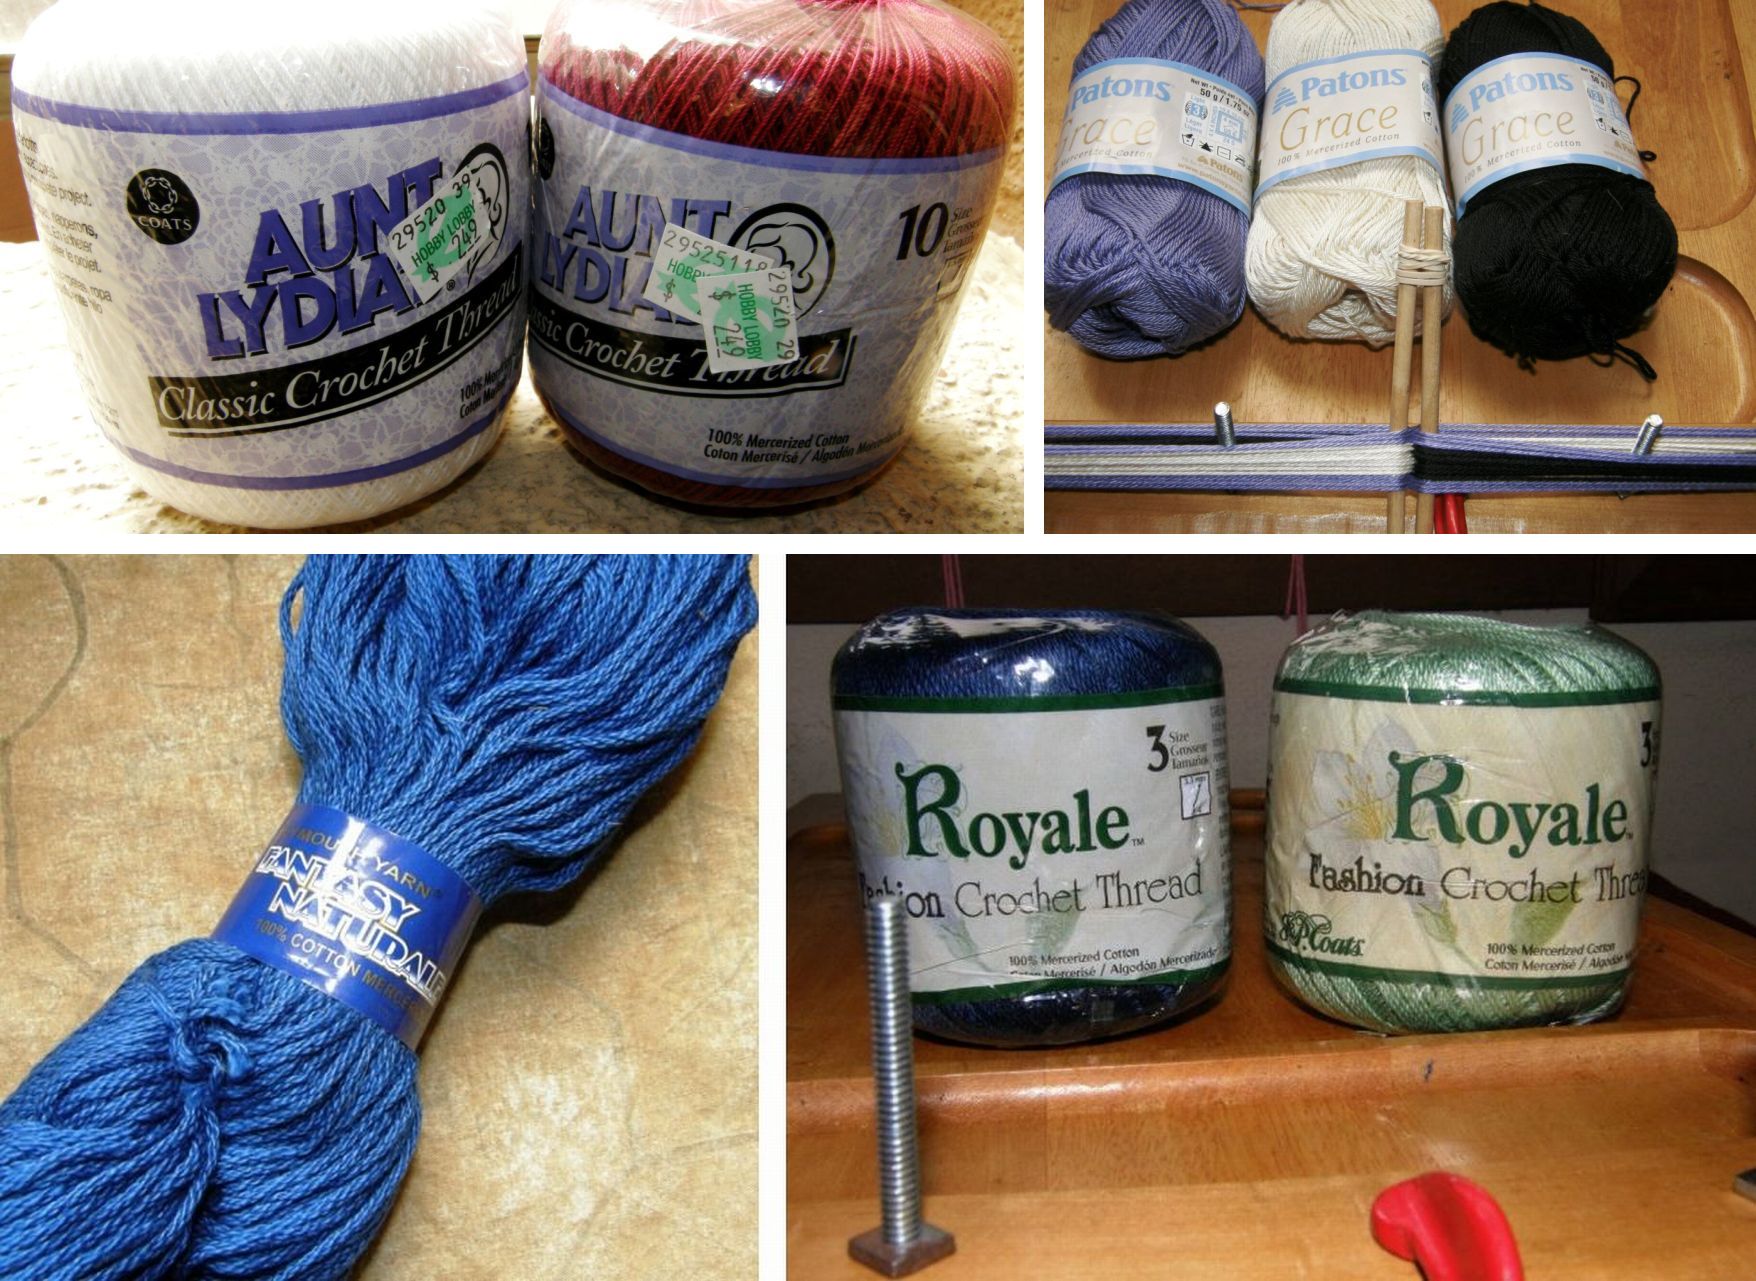
3. Choose your yarn carefully. Don’t use wool for a first project. Try to find a mercerized crochet cotton. Size 3 crochet cotton is good for beginner practice bands. Heavier cotton is better if you want to make a backstrap. Don’t use the cottons that are sold for dishcloth projects.

Tahki Cotton Classic is a good choice for making a backstrap. Cathyz made the purple strap above with this thread. WEBS recently had a sale on Tahki Cotton Classic and I got a grab bag of ten skeins.

Other brands that are readily available at Michael’s, Hobby Lobby and such places that I have tried and recommend are pictured below…The Fantasy Natural is a good weight for backstraps. I got that at The Mannings.

Read more about yarns including some information on using wool here.

My new backstrap was made with this thread pictured below…love this stuff!

Read more about suitable cotton thread and wool here.

Don’t forget the lettering tutorial.

Many thanks to all those who visited and left me Christmas greetings last week.

A very happy new year to everyone!

Backstrap Weaving – Different “tribes”, different customs.

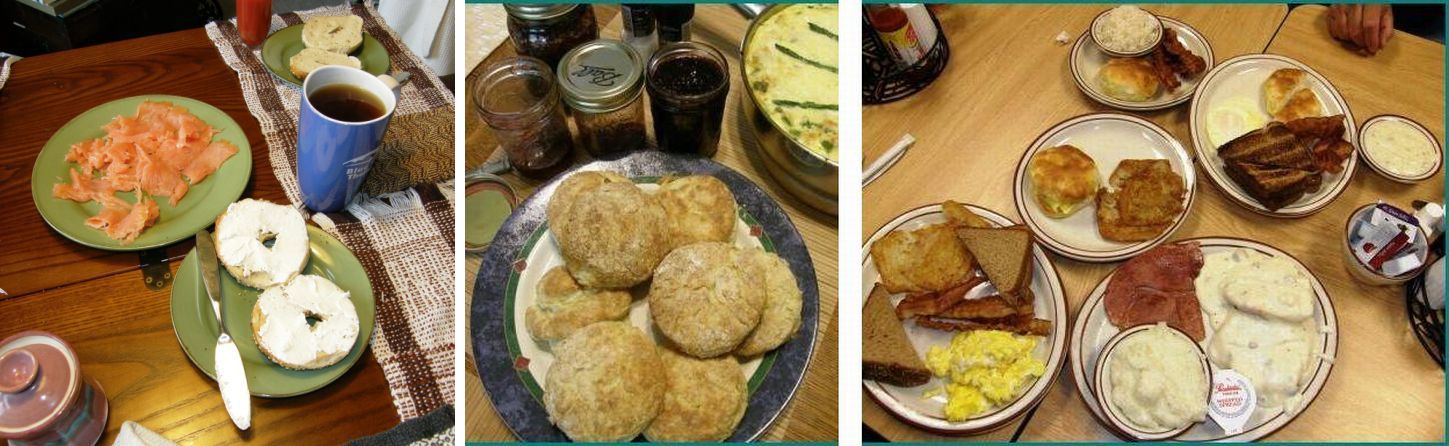
Different places, different customs…are you one for grits, biscuits and sweet tea or bagels, lox and giant mugs of coffee for breakfast? I love seeing all these different things when I am traveling. Different “tribes”, different places, different customs…

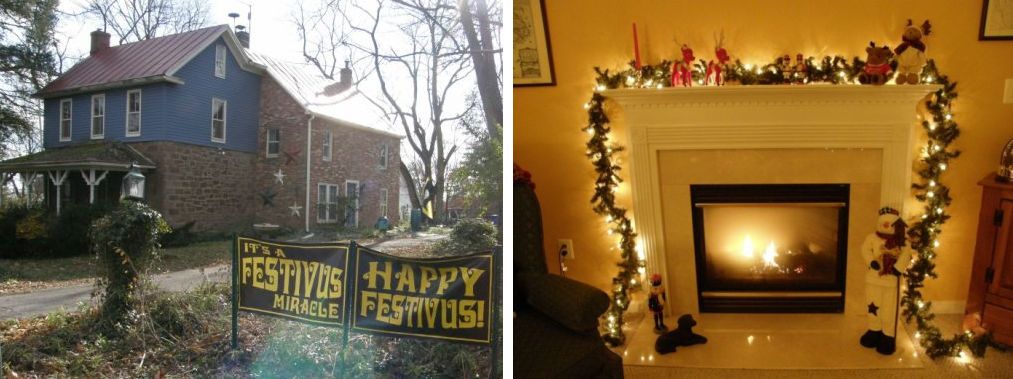
Christmas, Hanukkah or Festivus?

I had fun the weekend after Thanksgiving helping to decorate the tree in Claudia’s home and then we ran into this Festivus sign (for the Seinfeld fans out there) in Poolesville. Maybe the Festivus pole will make its appearance soon.

I am enjoying the cold weather here in the US getting wrapped up in scarves and gloves. It makes me nostalgic for my skiing days. I have been invited to spend a week in colonial Williamsburg with Claudia and friends and I hope it snows.

In the meantime, I have more to show and tell about the time I spent with the Montagnard weavers in North Carolina. They are all grouped under the general French title of “Montagnard” but Ngach, a Jarai women, tells me that the hill area of Vietnam is home to over sixty different tribes with their many similarities and differences in customs, textiles and weaving styles. I was able to meet people from the Jarai, Rhade , Bunong and Koho tribes during  my stay.

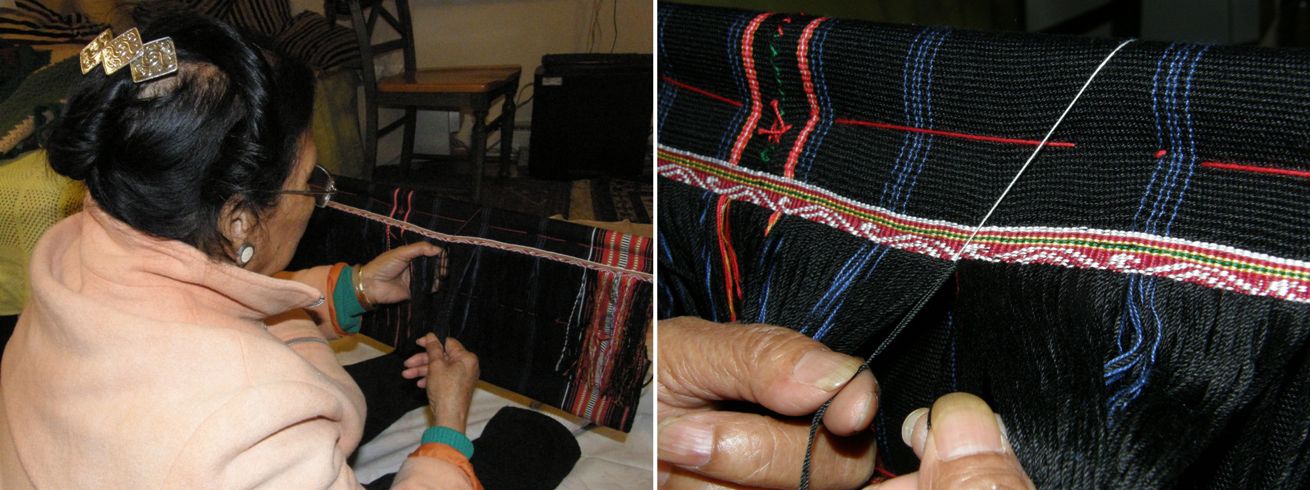
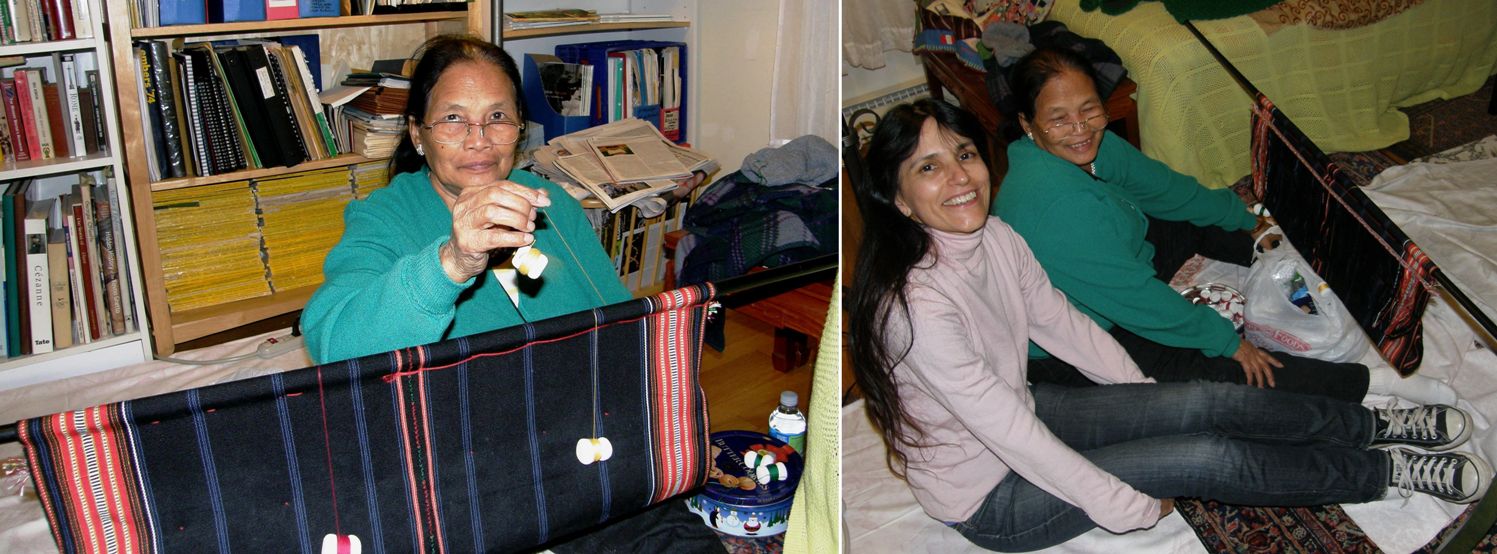
My twining classes were with Ngach from the Jarai tribe and Ju who is Rhade. I ended up spending more time with Ngach who seems to have had more experience with the kteh technique and whose eyesight is better able to deal with the fine threads that are used.

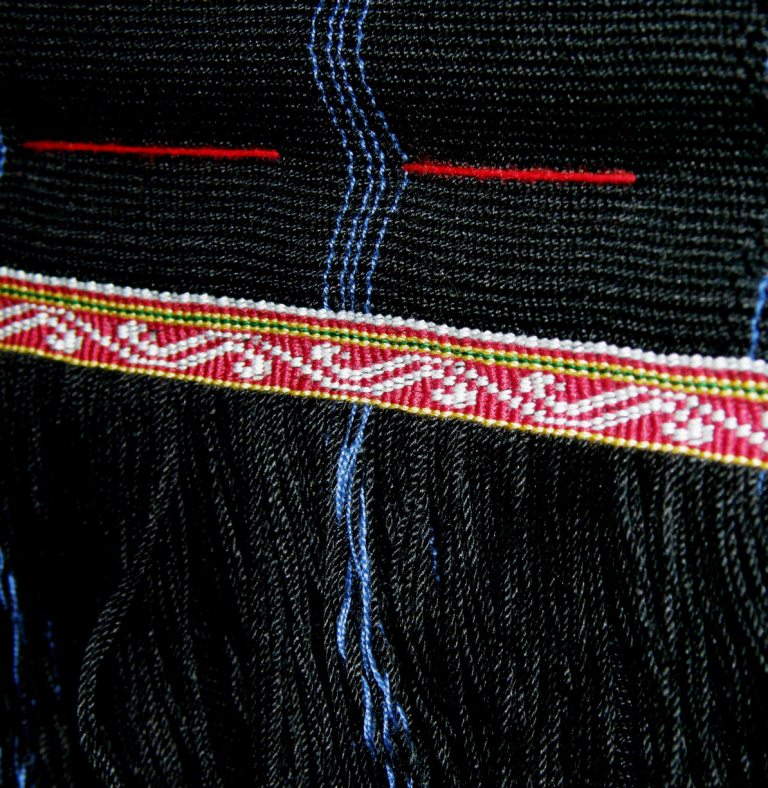
We twined this small border design on a child’s skirt as that is all that time would allow. Normally this would be followed by a large central design three to four times the width of this one and then finished with the same border. Ngach was a wonderful teacher, as I said last week, with a quick eye for catching my mistakes and a lot of attention to detail.

She would start a row and work it to the midway point and then let me take over and finish copying the design while she went back and started the next row. So, pretty much the entire left side of the work is Ngach’s and the right side is mine. You can certainly tell the difference between the two halves.

She asked me  a lot of questions about Bolivia and was pleased and surprised by the similarities in climate, vegetation and food between the hills of Vietnam and lowland Bolivia. I showed her pictures of llamas from the highlands, weavers and weavings of Peru and Bolivia and told her about the custom of chewing coca leaves. She would ask me again and again to repeat the words in English so that she could tell, I imagine, all the stories to her husband when she got home.

She then shared a story with me about how she had learned the kteh technique at the age of ten.

She was visiting her sister-in-law in her village who happened to be doing kteh that day and immediately fell in love with the designs and insisted on being allowed to sit and watch and try it. She stayed all morning instead of going home to prepare the rice for lunch as was her duty.

Eventually, angry messages and threats of slaps, in Ngach’s words, started arriving from her mother who had come home to find that lunch preparations were not underway. Both Ngach and her sister-in-law decided that it would be better for her stay on and pratice the kteh in the hope, I suspect, that her mother’s anger would pass. I don’t know what happened when she got home but Ngach soon became the one to whom other weavers would bring their finished loin cloths and other woven pieces so that she could make the intricate twined patterns. she would be paid with a leg or pork or sometimes cash.

She told me of one time that she stayed awake all night thinking about and planning her design and then got up in the morning to go straight to the store to buy her thread so she could get to work.

I think I really lucked out having Ngach as my teacher!

And she softened and finally agreed to sell me two of her lovely cement bobbins. She also has wooden ones from Vietnam but I have not seen her use those. The cement ones are a little heavier and feel really nice in the hands although they can be a bit rough on the thread.

And here is the design finished with only the border stripes to go…that’s the easy part.

Dear Ngach working at the kteh and then the two of us celebrating the end of the design.

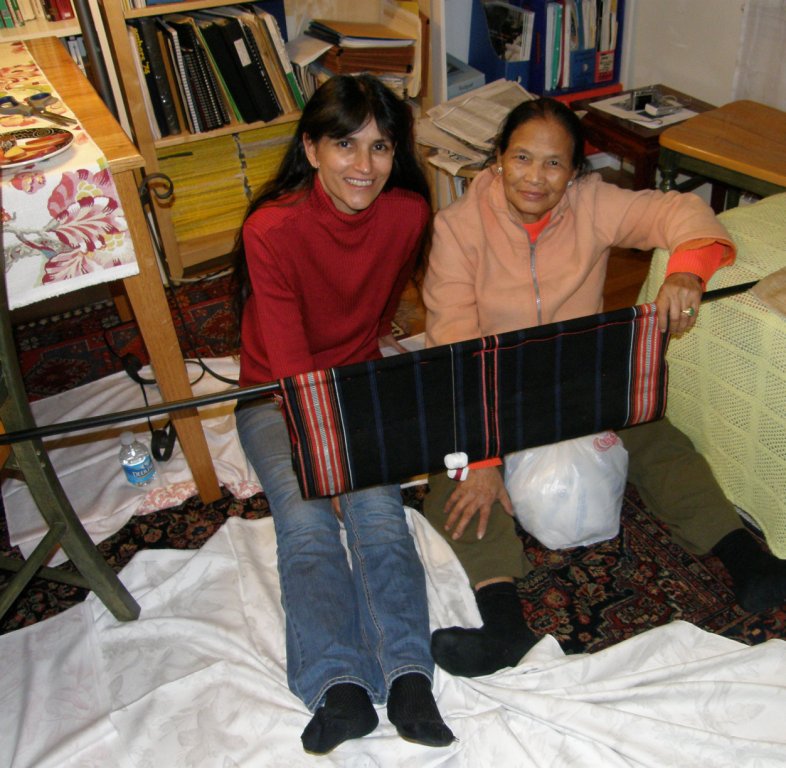
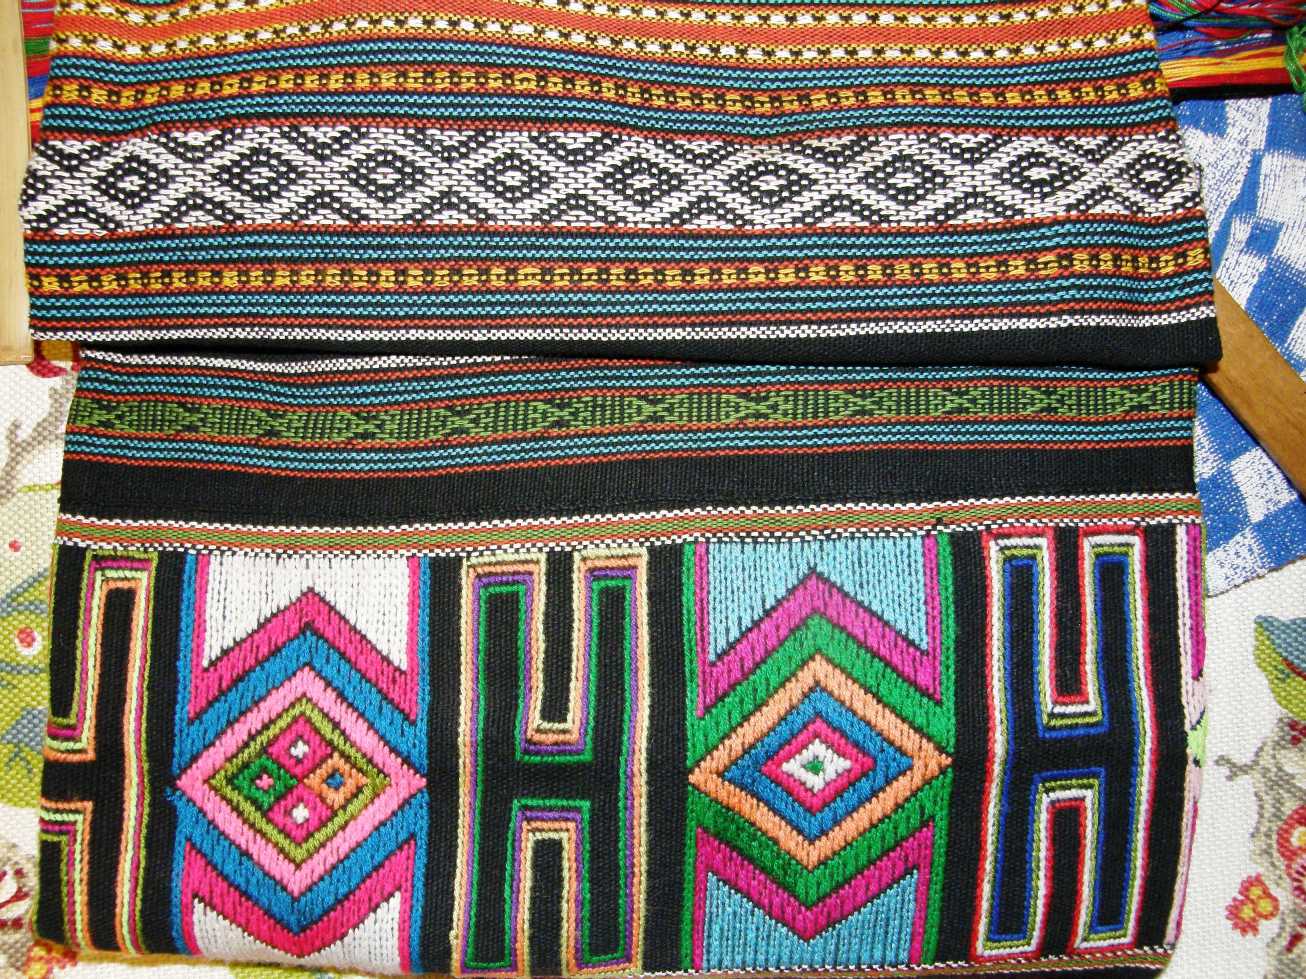
Betsy Renfrew, who is working with the Montagnard weavers and who  made all this possible for me, has several books on the textiles of the hill tribe weavers of Vietnam. I had just been admiring a particularly beautiful piece, which was labeled as Maa in one of the books and which unfortunately was not detailed enough to allow me to see the technique, when in came Rah and her daughter Sel who are of the Bunong tribe (Betsy has found many variations of the spelling of this name), armed with a  woven basket full of Bunong textiles. There was a piece with the very same technique that I had been squinting at in the book.

Above you can see the work on the central panel of Rah’s gorgeous skirt.

Rah understands English quite well but has difficulty expressing herself.

I don’t think she had any problem understanding my excitement over this piece and my desire to learn how to do the patterning technique.

However, her fourteen year old daughter Sel told me that, although her mom would love to teach me, unfortunately she had not  woven this particular piece nor had she ever learned this kind of patterning.

It had been sent over from Vietnam.  Sel was happy to show off the baby carrier that her mother had made for her – a piece for which she has an obvious strong attachment and affection. Her blouse was woven by her mom too.

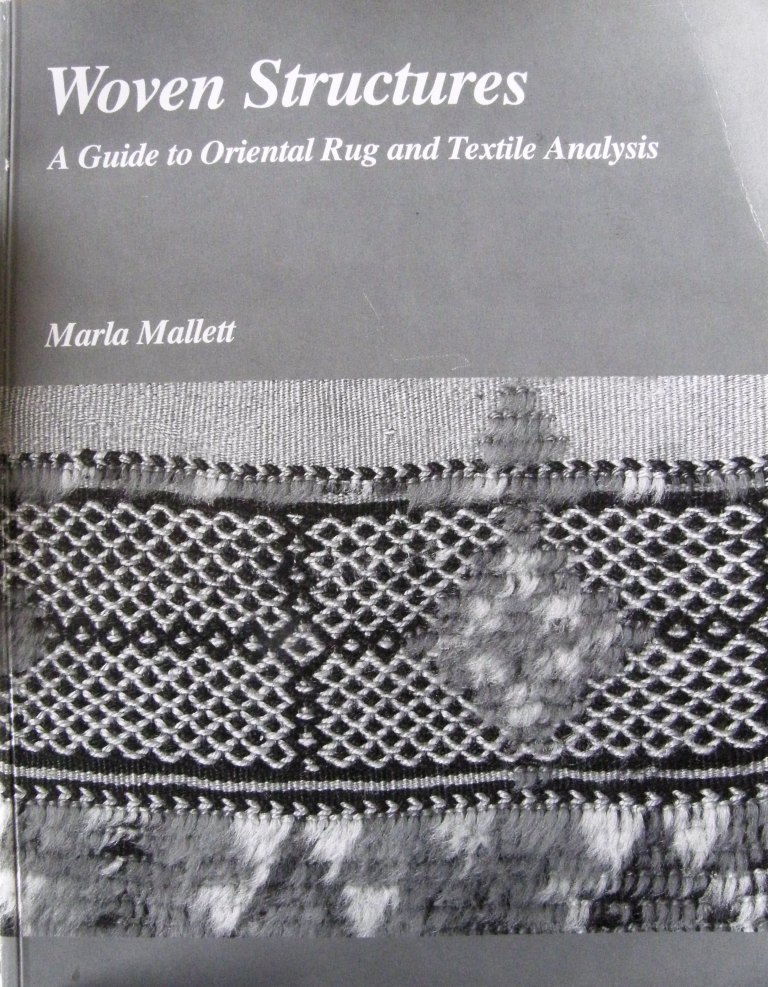
There are  examples of Bunong skirts on the Tribal Trappings website where the structure is described as “a soumak-like technique”.  As I am now the happy owner of Marla Mallett’s wonderful book on woven structures, I am hoping to perhaps be able to pin it down from her pictures and descriptions. It could be countered soumak but I need to look at this more closely. Any thoughts from my readers would be very much welcomed.

In many ways the patterns resemble those that are created using one of the warp wrapping techniques I learned in Guatemala. The main difference is that the Guatemalan style is worked in a shed on a warp faced ground weave and does not show on the back of the piece. The Bunong piece has a balanced ground weave.

Rah wearing her traditional Bunong skirt. Betsy tells me that Bunong textiles generally stand out from those of other tribes for the use of green in the designs.

Here is the beautiful “backpack” ‘basket in which some of the textiles had been brought to Betsy’s home…

Rah enjoyed watching videos that Betsy has made of Montagnard weaver Ju Nie at work at her loom. Sel said that Rah had had a loom at one stage here in North Carolina but also said that some of the loom parts had been confiscated by airline security when they had attempted to bring them over from Vietnam. We are hoping that she may feel inclined to take it up weaving again and that even Sel may decide that she would like to learn.

One more look at that gorgeous skirt piece, this time showing some of the other float patterns…

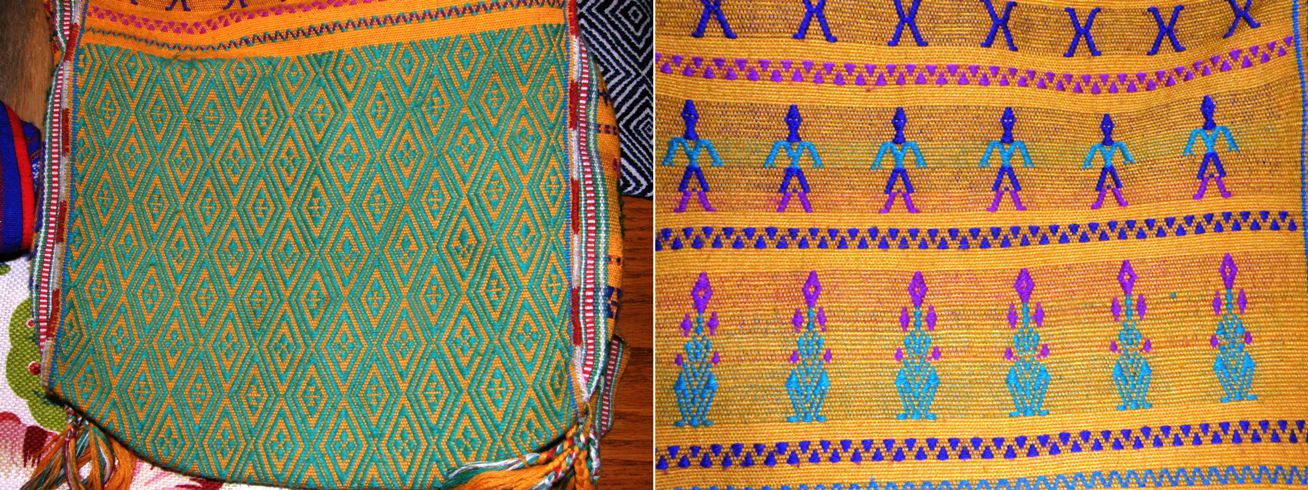
I loved this next piece too – a bag that Rah and Sel brought to show with all-over supplementary weft pattering on the body and supplementary weft patterned figures on the flap…

As I mentioned earlier, I was happy to be able to swap my Andean Pebble Weave book for the first edition of Marla Mallett’s book with someone who had recently purchased the second edition although I must say I am itching to find out what I am missing from the updated version!

I simply haven’t had time to take a close look at it but one thing I did notice is that the cross knit looping ”stitch” which is often used by the Montagnard weavers to join their blanket and skirt panels or edge bags is a well known stitch in the world of embroidery known as the “Van Dyke stitch”. After seeing Ju’s blanket panels so effectively joined with this stitch I used it myself to join two of my woven pieces to make a tool bag.

A closer view…

For those of you who would like to try this on your own work, I found a great video tutorial on Van Dyke stitch and I particularly like the way she starts the stitch which is not at all like the way I was taught by the weavers in Bolivia.

Marla Mallett shows an example of it on a south Persian bag. It’s amazing how these techniques show up across the globe.  The Bunong weavers use it too and Rah’s bags were edged with it.


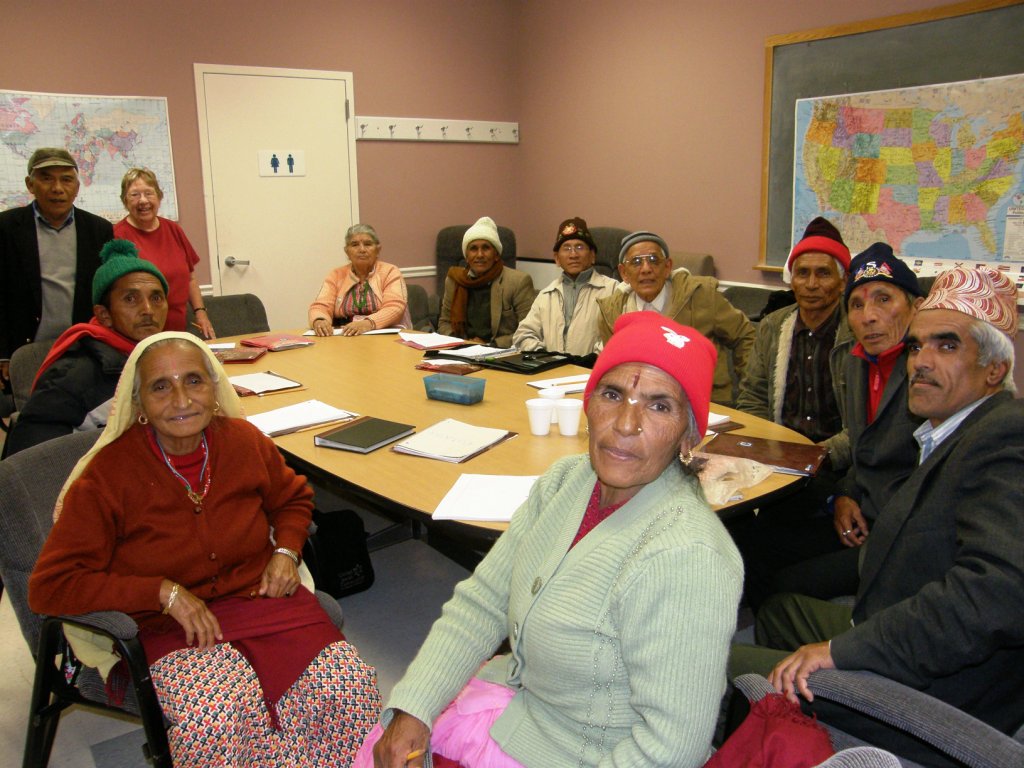
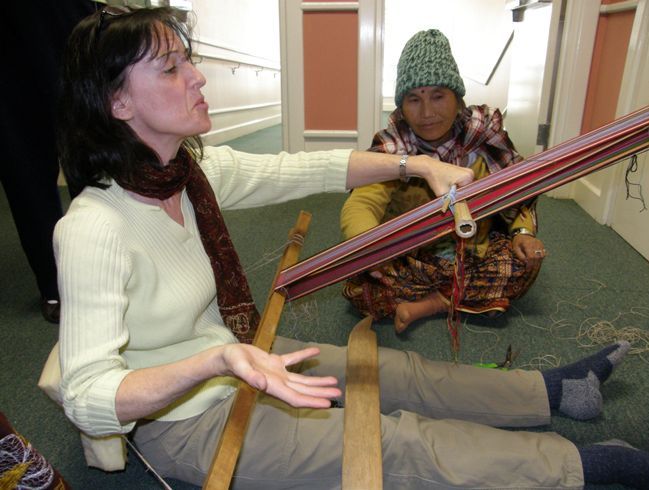
My visit with Betsy also included an afternoon at the Seniors Center where a group of Bhutanese ladies and gents, recently brought here from refugee camps in Nepal, have English classes with teacher Mary Ellen. Betsy had organized to give a weaving demonstration during their class and so we took along the loom on which Betsy has been learning from Ju and a narrow double weave piece still on the loom that I have been working on while on the road. Again, Betsy is hoping to find weavers in this group  who may like to take up weaving in their new home here in the US.

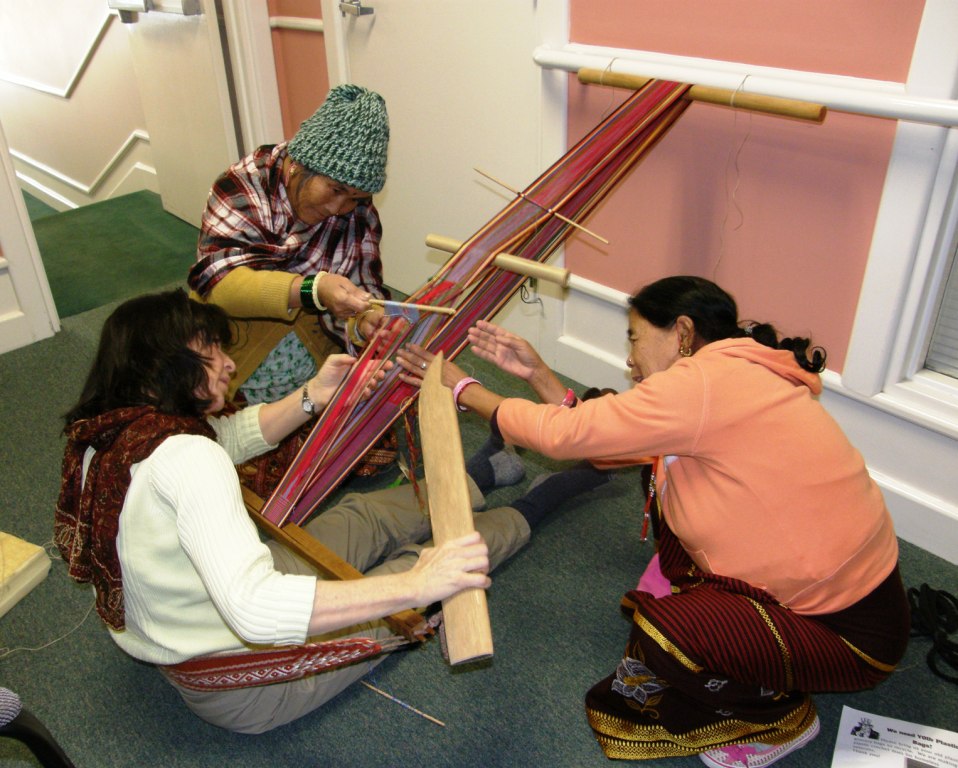
The demonstration certainly aroused a lot of interest and chatter with two ladies in particular very keen to help Betsy manage her loom. Betsy is learning to weave a narrow band on a very large loom which is not at all suited to this size of weaving. The loom, therefore, is very unwieldy. Ju weaves two bands at once side by side on these large looms to help overcome this problem.

One of Betsy’s helpers indicated with gestures that she weaves much wider pieces in Bhutan and showed the way she throws the shuttle across the warp. She patiently sat by while Betsy explained that she was just learning and still having problems opening the sheds until, finally, the urge to lend a hand became too great.

Above Ranmaya and Bhimaya Gurung are helping Betsy to open that nasty heddle shed.

Poshupati (I am guessing the spelling) came along to act as translator.

He told me that he used to be the director of an artisan training center in the refugee camp that taught weaving and leather work amongst other skills.

Once most of the class members had returned to continue their lesson of “family” vocabulary with Mary Ellen, we were left alone with Ranmaya and Bhimaya and our looms and got along just fine without our translator.

I was surprised to find that I could remember a few words of Nepali from my two trips there in the eighties like the words for “finished”, “thank you” and “sister” which seemed to be a word used for any female companion.

One of the big problems with Betsy’s loom was the fact that the heddle stick kept falling out. This was not due to poor heddle making but rather to the fact that the loom  bars are so wide that it is difficult to manipulate the sheds without tipping everything from side to side.

I told you all in a previous post about how Ju and Ngach set up their heddles during the warping process rather than later once the warp is on the loom. It is a tremendous time saver but I am far too fond of my string heddles with their extra hitch to adopt this method. I did, however, try it at home just to see if I understood how it is done.

Here is a short video clip that I made on my last visit with Ju in August in which you can see her winding the warp and making her heddles as she goes. The stick she is using ensures that the heddles are of equal lengths.

BACK IN MARYLAND…….

Claudia has been coming along well with her tubular woven bands to the point where she doesn’t need my help any more. I suspect she will have the directions memorized soon.

I made another trip to the Textile Museum so that I could revisit the Central Asian ikat exhibit with a guide and use the museum’s library. The tour was good, our guide enthusiastic, but I was disappointed not to find any information on what appeared to be warp twined bands on the edges of some of the garments. I seem to be twining mad at the moment.

In the library I got to see David Fraser’s work “A Guide to Weft Twining and Related Structures with Interacting Wefts” which, sadly, can’t be had for under $300 these days but, then again, there it was in the library for me to peruse for free. It was quite a coincidence to find a mail from a Weavolution member a couple of days after with a link to a site which gave a virtual version of the talk which David Fraser had given on the weft twining in what he calls plateau bags at the Textile Museum in August.

There is a great photo here on the same site which I really like of a woman twining a bag in much the same way as I have been doing at home with the piece simply held in her lap…no loom and no tools, except that she twines with the warps extending away from her.

Upstairs in the Education Room at the museum, the only place, the guide told me, where one can take photos, I was able to clear up my confusion about the different kinds of ikats.

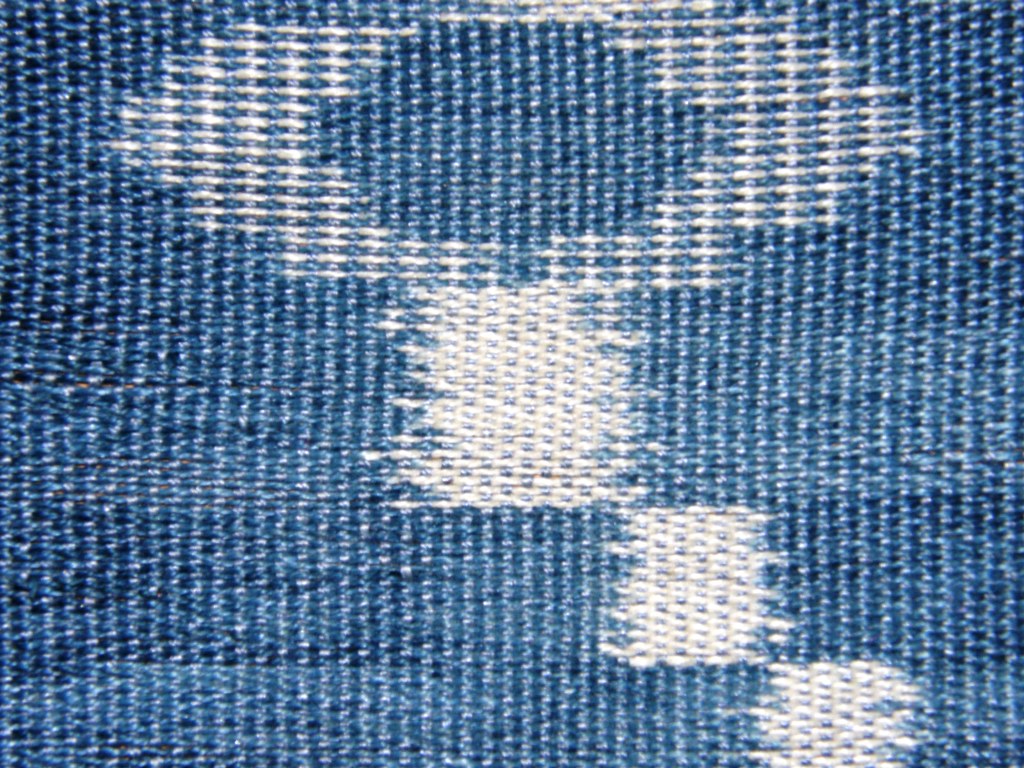
This is weft ikat where horizontal resist dyed yarns are predominant in the fabric.

Both warp and weft yarns can be resist dyed separately and then used to create independent designs in a balanced weave fabric. This is called compound ikat.

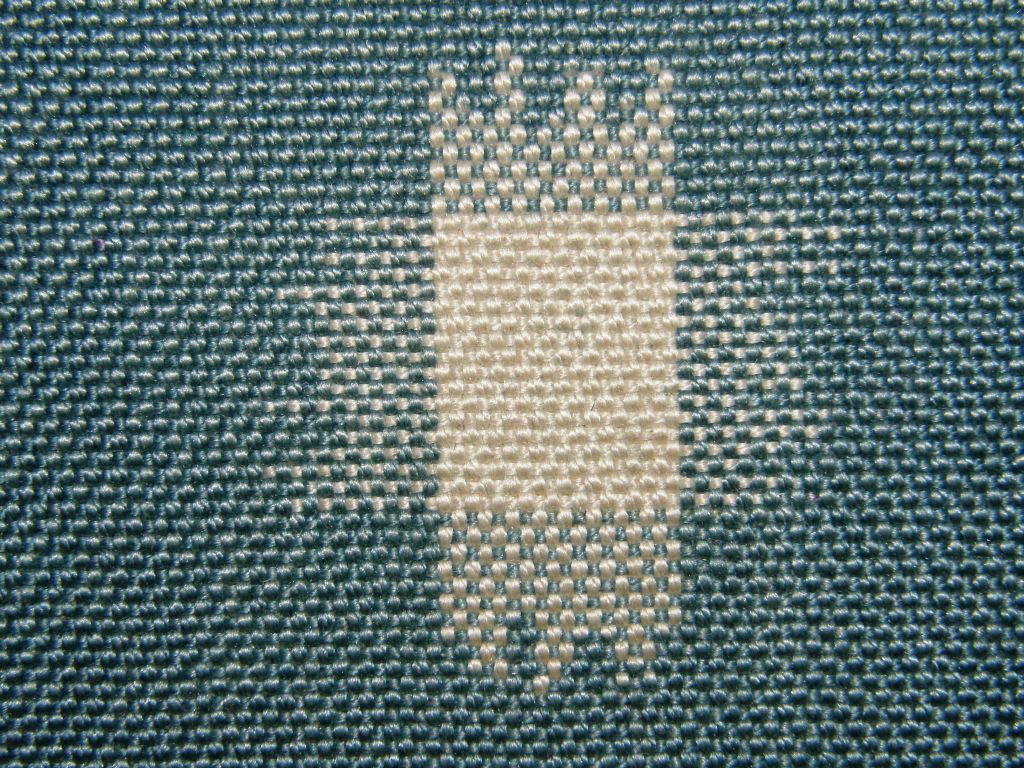
In double ikat the weave structure is balanced and resist dyed warps and wefts meet to produce a single design.

I don’t think I had ever seen a piece of just weft ikat fabric until once again along came someone at Weavolution with a link to a gem of a video on traditional Laos weaver Bounxou Duoheuang and her inlay work. Wait until you see the piece of weft ikat that she prepares towards the end of the video.

I will finish off here by showing once again the wonders of the online Worldwide Weaving Guild which is, by the way, the way I first found out about Betsy’s work with the Montagnard weavers. This week I would like to show you what Tracy has been up on her backstrap loom in Qatar. Check this out!!

I was going to give you the whole story here but Tracy has covered it on her blog with lots of background and details so you can read about what it took to produce this gorgeous piece.

Above is a sneak peek at the work in progress but you really need to read the story of how this all came to be. Note the plastic tape that she uses for her heddles.

And here is the amazing backstrap that a friend gave her as she took her first steps in backstrap weaving. Does anyone have an idea about its possible place of origin?

Next there’s a balanced weave piece on the loom that I know is already off the loom and done.

I am saving a few more stories from the Montagnard weavers for next week’s writings from colonial Williamsburg. Let it snow, let it snow, let it snow!

I have a million thanks for Betsy Renfrew and Andrew Young who hosted me during my stay in North Carolina and made all these encounters with the Montagnard people possible.

Backstrap Weaving – Loops, braids and edgings

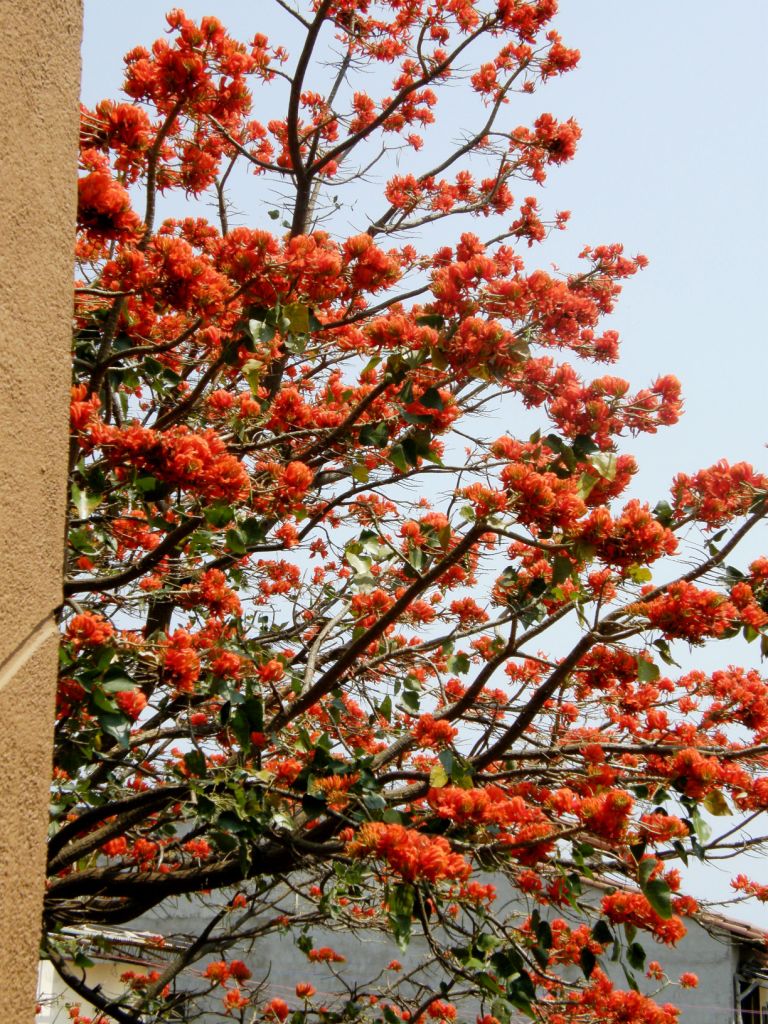
The tajibos have finished blooming and now the city is splashed with the red flowers of the ceibo, the national flower of Argentina, which grows equally well here in Santa Cruz attracting all kinds of small birds to noisily feast on its nectar.

And once again we are experiencing heat, smoke and humidity after a five-day lull where rain preceded low temperatures and provided perfect conditions for Anna from The Netherlands and her boyfriend Alistair to come down from the highlands to visit.

Many backpackers abandon the cold and dry highlands for a few days of sun, swimming pools and lazy afternoons swinging in hammocks in jungly lowland Santa Cruz but Anna and Alistair were quite relieved to find cooler more pleasant conditions. They have been riding their bicycles since May 2008 starting in Alaska and plan to finish their journey in Tierra del Fuego at the very end of the Pan American Highway in February next year.

Occasionally they leave their bikes behind for a side trip here and there and so, after having crossed the Salar de Uyuni by bicycle and taken some spectacular photos including some of their campsite on the salt on the night of a full moon, they took a bus to Potosi and on to Sucre  before flying in to Santa Cruz.

Anna had taken backstrap weaving classes in Huancayo, and after having found my blog, we started corresponding. She proposed getting together to weave. She seemed so unsure of her route and movements…one moment she was coming from La Paz and then the next from Salta, Argentina… that I really didn’t believe she would make it.

But I know how it is. I am guilty of making grand plans to visit many people when I go to the US only to run out of time and money. I also know how difficult it is to keep to a schedule when one is backpacking. So, of course, I was pleased and surprised when I got her mail saying that they were on their way. It was a four-day visit and we crammed as much fiber fun as we could into that time and my small living space while Alistair, who happens to be Australian, went to the stadium to see a football game with my boyfriend and educated him on the finer points of Australian Rules football.

Day one was a chance to brush up on warping and shed making for Andean pebble weave. Anna’s teacher in Huancayo, at her urging, had warped up a long band and so Anna had only had the opportunity to see the warping process once. When I had studied there, I came away with at least four short bands and so had been able to practice warping quite a lot. I was tickled to see that Anna had downloaded my Andean Pebble Weave book and had been carrying its pages in her bicycle panniers.

Anna learns how to pick up the warps to form patterns in pebble weave.

The band on which she learned in Huancayo just happened to have been set up for eight revolution motifs and so she was able to weave many of the patterns from my book while on the road. While with me she practiced making the sheds the “Huancayo” way that I show in the appendix in my book.

Now she has several warps to take along for the rest of her trip and I supplied her with wider patterns to weave. She now has the technique totally under control and I am expecting to see pictures of some beautiful bands and especially of her weaving in some spectacular places between here and Ushuaia.

They are heading to beautiful southern Chile and Argentina and will probably pass through or very near to Punta Arenas on the southern tip of the continent where I spent my first five years in South America.

Anna brought some colorful weavings that she had bought in Sucre and Tarabuco – a tapestry weave bag, another in a complementary warp weave and a striped warp faced plain weave unku, a short poncho-like man’s garment only worn now for festivals.

She also bought a bag with the typical red and black weavings of Potolo as well as a double weave belt which prompted her to want to learn this technique.

Above she is learning the basic steps of double weave while weaving some simple triangles. We made some more warps and copied some more complex charts for her to take away.

At my request, Anna had gone to the campesino market in Sucre and got me some drop spindles and llama bone beaters called wichuñas here in Bolivia and rukis in Peru. In the picture on the right you can see a “new” wichuña after having been boiled and cleaned on the right. The middle one has had some use and is already changing color from having been handled a lot and the one on the left has taken on a nice dark polished sheen from many years of use.

When first bought in the market, the wichuñas are really quite disgusting with scraps of meat and sinew still attached. They are not so bad in the very dry atmosphere of the high plains but once down here in humid Santa Cruz, they are not at all pleasant and need to go into a pot and be boiled before they can be considered tolerable!
I have a lot of llama fiber here at home and recently got some alpaca from the US so, of course, Anna got a quick lesson in spinning on a drop spindle and took some fiber away for the trip.

And…to finish it all off we did some braiding so that Anna could put a nice finish on her Huancayo band. I dragged out my journal to teach her a six-strand flat braid that I hadn’t made for a long time. Thank goodness I have recorded everything I have learned with diagrams and directions.

I  had forgotten about this braid and decided to revive it by using it as the zipper pull on my new blue tool bag.

It was a fun few days of weaving, spinning, braiding and chatting. I lived ten months in a backpacker hostel when I first came to live in Santa Cruz and used to teach weaving to many foreigners who were passing through town. It has been many years since I have done that. We learned from each other and this is one of the things that Anna taught me…

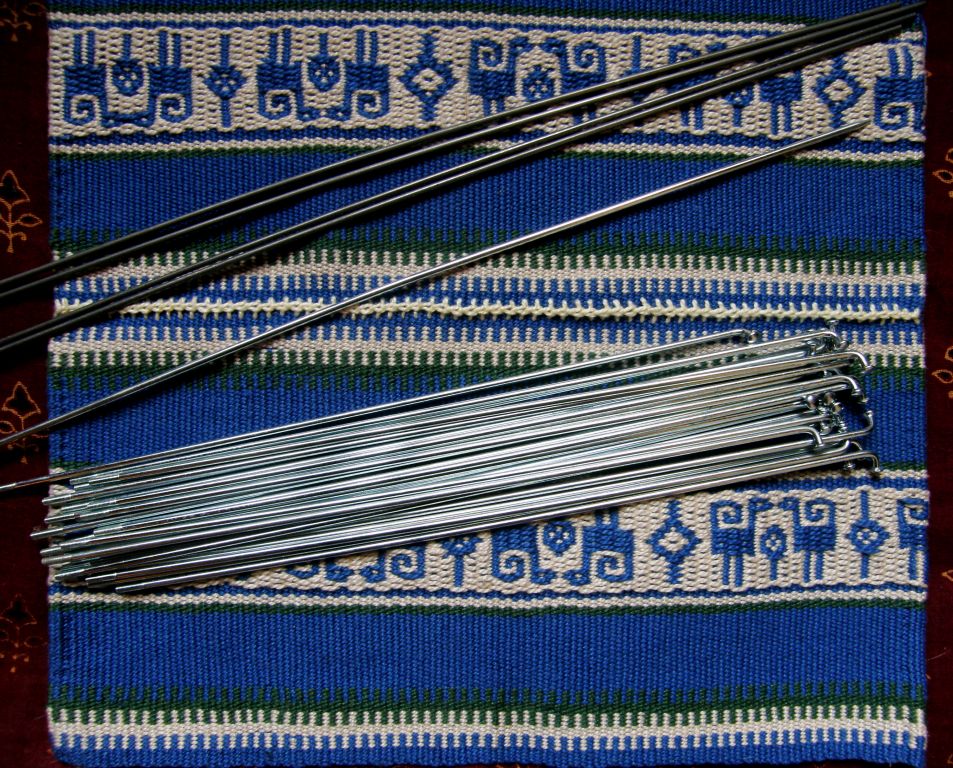
One of Anna’a gifts to me…a bunch of bicycle spokes! I have been using steel knitting needles and piano wire (in the upper part of the photo) to create my third selvedge on my weavings and struggling to find things that weavers can easily get hold of and use. I used to suggest cut down coat hanger wire which is really a bit on the thick side, but bicycle spokes are perfect!! I think that even the smallest town must have a bicycle repair place or somewhere where spokes can be purchased.

Anna and Alistair are back on the road now and riding, if I am not mistaken, by back roads into Argentina. You can start reading about their adventures and enjoying their photos here.

So I had dug the old journal out to brush up on the six-strand finger loop braid and while flicking through stopped on the page with my cross knit looping diagrams and instructions for other edgings and finishes and decided it was  time to brush up on some of these forgotten techniques. So you will be seeing some of those appearing in my projects in the next few weeks.

It seems that I had gone a little cross knit looping mad after I first learned the technique in Potosi back in 1997. The woven cover of my journal is edged with it and even some of the pages within. Pretty much anything with an edge got looped!

Triple columns of cross knit looping on the edge of a felt pouch I made many years ago. The button is piece of gourd from Peru. On the right is a page from my journal where I describe different bands, braids and finishes and have worked cross knit looping along the edge.

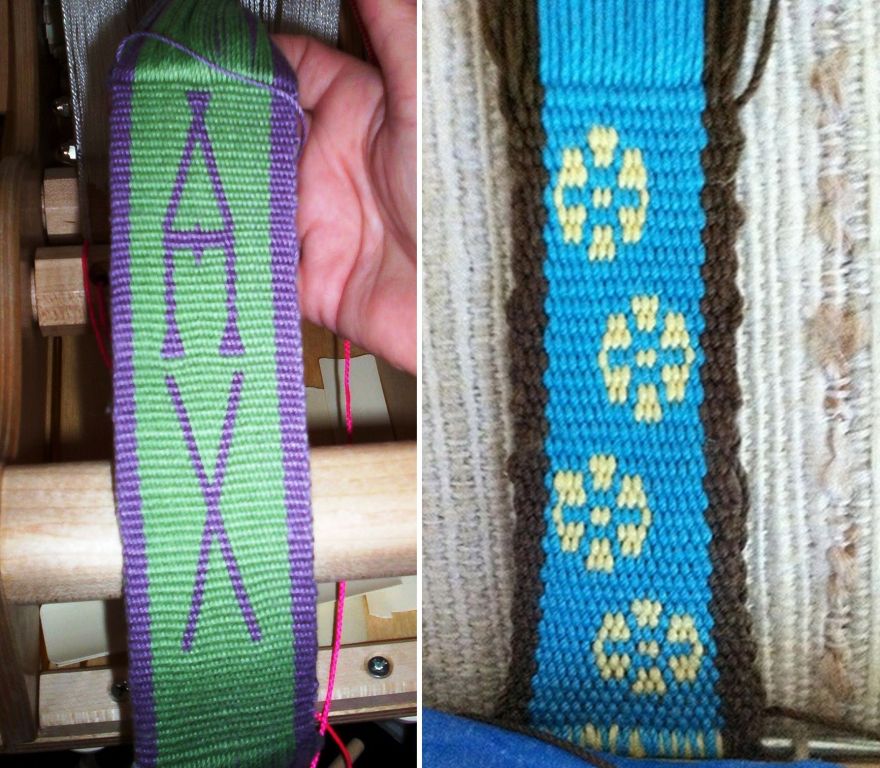
I always did triple columns as that is what I had been taught in Potosi and never thought to experiment with any other way until recently when I saw that the Montagnard weavers use single columns of this looping to decorate edges as well as to join two pieces of fabric together.

At left, the Montagnard weavers have used this technique to join the side of a bag to the main body. They work it in sections of various colors. I used it in the same way to decorate the edges of some small pouches I recently made.

I was keen to try it as a joining stitch to join two pieces of fabric side by side. I had woven a narrow table runner some time ago and, as it wasn’t being used, I decided to cut it in half and use it for my joining stitch experiment.

I think the joining stitch goes well as its form mimics the comb design that I had originally woven into this piece of fabric.

Above left is the front of the fabric. At first, I ended up with a not particularly attractive column of diagonal stitches on the back. Unless the diagonal stitches are exactly the same length and at the same angle they just look untidy and I unhappily pulled out the stitching and redid it several times. I then  looked at an article by Lila O’Neale which contained a diagram showing how the looping can be worked simultaneously on the back of the fabric and so that is what I did. The photo above right shows the back with its row of looped stitches and I am much happier with the way that looks.

And now…finally a tool bag long enough to fit my longest shuttles and a few of my medium sized beaters.

Then I wanted to try it out as a decorative stitch in the middle of a piece of fabric rather than along the edge…

Here it has a different appearance to the work on my tool bag. On the tool bag the looping had to hold two pieces of fabric together and so the “legs” of the stitches had to be spaced widely in order to span the two pieces of cloth. In the example above, they did not.

I have to thank Sue Prior of the Online Guild of Weavers Spinners and Dyers for kindly giving me the link to the Lila M O’Neale article on Peruvian needle knitting which proved to be so very helpful. Sue is part of a Peruvian Textile Study Group in the Cambridgeshire Guild in the UK and a very interesting article about the group’s studies was published in the Journal  for Weavers Spinners and Dyers this summer. In this group Sue has managed, amongst other  things, to needle knit some three-dimensional figures using this looping technique. An article on this technique also appeared in the September/October 1993 issue of Interweave’s Piecework magazine and was more recently re printed in Interweave’s Knitting Traditions magazine.

My aim is to be able to work many columns of stitches flat incorporating color changes and pre Columbian patterns.

While investigating on the net I found this short slide show of the work being done by a Chilean artist to make jewelry with this looping technique – beautiful!

And on re reading the artcile on the Peruvian Textile Study Group I see that Peruvian knitters are also using the versatile bicycle spokes, in this case as knitting needles.

After some more rummaging through my gigantic journal, I found my directions for a nice two-color edging that I was taught by my sling braiding teacher in Peru and so out came another table runner for a refresher on this technique.

The cradle of the sling that I made with my teacher in Peru is edged with a two color looped stitch. Above that you can see the stitch on the edge of my table runner.
I think it makes a really nice finish for this table runner. The central band is a balanced double weave piece.

Some instructions for this two-color edging…

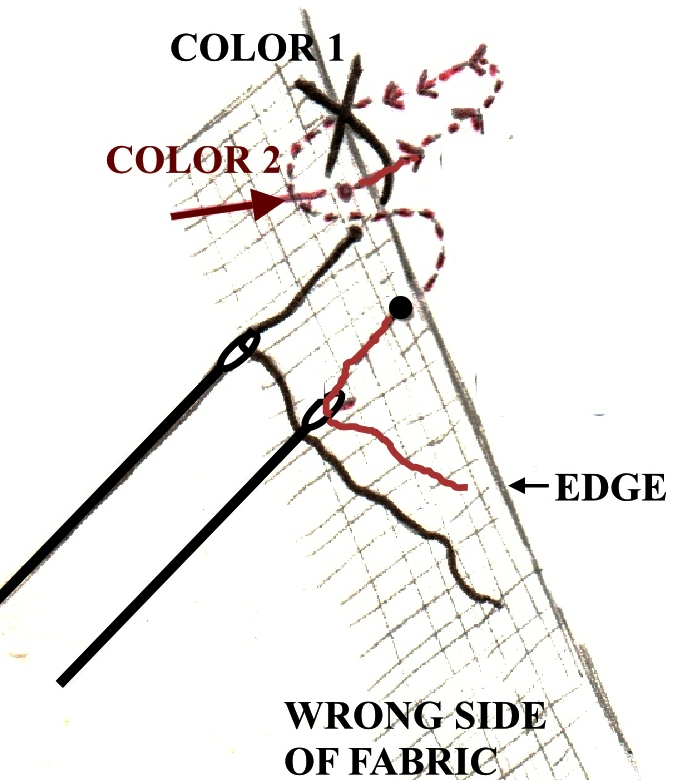
I am right handed and was taught to hold the fabric wrong side up with the edge on the right. The two threads will be on two needles.

  • With color one sew an “X”  which sits along the edge and bring your needle and thread back up to the wrong side of the fabric as shown.
  • Sew a small stitch into the wrong side of the fabric with color two to anchor the thread before passing it under the “X” formed by color one (the needle does not pierce the fabric as it passes under the “X”)  and bring it back out to the wrong side as shown.
  • Color two will have formed an “X” in this path. Color one then passes under the “X” formed by color two and so on.

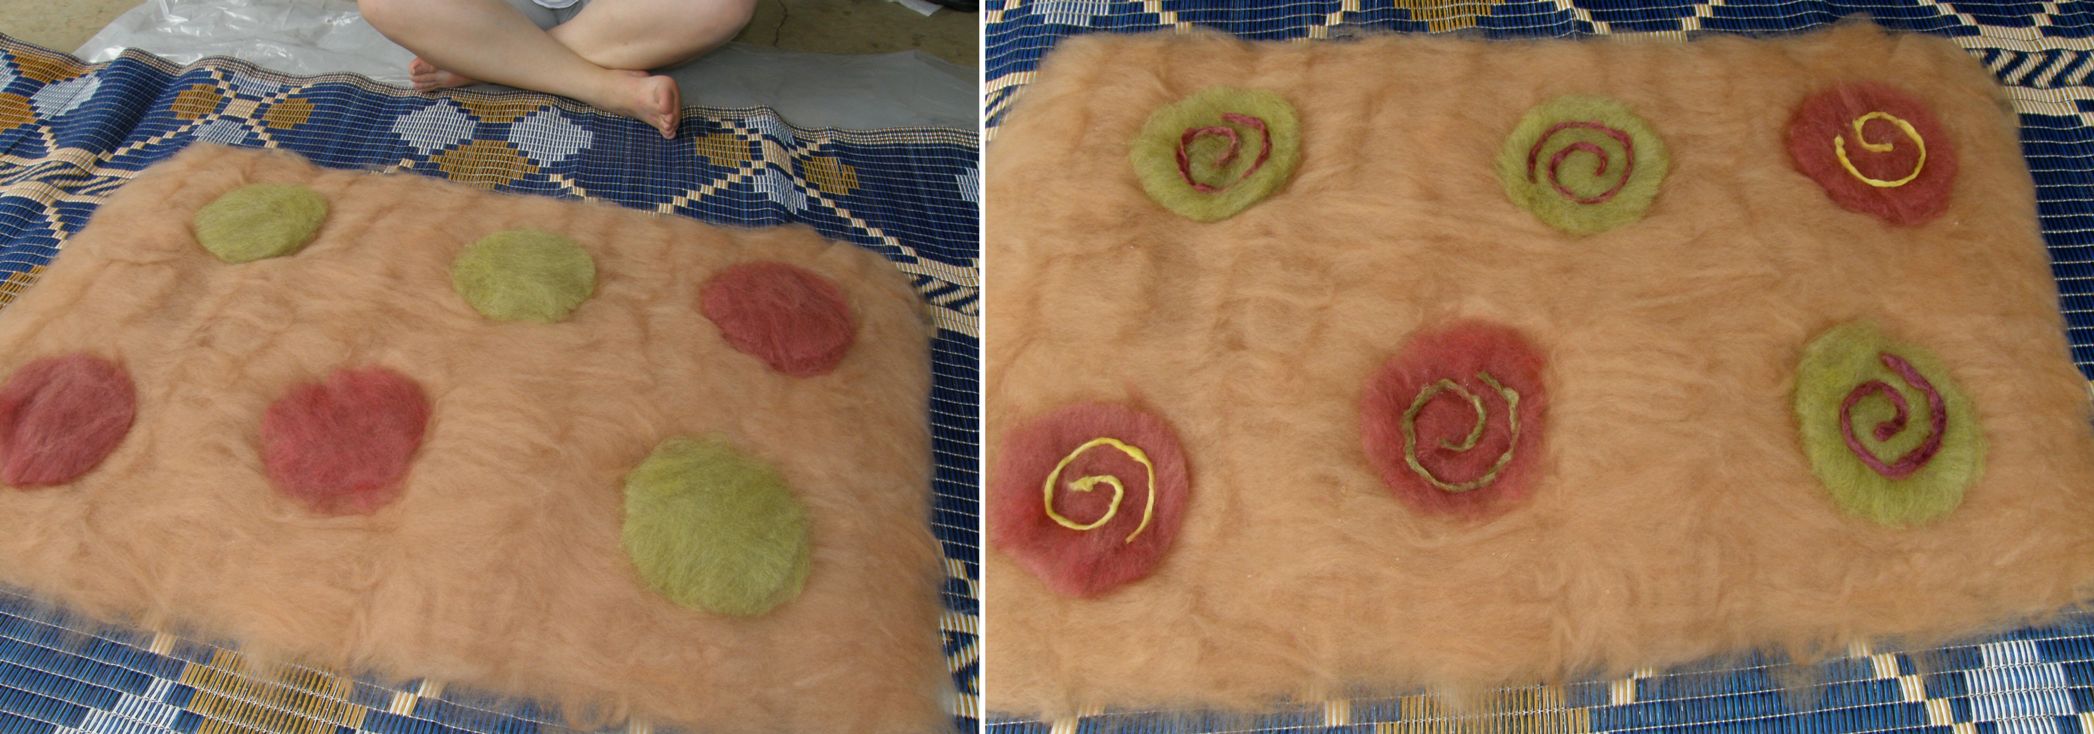
My mind is swirling with ideas….! Now I am thinking that I might decorate the piece of felt that I made with my friend Lisa on my last visit to North Carolina with this looping technique. I just have to find the right design.

Lisa is a skilled felter and was kind enough to give me a chance to learn a little about the technique when I was visiting her. I had made felt many years ago in Chile, following instructions in the Ashford spinning book, rolling it around on the kitchen floor and taking all the color out of the plastic tile!  I had not felted my piece enough and had no idea about what a physical activity it was!
First we chose colors and laid out the wool in five or six thin layers. As there wasn’t enough colored wool we used a white base.
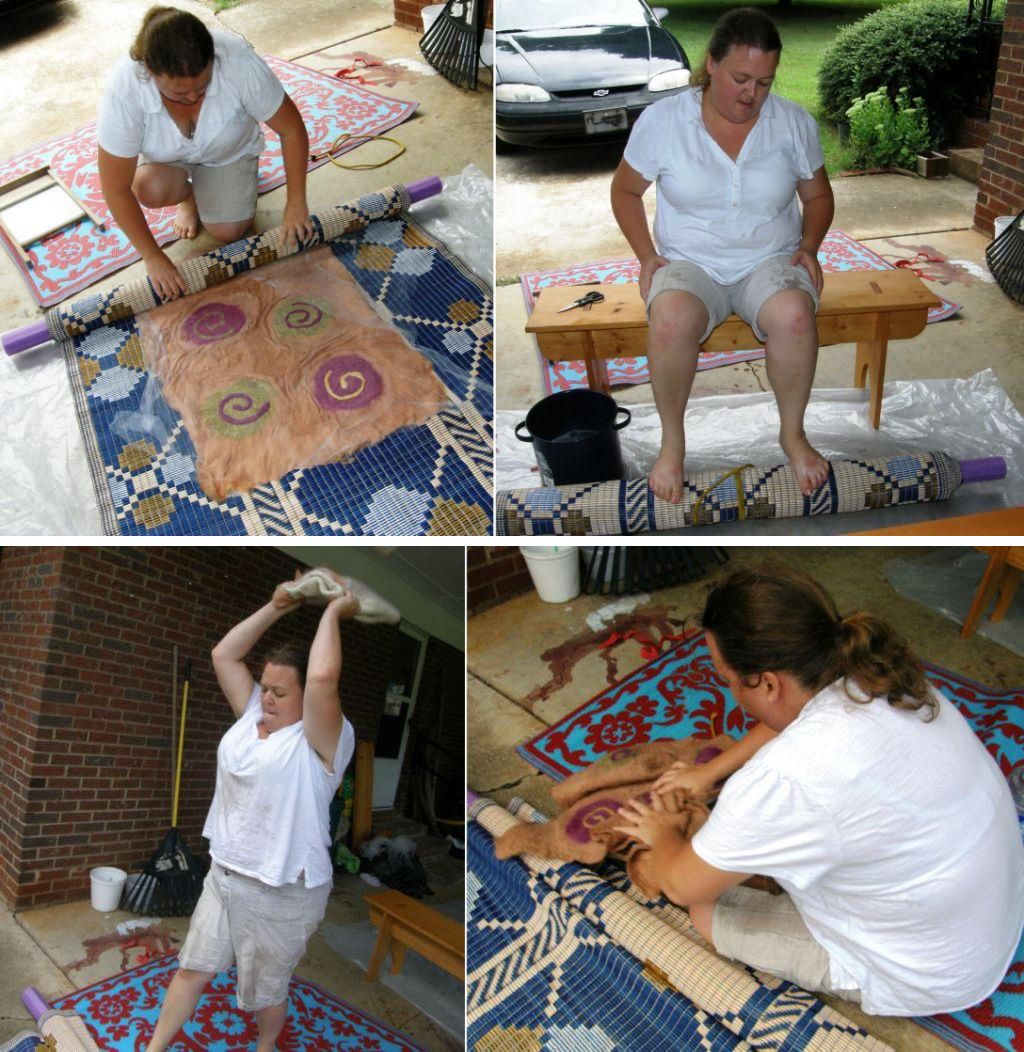
Shapes are cut and placed and then the whole thing gets covered with a piece of tulle and sprayed with hot water and detergent. We then rubbed the surface through the tulle adding more hot soapy water as needed.

When we were satisfied that felting was underway and that the various design elements were clinging sufficiently to each other and the base, the fun began!

The piece had to be rolled so we both sat on benches facing each other, put on some jolly music by the Carolina Chocolate Drops and rolled away stopping now and then to unroll, turn the piece and re roll. Then came a lot of folding, slamming and pummeling. The piece was rinsed and tossed onto the roof of the shed to dry. 
Back home in Bolivia, my cat has still not decided if she wants to let this luxurious felt piece go. I am not particularly in love with the design I made and so will most likely turn it over and use the white side to create some kind of applique and embroidered design – something inspired by a South American textile no doubt!

I have just about caught up on all pending projects. The guitar strap came off the backstrap loom, all six feet of it and so there will definitely be some left overs to sew up into something.

And here are those blue bags again. I sold the original two and made up two more from the piece I warped up for demonstrations at Convergence. My belt shuttles and sticks once again have a home. You can see the six-strand finger loop braid on the left that I used for the zipper pull. My weaving teacher in Potosi taught me this braid which we used to make a strap for the chuspa I wove with her.

Online weaving friends have been posting pictures in the forums…

Amber has been studying simple warp float techniques weaving both single and two-color motifs and inventing some patterns of her own. I like her two color “S” on the background of horizontal bars.

Amber dove into the deep end earlier this year and wove mug rugs on a backstrap loom following my one-weft double weave tutorial as her first backstrap weaving project and is now weaving simple warp float bands on an inkle loom which allows her to weave in a more confined space.

Marydargie is continuing to follow the lessons in my Andean Pebble Weave book and is also working on an inkle loom producing great-looking bands.

I have a new project in mind for next week which involves charting, which, fortunately, I love so I will be down on the floor once again with paper and colored pencils to see what I can work out. I am very excited about a design I have found and can’t wait to weave it.

Finally, helloooooo out there to Anna and Alistair. I hope you are enjoying smooth riding where ever you are!
Alistair is from Adelaide and Anna now makes her home there too so perhaps we will meet again on my next trip to Australia.

I will leave you all with some gorgeous shots from Anna and Alistair’s time in the hotspring and salt lake region on the Chilean/Bolivian border…The little animal is a viscacha and is one of the motifs in my pebble weave book.