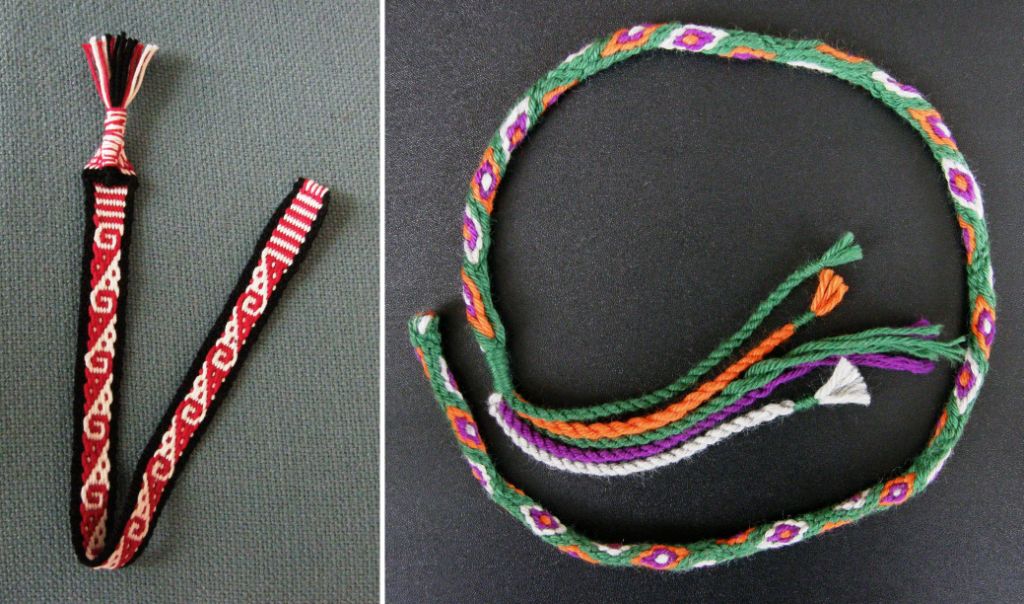
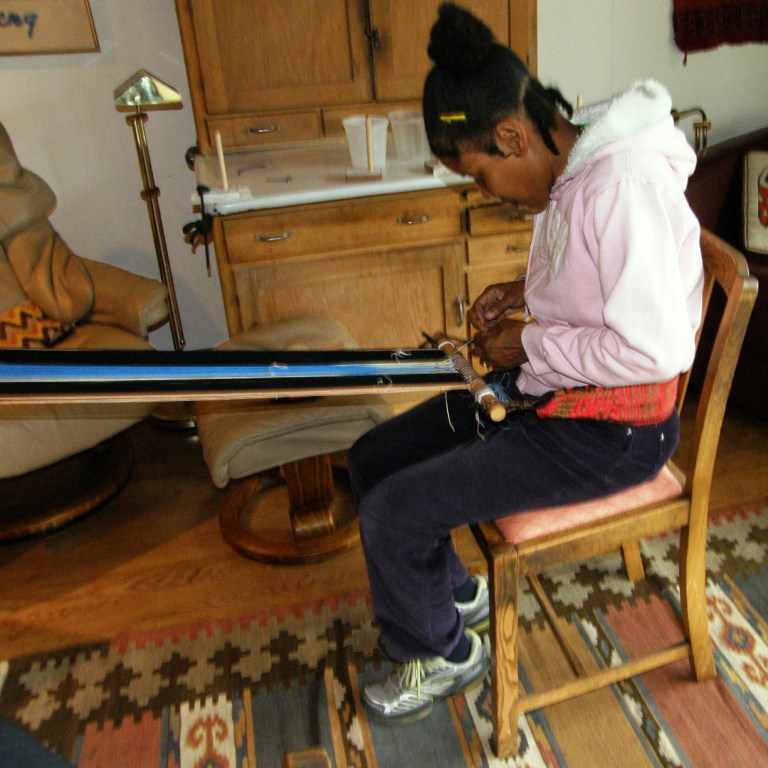
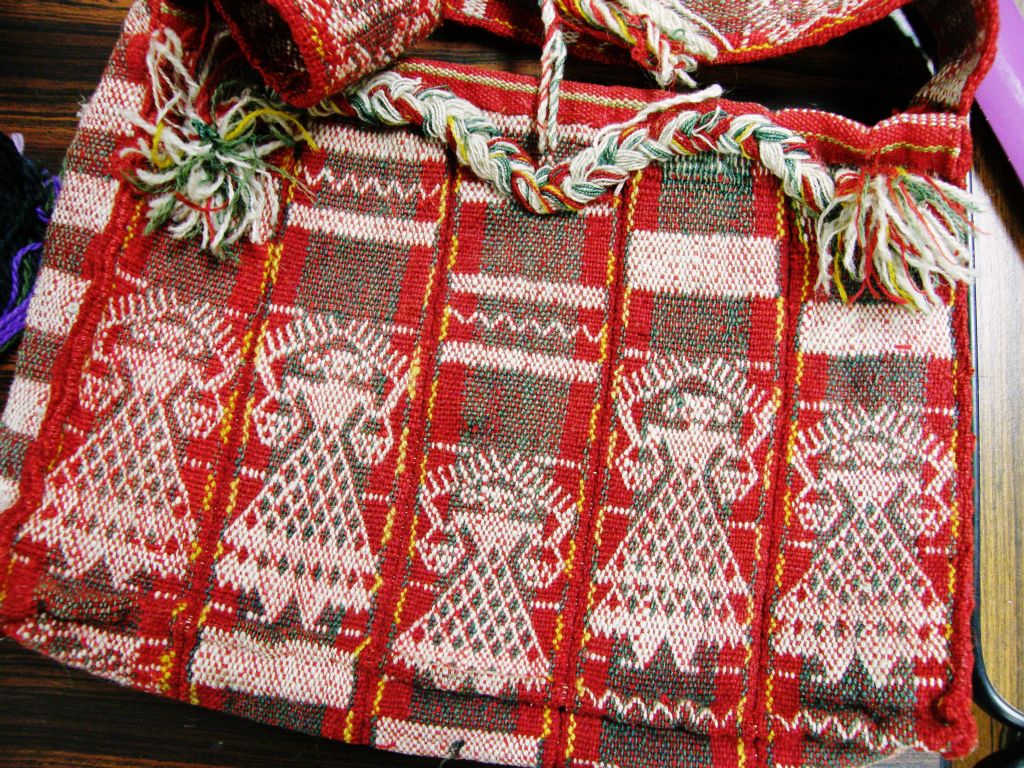
It’s just a short one this time to show my most recent finished product.
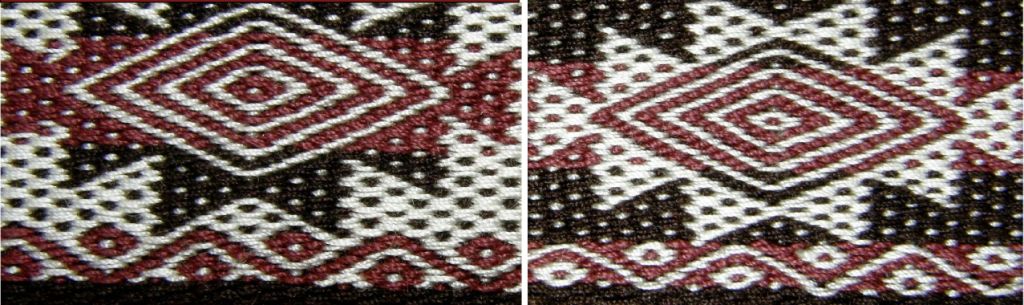
One panel of three that I wove for this project using wool singles in a three-color version of the structure I call Andean Pebble Weave..
I really enjoyed weaving this piece but I think I enjoyed even more figuring out how to use this fabric to make the expandable folder for my pattern charts.
I had woven more grey fabric to add to the sides of this central panel….
Then came the decorative stitching to connect the three pieces. I chose the “quietest” of the various stitches that I’ve been shown by my Bolivian teachers. This particular stitch is used as an edging by my Bolivian teachers. I was also taught it in Peru by the gentleman who taught me sling braiding. He uses it to edge the cradle section of the sling. I stitched it flat in this case in the way my backstrap loom teachers from Vietnam use it. They use cotton. I used wool which I think is more forgiving in that it is better at disguising inaccuracies.
This stitch can be found in some embroidery books as Van Dyke Stitch.
I lined the piece and inserted sturdy card between the layers. I had an old calendar from 2012 with sturdy card pages that my sister-in-law had made for me using photos of my weavings. It’s made with such high quality materials that I’ve been keeping it until the years can roll around and match 2012 so that I can use it again. Well, it’s too bad because now it’s been cut up for this project. The fact that I had written lots of notes on the calendar back in 2012, making it less re-usable, helped me make the decision to sacrifice it.
Then came time to construct the expandable innards and figure out how, once constructed, I was going to stitch it into the folder. There was a lot of back-and-forthing on this.
In the end, I stitched part of it in and then went building the rest in two halves. I glued them together in the final step. Still, it was fiddly and quite awkward at times….but fun! The center fold in the fabric fan is where the two halves were joined. Here it is finished…
I used cotton lining fabric…you may recognize this fabric from some of my other recent projects. I don’t have a fabric stash and it was just pure luck that this print with its little red and green flowers and leaves suited this project so nicely.
The dividers within the folder are made from the same cut-up calendar. There are six pockets and they are currently holding my supply of blank charts. I haven’t yet sorted through my drawn pattern charts and I’ve actually decided that they need a folder of their own…..that’s how much I enjoyed this project! Plus it gives me another excuse to weave something.
A button and braided loop have completed the project.
And so, in preparation for the next folder project, I’ve dyed more of my Petaluma wool singles yarn and am currently deciding on the pattern. I’ll spend time on that. All the number crunching has been done. I already know all the measurements… what size to cut the dividers and the strips of adhesive interfacing that hold them in place, for example, the ideal warp length and width and the number of ends per inch I need in both plain weave and warp-float pattern to achieve that width.
Speaking of width and expandable projects….I’ll include a photo here a little further down the page that I took back when I was weaving the paisley fabric for the larger of my two box-like purses. This is to give you some tips on how to prevent having the width of your cloth expand as you progress.
I always weave a sample when I am about to use new-to-me yarn or if I am going to use a known yarn in a new structure. I get it all figured out and write the ends-per-inch numbers in my notebook so that once I have the warp on the loom I know how to distribute the threads to get the correct width. In warp-faced weaving there is no reed or other implement to hold the threads in a fixed spacing.
Distributing the threads evenly across the beams takes me some time and a lot of measuring and even so, sometimes I don’t get it quite right. I might find that a supplementary-weft motif on the right-hand side of the cloth is more robust than the same one on the left. The overall width of the cloth might be correct but the threads are sitting just that little bit closer together on the left than they are on the right. It can be tough to manage with hundreds of ends of very fine thread! This experience leads me to appreciate even more the skill of backstrap-loom weavers in traditional weaving cultures when I look at the cloth they produce.
The leaves on this piece varied according to how closely the warp threads were spaced in different areas. It’s just one of the challenges of doing warp-faced weaving on a backstrap loom.
The distribution of threads will depend on the kind of structure to be woven. Naturally, threads will be more closely spaced in a section of warp-float pattern than in a plain warp-faced section, for example. If you’ve figured from your sample that fifty ends give you an inch, it’s not enough to check that a section of fifty ends measures an inch. You don’t want twenty-five of those ends to give you three-eighths of an inch and the rest five-eighths. I fiddle around with this a lot before I throw the first shot of weft. This next picture shows how one can easily be tricked about width if you haven’t first woven a sample and done the math.
Outside of my sampling notes, the way the threads lie along the cross sticks is the best indication of how wide this warp wants to be. But even so, the figures in my notebook will more often than not tell me that I need to spread the threads even more before I can start weaving. I have to trust those figures even though my eyes are telling me otherwise.
In the photo I am settling all the warp threads neatly along the beam. The section on the right has been settled, thread by thread, so that none are overlapping. This enables me to create the neatest possible selvedge. You can see that the groups on the left clearly haven’t been settled yet. Once I have made my heddles, those cross sticks are removed and that width reference is lost. See how much narrower the first section of threads is along the beam where pairs of threads are positioned one above the other rather than side by side as they are along the cross sticks. Without having woven a sample and made notes, or noted the width on the cross sticks, one can be tricked into thinking that this is the correct width for that section.
Maintaining width from start to finish.
Of course, I could start weaving the cloth at that narrower width. It would be a very tight warp-faced fabric compared to what I naturally weave and I’ll be fighting with it the whole way if I want to be able to maintain it. The width will want to expaaaaaand. Knowing what width the fabric wants to be in YOUR hands is the key. It will vary from person to person. In short…..I find it so very important to weave a sample first!
This next folder project will put an end not only to the supply of card from the calendar but also the stash of Petaluma wool. The stash bust is going very well! What’s next on the list?….maybe my handspun cotton singles?
I have been enjoying some stretches of quiet time in which I have been sewing and tying tape onto a new ikat warp.
The sewing part of my reward time was about converting the long strip of cloth that I recently wove on the Karen backstrap loom into a table square. I cut the strip into five pieces so that they could be joined side-by-side into an almost-square piece of cloth, roughly 24″ x 24″. I think that it is something I can use on tables to display my workshop samples.
I wanted to lay the strips side by side and join them edge to edge using one of the decorative stitches that Bolivian weavers use when they join their woven panels. There are many varieties of these joining stitches and I chose one of the simplest one. The needle and thread follow a basic figure-eight path. The needle emerges from bottom to top a certain distance away from the edge of panel A. Then it dives down in the gap between the two edges of the panels and emerges from bottom to top the same distance away from the edge of panel B. Then it once again dives down in the gap between the edges of the two panels and starts again from the beginning.
I used this joining stitch a couple of times before when I connected wool panels to make lap blankets. Here’s one of the two panels of the purple blanket on the loom…
And, here it is connected to its partner with the decorative stitching…
I took care of raw edges by eventually covering the perimeter of the blanket with the woven band you can see below…
The red and brown blanket got the same treatment. Above you can see the two panels sitting side by side before I sewed them together.I used a contrast color for the join which made the stitching practical as well as decorative. This blanket also had its perimeter covered and raw edges protected with a woven band.
I guess the hardest part is making sure that the needle always pierces the cloth the same distance away from the edge. Cotton seems to demand a higher level of accuracy and I wasn’t confident enough to go with a contrast color for the stitching. I matched the color of the sewing thread to the cloth and the little inaccuracies give my stitching a fairly ”rustic” look.
Stitching in progress. There were four joins to cover.
A close-up of the joins.
I covered the two raw edges with cross-knit-loop stitches and left the two selvedges uncovered….
I kept the cross-knit-loop stitches as close together as possible. This gave good coverage and meant that I could just turn the raw edge over once and feel confident that the stitching would cover and protect it.
My other non-weaving activity was time spent tying a new pattern into my next ikat project. It’s another short warp as I am still at the stage where all I am hoping to do is learn and improve my skills before I launch into a ”real” project.
The base colors show against black in the last silk ikat project.
I again used the naturally dyed silk sample skeins that I had been given.
This warp is made of a different kind of silk to that which I used in my last ikat project. It is different in that it is finer, more slick and has a higher twist. I guess it more closely resembles the silk that I eventually hope to use in the real project, whatever that might be.
A major difference is that this kind of silk absorbed the natural dyes in a very different way too. The colors in my last warp were more muted and “sad” I suppose you could say. These colors are brighter and clearer….almost too bright for my liking and I might over dye the project later to sadden the colors if the contrast against the black dye is too high.
It’s the differences in this thread that are of interest to me. Will the fact that it is finer and slicker make it more difficult for me to achieve good firm ties when I apply the ikat tape? Will the black dye bleed under the ikat ties? Will the threads shift more freely out of alignment when I weave because they are more slick than those I have tried in other experiments?
To make it all a bit different to the last ikat experiment, I plan to add two panels to either side of this piece when the time comes to weave it. I hope to be able to weave motifs with supplementary weft in those two panels that resemble the ones I have created with the ikat tape.
When I posted pictures of my last experiment in online forums, questions arose about the tape I am using. It was given to me years ago by my weaving friend Betty. You can see a roll of it at left.
I don’t know where she got it from but the only place that I have seen selling anything that seems to be specifically designed for ikat is Maiwa in Canada.
I used cassette tape with some success before I was given the ikat tape. It worked very well when I was using cold water dyes on cotton. It failed in hot water, though. It held knots well but you had to be careful when pulling knots tight as it could snap. The ikat tape has never snapped.
Others in the forums have mentioned using flagging tape and cut strips of plastic grocery store bags when they have taken ikat workshops. One of the features I like a lot about the ikat tape is that it can be split and torn vertically into strips as fine as you like. I am not sure if that is a good thing if you are trying to use the entire width of the tape to wrap a very large area. I think it in that case that it may have a tendency to split when you don’t want it to.
This is probably one of the last ikat experiments that I did using cassette tape….
I know that you probably can’t make out anything here but this is the pattern that I am currently tying. I mark the pattern with a charcoal pencil and I use a paint brush with stiff bristles to “erase” mistakes in my marking.
I am finding straight horizontal lines the hardest thing. I tie each bundle separately and just hope that the plastic wraps line up well enough to give a smooth horizontal. I have been tempted to put several bundles together and bind them all at once but I know that if I were to grab my bangs in a bunch and cut straight across, I wouldn’t end up with a straight line.
The other thing I did in my reward time was to cover the journal with the last ikat piece and add it to the collection of little books with hand woven covers.
I was pleased that the three motifs in the middle ended up nicely seated on the spine of the book.
I have actually finished all the tying part of the latest ikat project. Now I just need to carefully inspect it and make sure that I didn’t forget any parts. You can see in an old experiment in the picture below that the top left motif is missing one wrap on its extreme left. It went into the dye bath like that. So, I will be looking very closely over my current pattern to make sure it is complete!
It will go into the dye bath tomorrow. Fingers crossed that all goes well!
Happy 2019 to you all! New Year’s Day for me was more about celebrating finishing my latest e-book. And now that that project has been put aside , I am back at my loom and working on a large piece of fabric. This will be sewn into a shoulder bag. Don’t ask me what shape or form that will take. I am not skilled at sewing and I’ll have to figure that out later! I have worked on this for more hours than you might imagine. If you compare the first and second pictures, you might notice that the green stripes that flank the center pattern are missing in the second picture. They were begging to be removed and so I spent one evening un-weaving back to the start and cutting them out so that I could get up the next morning to a fresh warp and pretend it never happened! That left me much happier with the project. Ofcourse, I will be finishing the cloth with decorative stitches and tubular band edgings. How could I not after finally getting the instructions down in my latest e-book, The Eye-pattern Tubular Band and Other Decorative Finishing Techniques.
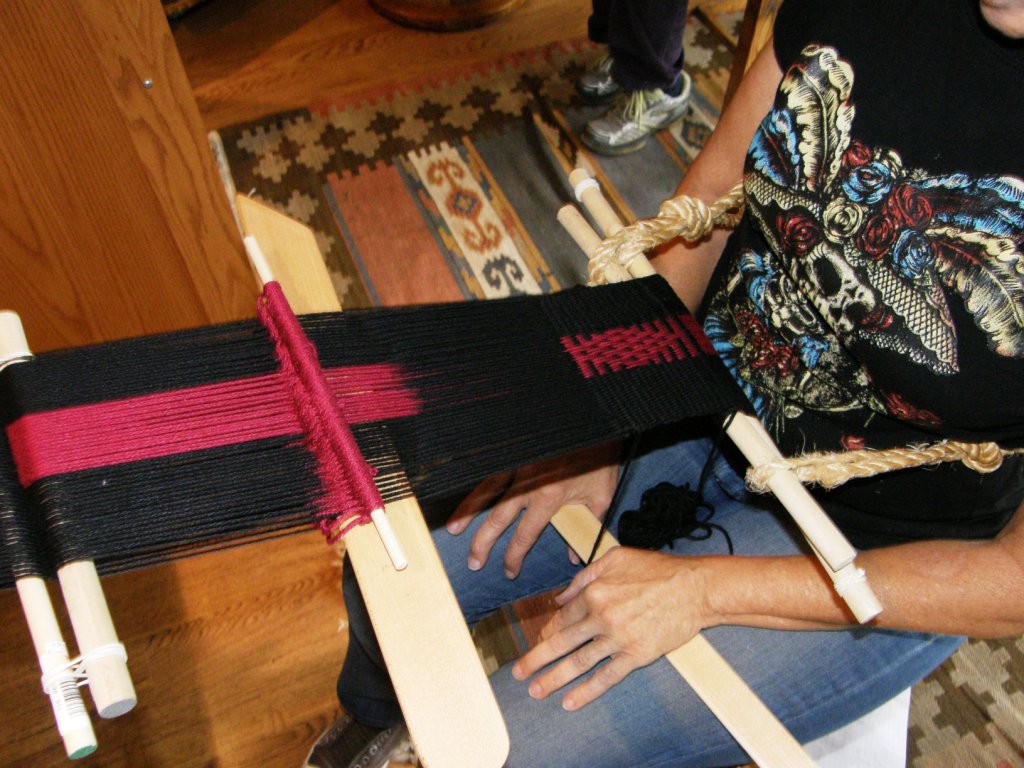
This bag will have a built-in pocket. If you look closely at the picture above, you will notice that I began by weaving across the whole width of the cloth. Now I am only weaving the center section. You can see that the weaving there has advanced far beyond the side sections. In that center section the warp is longer than the two side sections and this is what will form the pocket.
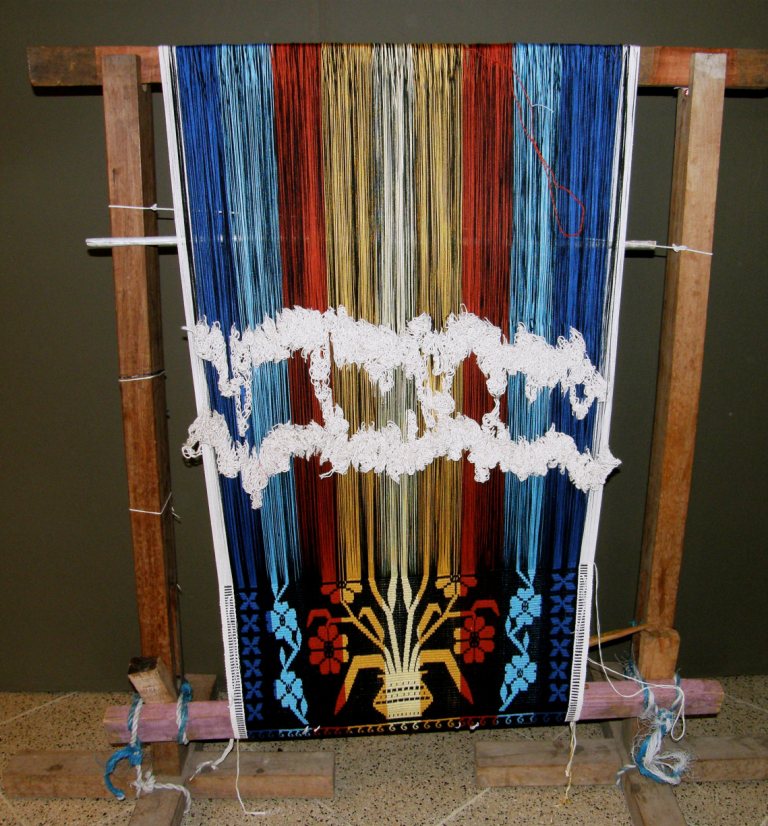
This is the warp for the black pocket bag that I recently wove. You can see how the center section of warp extends all the way to bottom of my bed, which is my usual anchoring spot for my warps. The two side sections don’t extend that far. They are suspended on a separate beam which is extended on rope (my lovely braided llama-fiber rope from Peru :-)) away from the bed. I guess for me that is the trickiest part of the set-up….having the two shorter parts of the warp sitting at just the right distance from the bed so that tension is exactly equal the whole way across the three sections.
That involves a lot of sitting in my backstrap to feel the tension across the warp and then laying the warp down so I can go to the far end and guess how much the rope needs to be adjusted…back to my backstrap….back to the far end, another minute adjustment…and so on! You can try to feel for tension differences all day and night but they will only really show up once you start weaving. Ridging, or corrugation, in the plain weave is the warp’s way of telling me that it is unhappy!
It was a lot easier to equalize the tension when I learned this technique in Potosí, Bolivia back in 1997. We used a horizontal ground loom and wove a very small piece. Adjustments were made by simply shifting a stake within easy reach that had been whacked into the ground.
My teachers Julia and Hilda discussing how to create the warp that includes the pocket. It had been many years since either of them had woven one of these bags.
I wanted the pocket on my current project to be 10cm deep. That means that the center section of warp is 20cm longer than the rest of the warp. I wove the center section, as I am doing in the second photo in this post, for 20 cm. Then I placed the entire warp together on just one back beam, put the llama rope aside, and anchored the beam directly to my bed as I normally do. The long piece of pocket fabric then gets pulled toward me and folded back and out of the way so that I can continue weaving across the entire width of the warp once again.
The next challenge is folding the pocket and somehow securing it so that I can once again put tension on the warp.
That was easy in Potosí when I was learning and relatively easy on the small pocket pouches that I have been weaving lately. In Potosí we just used a long needle and pinned it to the rest of the cloth. We were weaving with re-spun acrylic. It had a lot of twist added to it and it was tight and firm. Added to that was the hard beat on which my teacher always insisted. My cloth, like the yarn, was stiff and firm. I could just pin something to it and it would not budge.
The 20/2 wool that I am using, on the other hand, has a bit of stretch to it and the cloth that I am weaving is not stiff. After trying many ways to secure it, none of which were satisfactory, I ended up using crochet cotton to sew the folded pocket down. The stitches can be removed once I have finished weaving.
It’s a quirky little pocket. It sits on the outside of the bag and is accessed from the inside. I have been wanting to weave a large piece with one of these pockets for years. Now that the exciting pocket part is done, the rest of the weaving will be less technically challenging. Maybe some warp threads will break to provide some additional challenges…ha ha. Actually, that’s quite unlikely. I am not needing to do any strumming on this piece to get sheds to open and so the 20/2 wool should remain in excellent shape. The bag will be 30cm long and so I am quite near the half-way point where I can start working on what will be the back.
I am also working a bit on another book while I weave this piece (I have a lot of started book projects on my laptop!). I am actually always working on something like that when I am not at my loom.
I have seen a few eye-pattern tubular bands being woven in my online groups since I launched my latest e-book on the topic earlier this month. I can’t tell you how happy that makes me. Nancy, aka yarndragon, was the first to post a picture of hers which she made on her inkle loom..
I wonder who will be the first to post a picture of one they have sewn to cloth. I am pretty sure I know who it will be but I won’t reveal that here!
But, you don’t need to wait until you have woven a piece of fabric to which you can attach an eye-pattern band. One of the happy discoveries I made while writing the book was that the tubular band can be attached very nicely to store-bought cotton cloth. I had actually planned this to be a sample that showed how light cotton cloth cannot support the spiraling energy of the tubular band when it is simultaneously woven and sewn to the edge using the weft as the sewing thread. Light cloth can buckle and get distorted with all that spiraling energy.
The eye-pattern tubular band used to dress up a simple pouch made with commercial cotton fabric.
However, after having folded the cloth to make a little pouch and seaming the sides, I was actually sewing to four layers of fabric and that was more than enough to support the tubular band. I had bought interfacing to use but didn’t need it in the end. I am very tempted to make a bunch of little pouches now as gifts using lovely Japanese cloth pieces that I bought at the indigo exhibit we visited as part of BRAIDS 2016. Tubular bands along the sides and cross-knit-loop stitching along the top are nice finishing techniques. The legs of the cross-knit-loop stitches completely cover the hem at the mouth of the pouch. The strap is braided ( a 4-strand round braid) and there is a simple snap closure in the center. The button, or rather, pendant, is just decorative.
I pulled out examples of my eye-pattern tubular bands used as edging so that I could photograph them for my book. I completely forgot this quirky piece that I wove some years ago. It lives with my travel bags as I only use it as slip-cover for my laptop when I am traveling. Hence , it was forgotten and didn’t make it into the book.
I made the circle shapes in ikat and then filled them in with pick-up patterning. The piece is edged with the tubular band as are the circles. My ikat circles which were quite round (I was very proud of them) got slightly flattened as I wove because silly me forgot to consider take-up!
I am very fond of this piece because of its quirkiness and the somewhat unconventional application of the techniques I have learned to do while living here in South America. I love that I have created something that can travel with me everywhere.
Knowing how to turn corners while attaching the tubular band is something that will open up even more possibilities for adding decorative finishes to bags and pouches. I have covered the various ways that the bands can be placed on these kinds of projects in the e-book and there is a tutorial and supplemental video clip on turning corners.
Now I am thinking….wouldn’t it be nice to have a laptop bag with a pocket for the cable….hmmmm.
Until next time I will leave you with a reminder of my new e-book….
One of the things I like about the discontinuous-warp technique I have been playing with lately is that it gives me not one, but two opportunities to practice creating four selvedges….a two-fer. So, with the new piece that I warped this week I get two more chances, which makes five in total these last few weeks. I think my skills are improving. At the very least the process is becoming much less intimidating to me. I wonder if one day I will shrug it off and say that it is “normal” as my young teacher from Pitumarca, Peru did.
Four-selvedge bands woven by relatively new weavers…Bolivian teenagers-in-training.
The first piece on which I learned the four-selvedge technique in Potosi, Bolivia.
Here’s where I was at last week when I wrote my blog post. I still had the heddles in place and and had just removed the shed rod from the left hand side.
And here is the piece with the gaps closed. There are a few wobbles here and there but I am pretty pleased with it. Next came the tubular edging band and it took me five attempts to settle on the pattern and size. Part of the problem is that I don’t have much of a wool stash and the colors are very limited so, in the end I had to go with a heavier tubular band than I would have liked.
Late night weaving and sewing with poor lighting…not a good idea! I had to unpick a fair bit next day. You can just see near the upper left corner the end of the tubular band. I was left with the problem of what to do with all those warps ends. They are easier to deal with when you sew a tubular band to a bag. The band can be continued down into the bag, its end sewn over and hidden away inside. When you look at an Andean textile that has been finished this way, you have to look hard to find the start and finish of the tubular edging. On all the pieces I have seen, the end has been sewn over and over and the unwoven warps cut. It has been done so neatly that you can barely tell that the resulting blunt end is there. This is something on which I need to work!
So, I wrapped the place where the start and finish of my band collided. It was obvious and ugly and I wanted to hide it. The small bit of wrapping looked pretty awful. My solution was then to extend the wrapping to about an inch and wrap all four corners the same way. This would transform the wrapping into what we weavers like to call, with tongue in cheek, a ”design element”. You can see two of the wrapped parts below.
I created a threaded-in pattern for the tubular band rather than do something with pick-up. I warped the pattern off center so you can see the whole design sitting next to the upper face of the cloth rather than having to tip the edge to view it. The band on the back side of the cloth is in a solid color. Underneath all that you can see this week’s new discontinuous-warp project…another two-fer. It looks like I will be able to use that discarded tubular band warp from last week after all. I think the colors match this new project well.
What am I going to do with these pieces? Nothing! They are samples, practice pieces, notes and lessons in cloth. I would like to have one of the pieces in my wall hanging series represent the ticlla, or discontinuous warp technique, and so, the pieces I am currently weaving are part of my warm-up for that.
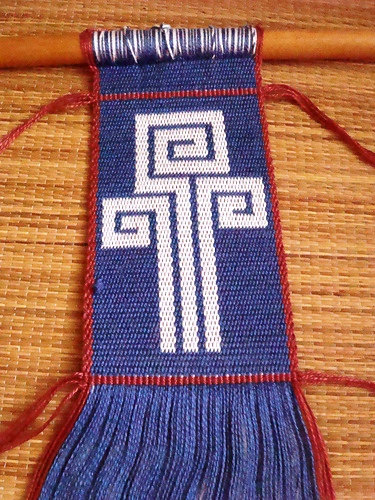
I so love sitting in front of a fresh warp like this!…terracotta and natural discontinuous warp in the same Navajo wool warp yarn that I used for the Four Seasons piece. This time I warped for a tiny strip of simple pick-up down the center and re-spun some brown wool to match the twist of the Navajo warp to use as the border color. I wanted to use a complementary-warp technique.
I wanted to decorate this one with supplementary-weft patterns again but I chose a “discontinuous” method this time in that the weft does not travel all the way across the warp to turn at the edge. The weft-turns shadow, or outlines, the motif.
The terracotta supplementary-weft yarn that I used could have been thicker. I didn’t get as good coverage with it as I did with the lighter color. The light bumps at the edge of the terracotta half of the cloth are the main weft turns. I had to go back and forth between white and terracotta weft as I didn’t have enough of either alone to complete the project. Those contrast color weft-turns will get covered by the tubular band later. The turns of the supplementary weft lie beside the motifs in a nice outline.
I wove the pick-up pattern wondering if there was a way I could close the gap between the two woven ends without interrupting the pattern. It was a four-shed pattern and I hoped that I would be able to fix things so that I would be in just the right shed for the last weft pass. I think a lot of it came down to luck in the end. The weaving fairies were with me :-).
It worked! Now, let’s see if I can manage it on the other side. Hey, weaving fairies, don’t go away yet. I am disappointed with how noticeable the change from white to terracotta weft is in the white section…oh well.
I am very happy with my wee bit of pick-up on this piece but, before I get too carried away, here’s a reminder of what the Pitumarca weavers achieve as far as pick-up is concerned….
Granted it is a little easier to weave supplementary-warp pick-up in the small space at the finish of a four-selvedge piece but, oh my gosh, look at that! I would say, and this is just my guess, that the weaver closed the gap at the outer edges where you can see the tiniest fraction of an inch that is without pattern. The natural alpaca colors are so gorgeous. I don’t remember where the start and finish of the tubular band is located on this piece but your eye is certainly not drawn to any obvious spot where the weaver may have finished.
Above you can see a weaver from Pitumarca, Peru nearing the end of the warp. You can see how small the space in which she picks up the patterns and operates the heddles is. One the right you can see how a four-selvedge piece with supplementary- warp patterns (part of a discontinuous-warp piece) has been finished.
While waiting for the brown yarn to dry and have its twist set, I thought about other possible ways to hide the join in tubular bands on these flat woven pieces. Maybe some cross knit looping? I practiced on one of the braided keyfobs that I have been making, the first one which was bit on the loose side. It could be sacrificed for this experiment.
I am not convinced but I will keep it up my sleeve just in case. I think it looks cute, as if I had knitted a wee wool sweater for the braid! I added another Margarita braid to the collection in red and black.
Jennifer finished her stunning hemp piece with pick-up patterns of Chinchero, Peru. I have charted these in my second book. I like to think of complementary-warp structures as two-fers…one weft shot produces pattern on two beautiful faces.
Now she has to choose which face with be the outside of the bag she is planning. I am afraid that none of us in the Ravelry group were helpful when she asked us for opinions. We all liked both sides equally, of course!
And speaking of bags, Julia once again wowed us with her weaving, piecing together and sewing skills….her creativity!
The main fabric was woven on her floor loom and is stunning in itself. CindyQ, also in the Ravelry group, wove the blue supplementary-warp pick-up band and had given it to Julia as a gift. Julia’s idea for making a shoulder pad for the slim tubular band strap is so clever. She wove the band for the strap in tubular form and then wove it as a flat band for a while. She braided the flat band to form the shoulder pad. How cool is that?
Kim Varland, yet another Ravelry weaving buddy, has been playing with the yurt band border pattern that I have charted and explained in one of my tutorials. I love her color combination and she shows more examples on her blog.
Kim has used what I call a simple warp-float technique. While the pattern on the back side of the band is attractive and interesting, it is not truly double-faced. I have shown these patterns to weavers who all love the way it looks on the back.
The other day I was explaining to one of our new Ravelry group members what was meant by a “complementary-warp structure”. I was thinking that surely I had put a description of this somewhere on my blog with lots of pictures. I found it in a post back in 2011 which I had written just before going to Cochabamba to weave with my teacher Maxima. I had promised to start a tutorial page on my return which explained some of these terms which are used for some of the common structures woven by backstrap weavers here in South America.
It turns out that I never did and so , I will copy that portion of the blog post to a new page and will add some other structures to it this week….only two and a half years overdue! Above you can see the double-faced, or two-fer nature of complementary-warp structures.
I love that “big picture” feeling you get from the airplane window. It’s been a long time since I have been able to get a window seat on a coast to coast USA flight in daylight to enjoy the view. The picture below was taken somewhere between Dallas and San Francisco last week.
The view reminded me of the months in the early 90s when I would be sometimes rambling about on top of the Sangre de Cristo Mountains on a peak bagging trip or dropping by rope into the depths of the Utah canyons. From the air you feel so carefree floating over the ever changing landscape like a bird while trying to imagine the thousands of specks of people down there below like ants and what they might be up to.
In a similar way, I made myself step back and admire the big picture before zooming in on the details when Ute brought in a piece of Uzbek silk ikat cloth for me to examine and admire during a visit with her in Northampton.
I got to see the exhibit of Uzbek ikat robes at the Textile Museum in DC a few years ago. Of course, that was a strictly “hands off” affair. And even though I had the opportunity to touch similar fabric from Uzbekistan at the International Folk Art Market in Santa Fe this year, the market simply had far too many interesting things to be able to stop and focus on any one item for any meaningful length of time.
Thanks to Ute, I had time alone with the cloth at left and could examine it to my heart’s content although I found it difficult to capture its true colors on camera.
Ikat fabric I saw at the Santa Fe International Folk Art Market
When I then zoomed in to get an ant’s persepective, I saw what I had named many times, in despair and frustration, during my own ikat experiments on my backstrap loom, the ” dreaded railroad tracks”…
I took extreme measures to keep my warp threads aligned on this piece…that was my goal at the time.
I am talking about those horizontal bars that show that the warp threads have shifted from the original positions into which they had been locked during the tying and dyeing process.
It was always so disheartening for me to be weaving and approaching with excitement the first wrapped area on my ikat warp, eagerly waiting to see how my carefully tied and dyed pattern would appear only to see first, the little specs and then the growing rows of lines of un-dyed thread appearing….those dreaded railway tracks. They told me that the threads had been displaced too much and that my design had been ruined.
But, walk away to the other side of the room and look again at the Uzbek cloth. What do you see? A beautiful pattern with the soft blurry outlines that give ikat its charm and character. Look at the big picture!
I will be trying ikat again when I get back to Bolivia and reminding myself to think like a bird and not an ant!
The same goes for one of my current favorite structures as woven by the Guarani weavers of the lowlands of Bolivia…intermesh.
Stand back and admire the crispness and clarity of the design woven by my teacher Angela.
Closer inspection of motifs on another piece show the feathering that characteristically appears along the edges of diagonal lines.
This has me adjusting and readjusting my pattern charts in an effort to reduce the feathering as much as possible which can sometimes distort the original shape I was striving to create.
Stop fussing and thinking like an ant! The GuaranÍ weavers, as far as I have seen, make no such (unnecessary) effort…they think like birds.
Speaking of intermesh, let me show you Julia’s latest creation in progress in this structure….
Julia tells us that the design comes from a book entitled Japanese Design Motifs. Designs like these with horizontal and vertical lines are ideal for learning this structure and are the kinds of motifs that I have provided with the tutorial in my second book. I used Bhutanese and Mexican patterns for inspiration. The horizontal lines have “saw-tooth” edges and the verticals are crisp and smooth plus the cloth is double-faced!
This trip is drawing to its close. I can look back over the last weeks of weaving with friends, new and old, from a bird’s eye and ant’s eye view and benefit greatly from both perspectives. The ant asks what details can be improved. The bird hovers above to see patterns appearing on bands and cloth, the weavers’ reactions – their smiles and frowns and “aha” moments, changes in their energy levels and receptiveness which their body positions often reveal….and listens to the fluctuating levels of concentrated silence and relaxed chatter.
Here’s a quick whiz through some of the days I spent weaving both east and west on this trip….
Backstrap weaving with ladies at Yale University…. They have a wonderful weaving room for free time weaving. It is full of floor, table and rigid heddle looms which meant standing room only. Many thanks to Barbara who took me to visit with these ladies. Here they are finding the cross in their warps so that they can make simple heddles.
Massachusetts turned on its fall colors for me as we drove home each evening after some weaving in the glow of the setting sun. Here is a shot of what Lausanne in Vermont has dubbed “cinnamon hills”.
And winter was definitely in the air with frosty mornings. Only the brave sat outside for lunch! I was one of them for about 5 minutes.
The round table was a perfect set-up among Liz’s natural yarns and fibers, locally made scarves and shawls and crafts. It was a sweet space in which to weave.
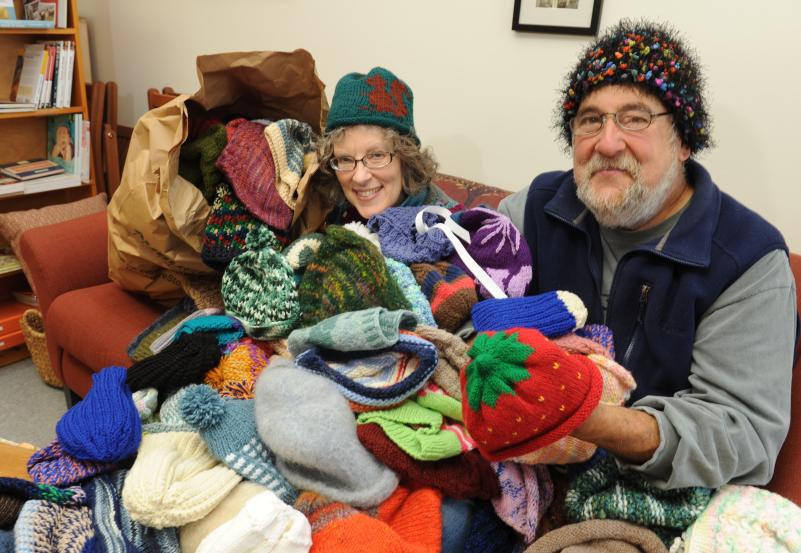
RIght now Liz and her partner John are involved in the 500 Hats event which John came up with to celebrate the 75th anniversary of the Dr Seuss book. You can read more about the project here…there are over 1600 hats so far in their living room.
Moving over to nearby Northampton….here are a couple of things that Chris worked on..
Here you can see her pick-up band finished and decorated with a triangular braid (which I now know how to do….yay!, thanks Chris) as well as her ñawi awapa piece on which she has just about finished twisting and binding the warp ends.
It was a second time weaving with these friends and we did some more pebble weave, made tubular bands and sewed them to pouches which we later dressed up with decorative stitching.
The mouth of a Bolivian woven pouch is decorated, after having been edged with a tubular band, with cross knit looping which is a sewn technique.
The hands above belong to Lisa, on the left, seen here weaving a complementary-warp band alongside Mary-Lou. Lisa is wearing one of her own gorgeous deflected double weave scarves.
Barbara invited friends to her home in Connecticut and her fabulous weaving studio for another gathering where we all wove together….
Claudia and Susan decorate a warp-faced band with both single and double-faced patterning techniques.
And here in California yesterday, we gathered to practice setting up for wider projects. Some people in this group were weaving with me for their their third and fifth times while others were on their second time.
Picture by Ruth Temple
Cookie’s finished piece will be folded into a long narrow bag for a small backstrap loom that she was recently given.
So, we had a group with a variety of experience levels. I think that “experience level” is often most evident in the kind of warp a weaver can create in terms of evenness of tension. Here is where the “short and narrow” mantra comes into play.
Perfect your warping techniques winding short and narrow warps over and over again! SHORT, because you will weave off your project quickly and get another valuable chance to warp again soon. NARROW, because there are different tips and tricks yet to be learned for creating successful wide warps once winding narrow ones with consistent tension has become natural.
The idea was to go wider without necessarily going longer. You can see Ruth’s pretty warp above made from Tahki Cotton Classic onto which she is putting her first set of string heddles. The strip of orange and purple down the middle will be used to create a pattern in the Andean Pebble Weave structure.
She is going to weave the other plain parts using the “thick border” technique described in my first book. This will cause the plain parts to narrow and thicken to match the thickness of her pebble section. Therefore, her finished band will be a lot narrower than the warp appears in this picture. This might become her backstrap.
We needed to refresh some things that are necessary for creating wider pieces, such as putting the string heddles on a stick instead of tying them in a little bunch.
Picture by Ruth Temple. Kathy gets a refresher in heddle making for wider warps
Kathy chose to make a backstrap using Plymouth Yarn Fantasy Naturale and a double- faced warp float pattern.
Kathleen chose to use overtwisted wool that she got in a class with Jacquetta Nisbet many years ago. She has already made a beautiful backsrap with this wool and knows how it behaves. She wants to make a small pouch with a pebble weave motif and wrote to me about how this warp feels “alive” after having used cotton for some time. As you can see we were in a soothing environment in Betsey’s home surrounded by textiles that she has collected in her travels.
Dorothy’s project in Tahki cotton classic is so beautifully arranged. It will have three strips of pebble weave pattern and the color combination is so gorgeous! I am wondering when she will have time for it as she is off to the Tinkuy in Peru this Friday!! We are all so excited for her. Goodness knows what kinds of inspiration she will bring back with her. By the way, Dorothy’s loom is made by Terri at Magical Moons. I hadn’t seen one of these before made by Terri. The loom bars are silky smooth….beautiful work!!
Betsey’s project was the narrowest but with by far the finest thread and I neglected to photograph it, unfortunately. She warped for a pebble weave pattern using the thick borders and her piece will do nicely as a cellphone pouch.
Somewhere in-between all that, Barbara took me to Shelburne Falls Ma to visit Vavstuga Weaving School. That’s a name that constantly comes up in the weaving groups on Ravelry and I was excited to finally be able to see it and meet the staff. I was surprised to find Cindy, one of my backstrap weaving friends, apprenticing there.
What a beautiful location right next to the Bridge of Flowers which even at this late time of year is full of color against its backdrop of cinnamon hills.
Color inspiration anyone? This was in the bridge garden…never seen anything like it!
Becky Ashenden along with her newest apprentice and other Vavstuga staff showed me around. As we chatted at the table, Becky pulled out one gorgeous textile after another to spread on the table.
Not that I know much about Scandinavian weaving, but the textiles were everything I expected and more…rep weave, white on white, linen, crisp and clean, simple, classic, impeccable!
Becky opened a door to a closet which housed hundreds of samples. More samples were draped over loom beams for further inspiration, instruction and guidance but, most importantly, gorgeous handwoven textiles were everywhere to be seen and touched and used in in the house and studio….not just sterile samples to be taken out and studied and then put away. They added warmth and comfort and a lovely sense of home and familiarity. This must be a lovely place in which to learn to weave!
This hanging adorned the wall of Vavstuga student dining room which overlooks the river. I had heard it all before in the online groups…everything at Vavstuga is handwoven. It was wonderful to see it all…. from curtains to hand towels and floor coverings and hangings.
And then there was the band weaving with the typical Scandinavian backstrap set-up…(look at the piece of fabric under the backstrap…that was one of my favorite pieces)
Becky wove that backstrap. Isn’t it gorgeous? She wove one end of the waist band as a tubular band in order to more easily hook on the clever wooden device that holds the warp . Look at that sweet rigid heddle and there is also a lovely wooden smooth shaped sword that completes the set-up. I guess that I just couldn’t hide the smile and delight I felt at seeing all this as, when Barbara and I were about to leave, I was given this mystery package….
No prizes for guessing what was inside!!
Some of the other textiles I met along the way….
Many thanks to Ruth who brought this along to share with me. It is warp-faced double weave cloth, although in many places the warps are quite spread and reveal the weft. A band has been cut into strips and sewn to make this bag. We don’t know its origin but I really appreciated the opportunity to look at it.
Ute always keeps me supplied with textile goodies to photograph and examine. Here is a beautiful presentation of some of her own tablet-woven bands…
And here is a bag from Tibet, owned by Ute, that was made by sewing pieces of a tablet-woven belt together….fabulous motifs for intermesh.
And here I am today in the home of inkle weaver, guitar strap and sash maker Annie. While she is at work I get to rummage through baskets of her colorful bands and sashes and samples….no two alike, so every visit brings forth something new!
Thank you to Kathleen who took me down to ground level to be an ant last weekend. Kathleen is a marine biologist and took me to the beach to go tide pooling…super fun!…While swathes of slumbering and interesting seaweed waited out lowtide above water, we peered into pools and found whole worlds of life and variety and movement and color and cleverness within.
And when we got home, Kathleen’s husband had made this…
I had remarked to Kathleen earlier that day that the vertical pieces of rebar sticking out of the top of the wall would make great warping stakes. It was too bad that they were soon to disappear within another row of blocks. I then told her about the woman in Peru who had warping stakes embedded in the wall of the hall of her house. She would stroll up and down the length of her hall creating her warps. And so, an idea was born.
Those metal pieces of pipe will be locked into place when concrete is poured into the blocks. Then, dowel rods will be placed within the pipes…..a wall warping board. I am jealous! Next will come hooks in the wall to which Kathleen can attach her backstrap. Warm, sunny days outdoors weaving….lovely!
Jennifer Moore, DY Begay and I in Santa Fe in July
Tinkuy is next week!!! I am not going… what will keep me from pining is the fact that I will be over the ocean thinking like a bird on my way to Australia on the14th.
My weaving friends Dorothy and Karen are going. A few of my Argentinian Facebook friends will be there and Jennifer Moore, with whom I backstrap wove in Santa Fe this year, will be going to teach the Peruvian weavers balanced double-weave pick-up. Jennifer wrote to me this morning to tell me that we will be roomies at CNCH next year. There will be some stories to tell!!
I hope that if you go, you will send me stories, reports and pictures that I could share on this blog or links to your own sites that I can include here. Have a wonderful time all of you!!!
Dorinda from PAZA Bolivia (no link as the website is temporarily unavailable.) and my weaving teacher, Maxima, will be going again. Last I heard, Dorinda was also going to take one of the teenagers. Dorinda met her funding needs with many generous donations from a variety of sources. Look out for Dorinda and Maxima there. I wonder if Maxima will outspin the Peruvian ladies in the speed spinning competitions again this time!
Dorinda and Maxima were my roomies at Tinkuy 2010
Jasmin Pitt of Sustainable Bolivia was recently in Independencia with Dorinda and her weaver friends and made a documentary about the weavers. Here is Dorinda’s description from her PAZA newsletter:
Making a documentary with the weavers of Huancarani became reality last April after over a year of talking about the possibility. Thanks to Sustainable Bolivia’s artist in residence Jasmine Pitt, most of the footage was shot in Huancarani in a day. Jasmine directed, filmed, and edited the documentary. The women were ready with their thoughts, comments, and stories about the past, present, and future of their millennium long weaving tradition. More interviews were held in Independencia and Jasmine and Dorinda walked miles so Jasmine could capture the breathtaking landscape on film. The musical group Sacambaya generously granted permission for use of their music. It was a collective volunteer effort. Through Jasmine’s lens you will gain insight into the personalities and lives of the weavers and their concerns for the future of their weaving tradition.