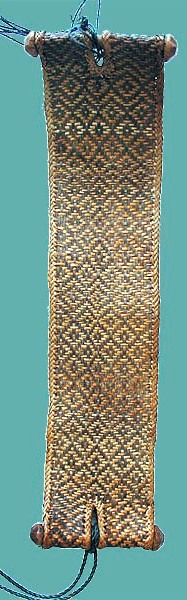
I live right in the heart of Santa Cruz city. It is a crazy jungle of tangled electrical wiring, crumbling adobe and sagging red rooftops. Even when I am alone in my little condo I can sense the beat of the city as people go about their daily lives…booming tropical rhythms, car horns constantly blaring, the scratching scraping sound as the washer woman in the building next door scrubs the heck out of the clothes. And then there are the smells. At any hour of day or night someone somewhere in the neighborhood is having a barbecue. I live within a stone’s throw of one of the city’s largest street markets. That brings its own collection of interesting aromas. The football stadium is four blocks away….faint cheers, chants and whistles on weekends and, if the wind is blowing the right way, I get to hear all the concerts for free. It is colorful and somewhat joyful…nothing “plain” about it, that’s for sure.
I have been going through old pictures. Here’s a reminder that there are some simple, “plain” places to which one can go to escape all the man-made mayhem. Right here in the city there is a very odd and very large and unexpected stretch of sand dunes. Go there mid-week and you can have it to yourself. On weekends it becomes yet another venue for salsa music and barbecues.
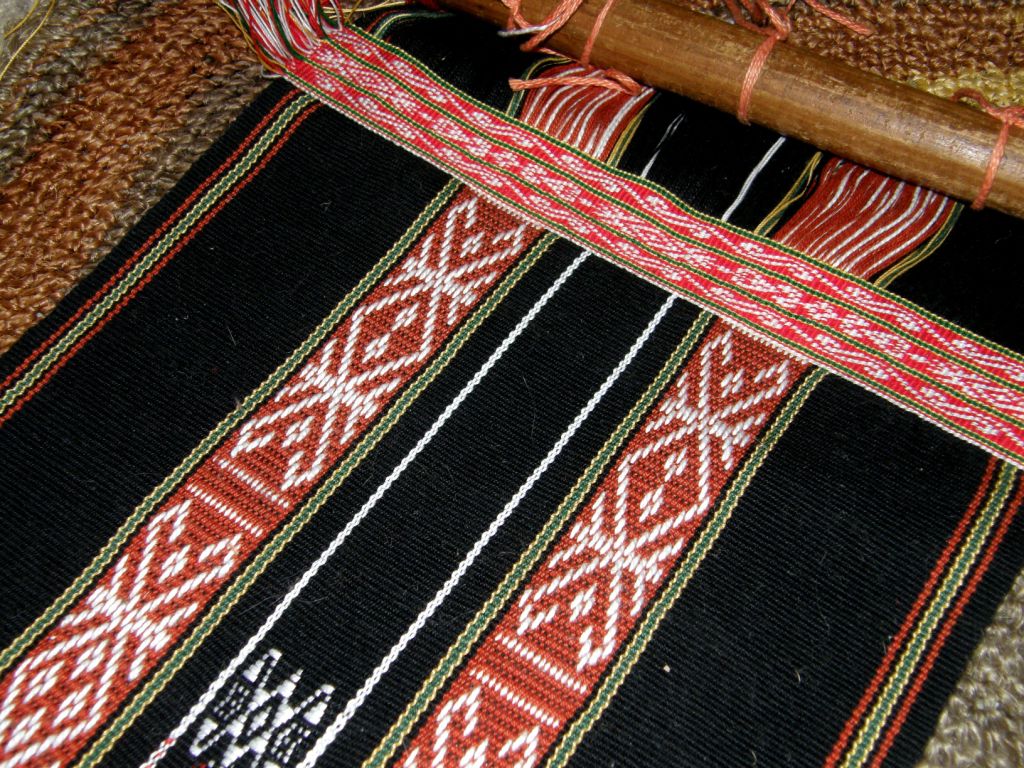
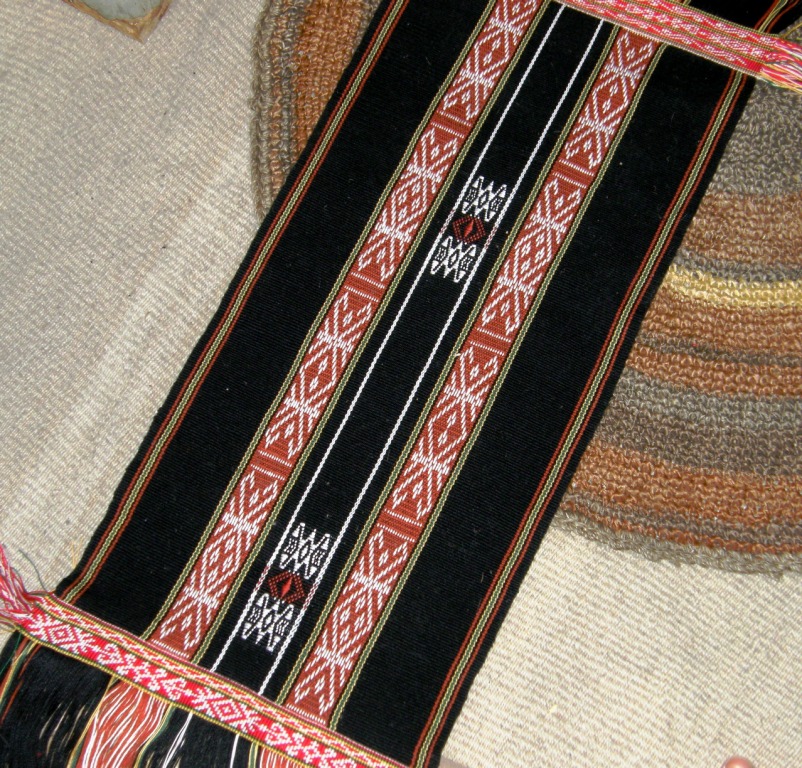
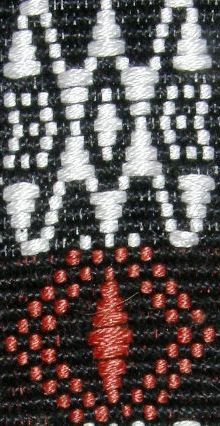
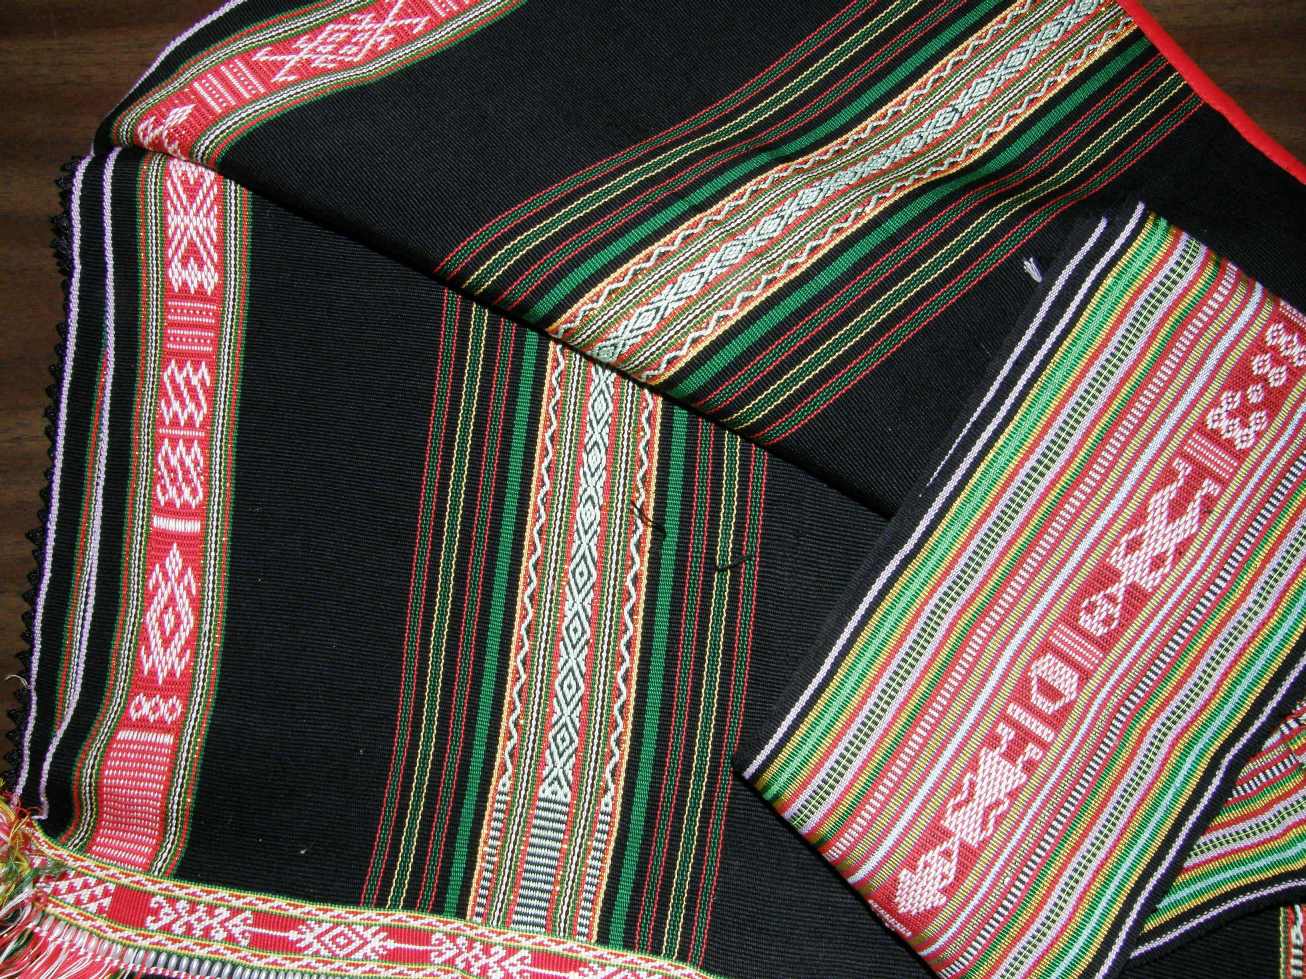
I am weaving the black panel of my wall hanging project. Nothing plain about this. In fact, I have to keep stopping and checking myself…how much pattern is too much…have I gone too far? Is it too much, overdone?
The thing is, I am still learning LOTS of lessons from weaving this piece and so I won’t be using it for the wall hanging. I will finish it and keep learning from it.
There are definitely some things I would do differently a second time around. Luckily I have a whole lot of green Guatemalan cotton that I can dye black for a second attempt and I think that my silk supply will hold out too.
I can probably make something nice from what has now become another “sample” and I will start again on the wall hanging panel.
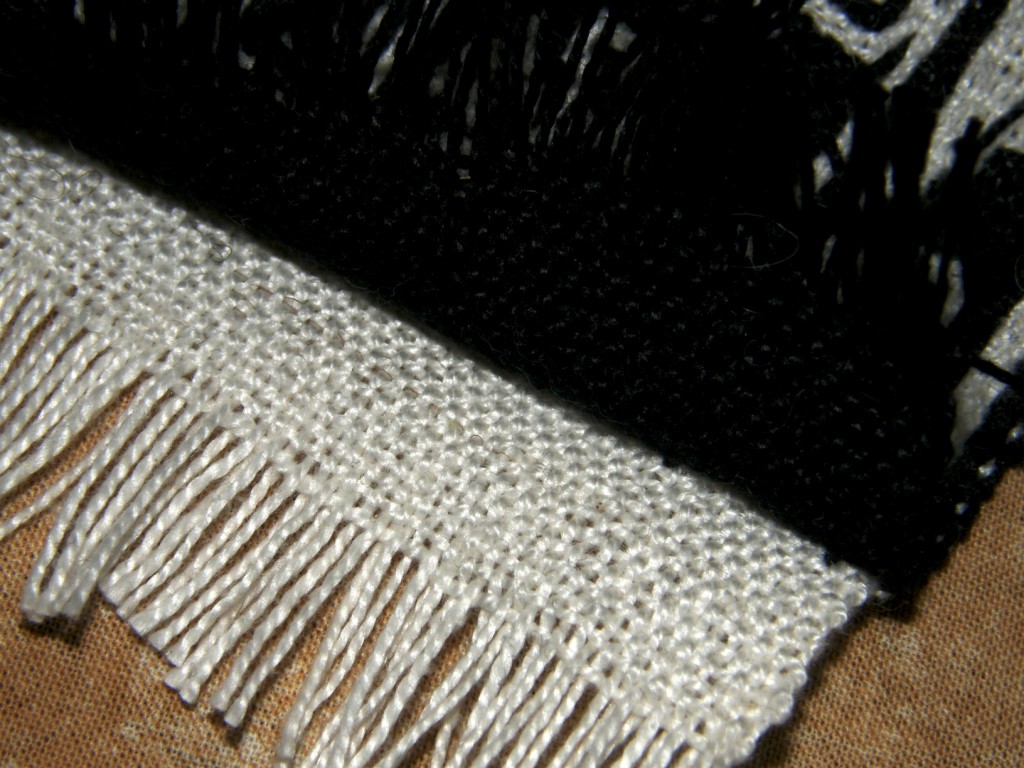
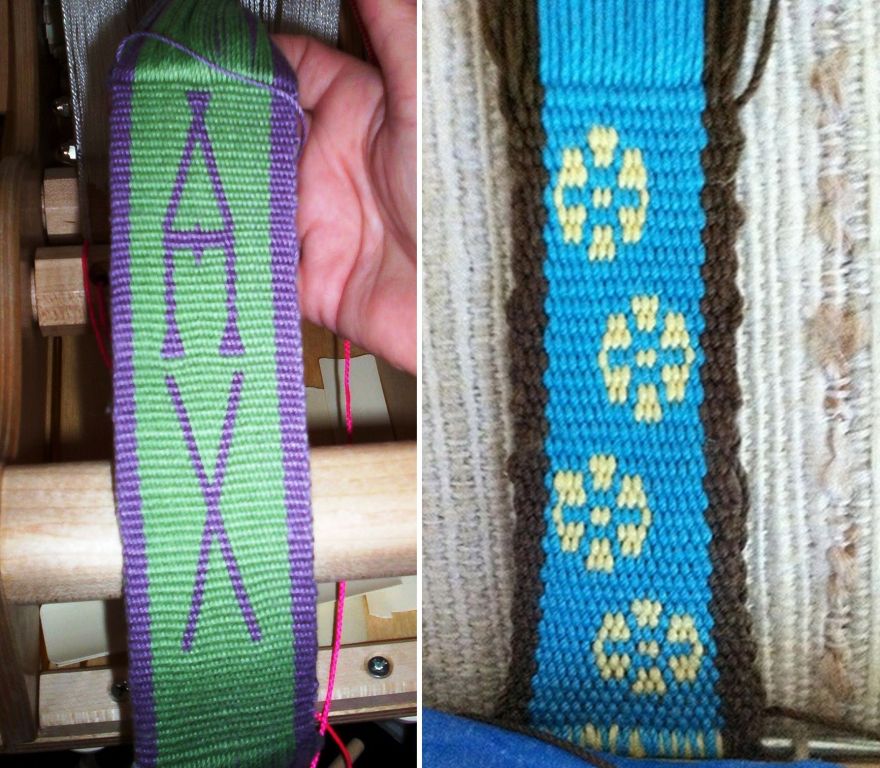
I will tell you just one of the lessons I learned. If you are doing plain weave and using black warp and weft it really doesn’t matter if some parts of your piece are a little less warp-faced than others. You won’t be able to notice that fact.
However, when you are using a white continuous supplementary weft, it DOES matter. The smart thing to do is to put that white weft in as a tester right at the beginning. That way you will be able to tell if some of the black warps have a slightly different spacing to others as the white weft will show through. You can then go about shifting and settling the warps so that their spacing is consistent and completely hides the white weft.
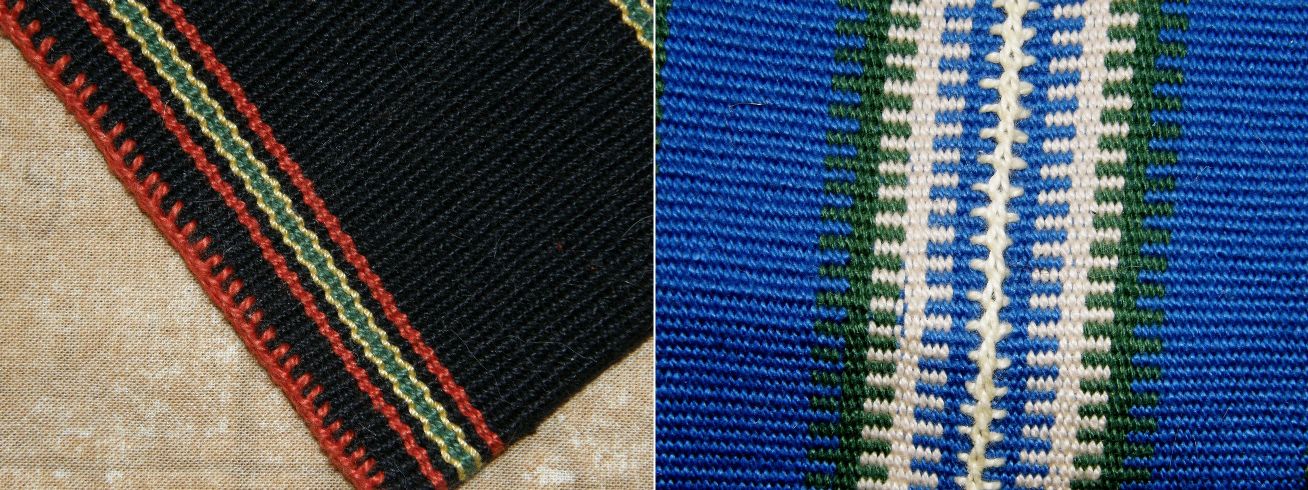
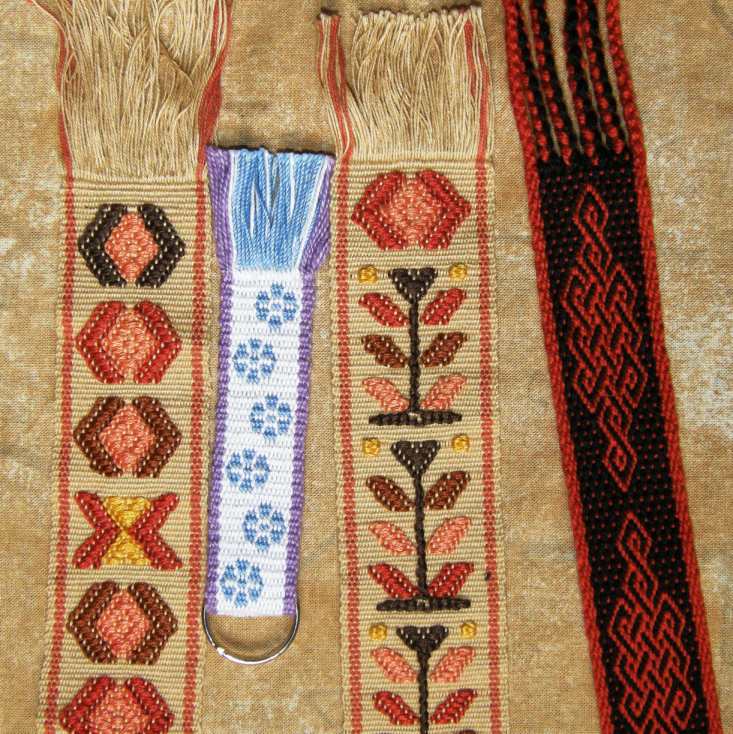
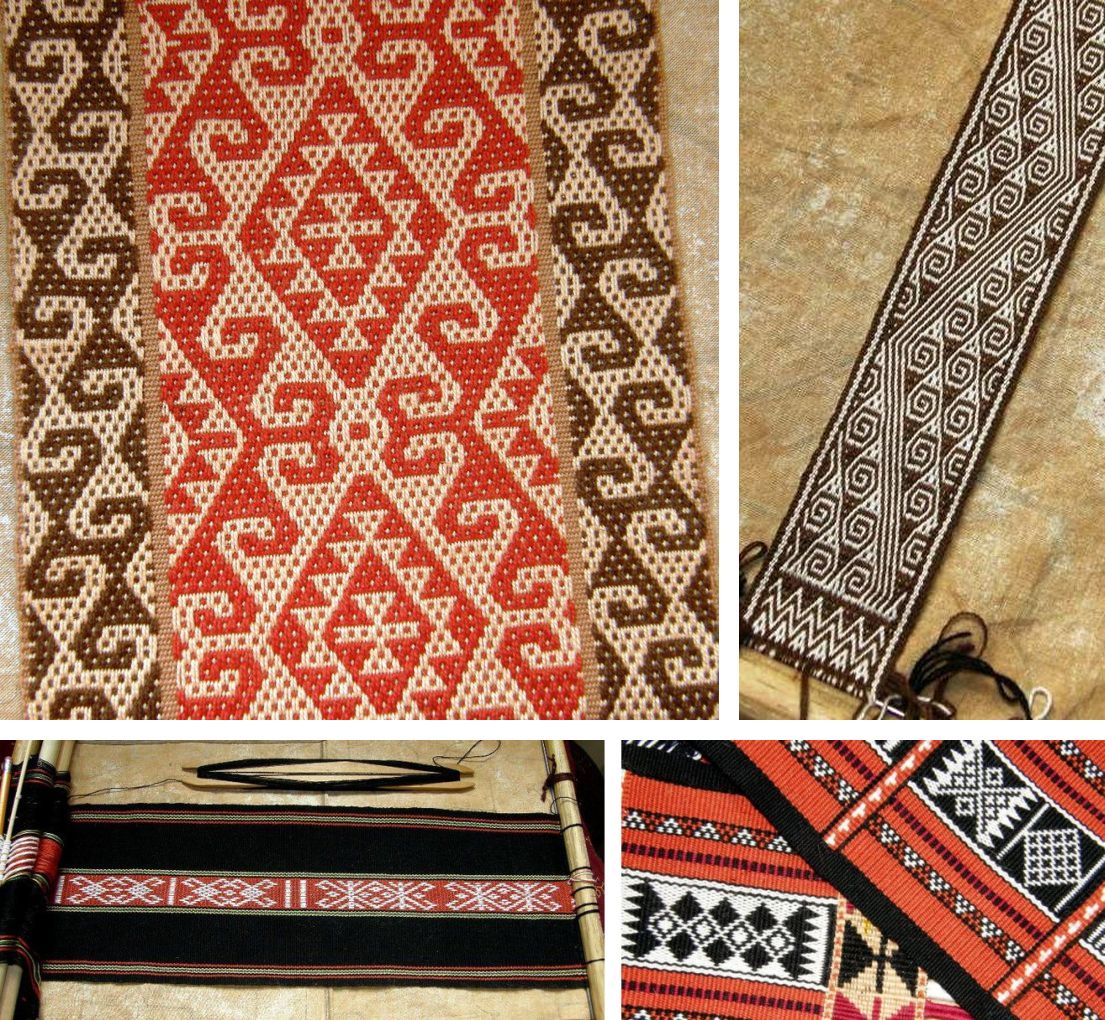
At the same time I have been doing a little study of some of the different ways that indigenous weavers here treat the plain parts of their woven pieces. By plain parts I mean those that do not have any kind of pick-up patterning.
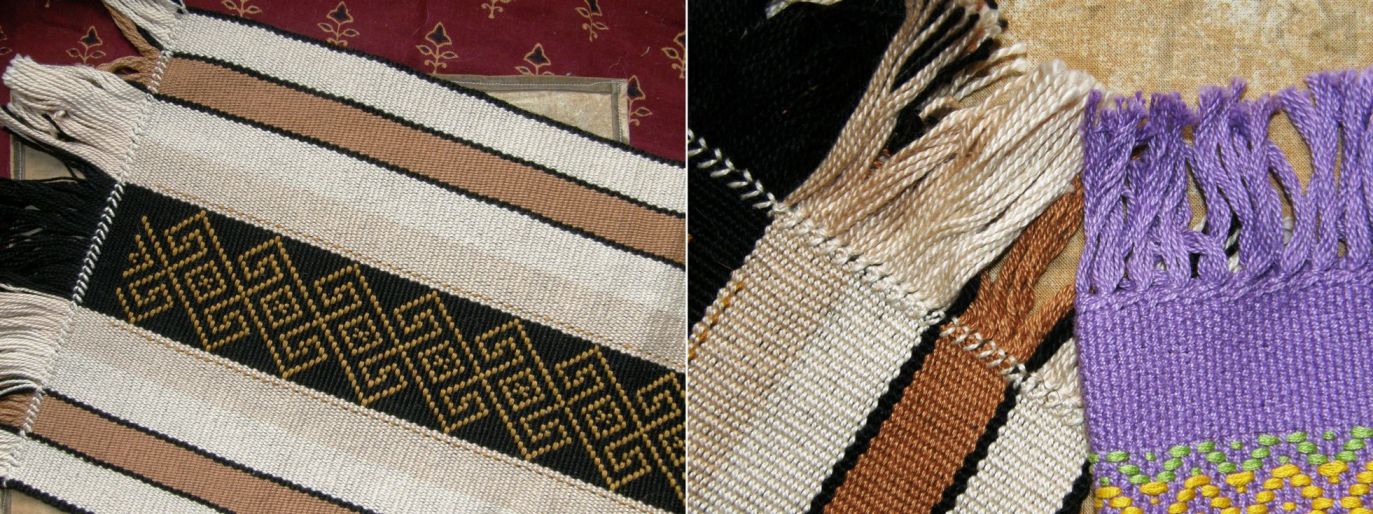
Here are some examples…from left to right…
Sample 1: A rolled edge. There are actually 18 brown warp ends there on that border that have been woven and rolled to form a sort of tube edge. The edge is good and thick and would provide very good protection for the sides of a belt. The weavers from San Ignacio de Loyola use this kind of edging for the plain weave that borders their belts.
Sample 2: Two-weft-span borders. I learned this method from my teacher Maximia in the Bolivian highlands. Look at difference in the yellow edge on sample 2 and the green 1/1 plain weave border on Sample 3.
Maxima makes a cross with her fingers while she picks the various colors needed to create her pebble weave pattern. She first takes the borders from the far side of the cross, then works her way across the warp picking her pattern , She finishes by taking the borders from the near side of the cross. This is what enables her to form the two-weft-span borders.
Sample 3: 1/1 Plain Weave. Using 1/1 plain weave as the border gives the pattern area another dimension. The border remains “flat” and the pattern area is raised. This is a very nice effect.
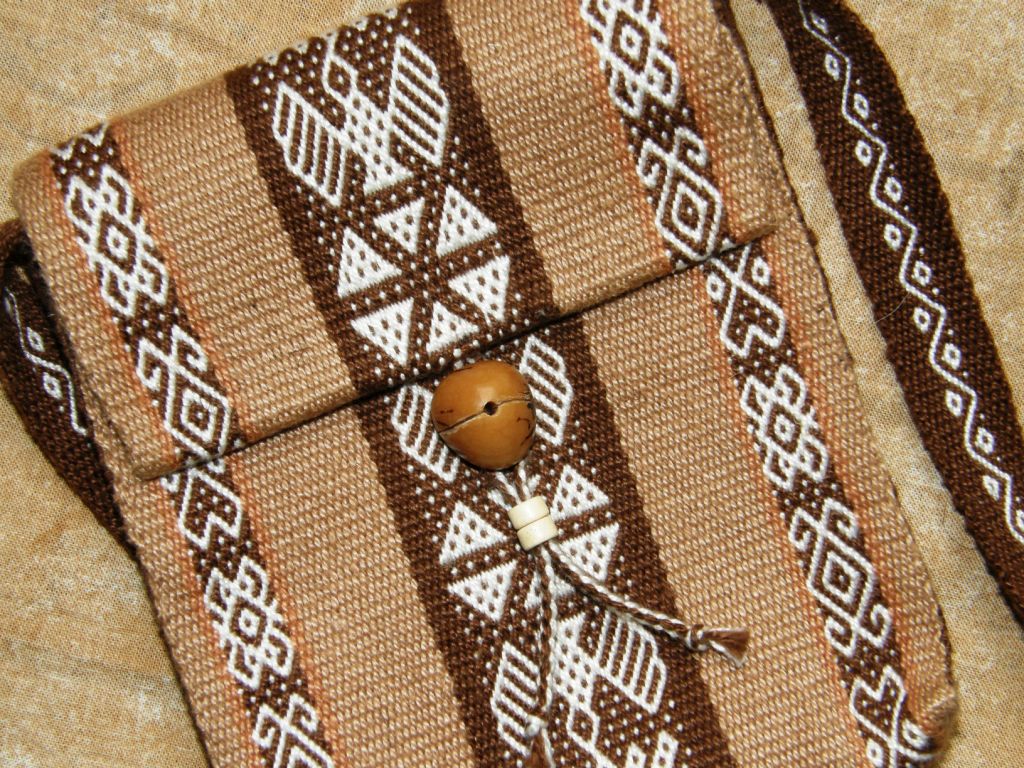
Sample 4: Intermesh border. This is the “thick border” that I explain in Andean Pebble Weaveand was taught to me by weavers in Ayacucho. Because it is a three-shed structure, it is the perfect companion to the two-heddle pebble weave set-up. The plain borders match the thickness of the pebble weave sections.
In this pebble weave piece from Ayacucho, the red plain area on the left is woven using the intermesh structure.
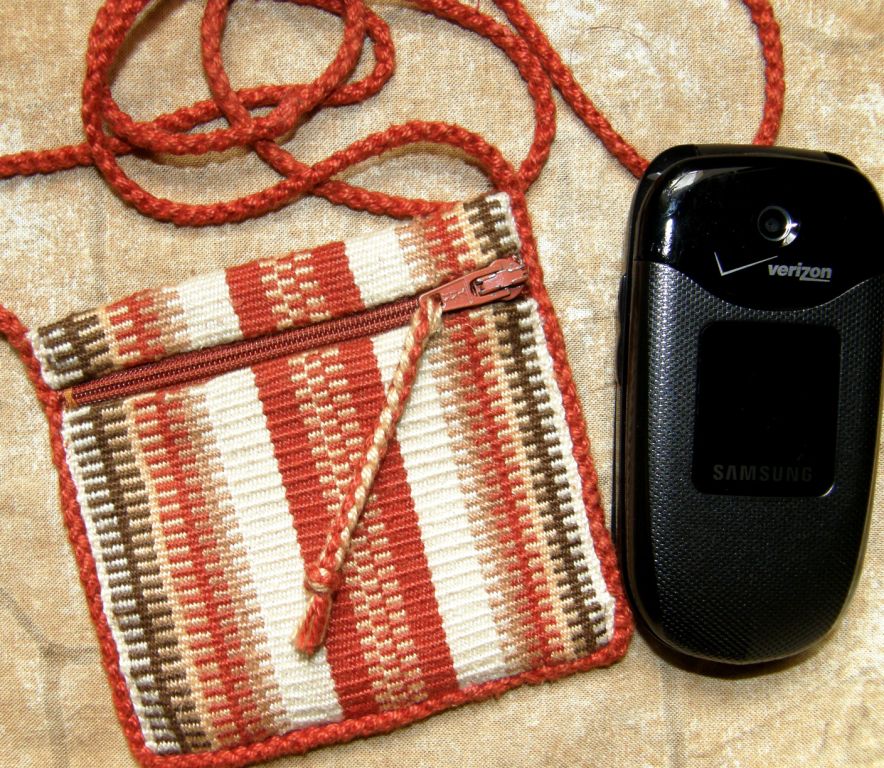
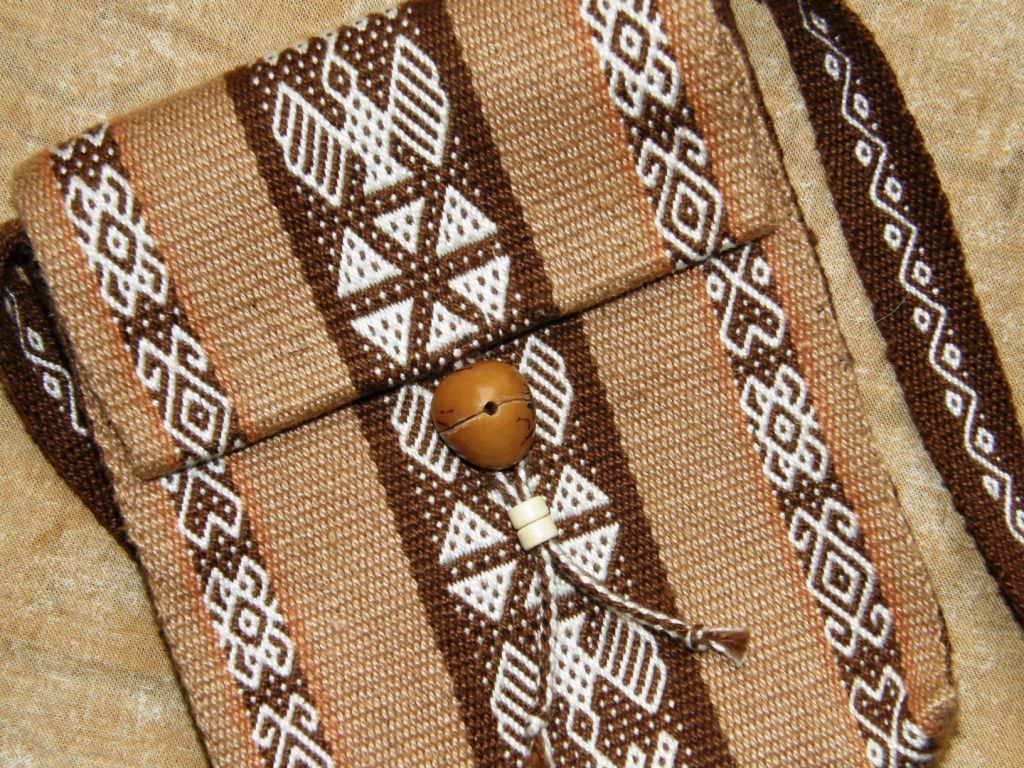
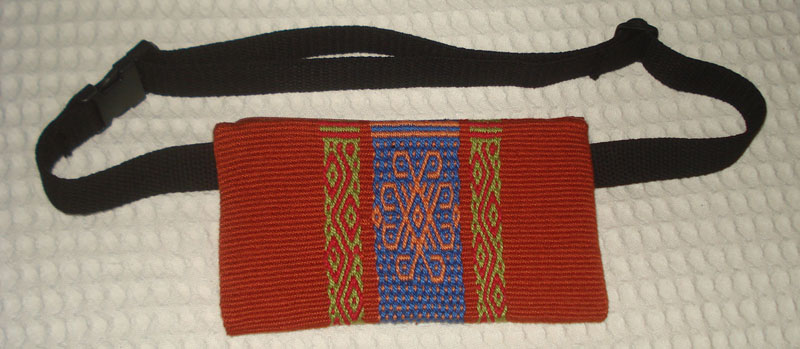
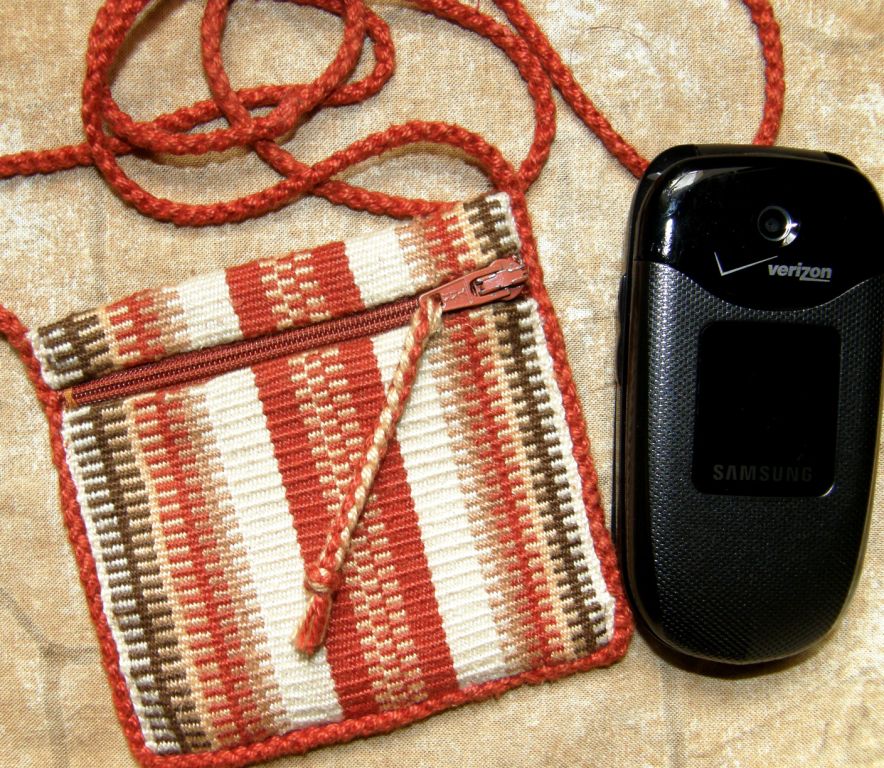
Here are some of the sample bands that Maxima and I wove using the border method in Sample 2. My cell phone pouch uses the method in Sample 4 for the plain red sections.
The method I most use is that in Sample 4…intermesh.
Oline friend Larisa sent me pictures of her project using intermesh using scrap yarn for learning purposes and so the piece does not have as good a contrast in colors as she would have liked. She says that she believes that intermesh is good for “bold statements”.
Larisa tells me that her rosebud motif is based on one from Palestinian embroidery. Gorgeous!
Julia used Plymouth Yarn Fantasy Naturale to make the pebble weave band, below. This yarn, for me, is the perfect weight for making a backstrap and I have used it often for that purpose alongside some doubled Tahki Cotton Classic for additional colors. You will need two skeins of Plymouth for a backstrap in the dimensions I give in my WeaveZine article.
You can see one of the beautiful swords in the picture from Magical Moons.
My backstraps made from Plymouth Yarn Fantasy Naturale and doubled Tahki Cotton Classic.
Julia wove with me one day and we played with the finishing techniques shown below in which we worked with tubular bands, coil stitches and cross knit looping.
I gave Julia a piece of wool woven cloth made by Maxima and weavers in her cooperative in Cochabamba so that she could practice her new skills. Here is her finished bag:
The broader part of the strap is two tubular bands edging a piece of linen. Beautiful work and she had just the right colors of yarn for this project.
I have been working a lot with wool this week as I sew pieces of woven wool bands from Cochabamba into little pouches and dress them up with all kinds of pretty finishing techniques. Some of the finishing stitches are easy but they require precision and doing this work increases my admiration for those who do fine embroidery work. I am using wool for my stitching thread.
Working with wool is wonderful but, above all, working with wool is forgiving! This is one of this fiber’s big positive features for me. It fluffs out happily and fills in tricky spaces. Never mind if you didn’t insert the needle the exact same distance from the edge of the woven piece every single time…wool will forgive this…it has a certain rustic look that forgives even if it doesn’t always hide the imperfections. I love it. I am glad that I have spent years getting my “training” using cotton for these sewing techniques. When you switch to wool, it is all so much easier. My indigenous teachers used acrylic when they taught me these things.
I added multi-color cross knit looping to the top edge of this little pouch and wove a strap. You can just see the grey cross knit looped stitch along the right hand edge.
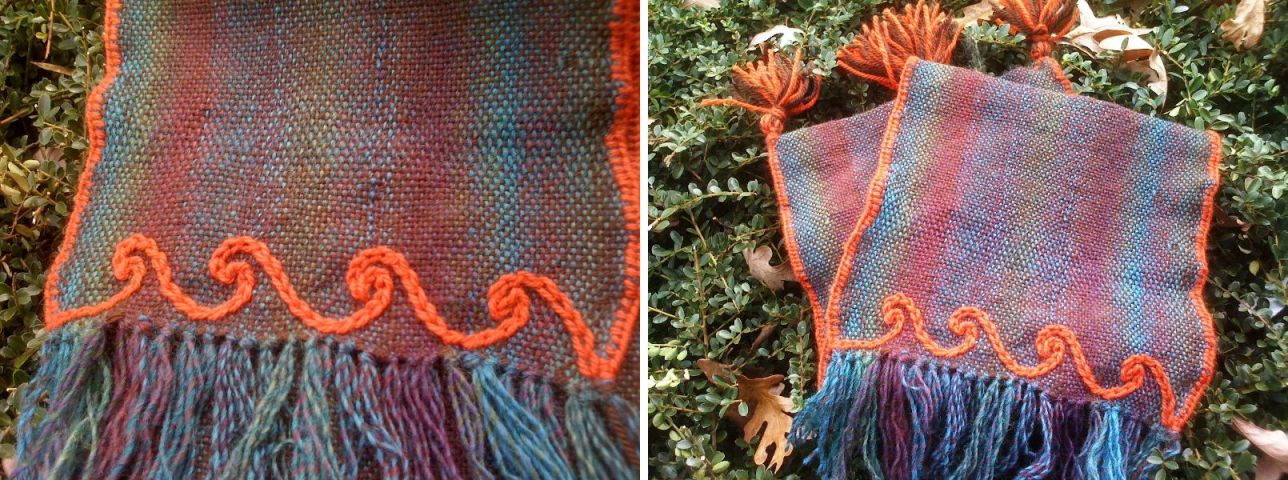
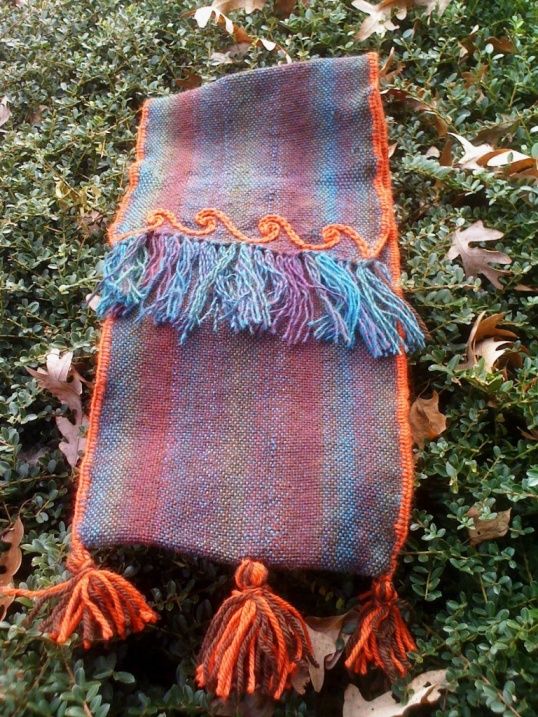
Here you can see the bottom edges of the two pouches on which I have been working this week. The one on the right has been edged with a tubular band and I added what I am calling a “coil stitch” to the bottom of the other…lots of fun to do albeit rather fiddly. I made a braid with a couple of pom poms for one pouch and added tassels to the other. It was fun weaving the strap. I am using just regular knitting wool for these finishes and am not re-spinning or treating it in any way. It stood up wonderfully well for weaving the straps which were woven on 72-inch circular warps.
Note to the pebble weavers out there: can you see the “blip” in the pattern on the pouch on the right? The weaver used the same pebble shed twice instead of alternating them. You see, even the experts get caught sometimes!
And then I played with some decorative joining stitches on some of the left over pieces. That’s where wool really was my friend. It was really hard to count the warps and place the needle accurately on that variegated grey wool. If I had tried this with cotton, it would have looked awful. Wool is Cool! (Too bad that doesn’t really rhyme. But try making it rhyme…it’s kind of funny. Ah, the English language!)
Weaving with wool, on the other hand, is a different story. It can be rather unfriendly depending, of course, on your level of expertise in preparing wool for warp-faced weaving.
If not well prepared, each warp will extend its little hairy fingers to grasp its neighbor and protest loudly as you try to open a shed. Worse still, they will start to break. But, you can learn to deal with that stickiness.
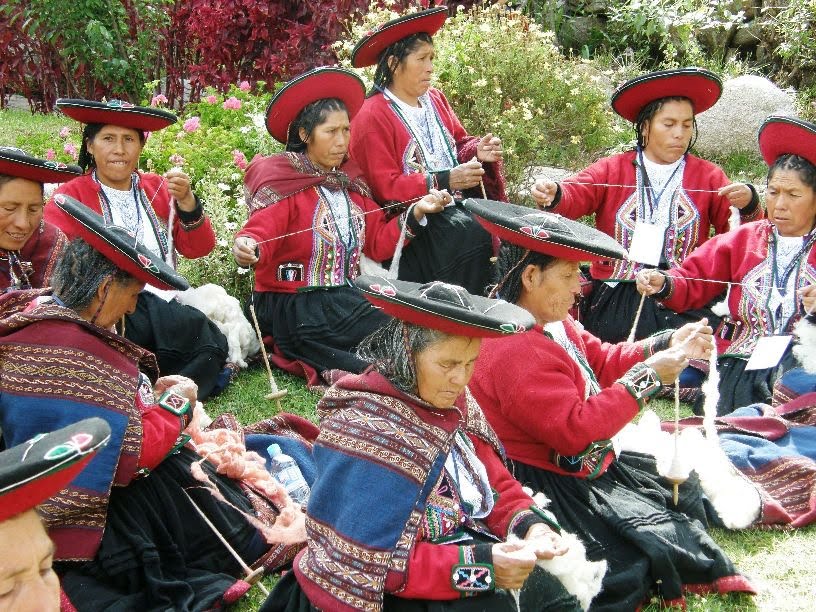
Even if you haven’t learned how to prepare the wool to the state of fine, smooth, even, perfection like the spinners in Chinchero do, there are strategies for dealing with those sticky warps. It can slow things down, and I guess you could call this one of this fiber’s negative aspects. The results, however, are always worth the effort.
Maxima in Cochabamba adds extra twist to her hanspun yarn before winding a warp for a pebble weave band.
Speaking of beauiful handspun, Janet, Ace, Connie and Gina from the Humboldt backstrap weaving gang got together at Ace’s place in amongst the gorgeous redwoods for a weave-along.
It was a chance to practice among friends and lend a hand to those with a little less experience.
Janet and Connie helped Gina and Ace remember how to make string heddles. Ace is working with his own handspun wool and Gina is using Tahki Cotton Classic to make a backstrap. Janet gave Ace tips on how to handle the wool warp and open the sheds smoothly.
Janet and Connie worked on pebble weave projects. Janet, of course, is using her handspun while Connie used 8/2 tencel to make the lanyard for her name tag for CNCH (pictured at left). I imagine that must feel gorgeously silky in that tencel.
And there they were on Ace’s balcony with their warps attached to the railing calling me to join them from Bolivia via Skype! How cool is that?
Above you can see Ace with his wool warp and freshly installed heddles next to Connie’s latest tencel warp…yummy colors!
Janet gets to work on her wool warp while Gina installs heddles on her cotton one. I love that this group is finding time to get together and do this and support each other and I hope that they Skype me every time!
Back at my own loom, I have been sampling supplementary-weft inlay while playing with positive and negative spaces. I showed you in the last blogpost how I want to try covering the negative space on a band with supplementary wefts leaving the ground weave exposed to form the motif. So, I have been sampling away and have made some useful discoveries about the changes in weaving width that happen when you do that. This will be something to keep in mind when planning bigger projects later. I have to say that I am loving the way this looks! I am using the 60/2 silk on the Guatemalan cotton warp.
I think I will still try to sew this in to something despite the width inconsistencies. I will just keep on sampling and see when I am done what can be made with it. I am keen on dressing it up as I did the wool pouches but I will use cotton instead of wool for that.
I continued and added a bit of “positive” pattern just to compare.
Now I would like to adapt some Andean warp patterns where both the positive and negative spaces form the same motif and weave those with supplementary wefts.
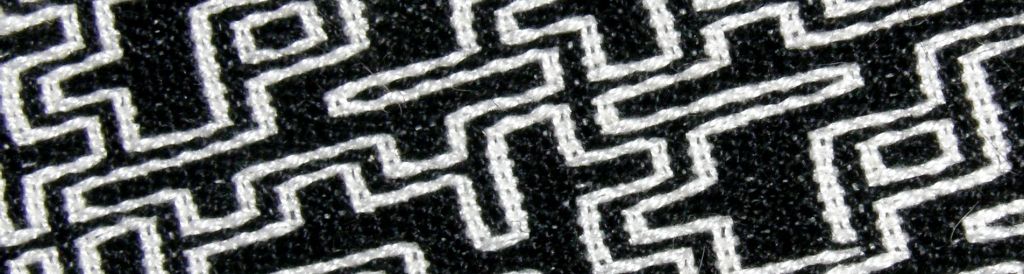
There are certainly many of those to choose from and I am sure that I can find many on textiles from other cultures too. If you are not sure what I mean, take a look at the motif at left which is from the edge of a belt woven and used by Russian Old Believers.
I will leave you this week with a couple of pebble weave projects.
Larisa has been writing to me via my Andean Pebble Weave Facebook pageand sent me pictures of her first pebble weave band using some of the 4 rev patterns from my first book on a wider band. I like the way the hearts look with the border around them. She is going to use this band as the tie for her end loom bar.
And Julia continues to adapt traditional Japanese embroidery patterns to pebble weave. She uses the spotted charting system that I show in my second book to sketch the patterns ready to be woven using the pebble weave structure. Inspiring! Background, pattern, positive and negative spaces merge into a spectacular pattern.
SAMPLE! My own words are ringing in my ears….if you are using a new yarn or a new technique on your backstrap loom….sample, sample, sample. And don’t trust your first samples for making width measurements for future projects. You have yet to settle into the new technique and things are still bound to change. Keep practicing while you slowly smooth out the rough bits. Sample away happily knowing you can probably make something from the samples, no matter how small or silly! If not, put it in your notebook with lots of notes beside it…believe me, you will forget if you don’t write it all down.
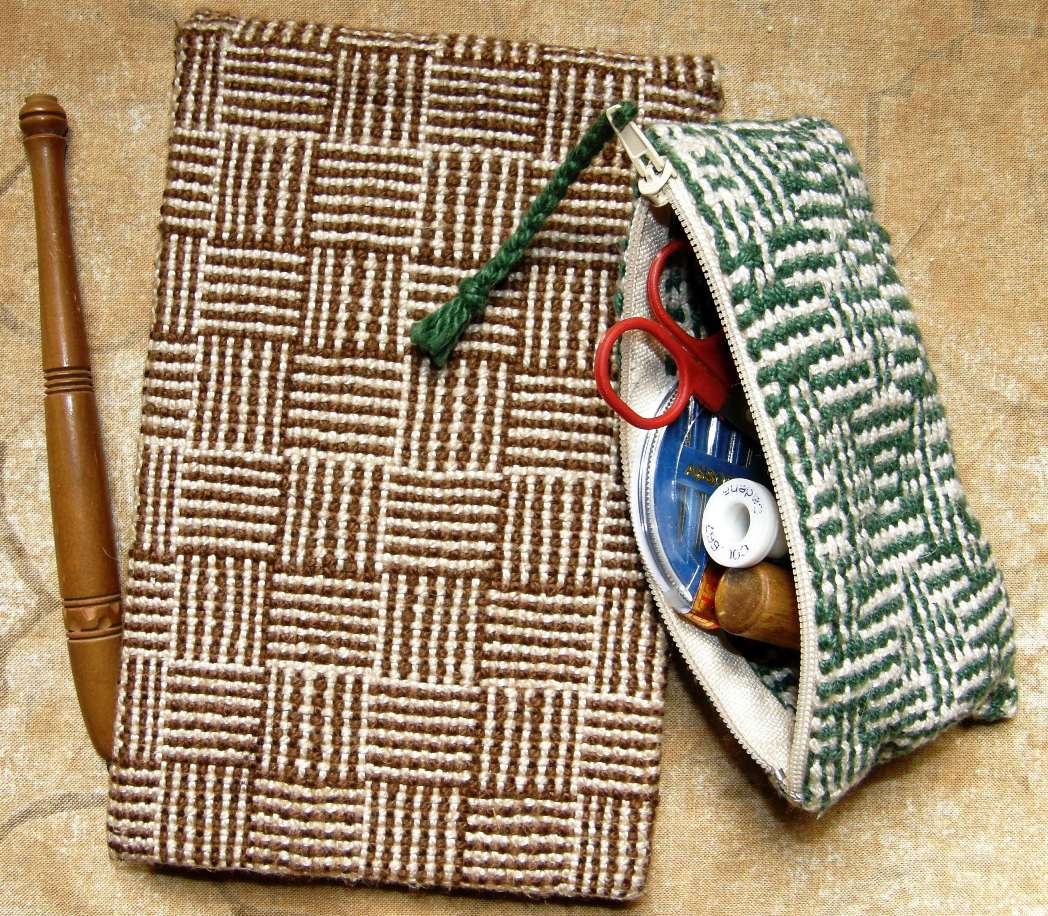
Here are a couple of small samples that I managed to make into decorative and useful things. My log cabin sampler got used as the cover of a flip notepad that always goes with me on my travels. This notebook is now full and I need to get the cover off so I can somehow fix it to another notepad. My first ever shadow weave sample got pulled off the loom as I was satisfied once I saw that it was working and I didn’t really care for the color combination. It got made into a small sewing kit purse which also goes traveling with me.
And never mind if your sample ends up with wonky selvedges and you don’t know what to do with those pesky raw edges. There is usually a way around all that. The edges of my log cabin piece were turned around the ends of the notebook cover and glued down. Another piece of fine cardboard glued to the inside covered those edges for a neat finish. The zip took care of hiding and protecting the raw edges of the shadow weave piece.
I thought I would show in this blog post some of the finishes that I have used for my pieces, uses I have found for samples and different ways that I have dealt with raw edges.
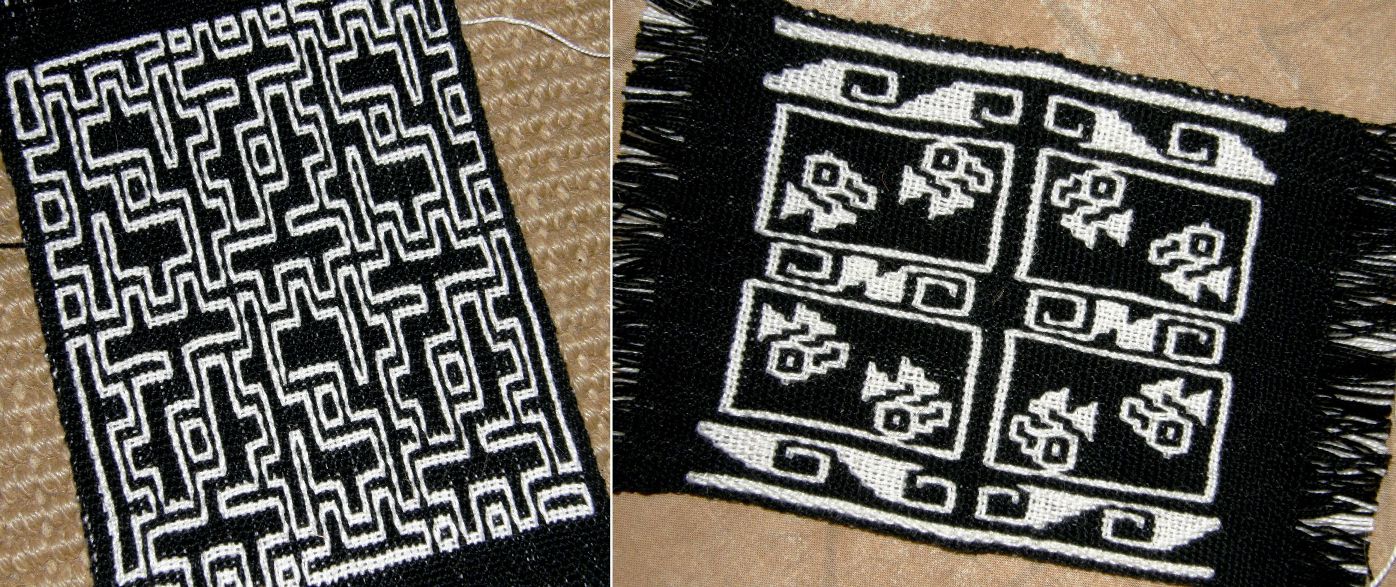
You may remember from these previous posts here andhere that I have been trying out finnweave on my backstrap loom. My first samples did not prove trustworthy for calculating the dimensions of my next project and so, what I had hoped would turn out as squares, ended up being more rectangular. Here is my warp set up for my square design samples…
And here are the rectangular results…
Width needed some adjustments and I learned to beat a bit harder as I progressed. I learned a lot about how to read from the weaving rather than from the chart with the design on the left. This is from one of the Prairie Wool Companion 1982 issues. There is a Chinese lattice work design charted and then three variations provided so that one can weave a set of four placemats. The version I chose is the one furthest removed from the original Chinese design. The design on the right is one I invented using the little pre columbian birds that I wove before and gave me more practice with filled-in shapes.
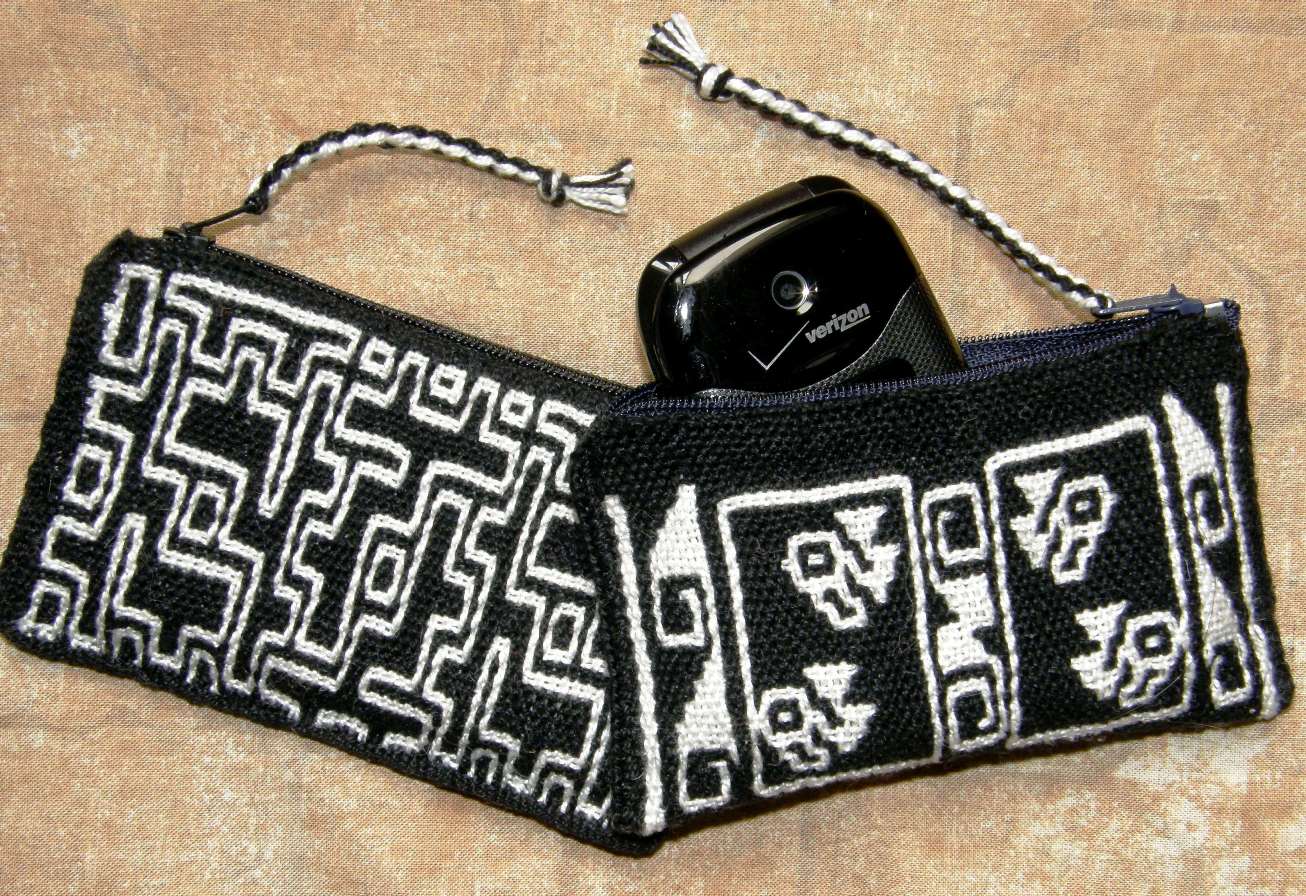
I was able to make something cute from the two samples…
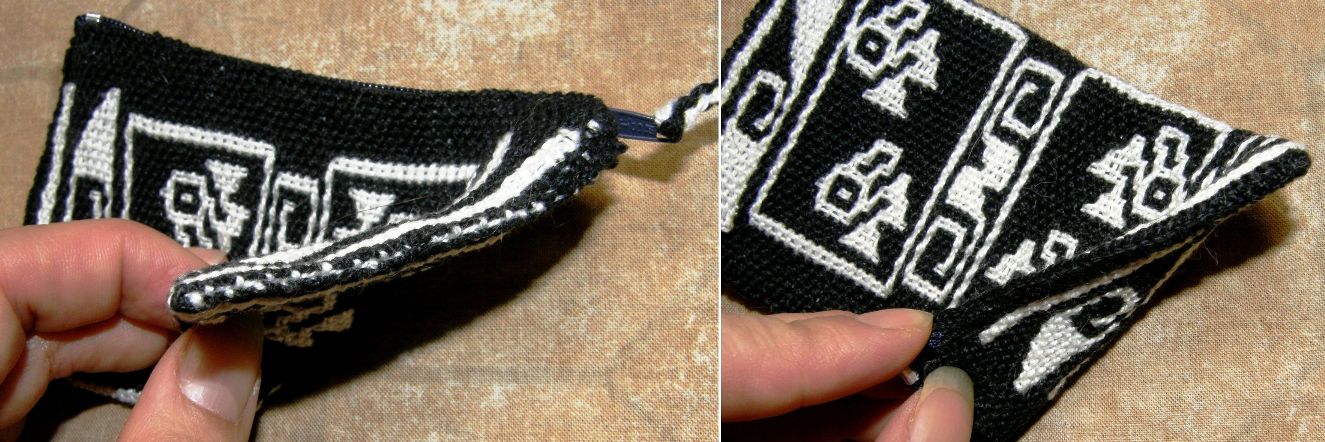
This is a double weave and it is particularly tricky dealing with its raw edges. Folding over two layers to hem is bulky and unsightly and so I followed the advice that I read in an article and wove the start and finish of each piece as two separate layers with open edges.
The idea is to turn both edges inward and sew them together like that. However, I didn’t do that. As I was going to sew in a zip, I cut the white layer back as far as I could and then simply turned the black layer over it. The black turned edge got sewn down and hidden under the zip so all is well and protected and nice and neat to boot.
One thing I was not so happy about was the edges…
This may just be something that I am goofing up, but to my eye, the edge is ugly as you can clearly see how both layers of contrasting colors come together. A row of single cross knit looping covered that up nicely as you can see on the right. However, my eyes just about fell out…black on black. I had to stand right by the window in good light to do this.
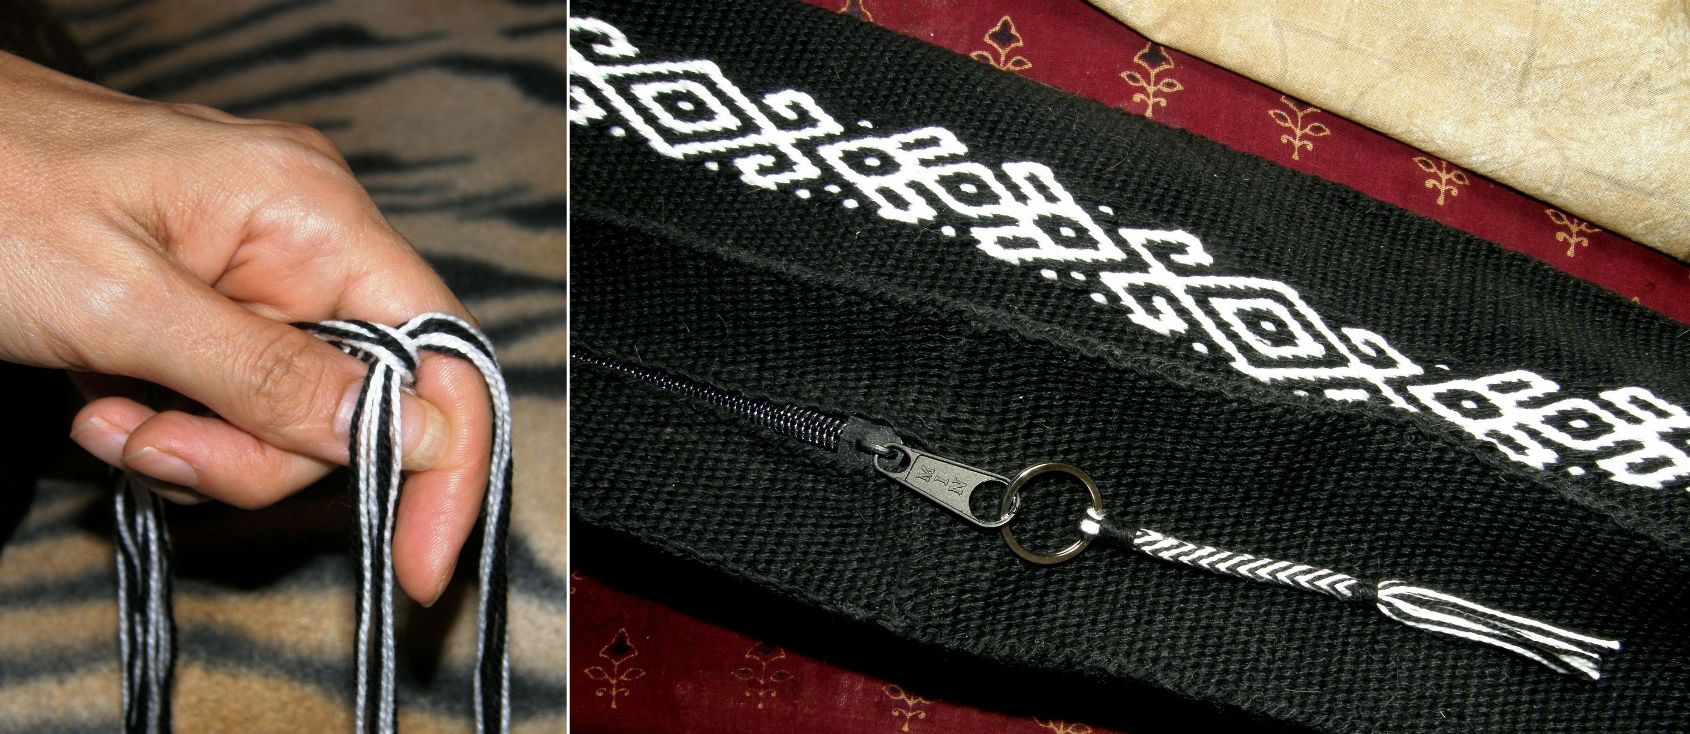
So that was one solution to the ugly edges. On the other little bag, I added one of those woven bands that are woven and sewn simultaneously using the weft as the sewing thread. I used it down the side and along the bottom and it broke the design up nicely between the two faces. A four-strand braid for the zipper-pull was the finishing touch.
Speaking of braids I made the zipper-pull for my loom bag project…remember? – woven bag, braided zip-pull and twined strap.
It’s a 24-strand braid worked in the hand as my Peruvian sling braiding teacher had shown me.
I had not done this kind of braid in this size yarn before and so it was a bit of a challenge.
This is the base of theMargarita braidbut as, I was so focused on just keeping everything in order while muttering the moves to myself, I did not venture into doing the changes in sequence that produce the diamond designs on the Margarita-style braid.
The cross knit looping that I used to hide the ugliness on my finnweave piece can sometimes be added to perfectly good looking selvedges as an extra decorative feature or it can be used to draw attention to or hide the place where two pieces of fabric are joined. This is also known as Van Dyke stitch in embroidery (see the video embedded in this blog post).
Other things that can be used to disguise a less-than-perfect edge or brighten something that is a little too plain are braids.
A two-color stitch can look good on the edge of a very plain one-color piece or hide its wonkiness if necessary!
This was a sample I made for a plain warp-faced weave weave-along. I sewed a four-strand braid around the edges which also served as a strap. Again, the zip handily hides and protects the raw edges.
This little pouch was started with a third selvedge which you can see on the right. I sewed across the raw edge with very visible stitches as neatly as I could by hand and then sewed that edge down.
Then there’s good old hem stitching which I only learned fairly recently from this video. I got such a kick out of learning and doing this the first time, I wanted to go around and hem stitch everything!
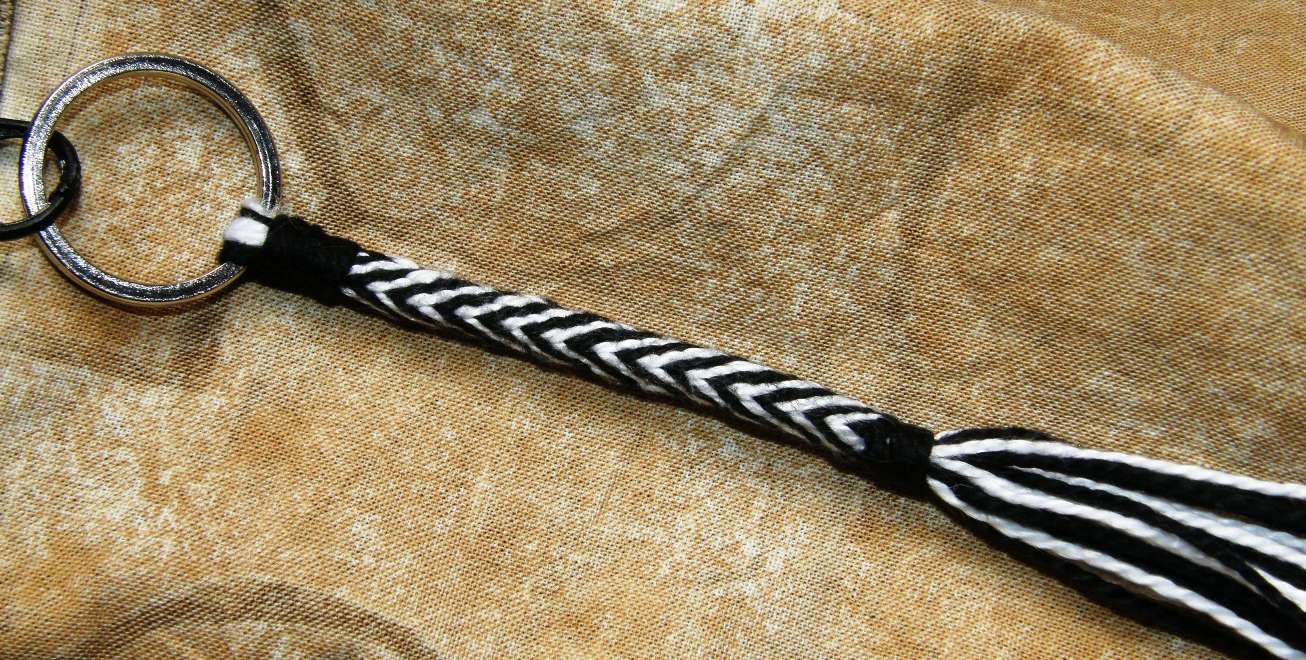
Teeny tiny “invisible” hand stitches seem to work well at the bottom of book marks and keyfobs. Warp ends can also be braided. I like to dab the ends of the braids with diluted white glue and squeeze them into a tapered shape as they dry. I think it looks better than having knots in the ends.
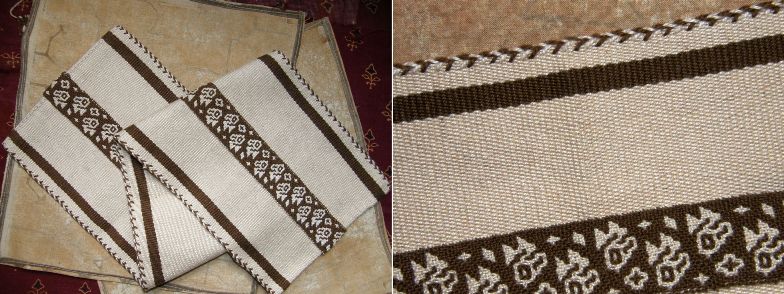
I am not so convinced about the way that I chose to deal with the raw edges on these very thick double weave mug rugs.
This came after many attempts to sew them neatly and invisibly. They are too thick for the method I suggested earlier where you weave the two layers separately and turn them in on each other.
I figured if I couldn’t make the stitches invisible I would go for very visible and decorative, and something in keeping with the ethnic nature of the design.
This is the back side. The brown thread cannot be seen on the front.
I sewed these while they were still stretched out on the loom and had to put a mirror in my lap so I could see how the stitches were being placed on the back.
I am open to suggestions for improving this!
Montagnard (Vietnamese hilltribe) weavers often finish their weavings with weft twining. They then add beads and often a few more rows of weft twining. I wasn’t convinced that the weft twining would stand in place on its own and sufficiently “finish” a piece until I tried it myself. It is firm and sturdy and there is no way those twined wefts are going to work their way loose. Here is some twining I did in a traditional Jarai design on the end of a warp-faced piece…
On the Bedouin design wall hanging that I did on the right I also twined the edge and finished it off with wrapped warps.
Warp wrapping, braiding and other finishing techniques are covered in Finishes in the Ethnic Tradition by Karen Searle and Suzanne Baizerman.
My latest favorite edging which I learned at the tinkuy de tejedores in Cusco last November is the tubular woven band which is woven and sewn simultaneously to edges shown below on the right. This is another one that totally grabbed me. I had to stop myself from tubular banding everything in sight!
I decided to try a plain weave single-color band as an edging after seeing how Guarani weaver Angela edges her pieces and I used it on the cell phone pouch above. It very nicely covers and protects the raw edge where I cut and shaped the flap.
Well, enough about smoothing out the rough, brightening the plain and taming those wild warp ends. Back to finnweave. I am still enjoying the Cora and Huichol pieces and traditional Scandinavian patterns and have just learned that another Mexican group, the Otomí, also practice this technique. However, I am returning to my original goal now and am about to chart my first pre columbian design based on one of my textile fragments. This will be another sampler and I will wet finish this one.
#############################################
What have the weave-alongers been up to?
Linda wove her first band with horizontal bars getting warmed up for simple warp floats. She also made supplementary weft samples so she could learn about the scale of her charted designs against the woven fabric before launching into a project. Bobbie finished her piece with the central supplementary weft pattern. The chart for this design is here. I really like the effect of the different colored horizontal bars design that she used on the edges.
After finishing another pebble weave piece, Jennifer shifted to double weave and enjoyed sampling the technique in #3 crochet cotton. The llamas are charted here.
Tracy is back from her trip and back at the loom doing pebble weave.
Tracy’s latest band is on the left and Jennifer’s finished piece is on the right. You can see that her knitting needle is not standing up to the task of creating her third selvedge. You can read some tips about starting with a third selvedge here.
Both Marsha and Jennifer tried double weave in #10 thread but decided it was too fine to tackle yet. Marsha is doing a double weave band, her first with a pattern, in #3 thread. She is writing the name of her roommate on what will be the strap for a camera bag. Jennifer made a keyfob as her first attempt with #10 thread and is happy to continue sampling with #3.
And just wait until you see this…
Helena in Brazil finished her pouch and has attached an adjustable band with buckle for her sister to use on her trip to Australia. I love that orange! There are ideas here for fun ways to combine colors, right?
The central design is one I invented and include in my book. I made it to go in a wall hanging along with the adaptation I made of a Huichol motif. This design includes the diamonds, spokes and curls that were also elements in the Huichol pattern.
I will leave you with our Weave-Along group’s learning mantra:
Central Asia, Mexico, Vietnam and the Middle East were new weaving territories for me this year.
I am not one for making New Year resolutions but I got caught up in the moment last year at this time and went public with three weaving resolutions in one of the online weaving groups. I am happy to say that I did not even come close to fulfilling them. I say “happy” because my weaving path for the year took me off on several tangents and led me to interesting and unexpected places.
I am not going to make new resolutions. I do have two or three things mapped out for the coming year and I will happily allow the gaps in between to be filled with whatever comes my way. I have to say that a lot of those gaps are being filled by you guys, my blog readers, who email me with video links, images and ideas from all corners of the world.
What was on the loom this week?…firstly, I will show you what was on the weaving –
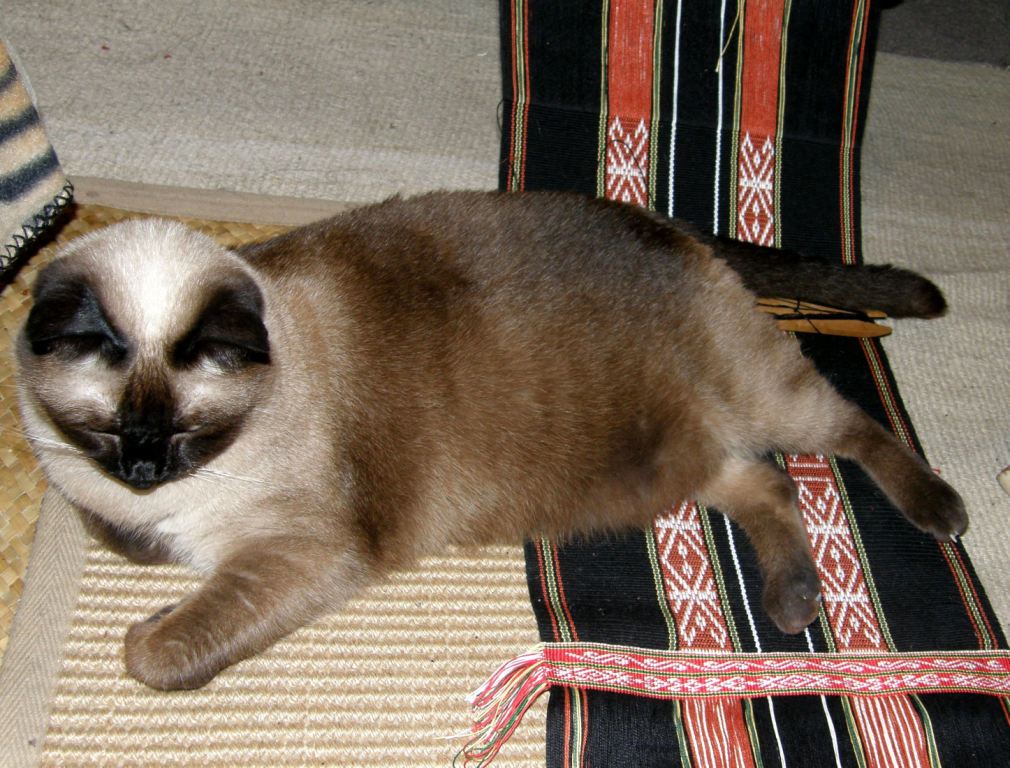
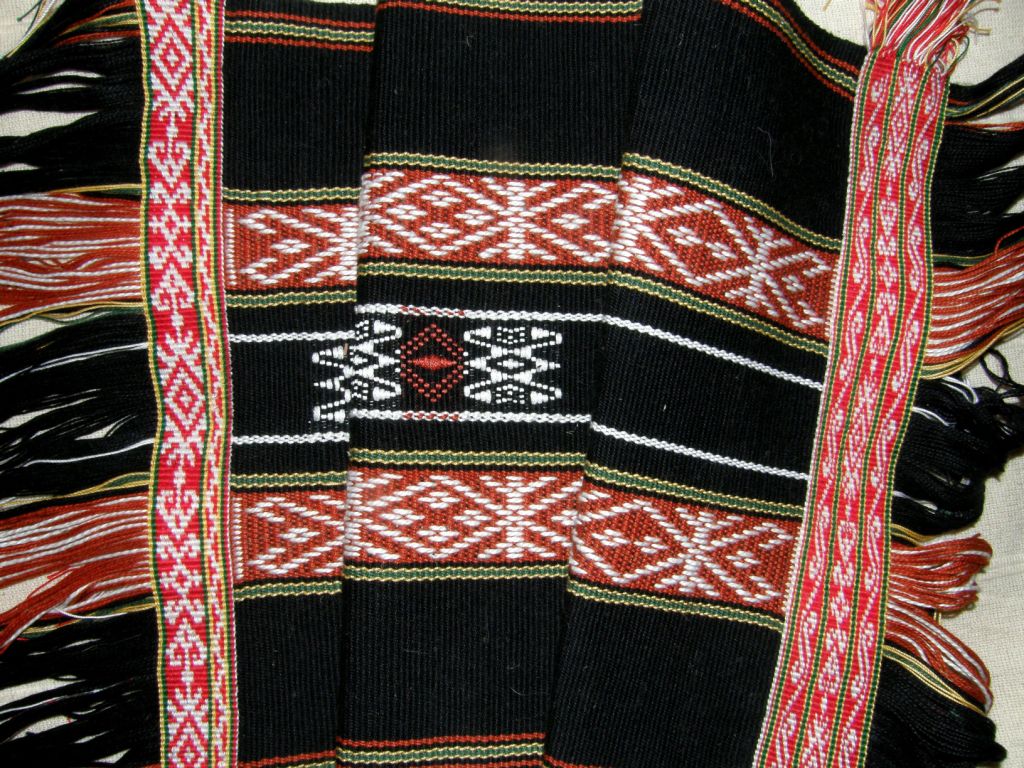
My cat loves to leave all her little beige colored hairs on my black weavings. You can see the twining at the bottom of this piece where I have finished the second part of the design.
Above you can see the three parts finished. I was still debating at this stage what to do with this piece. You may remember my mentioning table runner and then center piece. Who am I kidding?
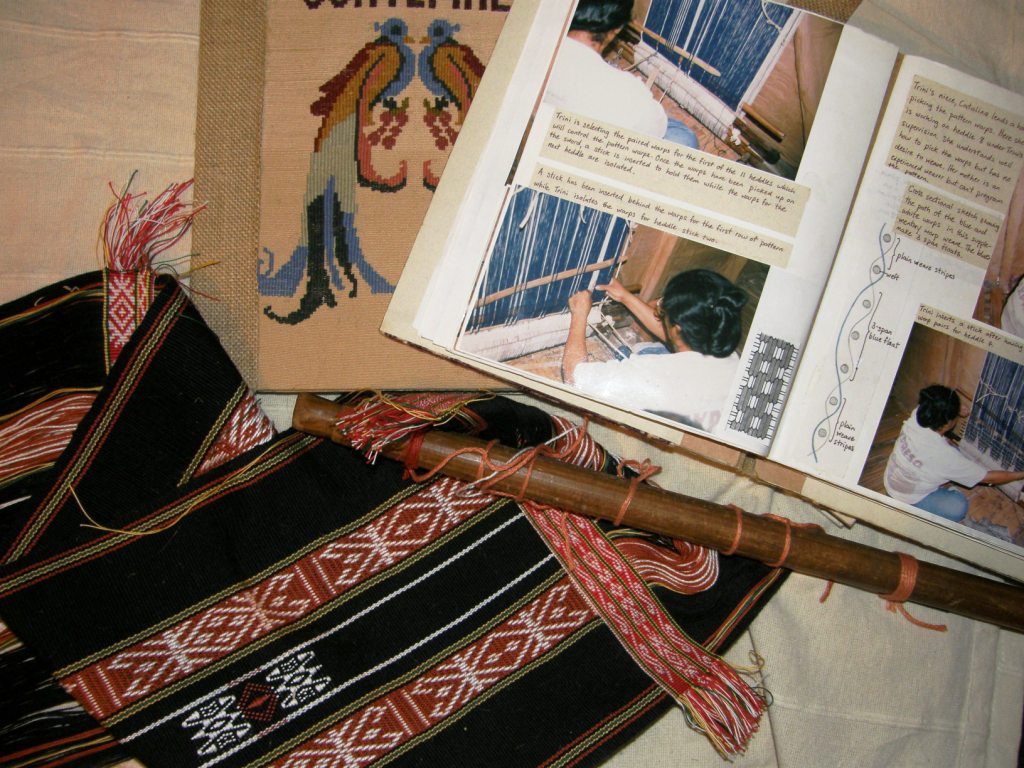
This was never about the product. I just wanted to weave something to put the various Montagnard weaving techniques into practice. So I finally decided that the piece would be cut in two and used as the cover for the journal in which I will document the processes. I have over twenty supplementary weft motifs to chart from photos I took when I visited the Montagnard weavers as well as their warp float designs and twined motifs which I will put in the journal along with step-by-step photos.
Above left are a couple of my finished journals from other weaving trips. One has a woven cover which I made to practice the double faced supplementary weft patterning that I was taught in Guatemala and the one on the right documents all I learned in coastal Ecuador.
But first I had to twine the other end of the piece. I needed to weave some more in order to have enough fabric for the book cover and then I twined the edge using one of the same patterns from the other end but doubling it, that is, I twined two rows for every row of pattern. What a difference that made!
You can see that the design on the center strip of twining on the first end is the same as that on the second end. A closer look…
I have the pages, now I just have to get the cardboard for the journal’s cover. I stitch and bind everything together myself. Then I have to get the scissors out, take a deep breath and cut the weaving in half – yikes.
An interesting thing about the supplementary pattern on this piece…usually I don’t recommend having weft floats of less than two warp spans as they barely show up on the fabric but I had to have floats that only spanned one warp on this piece in order to faithfully reproduce the Montagnard motif and, to my surprise, the design shows up very well. My base warp and weft are number 10 crochet cotton and I used one and a half strands of embroidery cotton as the supplementary weft. The white thread for the warp floats is number 3 crochet cotton and the twining was done with number 20.
Staying on the topic of Montagnard pick up weaving, I have put together a tutorial on the woven letters that some of the Montagnard weavers are using to weave biblical phrases on their woven bag straps. I really like the shape of these letters and it is quite a simple pick up technique. The drawback is that there are some longish floats on the back of the piece which doesn’t bother me too much as bands with letters are essentially single faced anyway with the letters being reversed and unreadable on the back. The technique does not produce an entirely warp faced fabric.
One weft double weave can also be used to weave letters which don’t have long floats on the back. The one weft double weave tutorial ishere and the chart with some basic stick letters ishere.
These letters, which were woven by Guarani weaver Angela, are the ones that I really want to learn…
These are woven with the same technique that I used to weave this copy of Angela’s cell phone pouch design…
I would like to have Angela weave a complete alphabet for me to use. I really like the solid “blocky” nature of these letters.
Other beautiful, fluid and non-blocky letters can be found in Linda Hendrickson’s book Please Weave a Message with charts designed by Linda as well as adapted by her from the work of Michael Cook for card weaving. I have just set up warps to make my first attempt at twining Linda’s lettering. Her charts don’t work for the double weave pick up that I like to do on my backstrap loom but should work perfectly for twining. Hopefully next week I will have some progress to show and I will try to make something useful from the sample!
You may remember inlast week’s postI showed you pictures of Li weavers from Hainan Island and their looms. I have since found someone else who owns one of these looms who also has the backstrap. I don’t remember seeing one at Pam Najdowski’s stand. Susan Stem of Tribal Trappings has this photo of a Li weaver’s backstrap…
The one on the extreme left is the Li backstrap, made from fiber, which is believed to be from the weavers who speak the Meifu dialect according to collector Pamela Cross. The one on the right is probably from a completely different part of the world. This was gifted to Tracy who lives in Qatar and who unfortunately does not know anything about its origin. I love them both and wish that the weavers here in Bolivia had such interesting ones! Most weavers I have met here have had no interest whatsoever in constructing any kind of special backstrap and have been quite content to use any old piece of sacking that is lying around.
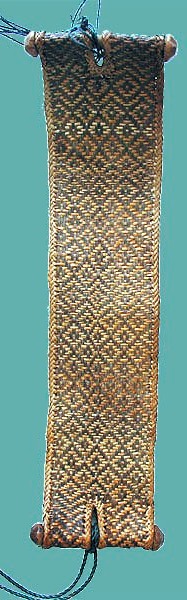
I find backstraps almost as interesting as the textiles that are being made on the looms. I really like the way the two backstraps above have been constructed with the pieces of wood on the sides. So, I dug around and found a weaving that has been sitting neglected at the bottom of the basket. Another one of those things that I wove for my interest in the process rather than for any real interest in the finished product…
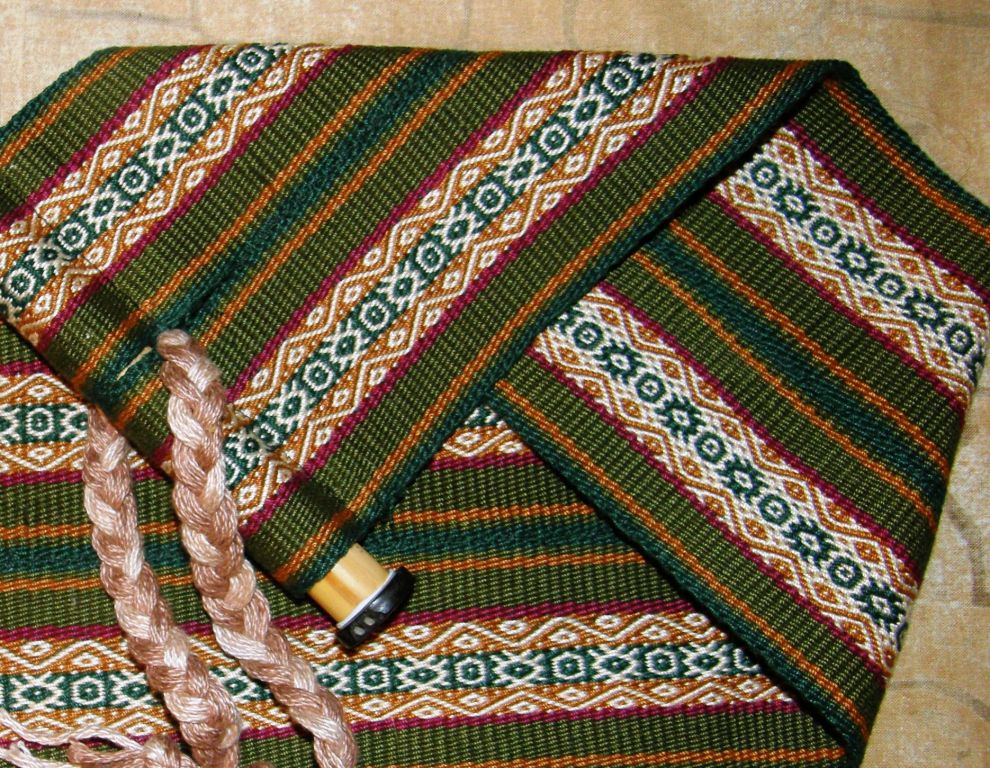
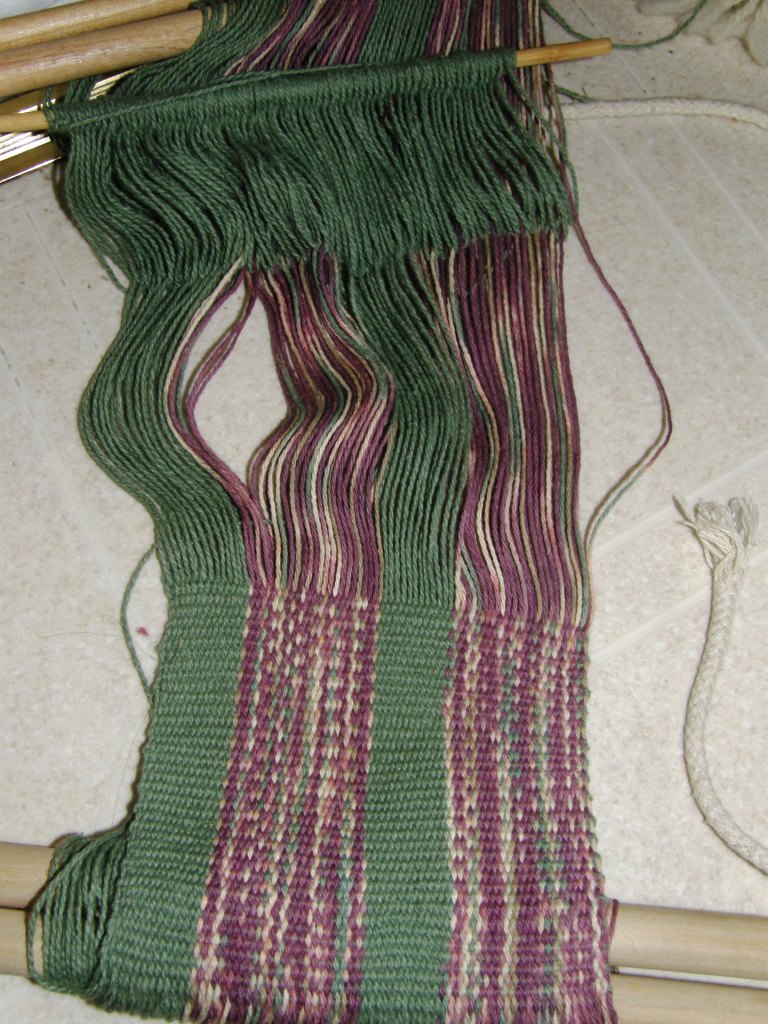
It started off as an experiment on my friend Lisa’s four-shaft loom. I wanted to weave a long Andean pebble weave piece after having made only tiny sample bands in order to put the draft together for my Andean Pebble Weave book. It came home with me to Santa Cruz and went onto my backstrap loom to be finished…
When it was done, it was too wide to be a guitar strap and too long for anything else that I could think of. So, it got shelved to be later made into a loom bag of some sort…again, I was kidding myself.
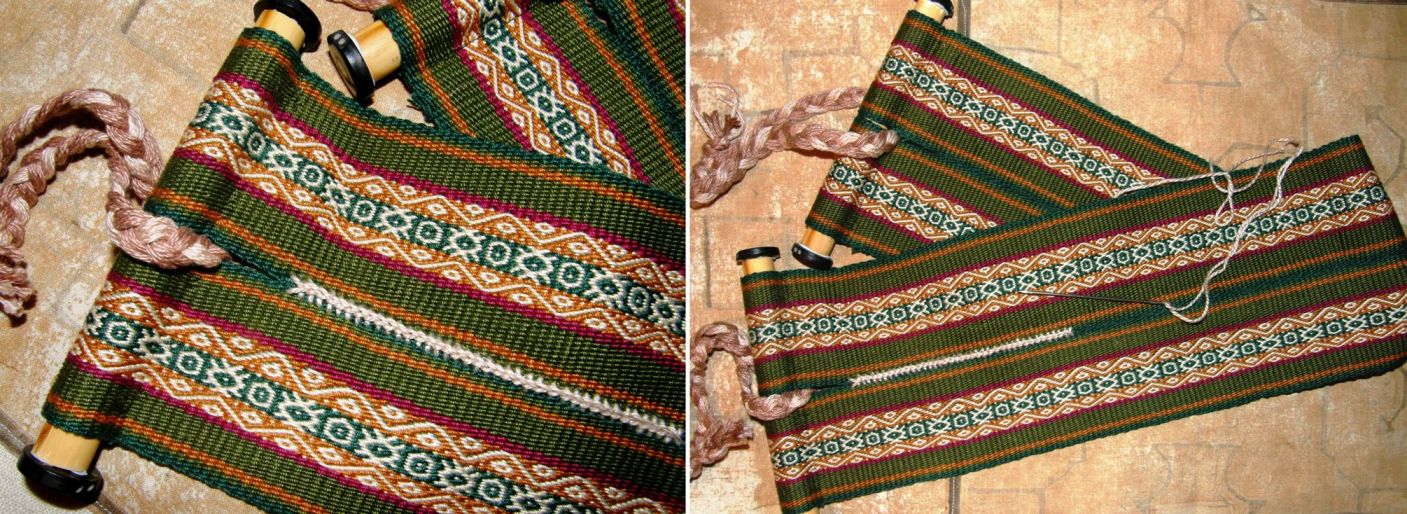
Now here it is resurrected as….my new backstrap…
It isn’t quite finished yet. I have just joined the two pieces together with rough tiny stitches and am now using the cross knit looping or Van Dyke stitch to make a stronger and more decorative join. You can see a video on the Van Dyke stitch in this blog post. I used bamboo sections on the ends of the strap stolen from a cheap set of panpipes and the dark ends on the bamboo are pieces of tagua nut that I bought in Ecuador which are only held on with Blutack until I can get some strong glue.
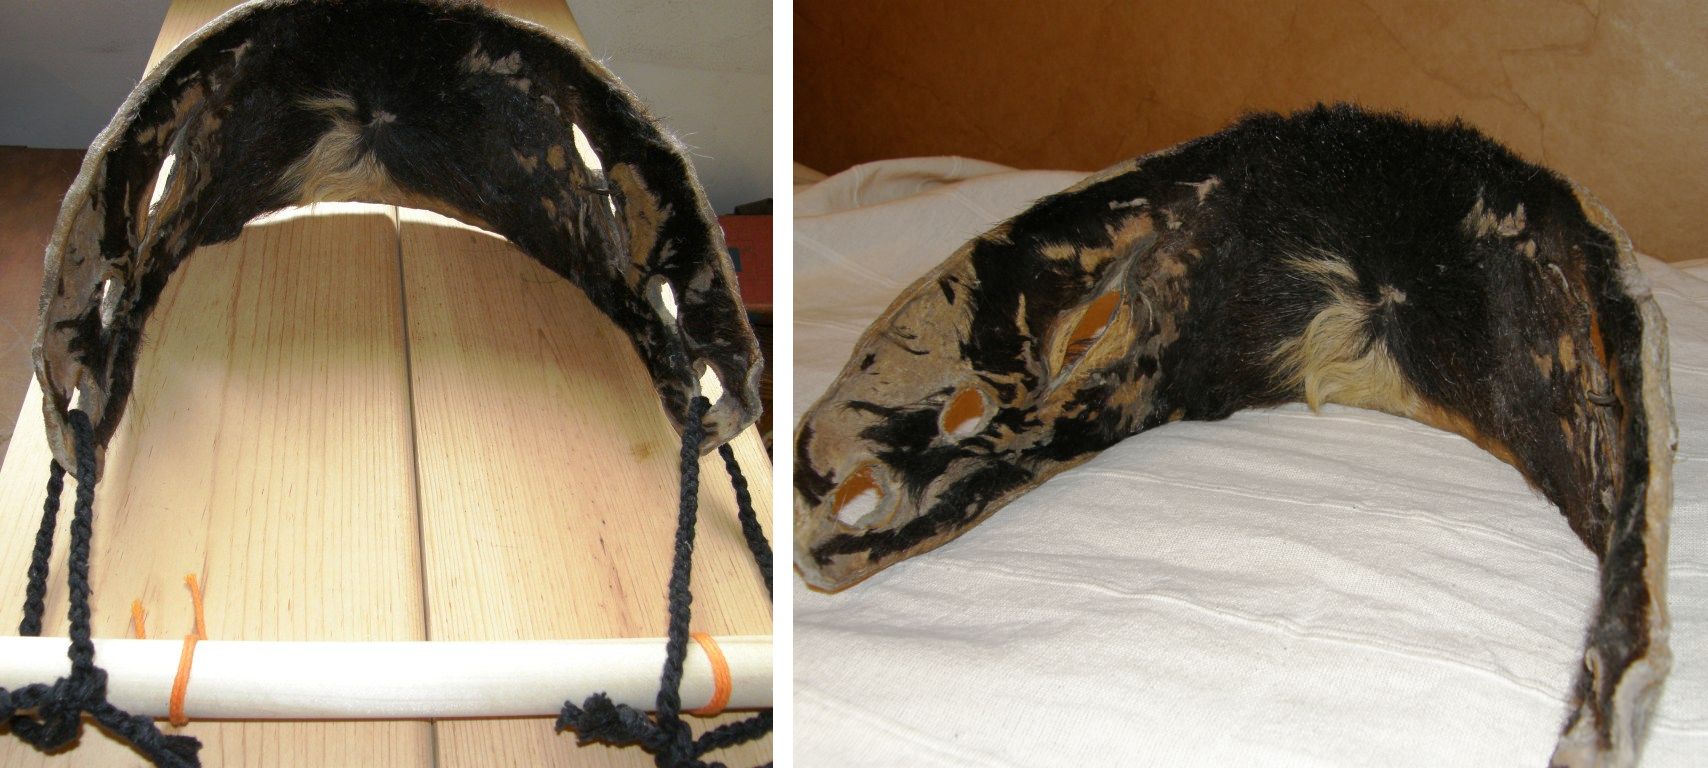
I have collected nice backstraps from a few other countries – a fiber one from Peru, a leather one from Guatemala and a very unusual hide one from Ecuador but nothing interesting from Bolivia.
A nice sturdy hide backstrap from Otavalo, Ecuador. The hairs tend to tickle while you are weaving.
I found the image at left on this site about backstrap weaving in Timor.
Timor is so close to my former home in Australia. I am seriously thinking about making a trip there the next time I go back to Sydney.
In the picture it looks like the weaver is making two pieces at once side by side as Montagnard weaver Ju Nie often does.
I love the backstrap. Ju uses a large pad which I think is stuffed with some kind of fiber. She just passes a rope behind it to hold it to her back which she then loops around her loom bars. It is very comfortable. You can just make it out in this picture…
Some blog readers, Weavolution and Ravelry members have made backstraps this last week…
Claudia from Weavolutionfinished her backstrap (on the left) and found a good place to tie up her loom in the process…to the bottom of the sofa (but with her back to the tv!). Anna who you may remember is cycling down to Tierra del Fuego wove her own backstrap while on the road. She has been weaving pebble weave and double weave until now and told me how lovely it was to cruise along with plain weave for a change. Anna does not, of course, have a regular tie up spot for her loom and I always look forward to seeing where she is weaving. You may remember seeing her warp tied to her bicycle on the Uyuni salt lake in a previous post.
Jennifer has her backstrap on the loom right now and I caught this image of Melisende’s “ceinture” on a French forum called Tricofolk. I didn’t ask her permission to post this here and hope she doesn’t mind!
Bonjour et bienvenue aux tisserands de la France!
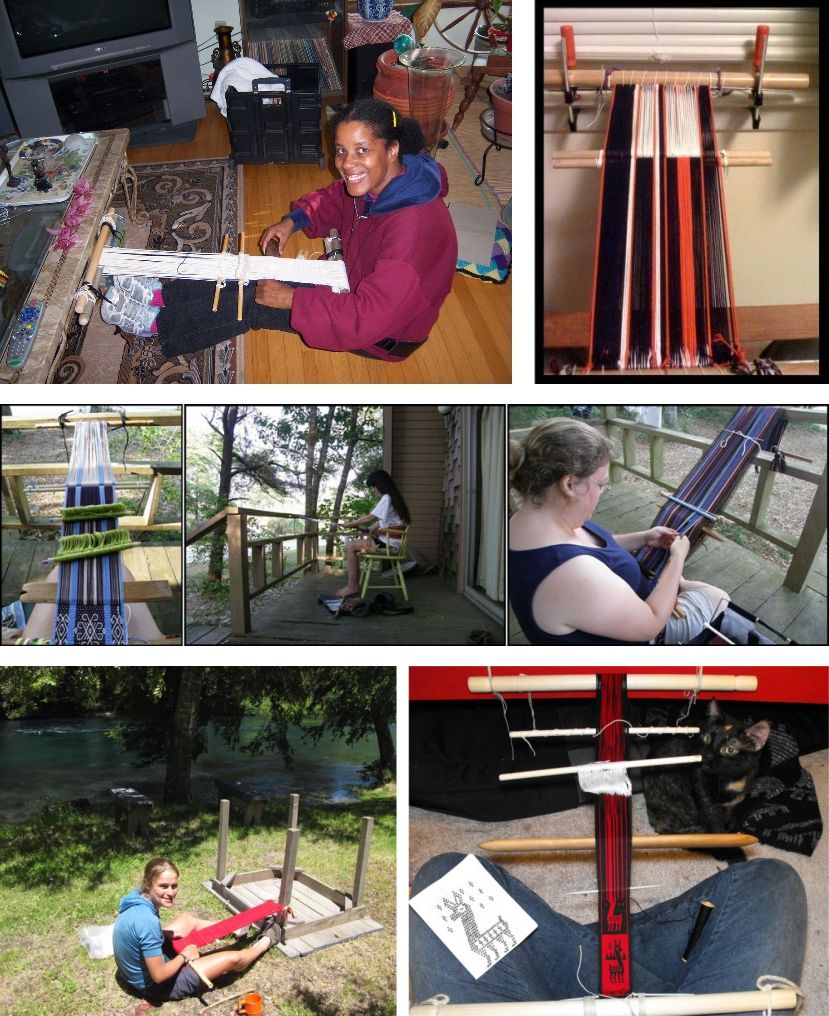
I know that at least Jennifer is getting ready for a backstrap Weave Along that was proposed in the Backstrap weaving Group on Ravelry some weeks ago. We all agreed that post holidays would be the best time to start and we should be underway in January. The exact date is yet to be announced.
This will be a chance for beginners to make their own bands and backstraps with lots of support and advice on the forum. Those who have already woven their first pieces on a backstrap loom can try their hand at a project or two. I will be putting several proposals and ideas in the forum based on the tutorials here on this blog. A few weavers have asked about forming a group to work through myAndean Pebble Weavebook too. So, all levels are welcome to join in.
As the WAL (weave along) approaches, I have three tips for you as you prepare…
1. Think about how you are going to wind your warp…
An evenly tensioned warp is essential. The warp will not be cut, threaded and retensioned once it comes off the warping stakes so you need to get it as evenly tensioned as possible while you are winding it. Beware of using stakes that are loose and may lean in as you are warping. The photo above right is from Franco’s blog. I am sure that Franco made sure that those stools were heavy enough to not move during the warping process. You can read more about warping and see videoshere.
2. Find a strong and secure place to tie up the far end of your loom. It is always better in my humble opinion to lash your entire loom bar to something rather than have it swinging in space. Experiment with the angle of your warp and find what is most comfortable for you.
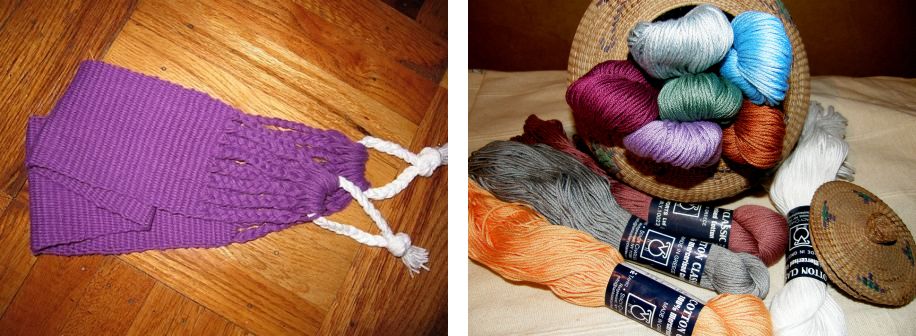
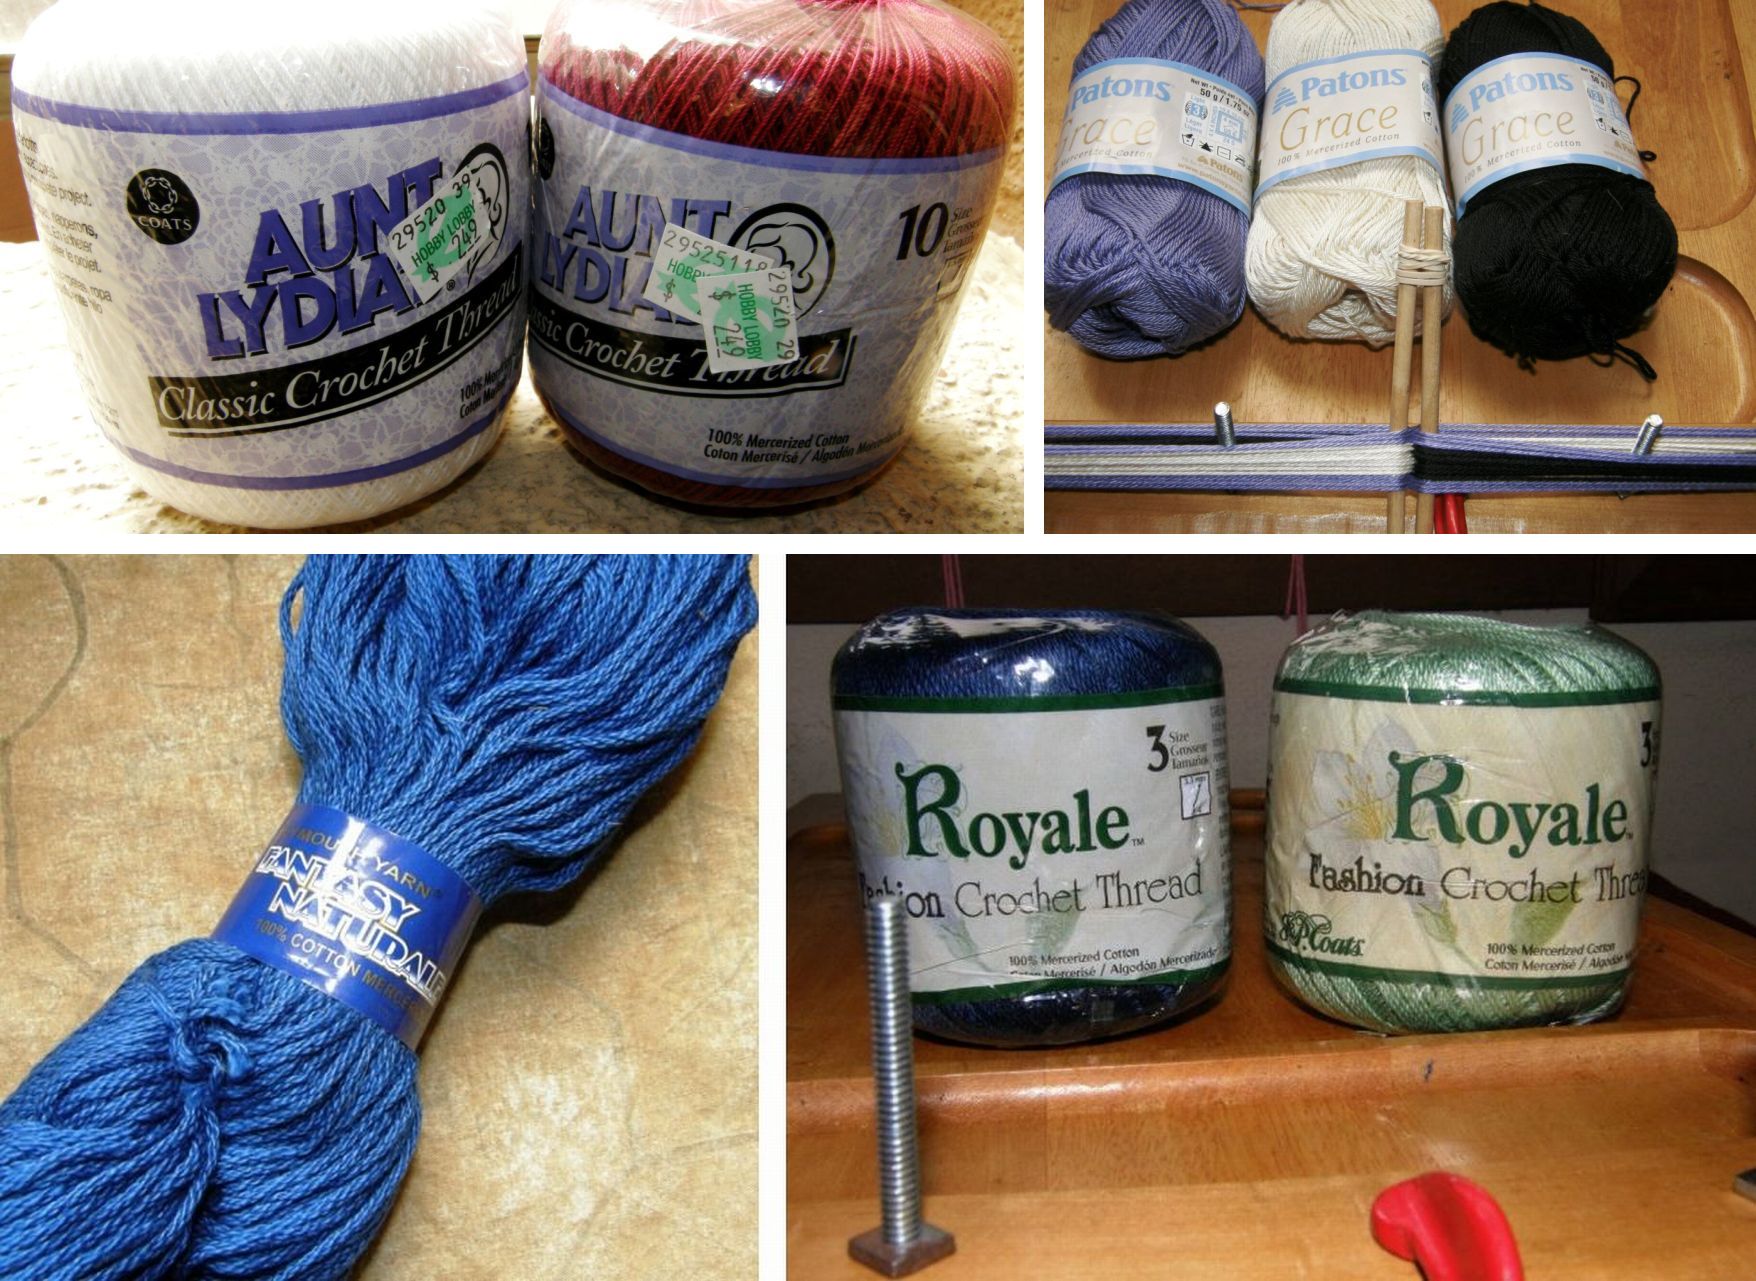
3. Choose your yarn carefully. Don’t use wool for a first project. Try to find a mercerized crochet cotton. Size 3 crochet cotton is good for beginner practice bands. Heavier cotton is better if you want to make a backstrap. Don’t use the cottons that are sold for dishcloth projects.
Tahki Cotton Classic is a good choice for making a backstrap. Cathyz made the purple strap above with this thread. WEBS recently had a sale on Tahki Cotton Classic and I got a grab bag of ten skeins.
Other brands that are readily available at Michael’s, Hobby Lobby and such places that I have tried and recommend are pictured below…The Fantasy Natural is a good weight for backstraps. I got that at The Mannings.
Read more about yarns including some information on using wool here.
My new backstrap was made with this thread pictured below…love this stuff!
Read more about suitable cotton thread and wool here.
I’m back, after having a wonderful week in colonial Williamsburg at the invitation of my friends David (aka Dr D, historian and super guide), Janet and Claudia. There wasn’t a blog post last week…no internet in the 18th century, you see. 😉
Colonial Williamsburg is “the restored 18th-century capital of Britain’s largest, wealthiest and most populous outpost of empire in the New World.
In the 301-acre Historic Area stand hundreds of restored, reconstructed, and historically furnished buildings. Costumed interpreters tell the stories of the men and women of the 18th-century city – black, white and native American, slave, indentured and free – and the challenges they faced.”
The challenge I faced was the COLD! It was not quite what I am used to in hot and steamy Santa Cruz Bolivia. It was interesting to note yesterday that the temperature was the same here as in Bolivia – around 34 degrees – except that the temperature here was in Fahrenheit while it was in Centigrade in Bolivia.
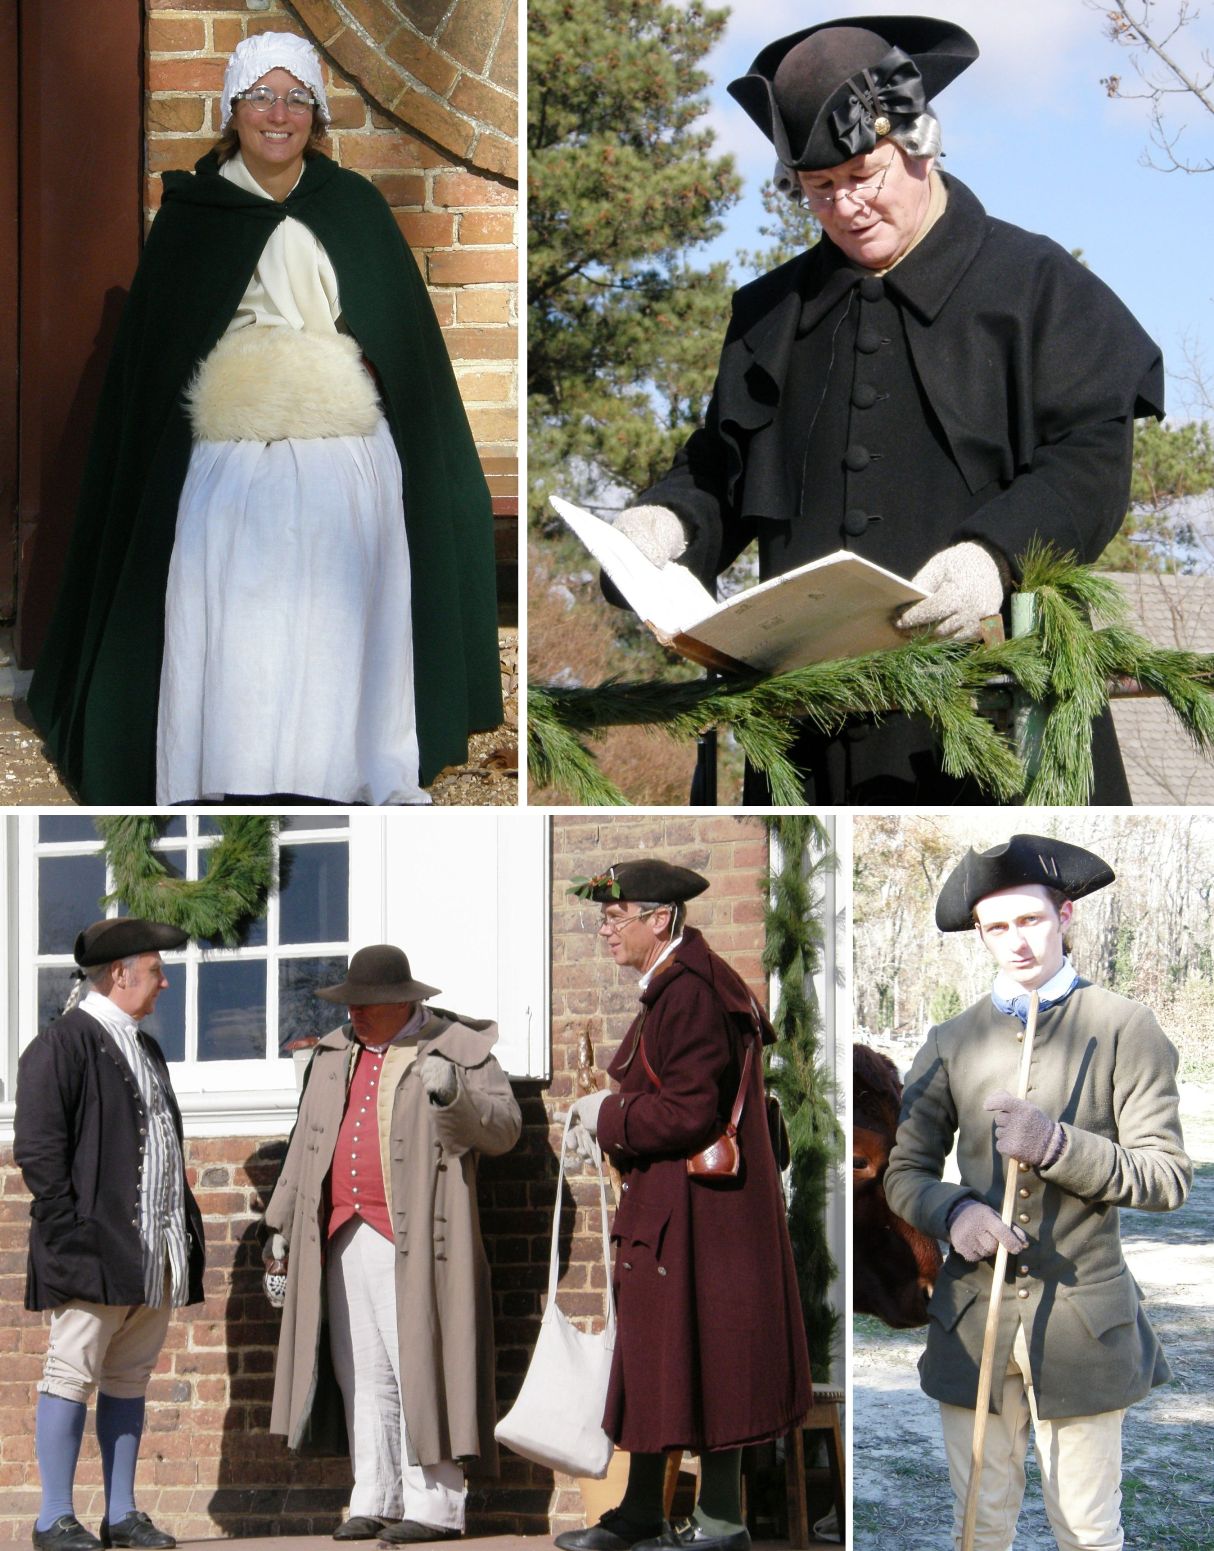
Here is what the colonial Williamsburg folk were wearing outdoors in the cold winters…
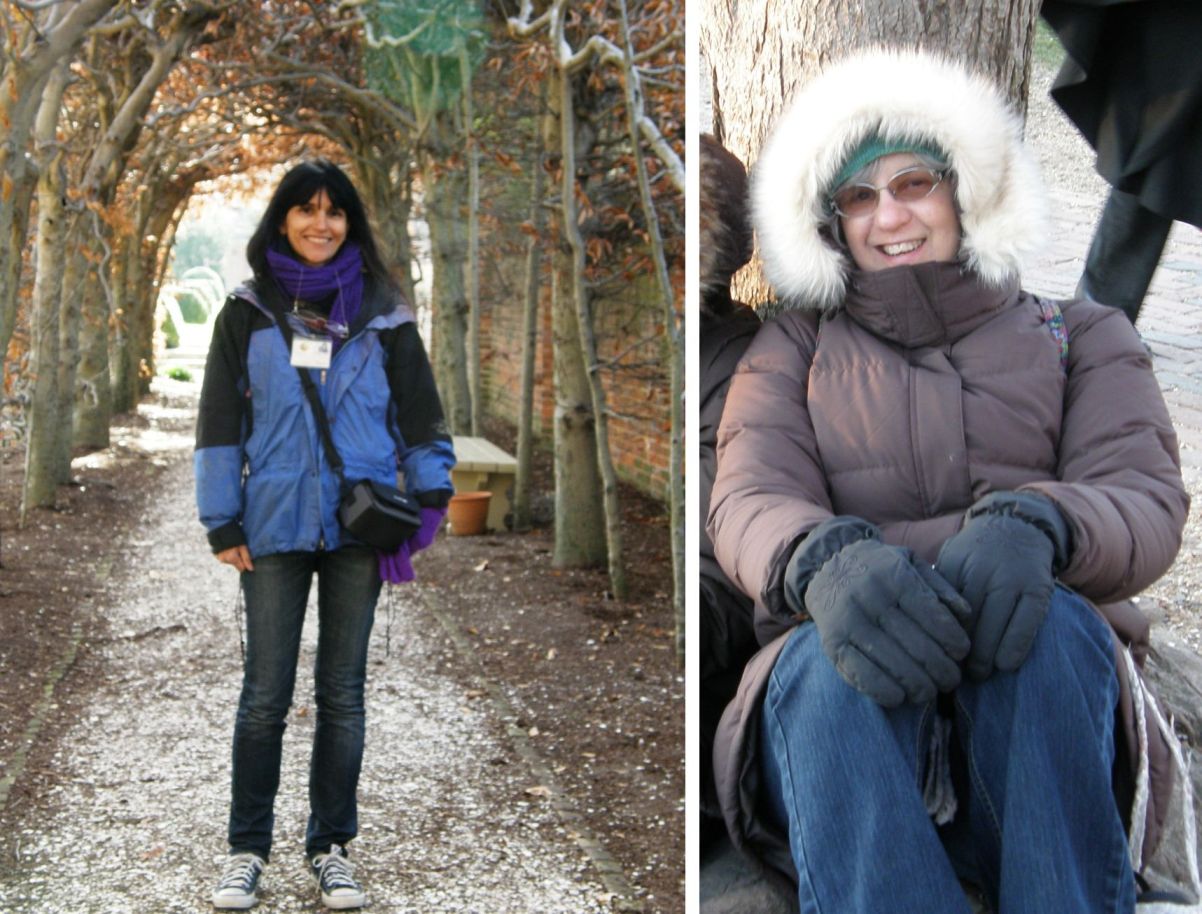
And here we are in our down, goretex and thermals…
It was a week of flames…candles, fireplaces and burning braziers in the streets after dark. It was COLD! and I made friends with every fireplace in every building along the way and became a big fan of hot cider.
We stayed at the historic Powhatan Plantation which is named after Chief Powhatan of the Powhatan tribe and father of Pocahontas.
I had wished for snow and there I got a dusting on the morning of day one. That was enough for me, thank you very much! A week of glorious clear blue skies followed. Above you can see the plantation Manor House and kitchen building which is now an intimate elegant restaurant. I don’t know what kind of awful weather in Canada has the geese flying down here to happily set up camp on the frozen ponds.
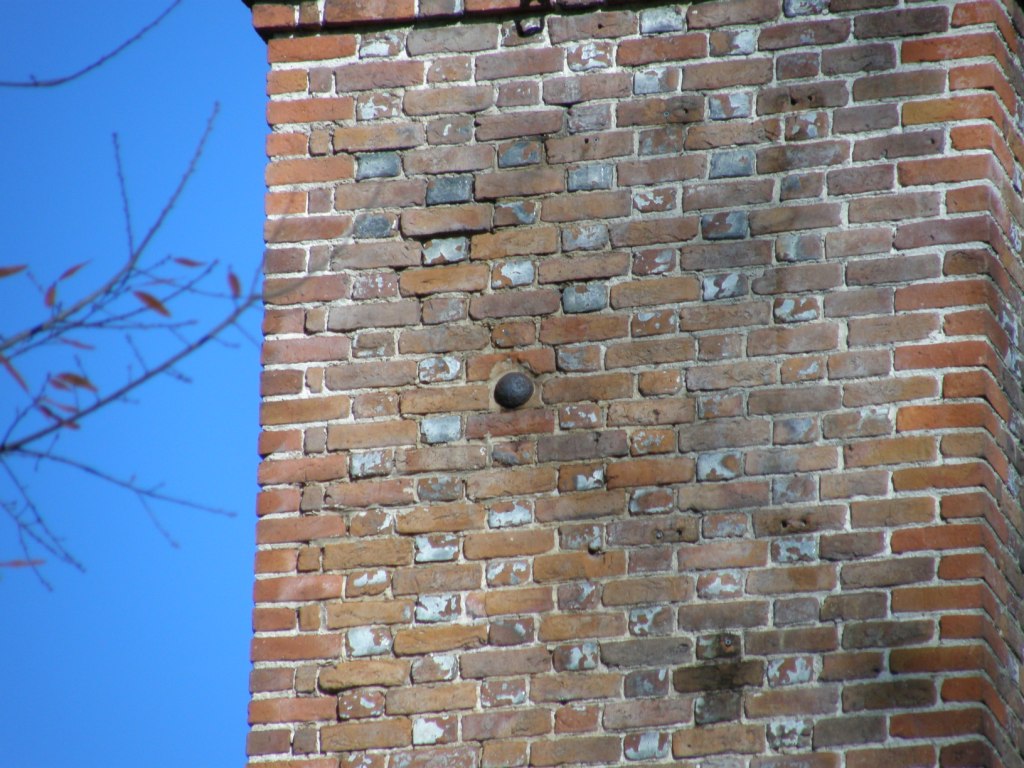
The Manor House came complete with a cannon ball lodged in its chimney and resident ghost Eliza.
Walking from place to place around the historic area and visiting every single place that was open to the public, we managed to keep ourselves warm, quite often forgetting the cold all together – everything was so absorbing and interesting with the constant reminder that we were walking the same floors, visiting the same stores, climbing stairs and grasping the same banister rails as people like George Washington, Thomas Jefferson and Patrick Henry.
Only Sunday evening had us sitting still and huddling down against the cold as we waited for the “Grand Illumination” – a tremendous fireworks display which marked the start of the holiday season. Large blazing braziers lined the streets and groups gathered around in the darkness for light and warmth.
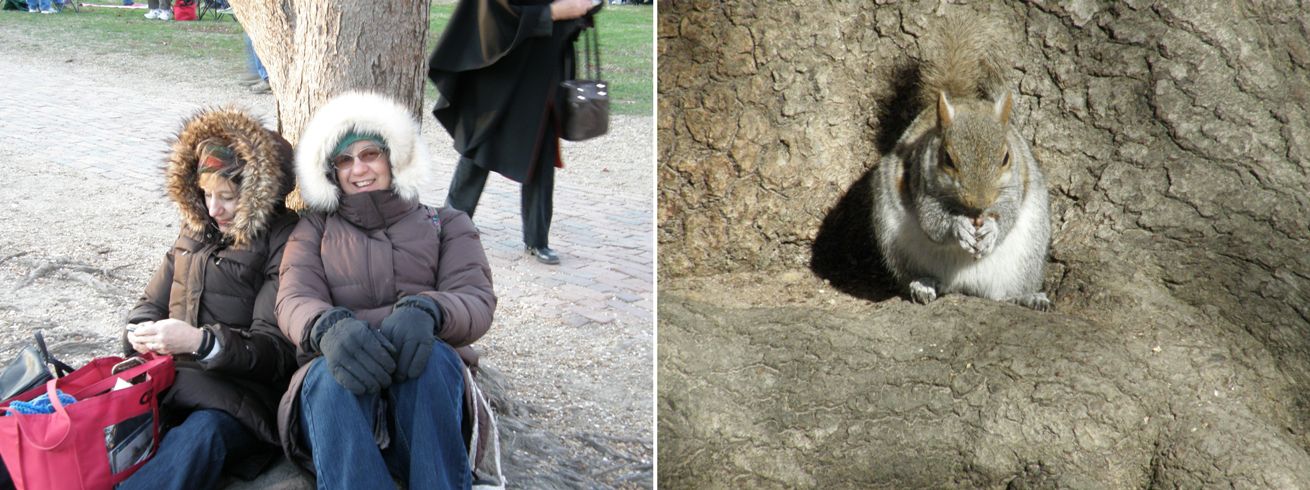
Forgive this photo – we don’t have squirrels in Bolivia.
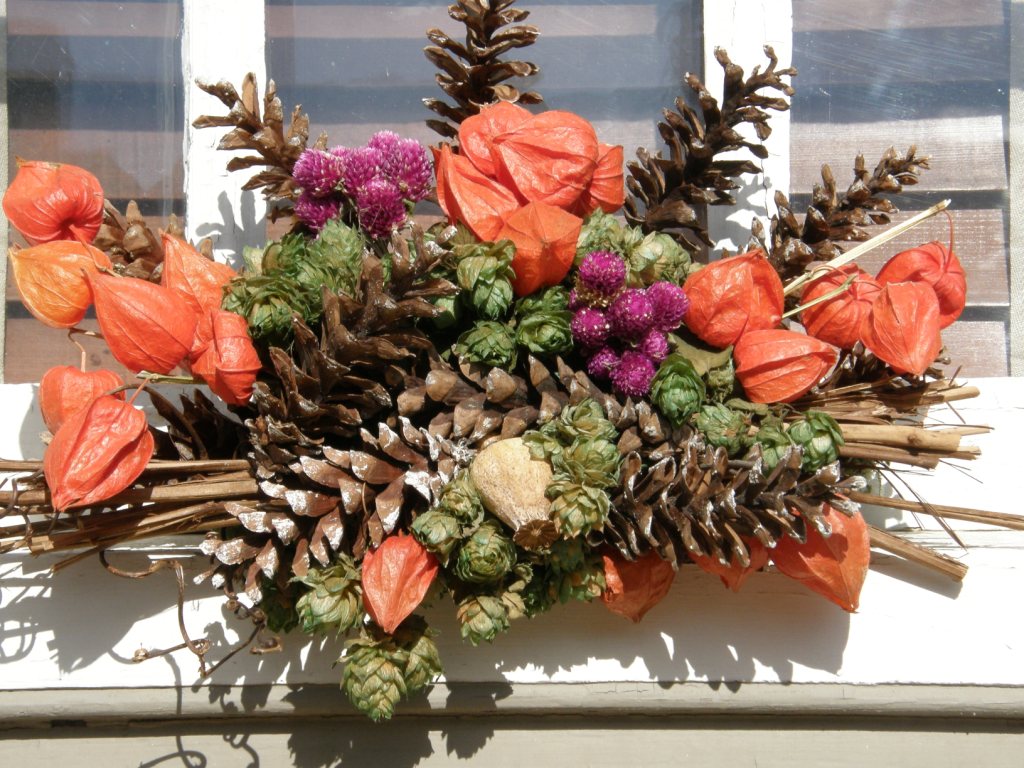
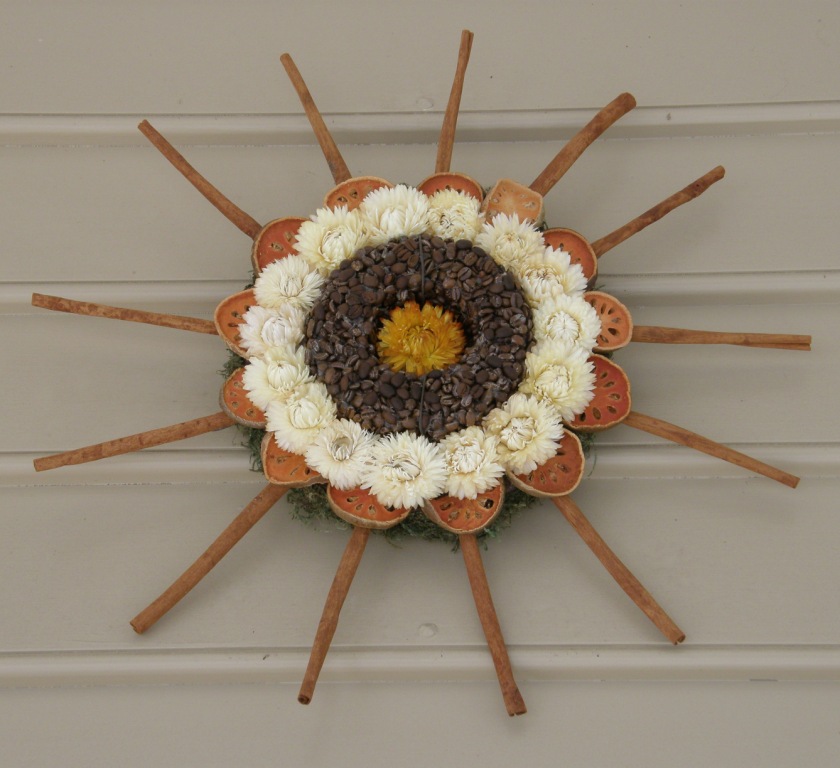
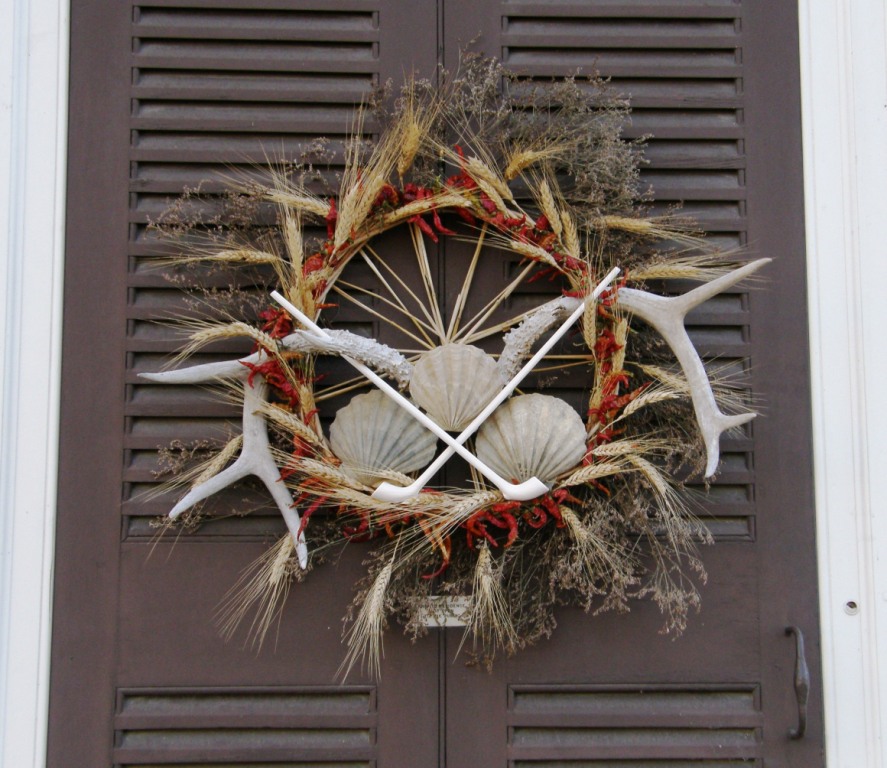
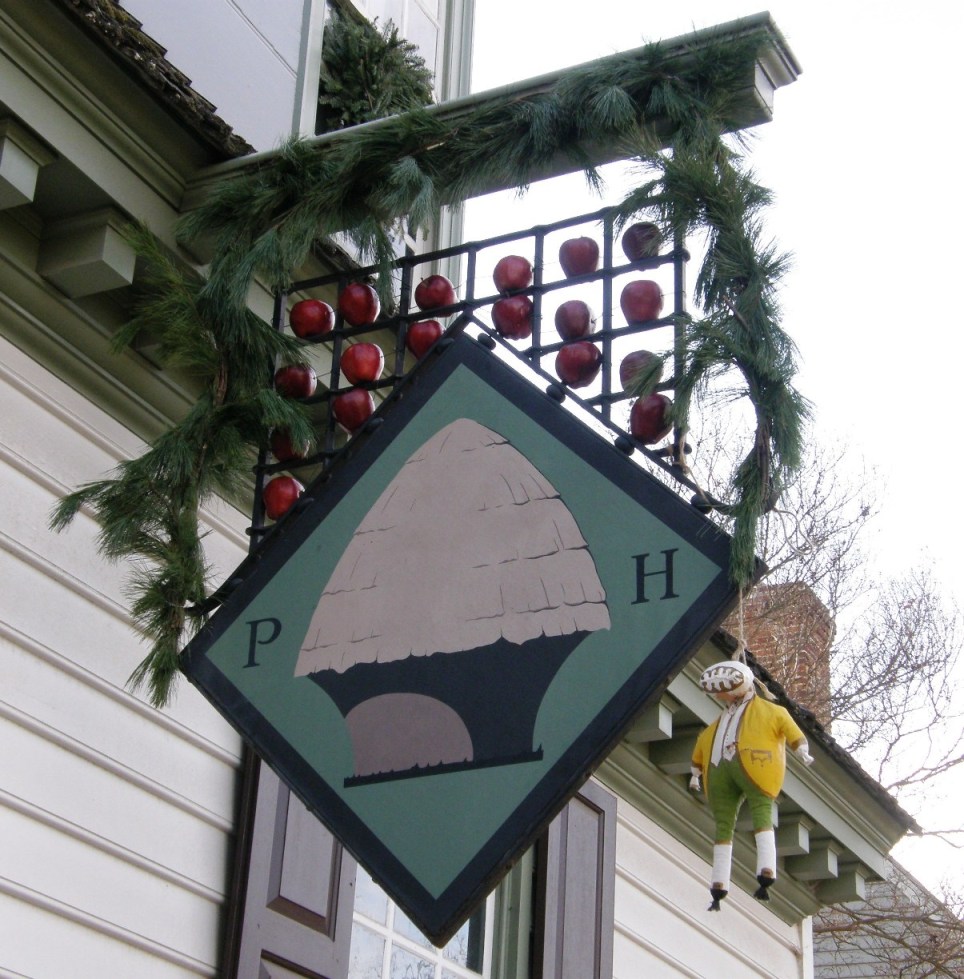
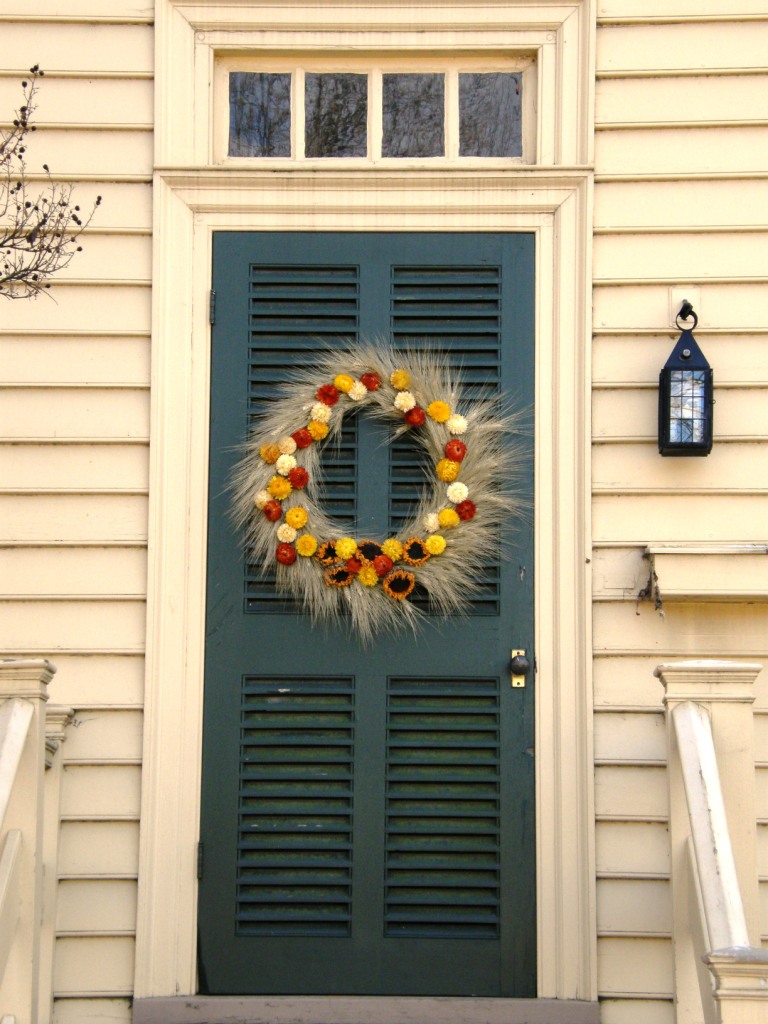
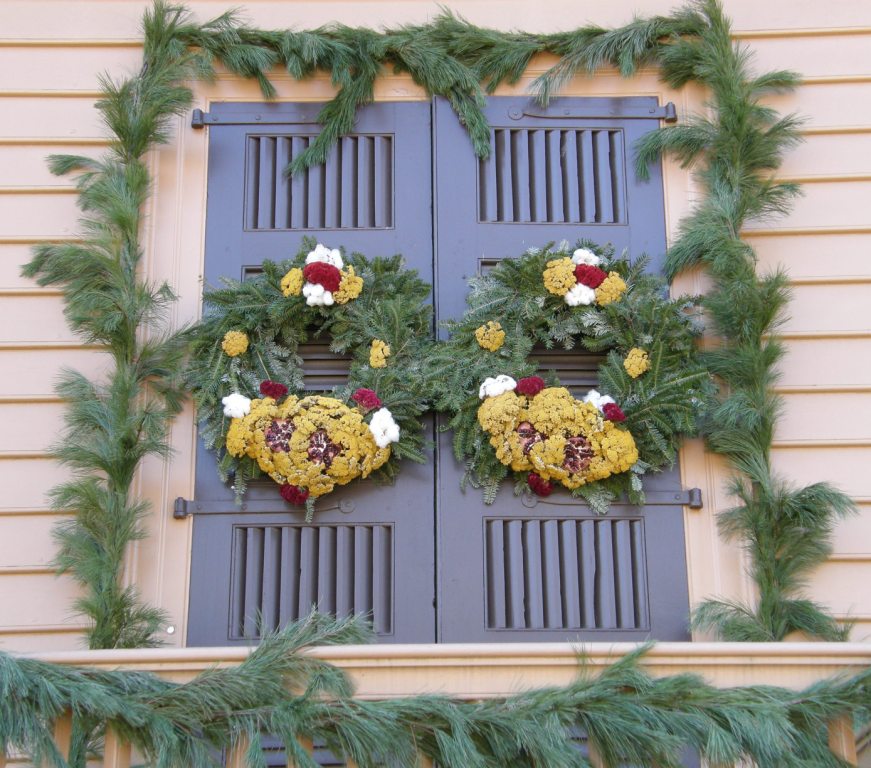
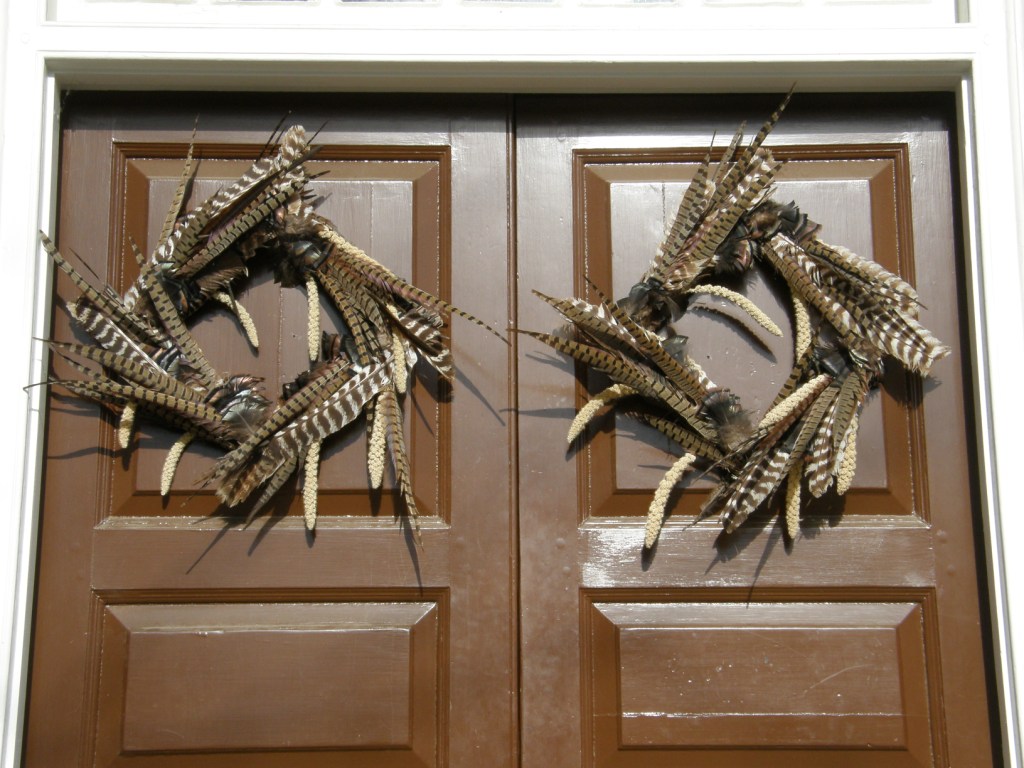
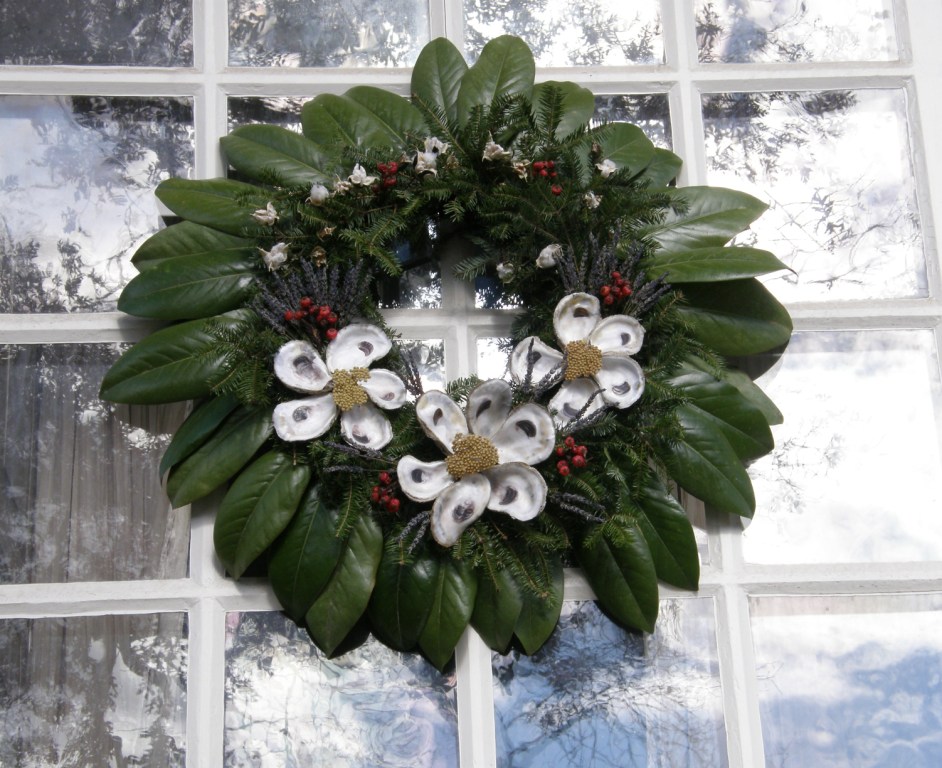
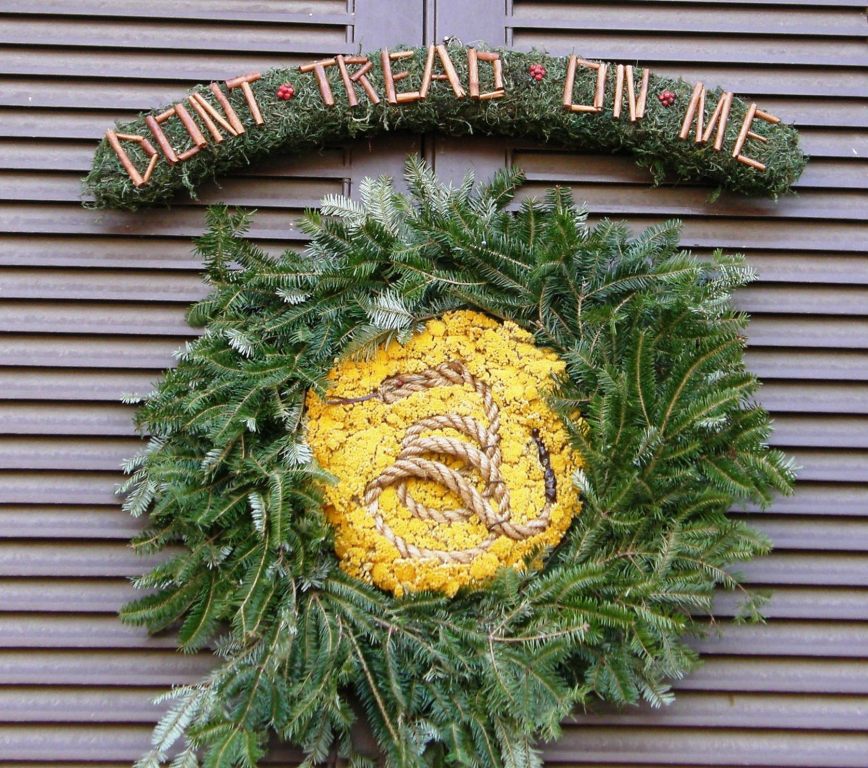
Doors, windows, shutters, fence posts and walls were adorned with wreaths – no two were alike, some pretty, some just plain quirky – candles flickered in windows and carol singers gathered on street corners while horses and carriage clopped by.
I have inserted tiny pictures of just a few of the wreaths throughout this post.
As idyllic as this all sounds, this swinging sign outside a private residence of colonial Williamsburg with its hung effigy of who was, most likely, Governor Dunmore shows that not all was well in the colony around the 1770s.
Indeed, we heard snippets of gossip and rumor from the various store, tavern and coffee house keepers about the general discontent with the British Government and its taxes. There were even whisperings of “independence”.
The vast majority of the interpreters stayed faithfully in character and it was fun interacting with them.
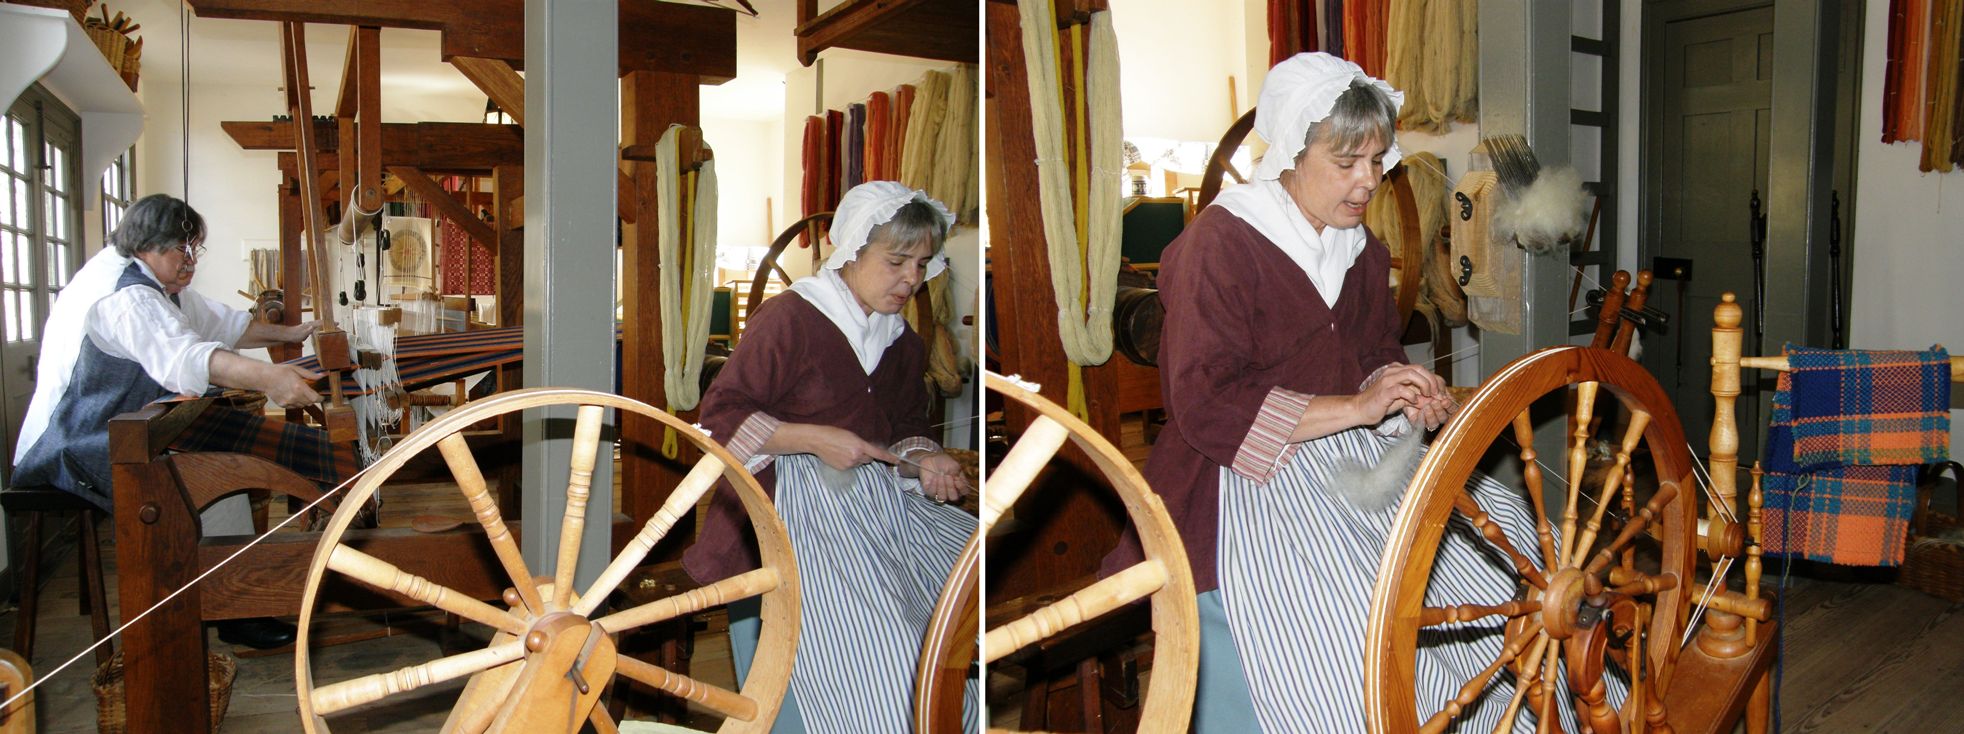
Of course we had to pursue the fiber trail which took us to the workshop of the weaver and spinner and out to the pastures to find the Leicester Long Wool sheep, one of the breeds known to have been raised in these colonial times.
This image from a website called Sheep 101 and the reproduction of a children’s toy in Williamsburg clearly show how this breed of sheep earned its name.
We eventually tracked down a half dozen LLW sheep in one of the pastures and saw some of the handspun wool on sale in one of the stores.
According to various pieces of literature that I picked up here and there in Williamsburg, most colonists bought fabrics imported from England from the local milliner.
However, those who could not afford these or who had very large households produced their own cloth.
On plantations around Williamsburg, the work of growing, combing and spinning flax into linen yarn for weaving usually fell on slaves or domestic servants.
Domestic fabric production increased with the eventual boycott of all English goods, including textiles. Strategies proposed to deal with this sudden end to the availability of fine English cloth included the following declarations set down in the Continental Association of 1774…
“We will, in our several stations, encourage frugality, economy and industry, and promote agriculture, arts, and the manufactures of this country, especially that of wool”…..and…..”use our utmost endeavors to improve the breed of sheep, and increase their number to the greatest extent.”
The additional labor of raising the sheep and carding the wool and cotton would go to the slaves who were now clothed in “Virginia cloth” instead of imported English fabric. Weaving, spinning and dyeing became necessities and patriotic duties.
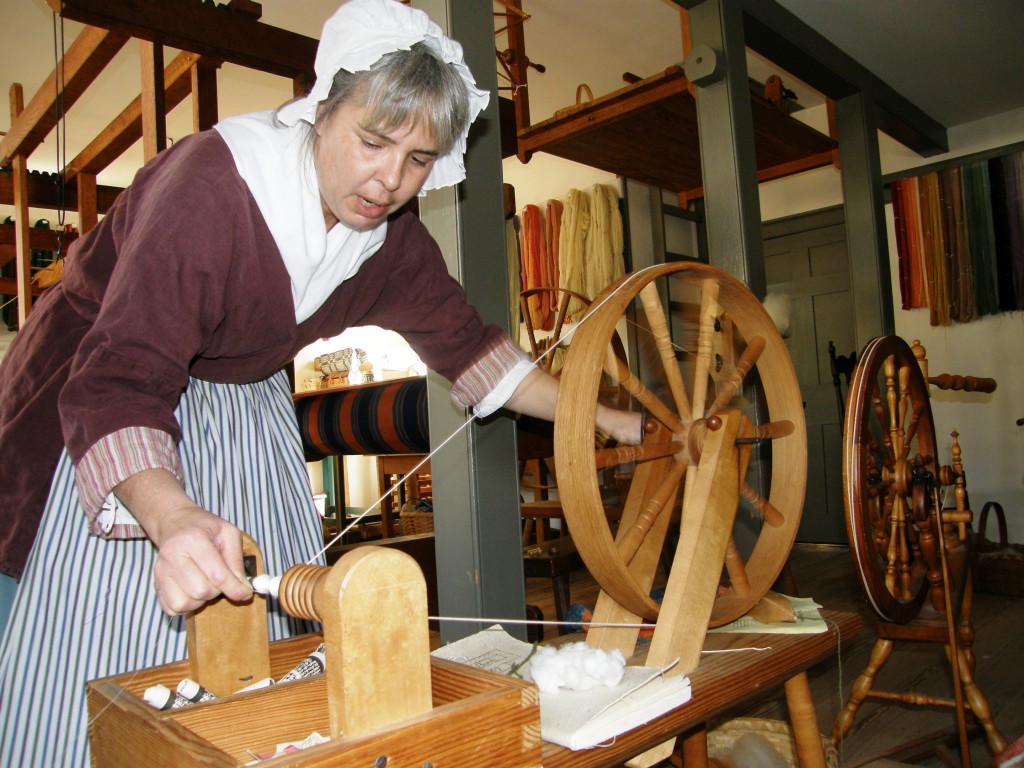
We visited weaver Max and spinner Karen more than once as, on each visit, they had different interesting tidbits of information to share. In fact, you could probably visit all the tradespeople in town several times over and learn something new every time. None seemed to have limited themselves to a set well-rehearsed speech for the visitors and their enthusiasm for their work was evident.
Karen showed us her Saxony and walking wheels while Max was reproducing an antique blanket woven in overshot for a client, a piece of which can be seen draped over Karen’s spinning wheel. While Karen wound quills as you can see above, she told us that children would be tethered to the equipment to perform the tasks of loading shuttles and winding the quills.
Let me take you on a short photo tour of several highlights of colonial Williamsburg…
Above left is Bruton Parish church, completed in 1683, where we attended an evening concert of Christmas songs ranging from pilgrim songs of the 15th century to jazzed up versions of twentieth century tunes. The Williamsburg Courthouse, on the right, is the only building we didn’t enter but we did try the stocks on for size. You can just make them out on the right.
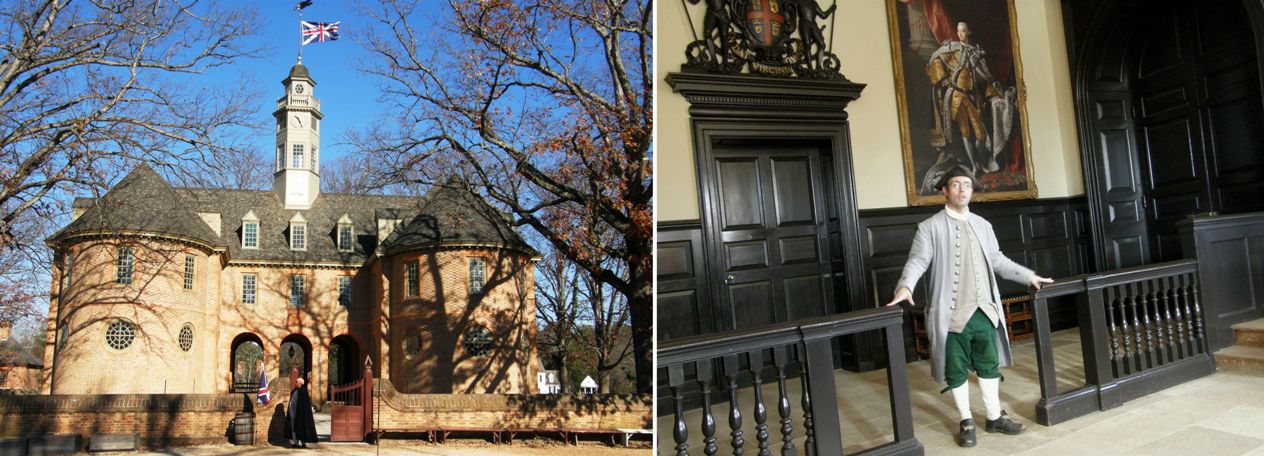
The reconstructed Capitol building. The Capitol building was the center of political life in Virginia for most of the eighteenth century and is where Members of the House of Burgesses met. it was here that Patrick Henry delivered his “Caeser-Brutus” speech against the Stamp Act on May 29, 1765.
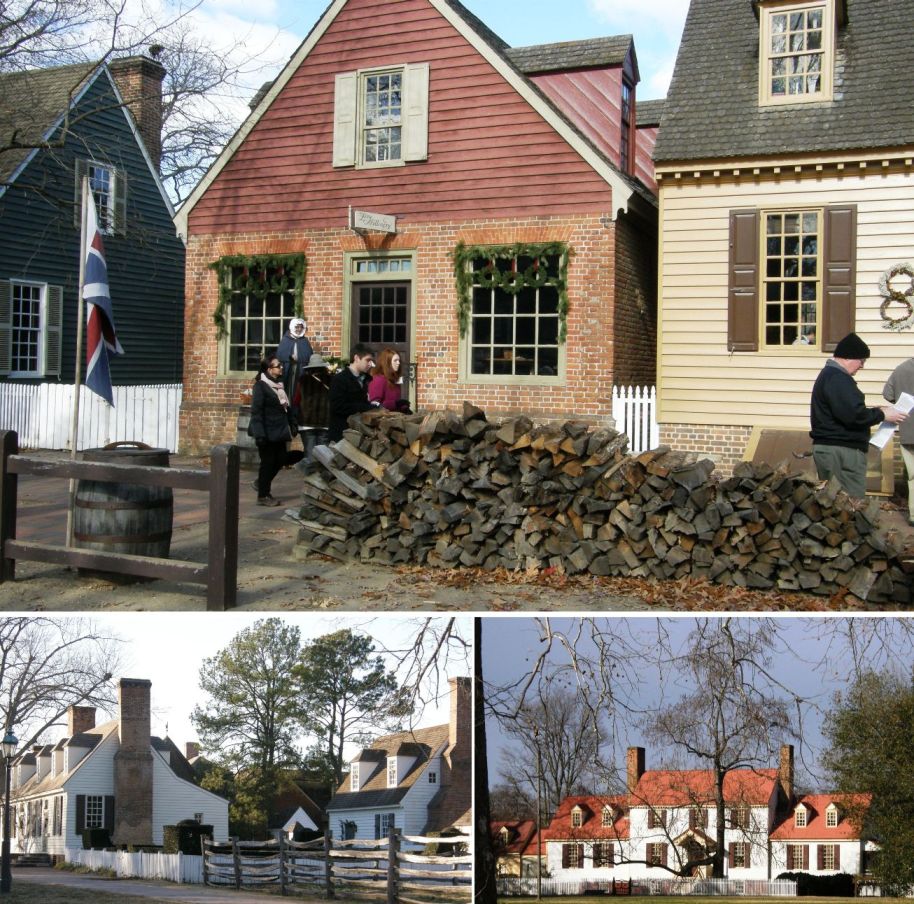
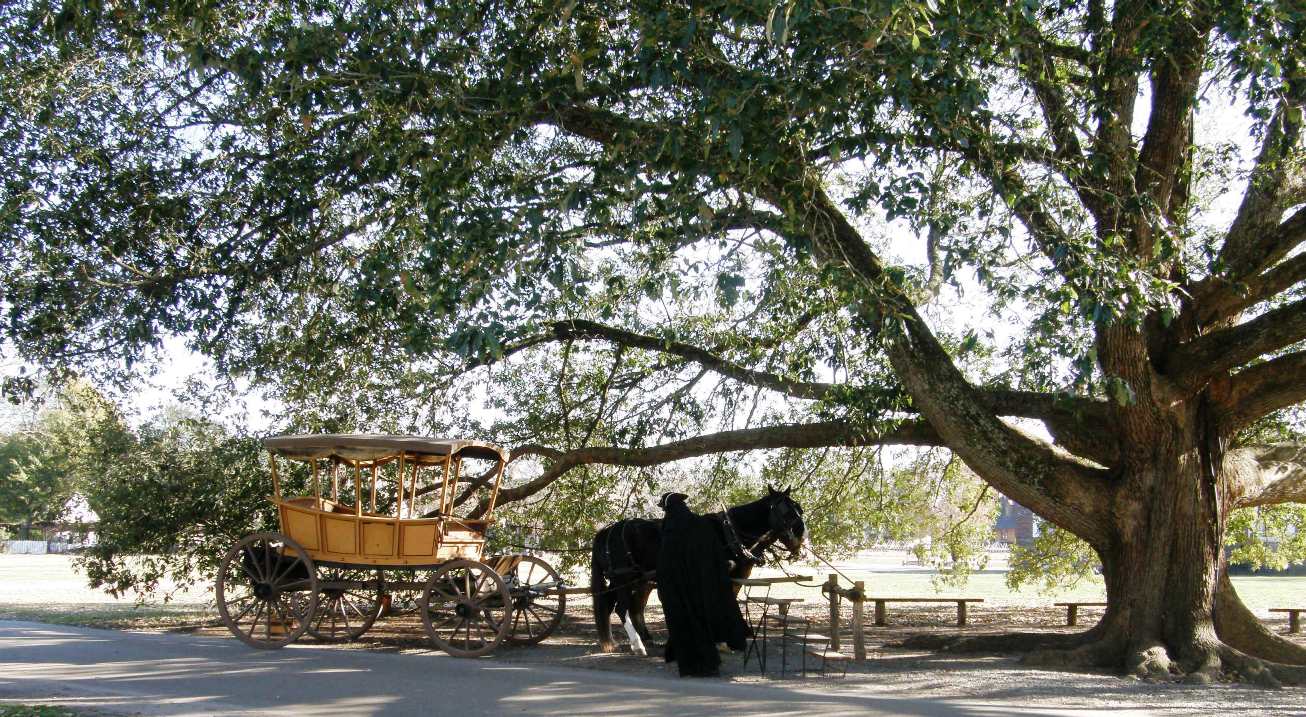
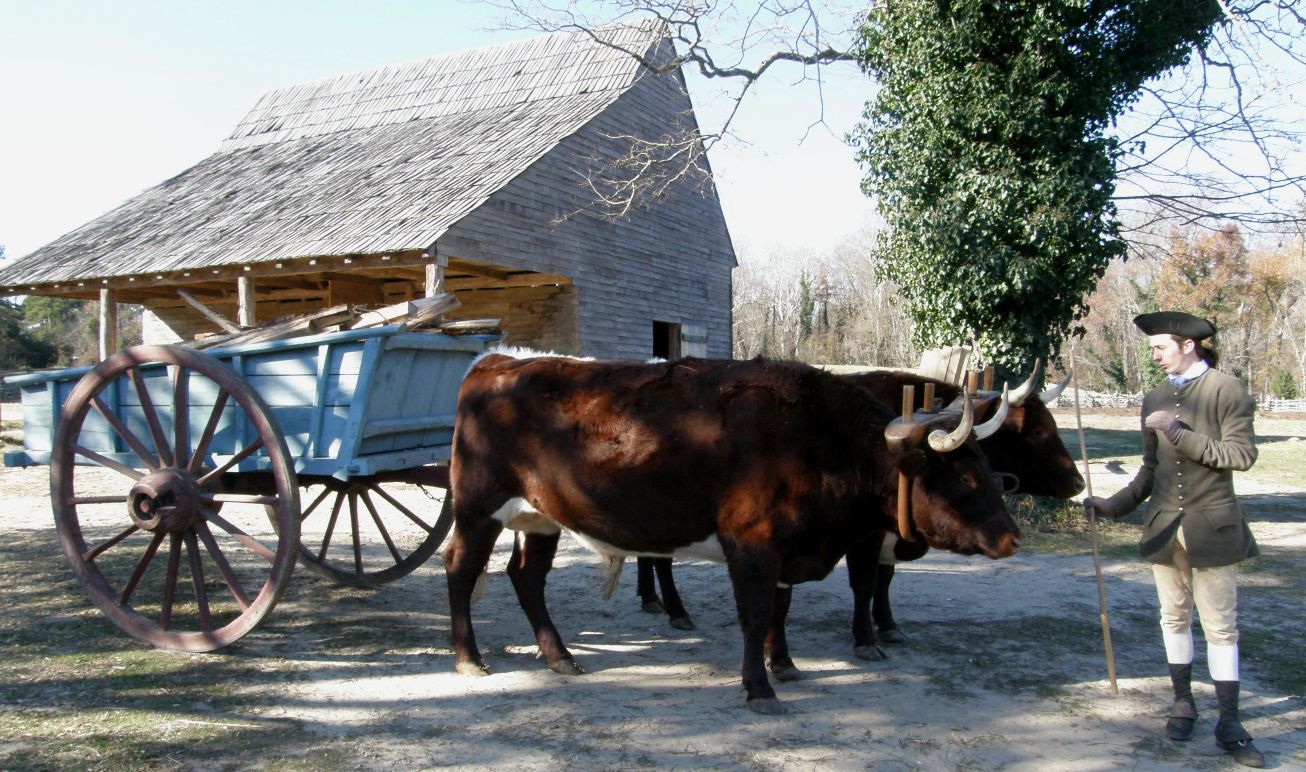
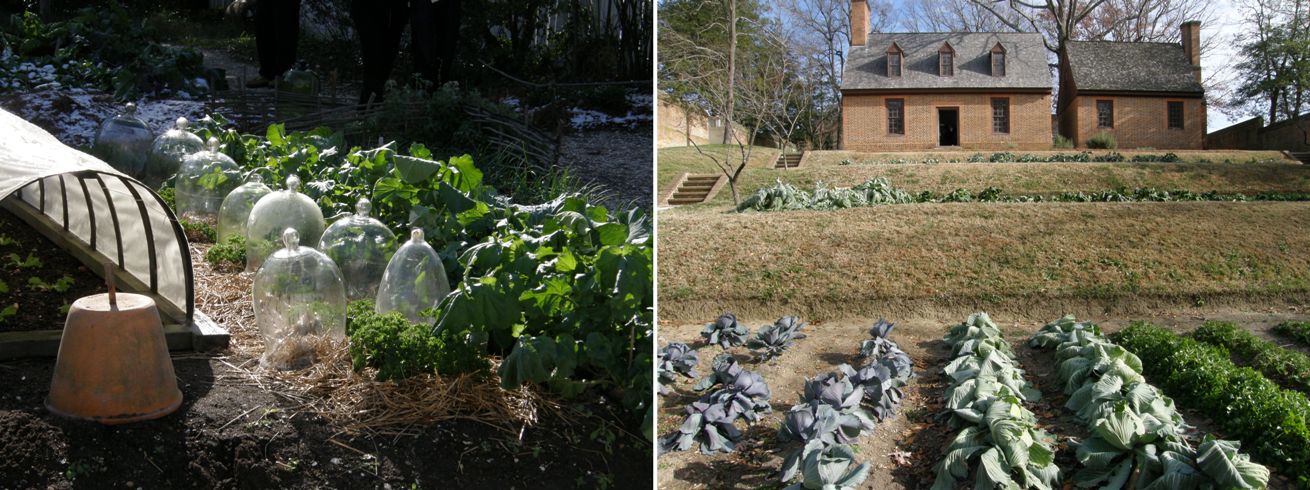
Private homes and stores in the historic area.A carriage pulls up under what we were told is a majestic willow oak.Ox and cart on Hope plantation where tobacco amongst other crops was grown.We encountered all manner of folk in the street.An actor plays out a scene from Sheridan’s School for Scandal and a group sings carols for passersby.The gardens of the Governor’s Palace were particularly beautiful even in the wintry weather.The kitchen gardens flourished despite the low temperatures and frosts.
My favorite places were the workshops of the various tradespeople.
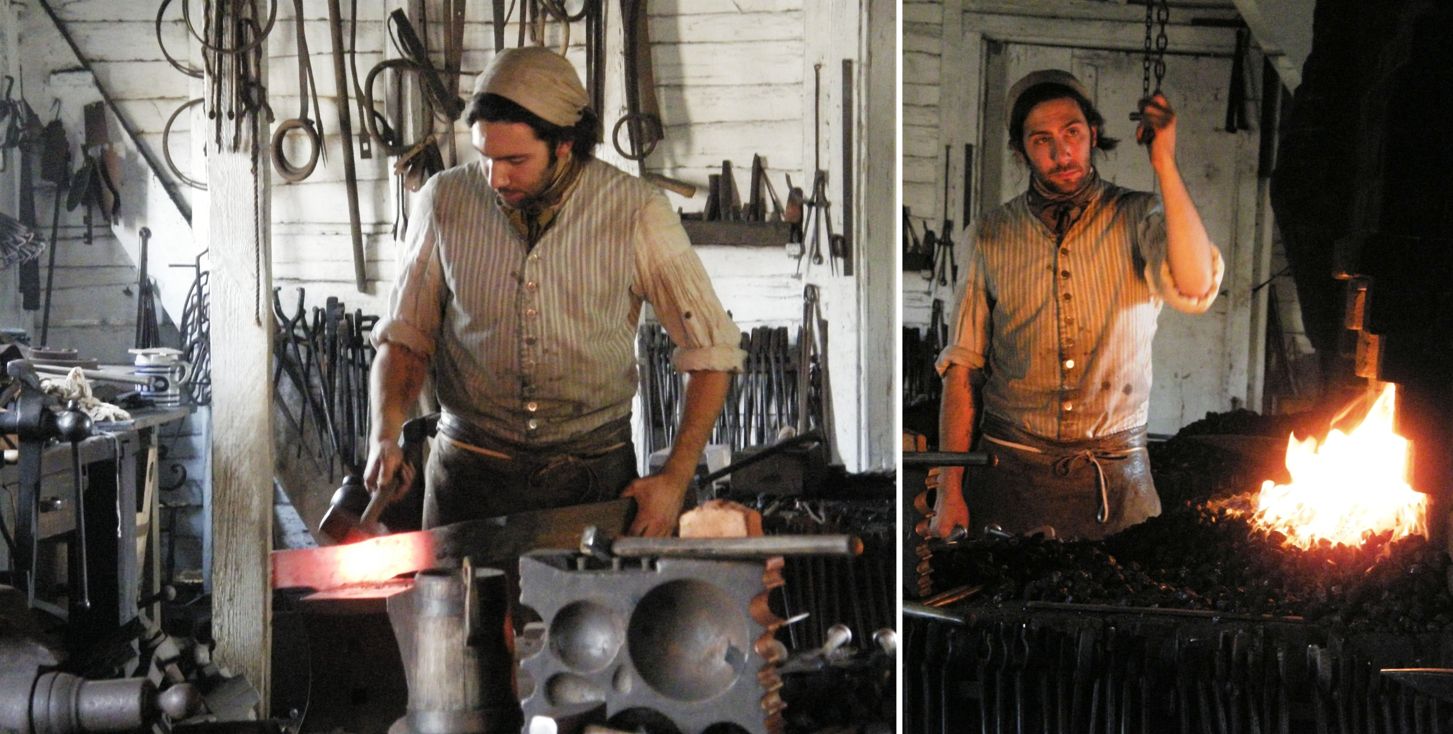
The blacksmith was working the bellows and beating out an ax head.
The visit to the seamstress’s shop gave us a chance to see some of the fabrics that were in fashion in the 18th century as well as some examples of the handstitching. My immediate reaction was to marvel at how someone had managed to work stitches by hand so perfectly that they resembled machine work. I then realized how stupid that was when reminded that machines were built to try to speedily replicate the perfection of hand stitching.
The wig makers at left were a fun couple with a lot of jolly banter between them and a witty comeback to every comment and question from the visitors. The brick kiln was being fired up for a restoration project. I was wondering how on earth they were going to slide all the bricks within when I realized that the kiln itself was built from the very bricks that were to be fired.
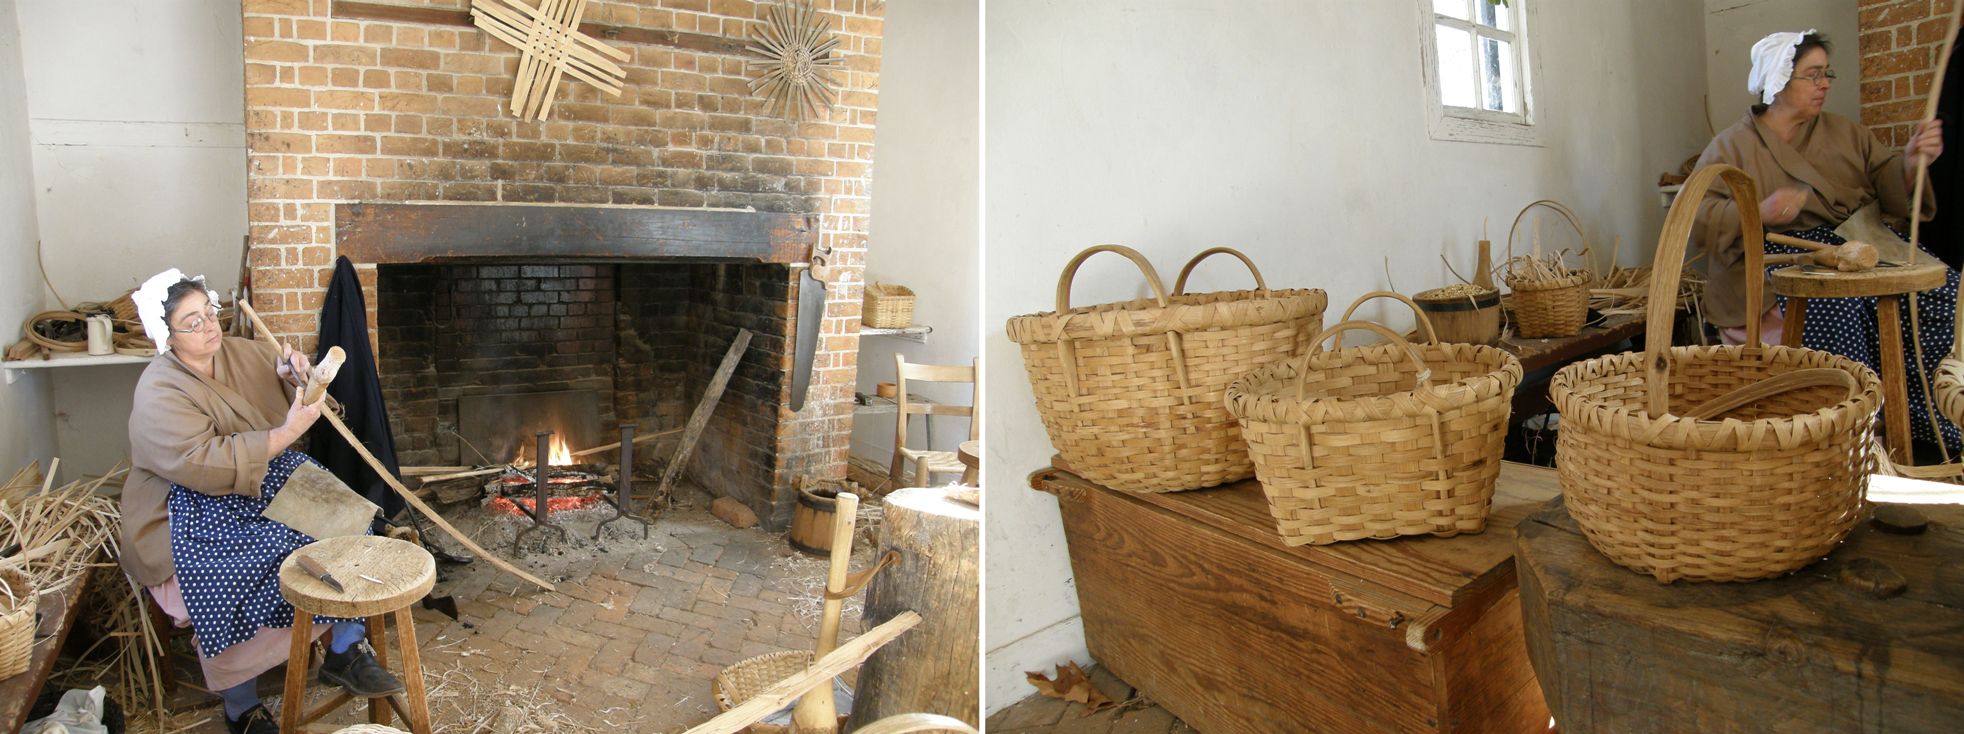
The basket maker was making containers from white oak, a hard task for the hands in those low temperatures.
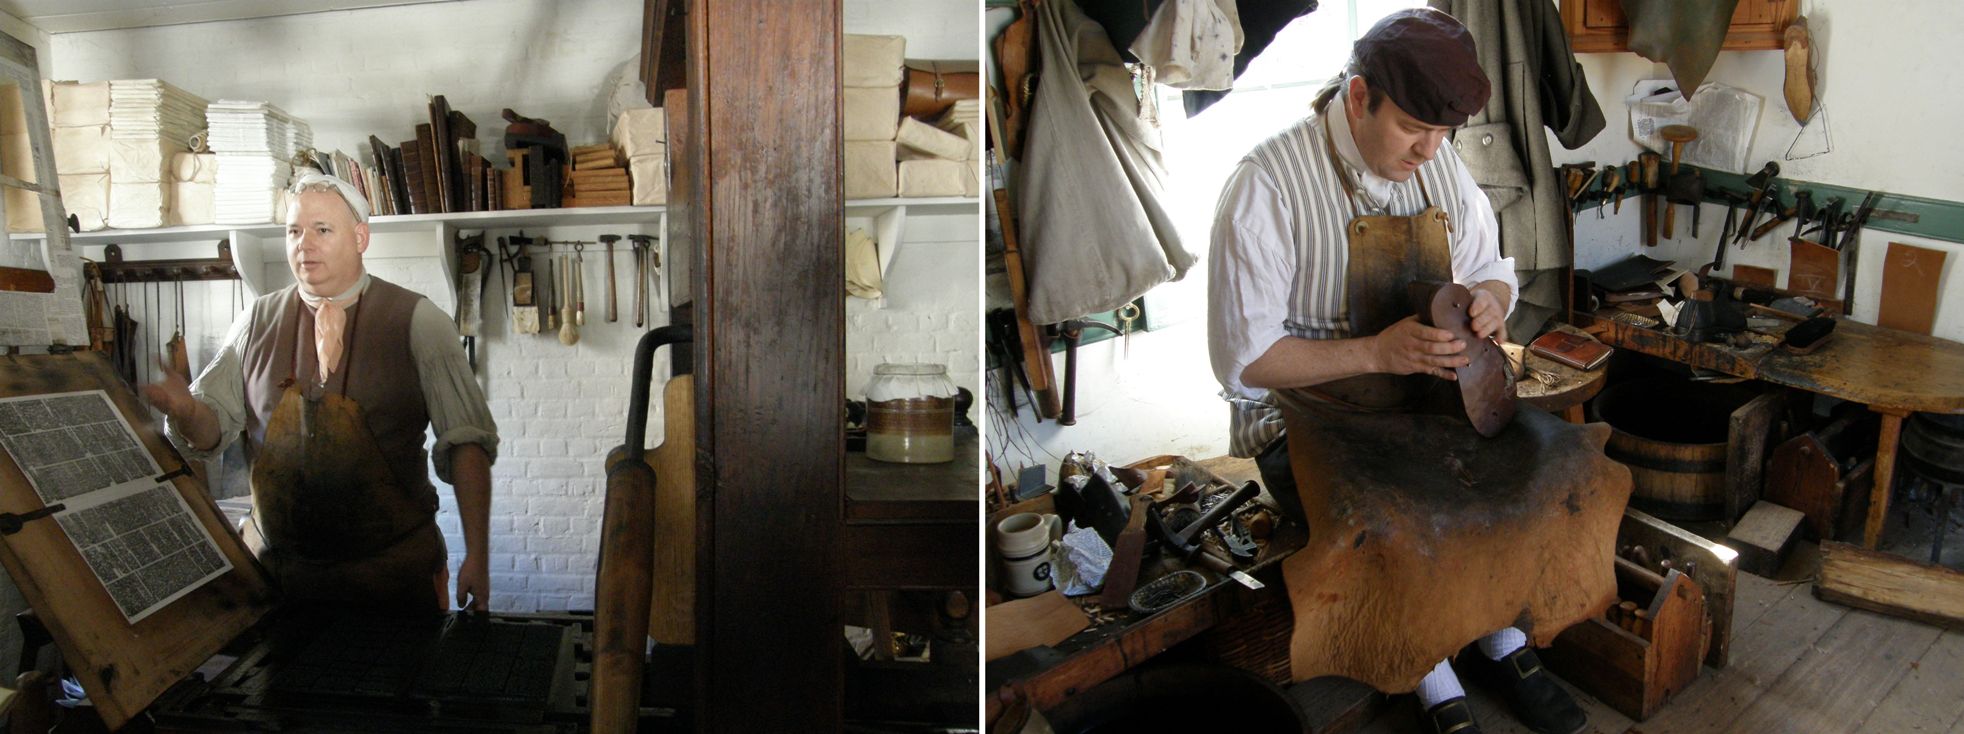
The printer and shoemaker. It was interesting to see the font that the printer was using which included different forms of the letter “s” depending on where it was placed in a word.
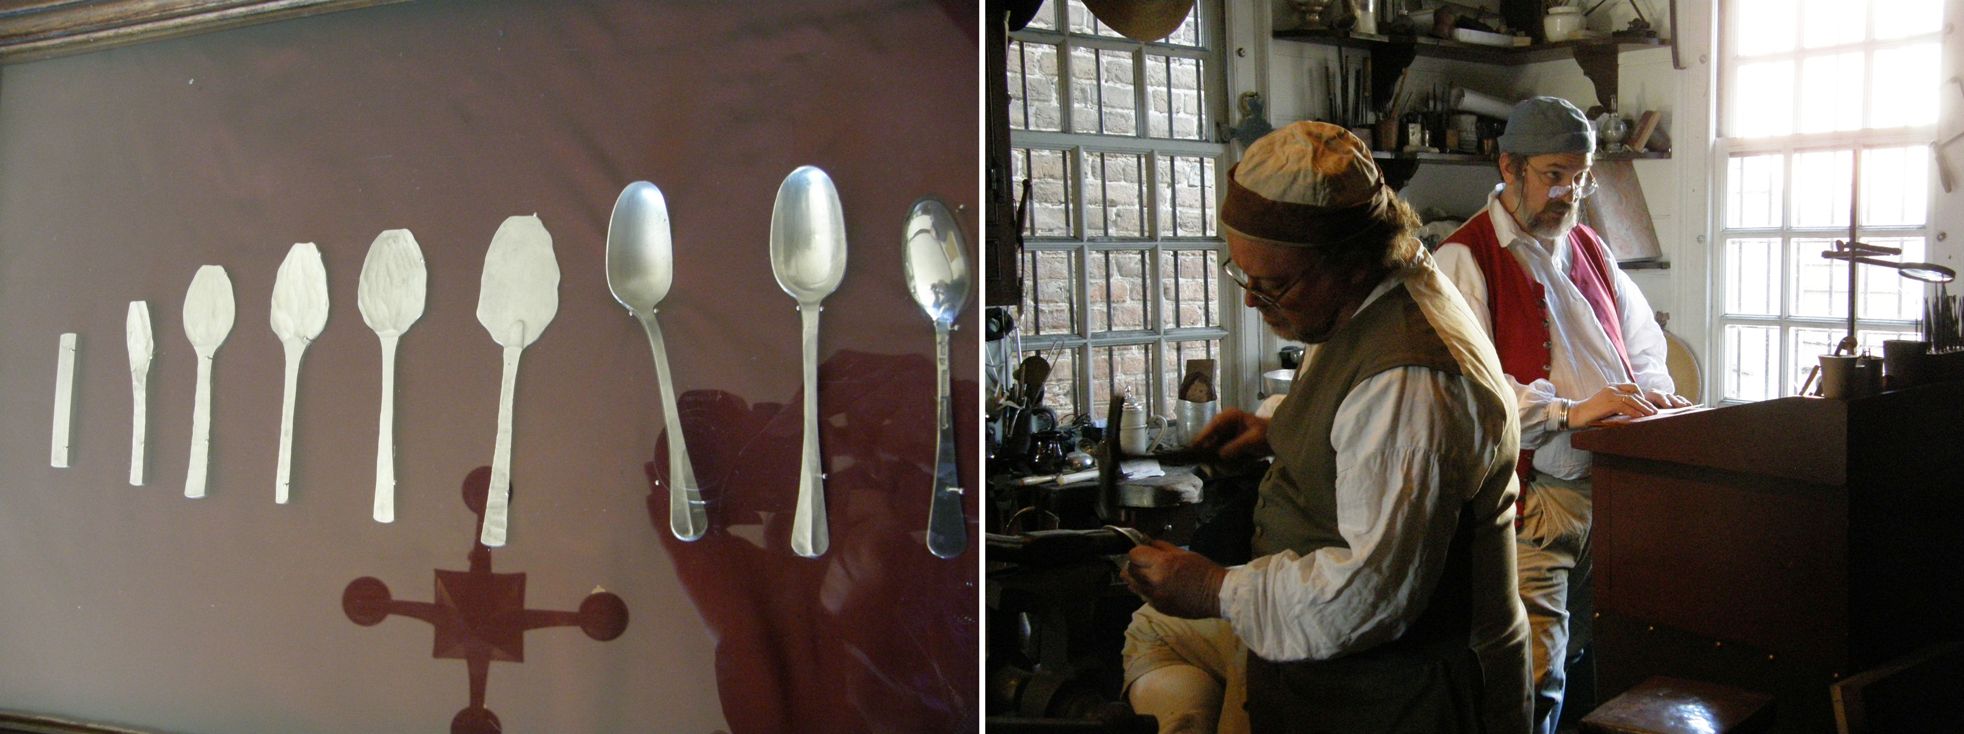
We learned a little about silver smithing and also visited the cooper, wheelwright, joiner, cabinetmaker and gunsmith. At the cooper’s it was interesting to see the amount of work and precision that went into making a simple wooden bucket, cutting pieces that fit together so perfectly in order to make the piece completely watertight.
It was very surprising for me to pick up a musket at the gunsmith’s and find that it weighed as much as 8 pounds.
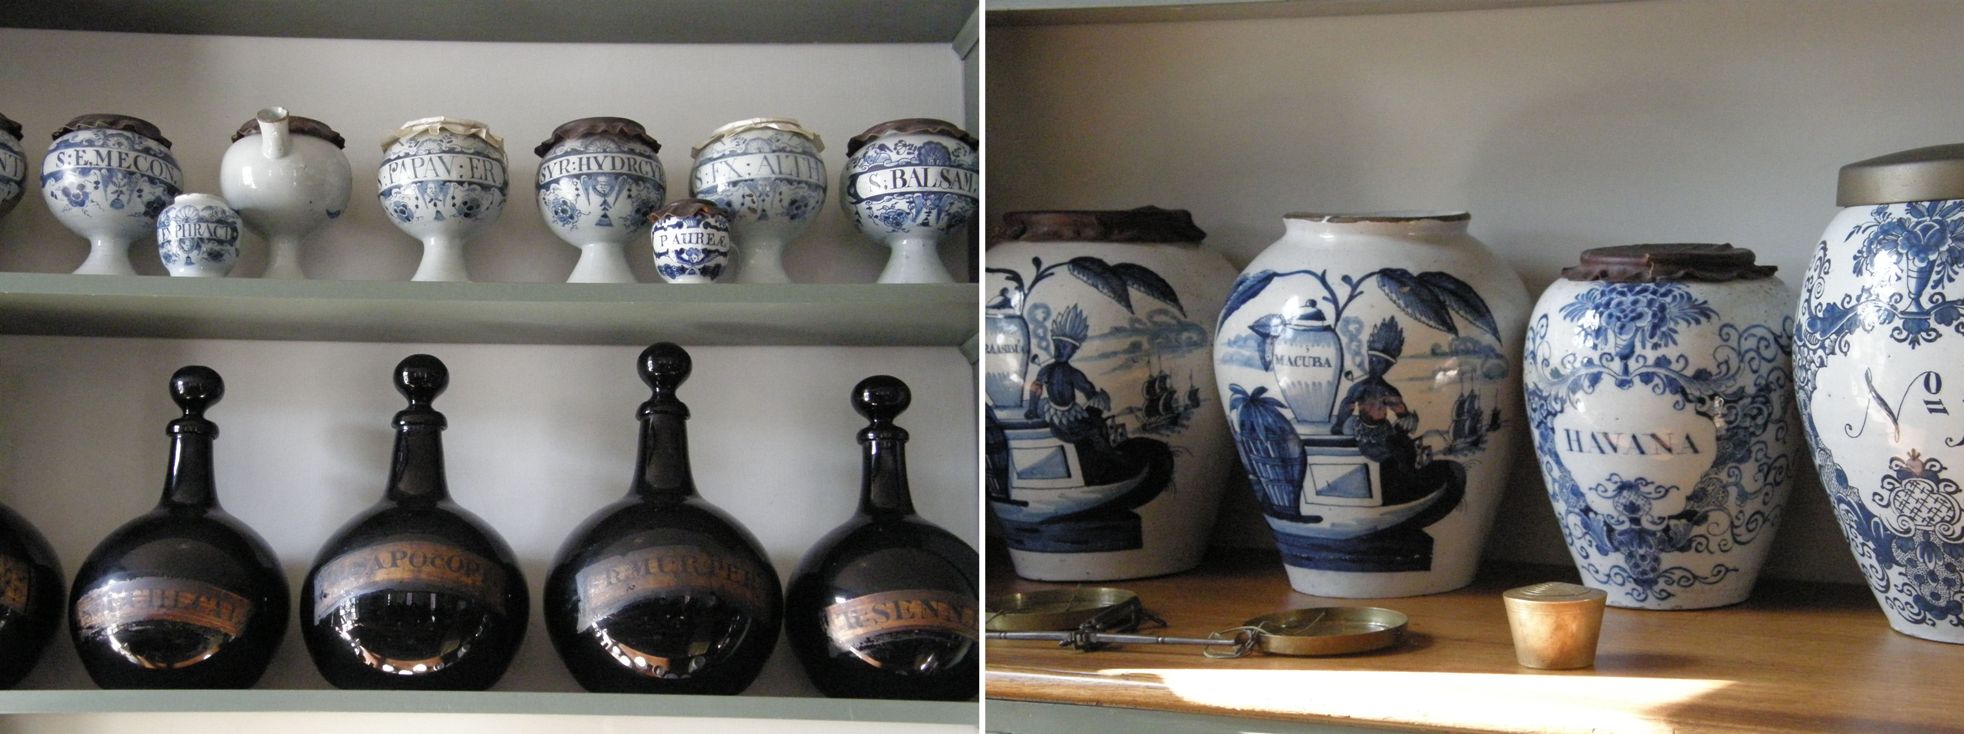
The apothecary was a favorite of mine with its strange mixtures in exotic-looking bottles and jars and herbal remedies for all manner of ailments.
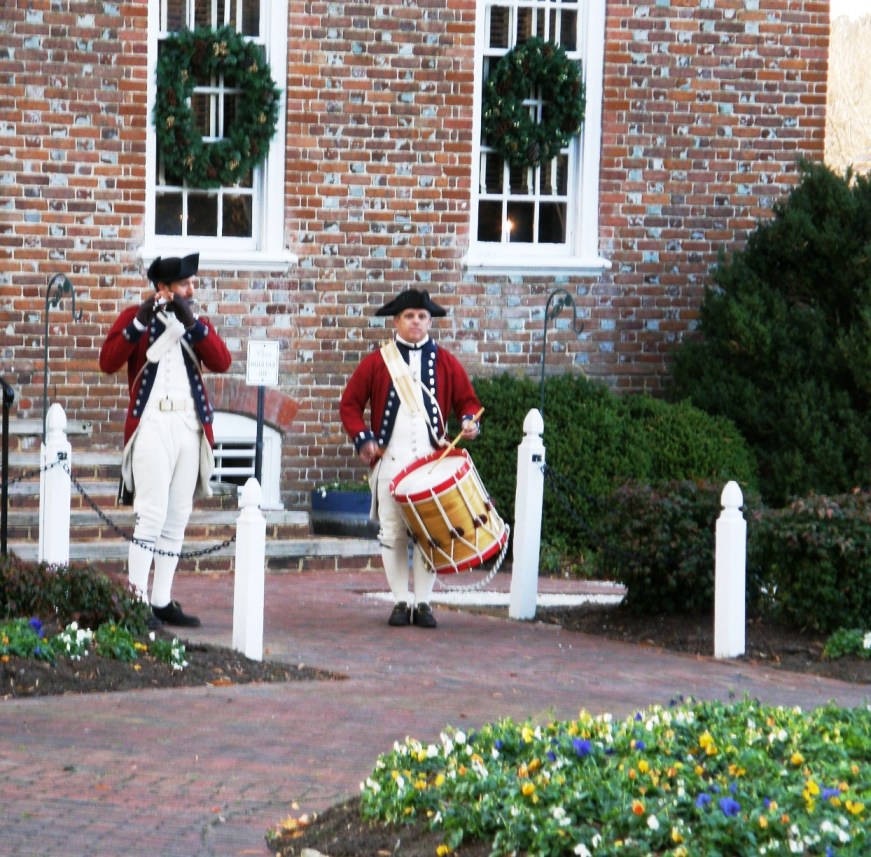
One of the highlights of the week for me was going into the historic area after dark to walk with the entire Fife and Drum Junior Corp as they marched and played along Duke of Gloucester Street accompanied by flaming torch bearers.
It was such a powerful sight in the darkness with the torches casting their orange glow over everyone.
The onlookers were completely hushed in awe.
Two members of the senior corps played at sunset at the manor house on the plantation where we were staying.
We stopped by the Abby Aldrich Rockefeller Folk Art Museum but the exhibit really was too much to try and take in in just one visit. I was a little uncertain about what exactly constitutes folk art and so a quick google search cleared this up. Folk art is defined as being…
that which is produced by an indigenous culture or by peasants or other laboring tradespeople. It is an unsophisticated art which is supposedly rooted in the collective awareness of simple people and reflects the traditional values of a society.
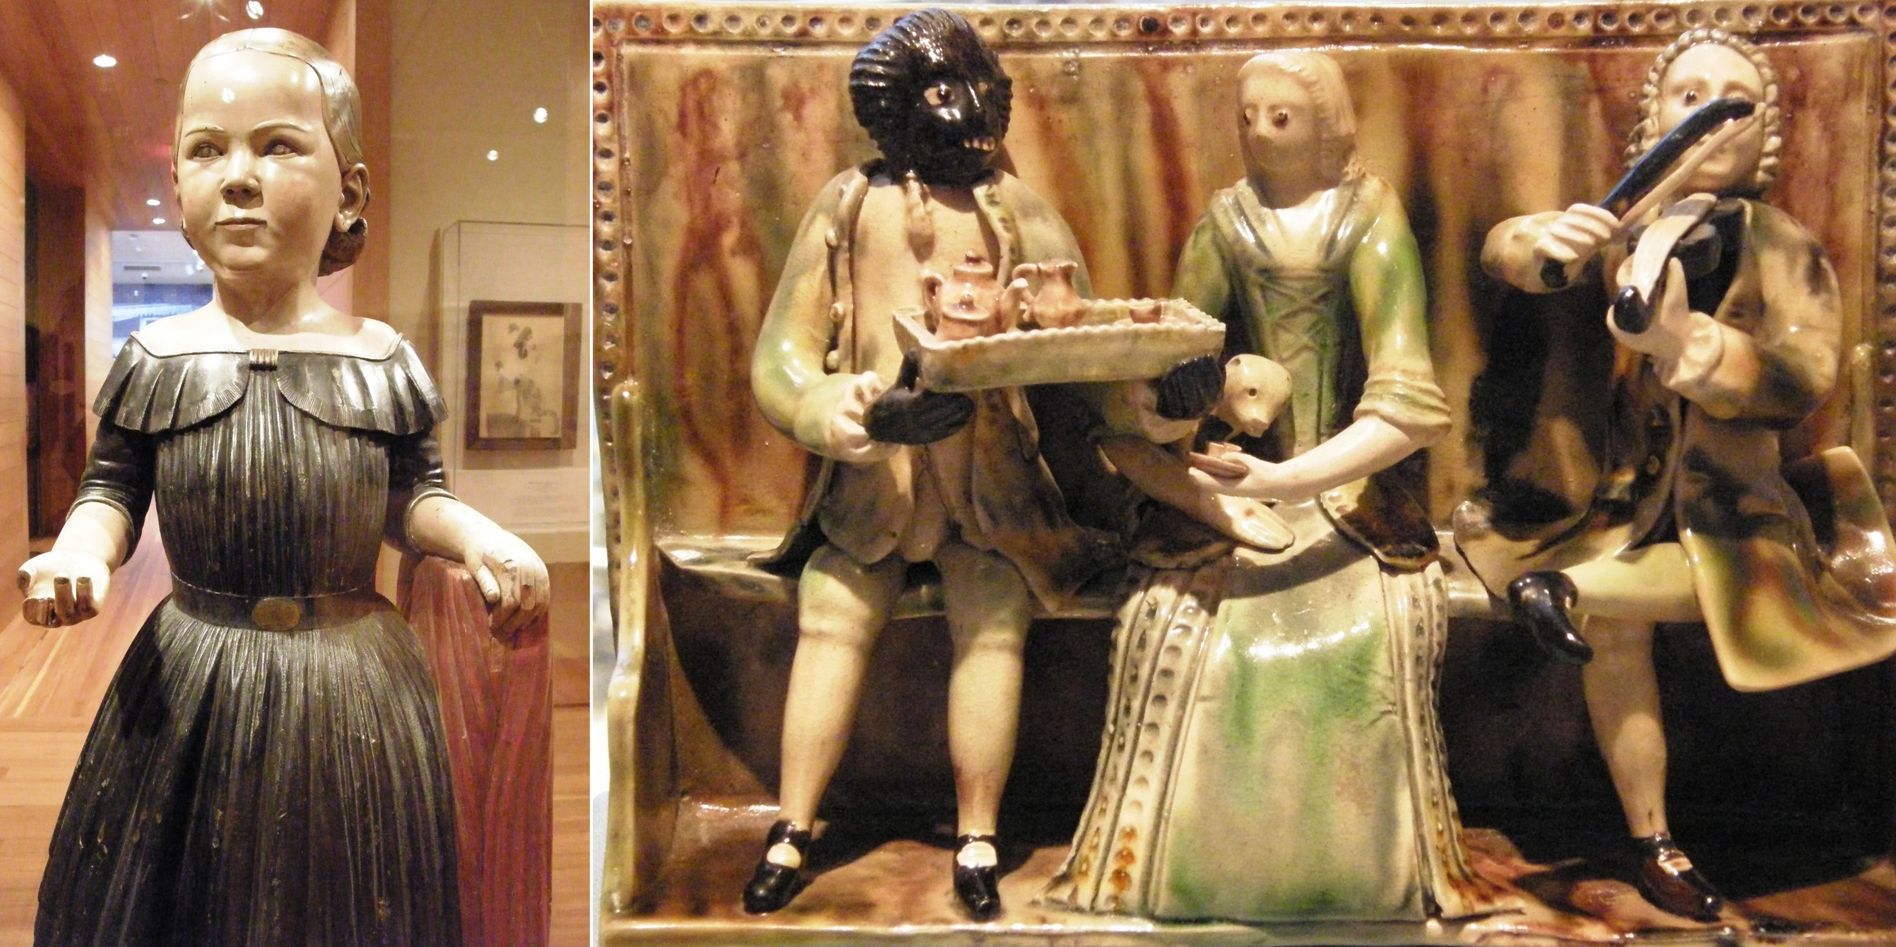
Here are a few pieces that were easier to photograph that caught my eye on my brief visit.
I particularly like things like the piece on the right that capture a slice of life.
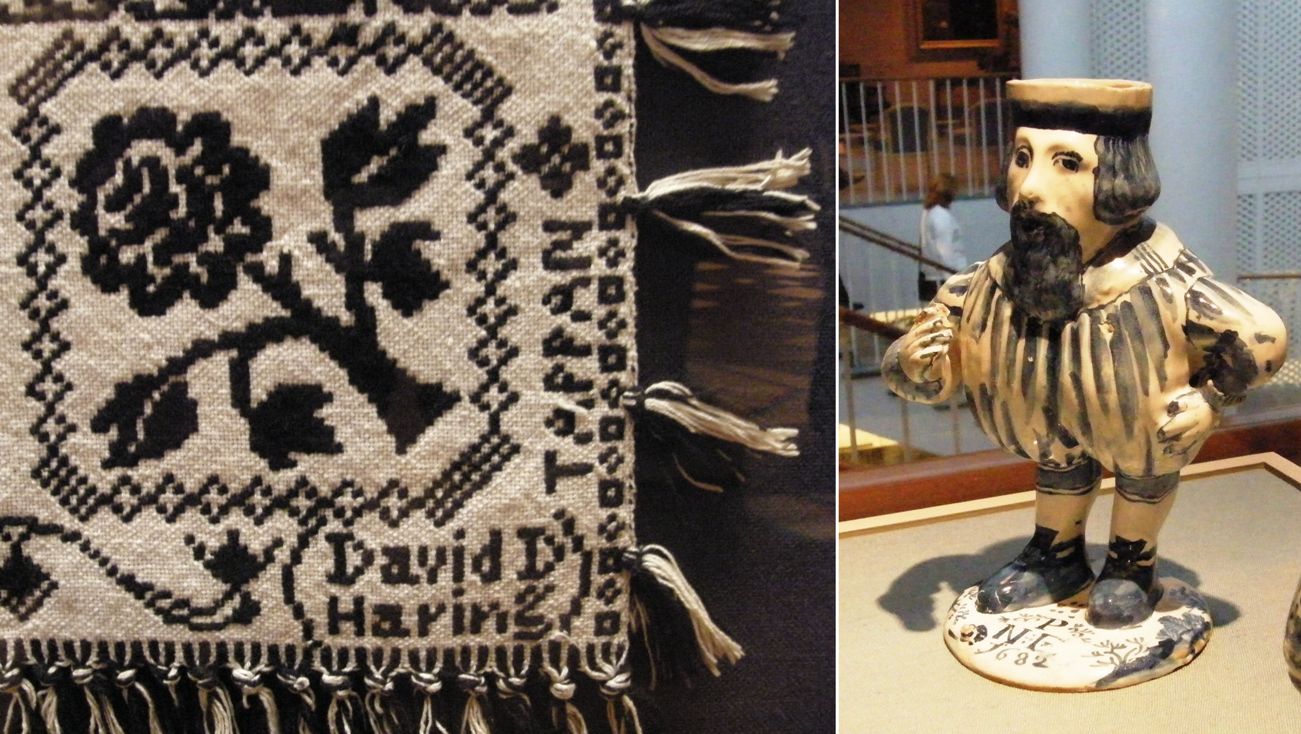
On the left you can see the signature of coverlet maker David Haring on his double weave coverlet made with white cotton warp and weft and blue wool warp and weft. The figure on the right is called Mr Nobody and apparently is the fellow in the household who is blamed for all that goes amiss.
Part of the folk art collection had been originally used to decorate Bassett Hall, the twice yearly residence of the Rockefellers in Williamsburg. It was Abby Aldrich Rockefeller’s husband, John D Rockefeller Jr., who we have to thank for financing the return of Williamsburg to its eighteenth century aspect.
And now let’s wander back ON TOPIC…
I have a few more things to show about my visit with the Montagnard (Vietnamese hilltribe) backstrap weavers a few weeks ago which I wrote about here and here.
A local church has kindly allowed Betsy and the weavers to use their space for weaving get-togethers and demonstrations.
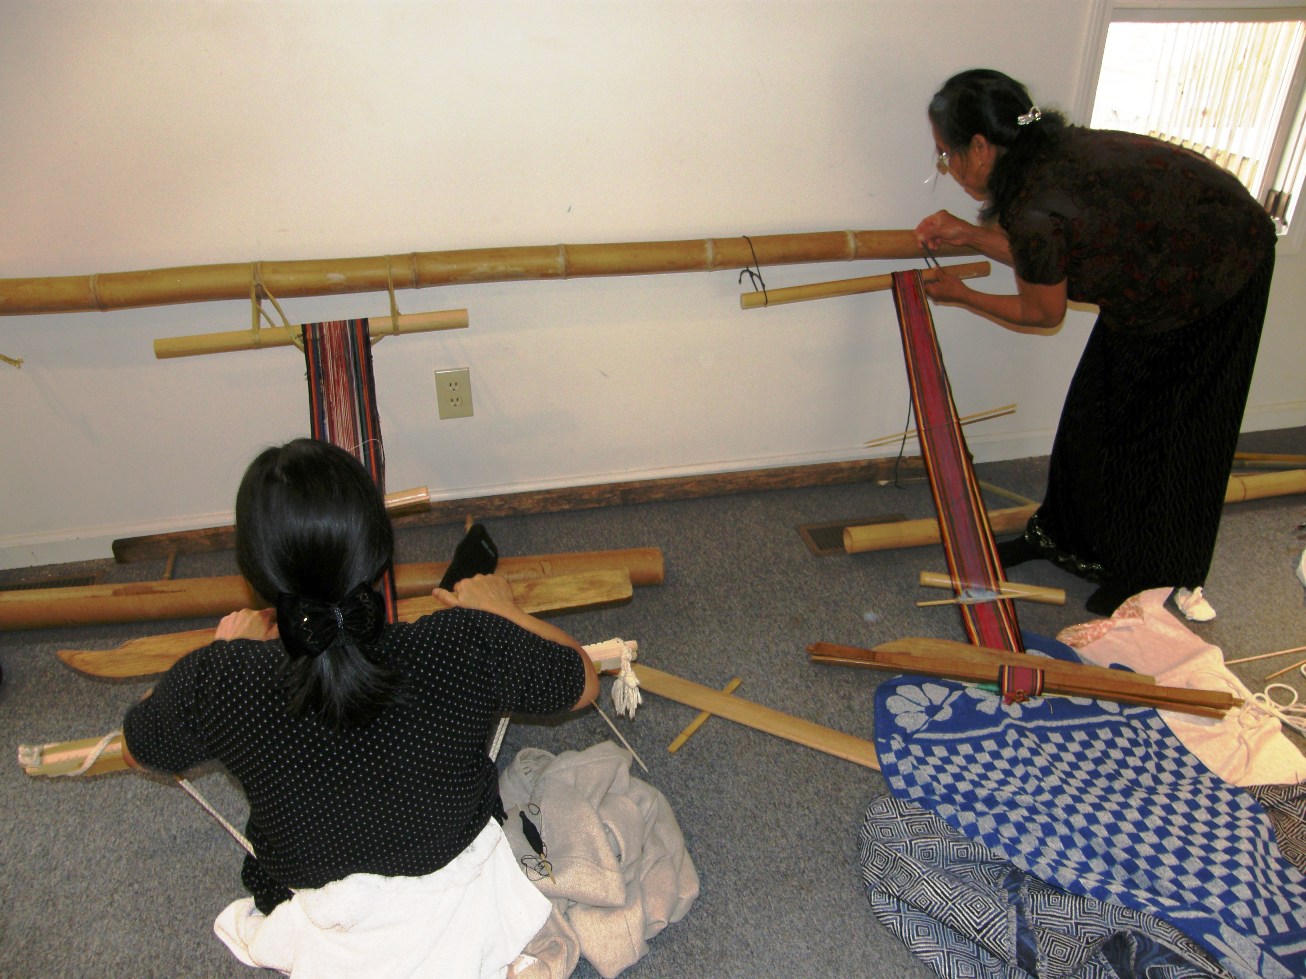
On a second visit there we were able to address the first challenge which was to find a place in the church where several weavers could tie up their backstrap looms at once as well as set up the foot braces against which they like to push to increase tension on the warp. The large piece of bamboo that you can see in the photo with some screws and rope did the trick. Khin joined us on this visit as translator and weaver. She said that she had not woven in at least twenty years and was a bit unsure about picking it up again.
Ju gave her a few pointers and she was on her way looking and feeling completely at home in the loom. Of course now she wants her own loom and is thinking big…she is already planning a skirt as her first project. My twining teacher, Ngach, arrived later and also gave Khin some tips.
A local nun, Sister Gretchen, dropped by and brought a collection of blankets that have been gifted to her by people in the Montagnard community over the last ten years. She is keen to have them identified by tribe and to have them out somewhere on display. There were some pieces there that were quite unlike anything I had seen made by Ju or Ngach. Nagch was very pleased and proud to identify one of her own blankets in the collection.
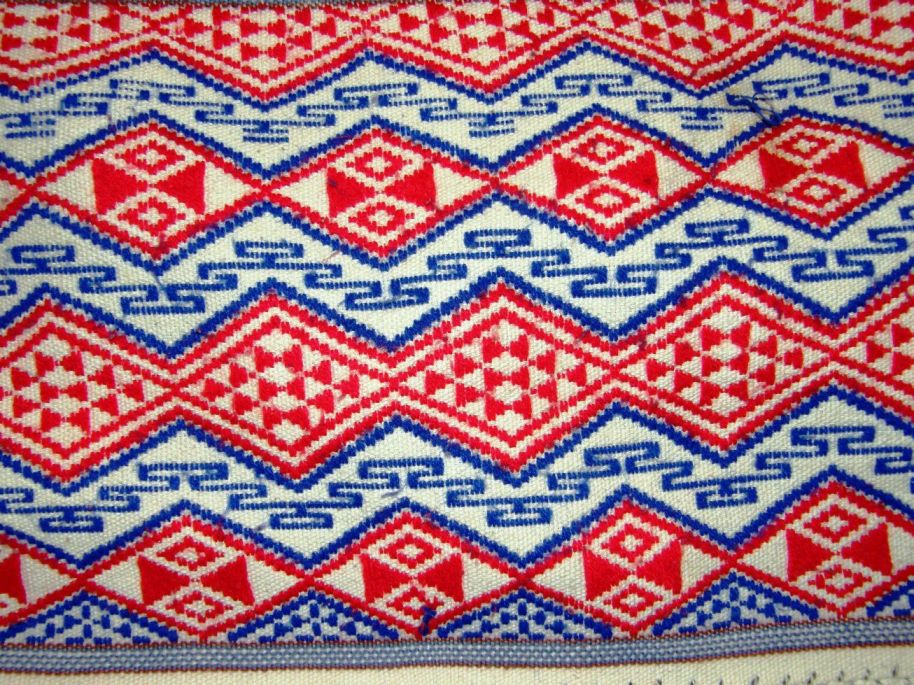
This heavy blanket caught my eye, not only for its lively red and blue pattern and the fact that it is white (you may have noticed that the Montagnard use a lot of black in their work), but for the band along its edge. This is not twining. It seems that the blanket was woven on a backstrap loom and then somehow the warps were used as weft to weave a warp faced band across the bottom of the piece. Three warps are used as a single weft. You can see that there is some puckering in the blanket where some adjustment in the number of warps used for at least some of the weft passes should have been made. I have been trying to imagine how this could have been set up.
I could see myself first weaving a narrow warp faced band passing my weft through a shed and extending it out and around a post some meters away so as to create a warp for the blanket. Once the band was finished I would then turn it around and somehow attach it to a loom bar and weave the blanket.
I guess I could figure out a way to do the blanket first and then the band but it seems that that would be much more awkward. One day I will meet the weaver and find out!
This piece was amazing! I liked it better from a distance as, on close inspection, I saw that the floats were very long on both faces and that it would only really work woven in very fine thread. All the weavers present had thoughts on the tribal and/or regional origin of this piece but nothing has been confirmed as yet.
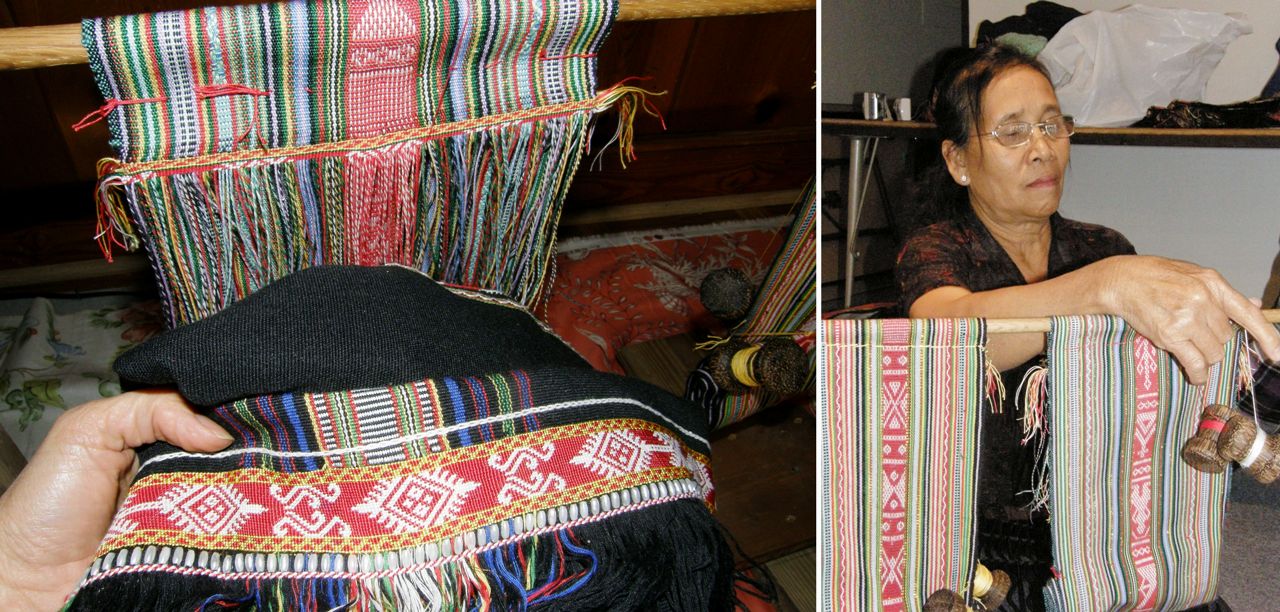
Ju brought along her twining frame and is twining designs on the edge of some bags she is making. On the left you can see the design that she is copying. She seems not to consider twining one of her strengths as she often sends her woven piece back to Vietnam with a traveler where her sister does the twining and then returns it.
The skirt made for Betsy and my scarf.
Pictured above is a skirt which had arrived back from Vietnam the previous day. Ju’s sister did the twining and bead work. This she gifted to Betsy along with a matching blouse. She gave me a beautiful narrow piece to use as a scarf and then had me cut up a similar long narrow piece into thirteen pieces so that she could sew them into glasses cases and pouches. She handed me the piece and a small pair of paper scissors and had me cut it up then and there! I can tell you that I was not really keen on the idea, especially not with a pair of paper scissors, but she trusted me to know the right lengths as I had shown her the small pouches that I had constructed at home.
Winter is a time for weaving for Ju as there is no work to be done in her very extensive vegetable garden. I wouldn’t be at all surprised if she has already finished all thirteen pouches.
################################################
My friend Lisa has started weaving again on her four-shaft floor loom. I thought she was making scarves and then she surprised me with pictures of this lovely fiber tool bag that she made…
She used the cross knit looping/Van Dyke stitch to edge the bag and embroidered a “running dog” design.
There is a video tutorial for the Van Dyke stitch as well as photos of how the Montagnard weavers use it as a joining stitch in this blog post.
She is still contemplating what kind of strap to put on it….perhaps a braid?
I love the colors and the contrasting edging and tassels.
EDIT: I have since heard from Lisa who says that this was never meant to be a tool bag. It turns out that her chosen yarn created the warp-from-hell and that she had had to abandon the original project but found she was able to salvage enough fabric to make something useful. Her less-than-perfect selvedges which resulted from her battle with the warp were nicely concealed within the Van Dyke stitch.
Claudia revived the backstrap project which she had warped up ages ago in a combination of variegated and solid colored yarn. She is using a scarf with cord now as her backstrap until she completes this, her very own woven one. I never think about using these variegated yarns and I should really try them out. I have a variegated roving that Lisa gave me ages ago that I need to spin and try out on my backstrap loom.
I am pretty much done with the cold weather now. It snowed last night and is blustery and windy today…nasty! I am ready to head back to the jungle and will leave tomorrow. It’s the usual story…standby flights which the airline tells me are fully booked. Fingers crossed that I don’t end up sleeping in Miami airport.


 I am weaving the black panel of my wall hanging project. Nothing plain about this. In fact, I have to keep stopping and checking myself…how much pattern is too much…have I gone too far? Is it too much, overdone?
 Sample 2: Two-weft-span borders. I learned this method from my teacher Maximia in the Bolivian highlands. Look at difference in the yellow edge on sample 2 and the green 1/1 plain weave border on Sample 3.
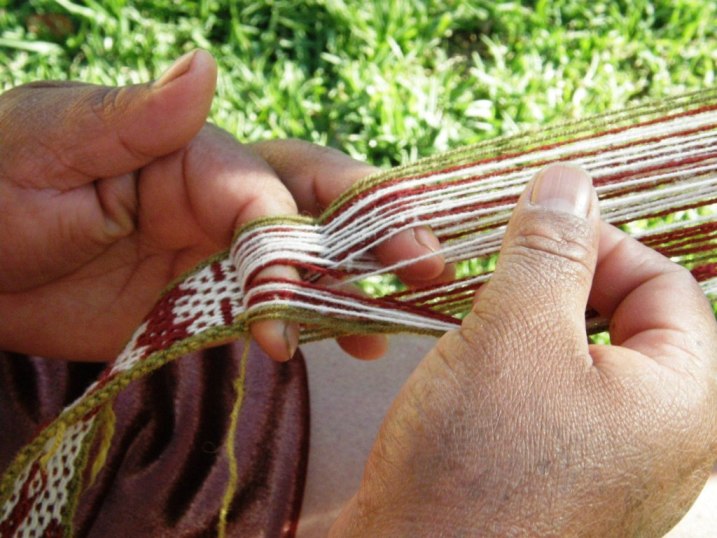 Maxima makes a cross with her fingers while she picks the various colors needed to create her pebble weave pattern. She first takes the borders from the far side of the cross, then works her way across the warp picking her pattern , She finishes by taking the borders from the near side of the cross. This is what enables her to form the two-weft-span borders.
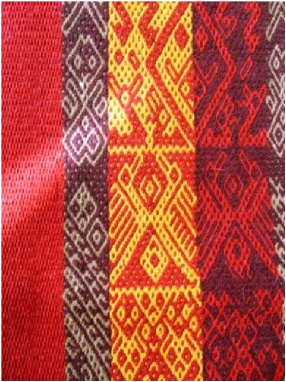 In this pebble weave piece from Ayacucho, the red plain area on the left is woven using the intermesh structure.
 Here are some of the sample bands that Maxima and I wove using the border method in Sample 2. My cell phone pouch uses the method in Sample 4 for the plain red sections.
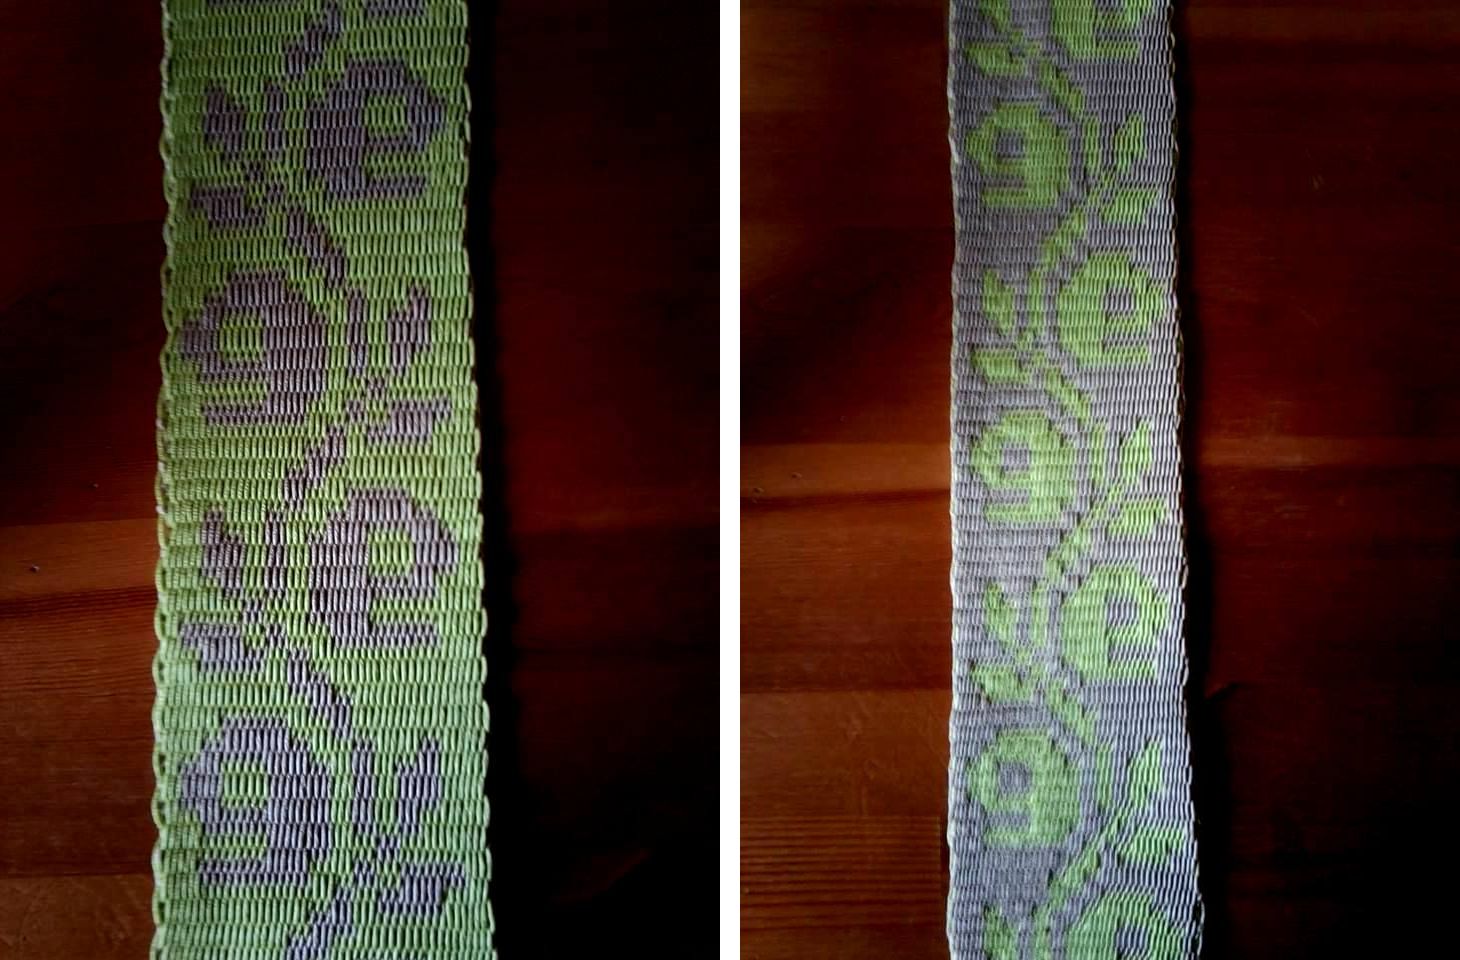 Larisa tells me that her rosebud motif is based on one from Palestinian embroidery. Gorgeous!
 You can see one of the beautiful swords in the picture from Magical Moons.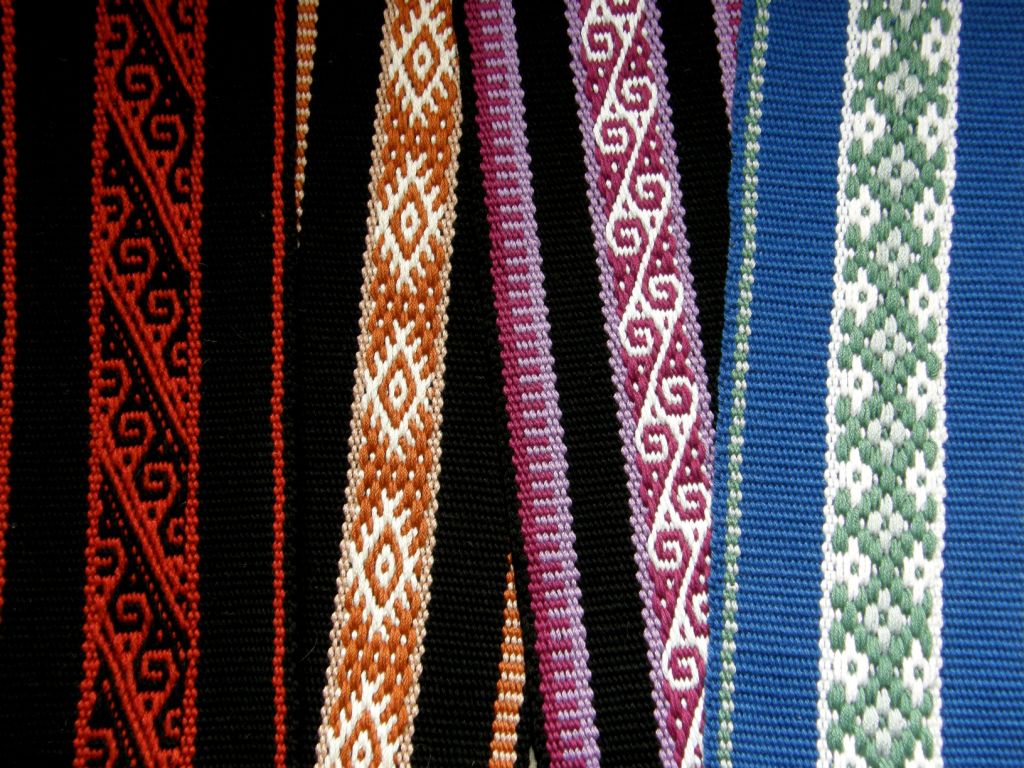
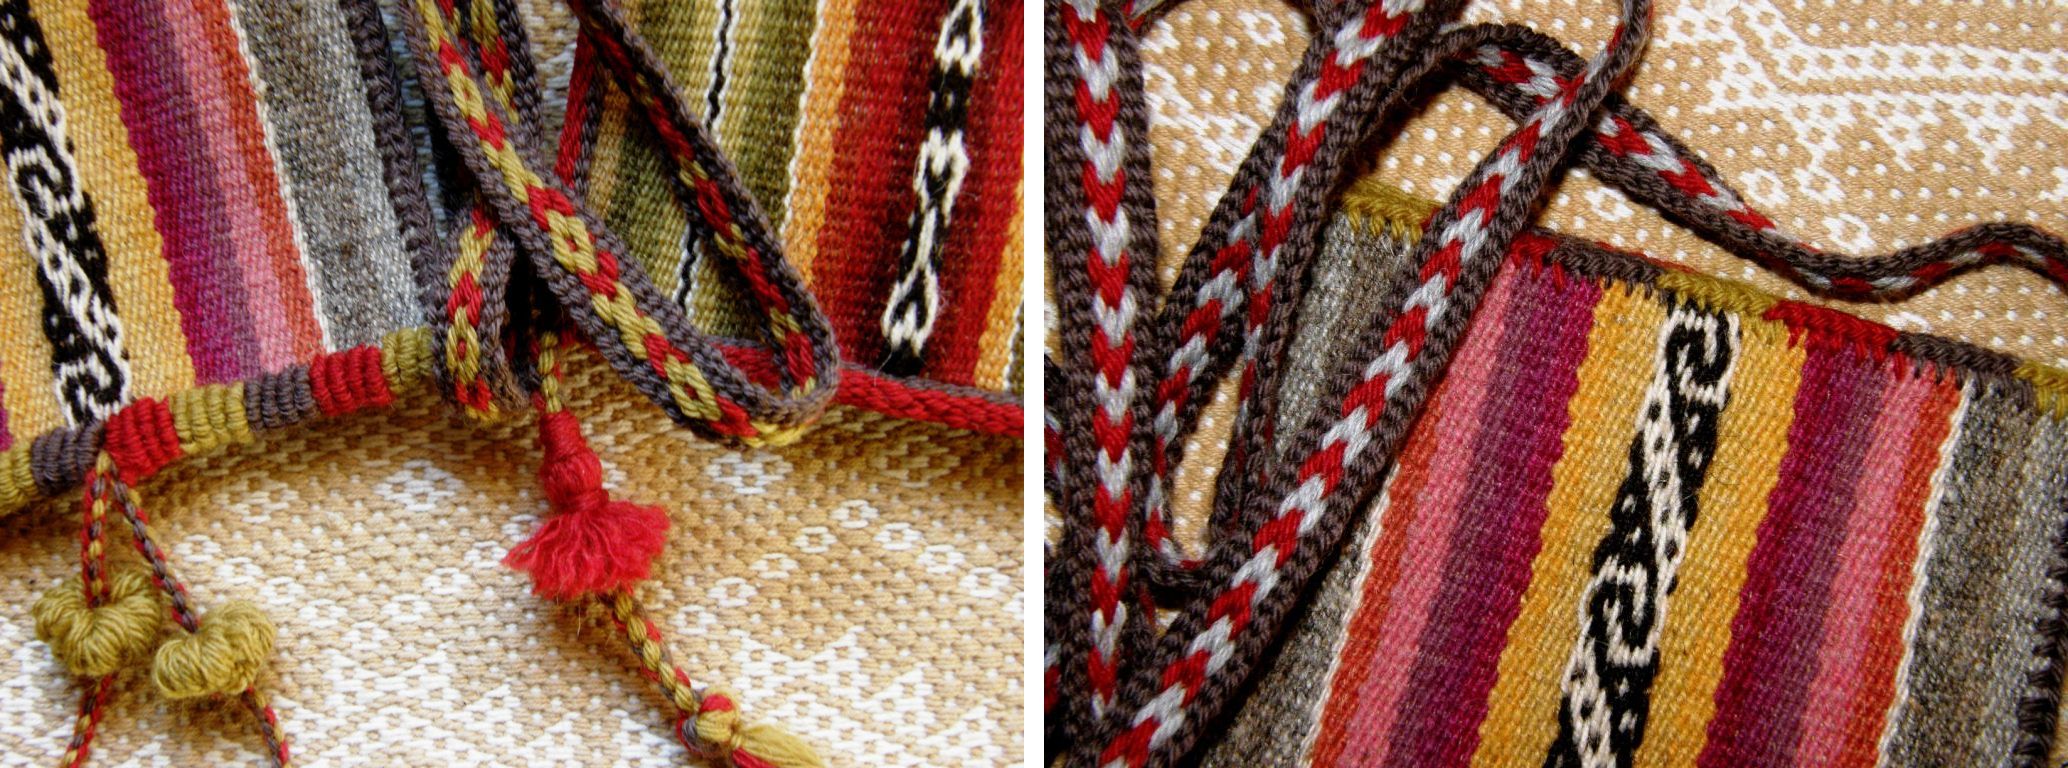 I gave Julia a piece of wool woven cloth made by Maxima and weavers in her cooperative in Cochabamba so that she could practice her new skills. Here is her finished bag:
 The broader part of the strap is two tubular bands edging a piece of linen. Beautiful work and she had just the right colors of yarn for this project.