I was recently asked to describe the kind of weaving that I do in an audio-only interview. Ummmmmm ….I was completely stumped and now I don’t even remember what kind of awkward response I made! When talking about my weaving, I’ve always been in settings in which I could basically just let the textiles do most of the talking for me. Although I ramble on in these blog posts, I always try to include lots of captioned images for those who just want the eye candy yet still want to get a general idea of what I’m talking about.
Even when I am away from home and on a plane, for example, chatting with a stranger and the topic of what we do comes up (it doesn’t always), I can just show them perhaps a wrist cuff, my belt or a purse I’ve made with my woven cloth to give them an idea.
Although I don’t typically wear four at once, I’m almost always wearing a wrist cuff when I’m traveling.
I remember the time I was at the CNCH conference in 2010. Inkle weaver Annie MacHale messaged me to see if we could meet up. We’d never seen each other and she spotted my woven belt first from behind and was immediately able to identify me. The weaving did the talking.
Wearing my woven work, such as these belts, is sometimes more effective at gatherings than wearing a name tag!
A more recent addition to my belt collection using both warp and weft-faced structures.
And then there are always my bags and purses. In the last few years I’ve gained more confidence in my hand-sewing and have created quite a few more but there was always one to carry to show to curious strangers.
Using my cotton-spinning bag as a purse on an outing with my friend Emerald in Australia. Multi-purpose items are a bonus when traveling with limited space in luggage.
I was never without my big camera in the earlier days of my travels and a camera strap is always a nice way to give folks an idea of what I do (not forgetting of course all the images stored in the camera). Of course we all prefer to be able to touch textiles, right? We see textiles online and want so much to be able to reach out and touch them. We have to imagine how they feel. What about when you can only hear about them in an audio-only context? Um, I hope I did a decent job of answering that question.
My updated camera strap woven in my own handspun wool and original hummingbird figure in three-color reversible pebble weave.
It was nice when I got my little iPod and was able to leave the bulky camera behind on trips. I would use it as my camera, wearing it around my neck in its special woven pouch. It was often a conversation starter because it was plain to see there hanging around my neck…
Backstrap loom weaving with camera at the ready. There was to need to let the pouch do the talking in this case as there was plenty going on there at my loom.
Which reminds me, there are also woven necklaces like the one I’m wearing above to do the talking on my behalf.
Wearing jewelry in the street here in Santa Cruz is not a good idea. I learned that the hard way in my first months here. Naturally, I do enjoy being able to do so when I’m away.
After the iPod, I got a phone to use as a camera but I found it hard to find a commercially-produced case for this Redmi brand. So of course I had to weave fabric to make a case instead which allowed me to show it as an example of some of my work with wool…
Fabric for the phone slip case on the loom. I only use it when I travel.
Perhaps when I complete my move to Australia and live in the cooler Blue Mountains, I’ll be able to use my scarves and neck gaiters when those “let the weaving do the talking” moments arise. I confess that those items have only very rarely been worn here in the tropics. Even putting up with their unwanted warmth in order to photograph them was a big ask.
Hurry up and get the shot before I melt!
So when I was faced with the question of having to describe my weaving just in words, it was a big “Ummmm” moment. Even given a second chance, I’m not sure I could do it. As I wrote in a previous blog post, I feel that I’ve drifted away from having a particular recognizable style…my style actually being the loom I use rather than the kind of cloth I produce. As I get more and more into creating my own original patterns and change my home to the other side of the world, maybe a whole new assortment of patterns and structures will emerge. Whatever happens, I hope there’s more growth.
Designs with SE Asian leanings have already been starting to appear.
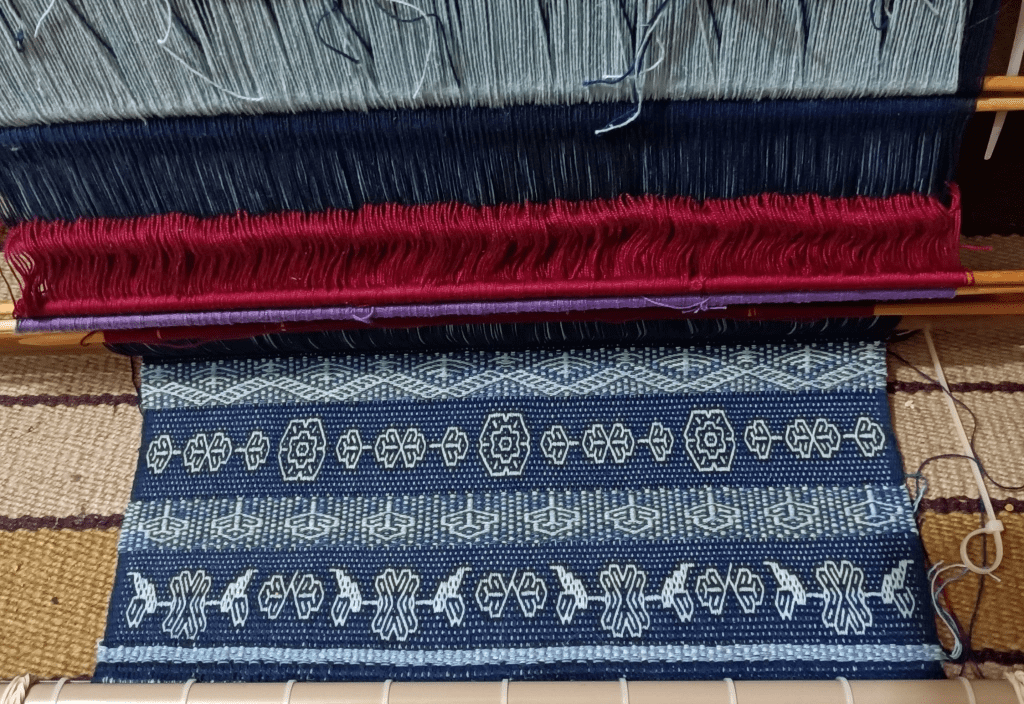
Ikat, rep weave with pick-up, warp-faced double weave, open balanced plain weave with inlay, complementary-warp pick-up, supplementary weft patterning.
I put this collage together to show some of the different kinds of things that I do. But of course, if you’ve been following my blog (maybe there are some die-hards who’ve even been with me for the last 15 years!) you’ll already know. I guess my purpose in writing this post is to to see if I can in fact, by way of these ramblings, answer the question for myself in my head….how would you describe the kind of weaving you do? I often find myself pondering certain things at the time I’m writing a blog post and find a solution right here as I sit typing. That’s one of the reasons I keep writing this blog and am so grateful to all of you who follow along and “listen”. It really helps clear out the mental clutter.
Until next time…….long-time blog followers may remember this dearly loved one making appearances in various posts. Rest in peace sweet girl.
Ikat and the eternal question….Will the result be a mess or a success? At most stages throughout the long process, I have absolutely no idea. Spoiler Alert….It all worked out in the end.
Things didn’t go exactly to plan with my latest project but with my usual “make it work” persistence, I ended up with something with which I am pretty pleased.
You may remember from my last post that I had discovered a blip in my ikat warp where I had neglected to wrap one of the sections with tape to preserve the first red dye color.
You might be able to spot the rogue section of black in the uppermostlarge diamond.
I took that as an opportunity to do a bit of spot-dyeing (but only because I knew that my piece of fabric would most likely never be washed. I have yet to learn how some ikat artisans make their spot-dyeing water resistant.)
You can see the sections of diamond that I spot-dyed black in the uppermost diamond and some spot-dyeing in progress at the very top of the image.I’ve put a sheet of plastic beneath that section to protect the rest of the warp.
That seemed to go pretty well. All that was left to do now was to remove the rest of the tape. I made a little video of my doing so for those who might be curious. Note that many ikat artists don’t tie knots in their tape. I do. It takes a while but it’s always exciting seeing the pattern slowly emerging.
And here’s the warp with all its tape removed. This is one of my favorite parts…
We’re still only seeing half the width of the warp at this point. I finished this part late at night and waited until the next day to unfold the warp to its full width.
Unfolding the warp is also one of my favorite parts but it does have me holding my breath just in case I had messed up and mismatched the bundles from the two halves when I first folded it. I hadn’t. Phew!
This might be my favorite part of all…the impression of order before I have to start handling the threads that are now loose and running free outside of their nice controlled wrapped bundles.
Next in the process is recovering the cross….carefully. Please don’t let the threads that I used to save the cross break!
Once recovered, I can use the cross to guide me to making my heddles on one of the two layers of warp.
Heddled and ready to go.
If you think you’ve seen me weave this pattern before, you’re not wrong.
Here’s a comparison photo with the blue purse ikat warp I created some time ago. Both are in my handspun cotton singles thread. The main difference is that I used more threads in each wrapped bundle in my latest so that the piece would be wide enough for my wallet project. The half diamonds on the edges are also colored differently.
This is the stage, before I throw the first shot of weft, at which I most ponder the “mess or success?” question that always comes to mind when I do ikat. The question looms even larger in my mind when I am using my own handspun cotton. The uniform nature of industrially-spun thread makes the result a little less uncertain. But, to be honest, in my limited experience, I just never can really tell what’s going to happen when I work with ikat.
Were the threads going to shift out of alignment more than I like them to? Spoiler Alert…..they were.
And I can’t account for that at all! I did every step in exactly the same way as I had for the blue project (except for the spot dyeing). Because there was what I consider quite a lot of shift going on I stopped weaving once I had the length of fabric that I needed for the wallet. It was getting to the point where the amount of shift just wasn’t attractive to my eye anymore. I cut the piece off the loom which means that I won’t have any any fun left-over bits to play with in a sewing project six months down the track.
My stitched shibori cloth is ready for the dye pot.
I wanted to make the inside pockets of the wallet from stitched shibori cloth and so I stitched some diamond shapes on some scoured cotton cloth and pulled up the threads so that the folds in the puckered cloth would resist the dye. I needed to first dye the cloth red and then overdye with black in order to hopefully produce the same brownish-black of the ikat cloth. I also dyed some plain cotton to line the ikat piece and make the bill pocket.
It has never occurred to me to do a multi-color stitched shibori but once I’d dyed the cloth red, I realized that there were some small open spaces that I could stitch to reserve the red color.
I didn’t put much thought into the design of the red figures. Someone said they look like puckered lips and now I can’t unsee that! Would I be able to match the brownish-black of the ikat warp? Spoiler Alert…I wouldn’t. Well, not on the first attempt anyway.
I don’t have the equipment to weigh and measure such small quantities of cloth and dye stuff. It’s all guess-work which makes it very hard to reproduce a color. However, after giving the cloth a second round of black dye, it came out just right.
The outside of the wallet with its tubular edging in place. The little tab of fabric on the left edge covers the cut end of the tubular band.
You may remember that I placed a coin purse on the outside of the other wallets that I recently made. I wasn’t keen on doing that this time because it would cover the ikat work. So, I sewed a small expandable coin pocket to the inside instead.
All that remains is to decide if I want to use a slim tab to hold the wallet closed. One might be necessary if the coin pocket gets very full.
That probably marks the end of the wallet phase! It’s time to fish around in my stash and see what’s next.
What did I learn from this project? It gave me some more experience with some spot-dyeing and it made me realize that I can layer colors in stitched shibori just as I do for ikat. And, as always, It added to my admiration and appreciation of the fabulous and meticulous ikat work done by the Masters in Indonesia, particularly those who use their own handspun cotton.
I’ll leave you with some news about Sue Richardson’s new blog. You might remember that I mentioned her work as writer for the Oxford Asian Textile Group (OATG) blog in my last post. I’ve also mentioned at various times her work with husband David documenting the techniques, history and cultural significance of textiles that they have encountered and researched in the field in Indonesia and other regions throughout Asia in their travels. The exciting news is that they have just started a new blog of their own….Asian Textiles Studies Blog. You might like to take a look and perhaps subscribe.
There’s no chance of my giving away any spoilers about my next project because I haven’t yet been swept away by a new idea. I’ll have to peer into my stash drawer and see what leaps out me.
I was actually originally going to simply call this blog post “Oops!” and leave it at that. I made a mistake in my latest ikat. Oops! Of course to me, the maker, it’s a glaring one. However, I’ve since come up with an idea which just might turn the blip into “beauty”…if not beauty, at least something acceptable. The lesson learned is to be extra careful when my first dye color very closely resembles the color of the ikat tape.
Anyway, more about that a little later.
Since I last wrote I have had and recovered from Covid…almost exactly two years since the last time I had it. For me it’s not a question of whether I have a just a regular flu or Covid….the symptoms are different enough for me to be quite sure it’s Covid. Nevertheless, I did get tested just in case it turned out be something else altogether that needed antibiotics.. We still have to do PCR tests here as the home RAT test kits are not available. I have no idea from whom I might have picked it up and I’m pretty sure that I gave it to a friend before my symptoms showed the day after our lunch together and I think that two days earlier my dentist might have been exposed to it from me as well. This is just awful and unavoidable unless we all go back to routinely wearing masks again.
I really felt the need to sleep a lot and rest this time. The problem is that I really don’t do well with not being productive. Fortunately, I had a little unfinished object which allowed me to sit and do some quiet work.
You may remember that I had gathered all these left-over scraps from old projects in order to test my idea for my wallet project. This was meant to be the prototype but I abandoned it because I had become convinced that my plan would workand that a sample wasn’t necessary.
At the point of abandonment I had sewn my stitched shibori cloth as lining for some left-over pebble weave fabric which formed the main body of the wallet and created the storage pocket for bills. I’d also just started to construct card slots with the shibori fabric. There’s some left-over blue ikat fabric woven with my own handspun cotton singles as well as plain black cloth that was at the end of another ikat warp, again in my handspun cotton. It’s hard to throw handspun scraps away!
So, I picked it all up again to finish. The part I enjoy the most is adding the tubular edging. This enables me to cut the closure flap of the wallet into a curved shape knowing that the tubular band will enclose and protect it.
I used multiple tones of blue for the tubular edging band rather than making it just one solid color. I love the way it came out.
The tubular band gave me the chance to use even more leftovers. I had dyed cotton thread various tones of blue to use in a complementary-weft project and there were just odd short lengths left over. They were perfect for this project.
The project that had combined both complementary-warp and weft structures had required only small quantities of each dyed weftcolor.
If you think that two wallets is one too many…..well, how about three? Yep, my latest ikat cloth is also destined to be a wallet.
The ”scraps” wallet also as a coin purse with expandable sides on the back. I used the black handspun cotton cloth for the sides. I took a deep breath and threw all remaining scraps away but only when I was completely convinced that they weren’t going to be useful in any way for any thing.
I was really delighted recently to see this picture of scissor bags made by Shahsavan nomads of northern Iran (courtesy of one of Sue Richardson’s wonderful posts on textile events on the Oxford Asian Textile Group blog).
The image is from a recently published book, Scissor Bags and Sheep Scissors in the Nomadic Tradition, by Peter Umney-Gray.
I have to wonder if the fabric for these bags was specifically woven for this purpose or if the nomads are using off-cuts or leftovers from larger projects in much the same way I have. I love that so much care has been taken to house these important implements in such a beautiful way.
I’m currently working on a three-color ikat piece (two dye colors plus original warp color) with my handspun cotton singles for wallet number three. The design is one that I have used before. I just added more threads to each ikat bundle this time in order to make it a bit wider.
The warp is double the width you see here. It’s been folded in half so that I can tie the repeating pattern on both halves at the same time.
While looking around online, I’ve seen various ways that ikat artists measure out and mark the pattern on the warp which is then tied with tape. Here’s a photo that my friend Pam shared with me of a gentleman in Uzbekistan just eyeballing it while marking the pattern lines with a charcoal stick.
I’ve seen weavers in the islands of Indonesia mark out an entire grid of lines on the warp which helps the artist tie sections of equal length and consistent spacing. And I’ve seen an artist working with the warp suspended over a grid of lines as a guide rather than having the grid marked on the warp itself. I haven’t come up with a good way yet. I just measure and mark with charcoal pencil as I go. If I get out of alignment by a millimeter or so here and there, it all adds up and then things end up noticeably misaligned. I tend to find it much easier in my larger pieces, like this one…..
Larger patterns with wider ikat bundles seem to be easier for me to measure and mark. This one is 60/2 silk.
Or with smaller scattered patterns….
Using 20/2 cotton with a scattering of small individual motifs.
Here’s the warp after the first dye color….so far so good.
The pink tape is reserving all the parts of the warp that I want to have remain the original white. Before I dye the second color, I need to add more tape to reserve the areas that I want to remain red. The final dye color, black, will cover all the remaining unprotected red areas.
And there’s the blip…can you see it? At this point the warp is stretched out on my backstrap loom and I’ve removed the second application of tape which reveals all the red areas. However, one bit that was supposed remain red is now black. I’d neglected to wrap it….after having checked three times!
I could just leave it as a reminder to be careful in future or I could find a way to “make it work”. Hopefully my plan will work. I decided to do what is called “spot dyeing”. Black dye is added (outside the dye pot) to other red areas in order to balance the mistake and add symmetry…..in other words, make it look like it was meant to be!
I’ve seen videos online of ikat artists in India routinely dong this spot dyeing, not to mask a mistake as I am doing but rather to add additional colors to their ikat warp. They carefully dip a small section of warp that is flanked by resist ties into a dish of dye and vigorously work the dye into the fibers with their fingers. I don’t know how wash resistant this kind of spot dyeing can be but it seems to be a normal part of the process for adding small sections of fourth and perhaps fifth colors to an ikat piece in certain parts of India.
I’ve also seen additional colors being painted onto ikat warps in some parts of Indonesia. My wallet won’t be getting washed at any stage and so I think that my spot dyeing will be safe. I am however very curious about the dye solution that is used by the artists in India and Indonesia for this kind of spot work because I’m quite sure that the fabric they are creating will be laundered many times. If I were making an item to be worn and washed, I’d just throw the warp back into a black dye bath and overdye all the red areas black. That would cover the mistake and give me a simple black-and-white pattern that I know would be safe to wash.
I had some experience with spot dyeing many years ago when I created this ikat fabric for a book cover. It’s a piece that has never been laundered.
I was using Dylon cold water dyes for cotton for the book cover project. Terracotta was the first color which was then overdyed with blue to give the darker chocolate-like color. These were three separate warps which I later combined on the loom. The easiest way for me to overdye the terracotta cross in the center block with blue was to spot dye. However, this was back in the days when I was using cassette tape as my resist material. For some reason, I made up a dye solution for the spot dyeing with very hot water. The cassette tape didn’t like that water temperature at all and the blue color seeped under the tape into the white. So then I had to rescue it by also spot dyeing a section of white with the blue to even out the bleeding. It added something totally unexpected to the project.
You’ll find out in my next post if my not-all-that-cunning spot dyeing plan worked. I’m still at it. If I remember, I’ll also wrap and spot dye a small sample so that I can see how it goes in the wash.
I’m going to leave you with something that I think is really spectacular. As some of you know, every now and then I do some reversible three-color Andean Pebble Weave and I get a lot of requests for instructions. I will be publishing on it but I can’t say exactly when. Life is a little topsy-turvy at the moment. The instructions that I have published on Andean Pebble Weave so far have been on the much more common two-color version which in itself is an awesome technique. For those who are hankering after the additional color and complexity of the three-color technique, I hope you find it interesting and inspiring to see what can be done with the basic two-color structure and a little imagination….
Julie Beers sent me this photo of her work with one of the double dragon patterns that I have published.
The richly-colored Lunatic Fringe cotton that she’s using really makes this piece glow and I also think that it makes it look deceivingly complex. It’s still just the two-color structure that we all know and love. Thank you, Julie, for allowing me to share this here. It’s so inspiring.
I gathered together a handful of these historic double dragon patterns that I’d seen on tablet-woven bands and transposed them into the Andean Pebble Weave structure. They’re published in my More Andean Pebble Weave Patterns book. I’d originally been asked to transpose one of the dragon patterns by a weaving acquaintance on Ravelry so that it could be woven with string heddles rather than with tablets. I shared the chart and this is what Penelope Hemingway did with it, adding it to a hat that she’d made with nalbinding.
I don’t have the stash to be able to get into the kind of colorful work that Julie is doing right now. Or do I? I just remembered this…..
My 30/2 silk cochineal stash. I’ve yet to come up with a project for it.
This might be next on the drawing board. I have more white 30/2 silk left as well as a new supply of cochineal. Maybe I’ll be able to add some more colors to this collection.
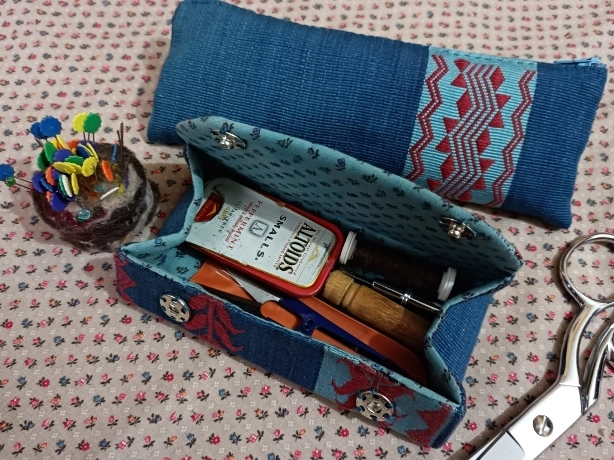
Before I get into the Pick-up Vs Wrap Up question, I’ll show you the completed expandable folder that I was constructing in my last post. All that was left to do was find some buttons and braid some loops. Rather than go out hunting for buttons, I stole one, a good heavy one, from one of my many wrist cuffs. I then I found two small ones lurking in my sewing box purse. I had originally been planning to use them on that little purse but ended up going with snaps instead.
The sewing box purse with its snap closures.
The finished folder with one large central button and two side buttons to keep all the bulk contained.
I guess I’m in a weave-and-construct phase and have had the idea to create a wallet. I just use a simple plain-weave zippered purse here for notes and coins (it’s still pretty much a cash society here) but upgrade to a proper leather wallet when I am traveling and need to carry more stuff like Yellow Fever vaccination card, public transport passes, credit and debit cards etc.
Plain-weave zippered purses that were fun to create.
I want to use some of my handspun cotton singles for the wallet project. It won’t take much to create such a small piece of fabric and there’ll be plenty of thread left over for other more ambitious things. I finally got all the white handspun boiled and ready for use.
This is my supply of the Upland cotton variety.
So far, I’ve only used my handspun cotton singles in plain-weave ikat projects….three small pieces, a zippered purse, a draw-string bag and a slip case. The cotton stood up well and I love how the simple warp-faced plain weave shows it off.
I have another ikat project in mind using a soft butter yellow, burgundy and black and thought that this would make a nice wallet. But then I thought that perhaps I should use the cotton in another way this time. I’ve already tried it in ikat and know that I like it. Maybe it’s more interesting to try something new? It would be good to know how well the singles thread stands up to a pick-up technique like the structure that I call Andean Pebble Weave, for example.
The process of creating both options is pretty intense! Ikat involves plain weave. That sounds so simple. However, it’s all that goes into the creation of the warp before it even hits the loom that makes it so complex. There’s the winding of the warp, the sectioning, folding and wrapping. Then comes the dyeing, more wrapping (if you’re dyeing more than one color) and dyeing again. This is followed by unwrapping, the careful settling on the loom and heddle making. Then you get to the weaving part which goes relatively quickly.
Wrapping the folded warp for the zippered purse project.
I’ve always liked these kinds of time consuming projects. These days I like them even more. They give me a whole lot of satisfying creative mileage out of just small amounts of materials.
As for pick-up, well that can be super intense as well, depending on the kind of pattern that I choose. As I’ve never used my handspun cotton for the Andean Pebble Weave structure, I needed to weave a decent-sized sample to gauge width. First, I dyed a small quantity black and wound a short warp of 320 ends.
That’s what it looks like on the loom.
I thought that I may as well go with a very busy pattern and give the thread, my fingers (and my brain) a good workout. Two threads broke. I’m quite used to working with black in pick-up and am pleased that these older eyes can still manage, although I think that my left one is doing most of the work.
Lately, I’ve been looking at textiles and basketry from the other side of the world….East Timor, Indonesia, Borneo…I guess with the idea of perhaps spending time in that area when I return to live in Australia. The pattern that I created for the cover of my folder was inspired by the shapes I have been seeing and in the same way, so was the pattern that I drew for this current project. It’s very busy!
The two faces of the band using the structure that I call Andean Pebble Weave.
It was a good call weaving a sample (it always is) as I’d started off slightly too wide. It soon settled into a consistent width. I used the method that I was taught by my very first teachers from Ayacucho which involves two sets of heddles with pick-up being done at a permanent cross. I used the “saver cord” which they taught me to use (although, to be honest, I had no idea at the time what purpose it served!) I soon learned that it is the instrument that helps me to read the pattern and saves me from having to handle and count each thread one by one. Having a permanent picking cross (rather than constantly creating and re-creating a temporary one) saves the warp from a considerable amount of wear and tear.
I figure that if the singles thread can stand up to this amount of handling, it should be okay with any other less complex pattern that I happen to choose. Hopefully, I’m not getting too cocky here. If I were to use this pattern on the wallet, it would be aligned sideways like this.
I changed the last part of the pattern (on the right) as an experiment to see what it looked like with a bit more open space.
I’m very satisfied with this sample. It’s answered my question about the suitability of my handspun for working with this structure but I still have the urge to create the aforementioned ikat piece. I haven’t come up with a pattern for that yet, just the three colors. So the question remains…Pick-up or Wrap Up? Of course, the solution is to make two wallets! Why not? That will certainly keep me out of trouble for a while.
In the meantime, I’m doing something I’ve never done before…I’m using up leftover scraps from other projects. I usually can’t bear to throw them away immediately after completing a project. They hang around until I turn them up six months later and think… why the heck am I keeping this?…and throw them away. But these I’ve kept. Perhaps I’ve been watching too many HandyMum videos (she often uses the tiniest scraps of fabric from her vast stash of commercial fabric to make sweet projects). I’m making a sample wallet with them so that I can test my ideas for putting one together. It might even be good enough to keep and use.
I have bits left over from ikat projects using my handspun cotton (that black scrap, for example, is the end of the ikat drawstring bag project). There’s a bit from the ikat cross-body purse that I wove in 20/2 cotton. You’ll recognize the stitched shibori leftovers from my folder project. The other side of the stitched shibori rectangle that you see in the picture (which is the inside of the wallet) is leftover plain blue Andean Pebble Weave fabric from this project….
I thought I’d finish this post with a little bit of book promotion, which I haven’t done for a while! The structure that I used for my latest project is the one that I call Andean Pebble Weave. This structure creates patterns that are double-faced. Of course all cloth has two faces. What I mean by double-faced patterns is that both faces of the cloth are structurally identical with colors reversed. That’s how I created one face that has a white pattern on black with the same pattern on the back in black on white.
This is a characteristic of a larger category of structures that are known as Complementary-warp. The structure that I call Andean Pebble Weave is just one variety that sits within this category.
Some of the varieties of complementary-warp weaves.
In the picture, above, you can see at top left both faces of a pattern in the structure that I call Andean Pebble Weave with its “spotty” surface. The image top right shows another complementary-warp structure which is known as intermesh. It gives a very smooth, solid color appearance. In some places it is woven more open so that it does indeed have a very mesh-like appearance. However, my Guarani teacher here in the Bolivian lowlands weaves a very dense version which closes all the spaces between the warp threads. At bottom left, you can see the two faces of another variety with its characteristic diagonal twill lines. The image bottom right shows how a pattern can sometimes employ multiple structures, in this case, both pebble (center) and twill structures have been used side by side.
As for my books, here are two that I can recommend to those who would like to learn how to do this kind of pick-up. I wrote them for those who are already competently and confidently weaving warp-faced plain-weave bands and who would like to try one of the many kinds of pick-up patterning structures.
If you use what I call a standard inkle loom (the Schacht and Ashford models are examples), this is the book for you…..Andean Pebble Weave on Inkle Looms…
This book teaches three methods for weaving these patterns to suit different learning and weaving styles. It includes access to supplementary instructional video clips.
If you use any other kind of loom or set-up that allows you to create two sheds and weave warp-faced bands (including standard inkle looms) this is the book for you….Complementary-warp Pick-up…
This book shows one method that allows you to weave any kind of complementary-warp structure. It includes patterns in the structure that I call Andean Pebble Weave as well as other complementary-warp styles.
Once you’ve learned the methods in either of these two books, you’ll be able to weave the patterns that I offer in both my follow-up pattern books… Complementary-warp Pattern Book and More Andean Pebble Weave Patterns. All my books are available as PDFs or as spiral-bound books (shipped from Washington state, USA) at Taproot Video.
I wish you all the best for your celebrations and will see you in the new year with, hopefully, at least one new wallet.
The good news is that I FOUND IT! If you read my last blog post, you’ll know what I’m talking about….the lost balls and skeins of silk that I had dyed with cochineal bugs. It had been a quite a task dyeing that silk as I slowly learned by trial-and-error about just some of the mysteries of dyeing with cochineal. It had got me through the tedium of being stuck indoors during the 36-day general strike that we had here last November. I had tucked all the thread away in a small zippered pouch and then misplaced it. The thing is that my apartment is tiny and its pretty hard to lose anything here. That made it all the more frustrating.
As expected, it turned up in a very unexpected place at a time when I wasn’t even looking for it. It was in a different zippered bag on a shelf in the bathroom of all places. It was safely tucked away in a very sweet zippered bag that I had got for a mere $3 at a used clothing store while visiting Washington State in the US. I had been thrilled with this find. It’s made of backstrap-loom-woven cotton cloth that was woven by the Women’s Skills Development Project in Pokhara, Nepal. I often use it as my toiletries bag when I travel. I can’t think of anything more perfect for me with its little label displaying a weaver at her backstrap loom. It’s beautifully put together and was in brand new condition when I bought it.
In this picture it sits on another piece of backstrap-loom-woven fabric that my aunt brought back from a trip to India. It’s an interesting combination of warp-float patterning, supplementary weft and weft twining. I’ve been twice to Nepal but never as a weaver. I would love to return and trek with a spindle and loom and see how I can connect with women along the way.
I look at my little bag from Nepal and wonder how long it took the weavers to construct it. I know, I know….I’m not a fan of the “how long did it take?” question but I can’t help wanting to compare their construction process to mine. The black bands around the mouth and base finish it so beautifully. You can barely make out the seam where they start and finish. Only the base is lined and covers the seam where the base meets the sides. I watch Handymum’s videos on Facebook and marvel at how she cuts and prepares all the parts for her bag projects. She then methodically sews everything in place and just leaves a small opening through which she eventually pushes all the fabric to reveal the finished bag right side out with everything in place ready to go. It’s like magic to me!
I tend to just make things up as I go and admit that I really don’t have much idea about what I am doing as I hand-stitch my bag projects. I look at pictures that I see online and take it from there. I am not looking for speed. I love sitting and slowly hand-stitching but I can never truly be sure about the success of a project at any point in the process. There’s almost as much time spent de-constructing as constructing and this project was no exception. But when its finally done, it’s very satisfying!
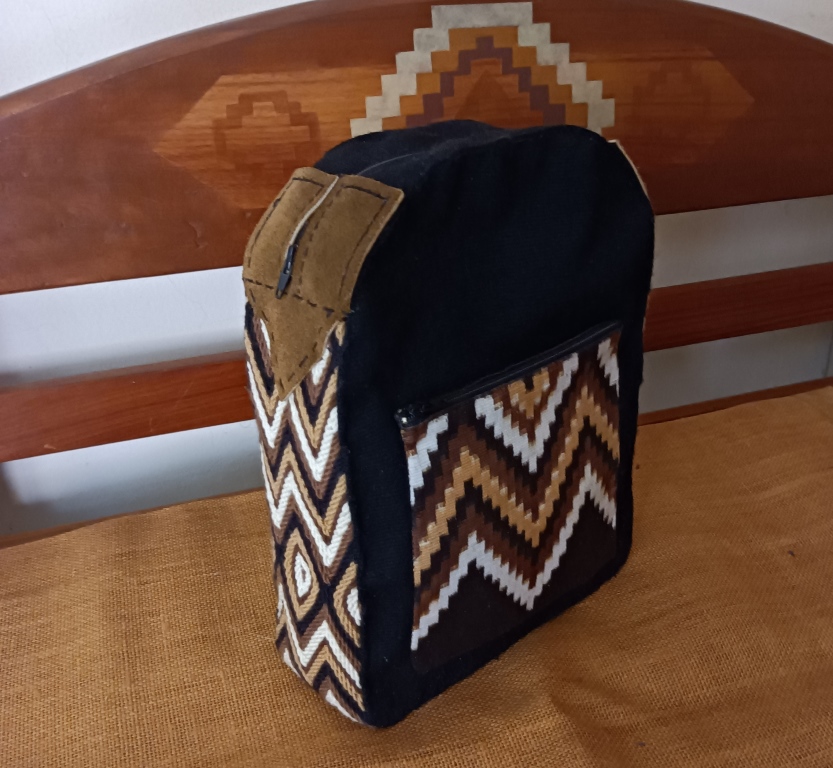
As you know, it started with uncovering the ply-split strap in my closet and deciding that it would look nice as the sides and base of a bag. How I was going to sew this rather thick and stiff strap to my backstrap-loom-woven fabric, I had no idea. That’s all part of my make-it-up-as-I-go style. I’ll just figure that out later. In the meantime, I’d go to all the trouble of weaving an ikat patterned piece to use as the outer pocket. There was wrapping and unwrapping of ikat tape and three dye baths. And then onward to the bag itself. After all that effort I’d just have to make it work.
Two hundred and sixty-eight heddles later came the black fabric for the body of the bag. I scraped together several colors of yarn and dyed them all black. Surprisingly they all came out with the same intensity of black color.
Construction underway….or should I say, construction, de-construction, re-construction. Still unsure at this point if I was going to be completely wasting my time.
Let me tell you that when you cut a ply-split band, it goes completely bonkers. I sewed back and forth across the band to secure it before cutting. All the twisted cords immediately unraveled and splayed out wildly in all directions. Help! I remembered that I had a leather backstrap that had been given to me by a guild. It had been part of one their deceased member’s estates. It was in just the right shade of brown. It would often be the first backstrap that I would put my hand on when I leaned over from my seat on the floor to open the bottom drawer and it got quite a lot of use. I hope that its former owner wouldn’t have minded my cutting it up in order to rescue this project by covering and protecting the end of the cut ply-split band.
With the leather in place and the bands for the zippered top woven and sewn into place, I was starting to think that maybe this project was going to be a success after all. I only then prepared the lining. It had to be lined. The wild ends of the ply-split band on the inside needed to be hidden! Where would the straps go? No idea at this point. I was still just making it up as I went.
This is basically a mini backpack that is designed to be slung over one shoulder. I haven’t yet been able to find a one-inch length-adjustment buckle and so I had to improvise. The strap can be attached on the left or right depending on the shoulder I want to use. The leather backstrap yet again came to the rescue.
Done! It’s ready to use now but I’ll keep looking for that length-adjustment buckle so that I can change from double d-rings to a hook. I just had to get this finished because I know that if I left it until I found the buckle, it would never get done. If I were to do it over, I’d have the zipper go down another couple of inches. Making it up as you go is kind of fun but sometimes leads to poor decisions.
Another thing that I have been doing on the side is preparing some print fabric for another stitched shibori project. I brought back some soda ash with me from my last trip to Australia (I hadn’t been able to find a way here to buy it that didn’t involve industry-sized quantities). I dismantled a Vera Bradley toiletries bag that I no longer use…it’s too big! (this might give you a clue as to what led me to the bathroom shelf to eventually find those balls of cochineal silk) because the fabric is so pretty and I’ve been busy washing and scouring it. I’m only guessing that it’s 100% cotton as there isn’t a sewn-in label. A burn test seemed to indicate that it most likely is. I wonder how well I can expect dye to cover the print.
What’s next on the loom? Well, as you know, I am weaving only from stash and I still have a fair bit of this Mayan Hands cotton that my friend Kate gave me several years ago. This is the cotton that I used to weave the fabric for my cotton spinning bag that you see below. I also used it to weave the straps for the bag in this post. I wove them in the structure that I call Andean Pebble Weave in just one solid color and they are good and sturdy.
If I have enough yarn, I’d like to weave a very brightly colored tote bag for grocery shopping, mostly in plain weave and with a little bit of pick-up patterning. I take four cloth bags with me to the store, two slung over each shoulder and walk the seven blocks there and seven back. The bags and the straps in particular need to be good and strong and comfortable in order to support the weight of the groceries over that distance. The bags are not just riding from store to vehicle in a shopping cart. Some of my bags are weaving conference tote bags that are looking a bit shabby now. I still use the one from CNCH 2010! It has been the best of all the conference totes I have.
I’ll finish by telling you about the latest issue of Tiny Studio Creative Life magazine in which I have an article. The theme of the latest issue is Magic and I really enjoyed writing about the science of the craft and the magic of the art of creating cloth on a backstrap loom.
Editor Suzy Brown describes the magazine as being for spinners and yarn crafters and she does a beautiful job putting each issue together. Once again I have to thank her for laying out my article so nicely. The magazine is available in both digital and print formats and you can buy single issues or subscribe to receive them quarterly. It’s been wonderful watching Suzy build this business and create an international community of fans from her home in New Zealand.