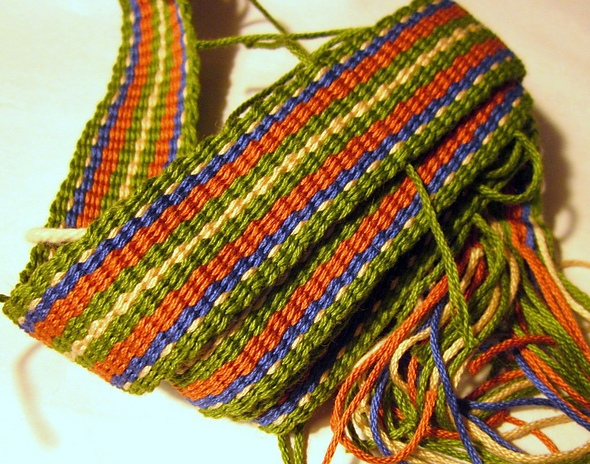
Backstrap Weaving – ”Big” Projects

Paule Bernard Roussel

I decided some time ago that I wanted to devote myself more to ”big” projects on my backstrap loom….longer and wider and with a greater number of ends.

But, as I put my latest big one aside, I felt that it would be fun to play around with some smaller ones for little while, something like a pouch for my iPod, for example.

However, after several days of searching through books and web pages, finding ideas for patterns, adapting them and charting, erasing and re-charting, I have come to the conclusion that even the projects that are small in physical terms are, in fact, ”big”….and that’s why I like them. I like putting in the time to search and sample. I could do without the do-overs that are sometimes necessary but that is all part of the process.

It’s nice to look back at the first steps towards the weaving of my most recent project…the silk paisley scarf…  and then look at the finished scarf lying on my bed. I think that perhaps the first thoughts about tones of blue sitting next to crisp, clean white entered my head when I came across the image of the Roussel painting, above.

Gathering colors…three tones of blue, white and assorted colors.
Deciding on the first shape to chart.

Other first steps involved sampling, lots of it. I have three small abandoned paisley samples which I am now willing to throw away plus a chart that is well-worn from all the erasing and adjusting.

There’s the memory of this first warp which got put back on the warping stakes and unwound back to zero. One of my stakes had shifted on the first attempt and the tension was off.

I have a tangle of blue 60/2 silk…the one part that didn’t survive my attempt to unwind and re-warp. I tell myself I’ll sit down one day with a good movie and untangle it, but I doubt it!

And now the scarf is done…washed and pressed and showing off its lovely sheen. Until the iron started pressing and lifting the dampness from the fabric, it was refusing to look or behave like silk at all. I am really happy with it.

Now what should go next on my loom from the list of ideas I have?

I have been carrying my iPod around in a sweet sprang bag that Tracy made for me but I decided that it really needed a woven bag of its own…a bag big enough to carry the iPod as well as its charger.

I had seen some photos of pre-Columbian textile fragments online and a particular motif had caught my eye. I charted something based on that and added a border pattern with the idea of weaving it with supplementary weft on a ground of 30/2 cotton I had bought way back in 2013 from Mayan hands.

It’s the same cotton I had used for the journal covers I  wove some time ago so I knew how it behaved. I had all the figures in my notebook from those projects and so I didn’t need to sample. I just needed to figure out the width I wanted and calculate the number of ends.

How do you like that bright pink tatting thread for the heddles?

I installed a coil rod because the cotton base structure would be plain weave.

Of the number of ways that I know of preventing the ”corrugated” look that my plain-weave cotton fabric sometimes gets, the coil rod is my (current) favorite. I much prefer it to another method which would involve turning the loom around and weaving an inch or so at the other end.

This cotton is not mercerized. There was a kind of tearing sound as I opened the sheds as the threads clung and scraped past each other but there were no breaks despite all the strumming I needed to do and everything stood up well.

Cindy and I bought this cotton at ANWG 2013. I bought a bag of this color labeled ”champagne” and Cindy bought the indigo. We shared the two colors.

Here’s the finished motif…

I was content to have a motif on just one face of the pouch and so I finished it off with plain weave, doubling the weft so that the rest of the fabric would have the same weight as that which included the supplemental weft.

And here’s the finished pouch…hand sewn. I was glad that I hadn’t forgotten how to put in a zip.

This project was supposed to give me a small break before launching into another ”big” one….but then I got distracted by a post in one of the online groups about the ”turned Krokbragd” that many people are weaving on their inkle looms and it reminded me that I had always wanted to weave a music-themed bookmark for a piano-playing friend of mine.

I chose to do it in warp-faced double weave using 60/2 silk so it would be fine enough to make a good bookmark. I set up my warp with four sets of string heddles, something I only do when weaving double weave if the thread is particularly fine or if there are a lot of ends.

I didn’t need to sample as I knew how the silk behaved in double weave, thanks to various woven samples and the notes in my notebook. Of course, I didn’t feel that I needed to chart the piano keys. However, I got a little cocky and tried to eyeball the length of the black keys rather than count threads and paid the price for that in the first two attempts.

Placing a marker on the 55th black thread made picking the colors for those black keys much faster. After a couple of repeats of piano keys, I got bored! Then I decided that it would be fun to weave a couple of bars of music. And now, of course, the ”project’ has turned into a ”sample”. My piano-playing friend will have to wait for his bookmark because weaving in those bars of music will make this piece much longer than any bookmark needs to be. Once my curiosity has been sparked, I need to follow through. The ”small” project has suddenly become big as the charting paper comes out.

Making a start on what I have charted so far…the key signature with the time signature soon to follow…

Once I have charted the notes and woven them, I guess I will go back to the beginning and figure out how to place all of this in a bookmark that is not ridiculously long!

Hopefully, I will be able to show the finished sample in the next post and we will see if you can recognize the melody I chose.


Backstrap Weaving – Golden Dreams

My friend Dorinda in Cochabamba wrote to tell me that my annual order of woven bands from the weaving co-op has been mailed to me….exciting! I only just managed to get myself a new P.O Box in time for this delivery. The timing is nice for the weavers as well, as money from this order will help mothers with the purchase of items on that long list of school supplies for the new school year that recently started.

Here are some of the colorful bands I have bought from the weavers via Dorinda in past years…

natural dye colors independencia BoliviaI had asked the weavers to include cochineal red in many of the bands and Dorinda posted pictures in one of her latest reports on her PAZA Bolivia website of the most recent dye day. I see lots of cochineal dyed yarn, some lovely greens and yellow….(oops, someone got caught with his pants down!)

Picture courtesy of Dorinda Dutcher PAZA Bolivia
Pictures courtesy of Dorinda Dutcher PAZA Bolivia.

Here are Maxima and other weavers in the cooperative thinking about color order and preparing to wind a warp for one of the bands.  Maxima’s warping partner sits at the opposite end of the frame. The balls of yarn will be rolled back and forth between these two ladies. After installing the shed rod and heddles, the warp will be transferred to the traditional leaning vertical loom.

warpfajaSome of the teenagers, under Maxima’s guidance, are weaving narrow bands which are sewn into yoga mat straps. Here is a basket of straps with their lovely pebble weave patterns which was ordered by a visitor to be taken to the USA…

susansyogaorderDorinda’s posts are always fascinating. Please, head to her site for more stories about her weaver friends and the work they do.

I took the opportunity when I caught Dorinda online to ask her about the decorative sewing that Maxima uses to join the panels for her carrying cloths, or awayos.

I was wondering if weavers in Cochabamba use the same name for the joins as that used in northern Potosi…siray. Maxima gave Dorinda the Spanish word costura which simply means seam. After I expressed my surprise at the fact that Maxima wasn’t using a word in her mother tongue of Quechua, Dorinda asked again and was told siray. Maxima had simply translated it to Spanish knowing that Dorinda wouldn’t understand the Quechua word. However, Maxima doesn’t have different names for the different kinds of stitches, unlike the weavers in northern Potosi.

Here are a couple of decorative siray  on two new awayos that Maxima wove. This first piece shows patterning in warp-faced double weave.

maxima awayo double weave siray

The patterning in this next piece is in the pebble weave structure…

maxima awayo pebble weave sirayHaving warp stripes at the edge of the cloth is a wonderful way to help guide the placement of the stitches and I plan to include stripes like this in my next wool piece. Just eye-balling the spacing is really hard! However, it doesn’t seem like Maxima places that much importance on having all the shapes in alignment. I like the sort of free spirit the work shows. She changes thread color when she runs out and is not concerned about only doing so at the start of a new shape or about having an equal number of triangles in each color. I am sure that there is little or no embroidery thread wasted that way.

I am about to wind the warp for my next set of wool panels and must remember to include those stripes. I wrote a couple of weeks ago that I was planning on winding that warp very soon. I had mapped out the colors and chosen my patterns. Luckily I didn’t go ahead with it as that was Version 1. I have since moved on to Version 4 and am still not quite sure that I have it right.

I have all the time in the world to ponder that as my yellow scarf is now off the loom and I am not weaving. However, my sticks are calling out for a new project.

finished yellow scarf on loom with toolsHere’s the scarf still on the loom with various tools that I used to create it….two shuttles: one for the main yellow weft and one for the cream supplemental weft, one of the two long swords that I used, a pick-up stick for the flower patterns and a small sword for extra beating in certain spots. Because I wove this in plain weave, I also used a coil rod.

It was an 86” warp but I stopped at 65” of fabric. Rather than squeezing in some additional inches I decided to stop. I did not want to be trying to create those final bands of supplementary-weft patterning while being very close to the end of the warp. There is a tendency to apply too much tension when there is little space left in which to work. That can cause elongated motifs and I really wanted the motifs at both ends to have the same proportions. That was a little hard to monitor with the other end of the fabric being rolled up and out of view.

yellow scarf on loom starting endIn recent posts I mentioned that this scarf fabric was a bit on the stiff side on the loom. I was really looking forward to washing and pressing it and watching and feeling the silk transform. Here is a bit of the fabric before washing…

close up silk fabric pre washI love how, after washing and pressing, the supplementary-weft motifs sort of melt into the cloth. They lose the appearance of having been created with individual strands of silk and look more like they have been painted on the fabric.

yellow silk sacrf after washing and pressing

I pressed it while damp and, as the moisture slowly lifted from the cloth, I could feel the fabric softening, relaxing and loosening up…magic! I am really pleased with this project. The scarf feels wonderful.

It’s funny thinking back to the start of this project. I kept trying to come up with ways to hide the yellow because I felt the color was too strong. I wanted to cover the scarf with cream supplementary weft and just let the yellow peak through in places. I am glad I didn’t go ahead with that plan.

When I finished winding the warp, I was close to abandoning this project. I had come up with a weird improvised windy warping path so that I could get the 86” of length. It was not a path to which I was accustomed and I wandered off it at various times. So, there were lots of things to be fixed and adjusted once I had taken the warp off the stakes and that always spells trouble for me. I rolled the warp in paper and left it over night. I didn’t want to look at it anymore. I even considered undoing the whole thing…all 860 ends… and starting again but knew it would end up a mess. Somehow, things looked different in the morning. I made the adjustments, set up the warp and just started weaving.

yellow silk scarf after wet finishAn online weaving friend commented that it is surely not cold enough in Santa Cruz Bolivia for me to need such a scarf and that I should send it to her in Canada. Well, she is right about that. It very rarely gets cold enough for scarves here. However, I have a dream of ending up back in Australia one of these years and living in a place called the Blue Mountains where I used to hike and climb a lot in my younger days. It is certainly cold enough there. I like to think of these things I am creating as items for a ”hope chest” for that dream to come true. Maybe I should start knitting socks too. I have always been envious of those.

In the meantime, I travel a lot and this scarf will certainly be worn even if it is just draped over my shoulders for decoration.

silk scarf backstrap loom

Now I can give my full attention to the wool warp. Let’s see how many more versions occur to me before I actually start warping and if I can have it set up and underway before the next blog post. Until then…..


Backstrap Weaving – Life in the Yarn Forest

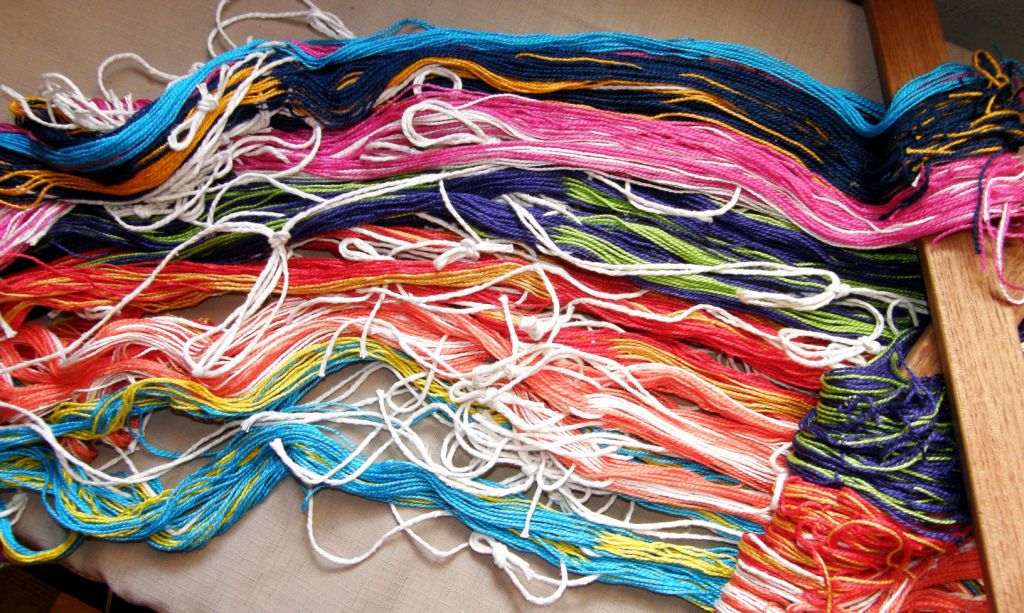
I was almost going to skip this week’s post. You see, I have been all tangled up in this stuff…This is about one-tenth of it!

warpsI am in the throes of warp preparation and, once I get the ball rolling, I don’t want to interrupt the flow in any way. The living room is a forest of colored thread. My cat is bored with it and just walks over the top as if it is all just some kind of new flooring. There is the risk, though, that she will bring down a lizard from the upstairs terrace and decide to play hide-and-seek with it in the yarn jungle.

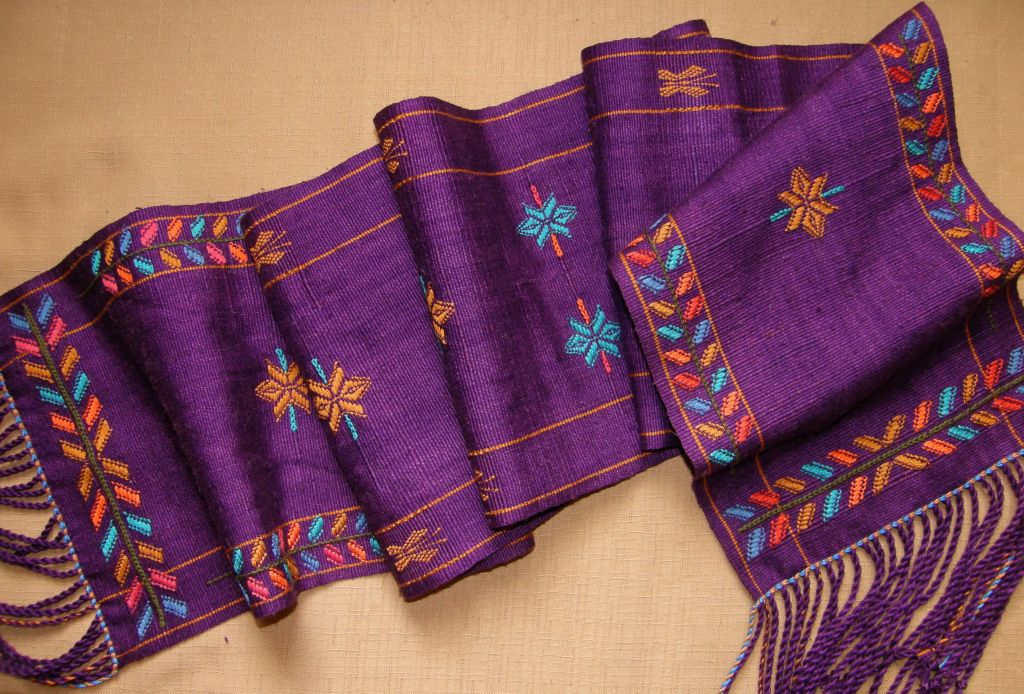
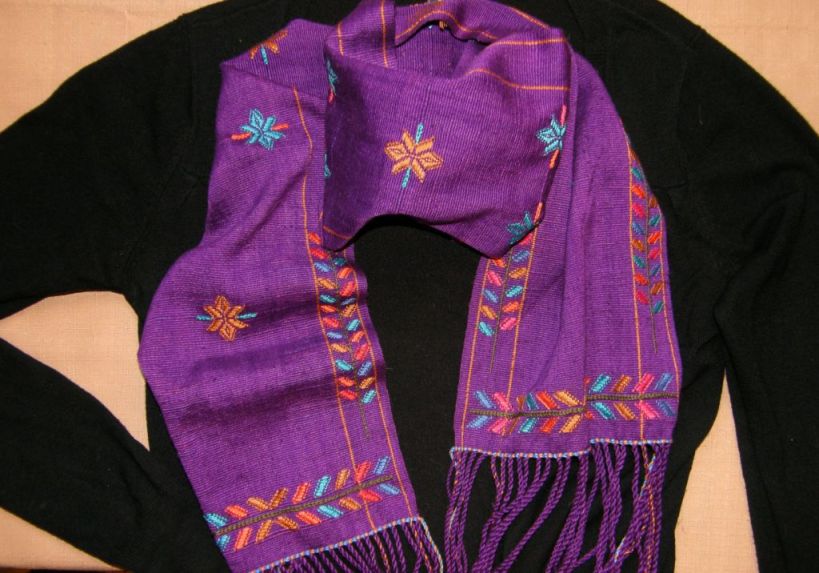
But, as I have been making good progress, I decided that I could part the branches and vines and step out for a bit so that I could post pictures of the finished purple scarf while I am still excited about it.

??????????????????????You will see that I decided not to add a few inches to start and finish. That is something that I had been pondering last week as I found myself with excess warp that I didn’t want to waste. The decision was made easier by the fact that I had just about run out of yarn for weft. That and the fact that the scarf really didn’t need any additional length, had me twining a two-color edging and cutting the circular warp apart earlier than expected. I am really happy with it.

And you can tell how excited I am as here I am playing fashion lady…(so NOT me!)

??????????????????????

I probably won’t have time to start another project before I get on the road but I have an idea developing for the next thing…a bandanna! which I will use as a kind of neckerchief.

The bandanna will be square, and wider than most things I weave, with supplementary-weft patterns scattered over it. I haven’t decided yet on the motifs…maybe something inspired by Mexican weaving or maybe something Indian for the Sanskrit origin of the word “bandanna”: बन्धन bandhana, “to tie”. I see many pictures on Facebook of the daughter of my Godmother, who still lives in India, dressed in luscious saris. Maybe something there can inspire this next project.

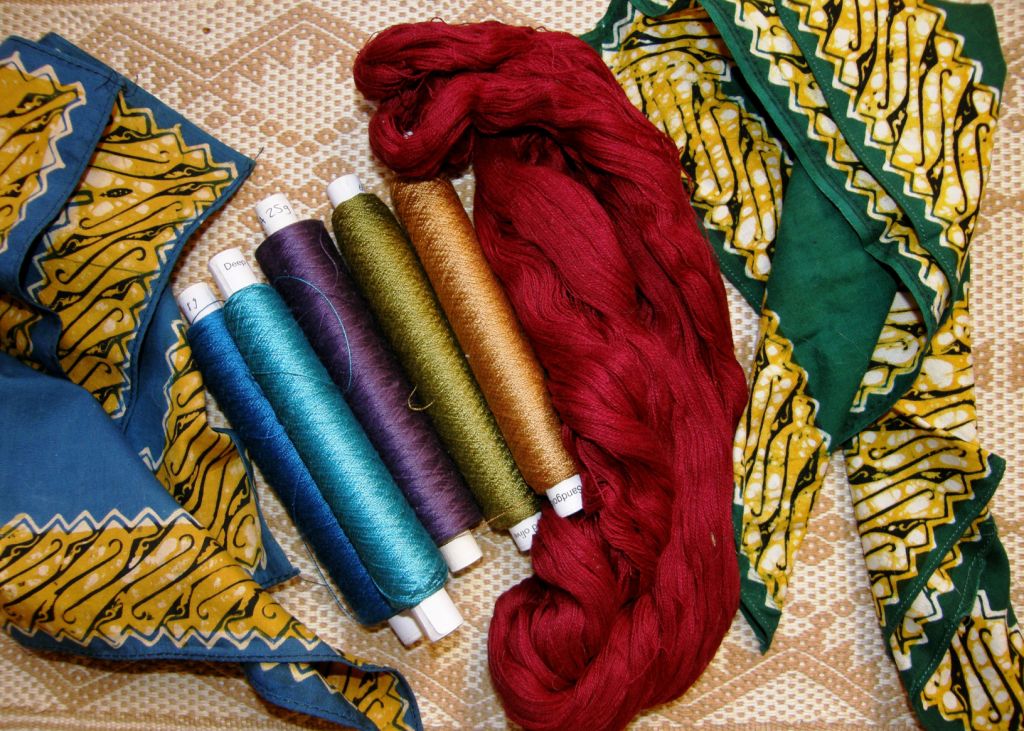
I have green and red left in the Guatemalan cotton with which I have been working and have chosen the red. I wish I had a really pale lilac in the silk for one of the supplementary wefts. Maybe I can pick up something on my trip.

??????????????????????So, I will have that idea percolating while I am traveling. If I do really well with my trip prep, maybe I will at least wind the warp so it will be good to go when I get back. Then it will be able to fight for first place among the many ideas which I usually bring home.

Along with my trip preparation, I have this project to finish….

finished baackstrap woven wall hangingsI won’t tell you how many warp ends there are in these three wall hanging panels that need to be twisted or braided or dealt with in some way. However, I kind of enjoy doing things like this. I like to find something that doesn’t really require my full attention on tv…like a movie or show I have seen and enjoyed before…and then sit with sweet snacks on hand and braid and twist away.

ANWG 2013I have lots of plans to add more panels to this wall hanging series. I can’t decide which project I will tackle next. I hope to have these three hung as part of an exhibit at ANWG in June.

It will be fun to see them up on a wall as there is certainly no room around here for them. The three pieces have structural and/or design influences from South American textiles I have seen. Some aspects were inspired by experiences I have had while on the road learning to weave.

Another reason I wanted to take a break and blog this week was to tell you about a weave-along in the Ravelry Backstrap Weaving group that Ghedrain is proposing starting March 1st.

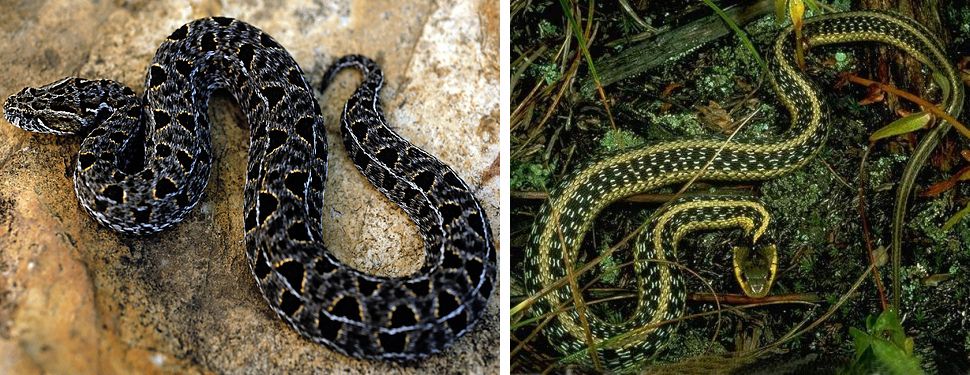
Considering that the Chinese Year of the Snake has just begun, Ghedrain has suggested creating projects that are inspired by snake-skin patterns or by the shape of the snake itself and has posted a number of pictures for ideas. Here are a couple: (the image on the right comes from this site.

snakes for WAL

Such amazing patterns!

The weave-along is open to all levels although it won’t be based on a tutorial of any kind. Any weave structure can be used…pebble weave, double weave, supplementary-weft inlay, to name a few….and we are particularly encouraging people to use plain weave with some creative colored warping to create snake-like warp-faced patterns. The inkle pattern generator is very helpful for experimenting with color arrangements.

Janet is planning to do a card-woven piece using a backstrap set-up. And it is not just limited to backstrap looms. We welcome the use of inkle looms or other looms on which warp-faced pieces can be woven.

Kateri, who wove with me in Massachusetts last year, showed the group what she has been up to lately using the pebble weave structure and patterns charted in my books

kateri pebble weave

It is nice to see Kateri venturing into wider pieces. The piece on the right became a study in how warp tension affects the elongation of the motifs…the more tension applied, the more elongated the motifs will be…something of which backstrap weavers need to be aware as they go rolling up and shortening the warp. The piece on the left has a favorite motif of mine which was taught to me by my dear teacher Maxima in Cochabamba. Kateri’s band is beautifully even and the motifs are nicely balanced the entire length of the band.

Ghedrain is set up to weave a scarf for her husband which is the project that lured her to backstrap weaving in the first place. After putting in some time to get acquainted with the loom and the warping process by weaving a few items, which I showed last week, the scarf project is now underway.

Ghedrain scarf


Backstrap Weaving – Tropical Themes and Tools

Santa Cruz,  Bolivia has almost all the lovely things that the tropics typically have to offer…swaying palm trees, avenues lined with mango trees dripping with fruit, exotic plant and birdlife and tremendous afternoon downpours of cooling rain (sadly few and far between these days). Too bad there aren’t any beaches in this country to complete the picture of tropical paradise. For those of you in the wintery whiteness of the northern hemisphere, here is a bit of tropical Bolivian color to brighten your day.

tropical color

And, on a similar colorful and cheery note, here is my newest scarf project still on the loom…

supplementary weft patterned scarf backstrap loom

Carmen at her loom

The main inspiration for the patterns has come from a particular Guatemalan plant motif woven using supplementary wefts. Carmen, pictured at left, taught me to weave this in her home of Santa Catarina Palopó on the shores of Lake Atitlan.

The small plant motif uses inlaid supplementary wefts for the leaves and various warp wrapping techniques to create the stem and plant base.

I took the leaf pattern, changed it a little to fit my working space, and used it in the side panels of the scarf. I also expanded it into an imaginary tropical flower. The tiny butterfly motif was adapted from one on a Mexican backstrap-woven textile that I saw online.

I love the way the turquoise and gold supplementary wefts look together in the flowers on this purple background….visions of tropical seas and golden mangoes! I have to admit that I have been dying to combine those two colors somehow ever since I saw the following shawl by Elisabeth Hill on her Flickr page…

Elisabeth Hill shawl

How is that for inspiration?! And I got to meet Lisa and see this piece in person at Maryland Sheep and Wool last year where the shawl took Best of Show. Lisa has done some backstrap weaving  with me so maybe that will somehow influence one of her projects. Take a look at her Flickr page to see more amazing creations in deflected double weave.

yarn from 2012 trips

I like how my purple scarf doesn’t really scream “me” at all…at least I don’t think it does.

I once had someone on Weavolution say that she could immediately spot a project of mine before clicking on the image to see who the weaver was. It’s nice in a way to know that you have developed a sort of weaving “character and style” that can be recognised.On the other hand, it’s nice to branch out and do something completely different and I have realised that, in order for me to do so, it is helpful to have access to yarn that I have never used before. So, I think that along with my “wider, longer, finer” weaving goal for this year, I will add “new fiber”. I intend to quieten the little voice that tells me to “keep it simple and just make do with what you can get locally” and take advantage of my trips to the US to gather up new-to-me fiber and a greater range of colors.

Above you can see alpaca, wool, hemp and bamboo (?…this was a gift and I am not sure what it is) yarn from a recent US trip….much of it gifts from weaver friends.
coil rod and other toolsNow, back to the current project. What about that coil rod…what has it been doing for me? I roll it along the warp as my weaving progresses and the fabric gets rolled around the loom bars. It is definitely a handy width guide. Beyond the coil rod the warp tends to spread and fan out as it stretches away toward the far loom bar.
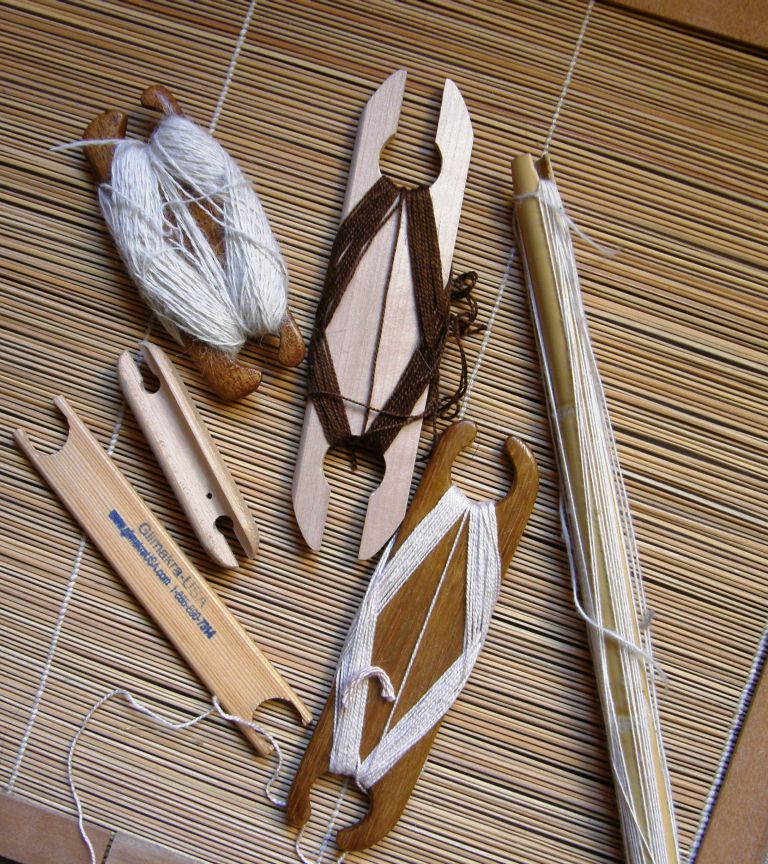
The rod also ensures that there is always beautifully consistent tension between it and the weaving line. It locks the warps into place and gives me even tension with which to work no matter how many stretched and loosened warps may be gathering beyond it and on the lower layer of warp beyond the far loom bar. In short…I like it! It is a great little tool.

You can see the coil rod in place in the above picture. Other “tools” that I am using on this project are several ties of colored yarn along the shed rod and in the heddles.  Because my patterns are not wide enough to warrant the insertion of pattern sticks to raise the warps under which the supplementary wefts pass, I am using little ties to raise the appropriate warps instead. There are some that go around the warps themselves in the shed-rod shed and others which are tied around certain heddle strings. I simply pull on these to raise the pattern warps in the heddle shed. They save time and prevent eyesight strain!

As far as tools go, sometimes the simplest are the best…

Montagnard backstrap loom with suttes and double band

It always delights me to see that the use of simple sticks to carry the weft is common to many backstrap weavers around the globe….no fancy tool required! You have seen in my pictures that I use a specially shaped shuttle. Three of these were made for me when I lived in Chile and they have a kind of sentimental value. I enjoy using them and they double as beaters and swords sometimes so they are pretty nifty.

The Montagnard backstrap loom above has two bands in progress and you can see the two simple shuttles. The looms are so large that it quite cumbersome to balance them when only weaving one narrow band. They are designed for weaving large panels of cloth which are used for skirts, shirts and blankets.

I must admit that I have been often pulled towrad buying teeny tiny shuttles at fiber fairs purely for their cuteness factor. I have on occasion used them but had to turn my closet upside down just now to find them to photograph as they have been idle for a long time…

small band weaving shuttles

The long thin shuttle on the right is one that one of my Guatemalan weaving teachers used. All my other teachers have used simple sticks about which the yarn is wound or, for narrow pieces, simple “mummy”-like butterfly bundles. Below you can see two such weft bundles. The yarn feeds off the outside rather than from the center and a hitch is put in place to stop the bundle from unravelling when it hangs freely. These two examples are of handspun wool and alpaca fiber from the Cusco area.

yarn bitterflies used in backstrap weaving

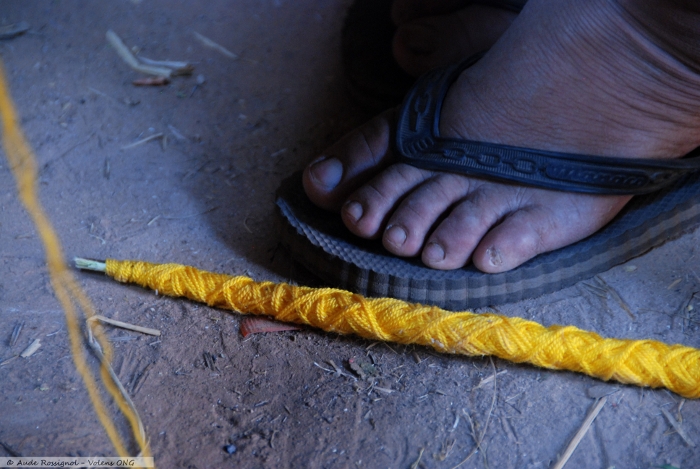
For narrow work my Guaraní teacher uses short lengths of scrap yarn for weft. This way she never wastes a thing! The weft lengths are so short that she does not even need to wind a butterfly. For wide pieces a simple stick shuttle is used as seen below.

Aude Rossignol

Permission to use this image was kindly given by Aude Rossignol.

Here is a video showing my Montagnard weaving teacher, Ju Nie, loading yarn onto her shuttle. You can see that her shin is a very useful piece of equipment as, in a previous post, I showed you how she also uses it to help twist the fringes of her woven projects. The video has two segments with a short pause between. Wait for the second part which shows a weaver from the Cusco area loading her large shuttle.


One of the most charming ways of passing the weft is one in which the weaver has her weft rolled into a ball. She places the ball within the shed and then tilts her body to angle the loom so that the ball rolls through to the other side!

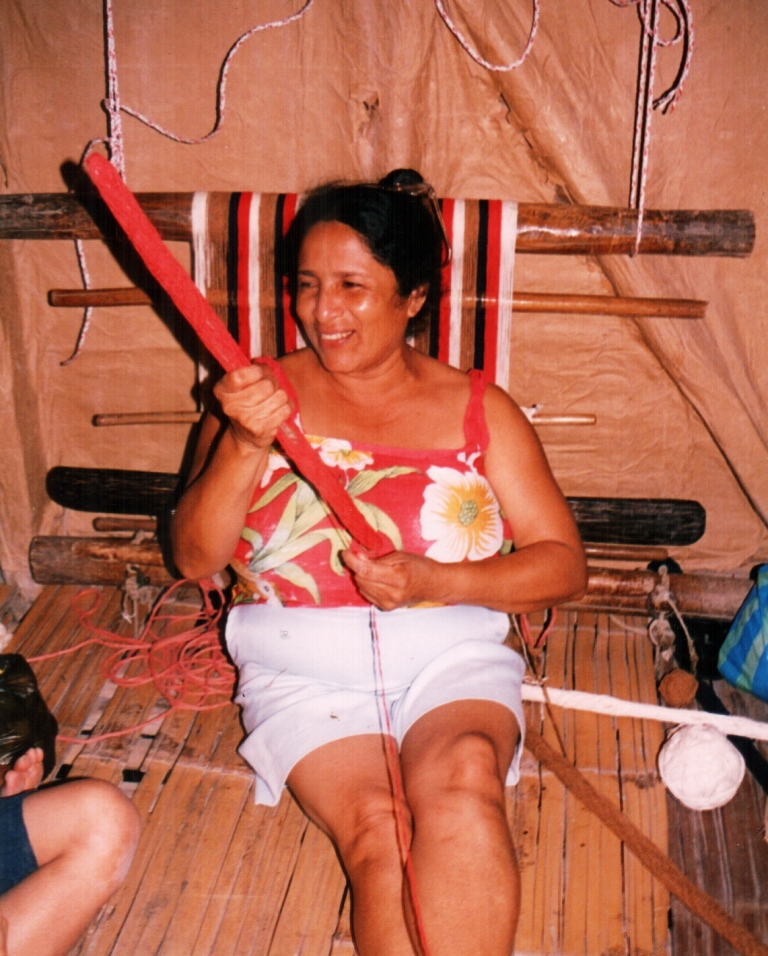
And finally, here is my teacher Trini in coastal Ecuador loading one of the three shuttles for the mini hammock she is preparing to teach me to weave. It was a balanced weave using three weft colors.

Trini with shuttle

In the Ravelry Backstrap Weaving Group, Marge and Julia showed what they have been working on lately. Marge has been trying out Tahki Cotton Classic Light. I have not tried the Light version but I did see it at WEBS when I visited and the color range is wonderful. Marge used an online inkle pattern generator to help her design the color arrangement. The result is gorgeous!

marge

Julia used two different color ways for the same pebble weave motif (charted in my second book) on two different looms…a four-harness and a Seidel Band Loom.

julia pebble weave on two loomsI will be visiting the Mannings this summer. If you want to come and weave, maybe we can spend a little time outside hitched to some shady trees down by the creek….on the ground or on chairs..that will be up to you.  How cool would that be?!

the-mannings-stream

Backstrap Weaving – Hands Full of Threads

The black neck wrap is done and I am already thinking about the next one.

I thoroughly enjoyed working with this fine Guatemalan cotton thread (you see how I have forgotten about all the woes in the beginning!). It was fun picking up threads with the delicate Guatemalan pick-up sticks and feeling the silk supplementary wefts slide through my fingers.

This will be the color scheme for the next one…

colors for next backstrap woven scarf

Maybe I will use some Guatemalan-inspired designs this time or perhaps I will invent some of my own.

cotton-spinnersI got the black piece off the loom and then I was faced with fringe twisting. Would you believe I have never done this before? I have left fringes on placemats and braided the ends of other pieces. I had read the grumblings about fringe twisting from those who regularly weave scarves in the weaving forums and seen pictures of the gadgets and gizmos that have been designed to make this task less tedious.

I even watched a video I had taken of my Montagnard weaving and twining teacher, Ju Nie (seen at left spinning cotton), twisting the ends of a piece she had recently taken off her backstrap loom. Ju had come to visit at friend Betsy’s house and, rather than sit idle while chatting in the living room, she pulled out a wad of stuff wrapped in paper and a woven piece of cloth and started working. The “stuff” turned out to be mushy, sticky over-cooked rice through which she drew the warp ends before rolling them on her leg and setting them in the twist.

Here is the video. Ju explains that doing it on her pants is “no good” and that it works much better on her bare leg. I am guessing that her bare shin makes the best rolling surface.


So, I twisted my fringe and it wasn’t as slow as I had thought…much faster than braiding, I can tell you! I added weft twining to the ends of the fabric before taking it off the loom. I think that made a nice finish.  See the countered weft twining tutorial here.

And then I found that scarves are kind of hard to photograph…way too long and flat and lifeless to try and stretch out in one shot so I gathered it up and threw it down many times, fiddled about and I felt that this was the best “pose” in the end.

bhutan scarf with border

And another shot that shows my favorite central motif…

finished bhutan scarf backstrap loom

Although I was mad keen to get into the Guatemalan purple thread and warp up another scarf, (especially since I think that I  already experienced, hopefully, all possible mishaps when weaving the black one), I decided that there was another project sitting in the closet that needed my attention…(plus I really need to ponder and plan the patterns I want to use on the purple scarf before rushing in and weaving it)…

wayuu_motif_with_twining

Remember this guy? I had just started the large main motif when I decided that I would not touch this until I was sure I would have enough time to stick with it and finish it. When doing pick-up, I think it is best to do a pattern all in one go rather than leave it sitting while I travel. If I leave a piece for a long period of time,  I can almost see the place where I left off and picked up again. Perhaps I sit a little differently, apply a little bit more or less tension, beat differently…I don’t know…something changes. So, now is the time to get down and finish this piece.

Usig a forked stick in the warpI welcome the opportunity to have my hands in there and full of threads again. I am not a pick-up stick kind of gal,  unless a particular technique or yarn really demands it. I like to hold and pick and drop threads with my hands. Perhaps it’s because that is the way my first Peruvian teachers showed me. I have been shown and I have willingly tried other ways but I always come back to just using my hands.

Here is a weaver creating a belt patterned with supplementary warps. It is a narrow piece and so it is easy for her to simply insert her hand between the warp layers to do the pick-up.

I was finally successful in uploading the video of this weaver at work. You can see how she does her pick-up as well as see the two-stick method she uses for opening the heddle shed. She has a forked stick in the warp….one prong is her shed rod and the other prong holds a second cross. Grasping and twisting the fork, while leaning forward to relax tension, helps her to smoothly open the heddle shed. 

These are the kinds of textiles she produces…

O

I watched a gentleman from Chahuaytire also weaving supplementary-warp patterns into a much wider piece of cloth. He uses a pick-up stick to hold all the threads in both the pattern and plain-weave sections as he works his way across the cloth…


This is his weaving…

chahuaytire backstrap weaving

Both weavers work equally fast, don’t you think?

So, on I go with hands full of threads. This is the third piece in my red-white-and-black wall hanging series. This one has patterns which have been inspired by the si’ira belts woven by the Wayuu people of Colombia and Venezuela. Since starting this project, I got to go to Holland and meet Mirja Wark who spent years studying, collecting and cataloging these belts as well as writing a book describing the weaving, braiding and twining techniques used.

si'ira belts wayuu mirja wark

wayuu project in progressThese are belts that Mirja herself wove while studying. You can see the “cow’s nose” pattern at the bottom of the blue, pink and green belt that I used in my wall hanging. The large motif that I will use in the center has been very much adapted to fit my piece and uses just certain elements of the Wayuu patterns as inspiration. There are a lot of threads to pick and, until I things get rolling, I am very much clinging to my pattern chart. Thank you, Terri, for introducing me to removable highlighter tape which works like a dream!

So I will be parked in front of that piece for some time while taking breaks to re-spin the Malabrigo yarn, plan supplementary-weft patterns for the discontinuous-warp piece for which the Malabrigo is destined, ball up that large skein of Guatemalan purple cotton, sketch some patterns for the purple scarf project, plan piece number four in the wall hanging series…maybe ikat??…do I dare?

And I am folding this sampler piece this way and that to see if something useful can be made of it. It’s still on the loom and there is room for more pattern experiments.

O

Let me show you some things that Ravelry members and students and friends have made. It is a strange coincidence that three people decided to edge pieces of clothing with woven bands. Janet decorated a pair of felted slippers that she made, Laura edged gloves (and also made a camera strap and headbands) and Julia edged a couple of tiny shadow-weave kimonos with a pebble weave band. Three gorgeous projects! (I am in love with that shadow-weave cloth, by the way…it takes four shafts…I would like to try it).

christmas_projects__2012_006_medium

laura xmas projects

kimono_baby_black___white2_mediumI will leave you with the happy twin recipients of the wee kimonos…Julia’s grand nieces!

ZellaHattieinKimono_medium2

######################################

Right before I was about to publish this post,  a question was posted in the Ravelry group by a weaver who is trying supplementary-weft patterning for the first time and not getting the rich satin-like finish  that she would like in her patterns. Instead, there are spaces and gaps between the rows of her design. I posted a reply in the group but am copying it here as I think that it may be useful for others who feel like trying this lovely technique…

There is no formula that will suit all weavers…that is, “x” number of strands of such-and-such a supp weft material will give sufficient coverage with such-and-such warp thread. All weavers are different in the way they handle their warps.

For example, some weavers put a lot more tension on their warp than others. This means that they have fewer picks per inch than others because the warps are pulled so tight that they can’t bend over and under the wefts as easily as they do for weavers who use less tension. This means that a certain amount of supplementary weft material won’t give the same amount of coverage for those weavers as it does for others who use less tension.

Another case…some people simply don’t beat hard enough when using supplementary wefts. I beat hard and really mash the weft into place…not “wham wham” beating…more like placing the beater right at the weaving line and pushing against the weft hard with a rocking motion.

Other people pull too tightly on the supplementary weft. It has to be fairly relaxed in the shed to allow it to spread and cover the surface. As an experiment, pull your supplementary weft tight once you have changed sheds and see what happens. It will flatten and narrow and not give good coverage. You have to find the balance between thread that is relaxed enough in the shed and bumps at the sides, where the weft turns, that are not too big and loose.

These are all things that come with trial and error and experience. It might be that you need to use more supp weft material or it could be one of the other factors I have mentioned here.

I often use thread that is similar to #3 and #10 crochet cotton. It is Brazilian cotton that I get here in Bolivia. I have used two strands of embroidery floss with the “#3” and one and a half with the “#10”. This gives people an idea of where to start and what to try but, as I said, every weaver is different.

Hope this helps.

ETA My first Guatemalan teacher combed the strands of her supp wefts with the point of her pick-up stick so that they lay next to rather than on top of each other. They didn’t move with handling…the floats are not long enough to cause that to happen. I did the same with the six strands of 60/2 silk on my current project.