Backstrap Weaving – If I were to do it over….

“If I were to do it over”….

I know that I am trouble if I find myself sitting in front of a warp and saying that phrase before I can even throw the first shot of weft or, in the case of my current ikat project, before I can apply the first tie to the area that will resist the dye. As I set the warp on the loom bars, I was thinking that I would warp it slightly differently “if I were to do it over”.

As I wrapped the warp threads, I was wondering why I had automatically started placing the knots at the edge of the wrap rather than in the center as I had  in past ikat projects where I used cassette tape. Would it make any difference? Yes it did. “If I were to do it over”, I would put the knots in the middle of the wrap. There is far less chance of nicking or cutting a warp thread with scissor tips when unwrapping if the knot is in the center rather than at the edge.

wraps for new ikat project?The wrapping part didn’t take as long as I had thought. It was fun watching the design appear and satisfying seeing it take on the same proportions as my sketches. I had calculated and measured corrrectly…yay. No thoughts about do-overs there.

ikat motif backstrap weaving“If I were to do it over”, I would wash the thread in hot water before starting the project. I have dyed a lot of cotton in my time. I guess it has all been knitting yarn and crochet thread. Those have all dyed beautifully with the Dylon cold water dyes that I buy in small packets. However, my supplier of  the UKI 20/2 weaving yarn that I am using in this project told me that this yarn is finished with a coating of wax. I only found this out by contacting them after my failed attempt to dye the warp black.

That explains the medium shade of blue I got with navy blue dye last week more than the fact that I had used a very watery solution. With this new warp, all I could turn out was an ugly steely grey instead of the black at which I had been aiming. What a waste of dye. I then overdyed it with far more dye than was necessary to ensure that I got black the second time around….another waste.  So, that’s the end of my black dye supply…no do-overs possible for that part of the process.

spots of dye under ikat tapeAs the ikat tape was close to transparent, I was able to see dark spots under the tape before I could even start removing it. That was very disheartening.

Clearly, the dye had seeped under the tape in several places.

However, it wasn’t that bad after all. A very noticeable concentrated spot of color on a group of threads all squished together and tied, turns into a vague smudge when the individual threads are untied and fanned out. It is not like the marks disappeared, but they were something with which I could live. I couldn’t see why those particular parts had allowed dye to seep in, and so it is not a problem that I would expect to be able to eliminate “if I were to do it over”.

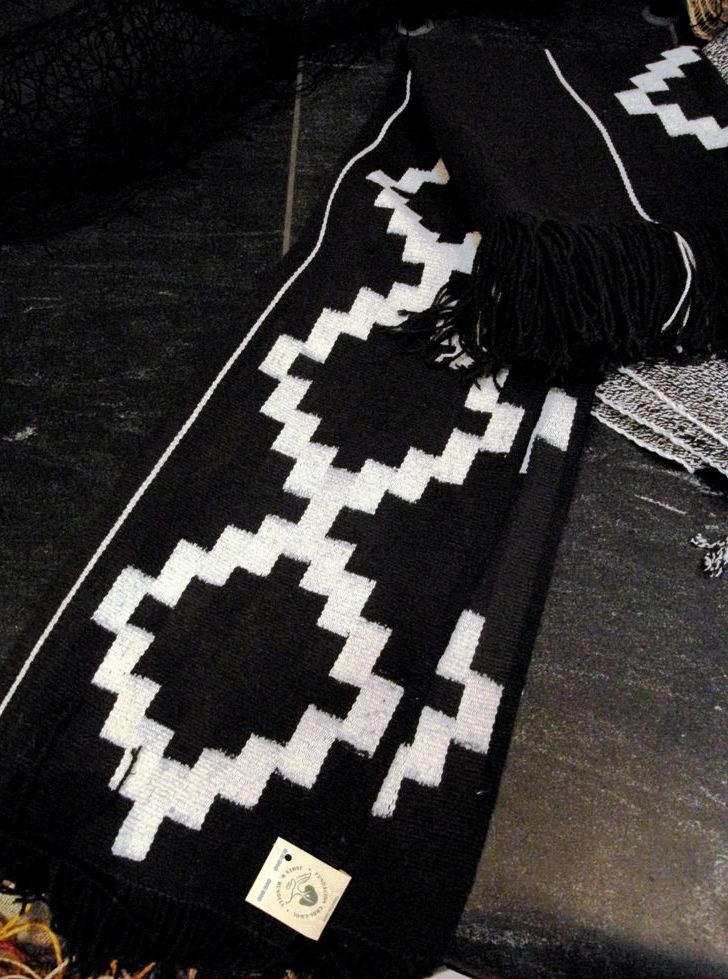
ikat motif on backstrap loomIt was time to make heddles, put the shed rod in place and then unwrap. The unwrapping part was nerve-racking….take it easy and don’t snip a warp thread for goodness sake!  And then it was time to weave! And this is where the “if I were to do it over” turned to “when I do it over” and there are several reasons for that.

woven ikat motif backstrap weavingI placed many…too many… thin strips of cardboard within successive sheds to start with. I can see now that not all those strips were perfectly straight and the accumulation of this flaw had the effect of having me start the weaving with a slightly askew weaving line.

I didn’t notice. Iwas concentrating so hard on the ikat motif and the alignment of the warps that I didn’t even notice until the whole motif had been woven. I had to weave in some short rows to get things straightened out for the supplementary weft patterning…NOT GOOD. It looked awful. Then I noticed that the ikat motif itself had also been thrown slightly off center. Oh well.

Maybe only I can see it but it just isn’t good enough. It was time to start the list headed “When I do this over” and get used to the fact that this will go on the sample pile.

However, I have to say that I am really pleased with the way the ikat pattern turned out. I didn’t get any of the dreaded “railway tracks” (my name for repeated single rows of lines and spots of undyed thread that get completely detached from the main motif.) There is fuzziness…perhaps more like a raggedness…it looks like ikat! Yay!

When I fished out my silk thread for the supplementary-weft patterning, it was plain to see that there are many levels of off-white-ness. The UKI thread is closer to white and the silk weft closer to cream. They weren’t going to look good together but I wove some patterns anyway. This piece is now a sampler and I may as well use it to learn as much as I can.

ikat figure with supplementary weft patterning backstrap weavingIn the picture above, I have flipped the loom around and made new heddles so that I can add the supplementary-weft patterns to the other side of the ikat motif. More short rows had to be added to get things straightened out….stupid cardboard strips! grumble, grumble.

So, WHEN I do this again, I shall adopt some different ways of doing things, starting with the warping. Add to the list….don’t forget to dye the weft!! Weft went into the steely grey bath but not the black one which wasn’t such a problem until I broke two warp threads while weaving and had nothing with which to replace them.

ikat tapeI have loads of thread, a lifetime supply of ikat tape, and I think that I could probably get some embroidery floss here to match more closely the color of the UKI thread. What is missing is enough black dye…darn. Do you think that mixing navy blue and dark brown would work?

In the midst of this I had visitors who had not seen my weaving before.

I hate having to feel all squirmish about showing my work to people because I know what kind of questions and reactions I always get from local Santa Cruz people when I do so.

They are fascinated and delighted at first until they eventually ask how much time I spend on this kind of thing. And, when they find out that I don’t intend selling my work, and won’t even be hanging my wall hangings in this home (I am saving them for some vague future home-of-my-dreams!), well, that is the end of the story. Heads are shaken in bewilderment and I am left feeling a little deflated and almost foolish. My explanation of the ikat process was sheer madness to them!

painted tshirt ethnic motifWhich had me thinking once again about process versus product.

Of course this and pretty much all my projects are all about the process.

I want to experience the ikat process and not merely create a large solid white motif on a solid black background. I could, after all,  paint a white motif on black woven  fabric if that is all I wanted,  like my friend Sharon did when she hand-cut stencils and painted a beautiful set of tshirts for me with ethnic motifs.

Or, I could use the warp-faced double-weave stucture which would allow me so much freedom to create motifs on solid-color backgrounds…made up of straight lines that can be put together to resemble curves, like those in my last Shipibo-inspired wall hanging and other projects.

Below, you can see an experiment with curves and Celtic motifs that I made a long time ago.

first-curve-experiments-in-double-weave

abba-yohanni-curtain-and-reproAnd another not-so-curvy one from the archives at left…

Double weave, of course, creates a thick fabric when what you might really be after is something finer and more flowing.

It also does not favor the use of a lot of unpatterned area. The parts of the double-weave fabric that do not have pick-up patterning will sit as separate layers of cloth simply joined at the edges. This can create a sort of ballooning effect over large areas.

The simpler little brother of the warp-faced double weave technique is warp substitution. With this structure, you won’t have to worry about layer separation in large unpatterned areas but most people do not like the awkwardly long floats that  form on the back of the cloth.

Another structure that allows motifs to sit on solid-color backgrounds is intermesh….

bhutan-collage-11It’s a warp-float structure that creates rather dense fabric….not something I would describe as light and flowing. The motifs can be very linear or curvy like the ones below.

intermesh with curved designPatterning with supplementary weft allows you to have a light piece of solid-color fabric patterned with soild motifs. The drawback is that in order to make the woven piece practical, the length of the weft floats needs to be limited and that will restrict the kinds of motifs you can create. Large solid-color areas will need to be broken down into segments of short weft floats.

tubular_band_on_ticlla_pieceAnd then, leaving warp-faced options aside all together, there is always tapestry technique…

greca design on a pillow coverThis is a pillow cover woven on a floor loom by a  member of the Hipolito family of Zapotec tapestry weavers in California. (Which reminds me…my weaving friend Dorothy is currently in Peru studying tapestry techniques with master weaver Maximo Laura… can’t wait to hear more about it).

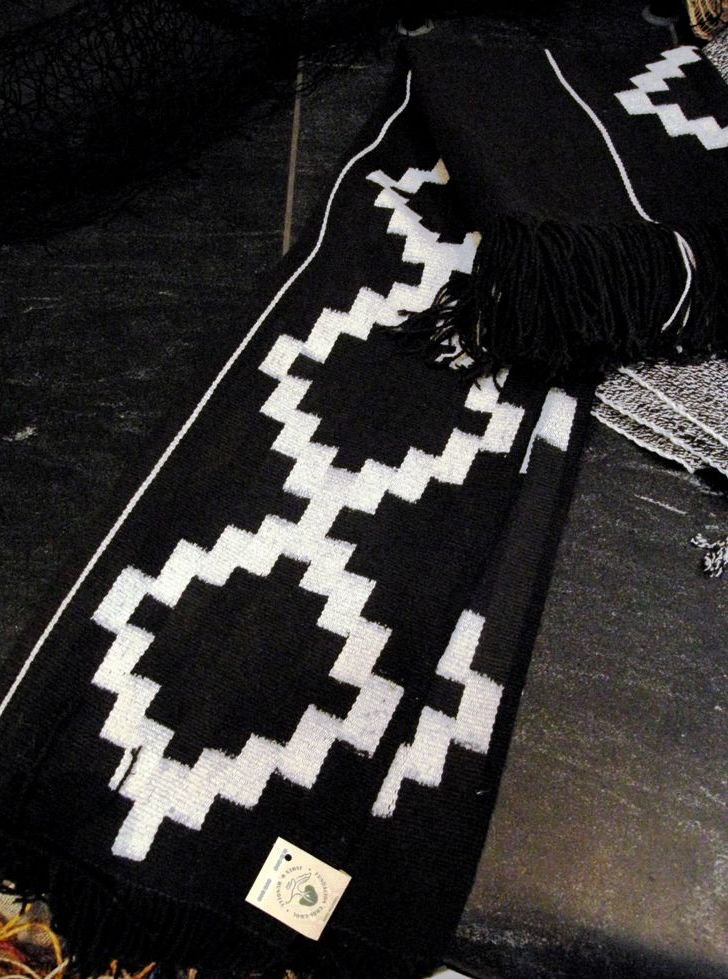
I love comparing the fine double-weave belt from Argentina, below, with its bold black and white pattern, to the precise black and white ikat work done by the Mapuche weavers of Argentina and Chile…two completely different processes that create superficially similar results.

OLYMPUS DIGITAL CAMERA

mapuche-ikat-11And so, I will finish this post this week by showing you a fabulous ikat poncho created by Argentinean master weaver, Guillermina Cabral, from Victorica, La Pampa province and thank the Ministerio de Cultura de la Nación Argentina, to whom the image belongs, for allowing me to show it to you here. I found it on the Facebook page of MATRA (Mercado Internacional de Artesanías Tradicionales de la Argentina). The page has other images of beautiful ikat work along with other exquisite handcrafts of Argentina.

10564839_1546978602191639_385201088_nSo, it’s all about process for me. But, concentrating too much on one particular part of the process can mean carelessness in others which are of equal importance…stupid pieces of cardboard! 😉



Backstrap Weaving – Poncho Envy

I am posting a bit early this week as I will be on the road for the next couple of days making my way to the cold north-east of the US and hoping that the latest dump of snow that DC just had will be the last. It seems like the kind of weather where a poncho would be of good use. What wonderful things are ponchos. I could use one as a blanket, roll it up to make a nice pillow, lay it out and sit on it or just wear it as it was meant to be.

I don’t have any desire to own one here in steamy Santa Cruz but, if my dreams come true and I can one day live in the Blue Mountains just outside Sydney, I think that I could make good use of one there. It even snows there sometimes. The question is, should I weave my own or buy one here in South America?

ponchis1-214x275I am excited about a new book that has recently been published on ponchos of Bolivia. One day before I am due to leave I find out about this treasure. I will have to wait until my return to hunt it down.

This article tells how Oscar Barriga spent 40 years collecting and studying over 250 ponchos in Bolivia.

He sold his collection to a museum in La Paz and has written a book which includes information he has gathered on their symbols, messages and their religious, civil and military roles. Barriga says that the poncho does not have any one country of origin.

I have certainly seen varieties of this item of clothing in the highland, lowland and low valley areas in the South American countries in which I have traveled. My friend Kathie, who works with weavers in the tropical lowland coastal areas of Ecuador, took the most wonderful picture of one of the gentleman there on horseback wearing a handwoven cotton poncho.

ponchos 1I was lucky to have been able to attend a talk on ponchos and rebozos given by Anne Rowe at the Textile Museum in DC some years ago. I am looking at my scribbled notes from the lecture in which I have written that poncho-type clothing  existed in the pre-hispanic times but the poncho, as we know it, was popularized by the Mapuche of central Chile and Argentina. The earliest known image of one dates back to 1648. The Mapuche people wove ponchos for themselves but also to sell. During the Conquest they adopted Spanish customs including riding horses. Ponchos proved to be very useful for this activity.

An image from the 1730s that we were shown during the lecture shows a Spaniard wearing a poncho while watercolors from Peru in the 1780s depict both Spanish and indigenous horsemen and musicians wearing them. During the War of Independence in the early 1800s ponchos were worn by Generals to indicate that they were South American and not Spanish. Some of the designs were Spanish-like while others were more Mapuche-like.

mapuche-ikat-2The black and white ikat ponchos woven by the Mapuche people are worn by those who hold positions of great power and prestige. I imagine that they are quite a weight to carry around as I was able to feel the rather thick and coarsely spun wool in the example in progress above.

It was wonderful to see and touch the incredibly fine vicuña ponchos that were brought from Belen, Catamarca in Argentina to the Encuentro de Tejedores in Cusco in 2012.

poncho-of-catamarca-argentinaThe handspun vicuña fiber has to be carefully selected to find tones of equal value for each piece. The ponchos are woven on floor looms and the fabric measures 2 meters by 1.30 meters and weighs only 320gms.Two people swing the beater and they need to make sure that they beat with exactly the same amount of pressure on this fine, light fabric.

An image on Facebook from this page shows a stunning poncho being made in Londres, Catamarca on a floor loom. This Facebook page shows other beautiful examples of Graciela Salvatierra’s work.

1463897_479549392162132_910966833_nThe Salasaca family with whom I stayed in Ecuador had their son dress up in the typical poncho that he would use for special occasions for a photo. I like this simple black wool poncho. Juan would otherwise be dressed in jeans and tshirt. The Salasaca ladies, on the other hand, wear their traditional outfits every day although they have other “everyday” hats that they use rather than the rock hard ones that you see in the picture.

salasacan-ponchoI managed to sneak a snap of a Cañari gentleman in Ecuador out in his Sunday best ikat-patterned poncho in the town plaza.

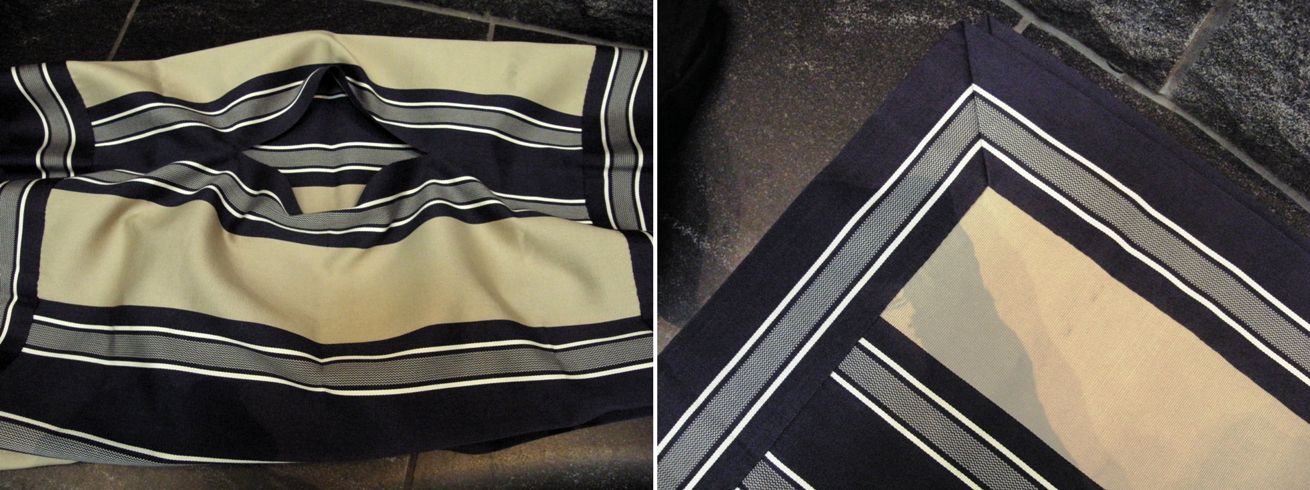
canar-poncho-and-beltsMantas and chamantos are made by weavers in the town of Doñihue, Chile and worn by the Chilean horsemen known as huasos. They are silky smooth and tightly woven. It is easy to believe that they could be virtually water proof.

mantaI imagine that the striped mantas provide an more economical alternative to the pick-up patterned chamantos, like the one below, which I am told sell for up to $3000 each.

chamanto

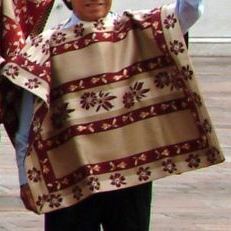
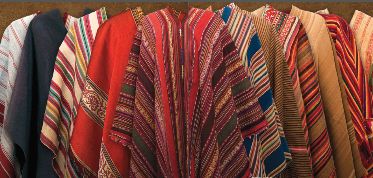
I love simple striped ponchos….so elegant. You will see that many of the examples in the picture from Barriga’s book above are patterned with stripes in  wonderful arrangements of widths and colors. The weavers of Tarabuco in Bolivia create cloth covered with tiny intricate figures which the women use for overskirts and bags in which to carry their coca leaves. However, the cloth that they weave for the men’s ponchos is beautifully simple…(you can see the pick-up patterned cloth in the background.)

Trabuco ponchoAnd of course, there is nothing wrong with a poncho that has been covered with pick-up patterning. Men in the Peruvian community of Chahuaytire in the Cusco region of Peru weave their own cloth for ponchos decorating them with motifs using supplementary warps.

chahuaytire ponchisThe more I read about Oscar Barriga’s book the more I want it but at the same time, the more I am convinced that its price tag will be very high. In fact, it is not clear to me whether the book will even be made available to the public. A more affordable option, if you would like to know more about ponchos in South America, is this book which was published in Argentina  and is available in English…..

??????????????????????In the meantime, I will think about my poncho and how I would lke to weave it. Yes, while writing this post I have decided that I should weave my own…one of these days. I have many hours of airport waits and bus rides coming up in the next few months in which I can sketch some ideas. 


Backstrap Weaving – Time for even more Play!

The fall trip is almost over…time to gather and bag my loom bars, fold the backstrap, wind up all the little balls of yarn, stash the beaters and sticks, and stuff them all into the wheely bag ready to fly home….but there is still a little time to play some more!  Now I am home and looking back. I was too busy playing last week to even do a blog post 🙂

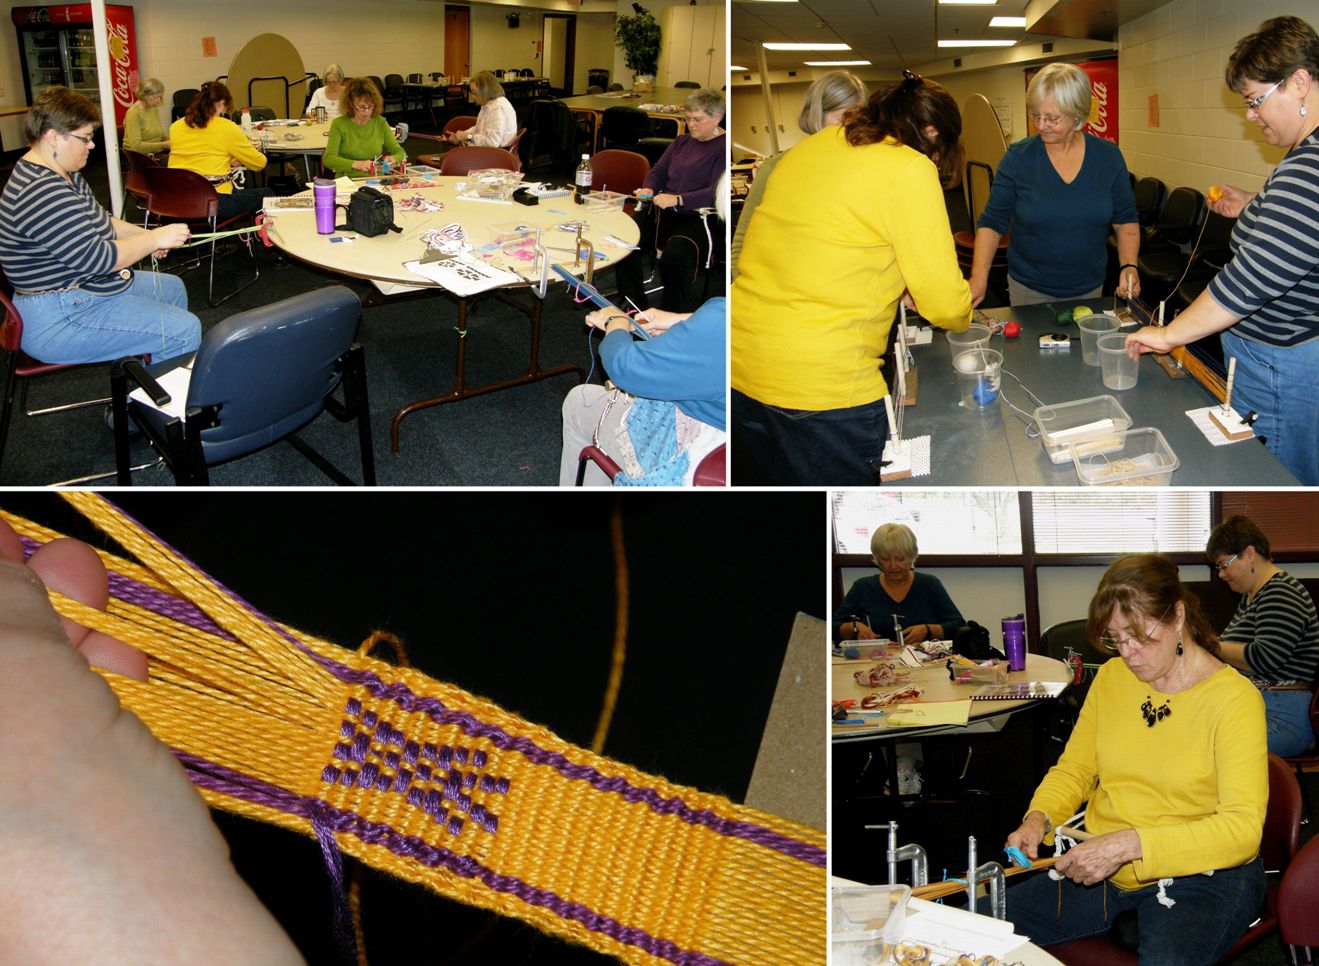
The last days were spent backstrap weaving with friends in Maryland.

It was nice but confusing seeing many familiar faces at the guild meeting. Now…. where did I meet these folks…was it at Sheep and Wool last year where Carla and Mary wove with me in the bunny barn or at the guild meeting I attended?

Weaving in the bunny barn at MD Sheep and Wool last year

There was one very familiar face…oh yes, that was Peggy who wove with me in Pennsylvania last spring. On top of that there were familiar names, if not faces, of people who have commented on my blog or Facebook page.

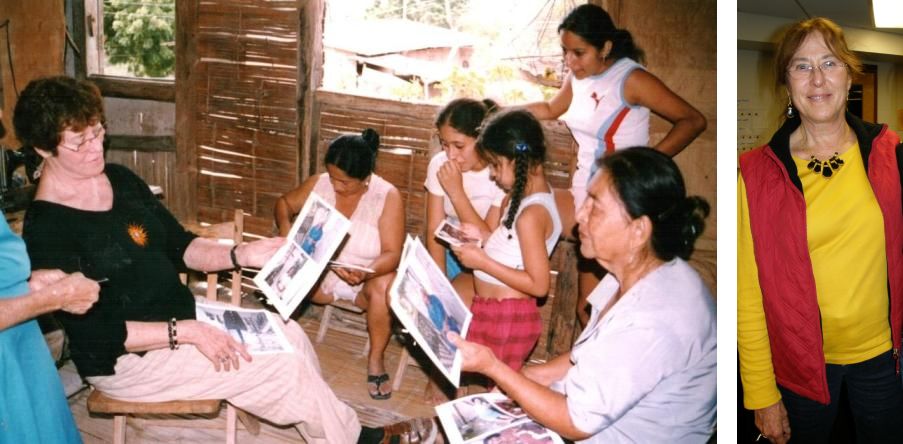
And then there was Kathie! I spent three weeks with Kathie in coastal Ecuador in 2007 with the family of cotton saddlebag weavers that I have told you about here before. Although we have kept up a regular email correspondence since then, we haven’t been able to get together in person until now. She came along to weave with us.

Above left, you can see Kathie on our visit to Ecuador in 2007 showing photos that she had taken when she first met this family back in 1976 and, above right, at our  backstrap weaving get-together.

I unwound with my friends  in their home in Maryland and made plans for my last week in DC. Claudia is a weaver and Janet is a knitter so there were still plenty of fibery things going on around me.

I learned about rag rug weaving from Claudia in her basement studio where she is in the process of making two 9-foot commissioned rugs. I was there to celebrate the finish of the first one. It’s quite a process!…cutting strips, sewing them together end to end, ironing them, winding them onto the long shuttles. I was glad to be able to help at least with the sewing and ironing and the sewing was novel for me…only my second time using a machine.

While the machine is definitely the way to go for sewing those hundreds of strips together, I still prefer hand sewing for my little backstrap woven projects. When I arrived home, I cut the wildly colorful striped demo warp, that I had been carting around the US, off the loom. It had served its purpose, I didn’t really like it and I couldn’t face weaving any more of it. However, it didn’t go to waste as I was able to sew the small piece that I had woven into a new sewing kit pouch.

I folded it in half lengthwise and sewed it together so you only see half the colors at any one time…a little less jarring than the way it looked with all the stripes together on the loom. It is the perfect size for storing tape measure, scissors, needles, buttons and thread. I still have to finish off the sewing on the zip and you can see that the pouch is without the usual baubles and embellishments that I like to add. I think I will leave it this way.

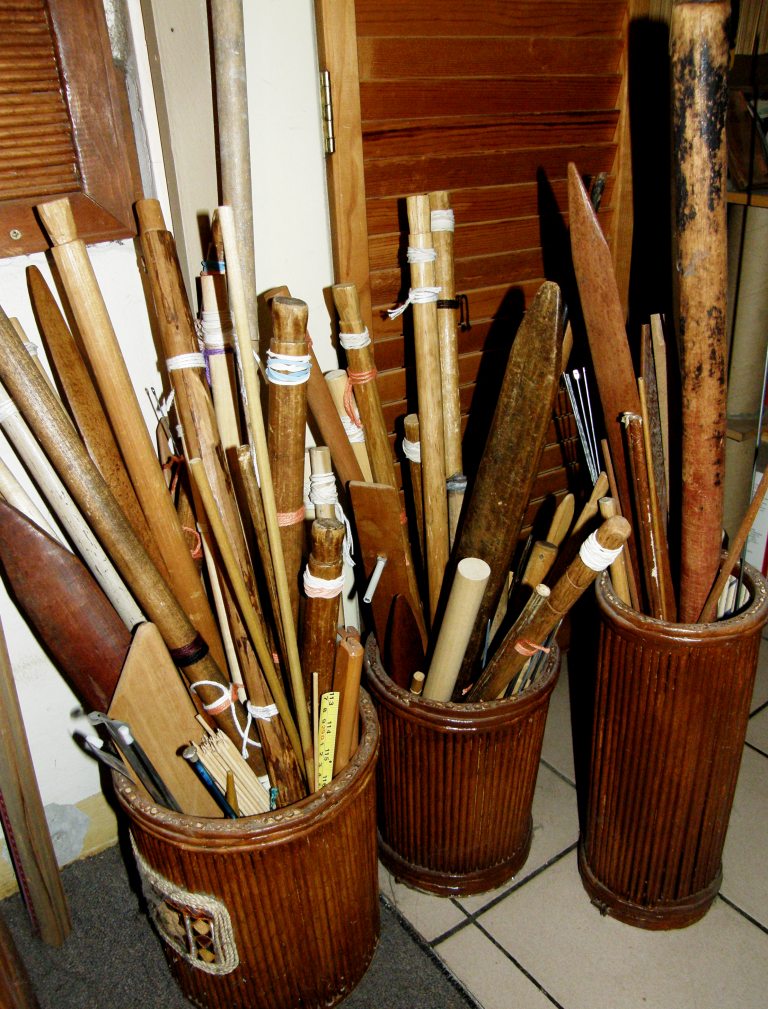
Now I have 26 loom bars standing up in their bins waiting for new warps and I have at least as many ideas floating around in my head for future projects!

But anyway… back to play time in DC.

A couple of emails arrived while I was at Claudia’s place. One from Mary told us about a Chilean handcraft exhibit at the National Museum of the American Indian which would include weaving demonstrations by a Mapuche weaver.

The other was from Peggy who has woven with me a couple of times and who is a docent at the Textile Museum.

She offered to guide me through the current Kuba textiles exhibit on Wednesday which also happens to be the day the museum library is open. I jumped at the opportunity.

Perfect!

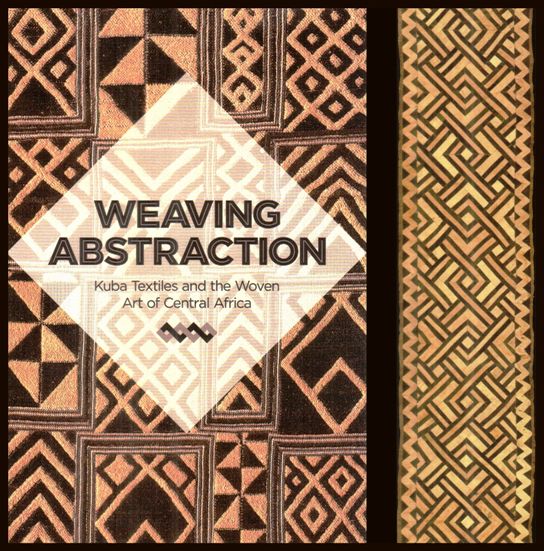
Of course taking photos of pieces in the exhibit is not permitted but you can see above some the publicity material that the museum has put out showing a piece of raffia cloth on the left and bark cloth.

The picture at left of a Kuba raffia cloth weaver in the Congo is on Marla Mallett’s website where you will also be able to see quite a few images of raffia pile and embroidered cloth pieces.

The Kuba Kingdom is a confederation of several groups of people in the area now known as the Democratic Republic of Congo. They were nomadic until the 1600’s and absorbed textile traditions from the Kongo people of the west coast as well as from the Tutsi and Hutu groups in the east.

Men weave the plain-weave panels using fiber from the raffia palm. The cloth is then wet and pounded to make it flexible. The insertion of the colored raffia in a pile technique is the work of the women. The raffia is not knotted. It is simply inserted under warps and/or weft and held in place by the tightness of the weave. The inserted raffia is then brushed with a knife which splits the fibers and creates a fuller more plush texture. I found myself surrounded by bold  labyrinth-like and swirling patterns.

The women also embroider along the edges of the pile sections. I was able to look at the back of the pieces that were on sale in the museum shop. Neither the inserted raffia nor the embroidery shows on the back of the cloth.

One of the uses of the cloth is for ceremonial skirts that comprise many panels sewn together and which are gathered around the body. Smaller panels are used as overskirts by high ranking women while other small pieces are status cloths, amassed as symbols of wealth and nobility.

There was bark cloth from the Bushong people, hats, caps and headdress of titleholders from the Kongo people that I can’t even begin to describe.

I saw a delicate cape thought to be from Angola that looked like it had been made in sprang, tie-dyed cloth using sticks tied to the cloth to create the straight lines in the patterns, patchwork, reverse applique, embroidery and ornate belts decorated with beads and cowrie shells.

I loved the boxes and baskets with shaped lids which immediately made me think of the basket maker from Burundi with whom my friend Joan is working in Massachusetts. (see her piece pictured at left).

Wouldn’t it be wonderful if she could be taken to such an exhibit?!

I bought the exhibit catalog and would love to use some of the motifs in double weave. That museum shop is a deadly place…I came away with the catalog as well as with Ann Rowe’s latest work on costume in highland Ecuador and a collection of papers on Andean weaving on sale for $5 while all the time wondering how in the world I would manage to squeeze this load into my luggage!

The next day was all about Mapuche weaving at the National Museum of the American Indian at an exhibit called Chilean Rakizuam.

Rakizuam is the Mapuche knowledge of being, whether it pertains to the environment or an understanding of life that has been passed from generation to generation.

It was quite  nostalgic for me listening once again to the very distinctive Chilean accents of the exhibitors and the accompanying folk music.

There was even a gentleman there from Punta Arenas, the country’s southernmost city, where I lived for five years.

He brought baskets made by the descendants of the Yagan people as well as his own jewelry which combines pieces of coiled basketry with silver.

When I lived in Punta Arenas there was one elderly pure Yagan woman still making the baskets who has since died. I still have one of the baskets that I bought back then.

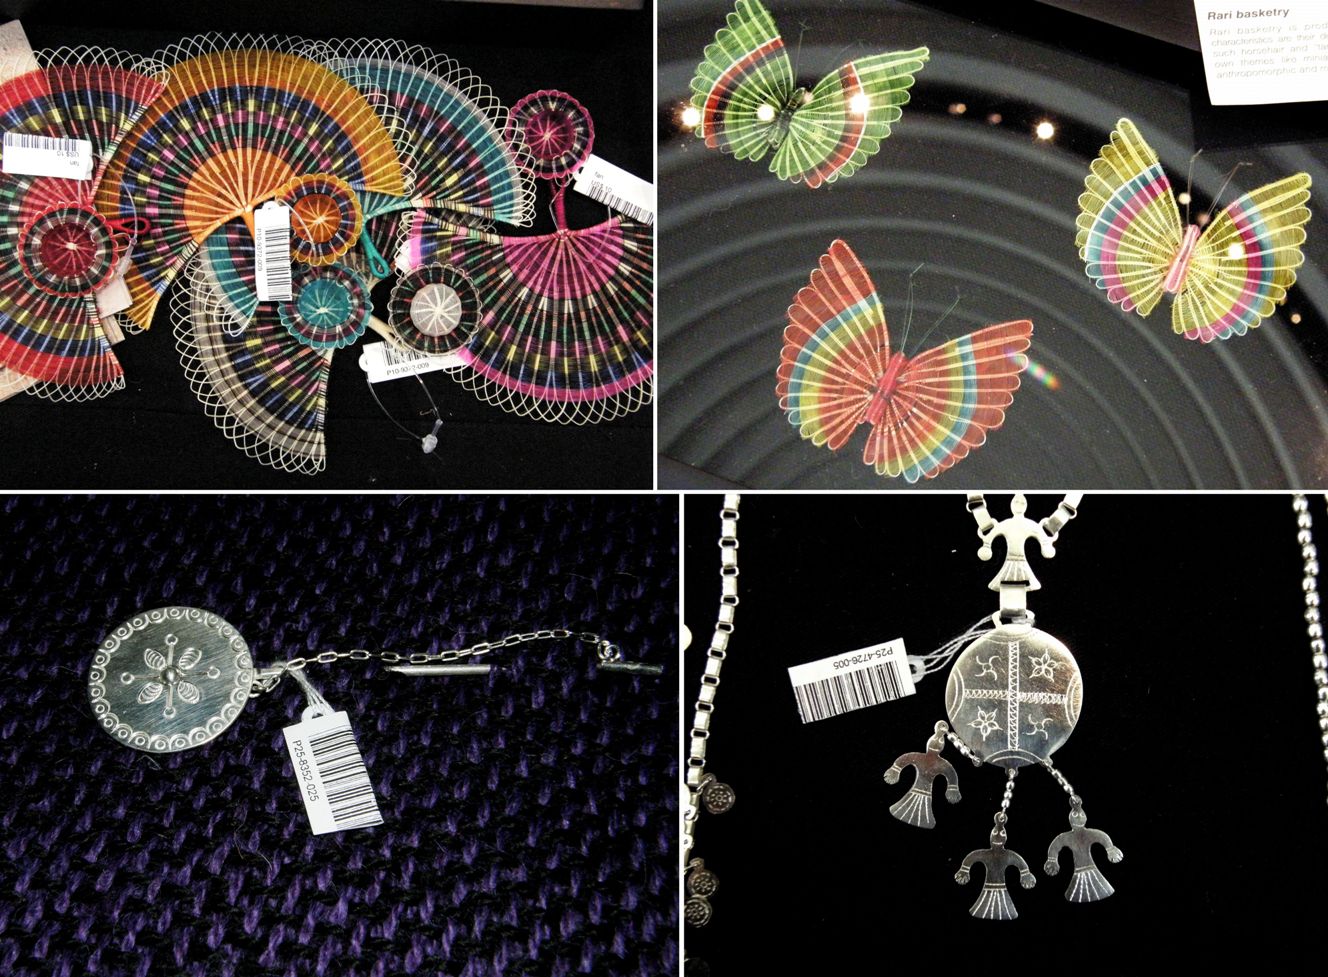
Other displays included pieces from the central zones of Chile south of Santiago…silver work with Mapuche motifs forming pendants and shawl pins as well as almost transparent figures woven from the hair of horses’ tails. The sturdy ribs in the figures are a plant fiber and the finer weft material is the crin, the hair of the horse or ox. And now I know that ”crinoline” according to Wikipedia was originally a stiff fabric with a weft of horse-hair and a warp of cotton or linen thread.

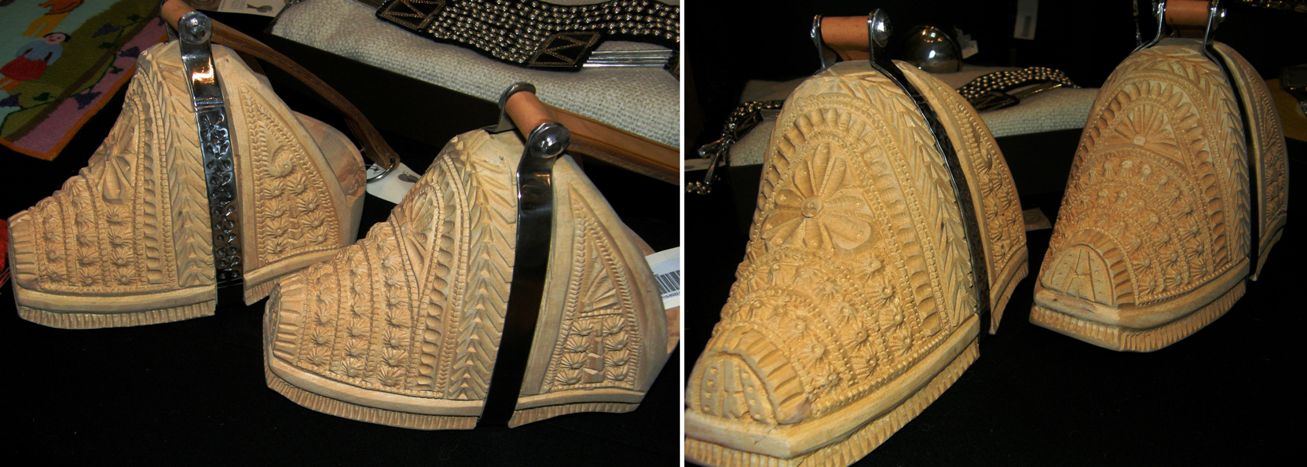
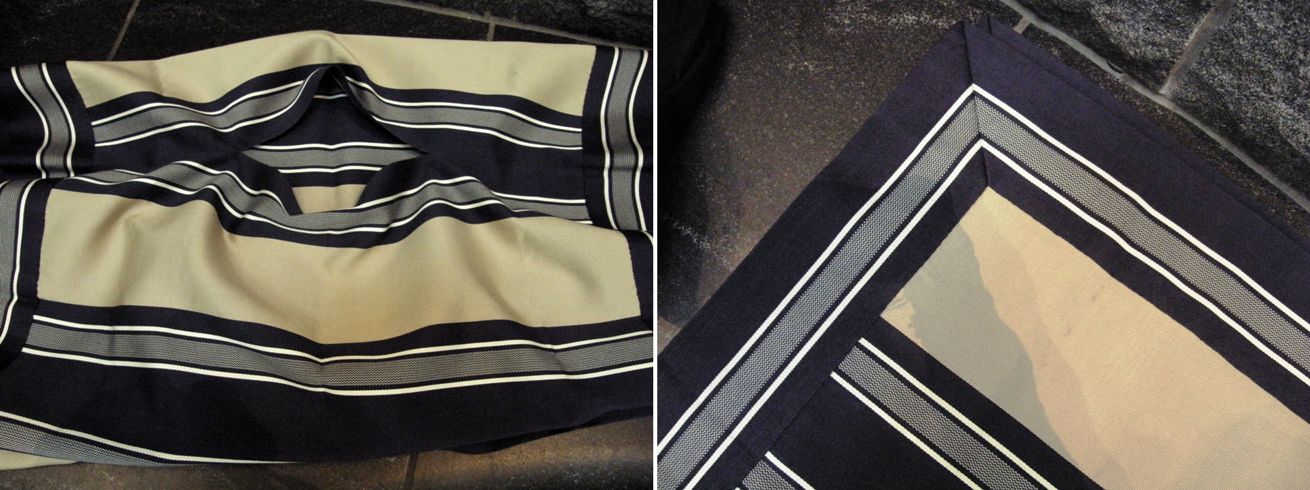
From the central zone of Chile come pieces, such as the carved wooden stirrups above, associated with the huasos, the Chilean horsemen who also use a finely woven silk poncho known as chamanto. The exhibitors brought one of the striped examples which I have been told is called manta with the name chamanto being reserved for the ones that have been decorated with pick-up patterns.

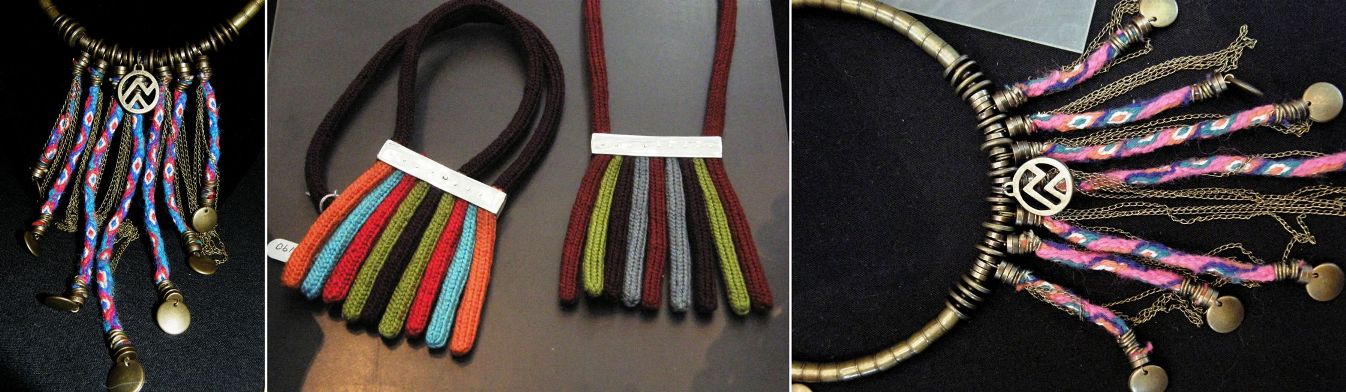
Representatives of the northernmost region of Chile brought jewelry which incorporated traditional weaving and looping techniques. Now there’s another use for the tubular bands!

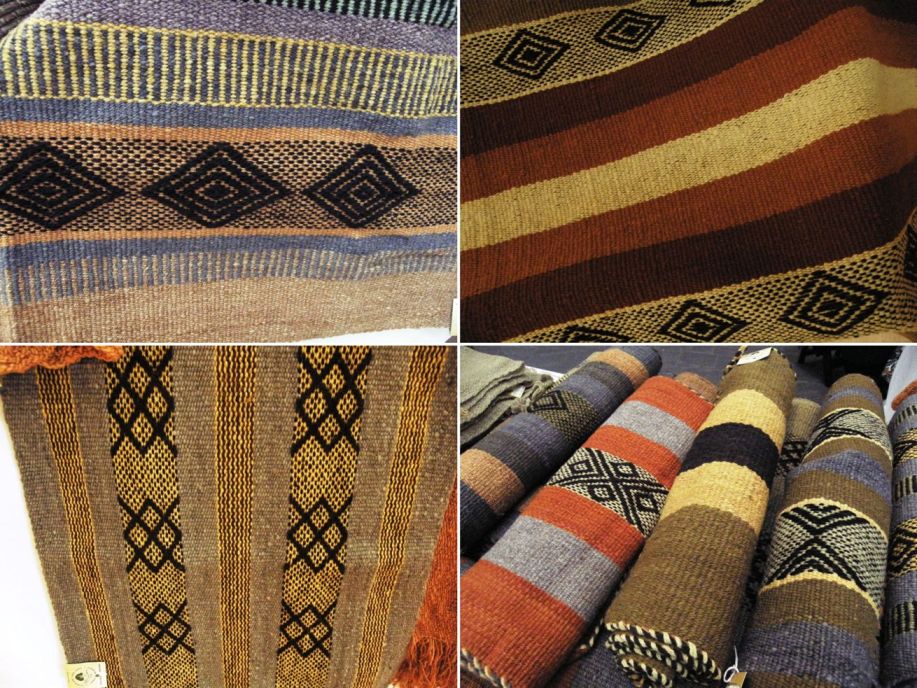
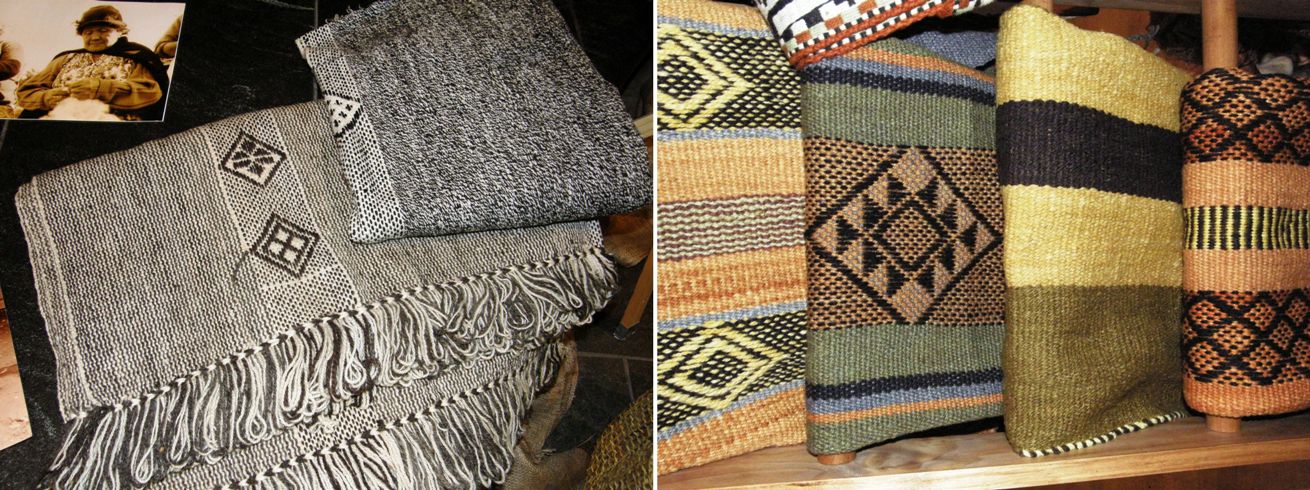
There was a variety of shawls, pillow covers and other woven household items as well as knitted apparel made with handspun and naturally dyed wool by Mapuche artisans.

And the best part…a Mapuche weaver, Marta Isabel Huitraiñan Aillapán from Carahue, had been brought by the Chol Chol Foundation to demonstrate her weaving skills.

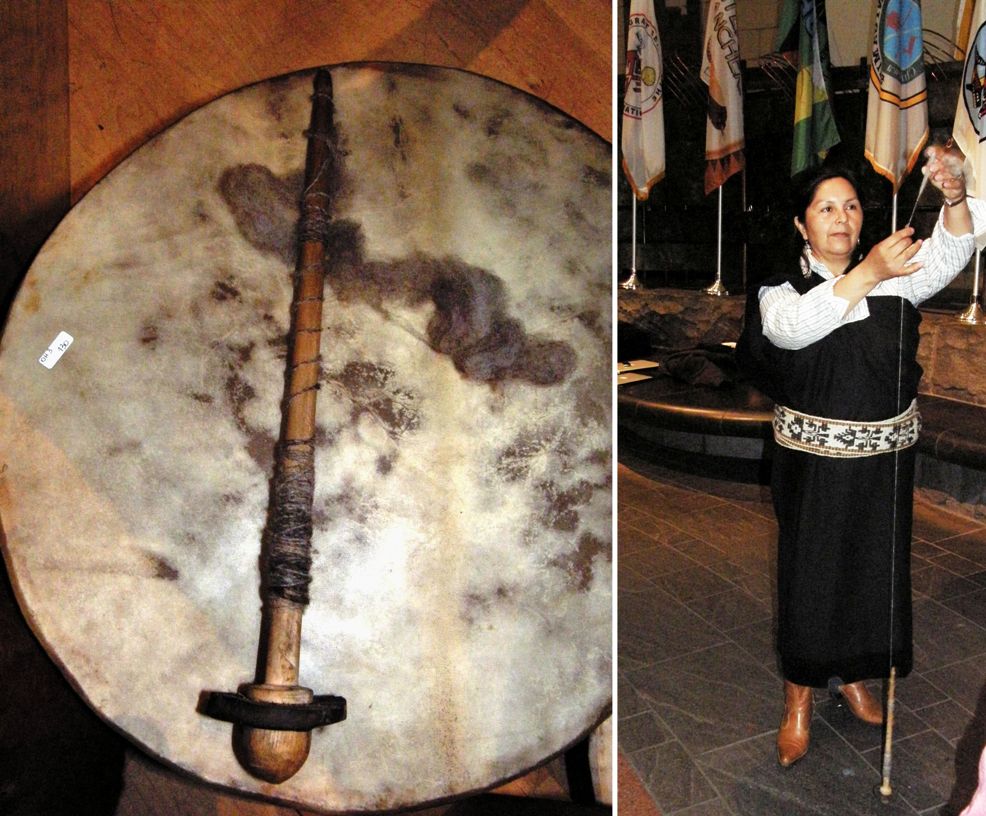
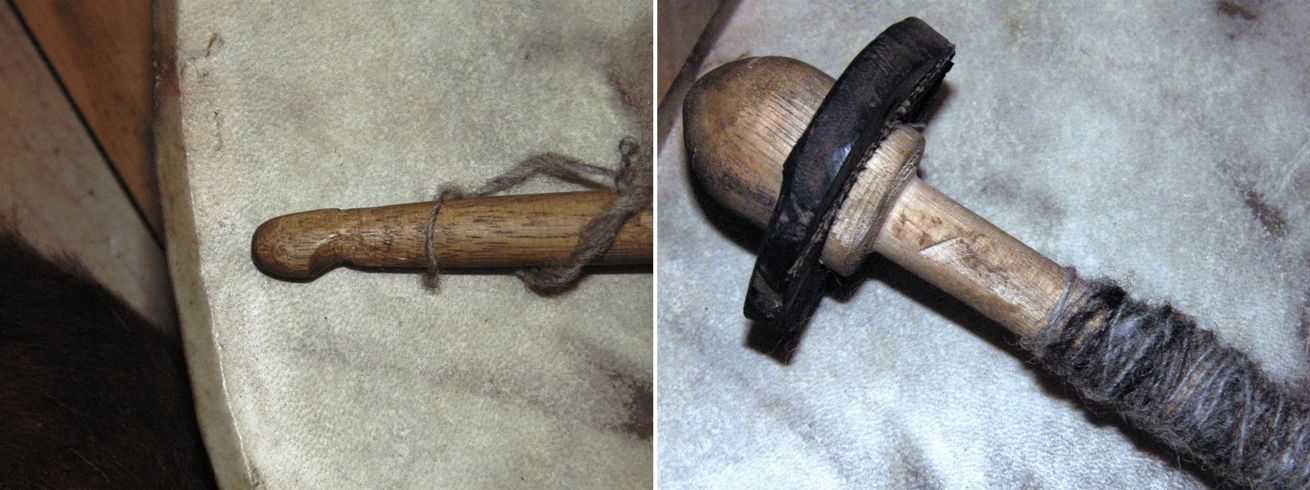
While looking at the displays of woven pieces I spotted a spindle in one of the baskets that had been made for Marta by her son. She was quite happy to give me a quick spinning demonstration.

And here is a video…soft lighting in the exhibit area has made the footage a little fuzzy.

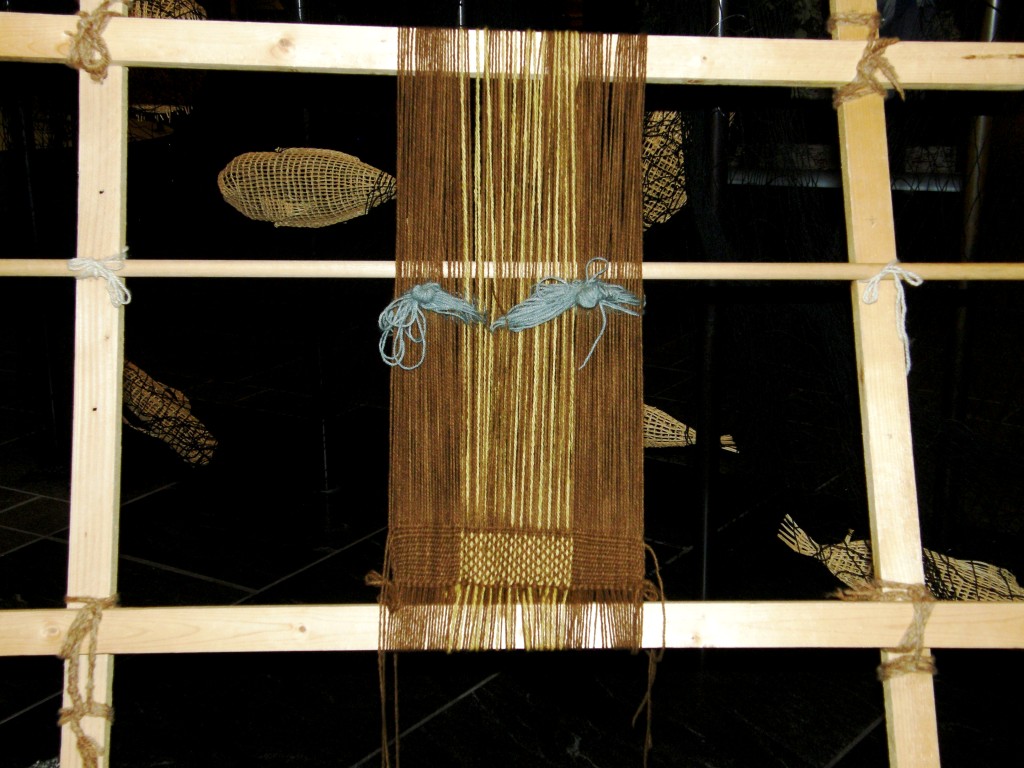
And there was the leaning vertical loom almost ready for Marta’s demonstration. You can see that the shed rod is fixed in place lashed to the posts of the vertical frame. The string heddles were made and tied in bunches to transport the piece to the US. They will later be put on a heddle stick.

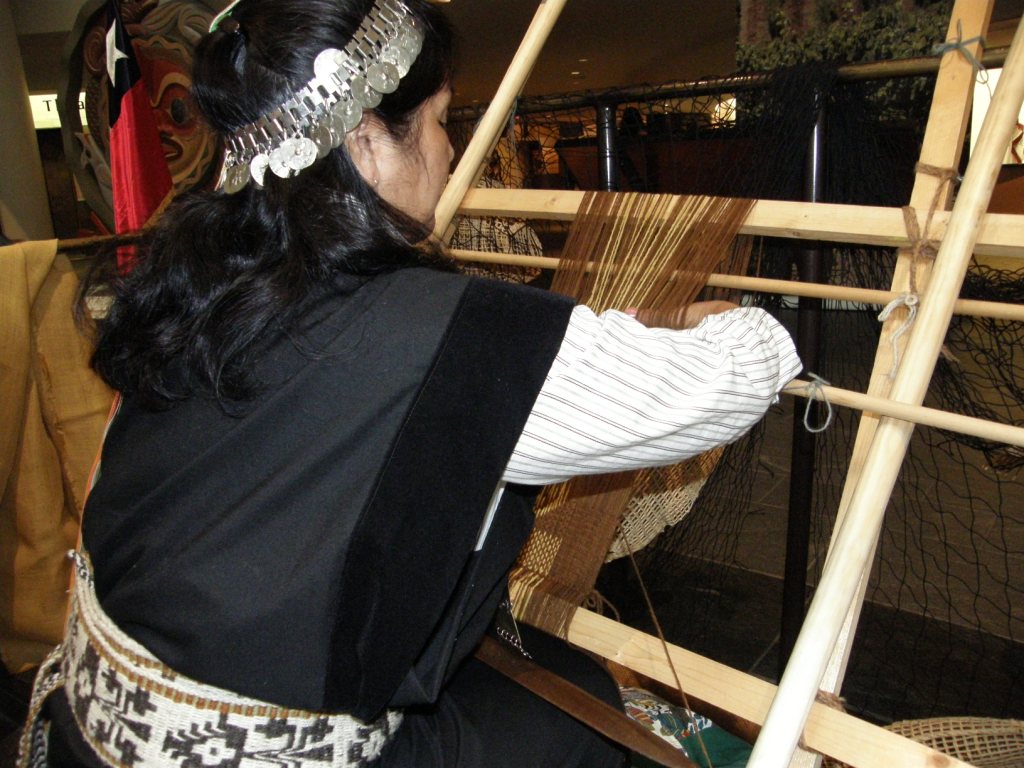
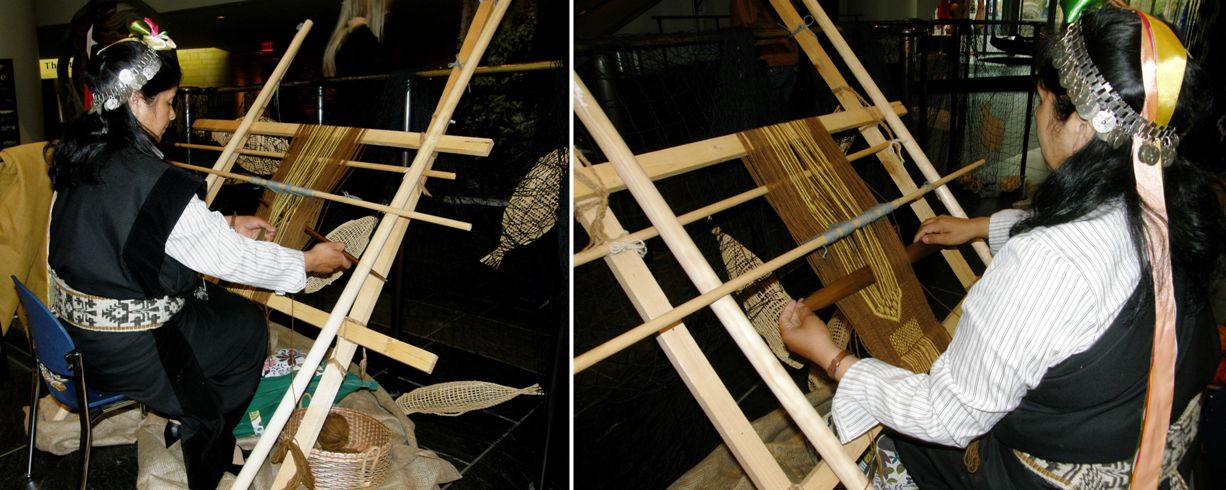
In the picture above, Marta is lifting the warps on the shed rod with her hands and clearing them through the heddles.

You can see that the heddle stick is now in place and is protruding from under her right arm. The heddle stick rests against poles which are placed alongside the vertical posts of the loom frame which means that the warps in the heddles are in a permanently semi-raised position. This means that Marta does not have to pull on the heddle stick in order to raise the warps in the heddle shed. By pushing down on the warps held by the shed rod, just enough space is created to allow her to get her fingers under the warps in the heddles and pull and fully raise them.

You will see the process (executed very quickly!) in the following video:

You see that she holds the shed open with the sword in her right hand while picking up and dropping out the supplementary warps with her left. The tension on the warp and her beat are relaxed.

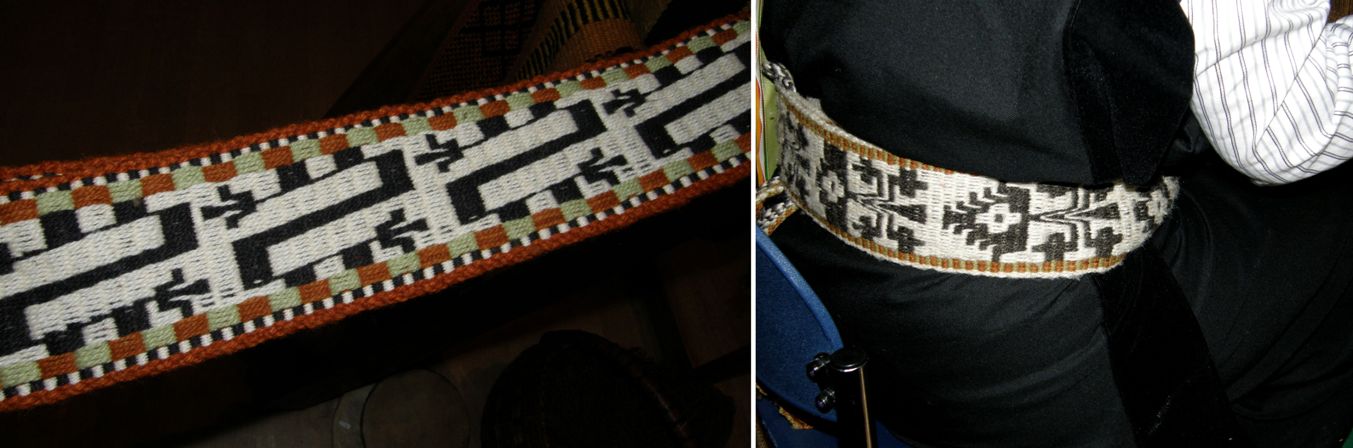
The next day, after warping and weaving the supplementary warp piece above, Marta allowed me to help her warp for the complementary warp technique that is used to weave their belts. With the warp we made, Marta planned to weave a band with lettering (RDO DE CHILE…recuerdo de Chile, souvenir of Chile). I wove the letter “R” with her guidance and then, sadly, it was time to go. And once again twining enters the picture. Marta starts and finishes her woven wall hangings with weft twining before braiding the warp ends or leaving them as fringe.

On this narrow complementary warp piece we did not use a heddle stick but tied the heddles together in bunches instead and pulled on them to raise the warps.

Marta was a great teacher for me – very patient –  and says that she loves to show the process to people who are really interested. I don’t know how many times she answered the question from onlookers “How long does it take you to weave something like that?” I know that question well!!

I was in very good company with Marta on the second day right up there at the loom! On the first day I was very much occupied with taking videos and photos when I suddenly realized that I should probably step back so as not be in the frame of other onlookers’ pictures. It was then that I noticed another particularly interested onlooker with camera in hand… Ann Rowe. So, spending time with Ann made day one even more special.

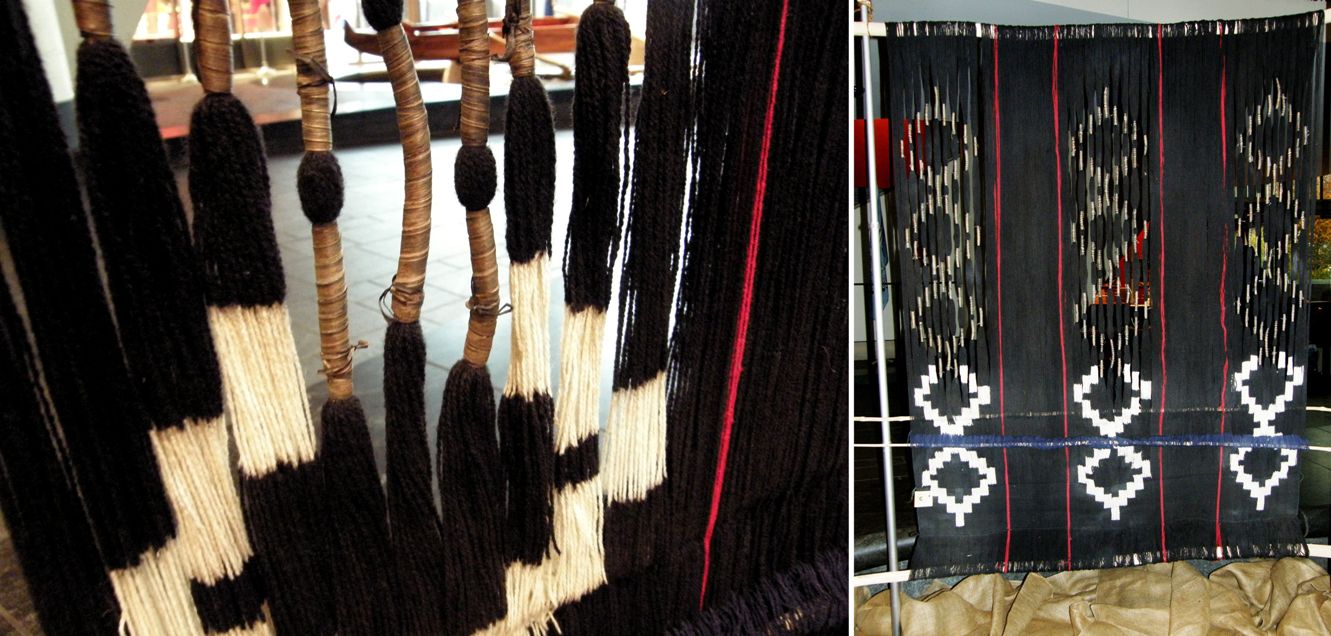
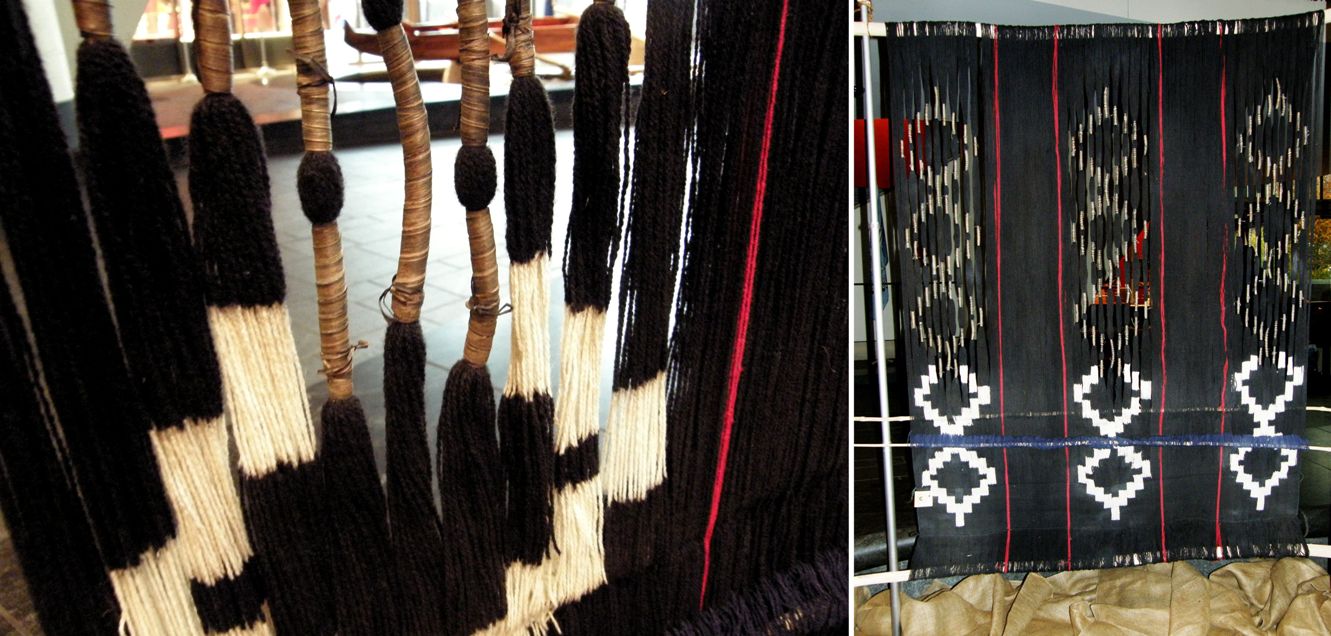
Another great opportunity at the exhibit was being able to see, for the first time, one of the ikat patterned poncho pieces on the loom.


I have always wondered just how the Mapuche weavers stop the warps from moving out of place while they weave ikat patterned pieces.

They manage to reduce the characteristic blurry feathered effect on the edges of the designs  to an absolute minimum. The result is beautifully sharp white figures on the dyed black background.

The set-up on the loom certainly didn’t give away any clues!

I was told that of the one hundred and fifty weavers that belong to the Chol Chol Foundation cooperative only one knows how to make the ikat-patterned ponchos.

One thing  that was missing was the double weave belts. I guess I shall just have to take myself off to Chile to see those. And happily now I have a contact in the Mapuche community. While I have been to Mapuche weaving exhibits before in Santiago, I have never been to one where I have been able to have so much interaction with the weaver.

It would also be nice to visit with Celinda and Isobel, the Aymara weavers, that I met at the weavers’ gathering here in Santa Cruz earlier this year. And, if I need any more reasons to justify the trip, I could also go to Doñihue to learn more about the chamantos.

So, here I am at home in Santa Cruz trying to get back into a routine, blogging one day earlier than usual to make up for the missed post last week. I send a big hello and hugs to all the people with whom I wove on this latest US trip and to all the people who so kindly took me into their homes.

Now to decide what to warp up and put on the first pair of those 26 loom bars!