Backstrap Weaving – Inspiring Ikat

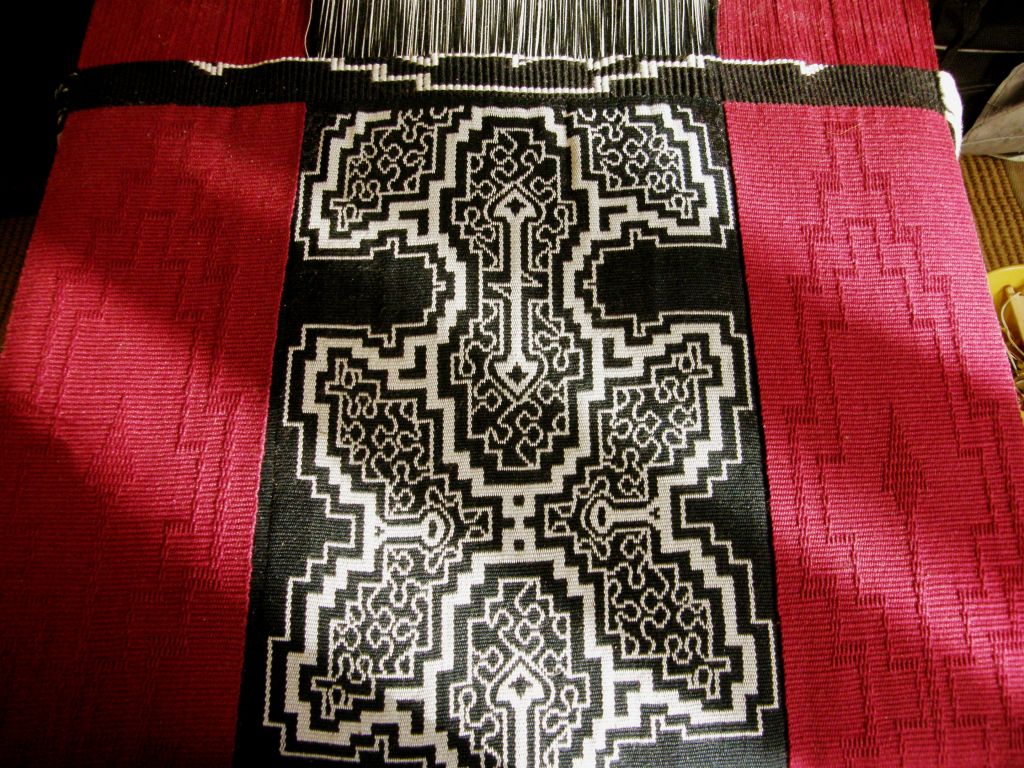
sunlight on red panels backstrap weaving“Question of the Week” on the Warped Weavers Forum asked us if our finished projects always measured up to what we had envisioned. It is interesting for me to think about this and see how my ideas about the larger projects on which I have been working lately have evolved during the long process of weaving.

I have been spending months planning and weaving these wall hangings, often interrupted by a break of several more months while I travel.

I look back at my notebook with its sketches and glued-in pictures and can see how far the finished pieces sometimes stray from the original idea.

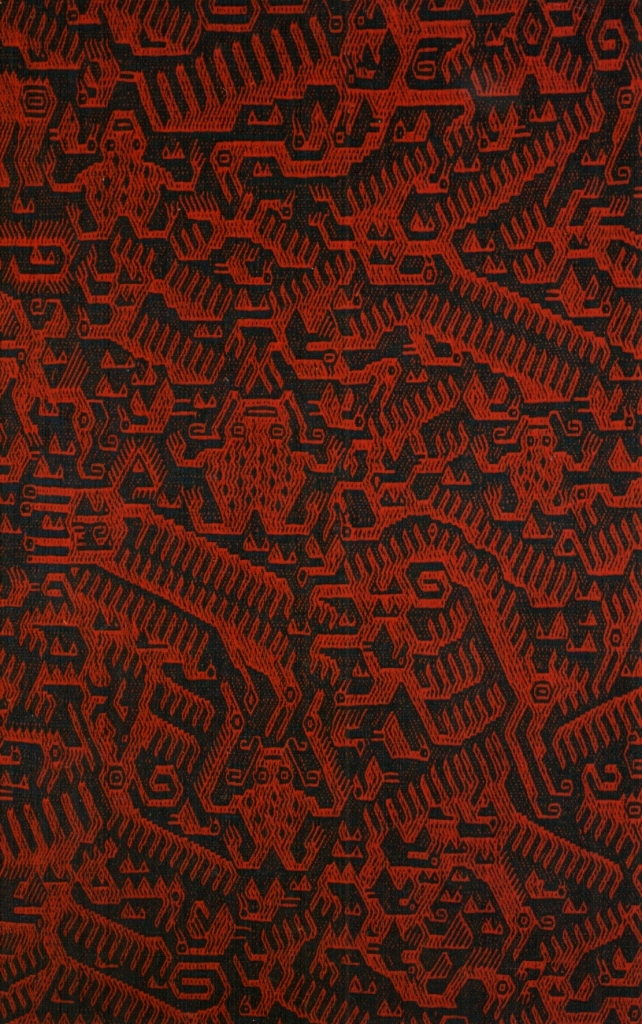
Sometimes it is a technical hitch that does not allow me to create what I had envisioned. For example, I had wanted the Shipibo-inspired piece to comprise only curves but could not manage to form nice smooth curves with the thicker solid lines in double weave. That had almost caused me to abandon the idea. But, I went with a strong angular outline filled with finer curves instead and I really like that contrast.

backstrap weaving Bhutan bagSometimes, in the middle of a project something will catch my eye online, or someone will show me something and I will want to add those ideas to the mix.

That is what happened with my Tales of the Sub-Continent fabric which started with a Bhutanese-inspired motif and spread to Afghanistan, Nepal and beyond.

Sometimes it works, sometimes it doesn’t. When it doesn’t, it goes into the closet. And this is one of the many cool things about backstrap weaving…my half woven projects can be easily removed, still on their metal rods, from the loom bars and stored. I can discover a project months later, pull it out and wonder why on earth I hadn’t liked it! Then it can be easily lashed back onto the loom bars and continued..

It’s like in the old days before digital cameras. I never wanted to process my rolls of film until at least three weeks after my trip. If I got impatient and processed them straight away, I would always be disappointed with the shots. They didn’t live up to my fresh memories of the things I had seen on the trip. The colors would not be as brilliant and they wouldn’t have captured the mood.

However, just a few months later, they would look fantastic as my memory of how things had looked and felt faded.
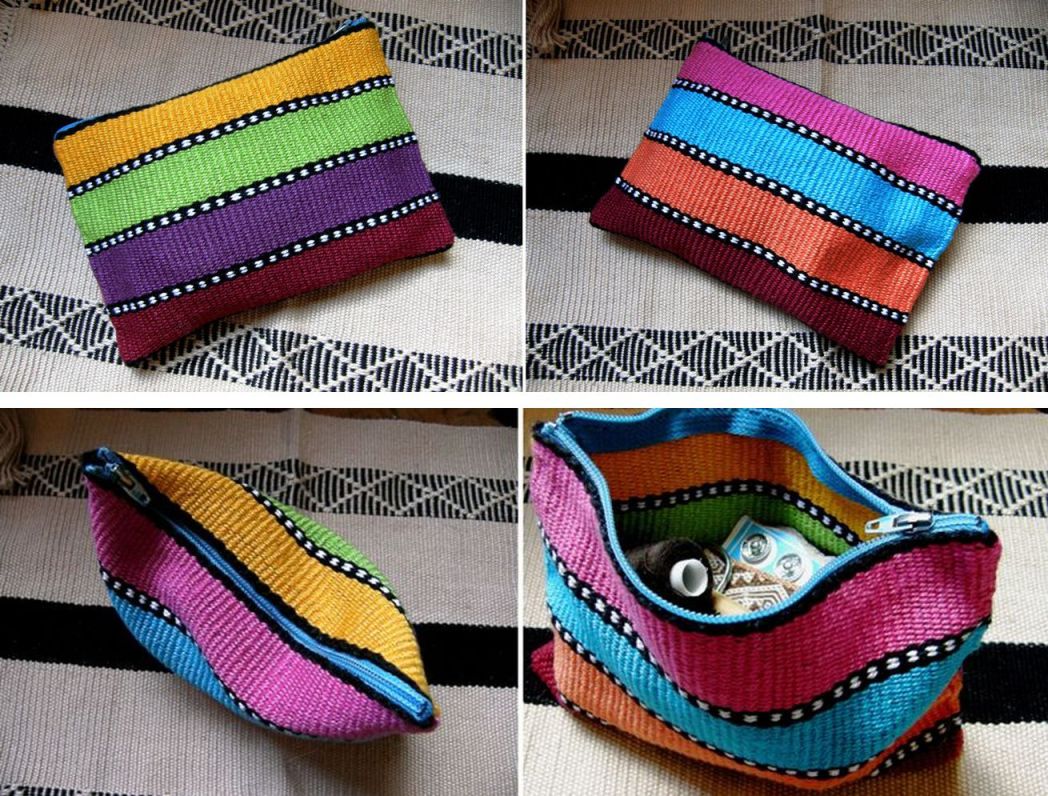
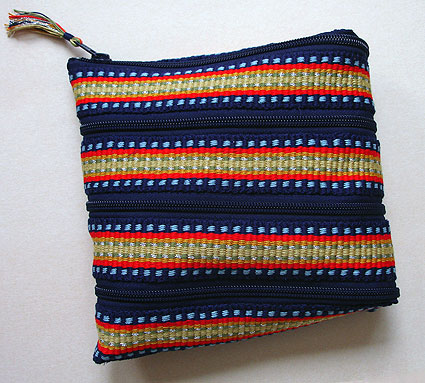
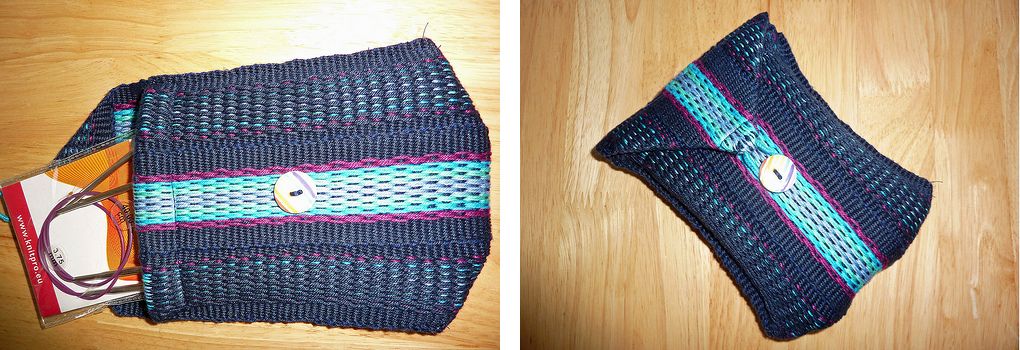
striped-pouch-x-4I detested the above fabric when I first wove it. It was a demo warp that I had hastily put together before a trip. I wanted something fun, bright and cheery in place of the black that I am so often using. It didn’t come out as I had envisioned and I didn’t even take it out of my bag to show anyone as I thought it was so ugly. Now I love the fabric, the original idea has been long forgotten, and the little sewing kit pouch is really useful.

Guatemalan supplementary weft sampler overviewThis fabric has also been living in the back of the closet for the longest time. I wove it to practice what I had learned in Guatemala shortly after returning way back in 2008. Now I love it and need to make something from it.

There have been a few things that simply didn’t work as far as I was concerned and those things got tossed. But, I have to wonder how I would feel about them if I were to uncover them in the closet today. If there isn’t even a picture of it, it means that I must have really hated it!

All this is leading up to my telling you that I have been walking by last week’s forlorn, rejected ikat piece, which has been sitting on a bench in my bedroom all week, and finding myself eventually wondering why I hadn’t liked it. Of course, there’s a whole blog post dedicated to why!  But, I finally decided that I could unweave some parts and improve it somewhat. So, here I am weaving away on that piece again…and not just to get it of the loom and learn more lessons…no, it’s because I actually like it now despite its flaws.

I spent most of the week washing yarn to take of the wax finish, setting it up on a frame and wrapping it for a new slightly larger ikat motif.latest ikat projectI was very excited about this new larger motif and really wanted to weave it. However, I had to face the fact that I didn’t have any black cold water dye left. In the end, I couldn’t resist trying to achieve black by mixing  colors.

Well, it looked black in the bath and even looked black while it hung to dry. However, the rinse water certainly wasn’t black and the dry cloth has a purply reddish glow.  It is kind of like the color of those big, fat, juicy, ripe mulberrries on the tree. They look so black and shiny but your hands and lips stain purply-red (which is why my brother and I could never get away with eating from the forbidden tree in our backyard as kids). I almost unwrapped it but I will wait until I return from my next US trip with fresh supplies of dye and I will overdye this warp black. That warp has to go on the back burner for now. What will be interesting, will be seeing what colors have already seeped under the wraps.

Here’s some online inspiration for more and more ikat experiments…lots of reasons to keep at it!

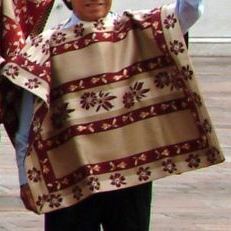
Photo used with the permission of the Ministerio de Cultura de la Nación Argentina. The ikat poncho was woven by Guillermina Cabral.

Ponchos on and off the runway….

Don Juan Millain shows a ponch woven by Norma Millain. Photo from the Facebook page of MATRA - Ministerio de Cultura de la Nación Argentina.
Don Juan Millain shows a ponch woven by Norma Millain. Photo from the Facebook page of MATRA – Ministerio de Cultura de la Nación Argentina.

And on the loom….

Graciela Salvatierra's work in Catamarca, Argentina from the Facebook page of Ponchos Artesanales  Salvatierra ll
Graciela Salvatierra’s work in Catamarca, Argentina from the Facebook page of Ponchos Artesanales Salvatierra ll

And here’s my wee, wobbly project being slowly fixed…straightened on one side, and now with white embroidery floss for supplementary weft which looks so much better than the creamy colored silk I was using last week.

ikat

Chris Buckley, in Beijing, has shared many images with me over the years from his vast collection of textiles. I was happy to find his Art Southeast Asia page on Facebook recently, via a weaving friend, and see the picture of Li ikat weaving that he had posted. He has just had an article on these pieces published in the September issue of Textiles Asia (I have a copy coming my way). There were a lot of tiny wrapped sections in his piece! and the seeping of the indigo into the white has created a nice effect. Using handspun cotton…now that’s a whole other trip.

chris buckleyHere is his description that accompanies the picture:

The September 2014 issue of Textiles Asia (www.textilesasia.com) includes my article on ikat made by the Meifu Li people of Hainan. The Li make dense, complex and beautiful ikat, using locally grown handspun cotton and natural indigo dye. The designs are tied on the warp threads with small strips of resist, before the yarn is dyed. The dyed threads are woven on a simple backstrap loom, so that the designs appear in white on a deep blue background on the finished fabric. Motifs include geometric forms, human figures and amphibians, such as those in the photo here, which shows a detail of a large sarong. These were mainly for ceremonial use (weddings and festivals). The Textiles Asia magazine is excellent and I recommend it to anyone with an interest in this area.

You can watch a short Youtube video here showing the ikat process with string and masking tape used by some weavers in Argentina.

I think they are very brave to use that heavy marker pen! I tried using a fine-tip marker and the ink bled into the yarn. Now I use faint pencil marks.

A booklet that I have on Guatemalan ikat, known there as jaspe,  says that the person tying the knots marks with a pen the parts that need to be reserved. Most likely they are less prone to making mistakes than I am!

A Guatemalan jaspe warp ready for weaving
A Guatemalan jaspe warp ready for weaving.

Leaving ikat aside for now, let’s look at some other kinds of backstrap woven beauty. Gwen shared with us pictures of the beautiful pick-up weaving that she saw on a recent visit to the Cusco area of Peru.

10305594_10203495499921874_8779412477090214824_nThis is one of the textiles that has inspired her to take up backstrap weaving and she has already woven her own backstrap. Her enthusiasm and obvious enjoyment of the whole process has me remembering the simple pleasure of just sitting at the loom and working the sheds, listening to sticks clack while watching the warp and weft interact and the fabric appear…

gwendolyn facebook (2)I appreciate her having taken this next picture of the process of braiding the ends of the backstrap and inserting the cord. I didn’t use a picture of this in my article and I know that Gwen’s picture will make the process very clear to those who may be unsure.

gwendolyn facebook (3)Some more simple pleasures…

10570318_770325679684468_7800201937456857640_n…weaving outdoors on a warm sunny day. Oscar Vasquez tells me that he doesn’t live in a part of Mexico where backstrap weaving is practiced and so, he has been following the same WeaveZine article that Gwen used (the Spanish translation) to weave a narrow band while out and about.

This coming week, I hope to warp the two red panels that will accompany the central  ikat panel of my planned wall hanging. I will create another red-on-red pattern using simple warp floats. The motif will have elements of that used in the ikat panel.

See you next week.


Backstrap Weaving – If I were to do it over….

“If I were to do it over”….

I know that I am trouble if I find myself sitting in front of a warp and saying that phrase before I can even throw the first shot of weft or, in the case of my current ikat project, before I can apply the first tie to the area that will resist the dye. As I set the warp on the loom bars, I was thinking that I would warp it slightly differently “if I were to do it over”.

As I wrapped the warp threads, I was wondering why I had automatically started placing the knots at the edge of the wrap rather than in the center as I had  in past ikat projects where I used cassette tape. Would it make any difference? Yes it did. “If I were to do it over”, I would put the knots in the middle of the wrap. There is far less chance of nicking or cutting a warp thread with scissor tips when unwrapping if the knot is in the center rather than at the edge.

wraps for new ikat project?The wrapping part didn’t take as long as I had thought. It was fun watching the design appear and satisfying seeing it take on the same proportions as my sketches. I had calculated and measured corrrectly…yay. No thoughts about do-overs there.

ikat motif backstrap weaving“If I were to do it over”, I would wash the thread in hot water before starting the project. I have dyed a lot of cotton in my time. I guess it has all been knitting yarn and crochet thread. Those have all dyed beautifully with the Dylon cold water dyes that I buy in small packets. However, my supplier of  the UKI 20/2 weaving yarn that I am using in this project told me that this yarn is finished with a coating of wax. I only found this out by contacting them after my failed attempt to dye the warp black.

That explains the medium shade of blue I got with navy blue dye last week more than the fact that I had used a very watery solution. With this new warp, all I could turn out was an ugly steely grey instead of the black at which I had been aiming. What a waste of dye. I then overdyed it with far more dye than was necessary to ensure that I got black the second time around….another waste.  So, that’s the end of my black dye supply…no do-overs possible for that part of the process.

spots of dye under ikat tapeAs the ikat tape was close to transparent, I was able to see dark spots under the tape before I could even start removing it. That was very disheartening.

Clearly, the dye had seeped under the tape in several places.

However, it wasn’t that bad after all. A very noticeable concentrated spot of color on a group of threads all squished together and tied, turns into a vague smudge when the individual threads are untied and fanned out. It is not like the marks disappeared, but they were something with which I could live. I couldn’t see why those particular parts had allowed dye to seep in, and so it is not a problem that I would expect to be able to eliminate “if I were to do it over”.

ikat motif on backstrap loomIt was time to make heddles, put the shed rod in place and then unwrap. The unwrapping part was nerve-racking….take it easy and don’t snip a warp thread for goodness sake!  And then it was time to weave! And this is where the “if I were to do it over” turned to “when I do it over” and there are several reasons for that.

woven ikat motif backstrap weavingI placed many…too many… thin strips of cardboard within successive sheds to start with. I can see now that not all those strips were perfectly straight and the accumulation of this flaw had the effect of having me start the weaving with a slightly askew weaving line.

I didn’t notice. Iwas concentrating so hard on the ikat motif and the alignment of the warps that I didn’t even notice until the whole motif had been woven. I had to weave in some short rows to get things straightened out for the supplementary weft patterning…NOT GOOD. It looked awful. Then I noticed that the ikat motif itself had also been thrown slightly off center. Oh well.

Maybe only I can see it but it just isn’t good enough. It was time to start the list headed “When I do this over” and get used to the fact that this will go on the sample pile.

However, I have to say that I am really pleased with the way the ikat pattern turned out. I didn’t get any of the dreaded “railway tracks” (my name for repeated single rows of lines and spots of undyed thread that get completely detached from the main motif.) There is fuzziness…perhaps more like a raggedness…it looks like ikat! Yay!

When I fished out my silk thread for the supplementary-weft patterning, it was plain to see that there are many levels of off-white-ness. The UKI thread is closer to white and the silk weft closer to cream. They weren’t going to look good together but I wove some patterns anyway. This piece is now a sampler and I may as well use it to learn as much as I can.

ikat figure with supplementary weft patterning backstrap weavingIn the picture above, I have flipped the loom around and made new heddles so that I can add the supplementary-weft patterns to the other side of the ikat motif. More short rows had to be added to get things straightened out….stupid cardboard strips! grumble, grumble.

So, WHEN I do this again, I shall adopt some different ways of doing things, starting with the warping. Add to the list….don’t forget to dye the weft!! Weft went into the steely grey bath but not the black one which wasn’t such a problem until I broke two warp threads while weaving and had nothing with which to replace them.

ikat tapeI have loads of thread, a lifetime supply of ikat tape, and I think that I could probably get some embroidery floss here to match more closely the color of the UKI thread. What is missing is enough black dye…darn. Do you think that mixing navy blue and dark brown would work?

In the midst of this I had visitors who had not seen my weaving before.

I hate having to feel all squirmish about showing my work to people because I know what kind of questions and reactions I always get from local Santa Cruz people when I do so.

They are fascinated and delighted at first until they eventually ask how much time I spend on this kind of thing. And, when they find out that I don’t intend selling my work, and won’t even be hanging my wall hangings in this home (I am saving them for some vague future home-of-my-dreams!), well, that is the end of the story. Heads are shaken in bewilderment and I am left feeling a little deflated and almost foolish. My explanation of the ikat process was sheer madness to them!

painted tshirt ethnic motifWhich had me thinking once again about process versus product.

Of course this and pretty much all my projects are all about the process.

I want to experience the ikat process and not merely create a large solid white motif on a solid black background. I could, after all,  paint a white motif on black woven  fabric if that is all I wanted,  like my friend Sharon did when she hand-cut stencils and painted a beautiful set of tshirts for me with ethnic motifs.

Or, I could use the warp-faced double-weave stucture which would allow me so much freedom to create motifs on solid-color backgrounds…made up of straight lines that can be put together to resemble curves, like those in my last Shipibo-inspired wall hanging and other projects.

Below, you can see an experiment with curves and Celtic motifs that I made a long time ago.

first-curve-experiments-in-double-weave

abba-yohanni-curtain-and-reproAnd another not-so-curvy one from the archives at left…

Double weave, of course, creates a thick fabric when what you might really be after is something finer and more flowing.

It also does not favor the use of a lot of unpatterned area. The parts of the double-weave fabric that do not have pick-up patterning will sit as separate layers of cloth simply joined at the edges. This can create a sort of ballooning effect over large areas.

The simpler little brother of the warp-faced double weave technique is warp substitution. With this structure, you won’t have to worry about layer separation in large unpatterned areas but most people do not like the awkwardly long floats that  form on the back of the cloth.

Another structure that allows motifs to sit on solid-color backgrounds is intermesh….

bhutan-collage-11It’s a warp-float structure that creates rather dense fabric….not something I would describe as light and flowing. The motifs can be very linear or curvy like the ones below.

intermesh with curved designPatterning with supplementary weft allows you to have a light piece of solid-color fabric patterned with soild motifs. The drawback is that in order to make the woven piece practical, the length of the weft floats needs to be limited and that will restrict the kinds of motifs you can create. Large solid-color areas will need to be broken down into segments of short weft floats.

tubular_band_on_ticlla_pieceAnd then, leaving warp-faced options aside all together, there is always tapestry technique…

greca design on a pillow coverThis is a pillow cover woven on a floor loom by a  member of the Hipolito family of Zapotec tapestry weavers in California. (Which reminds me…my weaving friend Dorothy is currently in Peru studying tapestry techniques with master weaver Maximo Laura… can’t wait to hear more about it).

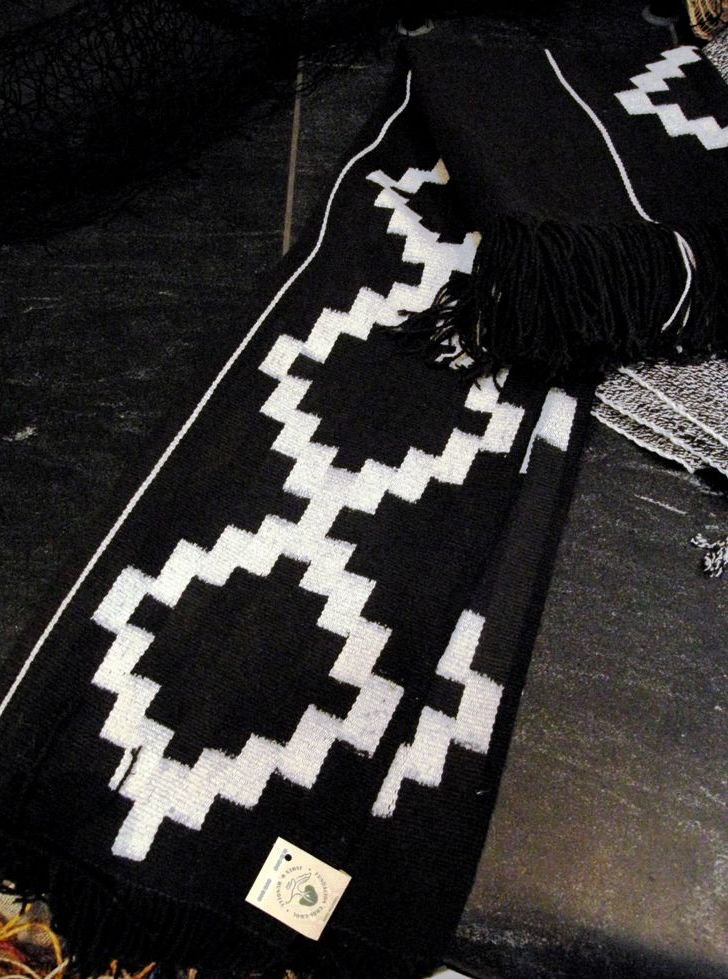
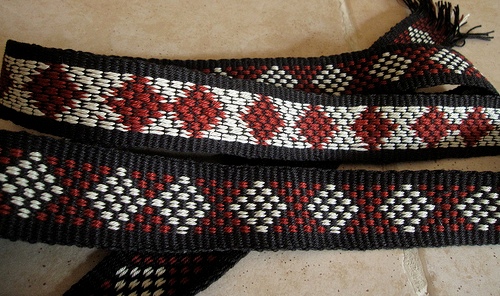
I love comparing the fine double-weave belt from Argentina, below, with its bold black and white pattern, to the precise black and white ikat work done by the Mapuche weavers of Argentina and Chile…two completely different processes that create superficially similar results.

OLYMPUS DIGITAL CAMERA

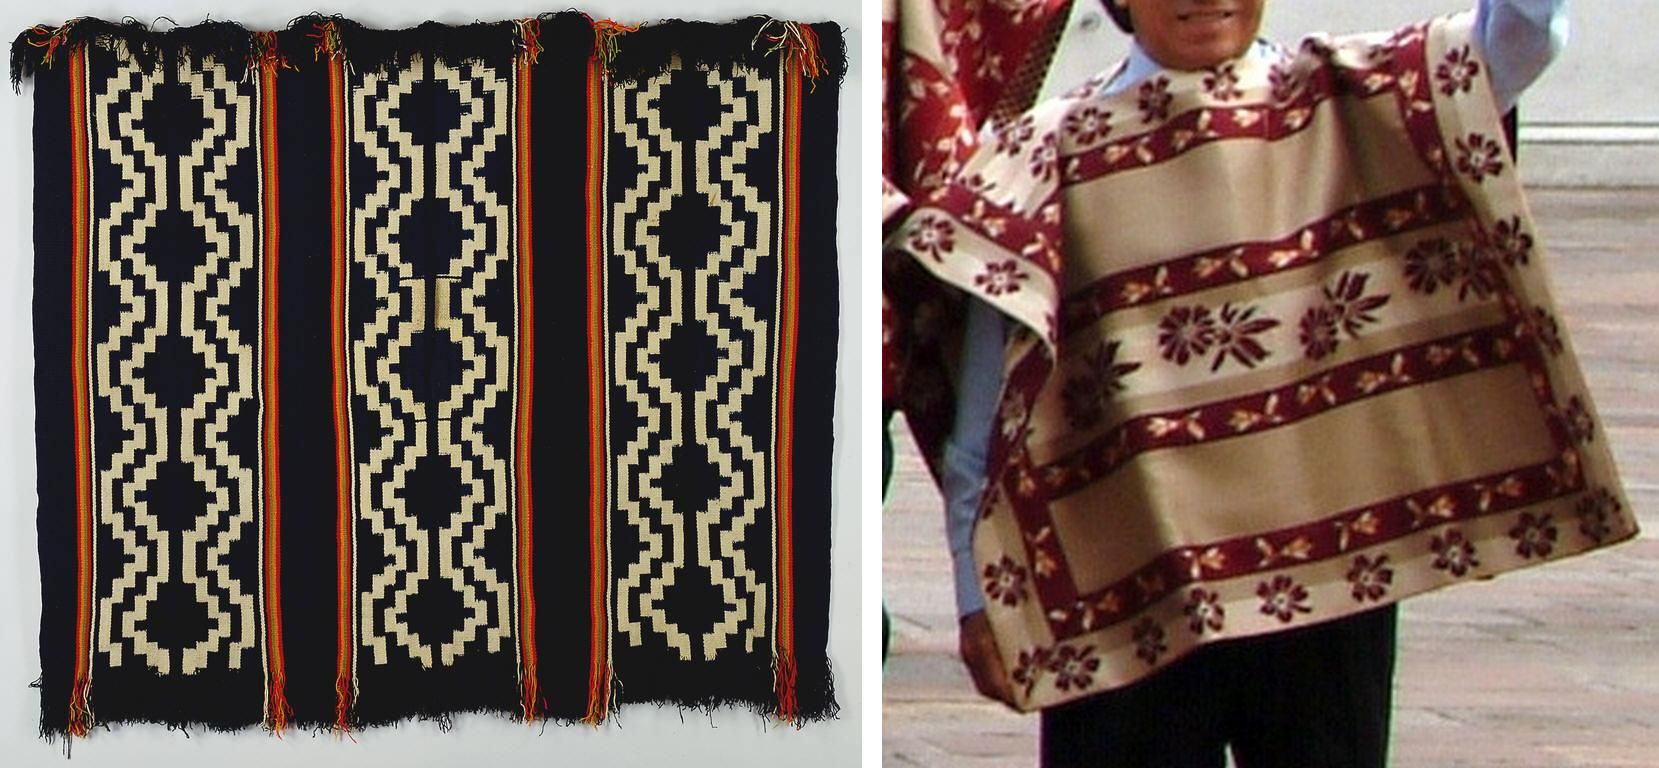
mapuche-ikat-11And so, I will finish this post this week by showing you a fabulous ikat poncho created by Argentinean master weaver, Guillermina Cabral, from Victorica, La Pampa province and thank the Ministerio de Cultura de la Nación Argentina, to whom the image belongs, for allowing me to show it to you here. I found it on the Facebook page of MATRA (Mercado Internacional de Artesanías Tradicionales de la Argentina). The page has other images of beautiful ikat work along with other exquisite handcrafts of Argentina.

10564839_1546978602191639_385201088_nSo, it’s all about process for me. But, concentrating too much on one particular part of the process can mean carelessness in others which are of equal importance…stupid pieces of cardboard! 😉


Backstrap Weaving – Poncho Envy

I am posting a bit early this week as I will be on the road for the next couple of days making my way to the cold north-east of the US and hoping that the latest dump of snow that DC just had will be the last. It seems like the kind of weather where a poncho would be of good use. What wonderful things are ponchos. I could use one as a blanket, roll it up to make a nice pillow, lay it out and sit on it or just wear it as it was meant to be.

I don’t have any desire to own one here in steamy Santa Cruz but, if my dreams come true and I can one day live in the Blue Mountains just outside Sydney, I think that I could make good use of one there. It even snows there sometimes. The question is, should I weave my own or buy one here in South America?

ponchis1-214x275I am excited about a new book that has recently been published on ponchos of Bolivia. One day before I am due to leave I find out about this treasure. I will have to wait until my return to hunt it down.

This article tells how Oscar Barriga spent 40 years collecting and studying over 250 ponchos in Bolivia.

He sold his collection to a museum in La Paz and has written a book which includes information he has gathered on their symbols, messages and their religious, civil and military roles. Barriga says that the poncho does not have any one country of origin.

I have certainly seen varieties of this item of clothing in the highland, lowland and low valley areas in the South American countries in which I have traveled. My friend Kathie, who works with weavers in the tropical lowland coastal areas of Ecuador, took the most wonderful picture of one of the gentleman there on horseback wearing a handwoven cotton poncho.

ponchos 1I was lucky to have been able to attend a talk on ponchos and rebozos given by Anne Rowe at the Textile Museum in DC some years ago. I am looking at my scribbled notes from the lecture in which I have written that poncho-type clothing  existed in the pre-hispanic times but the poncho, as we know it, was popularized by the Mapuche of central Chile and Argentina. The earliest known image of one dates back to 1648. The Mapuche people wove ponchos for themselves but also to sell. During the Conquest they adopted Spanish customs including riding horses. Ponchos proved to be very useful for this activity.

An image from the 1730s that we were shown during the lecture shows a Spaniard wearing a poncho while watercolors from Peru in the 1780s depict both Spanish and indigenous horsemen and musicians wearing them. During the War of Independence in the early 1800s ponchos were worn by Generals to indicate that they were South American and not Spanish. Some of the designs were Spanish-like while others were more Mapuche-like.

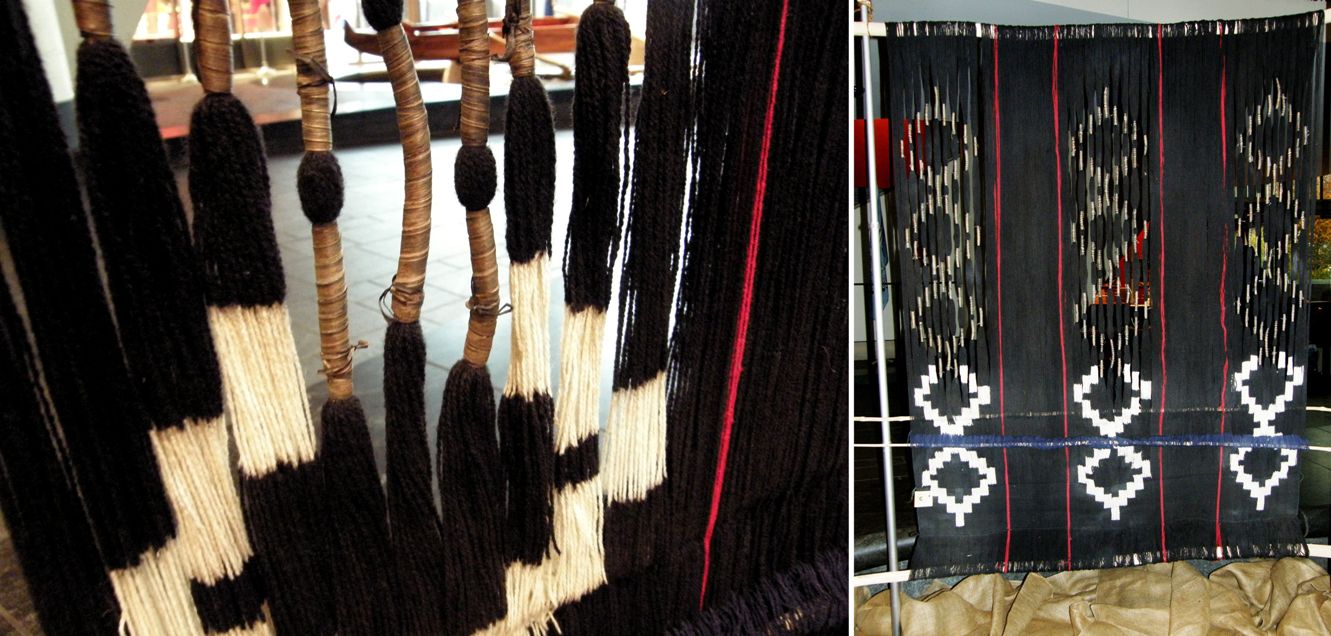
mapuche-ikat-2The black and white ikat ponchos woven by the Mapuche people are worn by those who hold positions of great power and prestige. I imagine that they are quite a weight to carry around as I was able to feel the rather thick and coarsely spun wool in the example in progress above.

It was wonderful to see and touch the incredibly fine vicuña ponchos that were brought from Belen, Catamarca in Argentina to the Encuentro de Tejedores in Cusco in 2012.

poncho-of-catamarca-argentinaThe handspun vicuña fiber has to be carefully selected to find tones of equal value for each piece. The ponchos are woven on floor looms and the fabric measures 2 meters by 1.30 meters and weighs only 320gms.Two people swing the beater and they need to make sure that they beat with exactly the same amount of pressure on this fine, light fabric.

An image on Facebook from this page shows a stunning poncho being made in Londres, Catamarca on a floor loom. This Facebook page shows other beautiful examples of Graciela Salvatierra’s work.

1463897_479549392162132_910966833_nThe Salasaca family with whom I stayed in Ecuador had their son dress up in the typical poncho that he would use for special occasions for a photo. I like this simple black wool poncho. Juan would otherwise be dressed in jeans and tshirt. The Salasaca ladies, on the other hand, wear their traditional outfits every day although they have other “everyday” hats that they use rather than the rock hard ones that you see in the picture.

salasacan-ponchoI managed to sneak a snap of a Cañari gentleman in Ecuador out in his Sunday best ikat-patterned poncho in the town plaza.

canar-poncho-and-beltsMantas and chamantos are made by weavers in the town of Doñihue, Chile and worn by the Chilean horsemen known as huasos. They are silky smooth and tightly woven. It is easy to believe that they could be virtually water proof.

mantaI imagine that the striped mantas provide an more economical alternative to the pick-up patterned chamantos, like the one below, which I am told sell for up to $3000 each.

chamanto

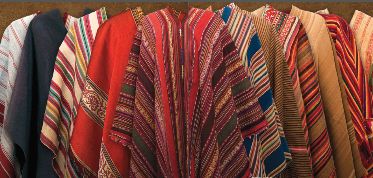
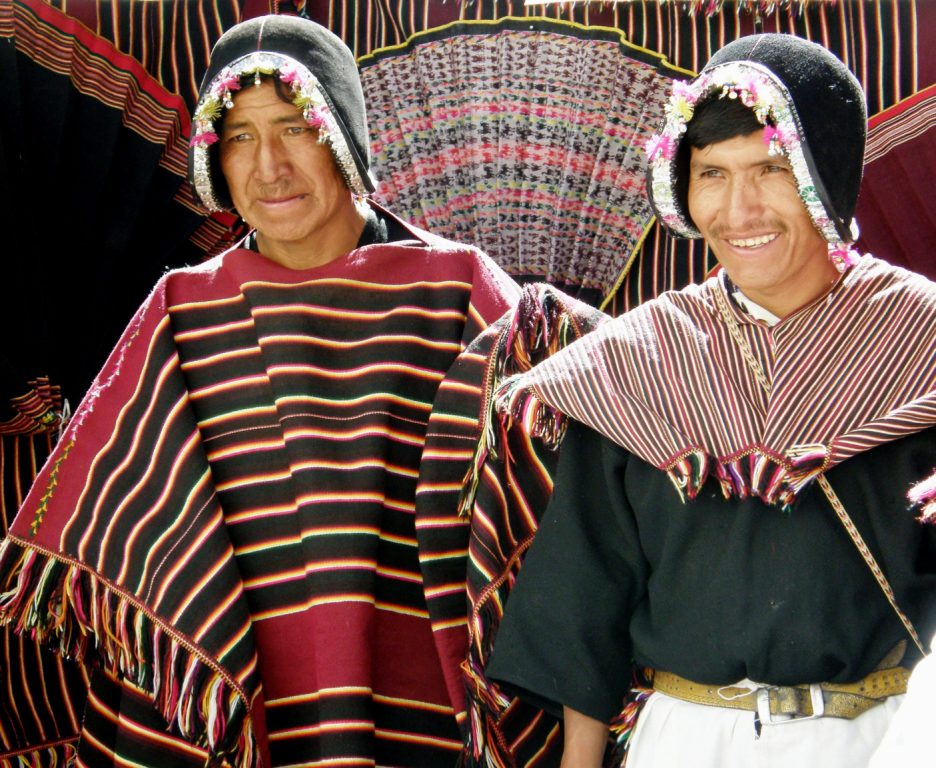
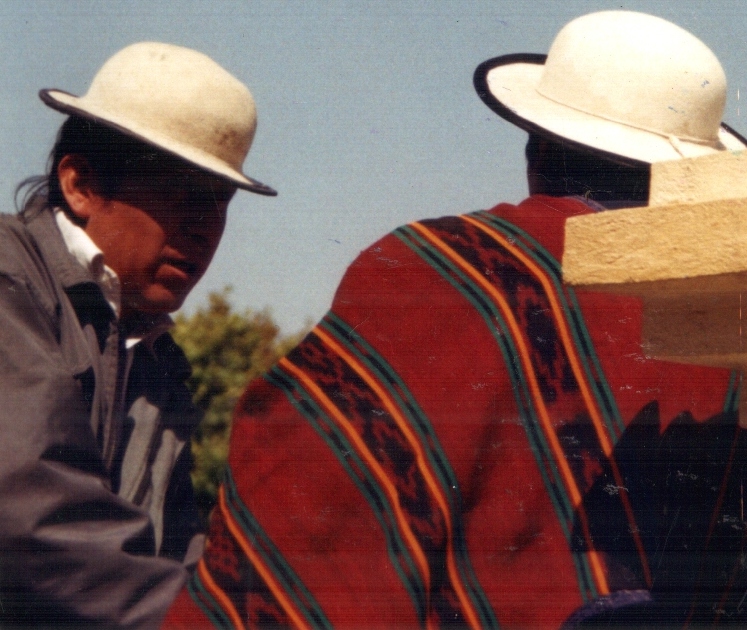
I love simple striped ponchos….so elegant. You will see that many of the examples in the picture from Barriga’s book above are patterned with stripes in  wonderful arrangements of widths and colors. The weavers of Tarabuco in Bolivia create cloth covered with tiny intricate figures which the women use for overskirts and bags in which to carry their coca leaves. However, the cloth that they weave for the men’s ponchos is beautifully simple…(you can see the pick-up patterned cloth in the background.)

Trabuco ponchoAnd of course, there is nothing wrong with a poncho that has been covered with pick-up patterning. Men in the Peruvian community of Chahuaytire in the Cusco region of Peru weave their own cloth for ponchos decorating them with motifs using supplementary warps.

chahuaytire ponchisThe more I read about Oscar Barriga’s book the more I want it but at the same time, the more I am convinced that its price tag will be very high. In fact, it is not clear to me whether the book will even be made available to the public. A more affordable option, if you would like to know more about ponchos in South America, is this book which was published in Argentina  and is available in English…..

??????????????????????In the meantime, I will think about my poncho and how I would lke to weave it. Yes, while writing this post I have decided that I should weave my own…one of these days. I have many hours of airport waits and bus rides coming up in the next few months in which I can sketch some ideas. 


Backstrap Weaving – Forgotten Resources

My new Resources page is up but bear in mind that it is a work in progress. You can click on the tab on the header of my blog or on the red image (the same as the one at left) that is on the sidebar.

The idea is to dig out all the links to articles, sites and other resources that I have used in my posts over the last two years and gather them in one convenient place. I know how easy it is to forget that all that good stuff is out there.

It’s even worse to remember that it is out there and not be able to find it! Ask me how I know.

Slowly I am going through old posts and finding those links and re posting themhere. I often wonder if people go back and re read my old posts. I surprise myself sometimes when I do a Google search and run across something from my blog about which I have completely forgotten.

So, you will find a handful of links that I have put there for now. One of them is completely new – a free book on Mapuche weaving.

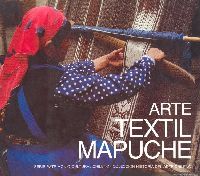
Many years ago, when I was still living in Chile, I bought a book in Spanish on Mapuche textiles from the Museo Chileno de Arte Precolombino. My friend Caroline, in Australia, told me about the free download of this book that is available some time ago, possibly before I even started my blog.

Recently Luchita on Ravelry reminded me of it when she provided a link to the site where you can still download this book for free.

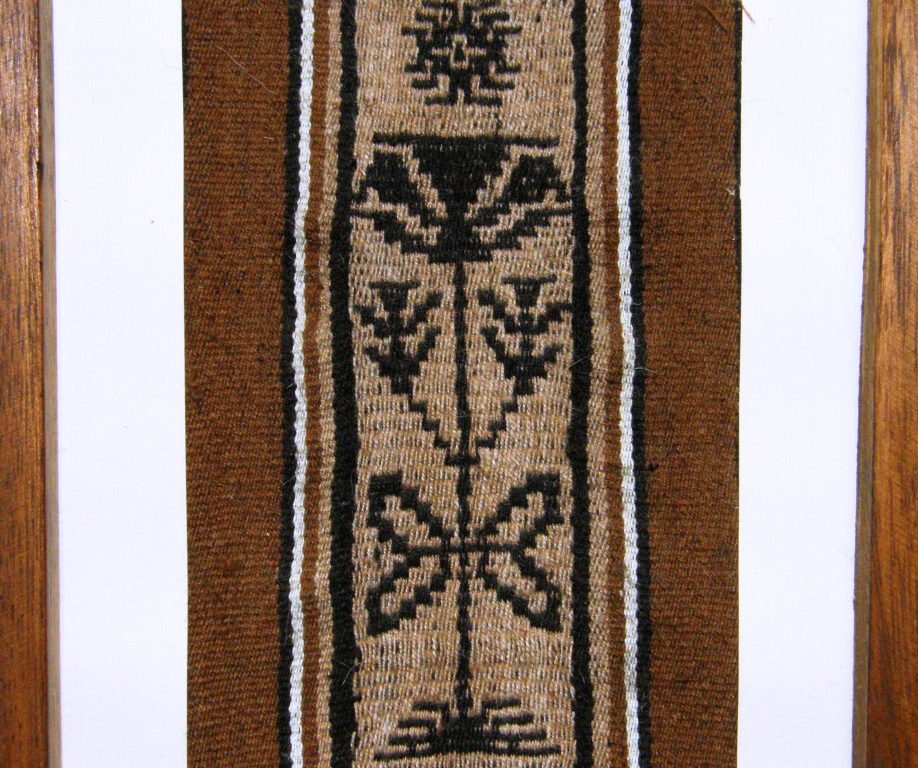
If you go to the RESOURCES page you will find the link. The woman on the cover is weaving a large piece, possibly a blanket or a poncho, which has a plant motif. Copying it from the cover image, I was able to make this the second Mapuche design that I ever wove many many years ago.

Here it is in my handspun llama fiber and it also happens to be the first time I ever wove with my handspun. I was so pleased with the result that I framed it even though it is rather wonky! I guess I didn’t think at that time I would ever weave with handspun again. It is a tiny piece as, if I remember correctly, many of the warp threads were breaking and it was a trial of patience.

Fortunately my handspun improved as a result of this initial experiment and I have no problem weaving with it now. It is interesting to see variations of this plant motif on old Mapuche textiles and notice how it has changed over time.
While skipping about on the net this week I ran into another almost forgotten resource…WeaveZine!

Of course it is not entirely forgotten for me as my article is there but you tend to forget that WeaveZine has been around since early 2008 and there is a lot of great stuff on there.

It was the article by Erica de Ruiter on this cute spiral zippered pouch made from a warp-faced band that took me there (go to the RESOURCES page if you want the link!).

As editor Syne Mitchell puts it, WeaveZine is no longer in production, but as weaving is timeless, so is the content within this archive.

I wish I had two months to just sit down with all my books and go through and refresh my memory of all the wonderful resources I have on hand. Many of them have little Post-It notes sticking out of them with inspiration for that next exciting project and the next and the next…

I was clearing up a bit more today and decided to put away the Textile Museum Journal that has been lying about here for ages under a pile of cat toys. Of course this provided a nice excuse to sit down, browse and stop tidying up and I was curious to know what had made me buy this issue of the Journal in the first place.

Oh yes, it was the article on the weavers of cotton saddlebags on the Santa Elena Peninsula in Ecuador. This article, among other things, gave me the little twin bird motif in the simple warp float technique that is shown on a cotton saddle bag from this region in the article. My version is at left.

Talk about forgotten resources.

I usually buy these journals for one particular article, sometimes two, and just glance through the others and it is funny how months later suddenly one of the other neglected articles jumps out at me.

This time it was the article in this 1983 issue by Maaike Knottenbelt on backstrap woven Mitla cloth of Mexico. According to the article the cloth was woven in skirt lengths for local use or for trade. Sadly, the article is in black and white and I was curious to see the traditional colors that are used in these skirt fabrics so I went online.

A Google search didn’t turn up anything that looked like the cloth pictured in the article. And then….Teyacapan to the rescue! Of course I should have known to go directly to Karen Elwell’s fabulous Flickr page on Mexican crafts. This is, as far as I can tell, a example of the Mitla cloth shown in the article.

The cloth has two faces, one which is warp-faced which we would normally consider the “right” side  and one which has exposed wefts. According to the article, the side with the weft floats is the one that develops as the upper face while the cloth is being woven and that is the face that can be seen in the picture.

In her article Knottenbelt quotes from Irmgard Weitlaner Johnson:

In 1957 only five weavers (men) knew how to weave this cloth, and only four Indians (men and women) knew how to warp the complete traditional pattern.

Knottenbelt published her article 26 years later and now almost 30 years after that I can’t find anything online about this kind of cloth being woven today and could only come up with Teyacapan’s photo of a museum piece. I wonder if it has completely disappeared.

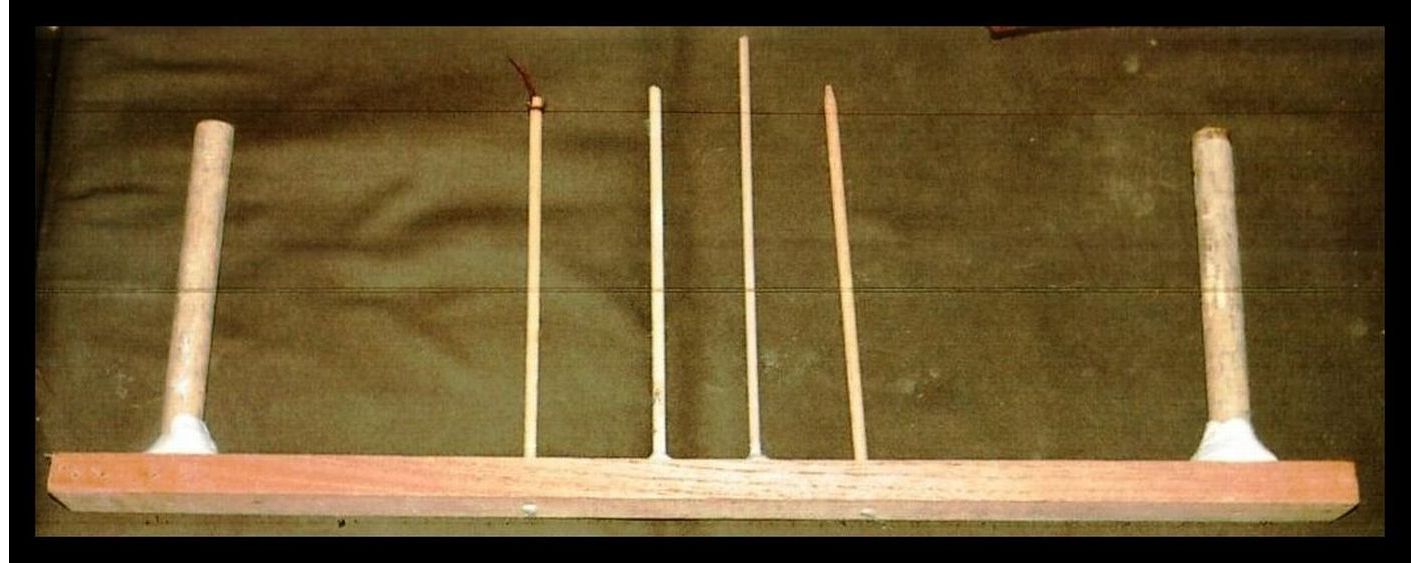
The article goes into a lot of detail of the warping process where the warp threads are separated into their various sheds on the warping stakes themselves. The warp threads are not wound in a simple figure-eight and then rearranged later once on the loom. This is one of the aspects that the author found particualrly interesting.

Eight stakes are used to set up this warp for a skirt length. Six can be used for shorter lengths. Of course, I have seen this kind of thing done here in South America. Extra stakes are added to the basic warping set-up to conveniently separate warps into different sheds according to the structure being woven.

Felipe in Salasca, Ecuador is making a dovetailed warp for a supplementary warp belt using six stakes. The belt will be woven on his backstrap loom.

Above is the set-up I created at home to practice what Felipe had taught me except that my set-up is for a warp in a single plane and so doesn’t have the dovetail stake. I actually added an extra stake to further separate one of the colors. Hopefully I will be able to use this to try the Mitla cloth. I just wish there were more pictures out there. Even the simpler four-stake version is a variation of this idea…separate the colors into sheds on the warping stakes themselves….such a time saver!

I wonder what will leap out at me from the pages of that Journal if I pick it up again in a few months. There are three other articles in there and there is already a Turkmen tent band in there calling out for attention!

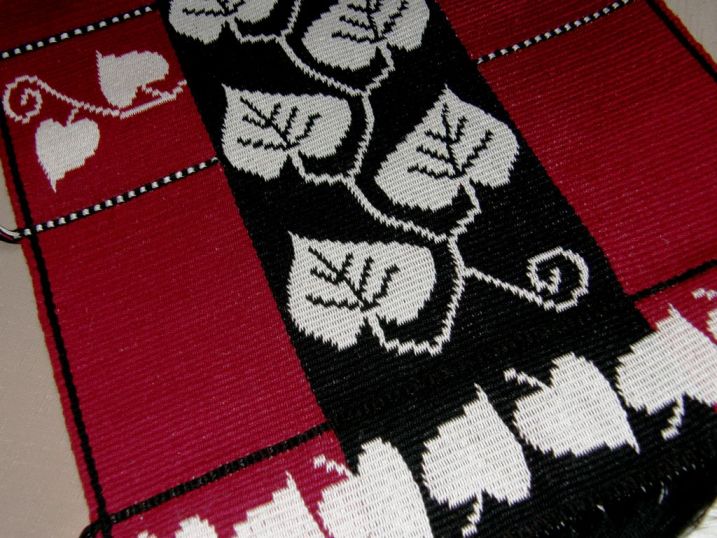
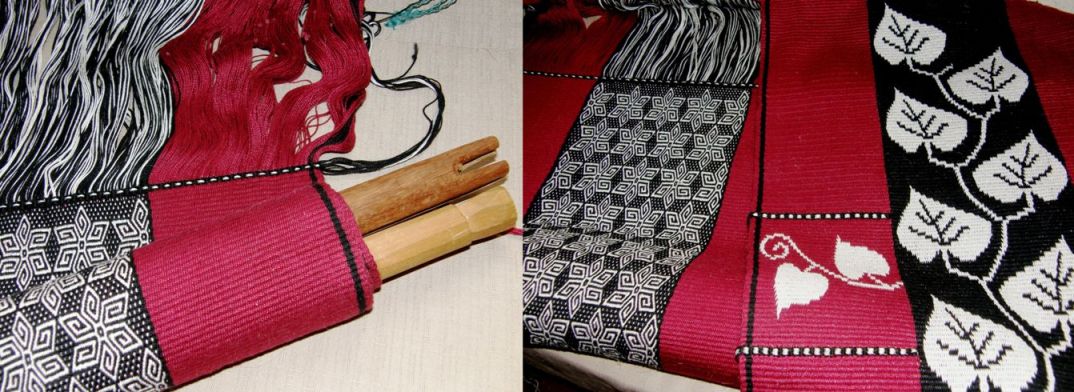
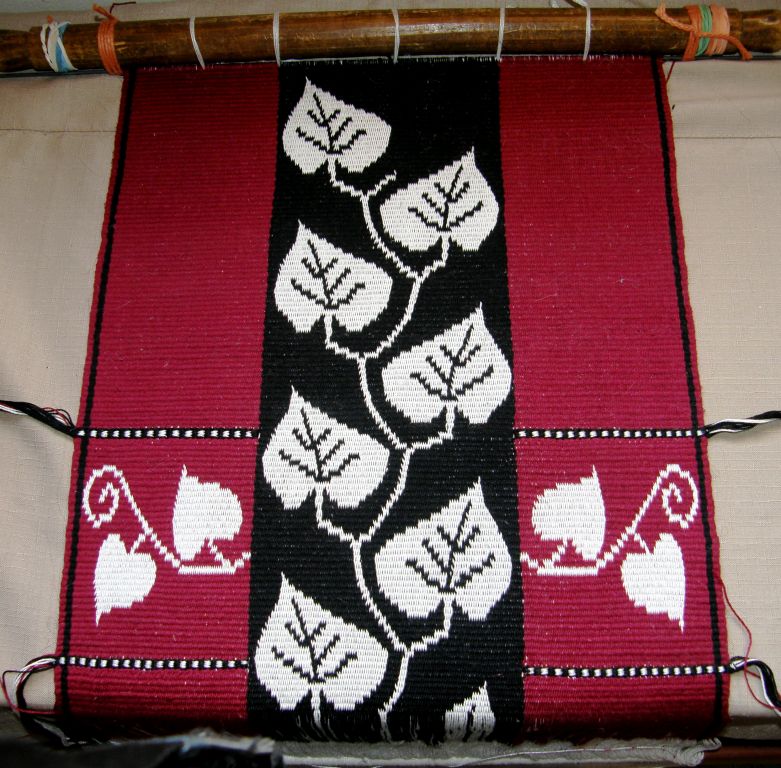
In the meantime, I have just about finished my chamanto inspired wall hanging.

The question is… how much pattern is too much pattern? I am not sure if I went overboard with the last row of leaves.

I am now re-twining the bottom of the Starry Night hanging so that it better matches the twining on this piece. That didn’t seem like a fun thing to do at first as the piece was already off the loom but it turned out not to be a problem as I had not yet cut the end loops.

I much prefer to twine on loom than off so that the warps are under tension.

I was able to slip the far loom bar back through the loops and then clamp and roll the weaving so I could twine with the warps once again under tension.

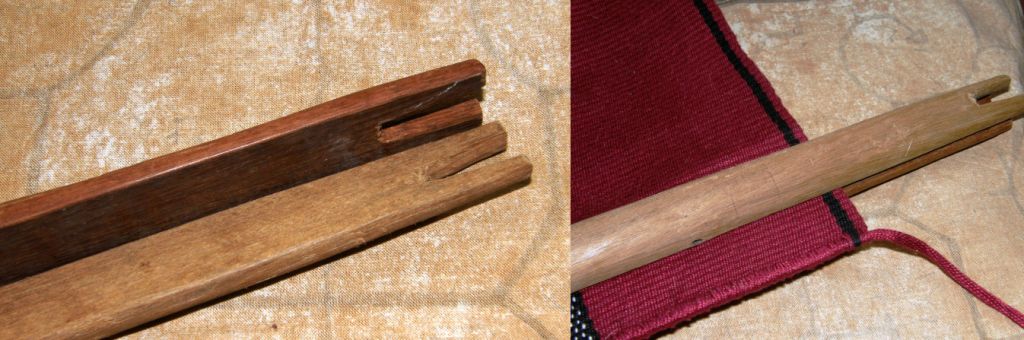
I have this nifty split loom bar that I bought from the Burmese backstrap weavers in Massachusetts. It is a typical round dowel-like bar which has been split in half and is used by the weavers to clamp and anchor their circular warps so that they don’t slip when beaten. The first thing that comes to mind is that surely it would be easier to just use two flat sticks but, they like the loom bar to be rounded, and I could see good reason for that once  I put it into use. Lucky for me I got to buy one ready made.

The third hanging in this series is on the drawing board. It will be influenced by South American weaving from a country a little further north this time. I hope to have made a start by next week’s blog post although there is a lot of sampling to be done first.

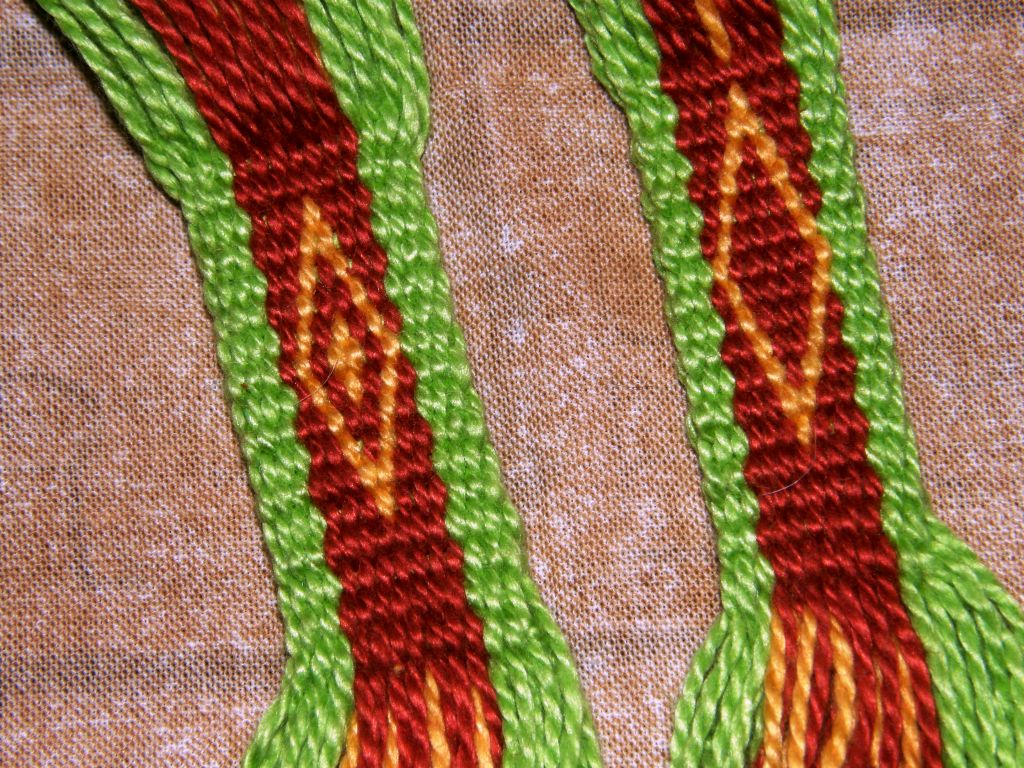
Now, about that double weave edge experiment that I mentioned two weeks ago… I made my samples and photographed them. Unfortunately the pictures don’t really tell you anything so you will have to take my word for it!

Both these bands have the same number of ends except that the one on the left has two revolutions of single thread on the very edges and the one on the right has only one revolution of single thread. Both methods improve the appearance of the edges for the reasons I gave in this blog post.  The band on the left has a flatter square-ish edge while the one on the left has a more rounded transition from upper to lower layer. I will post all this information on the tutorial page for double weave.

As for my earlier question… how much pattern is too much pattern?…I will leave you to ponder this with something truly spectacular….

This kind of weaving is made by the Jalq’a people from Potolo in Bolivia on leaning vertical looms. There is barely any space that does not contain a motif. You even see motifs within motifs but, as the idea is to convey a sense of chaos, it all feels and looks just right, doesn’t it?

Backstrap weaving – Staying on Track

I have been trying to resist the urge to warp up for an al’ouerjan project and join in on the fun in the Ravelry group. You may remember that a couple of weeks ago, after having posted the warping tutorial for these traditional Bedouin patterns, Tracy suggested a weekend warp-along. Now we are seeing the increasingly large and impressive results of all that warping practice. Take a look at the bag strap that Tracy made at left.

But…I am staying on track which means that I am sticking to my chamanto-style leaf-patterned wall hanging (although I couldn’t resist throwing in a bit of weft twining). I finished the first pebble weave hanging in this set with weft twining and so I decided that, apart from the common color scheme, the weft twining would be another theme that would tie all my planned wall hangings together.

While I sit and pass the shuttle, strum the warps, beat and coax the sheds open I think about what will be next in this series. I have no problem whatsoever in coming up with ideas…the problem is that I want to weave them all at once!

I stand back and look at this piece and I still can’t get used to it.

It’s not quite like anything I have done before but I have to say that I am having fun with it especially adding in that twined section with the motif within. I had to stop for a bit to chart those smaller leaves on their vine, sample them etc…It took a while to get them right.

I think that all my planned red, black and white pieces will look pretty nice when hung all together. The question is….where? Although I have been doing some major cleaning out, I still haven’t managed to uncover any significant amount of wall space.

Next on the clean up list is my dear old Ashford traditional wheel. Yes, I have a spinning wheel…who knew? It has been sitting there so long unnoticed, dusty and in desperate need of oil…poor thing. It was born in New Zealand and made its way all the way over to the Falkland Islands before finding its way into my home in southern Chile. I left a lot of stuff behind in Chile but the spinning wheel came up to Bolivia where it has sat in the corner for almost 14 years…shameful! I won’t take a picture of it now in its pitiful state. I will clean it up and get it back into shape. I have room to use it now!

I only had it for four months before leaving Chile and just got into using it and being able to turn out something consistent. I did, however, spin enough yarn to construct a vest, knitting the natural colored front and weaving the dyed brown back. The edging has been worked in cross knit looping.

This, too, sits neglected here in this hot steamy climate. It is a souvenir at least of the Patagonian sheep.

But, back to the al’ouerjan and let’s see what else the Ravelers have been up to…

So, there’s the strap that I showed you earlier on the gorgeous bag that Tracy made. She will line the bag  to protect the warp floats on the inside. She used an additional weft to secure the floats on the strap. You can see details about how that is done here. One of Tracy’s other warp-along products is the pillow cover which includes some tapestry-style twining in  the lower left hand corner and a striking and beautifully executed joining stitch.

Aunt Janet’s piece above left is in her own handspun wool. She has three sets of al’ouerjan patterning and that blue looks amazing.

Traudi so loved Tracy’s piece that she got into the act too using brown instead of black which looks fantastic. She twined along the bottom of the piece too. We are seeing more and more twining in this group…cool. Here is the tutorial for basic weft twining.

Jennifer did some charting and planning for the shajarah patterns before warping a wide piece that also includes an al’ouerjan design.

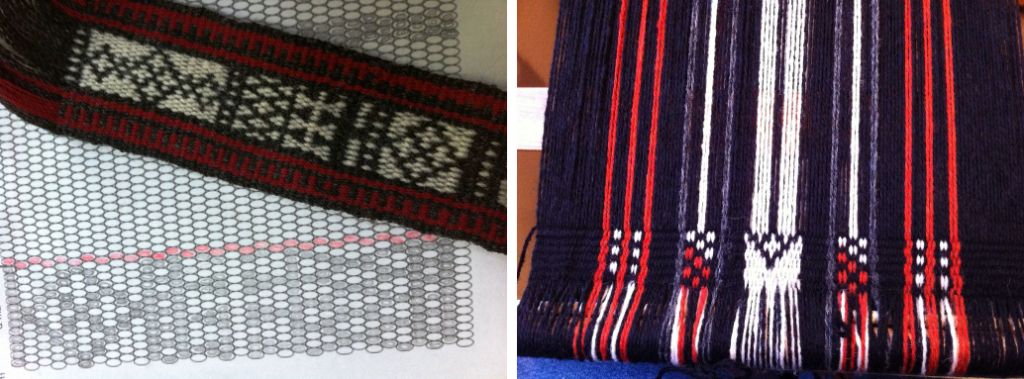
The charting paper with ovals which is useful for double weave, warp substitution and supplementary weft patterns can be found here. A tutorial for weaving these kinds of warp substitution patterns is here.

So, January has gotten off to a great start in the Ravelry group! Pantoffels has been wrangling with what she calles an ancient inkle loom and still managed to make this pretty needle pouch with plain pebble weave patterning.

And then she got a new inkle loom under the Christmas tree and will now try the pebble weave patterns in my book Andean Pebble Weave.

While I have been weaving my “leaf” piece based on the Chilean ponch known as a chamanto, I have been getting out other pictures of ponchos that I have to study the design layout that weavers use on these large pieces.

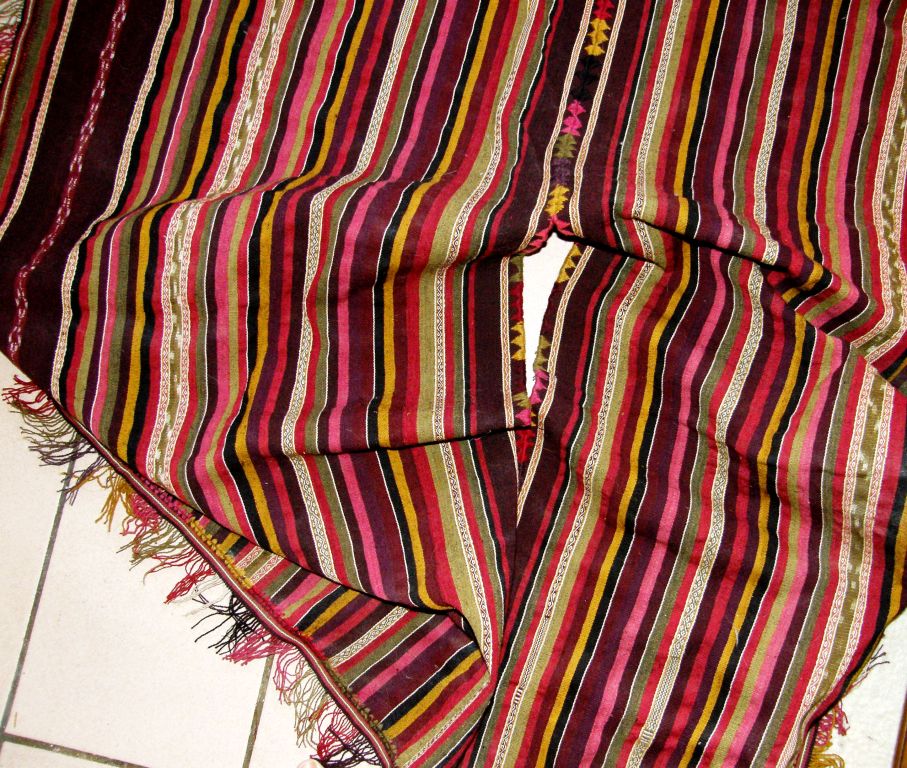
I own one poncho which I bought in Calcha, Bolivia many years ago. It is made from very fine handspun wool which has been colored with natural dyestuffs. It is patterned with simple stripes, some very narrow and simple ikat bands as well as several very narrow strips of pebble weave.

It has been woven as two panels with four selvedges each and a woven band has been sewn around the four edges with an added fringe. Don’t you love that decorative stitch that has been used to join the panels?

There is definitely an art to stripes. You can see the clever placement of fine white stripes to break up some of the richer colors.

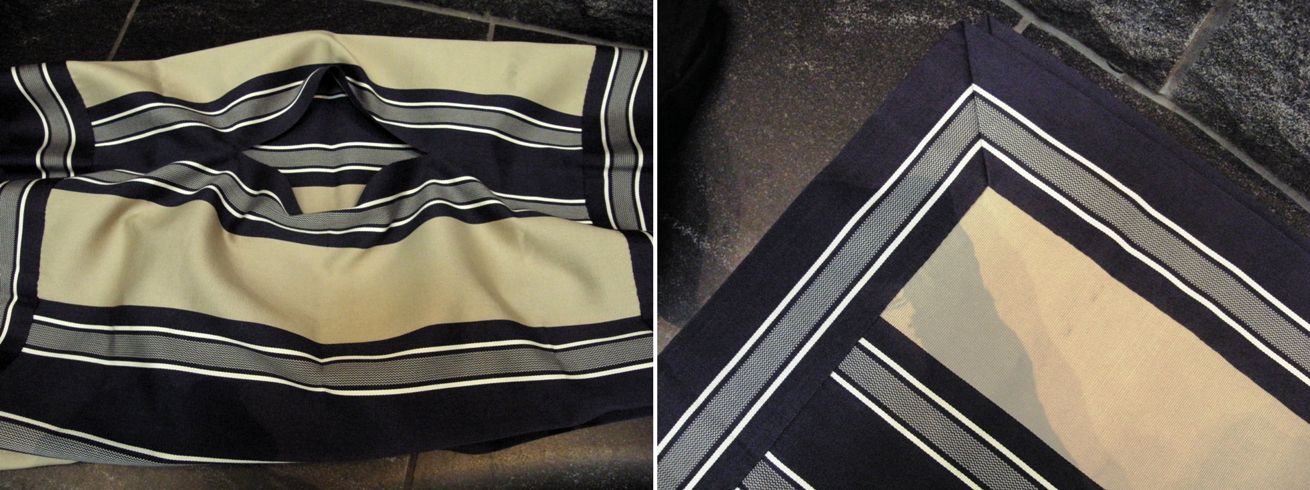
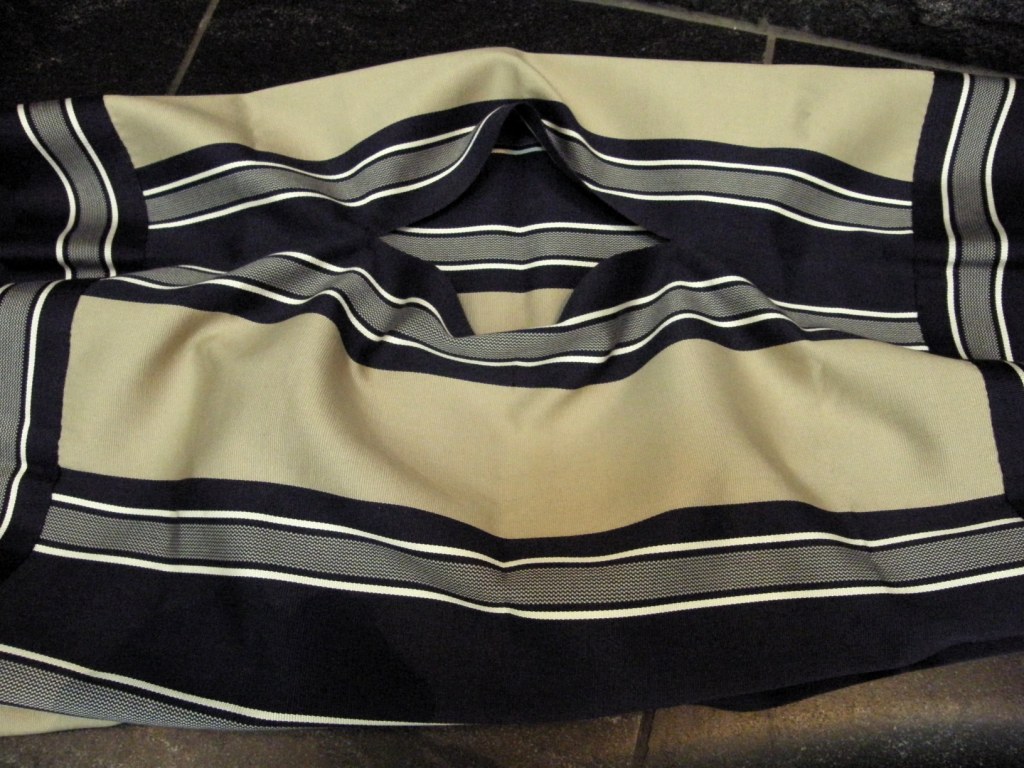
 An extremely fine and simply patterned manta from Chile. It is always interesting to see how the colors and stripes are distributed. As is typical, a broad band has been woven and sewn to the four edges of the piece and there is no fringe.

The typical poncho of Tarabuco and the smaller version known as unku can be seen above.

At a handcraft fair in Tarabuco I saw weavers making the long poncho panels. My friend, Anna, showed me the unku on the right that she had bought in Tarabuco when she came to visit me.

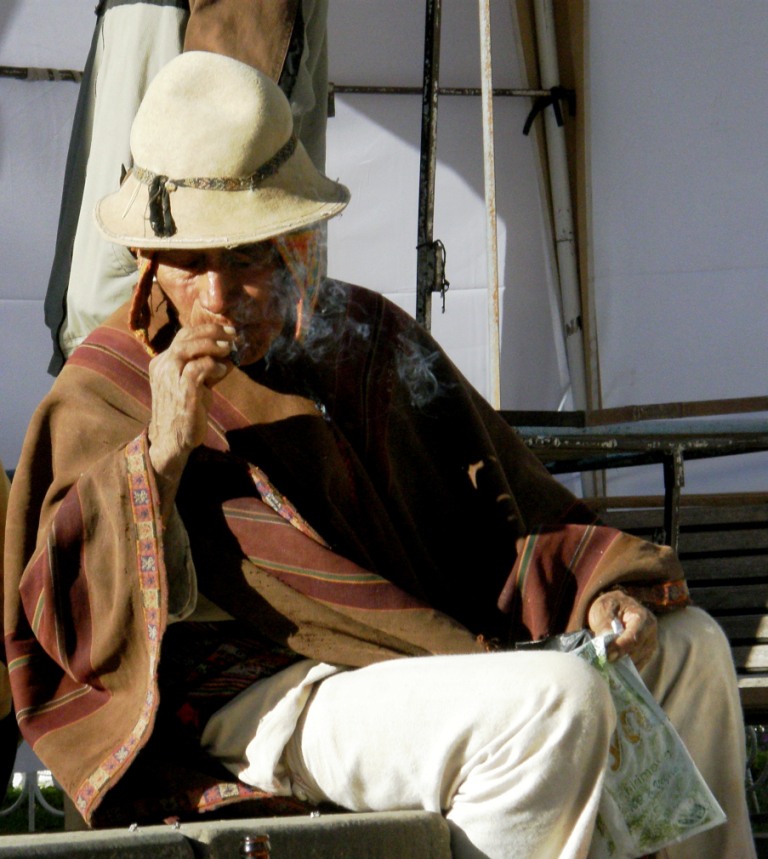
I spotted this gentleman in his much more subdued woolen poncho in a small plaza in Sucre. He was performing an offering to Pacha Mama in the early morning. How wonderfully simple and light the poncho looks although I am sure it is extremely warm and virtually waterproof.

And then you have the incredibly intricately patterned calf-length ponchos woven and worn by the men of Chahuaytire in the Cusco area of Peru.

From Argentina and Chile we have the Mapuche makuñ with its ikat patterning technique executed in such a way that there is virtually no blurring of the design. The popularization of the poncho, from what I have read, is generally attributed to the Mapuche who wove them for their own use as well as for barter. On the right you see the chamanto of the Chilean huaso, with its leaf, fruit and floral motifs, which are said to have both indigenous and Spanish roots.

I have  a few pictures from Ecuador too…scans of old prints…

This is the “jijon” poncho which is factory-made in Quito and worn by those men who can afford one in Otavalo. You can see it being worn with its grey plaid face showing by the gentlemen on the left and with its darker face outward on the right. These men were wearing their ponchos to the market on a regular day. Apparently there is a much more costly blue double-faced poncho which is woven on the backstrap loom made-to-order. The ownership of one of these special ponchos indicates wealth and high social status.

On Sunday, which was both market day and church day in Cañar, a very social time around the main square and surrounding streets, I saw quite a few ikat-patterned ponchos being worn.

And finally there’s Juan below, (my pebble weave student!) with his mother and neighbor. Juan put on his  narrow, black fringe-less poncho and felt hat especially for this picture. On another visit during a festival all the men were wearing their ponchos for the occasion.

You can see the backstrap looms on which I was teaching Juan and Natalia pebble weave tied to the pole. In exchange Anita introduced me to her cousin on my next visit and he taught me to weave the typical supplementary warp patterned belts of Salasaca.

Okay, so I promised you some double weave edge samples this week, right? I am sorry, I didn’t get those done. I was busy trying to stay on track and not get “dis-track-ted” by all the goings-on in the Ravelry group. I want to finish my leafy hanging. but I must say that I have a bowl of tencel calling to me wanting to be made into a scarf…

That blue ball is indigo-dyed Japanese silk…a fabulously thoughtful gift brought to me from Japan by one of my old teaching colleagues here.

Hopefully I will get the leaf piece off the loom this week, plan and warp the next hanging, play a little with my tencel, get the Ashford Traddy up and running and do those double weave samples for the tutorial too….phew!

Oh, and I have started a new page for RESOURCES. You will see the tab for that on the header and I am slowly extracting all the links to interesting sites, articles and products that I have linked to in my 105 posts so far. This is quite a job but I hope to add two or three links to the page every week. I hope you find it useful.
.