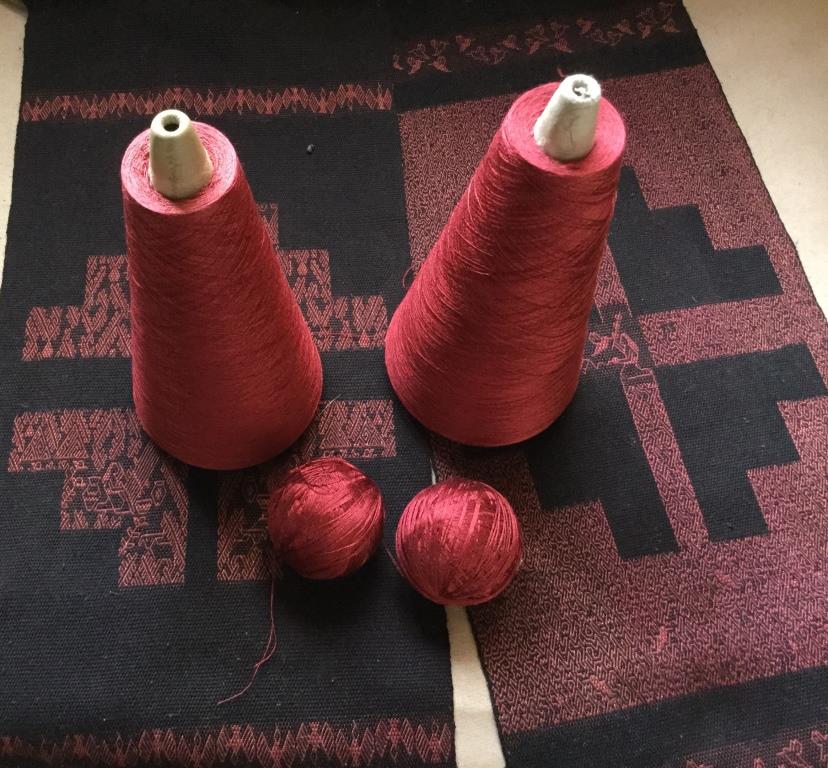
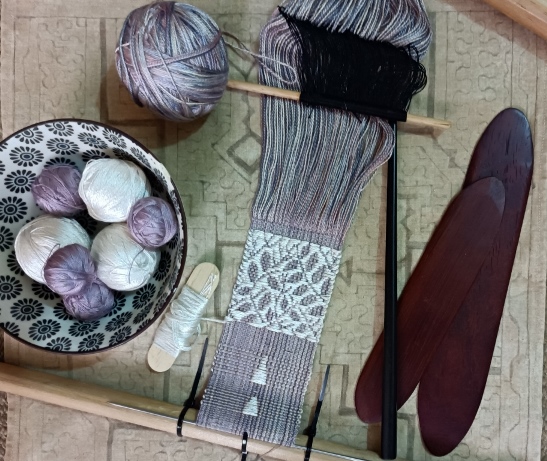
Once again, other projects have kept me away from my loom which means that I’ve only just finished the silk cushion-cover fabric on which I’d been working.
In my last post, I left you with just the tail feathers of a hummingbird figure making their appearance. This isn’t a new pattern. It’s one of the figures that I designed during the pandemic when I was in my “hummingbird phase” and so you might recognize it.
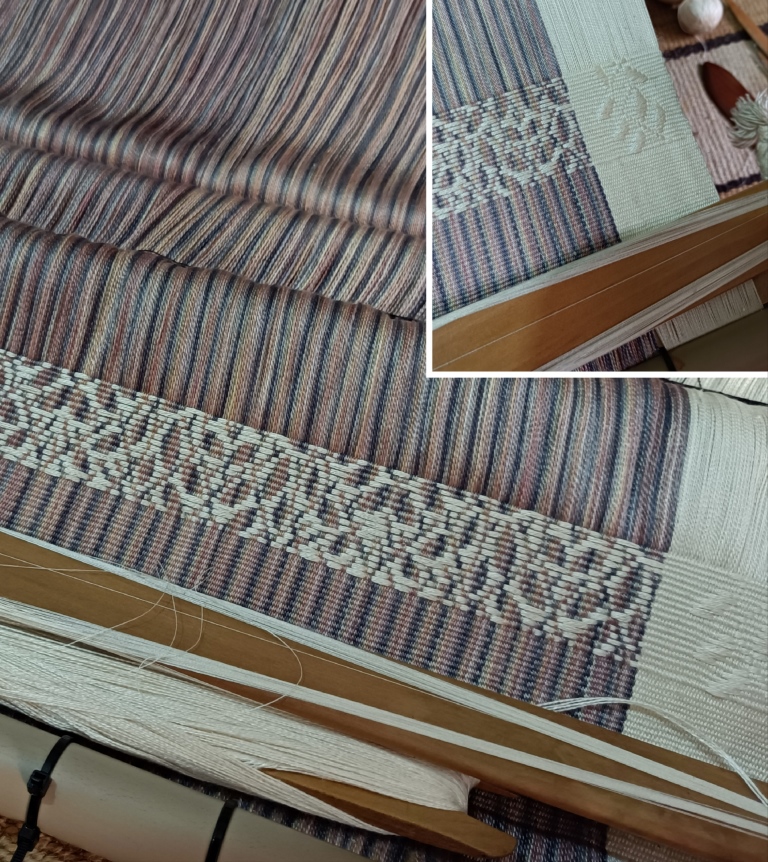
The white-on-white leaf pattern continues along the sides. While it was tempting to fill all that center space with hummingbirds flitting amongst flowers, I decided in the end to keep it pretty open and quiet and only added one more figure.
Here you can see the head-less second hummer as I add a second beam to roll up the woven cloth and advance the warp.
Finished with the second figure and glad that I hadn’t cluttered the center space.
And then it was time to embark on the home stretch by duplicating the strip of foliage pattern that I’d woven at the start.
This photo gives a better view of the white-on-white pattern which is sometimes very hard to capture well. Note how the variegated thread mysteriously changes tone right at the middle of the warp.
With that, it was done…done on the loom, at least. I have yet to wet-finish it.
When laid out flat like this, it’s a bit disappointing how “flat” it looks considering that it is, after all, made from silk.
If I crinkle it up a bit it catches the light in places and shows off some of its sheen….
Of course, I know very well how silk behaves from the many silk projects I’ve woven in the past. It can be deceivingly dull, stiff and almost cotton-like on the loom only to melt into slinky, shiny softness after being washed and, most importantly, given a hard press. I’ll just have to be patient.
Here’s another look at the white-on-white patterning on the sides that I love so much.
When I eventually get myself over to Australia to live, I’ll use this as one face of a cushion cover in my home over there. While thinking about that, I remembered other hummingbird and foliage pieces that I’d woven during the pandemic that I think could be combined to match this project surprisingly well.
I wove this long silk hummingbird band for the pure joy of it. I didn’t have any kind of end product in mind and so it has been just sitting there in a drawer along with the two flower bands that I’d woven to accompany it. I used a warp-faced double weave structure using four sets of string heddles in this case in 60/2 silk. And here I was thinking that the colors in my latest project were all soft and feminine and not like me at all, forgetting that I’d already used very similar ones in this three-part project during those pandemic years.
Here it is with one of the two flower/foliage bands placed alongside.
The two flower/foliage bands together. I was particularly pleased with these two bands as they had been a study in how to switch background colors smoothly back and forth along the length of a band without using a harsh and sudden horizontal transition.
I think the three pieces could be combined to make another cushion cover and that both cushion projects would sit nicely together. So, it will take a move to the other side of the world before I can truly call these projects “done”.
I’ve absolutely loved having this wide-ish warp on my backstrap loom beams. I loved using the longest of my shuttles and hearing the clack-clacking of the long and heavy-ish swords as they worked together in the sheds. The silk was lovely to work with. I was able to create sheds easily with just a little gentle strumming action. I think my next project will involve experimenting and so I’ll most likely be back to good ol’ sampling on narrow warps to see how well my ideas translate to cloth.
Once again, thanks to Will for the gift of the lovely 10/2 variegated thread, to Susan for the white 20/2 and to Betty and Deanna for the white 30/2. This just about finishes off the cone of 30/2 silk with which I was able to do so much! But this isn’t the last I’ll see of it. I still have the little skeins of cochineal-dyed 30/2 which is one of many experiments that I used it for. I’ve yet to come up with a project for those.
I’ll leave you with images of two little slices of culture here in Santa Cruz…
On the left you see San Roque church which is two blocks from my home. It’s one of the venues for the International Baroque Music Festival which takes place here every two years. It’s nice to be able to stroll over there to enjoy a few of the concerts. This year’s festival starts tomorrow night and all the concerts are free (which can make things a little tedious as people line up early to get in on a first-come basis.)
On the right, I give you the view while dining outdoors at Burger King, would you believe?! Indoors, it’s your standard BK unloveliness. That’s the top of the San Lorenzo cathedral that you can see half a block away in the main square.
Many years ago an online acquaintance told me that she could instantly tell which of the images of woven pieces that had been posted to one of the online groups were mine. I thought that was fun…wow, it seems that I’ve developed a “style”. However, as I think back to some of the things I have woven over the years I’m sure that’s not true at all.
I’m thinking that perhaps my work was so easily identifiable back then because it stood out as being warp-faced in a group where the vast majority of work wasn’t. Also, in those days I did seem to weave a lot of patterns that could be described as big-and-bold and decidedly “ethnic-looking” at a time when replication was a big part of my learning process. The products were hardy belts, straps and shoulder bags. The thread I used was locally-sourced 8/2 cotton which was almost all I had access to here for this kind of work.
Now, I’m not quite sure that I want my work to be so easily recognized. It feels like that would mean I was not branching out and trying new things or heading in new directions. And that might very well have been the case if I hadn’t been given so much yarn by weaving friends over the years….yarn that I probably never would have chosen on my own…like the cones of 140/2 silk I was given by two friends, eeeek! Who would ever contemplate weaving with that? It was offered to me, gratefully accepted, and eventually I used it (and loved it!). I can only hope that I wove something worthy of the lovely gift.
One of the projects using the 140/2 silk as warp was the last two panels in my Within These Walls series.
I suppose that if there had to be something that somehow categorised what I do, or my “style” of weaving, I would like it to be the fact that I use a backstrap loom. For me, the process in most cases is more notable than the product. I’m rambling on about this a bit because of a couple of things that I have seen in my online groups recently. One was a comment on a photo of my latest warp…
The commenter asked me to make sure to eventually post the finished project because she is fascinated by “backstrap weaving”. The thing is, once the fabric is off the loom, there’ll be nothing to indicate that it was woven on a backstrap loom. It could have been woven on any kind of loom that allows one to create 18- 1/2″-wide warp-faced cloth. For me, the product isn’t “backstrap weaving”….the act of creating it is.
What I’m trying to say is that I think that the term “backstrap weaving” is suitable for describing the act of weaving on a backstrap loom…. I’m out in my back yard today backstrap weaving, for example. I don’t think it works as a word to describe the cloth that comes off the loom and I have a feeling that this is the way many people use the term. I suspect that the person who asked the question is interested in seeing the cloth (and of course that’s fine) thinking that somehow it’s exclusive to the backstrap loom. If she had been interested in “backstrap weaving”, the activity, I think she would have asked to know more about the loom, my set-up, how it all works etc..
It makes me wonder, as I have often done in the past, what people think “backstrap weaving” is. And it makes me regret not having made it clear when I decided to name this blog Backstrap Weaving almost fifteen years ago. Maybe I was unclear about how the term should be used myself back then or at least unaware of how it might cause misunderstandings. I know that in the past I have been guilty on my many occasions of referring to my cloth as “my backstrap weaving” as a quick way of saying “pieces I have woven on my backstrap loom”.
One clear indication of misunderstanding was when someone posted that they were doing backstrap weaving on their inkle loom (simply because they were using a pick-up patterning technique that is often used by weavers who use backstrap looms in the South American highlands).
So, here I am “backstrap weaving”. The cloth that I’m weaving is in a balanced doubleweave pick-up technique known as Finnweave which can be and is woven on other kinds of looms. I don’t think anyone is going to pick up my finished cloth and identify it as “backstrap weaving”.
The fact is that, with will and skill, so many different kinds of fabric can be woven on a backstrap loom (with obvious width limitations, of course). The fabrics don’t have any particular characteristic that make the backstrap loom the only possible piece of equipment. The product could be weft-faced, balanced, warp-faced. It could be cloth where all structural and pattern elements are created by pick-up, or the loom could have been set up with multiple sets of string heddles and other aids to make those elements completely loom controlled, or a method that lies somewhere between those two could have been used.
A weaver from Pitumarca that I watched at Tinkuy 2010 creating weft-faced fabric on his backstrap loom.
A weaver from San Ignacio de Loyola in Peru has made the weaving of her warp-faced pattern totally loom controlled by using multiple sets of string heddles.
My weaving friend Sharon Kersten is currently sampling balanced cloth on a backstrap loom using a 15-dpi rigid heddle. Note her cool temple…push pins in a length of balsa wood.
By the way, I seem to have been asleep the last few years as far as rigid heddles go. I had no idea that they’re now available in 15 dpi. Sharon says that unlike other weavers who tend to have shaft envy, I on the other hand have dent envy.
This gorgeous sheer cotton cloth was woven on a backstrap loom by a weaver in Mexico. It’s yet another kind of fabric that I think is more accurately described as having been woven on a backstrap loom rather than with the blanket term “backstrap weaving”. The range of achievable structures and techniques is wide! (Image from the Flickr page of Teyacapan and used with her permission).
The other thing that had me pondering what is meant by “backstrap weaving” was a question in another group: “What is the best book on backstrap weaving for beginners?” It leaves me wondering if they’re referring to the activity or the product. Do they want to know how to make, set-up and use a backstrap loom or do they already have one and just want to learn the patterning structures that are most often associated with this kind of loom? Are they looking at “backstrap weaving” as the process or the product? I haven’t asked but I am curious to see what other people reply as I think it will give a good indication of how others understand the term.
Anyway, let me get on with what’s currently on my loom…..I’ve been working on my latest project with the latest gift of yarn from my friend, Will, in Australia….some lovely variegated 10/2 silk which sits alongside some luscious white 20/2 silk that Susan had given me many years ago. I have admired work done with variegated thread but never thought to branch out and buy any because I really had no idea what to do with it. With the gift of this lovely mother-of-pearl thread, I’ve been given the push that I needed to come up with something.
My piece is all kind of soft and feminine-looking which might shock you if you’ve come to think of my style as big and bold. This is another example where gifts are ensuring that I don’t fall into any particular style box in terms of product. The common factor is the loom. It’s all about the loom.
It’s always lovely when the threads have all been settled into place and I can get started on the pattern.
The colors in the variegated thread have aligned themselves quite differently from the way they did in my much shorter sample. In the sample there was less space between the darker threads across the warp which meant that there was higher contrast between the leaf shapes and the surrounding white supplementary weft. The effect in this longer warp is much softer. I’m doing some white-on-white patterning with supplementary weft on the sides. (This isn’t the “mad” idea I mentioned in my last post. I decided I wasn’t going to take a chance on trying that in this “real”project).
That’s the extent of the foliage pattern. I’ll weave this band of pattern again at the end. I am, however, continuing with the white-on-white along the sides.
I’ve had to keep an eye on the width because I broke one of my rules and didn’t sample the doubled 20/2 silk on the sides to get a width reading. That’s the price I pay. I guessed how those threads would want to settle and now I have to keep an eye on them in case they decide otherwise.
And now a hummingbird and flowers start to make their appearance. This might be the only motif I weave between the upper and lower strips of foliage….keep it clean and simple, perhaps. We’ll see.
I’ve just joined a hummingbird group on Facebook and it’s so much fun seeing the joyful posts as people announce the return of their friends after their winter away.
Before I switch off the bedside lamp at night, I take a quick look over the edge of the bed to see my loom with its limp warp lying on the floor. I love the way this looks in the soft yellow light. I wonder if I can get silk thread in these colors?
I’ll leave you with this photo that Kate sent me after having read my post last time which touched on the subject of width. Kate recently returned from a trip to Mexico in which she was able to visit with backstrap loom weavers and received permission to share this photo. As I sit at my loom quite pleased with my eighteen-and-a-half inch warp, I am in awe of the forty-eight inches (by Kate’s estimate) this weaver is managing…..and that’s wool! The fabric she produces is used for a very unique kind of cloth which is used as a man’s garment about which I’ll tell you more in my next post.
A backstrap-loom weaver from the Chamula municipality of Chiapas in Mexico.
It’s been a while since I’ve had something wide (wide for me, anyway) on my backstrap loom. The last thing was the cotton rep-weave warp from which I made a backstrap/loom carry bag. This one was 15 1/2″ and had 800 ends.
The warp is made up of white and cochineal-dyed cotton from Guatemala. I dyed some of the white black.
The finished backstrap which doubles as a loom and tool tote bag.
As I said, these kinds of warps are wide for me but not necessarily for backstrap loom weavers in other parts of the world. The widest warp that I’ve seen over here was 39″. It was a light cotton ikat warp that was being woven by a weaver from northern Peru. She stood while weaving in order to manage the width. That makes my 15 1/2″ seem quite ridiculous. Backstrap loom weavers in parts of SE Asia routinely weave what look like even wider pieces while seated at their looms. Maybe when I am eventually living back in Australia, I’ll be able to explore that side of the world and maybe sit beside those weavers to see how they skillfully create their warps and manage those widths.
An ikat shawl weaver from Tacabamba, Peru, standing to manage the wide cotton warp on her loom.
I like the fact that, as far as the loom is concerned, going wide simply means getting hold of some longer sticks. I have a piece of painted metal curtain rod that I’m using as the cloth beam of my latest project. A dowel rod acts as the warp beam. The weft thread can be wound around a suitably long stick if I don’t have a long enough shuttle.
My Montagnard (Vietnamese hill tribe) teachers always use the beams and swords that are designed for the widest pieces of skirt and blanket fabric that they weave no matter how narrow the piece they happen to be weaving.
My current project is 18 1/2”…a very humble width in comparison. However, to me it feels wonderfully wide and I love having my beams loaded up like this.
The other thing to which my “Wonderfully Wide” blog title refers is the fact that I feel that I have a wonderfully wide range of techniques and structures that I can draw on when it comes down to planning a new project. I wandered through several ideas when it came down to figuring out what I would do with the silk thread that I had been given by a couple of fiber friends in Australia.
I wasn’t one hundred percent sure about the size of this silk thread but after fishing out silk examples from my stash drawer that range from 30/2 to 140/2, I came to the conclusion that the variegated is most likely 10/2 and the white 20/2.
I thought about doing rep with alternating thick and thin weft and some pick-up. That idea got discarded in favor of ikat…a variegated ikat pattern on a solid-color background. In the end I settled on using supplementary weft to play with positive and negative space.
I felt that I’d already explored the idea of a variegated ikat pattern in this piece (although the thread in this case isn’t actually variegated. It’s just a mix of lots of different colored ends of warp). I had to look back at this to be reminded that I hadn’t particularly liked the effect at the time (although it’s funny how things can grow on you!)
When I do ikat on a multi-colored warp, I prefer having wide stripes of color so that there’s only one color in each pattern segment, as you can see in this silk example I made some years ago.
The warp on which I’m currently working will hopefully be fabric for one face of a pillow/cushion cover. I am using the 10/2 variegated thread alongside doubled 20/2 to give me the width I need. Please bear in mind that I’m not saying that doubled 20/2 equals a single strand of 10/2. I’m just hoping that the two will play well enough together to give me the width that I need.
But first, as always, comes the sampling. The pattern will be foliage and hummingbirds. I wanted to weave the foliage using white supplementary weft (multiple strands of 30/2 silk) to fill the negative spaces. This means that the foliage pattern would be revealed in the underlying variegated ground cloth. Normally it’s the supplementary weft itself that forms the positive part of the pattern.
This covered book that I created is already living in Australia. I dug up photos to see what the various colors of supplementary weft looked like in the upper and lower foliage patterns. Again, it isn’t variegated thread but rather a combination of four strands of three different colors. In this case the supplementary weft is used as the positive part of the pattern on the green background.
In this example, the gold supplementary weft has filled the negative space around the flower pattern which is revealed in the black ground cloth. The red patterning shows the use of supplementary weft in both positive and negative space.
So, I wound a warp of what I figured would be a suitable width to give me the information I needed for the larger project. With this sample I would find out the number of ends I needed to create X inches of cloth, the number of strands of 30/2 silk that would give good coverage as supplementary weft, the best weight of silk to use as the main weft and the warp span of the longest practical weft float. I took some old foliage patterns that I had created for other projects and altered them to reduce the negative spaces to what I guessed wouldn’t create impractical lengths of floats….the kind that would sag or get hooked on things when the cloth was in use.
The pattern needs to be busy so that there are never any excessively long floats of the white supplementary weft.
I was very happy with the result and made a note not to have the pattern on the real project extend all the way to the selvedges. The first couple of little triangles you see there are where I was testing the ideal number of strands of 30/2 silk to use for the supplementary weft. The 30/2 silk comes from my weaving friend Deanna. We made a swap….a very large cone of 10/2 cotton (which had also been a gift from my friend, Betty) for a cone of 30/2 silk.
Susan’s gift of 20/2 silk is being used as warp alongside the Will’s variegated 10/2s in the real project. Deanna’s 30/2 silk (which in a roundabout way also comes from Betty) is the supplementary weft. I am weaving the generosity of all these fiber friends into this piece!
Off the warping stakes and onto the loom. As usual, when winding wide warps, I wind several small sections removing them one by one from the warping stakes and placing them on the loom beams that are waiting nearby on the floor. I don’t take any risks with having my warping stakes lean, even if ever so slightly, by having too much thread loaded onto them.
The next task was to make 593 heddles.
I placed a couple of cardboard strips in the sheds to help me see if any sections of the warp are set more closely than others…as I’ve said here many times, there are varying degrees of “warp-facedness” which means that some warp threads might be positioned closer together than others. When weaving with supplementary weft I need to weave a little narrower than is my natural tendency so that I make sure that the patterning weft is not exposed at all when it travels between the layers of warp. That can be a bit tricky….fighting against muscle memory.
It’s normally my habit to start with a selvedge in which case I would remove those cardboard strips and start weaving right at the base of the warp. However, I decided to leave them in place this time.Although the two aren’t visible in this photo, I can tell you that the 10/2 silk and doubled 20/2 seem to working together well.
This is the point where I will start weaving the pattern. And here I’ve stopped for the time being while I figure out my design. My sample was on 142 ends. I need to extend it to 1186 ends! I plan to have a strip of pattern the same length as my sample, once again using the supplementary weft to fill the negative space. Then I plan to weave scattered frolicking hummingbirds in white supplementary weft, this time using the variegated thread as the negative space surrounding the figures. I’ll finish by repeating the first strip of pattern. Well, that’s the plan anyway.
I’ll have a choice in the style of hummingbird figures….either using the supplementary weft to “draw” the swirls within their bodies as can be seen on the left, or use the weft to fill in the negative space within their bodies so that the swirls appear the underlying ground cloth, as on the right. I’m leaning towards the latter but maybe a combination of both?
This is what I mean by “wonderfully wide”. Choices, choices, choices. I have another idea, which I won’t go into yet, for including some very quiet pattern in the white sections of warp. I thought of it about two minutes ago! There’s something about writing this blog that helps with the creative process, it seems. The idea is a little mad so I might wait and see how that goes before I reveal it….or not! The madness might be just temporary, lol.
So, thank you so much all my extremely generous fiber friends for these lovely gifts of thread. Here I am weaving in a color palette that is not a common one for me. It does remind me a little, though, of the piece I wove when weaving friend Marilyn let me pick colors from her stash of 10/2 cotton.
Maybe this sunrise I had witnessed with Gwen while in Florida was on my mind at the time……
The lake had alligators in it!
I’ve spent several evenings now just working on the pattern. Let’s see how much progress I’ve made when next we meet…..
In my last post, I showed you what happens when I become way too immersed in the process and forget about the product. I ended up with a new strap for my camera in the lovely reversible three-color pebble weave on which the hummingbirds were upside down on one end! Friends told me that this was done on purpose so that I could see them the right way up when I looked down. I have some very nice friends :-).
I am trying to think of a time when the reverse was true and product may have overtaken my thoughts about process. I guess there was this example where I needed a wool band fast-fast for a work shop I was teaching in which way more people signed up than expected. I forgot all about my backstrap loom and jumped onto my friend Pam’s floor loom. Pam offered to set up the loom. After all, she would do it far more quickly than I would have been able to given my limited experience. Then I took over to weave.
The message on my top was appropriate for the task. I needed to put my head down and weave!
In my latest project, I find myself slipping back into process mode. I guess my focus is on designing and structure for this one as I am using a structure that I don’t often use….Finnweave. The product? I’ll make one up along the way.
I didn’t learn this one from any of my indigenous weaving teachers. That and the fact that I seldom use this structure, had me pulling out my notes to remember how it all works. Learning it from a teacher in Mexico, for example, where it is still practiced, would have involved days, if not weeks of study. Prior to that, there would have been days spent looking for teachers, more days spent waiting for them to discuss with family and/or friends the price they should charge, time spent preparing yarn if there wasn’t any on hand, and possibly even more time spent scratching about for loom parts which were perhaps long since out of use and maybe even re-purposed. One of my teachers in the highlands was using one of her warping beams as a fence rail.
And then there would be the days or weeks of interaction with my teacher as I watched and tried to imitate her movements at the loom. I can only describe some of my earlier learning experiences as a real struggle when no verbal explanations were being given or patterns provided on paper. Of course, there is more than one way to impart knowledge and skills and I learned to adapt. All that combines to implant some pretty firm memories which make it much easier to just pick-up a technique that I haven’t used in a long time and slip easily back into it. Obviously it’s not the same as learning something from a book.
It annoys me having to study a structure all over again! Why won’t it sink in and stay there?! In the process I improve my notes so that it will be easier and quicker the next time. And yes, it does get faster each time. My notes include tips that I have come up with myself for remembering, for example, the home position of the two shuttles, which color comes next, and the changes I make to the basic loom set-up depending on whether I am weaving a narrow or wide piece. These are things about which I need to be reminded when I first get back into it.
A very narrow sampling warp in 20/2 cotton that I used in the past to test the proportions of basic shapes.
This time I am using 20/2 wool for the first time in Finnweave. I needed to sample again for a width gauge and to see if the proportions of my motifs in this material matched those of the figures on my old charts.
I have to figure out all over again just how hard to beat. You can see how different the two figures look when I change beat. After wet-finishing the sample, I could see that the firmer beat had produced the better cloth.
Those figures are adapted from a crochet pattern by Svetlana Rogatykh (she does amazing work in crochet!). This is a smaller version that I drew of the much larger one I showed earlier. The larger one is much closer to Svetlana’s creation for crochet.
I had decided that I wanted to weave a foliage pattern and set about creating leaf patterns….my usual thing…basic oval-like shapes with veins. They were all too large and also difficult to position at different angles. I wanted something more delicate that would climb and twist its way up the warp and not something static and repetitive. This structure allows horizontal and vertical lines. Diagonals are harshly stepped. I was about to give up until I decided to look at Svetlana’s work again. She offers a free foliage pattern and that gave me the spark that I needed to get this going. Her leaves are also in horizontal and vertical lines and in all kinds of hard blocky shapes that alone would not be recognizable as leaves at all. However, place them all on a stem and make them all just a little bit different, and suddenly you have a lovely pattern of flowing foliage, somewhat delicate despite the hard stepped diagonals and block-like shapes…..at least to my eye.
So, I had to create another sampling warp.
I would have loved to have designed some hummingbirds but that just wasn’t going to work. I went for tiny butterflies instead…simple enough, just two triangles. I was thinking that if I swapped those butterflies for fish, this could also make a nice aquatic scene.
This second sample gave me another opportunity to test the proportions of my woven figures against my charted ones and confirm the width information that the first sample had provided. I added my large leaves to compare….nope, they really are too big.
Then it was onward to the real project. The samples finished off my supply of black 20/2 wool but there is still a lot of green…perfect.
This 20/2 cotton Finnweave piece works nicely as a “neck wrap”. Maybe this wool one will too.
Almost ready to go. I still had to remove the original cross sticks and insert a coil rod. As I am not using a reed to help maintain sett in this balanced weave, I find that the coil rod is particularly helpful for maintaining the established width beyond the shed rod.
I took a lot of time at the start settling the threads and trying to make sure that the spacing between the warp threads is as consistent as possible across the eight inches of warp. I find it handy to be able to divide the warp in half and then in quarters with my lashing cable ties. I count out the threads to make sure that I place the ties in the right places. I can then focus on one section at a time making sure that each half measures four inches and each smaller section two. I check that the threads are as evenly spaced as possible within those sections.
Maintaining that sett without a reed is much easier for me to do in this double-weave structure as opposed to plain weave. Something about the exchange of colors between the two layers of the double weave seems to help. As soon as I stop weaving patterns and the layers separate, I risk losing control of the sett.
Coil rod in place and weaving underway.
Of the course, the last ten or so edge warp-ends are the ones that most want to snuggle together and hide the weft. I don’t usually weave patterns all the way to the very edge and so those warp threads are left free to misbehave. I was watching a weaver in Mexico weaving plain balanced weave on her backstrap loom in a video and noticed that after every four weft shots or so, she would take a pointed stick from where it had been parked in her hair and strum the warp threads in the last inch at the selvedges. She would strum outward. I figure that she must be coaxing those problem threads apart. I must remember to do that too.
I feel like I have been neglecting my loom’s role in this whole process. I seem to be taking my beloved backstrap loom for granted and I think that I will devote my next post to more about the loom and how it works in my hands. I guess I just see it more and more as a part of my body when I am weaving in the same way that I used to feel that skis were just an extension of my feet!