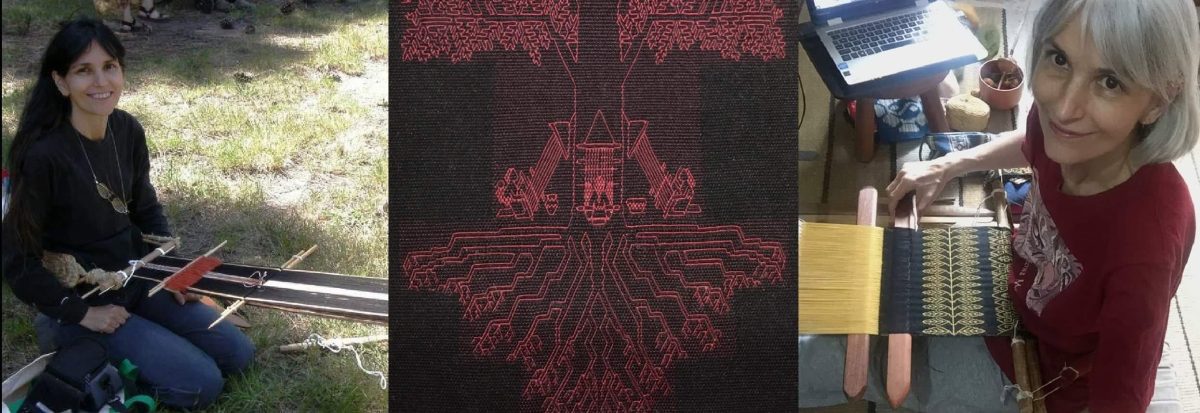
Backstrap Weaving – Bubble, Bubble

Why “Bubble, Bubble”? Because I seem to have spent more time at the pot dyeing yarn and boiling my hand spun cotton than anything else these last days. And that’s okay. I can stand there stirring and thinking about what I am going to weave, or continue with the Bananagrams game that is always in progress nearby. I kept a careful watch over the cotton because I am notorious for letting things boil dry. I don’t know how many times I have stepped away from rice, beans or quinoa on the stove to weave “just a few rows” only to be alerted to a dry pot by the smell of something burning. The pencil cups that I showed in my last post have been working out well for holding these samples of my newbie hand-spun cotton singles under tension. I got a few suggestions from Facebook friends for alternatives when I start producing larger quantities….mostly involving pvc pipe.

I put my juggling balls into the cups to weigh them down and then set them on the window sill to dry. The wind was so strong yesterday that I had to go down the three flights of stairs twice to retrieve everything from the garden below. Versions 2 and 3 seem to to be similar enough to use in a piece of sample weaving. I am not ready to go with the sheer-cloth-and-sizing idea yet. I am thinking of using these samples in my finest reed to weave some balanced plain-weave, something along the lines of this silk sample that I wove some time ago….

I’d like to weave in some tufts of very lightly twisted colored cotton into the cloth now and then. I have a few shades of natural brown and a bit of green. I saw a lovely scarf on Instagram that had been created like that with tufts of wool.

That’s taking second place on the to-do list because I am first weaving fabric for the bag to accompany the three-color pebble strap that I recently finished. It’s funny that this whole project has sprung out of the desire to weave something in the reversible three-color pebble structure and use it in something that would allow both faces to be seen. A bag strap is what I came up with. And so, here comes the bag fabric.

I over-dyed some pale green yarn to this dark blue, hadn’t thought through the project properly at all, and ran out while creating the warp. So then I had to over-dye some pale yellow to finish the warp and have enough for the sides and separate flap. Of course, I can’t expect for a minute to be able to create the same shade of blue when over-dyeing yellow instead of green but this is what happens when you are working with diminishing stash. You either have to plan more carefully around the quantities that you have or just go making it up as you go along! I am usually much more in tune (to the extreme!) with the former of the two strategies and it is interesting finding myself being fairly content with this more carefree approach this time.

I found out when I dyed cotton black for the scarf project above, when it was already too late, that not all blacks are alike. You can probably make out the two strips of darker black in the cloth. They could have been placed at the two selvedges if only I had noticed earlier. What chance do I have, then, of perfectly replicating blue on two different base colors? At least this time I was aware that there was going to be a difference and I placed strips of the “new” blue on the left and right edges of the warp to balance things out. I am weaving in warp-faced plain weave and will add a hummingbird and a flower motif in supplementary weft to one lower corner of the front of the bag and perhaps another pairing in the center of the back. The cloth needs to be fairly “quiet” because the strap is so lively.

I christened the Weaver’s Journal that I had covered with my woven cloth. I haven’t even tried to make my notes neat and pretty because I knew that the effort would not last long at all. Besides, I kind of like my scribblings. 🙂

I haven’t made notes in the Dyer’s Notebook yet because my latest dyeing has been of the more desperate never-to-be-repeated variety.

My Weaver’s Journal covered with cloth in 30/2 silk and patterned with supplementary weft.

This kind of stash scrounging reminds me of when I weaving Navajo-style tapestry pieces in southern Chile in the mid 1990s. I had brought back some Wilde and Woolly wool from the States and topped up my stash some months later via mail order. The rich “Ganado Red” color that I had ordered didn’t arrive. Instead, I got this kind of dusty pink. It worked out okay. I gave this piece to my brother when he visited here and he keeps it under glass on his dining table.

The way the diamond pattern was meant to be aligned.

After that, I decided that I wouldn’t order more yarn by post and that I would only buy in person. I wove several pieces and eventually the bottom of the yarn barrel was in sight with no plans to travel to the States. I had to get into “make-do” mode with whatever I could scrape together. I didn’t want to stop weaving.

Joanne Hall had written a book on tapestry weaving. I had a used copy and I loved some of the Mexican patterns that she had included. The main motif of intertwined black and white lines was meant to be woven as a diamond shape sitting within a square. The square was supposed to be positioned with horizontal top and bottom and vertical sides surrounding the diamond motif….that is, not like I had woven it on the loom.

Because I didn’t have enough of any one color to weave the whole surrounding square, I had to swivel the pattern 45 degrees. And I didn’t have enough yarn to be able to weave the two inner motifs in the same colors. It didn’t look like the picture in the book and I just wasn’t crazy about it when it was done. When I moved to Bolivia, it got left behind in Chile hanging on the wall of the little cottage in which I had lived. I wonder where it is now. Of course, I wish I had it now. What you see here are photos of the only photo I have of it.

The way I had to align it on the loom.

I remember tapping away at a calculator to plan out this piece so that the pattern would fit into the four-selvedged limits and use just the right amount of yarn. My boyfriend at the time asked me if that was how the Navajo weavers plan their pieces….with a calculator…lol. I had obviously put more thought into planning this around my available yarn quantities than my current bag project!

And then I threw almost all the left- over bits and pieces into a pot, dyed them red and wove one last piece….another odd piece with, naturally, multiple shades of red. I got to use the Navajo saddle-blanket structure at the top and bottom of this four-selvedged piece before running out of the tan color and then filled the center with plain weft-faced pattern. Sound familiar? Here I am in 2022 doing the same thing with dye to make the most of my supplies. I like the challenge. I like just making do with what I have on hand.

The twined edging tassels in the corners were sewn down to make the piece less interesting to my cat (who had chewed off the tassels on one of my other pieces as well as a chunk of corner!)
From the archives! 1996 and weaving with my backstrap warp attached to the bottom of the Navajo-style vertical frame.

Of course, it didn’t matter in the end that I had run out of tapestry wool yarn for weft because shortly after all this I went to Peru for the first time and it all became about warp-faced weaving on backstrap looms when I returned, using locally available cotton and the high-twist wool singles that I had been using for warp for my Navajo-style pieces. It all got used! My Navajo-style loom was only used as the anchor point for the end of my backstrap-loom warps after that, except for a couple of quite wide warp-faced pieces which I wasn’t yet ready to handle on a backstrap loom.

Now I am looking at a tiny amount of powder at the bottom of my pot of red-blue dye. My friend Mog had given me some of her supply the last time I was in Australia and it’s almost all gone now. That’s okay. I had a good run with it in some fun projects mixing it to get a variety of blues….

I enjoyed creating different intensities of blue on 30/2 silk for this book cover project.
More fun with dyeing blue on this 60/2 silk ikat warp.

I still have a good amount of a green-blue (again, thank you, Mog) as well as a teal, so who knows what might come of that.

I am reminded that I have credit with Southwest Airlines that expires in September and an empty Traveler’s Diary. But everything is still so unclear and confusing, isn’t it? In the meantime, I am trying to coax my book-writing mojo back into existence. I made a good start but a tripod-fail let me down. I finally got a new one…no excuses now! Please check out the eight books I have published so far at Taproot Video. They’re available as PDFs to download as well as in the form of spiral-bound books. Here are a few…

Until next time.

Backstrap Weaving – From Experiment to Project

Just when I am at the point when I feel that I have learned enough about the behavior of the naturally-dyed silk that I was given to be able to move on to real projects rather than experiments and samples, I find that I don’t really have enough of this yarn left to be able to make anything decent!

These are the skeins of silk that had been used in natural dye experiments and given to me. I have used them to weave journal covers using a variety of warp-faced pick-up structures and, more recently, to experiment with ikat. If you have been following my most recent posts you will have seen and read a lot about my experiments in which I use multi-colored base warps for ikat. I wrap the warp in ikat tape to create a pattern. The taped areas resist the color in a dye bath and, when the tape is removed, a multi-colored pattern is revealed ready to weave.

Sadly, I am almost at the end of my supply of this naturally-dyed silk. There is just about enough to make one more small warp but I think that it is time to move on and try out the 30/2 silk that I got from my weaving friend Deanna in a swap.

The fourth in my recent ikat experiments with the multi-colored silk has happily changed its role from  experiment to project. I warped up a wider and slightly longer piece and decided not to create stripes of random color and width this time. All the stripes were twelve ends wide and I used symmetry in the arrangement of the colors.

I divided the groups of warp threads to be wrapped in tape into twelve-end sections. This was going to be a very orderly warp. I didn’t challenge myself to creating the impression of curves or to create nice even horizontal lines. I went with bold diagonals instead.

Here it is out of the black dye bath and almost dry enough to place on my backstrap loom beams.

As soon as the first few inches I had been woven, I knew that this one was going to be my favorite so far.

A little further along and feeling really pleased with it :-).

And, finally, off the loom…a close-up.

One more picture (can you tell I am loving this one?!)

How would it behave once wet finished? I had high hopes that this would work as a cowl. I had used 60/2 silk as weft. Would it have enough drape? I love the wet-finishing part of working with silk. The fabric relaxes and almost oozes under the iron as I give it a good hard press.

I am trying to show the sheen after wet finishing in this next picture. It was really hard to capture.

And, yes! It works as a cowl. I am so happy that I can wear this piece! (This is what fifteen months of cold turkey grey-hair grow-out looks like, by the way).


It is just draped around my neck in this picture. I have yet to finish it. I have three selvedges and need only deal with one raw edge. I’ll cover that edge with fabric and use three buttons and loops to close the cowl. I need to make the closure decorative as I am pretty sure that the cowl will swivel at will around my neck as I wear it. The buttons could end up in any position and they need to be pretty. Once again, I’ll have to put my meager sewing skills to the test.

Another project that got almost finished is the silk ribbon that I made for my Koru pendant:

I have washed some of the 30/2 silk so that it can be dyed. The first ikat project with this new material will be a narrow one while I get acquainted with the way it behaves. I want to focus on a much longer warp which will be folded in two on the ikat frame. In that way I can tie the ikat tape in multiple layers at the same time and achieve a repeat.

My weaving friend Pam shared pictures with me of her visit to Uzbekistan many years ago in which you can see a warp of many meters length folded and placed on the ikat frame where the young ladies sit ready to tie the pattern. The  beams that hold the warp under tension are tied to bolts in the floor.

I am absolutely in love with this piece below from Timor. Kinga Lauren who collected the piece, kindly allowed me to show it here in my blog post.

I love those curvy irregular patterns. You can see how the irregularities in the pattern in the lower half of the fabric are perfectly replicated in the upper half. The warp was obviously folded with ikat tape wrapped around both layers at once. 

A close-up of part of the ikat section and the fringe shows the number of beautiful subtle colors that were used in the stripes. This is naturally-dyed cotton.

Wrapping multiple layers will be one new challenge for me. The other will be attempting to dye with more than one color. I tried a very simple version of this many years ago on a rather carelessly tied pattern. I really liked the effect and was able to use the piece as a book cover. I had some mishaps with this cotton warp. This was back in the days when I was using cassette tape for wrapping cotton warp. I made one of the dye solutions too hot and the cassette tape simply did not deal well with the heat.

So, on the heels of my happy cowl project/ikat experiment, let’s see what kind of mess (or success) I can make with 30/2 silk!

To finish, I have some nice work to show you from my inbox from new and old online weaving friends…

Shilpa Nagarkar Rao is weaving Andean Pebble Weave patterns using my Complementary-warp Pattern Book (after having learned the technique in my Complementary-warp Pick-up book). She uses an inkle loom to weave bands and then combines them to make beautiful bags. (See her Facebook page).

Bag made from several bands woven on an inkle loom by Shilpa Nagarkar Rao

Cynthia has been working with supplementary weft creating motifs in several colors along the length of the band. This ability to change color at will is one of the many nice things about this technique and is why Guatemalan clothing can be so colorful.

I love how Vanessa De Columna made what I believe to be her very first Andean Pebble Weave band into a headband.

In book news, my latest pattern book, which ended up with 132 charted patterns, is in the hands of Taproot Video and I am just waiting for it to go live on the website. The Taproot folk are currently busy shooting a new spinning class with Joan Ruane…exciting news!


Backstrap Weaving – Something from Scraps

I was motivated by the announcement that the summer 2019 weave-along (WAL) in one of the weaving groups on Ravelry would be “Weaving with Hand-dyed or Painted Yarns”. The WAL for the last couple of summers has been about band weaving and although I happily participated in those, this newest topic is much more interesting and challenging for me.

I decided that it was a good time to try ikat using silk for warp and started scratching around in my silk stash which includes cones and skeins of 30/2, 60/2 and 140/2 thread. I figured I would be wise to start with the heaviest 30/2 thread even though that still seemed very intimidating. I have mostly used cotton for my ikat experiments in the past, the finest being this one with 20/2s.

I was able to turn this experiment into something useful…a nice draw-string bag for my Kindle…

I had been using cold water dyes for these cotton experiments. Now was the time to take out the lovely Landscape and Jacquard brand dyes that I had bought a few years ago in the hope of dyeing wool and silk for some of my projects. I had all I needed: the ikat tape, the right dyes and a selection of silk from which to choose, but I still hesitated.

Ikat projects are such a big undertaking. There’s all the time spent designing and then tying a pattern, not to mention all the measuring and care to make sure that the pattern gets tied on straight. My eyes always seem to to tell me something completely different to what the ruler is indicating. Then you can never really be sure if you have wrapped the yarn well or tightly enough. There’s always a chance the dye will seep into the wrapped yarn and spoil the motif. And, finally, even if the initial tying and dyeing stages have been successful, you can never know just how much the threads will shift on the loom to possibly blur the pattern out of recognition.

The fineness of my silk in my stash was intimidating. So, I was quite relieved to discover in my scratching around that I still had scraps of naturally dyed silk left over from other projects. This silk is much heavier and seemed like it would be much more manageable for my very first ikat experiments with silk. I had been offered all these tiny dyed skeins of silk by a guild when the guild member who had created them had passed away. No one else had seen a use for them, but I knew that I could use them for small projects on my backstrap loom. This was what I was able to bring back home with me to Bolivia….

You may remember that some time ago I used them to weave four pieces which became covers for journals…

These are the remaining scraps I found in my closet…

Ikat Cat by Budi Satria Kwan fineartamerica.com

There are two quite different kinds of silk rolled up in these tiny balls. I opted for the heavier of the two for my ikat project and decided to wind a crazy multi-colored warp. I wanted to weave a piece that would cover a journal that I had left over from the other project. The warp only needed to be nineteen inches long to give me enough fabric for the cover as well as a comfortable amount of working space on my backstrap loom.

I was inspired by a picture of some fabric I had seen on the internet many years ago of the silhouette of a multi-color cat sitting on a dark background. I had saved it and kept it in the back of my mind. I wasn’t feeling brave enough to go for such an ambitious shape right now and decided to stick with some basic straight lines for this experiment. I had done some experiments with creating curved shapes in ikat some years ago too. They were quite successful but would have been even better if I had remembered to account for take-up when I tied the shapes. My circles had come out a little flattened!

I really liked the simple idea of having the multi-colored shape appearing on the black background.

Here’s the warp I created.

Next, I extended the warp on a frame so that I could start tying in the design. A friend lent me a small table that made a perfect frame for this.

Those light pieces of thread you can see in the picture are enclosing the sections of threads that will be tied. Most bundles were made up of twelve ends with a few evenly distributed ones that held fourteen ends so that I could cover the total of 270 ends across the width of the warp.

I wrapped the thread in ikat tape in several short sessions over three days. The frequent breaks are necessary as I tend to get sloppy with my measurements when I get tired.

Here you can see the warp off the frame and ready to be soaked before going into the dye pot.

Here it is after being rinsed and left to dry overnight…

And now on the backstrap loom, heddles in place, first section unwrapped and with weaving underway…

Rather than remove all the ikat wraps at once, I like to slowly unwrap as the weaving progresses.  I feel that leaving some of the wraps in place helps reduce the amount of shift in the threads which gives a crisper design. I know that the shifting and blurring can be attractive but I have found that it is less so when the motifs have blunt horizontal edges as mine do. Shifting in motifs like these can sometimes create spots and/or lines of color that are totally disconnected from the main motif. The practice of not removing all the ties at once gives me a relatively small space in which to weave and operate the loom. I use fine swords and wrap my weft around a stick rather than the regular shaped shuttle that I prefer. I can slide the stick with the weft into a very small shed. I keep weaving until I absolutely can’t continue due to the lack of space and then I remove the next ikat ties to free up some space to continue.

Almost there…

I am hoping that I have planned this well enough so that the black squares in the middle of the center row of three motifs sit right in the middle of the spine of the journal.

Done!…

I am very pleased (and relieved!).

Ikat projects are always a big unknown for me. They can end up being a mess or a success. I’ll call this one a success.

It does seems a bit weird over-dyeing naturally dyed silk with chemical dye, but there really wasn’t a whole lot more I could do with the scraps of silk that were left in my closet except perhaps make some wrist cuffs.  I already made the cuff you can see at left when I was sampling for the first set of book covers.

I am glad that this project still shows off the beauty of the natural dye colors.

There is probably enough of the other kind of silk that I was given to do some further ikat experiments. It is finer and slicker. Maybe I will make an ikat cuff or two. The more experience the better if I am ever to move on to my finer 30/2s and 60/2s silk thread!

I could have produced a very similar effect in warp-faced double weave without all the mess and risk. I was thinking about that. Double weave would have given me a thicker fabric for a start, which I didn’t want. Plus the two layers of cloth would not have connected in the areas of solid black. That can sometimes create a sort of ballooning effect between the areas where the layers are in fact connected. In any case, the more ikat I do the more confident I will feel about eventually reaching my goal of creating complex curved shapes…the kinds I wouldn’t be able to achieve in double weave or the other patterning structures that I use.

Now all that remains to be done is to look for some pretty paper to use on the inside of the front and back covers of the journal.

Between bouts of ikat wrapping, I started sewing together strips of the green cloth from my Karen backstrap loom project to make a table square that will be approximately twenty-five inches square. It will be another piece on which I can display my samples at my workshops. I’ll show you my progress on that in the next post.

And, this will be my last chance to remind you to make sure you have downloaded all your purchases from Patternfish. You have until the end of the month to do so.