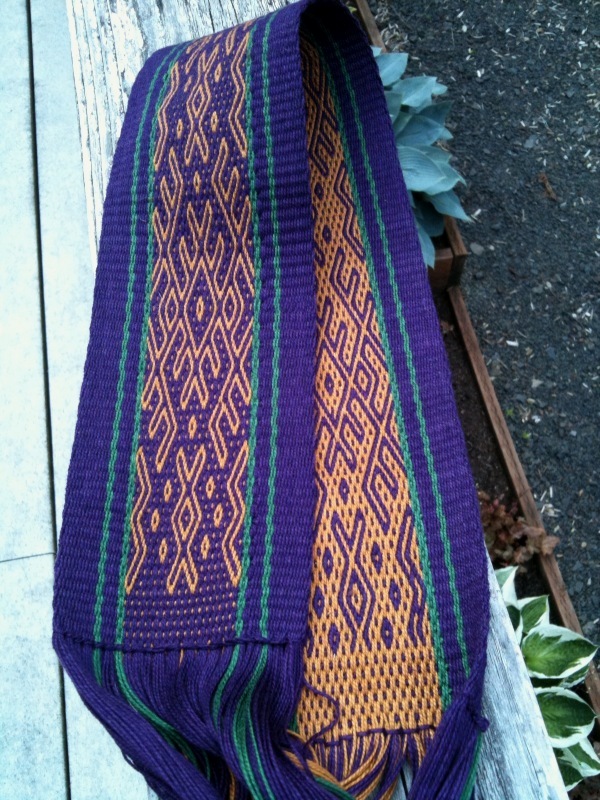
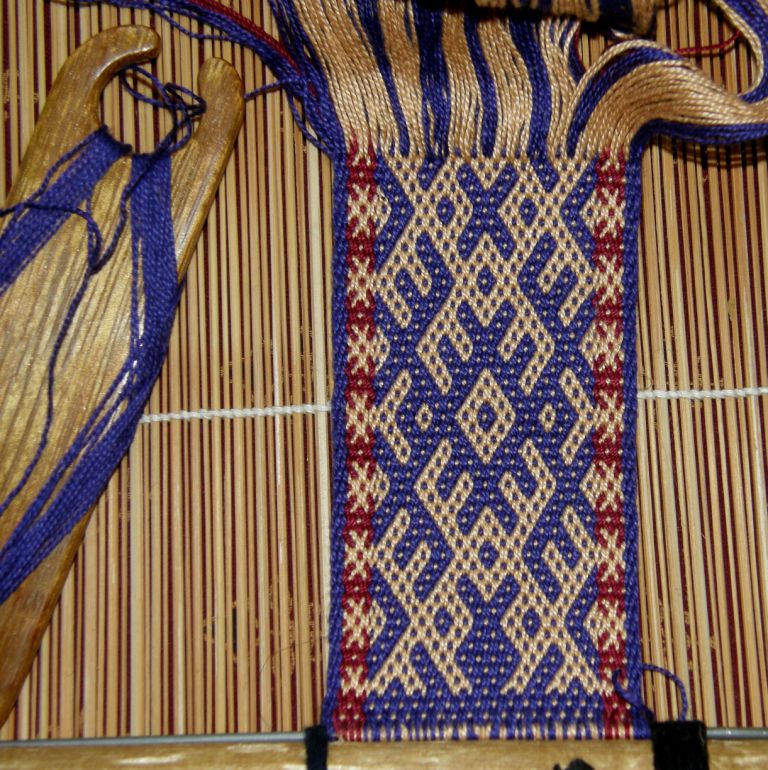
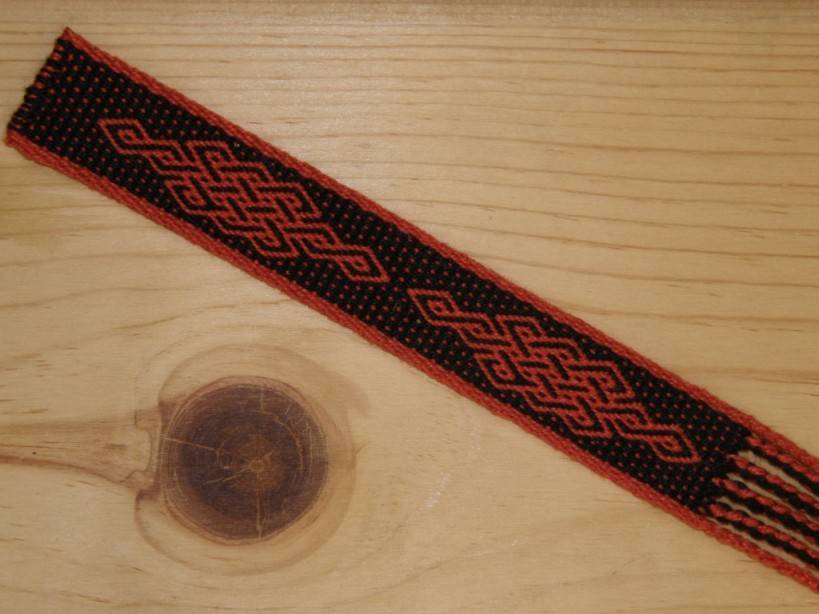
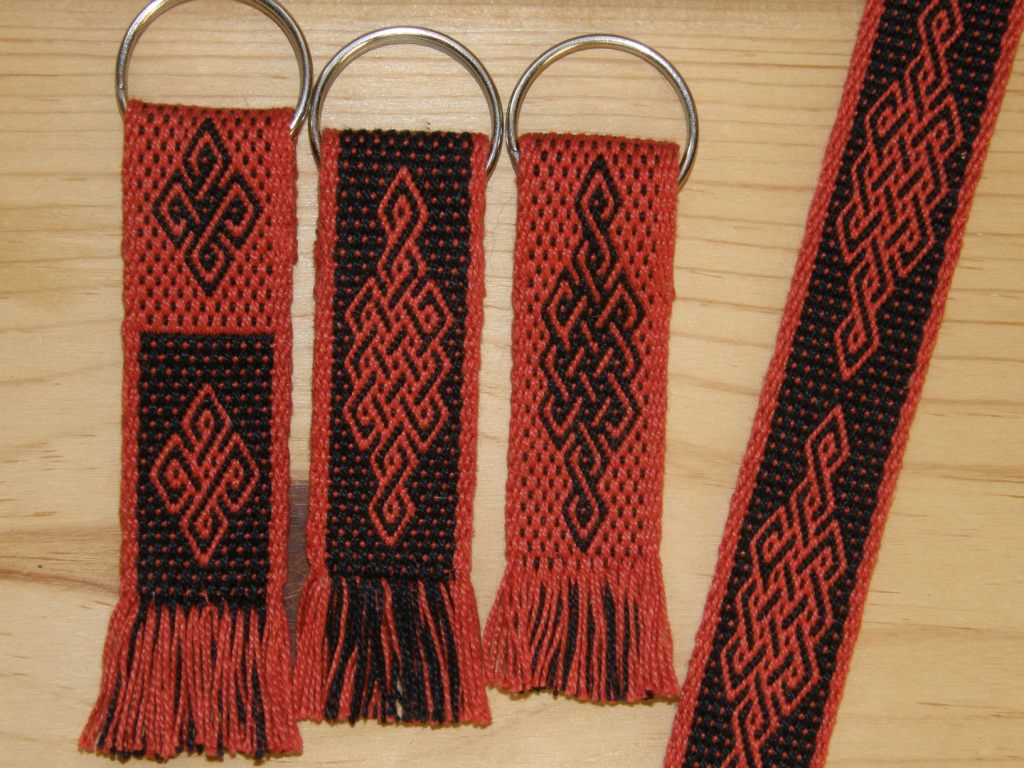
Celtic knot motifs in Andean pebble weave on my backstrap loom
PUTTING DOWN ROOTS AND WEAVING A GUATEMALAN TREE (PART ONE)
It is exciting how much interest there is out there in backstrap weaving. Some people are attracted to all the beautiful pick-up patterns they have seen on ethnic textiles around the world many of which have been woven on backstrap looms. Others are attracted to the loom itself – its simplicity, portability and low cost. Some people are interested in the products they can produce using up their yarn stash with this inexpensive piece of equipment while others are more intrigued by the processes involved in the “slow cloth” it produces.
I think that some people may be unaware that most of the pick-up patterning techniques do not need to be limited to the
My boyfriend learning Andean pebble weave on my rigid heddle loom
backstrap loom and can be set up and woven on other looms. I have heard from quite a few people in the time that I have been active in the online weaving groups who have jumped headfirst into backstrap weaving and attempted some of the more complex pick-up techniques as first projects only to become frustrated and disappointed.
A few have managed to succeed and I am always reminded of the Spanish girl who wrote to tell me how she had taken my monograph on a hiking trip, picked up some sticks along the way, and woven a band in Andean pebble weave as her first ever backstrap loom project. She blew me away!
Unfortunately, I have heard more stories of people falling in love with the llama motifs on my blog, getting some dowels for a backstrap loom and attempting double weave as a first project. The poor backstrap loom now sits under dust on the shelf.
Jorge made a key fob and quickly got the hang of operating the two sets of heddles.
I would like everyone to be as in love with the backstrap loom as I am but, if you are really more interested in the patterns than the loom, why not lash your warps to other looms as I did for my boyfriend above? Now I have to tell you that Jorge had no particular urge to learn Andean pebble weave. He has been listening to me beat away at my loom for many years now with no desire to get down on the floor and join in but I needed to do a timed test run for a lesson I had planned and he kindly obliged – and very well he did too. He even allowed me to post this picture! He is pretty confident that the fellow members of his heavy metal rock band don’t read my blog. 🙂
For those of you who love the loom and want to get down and beat away, I have put together a kind of tutorial on what I would call the “Steps to Success”. It is a list of all the tutorials that I have put out there and the order in which I would recommend doing them. “Putting Down Roots” would be another good name as, taking it slowly, and following these steps will give you a firm foundation, develop your skills and have you well prepared for all those lovely pick-up patterns that we all want to weave. You will find the listhere. It is worth checking out as you may have forgotten how many tutorials there were out there amongst WeaveZine, Weavolution and this blog. I have gathered up seven that I would list in the beginner category.
Tool bag fabric almost ready to come off the loom
I wove like mad all weekend as I was determined to get two projects off the loom. I have several others churning around in my head and I needed to free up some loom bars. Above you can see the purple fabric that I have been weaving for a tool bag set. This is what always happens when I do pebble weave – I turn the fabric over and then can’t decide which side I like best. Fortunately I have enough fabric to make two bags so I can have one with each of the sides showing. Before I declare this project complete, there is the horrid zipper sewing task to get through. I have one bag finished so far.
The smaller of the two purple bags has not been sewn up yet. I would like to make more in these rich colors.This came off the loom too this week. I should be able to make three coin purses from this - more zips, sigh...This was a yarn test for the Aunt Lydia number 10 crochet cotton. The black is the Brazilian brand crochet cotton that I get here. There was a small amount of pilling on the heddles in the black sections but virtually none in the red.
You may remember that I had planned to go to Guatemala on my way home from my recent visit to the US. I didn’t go as the US trip had been so long and I really needed to get home. It turns out that it was just as well as Guatemala City soon after was affected by a volcanic eruption which caused havoc. I would normally choose to avoid Guatemala during hurricane season but volcanic eruptions can happen at any time of year.
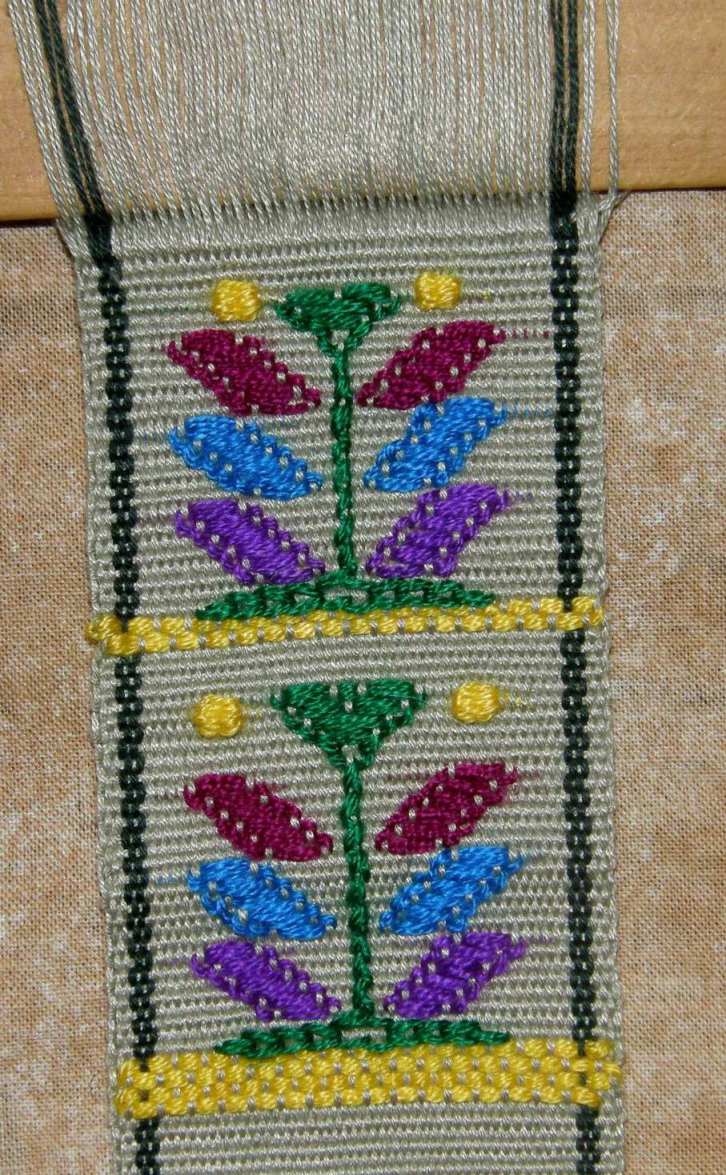
Guatemalan tree designs woven with acrylic supplementary wefts on a fine cotton ground weave
Anyway, I thought that we could do a little virtual trip to Guatemala in the meantime. I still have the bag of bright Guatemalan acrylics on the shelf and am no nearer to getting down to respinning them to use as warp.
I decided I would use them for some supplementary weft patterning, as they were originally intended, instead.
I wove a tree design using the various warp wrapping and inlay techniques that the Guatemalan weavers employ and this was fun as I hadn’t done any of this since 2008 immmediately after my return from my first visit there.
I learned these techniques with my teacher Martine and her daughter Carmen in Santa Catarina Palopo on the shores of Lake Atitlan. I met Martine in Panajachel where she sells textiles in the street market. She took me to her home and spent one morning setting up the loom and then her daughter took over weaving and teaching me for the next week or so. She was a good teacher. Each motif was repeated six or seven times across the cloth. Carmen would show me five times what to do and then would let me weave the last one or two motifs to practice what she had shown.
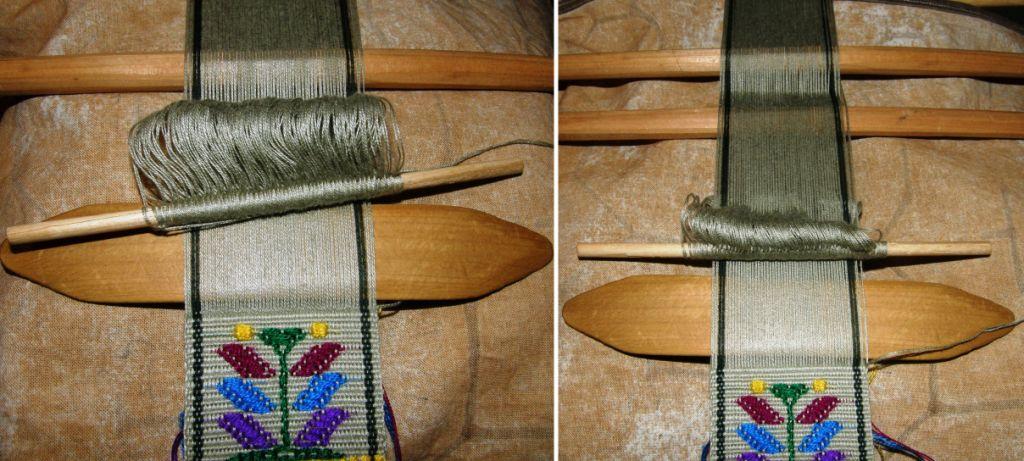
The weavers set up their looms with great care. Martine was obviously more skilled at doing this and Carmen only took over when everything was set to go. The warp is wound with two crosses. The second cross helps hold the shed rod in place.
LEFT: The basic loom set up with shed rod and string hedddles in place. RIGHT: An extra stick is placed in the second cross to hold the shed rod in position.
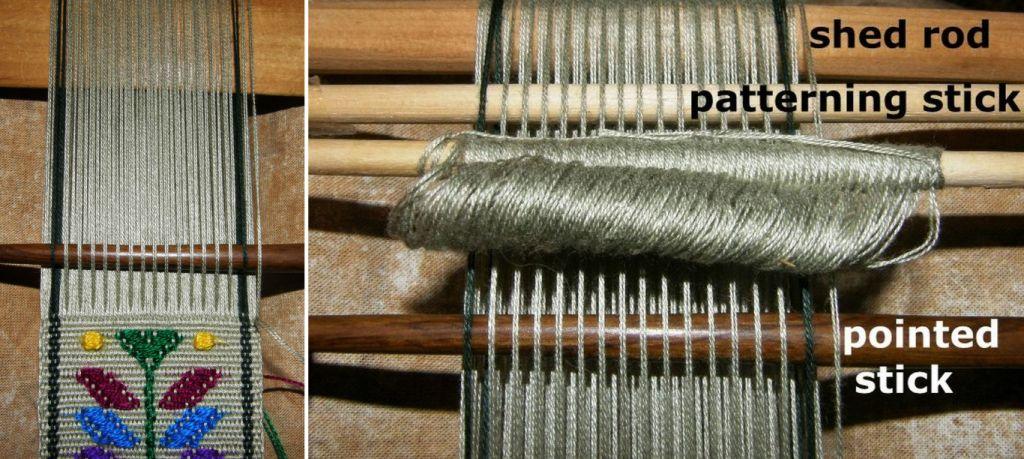
In order to create the patterns, two extra patterning sticks need to be inserted and stored up beyond the shed rod. One is stored on top of the warp and the other underneath.
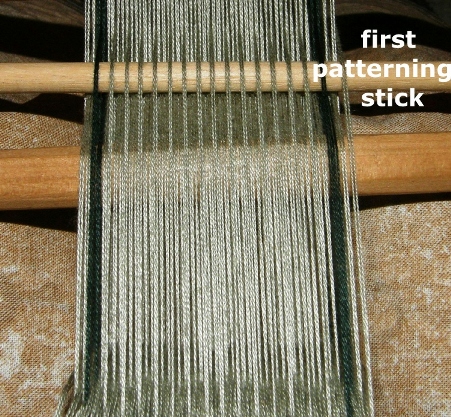
LEFT: To set up the patterning sticks, the shed rod shed is opened and the first set of patterning warps are picked up. Pick one, drop two, pick one, drop two across the width of the warp.. The weavers use a pointed stick to do this. RIGHT: The pointed stick is inserted under all the picked warps and then pushed up toward the heddles. This will raise the picked up warps on the other side of the heddles. Another stick is then placed under the warps on the other side of the heddles. This is the first patterning stick.The first patterning stick sits up beyond the shed rod until called into use.LEFT: A colored weft is placed under the warps in the first patterning shed. This serves as a reference to make picking up the warps for the second patterning shed easier. RIGHT: The heddle shed is opened and the warps in the second patterning shed are picked up. Between each warp in the first patterning shed, there are three warps. You need to pick up the middle one of these three warps. You will pick one, drop two, pick one, drop two all the way across the warp. The pointed stick is inserted under all the picked up warps. LEFT: The pointed stick is moved up toward the heddles which will raise the picked up warps on the other side of the heddles. RIGHT: A stick is placed under the warps on the other side of the heddles. Both the stick and the shed rod are raised and this creates a new shed underneath the two. I have my hand within this shed and will replace it with the second patterning stick.Here you can see the two patterning sticks in place up beyond the shed rod.Two wefts are used to weave the above typical patterns of Santa Catarina Palopo: a red weft is passed through the two main sheds (shed rod shed and heddle shed) to weave the ground weave and the brightly colored supplementary wefts are passed under or wrapped around the patterning warps to form the motifs. These are samples that I wove when I returned from Gautemala.Motifs are usually started and ended with four rows of supplementary wefts in the patterning sheds forming a brick-like design. The colored pattern weft (in this case yellow) is passsed through the pattern shed and then the main weft (in this case light green) is passed through the main shed.
To open pattern shed one, the patterning stick is simply drawn down to the heddles. This will raise the pattern warps and a stick can be placed under them on the near side of the heddles. The yellow weft can then be passed through this shed. Then the shed rod shed will be opened and the green weft passed. RIGHT: To open pattern shed two, the patterning stick is also drawn down to the heddles (under the warp). The pattern warps won't pop up quite so easily for this shed so it helps to have your beater in the heddle shed and tilted as shown. Like this the pattern warps will be more apparent and you can slide a stick under them.The yellow weft is passed under these warps and then the green weft is passed through the heddle shed.In this picture I have laid in the first pass of yellow supplementary weft in patterning shed two. The beater is in the heddle shed and I have just passed the main green weft through.
Here concludes Part One of this tutorial on Guatemalan single face supplementary weft patterning. So far we have looked at how to pick the two patterning sheds and store them on sticks up beyond the shed rod, how to open the patterning sheds and how to weave the basic brick design which separates the motifs on a piece. We also looked at the weaving sequence, that is, first passing the supplementry weft and then the main weft.
In Part Two, next week, I will show you how to create the outlines of shapes by wrapping the supplementary weft around warps and fill them in by laying in supplementary wefts. The Guatemalan weavers create all kinds of bird, plant and human figures. They even include some of their weaving tools, for example, a swift.
To finish off here, let me show you my weaving teacher and her family and some places around beautiful Lake Atitlan where they live.
RIGHT: Carmen is asking for guidance from her mother Martine. LEFT: Carmen's younger sister and niece and nephew. The little niece was so sweet in her tiny huipil, corte and belt.Santa Catarina Palopo is oe of many settlements on the shore of beautiful Lake Atitlan. The sign outside the library shows words in the Kaqchikel language.I hitched a ride another 20 minutes down the road to the smaller town of San Antonio Palopo and visited with some backstrap weavers making incredibly wide pieces on their looms and some siblings all dressed in the same typical colors of the town. It was a nice quiet place to stroll and hear the sounds of warps being beaten from within the walls of the homes and see the warping boards out in the patios. From there I took a launch ride on the lake back to Panajachel.I went across the lake to Santiago Atitlan for the Sunday market. This town is known for its superbly hand embroidered clothing. I saw older women in the market wearing hair sashes wrapped around their heads. The men wear three quarter length loose white striped pants which are often covered in embroidered birds.I sat by the roadside and tried to photograph the parade of people in their gorgeous embroidered and ikat dyed clothing as they walked by.In San Juan La Laguna a women's weaving cooperative is producing items for tourists using only their own cotton thread dyed with natural substances.
Strolling back to San pedro La Laguna from San Juan I met Roi from Israel who was attempting to cycle around the world. I have never heard of him since. I wonder if any of you have run into him in your travels? The lady at right is from San Jorge La Laguna, high up on the hillside above the lake shore, which is known for its ikat woven fabric. Here she is demonstrating spinning the natural brown “cuyuscate” cotton which is highly prized and costly in Guatemala.
Speaking of epic cycling journeys, I was contacted through this blog by a lady who is cycling from Alaska to Tierra del Fuego. She stopped off in Huancayo and had weaving classes with the very same weaver who taught me. Funnily enough she told me that Margarita is no more vocal in her instruction than she was with me fourteen years ago! I can just imagine this lady cycling about with her backstrap loom on the back of her bike. If we can get our timing right, she will come to Santa Cruz to visit me and have some more classes.
Last week I showed you what Jennifer , one of my four-shaft loom testers for Andean pebble weave was making on her floor loom. Well now it is finished and here it is!!
Stand by for the four-shaft loom appendix to my e-monograph….:-)
And Karren has been weaving more bookmarks in simple warp float technique with all her own designs.
Well, I had my suspicions but now it is definitely confirmed. I am all about process rather than product. It gets harder and harder coming up with that “excuse” to weave. My usual excuse is “I need such-and-such so I had better weave one” – a thin disguise I am afraid. The truth is I just like to weave. I like the whole process- charting, calculating, warping, heddle making, picking up the warps, watching the patterns slowly appear and take shape, beating and pushing each weft into place. At the end of it I am pleased if, after having taken photos of the piece, I can give the product to a good friend.
After all, just how many shoulder bags, purses, table runners and wall hangings do I need? As it is, there is hardly a patch of uncovered wall space in my tiny apartment. Mind you, I could do with a rug or two…hmm…
This is what came off the loom this week. My excuse…I found a new color in the mercerized cotton I use and there was one more Celtic knot I wanted to try from Kurt Laitenberger’s site. His site shows tablet-woven bands in a technique called Hochdorf.
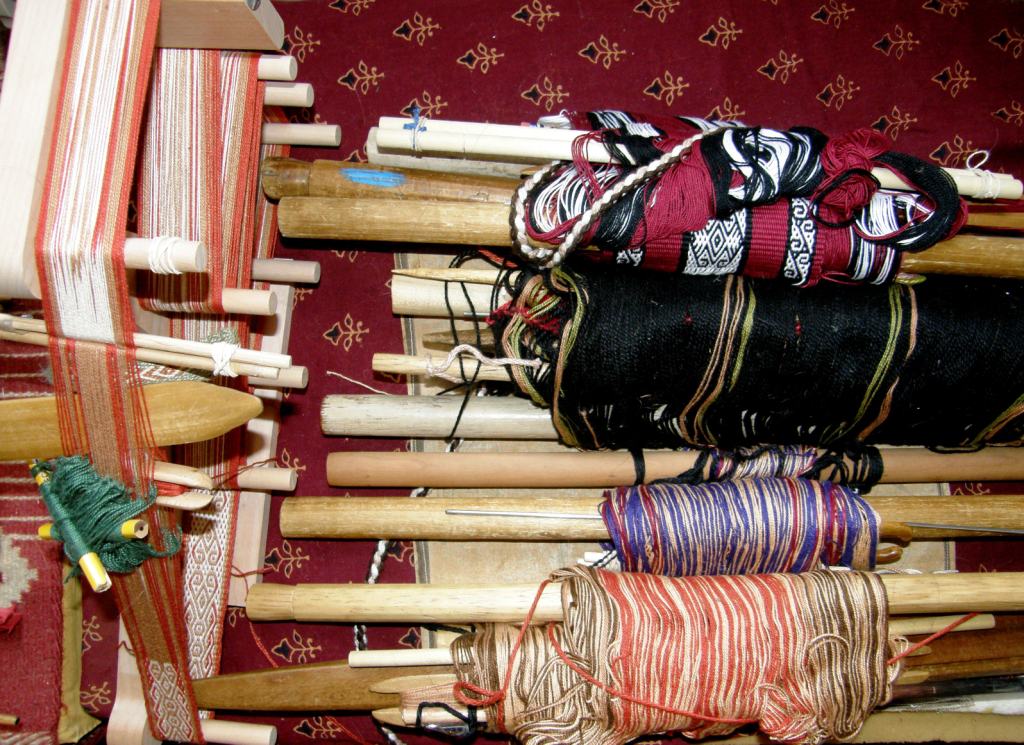
I just can’t resist trying out a new color combination, reproducing a beautiful ethnic design that I have seen on the net, or attempting new structures. Now the explorations have extended to finding other looms on which the South American pick-up techniques can be comfortably woven – not for myself as I am very happy weaving on my backstrap loom – but for others who may not feel like being strapped into a loom. So I am developing a project stash as you can see above. There is also a pick up piece on my rigid heddle loom which wouldn’t fit into this picture.
One thing I wanted to do this past week was weave one of the pebble-like designs from the Russian Old Believer belts in the heavy duty sewing thread that I got in the US. Well, shock and horrror, that thread turned out to be polyester. Silly me not to have looked more closely. I was wooed by the beautiful colors and made a warp anyway but it felt awful. I guess it’s back to the doubled regular cotton sewing thread.
Russian Old Believer belts woven in supplementary warp and complementary warp techniques.
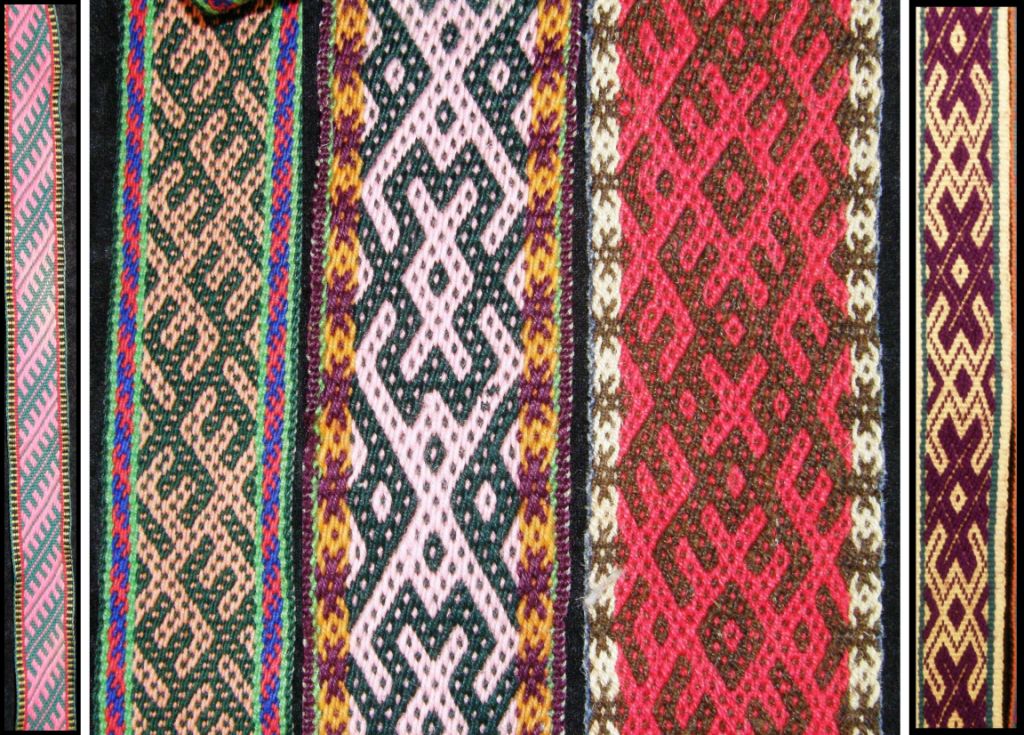
So that project got put on hold and I decided instead to chart all the designs from the pebble-like belts in Kathe Todd-Hooker’s collection so that I would have them ready once I got all the thread colors that I needed. I started looking at all the belts including the supplementary warp ones and there is not a single repeated color combination amongst the lot. However, it was interesting to see the repetition of certain motifs on bands woven in different techniques. As you can see above on the left the diagonal “comb” design woven with a supplementary warp is also woven as a border in the bands with the pebble-like structure. The “star’ border design also appears in the two pebble examples on the right as well as in the supplementary warp example on the far right.
And now I come to the “prejudice” part of the title of this post. I have to confess that I have never really liked weaving with supplementary warps. I am not a big fan of longish warp floats but I have decided that I really must get over this as I would like to weave some of the beautiful patterns on the bands below.
The Russian Old Believer bands in the central part of this picture have all been decorated with supplementary warps.
Annie McHale (aspinnerweaver) gave me an amazing book on Lithuanan sashes when I met her at CNCH which is packed with similar patterns. They are stunning and are just calling out to me to be woven!
I first learned this supplementary warp technique with my pebble weave teacher, Margarita in Huancayo in 1996. I guess I never really cared that much for the little motifs we wove and didn’t explore the technique much further. Pebble weave, on the other hand was a very different story!
At left is the first piece I wove when I returned to Chile from Huancayo. I combined pebble weave with the supplementary warp patterning in the one piece. I was new to all of this and way over ambitious and got my warping all back to front and mixed up and so what you see here is what I wanted as the upper face of the pebble weave and the reverse of the supplementary warp patterns – those little green creatures on the left and right borders.
Below are the bands that I wove with Margarita and you can see what the upper face is supposed to look like. They have been glued into my journal where I have documented the technique.
You can see that like any beginner I was very selvedge-challenged! We used orange weft which was exposed on the surface of the weaving adding an extra decorative feature. We could have created a smoother-looking single color background by using a yellow weft instead.
The following year I went to the Colca Canyon region of Peru and spent some time with a weaver in Cabanaconde. Together we wove the blue and white band on the right.
The motifs used in this area were quite different to those in Huancayo and the technique too had some slight differences.
As we used white weft, the background to the blue figures appears smoother.
Estela, in Cabanaconde used a very fine ground weave warp thread and a thicker supplementary warp thread. In Huancayo, both the ground and supplementary warp threads were the same. The fineness of the ground weave and the tightness of the weave made Estela’s band more atractive to me than those from Huancayo. I still wasn’t crazy about the technique, however, and although I carefully documented the differences in the weavings done in both areas, I was not motivated to incorporate supplementary warp patterning into my own work.
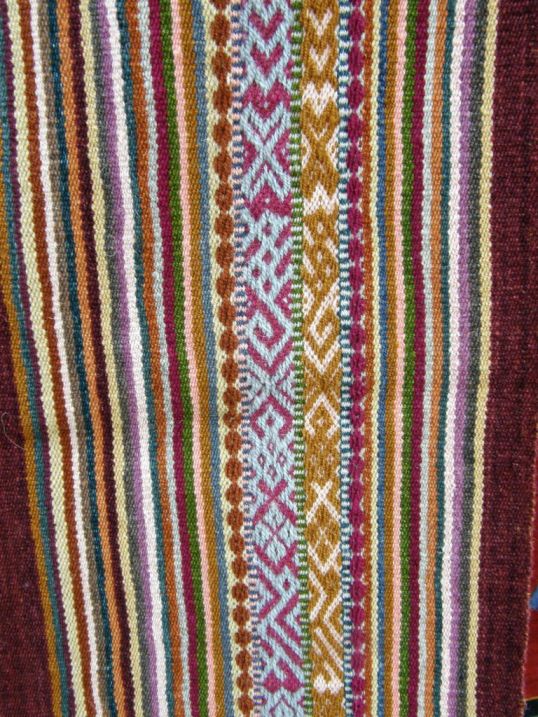
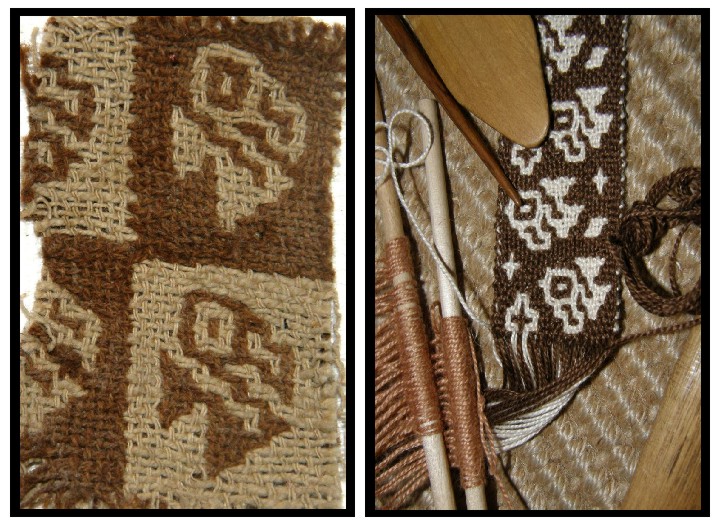
At the Maryland Sheep and Wool Festival I happened upon the old familiar supplementary warp motifs in this weaving from Ayacucho. I had been to Ayacucho in 1996 before arriving in Huancayo. Back then, only one year after the capture of the leader of the “Sendero Luminoso” group, it was a beautiful but very sad place.
Shortly after this trip and returning to my home in southern Chile, I visited a sheep “estancia” in the southern Argentinean town of Rio Gallegos. The owner showed me a belt that the Mapuche wife of one of his farm hands had woven and given him many years ago. It was yellow and decorated with motifs in many bright colors and I still remember how he snorted in disblief when I asked permission to chart it as I wanted to reproduce it. I couldn’t believe that I was there at the bottom of the continent seeing this very same technique. I am sorry I never got around to sending a photo of the reproduction to that doubting farm owner.
I chose a white ground weave and multi color pattern using the same yarns for both ground and supplementary warps as had been done in the Mapuche belt. It is a four-selvedge piece with the edges decorated with cross knit looping. This bag hangs off the side of my bed and holds whichever books I happen to be reading at the moment.
Since then I have found many gorgeous Mapuche designs in books which have been woven using this supplementary warp technique. I have an ongoing project which involves making a set of sashes to represent all the weave structures I have learned here in Latin America. I have gotten as far as making a yarn test for the sash I would like to weave using a Mapuche design and this technique. I much prefer using fine thread for the ground weave and a heavier and fluffier yarn for the supplementary warp.
LEFT: My sample band for a sash in this technique. RIGHT: Another yarn test using sewing thread as the ground warp. The pencil is one of the small IKEA ones.
AlthoughI learned this technique almost fourteen years ago, I really haven’t done much with it. Such has been my “prejudice”. I almost considered it “inferior”, being much more fond of complementary warp structures. However, quite recently I wove these little purses…
Here both the ground and patterning warp are the same weight and I am still not crazy about the longish floats. I think small and fine is the way to go for me.
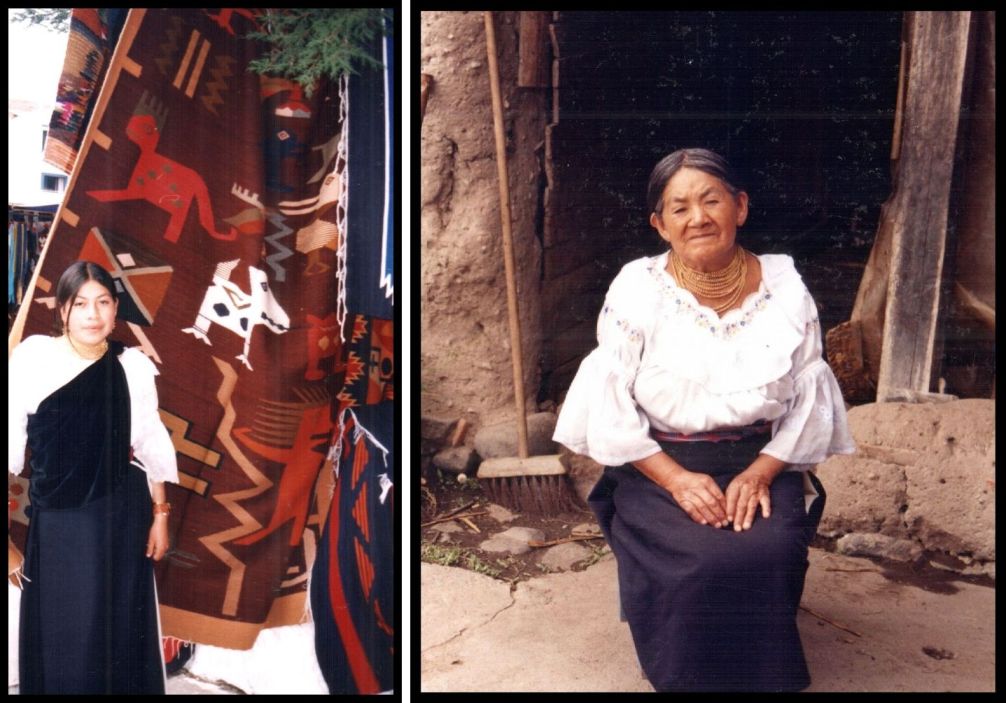
Two women in Otavalo wearing the traditional “anaku”
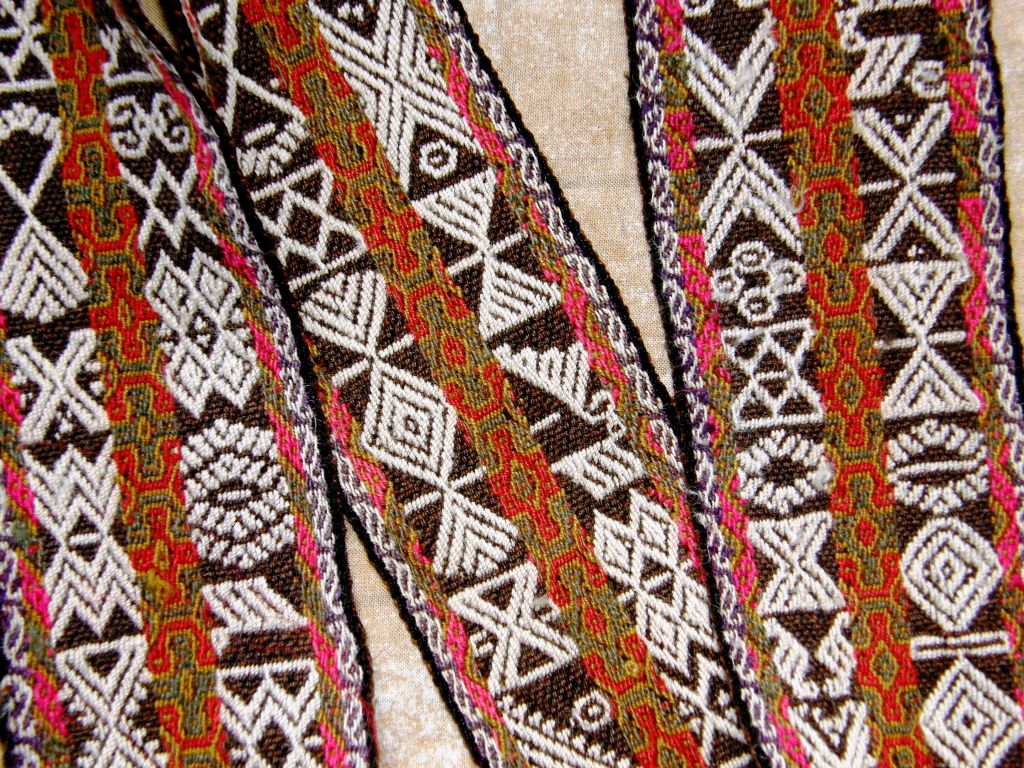
I have certainly seen a lot of patterning done with supplementary warps in my travels. Ecuador is full of this technique. There it is used to make the “chumbis”, or belts, used by the women to secure their long skirts.
I particularly love the long wrap skirt called “anaku” used by the women in Otavalo. These are said to be the skirts that most closely resemble those used by Inca women with their long split sides.
In Otavalo two anakus are worn. A white one with the split on one side is worn under a darker colored one with the split on the other side. A pleat is made in the waist to fit the wearer and both are held in place with two chumbis – the “mama” and the “guagua”(pronounced wa-wa), the mom and baby. Some weavers I visited in the village of San Roque explained to me that the outer belt is the guagua chumbi and is the one which bears the supplementary warp patterns.
The guagua chumbi is woven on a backstrap loom with acrylic yarns and is extremely firm and stiff. The white ground weave warp threads are finer than the red patterning ones.
I believe that these are both guagua chumbis. Each measures around three meters. I have noticed a trend towards wearing the double woven belts from Potosi, Bolivia in Otavalo. These belts are narrower and only wrap once around the waist. I wonder if they are as effective for holding up the two anakus. Look at the car motif on the red belt.
Below are some of the motifs from the blue chumbi. Any large white areas need to be filled with spots or squiggles of design to avoid having very long warp floats on the back of the belt. This is one of the things that feeds my prejudice againt this technique. I love these motifs but sometimes the weavings are a little too “busy” for my liking having all their spaces filled in.
Similar figures appear on the belts from Salasaca.
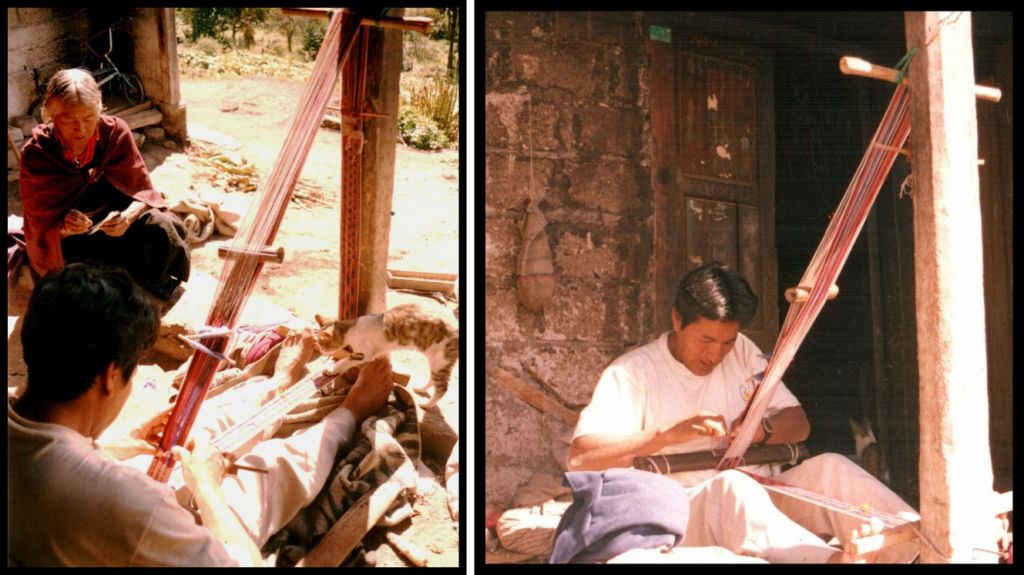
When I went to Salasaca, I did not learn to make the belts with these little human and animal figures. My teacher, Felipe taught me to weave the geometric designs that they call “kingus” and “frutillas”.
Felipe at work on his long continuous warp on his porch while his mother-in-law sits by. As usual there is a cat that wants to get into the act.
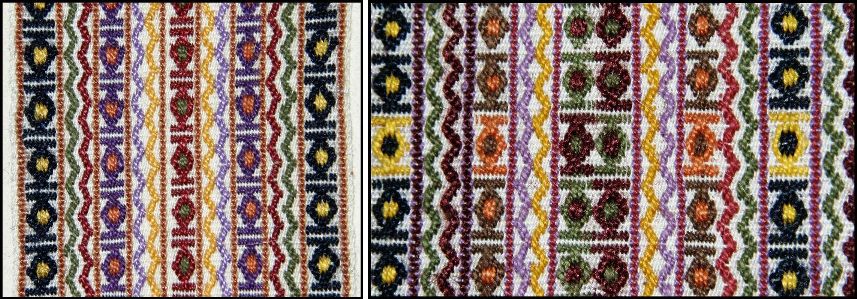
There are no over-long warp floats when weaving the tiny repeated motifs like those on the left. The example on the right, however, has long floats on the back as the colors in the motifs have been alternated. These are the pieces I wove when I got back home to consolidate what I had learned and enable me to take step-by-step photos of the process.
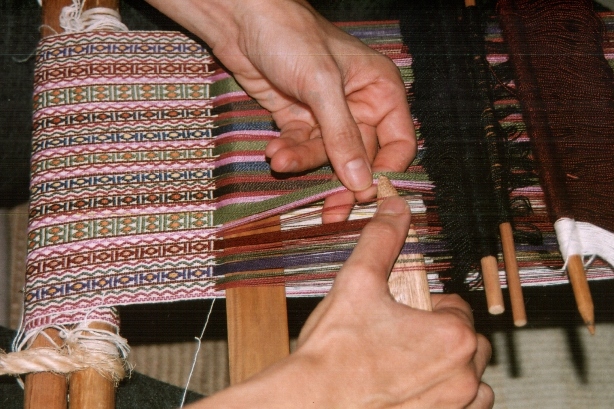
Above left you can see one shed of ground weave warps – white with colored stripes which separate the columns of motifs. On the right, I have picked up all the supplementary warps required to make the design and am about to add them to the ground weave shed.
At left I am picking up the pattern warps with the tiny Salasaca sword. The beater I used when I was learning with Felipe was an enormous heavy version of this sword which slammed the wefts into place. Needless to say, the resulting belt was firm and very stiff and my knuckles blue and bruised!
Warping for these belts was a little complicated and required six stakes.
We set up some stakes in the yard so Felipe could show me how to warp. Quite often two colors were being wound at once in different directions and it was quite confusing. I added stakes to one of my standard warping boards at home and managed to warp successfully for my practice bands. In Huancayo too, two colors were wound at the same time – full bouts of ground warp alternated with half bouts of the supplementary warp.
So, I am taking another look at this negelected technique. I learned it, I documented it and practiced it a little but I think it is time I gave it a bit more attention and learned to love it. Who could help but love it? Look above at the gorgeous belt I bought in Cusco. The brown sections are patterned with white supplementary warps.
I am going to weave a few of the Old Believer belt patterns to start and get a feel for those designs. The first part of the process will be the charting.
#################################################
You may remember the blue shuttle bag that I wove recently and which I was going to edge with a tubular band. In the end I decided that less was more and left it unadorned. I also thought it would be a good idea to practice that band first considering I hadn’t woven it for over ten years. Out came the chunky yarn and I chose colors that would photograph well – not the nicest color combination you have ever seen I am sure. This band is what I consider the “poor cousin” of the complex ones woven in Peru and was taught to me in Potosi here in Bolivia. Now I am confident about the process and need to find the “excuse” or product on which to use it!
#######################################
THE MARGARITA BRAID
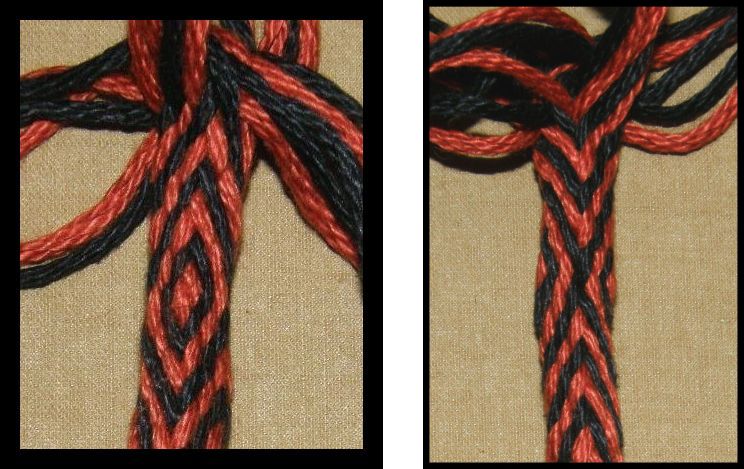
Here are the instructions for weaving the Margarita braid as taught to me by my sling braiding teacher, Zacarias in Yanque, Peru. If you have watched the video I made on the Palma braid here (embedded in the post), you will be familiar with what I mean by “near side”, “far side”, “uppers” and “lowers”. You will have seen how the braid is held in the fist, how a warp is passed from one side and paired with a warp from the other side and anchored and how the entire braid is rotated once a part of the sequence is completed.
So all I need to tell you now is the number of strands, their color arrangement and the parts of the sequence.
Remember that lowers always pass over to pair with uppers.
Part one: (Always starting from the left and moving right)
Black near side to red far side.
Black far side to red near side.
Red near side to black far side.
Red far side to black near side.
Black near side to red far side.
Black far side to red near side.
Rotate ninety degrees clockwise.
Part two: Start at black far side.
Part three: Start at red near side.
Part four: Start at red far side.
If you continue like this, you will be making “V”s on two opposing “sides” of the braid and inverted “V” s on the other two sides.
If you reverse the parts of the sequence, the “V“s will invert to first form a diamond. The inverted “V”s will flip to form an“X”. In the photo at left you can see the diamond on the left and the “X” on the right.
To create a black diamond with a red center, stop when you finish part two of the sequence. Instead of proceeding to part three, do part four. Now the sequence will reverse. You will proceed with parts three, then two, then one.
Play around with it and have fun!
The version I learned in Peru allowed color changes. We used twelve strands of a third color, for example white, that were hidden as the core of the braid. The white strands would slowly be brought into action two at a time replacing the reds until eventually the reds formed the core and the blacks and whites were active. I will show you this another time! 🙂
###################################
Phew! This has gotten really long but I really have to show you what people have been weaving this week.
We are still weaving along at Weavolution following my e-monograph on Andean Pebble Weave and other folks are following the tutorials in the Backstrap Weaving Group.
Lydia finished her pebble weave piece on her four-shaft loom and has made a wall hanging with it. Karren wove some bookmarks for a guild exchange using the simple warp float technique. The colors in both pieces remind me of the American southwest.
Jennifer has begun to create her own motifs in Andean pebble weave on the left and Jeanne is gradually weaving wider bands with more complex motifs.
Lydia’s first experiment on her four shaft loom was made into keyfobs. Carolyn has designed a bee to weave in Andean pebble weave.
And Lisa has taken her loom to the beach to continue participating in the weave along. This next photo falls into the category of…
COOL PLACES TO BACKSTRAP WEAVE!
I will leave you all here with a couple of beautiful drawings by Guaman Poma de Ayala. I told you a bit about him in this past postand wanted to include these pictures of the Inca woman’s skirt as we have been looking at the elegant Otavalan anakus here.
As Weavolution, the home of my Backstrap Weaving Group, approaches its one-year anniversary on June 8, I have had good cause to stop and reflect on all that has happened in the past year or so since I entered cyberspace in a big way and got into what I like to call the World Weaving Guild.
It all started when I joined WARP in May last year.
I had been struggling along trying to figure out balanced double weave so that I could reproduce one of my pre-Columbian fragments on my backstrap loom. There were a couple of things that had me puzzled and I really had no idea where to turn. I found Carol Ventura’s contact information in the WARP Members’ Directory. As Carol Venturahas been involved in Latin American weaving, having written, amongst many other things, a book on the hair sashes of Jacaltenango, I decided to contact her with my questions. She pointed me towards some other resources and also happened to mention an online group called Ravelry that had a backstrap weaving forum.
And it all took off from there…
Actually, my very first entry to this World Weaving Guild was through a backstrap thread in the weaving forum on Interweave’s Knitting Daily site. It was just by luck that I stumbled upon this tiny thread embedded in a knitting site and discovered that there were quite a lot of questions about, and interest in, backstrap weaving.
That tiny thread unraveled and lengthened, and along came my entry to Ravelry. Shortly after, the revolution that is Weavolution provided a place just for weavers and my own backstrap weaving group.
Then came the Online Guild of Weavers Spinner and Dyers with its in-depth monthly workshops on all kinds of fiber-related topics which I discovered on fellow Aussie Kaz Madigan’s blog and, after that, several Yahoo groups including Backstrappers started by my friend Caroline and co moderated by Franco Rios and myself.
One of the Online Guild members told me about this person called Syne Mitchell and a thing called WeaveZine and look where that led…an article, an e-monograph.
And now Handwoven magazine has launced its own new online weaving community called Weaving Today. The offiicial launch was June 2… and so the World Weaving Guild grows…
By the way, I started a thread on Weavolution asking about the balanced double weave project mentioned above and weavers from Scandinavia and other parts of Europe, USA and Australia came on to tell me about Finnweave and provide me with a myriad of resources which eventually led me to the Huichol people of Mexico and their double weave textiles – many corners of the world!!
I got hold of this pre-Columbian fragment after I had woven the balanced double weave/Finnweave band at right using a motif from a book.The eight journals I have put together so far where I have documented the techniques I have learned in this region. The two larger books in the foreground are big 2 1/2" volumes with braiding, weaving, dyeing, edgings and other crafts from the places I have visited.
Prior to all this cyber space globetrotting, I had used my one month of vacation per year to either go to Australia to see family, or take a weaving “safari” here in South America and spend time with weavers.
For the other eleven months of the year, my weaving world was so small. Apart from some foreign backpackers passing through town to whom I gave lessons, I didn’t know anyone with whom I could share this passion. I have run across many attitudes, one of the most common ones being…”if you can’t make money from it, what’s the point?”
Nevertheless,I continued to carefully document all the techniques I was learning in my journals but would often wonder what would happen to my substantial collection of books on South American weaving and all the information I was storing in my journals when the time came to head to the “big loom in the sky”!
So, when I discovered the online groups and the level of interest that there was out there, everything just started to pour out! It was so exciting to find people to chat with about this and many close friendships have formed where we have moved the chat from the online forums to our own personal emails.
I put together tutorials and ran weave alongs and was thrilled to see people getting their sticks together, making their looms, weaving and participating in the weave alongs with so much enthusiasm. Below you can see contributions from Bibi in France, Franee in Australia, Jeannine in Belgium and Kimo in the US.
But there was so much more that I wanted to say. After having had my knuckles rapped a couple times for veering off topic, having gotten completely carried away with a travel tale or two, I decided that the time had come for a blog. Opening one was easy…but how to get the thing started? It sat there pathetically for weeks with what I considered a very lame introduction. I was too embarrassed to tell anyone about it.
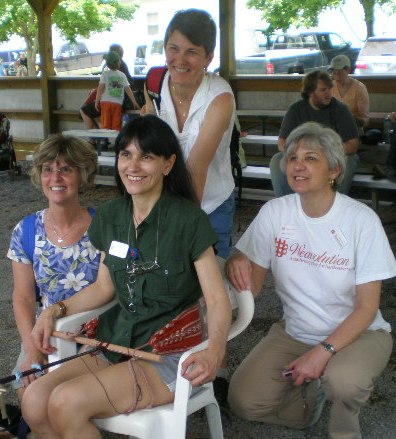
Meeting Weavolution buddies at MSWF
One night, my brother, the pilot, called me from one of his many trips to London. I told him about the blog, my doubts and my reluctance to take it further. He immediately read it and said “Well, what’s wrong with that?” Well I have to tell you that my brother’s opinion means the world to me and that little comment gave me the impetus to throw the blog out there for all to see.
Then came the trip to the US with a chance to meet, stay and weave with my cyberspace companions – amazing! as well the opportunity to attend my first weaving conferences.
What’s next? Convergence, Albuquerque 2010!
###########################################
Being part of this World Weaving Guild has brought ideas and inspiration flooding into my little corner of the planet.
Two zippered tool bags with pebble weave designs
I told you last week about my new color adventure and what had influenced it. Well I forgot to also mention the weavings of Linda Hartshorn who I met at CNCH. Check out her gorgeous shibori shawls on her site.
I finished the shuttle bag I had on the loom. In fact, I got two bags from that warp. I wove a narrow band to make sides for the smaller of the two bags to make it a bit more substantial.
I had planned to edge them with a tubular band but, after having made the braided zip pulls, I decided that the bags didn’t need any further embellishment.
LEFT: Almost finished on the loom. RIGHT: Detail of the pebble weave design.
Another encounter in the World Weaving Guild…you may remember my story about having met Kathe Todd-Hooker and Pat Sparks at CNCH and how they shared with me stories of their experiences with the people in the Russian Old Believer communities in Oregon. Kathe allowed me to look at and photograph her collection of Old Believer belts. Well, I am still puzzling over the structure of the weave in the pebble-like belts and have woven a reproduction using Andean pebble weave technique.
The other side of the band on the loom
It certainly looks like the same weave structure but I have learned not to make quick conclusions about these things. The motifs on the back of the Old Believer bands appeared to be exactly the same only with the colors reversed as happens in complementary warp weaves like Andean pebble weave but I would be happier if I could examine them again.
Kathe told me that these belts were woven by members of one branch of the Old Believer groups which had migrated to China before being taken to other countries by the Council of Churches.
In the meantime, Caroline in Australia, my longest World Weaving Guild buddy foundthis articlewhich indicates that this structure could well be what I refer to as Andean pebble weave.
I will quote one small part of the article here…
The first example is the Andean pebble weave structure woven on 2-hole tablets with a 4-hole warp-twined selvedge. This structure is found in other regions, including Central Asia, but is traditionally not woven on tablets. There is no warp twining, and the front and back are identical but with reversed colors.
Now to hunt down other Central Asian textiles with this structure. I already know that the yurt bands that I have seen so far are not woven in Andean pebble weave. Hopefully any images I find will show both the front and back of the textiles.
So I am weaving this sample band, which unfortunately, is not a good size to actually make into anything. It is too wide and thick for a bookmark, too narrow for a coin purse and too short for a belt or guitar strap. It probably won’t go any further as I am planning to weave this reproducton band again in this heavy duty sewing thread that my friend Janet found for me in the US which should make a band of the right width and weight for bookmarks.
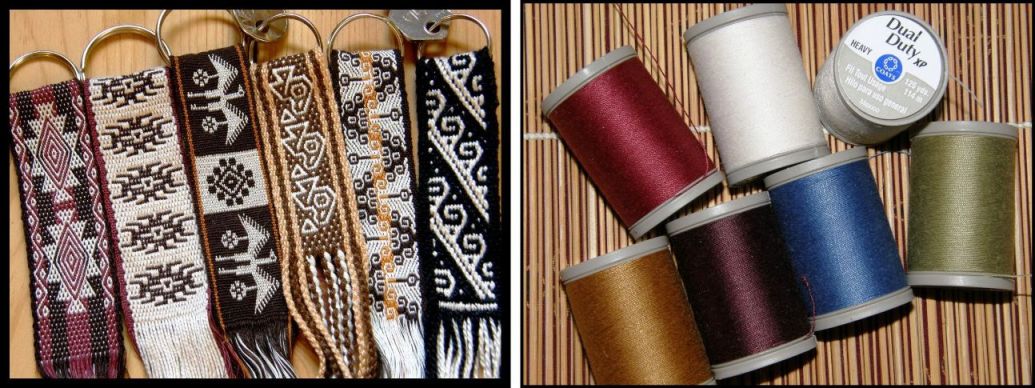
LEFT: From the left, fobs, 1, 2, 3 and 5 have been made with doubled sewing thread. I nearly went mad doing pick up with the doubled threads and so am grateful to have the heavy duty version of sewing thread you see at right to use.
Caroline then directed me to a 2009 newsletter of TWIST, which is a tablet weaving group. An article in this letter tells of a card weaving technique which has been named Hochdorf after the location of a Celtic noble’s tomb containing weavings made with this pebble-like structure. And so the World Weaving Guild’s threads once again stretched across the world and I found myself at the web site of Kurt Laitenberger who just happens to be a frequent visitor and commentor on my Flickr page. He has been making card woven bands in the Hochdorf technique and I was immediately tempted to try and adapt the knotwork designs to Andean pebble weave. Above you can see a bookmark that I wove with one of the knotwork designs.
Keyfobs and a bookmark with knot work woven in Andean pebble weave. I think I MUST make a guitar strap with these motifs.
I don’t think that Mr Laitenberger reads my blog and so I will surprise him by posting these pictures on my Flickr page. 🙂
And I was able to dress up my Andean pebble weave band on the inkle loom which, you will see from the photo on the left, started out a little plain. The idea was to see how the inklette stood up to working with the two sets of string heddles required by Andean pebble weave. I really had not put much thought into the project. I added two knotwork motifs to either side and a couple of other embellishments and what a difference it made! This will definitely be a new belt.
The test piece for the Aunt Lydia's number 10 mercerized crochet cotton- beautiful thread!
This above yarn-test piece is coming along slowly.
The photo next to the test piece on the left shows what first inspired the three large motifs.
I took this picture at the National Museum of the American Indian in DC in 2007 and I am sorry to say that I can’t find the notebook where I wrote down the origin of this weaving.
The top motif on my weaving is based on the main motif in the photo. I then designed two other motifs that had the same elements as the first…basically diamonds, curls and spokes and put the three motifs together.
The charts for these motifs are included in my Andean Pebble Weave e-monograph.
The first time I used these three motifs was in a hanging I made for my friend Tess in Australia which you can see here on the left. I included the comb-like border beside the motifs which I also adapted from the museum piece.
The motifs are in red and gold on off-white but I actually intended the other face to be the front. Once off the loom, however, everyone agreed that this face looked better.
I haven’t seen it hanging in Tess’s house yet to see which side she decided to show.
Finally, here are a few bands from the backstrap group members and pebble weave weave-along participants.
Jeanne wove four different pebble motifs to make some keyfobs while Michele set up for her first pebble weave band on her Cricket loom.
Donna wove a wide band in plain pebble weave and Cathy made her own backstrap following my article on WeaveZine.
I sent Lydia my draft and instructions for weaving Andean pebble weave on her four-shaft loom. She is testing the instructions, for which I am very grateful, and it looks like she has been having a fine time with it. These instructions will be added to my e-monograph as an appendix at no extra cost and will be sent to all those who have already purchased the book. Coming soon......
I would like to finish this post where I began by mentioning once again the Worldwide Weaving Guild and the inspiration it constantly brings me from all corners of the world from so many people far too numerous to name here, but thank you!
I would like to thank especially Caroline in Australia who is constantly sending me links to articles and interesting sites, Sharon in Florida who has a DIY solution to every problem I have and has the keenest eye I have ever seen for charting motifs from even the very poorest of images and Lisa in North Carolina who keeps me up to date with her YouTube finds and shares images and information on Central Asian textiles.
AND FINALLY….
HAPPY ANNIVERSARYWEAVOLUTION!!!
Oh and, ahem, the video I promised showing the sticky warps will be going up some time before next Friday’s post. I ran into some uploading problems which will hopefully get fixed- erratic internet service. Look for it by clicking on the VIDEO tab on the blog banner. I will link to it in the next week’s post.



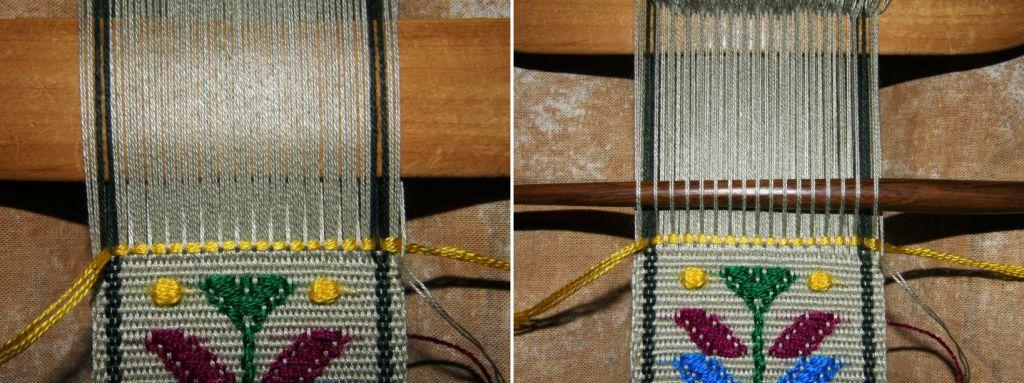
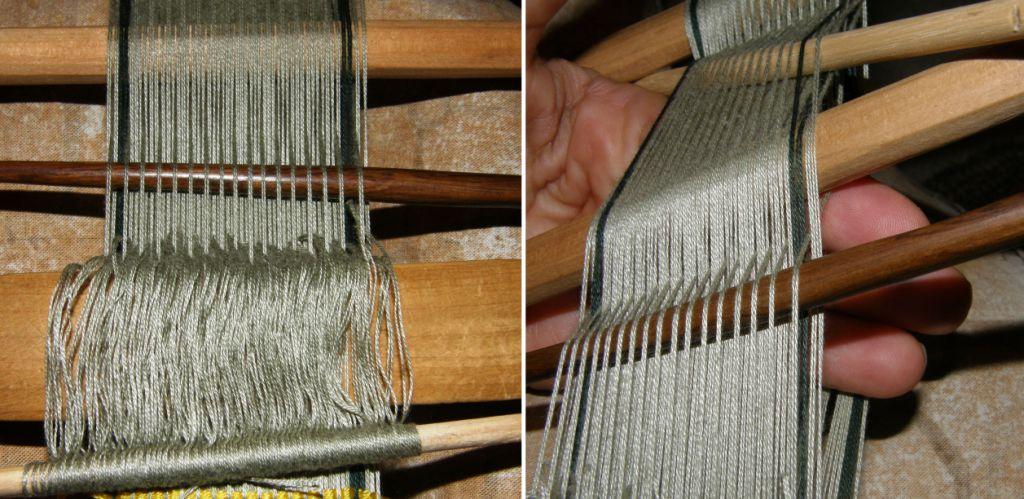


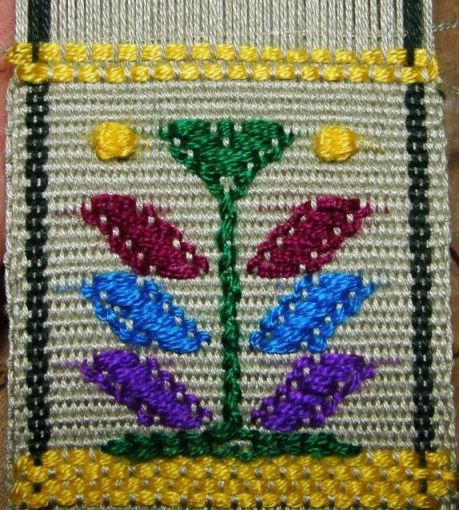 Motifs are usually started and ended with four rows of supplementary wefts in the patterning sheds forming a brick-like design. The colored pattern weft (in this case yellow) is passsed through the pattern shed and then the main weft (in this case light green) is passed through the main shed.