Backstrap Weaving – Colors from Camelids and Cotton

This week’s blog post is brought to you by these fine fellows…

and their beautiful fiber but also by…

my friend Janet in northern California who gave me a ton of alpaca fiber last year, Celinda, an Aymara weaver who swapped some of her handspun alpaca yarn with me for one of my woven keyfobs and the weavers of Peru who got me started in spinning on drop spindles back on my first visit to Peru in 1996. I also have to thank Gladys Miller in Colorado who encouraged me to spin while she taught me about Navajo weaving in 1995.
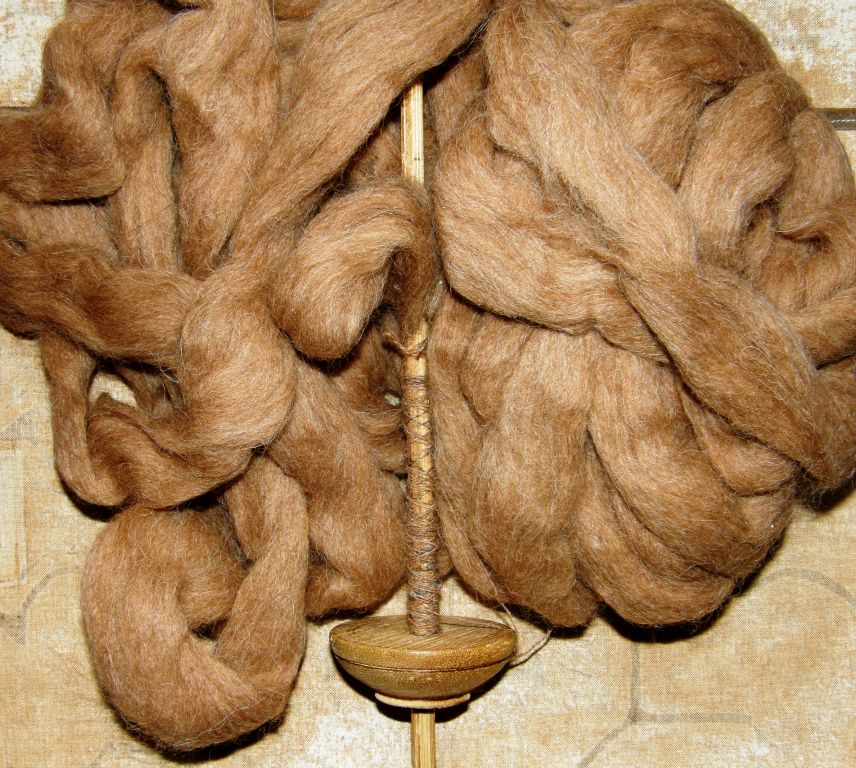
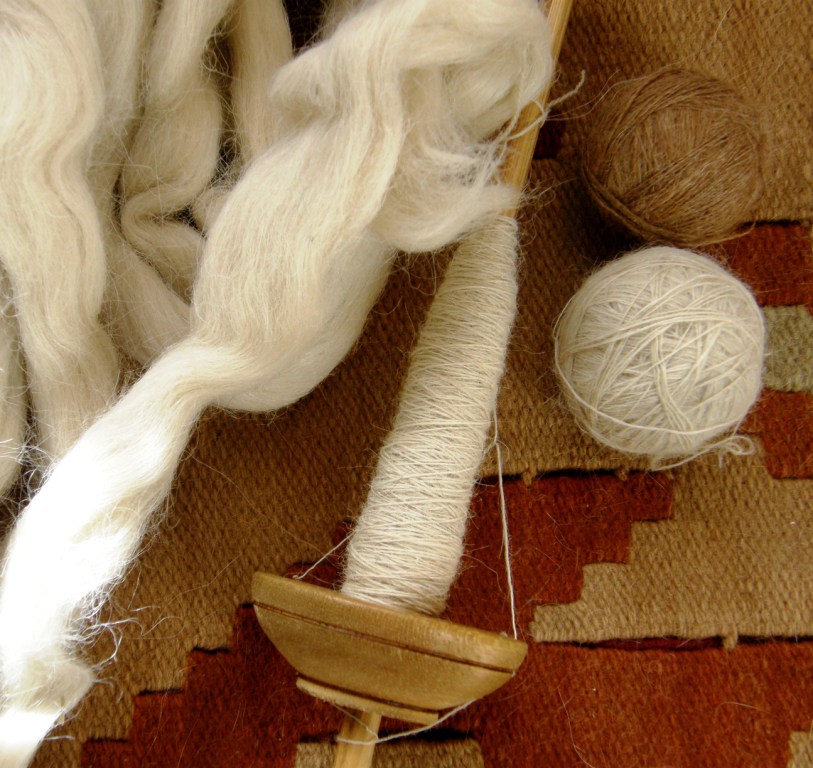
Now I am thoroughly spoiled with this gorgeous alpaca fiber that Janet gave me. A lot of it was already beautifully prepared by Janet herself in her mill. For the stuff that hadn’t been prepared, all I had to do was tease the tips open using my hand carders.

Until now, all I had spun was wool that was readily available from the farms where I lived in Patagonia and llama fiber that I bought from  little villages outside of Uyuni, Bolivia many years ago…bags and bags of it which I have cleaned and carded, spun and even dyed to weave with as the years have gone by. I thought it was pretty good but now that I have had the experience with the alpaca fiber I look at the poor old llama stuff with a very critical eye…dry, coarse and filthy!

Nevertheless I did manage to weave some nice things with it…
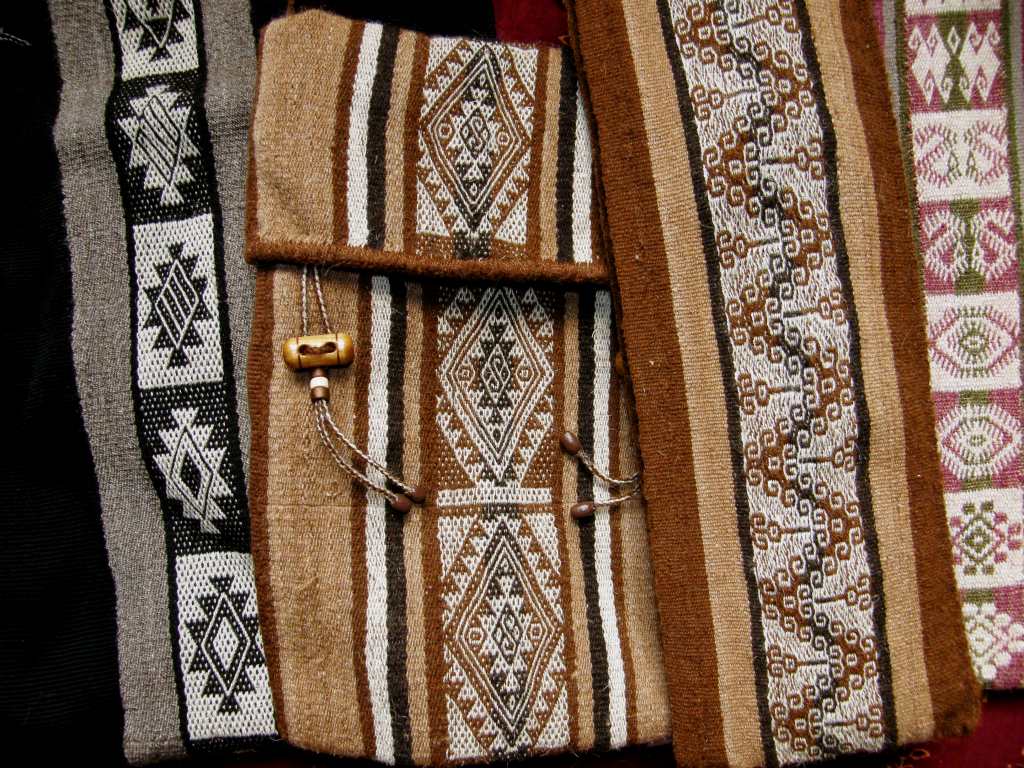
And I also like to weave llamas although these guys were woven in cotton…

I still have tons of llama fiber left so I don’t want to get too spoiled!

So, I have spent some time lately spinning the alpaca mostly because we have been having a Spin-Along in the Backstrap Weaving Group on Ravelry with a lot of discussion about just how much over twist one needs to put into the yarn to make it suitable for warp-faced weaving on the backstrap loom. And this is where Celinda, the Aymara weaver from northern Chile came in. The yarn that she gave me was quite hairy and not heavily overspun. I wove with it and it was soft and luscious. That is how I wanted my yarn to be, not like the hard severely twisted llama thread I had been making.
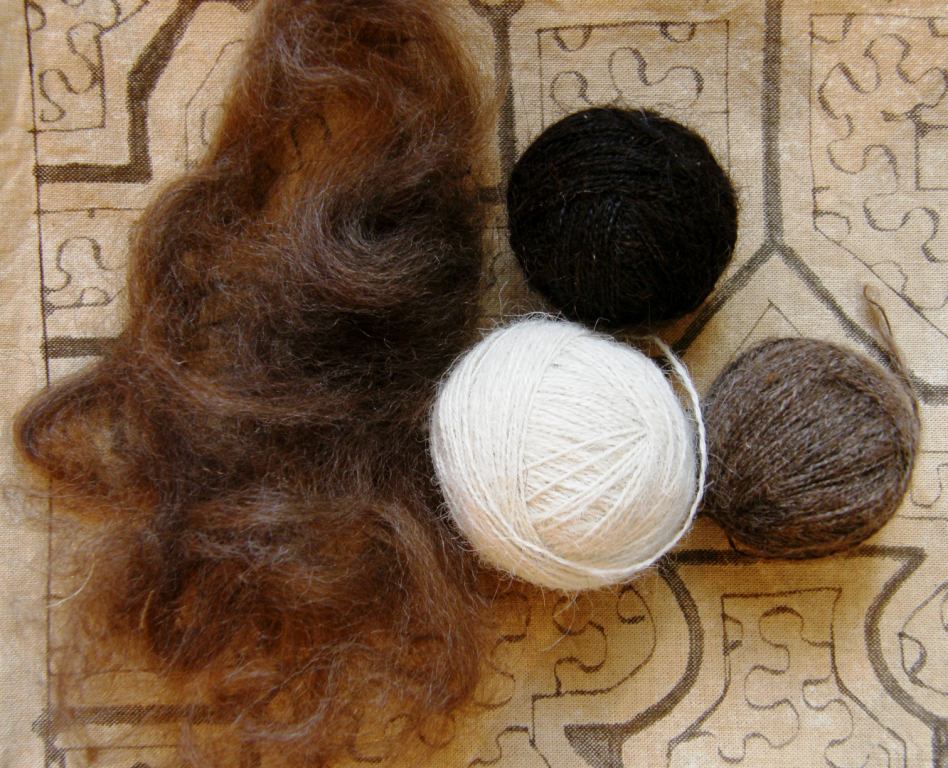
And then it was down to the all-important sampling. Would it be too hairy to work with? Would it be a lot of really hard work clearing the sheds? Would it shred and would I have broken warps because the yarn couldn’t stand up to the abrasion of warp-faced weaving?

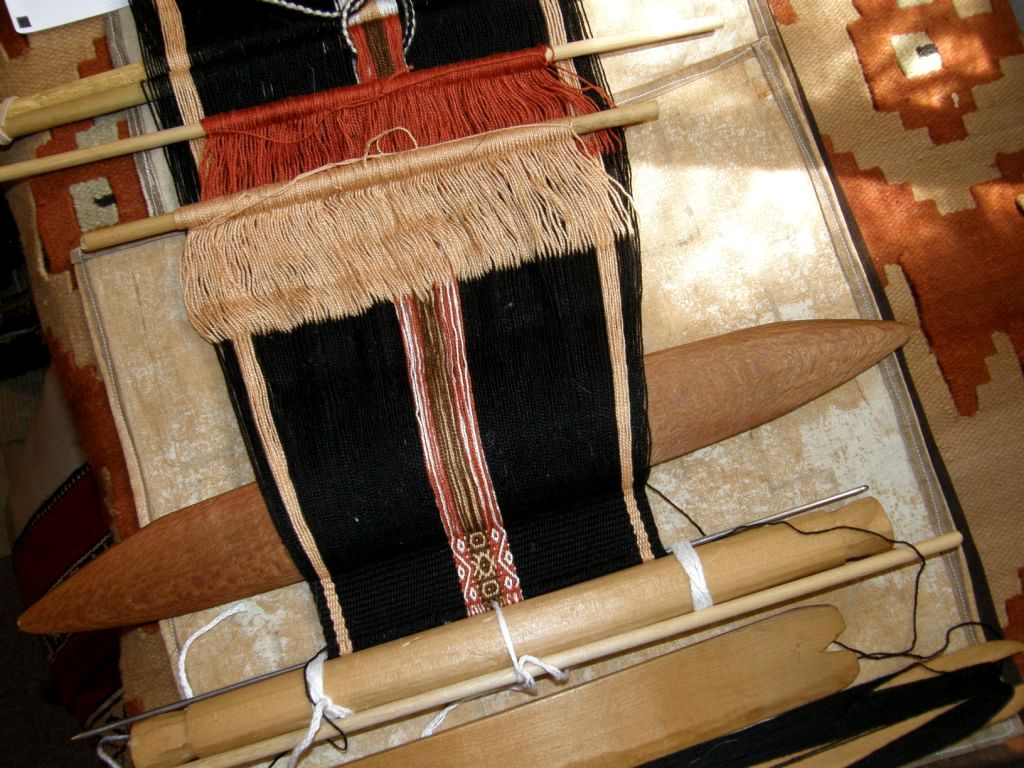
Thankfully, I didn’t get a “yes” response to any of the above questions. Of course, the sheds were more difficult to clear than those in a mercerized cotton warp but they were manageable. You can see the warp at rest above and the yarn is not curling up on itself. One thing I regret is my decision to use white weft as it did show through the brown a bit. I didn’t mind it showing at the edges as I knew that I was going to cover those with a tubular band. I used an alpaca weft that was balanced.

None of the warps broke but, then again, my warp was only 24″ long. The only problem I had was with some of the knots at the color changes which slipped undone as the yarn was so silky.

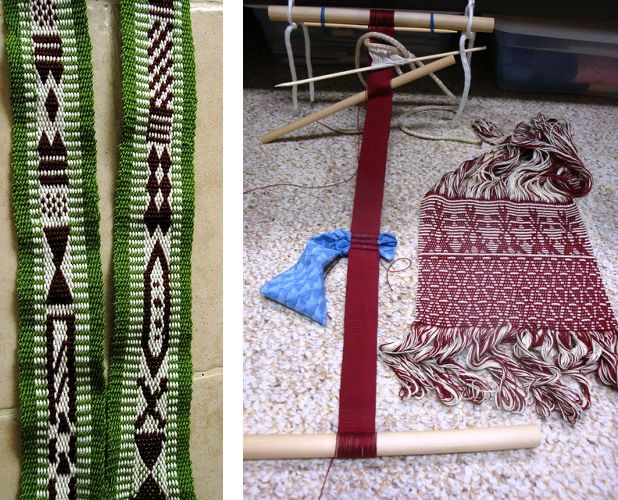
This is the alpaca warp for the tubular band and there it is being woven and sewn to the edge of the piece.

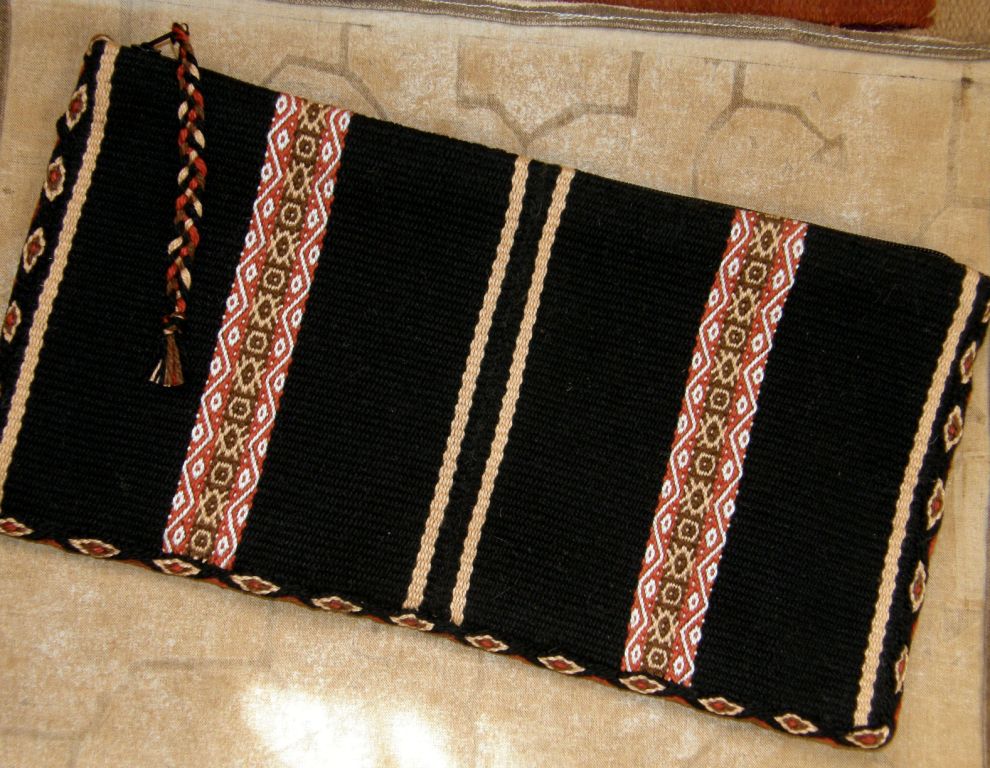
Now my passport gets to travel in first-class luxury even if I don’t. I made this sample piece into a passport pouch which is a vast improvement on the plastic wallet I have been using until now. It feels lovely!

Cutting the piece off the loom was the hardest part! There was still enough warp there to weave a little something. This was my precious handspun and I didn’t want to waste a bit but then I got the idea of using the leftover bits as supplementary wefts in another project and, with that in mind, I cut away.

Now with the Tour de Fleece approaching do I keep spinning the alpaca, go back to the nasty llama or take up the cotton?  Decisions…

Actually, I am thinking of spinning some heavier yarn from the llama fiber to use, as it often is up in the mountains, to make slings. Well, I probably won’t make a whole sling, although I have made one before with a teacher in Yanque, Peru using llama fiber. It would be nice to have yarn suitable for making the braids rather than the whole sling. This will be challenging as I have been aiming for fine thread all along and now I am not sure if I can spin thick.

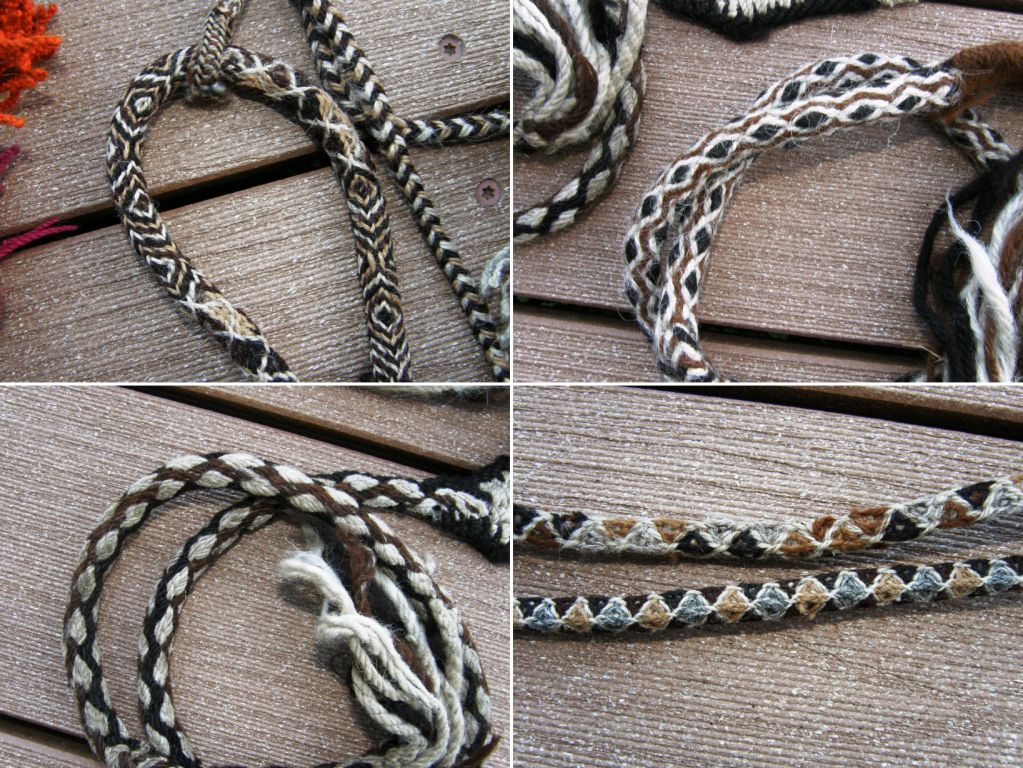
When I was in southern California, Martha shared her collection of South American textiles with me which included a number of beautiful Andean slings…
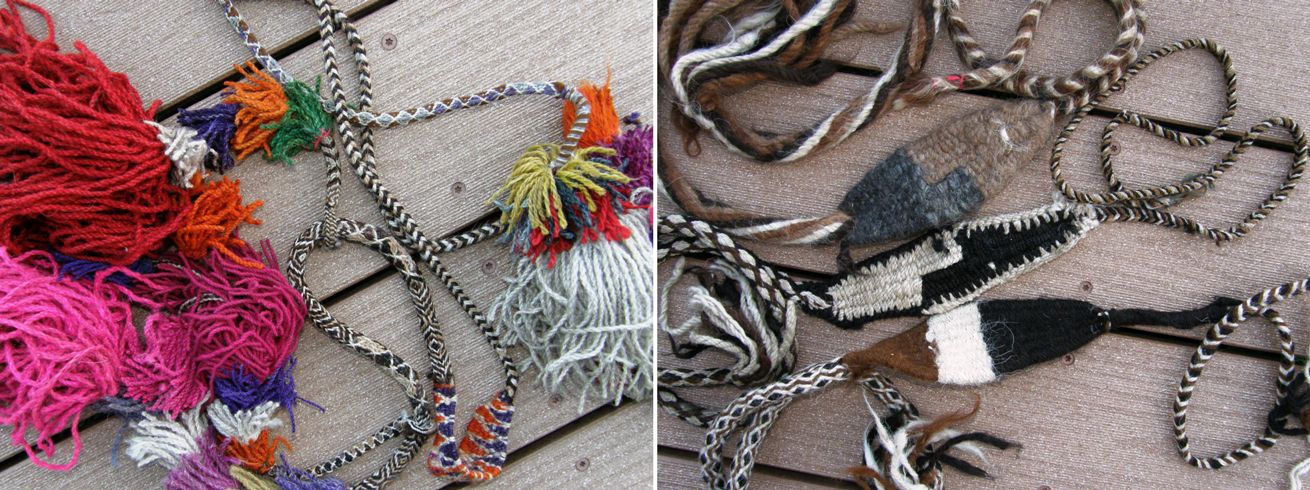
They have been made with such a variety of gorgeous braids and with the beautiful natural colors of the llama…
Ben Turner in Australia showed me two Tibetan style slings that he has constructed. While the cradles of the Andean slings that I have seen have been woven weft-faced, Ben tells me that Tibetan slings usually have twined, braided or felted cradles. The cradles of his two examples here have been twined.
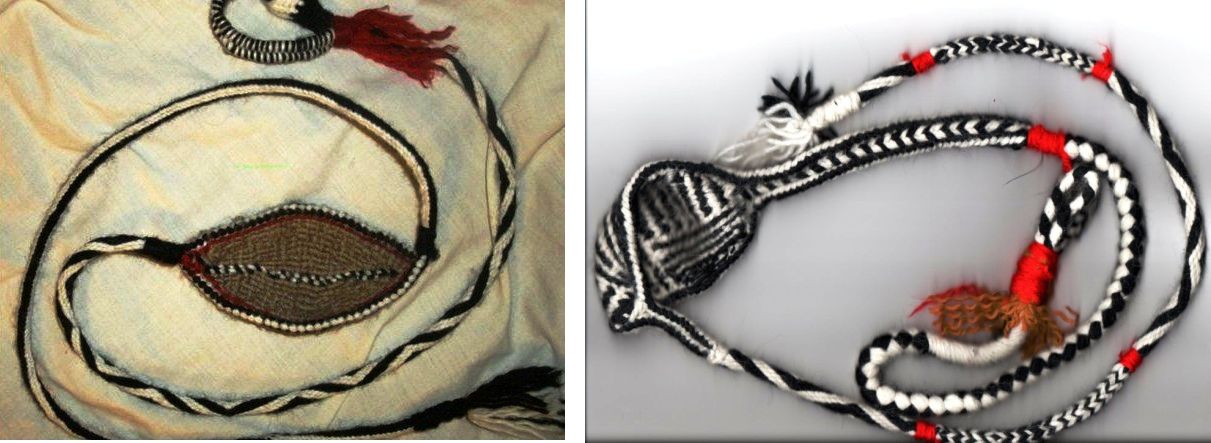
I must ask him what yarn he uses for these.

And now on to cotton, the material most available to us “lowlanders” in Bolivia…

Another piece of sampling I did this week was using the bamboo reed on my backstrap loom. This was extremely clumsy especially with such a narrow piece but I will eventually come up with some kind of system for this. I am tenacious with these kinds of things and I am determined to make this work. I so rarely weave plain balanced cloth and I get ridiculously excited about it! I have a cotton shadow weave project in mind and later I would like to use some 10/2 tencel that I received in a swap to weave something.
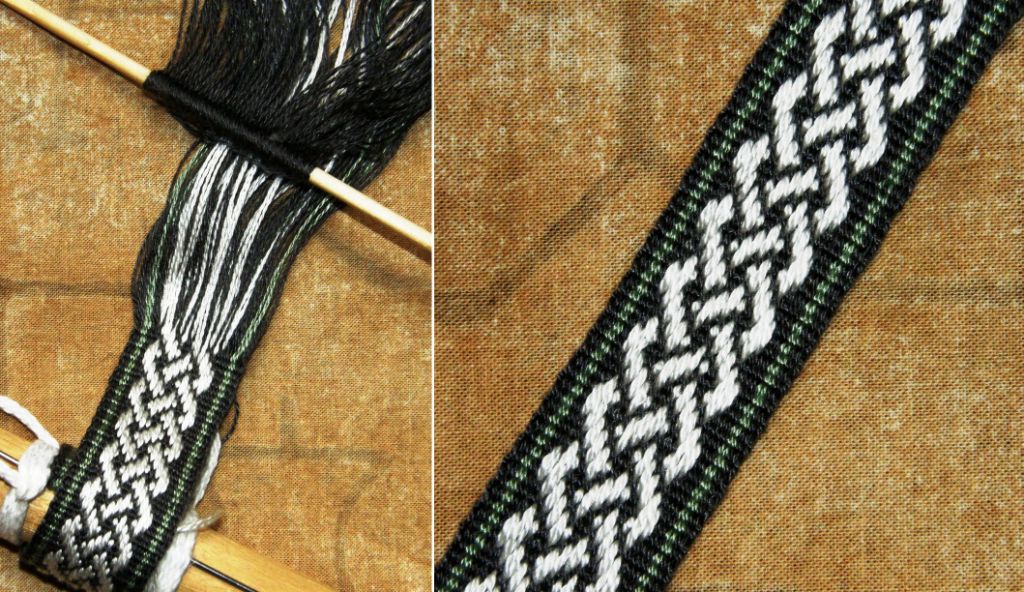
This is all I have used the tencel for so far…a supplementary warp band, but I am hoping that there is enough contrast in the green and grey for shadow weave (I don’t have all that much of the ivory).
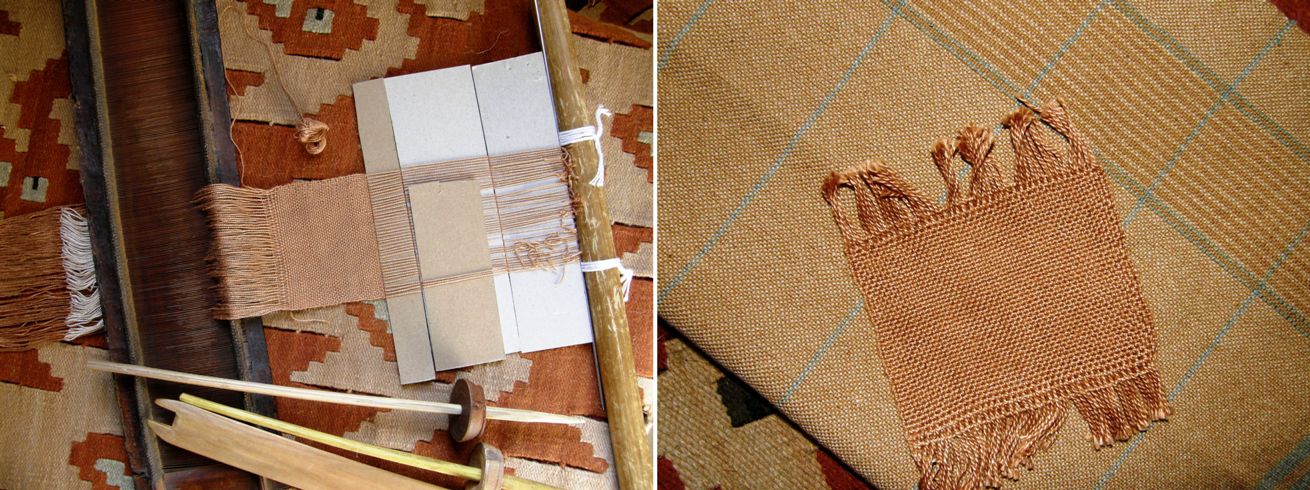
This experiment is with the cotton that I usually weave my warped-faced pieces with, more or less equivalent in size to the #10 crochet cotton that is available in the US. Above right you can see it wet finished and lying on top of a beautiful cotton dish towel that Betty Davenport wove. That towel is my inspiration and I can tell you right now that it won’t be going anywhere near a dish!

Betty wove this towel using cotton from Sally Fox Vreseis Ltd line of 10/2 in camel, coyote and green…all natural cotton colors! I had not heard of Sally Fox until Betty told me about her and her experiments with developing colored cottons (which reminds me that I did a spindle swap with a lady in the US who sent me natural green and caramel cotton sliver…must get down to spinning that).

Betty has a collection of small skeins of cotton in an incredible range of natural colors…all kinds of browns, greens and even a mauve from Peru. Some of the skeins come from Sally Fox’s experimental supply when she first started developing her standard colors. There are reddish-browns from Guatemala and dark browns from Peru as well as colors from some of the US southern states.

So, a four-shaft shadow weave with my nifty reed in place will be an up-and-coming project.

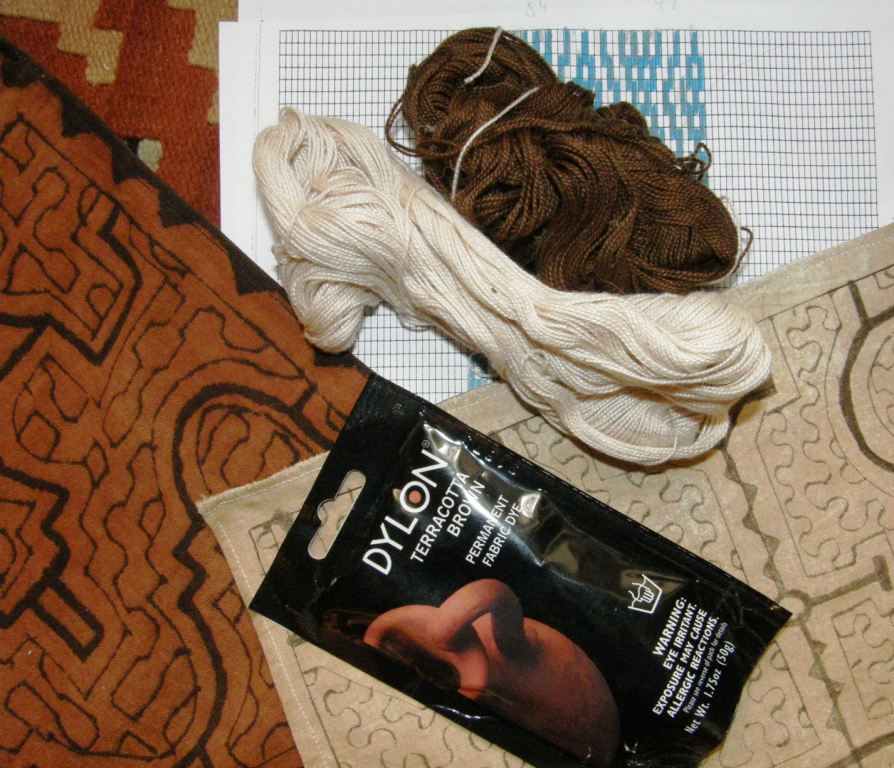
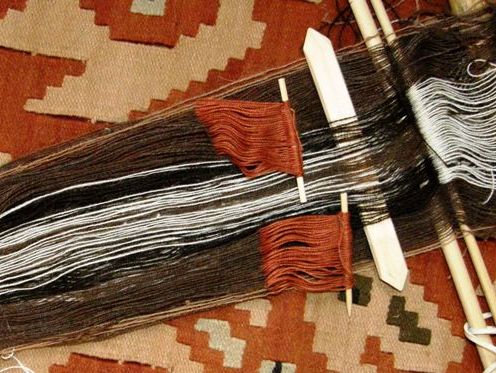
Well, until someone comes up with a natural terracotta-colored cotton, I have no choice but to dye some. So, this week I dyed some of my crochet cotton with the Dylon Terracotta Brown dye. The color is perfect! It is exactly what I was wanting for my Shipibo piece so that will be on the loom this weekend too.

That is the color below on the string heddles…yummy!
The Ravelry gang continues to weave and spin…
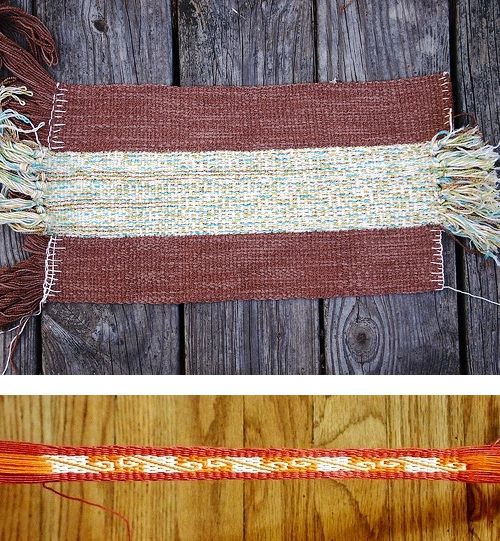
Naomi has tacked three plain warp-faced pieces together for cutting and sewing into a zippered bag. She is also weaving a pebble weave strap for another bag project.

Amber finished her pencil pouch. She wove the fabric for this using the simple warp float technique. Jennifer is piecing together a bag patterned with pebble weave motifs.

Tracy wove a sample band for the traditional Bedouin al’ouerjan technique which is simple and stunning. I have added some information about this to the warp substitution tutorial page which will be more meaningful to those of you who have already followed the initial instructions on that page. Helena in Brazil kindly provided a link to a pdf by Joy Totah Hilden, author of the book on Bedouin weaving pictured in Tracy’s picture, in which the draft for the al’ouerjan structure is provided on the last page.

After Jennifer and Tracy’s beautiful weavings I have no more fear of putting red and blue together! They have given me the courage to get that red and blue Central Asian piece I have been planning underway soon.

####################################################

And finally, I have a wee favor to ask of you all…I just started a page on Facebook for my Andean Pebble Weave book and would love it if you would take a moment to go there and hit the “like” button. Things like this could really help me in my future publishing endeavors.

I have a few exciting things on the drawing board. 😉
#####################################################

Backstrap Weaving – Sampling: Short, Sweet and Simple

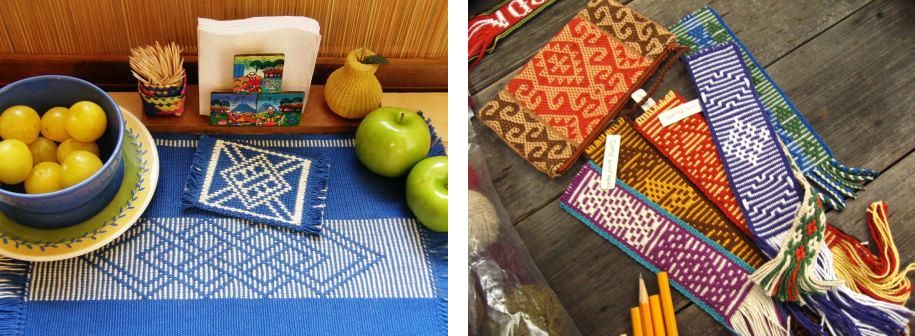
I don’t mind sampling before I take on a new project. I usually end up making something with the sample…count the zippered purses I have around here! They are just a fraction of all the sample projects I have made. Those little zippered purses make great gifts and swap items.

I know how important it is to sample width when trying a new pick-up technique on my warp-faced weavings.

With a backstrap loom it is so easy to wind a twelve-inch long warp or even shorter and test this out before warping up the major projects.

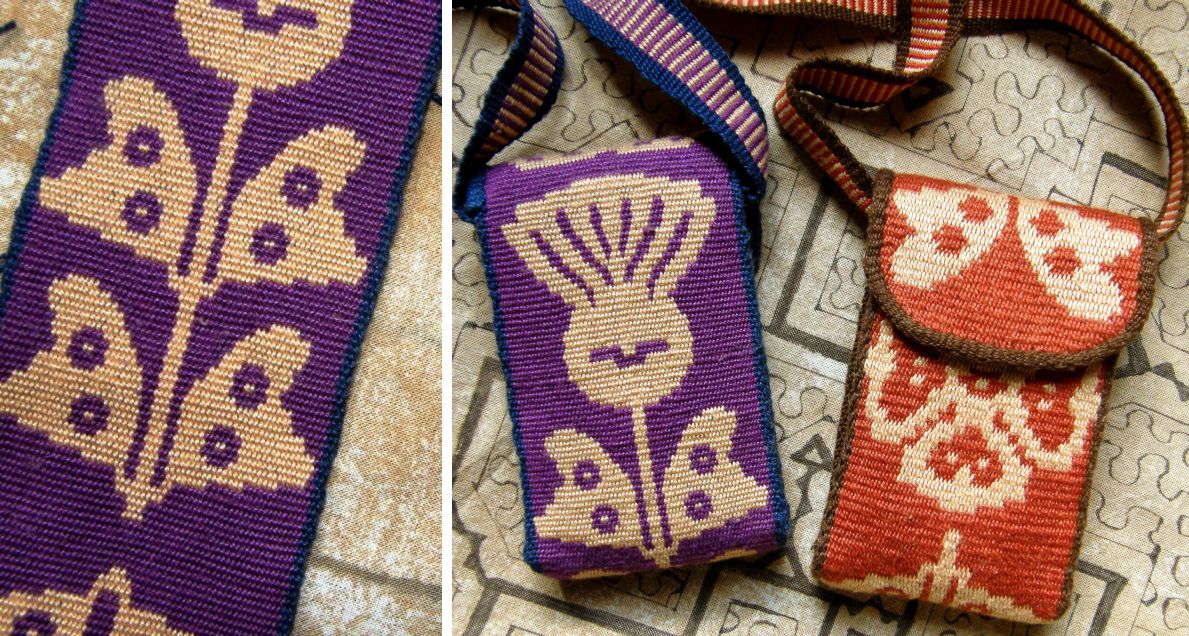
Sometimes I just need to see if I have gotten the scale right when I am charting a new design which is what I was doing on the sample pictured above.

That sample was enough to show me that I was on the right track and from there I finished the chart and wove my cell phone pouch.

Right now I am agonizing over colors, trying to find the right combination of red and blue to weave a Central Asian design that I have had my eye on. It doesn’t matter how long I sit here and stare at my color options, nothing helps. In the morning I favor one combination and in the evening it is another. I even pleaded with the online backstrap weaving group to make the decision for me only to be reminded of my own words…”make a wee sample” (thanks Jennifer).  I will never really know how this will turn out until I make a warp and start weaving.

So it has come time to sample again.

First those shades of red and blue and then my handspun alpaca. I have to say it is a lot harder to sample and risk wasting that precious handspun especially when I am not someone who gets terribly excited about the process.

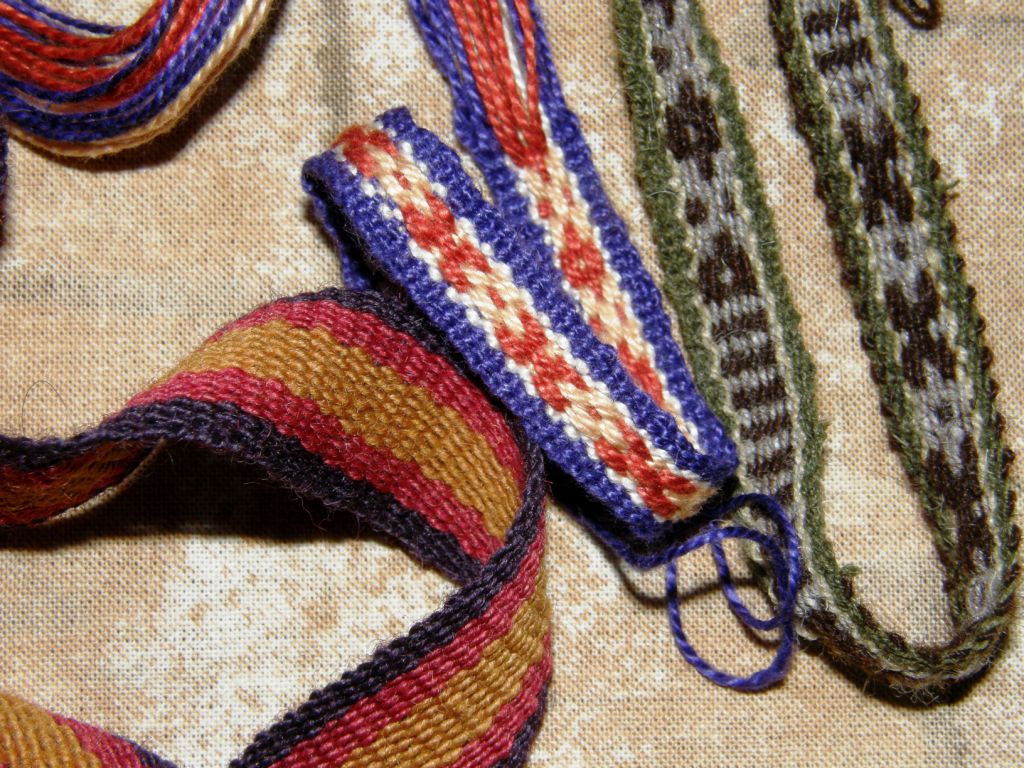
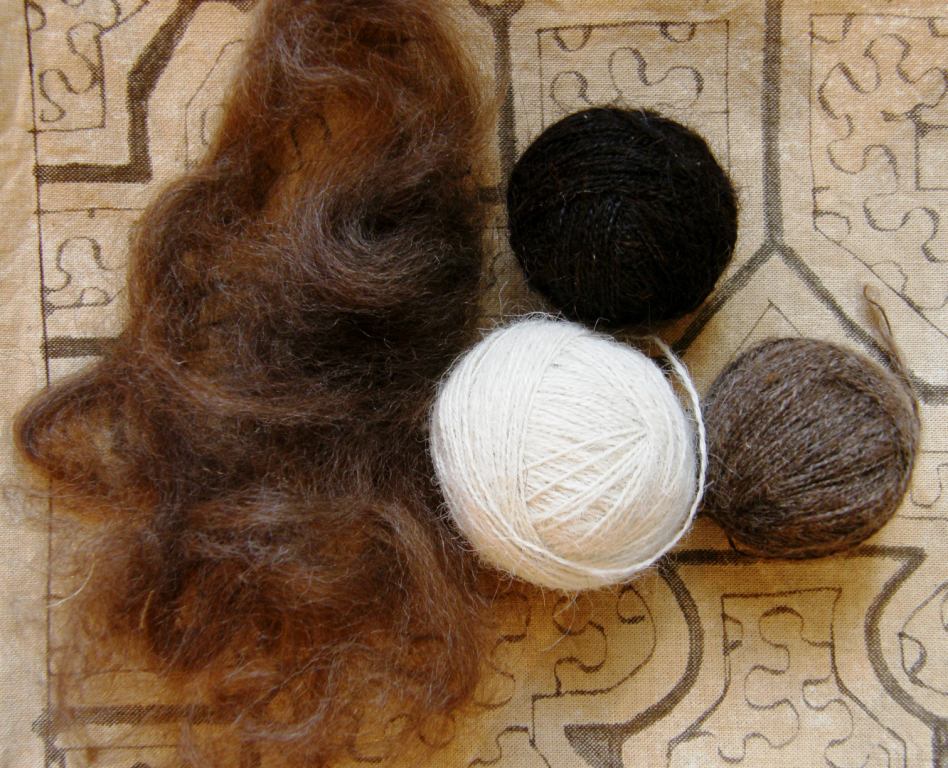
As I said last week I just want to get it done and go weave with it.  So far I have a ball of white, dark brown and black ready to go. There will be a slight delay with the medium brown as I had to turn the house upside down looking for one of the balls of spun single that my cat had made off with. I am lucky to have something to which I can aspire. Some Aymara backstrap weavers from northern Chile brought some of their handspun alpaca with them when they came to attend a weavers’ gathering here in Santa Cruz last March. I was able to weave with and keep some of it. I wove the grey and brown band above with their yarn – a short and simple sample.

Once again I am grateful to the backstrap loom which will enable me to weave the tiniest sample with my own handspun before warping the main project. I have selected my pattern. I even have a product in mind and can’t wait to get started although I still have a couple more colors to spin.

As I said last week, spinning seems to be calling me. Thanks to Jennifer and Naomi the Backstrap Group on Ravelry now has a TDF 2011 team. If you don’t know what TDF is, don’t worry. I didn’t either until last week. I started noticing that avatars on Ravelry were being changed to show special TDF buttons with team names. TDF stands for Tour de Fleece and is a spinning frenzy that runs in conjunction with the Tour de France. The idea, from what I gather, is to set spinning goals for yourself, step outside your comfort zone, share, learn and have fun.

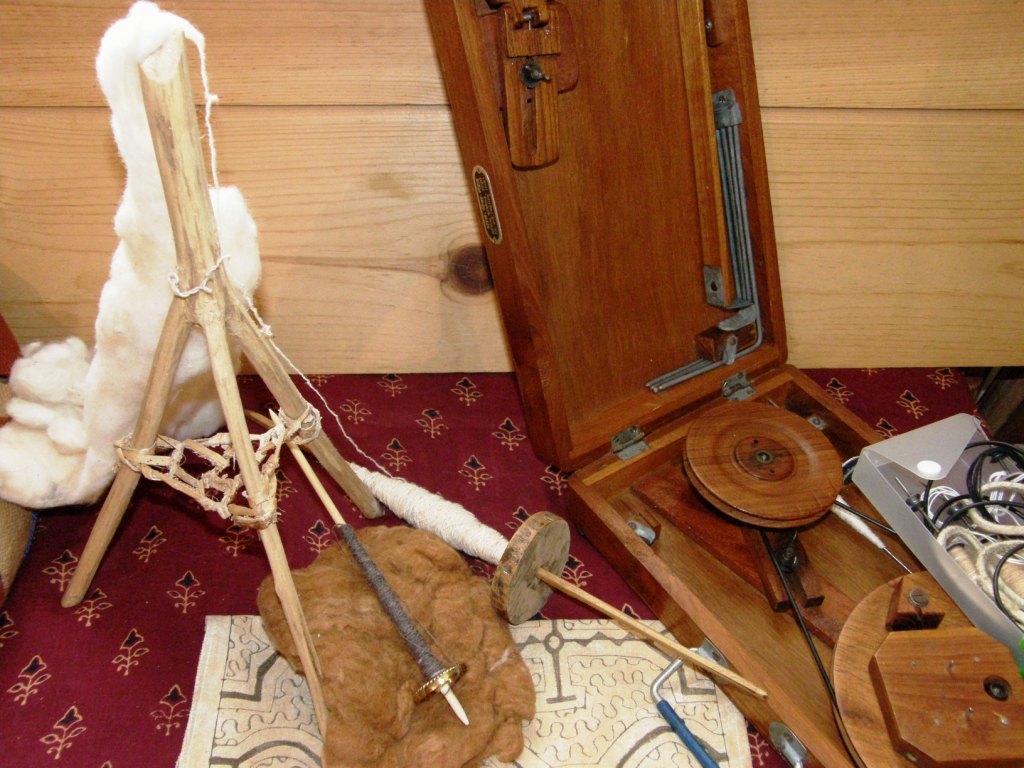
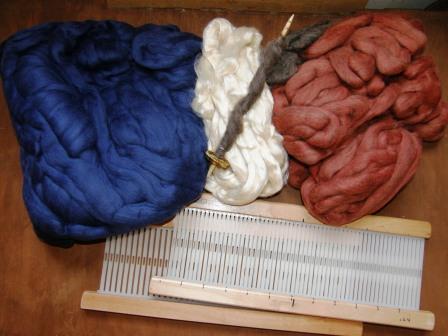
I haven’t set any goals yet but I am thinking that I should do something with cotton. There is a lot of expertise in my group and, as I have the above tools to play with and some nice cotton that I have been given in swaps and which I brought back from Ecuador, I should take advantage of this opportunity to learn.

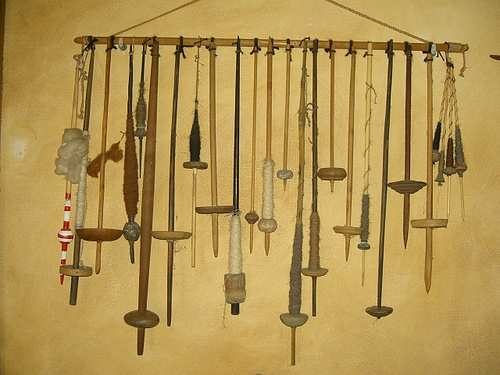
I learned to spin cotton in coastal Ecuador in 2007 where spinning is done on the larger of the two spindles seen above and using the rueca, or distaff, fashioned from a three-pronged branch.

Getting back into this alone would be a good enough challenge for the TDF as I haven’t done this in ages.

The smaller spindle in the first picture was sent to me as part of the swap package and I am told that it is a homemade tahkli which is a lightweight support spindle. I have never used it nor have I used the Indian charkha which was given to me in the US (although I take it out very often just to admire!) While this one calls to my Indian roots, I think that I should get a good grounding with the other spindles first.

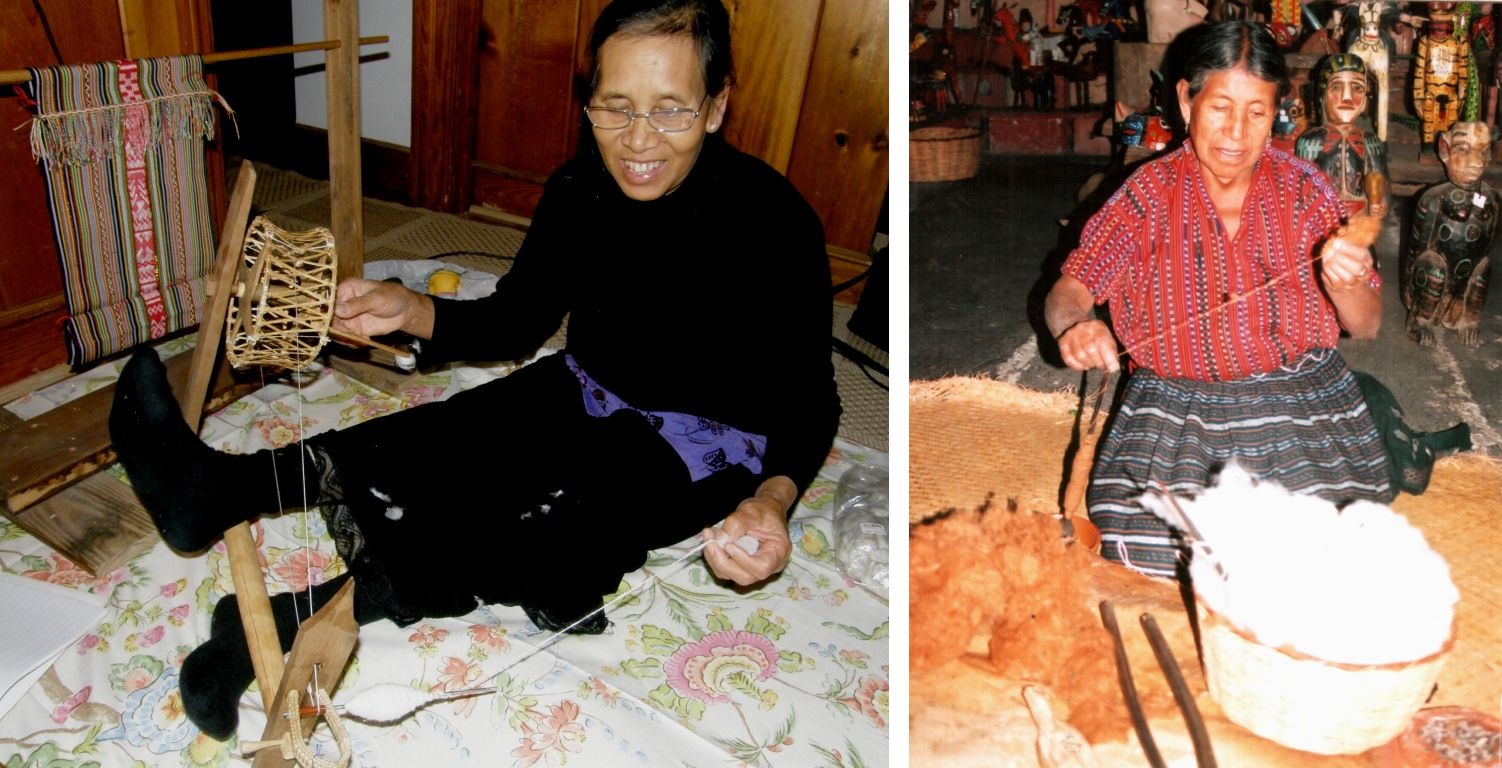
Cotton spinners I have met in my travels…Above left is Montagnard weaver Ju Nie and on the right is a lady spinning natural brown cotton with a support spindle in Guatemala. My Guarani weaving teacher also spins cotton with a support spindle.

But first things first…I will get that alpaca done, a sample made and the project warped!

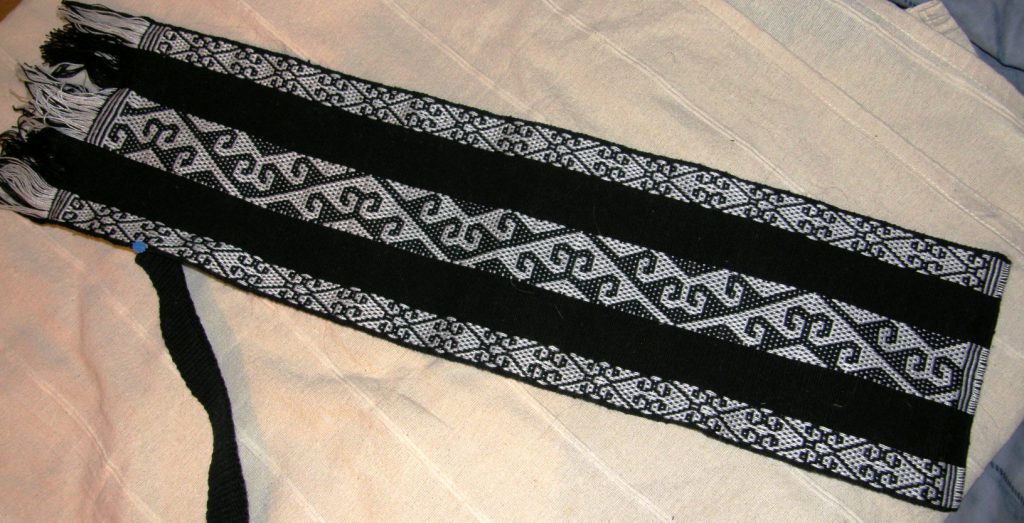
Here is last week’s project off the loom…

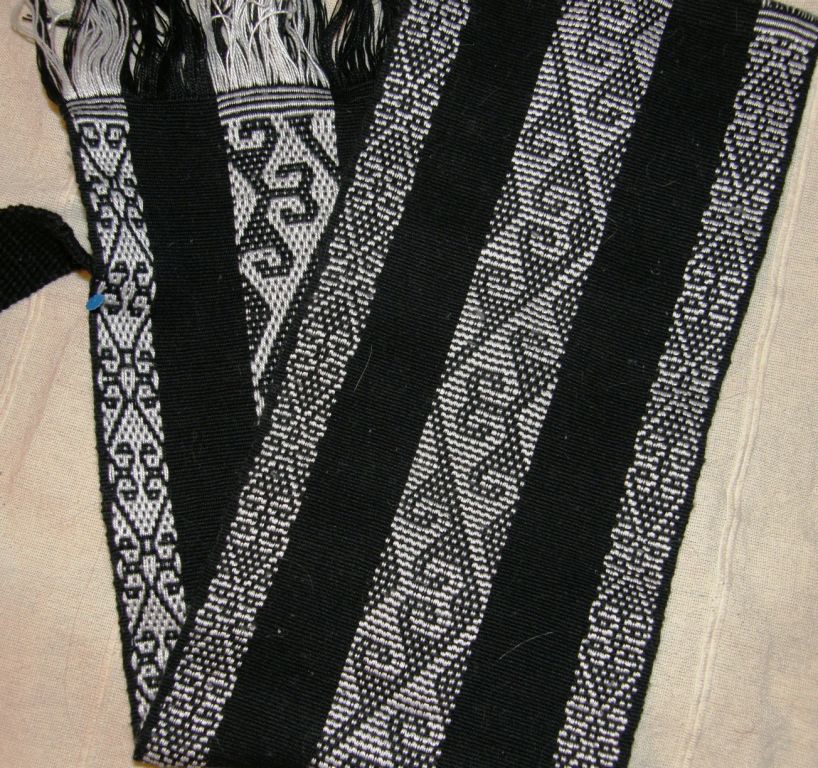
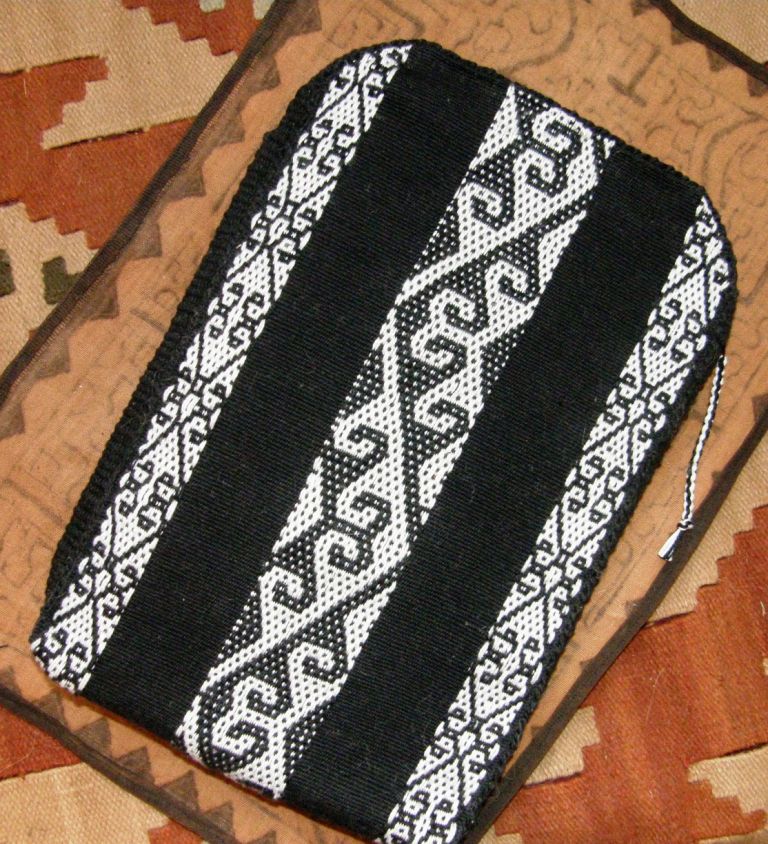
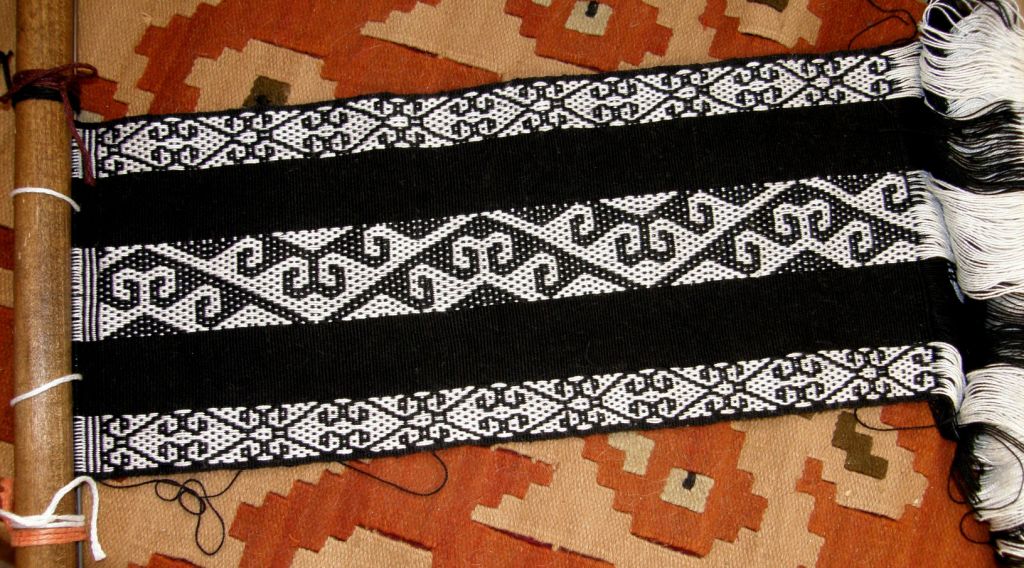
This is a Central Asian design woven in a simple warp float technique where both colors in the warp are floated to create the motif and fill in the negative space. It is not a double faced technique as gaps are left on the reverse of the fabric by the floating warps which expose the weft. Nevertheless the back of the weaving can look quite attractive…

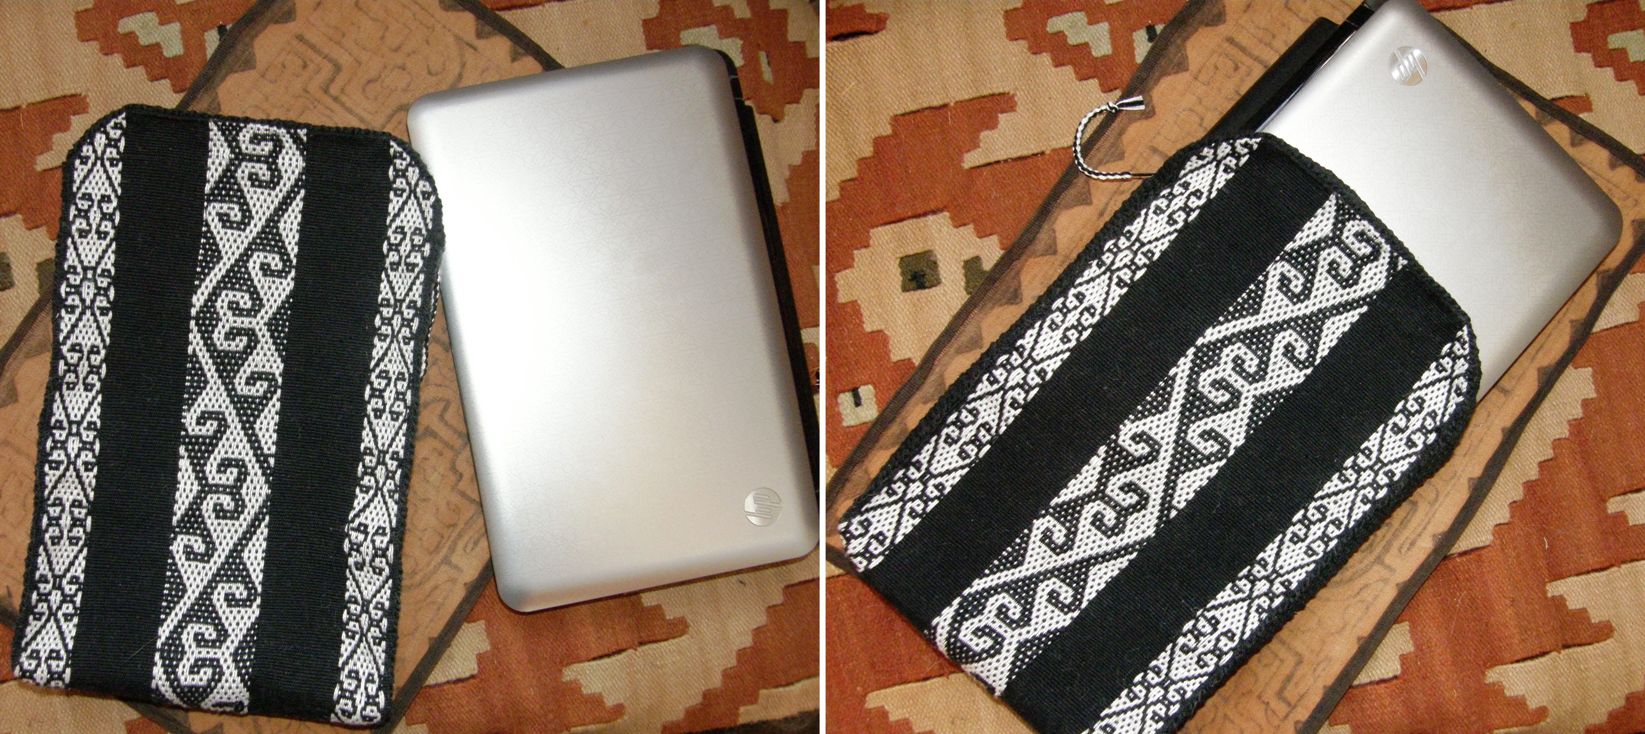
Anything made in black in my home attracts every stray cat hair! I made this into a sleeve for my notebook computer and so you can see the band I wove for the sides positioned and pinned ready for sewing. I rounded the top and added a zipper. You can see the zipper pull below….that is where the zip starts.

This was made from the demo backstrap warp that I took with me to the US on which I showed different techniques for opening the sheds. This case will protect my computer from dust and scratches but what will protect it from the cat hair?!

I am all about simple warp floats at the moment being influenced by two things I saw while I was away…

On the left…a Native American sash that Pam in Massachusetts showed me from her collection where the weaver has allowed the horizontal bars to shape the motif rather than the floats. Quite often we think of those horizontal bars as an annoying distraction from the motif which has been formed from floats and wish that we could somehow cover them up and make them go away. Here the weaver has used them as the design. Below you can see the more typical warp float designs that I have made where the floated motif sits on a background of horizontal bars.

The other piece that I found intriguing is the old Mexican (we assumed) belt that Susan showed me in Eureka. Here both colors in the warp have been floated just like in the Central Asian piece I made. However, we could just make out the remnants of a purple supplementary weft that had been used to fill in all the places where the warps had not been floated and, therefore, horizontal bars had been exposed.

The supplementary weft had almost completely deteriorated in this belt but you can probably better make out some of its remains in the above picture. That made me curious about the possibilities of combining supplementary weft patterning with simple warp floats, maybe not in exactly the same way as the Mexican weaver had, but it could be a way to add an interesting third color accent to a structure that is normally restricted to two warp colors. The best part about supplementary wefts is that you can change the color at will meaning that you could have a base warp of say red and gold and then add a turquoise accent, later a purple…any color you want, when you want. And, if you don’t like the third color accent you can just cut it out without affecting the structure.

So, I warped up this red and yellow band and played…no charting or planning, just messing around. I used a brown supplementary weft to add in some small accents. I had originally filled in the bottom diamond completely, decided that that was over the top and just cut it out. This was fun!

I tried the design on the red and black Native American belt but I think it might look better with stronger contrasting colors and/or heavier thread. Floating single threads instead of pairs, as I did in the example on the left, was an interesting exercise too. In this 35wpi cotton, it almost gives the appearance of a solid color background.

Sampling done! I want to plan a larger project now and see what else I can do with this.

It is amazing how many places this simple warp float technique turns up…

When I was in Santa Cruz California, Yonat showed me an Indonesian ikat textile in her collection which had a border of simple warp floats. On the right is one of the textiles made by the Burmese backstrap weavers in Massachusetts.

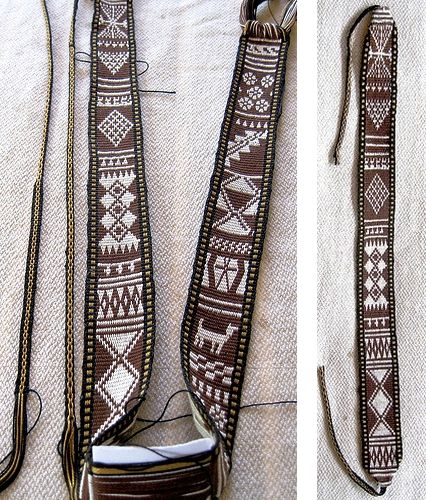
I learned this technique from the cotton saddlebag weavers of coastal Ecuador and have used designs from the coastal region in my own work above left. The Montagnard backstrap weavers with whom I studied in North Carolina float warps to create patterns. They use a slight variation in their warping set up and weaving. In the above piece I used a motif woven with a suplementary weft alongside the warp float patterns. The end has a design in twined wefts.

Here are two pieces woven by people who follow my blog. Eladio in Mexico wove the bird pattern from coastal Ecuador and a hook pattern which are charted here. Jeannine in Belgium designed her own warp float pattern.

Recently, Lydia in Texas sent me a picture of the piece on the left that a friend had bought in Madagascar. Apparently a Danish group has taught the local weavers this technique. The bag on the right is Betty Davenport’s and was collected in the hilltribe area of Thailand.

Amber in the Ravelry Backstrap Weaving Group showed us her finished piece above right on which she has used the motifs of coastal Ecuador. Now she is weaving a band which will be the sides of her pencil pouch.

Tracy finished her band in the warp substitution technique after studying with a local weaver in Doha, Qatar where she lives. Check out her blog to read about her visits to Souq Waqif in Doha.

And Traudi, after having already completed a few backstrap weavings, decided it was time to have her own woven backstrap. She wove this following the instructions in my Backstrap Basics article.

A couple of other things I have been pondering…

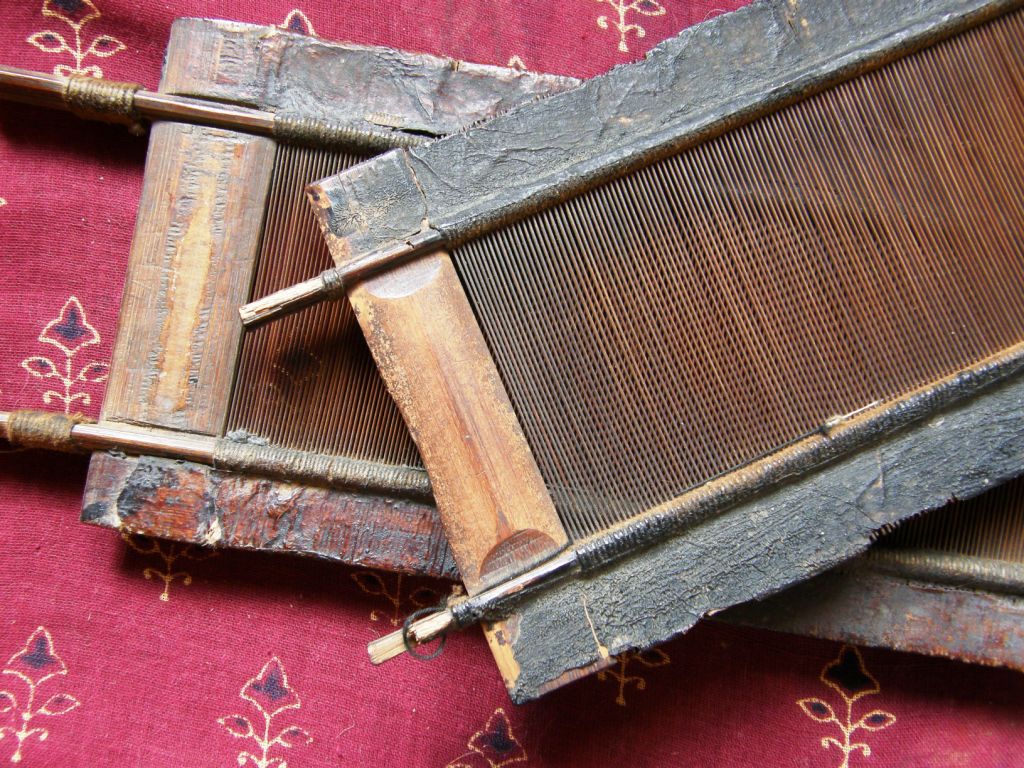
Here are my gorgeous bamboo reeds. I finally cut them down off the wall where they have been on display. They are a size 20 and I really want to use one to make some kind of balanced type weave…maybe a colonial overshot pattern after the inspiration I got from my recent visit to the National Museum of the American Coverlet in Pennsylvania and there’s always shadow weave.

Another thing that is percolating…I just finished charting a Shipibo design from a piece that is woven using two-color simple warp floats (the same technique as the Central Asian piece I just finished). I want to use the colors that are in the two pieces of Shipibo fabric above so it will be either a beige and brown combination or I might try that Dylon dye that I got in the US to see if it makes anything resembling the terracotta in the other Shipibo fabric piece.

There is plenty to keep me busy, you see!

Backstrap Weaving – Spinning and Swimming in Floats

I am a “cheap spindler” in much the same way as I am a cheap drunk…it doesn’t take much to make me happy! And don’t waste the good wine on me. I do not have a refined palate. So, it is little wonder that I am content to use my humble Cusco drop spindle when I get the urge to spin. I don’t have a refined palate for spinning tools.

Right now I am spinning some alpaca that my friend Janet gave me so that I can weave with it on my backstrap loom. The Cusco spindle was the second one I ever got, the first being from San Pedro de Atacama in northern Chile. The Cusco one, being more robust, became my constant travel companion. It was practical. Although I have collected many more spindles on my weaving safaris since then, this Cusco one is the one I always use while the others hang on the wall as souvenirs of places I have been and people I have met.

I really enjoy reading the online group forums about spinners and their spindles. The participants’ love and enthusiasm for their tools is wonderful….I totally get it but I just don’t share it. Some of the spindles they show are beautiful pieces of craftsmanship. I just want to get the job done.

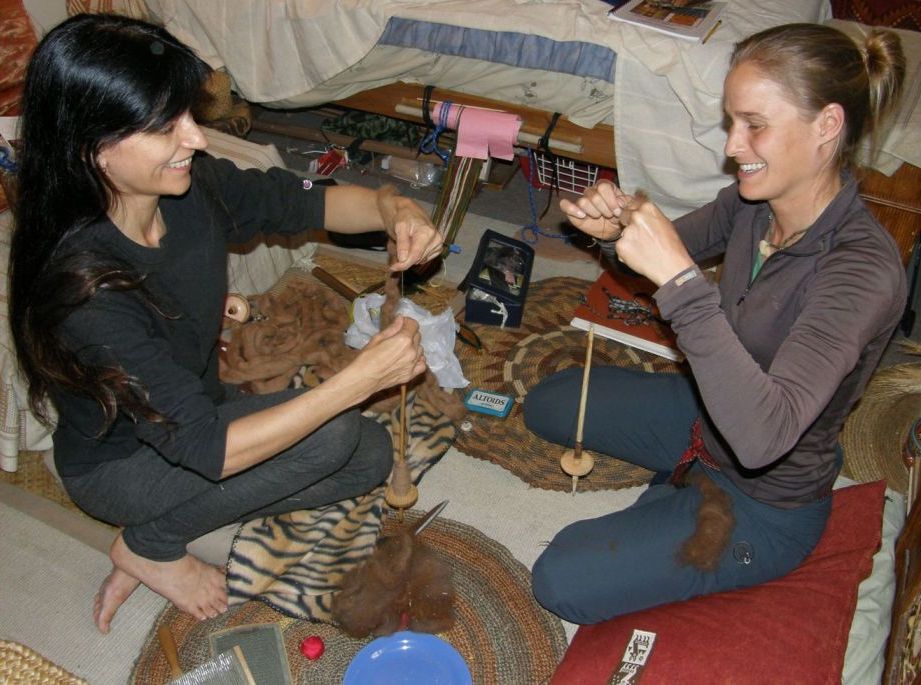
Below you can see the Cusco job in action while my friend Anna takes her first steps spinning on a Bolivian spindle.

It seems that when it comes to spinning I am totally product oriented which is kind of strange as it is quite the opposite when I weave.  I just want to get this stuff done so I can go weave with it. In weaving I am all about enjoying the process.

However, spinning does give me a lot of time to think which is good as I have arrived home from my US trip with a lot of ideas rattling around in my head. I would like them to kindly stop rattling about and settle down into some kind of order. Fortunately I had three warps on looms ready to go when I got home and so could slip back into the loom and weave without having to make many decisions.

This is one of the warps that I had taken away with me….Clea cotton (equivalent to #10 crochet cotton…35wpi).

I warped a narrow pebble weave band into a field of black plain weave. A simple pebble weave pattern meant that I did not have to spend too much time on the pick-up and could rapidly show people the entire process.

I probably only wove a couple of inches while I was away…at a May Day festival, at a Saori Studio and with other weaving friends and so this was the first thing I sat down to weave when I got home.

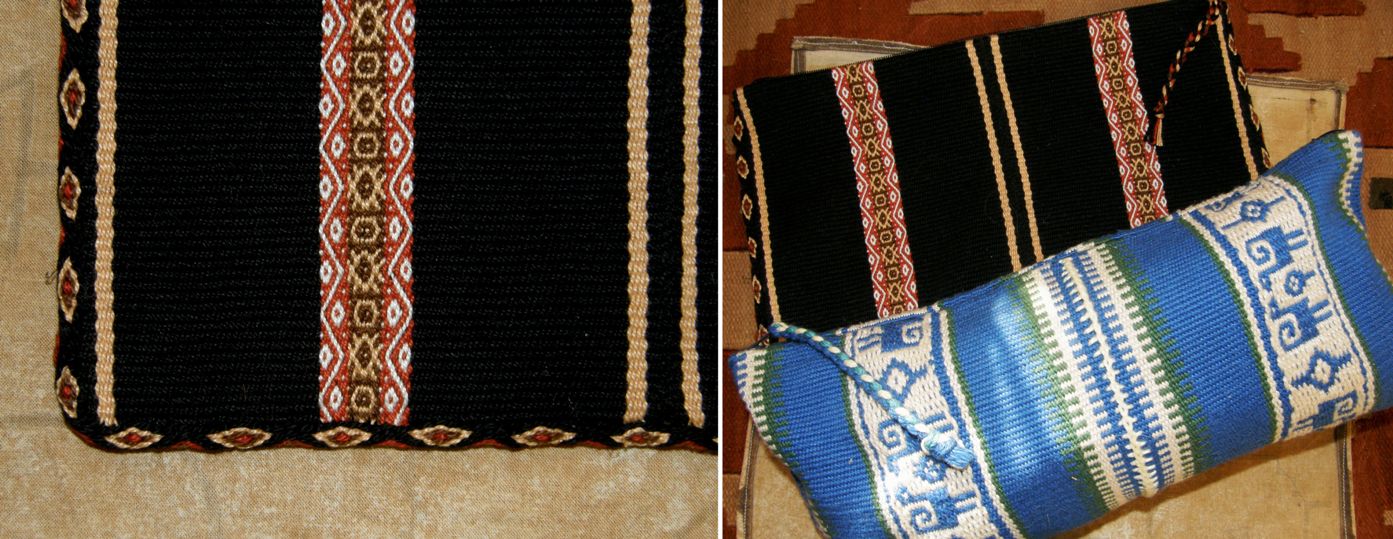
Once the piece was off the loom, I cut it in half and joined the two pieces side by side, added a zip and edged it with a tubular band. The tubular band is in Anne cotton (equivalent to #3 crochet cotton…24wpi).

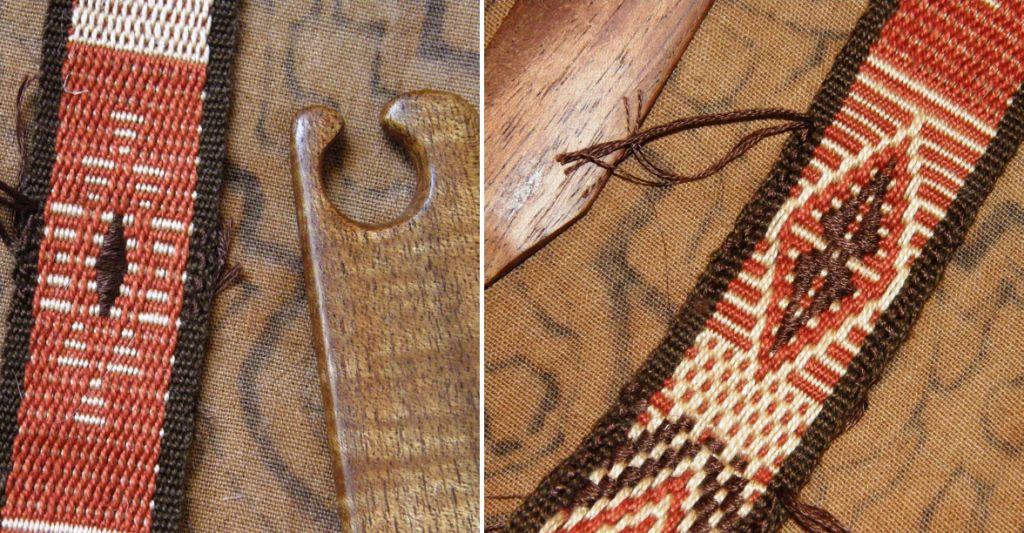
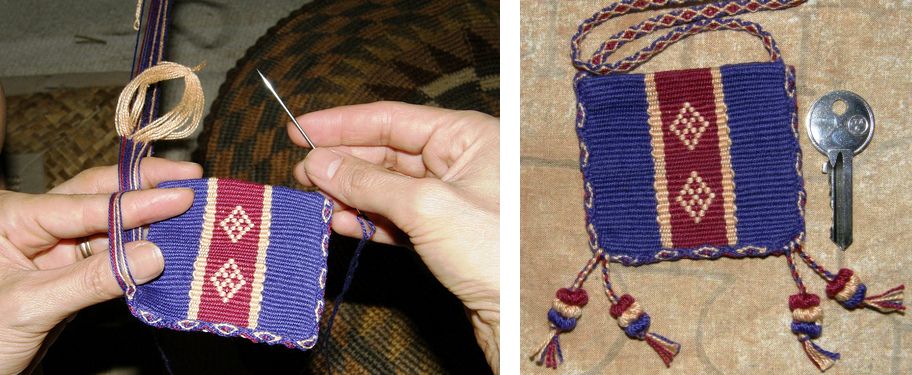
The tubular band is the ñawi awapa that I learned when I went to the Tinkuy de Tejedores in Cusco last year. Unfortunatley I neglected to have pictures taken while I was weaving and sewing it but I have pictures of one in the making that I made some time ago on a wee amulet bag.

The one I am making in the photo was made following Adele Cahlander’s instructions where she uses string heddles and a shed loop. The way that I learned in Cusco is very different. A forked stick holds the cross and all pick-up is done based on that. The resulting bands using both methods appear to be identical although I have to say that the way I learned in Cusco is far easier. There is, of course, no one right way.

These tubular bands are gorgeous. I have used one here to make the edge prettier. I have been told that the Peruvian weavers apply them to the edges of weavings as they help stop the edges and corners from curling which they tend to do on pieces woven from overtwisted yarn.

So, this is an extra long tool bag and one that I need as the only other one I have in this length (the blue one pictured below) is completely stuffed with things. It holds many tools for  and is the bag I took traveling with me.

A tutorial on weaving and applying a plain tubular band to the edges of fabrics can be seen here.

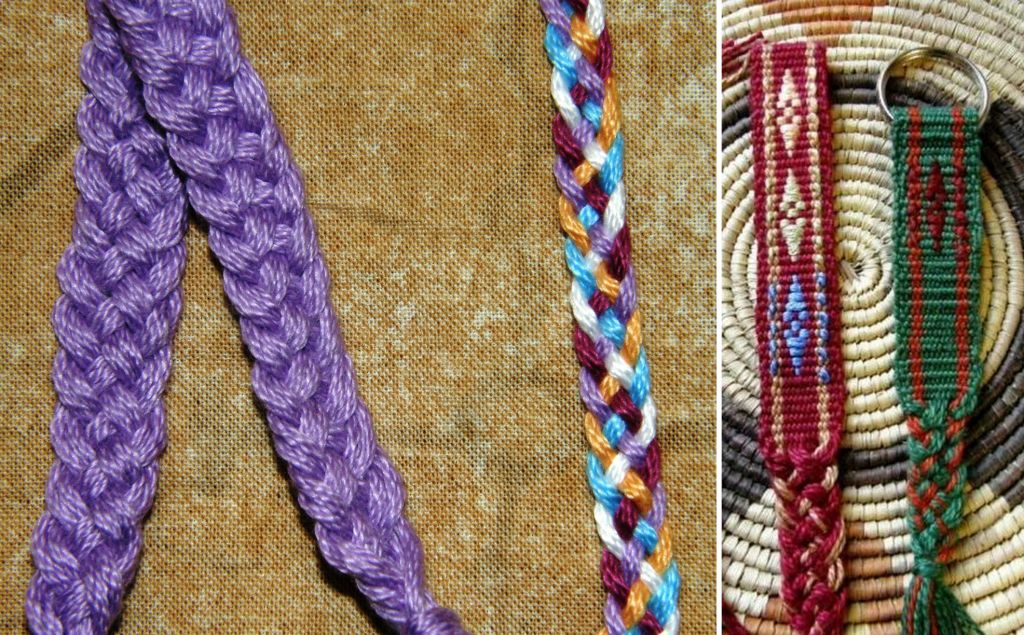
As usual, I made a braid for the zipper pull.

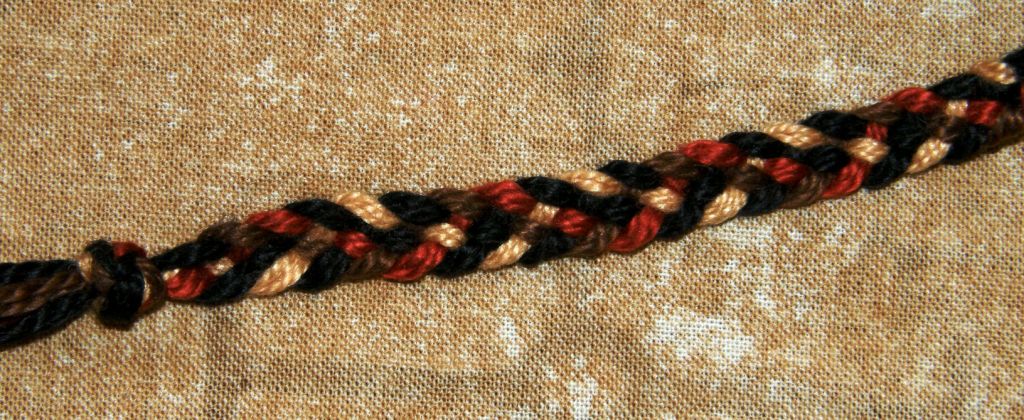
This is a five-strand braid which Yani, who was weaving with me in the US, taught me.

You may know that I often like to finish pieces with lots of tiny four-strand braids.

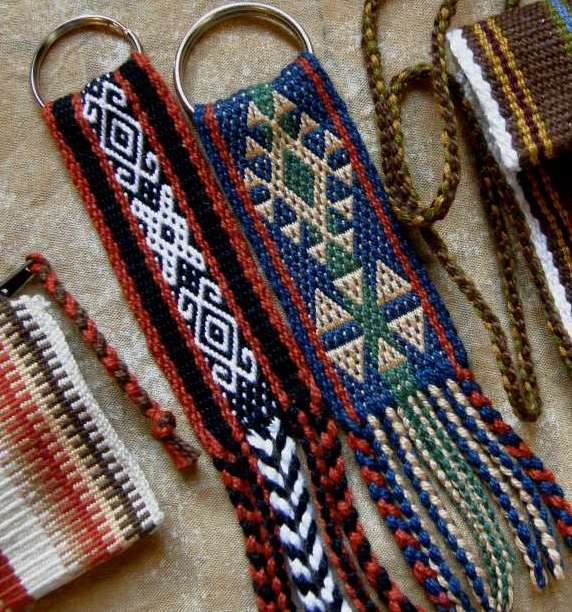
Well, Yani has no patience for those kinds of details and looked at me like I had gone mad when I suggested she finish her key fob with five or six four-strand braids.

She gathered up all the warp ends and worked one large five-strand braid and it looked brilliant!

This is a really easy flat braid which I think looks great the more warp ends you use.

I have not yet played with it much to see how different arrangements and numbers of colors affect its appearance.

When Yani gathered up all her warp ends she did not even try to separate them by color and the braid still looks great.

Yani’s key fob is on the right. On the left is a braid I made with heavy cotton all in one color and then one in finer cotton in five colors. I have put together a little tutorial on this braid here.

Speaking of braids, I got to spend some time with finger-loop braiding expert Ingrid Crickmore when I was in Santa Cruz, California on this trip. I had met her at the Education Booth at CNCH where she was teaching braiding and I was playing with m by backstrap loom. Ingrid has been hard at work lately putting together her blog and she now has tutorials there so please go and check it out.

Now, back to spinning. It seems to be calling me!

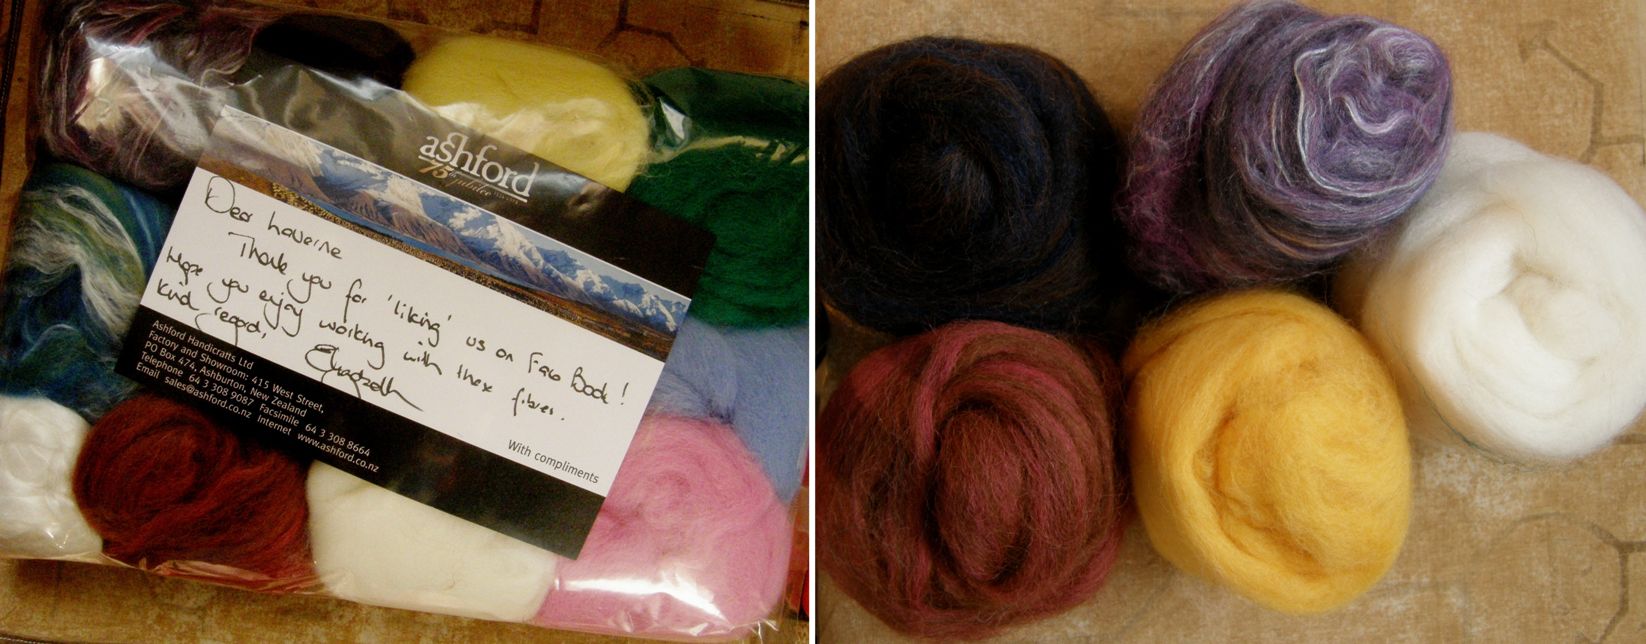
I arrived home to find this package at the post office. I had won a prize from Ashford for being one of the first to “like” their page on Facebook. I had been expecting yarn but I found a bag of roving instead which I shall set to and spin. There is nothing like this to be had here in Bolivia so this is quite a treat and I will enjoy weaving something with this on my backstrap loom.

So, I got one of my pre warped projects done and there are two to go. I had taken another warp on the road to show people the different ways to open the heddle shed when weaving wide projects with fine yarns. I have learned so many different ways, none of which can be considered the one right way. Some I find more efficient than others while others are better suited to particular yarns or warp widths. Again, I wove very little on this warp and actually unwove everything when I got home. I had made a simple two-color horizontal bar warp with no plan in mind at all.

When I got home I quickly decided on a pattern in simple alternating color warp floats as I have come home with a lot of ideas about using these simple warp floats and want to get warmed up with this technique before launching into the new ideas and experiments. I am swimming in warp float ideas!

So, this is what I have going on right now. These are designs from Central Asian yurt bands that I am weaving with Clea cotton which is very similar to the #10 crochet cottons that can be bought in the US.

What am I going to do with this? I have no clue! Something will come to me when it is off the loom. I have been wanting to make a case for my notebook and this just might do.

I would really like to use traditional colors for these pieces….those washed-out reds and blues that I see on the yurt bands are what I would really like to use, the colors that Martha Stanley has so cleverly managed to reproduce without having to wait for her yarn to be sun bleached and dusty!

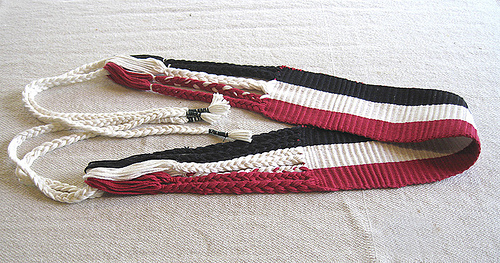
Then I remembered that I have this in the closet… something I got in a swap for a Bolivian spindle a long time ago. Okay, it’s cotton and yurt bands are NOT made of cotton but aren’t the colors gorgeous?! Spin, spin, spin.

The other thing that is pending…

A warp for another backstrap…it looks terribly wide right now but the blue and white pattern area will shrink down once I start doing the pick up. This yarn is doubled Tahki Cotton Classic and the project will give me practice on a technique that I have neglected for some time.

Ingrid gave me a tip for a source of Anne and Clea cotton yarn. This is the Brazilian cotton that I buy here in Bolivia. It is not as shiny or tightly spun as the crochet thread that I have seen in the US. It is all I can get here and I guess I am lucky as it is good stuff.

#######################################

Some other handy information that has come my way, this time through the Backstrap Weaving Group on Ravelry….

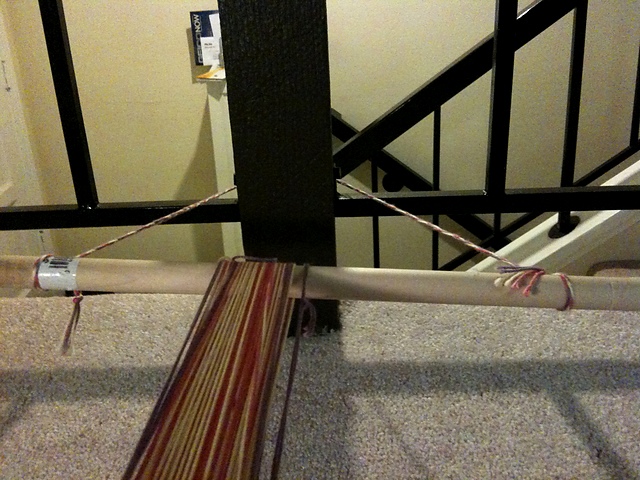
Barry Brown provided us with information on how to tie a loom bar to a vertical post and not have it slide down. It is a real problem sometimes finding a place to attach a loom bar in the home. I know because I spent time in a lot of people’s homes on my trip and sometimes we had quite a time finding hitching places. So, here is another option. This topic came up as Pancha had hitched to her stair rail and was having problems…

Number one problem…she really wanted her warp to be angled more steeply upward.

Number two…the warp kept sliding from left to right on her loom bar and messing up her tension.

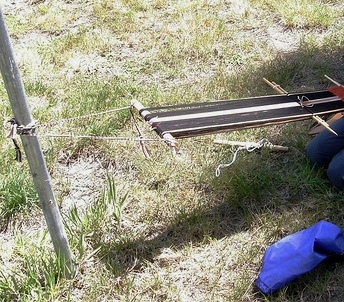
As usual many people came along and offered suggestions. That “floating loom bar” tie-up really only works well on wider warps like the one at left. You can see that that loom is much better balanced.

If you are going to use that method, you should try and cut notches into the ends of the loom bars into which the cords which attach the loom to the fixed object can sit. This will stop them from sliding in toward the middle of the bar.

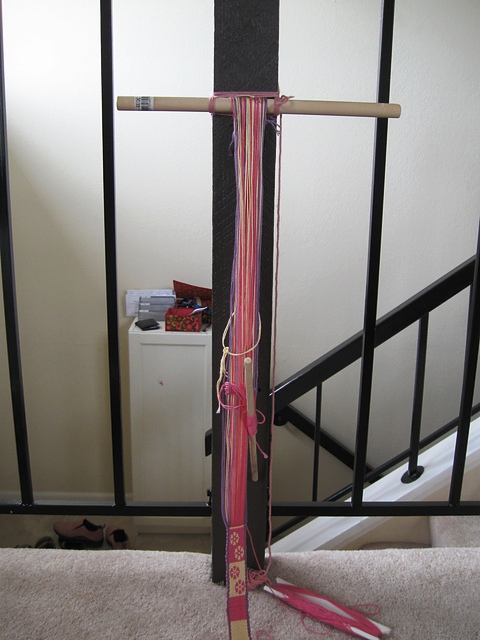
I like having my whole loom bar lashed to something so it can’t move at all but in some homes this just isn’t possible, Even using “C” clamps on a table or counter is not an option for some people. Fortunately Barry has provided Pancha and all of us another option. So here is Pancha’s loom now…

Barry provided this link to a Girl Guides page which gives instructions on how to lash securely to a vertical post. I have added all this information to the FAQ page.

What about in the car? I taught my friend Claudia to make the ñawi awapa tubular band and here she is making one in the back seat of the car.

Her warp is attached to the head rest of the front passenger seat and the other end is tied to her seat belt. I managed to catch this shot on Claudia’s phone. We were on our way to the Reagan National Airport as I was heading home on Sunday of the Memorial Day weekend and so we were competing for space on the highway with all the Rolling Thunder guys. You just see one going by.

And if all else fails finding a tie up spot you could always try this…

This picture of a Li weaver was taken by Pam Nadjowski at the International Folk Festival in Santa Fe. I did try this way once as a last resort but I think it works better with circular warps set up at just the right length rather than ones in a single plane. Mine was just a tad too long and I really wasn’t getting good tension.

I will leave you this week with a finished project from Traudi in the Ravelry group. She used this tutorial on the warp substitution technique and the Bedouin design pattern charts as well as some of her own motifs to weave a hair band (made on an inkle loom). She is using this technique as her stepping stone to one-weft double weave.

Himalaya (Tracy) has also been experimenting with this technique. She has the wonderful opportunity of seeing the Bedouin weavers at work on their ground looms as she lives in Qatar.

And it’s nice to see the simple warp float technique being used by Dyggvi to make a first-ever backstrap project….a backstrap.

The other threads you see in the picture belong to her warp weighted loom. Yes, we have another warp weighted loom weaver in the fold along with my friend Lisa.

Gannet has just joined us with her first pebble weave band in my favorite tone of orange…

Time to go get “drunk” on spinning and floats.  Back to the spindle, back to the loom, back to sorting all those ideas!