Backstrap Weaving – The Weaving Melting Pot

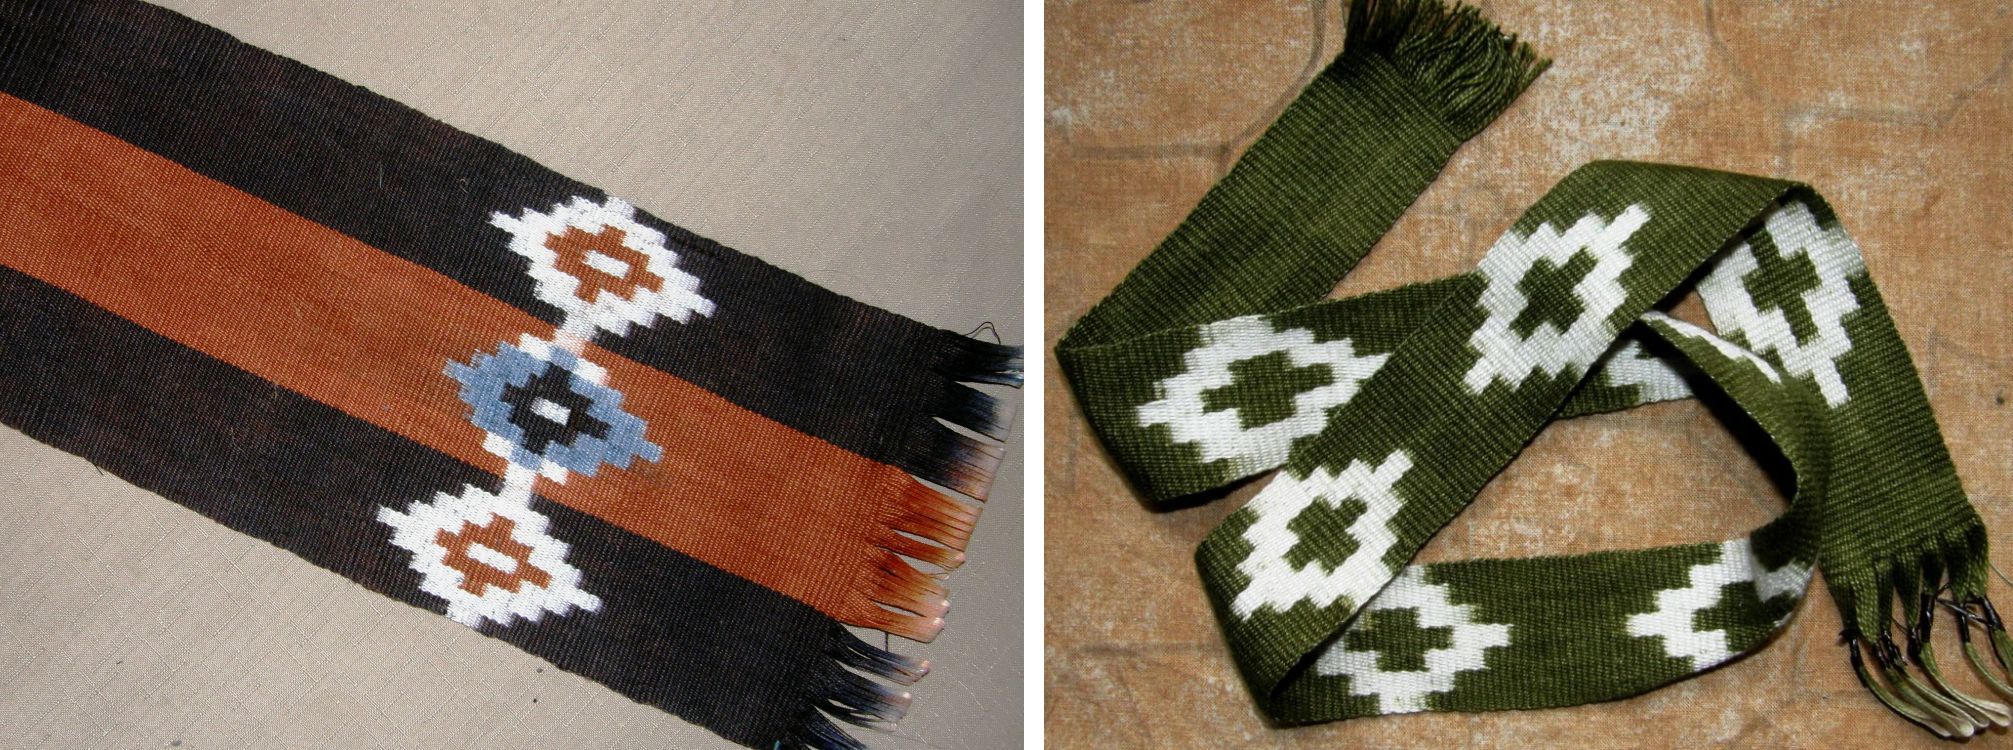
The Weaving Melting Pot….that is what I have bubbling away here. Every time I start a new piece on my backstrap loom I am so aware of the vast array of sources from which I have drawn technique and inspiration. I have studied weaving on a variety of simple looms here in  South America, in Central America and even in North America  and bring a little of everything to my work when I set up to weave on my loom of choice…the backstrap loom.
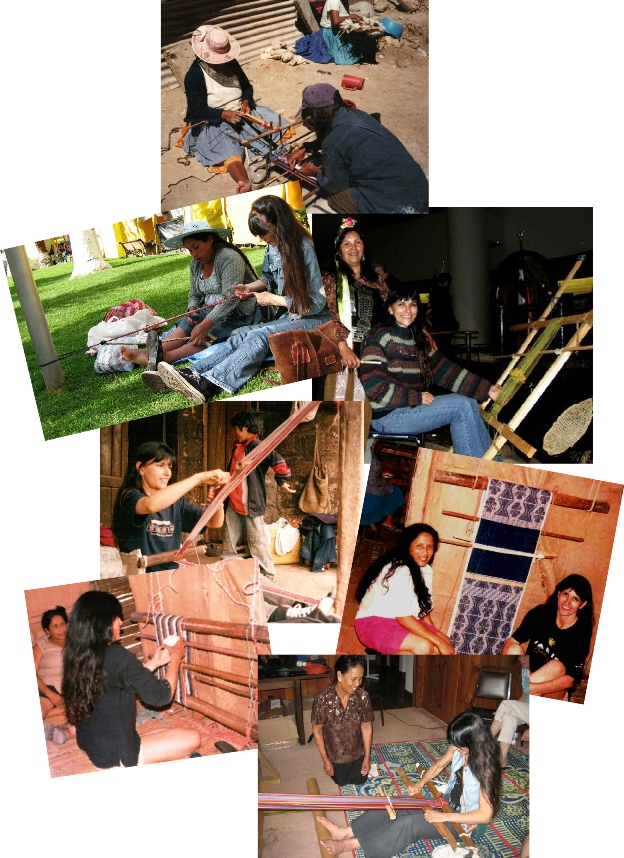
I even draw inspiration from the online weavers who work on floor looms…a handy tip about how to handle the two wefts in rep weave from Tom Knisely, ideas about finishing pieces from shadow weave weave-alongs, lessons in handling floating selvedges from discussions on twill, or from card-woven and inkle loom-woven warp patterned bands…all far removed from the Bolivian weaving environment in which I live.

They all go into the pot….stir, stir, stir….add a dash of ideas I have developed from my own experiments and onto the loom it goes. Some of my ideas having nothing to do with the traditional way of doing things……..
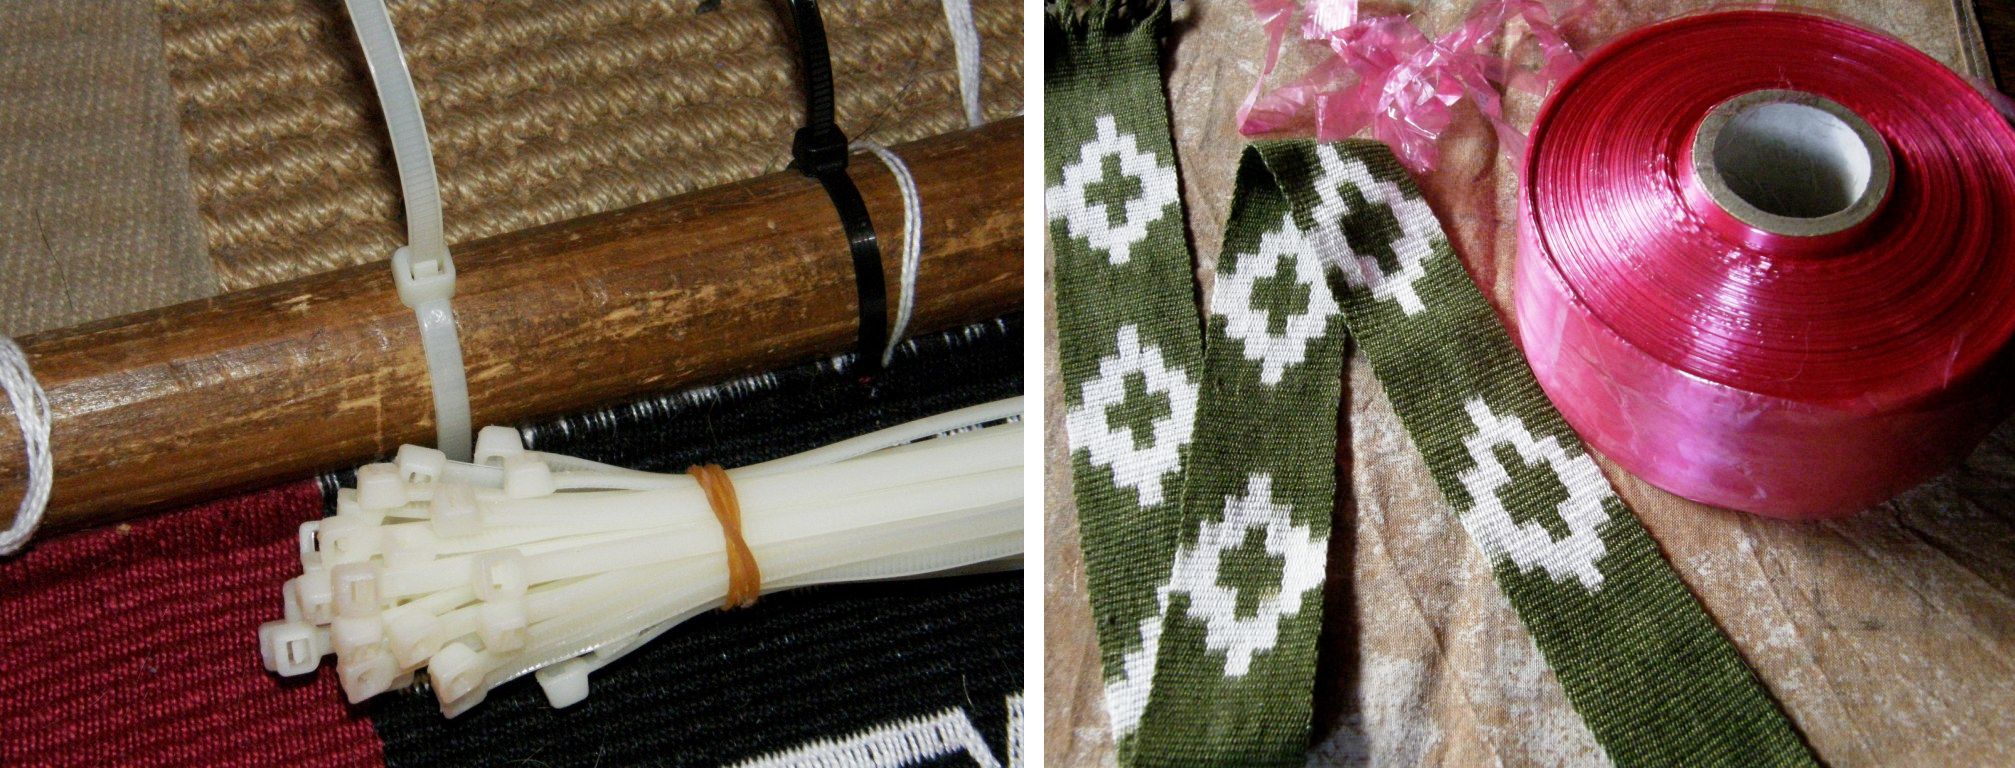
like using cable ties to lash my warp to the loom bar and a bicycle spoke instead of a yarn header cord. I was using cassette tape to wrap my warps for ikat until I was given “proper” ikat tape which seems acceptable in place of cabuya fiber and other natural materials in many “traditional” settings these days.

Plastic and metal??? One of the weavers I met in Candelaria found using what looked like a steel railway spike far more efficient than the traditional llama bone tool for beating in her weft. PVC pipe often replaces wooden shed rods.  It’s like the time I had a lovely wooden Navajo weaving loom made for me when I lived in southern Chile and used rope to tension the warp only to find that a lot of the Navajo weavers are using metal looms and turnbuckles for tensioning. After weaving for some time on that Navajo loom I found that copper pipe for the loom bars worked much better than wood anyway.

I travel from place to place and see things and bring back ideas to add to the ingredients that go into my weaving melting pot.

And now I am about to apply some Bolivian highland weaving technology to a weaving tradition on the other side of the world.

I am jumping the gun this week by sampling for the next piece in my red, black and white wall hanging series and I am concocting quiet a brew in the old melting pot.. I say jumping the gun as I am nowhere near finished the third piece which is coming along veeeeery slowly! The other two pieces while off the loom are not yet completely finished. But the temptation to  put an idea into action once it develops and starts churning in my head is irresistible!

You can see the melting pot at work in the above pieces…I took a motif designed by a German weaver for tablet weaving and wove it in an Andean technique, Chilean ponchos called chamantos influenced the leaf design hanging to which I added weft twining which has nothing to do with Chilean ponchos and the piece inspired by si’ira  weavings of northern Columbia and Venezuela has more than a few of my own added touches.

Some of the traditional colors of Bedouin weaving make that the perfect influence for what will be in the fourth piece in the wall hanging series… in red, black and white, of course.

It was a weird and wonderful path that led me to Bedouin weavings way back in October 2010. I was Googling weft twining techniques after having seen the twined work of Montagnard (Vietnamese hilltribe) backstrap weavers in North Carolina in August 2010.
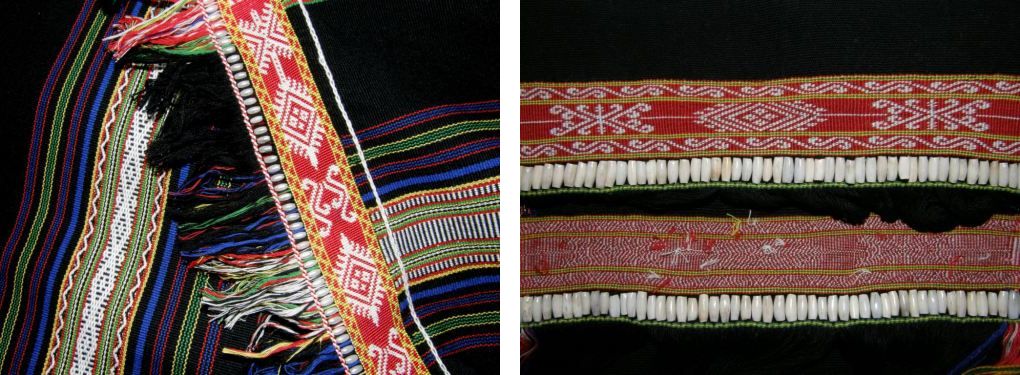
A book on the Taaniko twining practiced by the Maoris of New Zealand helped me to get started on my own off-loom experiments…. a Maori technique for Vietnamese patterns…straight out of the melting pot!
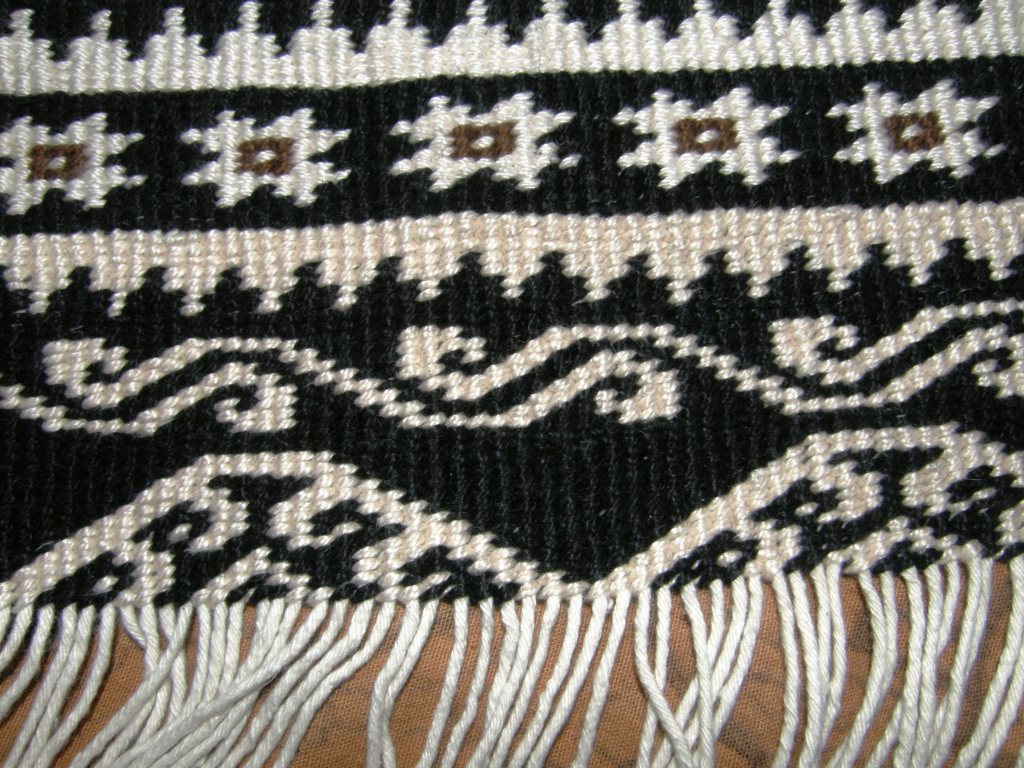
This piece has Montagnard designs as well as motifs found in both Bedouin weaving and twining. My Google searches led me to sites with Bedouin weaving and I was in love! I bought Joy Totah Hilden’s book on Bedouin weaving after finding her website and was pleased to be able to see images of the back of the woven pieces making the technique easy to identify as warp substitution which I already knew how to do. There is a link to a pdf  on Bedouin weaving by Hilden on my RESOURCES page.

It was clear from the book that the Bedouin do their twining  both on and off the loom and so I was interested in trying it on the loom…it’s so much easier when the warp is under tension, as far as I am concerned, and that enabled me to use much finer yarn than I had used for the off-loom piece.

Here is the first piece with its al’ouerjan (in which I had made a warping mistake) and shajarah patterns. The al’ouerjan pattern is the checkerboard type design on the sides.

The twined sections are sometimes worked in the middle of the woven piece as well as at both ends.
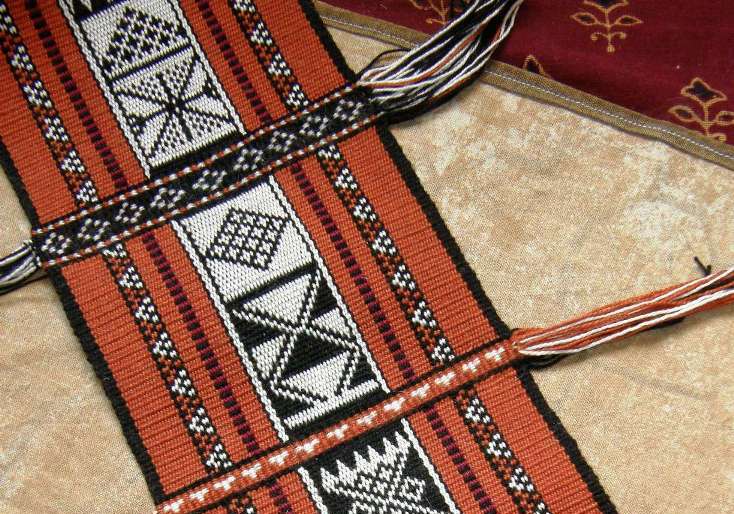
I then dove into the melting pot and added a finish of wrapped warp ends…

I enjoyed the process and I wanted to know more…both about weft twining in general and about Bedouin weaving.

I was especially curious as I found out from Betsy, who works with the Montagnard weavers in North Carolina, that their weft twining technique is done off-loom and this astonished me as the yarn they use for their designs is so very fine (Cebelia #20 or finer). I had to see and learn this! Betsy was happy to have me visit and I was able to learn from Jarai weaver, Ngach.

And in the meantime, Tracy, a member of the Backstrap Weaving Group on Ravelry, started showing us gorgeous pictures of Bedouin textiles from the souk in Doha Qatar where she currently lives and telling us about her experiences watching a Bedouin weaver at work.
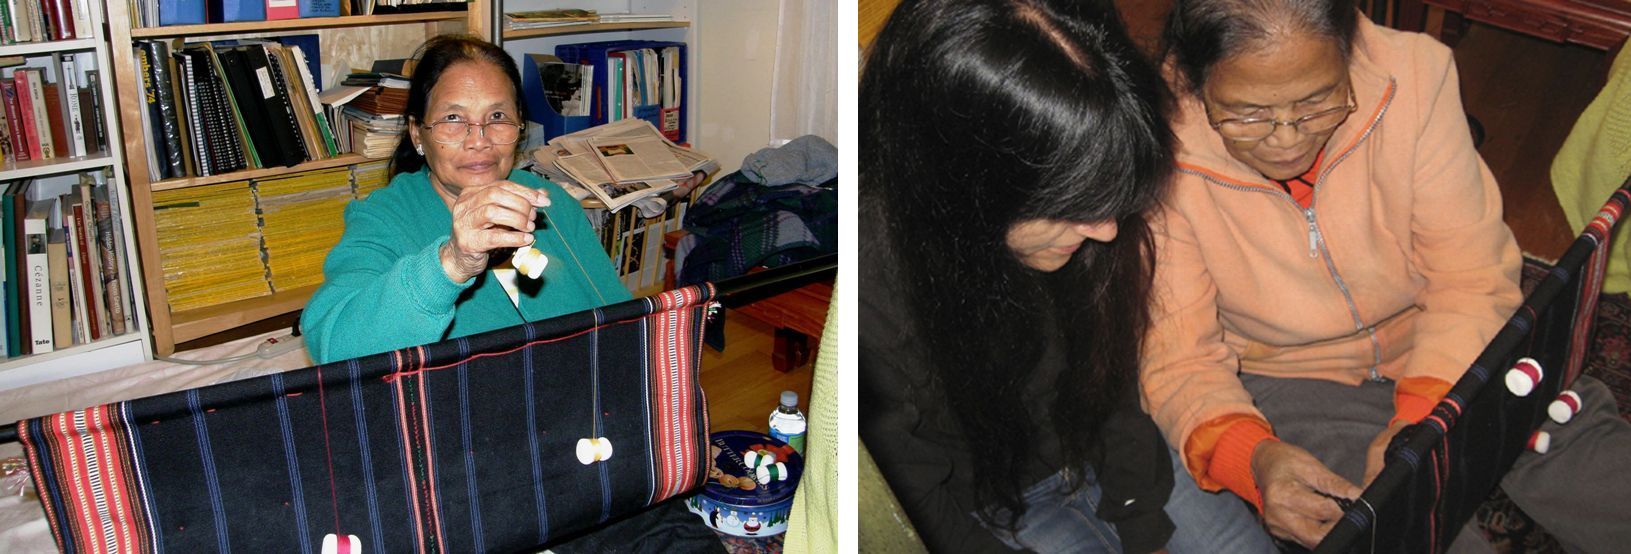
From books and images on the internet to suddenly finding myself seated next to Ngach, watching her bobbins twirl as she gracefully applied weft twined patterns to her large blanket piece off the loom, listening to her stories about her desire and determination as a young girl to learn to make the traditional kteh patterns. It was a dream come true.

Once back home, I stirred the tricks and tips I had witnessed with Ngach about color changes, hiding the ”bump” and other details into the pot and made my own kteh designs on my backstrap woven piece which you can see above.

I did it on the loom as my off-loom techniques still really needed some work! The advantage with off-loom twining is that several backstrap woven pieces once off the loom can be joined together and then the weft twining can be added along the edge of the entire piece. I have yet to do that and will definitely do so one of these days. I have my bobbins and thread ready!

Much later, the following year, came a golden gift in the form of  bag made from pieces of Bedouin weaving that Tracy sent to me through a friend who was visiting Bolivia.

Once again, imagine the thrill of getting to feel and smell the real thing…forgive me but that coarse handspun wool is just begging to be smelled! The bag is pictured above on the right next to the cotton piece that I made.

As you can see below, the floats that form in in the shajarah pattern area (the black and white design strip) are really very long! Some of them are even broken from possibly having gotten caught on things.

Now back to the sample I am weaving for the fourth wall hanging. I want to do a Bedouin-style piece but I do not want the long floats on the back. Tracy showed us images of pieces from a co-operative in Oman in which the weavers had found a way to tie down the floats  in the al’ouerjan parts (the checkerboard patterns) of their weaving possibly to make the pieces more attractive to foreign customers. It didn’t take long for me to see that they were using a  second fine weft to do so. This makes the woven cloth more practical too.

You can see the long floats that you typically get on the back of the fabric in the lower right hand corner of the image on the right and see how the appearance improves when the second fine weft is used. Unfortunately the second fine weft does not do much for improving the appearance of the shajarah patterns (the larger back and white patterns).
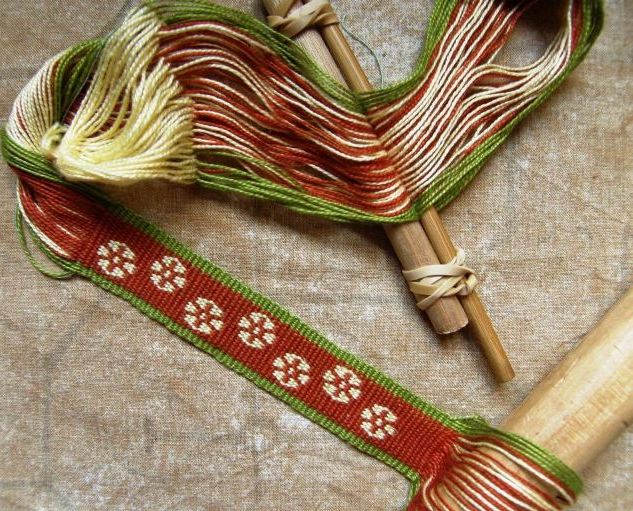
The solution to that is to go once more to the ingredients on the shelf and add some of the Bolivian highland weaving technology that I mentioned earlier to the mix. So I added embedded double weave to my sample, a technique I learned while studying with weavers in Potosi, Bolivia.

This technique allows you to weave sections of double weave alongside plain weave in the one piece. It is essentially the same warp substitution technique but with an extra step or two which basically insures, with the use of a second weft, that all the warps are interlaced with none left to float on either face.

The two-color center section of the band at left is double weave alongside a plain-weave single-color border.

What I sometimes don’t like about the embedded double weave technique is the obvious transition in the fabric from plain weave to double…the climb from single layer to double layer and back again which naturally has to occur….it is sometimes more obvious than at other times depending quite often on the kind of yarn used, and I have been experimenting with various things to help soften that. I don’t want to make the entire piece double weave either.(The three-color double weave that would be required to weave the al’ouerjan pattern is bulky and unattractive).  And that is where I throw my very own bit of spice into the melting pot!

It is still in the experimental stage but what I am trying to do is combine double weave with plain weave, add the thin weft for tying down the al’ouerjan warp floats and make the transition from plain to  double weave section as subtle as possible with a trick I am trying out.
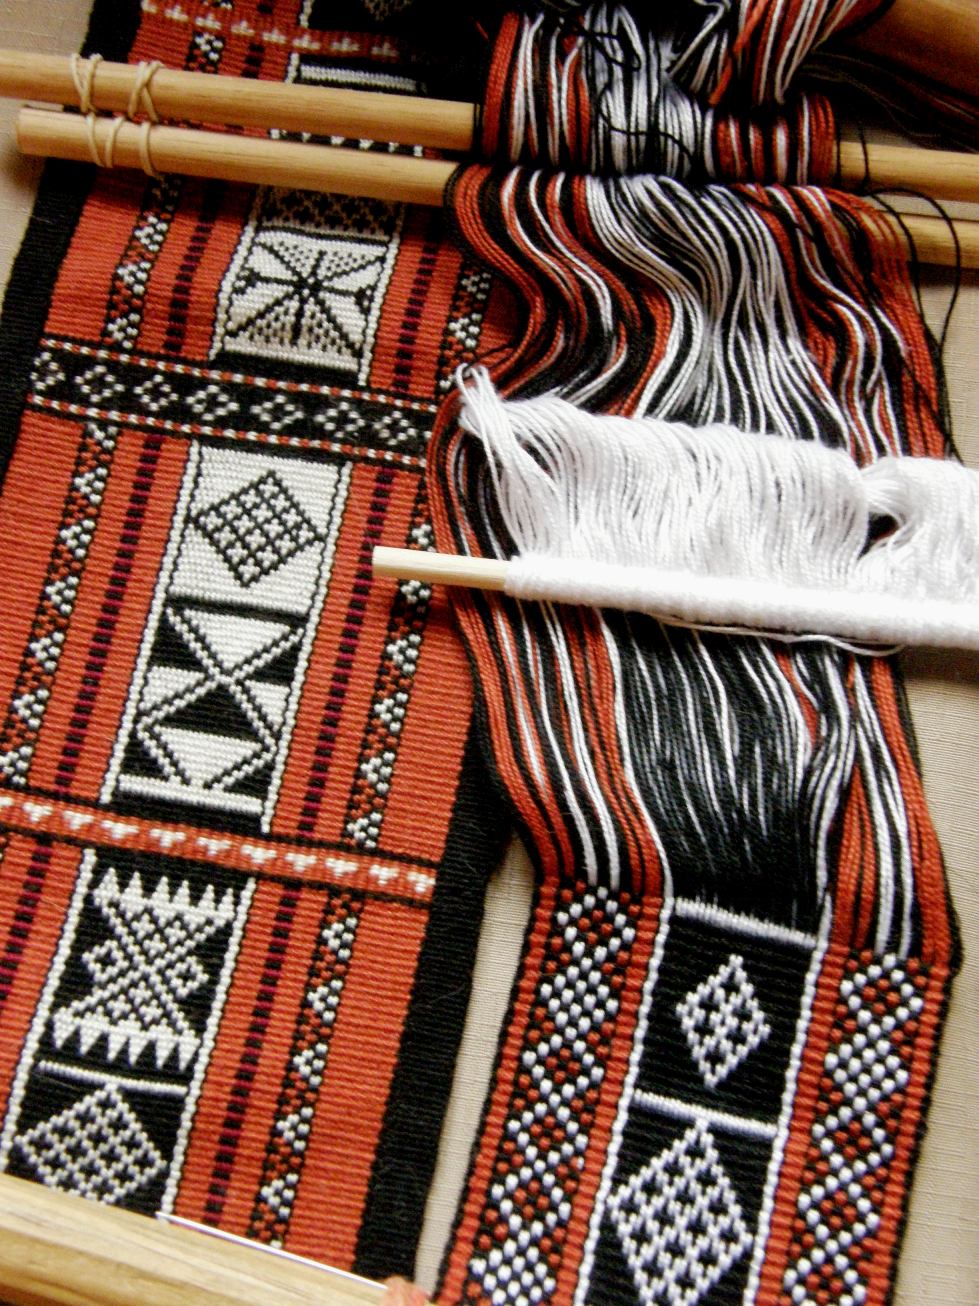
There is my first Bedouin piece on the left and the new sample on the right. The upper surfaces of both look the same and I don’t think you can tell that the center of the new sample is double weave.

The big difference is the back side of the fabric. My embedded double weave sample is on the left and my first sample with its long floats on the right. If this goes along well, I shall use this technique for my fourth wall hanging using the deeper shade of red that I have used for the other piece and incorporating more traditional Bedouin patterns.

So, enough red, black and white for goodness sake! Bring on some other colors. Here are projects from Ravelry group members and other online friends to save the day…

Oops! My bicycling friend Anna in Australia just happens to be using the same colors in a double weave piece. This is a Mapuche design from the book in Spanish by Enrique Taranto.
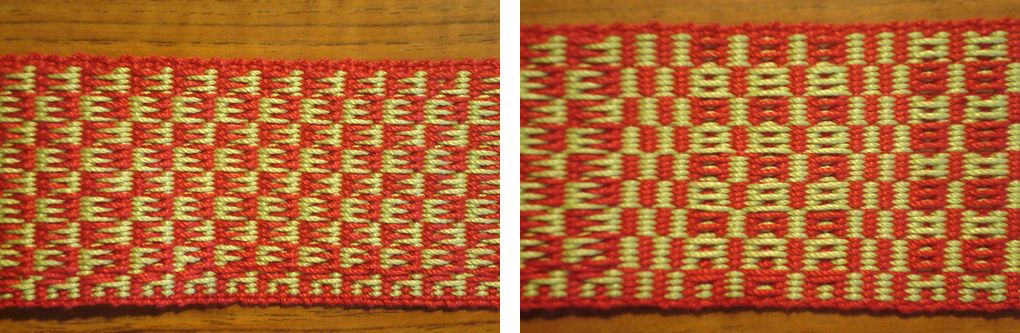
A new member to the Raverly group, Rob, showed us what he has been doing with simple warp floats inspired by a Guatemalan piece that Jennifer found on the Education and More website. You may remember that Bobbie wove a very large version of this in naturally dyed Guatemalan cotton thread that she bought from Education and More. Rob has added his own twist to the pattern at left.

Here are some of his other bands with simple warp floats and supplementary wefts. He used two supplementary wefts in different colors at the same time and says that one color stands out more than the other depending on the angle at which you view the piece….
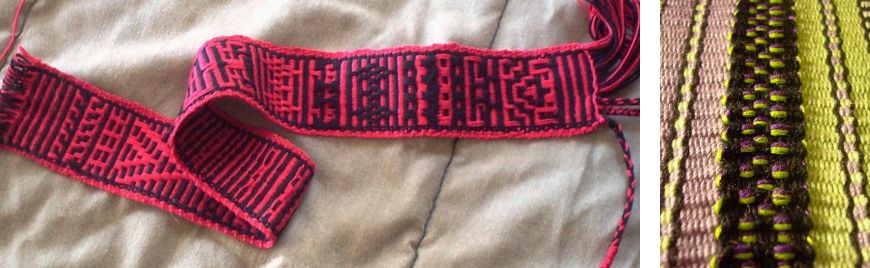
Another new member, Tracy, blew us away with her first ever piece made from her own handspun wool…we love her loom set-up!
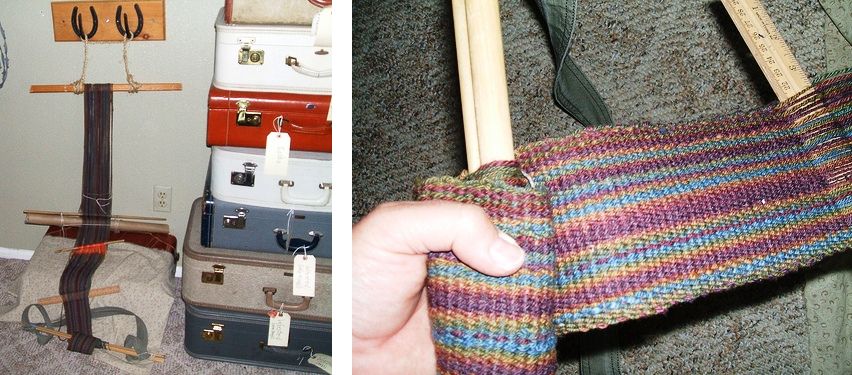
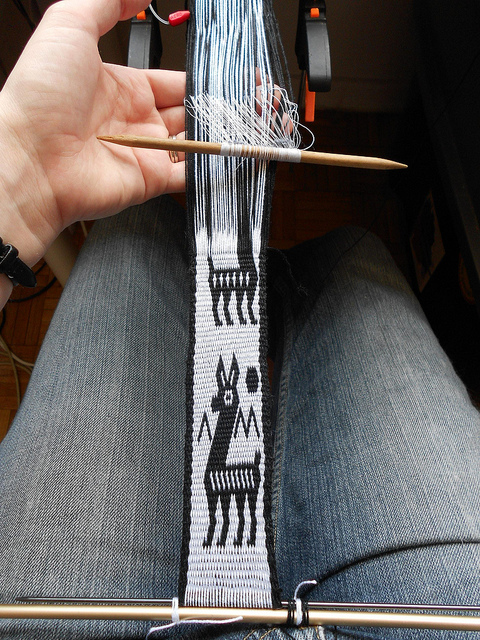
And Xav dove straight into double weave and the llama figures that I have charted here on the blog…her first ever backstrap woven band!
Jeen used her pebble weave experiments as embellishments on a couple of bags she completed. I love what she calls her “ball bag” and I think her use of variegated yarn for the border of her plain pebble weave band is so cool.

From Sweden Camila sent me pictures of her bands….

Some fun and clever designs with simple warp floats….she wove a pattern which is traditionally woven in a complementary- warp technique in the two-color simple warp float technique instead and it looks great!! On the right she has a pebble weave design from my book on her backstrap loom.

Well, I am off to continue my small sample as I think I can make something with it, weave a few rows on the third big wall hanging piece and see what unusual combination of ingredients might inspire the next piece on the loom…..
Backstrap Weaving – The Bizarre and the Beautiful

Wow, I hit California with a splash rather than a bang…flights delayed due to the awful weather and dreary wet highways to travel  but, on the up side, everything is so incredibly green! And now we have been treated to several days in the row of gorgeous, calm, sun-soaked blue skies and leafy greens.

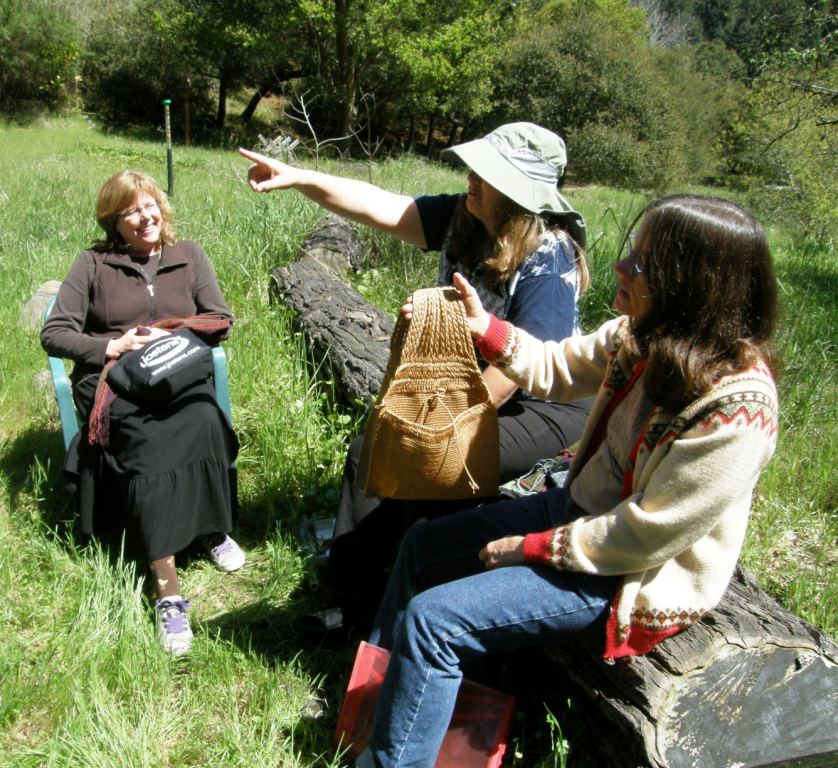
Lazy spring lunchtimes while weaving with friends…a good time to look at some of the woven treasures in  Martha’s collection.

Blue skies and green – colors to inspire a new weaving? No…my mind is reeling with the mixture of bizarre and beautiful cloth I have seen in the last few days and what has jumped out to inspire me is simple black and natural white wool in a new-to-me technique…..weft substitution….more on that later.

Before I left Bolivia, I was hurrying to finish up my two-color ikat experiment and practicing some “damage control” to salvage an ‘oopsy’.

I dyed all three panels of my ikat warp terracotta with the cassette tape ties that you see above.. That all went beautifully.

Then I added more ties to the center section of the two outer panels and dyed just those two panels dark blue…..perfect! The result was a terracotta-centered white diamond on a blue background. I wanted the reverse for the center panel and so needed to dye the center dark blue. And this is where things went wrong.

I prepared a small dye solution dissolving the Dylon cold water dye in hot water, added salt and then applied it to just the center part of the warp, which was suspended over a shallow dish, with a syringe. I then let the warp sit in the shallow solution.

I actually thought that I was cheating by doing this but now that I am at my friend Annie’s home, I have had a chance to read her copy of IKAT by Lydia Van Gelder and find that this is a bona fide technique that even has a name-  ”spot dyeing”. In the book, the author is seen applying dye to a small section of warp with a squirt bottle.

But here was my big ‘oopsy’. I had completely forgotten that the reason I am using Dylon cold water dyes in the first place is that I did not think that the cassette tape would stand up to being submerged in very hot water for the dyeing process and I suppose I should be pleased to find that I was right! The hot water in which I dissolved the dye did not lose its temperature in the shallow dye bath. The cassette tape did not like the heat and so, there were major leaks…ugly blue streaks on the white parts under the tape….much cursing ensued…

So, you can see that the damage control involved evening out the streaky blue so that the entire area would be tinted and that was the best I could do to rescue the mess. Well, that was a good lesson to learn. Other lessons learned…don’t wrap the warp in the evening in semi darkness. That accounts for some of the spottiness in the white areas from less then perfect wrapping. And I know that when I get around to making a ”real ” project in ikat, it will be worth taking extra care to make sure that the wraps are all the same length and made more precisely.

I was very pleased with the weaving part. The threads stayed pretty much in alignment and I love the way the terracotta and dark blue look together.

So, that was another project off the loom. My Wayuu inspired wall hanging was retired to the closet. I have been too busy with other things preparing this trip and decided that it should wait until my return. It is not something that I can just pick up and work on for a few minutes a day. I am more likely to ruin it that way…

So, it is there waiting for me to come back.

And then there was just enough time to go shopping and pick up a few requested woven items to take away with me for people with whom I will be staying on my trip…nice representations of Bolivian lowland fiber cultures…

This is an example of the looped bags that the Ayoreo people make and this is a particularly fine example. A cooperative store in Santa Cruz sells these and you can often see the ladies sitting in the street making them. The quality of the work varies and I was pleased to be able to get this stunningly fine one.

These placemats are woven in cotton by the Guaraní weavers. They, too, most often sell their products through the same cooperative store that is just one block from my home. As usual, the motifs they choose represent the abundance of vegetation and flowers in this jungly lowland area.

First stop is Santa Cruz, California staying with my sash weaver friend, Annie for some pebble weaving.

Loop braider Ingrid Crickmore  was up to midnight putting her newly acquired pebble weave skills into practice. Above you can see one of her bands on the left. We practiced drawing pebble weave designs from fabric directly onto charts and then weaving them and Ingrid took advantage of that skill to weave the two designs you can see above. On the right you can see Annie’s tubular band on which she did a beautiful job. Later we practiced weaving and sewing a tubular band onto the edge of fabric.

What was fun was that many of the guys in this group also braid with Ingrid and are avid loop braiders. They couldn’t resist finishing their bands with fancy looped braids. Below you can see Ingrid braiding away. You might notice that she even has loops on her thumbs!!

Some people like to stand and backstrap weave, like Anne above, while others prefer to be down low on the floor like Sawyer…some do a little of everything.  Some people put down their looms and take a walk and stretch while others simply change position so they can just keep on weaving.

Annie looks completely engaged and comfortable sitting at her loom. Annie wears a different hand woven item everyday, usually a huipil or part of a huipil from Guatemala.

This is a group that has woven with me on three occasions and we know each other better than most groups. Most only see each other when they come to weave with me so, there is a lot of chat and catching up to do! But there’s nothing like pick-up weaving to create pin drop silence while everyone settles in to concentrate.

There’s Yonat above left, who usually has us rolling on the floor laughing, in a rare moment of quiet concentration. She picks up things so quickly! I expect to see her Facebook page covered in tubular bands soon. You can see that even the dog has enough sense to keep quiet while everyone concentrates. On the right Sawyer is sitting up off the floor to get stuck into her first tubular band.

We wove, as we always do, in the Martha’s studio  and, as usual,  she brought out some of the beautiful pieces from her collection to show us while we ate lunch. Yonat also brings us some of her latest acquisitions and those pieces are the ”beautiful” part of this blog post.

But first, let me take a little detour at this point to show you some the “bizarre’ things that I mention in this post’s title….

Annie took me on a trip downtown to a clothing store to show me how “ethnic” and “tribal” seem to be the current themes in fashion. We had a lot of fun digging through the store and pulling out items of clothing and home furnishing trying to identify the weaving culture on which the designs had been based.

Some things were very “been there, done that” for me…the kinds of things that you would find in any South West USA or Guatemalan or Mexican souvenir store perhaps…

But other things were, quite frankly, “bizarre”!….

…like these tiny stretch knit shorts with their designs that imitate ikat. Can you see yourself in a pair of those?

This pillow imitates the patterns that are woven with supplementary wefts in some areas of Guatemala. Certain towns are known for these large multicolored flower motifs on black backgrounds.

On the pillow cover above, it seems that they have taken an image and enlarged it so that it has become pixelated and then printed that. In many areas in Guatemala the backs of these fabrics will have all the ends of the supplementary wefts hanging out in colorful chaos but it is never seen as it is on the inside of the garment.

The creators of this pillow fabric, however, have tried to imitate that by attaching fabrics ends to the back face of the pillow….it is not hidden on the inside of the cushion but rather facing out on the back side! Bizarre! Those loose ends are not part of the textile structure at all but have been added on purpose to mimic the original ethnic fabric.

Admittedly some of the fabrics were not quite so bizarre and were, in fact, very pretty but had obviously been fashioned into garments for people way way younger than myself.  The mini skirt fabric is reminiscent of Central Asian ikat and I just might have worn something like that twenty five years ago!

But this was the one that brought the biggest smile to my face….

Back in my ”ski bum” days I would have been perfectly happy prancing around in these leggings. Lime green and black and neon pinks were the colors we sought in those times, but apart from the colors, one of the printed designs in particular caught my eye. It is a motif with which I have been very familiar after having photographed it on a Huichol belt in the National Museum of the American Indian in DC in 2007.

Those of you who have been following my blog may even remember this motif from several of my posts.

It was very bizarre seeing this motif on these wild leggings. I can imagine the designers going off to the museum and taking pictures or making sketches from all the beautiful pieces there or maybe they only need to do a search on the internet these days.

I tried to reproduce the design when I learned how to do balanced double weave and I also translated elements of the main motif to pebble weave. Now, I can even wear the motif on lime green and black leggings if I am so inclined!

From there, let’s go to the beautiful textiles that I refer to in the title of this post and the new technique that I am itching to try. I have seen and heard about textiles made in the weft substitution technique but have not been tempted to try it because of the long floats that are created on the back of the fabric. Marla Mallett writes about it on her website and in her book Woven Structures.

Of course it is a different story when you are actually touching and holding the fabrics in your hands. The designs that I saw in these structures were ones that did not actually create exceedingly long and cumbersome floats. They were not like the Bedouin motifs in warp substitution which result in what many consider long ugly floats.

Yonat brought a Moroccan rug that she had recently purchased to show us…

I could show you image after image of the rows of the weft substitution patterns on this gorgeous rug. Only a few of them are repeated and this is what has me looking for white and black wool (which pretty much doesn’t exist where I live in Bolivia) so I can go home and play with this technique. The rows of alternating red and mustard between the motifs really set off the patterns.

The back of the rug is covered in tufts of wool which didn’t seem to have anything to do with the woven structure. It seemed that these tufts were added to give the rug a more plush feel on the floor. You can see between the tufts that the floats created by the weft substitution technique are not very long. There was one small row of countered weft twining along the bottom. Weft twining always catches my eye.

And here’s the whole rug….beautiful!

One day, Martha brought out a couple of bags in her collection which also show this weft substitution technique from Baluchistan (I had to run to Wikipedia to find out where that is having never heard of it before). She did not know that we had been admiring the Moroccan rug which had the same patterning technique and it so it was pure luck that I was able to have yet another chance to see fabric decorated with this technique.

Baluchistan includes parts of southeastern Iran, southwestern Afghanistan and western Pakistan and is home to the Balochi people.

There are those fabulous sun bleached reds and blues again that I adore! It was fun to see the upper weft substitution motif, a variation of which I have used in my own weaving in a variety of structures…

Above you can the motif woven with supplementary weft, in double weave, pebble weave and supplementary warp.

Above is the other side of the bag and below are a few details on this and other pieces that Martha brought out for us….

The closure system on this bag was particularly fascinating and I neglected to photograph it! It comprised a series of slits through which goat hair loops were passed. Each loop passed through the previous one to create a chain…a little tedious to close the bag but to open the bag you would only have to pull on one end to have all the loops pop open. Someone said that they have seen similar closure systems on canvas tents so some of you may know what I am trying to describe.

Back at Annie’s house, there is also plenty to inspire….like this Chamayo rug on her wall…

The weft-faced stripe patterns on each end of the rug would look right at home in a warp-faced band. And there are walls of colorful sashes to admire. I am struggling to find the time to take them down to examine and photograph before I leave for Oregon on the train tonight. I also have a pile of books that I borrowed from the guild library to peruse.

As for Oregon, I have told my friends up there to hold the rain, please!

I am excited about the prospect of a mini Ravelry meet up while there in Portland. Two members of the Ravelry Backstrap Weaving Group will be coming to spend a couple of days weaving with me. Jennifer and Bobbie have been very active members of the Ravelry group for a long time and I have shown many of their projects here. I am looking forward to seeing first hand Bobbie’s latest piece where she is using fine naturally dyed Guatemalan cotton. I showed a few pictures of that a few weeks ago so we will be able to get an update.

Pantoffels, also in the Ravelry group, recently adapted the techniques I teach in my Andean Pebble Weave book to her inkle loom. She is planning to sew the pieces of her band side by side into a wide piece. It looks great.

I am always happy to see this on inkle looms as it opens up the technique to those who are just not into being attached to a backstrap loom.

My book is now available as a download in four languages on Patternfish if Pantoffels has inspired you to try pebble weave too.

See you next time in Oregon…..