The coca leaf – I have enjoyed it brewed in tea, chewed it on hiking trips and used it to dye my handspun llama fiber above. However, a foreigner like myself can not even begin to understand the role that this humble leaf plays in Bolivian life and culture.
Lately there has been a lot more talk than usual about this piece of Bolivian cultural heritage as Bolivian President Evo Morales has recently announced plans to launch a new carbonated energy drink on the market which has the beloved coca leaf as one of its main ingredients. It should make an appearance in the next four months and will be called “Coca Colla”(the ‘olla’ in Colla being pronounced like the ‘oy’ in boy). “Colla” is the word commonly used to describe people from the altiplano of indigenous origins. This is President Morales’s attempt to erradicate coca’s unfortunate association with cocaine and drug trafficking, increase its cultivation and have it recognized instead, as stated in the new Constitution, as “cultural heritage, a natural and renewable resource of biodiversity in Bolivia and a factor of social cohesion”.
Coca is used to make tea, plays a part in religious rituals and is chewed in order to suppress hunger, thirst and fatigue as well as to alleviate the symptoms of altitude sickness. I have chewed it myself on hiking trips and I have to tell you that there is knack to getting a wad of it tucked neatly away in your cheek and not all over your teeth thus completely ruining your smile for the day! Bags of coca leaves are sold with lejia-the gray colored bar seen at left, comprising compressed ash and other substances, which is chewed along with the leaves and acts as a catalyst.
A special woven bag called a chuspa is used to carry coca leaves but I have only seen these in use at festivals and other celebrations. On a normal day, it is more usual to see people taking their coca leaves directly from a regular plastic bag. My weaving teacher, Julia, at right, is taking a break from classes to enjoy some coca.
While Julia and her sister Hilda both know how to weave a chuspa, strangely neither of them actually owns one. When I expressed interest in learning to weave one, they had to consult with each other in order to remember how to wind the warp. What is special about warping for a chuspa is the fact that most chuspas include a small pocket which is designed to carry a piece of the lejia or perhaps a few coins and allowance must be made for this in the length of the warp.
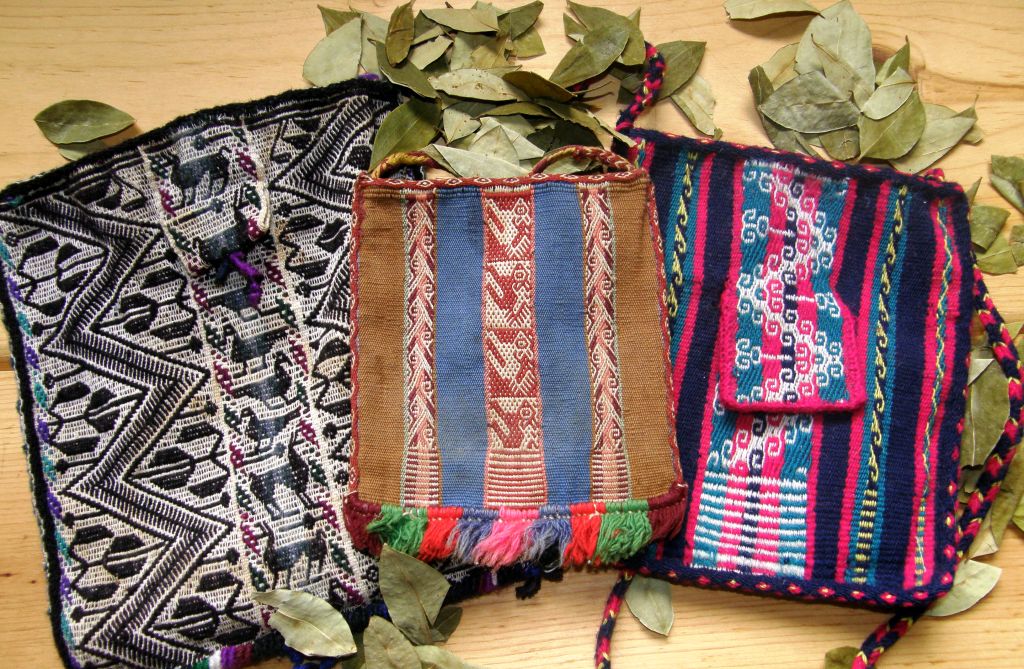
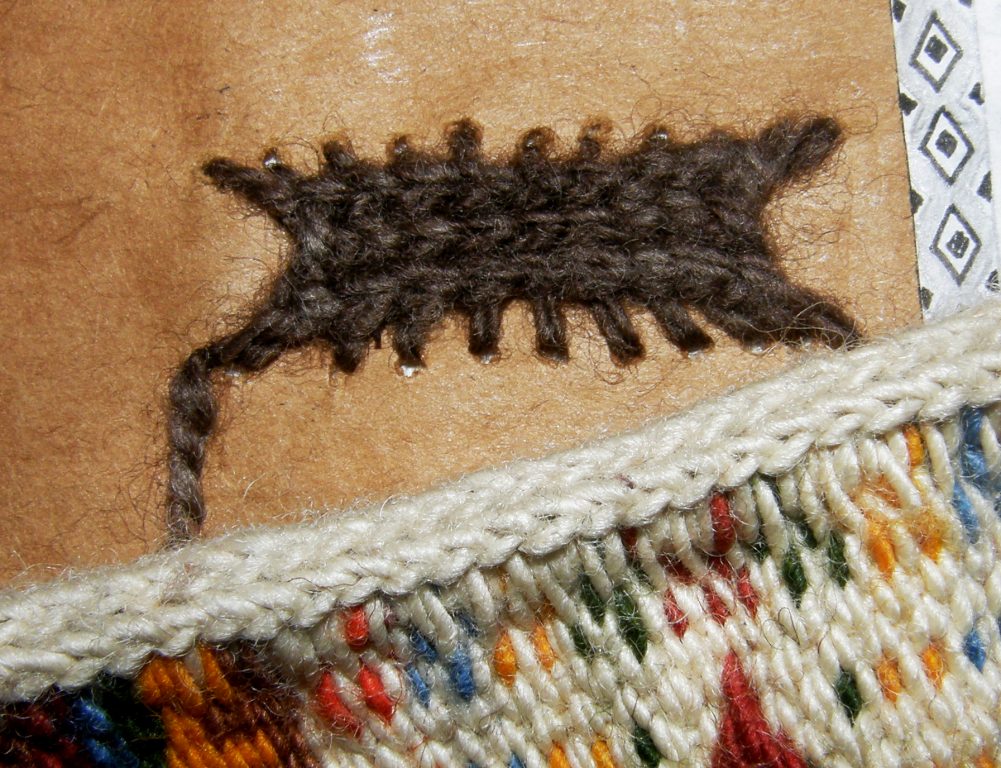
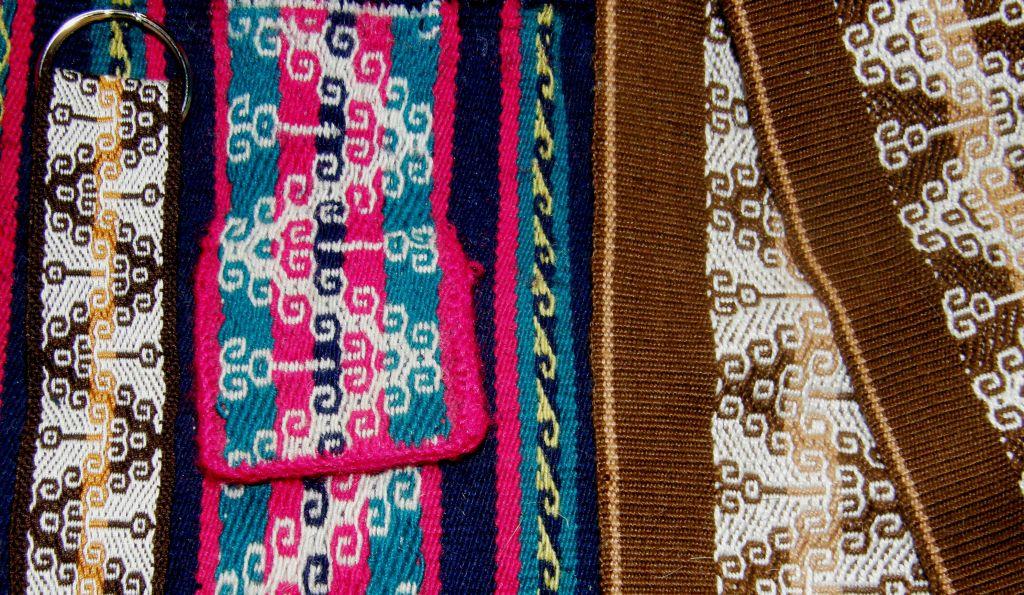
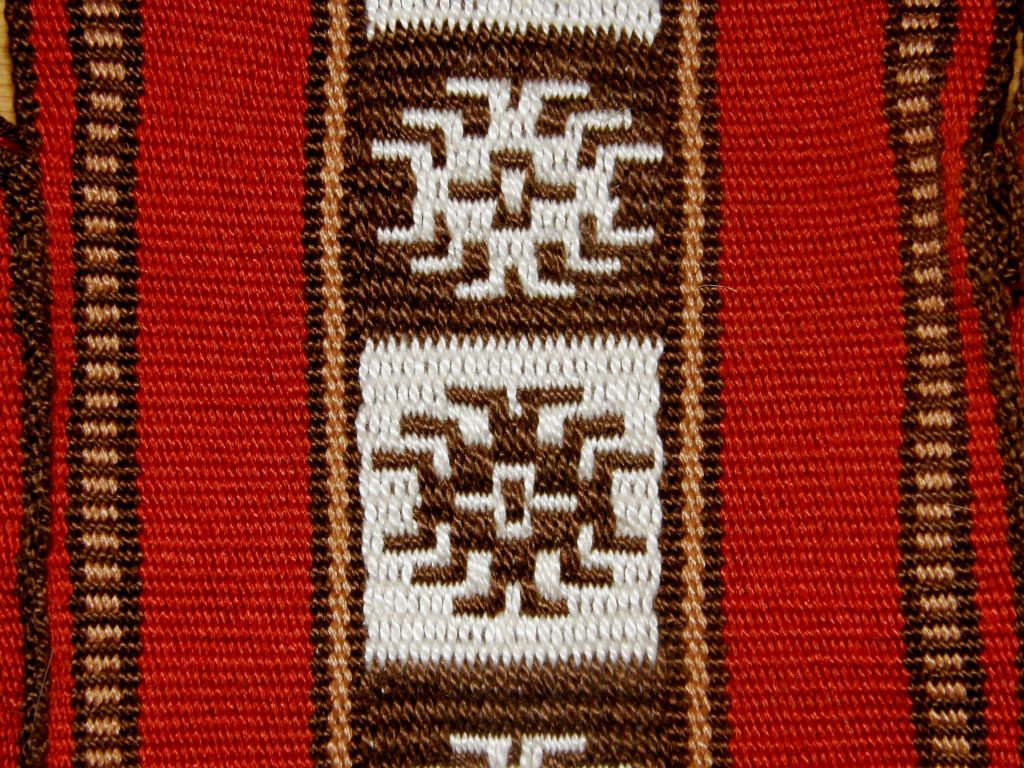
Three Bolivian chuspas, each woven with a different complementary warp technique. The one on the left was made by my weaving teacher in Candelaria and has a pocket. While the one in the middle was bought in Potosi, I am not sure of its exact origin. It does not have a pocket. The one on the right with a pocket is the one I made in Potosi under Julia and Hilda’s instruction.Julia and Hilda are preparing the warp for my chuspa. You can see the extended piece of warp on an extra stake which will become the pocket. We are using the brightly colored respun acrylic yarns that are very popular in this area. We are all at work here. I am working on my chuspa, Hilda is backstrap weaving a band while Julia, in the background, is cutting fleece to spin. My chuspa is a four-selvedge piece so I wove from one end, turned the piece around and wove from the other end and then had the usual agony of trying to squeeze weft into those last few rows to close the gap.Hilda taught me to weave the ”rolling river”design into my chuspa. Once off the loom, the sides and pocket are joined using a variety of decorative techniques.We used triple crossed knit looping to edge and sew the sides of the pocket. This is a very pretty technique that not only binds the sides but also completely curls over and covers the edges.You may be able to see the crossed knit looping more closely here on the edge of another bag that I wove. The brown sample shows how it would look worked flat rather than curled over an edge.A tubular band was woven with the weft being used to sew it to the sides and base of the bag as it was woven. A six-strand flat braid was made for the bag strap. The chuspas that I have seen being used in festivals are highly embellished with pom poms, tassels and multi colored fringes.A small selection from the variety of braids, bands and tassels used to decorate Bolivian chuspasThe ”rolling river” design has since become a great favorite of mine and I have woven it into tool bags, sashes and key fobs on my backstrap loom.
In 1998, I spent some time with a weaver in the village of Candelaria near Tarabuco and learned the weaving technique that is used in their chuspas and carrying cloths.
A Tarabuco style chuspa made by my teacher Felicia . The pocket is so small it is hard to see it being of any real use. The other piece is a small purse which has been woven specifically to be sold to tourists. Note the cute strolling llamas along the bottom.
I returned to Candelaria last year. Felicia is no longer there but the first person I met as I entered the village was Felicia’s cousin-also called Felicia! who took me to her home and graciously allowed me to film her weaving on her oblique loom. The next day I went to the market in Tarabuco where there was a cultural festival and was able to capture a small piece of video of a weaver warping for a chuspa. She was constantly being interrupted by ladies asking her questions so the clip is very short. I don’t know how well that warp could have turned out with all those pauses. When I warp, no one can speak to me!
So here is the short video (yippy! I have finally figured a way to get around my erratic internet service and upload heavier videos). The first part is the weaver warping for a chuspa with two colors around four stakes. You will see the extra stick she uses on which to warp the extra long part for the pocket.
The second piece is Felicia-keep an eye out for the kitty snuggled in her lap while she picks up those warps with lightning speed!
WHAT’S ON THE LOOM?-AN UPDATE
I have been working away on my Abba Yohanni inspired piece and have decided that I am going to make a table set to take as a gift on my next visit to Australia. So, the piece you saw last week will be a table runner. I have made some progress on that and have reversed the design and am just starting the final motif. In the meantime I couldn’t resist seeing how the motif would turn out in 12wpi cotton and so wove it into a (rather large) hot pad using one-weft double weave technique and then wove a small portion of the motif into a mug rug. I am thinking about weaving four placemats to go with the set with a piece of the motif woven with a supplementary weft in the center of each.
I love how easy it is to warp for backstrap weaving especially after reading and hearing about what is involved with warping those bigger table and floor looms-all that threading! However, finding the place and equipment for warping for the backstrap loom is often the problem. Finding the sticks to put a loom together seems to be relatively easy, making a nice beater takes a little time and thought but where and how to wind that warp-now that can be tricky.
As you can see above, my first weaving teachers in Peru taught me to make tiny bands using a tiny warping board. I learned two techniques with them and was eager when I got back to my home in Chile to incorporate both into one large piece.
Perhaps a little over ambitious but you can see the results of my attempts to wind a longer wider warp. My warping stakes leaned horribly and I ended up with this wonky thing-look at the far loom bar and the tilt on it! Firmly grounded warping stakes are a must.
Well, I persevered and put a lot of work into that piece but it was never quite right. At least I was satisfied that I could weave the techniques without the supervision of my teachers.The piece itself ended up in a box. Recently I got it out and salvaged what I could and am now using it to cover some small photo albums that I take with me on my travels.
The colors and layout were inspired by woven sashes that I had seen on Taquile Island on Lake Titicaca, Peru.
Photo album covers made with the two patterning tecnhiques I learned in Huancayo, Peru.
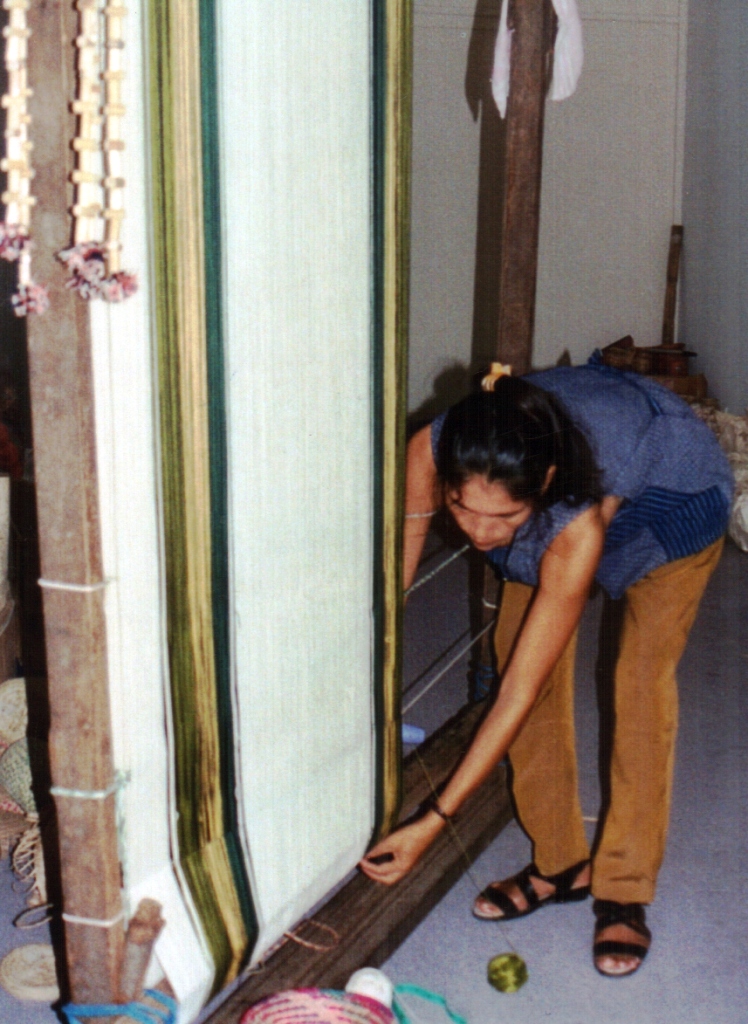
A year later I went to Bolivia and studied with two sisters in Potosi. They weave their large pieces on a staked-out ground loom and only use a backstrap set-up for small bands. I love the way they warp there. Two women seat themselves at each end of the loom and roll the ball of yarn back and forth while winding the figure-of-eight. The only problem–you tend to talk too much and lose count. Neither of us was counting in our native language-Hilda’s being Quechua and mine, of course, English. Between that and the chatting we lost count many times!
We are using respun acrylic yarn in the bright colors that the weavers in Potosi love. With two people, this would be a great way to direct warp for backstrap weaving.
The weaving I worked on in Potosi is almost finished here. It is a four-selvedge piece and there are a couple of inches to go to close the gap. It took all day to weave that last bit!Warping the Potosi way (almost)
Probably nostalgia for the fun I had had with Hilda and her sister Julia in Potosi led me to try the following way of warping when I got back home to Chile.
I can tell you right now that it is not as entertaining to do alone and it is pretty slow and difficult trying to manage two colors at once as you need to do for double weave and complimentary warp weaves.
Neverthless I got this warp done, it was well tensioned and even and I wove a big bold design inspired by designs of the Mapuche people of central Chile and Argentina.
One of the Mapuche inspired designs I wove into the above piece.
I traveled a lot more, met many weavers and saw a lot more ways to warp for a variety of looms and techniques, some of which I’d like to share with you here.
Making a dovetail warp for the collar of a poncho in Otavalo, Ecuador. Note the horizontal bar that helps stop the stakes from leaning in towards each other.In Salasaca, my teacher Felipe wound a mini dovetail warp for me to take home just in case I forgot how to make one for the belt weaving technique he taught me. This was put together hastily. The sticks leaned and the resulting warp was crooked but it was just meant as a reminder and served its purpose..Look at this beauty from Guatemala at a nice height so you can stroll up and down with your yarn.Warping for a hammock in Santa Cruz, Bolivia. This would certainly give you a work out.With my teacher, Trini, looking on I am learning to make a dovetail warp for a mini hammock in Zapote, EcuadorProbably the set-up I would most like to have–just the 5 stakes that my teacher in Santa Catarina Palopo is using here.My favorite way—group warping! We are making a straight warp here with stakes and metal rods driven into the ground-Salasaca, Ecuador.
Probably the most interesting system I saw, which, unfortunately, was impossible to photograph, was near Huancayo, Peru where a woman had stakes embedded in the walls of the hall of her home at chest level so she just had to walk up and down the length of the hall to warp. Now if only I had a longer hall……….
So what do you do if you don’t have a warping board? I have seen a Youtube video where a guy wedges stakes between books in his book case and warps around those.
I was lucky to have this chair to use when I first got settled in here in Bolivia. It was useful for narrow projects- practice bands, small bags and bookmarks.
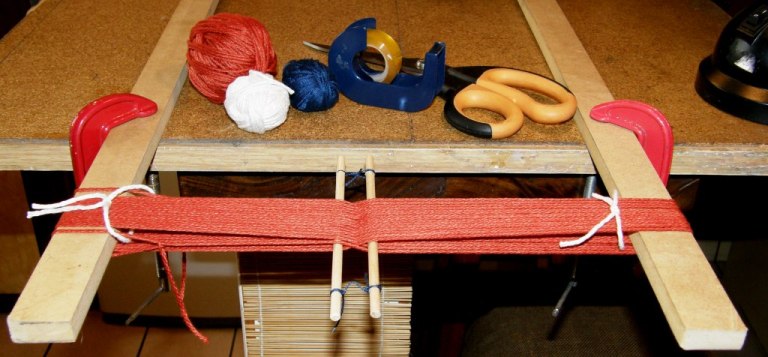
The way that I showed in my WeaveZine article using clamps is fine as long as you can clamp those stakes down really well . Don’t use your good table for this. I have heard of people turning chairs and tables upside down and using the legs. I once used a coat rack in a hostel room where I was staying. Whatever way your creativity and circumstances lead you, just make sure that the stakes or posts are very well grounded and will not lean in at all as you wind your warp. Even the smallest amount of lean will make a difference.
If you see yourself continuing in backstrap weaving and making longer and wider pieces, it will be worthwhile buying a warping board or making something sturdy and more permanent. It doesn’t need to be fancy as you can see from my little ”beauty” here.
This allows me to wind a 36” long warp which I have used to make shoulder bags, sets of three mug rugs, placemats, table runners, pillow covers and wall hangings. For making longer pieces such as belts and guitar straps, I have had to get creative.
Basic warping involves winding your yarn around two stakes, like those seen above, in a simple figure-of-eight path. Your loom bars will replace the two warping stakes and the cross you have created will allow you to set up your two sheds using a shed rod and continuous string heddles. I often put a second cross in once my warp is on the loom. (More about that in a future post)
Warping with a single color
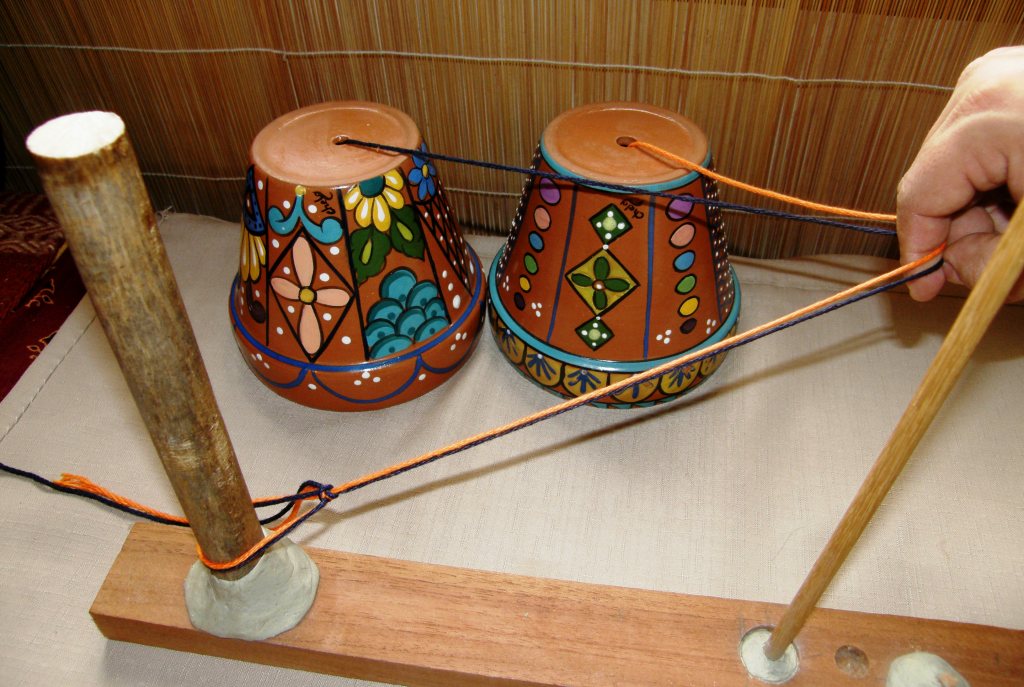
If you want to weave a piece with horizontal stripes in two colors or weave simple warp float patterns or any other complementary warp technique you will need to wind two colors together. Again, this can be done on just two stakes. I like to place my balls of yarn in flower pots so they don’t roll about and get tangled. Other hints and tips will come up in future posts or you can find them in the Backstrap Weaving Group forum at Weavolution.
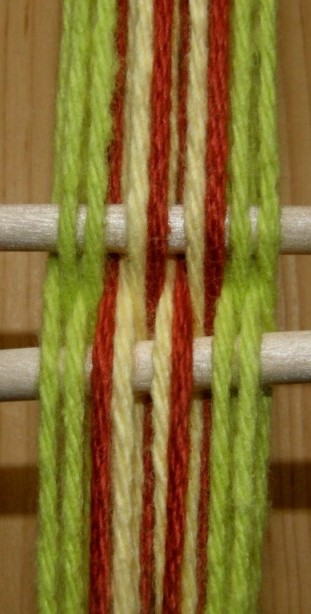
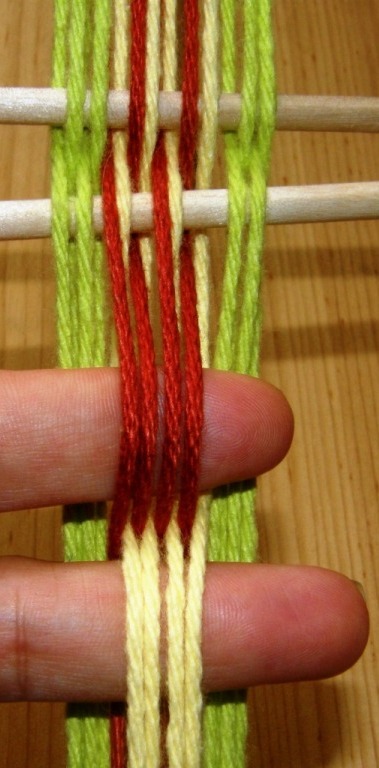
Winding red and yellow yarns togetherPreparing to wind 2 colors together on my smaller warping board. Note the large loop of yarn around the warping stake which can be easily slipped off the stake and onto your loom bar.Warping with 2 colors together will result in a cross like this.The colors on this tiny band can then be rearranged so that the original cross can be replaced by a new one where each color along with the green borders is in its own shed.Many Andean weaves are complementary warp weaves and require an arrangement of warps into sheds of two colors as shown above right. This arrangement of warps will allow you to weave something as simple as horizontal stripes or more complex warp float patterned weaves.
FOR THE ADVENTUROUS!!
The following is a video from my Flickr page which shows how I was taught in Peru to warp with two colors usingfour stakes. The colors are separated– each color into its own shed on the warping board itself as you warp–fast and efficient and especially recommended for wide warps. (The two additional stakes that you see in the video are temporarily fixed to the warping board with ”blu-tack”).
Just to finish off, here is what I am working on at the moment……
Two-weft double weave piece in progress
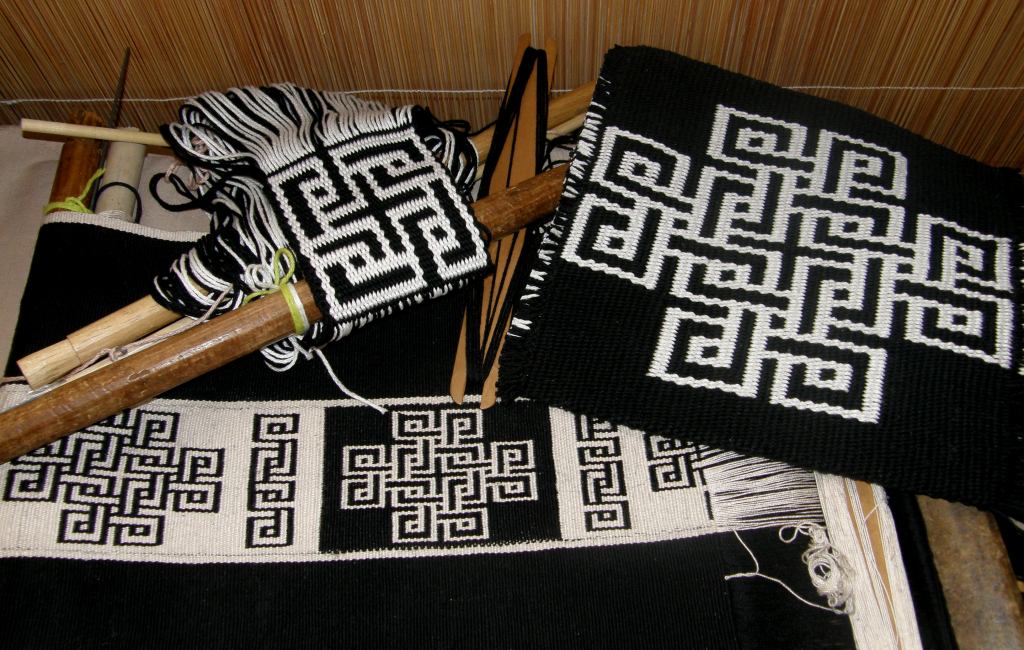
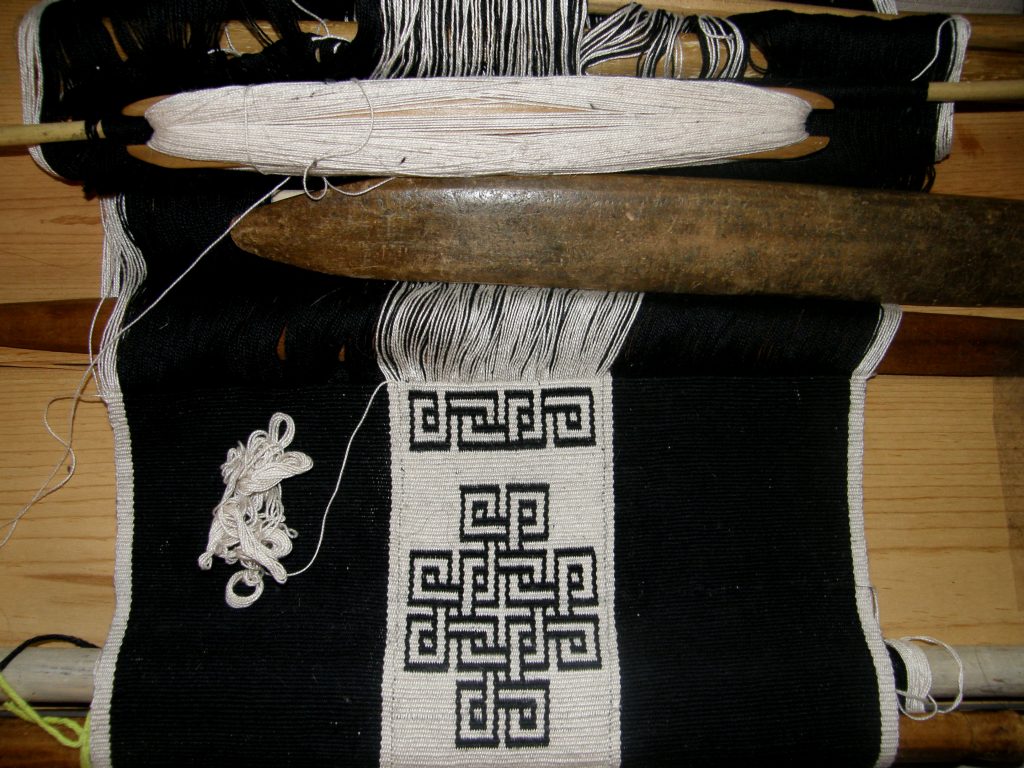
I fell in love with this design the moment I saw it posted at Weavolution. A member had woven a reproduction of a tablet woven curtain that hangs in a cave church in Abba Yohanni, Ethoipia. These curtains were produced and hung in many such churches in Ethiopia in the 17th Century. Rob S, who wove the reproduction, used over 300 tablets. This is just a small part of the overall curtain design. I am weaving it in two-weft double weave. I have a strip of double weave bordered by plain weave. One weft weaves the plain weave and upper layer of the double weave. The second weft weaves the lower layer of the double weave.
This is quite a change after making all those colorful key fobs but now I have to deal with the black picking up every single speck of dust in the house! I hope to now reverse the pattern and weave a white motif on a black base. I am not sure what I will make of this piece. I’ll decide when it is done. 🙂

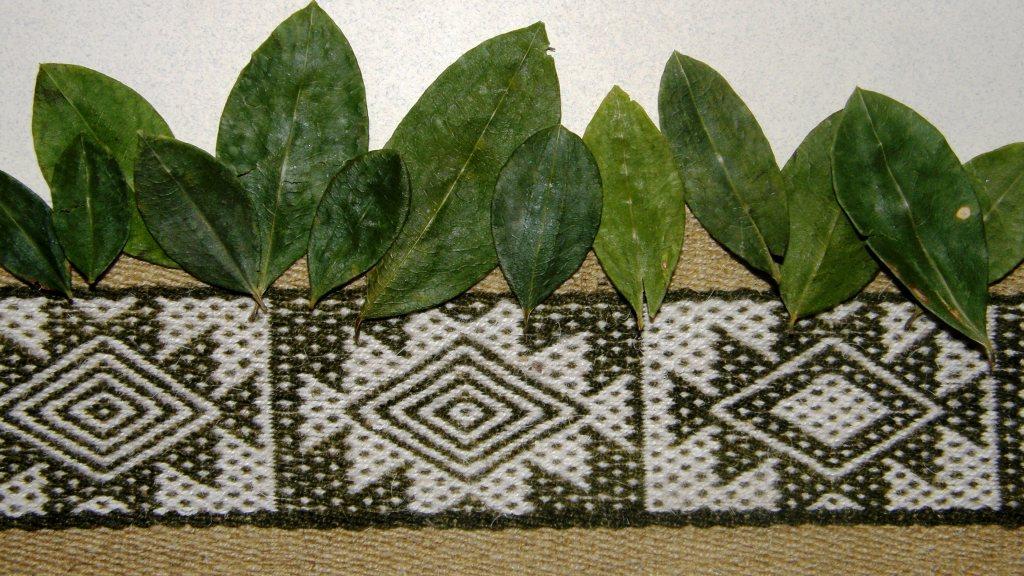 The coca leaf – I have enjoyed it brewed in tea, chewed it on hiking trips and used it to dye my handspun llama fiber above. However, a foreigner like myself can not even begin to understand the role that this humble leaf plays in Bolivian life and culture.
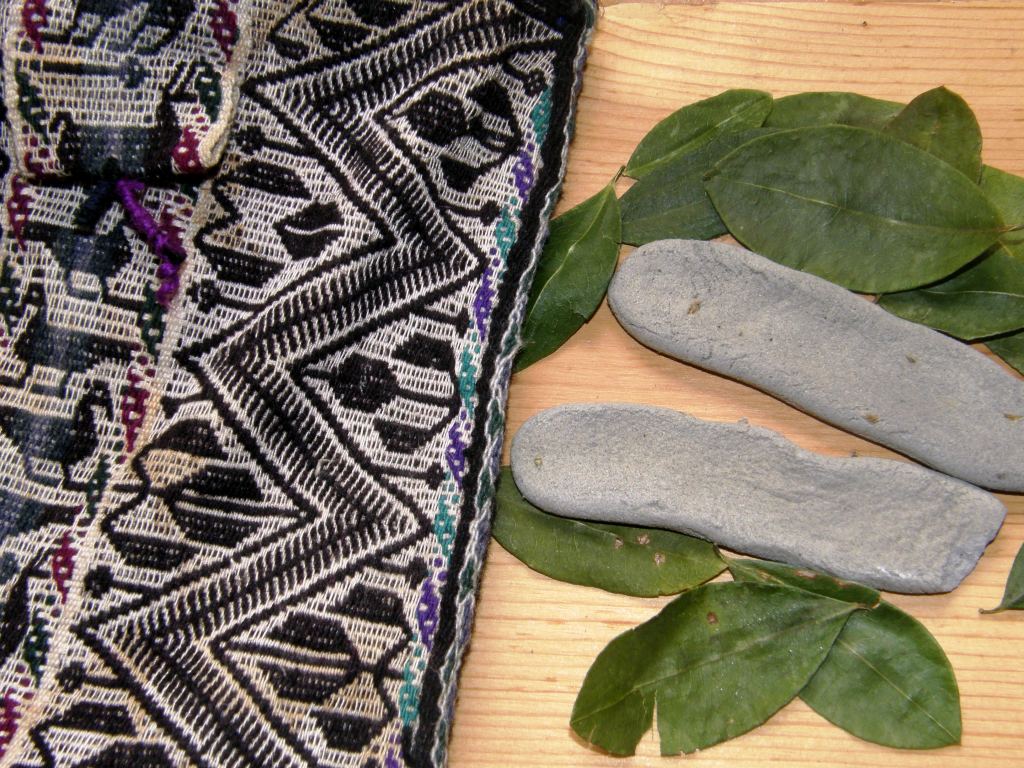 Coca is used to make tea, plays a part in religious rituals and is chewed in order to suppress hunger, thirst and fatigue as well as to alleviate the symptoms of altitude sickness. I have chewed it myself on hiking trips and I have to tell you that there is knack to getting a wad of it tucked neatly away in your cheek and not all over your teeth thus completely ruining your smile for the day! Bags of coca leaves are sold with lejia-the gray colored bar seen at left, comprising compressed ash and other substances, which is chewed along with the leaves and acts as a catalyst.
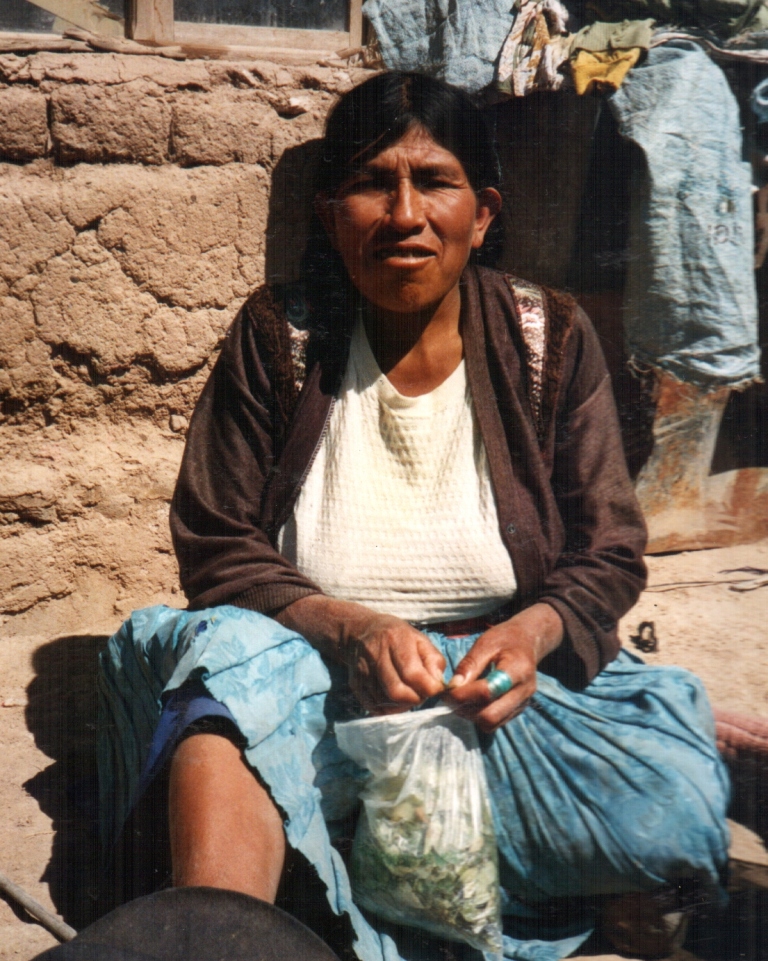 have only seen these in use at festivals and other celebrations. On a normal day, it is more usual to see people taking their coca leaves directly from a regular plastic bag. My weaving teacher, Julia, at right, is taking a break from classes to enjoy some coca.