Backstrap Weaving – Delightful Distractions

If all had gone to plan, I would have had one and a half storage bags done by now as part of my three-bag goal for the month of September. My black bag with the supplementary weft motifs from Bhutan should have been sewn and ready to stuff and hang and my Huichol design bag in finnweave should have been at least half woven.
However, some delightful distractions came my way and had me wandering off in other directions. That Worldwide Weaving Web that I am always talking about came a-knockin’ and the Band Weavers’ Grape Vine came a-tappin’.

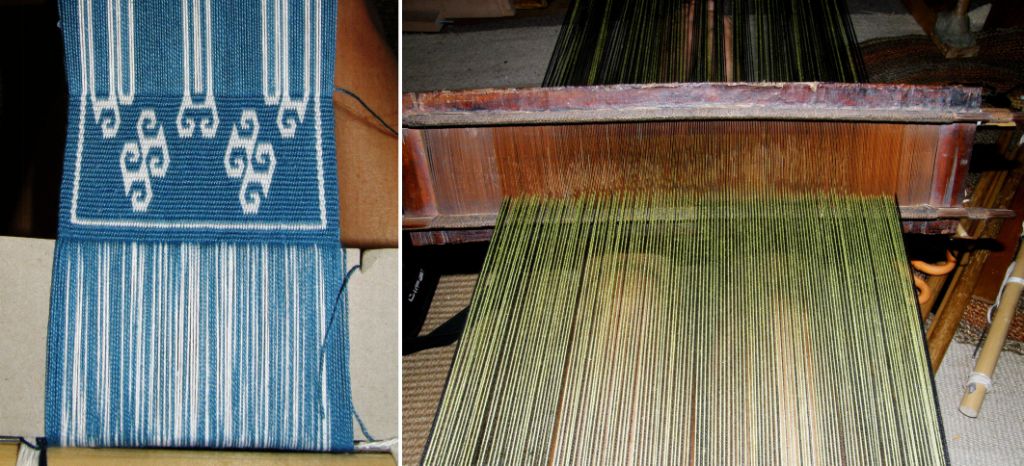
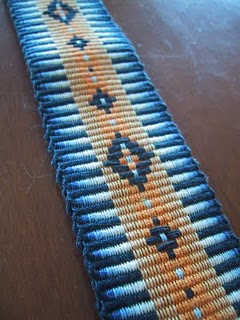
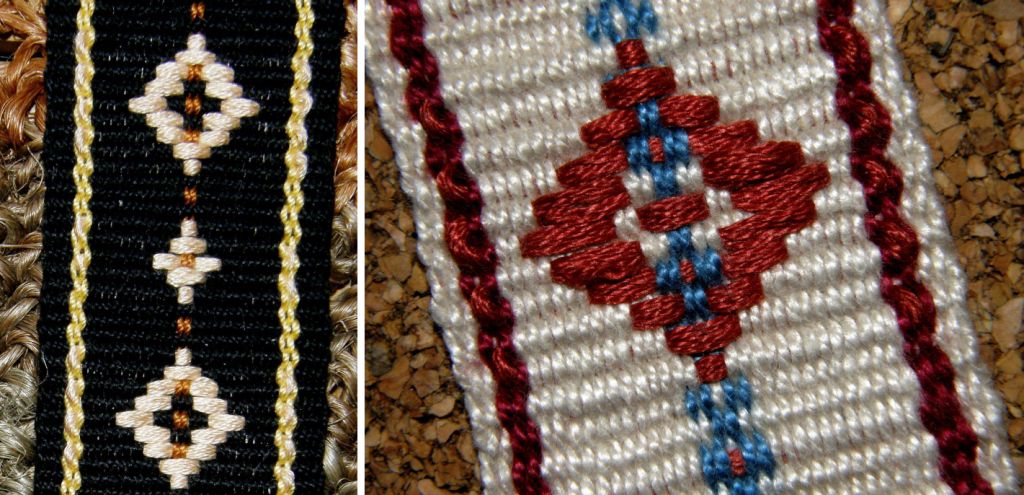
At left you can see a band woven by JacQueline Teller on her inkle loom. You may remember that I recently posted a picture of a bag she had made by sewing several plain-weave inkle bands to canvas which we were using in our Weave-Along group for inspiration.

Annie MacHale (ASpinnerWeaver), queen of sashes, drew my attention to the band at left on JacQueline’s blog and, apart from the gorgeous multiple tones of blue and peach that she has used, I was fascinated by the fact that she had used spots in her warp to enhance her supplementary weft pattern.

Whenever I have started a supplementary weft patterned piece I have always created a blank canvas of single color weave on which to place my patterns. It never occurred to me that the canvas doesn’t necessarily need to be blank and that colors that have been incorporated into the warp can be used to supplement the inlaid weft patterns. JacQueline has used the light blue warp spots as part of her design and I love how she used the dark blue supplementary weft to create alternating color spots between the main motifs.
So, I wanted to play with this and, again, I just have to point out what a wonderful thing the backstrap loom is for making tiny samples.

The experiment grew from one column of warp dots to three and I found that when I made samples in black, a Sharpie was very handy for making adjustments to the pattern, blacking out unwanted exposed weft to get different effects.
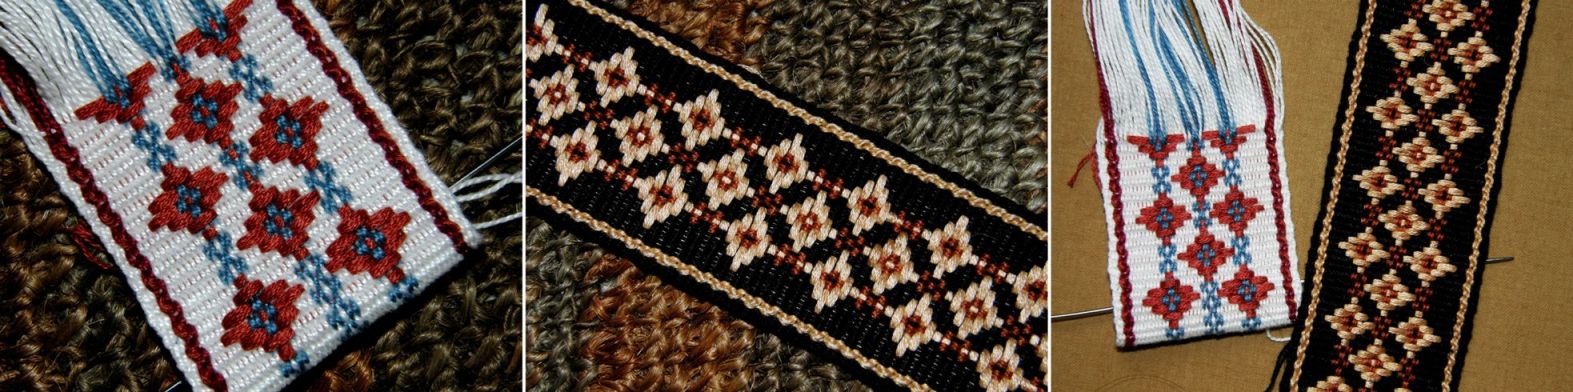
The three columns of warp spots grew to three columns of three and after some applications of Sharpie to the black one, I decided on the design I liked for a bigger project.

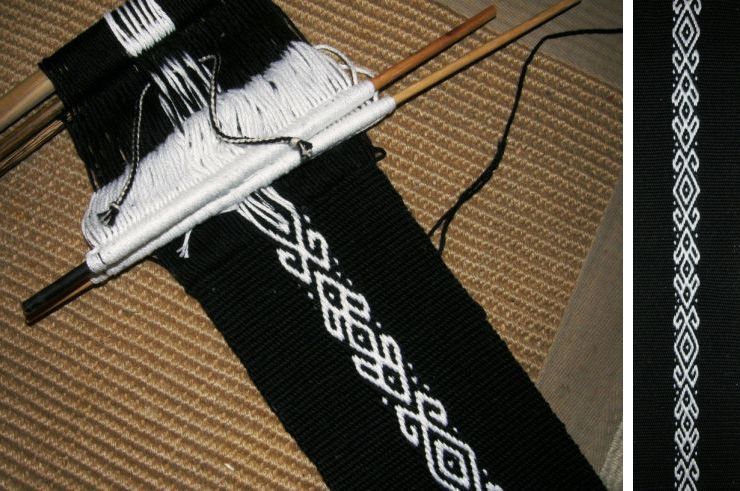
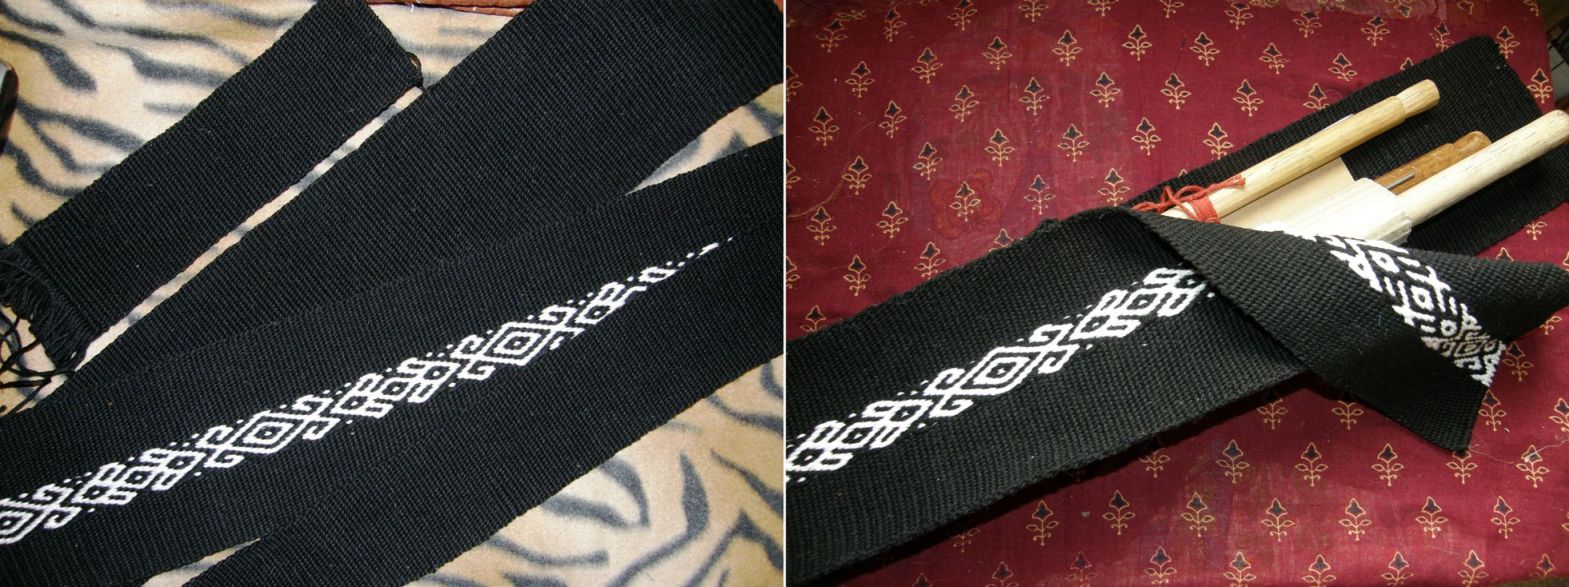
So, this is what is on the loom at the moment…(speckled with fluff and stuff)….see what you started JacQueline? This is the black thread that I had just bought for my Huichol design bag!
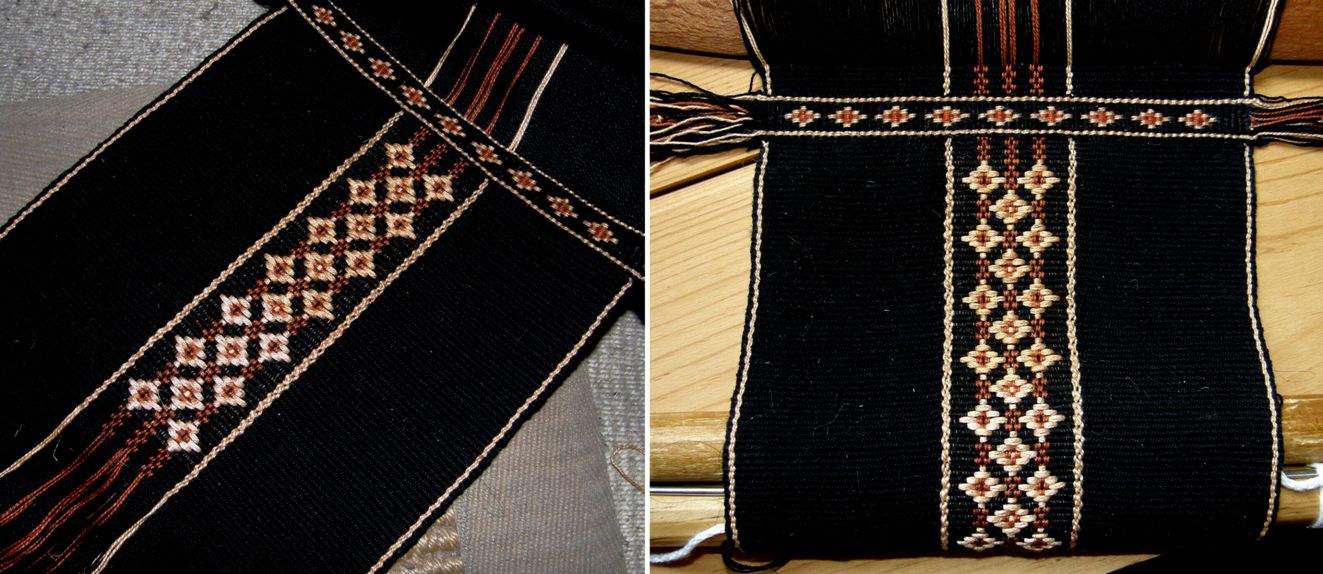
I have just finished adding a band of weft twining and I will twine that same design along the beginning edge when I have finished weaving.

I think I will do a single large supplementary weft motif in the very center followed by another band of twining and then repeat the beginning. What is it going to be? I have no idea but it has been fun getting back into the weft twining. This is the first time I have done three colors together in one row of twining in #10 cotton. What to do with all those weft ends?…I will try to bunch them into a nice tassel as the Bedouin weavers do. You can read about how I learned the twining technique and watch a video of my teacher Ngach at work in this blog post.

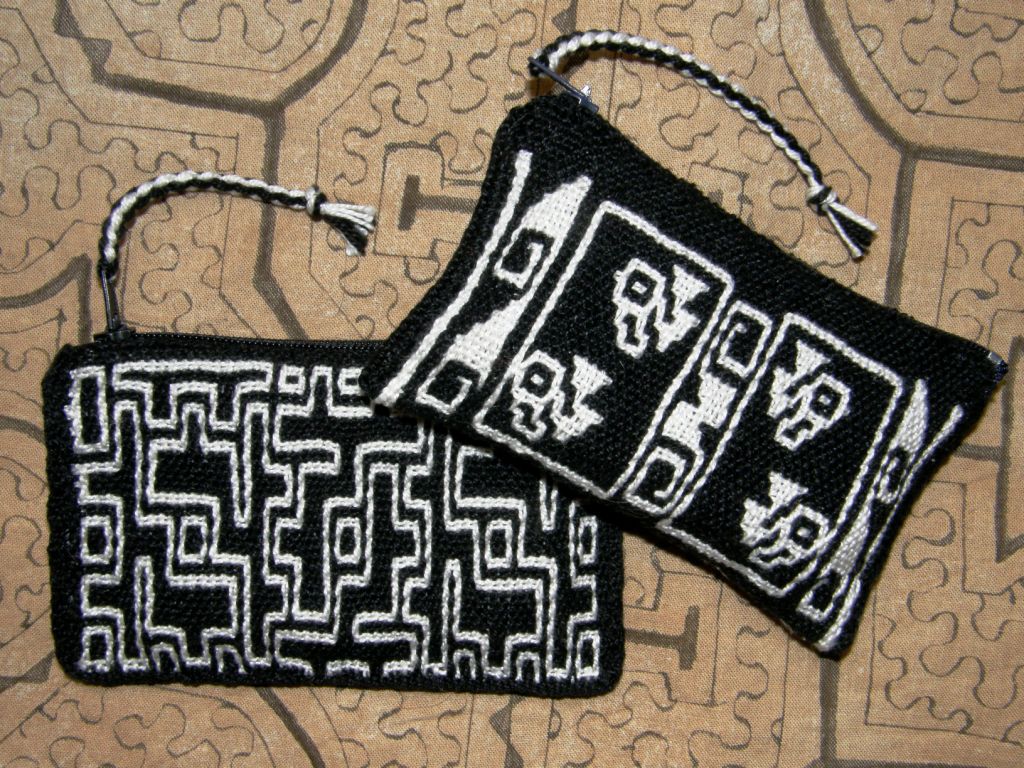
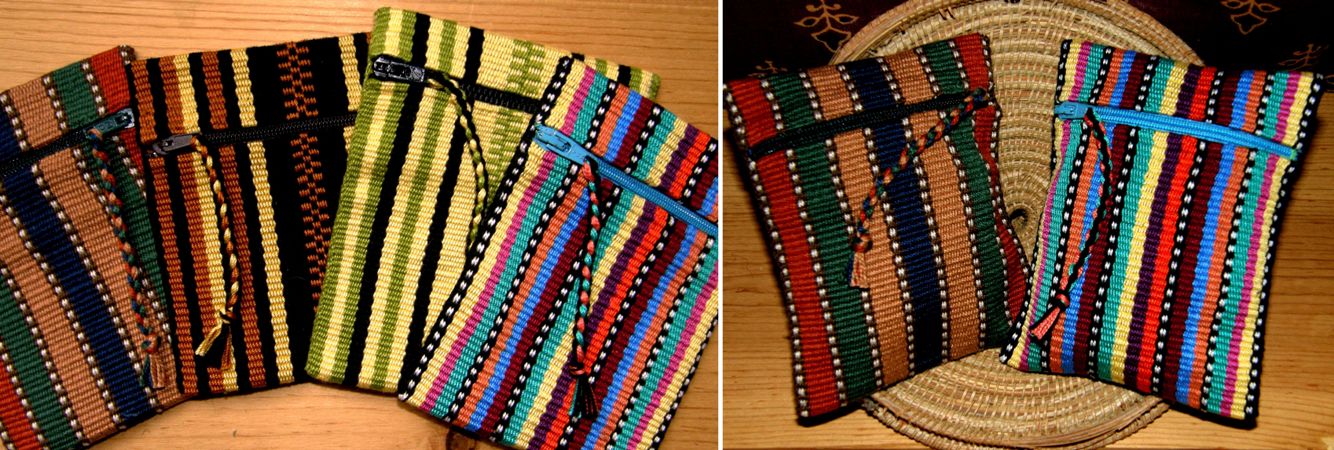
Before the distractions completely took over my weaving week, I did manage to sew up my weave-along projects into little zippered purses.
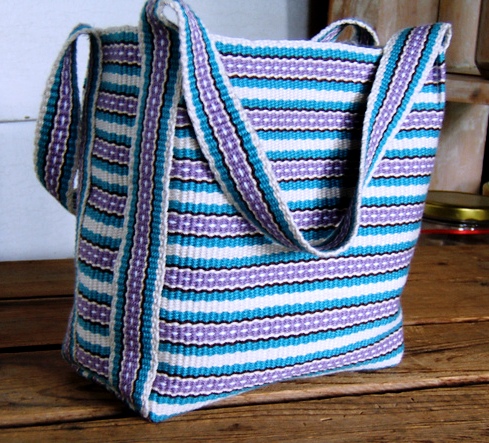
And I wove the back panel of my black Bhutan/ikat bag before my new ball of black thread got swallowed up by the distraction. And that was when I got side tracked yet again by jentide’s weave-along project which you can see at left.

She made the fabric for this fabulous mini tote bag on her backstrap loom with the strap made on her inkle loom.

I love her stripe design but, apart from that, I am completely in awe of people who can sew. Of course I had to pester her with a bunch of questions about the construction of this bag and she pointed me to this wonderful web page where you can learn how to create a flat bottom for a bag.

This has had me pulling out the Reader’s Digest sewing book, that I had just about forgotten I owned, determined  to learn once and for all some basic sewing skills (without the aid of a sewing machine, that is)and pinning and folding and pulling my poor Bhutan bag into all shapes.

Here is its latest pinned form…

Meanwhile I am looking out for other suitable materials to use as supplementary weft. I have some gorgeous hand painted 10/2 tencel that my friend Lisa gave me that works beautifully and one skein goes a long way. Wool works well too as it fluffs out on the surface to give good coverage without “fattening” the shed in which it is laid.

And then I remembered the fine loosely plied and fluffy skeins of acrylic that I had bought in Guatemala.
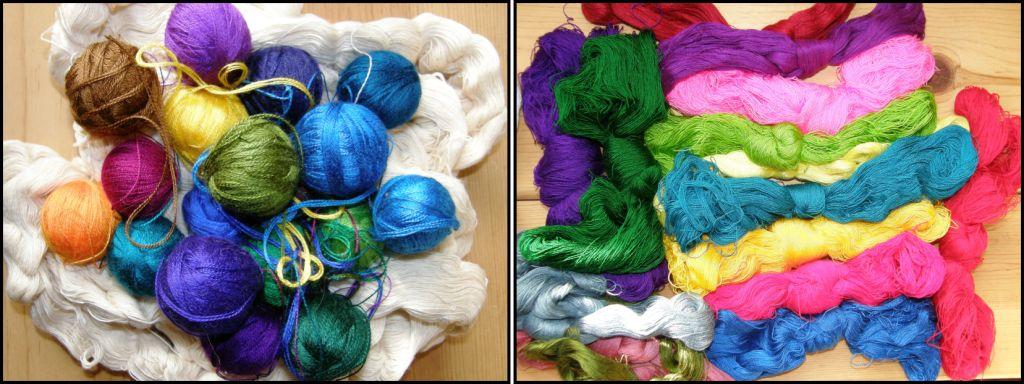
What I would really like to do is make super fine supplementary weft pieces using sewing thread as the ground warp and weft just like the ladies do here in Bolivia to make their hat bands. Their supplementary wefts are acrylic and much the same as the Guatemalan thread that I have.

The fineness of the weave means that they can get away with having quite long weft floats.

I love how the wefts are often used to fill in the negative spaces and outline the motif in the ground weave rather than forming the motif itself.

The floats are particularly long when they do that and I have not been able to reproduce these ”negative space” designs  yet as my patterning material has been too heavy and would have resulted in long and cumbersome floats. I have not yet reproduced any of the pretty Bolivian hat band designs.

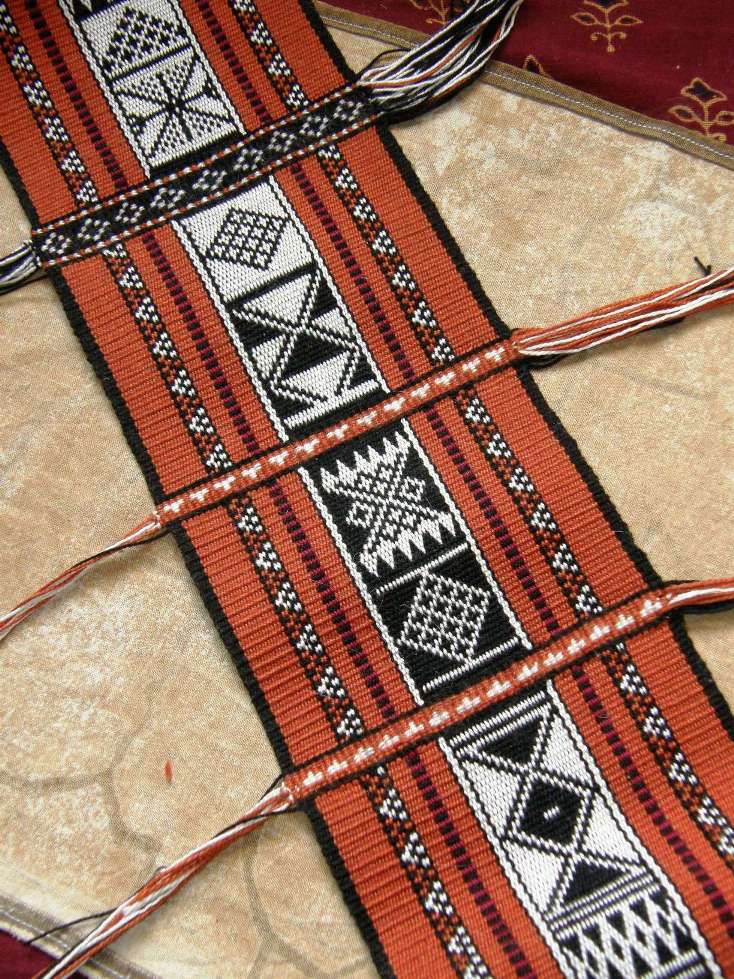
One more thing I did this week was to experiment with the traditional Bedouin al’ouerjan patterns using non- traditional colors. The most common color combination I have seen is black, red and white.

Can you tell that black, terracotta and yellow is my current favorite color combination?

This warp substitution technique produces long floats on the back of the fabric which are not so bad in #10 cotton.

It is interesting to look at the many different variations of this design to see which one produces the shortest floats.

###########################################

I will finish with this week’s Weave-Along round-up…
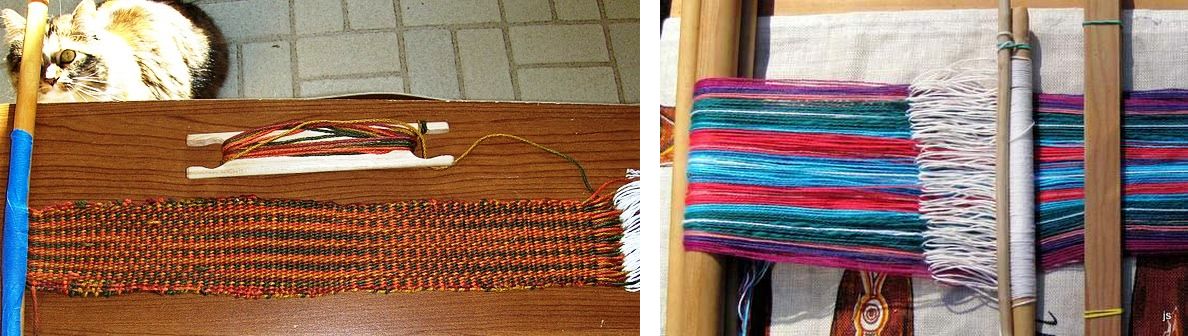
Peg is weaving on a backstrap loom for the first time ever and using Plymouth Yarn Fantasy Naturale mercerized cotton which I think is just perfect for first projects. See how quickly she has tamed that warped and how much she learned about laying in the weft and controlling the edges in such a short space. That yarn is so pretty. I have never woven anything with these multi-color type yarns. On the right, Janet has warped colorful stripes inspired by a piece of Guatemalan fabric that she has.

Dyggvi turned her narrow striped band into a neat zippered pouch and gave us the link to the instructions. Sylvie in France posted a picture of the making of her continuous string heddles on a gorgeous bright striped warp.

Jennifer’s homespun piece is under construction and Karri, who just completed her third ever backstrap woven piece is casting her critical eye over everything she produces and learning lots of lessons. We think her third project looks wonderful.

Both Amber and Marsha continue to turn out consistently straight, smooth, beautiful and useful pieces. Amber’s piece is one of two that will be sewn together to make a seat cushion. Marsha has hung her piece on a section of twisted vine. She has plans to modify it for its ultimate use. We’ll see about that next week.


Jennifer has taken the leap from homespun wool in natural colors to wild cotton stripes while Yonat, outside the weave-along, has been experimenting with those eye bending alternating warp float patterns.

Phew, quite a job winding all those colors! Many of us have come to know the “fun” of adding in all those strips of colors on the warping board and the special challenge all that cutting and tying makes for creating even tension. “Perfect” tension is something we all strive for and I think that we all come up with clever ways to somehow compensate for uneven tension once the warp is on the loom long before we are able to create that perfectly tensioned warp on the warping board. Unfortunately uneven tension will show up immediately in warp-faced plain weave in the form of ridging and cotton is particularly unforgiving.
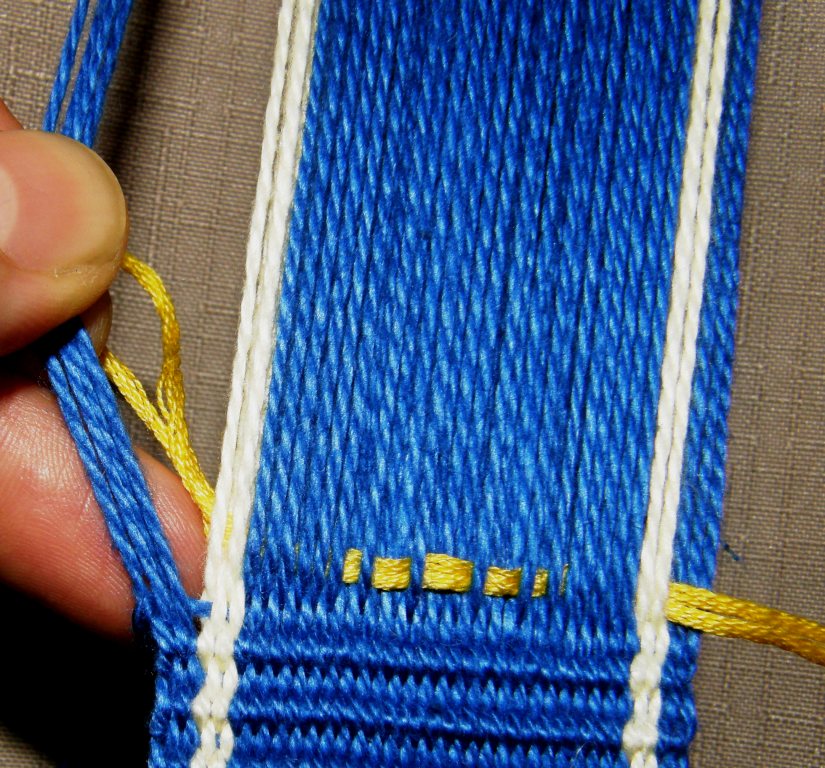
All we can do is make sure that our warping stakes are firm and sturdy and then just practice, practice, practice. Some days are good warping days and some not!

Ridging will turn up unexpectedly and most annoyingly in a piece I am working on and I have found that a worn out hole and a leaning stake on my mini warping board has been the culprit on quite a few occasions. Cranking up the edge warps too tightly caused the particular ridging problem in the piece pictured at left.

Fortunately the ridging shows up in plain weave and not in float patterning which is what I mostly do.  On the other hand, I know people who actually like the effect of the ridging. It’s a pesky and temperamental phenomena! I tried to weave a band specially for this blog post to show the ridging that results from crammed warps. The darn thing refused to ridge!

I suppose we could always do as my Montagnard weaving teacher, Ju Nie, does…
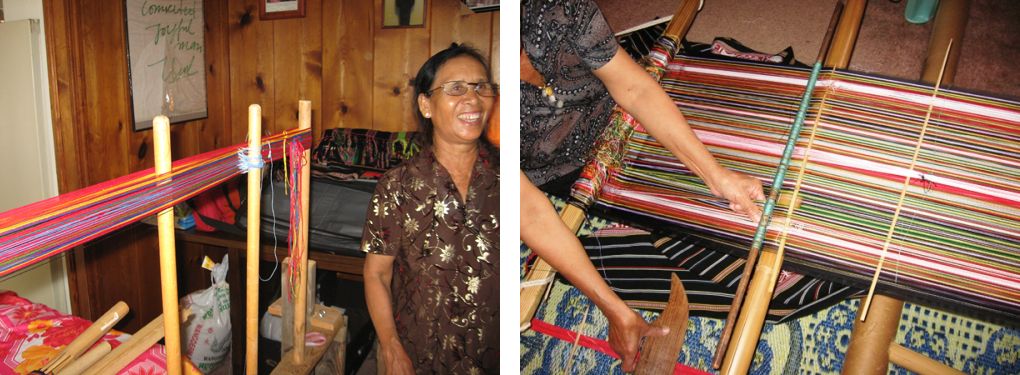
Many Montagnard pieces are woven with a multitude of fine stripes. Ju Nie joins the colors on the warping stakes with slip knots and then, once the warp is on the loom, she unties each and very knot, adjusts the tension and reties. It is not tedious for her. This is the way she was taught to do it and her large pieces woven in that “unforgiving” cotton are perfect!

Oh, and one more distraction to speak of before I go…one of my online friends just came back from Mexico where she bought a Huichol woven bag and is going to send me pictures. So, I am thinking it is just as well I didn’t get my bag project underway as her pictures are bound to have me changing my design plans. Thank goodness for those delightful distractions!
Backstrap Weaving – Sett and Match

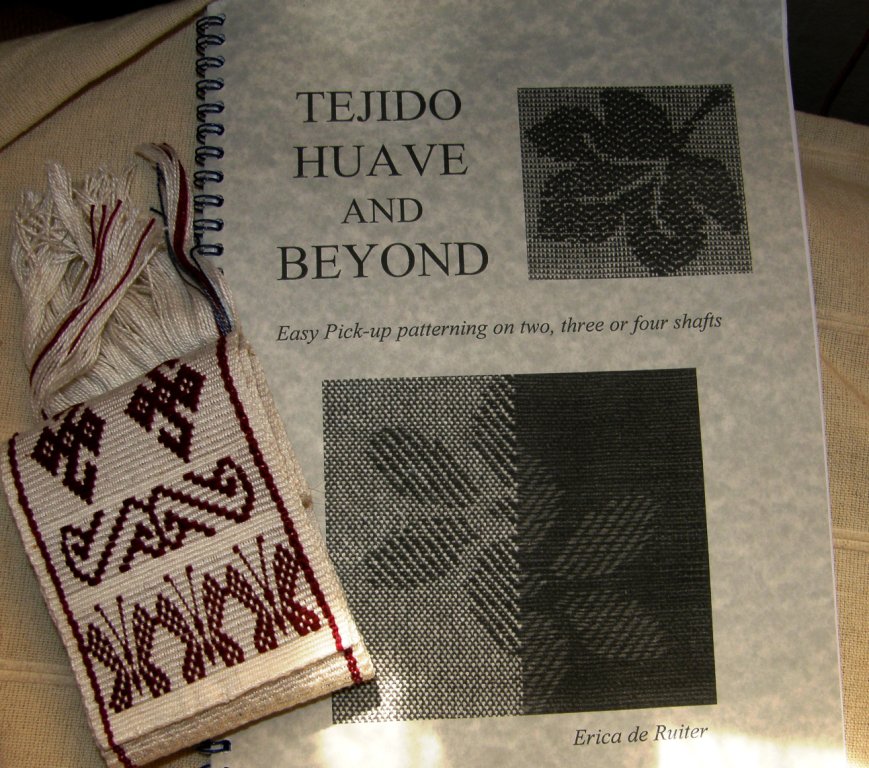
In the mail this week…a book on “Tejido Huave” by Erica de Ruiter which is described as “Easy pick-up patterning on two, three or four shafts”.

I had quite recently seen images online of Mexican Huave textiles decorated with supplementary wefts and used a butterfly motif from one of them on a warp-faced sampler of inlaid brocade patterns.

I am interested in seeing the variations that Erica de Ruiter has developed using the Huave textiles as her inspiration.

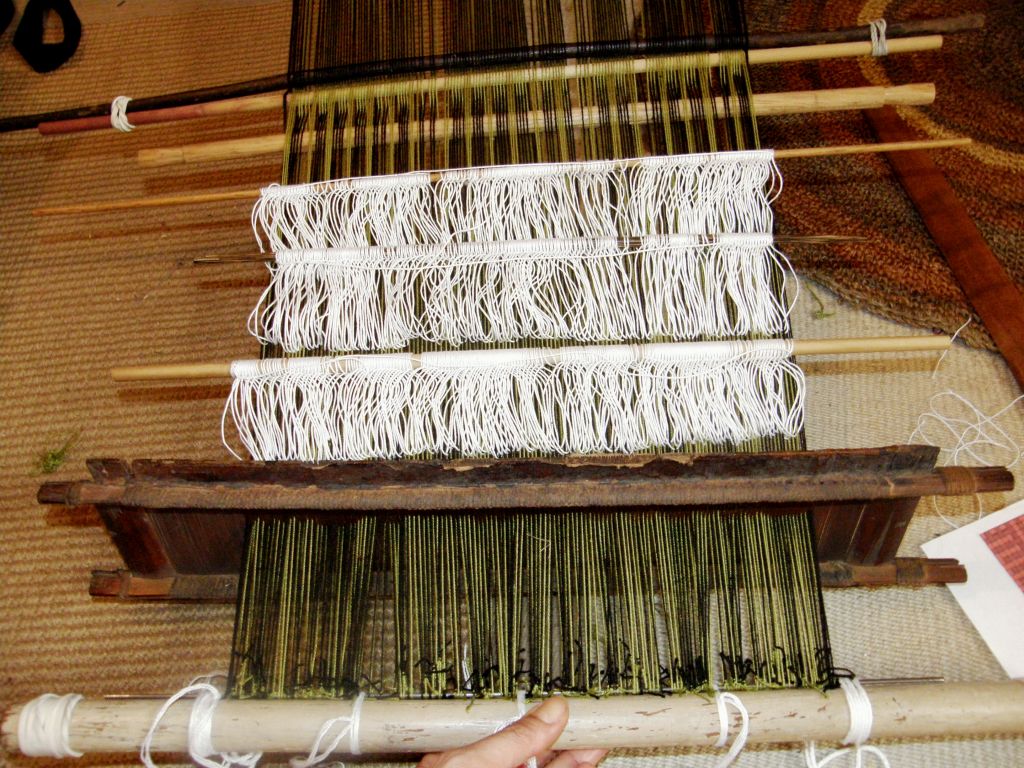
It will be fun to play with more than three sheds on my backstrap loom and, to get into the swing of things, I set up my loom for a four-shed weave this week using three sets of string heddles, a shed rod and my lovely bamboo reed.

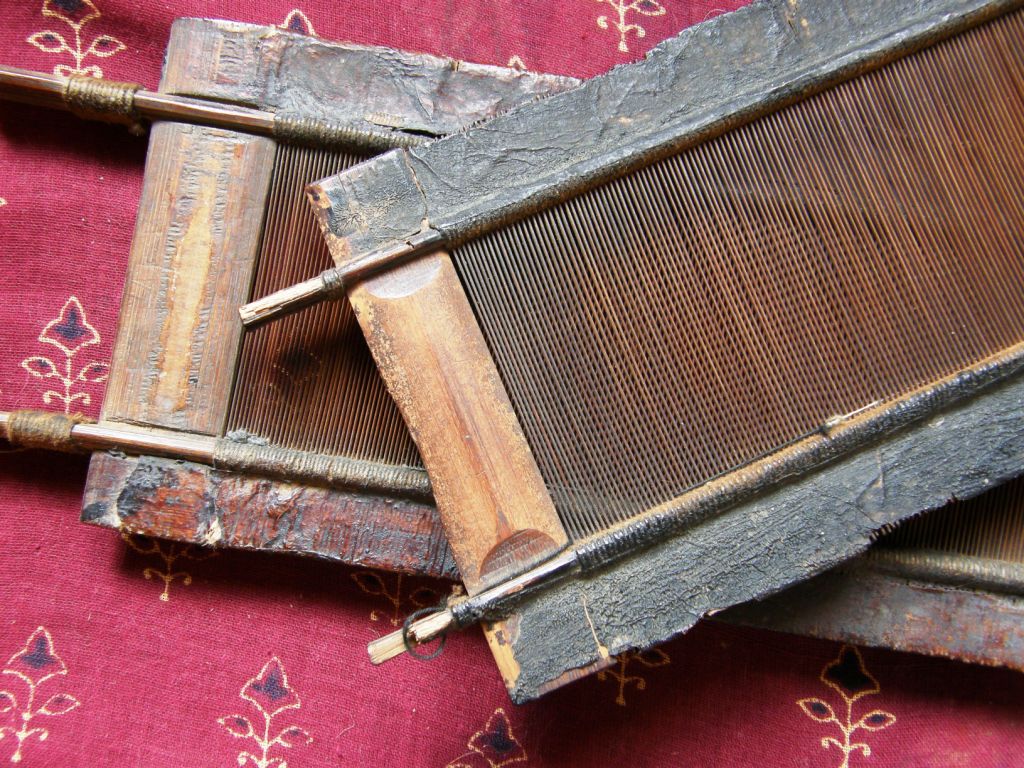
Finally this bamboo reed gets to do some real weaving with its new owner. I got two reeds like this at a stand selling textiles and weaving implements of Chinese minority groups at Convergence last year. My mind wanders off thinking about who may have been the previous owner/s of these reeds, what kinds of warp thread passed through their slots, what kind of weft they beat into place and the fabric they were used to produce.

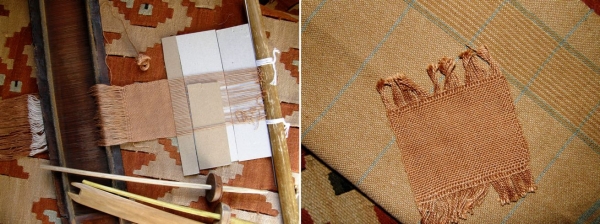
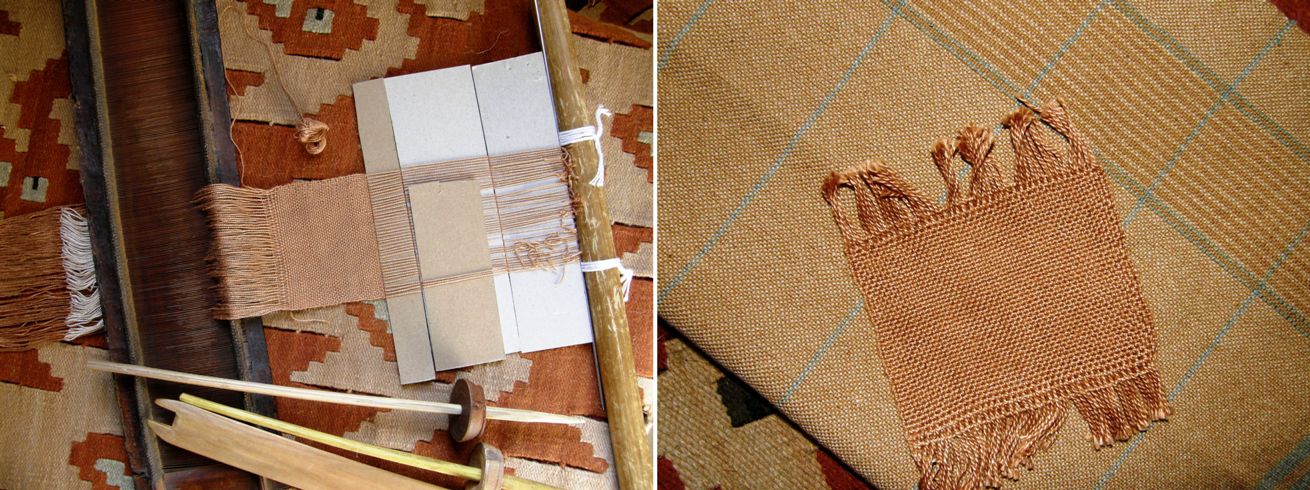
I made a tiny sample a few weeks ago to see how suitable my thread was for the spacing of the slots and since then have been dithering over what kind of weaving I want to do. This reed is 23 dpi and I am using my #10 crochet cotton. I guess I am working backwards as one usually chooses their yarn, figures the sett for the desired technique and then uses the appropriate reed. I, on the other hand, have the reed and am figuring the rest out with that as my starting point.

You can see my tiny sample above. I wove just enough to be satisfied that my #10 crochet cotton works well in this reed. I was thrilled with how it looked after weft finishing.

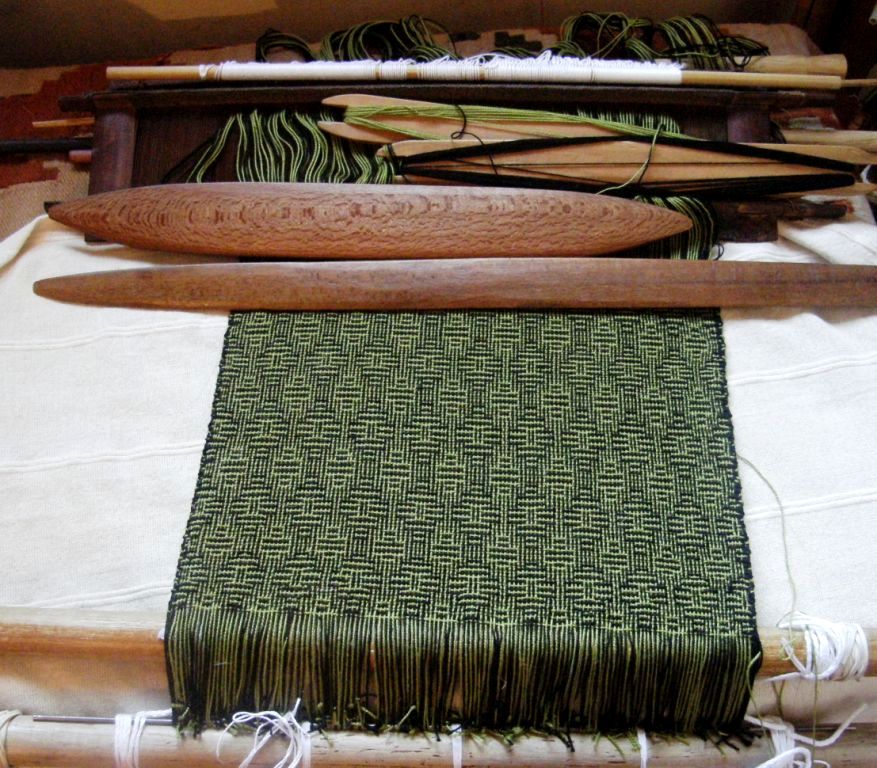
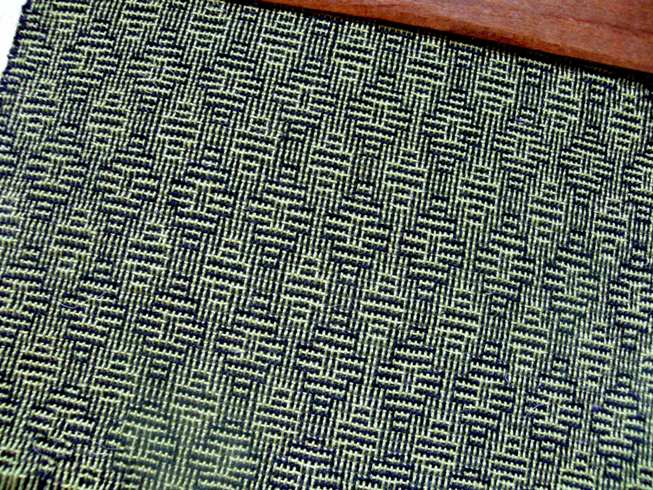
I went ahead with a four-shaft, four-treadle shadow weave using a draft I found online. I made string heddles for the threads on the shafts for each of the treadles…three sets of continuous string heddles with threads for the fourth treadle held on a shed rod. So the threads for shafts 2 and 4 (treadle 1) went all together in one heddle and so on.

Of course the whole business is a lot more stable with this width. When I wove the tiny sample it was very awkward handling the wide reed on the narrow warp. The reed sits up  nicely on this wider piece and it is really quite a comfortable set-up.

I mis-counted in the sequence at the start before things really got underway. Now I am really enjoying this!
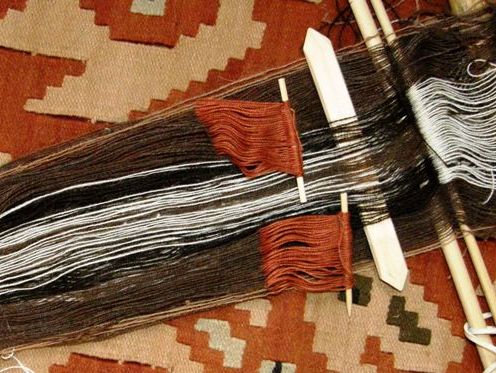
I don’t care for the edges and have yet to find a good way to turn the two wefts. I warped two ends of double- stranded black thinking that that might make a good edge…well, not so much!
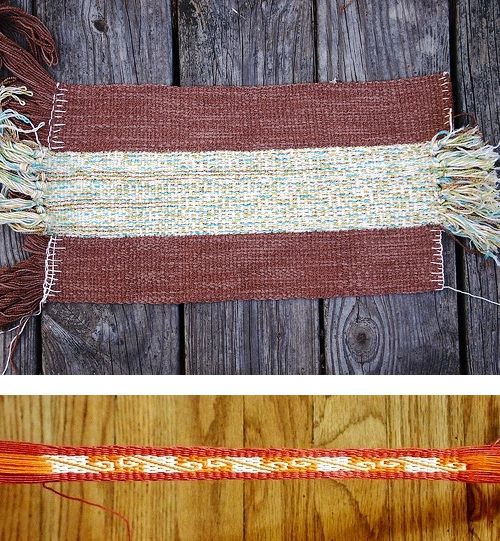
This has been all about the process so I had no thoughts at all in the planning stage about what this piece might end up being. I only wound a one-yard warp and now I am thinking that I might use it as lining for a bag.

It is odd for me having to wait to wet-finish this piece to see what it will really look like. In the kind of warp-faced weaving that I do, what you see on the loom is what you get. I am really impatient to get this off the loom, wash it and see the final product but, at the same time I am really enjoying weaving it…just raising heddles and passing wefts…such a change not doing any pick-up!

Two very different projects on the loom this week. One was all about matching designs and the other about yarn and sett for shadow weave…sett and match!

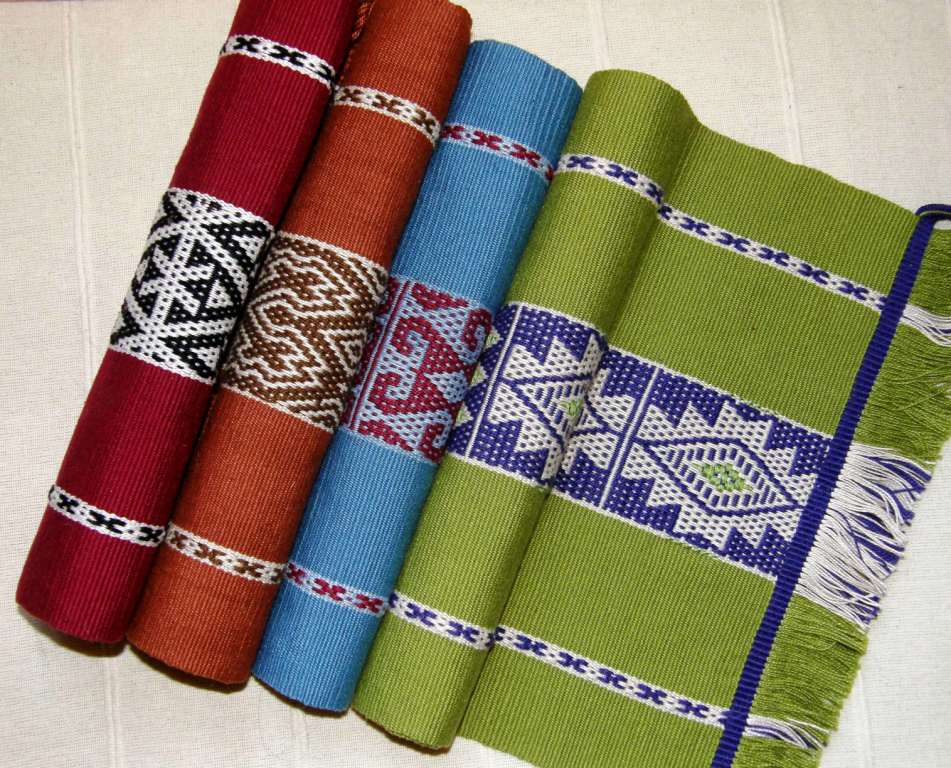
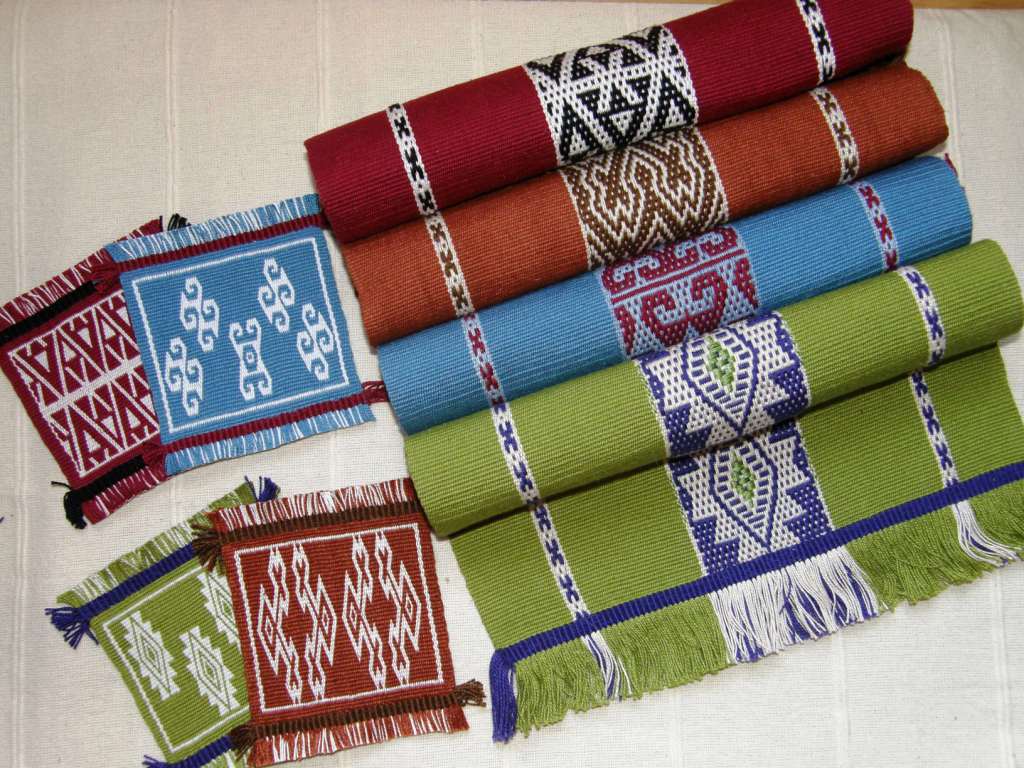
The other weaving I did this week did involve pick-up. I made a set of mug rugs in double weave to match the patterns on the four place mats I recently finished.

The patterns on the place mats were woven with simple warp floats and I tried to include elements of the various motifs in the matching double weave mug rugs.


I used weft twining on the edges of the mug rugs to match the finish of the place mats which also allowed me to incorporate the third color as each place mat had been woven in three colors.

The “Worldwide Weaving Web” has brought all these wonderful patterns into my home which I have seen mostly in images online.  A wonderful book on Tejido Huave has come my way as a result of internet wanderings and a box of goodies arrived just today from an online weaving friend.

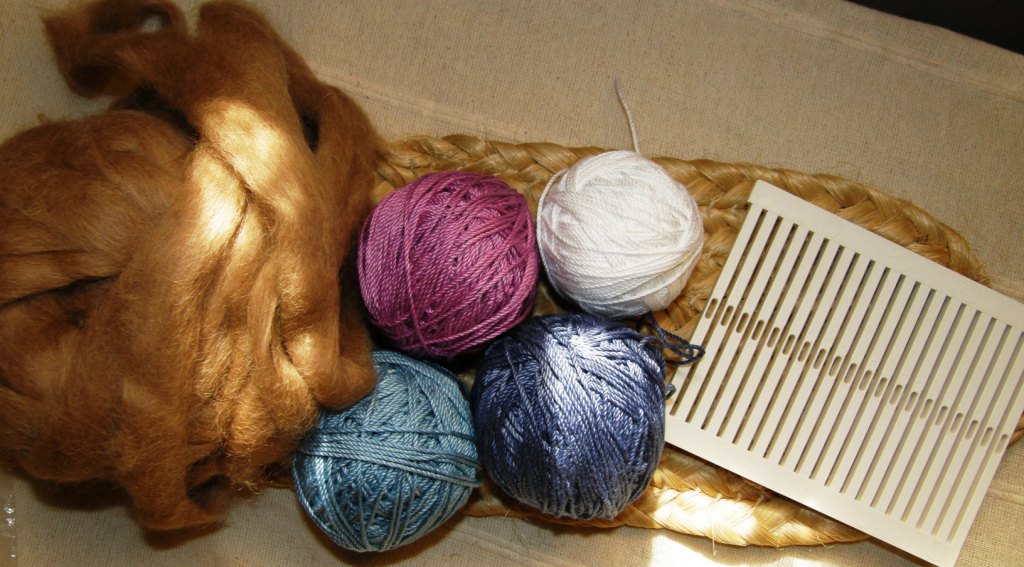
During the Tour de Fleece on Ravelry our Backstrap Weaving Group organized a fiber gift exchange and here is what I got from Bobbie…some suri alpaca fiber to spin…so soft!! and four balls of cotton for my backstrap weaving. The colors were dyed by Bobbie herself. After having met Bobbie online I actually did get to meet her in person when I was in Portland last May.

The rigid heddle segment was not in this box from Bobbie but came to me from another online friend who I haven’t had the chance to meet yet in person…Sharon in Florida.

I have taken this heddle out in preparation for the Weave-Along that we are planning for the Backstrap Group starting at the beginning of September. (Read more about this in last week’s post.) It is a plain-weave Weave-Along in warp-faced or balanced-weave and some participants are going to use these bought plastic rigid heddle segments while others are making their own from sushi mats, popsicle sticks and plastic folders. Others are planning ikat designs, colorful stripes and horizontal bars for their warp-faced pieces.

Home made reed and rigid heddle by Dyggvi and Janet.

We have found some good sources online for the heddle segments for those who would like to do narrow weavings. Some people are going to use the heddles that came with their rigid heddle looms. Janet is planning a 24″ wide shawl.

The segments can be found here and here (this link was provided by Traudi) and Joanne from Glimakra gave us information about all the heddles that they have available including some beautiful traditional-style wooden ones for band weaving with handles.

And if these gifts aren’t enough from the “Worldwide Weaving Web”, a real live person arrived from the other side of the world…all the way from Doha, Qatar! Fellow Ravelry member Berta aka mountainbird is traveling across South America on her vacation away from the temperatures in the high forties (Celcius) that are typical in her part of the world at this time of year. She is Canadian but has been living in Qatar teaching English for eleven years.

Berta is friends with Tracy who is a Backstrap Weaving Group member and who has been learning to weave Bedouin-style textiles in Qatar and sharing her findings with us in the group. She sent me this wonderful piece of Bedouin weaving with Berta…

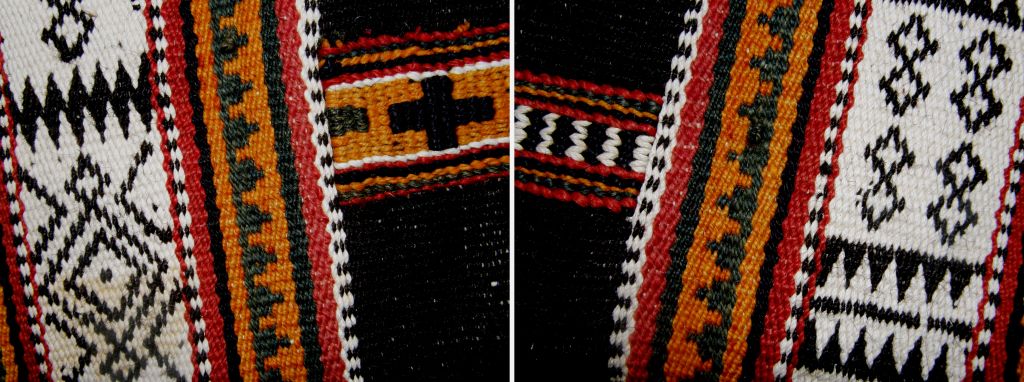
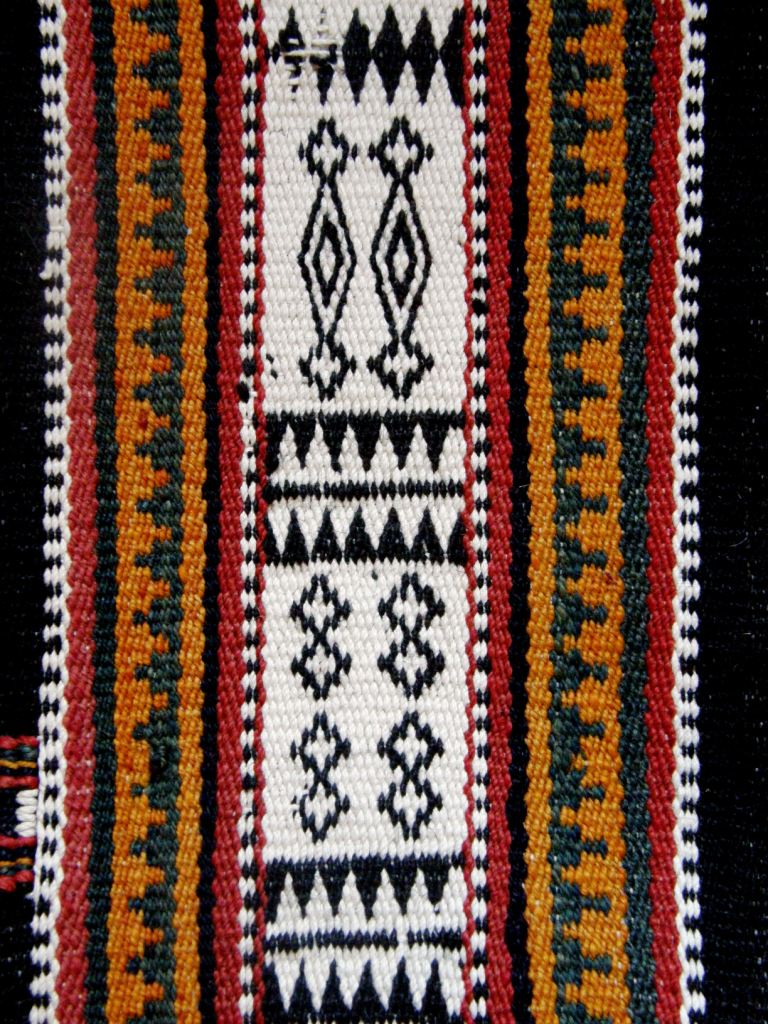
This fabric is part of a tent divider which has been cut up to make a bag. The black and white pattern has been woven using warp substitution technique as has the grey and orange “molar” design. You can also see small segments of weft twining which is what brought me to study these textiles in the first place.

I had learned weft twining with the Montagnard (Vietnamese hilltribe) weavers in North Carolina and google searches on the subject led me to fantastic images of Bedouin weaving which I was able to reproduce being already familiar with the warp substitution and twining techniques.

And now many months down the track I am holding a genuine piece of this weaving, a beautiful gift from Tracy all the way from Qatar…what a thrill. I was aware that the yarn used in the traditional pieces is quite heavy but didn’t appreciate how thick it actually is until now. I can now imagine just how terribly heavy a full tent divider must be in this yarn.

There is something so very wonderful about the coarseness and chunkiness of this piece not to mention the gorgeous wool aroma…definitely constructed to withstand some harsh elements

My reproduction piece below in the #10 cotton just doesn’t seem right at all!!


I had a fun couple of days with Berta who, in true Ravelry style, arrived with yarn and knitting in hand with a couple of pairs of socks already finished.

She is overlanding from Lima to Buenos Aires…many many bus hours in which to knit!

We spent August 6th together and invited an Australian girl from Berta’s hostel (home of Simon the toucan) to join us so we had an Argentinean, two Australians and a Canadian celebrating Bolivian Independence Day in a Brazilian restaurant!

Now she is on her way to Iguazu Falls on the border of Brazil and Argentina.

#########################################

To finish this week, I have put together some pictures and video for what will be the start of a new page on intermediate-level techniques and I wanted to start with a short explanation of what is meant by “complementary warp pick-up”. You will probably run into this term when you read about warp-faced backstrap weaving. Andean pebble weave is just one of the techniques that falls into this category.

The idea here is not to teach you a specific weaving technique but simply to show you how the weavers pick up the warps to form their patterns when weaving a complementary warp method. Irene Emery defines complementary weaves as those where “two sets of elements play equivalent and reciprocal parts on opposite faces of the fabric,”….

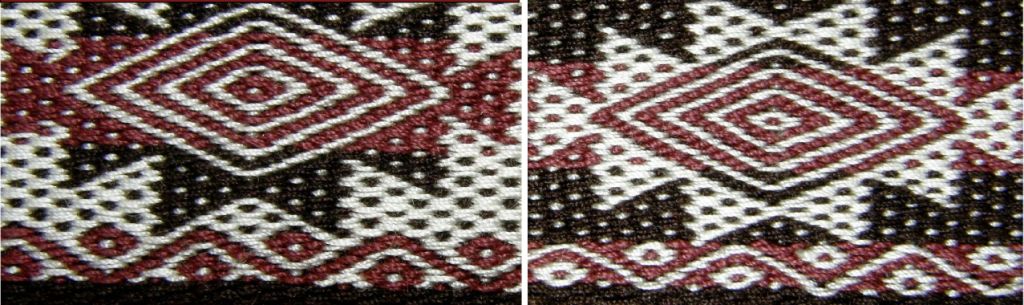
This creates a double-faced fabric. The design on one face of the fabric is mirrored on the other face with its colors reversed as in the pebble weave example below.

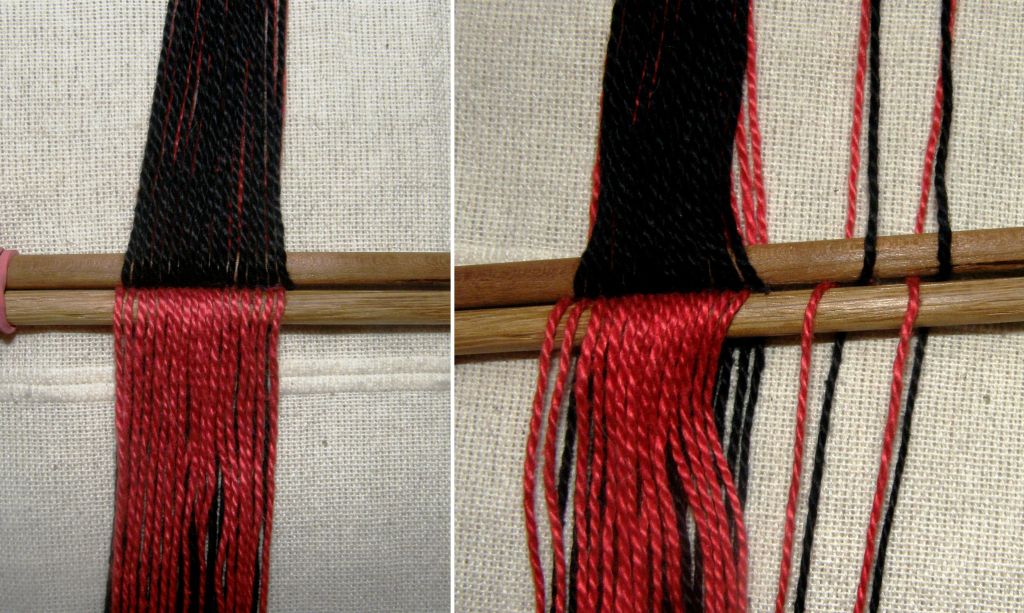
When weaving a complementary warp technique, the warps are generally arranged in two sheds with the colors separated as seen above. The warps in one color will go into string heddles and the other color will be controlled by a shed rod. In the example above, each black warp has a red partner. One black warp together with its red partner is called a complementary pair. In the example, the black warp sits on the right of its red partner. I have separated two complementary pairs from the rest of the warps so you can see how they lie.

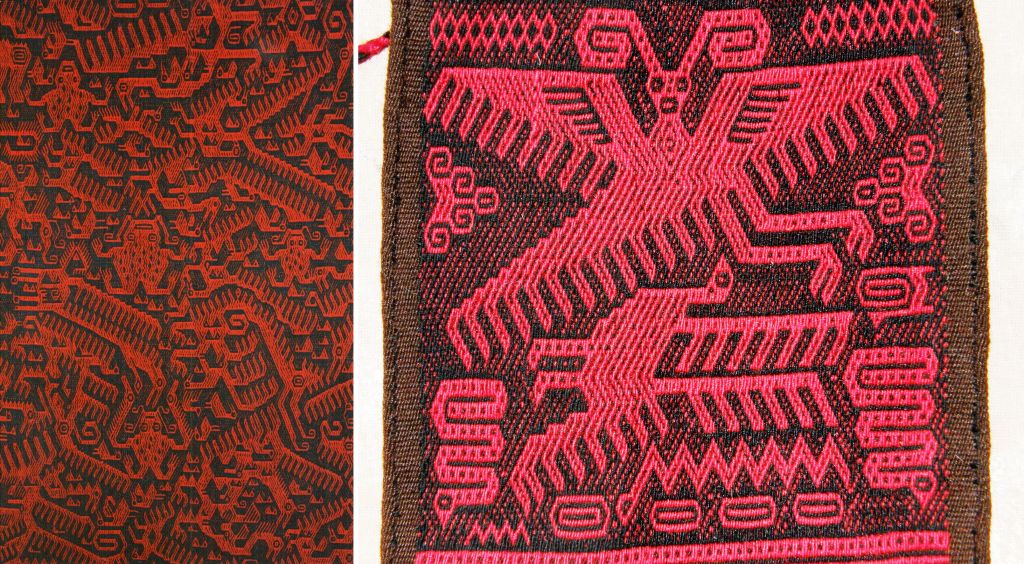
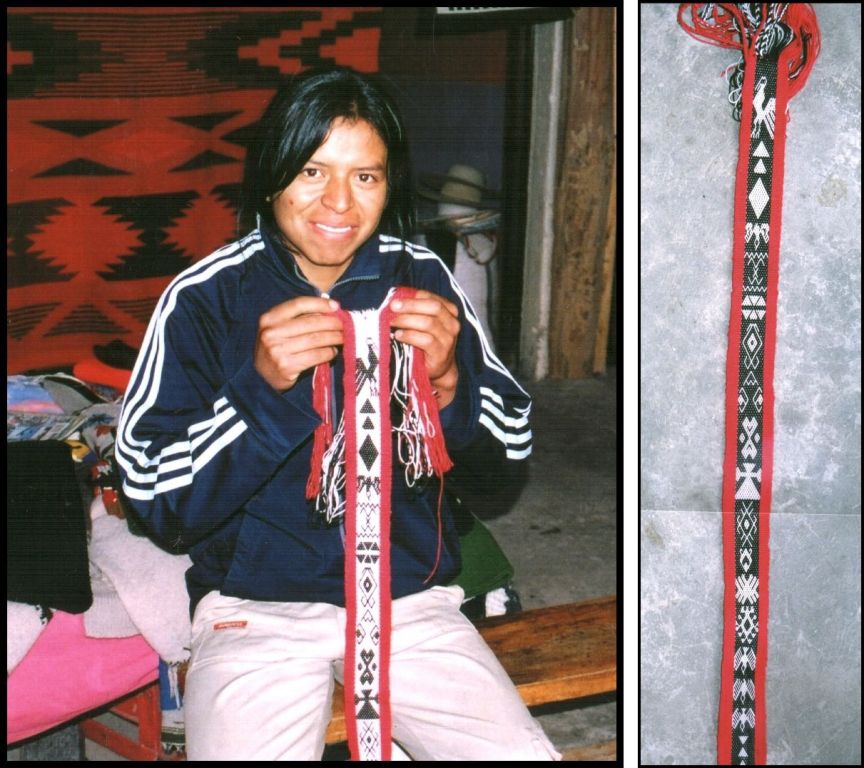
Weavings like these Jalq’a textiles above from Potolo, Bolivia have been woven in a complementary warp technique using red and black threads on a warp that would have looked like my examples above. You can see that the faces of the textiles show red figures on a black background. The back of the textile will show the same figures except that they will be black on a red background.

The pick-up is done with the aid of the cross. The cross keeps the warps in strict order so that the weaver knows which warps are complementary pairs. If the weaver wants black to show on the upper face of her weaving she will pick up the black and drop its red partner. The dropped red will show on the back of the textile.

The way weavers choose to form the cross and carry out the pick-up varies greatly from region to region. There is no one correct way to do it.

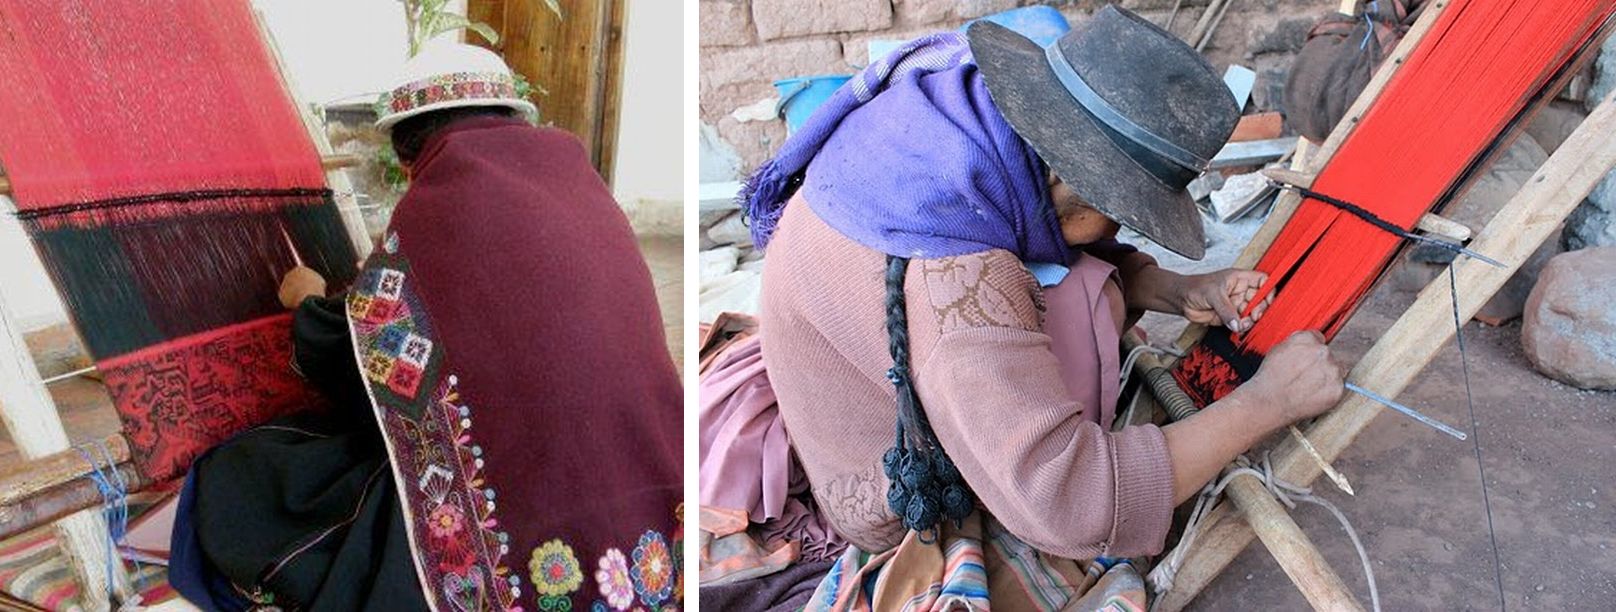
Above you can see two weavers from Potolo with their red and black weavings. The first weaver has created a ”picking cross” down at the weaving line. She has a stick under all the red warps and has opened up the shed with all the black warps. From this cross she will select the warps she needs for her pattern. When she picks a red she will drop its black partner and vice versa. Like this, she will create a shed of red and black warps through which she will pass the weft.

The weaver on the right is doing likewise except that she has inserted a stick under the black warps and has opened the shed with the reds. From this “picking cross” she will select the warps for her design.

Both weavers are using sticks to pick up the warps.

This weaver from Tinkipaya, Bolivia uses her hands to pick and drop the warps for her design. Her weaving has bands of many colors. She has a permanent cross in her warp. You can probably just make it out in the picture. Two cords are holding her cross rather than sticks. She is working her way across the warp picking the color from one side of the cross which she wants to have showing on the front of the weaving and dropping the complementary partner in the other color which will show on the back of the weaving.

This is the way I was taught to do pebble weave in one region of Peru….picking from a permanent cross with my hands. The pick-up method varies from region to region.

Here is a video that I made showing the theory of complementary warp pick-up. This is how I pick one pattern shed of red and black warps through which I will pass the weft to form my design.

Here are several video clips of Bolivian weavers from Potolo,  Isoso, Tarabuco and Tinkipaya doing complementary warp pick-up. See the hundreds of threads they are working with and see how fast they go! The first weaver you will recognize from Potolo, followed by a Guaraní weaver from Isoso, a lady from Tarabuco and one from Tinkipaya.

The second weaver in this video is my Guaraní weaving teacher here in Santa Cruz. The Guaraní weavers have their own very special way of doing the pick-up and are the only ones I have seen who don’t pick from a cross when doing complementary warp pick-up. Angela has her two colors, brown and white, separated into two sets of string heddles and simply pulls on the appropriate heddle when she needs a color. Somehow she manages to keep her complementary pairs in order and doesn’t mix up or cross the threads!
Well, I hope that these videos and explanations have been interesting for you. Those who have my Andean Pebble Weave book may like to see the theory of the pick-up I am describing therein with step-by-step pictures, in action here in my video. Note that none of the weavers in these videos are doing pebble weave. Pebble weave is just one of several techniques that fall into this complementary warp category.

I am off to the highlands tomorrow for some weaving lessons and will be meeting up with my Tinkuy roomies Dorinda and Maxima and seeing a bit of the Virgen de Urkupiña festival. I’ll be back next week with some new weaving knowledge and hopefully lots of pictures to share.

Backstrap Weaving – Colors from Camelids and Cotton

This week’s blog post is brought to you by these fine fellows…

and their beautiful fiber but also by…

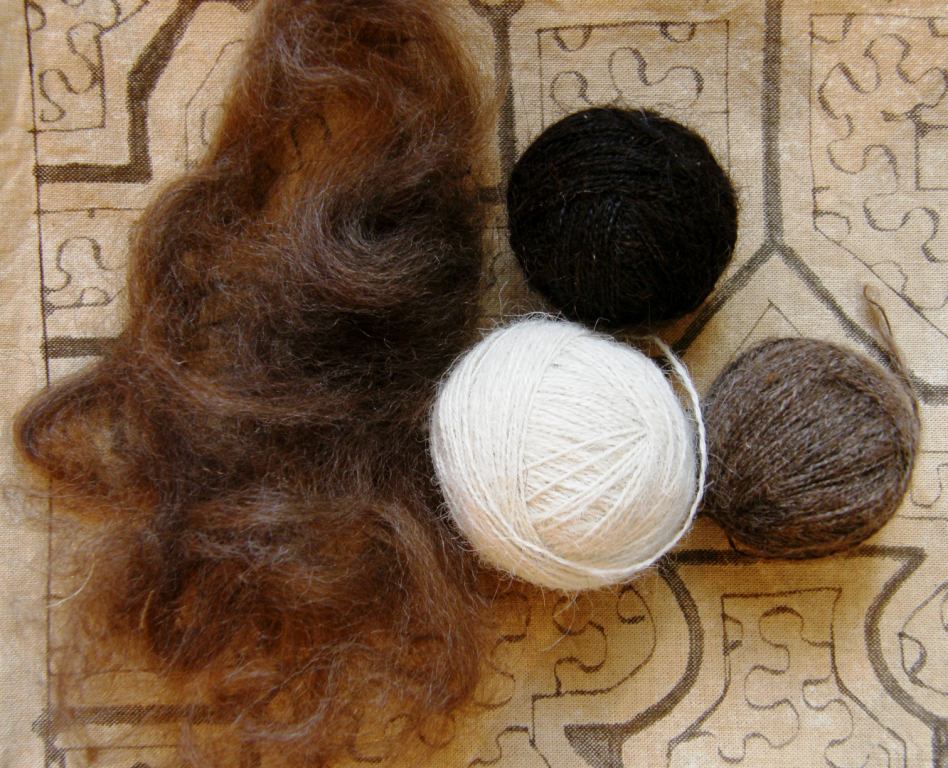
my friend Janet in northern California who gave me a ton of alpaca fiber last year, Celinda, an Aymara weaver who swapped some of her handspun alpaca yarn with me for one of my woven keyfobs and the weavers of Peru who got me started in spinning on drop spindles back on my first visit to Peru in 1996. I also have to thank Gladys Miller in Colorado who encouraged me to spin while she taught me about Navajo weaving in 1995.

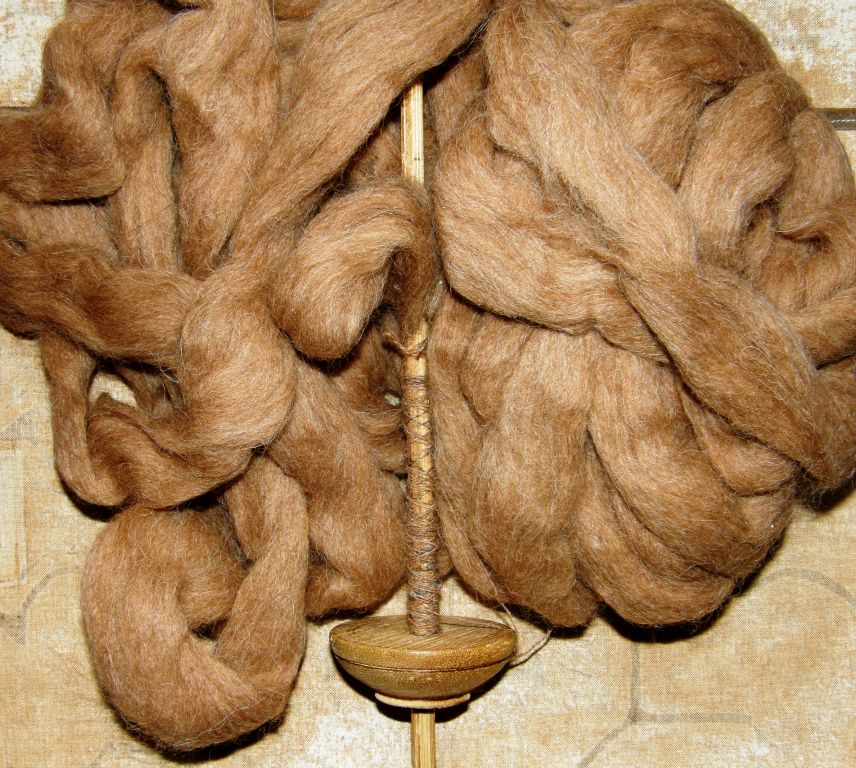
Now I am thoroughly spoiled with this gorgeous alpaca fiber that Janet gave me. A lot of it was already beautifully prepared by Janet herself in her mill. For the stuff that hadn’t been prepared, all I had to do was tease the tips open using my hand carders.

Until now, all I had spun was wool that was readily available from the farms where I lived in Patagonia and llama fiber that I bought from  little villages outside of Uyuni, Bolivia many years ago…bags and bags of it which I have cleaned and carded, spun and even dyed to weave with as the years have gone by. I thought it was pretty good but now that I have had the experience with the alpaca fiber I look at the poor old llama stuff with a very critical eye…dry, coarse and filthy!

Nevertheless I did manage to weave some nice things with it…

And I also like to weave llamas although these guys were woven in cotton…

I still have tons of llama fiber left so I don’t want to get too spoiled!

So, I have spent some time lately spinning the alpaca mostly because we have been having a Spin-Along in the Backstrap Weaving Group on Ravelry with a lot of discussion about just how much over twist one needs to put into the yarn to make it suitable for warp-faced weaving on the backstrap loom. And this is where Celinda, the Aymara weaver from northern Chile came in. The yarn that she gave me was quite hairy and not heavily overspun. I wove with it and it was soft and luscious. That is how I wanted my yarn to be, not like the hard severely twisted llama thread I had been making.

And then it was down to the all-important sampling. Would it be too hairy to work with? Would it be a lot of really hard work clearing the sheds? Would it shred and would I have broken warps because the yarn couldn’t stand up to the abrasion of warp-faced weaving?

Thankfully, I didn’t get a “yes” response to any of the above questions. Of course, the sheds were more difficult to clear than those in a mercerized cotton warp but they were manageable. You can see the warp at rest above and the yarn is not curling up on itself. One thing I regret is my decision to use white weft as it did show through the brown a bit. I didn’t mind it showing at the edges as I knew that I was going to cover those with a tubular band. I used an alpaca weft that was balanced.

None of the warps broke but, then again, my warp was only 24″ long. The only problem I had was with some of the knots at the color changes which slipped undone as the yarn was so silky.

This is the alpaca warp for the tubular band and there it is being woven and sewn to the edge of the piece.

Now my passport gets to travel in first-class luxury even if I don’t. I made this sample piece into a passport pouch which is a vast improvement on the plastic wallet I have been using until now. It feels lovely!

Cutting the piece off the loom was the hardest part! There was still enough warp there to weave a little something. This was my precious handspun and I didn’t want to waste a bit but then I got the idea of using the leftover bits as supplementary wefts in another project and, with that in mind, I cut away.

Now with the Tour de Fleece approaching do I keep spinning the alpaca, go back to the nasty llama or take up the cotton?  Decisions…

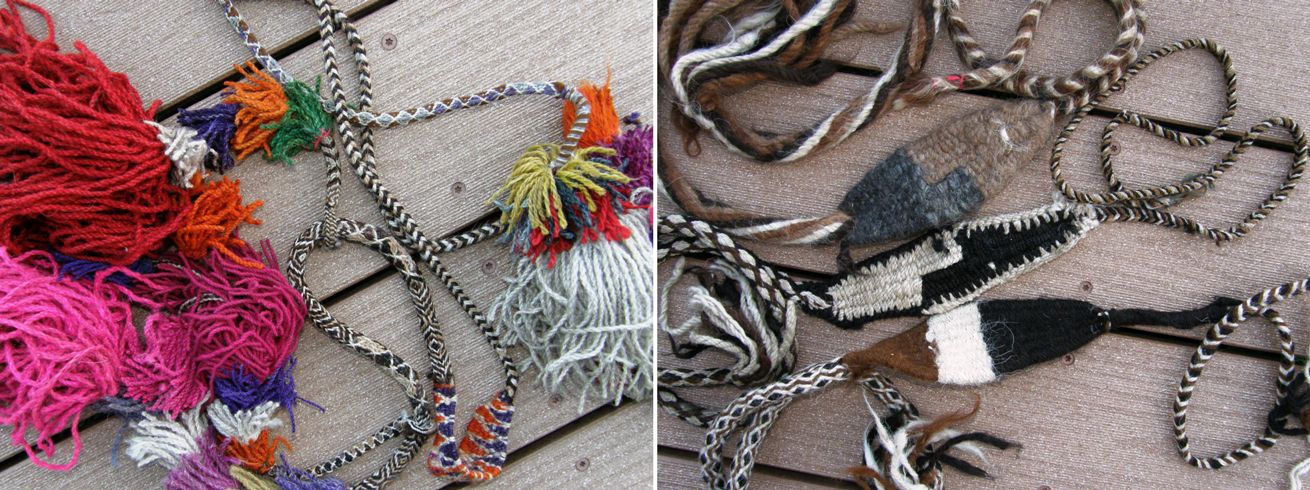
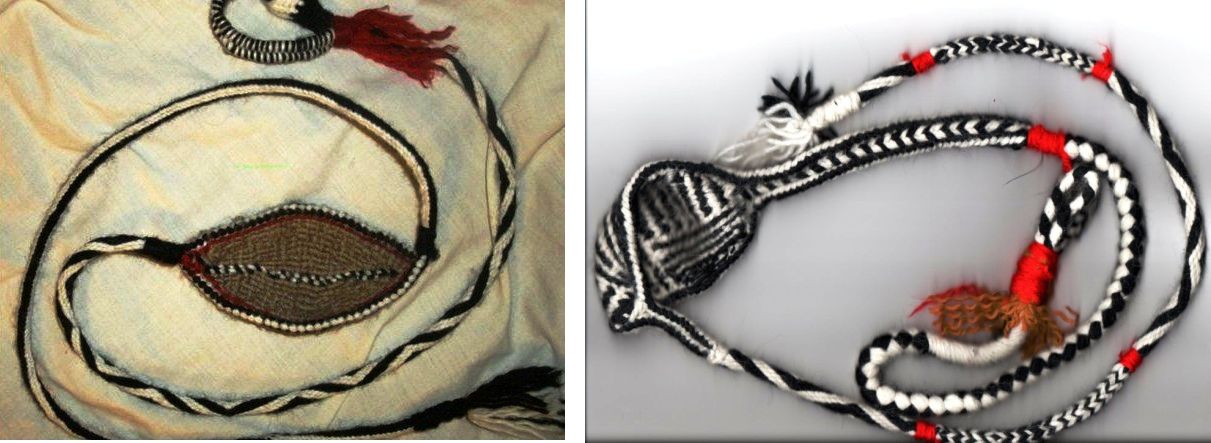
Actually, I am thinking of spinning some heavier yarn from the llama fiber to use, as it often is up in the mountains, to make slings. Well, I probably won’t make a whole sling, although I have made one before with a teacher in Yanque, Peru using llama fiber. It would be nice to have yarn suitable for making the braids rather than the whole sling. This will be challenging as I have been aiming for fine thread all along and now I am not sure if I can spin thick.

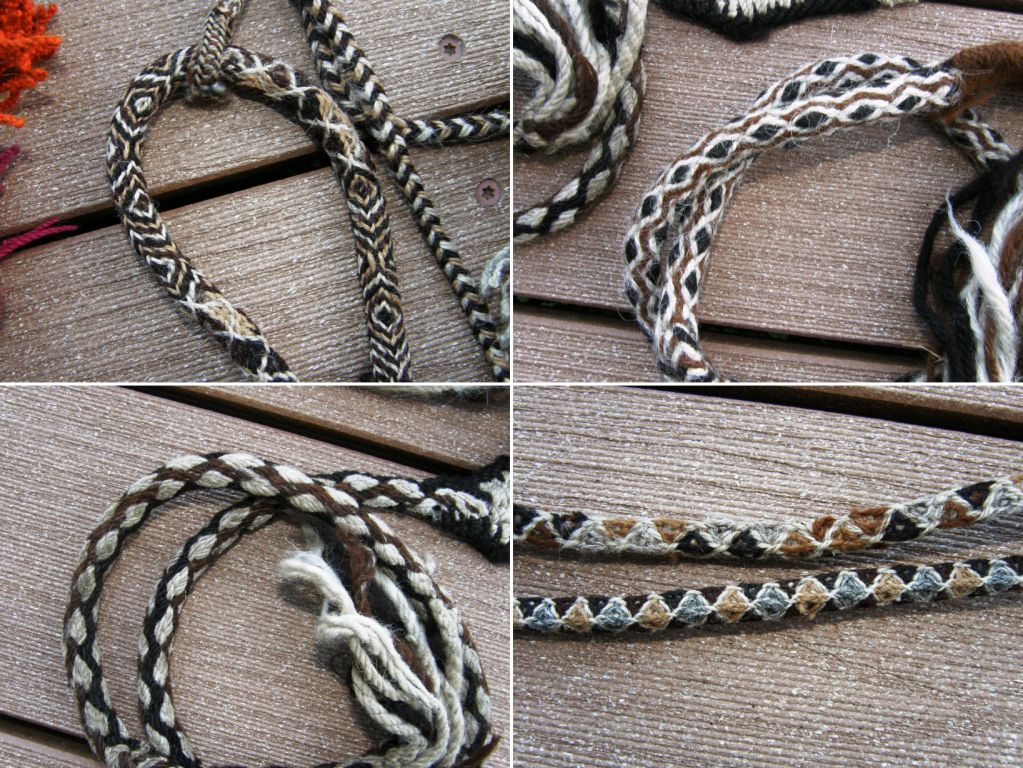
When I was in southern California, Martha shared her collection of South American textiles with me which included a number of beautiful Andean slings…

They have been made with such a variety of gorgeous braids and with the beautiful natural colors of the llama…

Ben Turner in Australia showed me two Tibetan style slings that he has constructed. While the cradles of the Andean slings that I have seen have been woven weft-faced, Ben tells me that Tibetan slings usually have twined, braided or felted cradles. The cradles of his two examples here have been twined.

I must ask him what yarn he uses for these.

And now on to cotton, the material most available to us “lowlanders” in Bolivia…

Another piece of sampling I did this week was using the bamboo reed on my backstrap loom. This was extremely clumsy especially with such a narrow piece but I will eventually come up with some kind of system for this. I am tenacious with these kinds of things and I am determined to make this work. I so rarely weave plain balanced cloth and I get ridiculously excited about it! I have a cotton shadow weave project in mind and later I would like to use some 10/2 tencel that I received in a swap to weave something.

This is all I have used the tencel for so far…a supplementary warp band, but I am hoping that there is enough contrast in the green and grey for shadow weave (I don’t have all that much of the ivory).

This experiment is with the cotton that I usually weave my warped-faced pieces with, more or less equivalent in size to the #10 crochet cotton that is available in the US. Above right you can see it wet finished and lying on top of a beautiful cotton dish towel that Betty Davenport wove. That towel is my inspiration and I can tell you right now that it won’t be going anywhere near a dish!

Betty wove this towel using cotton from Sally Fox Vreseis Ltd line of 10/2 in camel, coyote and green…all natural cotton colors! I had not heard of Sally Fox until Betty told me about her and her experiments with developing colored cottons (which reminds me that I did a spindle swap with a lady in the US who sent me natural green and caramel cotton sliver…must get down to spinning that).

Betty has a collection of small skeins of cotton in an incredible range of natural colors…all kinds of browns, greens and even a mauve from Peru. Some of the skeins come from Sally Fox’s experimental supply when she first started developing her standard colors. There are reddish-browns from Guatemala and dark browns from Peru as well as colors from some of the US southern states.

So, a four-shaft shadow weave with my nifty reed in place will be an up-and-coming project.

Well, until someone comes up with a natural terracotta-colored cotton, I have no choice but to dye some. So, this week I dyed some of my crochet cotton with the Dylon Terracotta Brown dye. The color is perfect! It is exactly what I was wanting for my Shipibo piece so that will be on the loom this weekend too.

That is the color below on the string heddles…yummy!

The Ravelry gang continues to weave and spin…

Naomi has tacked three plain warp-faced pieces together for cutting and sewing into a zippered bag. She is also weaving a pebble weave strap for another bag project.

Amber finished her pencil pouch. She wove the fabric for this using the simple warp float technique. Jennifer is piecing together a bag patterned with pebble weave motifs.

Tracy wove a sample band for the traditional Bedouin al’ouerjan technique which is simple and stunning. I have added some information about this to the warp substitution tutorial page which will be more meaningful to those of you who have already followed the initial instructions on that page. Helena in Brazil kindly provided a link to a pdf by Joy Totah Hilden, author of the book on Bedouin weaving pictured in Tracy’s picture, in which the draft for the al’ouerjan structure is provided on the last page.

After Jennifer and Tracy’s beautiful weavings I have no more fear of putting red and blue together! They have given me the courage to get that red and blue Central Asian piece I have been planning underway soon.

####################################################

And finally, I have a wee favor to ask of you all…I just started a page on Facebook for my Andean Pebble Weave book and would love it if you would take a moment to go there and hit the “like” button. Things like this could really help me in my future publishing endeavors.

I have a few exciting things on the drawing board. 😉

#####################################################

Backstrap Weaving – Variations on a Theme and a New Tutorial

I have been all over the place this week…sewing, braiding, twining and weaving four different patterning techniques. Keeps me on my toes!

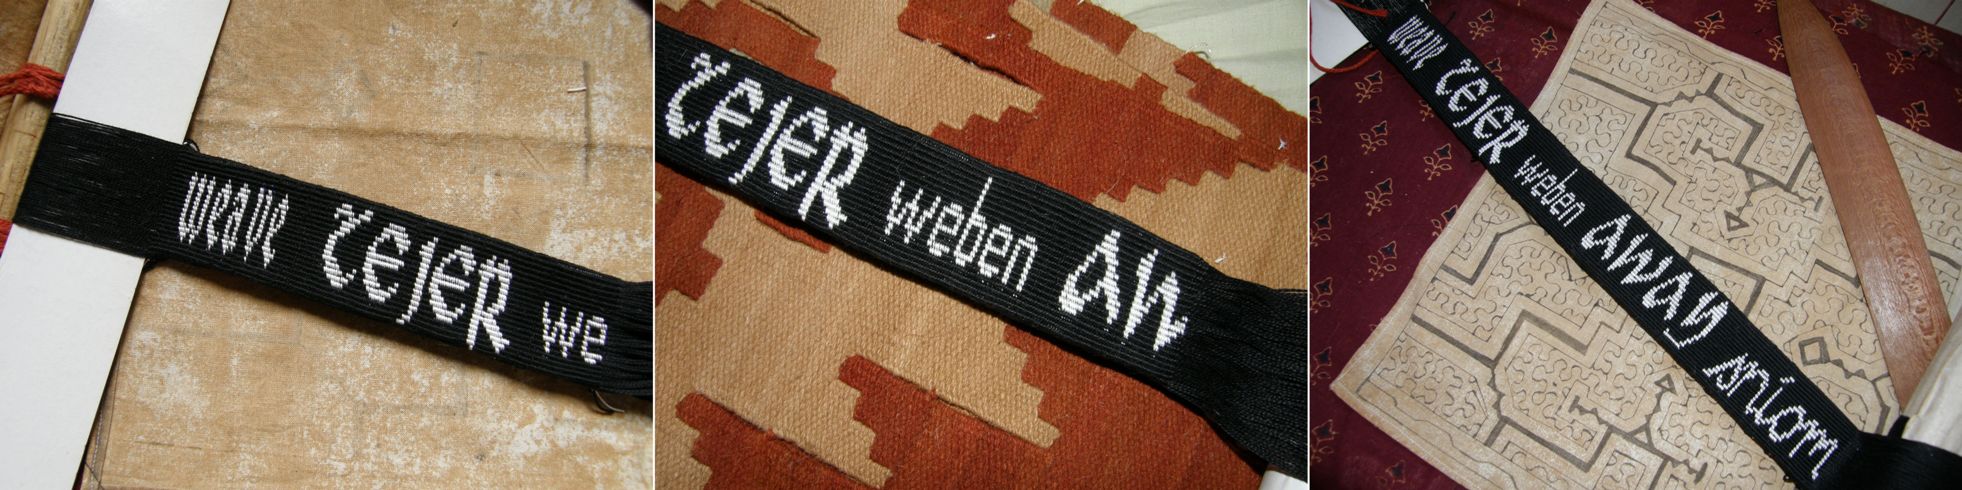
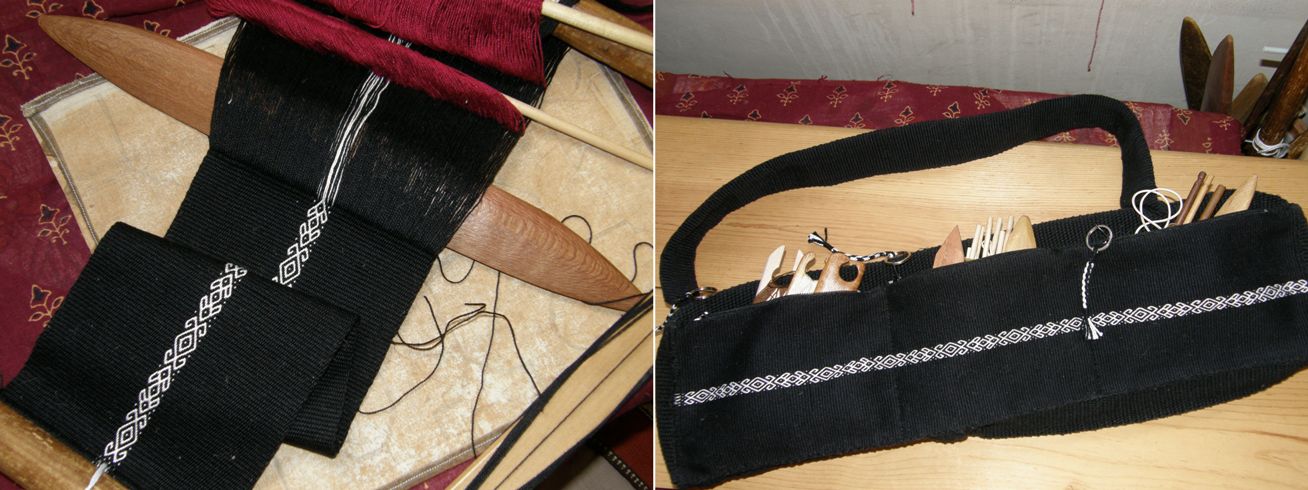
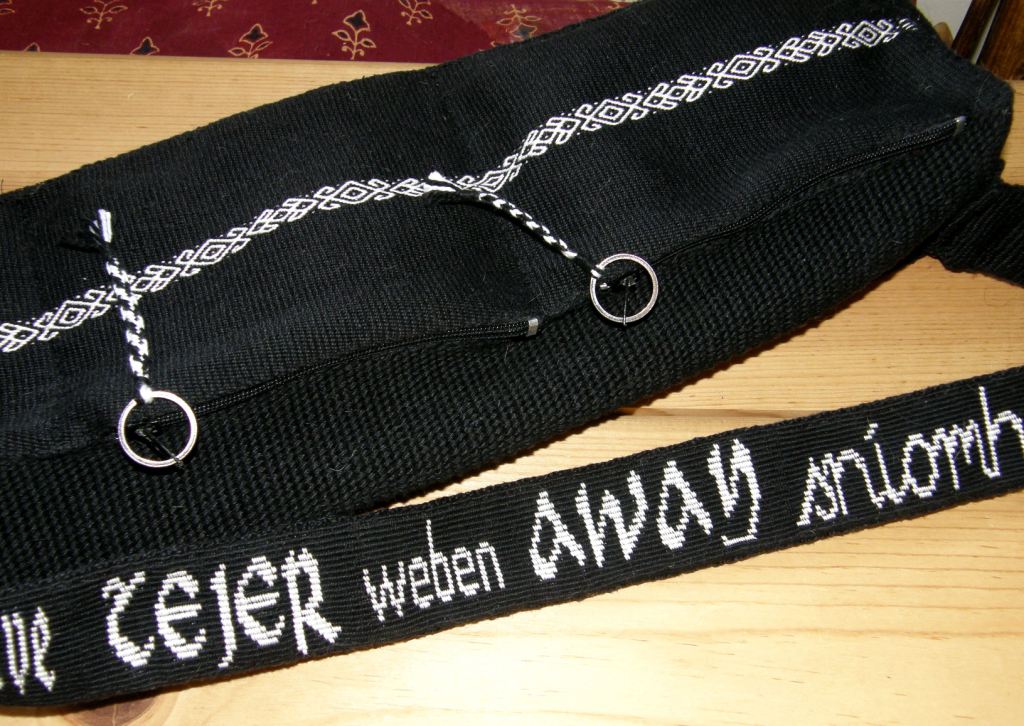
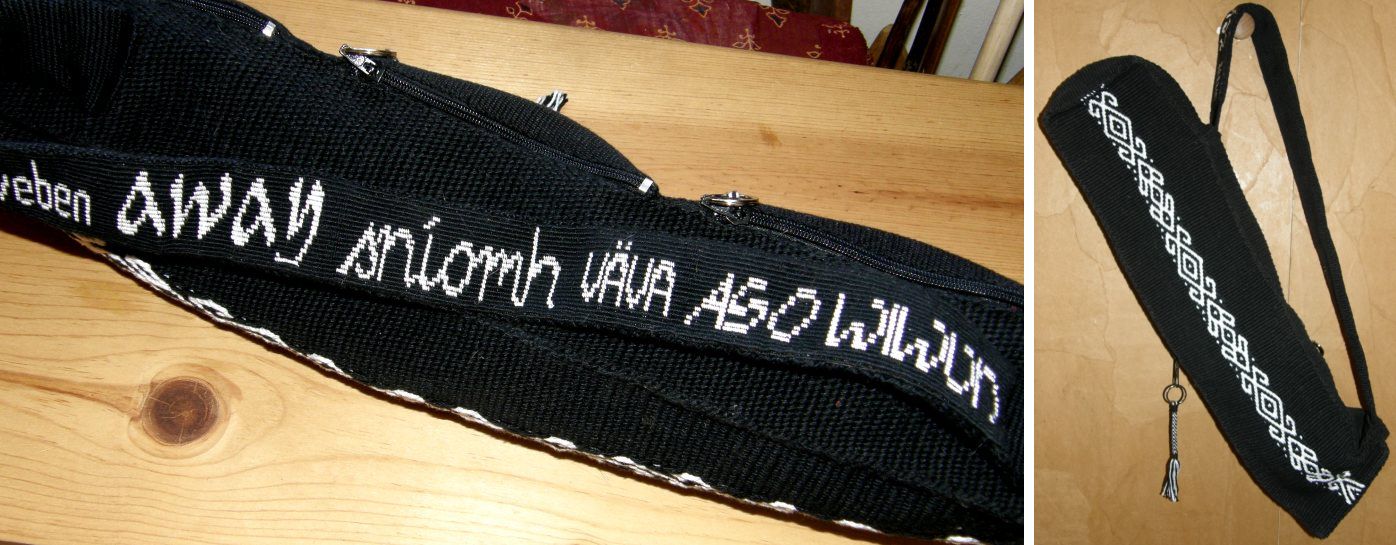
There was a lot of sewing as I finished the loom bag finally! This has been a long project mostly because I chose to twine the strap for the bag and that was slow slow slow. I decided to twine the word “weave” in different languages into the strap and, although I managed to gather a lot of words from different online buddies, I could only use a handful on the strap. I will save the others for another project.

There is some of the twining as it progressed. I used the English, Spanish, German, Quechua, Gaelic, Swedish and Nigerian words. As for putting the bag itself together, I am not much of a seamstress and so just made it up as I went along using a camera tripod bag as the model. First I made the front panel with a pebble weave design.

Then came the sides and the panels between which the zip would sit all woven in plain warp faced weave..

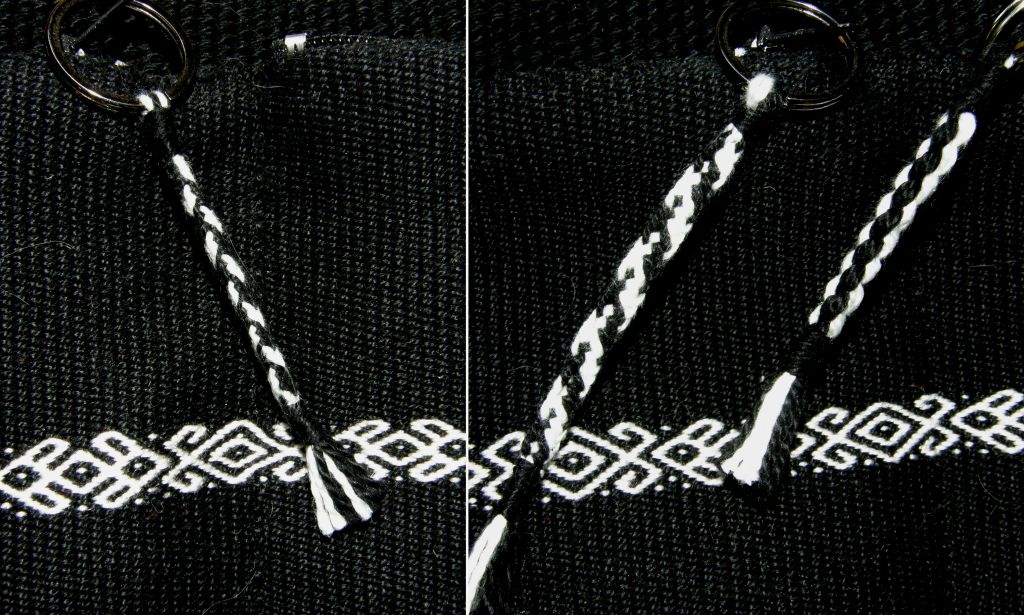
Once the zip was in I added a zip pull made using an Andean sling braiding technique.

Meanwhile I was still slogging away at the twining.

Then I decided it would be more practical to have pockets for all the smaller items like belt shuttles, pick up sticks and small swords and so I wove another thinner panel with the same pebble weave pattern.

The thin panel was sewn to the back of the bag. I have received two donations of large bags of assorted zips from online buddies so it was just a matter of diving into those and finding three small black zips the same size and I was set. I am getting pretty darn good at sewing these in!

Of course I couldn’t resist adding braided zip pulls. I made a square, flat-ish and round-ish braid for the the three pockets. I must do a tutorial here on that flat braid one of these days. I learned it for making straps for chuspas in Potosi.

Last of all was the strap. the last word to be twined was the Nigerian one which had been provided by a Facebook friend.The problem with twining is all the weft ends that are left hanging at the sides. I had to weave yet another plain weave band to sew to the back of the twined strap under which to hide all those ends. Actually it gives the strap quite a cushioned feel – quite appropriate for something that will be hanging off one’s shoulder.

There’s the last Nigerian word below (two words actually)…

DONE!!

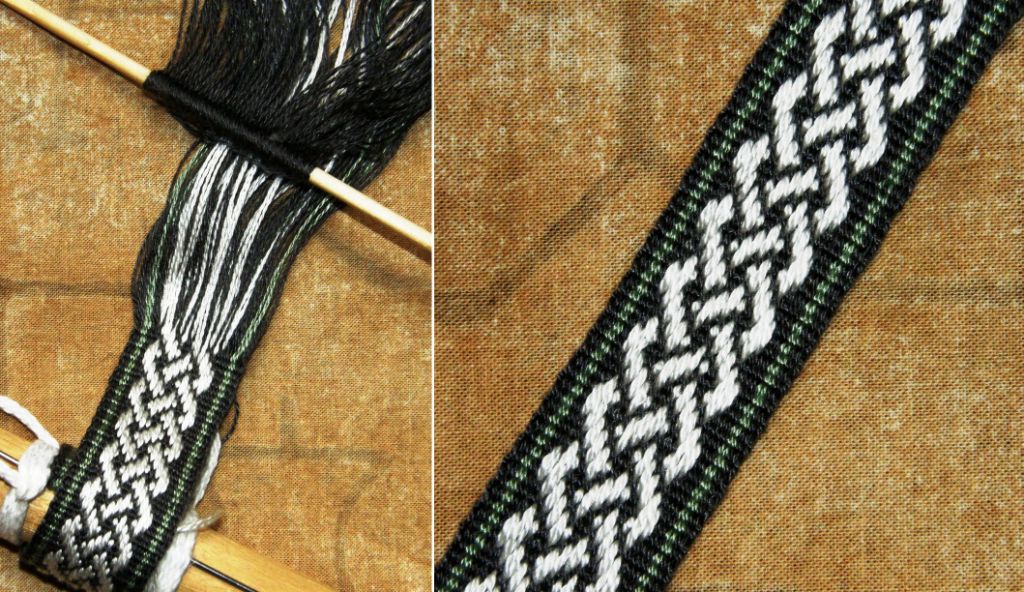
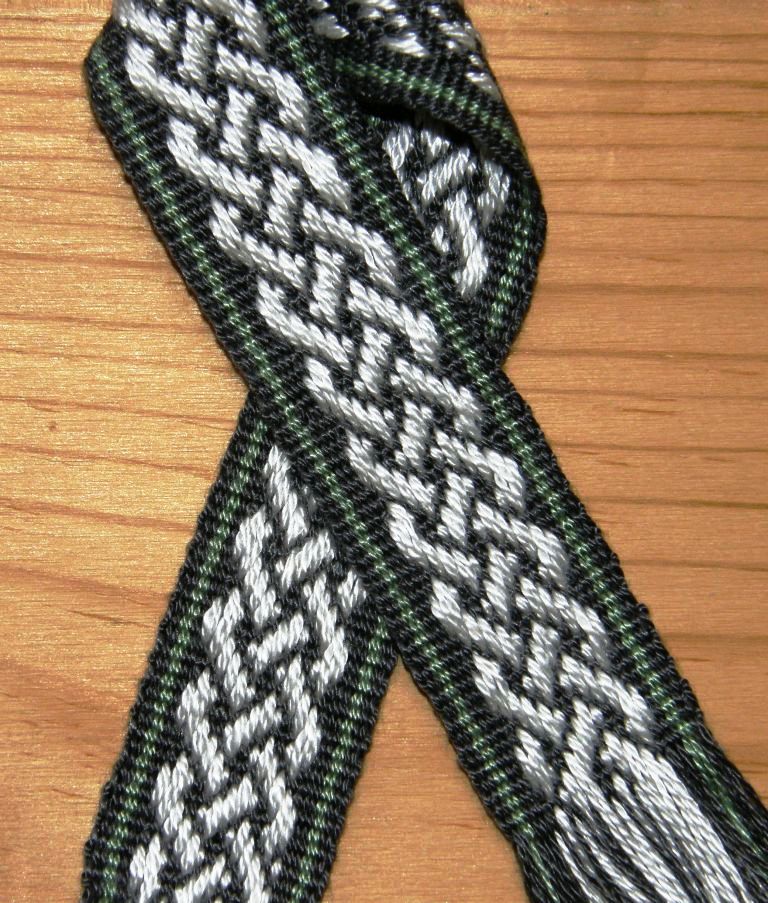
I wove a bit more on the tencel supplementary warp patterned band with its Celtic knot motif…


And I played a bit with a design I got from a Central Asian woven piece.

My friend Lisa photographed this piece at a reenactment event some time ago and sent me the image.

There was not enough detail to see what technique had been employed and I decided that it would look good anyway woven with a supplementary weft. The design is charted here.

Last weekend one of my online buddies sent me this same image saying that she had found it on her desktop and had forgotten from where it had originated and that she thought I might like to weave it in pebble weave. After I reminded her that it was actually from my blog, we both had a laugh and then I thought, “Huh, I wonder how this would look in pebble weave?” And then another “huh”. How would it look in other techniques?

Hence the title of this weeks’s blog post…Variations on a Theme.

Here is how it looked when I originally wove it using a supplementary weft…

I guess I am very lucky to have been able to travel so much here in South America and learn so many different techniques and designs. I have often met weavers here in my travels who are masters at two techniques and have been weaving them all their lives and who are delighted and bubbling with curiosity when I show them motifs woven in the same technique from another region within their own country. Others see a technique in my samples that they don’t know and plead to be taught it. Sometimes I have to push back my desire to learn from them in order to teach them. They are always so happy to have an “edge” over their other weaving companions with this new knowledge.

So, just for the fun of it I celebrated the fact that I have had access to many patterning methods and I adapted the Central Asian motif to three other techniques. There are still several more to try.


From left to right…in the same supplementary weft technique but in finer yarns (35 wpi ground), in double weave, the original supplementary weft (24 wpi ground), pebble weave and supplementary warp. I love them all!

I once taught pebble weave to a weaver in Ecuador. The weavers in his community weave with tapestries and belts patterned with supplementary warps. The pebble weave technique is not known. I left him with drawings of various Bolivian and Peruvian motifs to copy if he wished as I didn’t have woven samples to give him. Eighteen months later I returned to see his band with his attempts to duplicate the drawings but there was also a rooster motif which he had adapted from the typical supplementary warp belts and embroideries of his community.

And Juan definitely wanted to have an edge over the other weavers. He wouldn’t even teach the pebble weave to his brothers!

I shared a room at the tinkuy with a weaver from Cochabamba who was dying to learn the design on one of my pebble weave amulet bags. She already knew pebble weave but not this particular design. As there simply wasn’t time to learn it at the tinkuy I swapped my amulet bag for one of her spindles. I wonder if she has woven it and if her new design is envied by the other weavers in her community.

###############################

The Weave-Along in the backstrap group on Ravelry is coming to its end on March 6th with what we are calling the “big bang”. There seems to be a lot of weaving going on by the handful of weave-alongers and we have even been hearing from a lurker or two. Projects are still being posted…

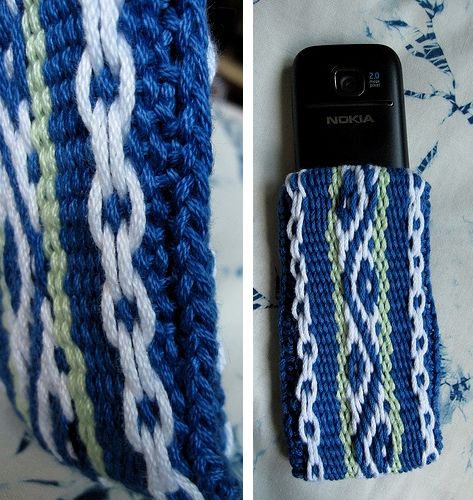
Tracy made one of her pebble weave bands into a cell phone pouch. She edged it with a single row of cross knit looping or Van Dyke stitch as it is in known in embroidery. (See the video in this post for instructions). Check out Tracy’s latest blog post on the textiles she saw in Syria.

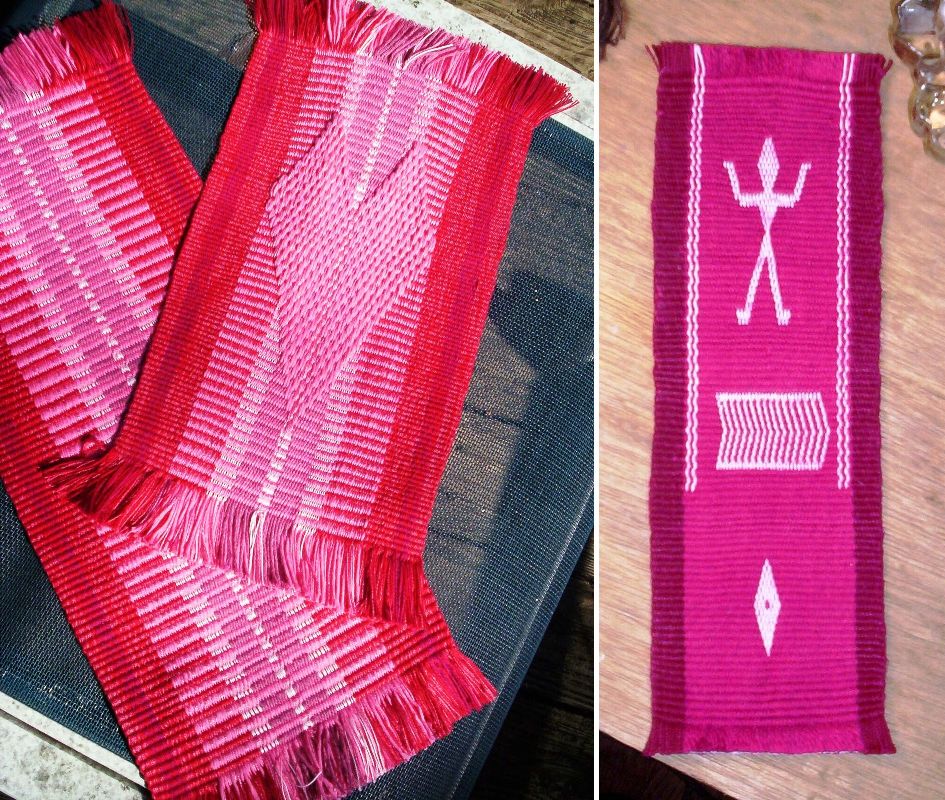
Marsha (PandulaArts) wove these pieces on the left patterned with simple warp floats and then dabbled in a little double weave.

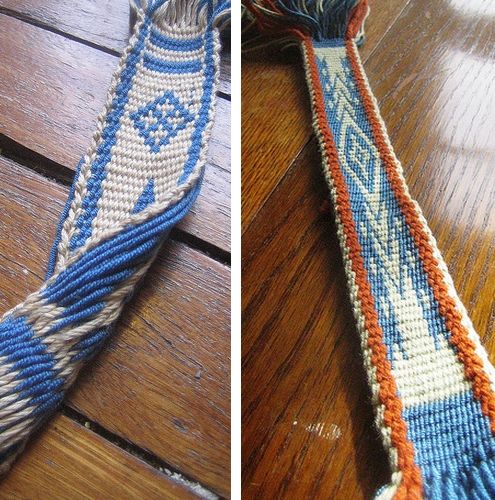
Toby, who is not participating in the weave along, but who is a regular contributor to the backstrap weaving group on Weavolution, has been trying warp substitution technique (on the left) using a Bedouin motif and double weave (on the right). The warp substitution technique is a very good introduction to the basic pick up patterning method which is also used to produce patterns in double weave. It is a good idea to start with this technique before advancing to double weave. As you can see, one of the disadvantages of the warp substitution technique is that it produces long floats on the back of the piece. The length of the floats can be reduced by carefully choosing designs and spacing. Toby’s design on the right is his own invention.

Tanyabe has been making her first steps in pebble weave on the left and Tracy is now weaving a Chinchero design in pebble weave. This design is charted in my book.

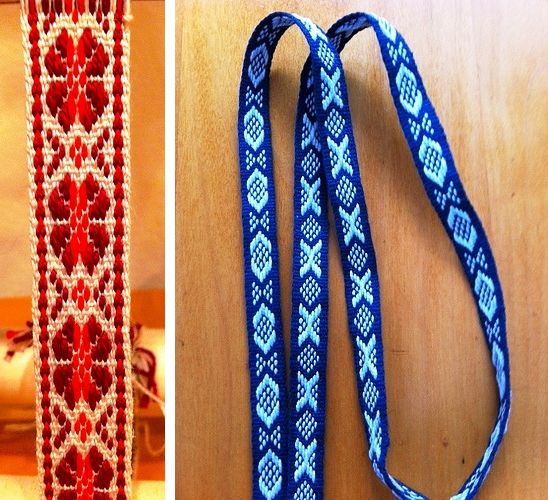
Jennifer’s Sami bands are gorgeous!! She has been doing these on her rigid heddle and inkle looms and I believe that she has one going in wool on her backstrap loom too. Once again I remind you that you can access instructions and patterns for these bands on the Yahoo Bands and Braids Group or by buying Sue Foulkes’s book here.

As folks finish off their projects for big bang Sunday, a couple have asked for a tutorial on the tubular bands that are often used here as decorative edgings for finished woven pieces. These are bands that are woven and sewn simultaneously to the edge of a piece of fabric using the weft as the sewing thread. There are several kinds of bands. Some are in plain weave and this is probably the easiest place to start learning about these.

I have put together a tutorial here with photos and a short video. I have also put a video there that I shot at the Tinkuy de Tejedores in Peru of a Bolivian weaver attaching a band to the edge of one of her bags.

These bands can be used to cover the raw edge of a weaving as I did with the edge of the cell phone pouch above. However, I would not attempt to do this until you have practiced the technique many times on the selvedges of your woven fabrics. It is far easier to learn to apply these bands to edges that are not threatening to unravel!

You can see above that a narrow warp is wound and set up with simple string heddles and a shed loop. I use a tapestry needle to carry the weft and sew the band to the fabric.

The purse on the left has been edged on three sides with one of these bands. See the full tutorial here.

#######################################

Greetings come from “bicycle Anna” this week who is now down in the Chilean city where I spent my first five years in South America. Punta Arenas is the southern most city on the South American continent. From the city you can see the island of Tierra del Fuego across the Straits of Magellan.

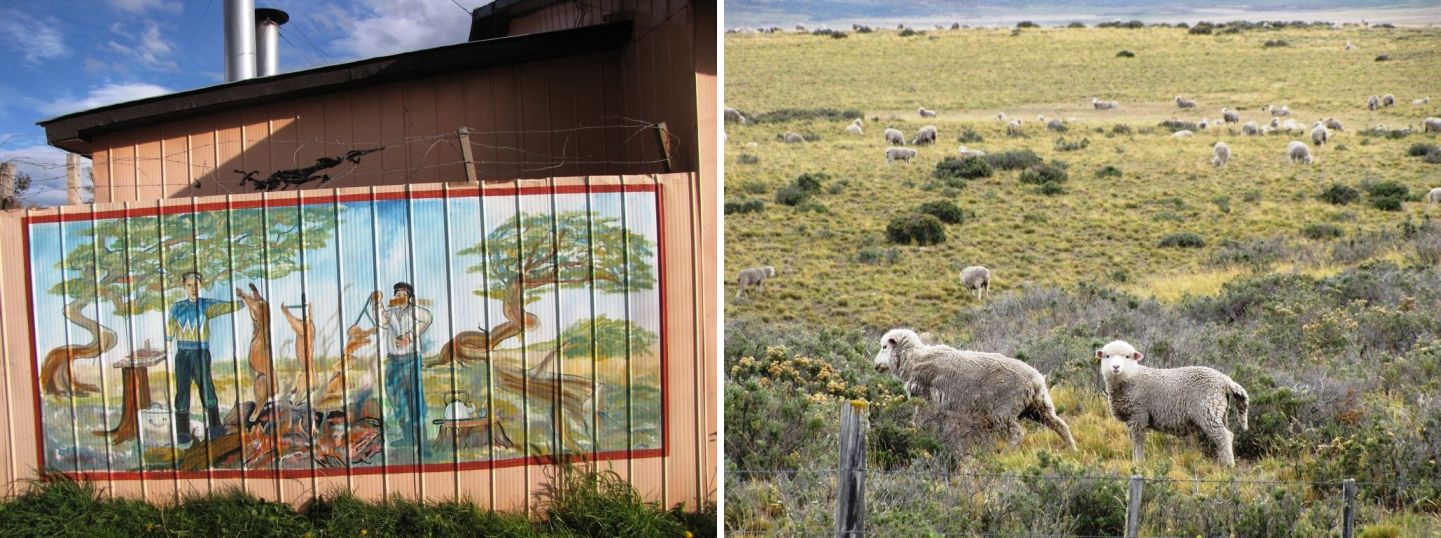
Anna stopped by to see me at home and have some weaving lessons. She is now in the land of sheep…tens of thousands of them and her new drop spindling skills are being honed. She is carrying llama and alpaca fiber that I gave her along with a Bolivian spindle and I am sure that she will be adding Patagonian wool to her fiber stash.

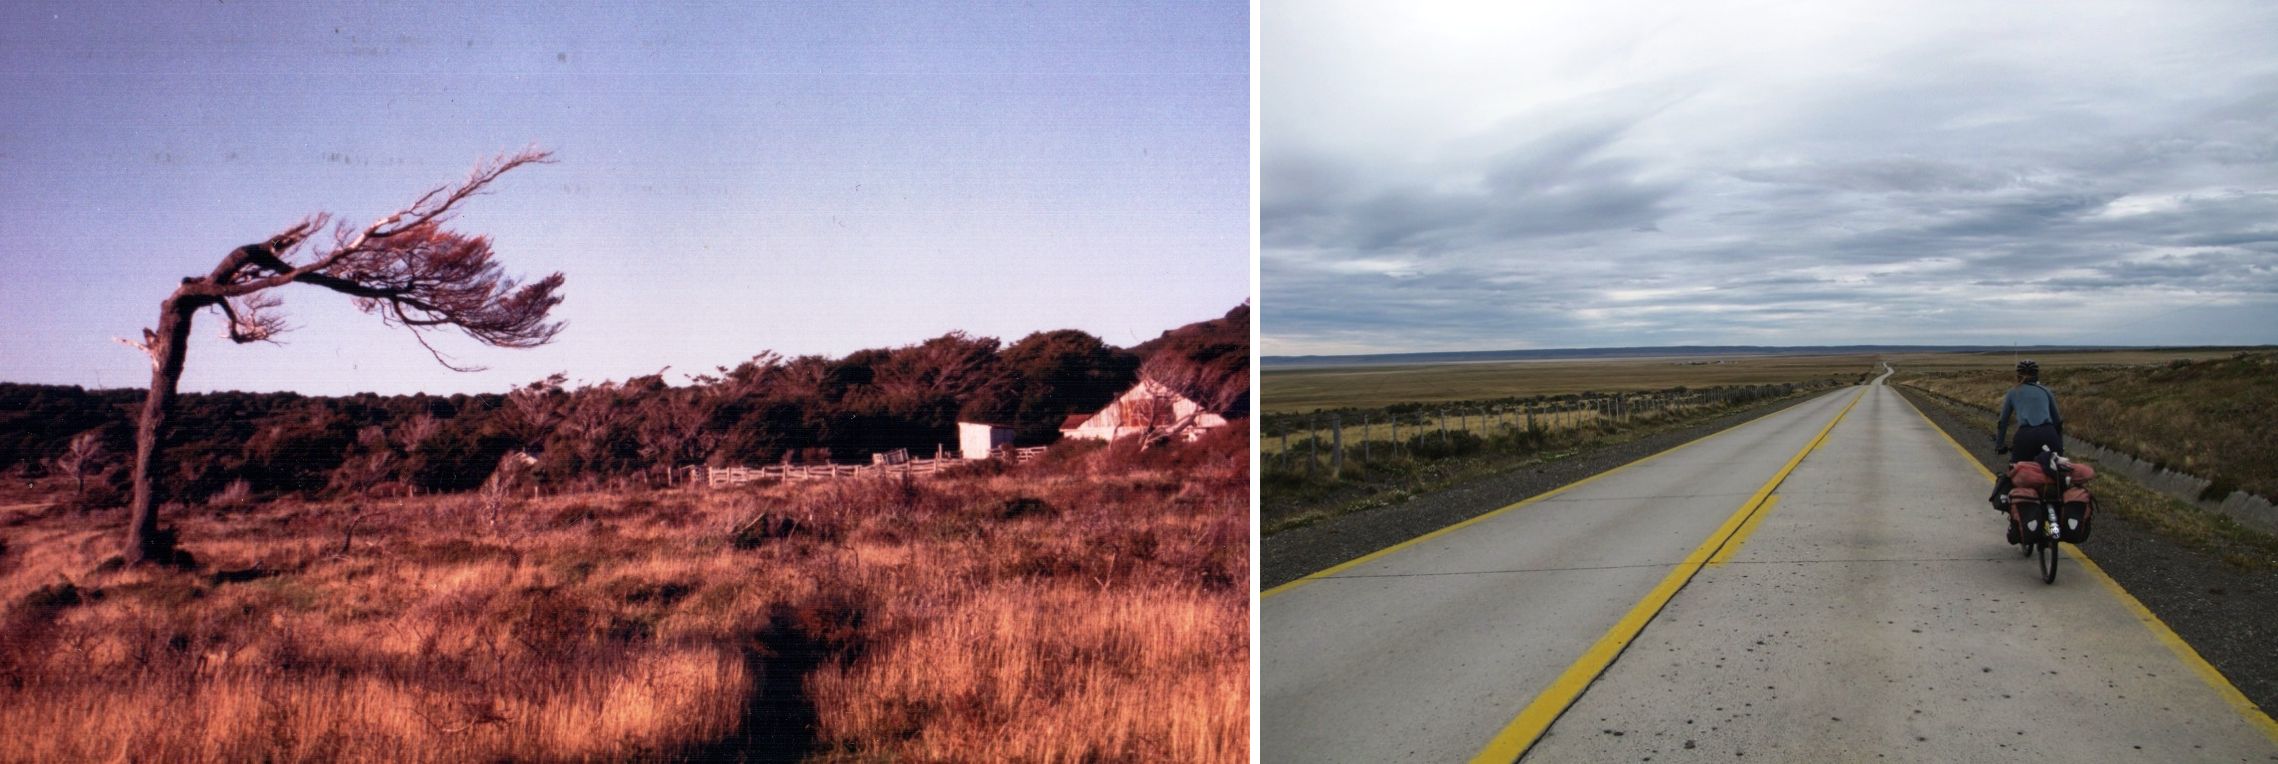
And look how she is getting on with her pebble weave with her loom tied to her bike! It’s summer down there…you wouldn’t think so from the gear she has on. The days are looong and if you get one without wind it can be heavenly.

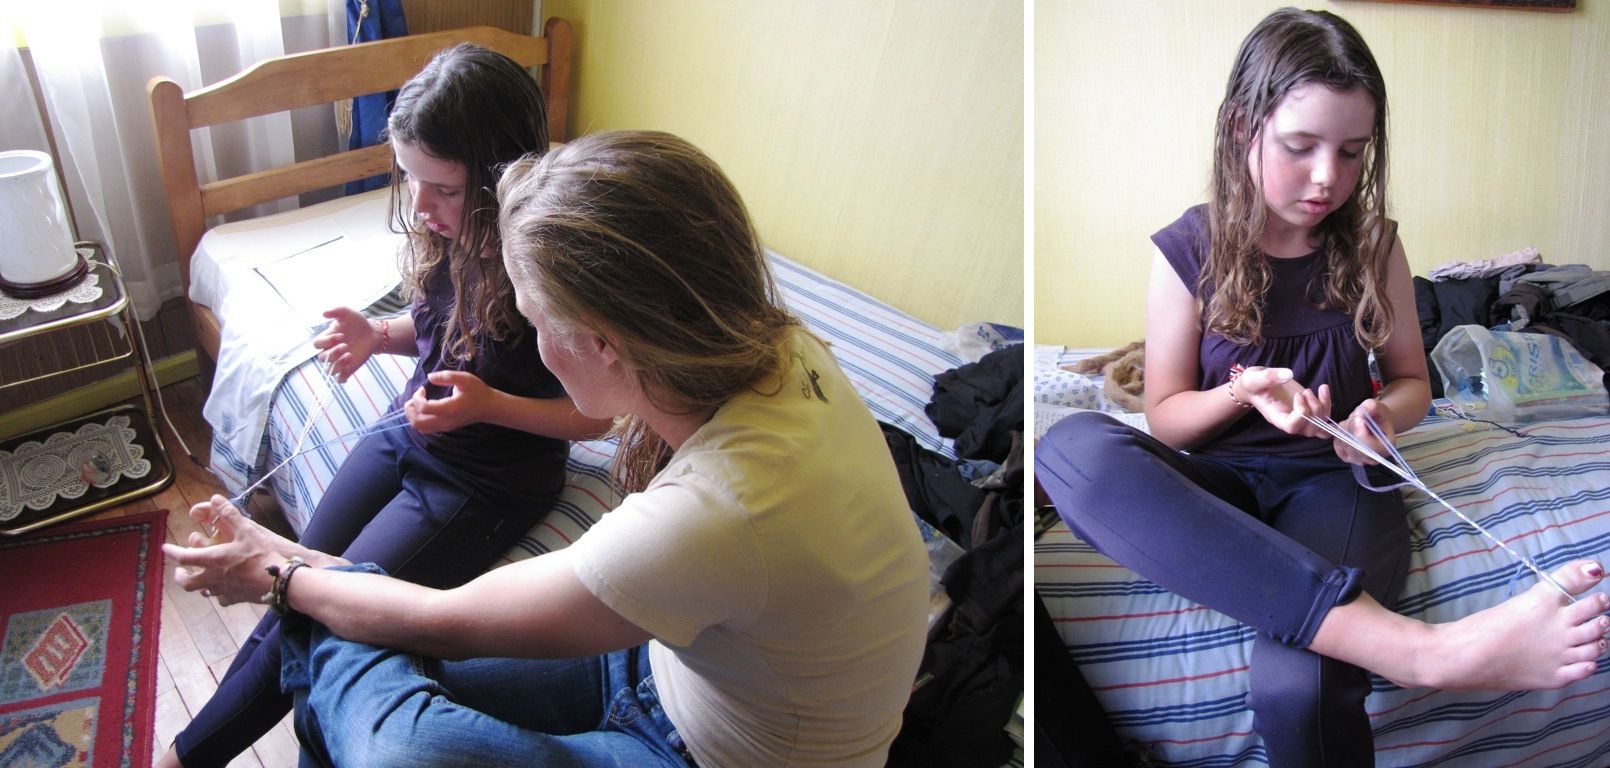
Anna has been spreading the fiber love by teaching young fellow cyclist Kate to make the six-strand finger loop braid that I learned in Potosi (one of the ones on my new loom bag).

I must warn you now that this is pretty much the end for this post of anything related to weaving or fiber as I indulge in a little nostalgia trip to the place I called home for five years…the wild Chilean Patagonia. Some of these pictures are Anna’s.

A house at left is painted with a scene depicting the famous southern Chilean lamb barbecue – asado al palo.

The Andes dip down into the sea before reaching this part of the world creating a series of islands, fjords and sounds. The land is scrubby and flat and rather colorless. Trees grow sideways with the constant winds.

Punta Arenas is a city of houses walled with corrugated sheeting. Rather than let it all run to rust residents paint with soft pastel shades, splashes of color in the bleak landscape.

This statue of an Ona indian is in the Plaza de Armas in the city center. The toe shines as visitors rub it to insure their return to Punta Arenas one day. Puerto Natales futher north is located on Ultima Esperanza Sound and is the gateway to the spectacular Torres del Paine National Park.

Craggy mountain peaks, fjords and wildlife in and around Torres del Paine…a rhea or ñandu walks with her chicks.

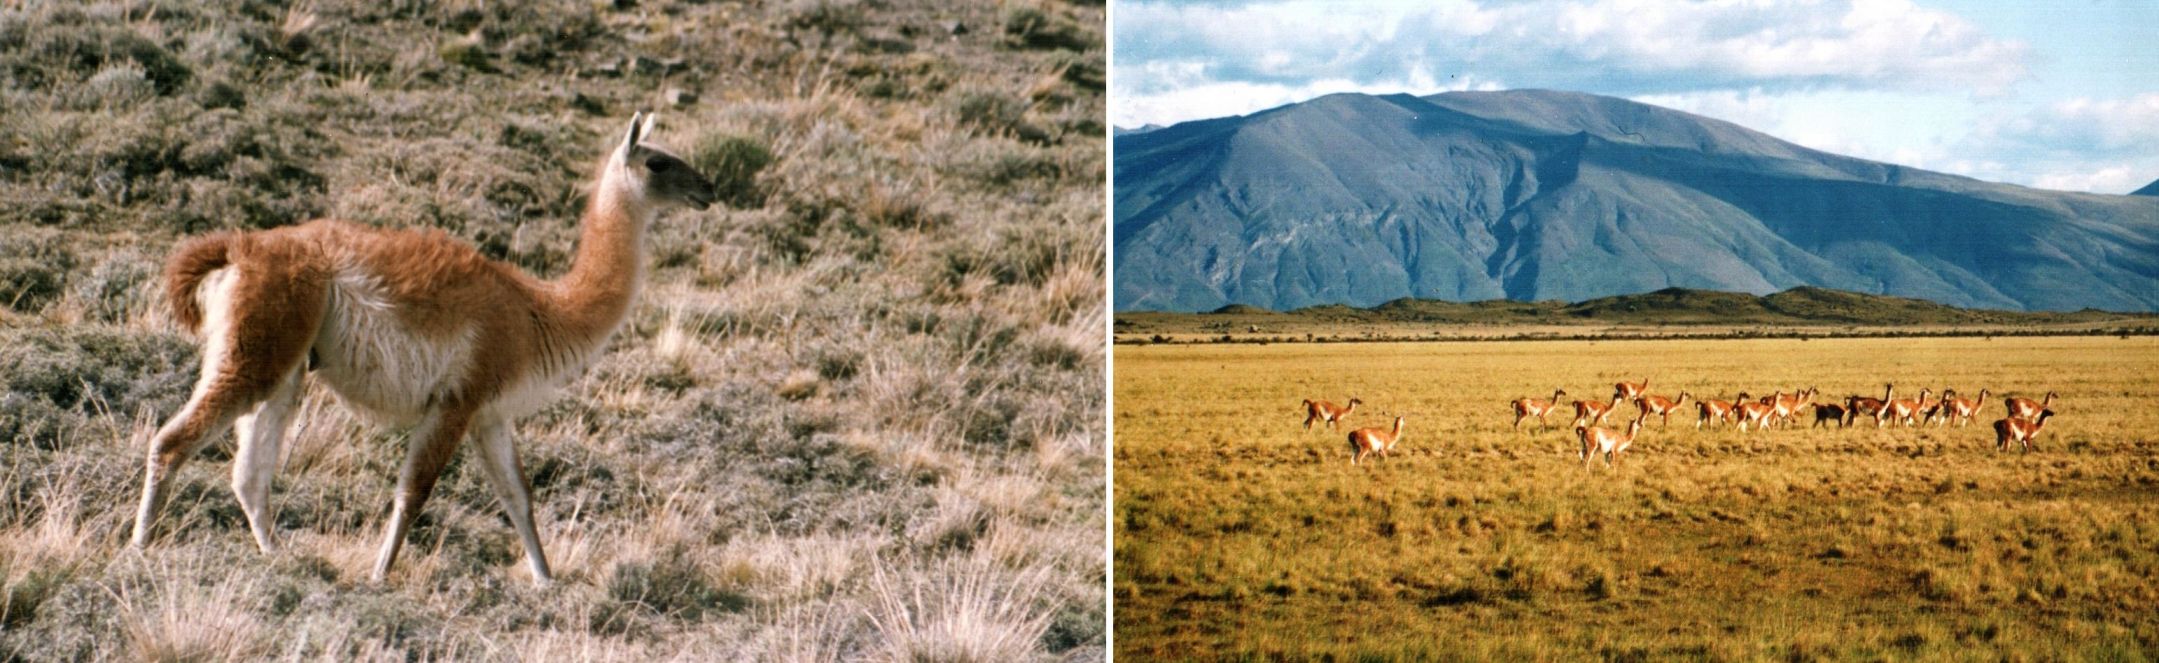
Herds of Guanaco roam  the park.

The hiking and scenery are superb but be prepared for a good battering by the wind! I got to go to Antarctica twice when I was there and thus add the seventh continent to my list. After all it is just across the Drake Passage! I will leave you with some shots from there.


Penguins, albatross and seals. This Albatross is in the Falkland Islands. Lots of whales too which I could never quite catch on film. And yes, I was weaving between all this!

They tell you to not to get within ten feet of the wildlife but if you just sit still on the beach long enough, the penguins all come to you!

Ah well, back to jungly steamy Santa Cruz. It’s time for coca tea and a mango!


Backstrap Weaving – There is no one “right” way

THERE’S NO ONE “RIGHT” WAY….and A NEW TUTORIAL

I went to visit Angela again (see last week’s post) one morning this week to see how she has been progressing on her wall hanging and give her copies of some of the photos I had taken during the previous visit.

She had several projects going at once and was very pleased as she had just been given an order for 1500 woven greeting cards from her regular Christmas customer. Now she is planning a trip to her hometown of Isoso to organize the other weavers there to help complete the order. She told me that when she took on this task last year she had been able to weave ten cards a day.  Imagine!

The smaller of her two looms is occupied with this gorgeous wall hanging which I watched her warp on my last visit. As I told you last week, the designs that the Guarani women weave in the Moisy technique are nothing like anything you will see anywhere else in Bolivia.

And here is something else she is working on in the Moisy technique…


The band says Centro Cultural Boliviano Americano which is the institute where I taught English for eleven years. The teachers are wearing these around their necks to hold their ID cards. Gee, I wish we had had these when I was there! The band includes a small snake skin design. There are over sixty teachers there and so I imagine that this task is keeping her somewhat occupied as well!

Lettering! I was excited to see that but haven’t taken a good enough photo to get a really detailed look.  I think I will ask her to weave me an alphabet band if she ever has the time!

Another thing about which I am very tickled is that she has put one of her sets of heddles on a stick (see photo above). She had asked me to teach her how to do it on my last visit and now here she is using it. If you watched the pick up video in my last blog post you will see that opening the lower of the three sheds is a little tedious with the loose string heddles that she makes. So now she is using the stick on this lower heddle with the extra hitch as I showed her.

The actual stick that she is using as her heddle stick is a large wooden needle which she uses to pass the weft when she is weaving a four-selvedge piece. When she is closing the final piece of weaving and there is very little room in which to manipulate the sheds, she passes the weft under and over each warp with this needle until there is so little room that she has to use a regular steel needle. I loved this needle and, as she has three, she offered to sell me one.

And then I remembered to ask her about spinning. Yes, of course she knows how to spin cotton and she had a tiny bit of cotton to demonstrate. Just a touch of saliva on the spindle tip got her started. Of course, she is usually seated when she spins. This was just a quick demo. She told me that in Isoso both white and brown cotton is still cultivated (there is not a single boll to be found around Santa Cruz although it used to be a very large and important cotton growing area) and that several women still spin and ply their own cotton and carry their spindles about with them when they are plying.

However, she told me that those who grow the cotton are very careful to keep their hold on the small market and won’t sell it with the seeds. Sounds good to me! Deseeding cotton is not a fun task. I did a bit of that in Ecuador although it was fun there as we sat together in a chatty group and worked.

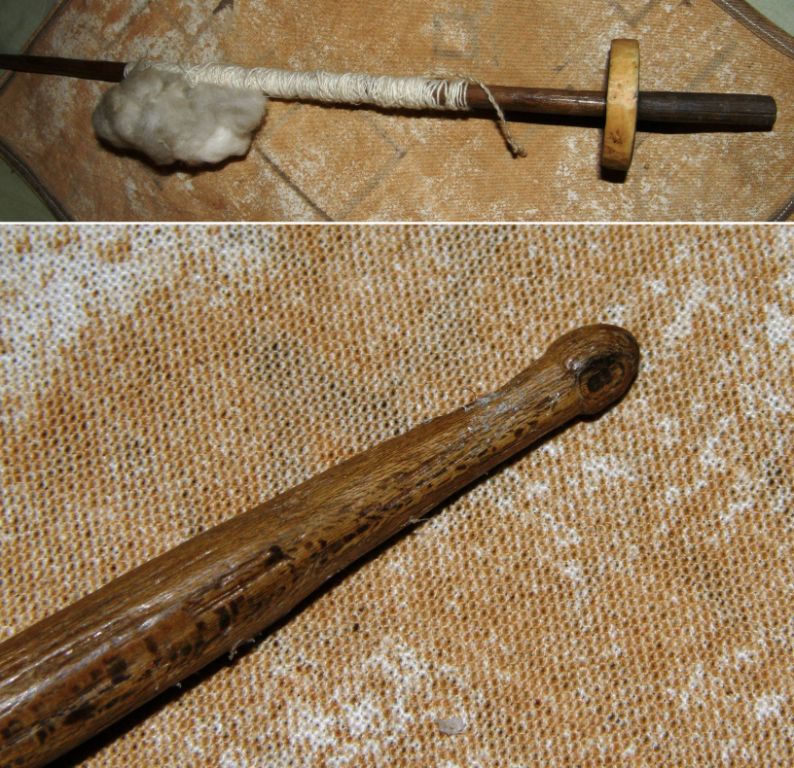
Angela’s whorl is plastic and a spindle that I bought years ago from the store where she used to work has what appears to be a piece of the sole of a shoe as its whorl. However she tells me that in Isoso, clay whorls are used. Guess what I have asked her to bring me from Isoso when she returns next Wednesday.

Above you can see the spindle I bought here in the city. The shaft is essentially the same as that on Angela’s spindle. I love the little knob carved into its end.

I also took home the yellow and black sample pebble weave band that Angela was warping up in the video that I put in last week’s post. She has warped this and set up the heddles quite differently to the way I was taught in Peru and so I can take a closer look at it now at home.

And this is kind of what I am alluding to in the title of this post. There is no one “right” way to do these things and I am constantly astounded by the similarities and differences I see in the way people are setting up their looms and weaving as I travel around. I had never seen anyone make string heddles the way Angela does and she was keen to learn the way I had been taught by my Navajo weaving teacher years ago. There is always room to learn something new and adapt your techniques. I am looking forward to a chance to try Angela’s way of doing pick up. It doesn’t work on the backstrap loom, believe me I tried it!

I wish I could do a tutorial on all the ways I have been shown to make string heddles so that you can try them all and see which way you prefer. Making the string heddles takes practice…string and fingers all over the place and then you just get them done and find that there are some that are woefully short…

I ran into Jamie’s blog last weekend where she had been battling to make string heddles following my video. It’s a good thing that resourceful Jamie came up with her own solution to the problem, made some heddles and wove a pebble weave piece.

Above right you can see the individual string heddles that she made and successfully used on her warp. She says that this way is much faster. Well, I had to tease her about that because I disagree 🙂 but I can definitely see that these are much easier in that you get guaranteed even length heddles. If you are an inkle weaver you probably already have a bunch of these heddles lying around that you can use. If you don’t, Jamie made a nice tutorial on her blog showing you how to make them.

Above left you can see Helena’s (telarahna on Weavolution) solution with her nifty re-useable heddles. She says she needs to clean them after a project as bits of yarn fluff adheres to them but then they are good to go.

So, if you have been trying to make heddles the way I have shown it here and have been getting frustrated, there you have two nice solutions. Try different ways and see which you prefer and, as Jamie so rightly says in her blog, it’s easy “once you get the hang of it”.

Speaking of “getting the hang of ” something, I spent a great part of last weekend trying to get the hang of tubular woven bands and am pleased to say that I succeeded!…eventually.

This is kind of my warm up for the tinkuy (gathering of weavers) which I will be attending in Cusco next week. I signed up for a class on tubular woven bands but, as it is only a morning session I have doubts about whether we will have time to cover the tubular band that I really want to learn.

I used Adele Cahlander’s booklet pictured above. It is still available out there for under ten dollars. I have had this book for at least thirteen years and have never made the tubular bands. I guess I tried at one point as I have scribblings in the margins and have penciled in the colors that I was using but it seems I gave up as I have nothing to show for it.

The book has two versions of the band that I wanted to make. One has a sequence of six steps and the other eight. The problem is that there is not a picture of what the six-step version is supposed to look like. It is in fact a slightly imperfect version of the eight-step one and I spent a lot of time trying to figure out why my six-step band did not look like the bands on the cover of the book. I did not feel encouraged to try the eight-step version if I could not even get the simpler version right but in the end I decided I would just go ahead and try it.

In the pictures above you can see the eight-step version on the left. See how it has two neat diamonds enclosing a center spot. In the six-step version the diamonds are not quite so neat and well defined, they overlap and cross and they actually get progressively messier as you proceed. This is just so you know what to expect if you buy the book and have a go yourselves.

Once I had this sorted I had the crazy urge to edge everything I could get my hands on with this tubular braid! I learned a tubular braid here in Bolivia many years ago but it is a very much simplified version of this one and looks nowhere near as nice.

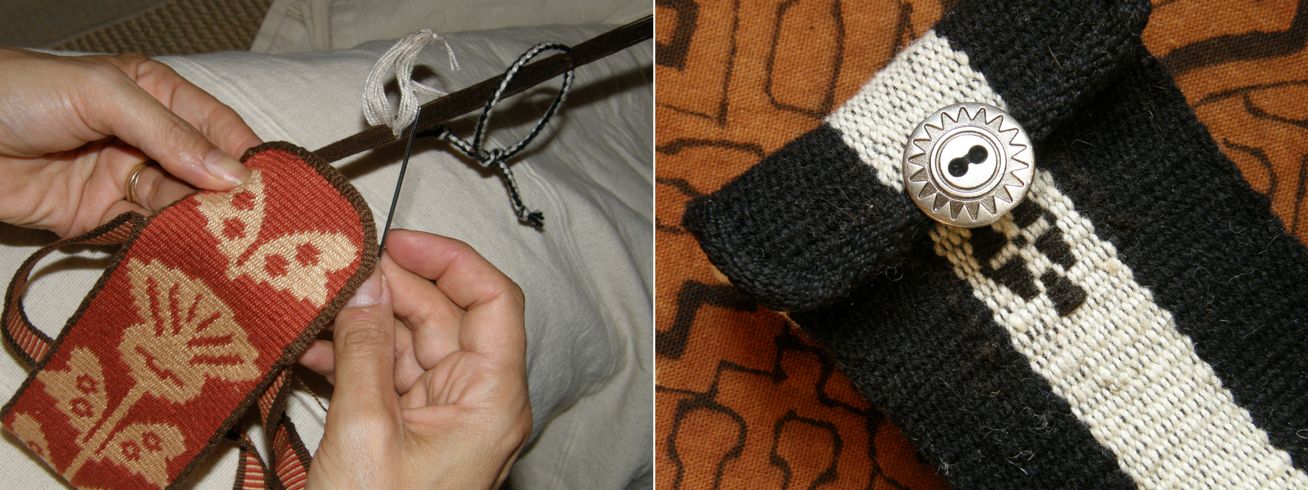
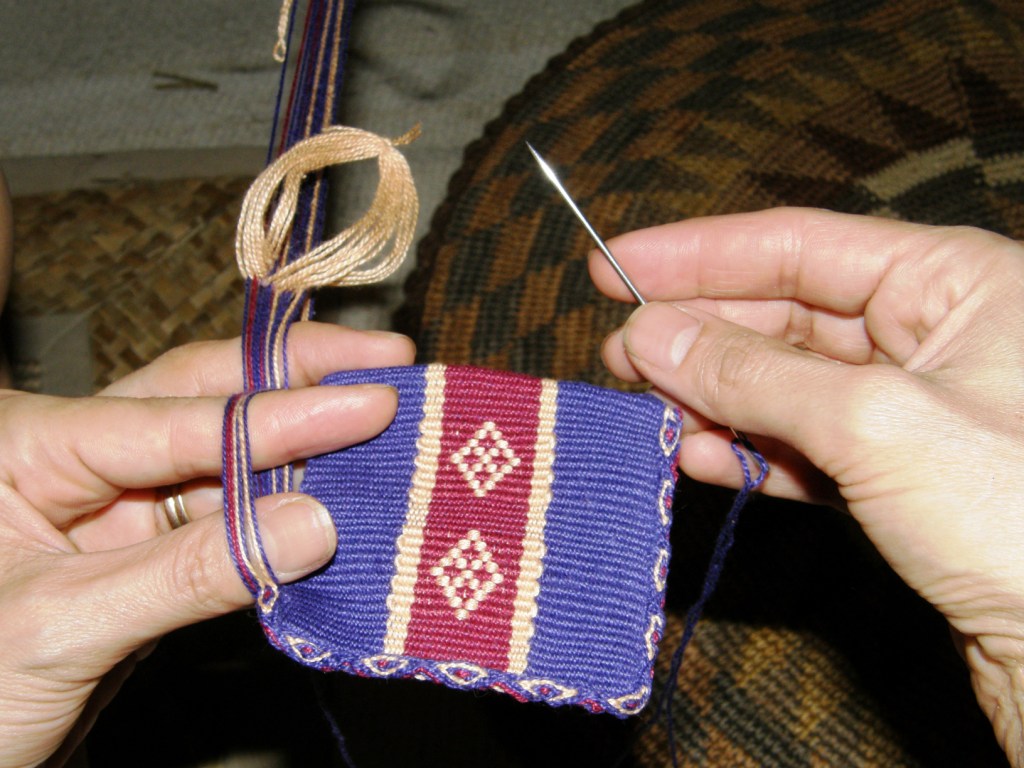
This is one of those bands that are generally simultaneously woven and sewn to the edge of a textile using the weft as the sewing thread. So this is what I did with my Tarahumara bag and I love it!

I was so excited about having learned how to make these bands that I could have quite easily dug out everything I have woven and edged them all with them . But I resisted and decided to weave a miniature piece where I could put several finishing techniques to use. The Cahlander book also has instructions for crossed warp bands which are very interesting. So I decided to make  a small amulet type of bag, edge it with a tubular band and make a crossed warp band as a strap.

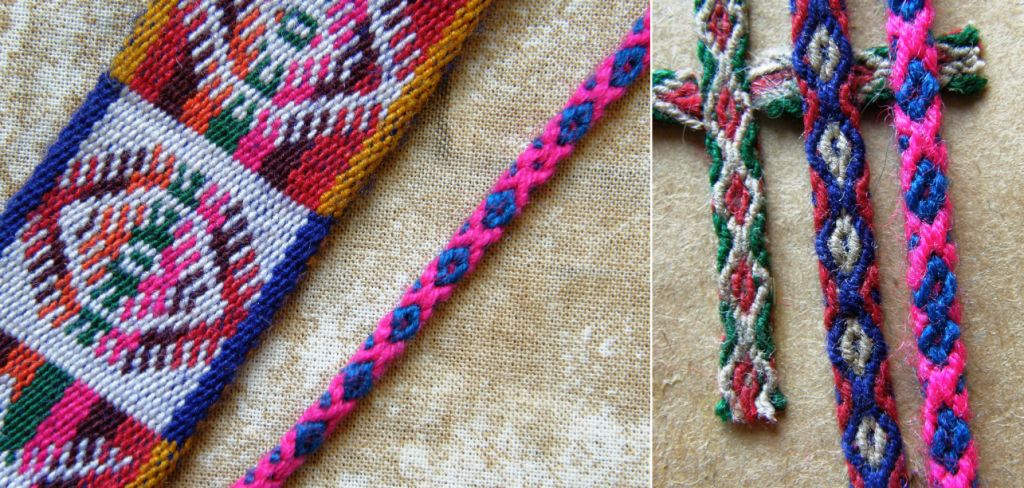
Crossed warp bands are used here in Bolivia as ties on the ends of belts like the one from Potosi seen above left and as chin straps for hats like the two wider bands on the right.

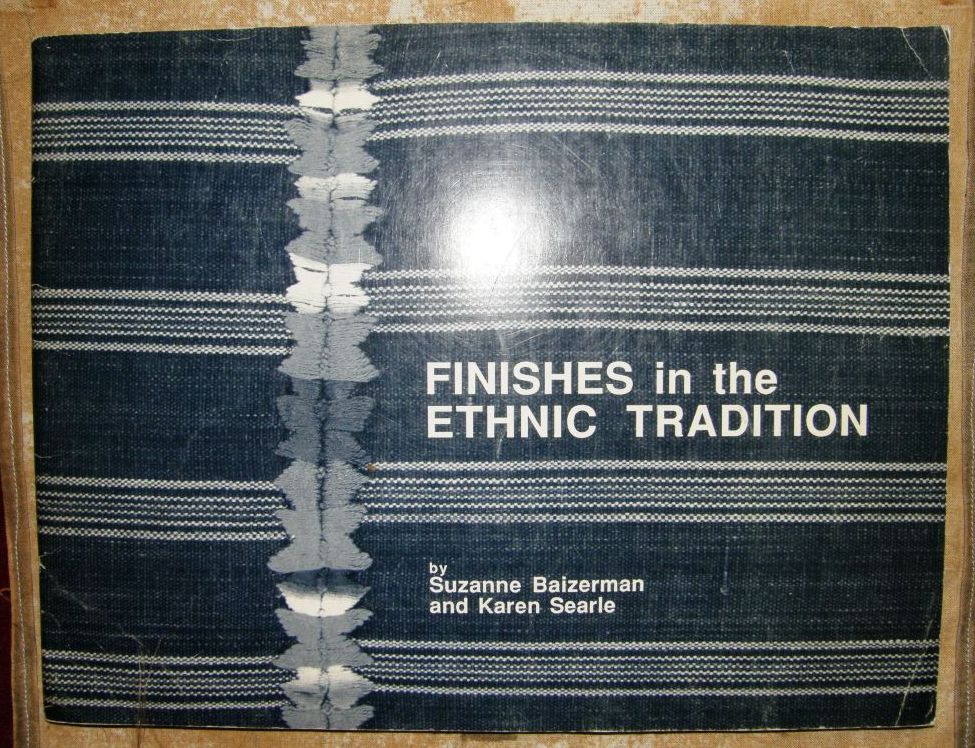
And then I fished out Karen Searle and Suzanne Baizerman’s wonderful work on finishing techniques and found the instructions for Bolivian pompoms I had made years ago to decorate my zampoña.

This book is full of all kinds of useful finishing techniques from around the world

First I had to brush up on the crossed warp techniques.

Then I wove the wee bag. I decided to keep it simple and warped up for plain warp faced weave so I could weave in a small motif with a supplementary weft (see the tutorial here).

A very simple design and there’s the pattern chart for you if you would like to use it.

Next I wove and sewed on the tubular band.

And I had fun making and attaching the tiny Bolivian pompoms.

But darn, I didn’t have time to make the crossed warp band for the strap so I have just placed thread there in the photo so you can get the idea. I am thinking of doing cross knit looping as an edging for the top of the bag too. Now I am mad for not thinking about this earlier. I think that these would have made nice gifts to take to the tinkuy- bags covered with little Bolivian techniques (although the suplementary weft motif is not Bolivian).

However I did find time to put together a NEW TUTORIAL. This one is on warp faced weaving with warp substitution which is the technique I used to weave the band with Bedouin designs that I showed you a couple of weeks ago.

Below is the sample band I wove in order to put together a set of instructions for you.

This is a great stepping stone to one-weft double weave.

You will learn the kind of pick up you need to do for one-weft double weave without having to deal with the extra manipulations and steps involved with weaving the doubled layers.

If you are interested in Bedouin weaving Helena (telarahna on Weavolution) gave me a link to an article by Joy Totah Hilden, author of the book on Bedouin weaving from which I got a lot of these designs.

Alaa (weave2 on weavolution and Ravelry) also gave me two great links to follow on this topic here and here.

And for the Spanish-speaking visitors to my blog, I have put up one tutorial so far in Spanish – the one on simple warp floats (although I haven’t found a way to say “simple warp floats” in Spanish. The literal translation sounds ridiculous!). There is a tab on the header photo and side bar.

Para las personas que hablan español he traducido el primero de los tutoriales que puedan ver aqui. De vez en cuando pueden chequear haciendo “click” en la pestaña “tutoriales en español” en la parte de arriba de la pagina. Alli podran ver si he traducido algun otro tutorial mas.

I may have time to squeeze in one more post before I go to Cusco on November 4th, but if you don’t hear from me you will know where I am 🙂