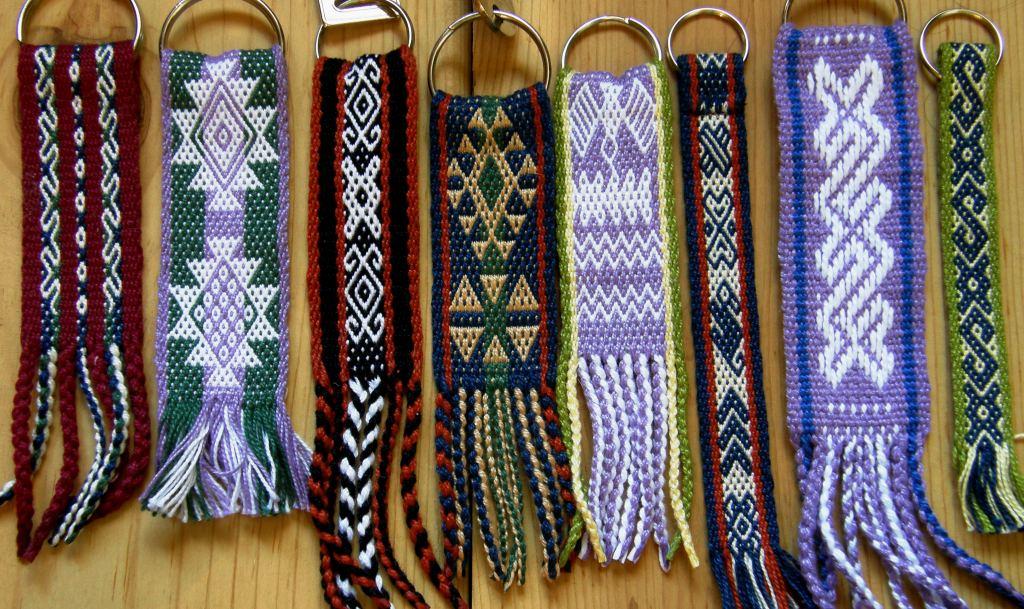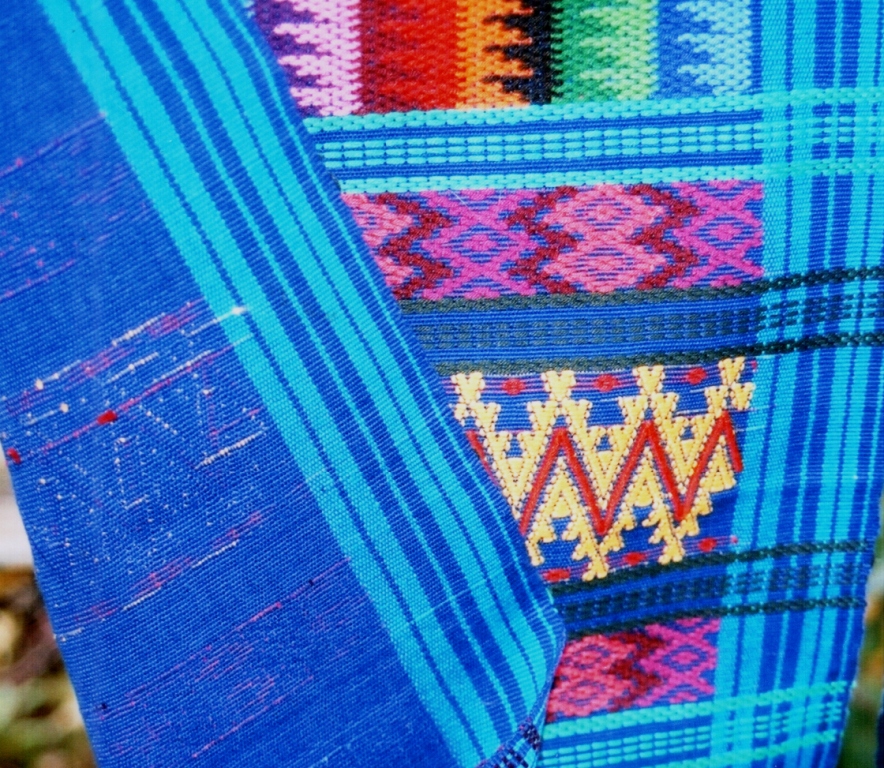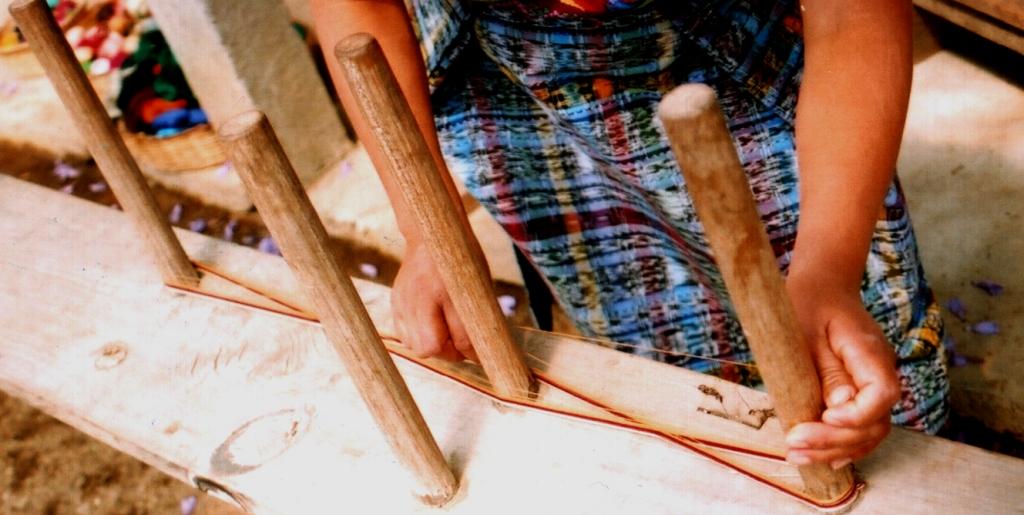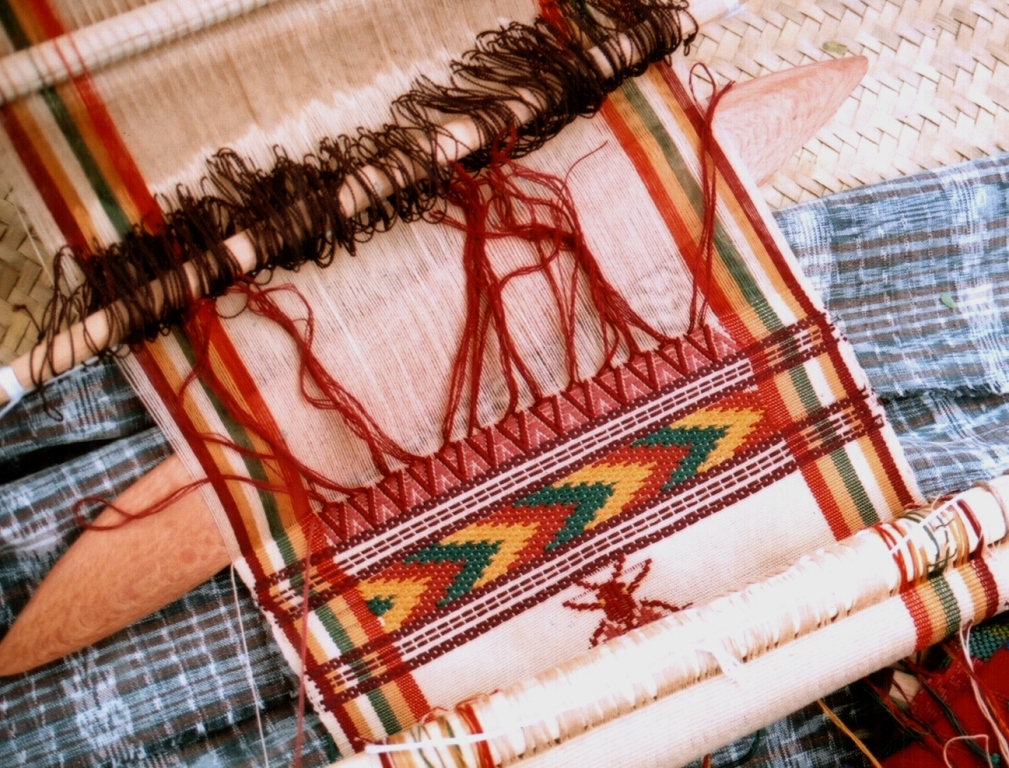
Backstrap Weaving-A tutorial and some terrific tiny projects.

SUPPLEMENTARY WEFT PATTERNS-the tutorial.

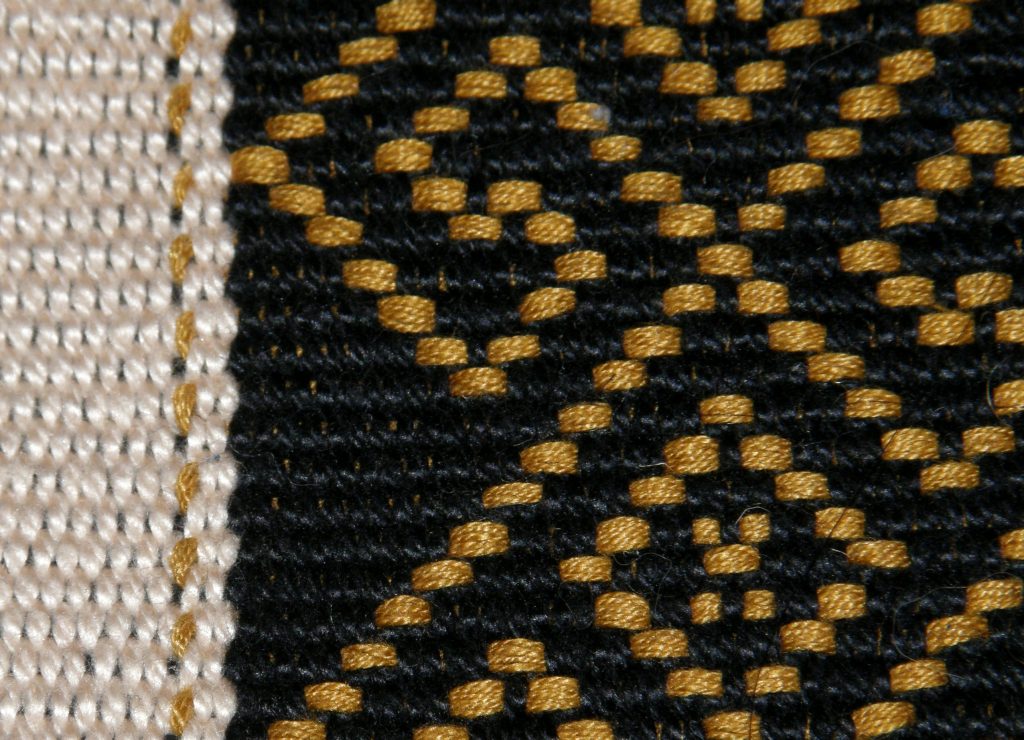
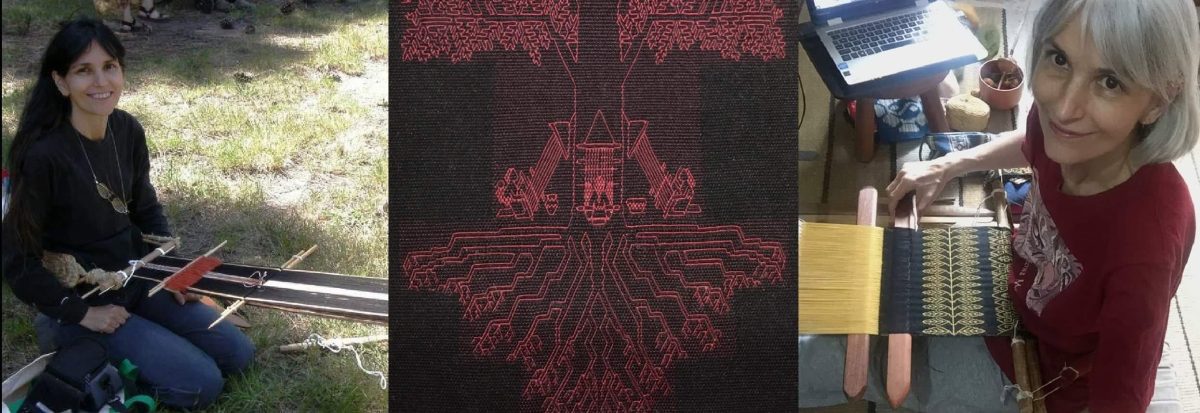
A motif inspired by a Central Asian design and woven with a supplementary weft
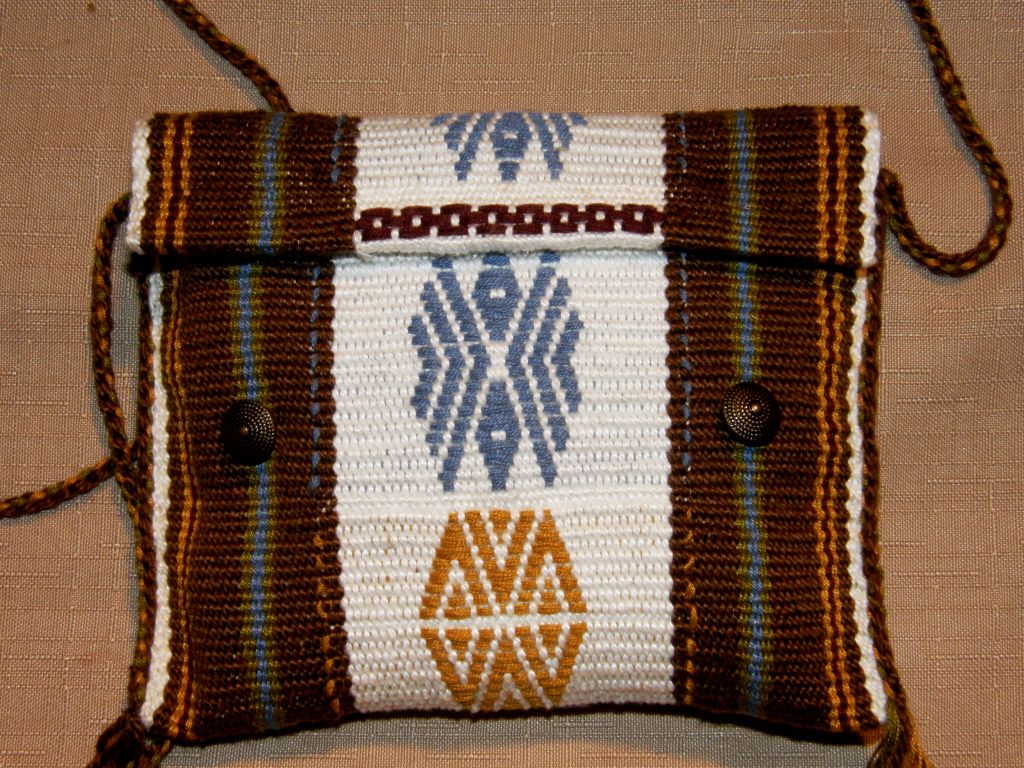
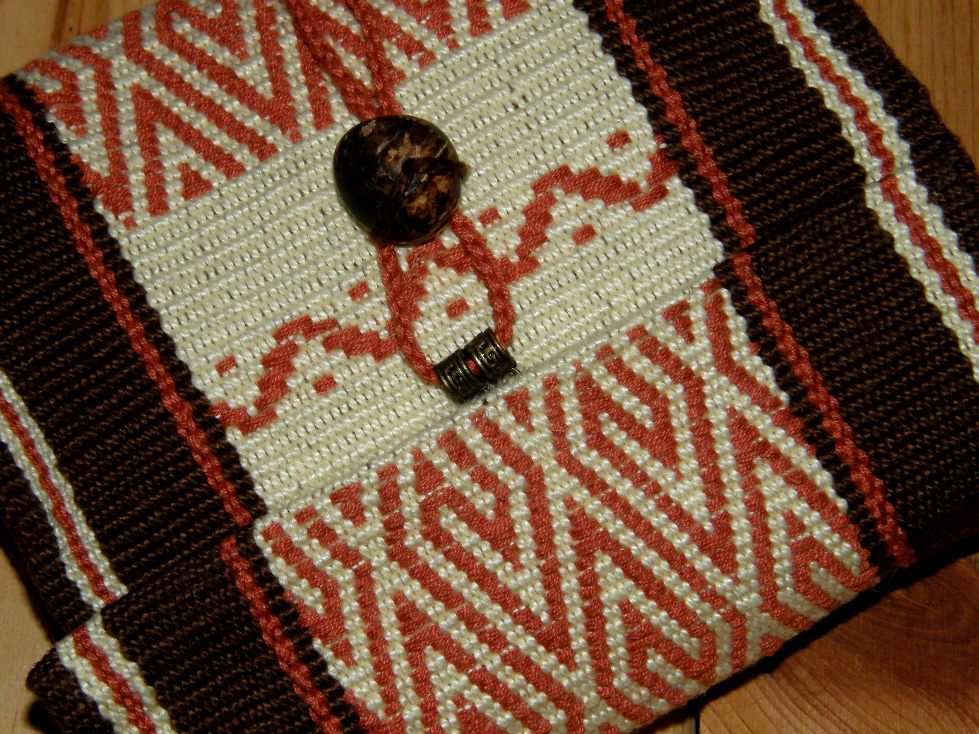
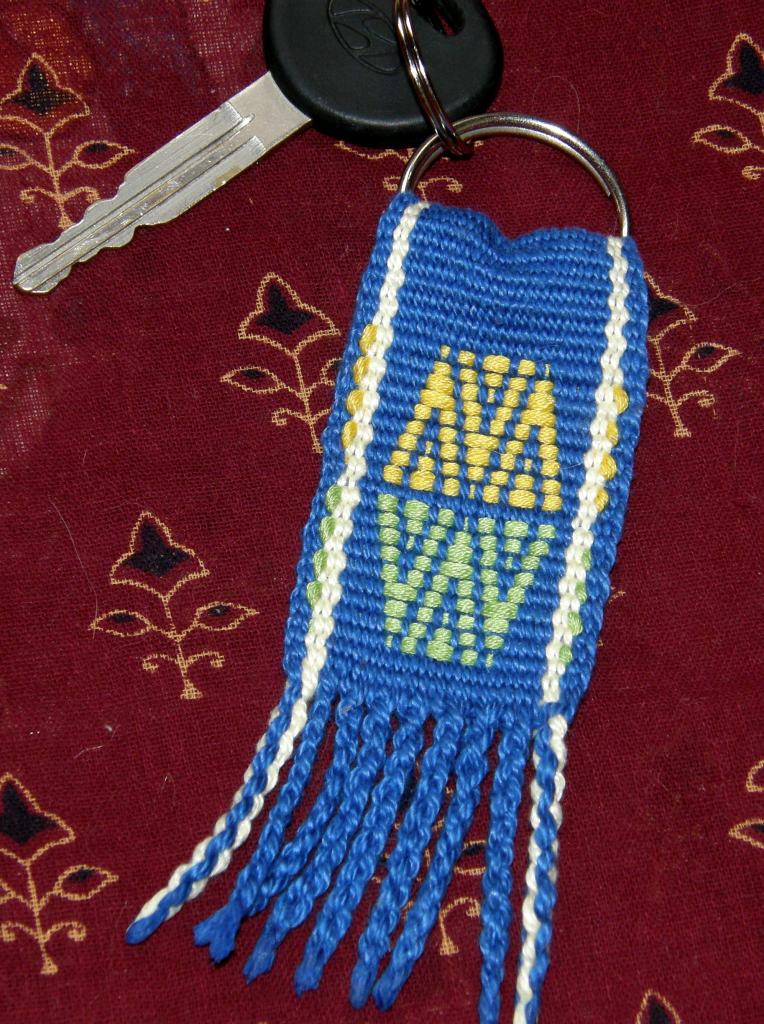
A design inspired by weavings of the Huni Kuin people of tropical Brazil

You may remember these designs from a previous post on supplementary weft patterning. Now I am happy to present the promised tutorial on supplementary weft patterning together with a tiny project idea-key fobs.

This technique definitely falls into the category of those which are within the reach of beginners. We weave a simple plain weave band and then ”paint” in some motifs with an additonal weft.

A set of simple key fobs made with techniques suitable for beginners.

Let’s look at the above key fobs-nice beginner projects. A beginner in backstrap weaving will probably start by weaving a plain band like the light blue one on the left, learning to wind an evenly tensioned warp, set up the loom, operate the sheds and keep their edges straight and even. They may then move on to the next band adding some stripes to their warp-getting used to cutting and tying on new colors at the warping board and maintaining an even tension. From there they can try horizontal stripes which involves a rearrangement of the cross on the loom-a new skill.  More complex arrangements will produce staggered horizontal bands or ”combs” as in the red and black  and black and white bands.

And then we come to the two supplementary weft patterned bands on the far right. I aim to show you in the following tutorial how simple this technique is.

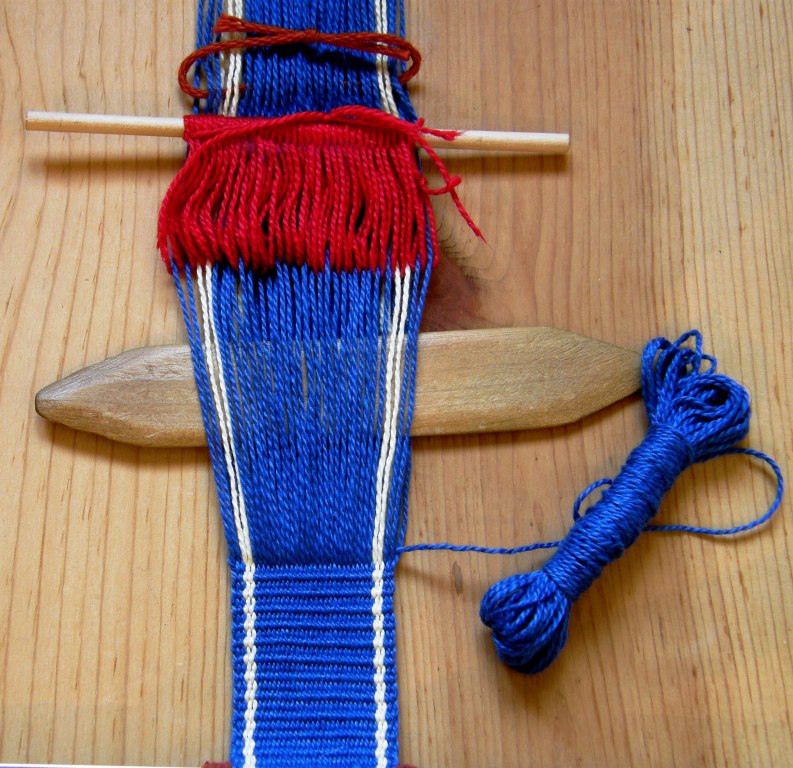
To weave bands decorated with patterns made with a supplementary weft, I start off with a warp prepared for plain warp faced weave. For this tutorial, I have used strong primary colors which show up well in photos. My yarn is 24 wpi mercerized crochet cotton. The blue base, seen below,  has a pale yellow stripe next to each edge. As I used my mini portable warping board, I have  just enough warp to make two key fobs. Instead of a shed rod I am using a simple shed loop and I have put the end loops on a needle to have a smooth rather than fringed start.

You can see more about the needle start in this previous post.
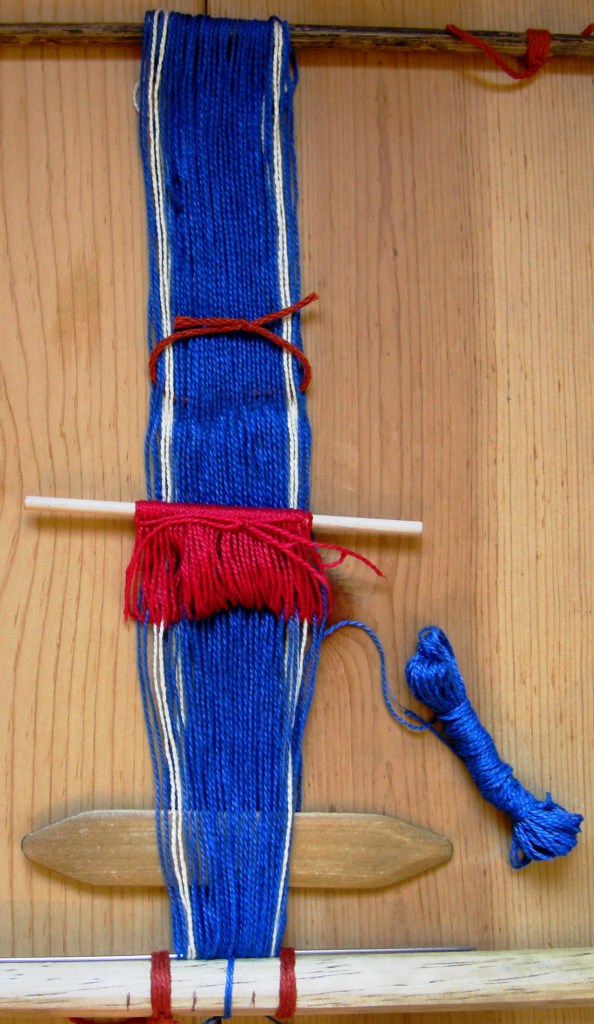
A warp prepared for plain weave. There are two sheds-the heddle shed and the shed loop shed.
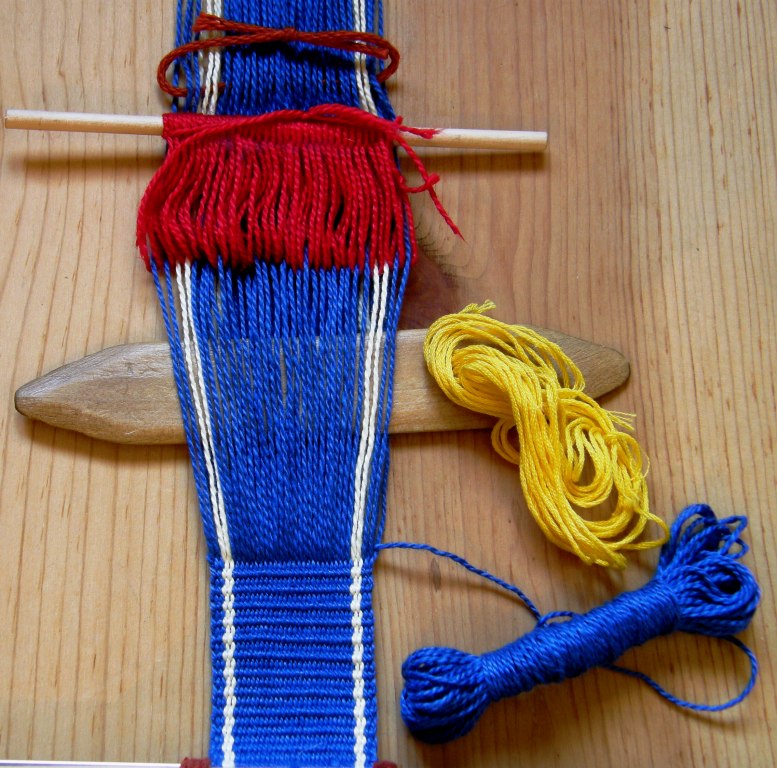
Enough plain weave has been woven to be passed through the key ring, folded and sewn. Now I can begin the pattern.

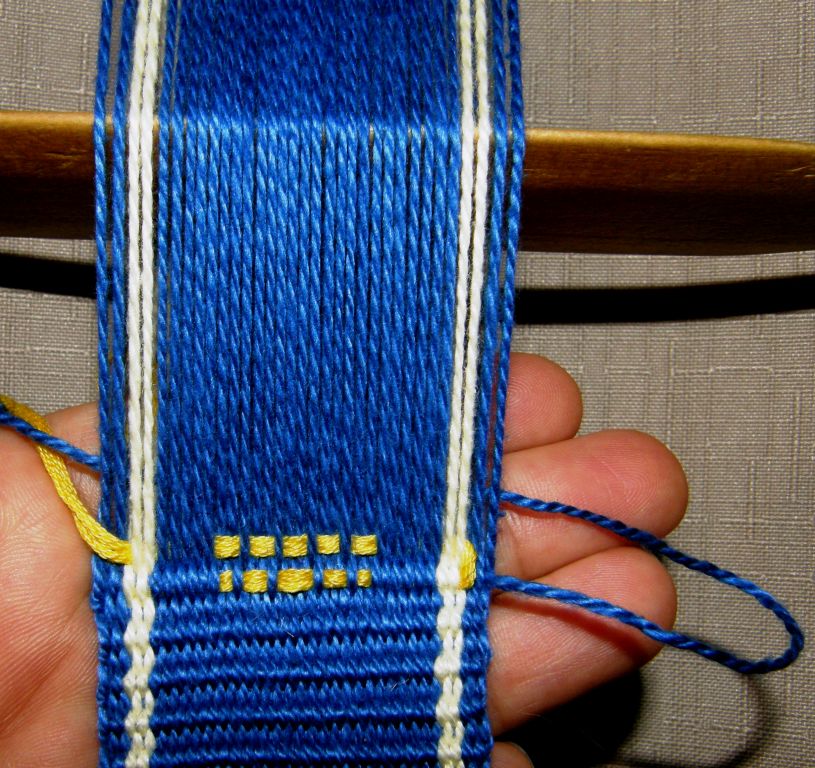
We introduce the color of our choice as the supplementary weft with which to make our patterns. I am using doubled strands of embroidery floss which work really well with the 24wpi plain weave base. The supplementary weft always needs to be a lot thicker than the main weft. Embroidery floss is thick, lies flat and gives good coverage. Looking at the photos below, you will see the difference in width between the blue warp and weft threads and the yellow supplementary weft.  The blue weft will continue to form the structure of the plain weave while the yellow independently forms the motifs.

THE PATTERN CHART (All the pattern charts for these projects can be seen here)
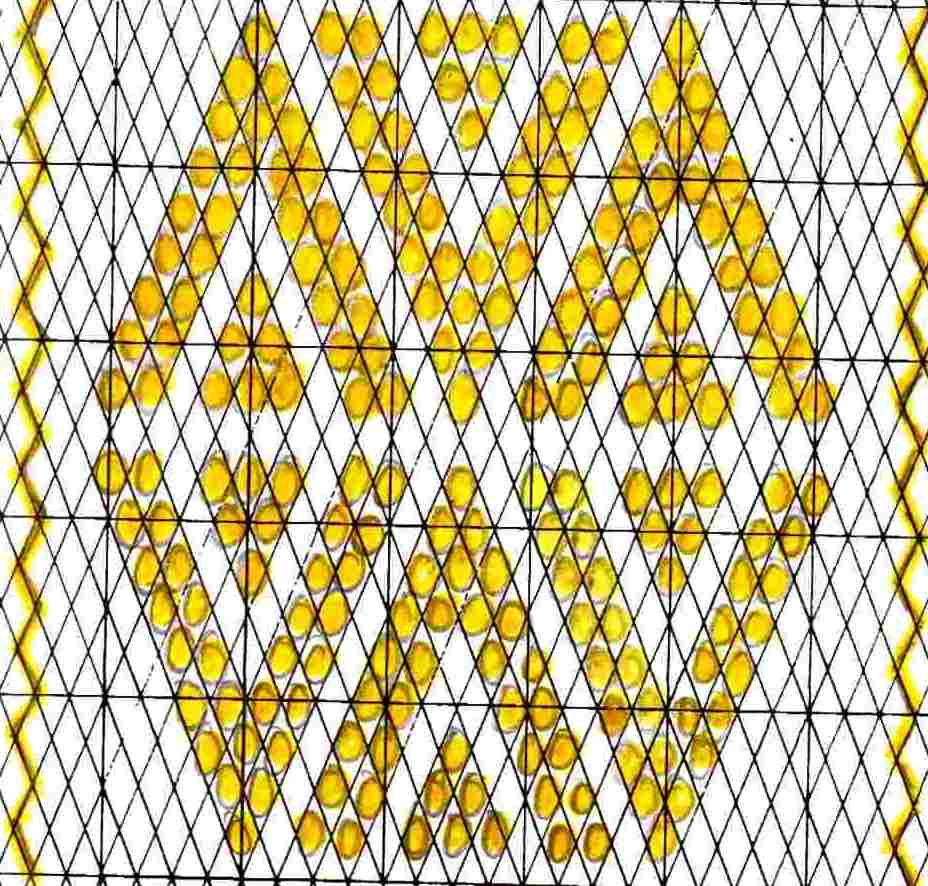
Pattern chart for supplementary weft patterning

You may recognize this diamond chart from my double weave projects.

For supplementary weft patterning, we need to look at the chart in a slightly different way. In double weave the yellow spots would indicate the warps that need to be picked.

However, in this technique the yellow spots within the diamonds represent each warp that needs to be dropped in order to expose the supplementary weft.

Now let’s see this in action……..

WEAVING
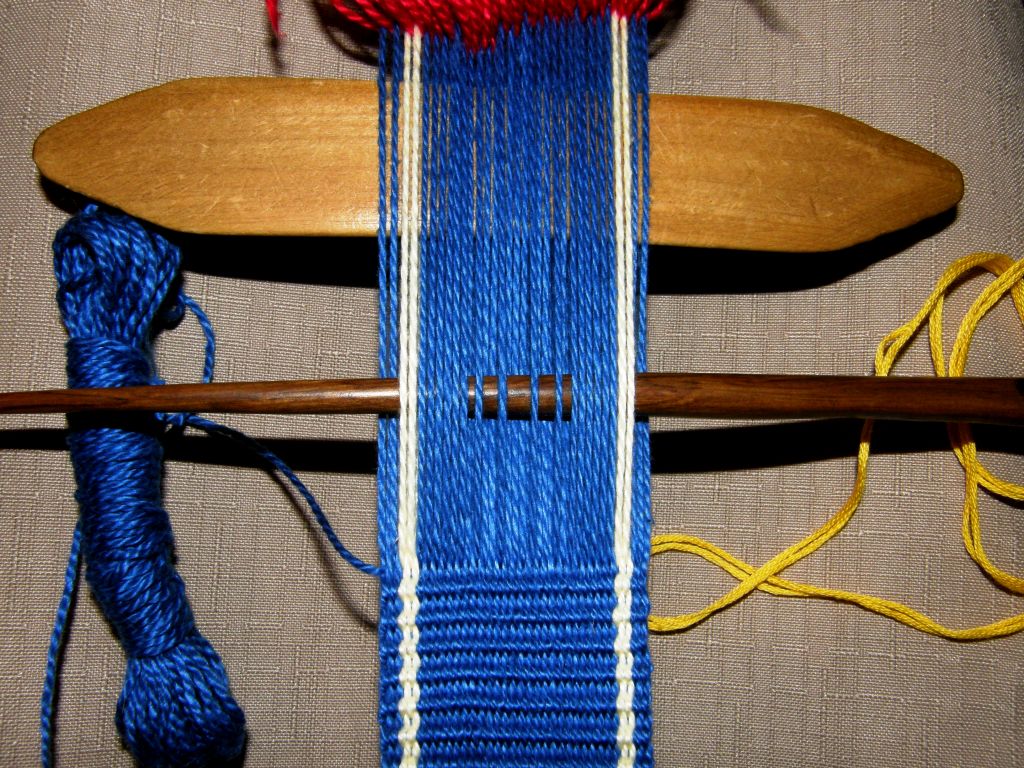
Dropping the warps in the first row of pattern.

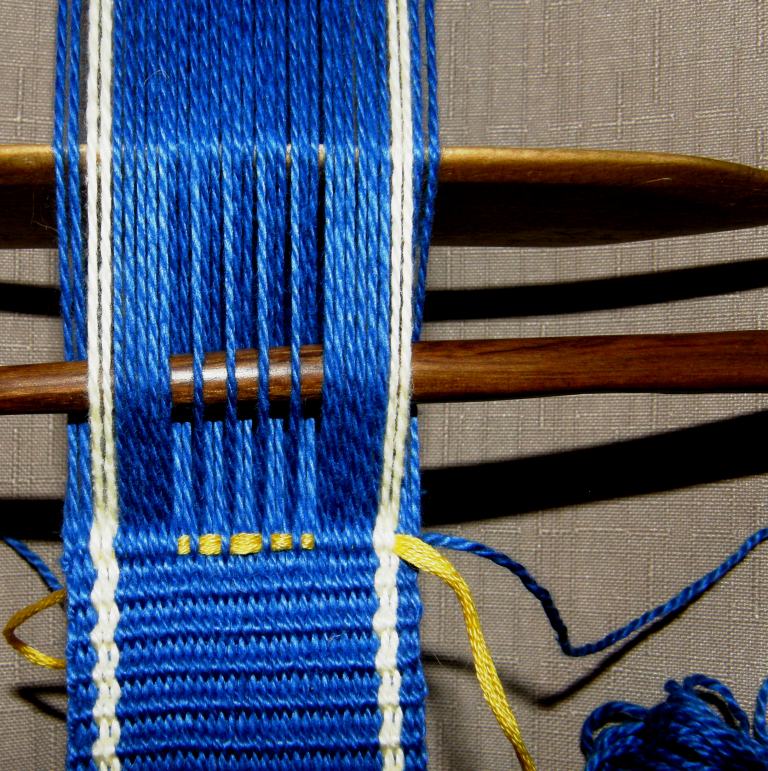
I have opened the heddle shed and placed my beater within and I am using a pointed stick to help select and drop my warps. Reading the pattern chart from right to left and starting at the bottom, I see that I need to keep the first six warps, then drop one, keep one, drop two, keep one, drop three and so on across the row.
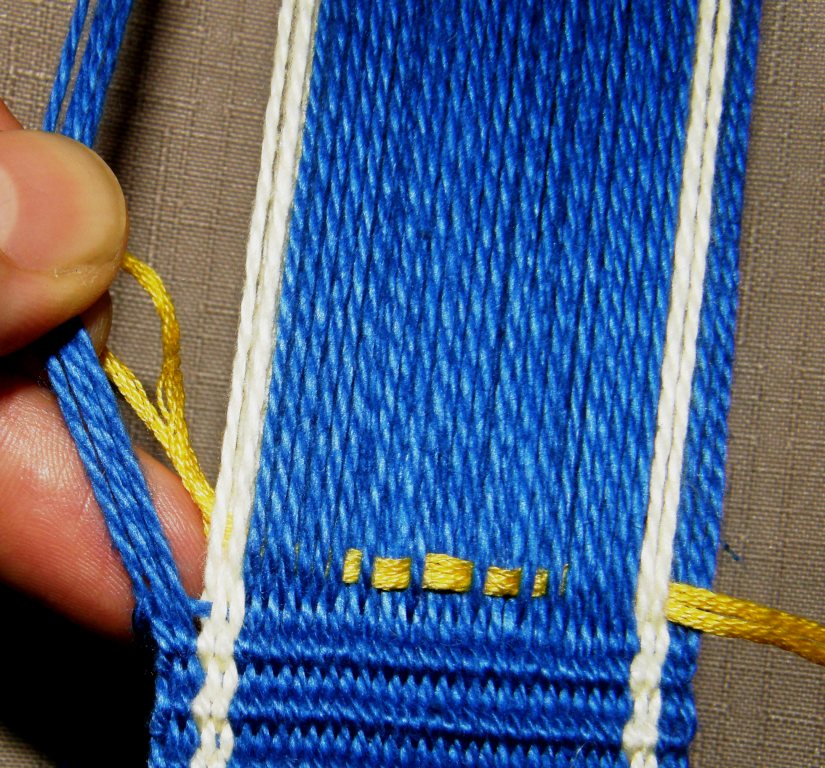
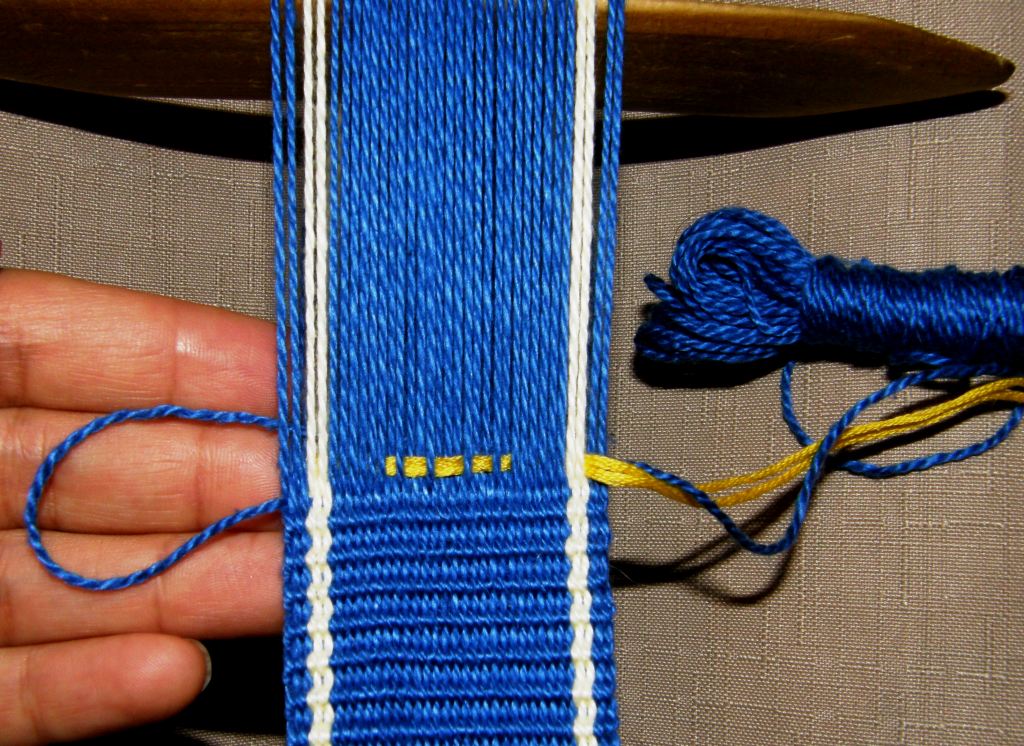
Passing the supplementary weft through the shed from left to right. I am separating the warps to show the starting tail which is left hanging out under the weaving and which can be trimmed when the band is finished. You can see that I am laying in the supplementary weft only from one yellow edge stripe to the other rather than all the way across the band.
Passing the main weft from left to right under all the warps in the open heddle shed. This completes the first row.
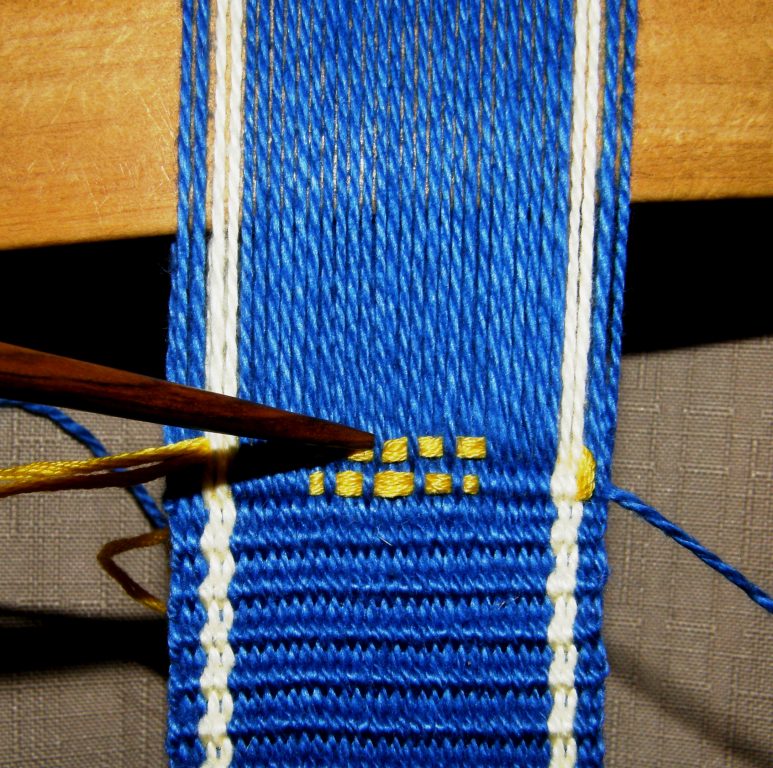
I have opened the shed loop shed , placed my beater within and beaten. Now I am dropping the warps in the shed loop shed according to the second row of the pattern chart again counting the warps from right to left-keep six, drop two, keep one, drop two and so on.
Again, the yellow supplementary weft is passing from the edge of one stripe to the other turning on the surface of the weave. I am laying in the weft loosely and pushing it into place with the pointed stick .
After passing the main weft from right to left under all the warps in the open shed loop shed, I open the heddle shed, place the beater within and beat, ready to do row three.
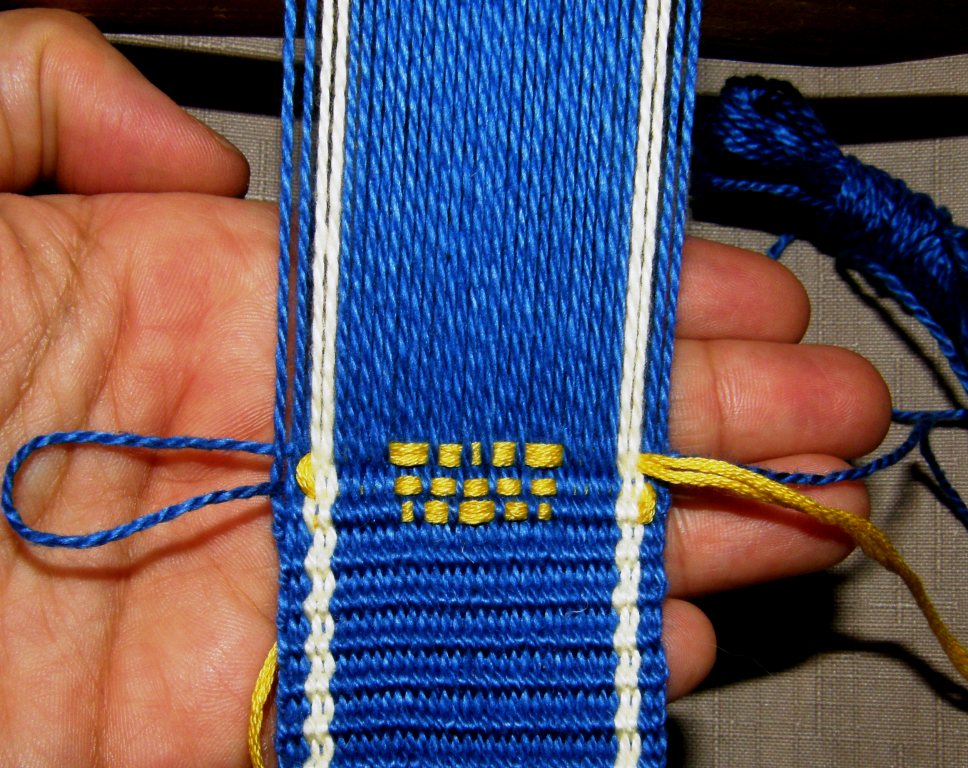
I am finishing the third row. You can see that the yellow weft turns on the surface of the weaving at the stripes. I don't like carrying the supplementary weft all the way to the edge as I don't like the bumpy edge that that creates. I would rather have the weft turning against the stripe and use that as a decorative feature.
One half of the motif is finished. I can continue with the same color or introduce another. The finish tail of the yellow weft will be left hanging out the back of the weaving. If you have packed your wefts in firmly, you will be able to safely snip the tail off when you finish the band.
On this Central Asian design that I made you can see that the turning wefts on the left form their own decorative ''stripe' on the plain weave.
The turns of the pattern wefts in this piece virtually disappear against a stripe of the same color.
Several colors can be used for the motifs within one piece.

I have put the pattern charts for these motifs as well as the Central Asian and Huni Kuin inspired designs on a separate page. You can design and print out your own blank diamond charts here.

If you are planning your own designs, as a general rule, it is best not to have weft floats that span more than four warps. This of course will depend on how fine a yarn you are using and the purpose of the piece you are weaving. You need to consider that long floats on a key fob or bag will easily catch on things whereas on a hatband, for example, they may not be a problem. You should also take in account the fact that floats over a single warp, for example the points of the triangles in my sample design here,  can barely be seen. Try to have your weft floating over a minimum of two warps.

c
I finished the motif in another bright photogenic color and have turned the loom around to weave another key fob on the other end. You can see that the design does not show on the back of the band.

Below are some more key fobs that I have made in a variety of techniques and yarns ranging from 12 wpi mercerized cotton to doubled sewing thread. I weave a few now and then to add to the collection and have them handy as gifts for my friends here, or back in Australia or for other travelers I meet on the road in South America. Some are finished and some are yet to be braided and sewn.

Two can be made on one warp. First I weave one and then I move the shed loop to the other side of the heddles, turn the loom around, pass a needle through the end loops and start weaving from the other end. I cut between the two small weavings when I have finished and then braid the ends or leave them as fringe.
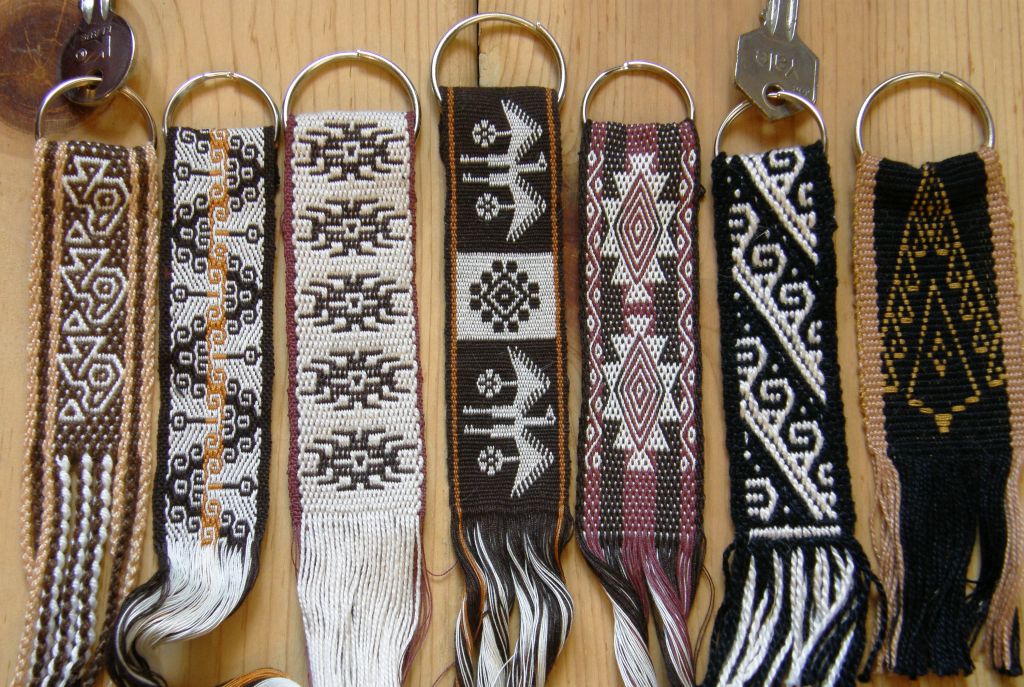
Key fobs in earthy colors
And some in brighter colors.

SO WHAT HAVE YOU GUYS BEEN UP TO?

There’s nothing I like better than to see my instructions and charts put to use!

Here are some things that a couple of blog visitors have worked on……..

Amber's mug rugs look good with black motifs on white.

Amber made one African and two South American motif mug rugs on the one warp. She tied up her loom to the ladder on her sister’s bunk bed which I think is a brilliant tie up place. I am thinking about having a sturdy wooden ladder with several rungs built  and screwed into a wall so that I can have different tie up places at different heights.  When I am not using it for weaving, I can use it to hang things on or display weavings draped over the rungs. Thanks for the idea, Amber.

Courtney tied up her loom to a sofa bed to weave her llama band. You can read more about this project and her furry helper on her blog.

My tutorial for this one-weft double weave technique can be found in the Backstrap Weaving Group at Weavolution.
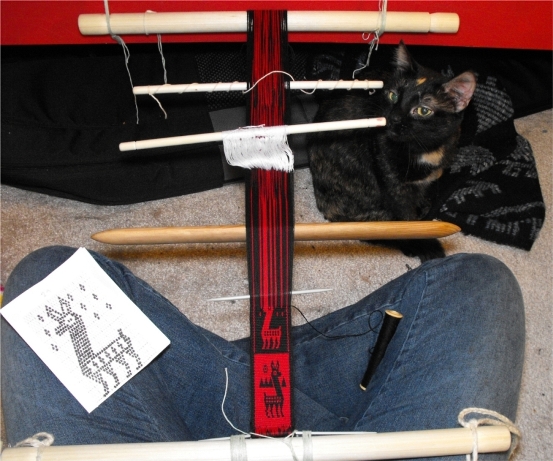
Courtney's black and red llama motifs.

If anyone else out there is weaving the designs or using the tips from my blog, I would love to hear from you and show off your projects here. Even if you have not woven a project yet, I would  love to see the backstrap loom you have put together. I hope to see what you have created with supplementray weft patterning.

Leave a comment for me here or contact me at Weavolution. You will need to join Weavolution to do so-it’s free!

Once again, thanks for visiting and thanks for all the comments! 🙂

© Laverne Waddington and backstrapweaving.wordpress.com, 2009-2010. Unauthorized use and/or duplication of this material without express and written permission from this blog’s author and/or owner is strictly prohibited. Excerpts and links may be used, provided that full and clear credit is given to Laverne Waddington and backstrapweaving.wordpress.com with appropriate and specific direction to the original content.

Backstrap Weaving-Supplementary weft patterning and learning to weave in Guatemala

SUPPLEMENTARY WEFT PATTERNING

Lately I have been playing with supplementary weft patterning and, once again, have been inspired by Weavolution members. One member joined my Backstrap Group as she is interested, amongst other things, in reproducing a Central Asian yurt band. She has introduced me to many beautiful Central Asian designs and often sends me photos of pieces she has seen at reenactmant events that she attends.

Together we figured out the technique on a yurt band she had bought and even wove it simultaneously- all coordinated by email!

When she sent me this photo (at left) of a Central Asian piece she had photographed at one of the historical events, I couldn’t wait to weave the design into something. The technique wasn’t clear in the photo and, as I wasn’t concerned with reproducing the original technique,  I decided to weave it in either double weave or supplementary weft patterning. I chose the latter as, since studying this technique in Guatemala in 2008, I hadn’t put it to much use.

In this technique, it is really important to get the right balance between the weight of the warp yarn and that used for the supplementary weft and so I quickly wove a sample and then went ahead and made the table runner below in 4/2 cotton (24wpi) warp with 6 strands of the patterning thread that I had brought back from Guatemala as the supplementary weft. You can see that I added a little embellishment of my own to the pattern.

My colors are rather bland compared with the original. I love that orange zigzag next to the main design. Perhaps I will be more adventurous with color next time!

My table runner with a Central Asian inspired design

My other source of inspiration has been a Brazilian member of Weavolution who has generously shared what she knows about the weavings of the Huni Kuin people who live in the tropical forest of Brazil and Peru. They weave with backstrap looms using cotton that they spin and dye themselves. You can see a video of their work here and a photo of a Huni Kuin weaver here. Although they do not use  the supplementary weft technique, I chose to use this method to weave one of their designs into a bag.

A small bag with supplementary weft patterning inspired by a traditional Huni Kuin design.

Here in Bolivia, the supplementary weft technique is used by women to weave bands to decorate their hats. It is in these hatbands that I have seen the widest variety of woven designs. Except for in Calcha, where it seemed that the women had decided on one hatband design to represent their village, I have never seen two hatbands alike.

This Potolo woman is using three hatbands at once.
Hatbands from Bolivia

Sometimes the supplementary weft is used to form the motif as in the small condors on the upper half of the center band above. At other times, it is used to fill the negative space to outline the motif on the ground weave.

From having purchased some hatbands here, I was able to see how they were woven. I made a few sample bands but, as I didn’t get the right warp to weft ratio, I wasn’t too pleased with the results and never really went on to explore this technique further- that is, until I went to Guatemala in 2008 and studied weft patterning with three teachers there. It was my first time in Guatemala and an absolute explosion of color and inspiration was awaiting!

The traditional hair sash of the women of Aguacatan, Guatemala

So I would like to spend the rest of this post introducing you to my first teacher in Guatemala and showing you how I learned supplementary weft patterning with her.

Lidia lives in the very small town of Santa Catarina Barahona near San Antonio Aguas Calientes in Guatemala. The typical blouse, or huipil of the area has designs woven in single and double faced supplementary weft patterning. The large areas of double faced patterning are those that most distinguish the huipiles of this area.

Typical huilpil of San Antonio Aguas Calientes.
Single faced weft patterning. The patterns can’t be seen on the back of the textile.
This double faced patterning looks very much like embroidery. The national bird, the quetzal, is a very popular motif.
Day 1-Lesson 1. I have chosen my colors for my piece and am winding the thread into balls prior to warping
Making a small warp for my lessons
Once the loom was tensioned, the heddles were made.
Lidia’s sister Carmelita showed me how the warps, under which the patterning wefts would be placed, are picked and stored on two additional sticks. The resulting designs are called ”pepenado”.
The first design lesson-Lidia is weaving the ”tijera” (scissors) pattern. She uses a pointed stick to hook theweft tails and pass them under the raised patterning warps.
The finished tijera pattern
Double faced ”abeja”-bee
Three ”abejas” that I wove when I got home

The ”abeja” was topped off with another section of ”tijera” and that completed my second day of classes. Finally, on day three, I learned the ”arcos” (arches) pattern. This is a combination of weft inlay and warp wrapping.

Weaving the ”arcos” designs
The finished ”arcos” design

It looks like my teachers did all the weaving and I just stood around and snapped pictures! Well, I can tell you  that it wasn’t so. Lidia was a very ”hands-on” teacher and she would take over only when I got up to stretch and take photos.

But it wasn’t all hard work. Other family members and neighbors came to visit, we paused to make and eat tortillas, chatted and played with the nieces and nephews in Lidia’s shady yard and walked to town to go yarn shopping.

Snack time. While making my way around Guatemala I learned to recognize the ”slap slap slapping” sound of tortillas being prepared.
Small rectangular pieces are covered with double faced designs and closed with a drawstrig to make a baby’s hat.
Whne I got back to Bolivia I finished off the piece that I had been making with lidia and then wove another sampler to consolidate the weft patterning techniques I had learned.
And I used my lesson piece in the lid of my weaving toolbox.

I went on from Lidia’s home to study with two other weavers in Guatemala but, more about that in another post!

Lidia’s daugther Sara and her cousins

I will be doing a tutorial on suplementary weft patterning with lots of step-by-step photos here on my blog in the following weeks so that you can add designs like the Central Asian and Huni Kuin ones, that I showed you above, to your projects.

I hope you enjoyed this little trip from Central Asia, to Brazil, to Bolivia and onward to my teacher’s home in Guatemala. If you did, I would love to hear from you 🙂

Backstrap Weaving-Hotpad and Heddles-more double weave

A Weavolution member recently introduced me to Teyacapan’s fabulous Flickr page which has hundreds of images of Mexican people with their crafts and weavings. Honestly, you can get lost in that site for hours! I was very much taken by a photo of a weaver doing gauze weave and hope to go to Mexico one day to study with the gauze weavers. Mexico is very high on my list of places to visit and, as I am planning to go to Guatemala again in March or April, it will be easy to duck over the border. If I can spend so long just looking at the images on Teyacapan’s site, imagine how long I will get caught up in Mexico!!

I am lucky to have some great books on Mexican weaving and have been inspired by the images in Joanne Hall’s marvellous book Mexican Tapestry Weaving, to make some more mug rugs with Mexican motifs. I was given this book by my Navajo weaving teacher back in 1995 and made a Navajo style tapestry based on one of the pictures. It is wonderful to see that all these years later, the images in the book are still fresh and inspiring.

So, I am happy to say that I have woven a set of four Mexican themed mug rugs in double weave and have come up with a new double weave project-a hotpad.

hotpad and matching mug rugs

So, it was Mexican all the way for lunch yesterday with spicy beans and tortillas. I think that the hotpad is another perfect double weave project using 12 wpi cotton-it makes a good thick piece to protect your table from hot dishes and casseroles. I wove it on my backstrap loom and is a good project for those of you who are thinking about venturing  into wider pieces. Practice on a mug rug set first and then add your matching hotpad.

hotpad and mug rug designs

Although I am very happy with the hotpad design, I think I will make a few changes in the patterns I drew for the mug rugs. Perhaps I will break up some of the large red areas with a bit of black-what do you think? Once I have tweaked the designs and woven another set, I will post the pattern charts here on my blog for you all. In the meantime, here is the chart for the hotpad. I am only posting half of it as it is huge!

double weave pattern chart for the hotpad

If you would like to learn this double weave technique, you can use my free tutorials in the Backstrap Weaving Group on Weavolution. The tutorials have step-by-step photos and links to videos on my Flickr page. Remember that you will need to first join Weavolution and the Backstrap Group to obtain access to them.

Well, as much as I love Mexican food, I don’t think I could manage it every day (although, if I am planning that trip to Mexico……..). Anyway, here is another fun use I found  for my new hot pad. It fits perfectly on my breakfast tray where it stops my plate from sliding about and certainly “spices” things up a bit!

spicy breakfast!

I loved designing and weaving this hotpad and I have a bunch of designs in my head for others so you can certainly expect to see more of these in the future. 🙂

MAKING CONTINUOUS STRING HEDDLES………..

I warped up a couple of weeks ago for another set of South American themed mug rugs and used that warp to put together a tutorial on making continuous string heddles. This process is shown on the videos in my WeaveZine article but I have heard from many people on dial-up who have not been able to access the videos. I spend half my time on dial-up as my wifi connection is pretty erratic so I certainly know how it is. I kept all my photo files small  for this and I do hope that dial-up folks will be able to enjoy this photo sequence.

I learned this way of making continuous string heddles from my very first weaving teacher, Gladys Miller who taught me Navajo style weaving way back in 1995. I have seen many different ways since then while studying with my indigenous weaving teachers but none have convinced me to change my ways.

First I’d like to show you some pictures of a few weavers I have met and worked with here in South America and Guatemala and how they make their heddles.

Zapote, Ecuador. This weaver is using her flat tenter stick as a spacer around which to wind the heddle string. This helps her to make all the heddles the same length.The spacer will later be removed.

San Antonio Aguas Calientes, Guatemala. Here the weaver wraps the heddle loops around her hand before passing them to a stick.

Santa Cruz, Bolivia. Hammock weavers' warps are so wide that they can't use a heddle stick. They just leave the heddle loops loose and pull them in small groups across the width of the warp to open the shed.

THE TUTORIAL………

Larger and heavier versions of these tutorial photos can be seen here.


For double weave, your cross will look like this. Remember that in this technique you are using doubled warps. The all-black warps will form the black border. You have one white and one black warp in pairs in the area where you will weave your motif.

You will be putting each of the pairs of warps that are passing over stick B in a heddle. Open the shed and pass your heddle string through as shown.

Make a slip knot in the end of the heddle string and place it on you heddle stick. Leave a long tail as shown.

Reach down between warp pair 1 and 2 and pull up the heddle string as shown.

Put a twist in the loop.

Place the loop on the stick and anchor it with your left forefinger.

Put an extra twist in the heddle string forming a small loop.

Put the small loop on the stick and tighten it by pulling on the end of the heddle string.

You can now let go and see that your first warp pair is secured within its heddle.

Moving on.....heddles have been made around the 1st and 2nd warp pair and the heddle string is being pulled up to make the 3rd heddle.

Slip the loop on the heddle stick and adjust its length by pulling on the end of the heddle string. Once you have the length correctly adjusted, anchor the loop on the stick with your left forefinger before making your extra twist.

Continue like this, cut the heddle string and tie the start and end tails together. DONE!

I always use the same yarn that I am using for the warp for my string heddles.  A lot of my teachers use thin nylon thread or cord as it is less abrasive on the warps. I can’t stand using nylon but you should experiment and see which kind of heddle string suits you.

Here’s hoping you have found this useful. Maybe you know some rigid heddlers too who will be interested in seeing how to make string heddles so they can add another shed to their looms. Pass it on!

© Laverne Waddington and backstrapweaving.wordpress.com, 2009-2010. Unauthorized use and/or duplication of this material without express and written permission from this blog’s author and/or owner is strictly prohibited. Excerpts and links may be used, provided that full and clear credit is given to Laverne Waddington and backstrapweaving.wordpress.com with appropriate and specific direction to the original content.

Backstrap Weaving: A Double Weave Project

I love double weave! I particularly like the clean solid designs this technique produces on a nice smooth background. The same design appears on the back of the textile with its colors reversed. There are, in fact, two layers being woven together.

The problem with double weave for beginners practicing with heavy yarns, is that it produces a thick textile. Now this is just what you want if you would like to make a belt or perhaps a strap for a bag or a  musical instrument.

A double woven strap for a Bolivian charango

But what about a small project for a beginner who would like to learn this technique? I always recommend that beginners start with heavier yarns and gradually work their way down to the finer ones as they gain more experience. So I have been trying to think of a useful small project made in a medium to heavy weight yarn (around 12 wpi) that a beginner could make once they have practiced the fundmentals of the technique on a sample band.

And this is what I came up with……………..MUG RUGS!!

South American and North African themed mug rugs

Woven in a 12wpi mercerized cotton, these are thick and firm-they really feel like mini rugs- and look great on the table. I guarantee that these will protect your good polished table from the hottest of mugs!

The black ones have adaptations of South American motifs from several countries. I got ideas for the designs on the  brown ones from a book on North African carpets that I have. I really had fun making these. With the 12 wpi yarn they weave up really fast. I have never been a fan of rolling up long warps as I find I get much better tension control on shorter ones so I wove  three mug rugs on a one-yard warp. I find warping for the backstrap loom a pleasure as there is no cutting or threading involved so making multiple warps for these two sets of mug rugs really wasn’t a problem for me.

Here they are as they come off the loom………..

I sewed over the last wefts and between the fringes with an ”invisible” nylon thread to finish these off while they were still under tension on the loom.

So, if you would like to learn how to make these you can find my tutorial for ONE-WEFT DOUBLE WEAVE in the Backstrap weaving Group at Weavolution. Weavolution is a free gathering place for handweavers. You will need to join Weavolution first and  then join the Backstrap Group so you can access the tutorial.

South American motif mug rugs on the loom

Here is a sample pattern chart for these mug rugs using forty-one warp pairs.

A South American motif pattern chart

Once you feel comfortable with this technique, you can move on to using finer yarns- on the right, 12 wpi; lower center, 35wpi; and upper center, plied sewing thread.

Double weave in various yarn weights

A LITTLE BACKGROUND……

I learned this technique in Potosi in Bolivia in 1996. I weave it now on my backstrap loom and, in terms of comfort, this is like flying First Class compared to the way I was taught this weave on a staked-out ground loom!

Weaving on the staked-out ground loom in Potosi

Julia and her sister Hilda allowed me to come to their home  to learn to weave crouched over the loom in their yard for six hours a day during three weeks. You can see from the bandaids that the bone tool that is used to beat the weft into place was taking a toll on my soft gringa hands! That was about ten years ago. I doubt I could maintain that position  for long now.  Here I am making a four-selvedge piece in the lively colors favored by my teachers which I later turned into a shoulder bag. The piece has bands of patterned double weave on plain weave.

This technique is put to many different uses in various regions here  in Bolivia. It is used to make the belts which form part of the typical woman’s outfit in the highland province of Potosi. Woven with several brightly colored stripes and covered with little figures, these belts are very sturdy and are woven just long enough to encircle the waist once. The weavers put a lot of effort into beating the weft in firmly and the quality of a finished piece and the skill of the weaver is judged by the belt’s stiffness.  I was surprised to see when I went to Ecuador that these belts are now much sought after and prized by women in Otavalo, who are themselves skilled weavers, and are being used by many together with their typical Otavalan costume.

Belts made in one-weft double weave technique in Potosi

I’ll leave you here as it is time for morning tea-there it is below! Remember, if you have any questions or if you just liked this post, I would be delighted to hear from you. Please leave a comment 🙂 Laverne.