Backstrap Weaving – Sunny Side Up


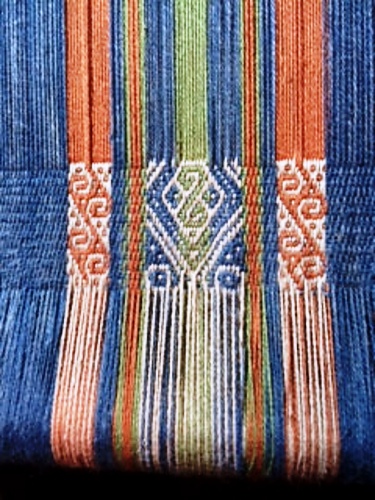
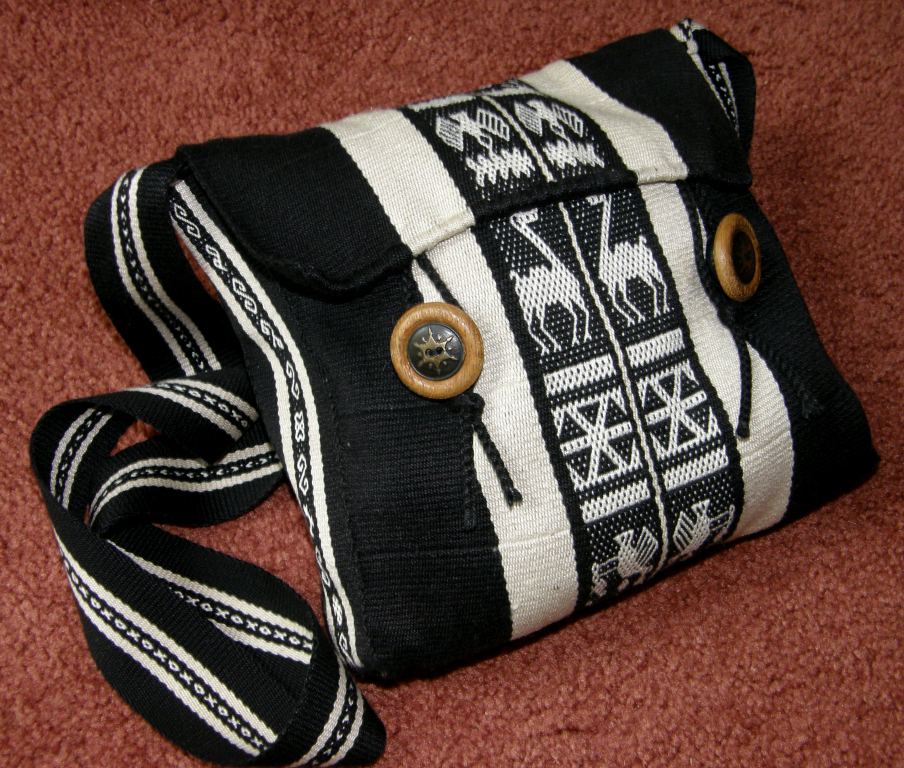
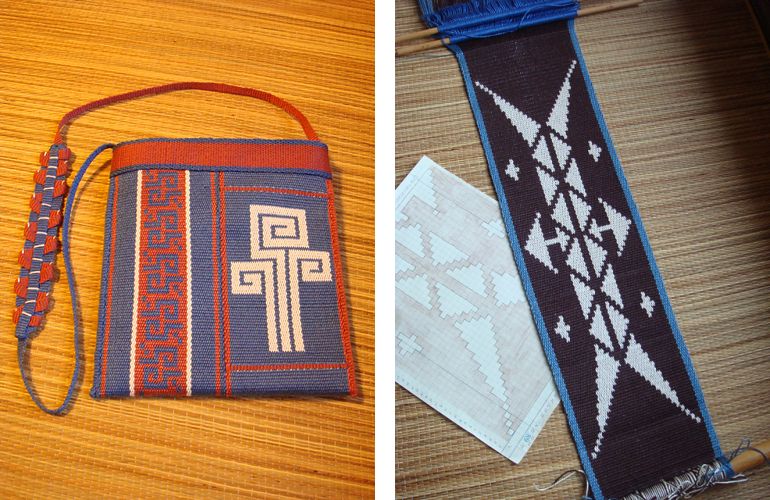
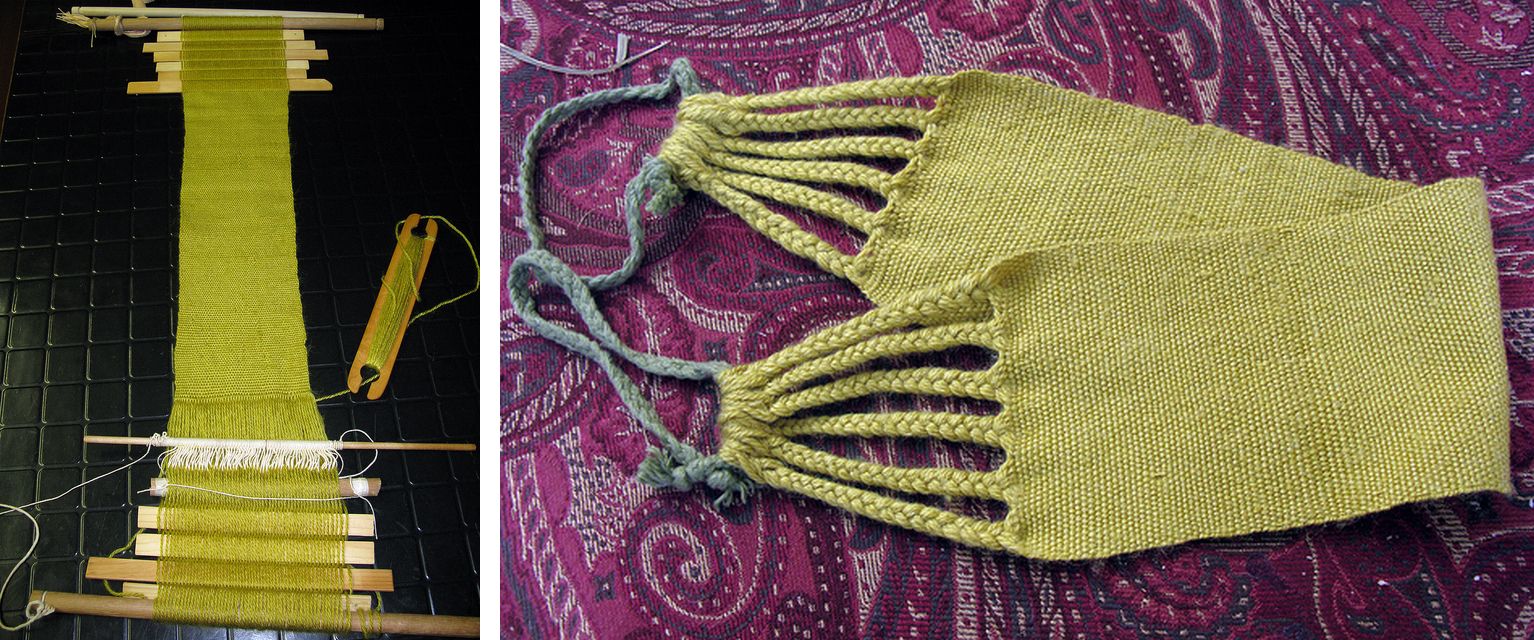
The only “problem” with double-faced structures, like Andean Pebble Weave, is that you sometimes don’t get to see and enjoy both faces of the fabric. I wove the above piece (using a non-Andean pattern) and then folded and sewed it into a bag. I had to decide which was the “sunny side” or, the side I would have on the outside of the bag while the other side, sadly, would be hidden forever on the inside. Actually, in this case, I guess I ended up choosing what you might call the “shady” side, the one on the right, the darker of the two options. The lighter, or sunny side, went on the inside.

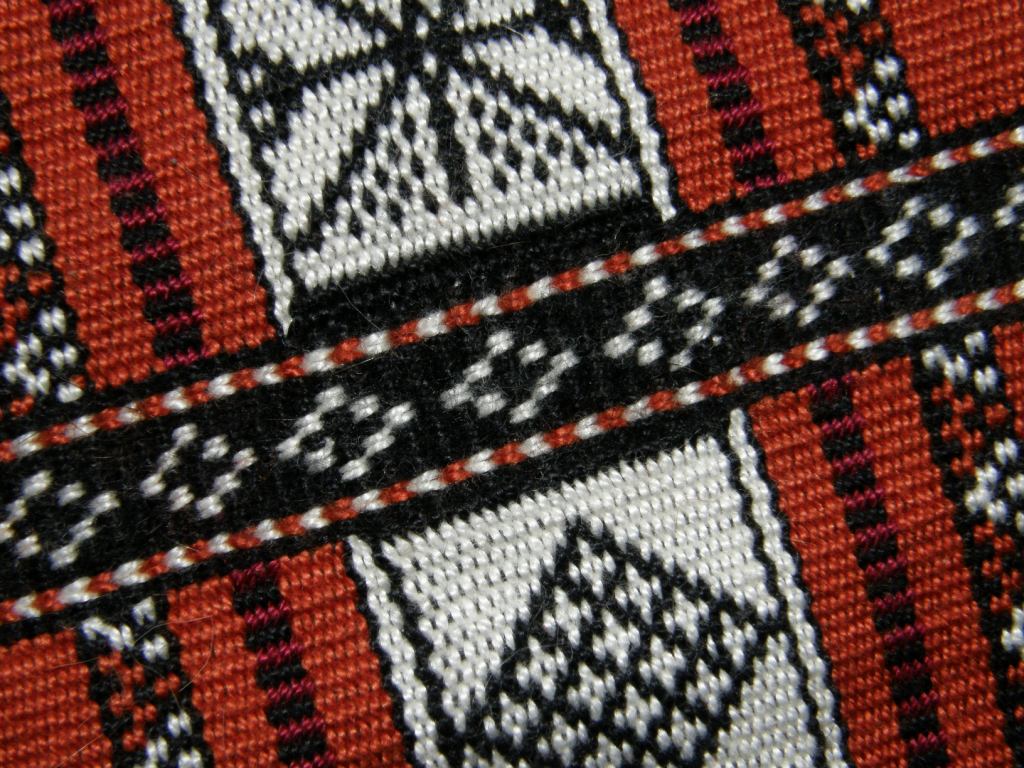
Some of the structures I weave have two acceptable faces but there is one that is obviously the “right” one. What I call the simple warp float structure is one such structure.

central asian backstrap weavingThis is the piece I wove and sewed into a case for my little notebook computer.

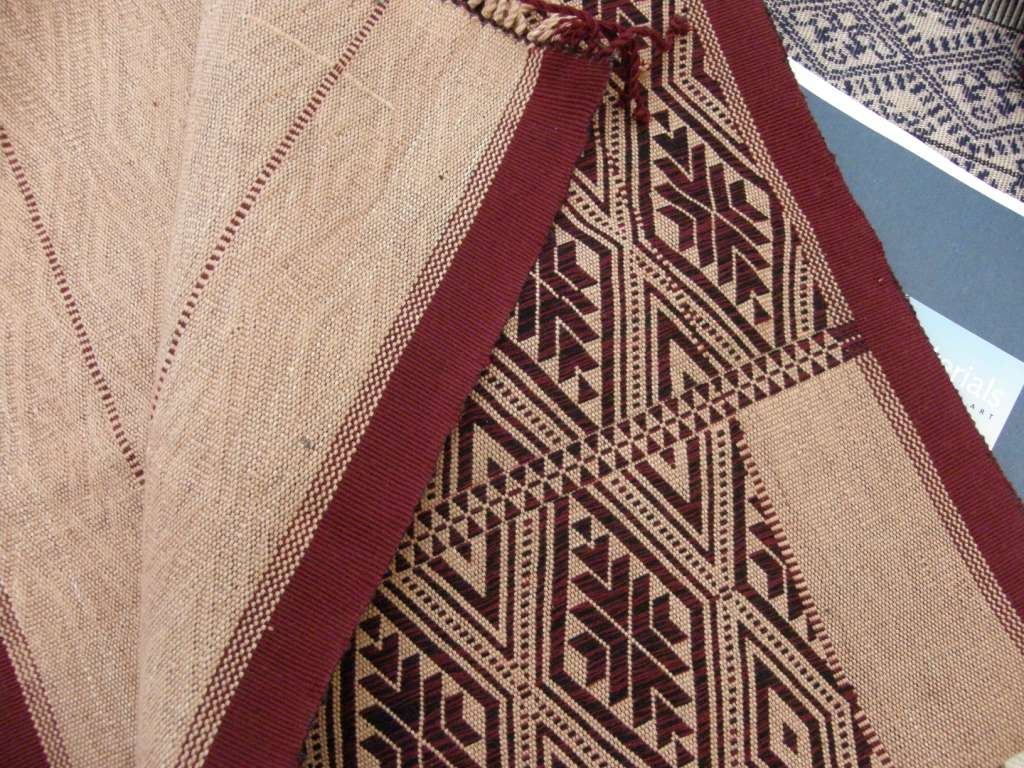
central asian simple warp floats both sidesBoth sides are attractive in their own way. The “right” side on the left is patterned with warp floats. The other face shows exposed weft.  So, in the end, I didn’t have to hesitate over which side to use as the outside of the bag.

The same goes for the latest computer bag that I have been weaving.
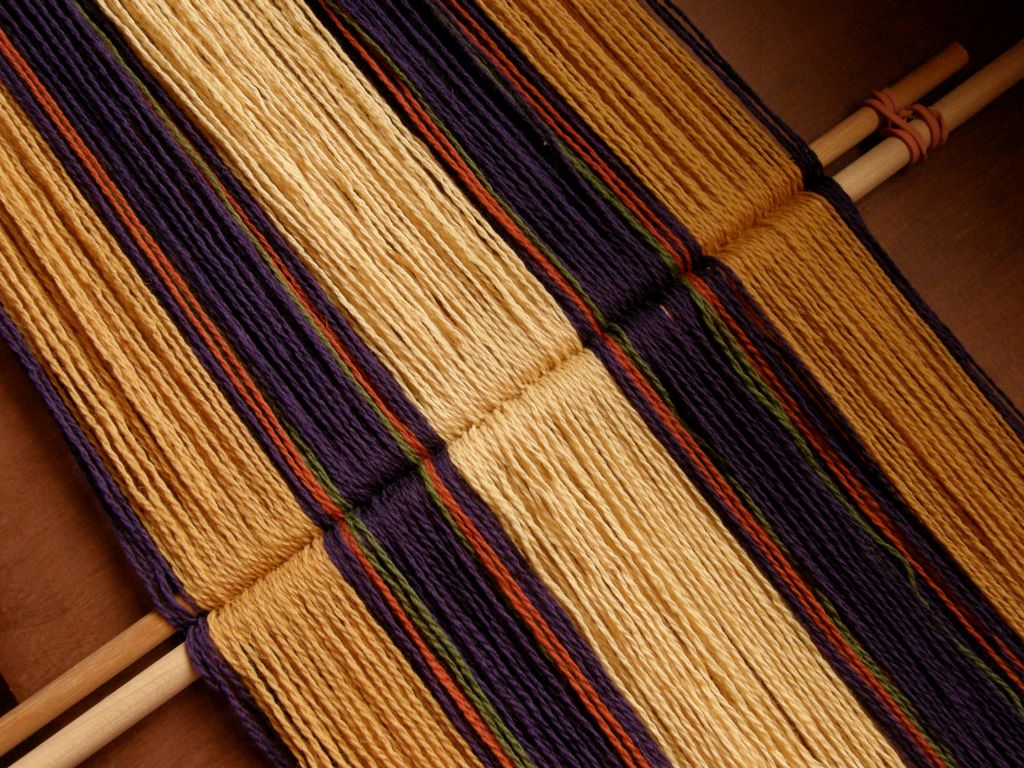
wool warp backstrap weavingRemember the wool warp that I showed in last week’s post? It really was just supposed to be an experiment in weaving with loosely spun and plied wool. I was nervous about it but, as soon as I started weaving, I could tell that it was going to work out. I could open the sheds carefully and achieve nice clean openings without stressing the wool much at all. I used nylon heddles (yes, shock, horror…you know how much I hate nylon heddles!).

No fluff accumulated on the heddles but it did between the cross sticks and at the point where I pressed down on warps to help raise the heddles. I just gently removed the fluff each time I had to slide the cross sticks up the warp. This didn’t become a problem as I advanced the warp as often as I could so that the points of pressure and friction  and resulting fluffing were never in the same spot for too long.

???????????????????????????????So, I decided that this warp was going to be  a keeper and that I may as well add some patterns with wool supplementary weft. The technique I used is single faced so I won’t have to make a decision about which face is the sunny side.

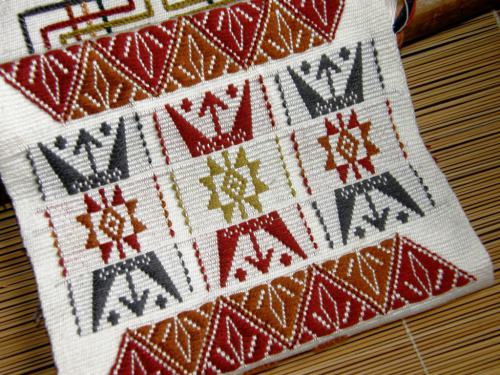
As you can see below in this cotton example I wove some time ago, the back side of this single-faced technique is plain (which I suppose could be the side you chose to show if you went over the top with your supplementary-weft design and made something that you felt was garish).

???????????????????????????????The only problem with the wool project was that I had used up most of this little wool stash in the warping and only had a bit of terracotta yarn left with which to make patterns.

You can see that I used a coil rod to prevent corrugation. I wouldn’t really expect ridging with wool as it is so springy and forgiving but I wasn’t taking any chances. The wool was behaving nicely and I didn’t want to push it by having to unweave and start over if ridges appeared.

wool warp with pattern color changes backstrap weaving supplementary weftTwo warp ends broke while none of the others looked particularly worn at all.

Eventually I had to change to green supplementary weft. That was okay as I also had a green stripe in the warp into which I could hide the weft turns.This allowed me to save the little remaining terracotta to weave the same design at the other end.

And then just to make things more “interesting” I decided that, since I weave with wool so infrequently, I should use this piece as an opportunity to practice making something with four selvedges.  I turned the whole thing around and started weaving in from the other end.

four selvedge wool warp backstrap weavingBring out the little sticks, the skinny shuttles, the umbrella ribs, the needles and a large serving of patience!

In the above picture there are just under two inches left to weave and I am still, thankfully, able to use both the shed rod and string heddles. I think doing all that twining last week was a good warm-up to this. It was taking me forty minutes to twine a single row. Opening the sheds and weaving in this small space, so far, is a lot faster! I expect that to change pretty soon!

I thnk I might have trouble needle-weaving the last rows as the yarn is plied so loosely. I fear that I will be continually splitting the two strands with the needle.

creating the shed with a needleI suspect that the overspun and tightly plied yarn created by the weavers in Pitumarca, Peru would be easier to work with in this case. I needle wove the two ends of the discontinuous-warp piece shown above (my teacher Yaneth is demonstrating in the picture). Now I will be able to see how it compares with using store-bought yarn.

Will my wool project end up being the computer slip case that I had planned? I am not sure. I definitely want to decorate all four edges with a tubular band and am hoping that I can scrape together enough of this wool to do so. We will see what it wants to be when finished.

As for the twining that was giving me trouble…..

???????????????????????????????….it is done. I have yet to find a spot with good light to stretch this out to full length for photgraphing. Neither of the reds in the above picture are the true color.

After having problems with either the twining buckling or the fabric getting a pleated look, I twined and untwined and finally found the right formula. So, now the three panels are joined across the top and I shall set it all aside while I decide what to do at the bottom. Most likely I will make masses of tiny braids which is how I chose to finish the other three pieces in this series.
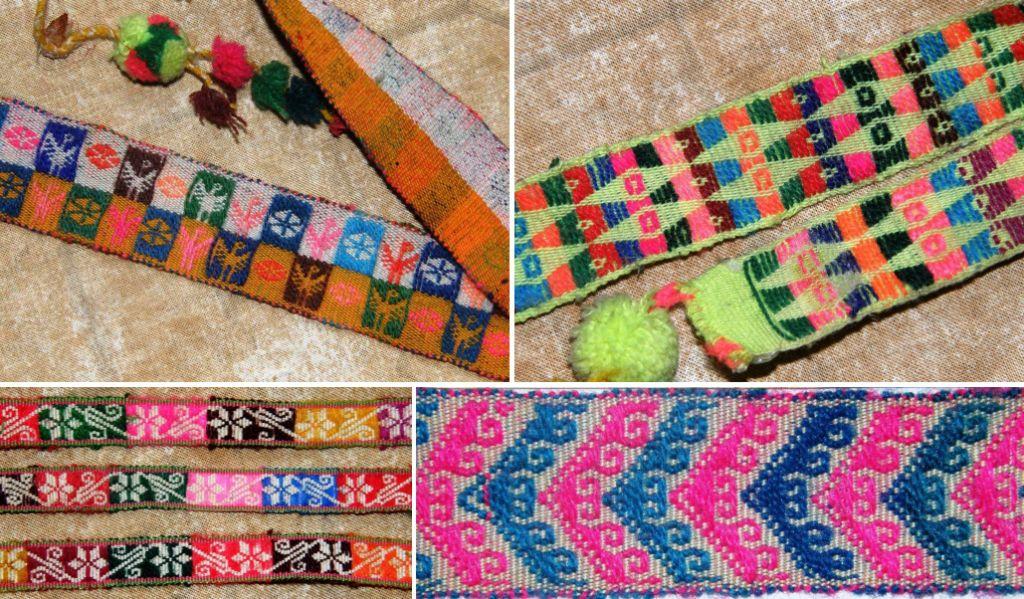
hatbands boliviaThis fourth hanging was inspired by hatbands used by the women in the Bolivian highland community of Calcha (the one bottom left in the picture at left).

I visited Calcha in August 1997.  It was a festival weekend and I hadn’t known. Because of the big party in progress, none of the women were weaving. A small boy ran home and brought back a hatband to show and later sell to me when I asked about weaving. I always wonder if he had taken it right off his mother’s hat and if he had gotten in trouble over it later. 

???????????????????????????????Now to dye some cotton red for  number five in the wall hanging series. Thank you, Bobbie, for giving me some of your Guatemalan cotton so that I can over-dye it for my projects.

So, we will see the end of the woolly adventure next week. If it gets frustrating, I will get up and do some more keyfob braids. I added one more to the collection this week…the one on the left. It is simply the Palma braid done with only two colors instead of three.

And if the wool project all goes horribly wrong, I shall cut the piece in two and use the two pieces as front and back for a computer slip case anyway.

I think I will be looking more closely at wool when I am visiting the Mannings yarn store. I can usually quite safely breeze through the store without getting too tempted by anything.  I would like to see what other wool I can find that works so nicely on my backstrap loom (the wool for this current project is KnitPicks Palette, by the way. It comes in so many colors! I am almost scared to name it. Every time I fnd a wool designed for knitters that I like to use for weaving, it gets discontinued!).

Last time I was at the Mannings I was checking out the Harrisville Shetland as I had had success using it for warp-faced weaving straight off the cone on a floor loom. I made this band with it on my friend Pam’s floor loom. It felt so good!

warp-faced wool bandI have had success with Navajo warp on my backstrap loom too. I bought a ball in natural white and dyed it and made the bag with Mapuche designs below when I was still living in Chile. It was overtwisted and easy to use and made a good sturdy fabric for a bag but I am looking for fabric with a softer, kinder feel now.
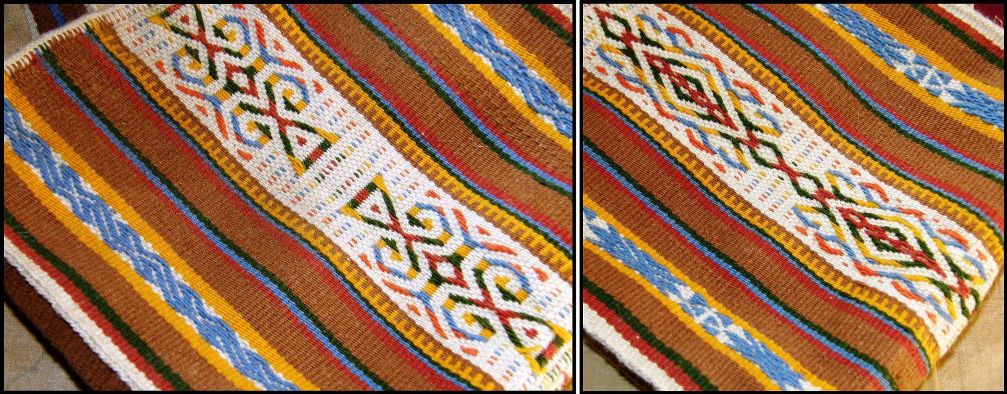
mapuche-bag-front-and-backScreenHunter_003Why am I buying wool and not spinning it myself? One reason is that there simply isn’t any available here to spin in lowland Bolivia where I live.

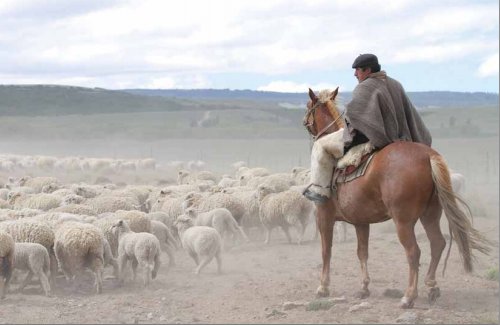
I think of all those years I lived in the Chilean Patagonia and all the sheep! Wool? It was everywhere! My boyfriend down there  worked as a shepherd for many years. I could have all the fleece I wanted. I did spin some of it and wove it as a plain balanced-weave piece that became the back of a vest. I used the rest of the handspun to knit the front. And then…. I moved to the tropics!

The picture above is from a free e-book entitled The Patagonian Loom, A guide for Beginners the link for which Weaving Southwest shared on Facebook today. It describes the continuing weaving tradition in the southern parts of Chile (not as far down south as where I was living where, unfortunately, I never came across anyone weaving). 

It’s a lovely book crammed with pictures with text in both Spanish and English. It gives a short history of the loom and then describes, the spinning, dyeing and weaving processes. It also provides instructions for warping and setting up the loom for projects that are typical of the region…saddle blankets, saddle bags, sashes, even a poncho. Thank you Weaving Southwest for sharing the link!
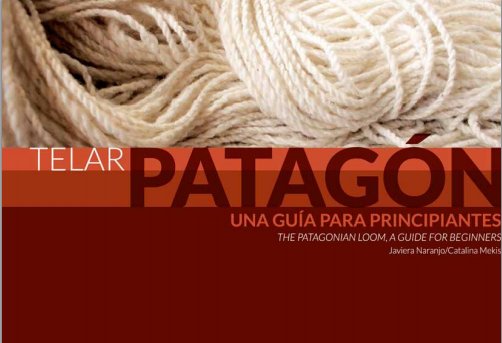
ScreenHunter_001Look at that gorgeous chunky handspun on the cover of the book which is used for warp-faced weaving on the vertical Patagonian loom. It reminds me of the fabulous yarn that Ace, one of my US friends, spun to weave into a backstrap. I had a lot of fun weaving with that yarn. It looked hairy and scary but wove up beautifully!

???????????????????????????????Now to get back to the loom and get my hands into that wool warp. Enjoy the e-book with its glimpse of life in the Chilean Patagonia.
Backstrap Weaving – What’s on the Drawing Board?

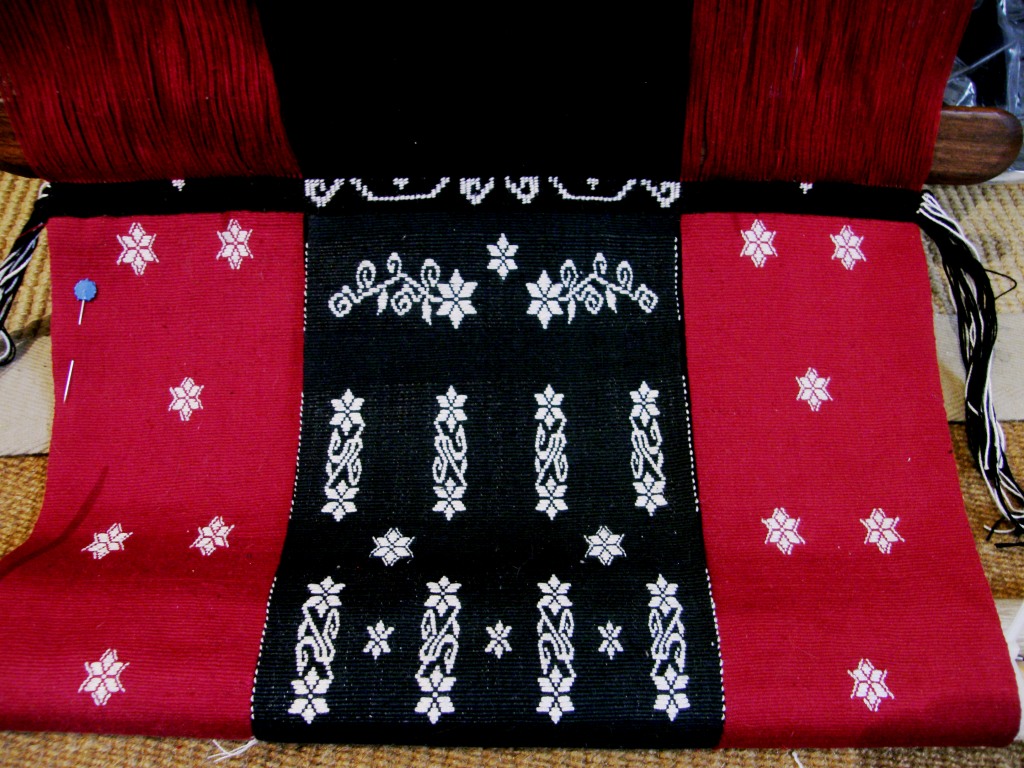
4th wal hanging weft inlayAs I pressed the last creamy silk supplemental weft into place with my Guatemalan pointed stick I was thinking “Okay, that’s enough brocade work for the time being!” I was just finishing the inlay part of the third of my three-panel wall hanging. The black central panel was the last one to be tackled and, in fact, this was my second attempt, the first having been set aside as a “valuable learning experience”.

As is my custom as a new year rolls around, I looked back at my blog posts from the end of 2012 and early 2013 to see what I had been weaving a year ago. I saw that I was up to my eyeballs in supplemental wefts. All in all it was a very “supplemental wefty” year. Here are some of the results…

supplementary-weft-pattern-sampler (1)

8319396336_aca5cdd068_o

??????????????????????And, messing about with supplemental wefts brought with it lots of  plain weave of the warp-faced variety. With that came the great coil rod adventure and the conquest of the dreaded corrugation, the circular warp experiments and the enjoyment of using fine thread. One of my students during the year told me about a weaving instructor who had urged her students to embrace the challenge of perfecting plain weave. I guess I unconsciously took on that challenge last year…not that I am saying that I have perfected it!! But, I have to admit that I just love the feel of the fine red plain-weave panels in the three-panel wall hanging, the lack of ridging and the evenness of the edges…no fancy floats…just lovely plain cloth. 

I am pleased that I chose to weave the panels separately. I want to have those red panels hanging freely to float and sway as they please.

So, as one part of my mind is saying “enough with the weft inlay”, something else  inside is sayng “Okay, but what if….”

bedroom floor of a backstrap weaverthree color andean pebble weaveMy bedroom floor says it all! There are certainly advantages to living alone. It allows me to make my bedroom floor my permanent project, ideas and drawing board. I just need to step between stuff anf fall into bed. And, who cares if you wake up at 3am and have the urge to sit amongst the stuff feeling suddenly creative? So, what’s on the drawing board?

There are five projects there, three of which involve supplementary-weft patterning. Clearly I am not done with this and I am not done with seeking the perfect plain weave either. You can see the first “failed” brocade black panel in the lower right corner waiting to be made into something. Buttons and balls of thread stand by.

Then there’s the three-color pebble weave band stetched out that I wove last year (pictured above) which needs to adorn a bag. Meanwhile, two little piles of yarn have formed and are sitting there as the vague beginnings of two new projects. I want to make a scarf with my pale blue indigo-dyed Japanese silk. While I have used silk as a supplemental weft, I have not used it as warp (except for a tiny pebble weave experiment). I am hoping to start a silk-on-silk weft inlay project with that.

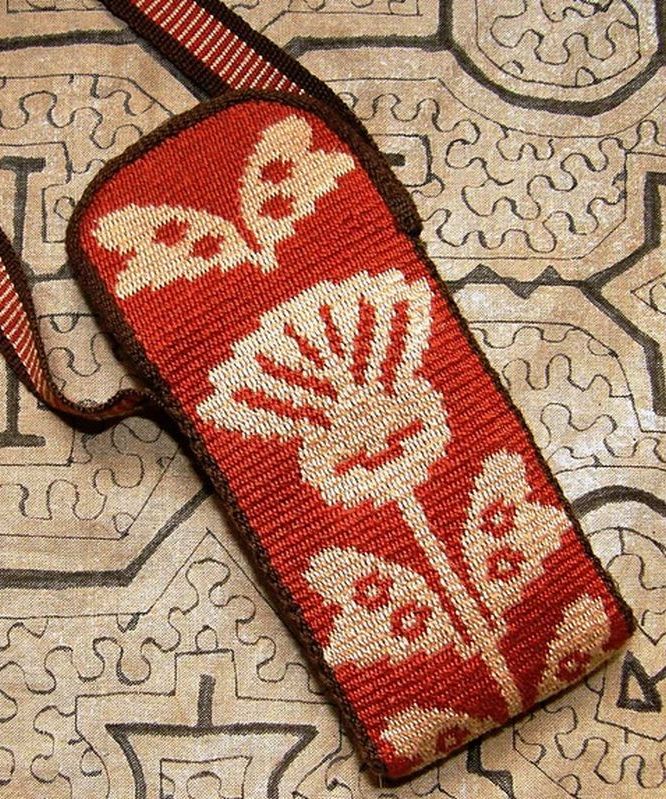
wool cell phone pouch backstrap weavingThe other project involves wool. I was really happy to find how easily I could weave my sister-in-law’s cell phone pouch using wool straight off the skein.

Re-spinning wool is generally recommended  for warp-faced weaving so that the “tighter” fiber can better withstand the abrasion of the string heddles and the rubbing of the warps against each other. I didn’t re-spin, yet the wool I used behaved so beautifully.

You do, however, need to have your shed opening technique down…smooth and gentle, no scraping or wrestling… to make his work.

There’s the wee wool drawstring pouch at left (picture kindly taken by my brother after my departure from Australia. He photographed it with some of the pretty colored plastic money that we use in Australia). We really need to find a nice wooden toggle for the bag.

alpaca_cell_phone_pouchThe wool I am planning to use for the next project is finer and more loosely plied. I think it will be more difficult to work with …a challenge.

Why don’t I just respin it? I don’t like the “hardness” of the resulting yarn or the curl that it gives to the finished pieces.

And guess what kind of patterning I want to do on this piece….weft inlay of course! Wool-on-wool.

I made a small pouch a long time ago with left over odds and ends of alpaca that I had spun and decorated it with supplemental weft of the same alpaca. I love the way the alpaca supplementary weft billows out of the sheds to lie fluffy and full on the surface of the cloth. I know that wool will behave the same way.

It seems there are endless possibilities for types of fiber to use for these inlay experiments. One thing I have not yet thought of using is hemp. Jennifer gave me some on one of my visits to Oregon and there it sits in the closet as yet untouched. Meanwhile Jennifer has been weaving with it and showed all of us in the Ravelry group her latest project….

photo_mediumThe colors, which Jennifer dyed herself, are gorgeous. They have that sun bleached look that I so love. The complementary-warp patterns are ones from Chinchero which I charted in my second book. Given the very hardy nature of hemp, I am thinking, as I sit here writing this, that I might use mine for the strap of a computer bag that I have been planning. Excuse me while I go fish the hemp out of the closet and toss it onto the bedroom floor! I won’t be using it for a weft inlay project, though.

The eucalyptus-dyed cotton thread awaits its purpose too…

???????????????????????????????And fr. Kyriakos wrote to me today and gave me a brilliant idea for it which has a suitably Australian theme….thank you!

Meanwhile, before I get too carried away with projects yet to come (well, it’s only natural with the coming of the new year, isn’t it?) there is still something on the loom which needs to be finished. I said that I had finished the weft inlay part of the wall hanging project. You could see in the first image at the top of this post that I have now set up the three finished panels on the one backstrap loom. Now I need to join the panels by twining across the top of all three at once.

twining on backstrap wall hangingSo, here you can see the twining underway. Oh my gosh, I had forgotten how SLOW weft twining can be! Thank goodness that muscle memory kicked in and I didn’t have to really refresh my skills. It’s been a while since I have done any major twining. The good thing about it is that this pattern doesn’t need any significant amount of concentration. As I said, muscle memory took over and, after the first row of pattern was in place, the counting was pretty much over and I could put on some music and sing and twine away.  

Tanka ch'oro and Andean hook patterns.
Tanka ch’oro and Andean hook patterns.

Muscle memory… such a handy thing. I never really believed that muscle memory would play a big part in pattern picking until I wove twenty-five tanka ch’oro bands in succession before the ANWG conference last June.

There would be times when my mind was reading the pattern and telling my fingers what to do yet I knew that something was wrong because it just didn’t feel right. I was actually picking the right colored threads in the right order but, because a distraction had caused me to form my picking cross backwards, my fingers were not picking in the way in which they had become accustomed after so much repetition.

I was amazed at how my fingers had memorized the moves and could immediately sense that something was wrong.

1521366_10152057744651530_1544583453_nAs I sit writing this post, a quick sidetrip to Facebook tells me that Radiant Orchid has been announced as the color of 2014. Who decides this and what does it all mean? Shock and horror…none of my planned projects included this color nor do I have any yarn  this color in my closet. Oh well, I guess I get to pass another year hopelessly out of fashion 🙂 It is a gorgeous color, though.

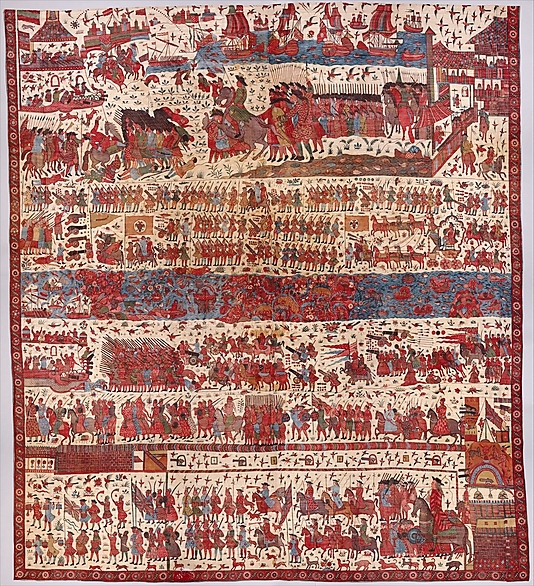
I will leave you here with an image of a textile from the website of the  Metropolitan Museum of Art in its current exhibit entitled Interwoven Globe- The World Textile Trade – 1500-1800. (Thanks to Jaina at Wovensouls for making me aware of this exhibit and the fact that it can be enjoyed online).

DP291194This cotton piece is labeled Hanging Depicting a European Conflict in South India and is dated before 1763. It is fascinating to me to see a textile depicting something of India in this time period. Some distant family members of mine in England have been tracing our family tree and have gone back as far as my great (x6) grandfather, Pierre Gallyot de la Vilette, who traveled from France to Pondicherry in south India to take up a post as a public notary around 1766. 

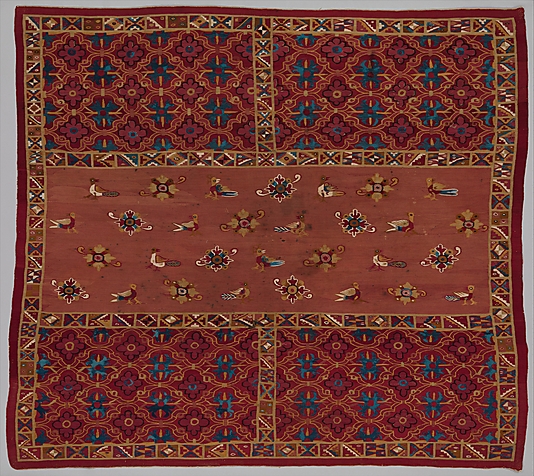
Another piece that I love from the exhibit is this tapestry mixture of Incan motifs (the tocapu design around the edges) and Spanish motifs in a wedding shawl made in Peru in the late 16th/early 17th centuries…

DP265667Take a look at the site and enjoy the exhibit!

Backstrap Weaving – Summer Weaving in Australia

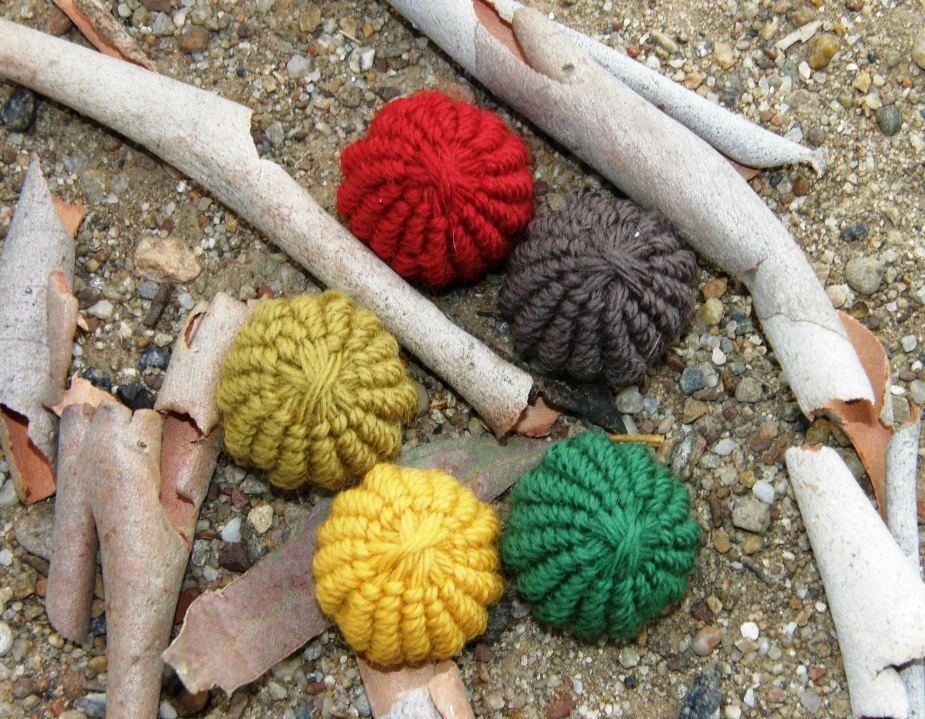
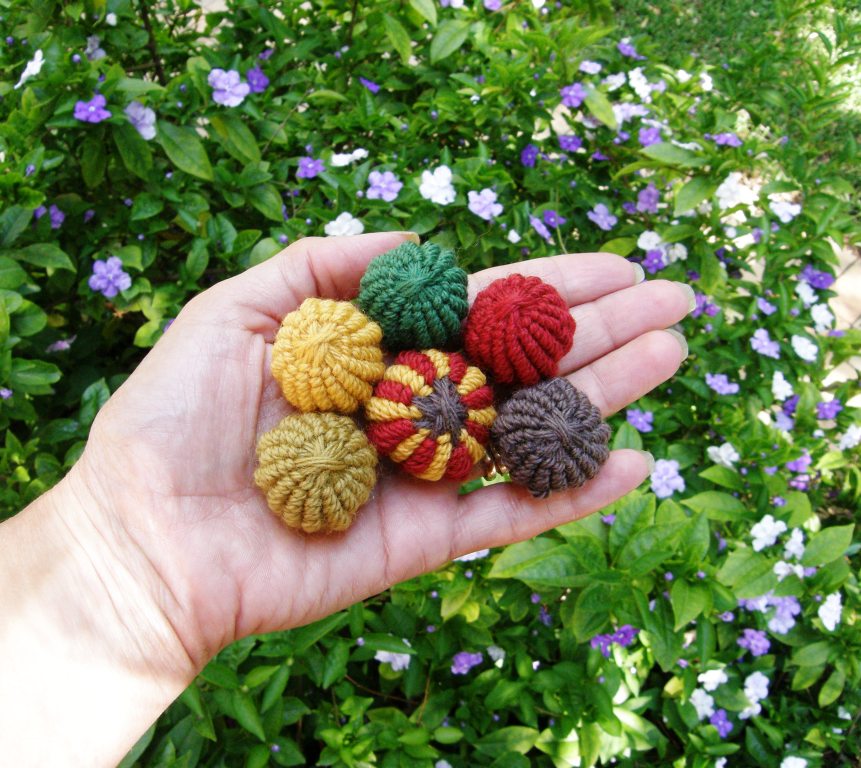
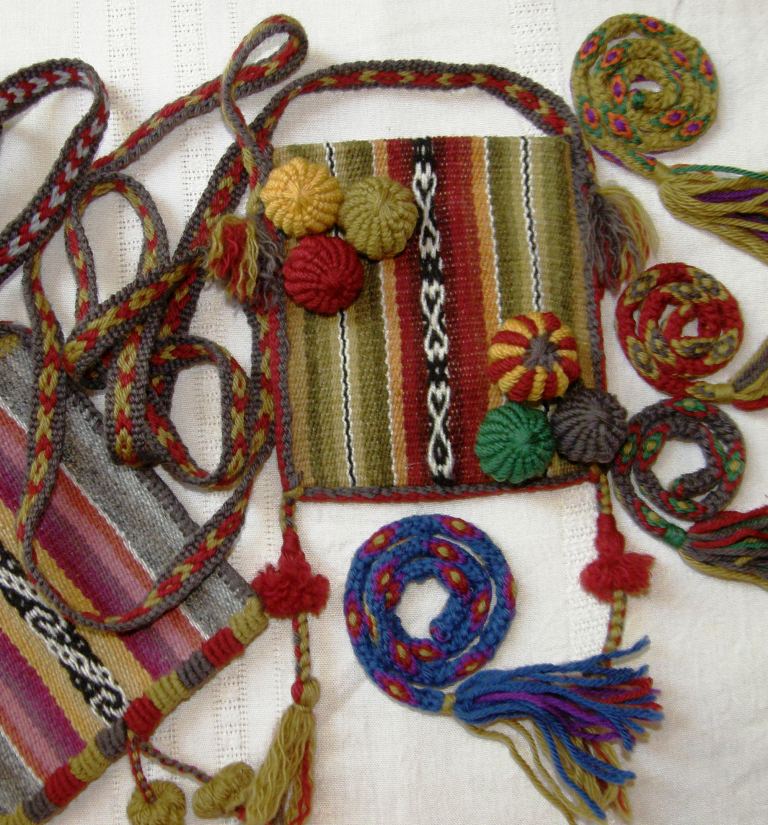
Ah, the Australian summer….while my weaving friends in North America and Europe post pictures of snow drifts and talk about extremely low temperatures…swathed in sweaters and blankets with snow falling outside in the -25 degree cold….the Australian cricketers are out in the field in their whites under the summer sun winning back the Ashes and I get to enjoy a little lakeside barefoot weaving…. ???????????????????????????????I stole a little time to warp and weave a band down on the shores of Lake Burley Griffin in Australia’s capital city, Canberra. Behind me, athletes were competing in a half-Ironman event in which my nephew won the amateur section and placed 6th overall. Having finished in just over four hours, he took a cooling dip in the lake while I wove and the other 1600 or so competitors continued to strain and sweat in the summer sun running along the lakeshore. They must have hated seeing me there as they ran on by. I was weaving a wool tubular band on which to hang the little button baubles I recently learned to make . I think I will turn them into a Christmas tree decoration and leave them behind on my brother’s tree as a memento of my visit.

Here they are nestled amongst some gum tree bark.???????????????????????????????In keeping with the Australian theme, I decided to try a two-color version inspired by the native Australian flower, the scarlet banksia. The banksia has the same ridged appearance as my wee baubles. I had red wool but no white so, yellow would have to do. bauble inspirationUse your imagination and you might see a resemblance in the two-color bauble in the center 😉 ???????????????????????????????I will add these little guys to my repertoire of finishing techniques for woven pouches. Smaller versions of these will make cute dangling pom poms.

???????????????????????????????After the race and back at our Canberra trailer park, we stepped out for a walk and found these guys happily grazing just meters from our door….there’s a mumma with her joey crammed into her pouch…white cockatoos screeched by in the soft evening light and kookaburras “laughed” unseen in the distance.

???????????????????????????????Of course, it was only at the end of our three-day stay that I discovered two amazing exhibits that were on in Canberra…darn! Well, you can’t have everything. exhibits in CanberraNow I am back in Sydney and I need to get to work and weave a cell phone pouch for my sister-in-law. I hope she doesn’t read my blog as it is supposed to be a surprise. I can just scrape together enough wool left over from my travel stash to make this work.

???????????????????????????????I have used this wool before for very narrow band projects and loved how well it worked straight off the skein without having to respin it. I wasn’t sure, however, how it would stand up to a wider warp so, here is my chance to test it. Would it be too sticky for warp-faced weaving? Would it be too weak and break with the abrasion from the heddles and the scraping of the beater?

debs cell hne pouch backstrap weavingHere’s the simple pebble weave pattern taking shape. So far, so good! There is no sign of weakness and the sheds open quite easily. This is enough for today…Deb will be home from work soon and I am doing this in secret.

Back in 2008, I wove a pebble weave bag for her and was surprised to return to see it still going strong. It is her favorite travel bag and has been to Dubai, Egypt, Turkey, Spain, India and Switzerland with her. Next year it will go to China where my nephew will represent Australia in the World Long Distance Triathlon Championship. Look out for him! I wish I could go too. I would love to take the train from Beijing to Lhasa.???????????????????????????????I also got to see some hangings that I had made for family members some years ago on previous visits… ??????????????????????The one on the left is an embedded double weave piece with typical bird motifs of Potosi, Bolivia  and the other one has pebble weave Guaraní patterns of lowland Bolivia in the center and a highland design on the edges. I had made that for my mum. It has inspired me to start planning a double weave piece for my red, black and white wall hanging series but first I want to weave a triathlon banner for my nephew’s bedroom wall.

And now for some more inspiration….

A new Facebook friend of mine from India sent me a picture of this piece of textile which he tells me was woven on a backstrap loom.

adi tribe arunachal pradesh nth east indiaIt looks like twining or soumak in the middle of a piece of warp-faced weaving.It is part of women’s costume from the ADI tribe of Arunachal Pradesh in northeast India. And this makes me keen to get into the soumak book that I recently bought and experiment with embedded designs like these. I have tried embedded twining in Bedouin design work that I have done, as in the example below.

???????????????????????????????Julia has been “intermesh-ing’ and inspiring the Ravelry group members with her beautiful projects. As always her pieces are beautifully finished.

Julias intermeshThe piece on the left has both Mexican and Japanese influenced patterns which work so beautifully together. The piece on the right has a motif that I recognize from Bhutanese weaving. Julia has adapted it to the intermesh technique. It is a very elongated and slightly different version of one that I chose to weave with supplementary weft some time ago.

cell 1I learned the intermesh  structure from the weavers in Peru who taught me Andean Pebble Weave. They used it to weave single-color borders for their pebble weave patterns.

It was only when I had spent time with my Guaraní teacher much later, that I discovered that the two-color patterning technique that she called moisy was actually the same intermesh structure woven with two colors.

I teach this structure in my second book, More Advemtures with Warp-Faced Pick-up Patterns.

At left you can see the first piece I wove after this discovery with Angela, my Guarani weaving teacher. It is a fun technique and realtively fast as it uses two sets of string heddles…every second weft pass is a free ride!, that is, no pick-up is required.

Now, I have an exquisite piece of wood working, precision, balance and engineering to show you. My friend Barbara was given the gift of a new spinning wheel and stool to celebrate the completion of her Master Weaver certificate. This was created by Tom Golding…anyone who is into spindles must know this name and must have drooled over his fine pieces of work at some point! Tom’s wife and sons all had their hands in the finished product.

Barbaras Golding wheel and stoolI will leave you with one of my friend, Annie MacHale’s latest creations. I never get tired of looking at the straps that Annie produces on her inkle loom. She never weaves two the same and has the knack of creating just the right custom pieces for her clients.

This one one is stunning!

558685_700776486599821_1305194224_nLet’s see if I can make it back to Bolivia before the next blog post. As much as I hate to leave, all good things must come to end and there are wall hangings to be woven, a long list of things to research, patterns to be charted and books to be read. Keep your fingers crossed for me that I make it back home without too many interruptions. Goodness knows where I will be spending Christmas Day!

MERRY CHRISTMAS!!!

????????

.

Backstrap Weaving – Working the Weft

I keep picking up the white paper bag that is lying on the chair in the bedroom half buried under a pile of tubular bands and warps. I scratch my head and wonder “What on earth is this?” My idea was to stop putting weaving things away in the closet. I fear the old “out of sight, out of mind” thing. So, the bag remains on the chair. I open the bag…oh yes, the contents of the paper bag are too precious to be left just lying about.  However, they are out of sight in the bag and, therefore, I keep forgetting what a  gorgeous delicate object it is that lies within.

Guatemalan supplementary weftIt is the wee Guatemalan backstrap loom that I bought at the Santa Fe International Folk Art Market in July. I gaped at the stunningly beautiful and delicate cotton gauze huipiles on the Guatemalan stand of weaver Amalia Gue with their white-on-white supplementary-weft patterns and was thrilled when I found that I could take home a relatively inexpensive example of these remarkable pieces.

This photo and description of Amalia Gue is from the website of the Santa Fe International Folk Art Market.

Guatemala_AmaliaGue_ArtistPortrait2_smAmalia represents Ixbalamke, a cooperative of women dedicated to the production of traditional textiles and preservation of traditional weaving. They live in the community of Samac de Cobán in Alta Verpaz and are inspired by the landscape and beautiful views of the region. The members of the cooperative maintain the intricate technique of gauze weaving and the use of coyuche, or natural brown cotton – practices that are rapidly disappearing. They also have a project making little looms for younger generations to continue to learn the tradition of weaving.

The cotton warp and weft is very fine and rather soft and a bit fluffy. It had not been sized. A thicker very loosely spun cotton is used for the supplementary weft. I haven’t looked at it closely enough to see if it is one thick strand or several fine strands combined. I am afraid that I will have to pull out one of the motifs in orderto ascertain that.

There are no obvious start and finish weft tails for the figures. The little bird figures just mysteriously start and finish. By picking at the weft I can see that the cotton used to weave the figures is most likely just twisted to undo the spin a little so that it can be torn when the motif is finished rather  than cut to give a blunt end. The torn end then just sits obediently within the shed. I think the fluffiness of the supplementary weft and the thread used for the ground weave causes all the fibers to interact and  somehow mesh and this is what prevents the motifs from unravelling….just my guesses and ramblings.

Guatemakan mini loom with supplementary weft patterningSo insanely delicate. Yet, this is the fabric of huipiles that I assume are frequently washed.

As it turns out, I have three large skeins of natural and bleached white Guatemalan cotton that is the same as the thread used in this piece. It has sat in the closet since 2008. It was an impulse buy and, when I got it home, I figured that it was way too soft for warp-faced backstrap weaving. I decided that one day I would size it and use it for something. For me, the biggest challenge will be achieving that even gauze-y ground weave. How in the world do the weavers manage that?  The good thing is that I have a ton of the thread and can afford to experiment and fail and try again.

I haven’t done supplementary-weft patterning on an open weave like that before. There will be much to learn! He is one of the huipiles for sale on the Gautemalan stand. This one was easier to capture in a photograph than the white-on-white ones.

Guatemalan huipil santa fe folk art market 2013So, while on the subject of the workings of supplementary wefts to create patterns, let me show you a few more things that I saw while in Santa Fe.

This is the work of weavers in the Sna Jolobil cooperative in Chiapas, Mexico headed by Pedro Meza Meza…

???????????????????????????????

And from Myanmar, Chin weaving…..

myanmar supp wef….brought to the Market by Khun Shwe and Pa Mang, experts in the textiles of the 40 subgroups within the Chin culture.

All the textiles I looked at on Khun Shwe’s stand were created with the single-faced weft inlay technique that I describe in my tutorial here. Below, you can see the “clean” back side of one of the pieces. 

single faced supplementary weft patterning myanmar

khun shwe myanmarIf you are in Santa Fe outside of the weekend of the International Folk Art Market there are still plenty of ethnic textiles to be seen at the Travelers’ Market not far from the downtown area. Many thanks to Marilyn who put me onto this place. It kept me happily occupied during one of the days leading up to the Folk Market.

There, I got to catch up with Pam Nadjowski whom I had met at Convergence 2010 in Albuquerque. Pam has a booth in the Travelers’ Market with textiles, jewellry and artefacts from Chinese minority groups that she has collected over the years. It was from Pam, in the booth she had at Convergence, that I bought the beautiful fine bamboo reeds that I use on my backstrap loom when I want to weave balanced cloth. These are treasures to me!

bamboo reedsPam allowed me to examine and photograph the beautiful silk brocade cloths, with pattern appearing on both sides, which come from the Quiandongnan area of China. They are used as baby carrying slings.

Sadae Torimaru in “Spiritual Fabric. 20 Years of Textile Research among the Liao People of Guizhou, China” briefly describes the patterning technique. She shows a weaver working at a floor loom and writes that each row of supplementary weft pattern takes 7-8 minutes to pick. The book includes 3 pages of images of individual symbols that are traditionally woven into the baby carrying slings and information about what they represent….such things as roosters’ feet, grass in paddy fields and a big tiger’s claw. It is interesting to go through the photos I took and identify the symbols in the book.

Here is just one of many pieces that I photographed. What an amazing piece of fabric in which to carry a baby.

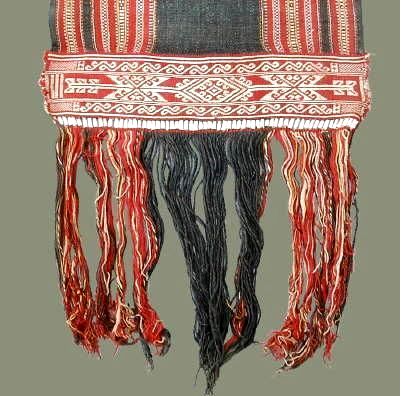
???????????????????????????????I’ll show you just one more thing from Nagaland, a state in the far north-easten part of India.  There happened to be an exhibit of Nagaland textiles while I was visiting the Travelers’ Market.  Here is a very striking piece of fabric patterned with supplementary wefts. It is quite a contrast to the delicate Miao brocade. I like the way the supplementary weft extends from the sides of the cloth to form a fringe….an interesting solution to bulky weft turns on the edge of the fabric. I have more interesting pieces to show from Nagaland….another time.

???????????????????????????????As for my own weaving, it is a little “on hold” as I am counting down to my departure.

My living room floor has once again turned into a hop-scotch field of baskets of skeined yarn,  all sizes of balls of yarn arranged in possible color combinations, sticks, elastic bands, tape, warping boards and STUFF. This is where I warp. I love the speed and efficiency that comes from winding many warps this way….choose the colors, wind the warp, put the warp on the sticks, make heddles. For the simplest warps I make the heddles after the warp is wound right there on the warping board….Done!…NEXT!

4 color pebble weaveThe bedroom remains the paradise where I do the actual weaving. It is simply a smaller version of the chaos of the living room but has many more sticks as well as scattered cushions on which to sit and weave.

Now that I don’t have my cat anymore, I don’t need to put everything away from kitty claws at night. This means that things can remain in sight and in mind at all times rather than being put away in the closet to be possibly forgotten. There is quite an array of bits and pieces scattered about to remind me that there is this certain thing that I wanted to investigate further, or that color combo that I wanted to try or that pattern that I wanted to chart. I see them during the day and step on them in the middle of the night if I need to visit the bathroom.

I now have several weaving anchor points in the bedroom so I don’t even need to roll up a project and put it aside when I feel like working on another for a change of pace.

Between spurts of warping which can be rather mind-numbing, I wove one more  pattern on the four-color pebble weave band and rearranged the colors a little for the repeated motif. This is certainly something that can “un-numb” my mind!

And then, when my head is good and clear, I work on my supplementary-weft wall hanging. It’s not a sampler. I don’t want any mistakes in it and so, I leave that project for the times when I feel relaxed and want to reward myself after a good long bout of warping. I will give you a break from seeing that project this week.

Let’s look at what others have been up to….

hummingbird_guitar_strap_002_mediumI taught Janet the two-heddle intermesh technique that I teach in my second book, when I was visiting with her in northern California last spring. She wove this guitar strap using her own handspun wool and…. look at that, first prize at County Fair!  The strap has bird, leaf and hummingbird patterns. I got to see it when I was at her place in July but wasn’t allowed to show it here at that time because of the rules of entry in the Fair. I have been waiting and waiting to show you how fabulous this is.

Photo by Zev Eisenberg

Figmentling, from Ravelry, told me that she learned how to twine from the basic tutorial here on my blog. This is another resource that she consulted as well as this discussion on Weavolution where my friend, Franco Rios, lists many more resources for instructions and information. Then, she took it so so much further and created the bag you see above! It has interesting finishing techniques and a braided strap that she learned to make from Ingrid Crickmore’s loop braiding blog. She drafted her own pattern which she says commemorates the new bak’tun in the Mayan calendar.

DigitalLeaf from Ravelry shared pictures of her backstrap project.

DigitalLeaf backstrapIt looks  wide and very comfortable, has nice edges and is beautifully finished. I hope that she will get a lot of use from it.

And finally, I would like to share a comment I got from a reader this week. As one of my goals in writing my second book was to have people feeling confident and inspired enough to design and weave their own pebble weave patterns, I can’t tell you how happy this comment made me:

Thank goodness! I have finally cracked it. Having worked my way through the first Andean pebble weave book I was looking forward to dipping into the second and then I noticed that you had changed the pattern format. My heart sank and I put that book away for a month. But I looked at it this weekend, tried one of the smaller bands without any notations (thought it best just to throw myself into it) and by the time I was halfway through the first repeat it all made perfect sense and I can now read them perfectly and am presently designing my first band from scratch

Thank you Laverne – you have opened a whole new range of patterns to me.I will post my first effort when it is completed (if it works, that is)!

See you next week!

Backstrap Weaving – An Early Start on the Finish

I have two out of three panels for the wall hanging finished. That sounds like a lot but these two panels are just the “quiet companions” for the center black panel which will be heavy with supplementary-weft patterning. So, while it might sound like 66% of the work is done, it isn’t so. Still, it feels good to have this project well under way. I have even wound the warp for the center panel and now need to install 312 heddles and wind 624 ends around the coil rod….it’s worth it!

2 of 3 anels supplementary weft inlayThe black panel will have a lot of supplementary-weft inlay filling both positive and negative space. Then I would like to join the three panels across the top using weft twining and need to plan a design for that which will suit the woven patterns.

The Montagnard (Vietnamese hilltribe) backstrap weavers with whom I studied in the US use weft twining across the ends of the panels they sew together to make blankets. Two or three panels are sewn together once off the loom and then weft-twined patterns are added to one edge.

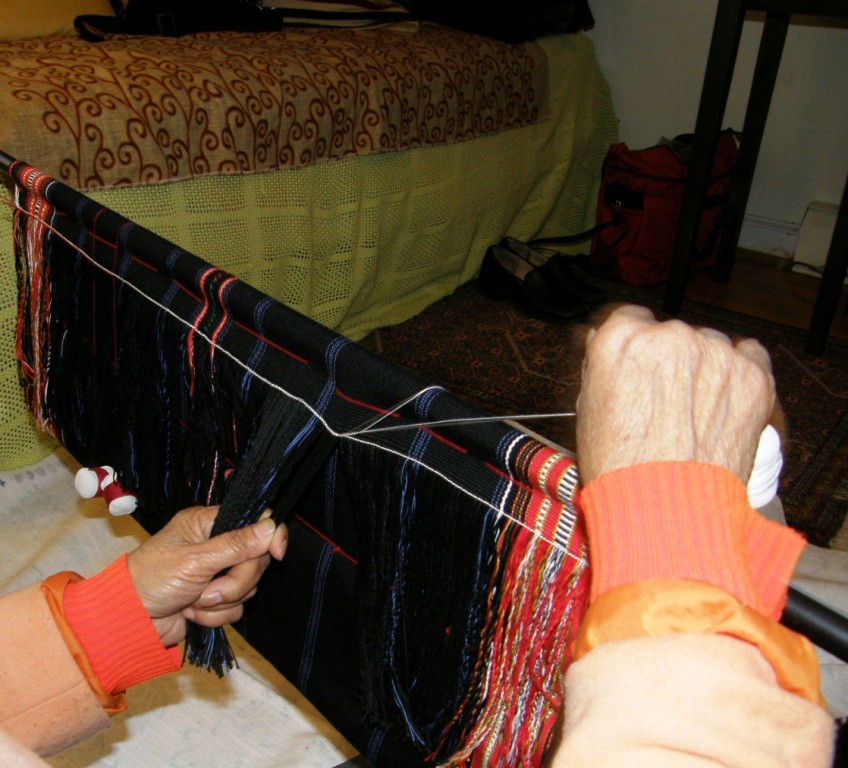
ngach twining set upAbove you can see my teacher Nagch working on a piece draped over a frame. The colored threads that she uses to encircle the hanging warp-ends are held on small cement bobbins that she made.

??????????????????????You can see how it is necessary to have the warps-ends under tension while the twining takes place. Nagch pulls the ends tight with one hand while twisting the bobbins with the other.

LEFT: Twining class with Nagch at Betsy's house. At right, Ju shows me how she gathers the warps in groups and sizes them before twining.
LEFT: Twining class with Nagch at Betsy’s house. At right, Ju shows me how she gathers the warps in groups and sizes them before twining.

Here are some the beautiful examples of twining on the edges of Montagnard skirts and blankets made by Nagch and Ju Nie…just the right colors for my project!

kteh designs

Twining on the bottom of a loin cloth. This image was shared with me by Susan Stem.

I have tried weft twining both on and off the loom and it is far easier for me to control while the pieces are still on the loom with the warp ends under tension. As my wall hanging is nowhere near as wide as the Montagnard blankets and skirts, I will be able to put the three panels on my backstrap loom side by side and twine all the way across them. That will be the only place that the three panels will be connected.

Then I will add some twining to the bottom of each individual panel. Again, it will be fun coming up with a design that works well with those on the panels.

I think they will need the weight of the twining at the bottom to help them hang well. I have always imagined that one of the possible reasons Montagnard weavers add twining and beads to the bottom of the loin cloths they weave is for the added weight. You wouldn’t want the flaps of those loin cloths blowing about in the breeze!

Anyway, that is what I envision for my wall hanging for the time being. Who knows how this plan will be modified along the way.

I have other ideas for perhaps edging the piece with a tubular band. So, I took some time off from the wall hanging project and brushed up on a tubular band structure that Marijke van Epen and I studied together when I visited her in the Netherlands last year. We had a picture from a book and were able after a couple of attempts  to figure it out.

As luck would have it, just ten days after I got home from that trip, I went to Peru and came across a weaver from Chahuaytire, in the Cusco region, weaving and sewing one of these very bands to the edges of a large piece of woven cloth. I saw how he had set up the warp and separated the threads into their various heddles and was able to buy a prepared warp from him.

tubular band of Chahuaytire

chahuaytire band three versionsIt was a long loooong warp!

It was designed to go all the way around one of the typical large carrying cloths.

Look at all that luscious handspun thread! The thread was colored with natural dyes and some of the shades of green were very similar. This means that the pattern is a little hard to discern.

The example that Marijke and I had been studying in Nilda Callañaupa’s first book had been done in very bright and distinct colors…six in all counting the border color.

I have made a few examples and have decided that I prefer a quieter version. The minimum number of colors could be as few as two.  That’s just as well as my wall hanging uses only three colors.

I have been sewing them along the edge of a wool band for practice. The one on the right is probably closest color-wise to the one in Nilda’s book. There is one fewer color in my wool version in the center.

Here is the three-color cotton version I made that I would prefer for my project:

three color version of chahuaytire bandHere is one from Chahuaytire that I photographed at the CTTC stall at the Santa Fe International Folk Art Market in July….those colors are so gorgeous!

???????????????????????????????Weft twined bottoms and tops and tubular edgings…it seems that I am more intent on thinking about the finishing touches for this project before I can even get started on the meaty part of it.

And, while on the same break…basically dithering around before getting into what I was really supposed to be doing, that is, winding the warp for the black panel….I decided to continue the three-color Andean Pebble weave sampler. It was coming out so well that I decided that I really needed to use it for something. I will probably sew it onto a woven piece of fabric. Too bad we won’t be able to appreciate the fact that it is reversible that way but it just so happens that all the mistakes are on the back! Never mind, there are some bigger and better projects yet to come using this structure!

???????????????????????????????The flower head motif is the center and I am now working my way backwards repeating the patterns. There you can see the hummingbird sipping from its flower.

Now, if only I were as talented with fabric and sewing needle as Julia….

julias sewing  with pebble weave(2)

julias sewing (1)Julia and Cindy, who are both in the Ravelry group and live on opposite sides of the US, got together at the Mannings to show and share their backstrap weaving work. Cindy lives in the northwest and has woven with me and Julia and I have gotten together a couple of times too. That’s Julia on the left and Cindy on the right.

Julia and Cindy at the ManningsThat’s an impressive display of their collective backstrap weaving work! I see some weft inlay work in there amongst the pebble weave and there must be a bunch of tubular bands there too.

Father Kyriakos in Australia sent me a picture of his Andean pebble weave work. He has both my books and is playing with color changes as well as working on using narrow patterns with reversals and reflections to create wider designs. I would say that he is a natural!

fr kyriakos pebble weaveWell, that’s enough thinking ahead about how my wall hanging will be finished.  It’s time to knuckle down and continue weaving it. I am off to dress up that black warp with its heddles and coil rod….see you next week.