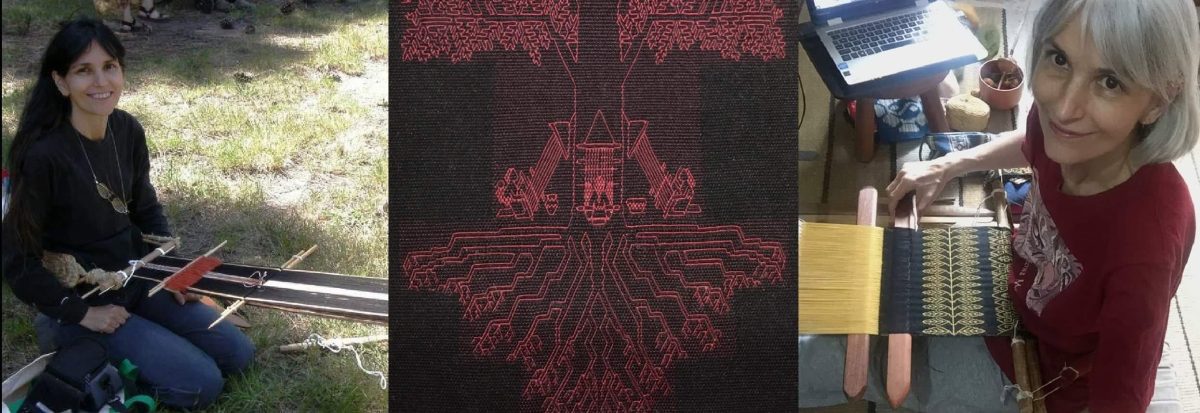
Facebook is fond of showing me memories from past years and the latest one to show up is from November 2017 when I was at my brother’s home in Australia working on weaving the samples for my Complementary-warp Pattern Book. Sometimes, the will is there to start a new book but for some reason it is just so very hard to get the project off the ground. At times, I have started by laying out the table of contents in a Word doc and that has been enough to kick me into further action. In the case of Complementary-warp Pattern Book it was the act of sitting down with this lovely blank Andean Pebble Weave warp stretched out before me that started the ball rolling.

There would soon be four horses galloping along the length of that warp…four horses called “Eldy’s Mustangs” by their creator, my weaving friend, Deanna Johnson. I love the simplicity of this set-up. Another warp that I set up for this book would have angels dancing among snowflakes, candy canes and Christmas trees. I think that just the colors that I had chosen would have provided a hint of what was to come.

And this next one was set up to display different kinds of maze-like and geometric patterns.


All three warps are set up for the two-heddle pebble weave method that I favor when I weave this structure on my backstrap loom. The pencils that you see in the warp are holding what I call the “permanent picking cross”. In the twenty-four years that I have been traveling here and there to study these structures with my indigenous teachers, one of the most important things that I have brought home with me time and time again is the fact that there is no one correct way to do things. There are many different paths that can be taken in order to arrive at the same place. I am so glad that I have been exposed to four very different methods that can be used to weave the Andean Pebble Weave structure.
The set-up that you see in these photos was the one that was taught to me by my very first teachers back in 1996. The mother and daughter who sat with me day after day as I wrestled around with those two sets of heddles came from Ayacucho in Peru. They happened to be living in Huancayo at the time.
I would like to say that they sat by patiently as I made a mess of their carefully prepared warp but it isn’t so. They were perplexed and annoyed by the fact that I was pulling away so violently at the heddles. My warp threads were breaking with all the friction and abrasion. I was not aware at that time of the role my body needed to play in the operation of the loom. The body needs to move and make subtle changes to the tension on the warp which makes the smooth operation of the heddles possible. Several movements need to be coordinated and when you finally find yourself picking up and slipping into the rhythm, it’s almost like a dance. Until then, you are brutish and clumsy and the result is heddles clogged with fluff, broken warp threads and annoyed teachers!
I didn’t understand that there was much to be learned about basic backstrap loom operation before I could hope to learn about the patterning technique. Fortunately it all started to come together eventually.
You can see my teacher picking out her pattern while working close to the cross sticks. This is the method used by weavers in Ayacucho. The two sets of heddles hold the regularly repeating pebble sheds….those that create the little spots, or pebbles, in the fabric.
(If you also find yourself seated at a nicely prepared warp but are unable to progress because of heddles clogged with fluff, you might consider taking a look at the video class that I prepared back in 2016…Operating a Backstrap Loom. It’s available as a dvd or as streamed content from Taproot Video.)
My weaving teacher here in lowland Bolivia uses this pebble weave structure on the large vertical frame loom that is used by the Guaraní people to weave hammocks.  Angela uses three sets of heddles…one set holds the threads from one of the two pebble sheds. A second holds all the dark threads and the third all the light threads. The threads for the second pebble shed lie on a shed rod or in one large loop depending on the width of the piece being woven. The Guaraní weavers have a very interesting way of making their string heddles. You can see how they are sort of chained together.
Angela was only working on very narrow commissioned pieces when I studied with her and so I have included here a picture (courtesy of Aude Rossignol) of another Guaraní weaver who is using the full width of her loom for a hammock in pebble weave. You can see the advantage of those loose chained heddles on such a wide piece. If the heddles were suspended on a rod, it would not be possible to just pull on the rod and achieve a good shed clear across that wide warp. This is a fixed tension loom and so using the body to make tension adjustments as one does with a backstrap loom is not an option. Instead, the weavers pull on groups of chained heddles working their slowly way from one side of the loom (in this case from right to left) to the other and inserting the sword as they go.

My weaving teachers in the central Bolivian highlands use yet another method when they weave narrow bands to create the same Andean Pebble Weave structure…

The only name that I can think of for this kind of loom is “body-tensioned”. Maxima’s index finger is one “beam” and her big toe is the other. Her left index finger is permanently in this position to maintain and adjust tension on the warp. All loom operation and pick-up is done with the other hand. There’s no backstrap. The warp is set up with one pebble shed in heddles and the other pebble shed in one large loop. Max makes a picking cross with these two sheds and from there picks the colors to form her pebble weave patterns. And, you should see the speed with which she does so!
The last time I visited Max and the other ladies in the co-op, I demonstrated a new pattern for them using a warp that was tied to my waist in the manner to which I am accustomed. I could see Max studying me and I could almost see from the expression on her face that she approved of this set-up which gave me two free hands with which to operate the loom…a definite advantage when working with the rather sticky handspun wool thread. All the ladies kicked off a sandal and started winding warps using their fingers and toes as warping stakes. Max took a length of yarn and tied hers to her waist. She had decided to try out this “new” method that I was using which involved tying the warp to her body rather than just suspending it on one finger. To my surprise she was immediately mocked by all the other ladies for wanting to do things the “gringa” way!
 Max, Antonia and some of the other ladies learned to read my pattern charts. You can see a picture of Antonia showing off the band she wove using patterns from the book I had left behind. Don’t we all love to learn new patterns?
The fourth way is the way that is used by some of the backstrap weavers that I have observed in the Cusco area of Peru in my travels. We were also privileged to have two ladies from Chinchero come to Santa Cruz Bolivia, where I live, to attend a small conference that was held here back in 2011. Only a handful of people from the general public applied to attend and it was wonderful to be able to spend so much quality time with these weavers over the three days that we had together. My Guaraní teacher, Angela, was also invited to demonstrate.

The warp being used by the Chinchero weaver in this picture is set up with all the threads of color A in heddles and all the threads in color B held on a shed rod. She uses two swords to hold what I call a “temporary picking cross” in which all the threads from both layers of warp are raised at the same time and held on swords. She can weave a variety of complementary-warp structures using this method. Some of the patterns that Chinchero weavers use are a complex combination of more than one structure which means that there is no real advantage to storing the pebble sheds in heddles. Some parts of a large motif can be woven using the two-two-two pebble arrangement of warp floats while other parts of the very same motif can be based on a two-one-two-one arrangement.
This two-sword method is he one that I teach in my Complementary-warp Pick-up Book. In my Andean Pebble Weave on Inkle Looms book I teach both this and a modified version of the two-heddle method. In fact, I teach three methods in that book.
You might have guessed that my favorite method for the backstrap loom is the first one that I showed with its two sets of heddles. For me, it has many advantages. I won’t go into them but, if you have ever taken one of my Andean Pebble Weave classes on a backstrap loom, you may recall my talking very enthusiastically about a thing called the “saver cord”. On the inkle loom, I guess I prefer the two-sword method of the three different methods I teach on that kind of loom.
Mary Spanos has woven with me on several occasions when I have been visiting the USA. She loves the backstrap loom and recently showed me her latest project….
 This is a Japanese sashiko pattern that is charted in my Complementary-warp Pattern Book. Julia Weldon translated the traditional stitched pattern to the Andean Pebble Weave structure and kindly contributed it to the collection. Mary is weaving it beautifully into this band. I particularly like the way that she has chosen to use a lavender and white strip of plain Andean Pebble Weave as a border stripe instead of a solid color.
And, here’s another band by Mary using a series of fish patterns from the same book alongside some of her own creation…

Carlos is also using a backstrap loom and the two-heddle method to weave a wide piece of fabric to be made into a shoulder bag. The same book mentioned above has charts for three bee motifs. The center bee on this piece is included and is Carlos’ own creation.
 Lausanne also learned the two-heddle method using a backstrap loom with me on one of my visits and you can see her here weaving a hatband for her husband with, yet again, a pattern that is charted in the Complementary-warp Pattern Book (from a pre-columbian textile fragment). This is one of my favorites…one of some cheeky viscachas rocking to and fro…

Here it is on the hat….

Annette Giles is using the two-sword/temporary picking cross method to weave the Andean Pebble Weave hummingbirds. Yes, they’re from that book again.

And, here are some initial results from Carol Berry from one of the very first Zoom classes I gave on Andean Pebble Weave on Inkle Looms…

So…… enough pebble weave! How about some double weave?
Nancy Ayton is using her inkle loom to weave warp-faced double weave bands and is creating her own fabulous patterns. Don’t you love the elf?! That’s just one of Nancy’s original designs on this band. The band includes some motifs from my book Warp-faced Double Weave on Inkle Looms.
 I think I will weave the elf on a set of Christmas tree hanging ornaments like the ones I made last year.
 On Maureen Farndell’s warp-faced double weave band you can see the motif that I adapted from Bedouin textiles and charted in the book. It’s lovely the way she has connected the motifs and turned them into one continuous pattern along the length of the band.
As for me, I am plodding along with another silk ikat sample. This one is a study of take-up and the number of warp-ends and picks I need to create a square. Hopefully the information on take-up will help if I later decide to try and tie some curved shapes into a warp. I do hope so because the study sample pattern I have chosen is just plain boring to weave! It’s rare for me to sit at my loom and think “Urgh, I just couldn’t be bothered”! But sometimes you just have to slog through this sampling process. Hopefully, when it comes time to write my next post, it will be off the loom and I will be on to something else with all the valuable information I have gathered from this sample.
Until then….stay safe and well.


