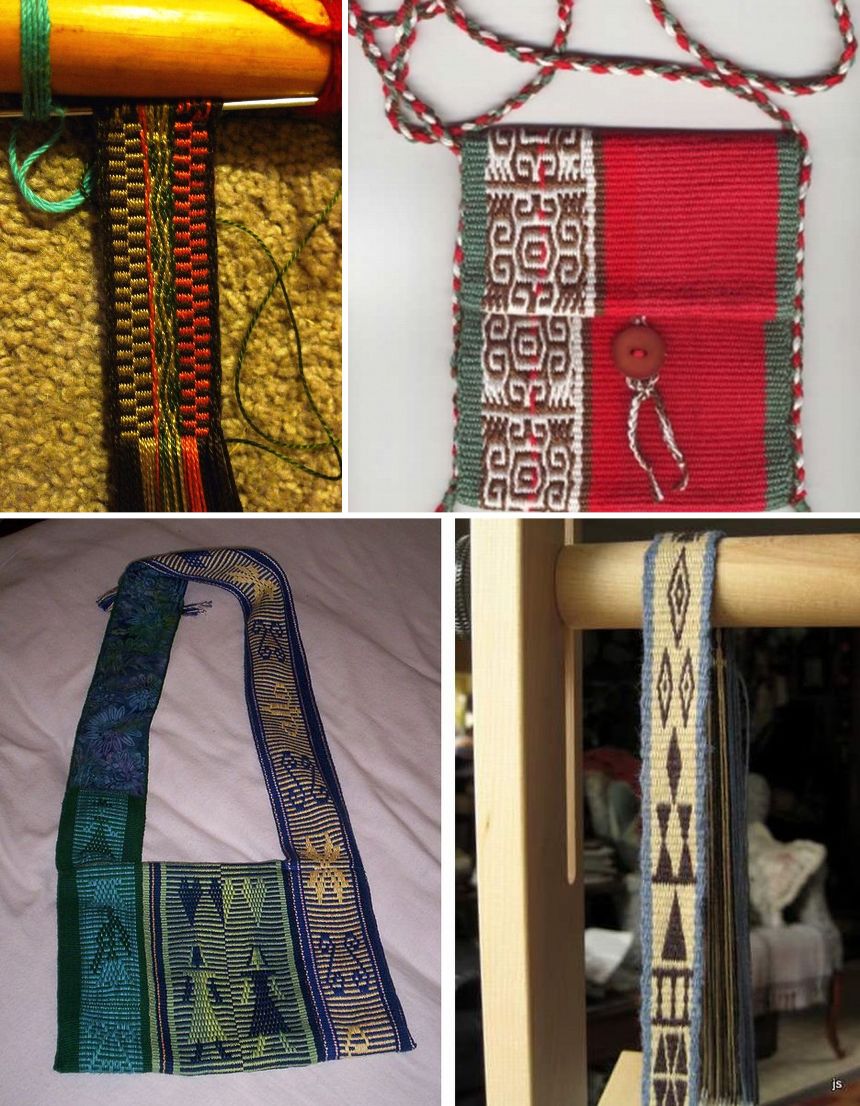
Backstrap Weaving – What’s on the Other Side?

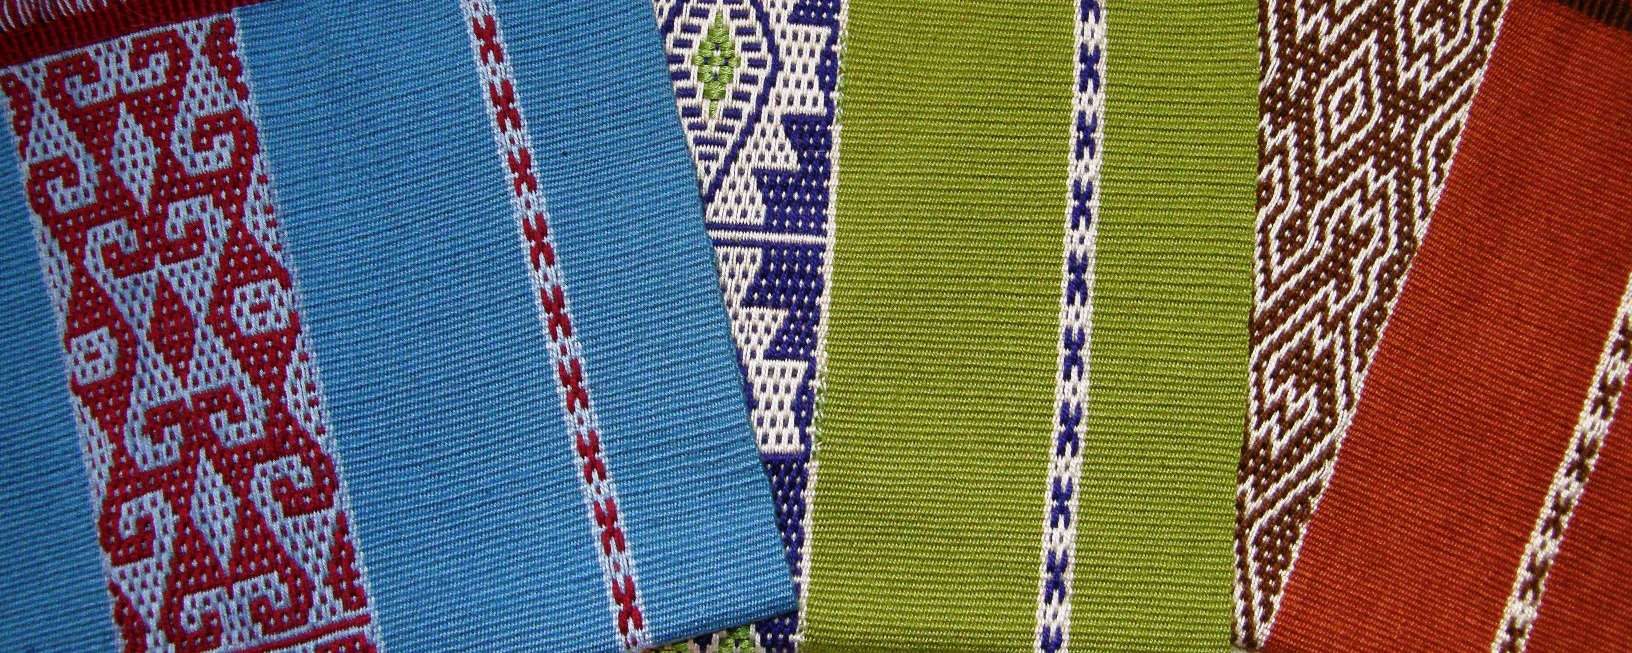
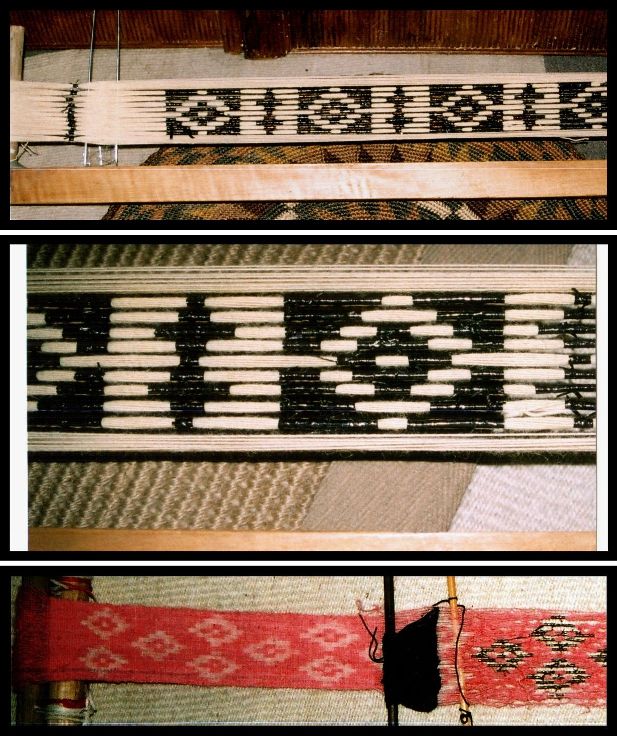
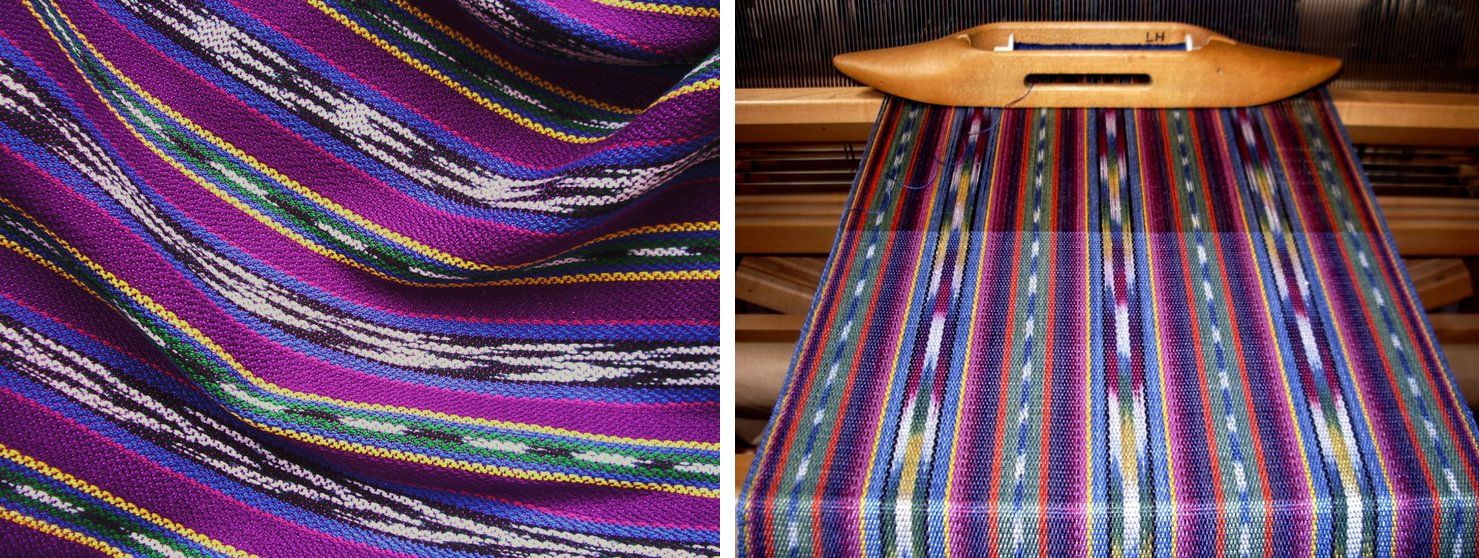
I have been looking at and thinking about what is on the “other side” of woven cloth and about the different attitudes of weavers from different cultures to what can be seen on the “wrong side” of the fabric. Some weaving structures are completely reversible as is the case of most complementary warp structures.

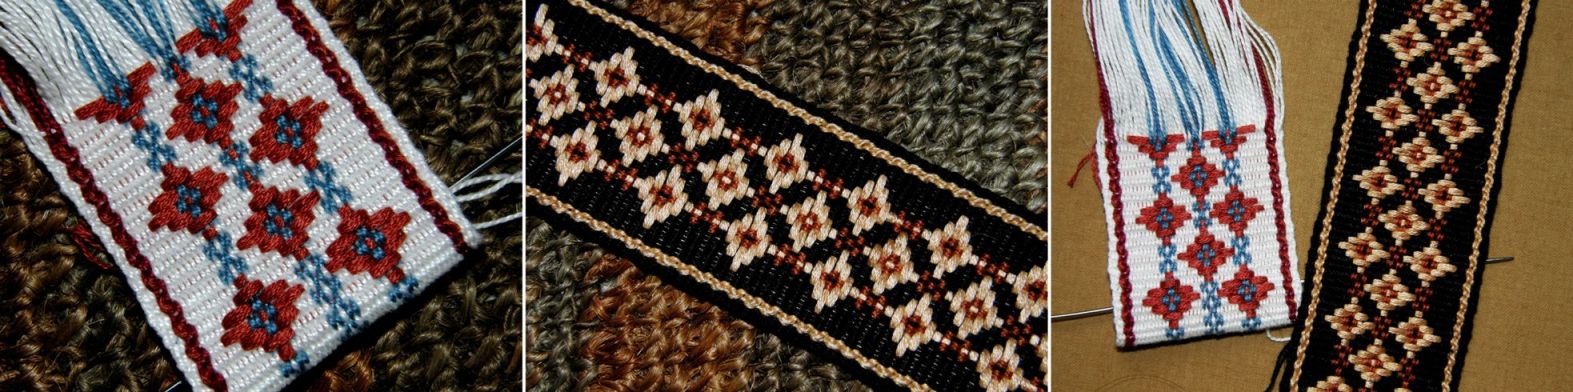
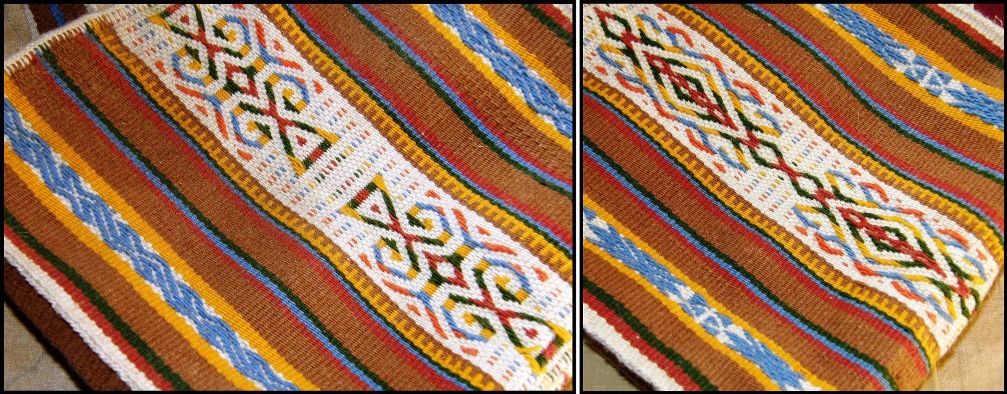
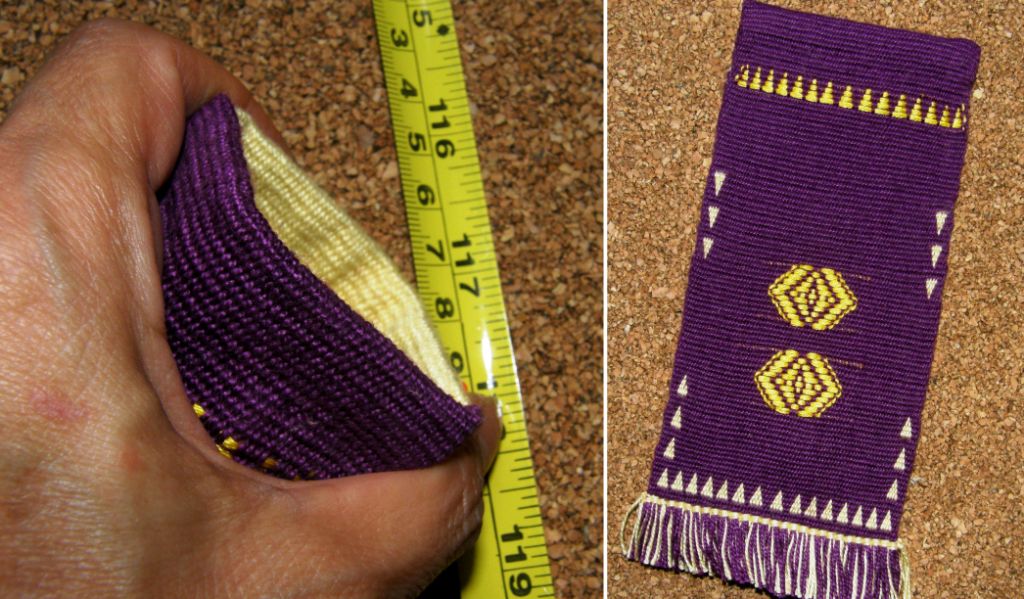
You can see both sides of my pebble weave piece at left and can probably appreciate that sometimes it is difficult to decide which side to make the “right” one as I had to in the case of this guitar strap when putting on the length adjustment buckle. As this is being sent to friend, I have actually left the decision up to her and only pinned the fabric in place around the buckle.
I always start with what I expect to be the right side facing me as I weave and find that sometimes I completely change my mind abut which side I like best once the piece is off the loom.

The wrong side of the weaving can also reveal just the information that is needed to be able to quickly identify the weaving structure.

For a while I was scratching my head over pictures of the yurt band that my friend Lisa had bought thinking it was pebble weave until she eventually sent me a picture of what was obviously its wrong side and I was then able to see that it had been woven using what I call simple warp floats.

At that time I didn’t much care for techniques that didn’t produce two “good” sides but who could resist trying to weave these gorgeous yurt band patterns?

Then it was a matter of getting the charting paper out, searching the net for more images of these bands and getting down to weave.

I must admit that lately I have gone a little crazy about this technique as I find more and more examples of its use in places like southern Iran, Mexico and tropical lowland Peru.
This weaving structure produces a definite right side. However, even though the wrong side with its exposed wefts looks nothing like the upper face, it can still be quite appealing depending on the color weft that you choose to use.
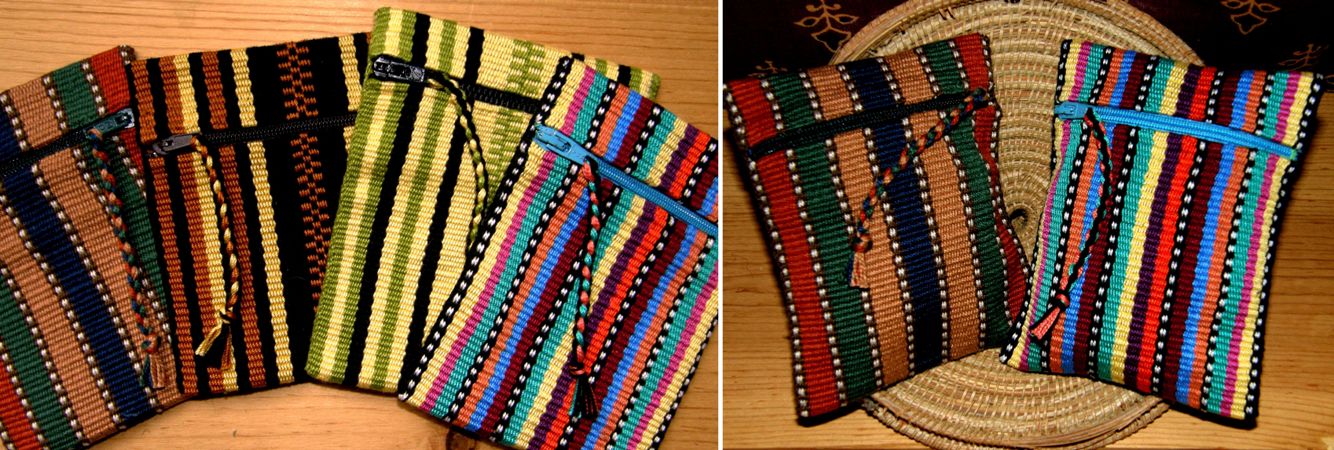
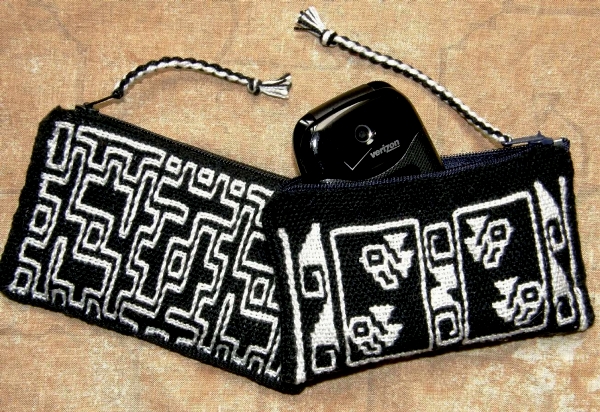
In the case of the yurt bands, only one side of the band is visible anyway when it is wrapped around a yurt. The piece I wove above right was made into a zippered purse and so no one needs to know what the inside of the purse looks like.

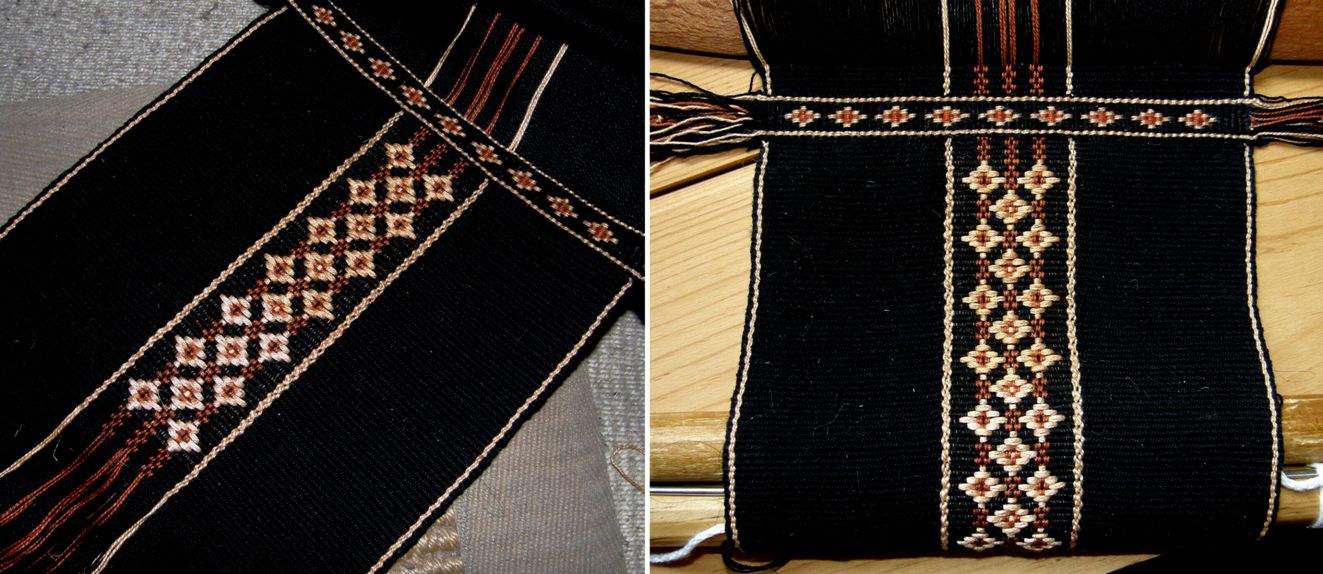
I am guessing that the day will come when there is a nasty spill on one of the place mats pictured above left and that I will be wishing that I could just flip it over and have the same design on the other side…oh well.

I might mention here that I just received my copy of The Journal for Weavers. Spinners and Dyers from the UK which has a beautiful article on  Kyrgyz textiles by Stephanie Bunn which includes yurt bands made in this kermé technique. She quotes a Kyrgzy person who says “Kyrgyz weavers are all mathematicians”. Bunn  then goes on to say “I found that trying to make the rhythmic pattern of kermé was the kind of experience that made me want to weep, although time improved matters.” You can read that article here.

I am infinitely grateful that I was taught the base of this technique by my wonderfully patient weaving teachers in coastal Ecuador and so taking the next step to  kermé was relatively easy.
The two pieces if weaving below have been woven in another technique with the same basic warp manipulations but their “back” sides are vastly different…

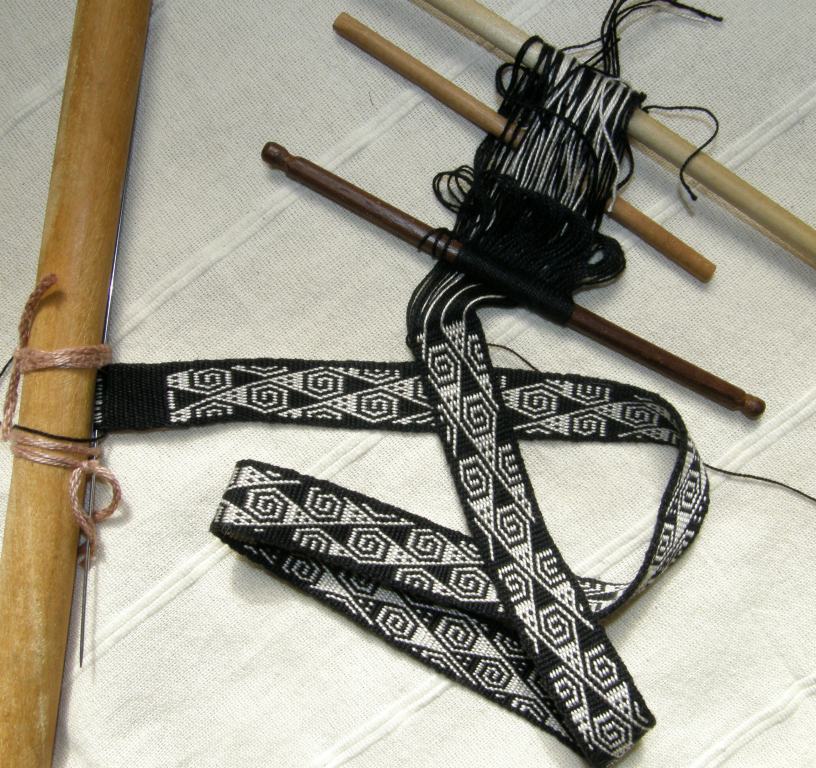
The motif above right is a smaller version of one of the Bedouin motifs on the belt above left.

The belt has been woven in warp-faced double weave and so the motifs are exactly the same on both faces with their colors reversed.

Unfortunately both sides will never be appreciated as only one face is ever seen! I wove this in double weave as this technique produces something sturdy enough to be used as a belt.

The camera strap I wove at left makes better use of this technique and I didn’t have to decide which face to make the “right” one.

Now look at the back of the piece above right which I show below…
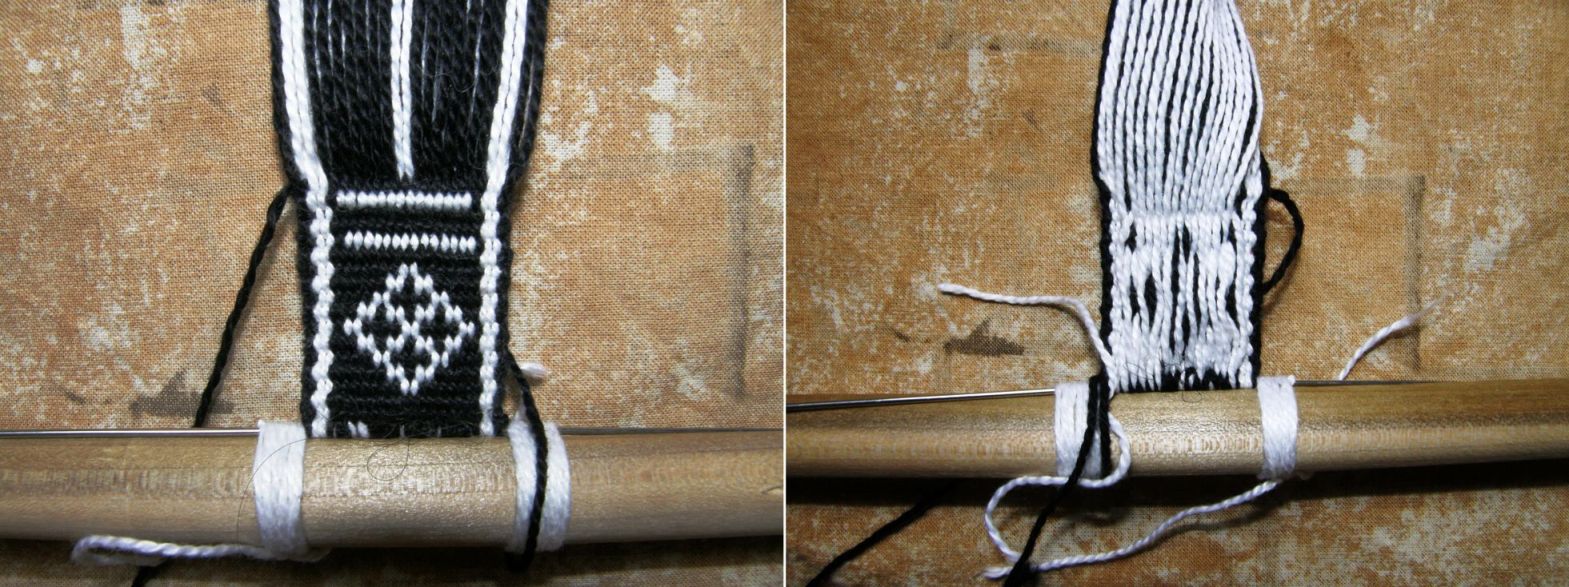
This piece has been woven using the simple warp substitution technique which produces as you can see long floats. Most people do not have a good reaction to these long floats. I have to admit that I am not a big fan of them but it depends on your intended use for the piece. If this band were mounted on webbing, for example, it would make a good strap for a camera or a belt and it is a very simple weaving technique.

And this is where people in different cultures see things in different ways. While we may wrinkle our noses at the excessively long floats, the Bedouin people use this technique to weave motifs into very large pieces of fabric that are used as tent dividers. Both sides of the fabric are seen (although I have read that they are hung so that the  “right” side faces the men’s living area). They are not pieces of fabric that are being continually handled and so I guess that the long floats are not impractical.

You can see the very long warp floats on the back of the Bedouin piece that Tracy in Qatar sent me. Some of the warps have even broken through age or use….hard to say which. What I do love about these particular long floats is that I get to really handle and examine the Bedouin handspun wool.

And then what about all the different kinds of supplementary weft techniques? I have only just scratched the very surface in this having learned the inlay technique on warp-faced fabrics which produces a single face of pattern and a double faced technique from Guatemala .
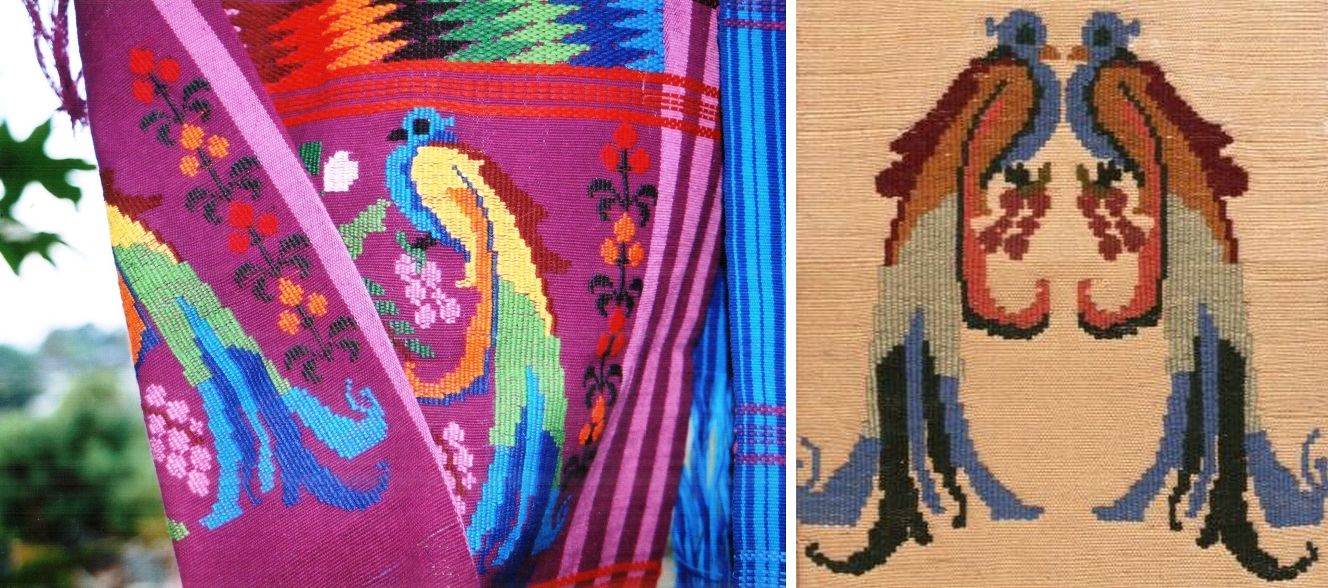
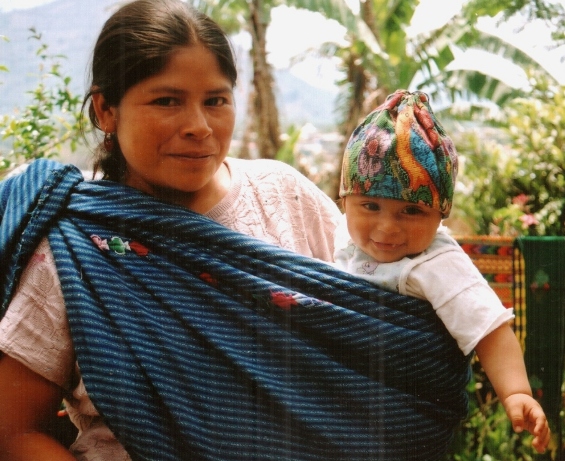
The double-faced technique can be seen above left on a Guatemalan weaving. This particular technique, as far as I know, is unique to San Antonio Aguas Calientes. My reproduction on the right was glued down onto the cover of my notebook in which I documented the technique so the other equally pretty face cannot be seen!

Even the weavers in Guatemala don’t get to show off the other face as they use this technique largely on their huipiles (blouses) alongside single-faced techniques.

Small babies’ caps are also made with fabric woven using only this double-faced method.
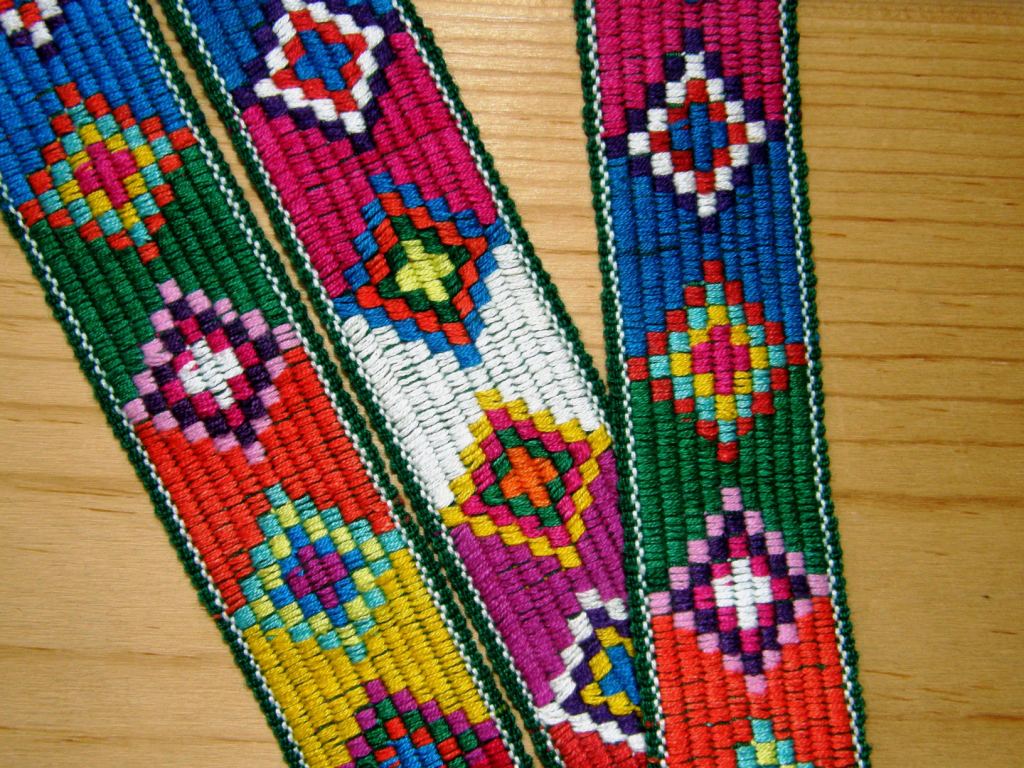
This hair sash from Jacaltenango was woven with a supplementary weft technique that produces two equally beautiful faces.

Sometimes the back of a piece patterned with supplementary wefts is left with small weft tails hanging…
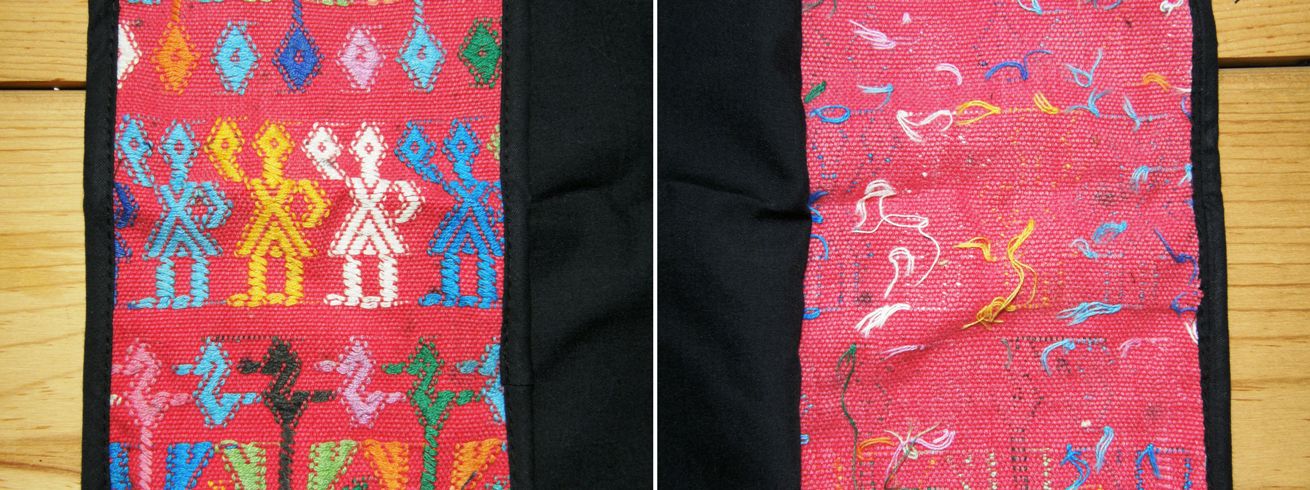
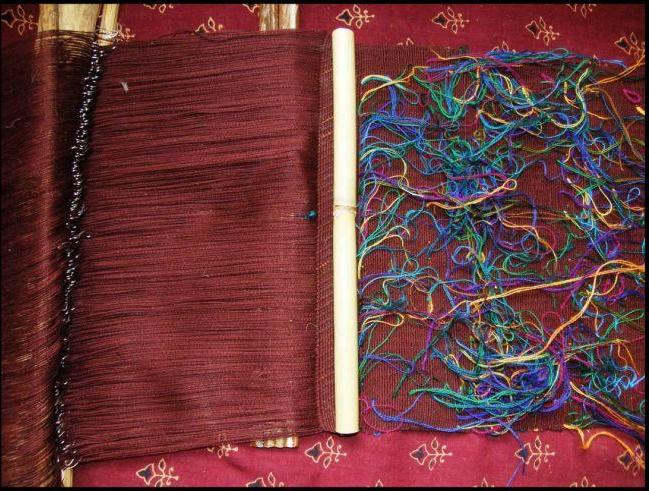
They can be a merry mess while the piece is in progress…
Or they can be cut right off and hidden entirely within the sheds so one would never know by looking at the back of the cloth that the other side was a riot of supplementary weft pattern. Look at the plain red back and colorful front of this hair sash from Aguacatan…

Look how much pattern weft material is used in those tassels!

When the weft patterning is particularly profuse the resulting weft tails on the back can be quite a sight! This is an old piece of huipil from, I was told, Chichcastenango. Many years of laundering have created quite a tangle of weft ends on the back. This is all quite acceptable to the Guatemalan weavers.

I was very much taken with the following Guatemalan belt that Teyacapan has on her Flickr page and asked her to photograph the back so I could see how the pattern had been worked.
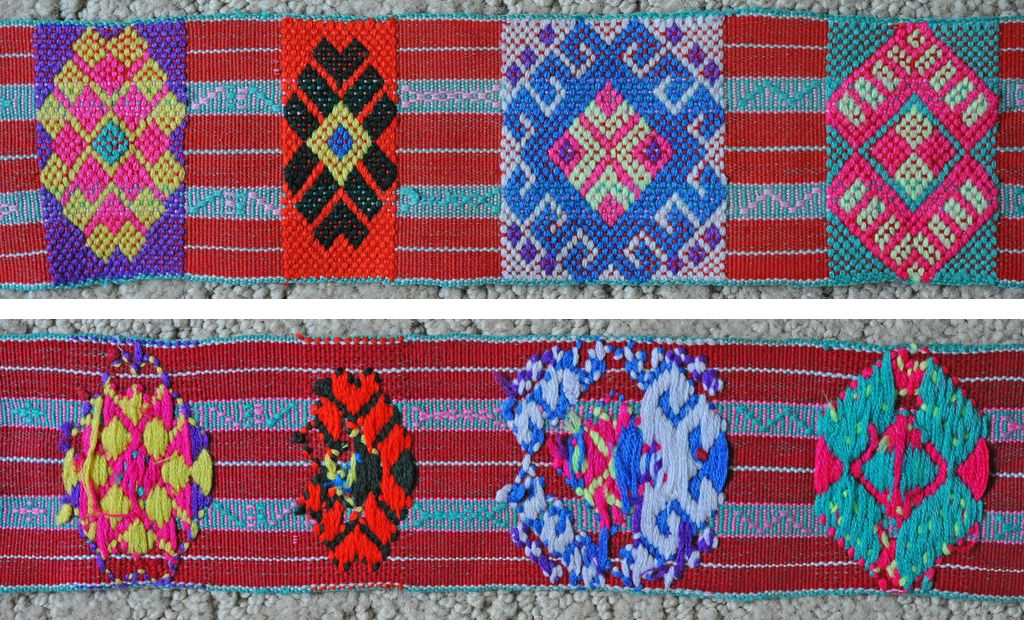
I love the blocks of pattern that the weaver has used! As I was saying in last week’s post, the supplementary weft pattern does not have to be worked on a blank canvas. It looks like this weaver has worked her weft pattern on tiny strips of fine warp float designs.
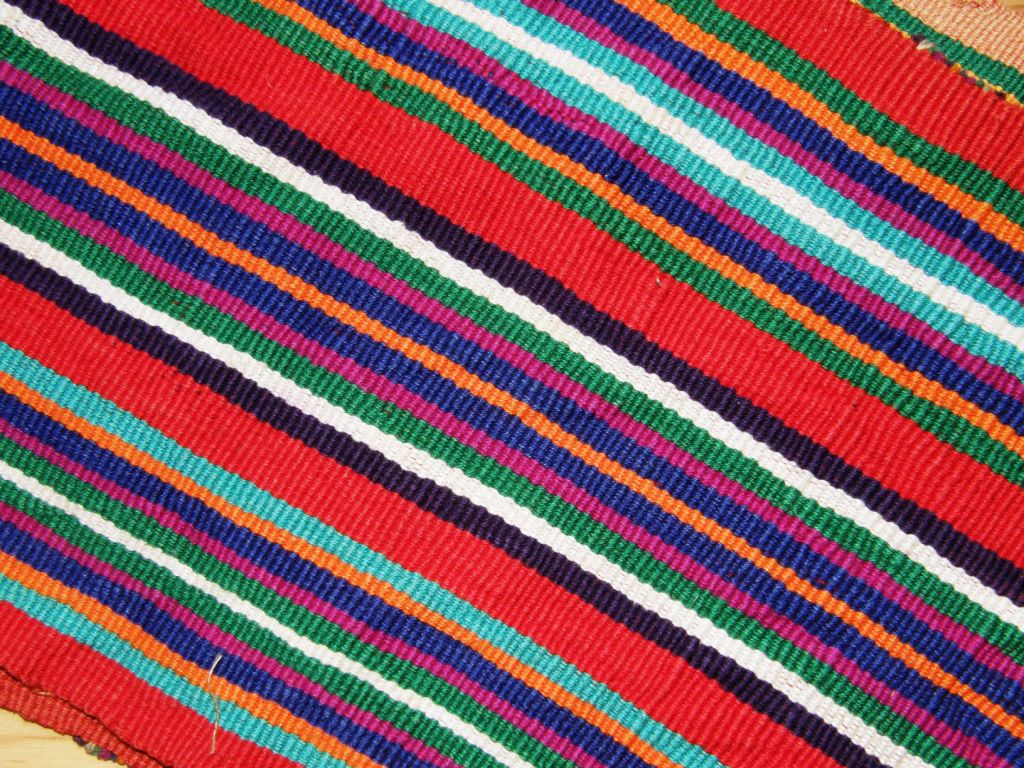
How is this for a canvas for supplementary weft patterns?
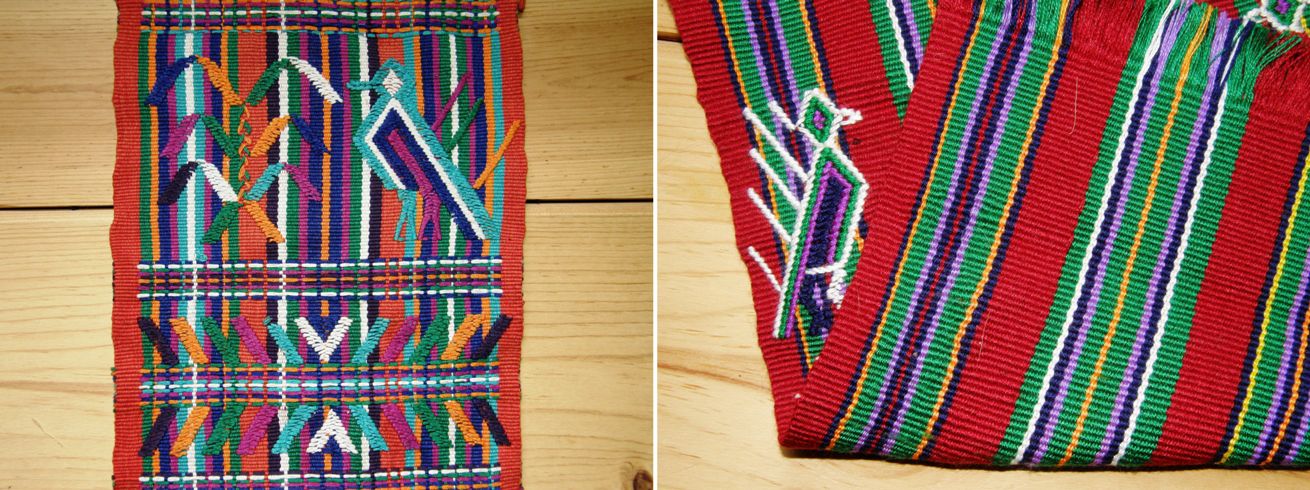
These pieces are from the areas of Nebaj and Cajul in Guatemala and again show how one face of the fabric can be completely different to the other. You can choose to show your bright stripes one day (free of any weft ends) or birds flitting about the corn plants another.

Some weavers actually work doing their supplementary weft patterns with the wrong side of the fabric facing up.
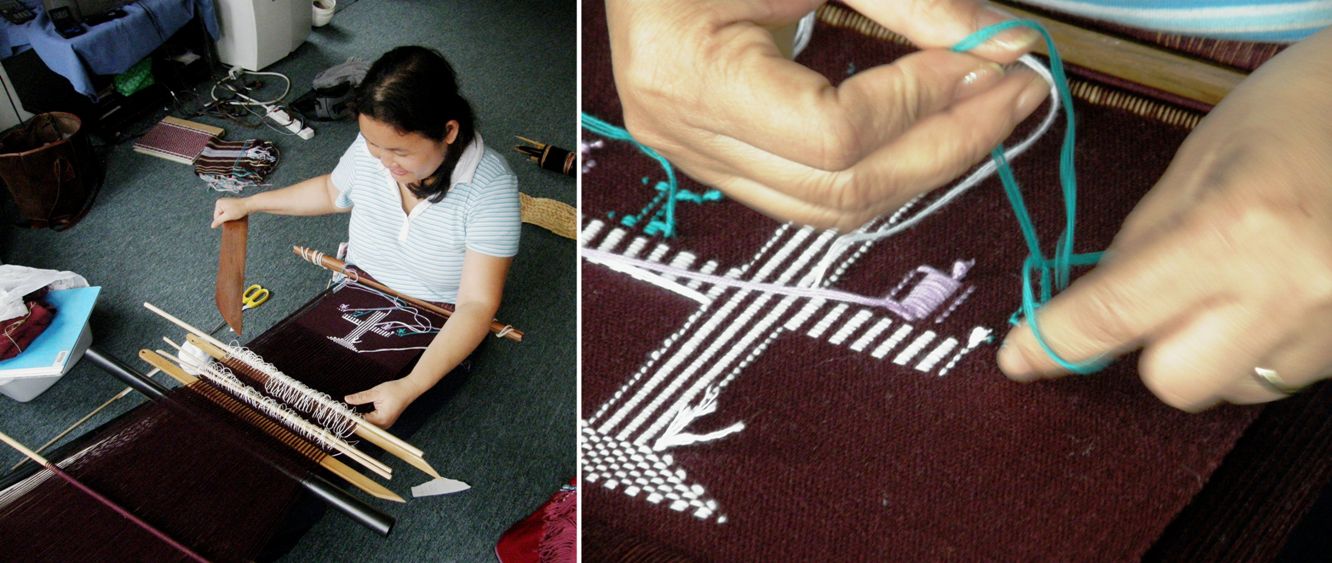
I got to visit Burmese weaver Dar Ku on my last visit to the US. She was happy to demonstrate for me while giggling and saying “It’s easy, it’s easy”. Her beat is surprisingly light and she does indeed make it look easy. Of course we all know not to fall into that trap! What fun to turn the piece over and see the right side with its neat patterns.
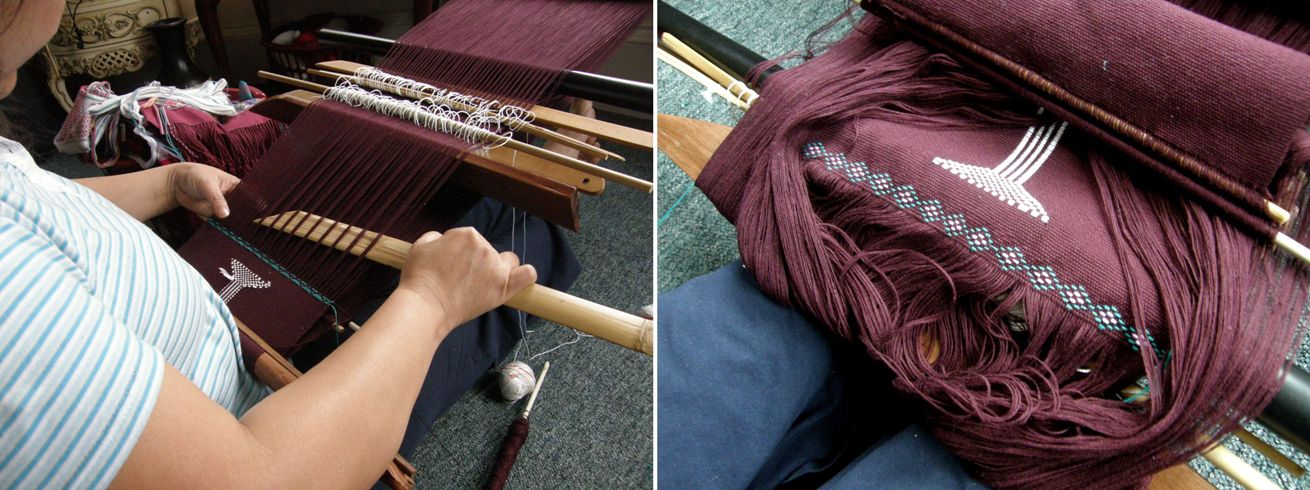
Franco shared a video of Lahu weavers from Thailand weaving supplementary weft patterns into tremendously long warp-faced pieces. The weaver is using a single-faced technique laying the supplementary wefts from edge to edge within the pattern sheds controlled by heddles and pattern sticks.

Here is another nice video of supplementary weft patterning from Acatenango Guatemala…one of the many videos that Red Corn Tours posts to its Facebook page every week. I watched this happily while asking myself “What’s on the other side?” and then the videographer, good chap, filmed from under the loom and I got to see the other side. What happy colors!

This is what has caught my attention most recently. I fished this out from the hundreds of photos I took on my US trip last spring when I got to photograph some gorgeous textiles from Bhutan in the collection of Betty Davenport.

I wove some motifs from one of the pieces into one of my more recent projects and now I have my eye on doing something like these zippered purses which Betty made from her samples using patterning techniques from Bhutan.

The supplementary weft pattern has been worked on a twill (on the left) and balanced plain weave (on the right) ground. Aren’t these pieces striking? There has been some talk of twills in our Ravelry backstrap weaving group which is what turned my mind to this project…that and my recent dabbling in supplementary weft patterns on interesting ‘canvases”. What’s on the other side? I don’t know…I didn’t think to look!
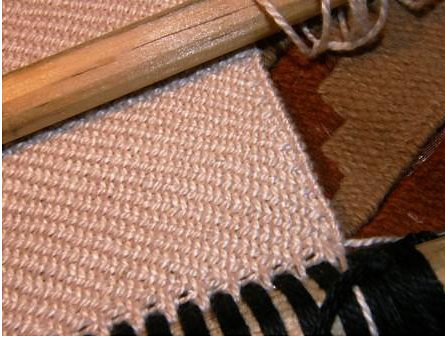
I wove a small twill sample a long time ago on my backstrap loom.

I don’t know a whole lot about non-warp-faced weaves (but I am slowly learning!) and so I just looked at a picture of a twill  in my copy of Irene Emery’s Primary Structure of Fabrics and set up my loom with three sets of string heddles and a shed rod holding the warps in the four sheds. I am not sure if I got the sett right…it was all guess work.

Not having any kind of reed to use at that time, I spaced the warps by lashing between them on the loom bar. It worked well for this small sample using #3 crochet cotton for both warp and weft. I had just read a discussion on Weavolution about the use of floating selvedges and so decided to try one of those too. And, as usual, I used the tiny sample  as a business card pouch. I learned a lot!

Another one of these non-warp-faced weaves that I find quite easy to handle on the backstrap loom without the use of a reed is finnweave. It behaves well enough for me. I have had the benefit now of seeing ”in person” the Huichol bags woven in this technique in the collections of two of my friends in the US so I know what I need to be striving for.

This is 10″ wide and is one of the storage bags I planned to make this month. Having used up pretty much all my black thread on some unexpected distractions, I chose blue and yellow for this project instead of the planned black and white. The designs are taken from Huichol and Otomi bags and belts. The flower design is actually taken from traditional Scandinavian finnweave pieces. The Otomi use a motif  that is so very similar but I prefer the Scandinavian version.

I am using three sets of string heddles and a shed rod to hold the fourth shed. And what’s on the other side, you ask? This technique I am doing is not truly reversible. You could get away with showing certain motifs on both sides. They wouldn’t be mirror images but they would look okay. However, the patterns I have chosen are not really amongst those.

Now here is the other project about which I am CHOCHA!! (chocha is used here in Bolivia and Argentina to mean “exceedingly pleased”!). I guess a lot of the pleasure comes from the fact that I am not skilled with a sewing needle, don’t own a machine and have never sewn anything from my handwovens larger than cell phone pouches and eye glass cases and a couple of very box-like shoulder bags.

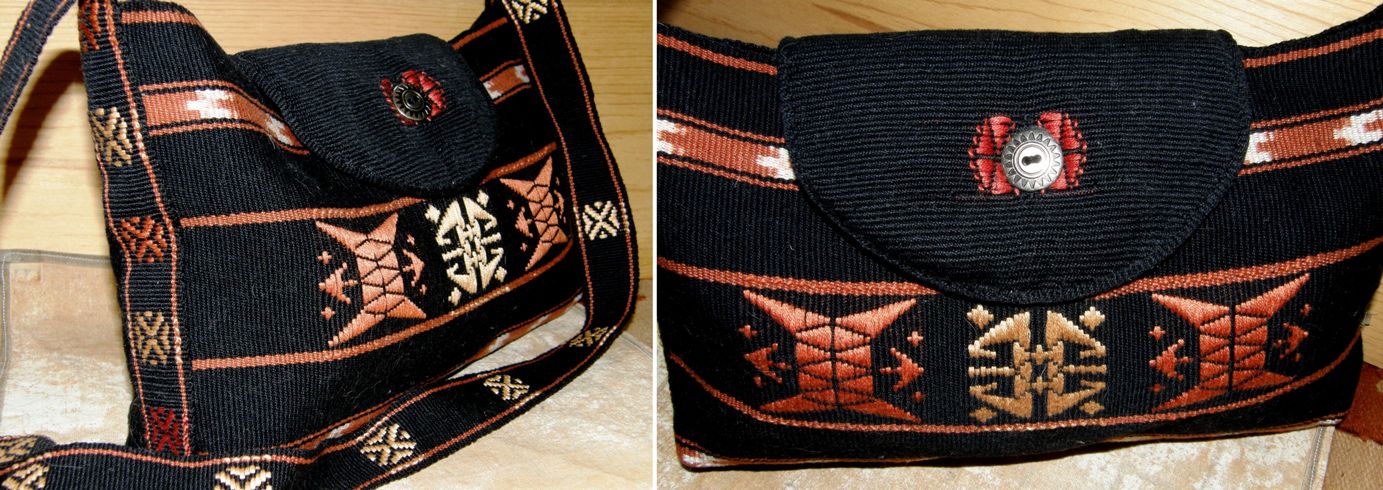
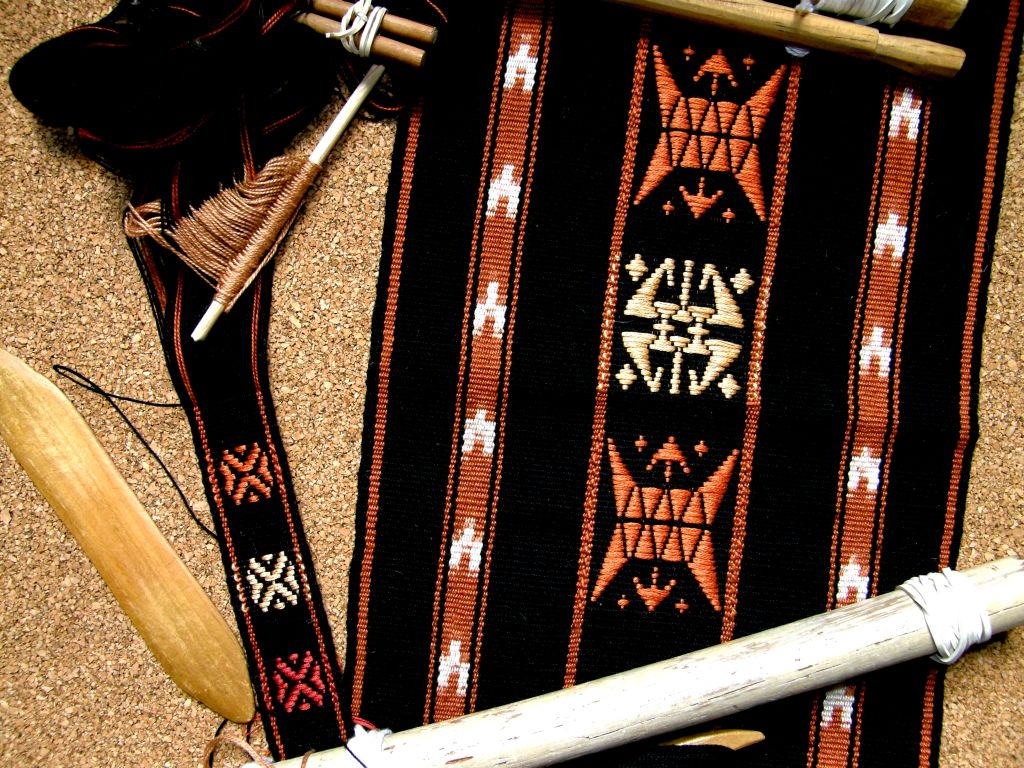
I just love how this all started as an experiment in ikat design with no intention whatsover to end up with a bag. I was bored with weaving the plain black piece of fabric with its two ikat strips and so added some supplementary weft patterns…motifs from a weaving from Bhutan in Betty Davenport’s collection. Then I decided I wanted to do something with it and the bag idea developed. I wove a strap and then another piece of plain black fabric for the back and finally a small piece of plain black for the flap.

How wonderful is the backstrap loom for enabling me to weave up the small pieces to put this bag together with very little waste.

Jentide from the Ravelry Backstrap Weaving Group showed us how she made a flat bottom for her tote bag and so I used that sewing technique and Amber had created a button hole in one of her bags so I did the same by separating the warp in the middle and weaving with two wefts. I wove a small supplementary weft motif on either side of the button hole.

I cut and shaped the flap edging it with a tubular band to cover the raw edge. The bag is still missing a zip. Zips are nice for the way they can hide raw edges.
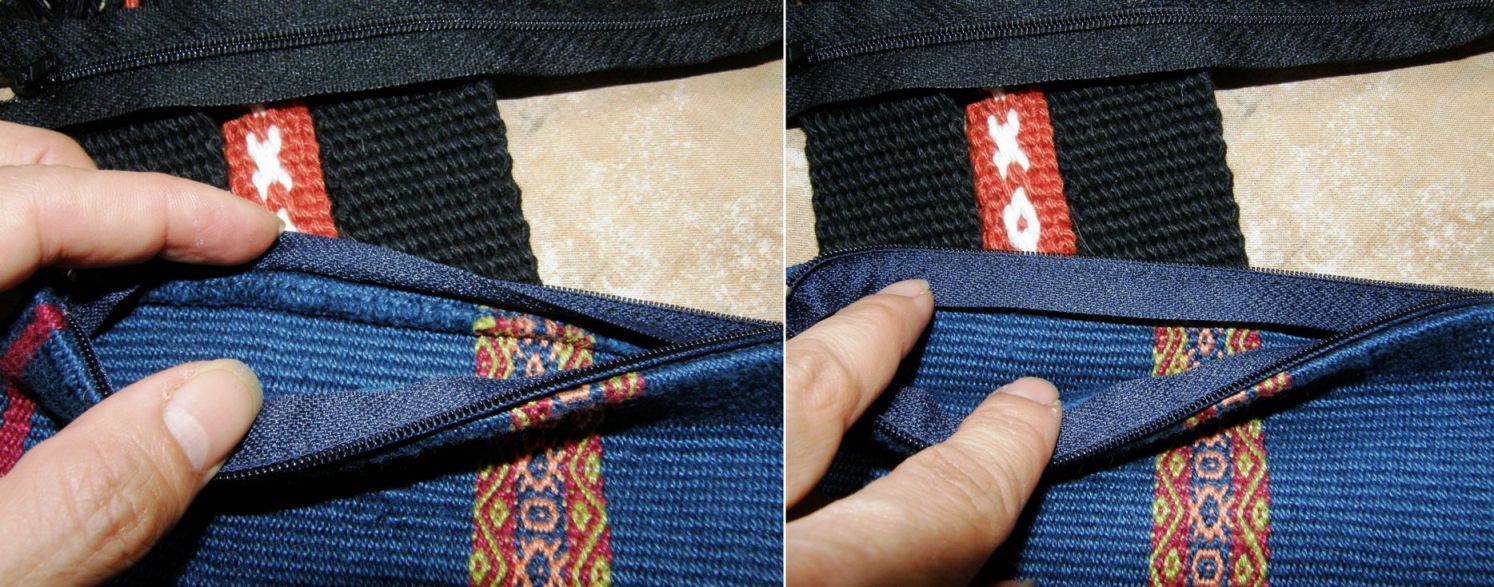
However, I turned the fabric sideways to sew this latest bag and so have two nice clean selvedges at the top.

And if you haven’t seen enough black yet, here is the other thing that I am still working on…

Here is the supplementary weft pattern on its “spotty” canvas that I wrote about in detail last week. I added some weft twining in the middle and am still working on the weft twining at either end. I have no immediate plans for this piece but am bound to come up with something to further test and hopefully extend my meager sewing skills.

Now I am planning a tote bag in bright Guatemalan style stripes….enough black, right?!

Some progress from the third week of our backstrap plain-weave Weave-Along…

Marsha has chosen fall colors to make a piece which she says reminds her of Halloween, Thanksgiving and candy corn. Amber is making a tote bag by sewing two of her backstrap woven panels together. It is gorgeously simple and beautifully woven.
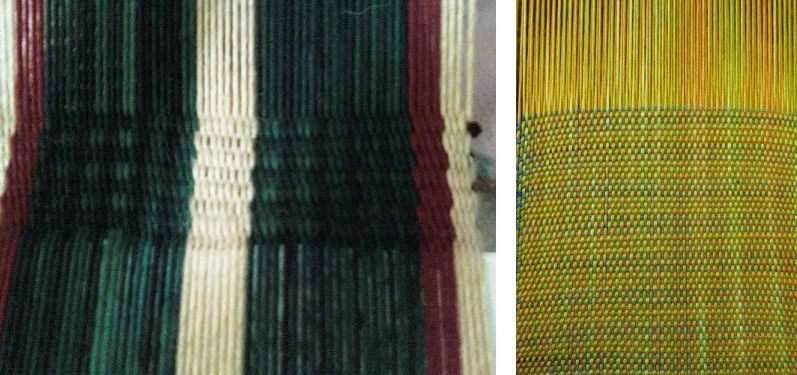
Misskineta, our newest active member, has started her first ever warp-faced piece while Tracy, fresh back from her summer vacation has jumped straight back into the loom with a lovely balanced piece which I believe is already off the loom. Janet is making progress on the panels for her indigo-dyed shawl. Her picture collages tell the story…
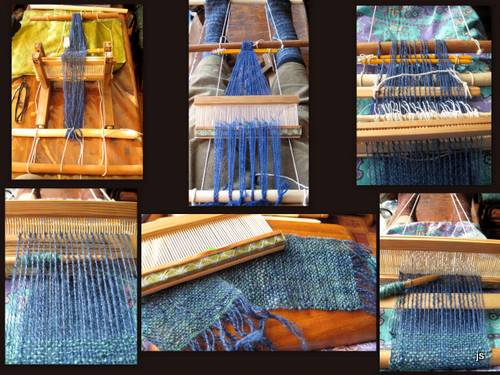
I dug out all my textile photos from my spring trip to get the shots of Dar Ku and Betty’s purses to post here and now have a whole lot more images and ideas swirling! Let’s see what materializes….
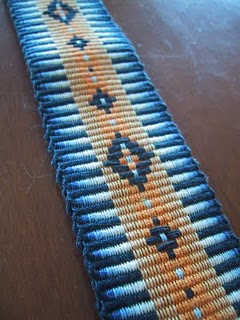
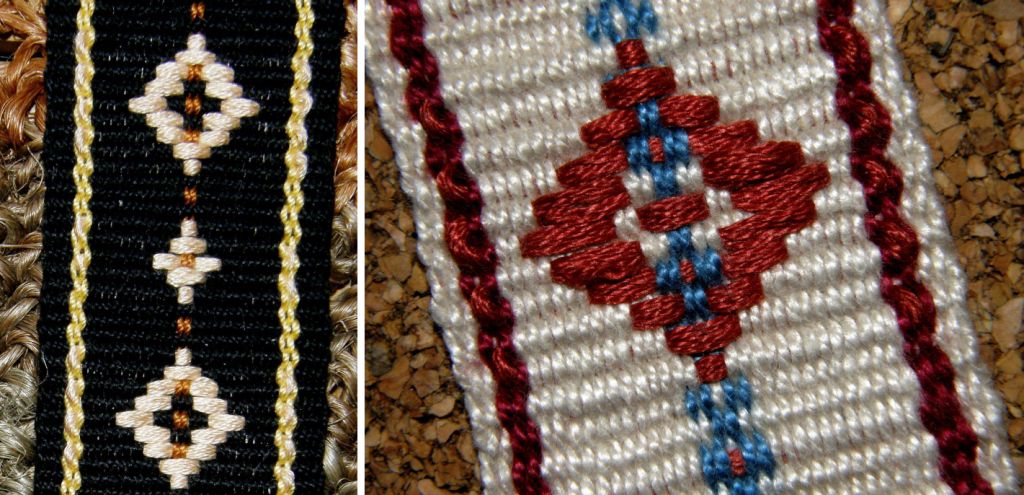
Backstrap Weaving – Delightful Distractions

If all had gone to plan, I would have had one and a half storage bags done by now as part of my three-bag goal for the month of September. My black bag with the supplementary weft motifs from Bhutan should have been sewn and ready to stuff and hang and my Huichol design bag in finnweave should have been at least half woven.

However, some delightful distractions came my way and had me wandering off in other directions. That Worldwide Weaving Web that I am always talking about came a-knockin’ and the Band Weavers’ Grape Vine came a-tappin’.

At left you can see a band woven by JacQueline Teller on her inkle loom. You may remember that I recently posted a picture of a bag she had made by sewing several plain-weave inkle bands to canvas which we were using in our Weave-Along group for inspiration.

Annie MacHale (ASpinnerWeaver), queen of sashes, drew my attention to the band at left on JacQueline’s blog and, apart from the gorgeous multiple tones of blue and peach that she has used, I was fascinated by the fact that she had used spots in her warp to enhance her supplementary weft pattern.

Whenever I have started a supplementary weft patterned piece I have always created a blank canvas of single color weave on which to place my patterns. It never occurred to me that the canvas doesn’t necessarily need to be blank and that colors that have been incorporated into the warp can be used to supplement the inlaid weft patterns. JacQueline has used the light blue warp spots as part of her design and I love how she used the dark blue supplementary weft to create alternating color spots between the main motifs.

So, I wanted to play with this and, again, I just have to point out what a wonderful thing the backstrap loom is for making tiny samples.

The experiment grew from one column of warp dots to three and I found that when I made samples in black, a Sharpie was very handy for making adjustments to the pattern, blacking out unwanted exposed weft to get different effects.

The three columns of warp spots grew to three columns of three and after some applications of Sharpie to the black one, I decided on the design I liked for a bigger project.

So, this is what is on the loom at the moment…(speckled with fluff and stuff)….see what you started JacQueline? This is the black thread that I had just bought for my Huichol design bag!

I have just finished adding a band of weft twining and I will twine that same design along the beginning edge when I have finished weaving.

I think I will do a single large supplementary weft motif in the very center followed by another band of twining and then repeat the beginning. What is it going to be? I have no idea but it has been fun getting back into the weft twining. This is the first time I have done three colors together in one row of twining in #10 cotton. What to do with all those weft ends?…I will try to bunch them into a nice tassel as the Bedouin weavers do. You can read about how I learned the twining technique and watch a video of my teacher Ngach at work in this blog post.

Before the distractions completely took over my weaving week, I did manage to sew up my weave-along projects into little zippered purses.

And I wove the back panel of my black Bhutan/ikat bag before my new ball of black thread got swallowed up by the distraction. And that was when I got side tracked yet again by jentide’s weave-along project which you can see at left.

She made the fabric for this fabulous mini tote bag on her backstrap loom with the strap made on her inkle loom.

I love her stripe design but, apart from that, I am completely in awe of people who can sew. Of course I had to pester her with a bunch of questions about the construction of this bag and she pointed me to this wonderful web page where you can learn how to create a flat bottom for a bag.

This has had me pulling out the Reader’s Digest sewing book, that I had just about forgotten I owned, determined  to learn once and for all some basic sewing skills (without the aid of a sewing machine, that is)and pinning and folding and pulling my poor Bhutan bag into all shapes.

Here is its latest pinned form…

Meanwhile I am looking out for other suitable materials to use as supplementary weft. I have some gorgeous hand painted 10/2 tencel that my friend Lisa gave me that works beautifully and one skein goes a long way. Wool works well too as it fluffs out on the surface to give good coverage without “fattening” the shed in which it is laid.

And then I remembered the fine loosely plied and fluffy skeins of acrylic that I had bought in Guatemala.

What I would really like to do is make super fine supplementary weft pieces using sewing thread as the ground warp and weft just like the ladies do here in Bolivia to make their hat bands. Their supplementary wefts are acrylic and much the same as the Guatemalan thread that I have.

The fineness of the weave means that they can get away with having quite long weft floats.

I love how the wefts are often used to fill in the negative spaces and outline the motif in the ground weave rather than forming the motif itself.

The floats are particularly long when they do that and I have not been able to reproduce these ”negative space” designs  yet as my patterning material has been too heavy and would have resulted in long and cumbersome floats. I have not yet reproduced any of the pretty Bolivian hat band designs.

One more thing I did this week was to experiment with the traditional Bedouin al’ouerjan patterns using non- traditional colors. The most common color combination I have seen is black, red and white.

Can you tell that black, terracotta and yellow is my current favorite color combination?

This warp substitution technique produces long floats on the back of the fabric which are not so bad in #10 cotton.

It is interesting to look at the many different variations of this design to see which one produces the shortest floats.

###########################################

I will finish with this week’s Weave-Along round-up…

Peg is weaving on a backstrap loom for the first time ever and using Plymouth Yarn Fantasy Naturale mercerized cotton which I think is just perfect for first projects. See how quickly she has tamed that warped and how much she learned about laying in the weft and controlling the edges in such a short space. That yarn is so pretty. I have never woven anything with these multi-color type yarns. On the right, Janet has warped colorful stripes inspired by a piece of Guatemalan fabric that she has.

Dyggvi turned her narrow striped band into a neat zippered pouch and gave us the link to the instructions. Sylvie in France posted a picture of the making of her continuous string heddles on a gorgeous bright striped warp.

Jennifer’s homespun piece is under construction and Karri, who just completed her third ever backstrap woven piece is casting her critical eye over everything she produces and learning lots of lessons. We think her third project looks wonderful.

Both Amber and Marsha continue to turn out consistently straight, smooth, beautiful and useful pieces. Amber’s piece is one of two that will be sewn together to make a seat cushion. Marsha has hung her piece on a section of twisted vine. She has plans to modify it for its ultimate use. We’ll see about that next week.


Jennifer has taken the leap from homespun wool in natural colors to wild cotton stripes while Yonat, outside the weave-along, has been experimenting with those eye bending alternating warp float patterns.

Phew, quite a job winding all those colors! Many of us have come to know the “fun” of adding in all those strips of colors on the warping board and the special challenge all that cutting and tying makes for creating even tension. “Perfect” tension is something we all strive for and I think that we all come up with clever ways to somehow compensate for uneven tension once the warp is on the loom long before we are able to create that perfectly tensioned warp on the warping board. Unfortunately uneven tension will show up immediately in warp-faced plain weave in the form of ridging and cotton is particularly unforgiving.

All we can do is make sure that our warping stakes are firm and sturdy and then just practice, practice, practice. Some days are good warping days and some not!

Ridging will turn up unexpectedly and most annoyingly in a piece I am working on and I have found that a worn out hole and a leaning stake on my mini warping board has been the culprit on quite a few occasions. Cranking up the edge warps too tightly caused the particular ridging problem in the piece pictured at left.

Fortunately the ridging shows up in plain weave and not in float patterning which is what I mostly do.  On the other hand, I know people who actually like the effect of the ridging. It’s a pesky and temperamental phenomena! I tried to weave a band specially for this blog post to show the ridging that results from crammed warps. The darn thing refused to ridge!

I suppose we could always do as my Montagnard weaving teacher, Ju Nie, does…

Many Montagnard pieces are woven with a multitude of fine stripes. Ju Nie joins the colors on the warping stakes with slip knots and then, once the warp is on the loom, she unties each and very knot, adjusts the tension and reties. It is not tedious for her. This is the way she was taught to do it and her large pieces woven in that “unforgiving” cotton are perfect!

Oh, and one more distraction to speak of before I go…one of my online friends just came back from Mexico where she bought a Huichol woven bag and is going to send me pictures. So, I am thinking it is just as well I didn’t get my bag project underway as her pictures are bound to have me changing my design plans. Thank goodness for those delightful distractions!

Backstrap Weaving – Ready, Set…Weave Along!

I fear the truth in the adage ”out of sight, out of mind”. You wouldn’t believe my computer desktop! It is a cluttered mass of folders and icons. I just know if I put anything away into a file, I will forget about it and I have new ideas coming up all the time.

The same goes for my bedroom/work space. We have had to come up with some interesting solutions to the lack of space in this little home which means we have two single beds side by side, one of which folds away during the day so I can have some floor space on which to work.

Everything has to be rolled up, picked up and put away at the end of the day so the bed can come back out. You would think that that would keep things fairly orderly…

I still seem to end up with piles of stuff on the floor everywhere…weaving sketches, books, tools, baskets of yarns, things I don’t dare put in a cupboard or closet because they serve to remind me of the latest new weaving idea I have had. They have to be covered so the cat won’t get at them. It is a merry mess, it lives and grows and never stagnates. But, it’s time for a change!

The fact is that there simply isn’t anywhere to put things anymore as my books have completely taken over…no more floor, shelf or closet space left but aha! there is wall space!

So, I am going to have lovely woven storage bags hung on the wall to hold my project bits and pieces and, on the whiteboard, a nice orderly list of what’s waiting to be explored. The bedroom will start to look like some kind of crazy textile bazaar! Actually it kind of does already.

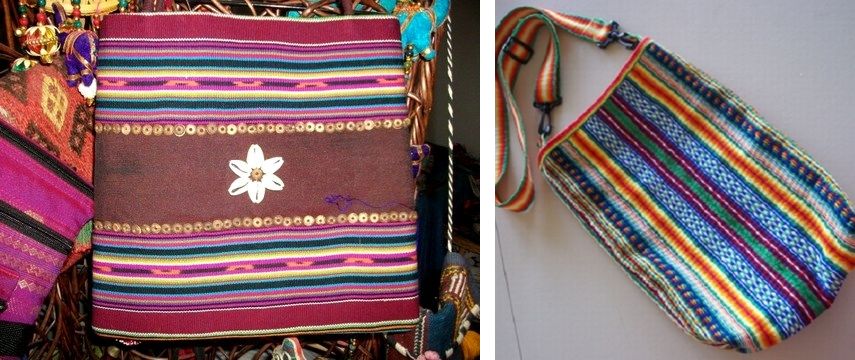
Storage bag ideas: I love the woven sacks that are used up in the highlands for storage, transport and display in the markets and fairs. I have been searching for ideas for interesting bag shapes but I have to admit in the end that a rectangular piece of cloth folded in half and sewn together at the sides is probably the most economical if not the most elegant way to create a practical bag from a piece of handwoven fabric.

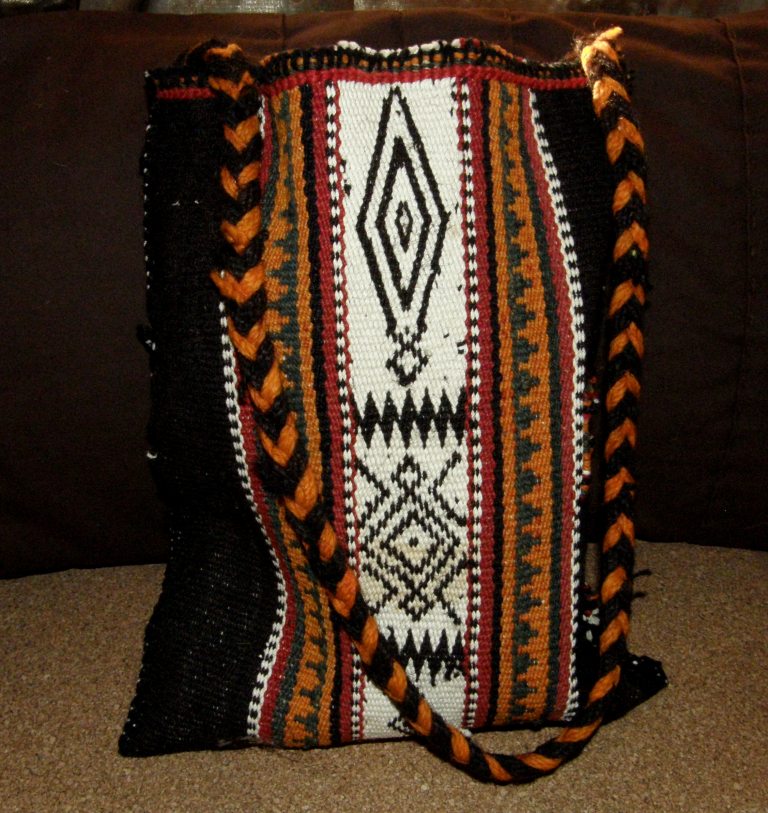
You can see one deep storage bag that I have at the top of this post that Tracy sent me from Qatar. The wool fabric is part of a Bedouin tent divider. That currently holds all my Tour de Fleece gear.

This wool bag that I made years ago with  Mapuche designs woven with supplementary warps hangs on a doorknob and holds all my camera stuff…battery recharger, cables, tripod attachments etc.

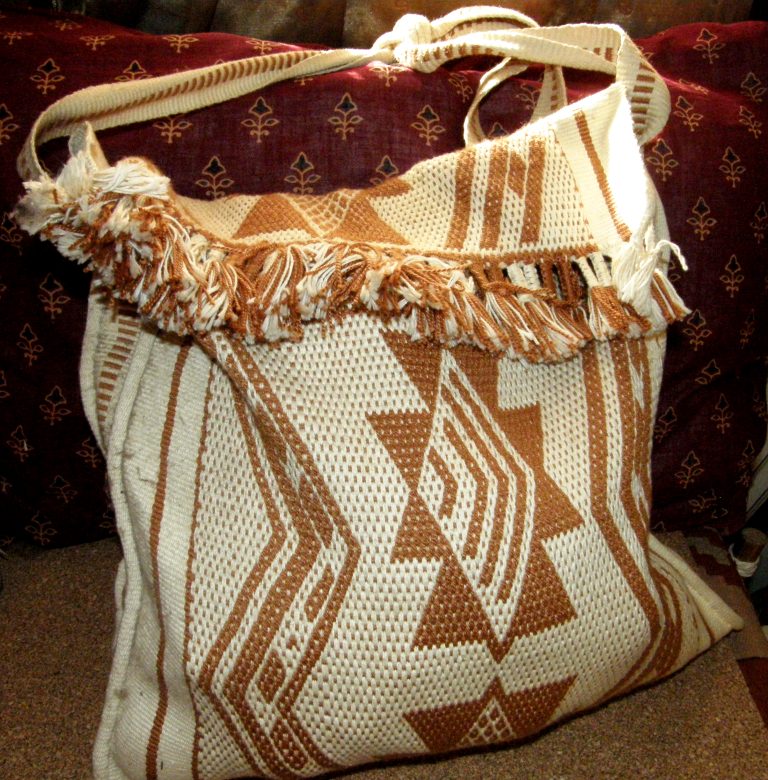
This gigantic cotton bag with Guarani pebble weave designs, which was bought here in Santa Cruz, hangs off one of the bed posts.

So there are more bags to be made so I can get everything off the floor and onto the walls! Well, you all know that I am just looking for an excuse to weave more things.

So, I am in the process of weaving a hanging strap, which I couldn’t resist decorating, for what will be a new storage bag made from a piece of fabric I wove some time ago as an ikat experiment. The strap has motifs from Bhutan as does the bag fabric.

It will also need a back and some sides in plain black…it will be very fast to weave those.

This will hang on the wall and hold what is currently being stored in a large basket on a shelf. The basket will go and yes! that way there will be more room for books or at least something that is currently on the floor. (I have a new book coming in the mail…thanks Anna!)

The motifs have been woven using supplementary wefts. I used one and a half strands of embroidery floss as the supplementary weft with my 35wpi cotton warp and weft. Veeeery slowly things may become a little better organized.

I have been admiring the designs made by the Huichol people of Mexico in balanced double weave for a long time ever since I first ran across their work in a museum in the US in 2007. They make bags on which they add large corner tassels and have an unusual way of braiding the warp ends.

These are a couple of samples I made in this technique some time ago.

 I prefer the patterns that they use in their belts and so I will probably try to make a storage bag in this double weave with motifs from their belts. I wonder if I can figure out how they work those warp ends.

The other project I worked on this week was the mug rug set.

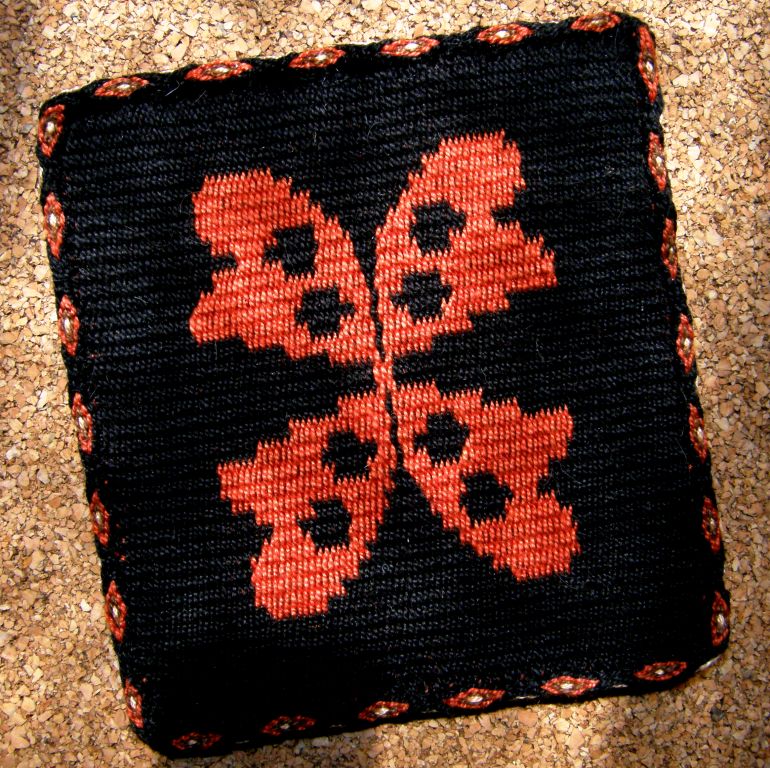
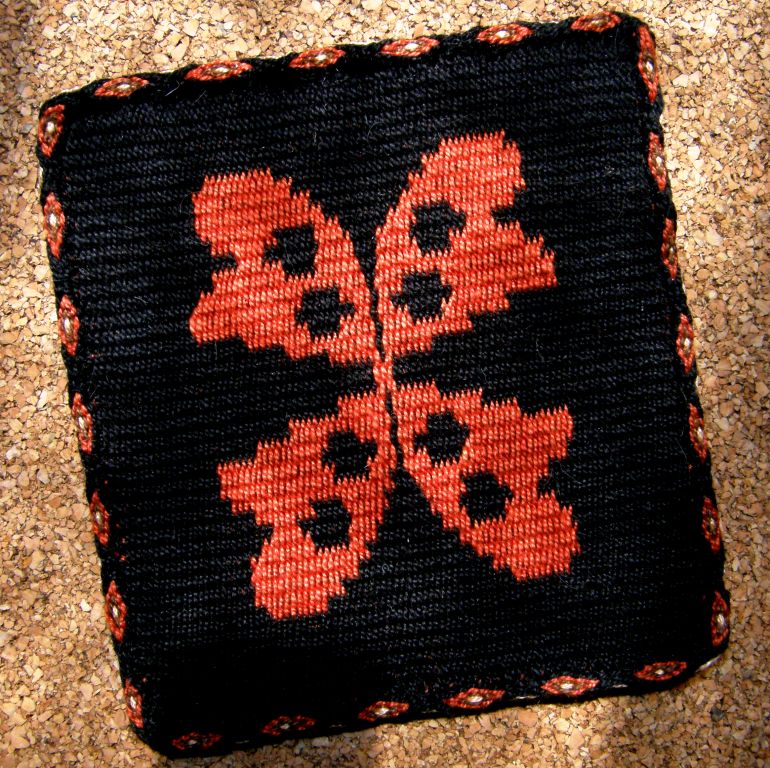
My friend, who has decorated her kitchen with flower and butterfly motifs, saw the prototype I had woven (at left) and asked for a set for her breakfast bar. Now she tells me that they are too pretty to use and that she will put them on her wall.

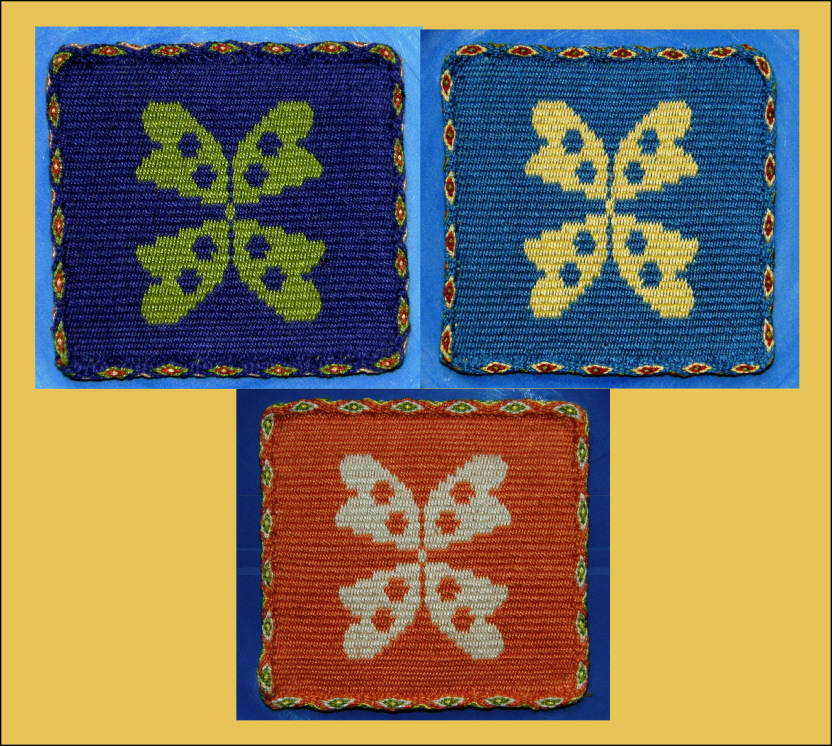
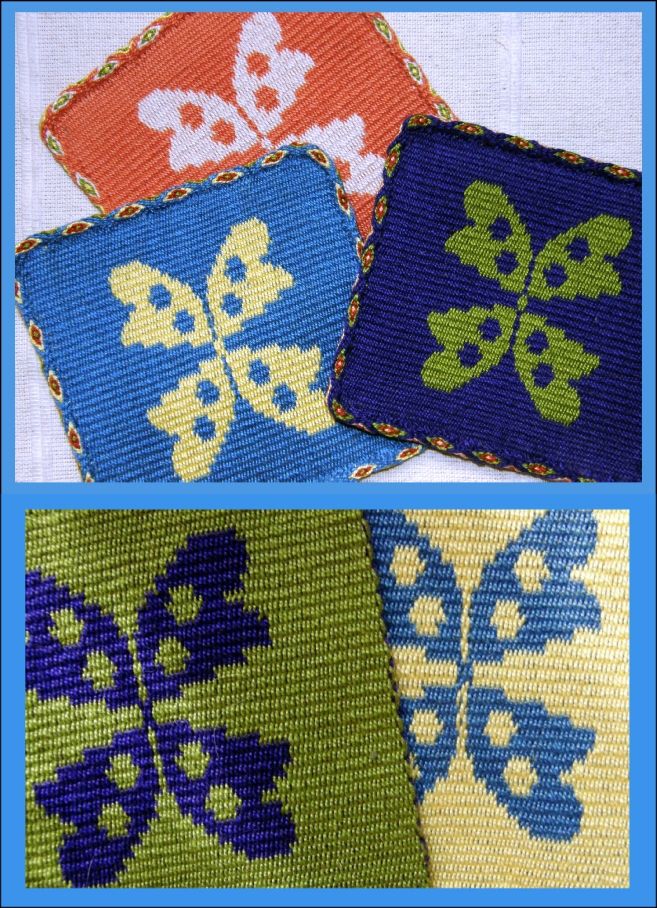
I have made three and will wait for her to choose the colors for the fourth. The motif is neither butterfly nor flower and is based on a Guaraní leaf design which I wove one way and then mirrored.

The red and black sample, which is larger than the other three, will stay here as my tea mug rug where I work on the floor and the other three will go to Evelyn with a fourth one yet to be made. They have all been edged with tubular bands.

Evelyn’s kitchen is yellow with bits of green and blue in the wall tiles so I think these will look nice there.

It’s hard to decide which face to make the “right” side.

There is another commissioned piece that I have been working on, which I can’t show here yet, but this piece has made me even more enthusiastic about the simple string heddle.

This is a particuarly long but narrow piece that I am weaving in Andean pebble weave and I have set up the warp with four sets of string heddles (two more than I would normally use for pebble weave), and what an incredible time saver this has been! This project is simply zooming along!

The black and white cord that you see in the warp is my “saver cord”. By using these two additional sets of heddles and the saver cord I actually get to do seven consecutive weft passes without having to do any pick-up for this particular design.

String heddles are so cool! I love how they allow you to put one warp thread into multiple sets.

No matter how they are made, whether they are single or continuous, I love them.

You can use one, two, three or four as I am currently using. I am not sure what limit I would put on the number that I would personally consider comfortable or practical for my own backstrap weaving. I have seen backstrap weavers in pictures with many more.

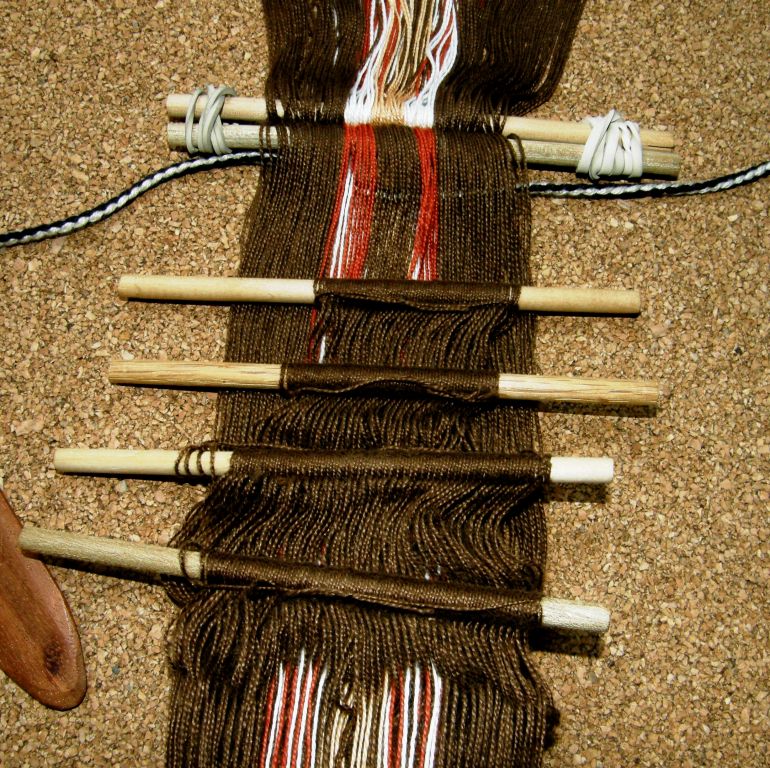
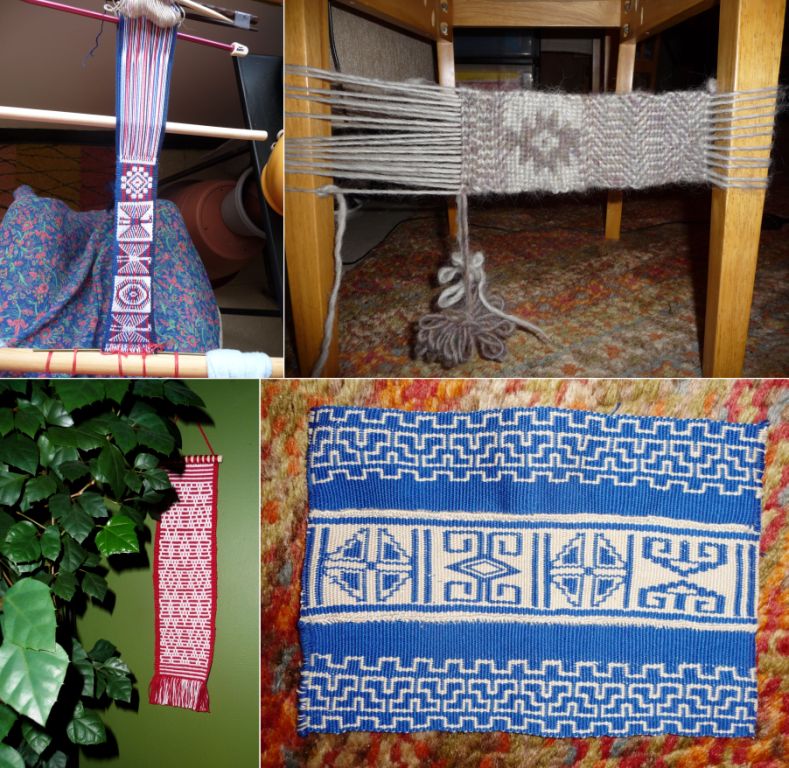
The warp on this vertical loom in Ecuador will have eleven sets of patterning heddles plus one that will control one of the two plain weave sheds.

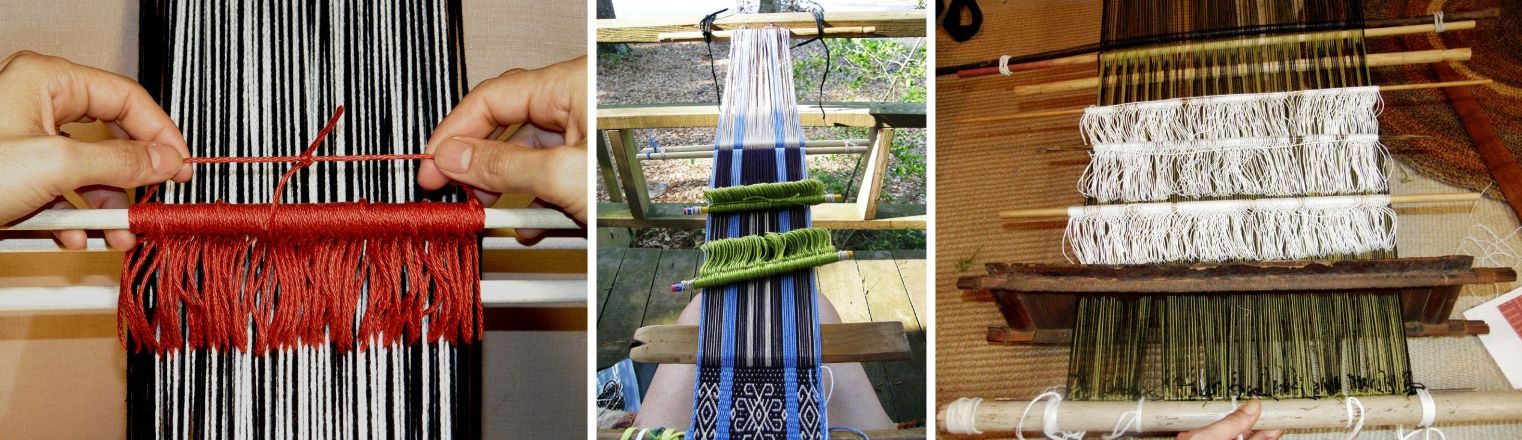
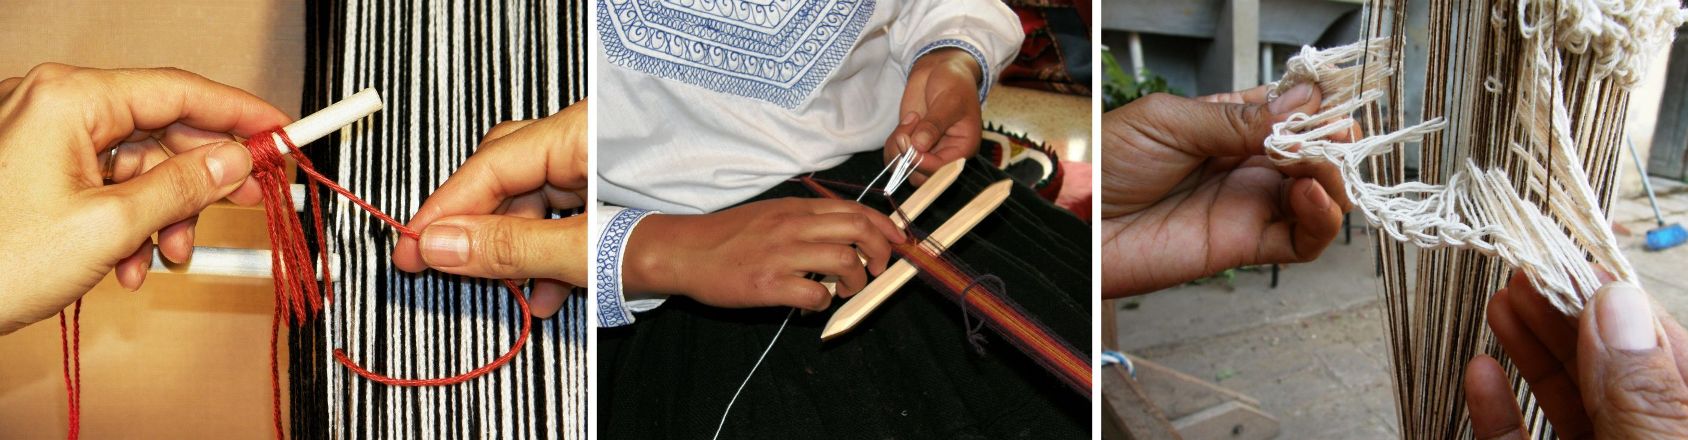
They can be made on a stick, made around the fingers and knotted into a bunch or chained together.

There are so many different ways to make them with no one particular way being the “right” way. I have chosen my favorite ways over the years but love seeing and learning new ones.

Education and More has just posted the following video on YouTube showing a Guatemalan weaver teaching her foreign student the way she makes her string heddles.

While on the subject of Guatemala, it is always fun for me to go to Facebook and see the latest video that Red Corn Tours has posted on Guatemala…weaving, costume, festivals and different aspects of simple daily life from the making of tortillas to the washing all those beautiful hand woven huipiles.

And now for our plain-weave backstrap loom weave-along progress….
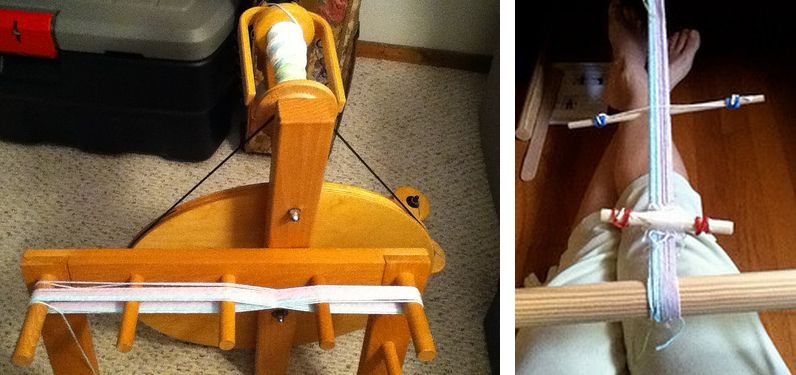
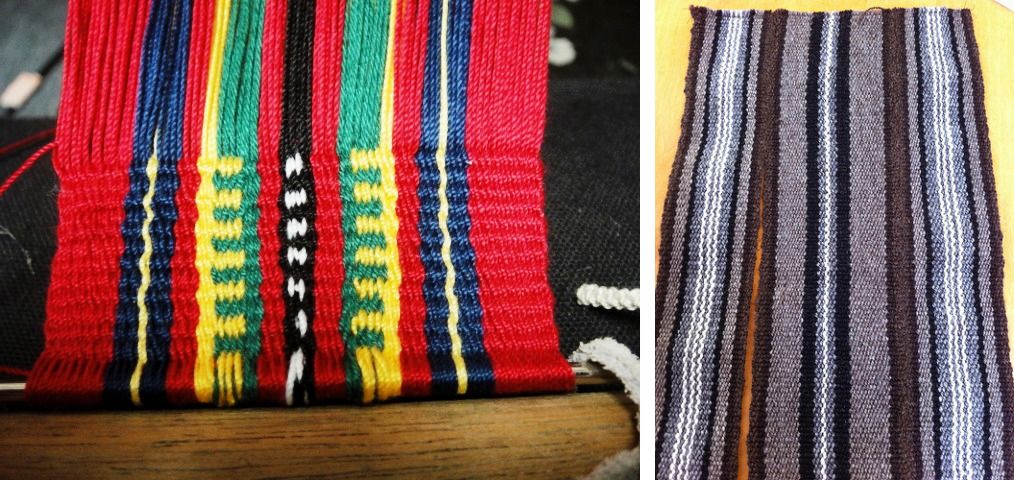
We started this week with more people, so far, opting for the balanced weave project after a flurry of pre weave-along DIY reed and hole-and-slot heddle making activity.

Warp-faced projects for the color and stripes challenge from Bobbie in cotton and Jennifer in her homespun wool.

Those who have not joined the weave-along have been turning out projects on their backstrap looms as well.

Jennifer is weaving a balanced piece using hemp yarn and a reed made for her by Janet. She has also finished three plain weave warp-faced panels with her homespun wool which will be joined into a bag.
Here's the beautiful reed that Janet made. Kathi has set up her loom with a rigid heddle with different kinds of yarn for her balanced weave project.
Cindy has joined in showing us her warp wound on its stakes and there she is with loom set up and ready to weave a warp-faced band.
Blomster is using wool in a piece she is weaving with a rigid heddle on her backstrap loom. It is pictured next to the warp-faced band she made with the same warp. She is making a bigger wall hanging using her rigid heddle loom and natural color and madder-dyed wool as, being new to backstrap weaving, she does not feel ready to attempt such a wide piece yet on a backstrap loom. Her wide piece is inspired by the hanging you see nearby which she bought in Oman. She thinks that it was probably made with goat hair.

Both Amber and catknitlatte have reported that they are on their way and we hope to see progress pictures soon.

Fiall and WannaGTD finished these backstraps before the weave-along started but these backstraps could easily be weave-along projects as they fit the plain weave criteria.

The instructions for weaving these backstraps are in my WeaveZine article.

Janet is making a shawl using her 24" rigid heddle and a bunch of different yarns. Her warp is cotton and her indigo-dyed weft will come from her homespun stash. This is really amazing! She will weave it in several panels.

Knitnfrenzy and ElizArtist have both checked in. Knitnfrenzy is going for a warp-faced project while spindleori showed us her homespun, at left, which she will weave up with a rigid heddle to make a bag.

Dygvvi is going to weave fabric which will go around a frame to make a yarn storage bucket.

We are waiting to see what Franco, AuntJanet and Phil have been up to. We know that Phil has a painted warp and can’t wait to see how that is going.

Marsha and Traudi have been working on their patterning techniques on projects outside the weave-along. Marsha's band has designs in both simple and two-color alternating floats ("warp floats galore") while Traudi has been playing with supplementary weft patterns.

And what about my weave-along project? Blush…I had better get going and go warp one up!


Backstrap Weaving – Prototypes, Samples and Keepers


It’s been a week of bits and pieces…trying out new patterns, practicing new techniques, making width samples and prototypes and then putting everything together into something I can keep and use.

Cochabamba and my teacher Maxima seem far away now as I sit here in shorts with the temperature and humidity rising. Only two nights ago I had the down sleeping bag on the bed. It makes me yearn for the “eternal spring” weather of the Cochabamba valleys but, then again, today I walked outside to the street and bought big glorious golden dripping slices of pineapple, saw tiny green mangoes up high in the trees and realized that the markets will soon be brimming with the tangy achachairú. I read recently that this fruit is now being grown in tropical areas of Australia with its name changed to the more manageable achacha.

This week I tried out a supplementary warp design that was on a bag at the PAZA stand in Cochabamba. This piece had not been woven by Maxima who seems to specialize in pebble weave. I hadn’t even noticed the pattern when I was there. It was, as usual, a bit of a case of information overload…a very intense three days of weaving, sights, colors and sounds.

It is fun for me now to slowly review the videos I had taken of Maxima weaving and listen to the birdsong and the melodies made famous by the Cochabamba band Kjarkas playing in the background…details that were obscured by my concentration on all that Maxima was teaching me. For that reason I did not see the lovely supplementary warp design until I came home and went through my photos.

You can just see the design on the bag on the ground in the picture above left. Supplementary warp is not one of my favorite techniques and I guess that is why I had not paid much attention to it but I was quite struck by the pattern when I got home and had time to examine my pictures. If I had run across this design on the internet I would never have thought that it was Andean.

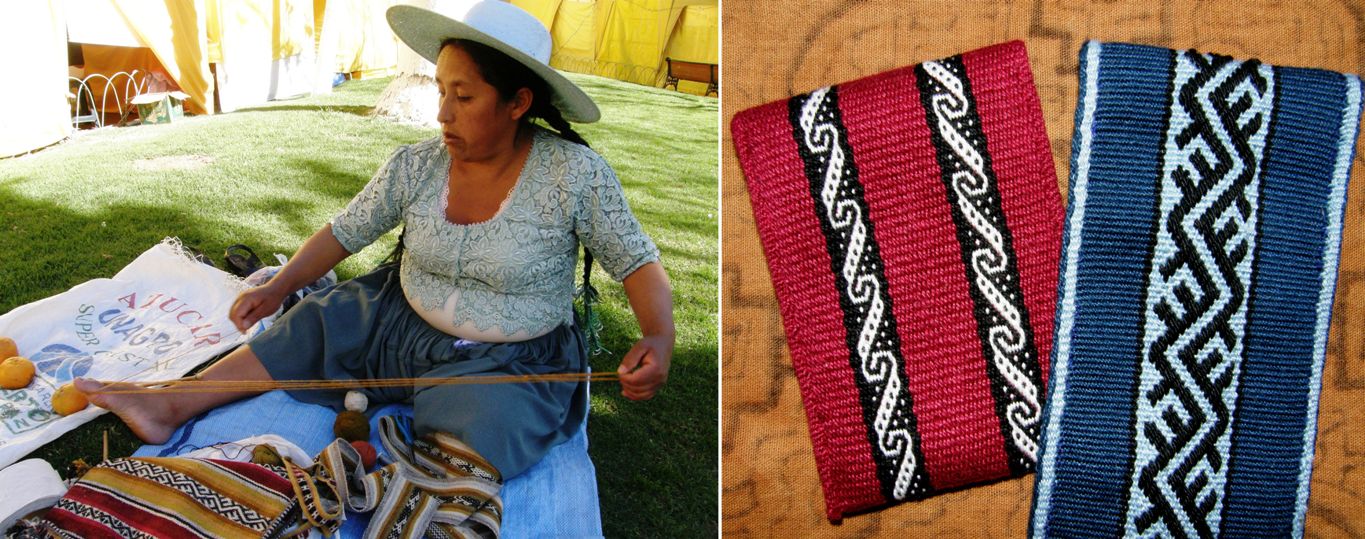
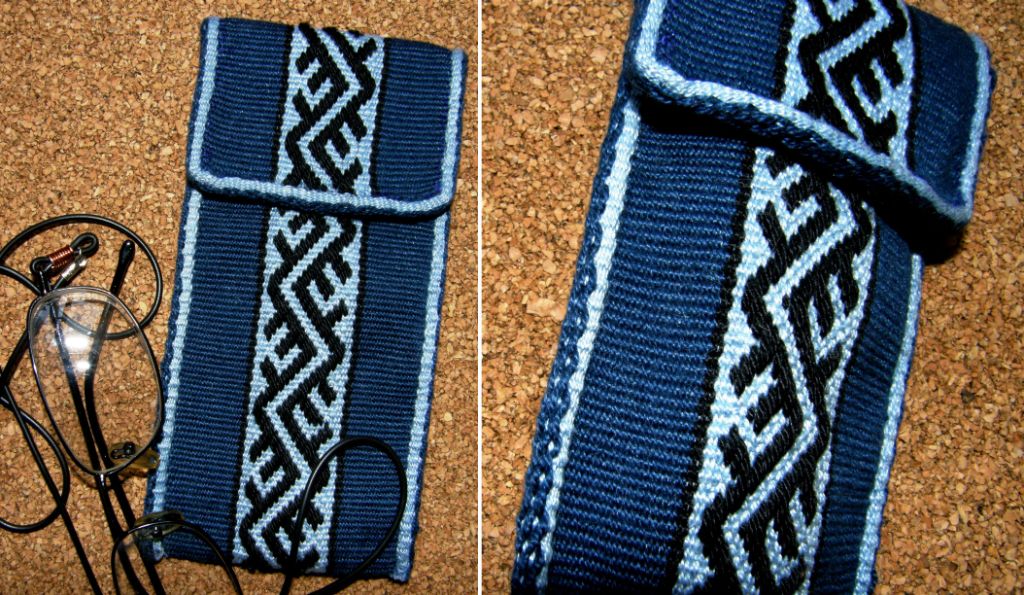
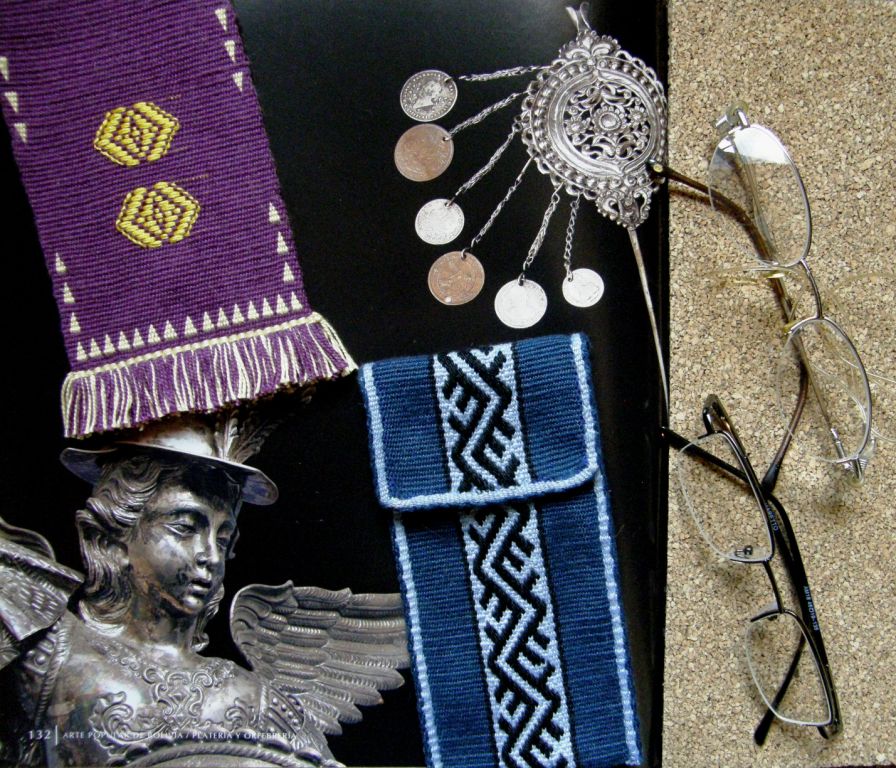
I wove it into a small piece which I sewed into an eye glass case and then used it as an opportunity to practice a tubular band in pebble weave. Not wanting to complicate things too much, I just did plain pebble weave (that is, a pebbled background with no motif) for this band setting up the warp as I was taught in Peru and thus avoiding having to do any pick-up.

Maxima’s way of doing pebble weave would have her picking up threads even for a plain pebble band. The advantage of her method is that it can be worked more easily using just finger tension rather than having the band attached to the body by way of a backstrap. No doubt I will discover other advantages as I delve further into her method.

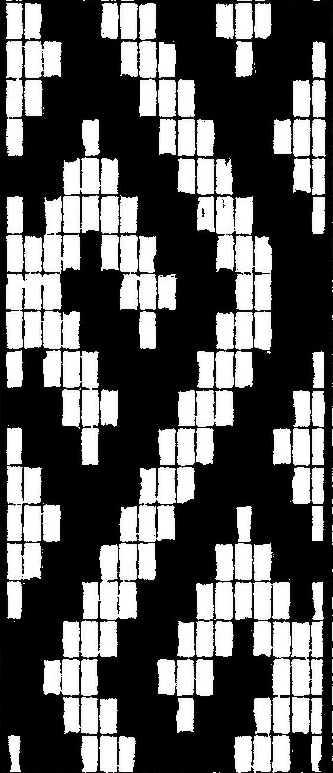
Here is the chart for the supplementary warp design if you would like to try it yourself. I have no idea if there is a standard way for charting these supplementary warp designs but this way works for me. I have also started a new page here where I will put charts for designs in this technique.

I have not done a tutorial on this pick-up method as there are plenty of good resources out there already. I believe that most inkle weaving books include it and Sue Foulkes recently did an online workshop in the Yahoo braids_and_bands group on Sami band weaving which uses the same technique.

If you would prefer to have a “real live” teacher with whom you can interact, Daryl Lancaster will be teaching an online class on this pick-up method for inkle loom weavers on Weavolution. Check out the details here.


You can just see the pebbles on the tubular band in the picture above.

So,  this particular sample found a use. I would like to weave this design again having the pattern extend right to the edge of the dark blue section. I think that would look even nicer.

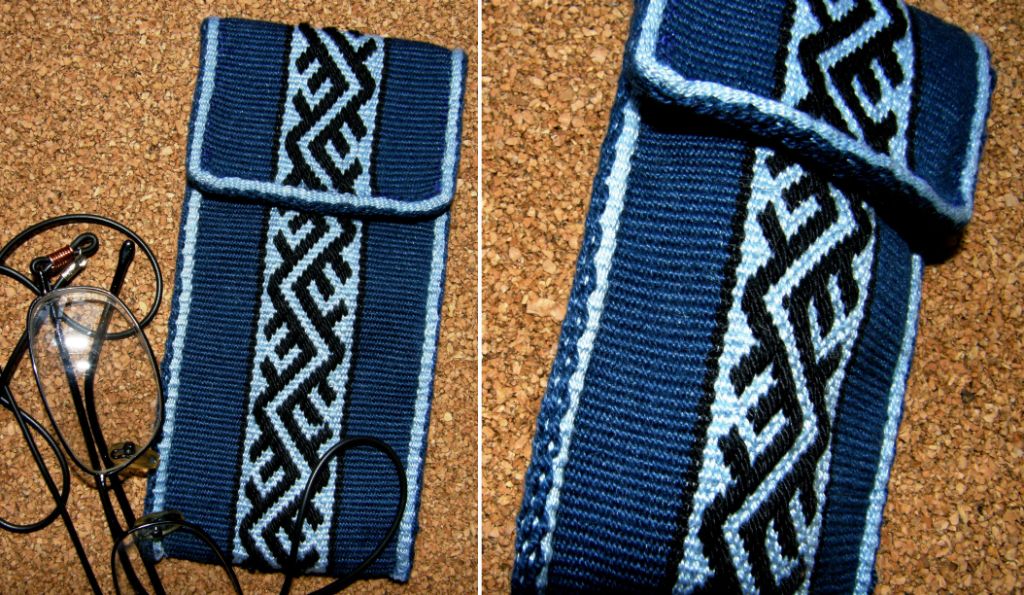
This meant that two of my three pairs of glasses were nicely accommodated in woven pouches. I had made an eye glass case from a discontinuous warp experiment many months ago. I figured that I may as well make the third one which would give me a chance to try out another experiment.

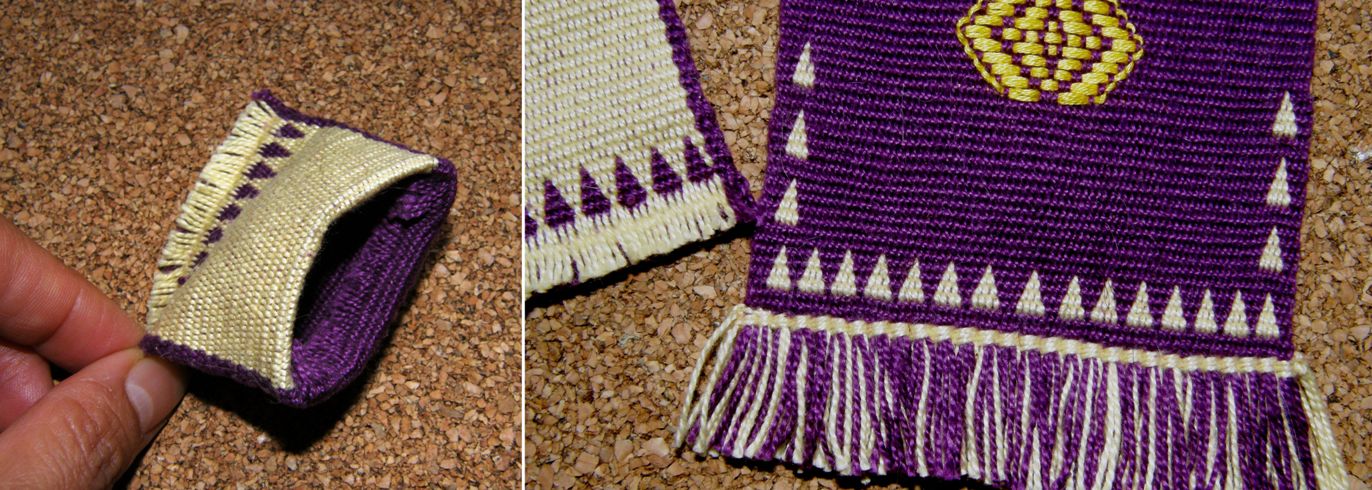
I wanted to make a pouch taking advantage of the fact that weaving a warp-faced double weave piece that doesn’t have motifs woven into it will create a tube. This meant that I could weave the front and back of the pouch simultaneously as two layers of cloth joined at the edges…..”instant pouch”!

It’s no big deal really! All this meant is that I would be saving a bit of seam sewing but I thought it would be fun to see what I could do with this. The tube, of course, is beautifully seamless! You can see, above left, a little sample I made a few weeks ago with some left over warp. There is no motif in that piece and so what I have created is two layers of cloth joined at the edges…a tube.

I sealed the bottom of the tube by weaving a pattern of triangles. Weaving motifs is what bonds the two layers in warp-faced double weave.

Although there was no need to do so, I decided to try to weave the triangles up the sides as well but soon discovered that the difference in take-up between the patterned and plain areas was considerable and that I would not be able to continue with that.

So I threw in a couple of supplementary weft figures woven in one of the ways I was taught in Guatemala with the turns of the weft outlining the motif. Then I just managed to get away with squeezing in three more triangles to balance things out. I was really just making it all up as I went…not like me at all!

I created another row of triangles at the top with a supplementary weft (next time I will put the weft turns on the inside of the tube so they won’t be seen). I couldn’t weave them in double weave as they would have sealed up my tube. Finally, I twined along the bottom to secure the weft and then I cut a fringe.

Probably the most fun part was creating the “flex” closure and I have my online weaving buddy Bobbie to thank for that.

When I met her in Portland last year, she showed me a bag made by a friend in which a closure had been created using pieces of an old tape measure. You probably know this kind of closure….you squeeze the sides of the bag and the top pops open. I am trying to show that in the picture above left.

My boyfriend patiently dismantled our tape measure, cut off a length from the inside end, wound the tape back up and put the case back together. No harm done. We didn’t need all ten feet!

I cut two pieces of the tape a little shorter than the width of my pouch. I then cut them down to about two thirds of their original width and rounded the ends. I turned down the top edges of the pouch and sewed them with the lengths of tape within and yes, it works! Above you can see a picture of a commercially available and far more sophisticated version and one of our Ravelry group members provided this link to various sources of these “flex frames”.

That was another experiment that can be used. Nevertheless I think I will make another taking into account lessons learned and with much more planning in the design.

I resisted starting on that straight away as I had another idea bouncing around and so, this is a prototype for a new set of mug rugs that I would like to make…seen here dappled with sunlight…

Actually the prototype turned out pretty well and so it may be a keeper.

I edged my little 4 x 4 1/2″ piece with a tubular ñawi awapa. I am thinking of mounting the mug rugs on cork as the reverse color combination on the back doesn’t really work alongside the other colors in the tubular edging.

The cork will also serve to hide the raw end of the tubular band.

It was so nice being able to sit beside Maxima in Cochabamba last week and weave tubular bands. I had already learned how to weave and sew them but mostly through various brief observations of indigenous weavers over the years as well as through a large group class I took at the Tinkuy last year.

It was wonderful being able to have this one-on-one experience and watch how Maxima held her work, placed her sewing needle and tensioned the warp, smoothly coordinating all the moves. I was so absorbed that the sewing part was the one part of my instruction that I completely neglected to video or photograph! (although you can see a Bolivian and Peruvian weaver doing so in my videos here).

However, I did take video of many other things and have put some bits and pieces together for this post.

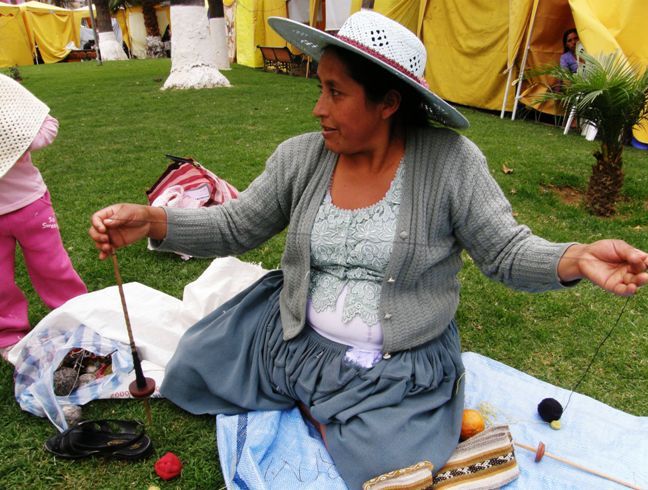
This first clip shows Maxima using her spindle to put extra twist into some plied yarn so that we would be able to weave with it.

I had been complaining during the Tour de Fleece of an aching thumb which developed from the way I was turning my spindle for plying. I really need to practice the Andean way of setting the spindle in motion for plying or respinning commercial yarn.

Maxima tied for first place with a Peruvian lady in the speed spinning contest which was held one night during the Tinkuy de Tejedores in Urubamba, Peru last year. The two ladies spun over six meters in two minutes.

The various segments in the next video show the stages of setting up a warp for weaving. Maxima winds a warp using her finger and big toe as warping stakes. You can see her winding two colors together with which she will pick her designs and then the final single edge warps. After tucking the end of the warp into her waist band she rearranges the warp cross separating the two colors into different sheds. Then she makes her heddles.

This final piece of video shows how Maxima opens her sheds and then forms a picking cross from which she selects the colored warps for her pattern. Not a stick in sight!!

If you would like to hear more of the music that can be faintly heard in the background of some of the video segments, check out this powerful live version of Wayayay by Kjarkas.

Before we leave Cochabamba, I would like to pass on Dorinda’s thanks to all those who visited the PAZA blog last week some of whom helped out with donations. Postscript: I see that Dorinda has just posted a thank you note on the PAZA site.

#########################################

The Ravelry Backstrap Group Weave-Along starts next week. We have a good bunch of people all ready to go. I am especially happy to see an old online weaving buddy Franco joining in.

Sharon aka Fiberaholic1 wove a bunch of 8-rev patterns from my Andean Pebble Weave book and did a beautiful job but this is a pre weave-along project as there will be no pick-up patterning in this latest weave-along. We are going to play with stripes and color.

And here are some more pieces to inspire our Weave-Alongers….my online weaving friend Caroline, in Australia, sent me this picture of a striped and ikat patterned textile from East Timor and JaQueline Keller on Weavolution allowed me to show her cheery bag made by sewing several plain-weave inkle bands, made with yarns of various weights, onto canvas. Such wonderful things can be made with plain warp-faced weaving!

And to finish I was just given this link from a Ravelry member to a book by Mirja Wark of The Netherlands about the weaving of a special belt called the si’ira  by the Wayuu people of Colombia and Venezuela. Colombia seems to be making its way bit by bit into my life…a little contact, a little information from here and there. I wonder where all this may lead?!

Backstrap Weaving – “Click, Click” weave weave.

“Click Click” weave weave! “Click Click” is the sound of the mouse as we navigate the internet finding all kinds of free resources for weaving. It is astounding how much information is out there and I struggle to keep the “click click” time to a minimum and the “whack whack” of the beater on my backstrap loom to a maximum. When I look at my blog stats behind the scenes I see that my tutorials are by far the most visited pages and wonder about all the people out there silently following along and hopefully making nice things on backstrap or other looms.

Anne’s first pebble weave band

Every now and then I am surprised by a letter that makes its way into my email inbox from a weaver on the other side of the world showing me what he or she has been weaving using my tutorials.

They have been silent followers on the blog but manage to track me down to share what they have woven.

This week Anne triumphantly showed me her first ever pebble weave piece. This arrived late at night and her enthusiasm simply made my day!

Dwayne wrote to get some yarn tips, Anna, who came to spend time with me in Bolivia and who always stays in touch, sent me pictures of what she is up to and Natasha sent me a bunch of photos of her backstrap weaving adventures.

Take a look…


From  top left you can see Natasha’s double weave band on her backstrap loom and next to it some weft twining (there are lots of posts here about that). She is hoping to create earflaps for a knitted hat with this twining. Below left is a hanging in simple warp float technique and  finally she took the motifs from my Mexican mug rug pattern chart page and wove three bands which she put together with cross knit looping.

But this wasn’t her first encounter with pick up weaving. She has clearly mastered the supplementary warp technique. Just look at the Latvian design band at left which she wove on a backstrap loom for the first time.

You have no idea how wonderful it is to receive this kind of feedback from something that started with a simple “click click”.

It makes me smile when people tell me how they have struggled for days to get the technique to work and how fortunate I am to have been able to learn by watching people doing it here in South America.  I think that sometimes they forget or don’t realize that my learning experiences involved quite a bit more than a simple “click click” in my living room!!

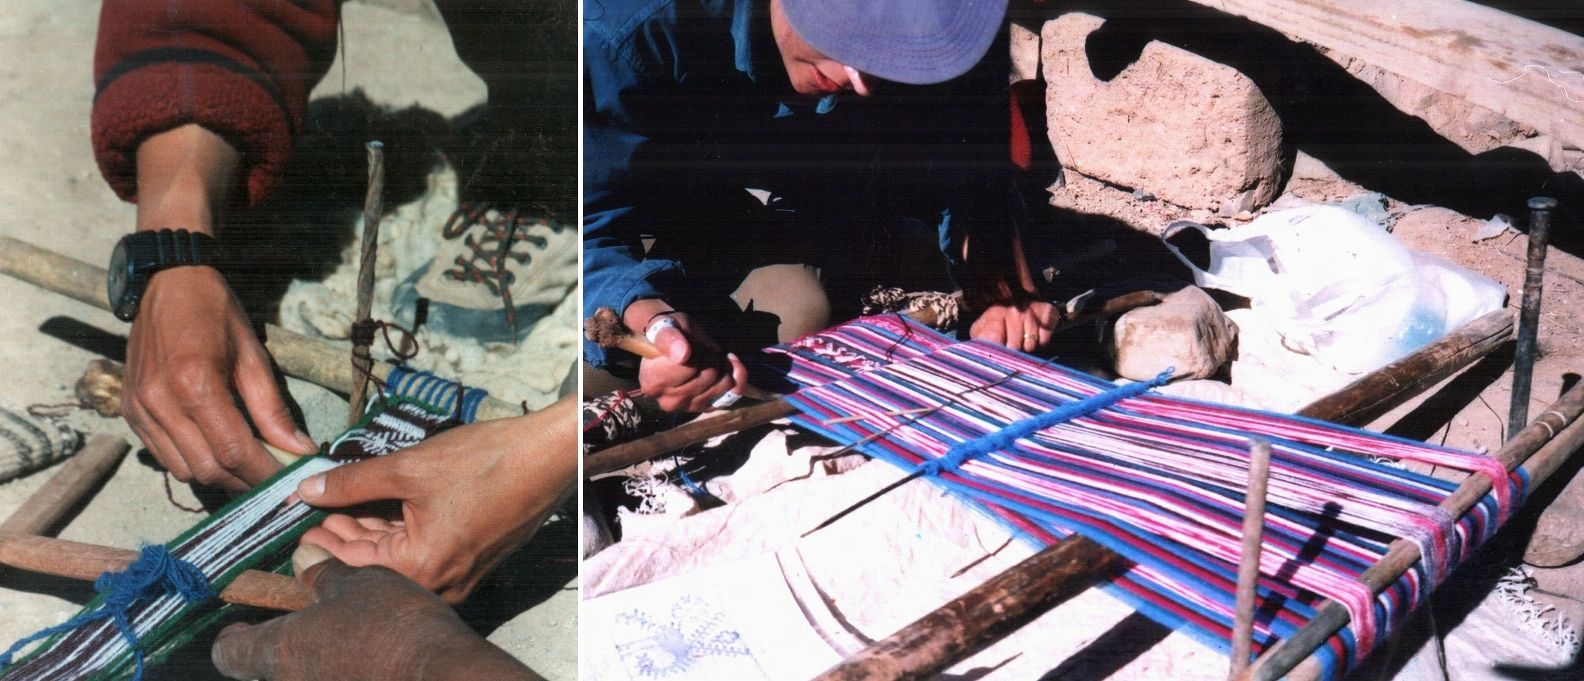
Here I am, for example, during the six weeks I spent with my teachers in Potosi, Bolivia learning double weave and a complementary warp patterning technique bent over the loom…

On the left I am learning the basics of double weave on a narrow band. My teachers wove this technique on a horizontal loom staked out on the ground. At this stage I wasn’t quite sure how to position myself at this awkward loom…one knee up and one down. Then it was on to the wider piece you can see on the right, on my knees on the hard baked ground up at 4000 meters. I spent some of the time quite ill. My teachers would offer me food and, as it would have been offensive to refuse, my poor gringa stomach suffered a lot! I lost a lot of weight on that trip! After rejoicing in the completion of the double weave piece for a day it was back down on my knees to learn another technique…

You can see how strong the high altitude sun is…my hands are baked as brown as my teacher’s. Compare them to the picture on day one where I am weaving the band. So yes, I was lucky as I did get to watch and learn how to do this kind of weaving but most times there were no explanations! Most talk would be in a mix of Quechua and Spanish from my teachers but we formed a nice relationship, found things to share and laugh about and my six weeks there with Hilda and Julia were fun. Ah, the stories I could tell of the fun, mishaps, joy, lonely times, moving times, exciting and even scary encounters I have had along this journey learning to weave here!……

So, I aim to make my tutorials as visual as possible with both step-by-step pictures and in many cases videos so you too can watch and learn and I try to be as available as possible to answer questions and give further explanations in the online groups, here on the blog, on Facebook or through my personal email. And more recently, I have been traveling to meet weavers face-to-face…you just can’t beat that kind of contact and the chance to meet many of the silent visitors to this blog.

Fortunately there is time to weave too! So, this is what I have been up to this week…

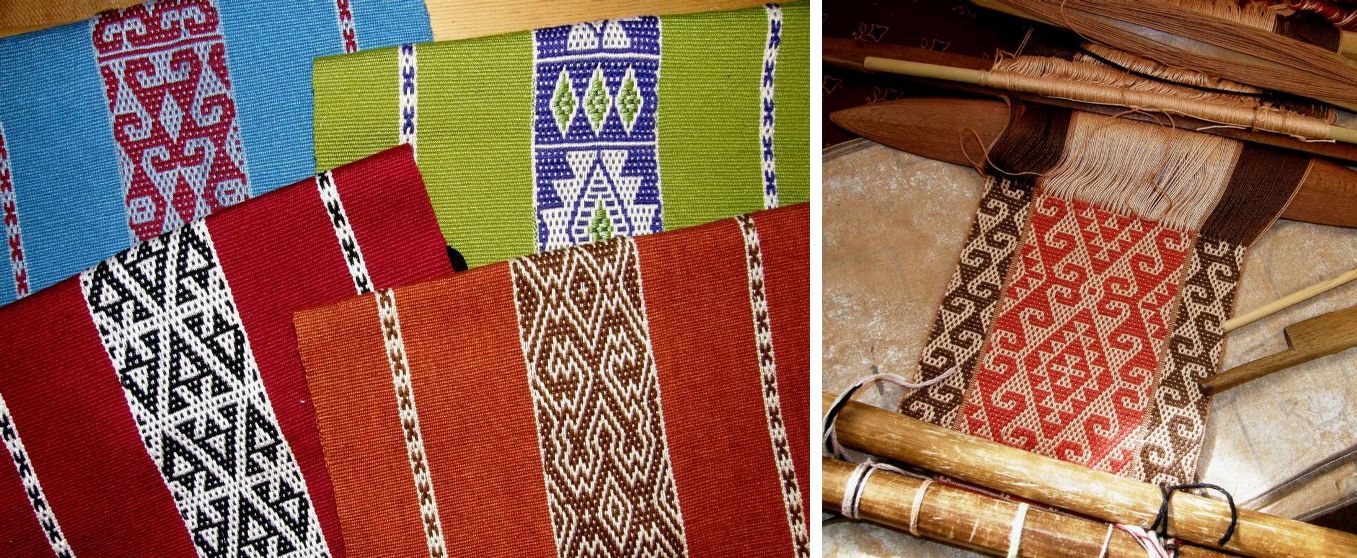
I finished the third in my set of place mats. I fiddled all day to get the blue for the patterned portion of the newest place mat using freeze dried indigo. Again, with a “click click” I found instructions and muddled my way through it. I don’t think I did it quite right as I had no way to measure the temperature of the dye bath but in the end I got the tone I was looking for. I have been wanting to weave red on blue for a long time as that is quite typical of a lot of the Central Asian pieces I have seen but the shades of blue that I can buy here just wouldn’t work well with the reds that I have available.

So, there are the three pieces so far…from left to right, a Central Asian yurt band design, a motif taken from a Mexican belt and a Shipibo pattern. The last one in this set will go on the loom this week. I have found the design I want to weave and chosen the colors and I will show that to you next week.

I kind of got into”dyeing mode” after the indigo day and also after having dyed that gorgeous terracotta color for the Shipibo piece. That is a Dylon cold water dye. I decided that since the package of Dylon was open, I may as well do an ikat experiment.

I played a bit with ikat some years ago. For some reason, which I will never understand, I decided back then that I should do it with my handspun llama fiber. As I had nothing else to use, I dyed my piece with a cotton dye which meant that the gorgeous Mexican chilli pepper red that I had been hoping to obtain turned out an awful Barbie pink which gave barely enough contrast to see the ikat pattern. I tied the warps with cassette tape after trying many things none of which were to my liking.

The uppermost project never got dyed after the Barbie incident and did not stand up to the test of time in my closet unfortunately. The lower piece went along just fine except I couldn’t stand the color and, as I can’t find it anywhere now I expect that it got tossed out at some point. I must have really hated it to have done that!

In my wanderings through Latin America I have seen ikat weaving here and there but have never been in the right place at the right time to see the preparation part in progress.

I guess the most time I spent in an ikat weaving area was in the towns and villages around Cuenca in Ecuador.

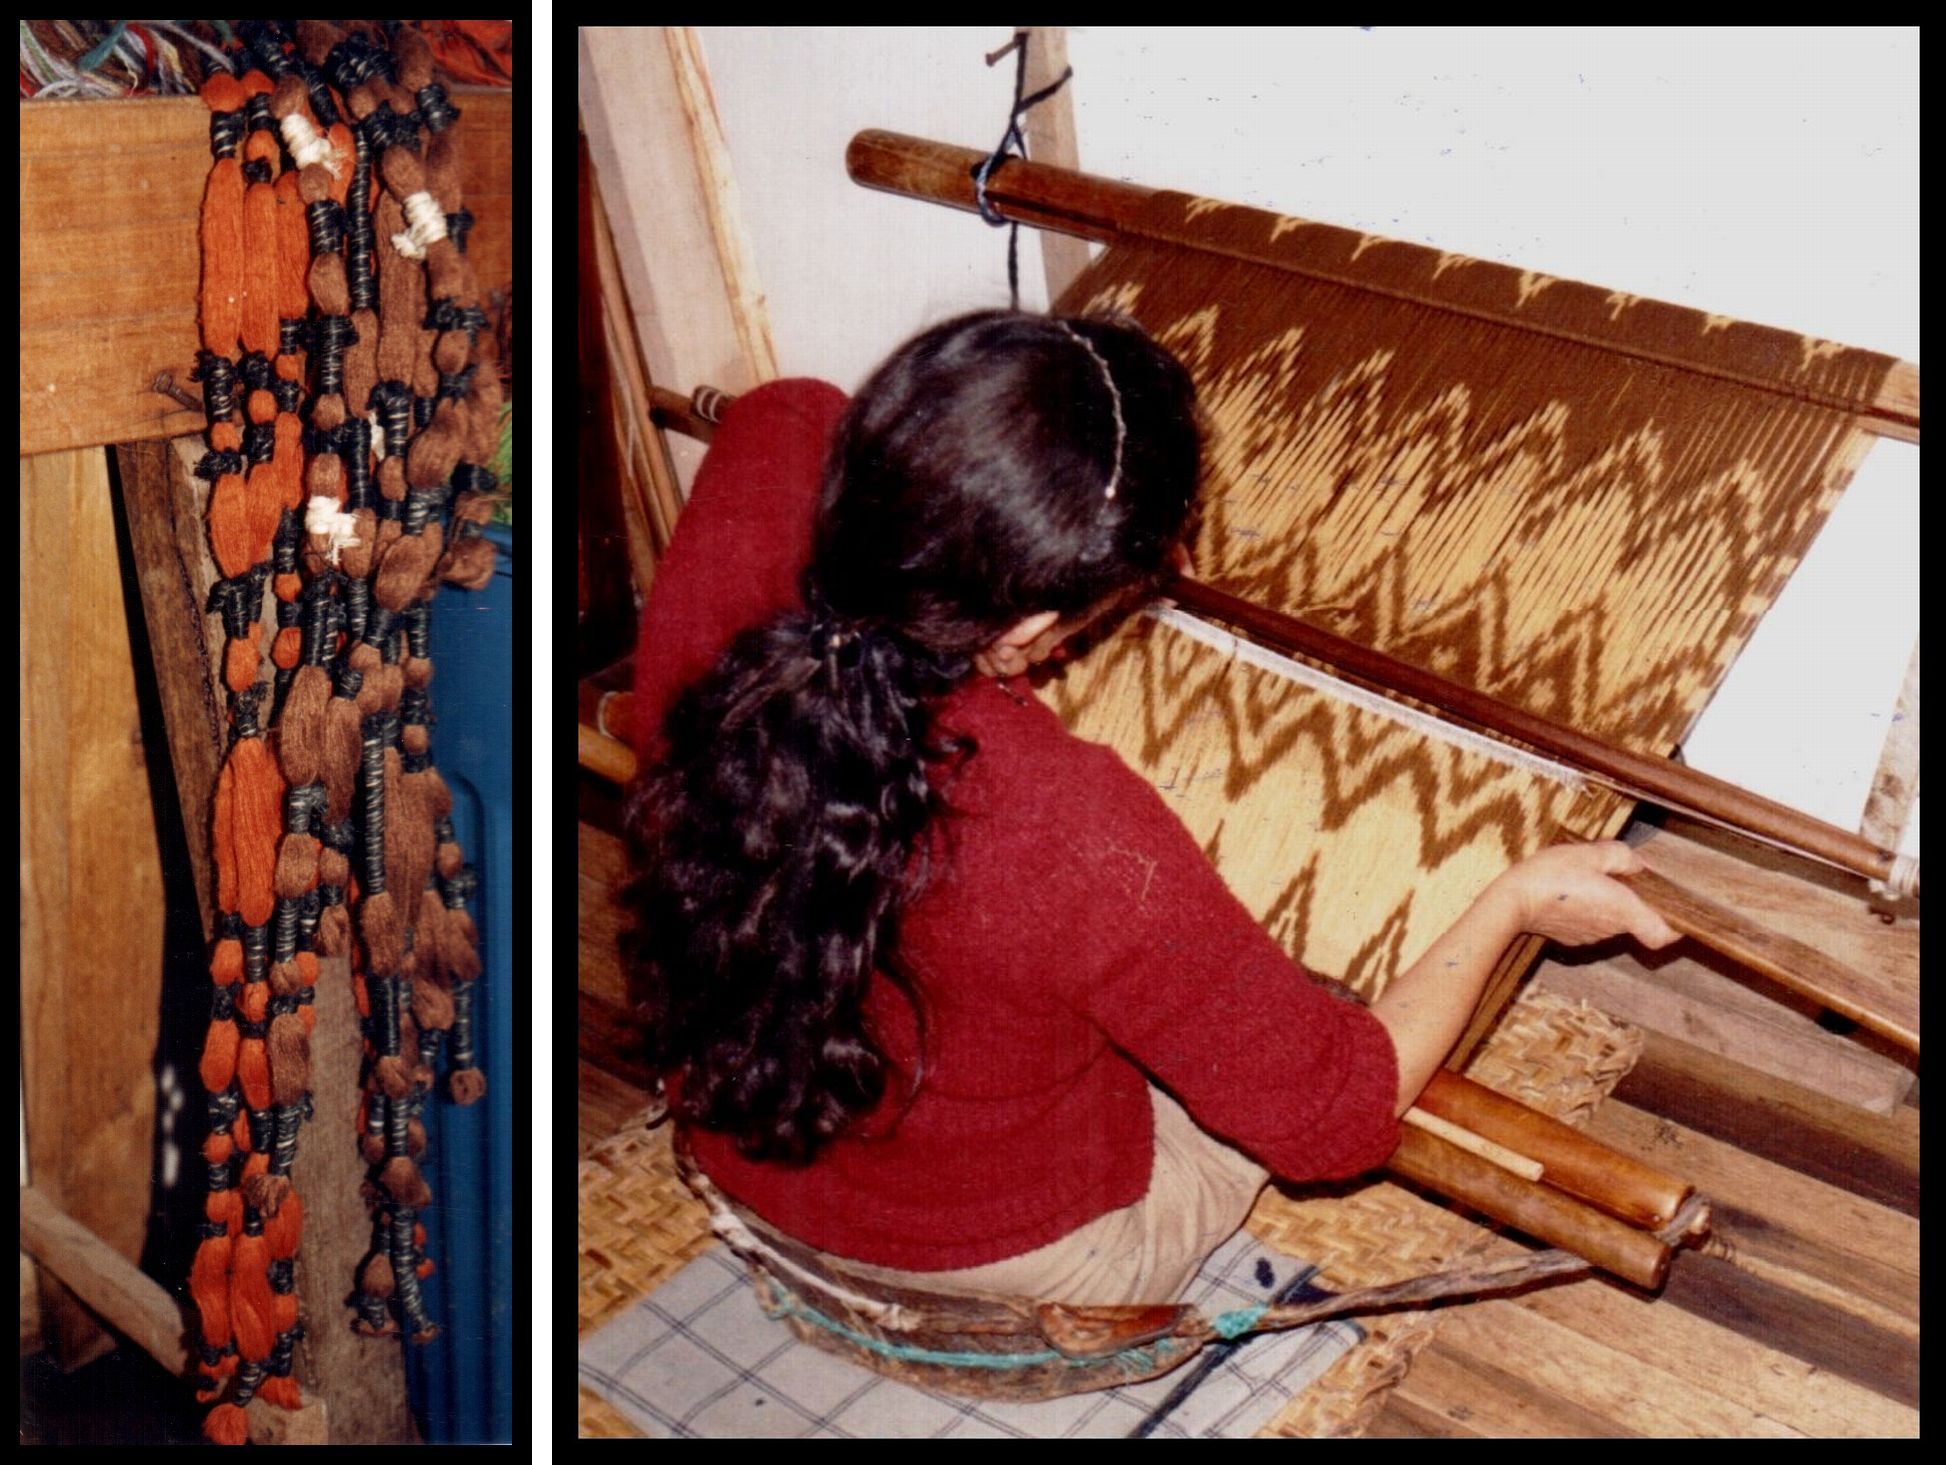
I was at least able to spend some time watching this weaver in Bulcay at her loom and see and handle one of her prepared warps. A lot of these pieces are woven specifically for tourists but local cholas wear a typical shawl or paño which is patterned with motifs in the ikat technique. The name cholo refers to the group of people who fall between indigenous and whites in the social-economic hierarchy. Besides the intricate ikat designs, an outstanding feature of these shawls is the long fringe which quite often measures a third to half the length of the shawl itself. Once the shawl is off the loom, the fringe is knotted in a decorative form and this work is often starched so that the beautiful designs can be more clearly seen.

Dutch weaver Agaath, whom I met through this blog and then again in person at the Tinkuy, sent me this image of a woman knotting the fringe of an ikat shawl which she took on her own travels in Ecuador. The picture at right is one of the knotted motifs that are worked into the fringes. This textile is part of the collection of the late Dennis Penley, author of Paños de Gualaceo. Sometimes the fringes are knotted into a simple mesh onto which figures are embroidered which you can see below right.

These pictures were also sent to me from Mr Penley’s collection.

I am told that the simple white and indigo-dyed cotton shawls are the oldest and I was able to see these in antique stores in Cuenca and in the museums but one day I was lucky to see a woman walking down the street in quite a hurry with one slung over her shoulder and only by trotting along behind her was I able to get a good look and a quick picture!

I dream about being able to create ikat designs like these but there is no need to get crazy and go tying bunches of intricate designs all at once. One has to start somewhere, keep it simple and experiment. I think that even my Barbie band was over ambitious.

Someone who had a strong influence on me was Linda Hartshorn whom I met at CNCH last year. She showed me one of her ikat woven pieces…a carnival of gorgeous colored stripes with simple bands of ikat between. This taught me that the textile did not need to be all about ikat. The ikat patterning could be used simply as a decorative feature on a large piece of fabric. Here are a couple of photos of Linda’s ikat pieces which she has allowed me to show. My encounter with Linda also had me looking at color in new ways.

The piece on the left has been made with commercial cotton and the other is natural dyed silk. The next time I am in Linda’s neck of the woods (Humboldt County where my friend Janet lives) I think I really should take a dyeing class with her.

Anyway, I created a few strips of ikat and incorporated them in a wider piece of warp and decided to weave some supplementary weft motifs in the center. These designs are from Bhutan copied from a textile in a friend’s collection.. While I think the ikat could stand much improvement, and I have some ideas about how to go about doing that for the next experiment, I am on the whole very pleased with this piece. I wove this with my standard crochet cotton and used the appropriate dye this time!


This form of weft patterning is an inlay technique and so the design is not seen on the reverse of the fabric.
It was a fun project even though I am still working out the mystery of aligning the ikat design warps in both sheds. I didn’t use any of the aids that I have seen backstrap weavers use when doing ikat as I wanted to see how the warps behaved. In the next experiment I will use some of those “tricks”.

Another thing that I have just started playing with is the selvedges on double woven bands. I am trying out something looking at several Bolivian double weave bands that I have here to see if I can create a neater edge. As the weft in double weave has to turn and travel around the edge in order to pass through the shed in the lower layer it often pulls the edge warps out of position on its way particularly if those edge warps are a little slack. So, I am looking for something that can sort of bridge the gap between the upper and lower layers. I will show you the results of this experiment next week if, in fact, there is anything worth showing!

Here is what some of my online weaving buddies have been up to…

At top left, Anna in Australia showed me the pebble weave motif she is doing bordered by an alternating comb design. This is cool! Helena in Brazil has made a purse using a design charted by Adele Cahlander. Marsha and Janet are both in the US and Marsha‘s super seamstress friend, Dana sewed three of her simple warp float bands into an amazing bag while Janet is using the tutorial here on my blog to practice double weave. She is weaving it and getting the technique well established on her inkle loom before transferring the skills to her backstrap loom.

The Ravelry group is still spinning away on the Tour de Fleece and, as tomorrow is “challenge” day they hope to warp their looms with their handspun and see how their yarn behaves. I hope my sticky sheds videos will come in handy!

We have a new member, Kathi Pecor aka fiberdance who is doing Saori style weaving on a backstrap loom using a sweet little rigid heddle segment which you can see at left.

And finally, I have embedded a beautiful video about handcrafts of Colombia. This was shared by two of my Facebook friends, Sharon and Danielle. I told you all some time ago about how little I knew about Colombia with a lot of my impressions being sadly tainted by stories of kidnapping and drug trafficking and all kinds of nastiness. And then I met a Colombian weaver at the Weavers’ Gathering that was held here in Santa Cruz some months ago and everything changed.

This is a really lovely piece of video narrated in English and I hope you have time to take a look.

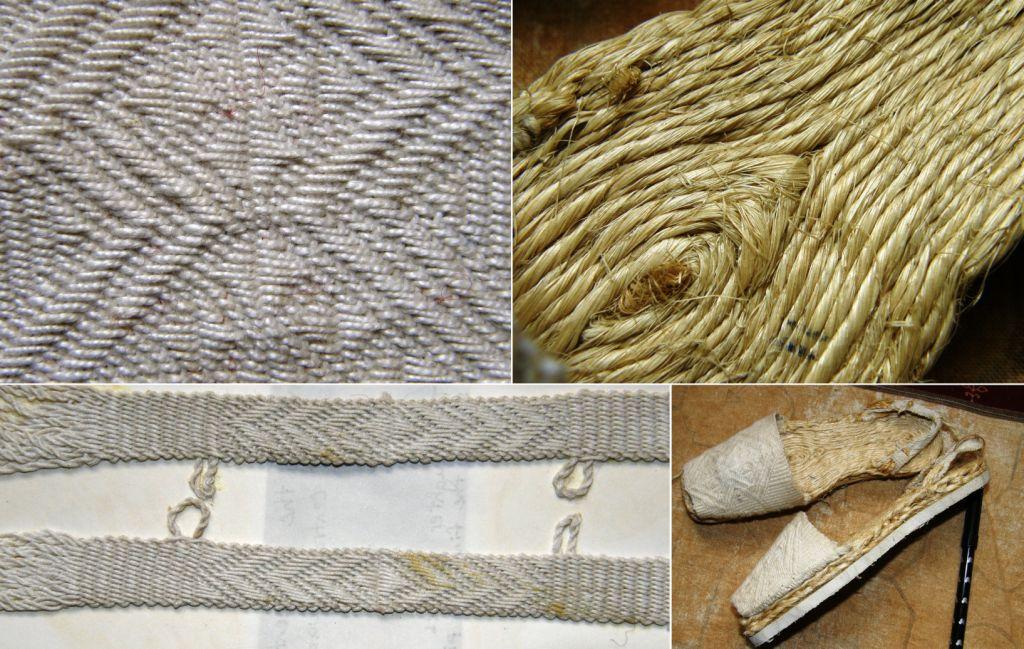
In the video I was excited to see alpargatas being made in what seems to be much the same way as they are in Ecuador.

I spent a lovely day in Ecuador visiting with one of the few remaining alpargata artisans. You can read about that in this post.

And so, here’s the video and thanks Sharon and Danielle for showing me this story with its haunting final phrase “I want to remember with my hands”.

THE HANDS OF COLOMBIA from Club Colombia on Vimeo.