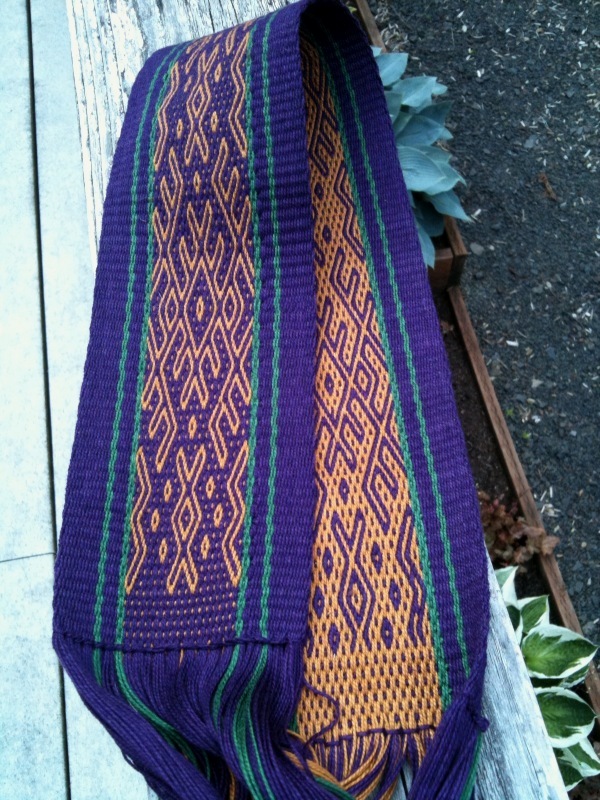
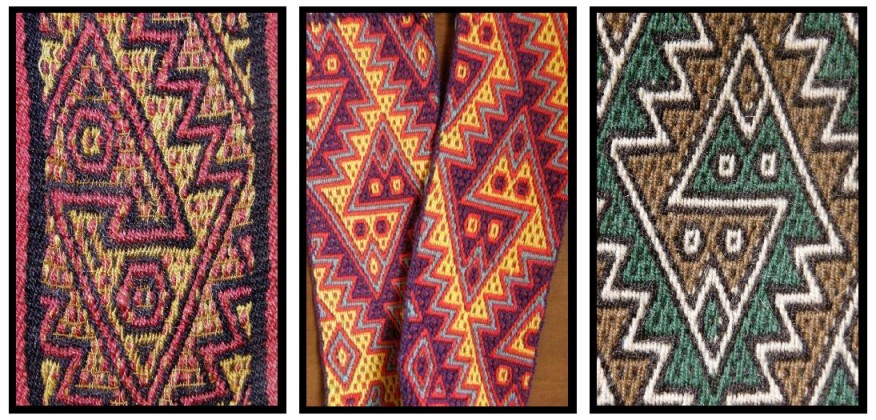
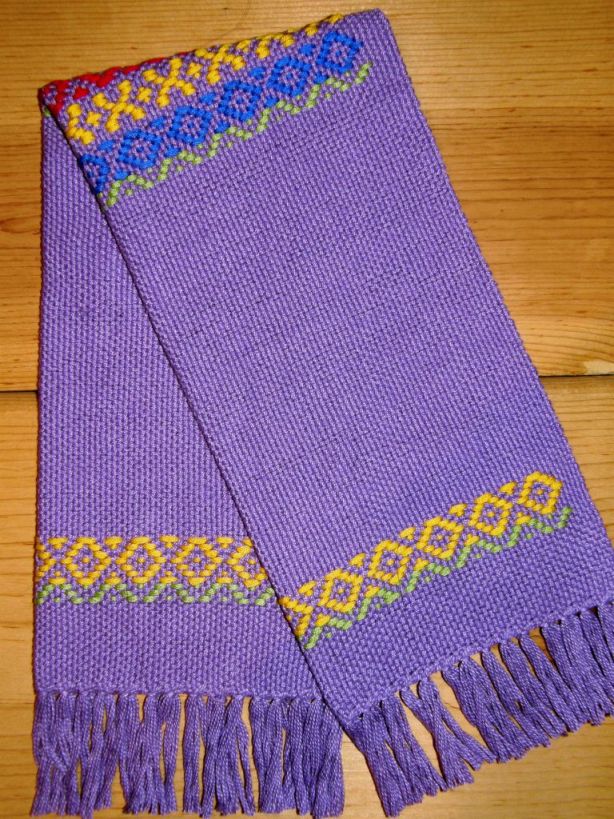
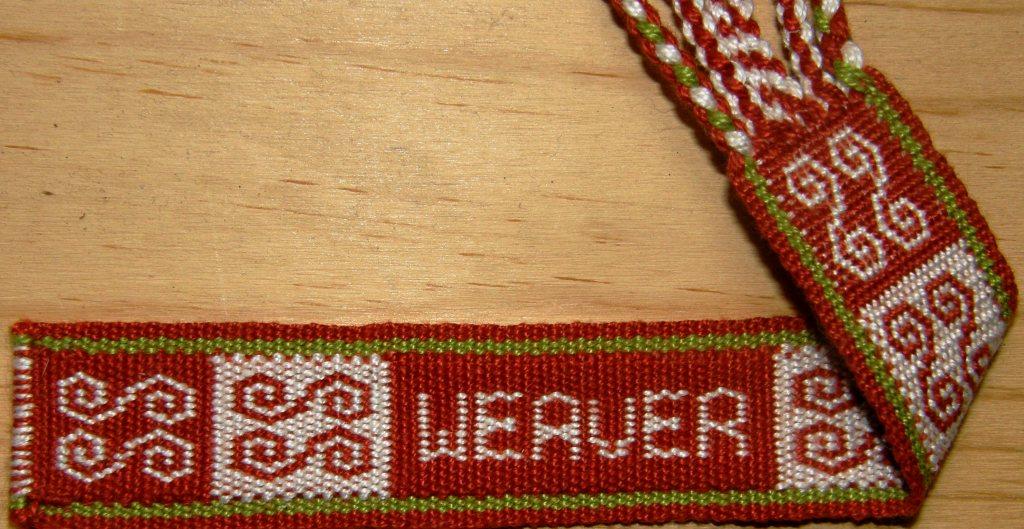
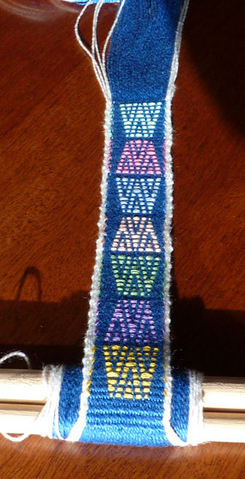
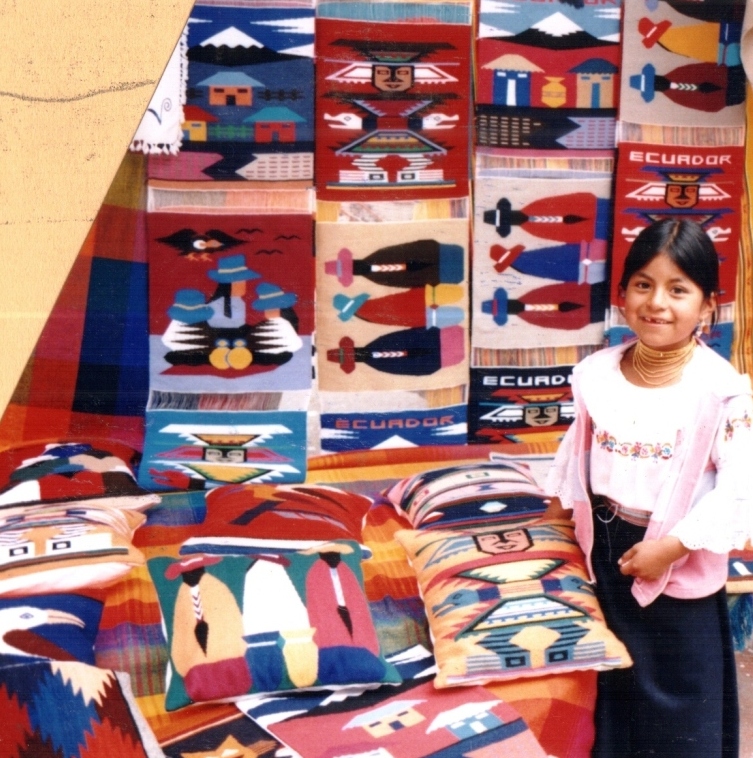
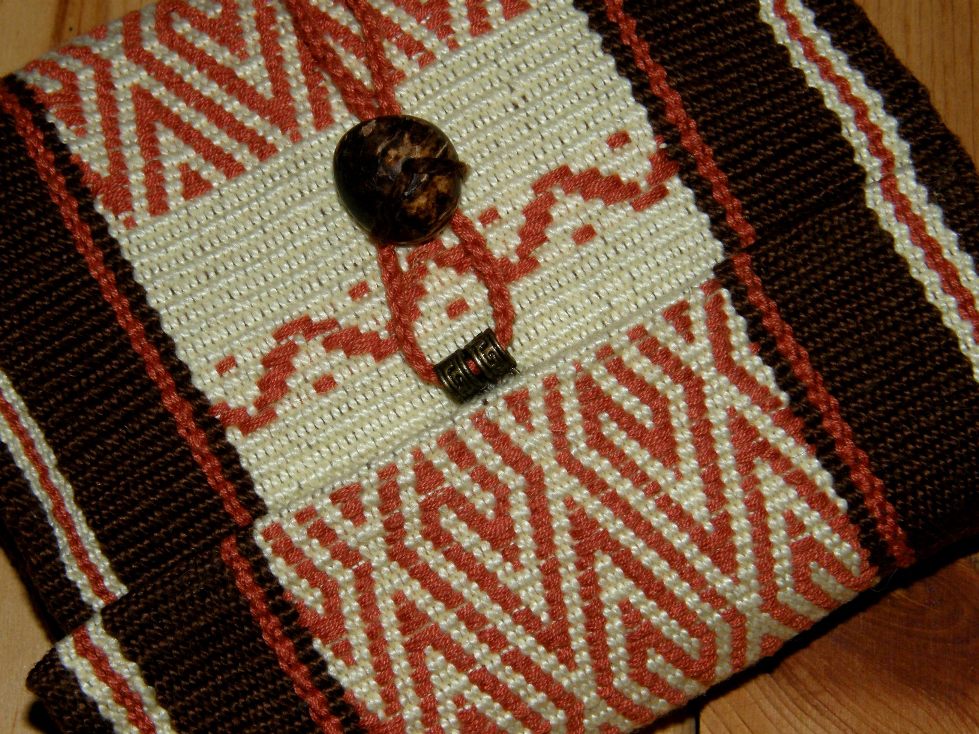
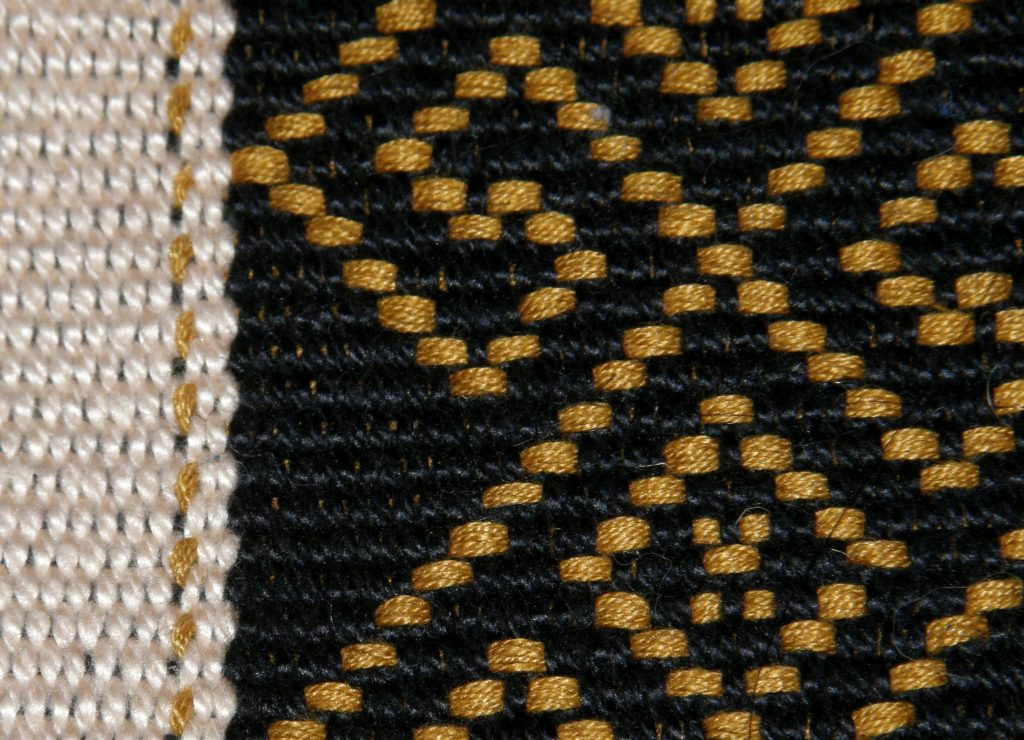
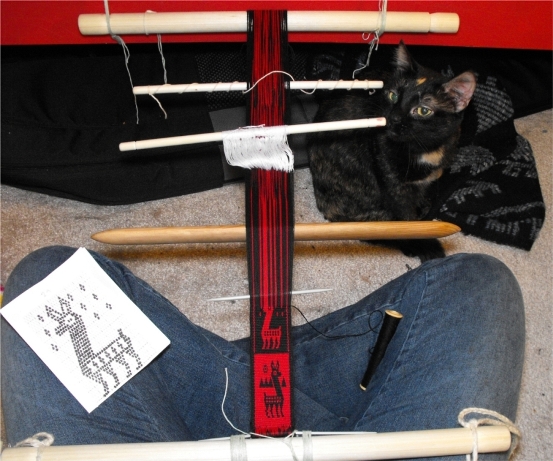
Celtic knot motifs in Andean pebble weave on my backstrap loom
PUTTING DOWN ROOTS AND WEAVING A GUATEMALAN TREE (PART ONE)
It is exciting how much interest there is out there in backstrap weaving. Some people are attracted to all the beautiful pick-up patterns they have seen on ethnic textiles around the world many of which have been woven on backstrap looms. Others are attracted to the loom itself – its simplicity, portability and low cost. Some people are interested in the products they can produce using up their yarn stash with this inexpensive piece of equipment while others are more intrigued by the processes involved in the “slow cloth” it produces.
I think that some people may be unaware that most of the pick-up patterning techniques do not need to be limited to the
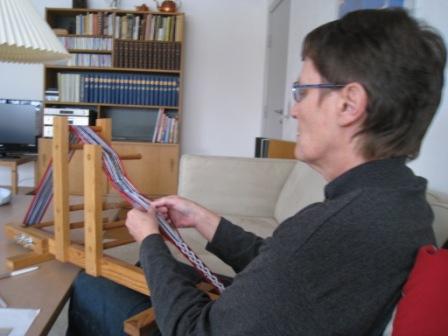
My boyfriend learning Andean pebble weave on my rigid heddle loom
backstrap loom and can be set up and woven on other looms. I have heard from quite a few people in the time that I have been active in the online weaving groups who have jumped headfirst into backstrap weaving and attempted some of the more complex pick-up techniques as first projects only to become frustrated and disappointed.
A few have managed to succeed and I am always reminded of the Spanish girl who wrote to tell me how she had taken my monograph on a hiking trip, picked up some sticks along the way, and woven a band in Andean pebble weave as her first ever backstrap loom project. She blew me away!
Unfortunately, I have heard more stories of people falling in love with the llama motifs on my blog, getting some dowels for a backstrap loom and attempting double weave as a first project. The poor backstrap loom now sits under dust on the shelf.
Jorge made a key fob and quickly got the hang of operating the two sets of heddles.
I would like everyone to be as in love with the backstrap loom as I am but, if you are really more interested in the patterns than the loom, why not lash your warps to other looms as I did for my boyfriend above? Now I have to tell you that Jorge had no particular urge to learn Andean pebble weave. He has been listening to me beat away at my loom for many years now with no desire to get down on the floor and join in but I needed to do a timed test run for a lesson I had planned and he kindly obliged – and very well he did too. He even allowed me to post this picture! He is pretty confident that the fellow members of his heavy metal rock band don’t read my blog. 🙂
For those of you who love the loom and want to get down and beat away, I have put together a kind of tutorial on what I would call the “Steps to Success”. It is a list of all the tutorials that I have put out there and the order in which I would recommend doing them. “Putting Down Roots” would be another good name as, taking it slowly, and following these steps will give you a firm foundation, develop your skills and have you well prepared for all those lovely pick-up patterns that we all want to weave. You will find the listhere. It is worth checking out as you may have forgotten how many tutorials there were out there amongst WeaveZine, Weavolution and this blog. I have gathered up seven that I would list in the beginner category.
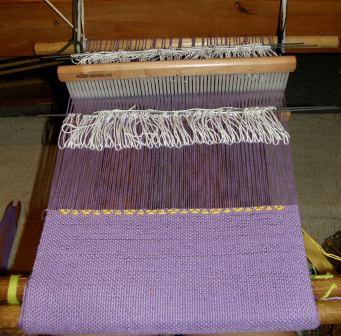
Tool bag fabric almost ready to come off the loom
I wove like mad all weekend as I was determined to get two projects off the loom. I have several others churning around in my head and I needed to free up some loom bars. Above you can see the purple fabric that I have been weaving for a tool bag set. This is what always happens when I do pebble weave – I turn the fabric over and then can’t decide which side I like best. Fortunately I have enough fabric to make two bags so I can have one with each of the sides showing. Before I declare this project complete, there is the horrid zipper sewing task to get through. I have one bag finished so far.
The smaller of the two purple bags has not been sewn up yet. I would like to make more in these rich colors.This came off the loom too this week. I should be able to make three coin purses from this - more zips, sigh...This was a yarn test for the Aunt Lydia number 10 crochet cotton. The black is the Brazilian brand crochet cotton that I get here. There was a small amount of pilling on the heddles in the black sections but virtually none in the red.
You may remember that I had planned to go to Guatemala on my way home from my recent visit to the US. I didn’t go as the US trip had been so long and I really needed to get home. It turns out that it was just as well as Guatemala City soon after was affected by a volcanic eruption which caused havoc. I would normally choose to avoid Guatemala during hurricane season but volcanic eruptions can happen at any time of year.
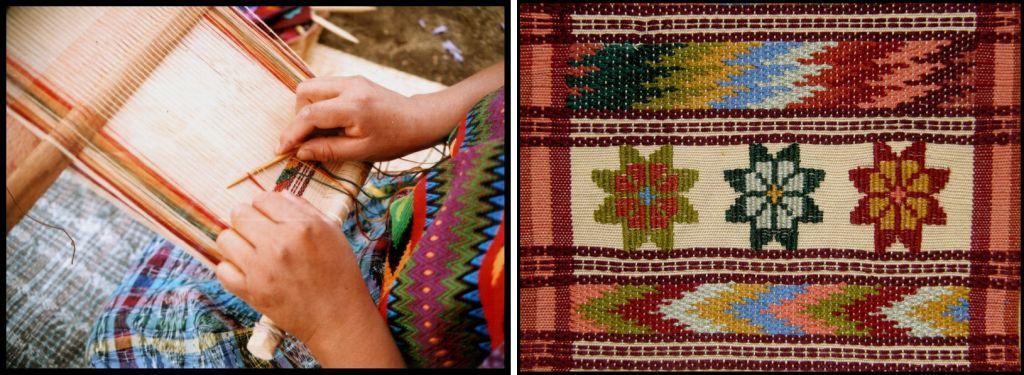
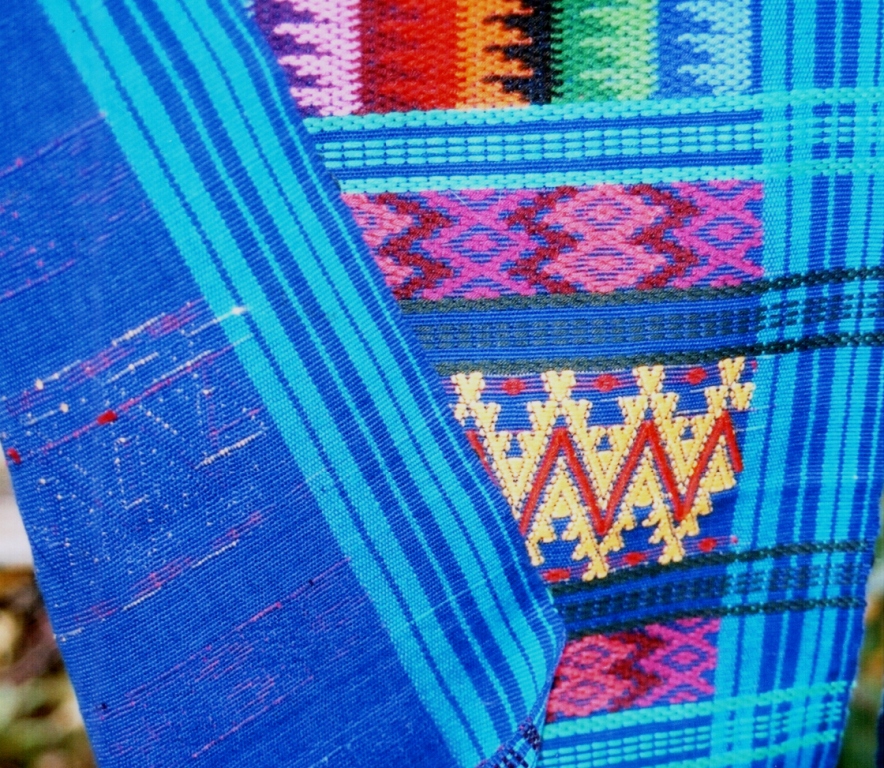
Guatemalan tree designs woven with acrylic supplementary wefts on a fine cotton ground weave
Anyway, I thought that we could do a little virtual trip to Guatemala in the meantime. I still have the bag of bright Guatemalan acrylics on the shelf and am no nearer to getting down to respinning them to use as warp.
I decided I would use them for some supplementary weft patterning, as they were originally intended, instead.
I wove a tree design using the various warp wrapping and inlay techniques that the Guatemalan weavers employ and this was fun as I hadn’t done any of this since 2008 immmediately after my return from my first visit there.
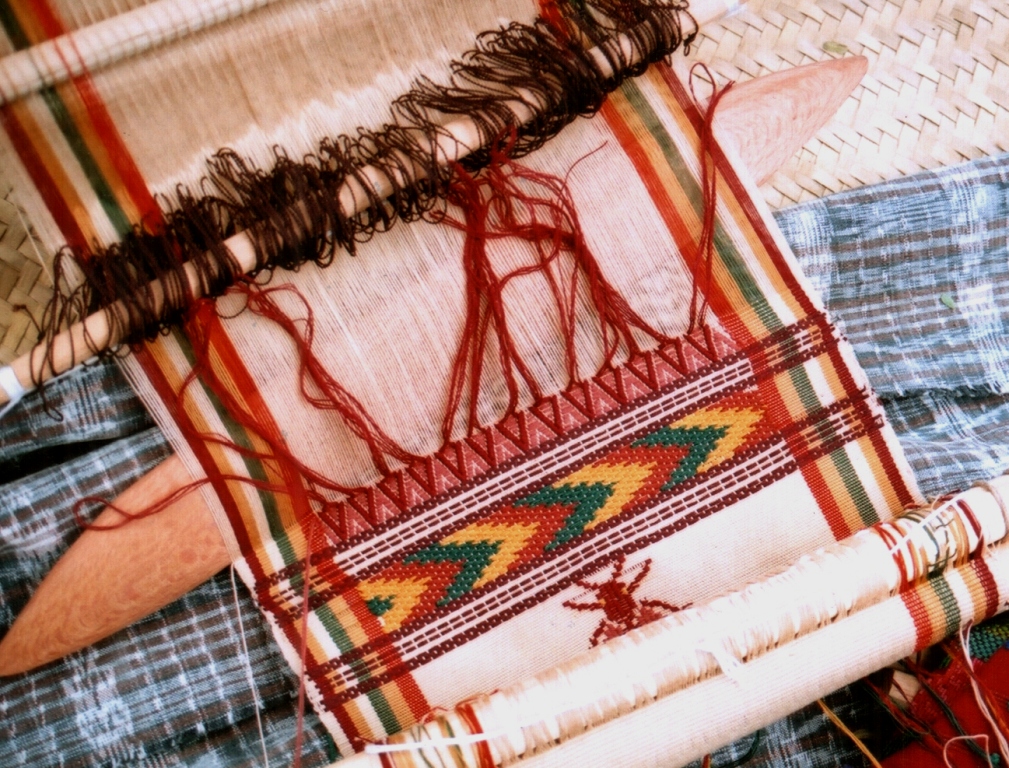
I learned these techniques with my teacher Martine and her daughter Carmen in Santa Catarina Palopo on the shores of Lake Atitlan. I met Martine in Panajachel where she sells textiles in the street market. She took me to her home and spent one morning setting up the loom and then her daughter took over weaving and teaching me for the next week or so. She was a good teacher. Each motif was repeated six or seven times across the cloth. Carmen would show me five times what to do and then would let me weave the last one or two motifs to practice what she had shown.
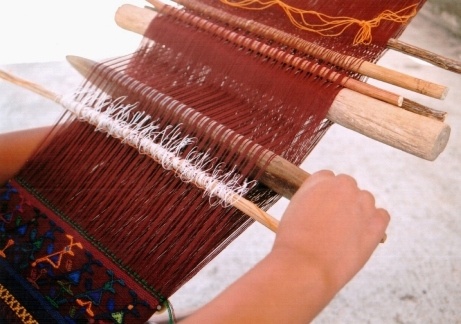
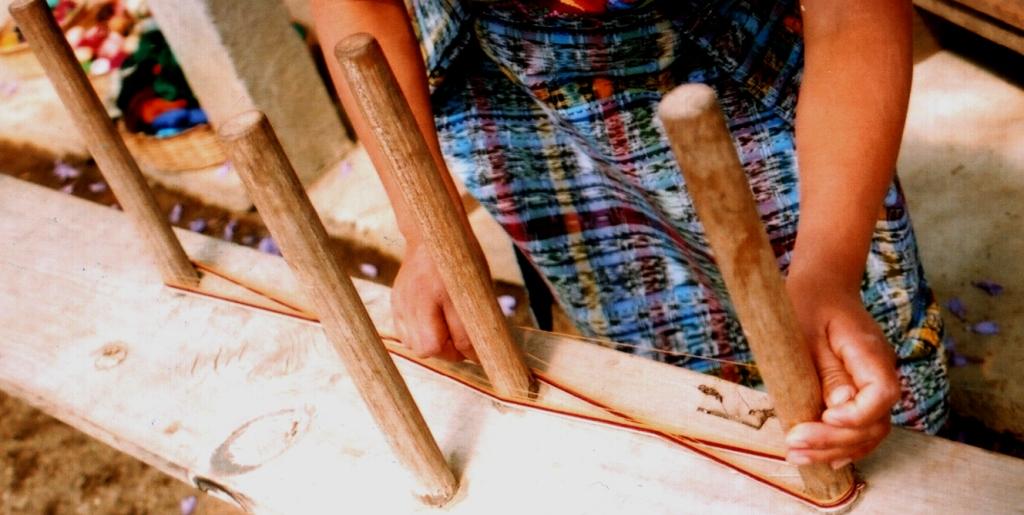
The weavers set up their looms with great care. Martine was obviously more skilled at doing this and Carmen only took over when everything was set to go. The warp is wound with two crosses. The second cross helps hold the shed rod in place.
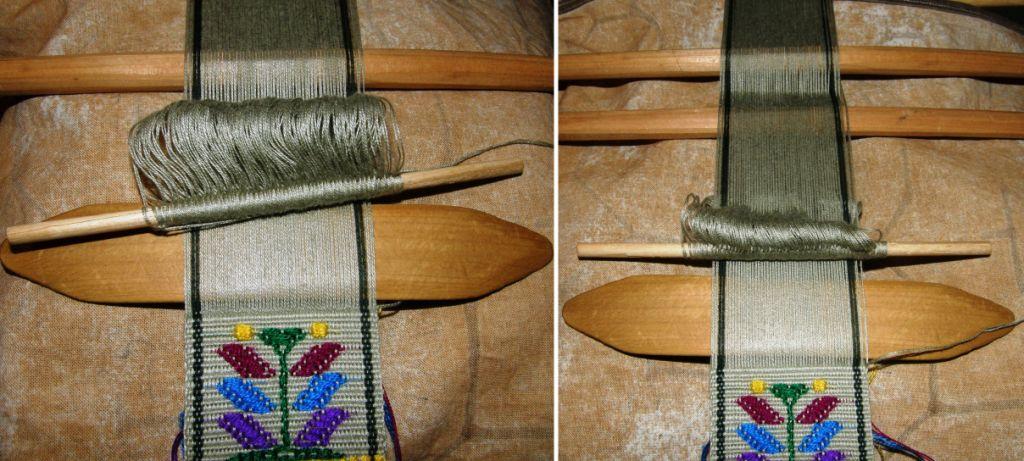
LEFT: The basic loom set up with shed rod and string hedddles in place. RIGHT: An extra stick is placed in the second cross to hold the shed rod in position.
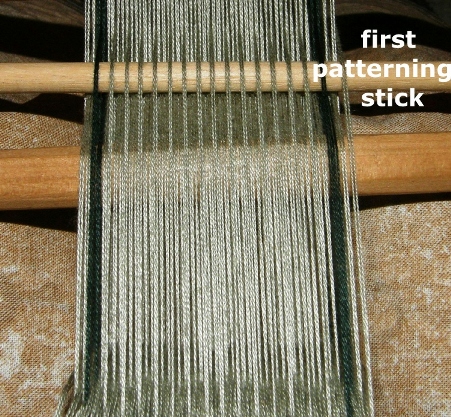
In order to create the patterns, two extra patterning sticks need to be inserted and stored up beyond the shed rod. One is stored on top of the warp and the other underneath.
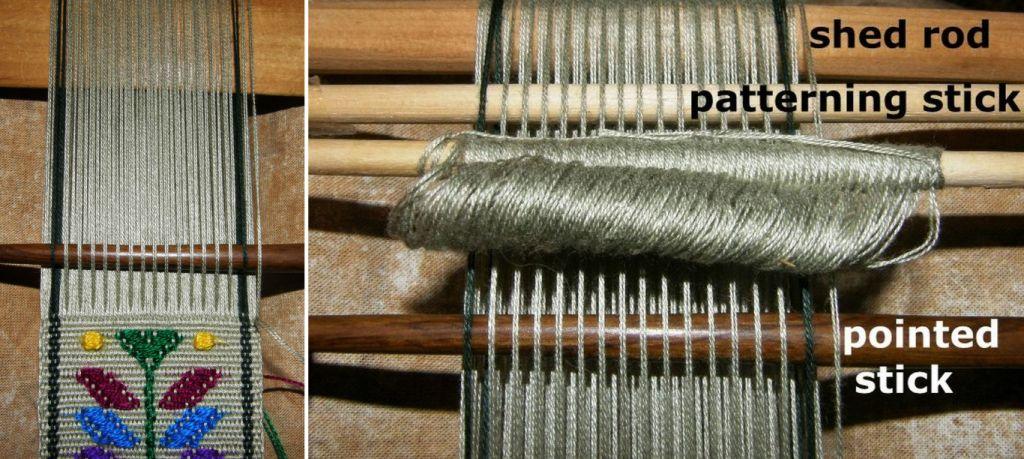
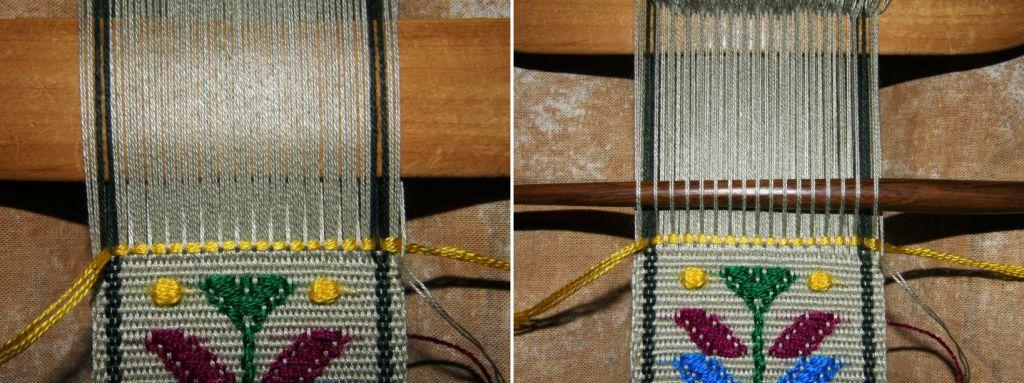
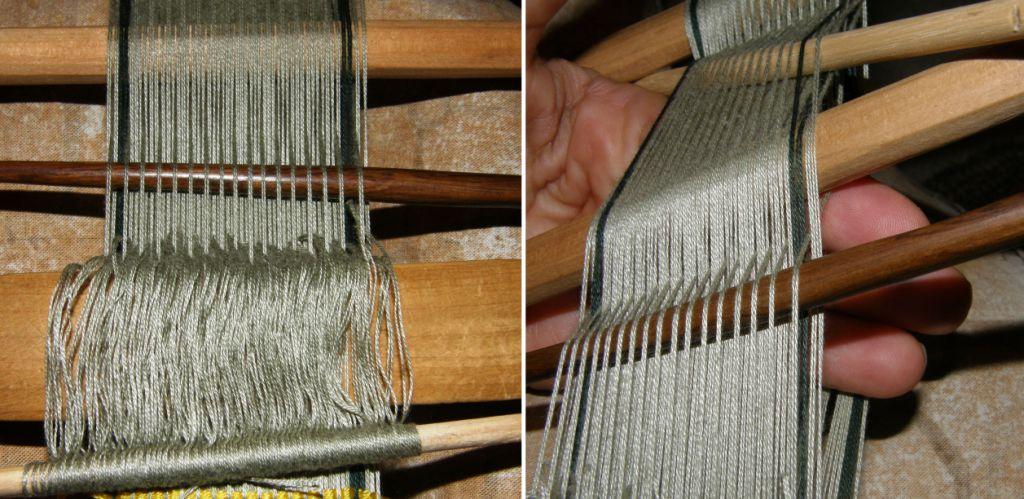
LEFT: To set up the patterning sticks, the shed rod shed is opened and the first set of patterning warps are picked up. Pick one, drop two, pick one, drop two across the width of the warp.. The weavers use a pointed stick to do this. RIGHT: The pointed stick is inserted under all the picked warps and then pushed up toward the heddles. This will raise the picked up warps on the other side of the heddles. Another stick is then placed under the warps on the other side of the heddles. This is the first patterning stick.The first patterning stick sits up beyond the shed rod until called into use.LEFT: A colored weft is placed under the warps in the first patterning shed. This serves as a reference to make picking up the warps for the second patterning shed easier. RIGHT: The heddle shed is opened and the warps in the second patterning shed are picked up. Between each warp in the first patterning shed, there are three warps. You need to pick up the middle one of these three warps. You will pick one, drop two, pick one, drop two all the way across the warp. The pointed stick is inserted under all the picked up warps. LEFT: The pointed stick is moved up toward the heddles which will raise the picked up warps on the other side of the heddles. RIGHT: A stick is placed under the warps on the other side of the heddles. Both the stick and the shed rod are raised and this creates a new shed underneath the two. I have my hand within this shed and will replace it with the second patterning stick.Here you can see the two patterning sticks in place up beyond the shed rod.Two wefts are used to weave the above typical patterns of Santa Catarina Palopo: a red weft is passed through the two main sheds (shed rod shed and heddle shed) to weave the ground weave and the brightly colored supplementary wefts are passed under or wrapped around the patterning warps to form the motifs. These are samples that I wove when I returned from Gautemala.Motifs are usually started and ended with four rows of supplementary wefts in the patterning sheds forming a brick-like design. The colored pattern weft (in this case yellow) is passsed through the pattern shed and then the main weft (in this case light green) is passed through the main shed.
To open pattern shed one, the patterning stick is simply drawn down to the heddles. This will raise the pattern warps and a stick can be placed under them on the near side of the heddles. The yellow weft can then be passed through this shed. Then the shed rod shed will be opened and the green weft passed. RIGHT: To open pattern shed two, the patterning stick is also drawn down to the heddles (under the warp). The pattern warps won't pop up quite so easily for this shed so it helps to have your beater in the heddle shed and tilted as shown. Like this the pattern warps will be more apparent and you can slide a stick under them.The yellow weft is passed under these warps and then the green weft is passed through the heddle shed.In this picture I have laid in the first pass of yellow supplementary weft in patterning shed two. The beater is in the heddle shed and I have just passed the main green weft through.
Here concludes Part One of this tutorial on Guatemalan single face supplementary weft patterning. So far we have looked at how to pick the two patterning sheds and store them on sticks up beyond the shed rod, how to open the patterning sheds and how to weave the basic brick design which separates the motifs on a piece. We also looked at the weaving sequence, that is, first passing the supplementry weft and then the main weft.
In Part Two, next week, I will show you how to create the outlines of shapes by wrapping the supplementary weft around warps and fill them in by laying in supplementary wefts. The Guatemalan weavers create all kinds of bird, plant and human figures. They even include some of their weaving tools, for example, a swift.
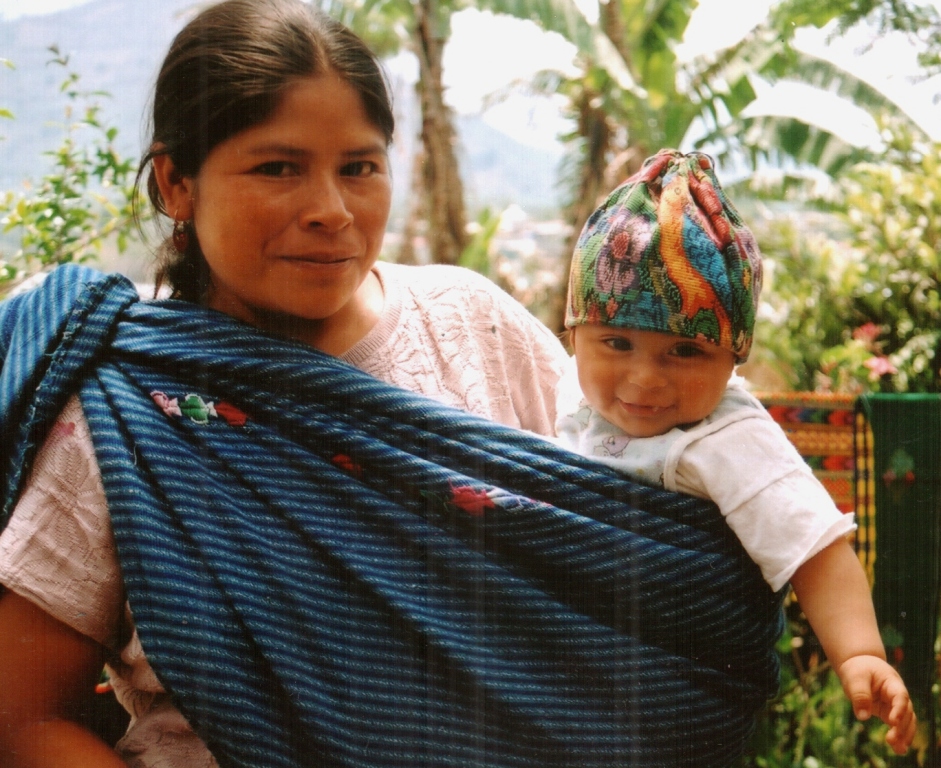
To finish off here, let me show you my weaving teacher and her family and some places around beautiful Lake Atitlan where they live.
RIGHT: Carmen is asking for guidance from her mother Martine. LEFT: Carmen's younger sister and niece and nephew. The little niece was so sweet in her tiny huipil, corte and belt.Santa Catarina Palopo is oe of many settlements on the shore of beautiful Lake Atitlan. The sign outside the library shows words in the Kaqchikel language.I hitched a ride another 20 minutes down the road to the smaller town of San Antonio Palopo and visited with some backstrap weavers making incredibly wide pieces on their looms and some siblings all dressed in the same typical colors of the town. It was a nice quiet place to stroll and hear the sounds of warps being beaten from within the walls of the homes and see the warping boards out in the patios. From there I took a launch ride on the lake back to Panajachel.I went across the lake to Santiago Atitlan for the Sunday market. This town is known for its superbly hand embroidered clothing. I saw older women in the market wearing hair sashes wrapped around their heads. The men wear three quarter length loose white striped pants which are often covered in embroidered birds.I sat by the roadside and tried to photograph the parade of people in their gorgeous embroidered and ikat dyed clothing as they walked by.In San Juan La Laguna a women's weaving cooperative is producing items for tourists using only their own cotton thread dyed with natural substances.
Strolling back to San pedro La Laguna from San Juan I met Roi from Israel who was attempting to cycle around the world. I have never heard of him since. I wonder if any of you have run into him in your travels? The lady at right is from San Jorge La Laguna, high up on the hillside above the lake shore, which is known for its ikat woven fabric. Here she is demonstrating spinning the natural brown “cuyuscate” cotton which is highly prized and costly in Guatemala.
Speaking of epic cycling journeys, I was contacted through this blog by a lady who is cycling from Alaska to Tierra del Fuego. She stopped off in Huancayo and had weaving classes with the very same weaver who taught me. Funnily enough she told me that Margarita is no more vocal in her instruction than she was with me fourteen years ago! I can just imagine this lady cycling about with her backstrap loom on the back of her bike. If we can get our timing right, she will come to Santa Cruz to visit me and have some more classes.
Last week I showed you what Jennifer , one of my four-shaft loom testers for Andean pebble weave was making on her floor loom. Well now it is finished and here it is!!
Stand by for the four-shaft loom appendix to my e-monograph….:-)
And Karren has been weaving more bookmarks in simple warp float technique with all her own designs.
I set up my loom yesterday to weave a narrow band – just 28 ends. Once I had made my simple heddles, tied them in a bunch and added the shed loop I realized that my entire loom consisted of just two simple sticks – the two loom bars and that’s all – one attached to a bed and the other to me. My weft was tied in a butterfly – no sticks there. The only other stick involved was a wooden beater to prop open my sheds and beat in the weft. How much simpler can it get?
I filmed the entire process from warping stakes to ready-to-weave if you would like to take a look. (Donna, I made this especially for you!)
So, again I ask you, how much simpler can it get?
Actually it can get simpler! I was in Tarabuco recently and watched a weaver sitting on the ground deftly wind a warp around her hand and foot. She tied one end of the warp around her foot, passed a length of yarn through the end loops at the other end and secured it to her waist. Then she made simple heddles around her hand, added a shed loop and started to weave. Briiliant! All in a matter of minutes.
A weaver in Tarabuco using a “toe” loom
You are probably thinking: okay, a simple loom for a simple weave– but even very complex weaves can be done on a very basic set-up.
A weaver from Tarabuco creating a complex design on a simple loom
You may recognize Felicia above with her sleepy cat from the video in this previous post. She has a shed rod, a heddle stick and some bars between which to stretch her warp. She has just inserted a couple of thin sticks to help with the pick-up but look at the photo at left and see the complex designs that she creates on this simple set up.
Now what about those looms that you see in pictures on the internet and in those Youtube videos? Some of them are loaded up with sticks – all those mysterious sticks – what in the world do they do? Hopefully I can solve the mystery behind at least some of them here. I have to admit that there are Asian looms that I have seen online with a multitude of patterning sticks and that I still haven’t figured out how some of those sticks work.
An extra stick added in a second cross in Guatemala
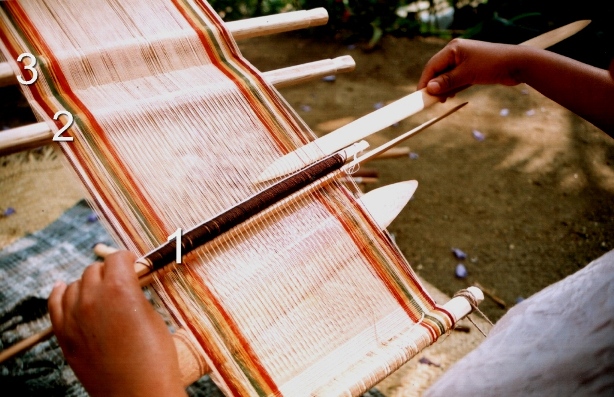
But at least I can let you know a bit about the sticks I have seen here in my travels in Central and South America and what they do. In the picture at right, number 1 is the heddle stick and number 2 is the shed rod. We are familiar with these. But what about number 3? This is an extra stick to hold a second cross. A lot of weavers wind a second cross as they warp. I don’t. I find that the fewer twists and turns I make on the warping board, the easier it is to wind a warp with good even tension. I only use a second cross on narrow warps to stabilize my shed rod which tends to slip from side to side and be a thorough nuisance. Making a second cross and putting a stick within will lock the shed rod into position. It is very easy to create a second cross once your warp is already on the loom. Here are the steps…
LEFT: Your loom is set up with heddles and a shed rod. RIGHT: Open the shed rod shed, place your beater within and draw it down to the weaving line. Remove the shed rod. It is important that the beater not fall out at this stage as it is saving your shed rod shed. Use a back up safety string if necesary.LEFT:Open the heddle shed and place an additonal stick within. RIGHT: Tilt the beater to open the shed up beyond the heddles and place your original shed rod within. Tie or tape the shed rod and additional stick together.You have created your second cross.Another Guatemalan loom with a second cross installed. The shed rod is pvc pipe which is often used as it can be thick without being heavy. Notice the orange safety string – if disaster strikes (and it most probably will with those 3 little guys hanging about!) and all this weaver’s sticks fall out, the safety string will save her cross. Even the experts use them! Look at the little future weaver there on the left. She is wearing the typical long “corte” skirt and even has her own woven belt.
Some looms have a mind boggling amount of sticks but the reason can be very simple!!
LEFT: The 11 sticks on this upright loom in Ecuador will become heddle sticks. The 22-row design, which is horizontally symmetrical, will be programmed into these 11 heddles. RIGHT: This is one of my own warps set up on my Navajo loom in Chile. As I am using 4 colors in my pebble weave I have extra sticks to separate and keep the colors in order for the pick up.Miguel Andrango’s granddaughter poses with one of the looms. You can see the two shed rods above the heddle stick. The space for the extra shed rod is programmed into the warp by using an extra stake during the warping process.
In Ecuador I saw the use of an extra stick which I have not noticed anywhere else. This is especially useful for wide warps or particularly fine yarns but I saw it being used on warps of all widths and yarn sizes in Ecuador. It is an extra shed rod. I know from my own experience that the shed-rod shed on a wide piece with fine yarns is really difficult to open. It was a very slow and tedious process on my Abba Yohanni piece, for example. The extra shed rod in Ecuador holds every second warp that passes over the main shed rod. This means that half the number of warps can be raised using the extra stick. Then it is very easy to use the main shed rod to raise the rest of the warps.
This is one of Miguel Andrango’s looms. He is a very well known weaver from Agato, a small town near Otavalo. You can watch a video of his work here. Fifty-seven seconds into the video you will get a very nice close up of the two shed rods. You will also see the typical white woven alpargatas he is wearing. I spent some time with an alpargata weaver and hope to blog about that some time. Miguel Andrango is not a large man and, although the piece above is not particularly wide, he weaves some of the widest backstrap woven pieces I have ever seen!
A weaver near Otavalo is preparing to make her string heddles. She is using the extra shed rod on her loom. This rod has a dual purpose as it also serves to stabilize the main shed rod.
Now we come to the patterning sticks that are used by weavers in Guatemala to create designs using supplementary wefts. The supplementary wefts are either laid in to form block patterns or wrapped around warps to form little figures.
It is not my intention here to teach you how to insert and use these sticks. So, don’t worry if you don’t quite get it. No doubt, I will be doing a tutorial on this in a future post. I just want to take a little bit of the mystery out of it so that when you are looking at weavers and looms in books and on the net you may have a better understanding of what all those sticks do. For now, read on and just enjoy the beautiful textiles!!
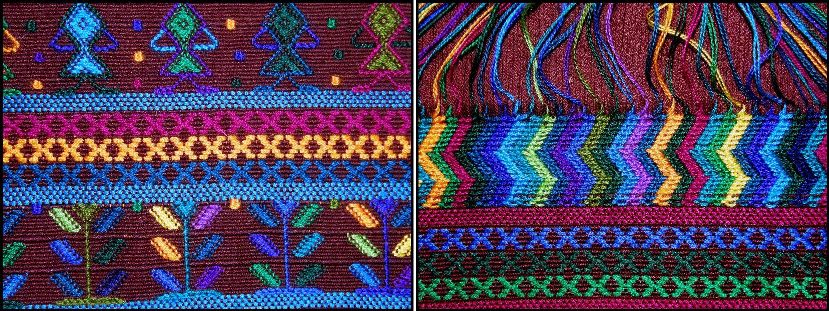
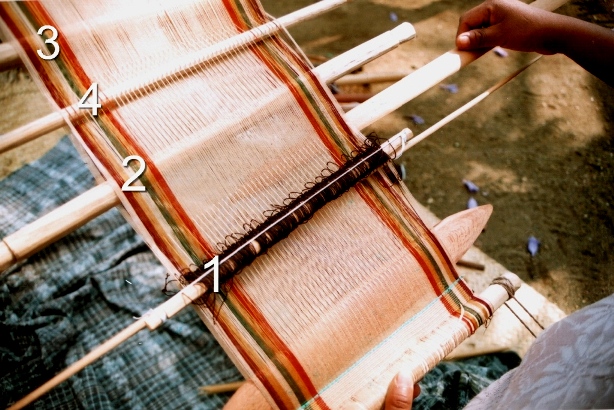
Typical designs of Santa Catarina Palopo.LEFT:Supplementary wefts have been laid in to make designs like the X’s in the center or wrapped around warps to form figures, like the stem of the plant below and the arms of the woman above. RIGHT: The upper design has been woven using the technique employed in making the typical huipil of this town.LEFT: Bands woven using patternig sticks and offered to toursits. RIGHT: The typical huipil of Santa Catarina Palopo. These colors are a relatively recent introduction. Old huipiles in crimson and white can be seen in paintings by Carmen Pettersen. My teacher told me that only the very oldest women in the town may still have the old huipiles.Carmelita is teaching me on this loom in Santa Catarina Barahona. Number 1 is her heddle stick, number 2 her shed rod, number 3 the stick in the 2nd cross and number 4 is her newly introduced patterning stick.
These patterns are created by adding two extra sticks to the loom – the patterning sticks. In Santa Catarina Barahona, the weavers open the shed-rod shed and pick up every fifth warp. They store these warps on a stick – the patterning stick that sits up behind the shed rod.
The heddle shed is then opened and, once again every fifth warp is picked up but in such a way that each picked up warp sits between two that were picked up on the first patterning stick. The warps are stored on another patterning stick which sits behind the shed rod but, this time, under the warp.
Here is how the loom looks with both patterning sticks installed.
Number 1, heddle stick. Number 2, shed rod. Number 3, stick in 2nd cross. Number 4, 1st patterning stick and number 5 the 2nd patterning stick. The patterning sticks are simply drawn down towards the heddles to create sheds for laying in the supplementary wefts.This diagram shows a loom in profile with the positions of the patterning sticksLEFT: Lydia is laying in a supplementary weft in one of the patterning sheds. RIGHT: The patterns at top and bottom were made with the aid of the two patterning sticks.
Sometimes a second pair of patterning sticks is inserted when the weaver wants to change the design. These are only temporary and will have to be removed when she wants to return to the original design.
Take a look at the photo below…can you name all the sticks?!
A sling braid made from llama fiber from the Colca Canyon area of Peru. It comprises a braid with a finger loop in one end and a cradle in which the stone to be hurled sits.
Now to return to the simplicity with which I started this post…………some braiding and edging techniques with few or no tools required.
After having done the tutorial on cross knit looping last week, I remembered another interesting edging that I learned with my sling braiding teacher in Yanque, Peru. We used it to edge the cradle section of an Andean sling braid.
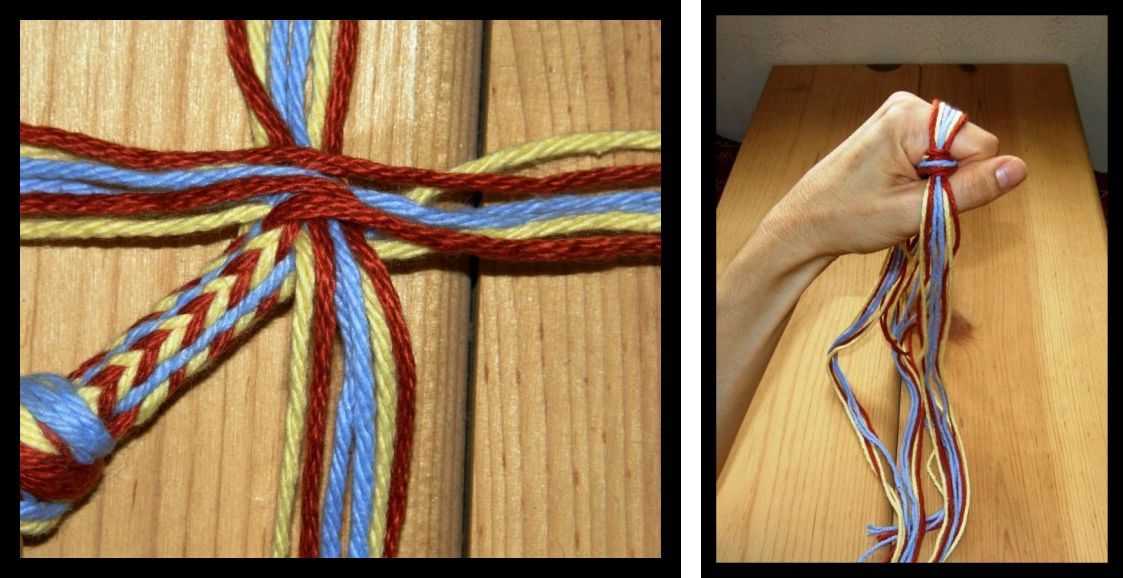
I made one sling with him and he taught me to make three different braids. Men in Peru braid their slings holding all the braid strands in their hands – no other equipment is required – and can quite happily stroll along the road while braiding. Two of the braids I learned had twenty-four strands and the other twelve. I was told that the main use of the slings these days is to hurl stones in order to keep control of animals straying from the herd.
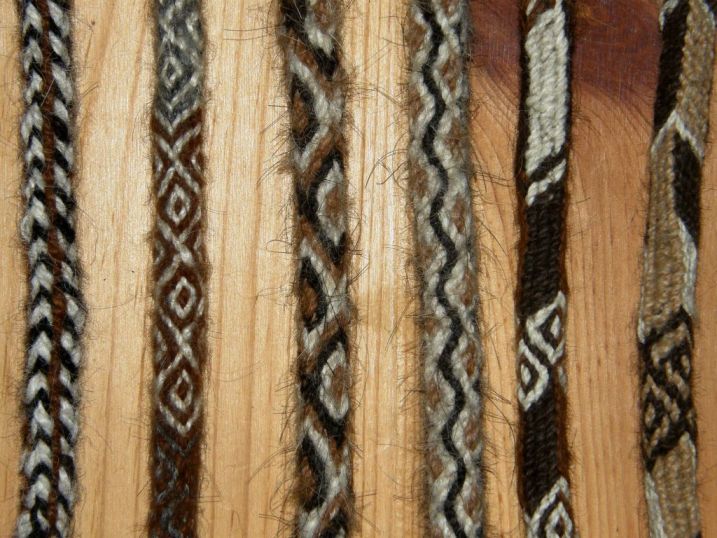
LEFT: The single cross two-color edging that I was taught on my sling. RIGHT: A double cross two-color edging on an Andean sling that I bought.A few of the braids used for Andean slings. Named from left to right…PALMA, MARGARITA (2nd and 3rd),SALSA and CAJAMARCA (5th and 6th)
When making an Andean sling, first, one half the braid is made. The strands of llama fiber are measured from the tip of the nose to the toes and then doubled. The first section usually includes the finger loop. More strands are added to weave the cradle in tapestry technique and then work the braid for the other half.
The cradle is woven on a backstrap set-up tying the braid to the waist while the strands which serve as warp are tied to a fixed point. Then the second half is worked in two braids – first a thick one and then a thin one to finish.
Decorative tassels and edgings are the last things to be put in place. Some of the tassels can be quite flamboyant. My teacher didn’t care at all for the more extravagant decorations!
I love these slings as there are several skills involved. Without even realizing it, this was my very first taste of backstrap weaving and with this one teacher I learned so much. He taught me the Palma and Margarita braid styles and a thin version of the Palma which didn’t seem to have a name, a little tapestry weaving by backstrap as well as tassel making and decorative edging.
LEFT; The very start of the Palma braid with the 4 sets of 6 strands used to make it. RIGHT: My hand in the braiding position. Two opposing sets of strands are interchanged. The braid is then rotated 90 degrees so the other two sets can be worked.
Zacarias was a marvelous teacher with a lot of patience. He would get me started on my work and leave me while he harvested the barley crop – plans were afoot to make some alcohol – moved the animals from one field to another and generally took care of things on his property.
LEFT: My sling braiding teacher, Zacarias on his property near Yanque, Peru. RIGHT: A woman by the shores of Lake Titicaca shows me how to hurl a stone with a sling braid.
I know that backstrap weaving isn’t for everyone and I am so glad that people are still able to make use of the instructions here and at Weavolution and use the techniques and designs on other looms. Ellen Turner, in Denmark, has woven a double weave band on her inkle loom using my tutorial at Weavolution.
She made a celtic design inspired by something she saw on the internet.
I also ran into Jessica’s blog where she has been experimenting with double weave on an inkle loom too. Check it out.
Kristina in Germany wove a double weave band on her inkle loom using her own handspun llama fiber. She commented that it put a lot of stress on her inkle loom so that is one important thing to take into consideration.
So if you have been enjoying the designs and have found the tutorials interesting and tempting but are still hesitating about getting strapped in, remember that you can adapt these techniques to other looms. I have set up warps on my rigid heddle loom and woven bands with string heddles rather than with the rigid heddle.
I have to tell you, though, that for me the backstrap loom wins hands down for the ease with which I can adjust tension with the slightest of body movements.
And, finally, I mentioned above the paintings of Carmen Pettersen. Check if your library has a copy of “Maya of Guatemala-Life and Dress”. Her paintings of Guatemalan people in traditional dress are stunning.
BALANCED WEAVE, DOUBLE WEAVE AND BALANCED DOUBLE WEAVE….
I made some New Year weaving resolutions. What about you? One is to weave at least one balanced weave on my backstrap loom per month. So I got one done in January which I’ll show you later and I am planning February’s project. You will see that I am all about process rather than product for this project as all I know is that I want to weave a shadow weave piece but I have no idea what I want the piece to be. I am counting on an idea developing as I go through my yarn bags.
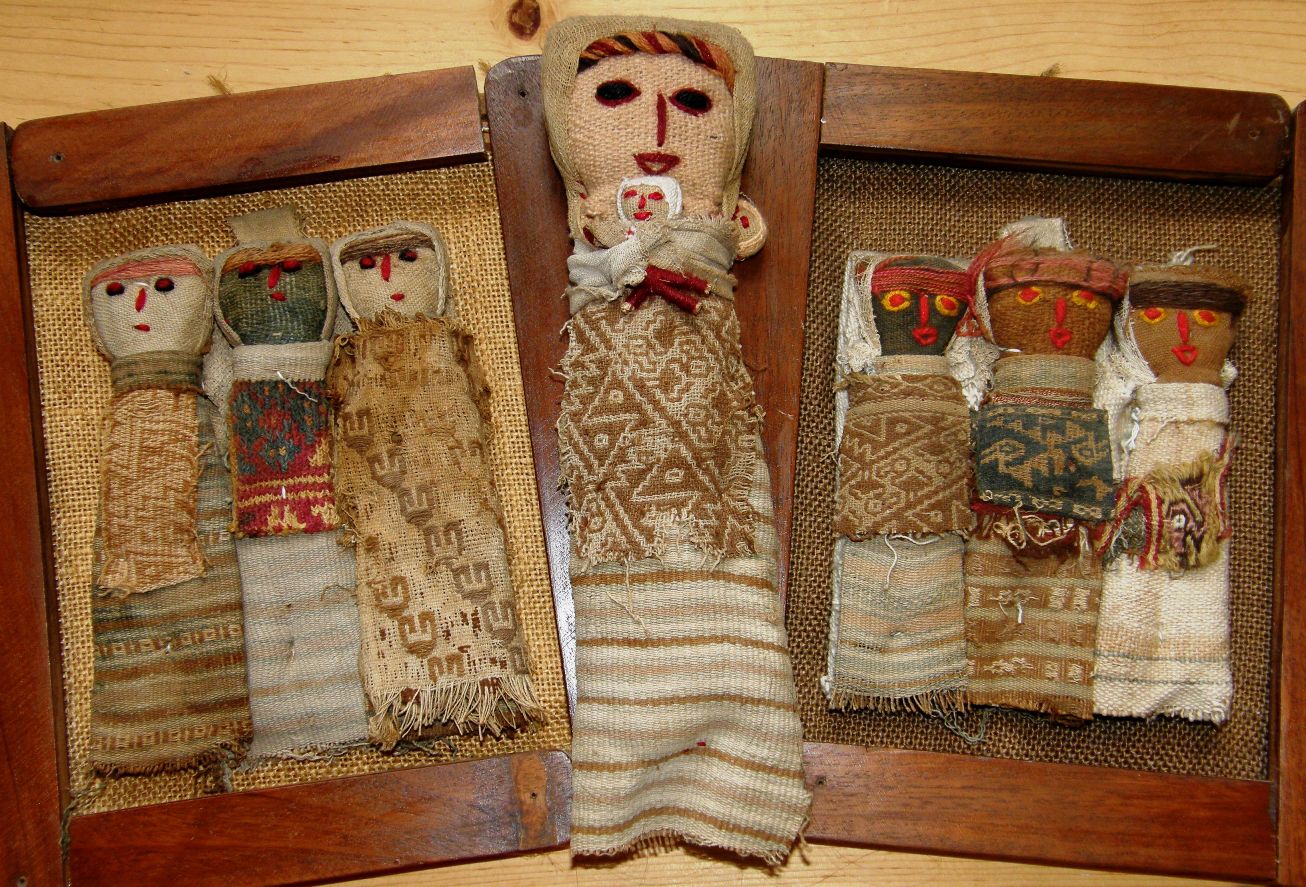
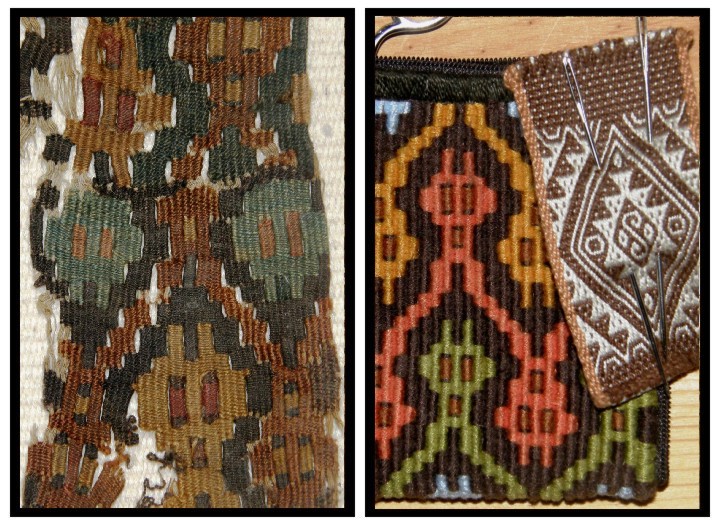
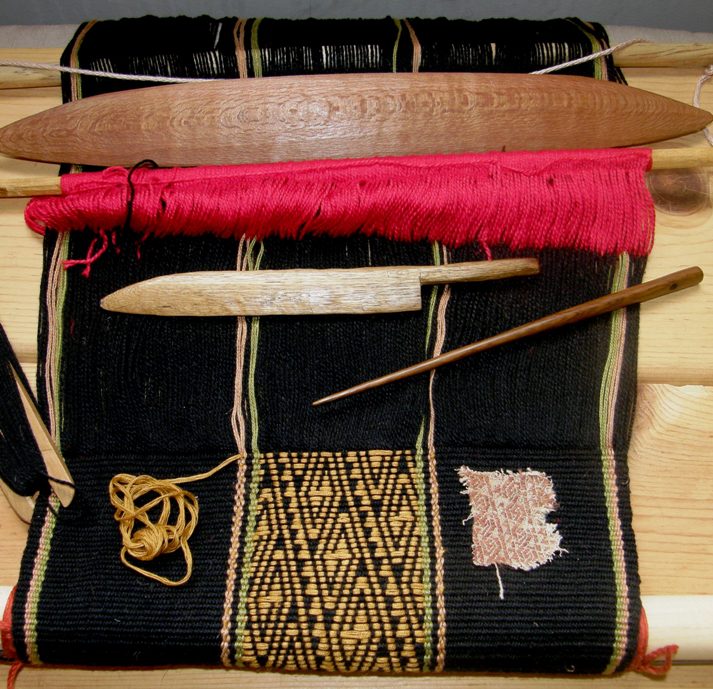
Another resolution is to weave reproductions of the designs on some pre Columbian textile fragments that I have gathered over the years. How did I get hold of these tiny scraps and fragments? Well, some industrious Peruvian artisans have been recreating Chancay dolls and dressing them in bits and pieces of old textiles.
Sets of Chancay doll reproductions
The Chancay culture existed on the Peruvian central coast from around AD 1000-1476. It is believed to have been conquered and incorporated into the Inca Empire in the mid to late 13th Century. The people of this culture were prolific weavers and, as the central coast of Peru is a particuarly dry area, many of their textiles have survived remarkably well preserved and are kept in museums around the world.
I was dubious for a long time about the authenticity of the textile pieces. However, it just didn’t make sense that someone would weave structures, some of which are no longer woven in Peru, take all the trouble to stress the fabric in order to make it look old, tear it up, sew the pieces onto dolls and then sell them for very little in the street market.
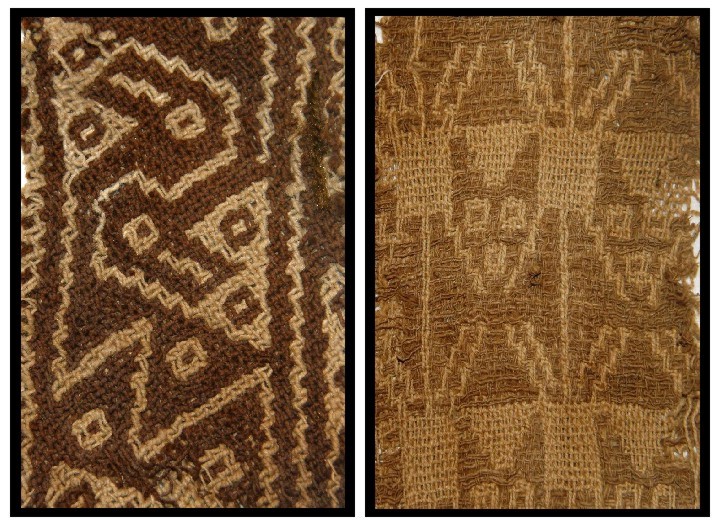
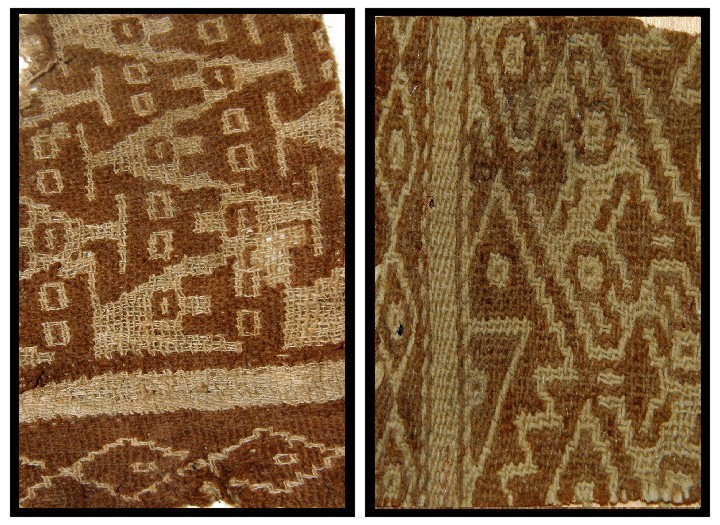
A close look at a couple of the fragments with bird and bat motifs
I have yet to find a good image of an authentic Chancay doll to make a comparison but apparently the originals did not have embroidered faces. Rather, the facial features were woven into a piece of cloth which was wrapped around plant fiber to form the doll’s head. As with most things, I imagine these dolls started out as quite faithful reproductions of the originals and that the quality of the work has since deteriorated.
Two more pieces with bird and snake motifs
The original Chancay dolls have been found in tombs and were possibly funerary offerings. Recently I found an article online which, not only confirms the authenticity of the ancient textile fragments used to dress and decorate the dolls, but also gives information abut the Chancay culture and speculates about the dolls’ purpose. It just gives me chills looking at and touching these pieces-something the museums won’t let you do! and wondering about the weavers, their looms and their lives.
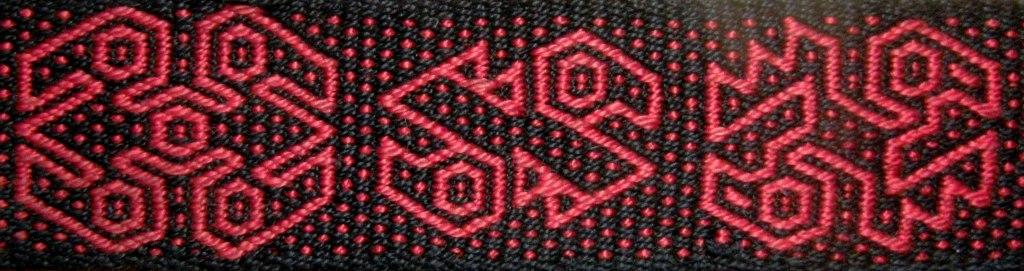
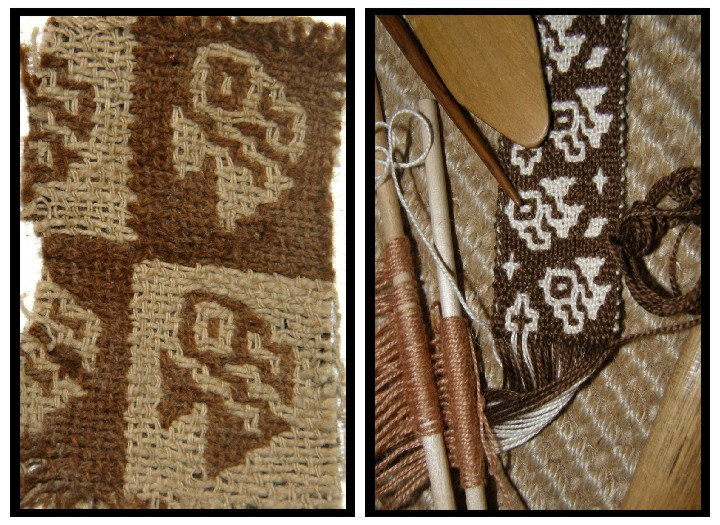
Snake motif in pebble weave
I have been weaving the designs I have seen in photos of museum pieces for years. The two pieces above center and right were made by me in the 90s. Imagine the thrill when I found a fragment, on the left, with a very similar snake design some years later.
A piece in slit tapestry that I copied on my backstrap loom
I copied the slit tapestry piece at left on my backstrap loom without the slits and made it into a small sewing kit purse with a zip on three sides.
This little purse goes with me on all my weaving safaris. Some people tell me that the design looks like figures from a 1980’s video game!
This was a very slow and tedious weave using split embroidery floss for the weft. I was quite happy to see the end of this one!!
Bird motif in pebble weave
Again, I had woven this little 4-color bird motif many years before finding the little fragment almost completely in tatters on a doll at the Otavalo market. I had to work hard to hide my excitement while cooly bargaining with the vendor-bargaining at the Otavalo market is expected. Although my bird is a little different and was copied from a book, it is still thrilling to see a similar original piece.
According to the aforementioned article, birds were highly esteemed in these cultures “because of their ability to cross between earth and sky” as well as due to ” their association with water…..and source of guano for fertilizing crops”.
Pre Columbian bird motifs
I love these birds and they find their way into a lot of my weavings.
Balanced double weave bird figures
Which brings me finally to balanced double weave and my weaving resolution for the year. This structure is no longer woven here so there is no one around to teach it to me. I found out that the Huichol people in Mexico weave it and recently got Chloe Sayer’s Mexican Textile Techniques which has pictures of some examples. I had dismissed the instructions by Suzanne Baizerman in Double Woven Treasures of Old Peru as they were written for the treadle loom but recently returned to them to find, to my delight, that I understood them. So I set to and wove the above band using the pattern chart in the book which just happens to be the very same bird motif that I have on a doll fragment. I used four sets of heddles for this weave and kept the cross sticks in to help spread the warps. This was just a narrow band. Now I hope to make a large wall hanging incorporating bits and pieces from several of the fragments.
Something that is on the loom at the moment….supplementary weft patterning. You can see the tiny fragment from which I am copying the design on the right. This was another exciting find as, at least here in Bolivia, I have not seen this technique used for anything other than hat bands and on one old chuspa in a book. I would love to know the original use for this piece.
You can find the chart for this design here. I have also put the chart for the Abba Yohanni double weave design from last week’s post here.
This is just a small selection of my fragments. I am sure that more will show up in future blog posts as I strive to reproduce them. There is one technique that I as yet have not been able to identify.
Now what about those balanced weaves? I am still very much into my recently gifted rigid heddles and have been using them to make samples and a few useful pieces.
"Strawberries and cream" pinwheel mats
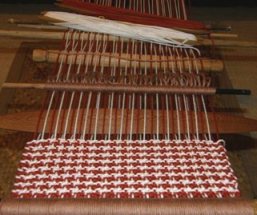
The rigid heddles arrived while I was in the middle of this “strawberries and cream” pinwheel piece. Rather than struggle on with my multiple stick spacers, I added the rigid heddle to the backstrap loom and finished it in no time.
Last month we had a WAL at Weavolution weaving rosepath motifs so I used my rigid heddle as a spacer and beater and used four sets of string heddles for the motifs.
Spring garden table runnerA small log cabin sample
Sometimes I just mess around and make samples trying to discover what is comfortably possible on my backstrap loom. The above log cabin piece was the first balanced weave I tried before my rigid heddles arrived. I thought the squareness of the design would look good as a notebook cover. I’ll take this little notebook along for my next weaving classes wherever that may be. It is nice to find a use for even the smallest of samples. You can see my test piece for the llama bookmark has been padded with foam and made into a pin cushion saddle cloth for the ceramic llama!
As the title of this post suggests, there is also some warp faced double weave to talk about. The last of my weaving resolutions is to design some nice letters to weave in double weave. I have been very much inspired by Linda Hendrickson’s beautiful book Please Weave Me a Message where she has designed alphabets to weave with tablets. You may have listened to Syne Mitchell’s recent interview with her at WeaveZine. I hope to come up with something like that for double weave. My stick alphabet above looks very humble next to her beauties.
Lastly, I would like to show off some work by one of my blog readers. Ann Littlewood wove a supplementary weft patterned band using embroidery floss for her supplementary weft. It is a great way to “paint” in designs and play with colors. It absolutely makes my day when I hear from people who have used my instructions. 🙂
I will leave you with a cheery little Otalavalena, below, at her brightly colored market stall at the enormous Saturday market. Otavalo is a town in Ecuador which has a lively and popular craft market every Saturday and is where I bought some of my dolls. Goods from near and far are sold there such as braids and beads from Peru, molas from Panama and Colombia and belts from Bolivia and Guatemala as well as an enormous variety of weavings and crafts from all over Ecuador. While the market largely caters to tourists, locals also shop there for clothes, footwear and beads.
Thank you for the nice comments last week. I am glad you found the videos useful. One of the visitors from Argentina, who has a limited understanding of English, had one of those “aha!” moments when she watched the double weave video. I hope to be able to show you one of her weavings soon 🙂
A girl from Otalvalo in typical dress-embroidered blouse, "anku" secured by a woven belt, beads, woven hair wrap and alpargatas
A motif inspired by a Central Asian design and woven with a supplementary weftA design inspired by weavings of the Huni Kuin people of tropical Brazil
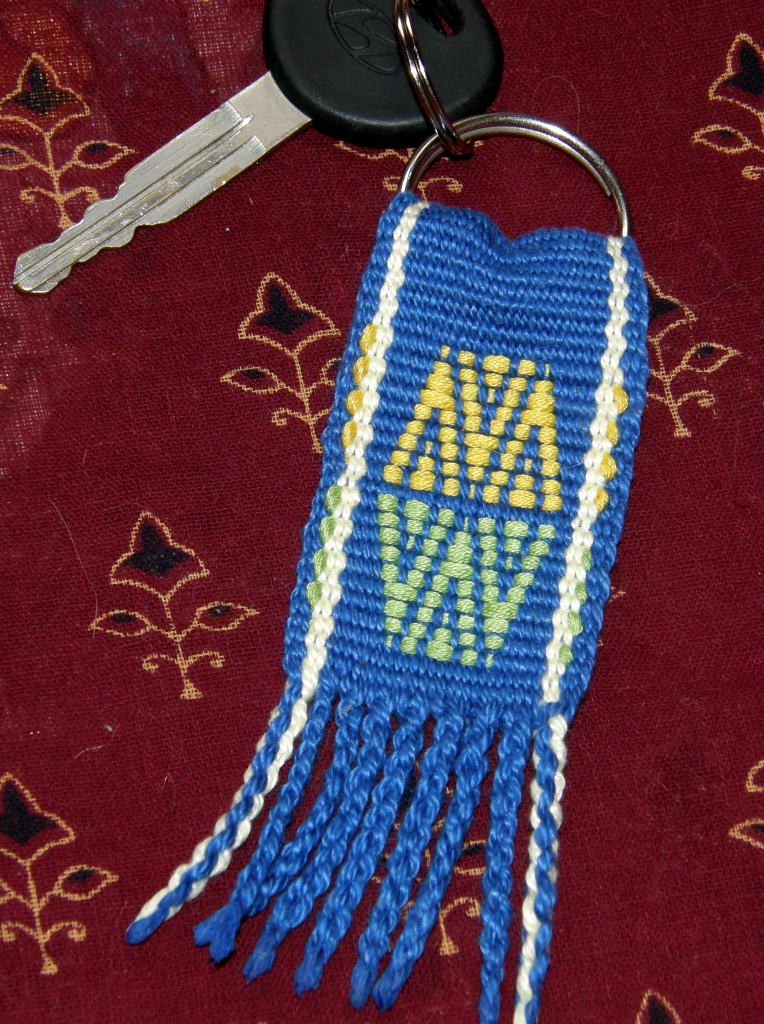
You may remember these designs from a previous post on supplementary weft patterning. Now I am happy to present the promised tutorial on supplementary weft patterning together with a tiny project idea-key fobs.
This technique definitely falls into the category of those which are within the reach of beginners. We weave a simple plain weave band and then ”paint” in some motifs with an additonal weft.
A set of simple key fobs made with techniques suitable for beginners.
Let’s look at the above key fobs-nice beginner projects. A beginner in backstrap weaving will probably start by weaving a plain band like the light blue one on the left, learning to wind an evenly tensioned warp, set up the loom, operate the sheds and keep their edges straight and even. They may then move on to the next band adding some stripes to their warp-getting used to cutting and tying on new colors at the warping board and maintaining an even tension. From there they can try horizontal stripes which involves a rearrangement of the cross on the loom-a new skill. More complex arrangements will produce staggered horizontal bands or ”combs” as in the red and black and black and white bands.
And then we come to the two supplementary weft patterned bands on the far right. I aim to show you in the following tutorial how simple this technique is.
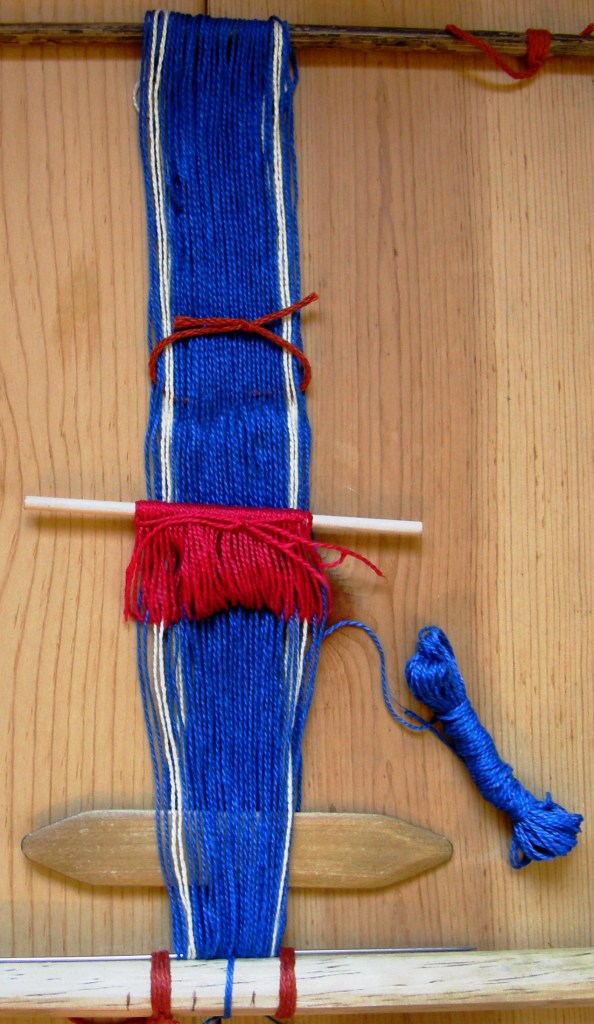
To weave bands decorated with patterns made with a supplementary weft, I start off with a warp prepared for plain warp faced weave. For this tutorial, I have used strong primary colors which show up well in photos. My yarn is 24 wpi mercerized crochet cotton. The blue base, seen below, has a pale yellow stripe next to each edge. As I used my mini portable warping board, I have just enough warp to make two key fobs. Instead of a shed rod I am using a simple shed loop and I have put the end loops on a needle to have a smooth rather than fringed start.
You can see more about the needle start in this previous post.
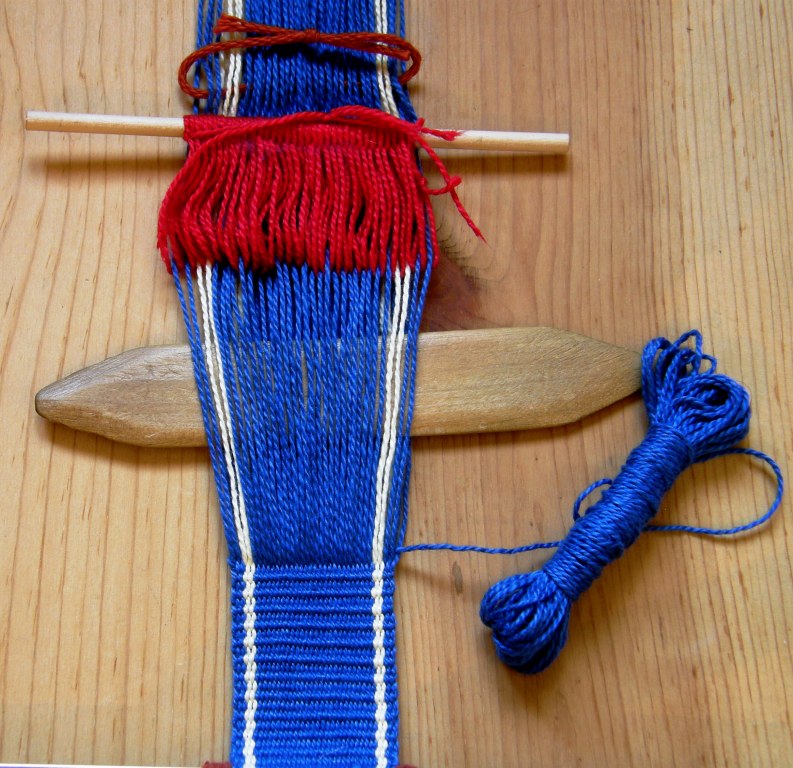
A warp prepared for plain weave. There are two sheds-the heddle shed and the shed loop shed.Enough plain weave has been woven to be passed through the key ring, folded and sewn. Now I can begin the pattern.
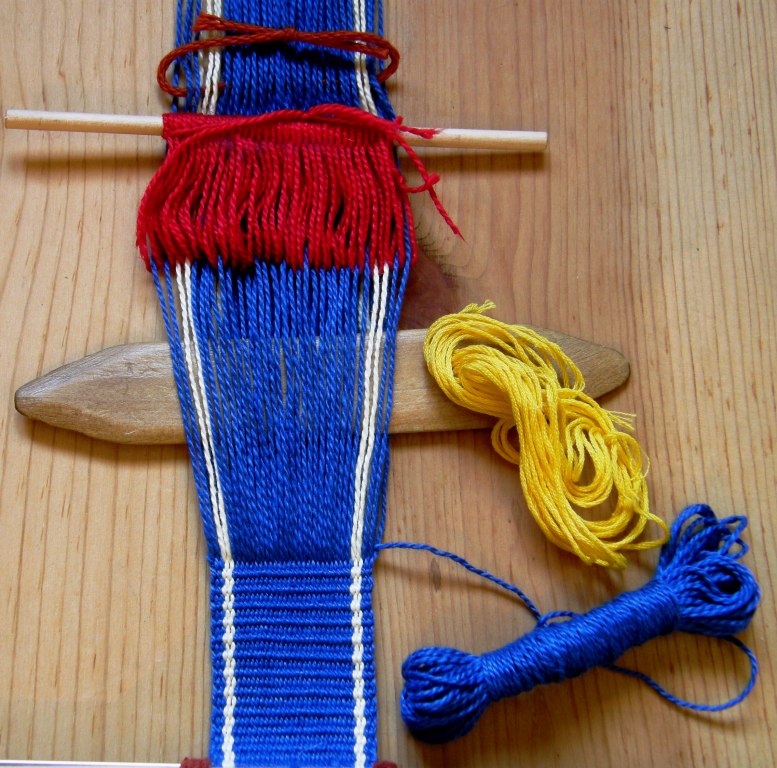
We introduce the color of our choice as the supplementary weft with which to make our patterns. I am using doubled strands of embroidery floss which work really well with the 24wpi plain weave base. The supplementary weft always needs to be a lot thicker than the main weft. Embroidery floss is thick, lies flat and gives good coverage. Looking at the photos below, you will see the difference in width between the blue warp and weft threads and the yellow supplementary weft. The blue weft will continue to form the structure of the plain weave while the yellow independently forms the motifs.
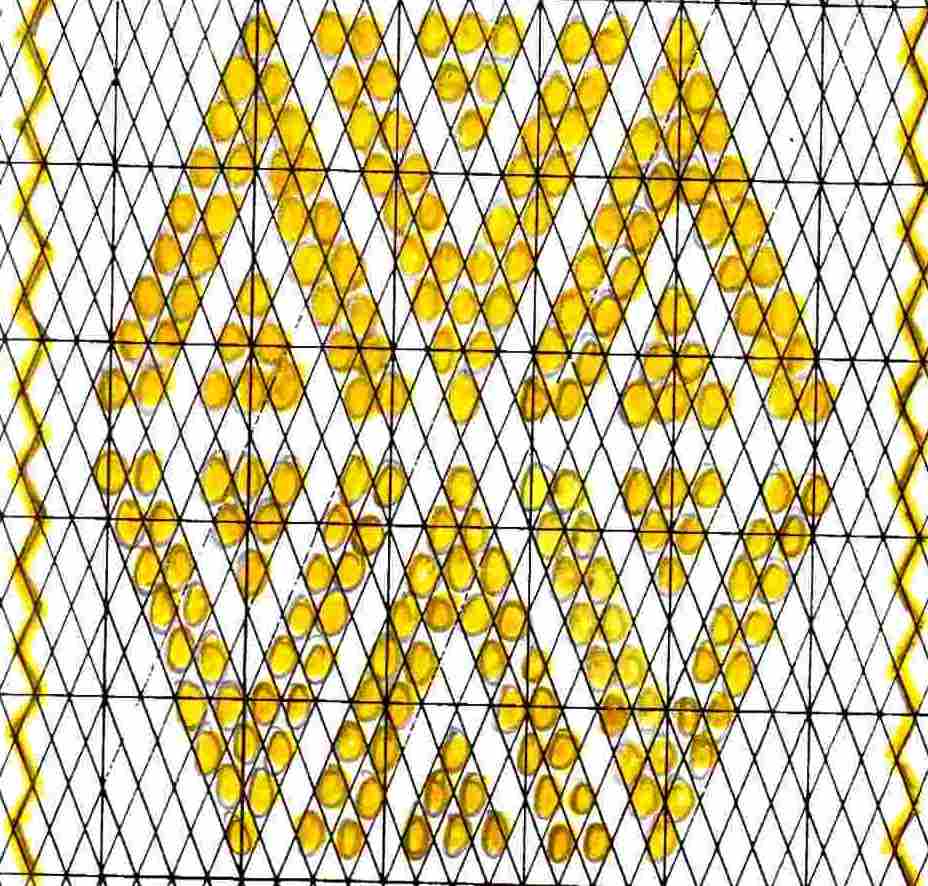
THE PATTERN CHART (All the pattern charts for these projects can be seen here)
Pattern chart for supplementary weft patterning
You may recognize this diamond chart from my double weave projects.
For supplementary weft patterning, we need to look at the chart in a slightly different way. In double weave the yellow spots would indicate the warps that need to be picked.
However, in this technique the yellow spots within the diamonds represent each warp that needs to be dropped in order to expose the supplementary weft.
Now let’s see this in action……..
WEAVING
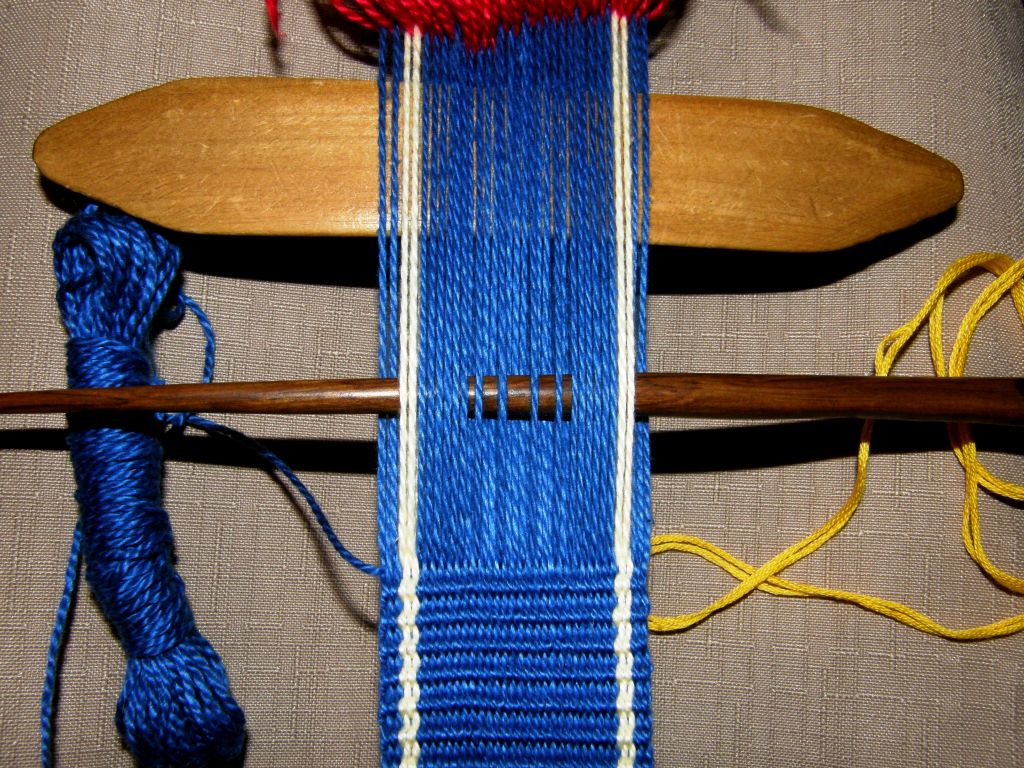
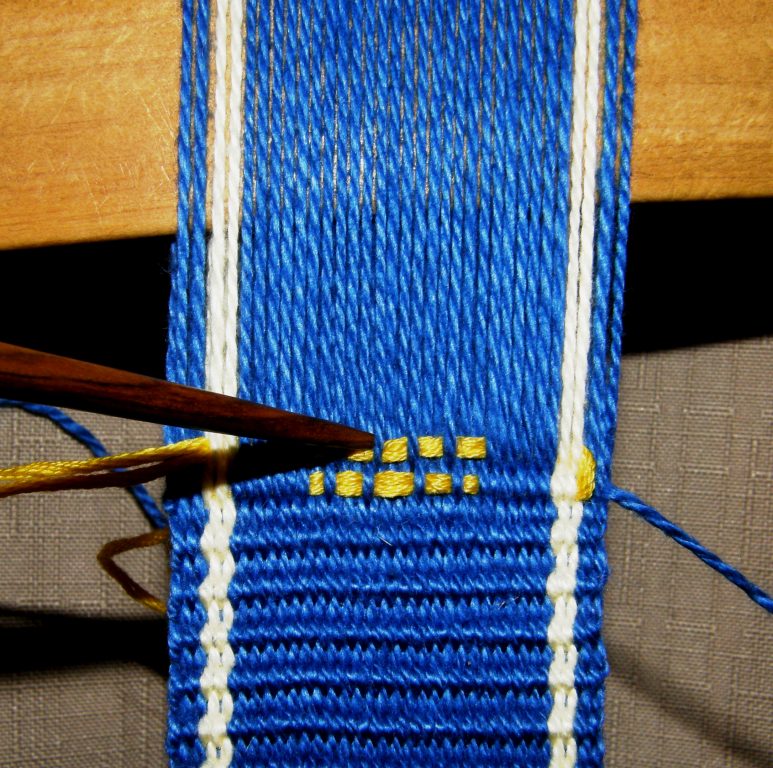
Dropping the warps in the first row of pattern.
I have opened the heddle shed and placed my beater within and I am using a pointed stick to help select and drop my warps. Reading the pattern chart from right to left and starting at the bottom, I see that I need to keep the first six warps, then drop one, keep one, drop two, keep one, drop three and so on across the row.
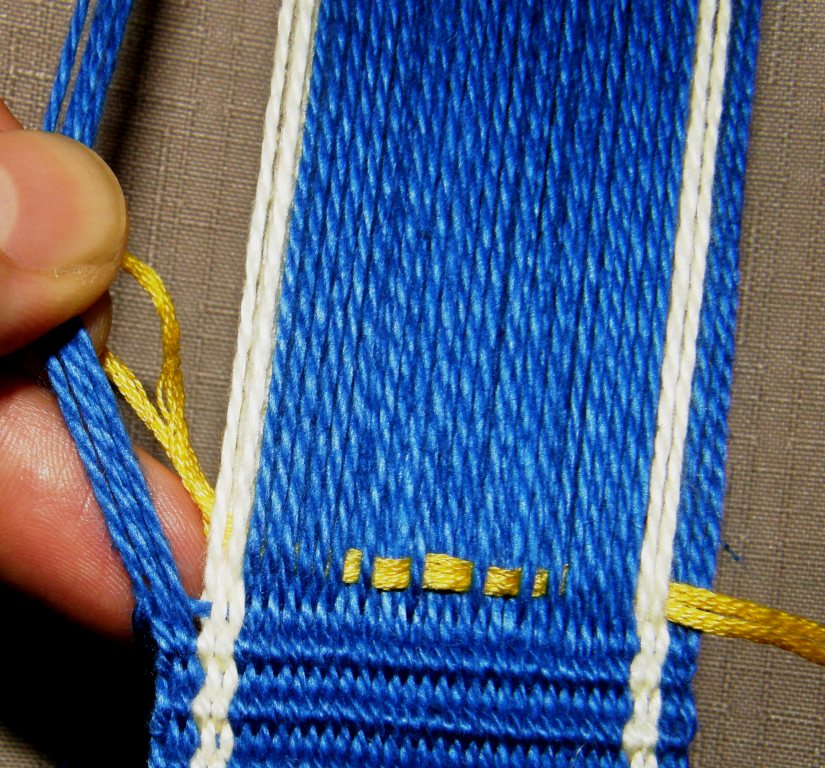
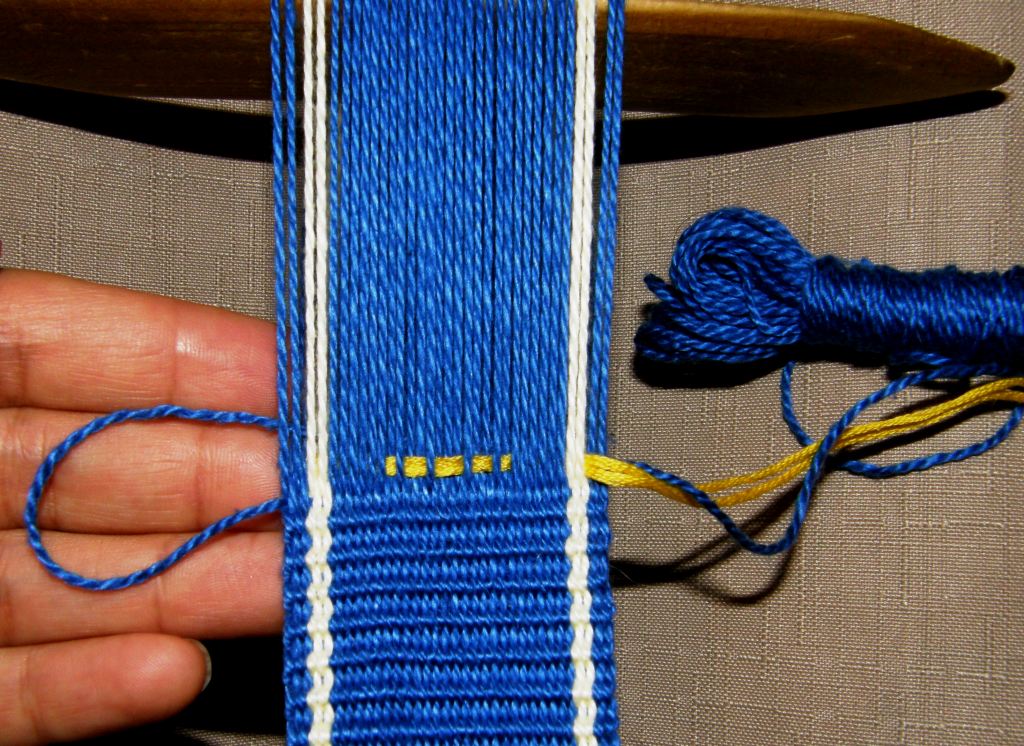
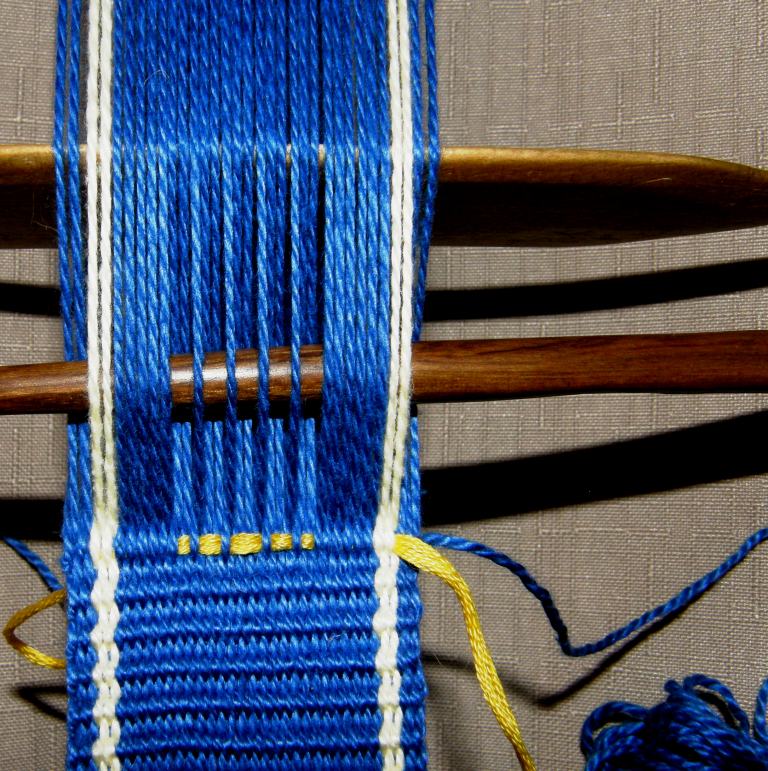
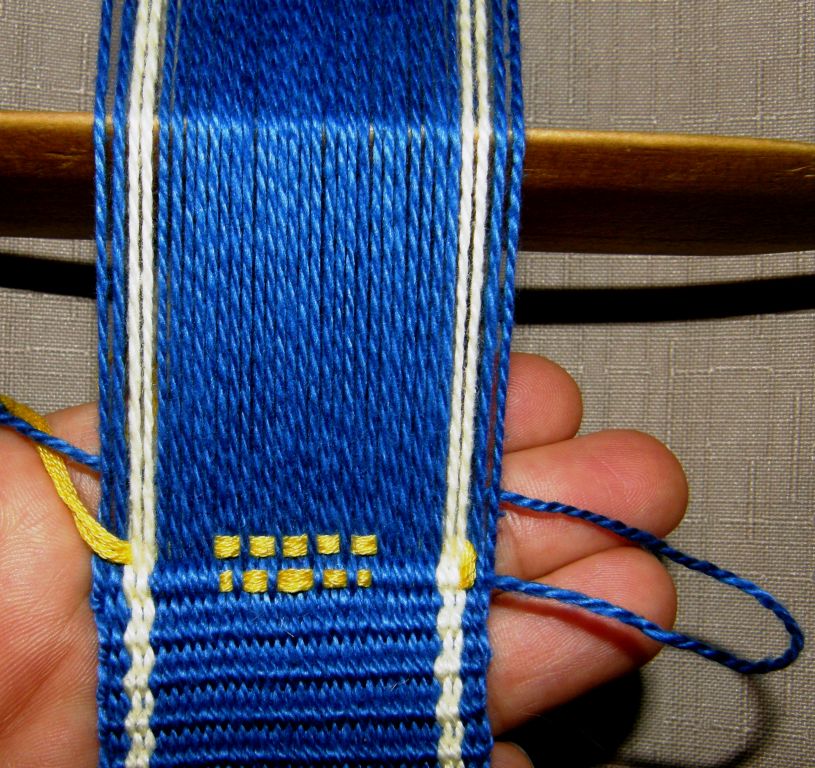
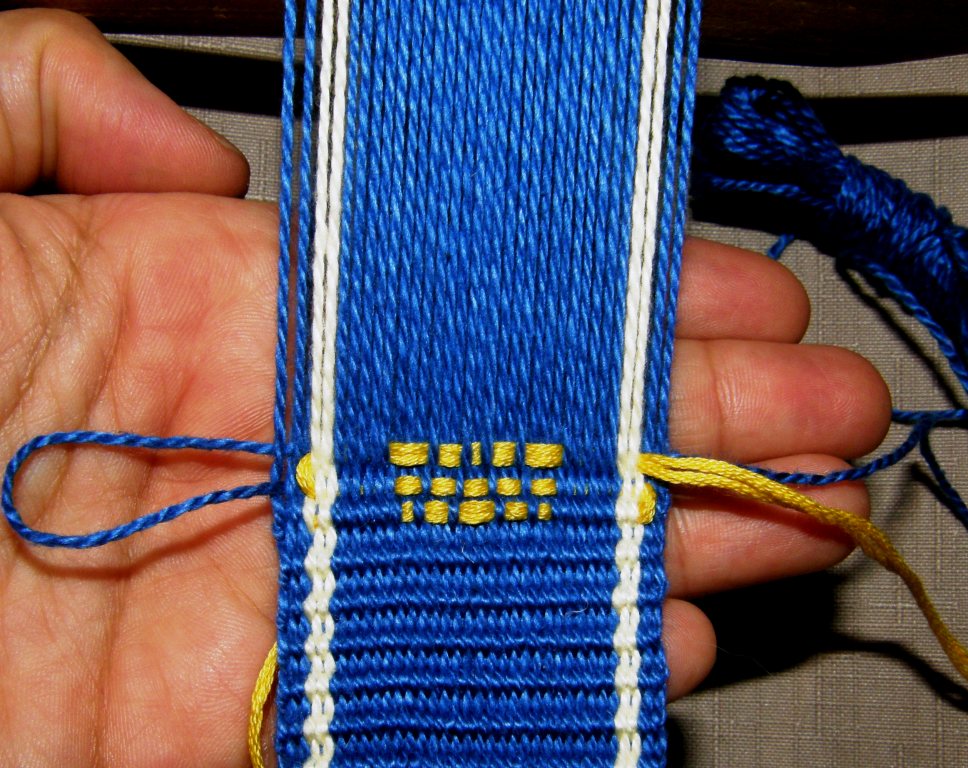
Passing the supplementary weft through the shed from left to right. I am separating the warps to show the starting tail which is left hanging out under the weaving and which can be trimmed when the band is finished. You can see that I am laying in the supplementary weft only from one yellow edge stripe to the other rather than all the way across the band.Passing the main weft from left to right under all the warps in the open heddle shed. This completes the first row.I have opened the shed loop shed , placed my beater within and beaten. Now I am dropping the warps in the shed loop shed according to the second row of the pattern chart again counting the warps from right to left-keep six, drop two, keep one, drop two and so on.Again, the yellow supplementary weft is passing from the edge of one stripe to the other turning on the surface of the weave. I am laying in the weft loosely and pushing it into place with the pointed stick .After passing the main weft from right to left under all the warps in the open shed loop shed, I open the heddle shed, place the beater within and beat, ready to do row three. I am finishing the third row. You can see that the yellow weft turns on the surface of the weaving at the stripes. I don't like carrying the supplementary weft all the way to the edge as I don't like the bumpy edge that that creates. I would rather have the weft turning against the stripe and use that as a decorative feature.One half of the motif is finished. I can continue with the same color or introduce another. The finish tail of the yellow weft will be left hanging out the back of the weaving. If you have packed your wefts in firmly, you will be able to safely snip the tail off when you finish the band.On this Central Asian design that I made you can see that the turning wefts on the left form their own decorative ''stripe' on the plain weave.The turns of the pattern wefts in this piece virtually disappear against a stripe of the same color. Several colors can be used for the motifs within one piece.
I have put the pattern charts for these motifs as well as the Central Asian and Huni Kuin inspired designs on a separate page. You can design and print out your own blank diamond charts here.
If you are planning your own designs, as a general rule, it is best not to have weft floats that span more than four warps. This of course will depend on how fine a yarn you are using and the purpose of the piece you are weaving. You need to consider that long floats on a key fob or bag will easily catch on things whereas on a hatband, for example, they may not be a problem. You should also take in account the fact that floats over a single warp, for example the points of the triangles in my sample design here, can barely be seen. Try to have your weft floating over a minimum of two warps.
cI finished the motif in another bright photogenic color and have turned the loom around to weave another key fob on the other end. You can see that the design does not show on the back of the band.
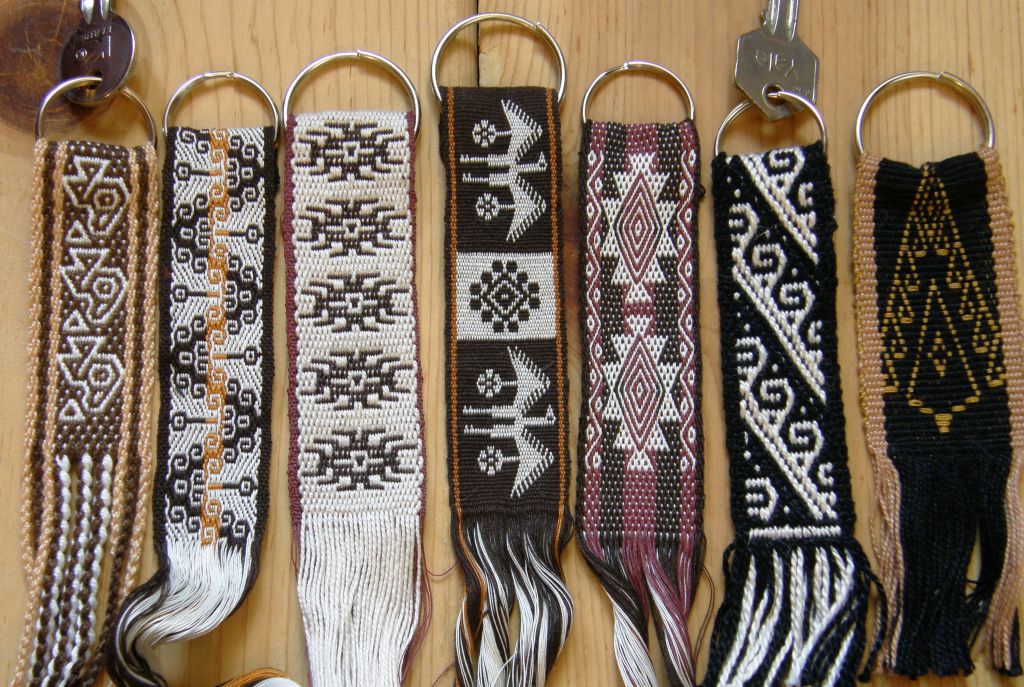
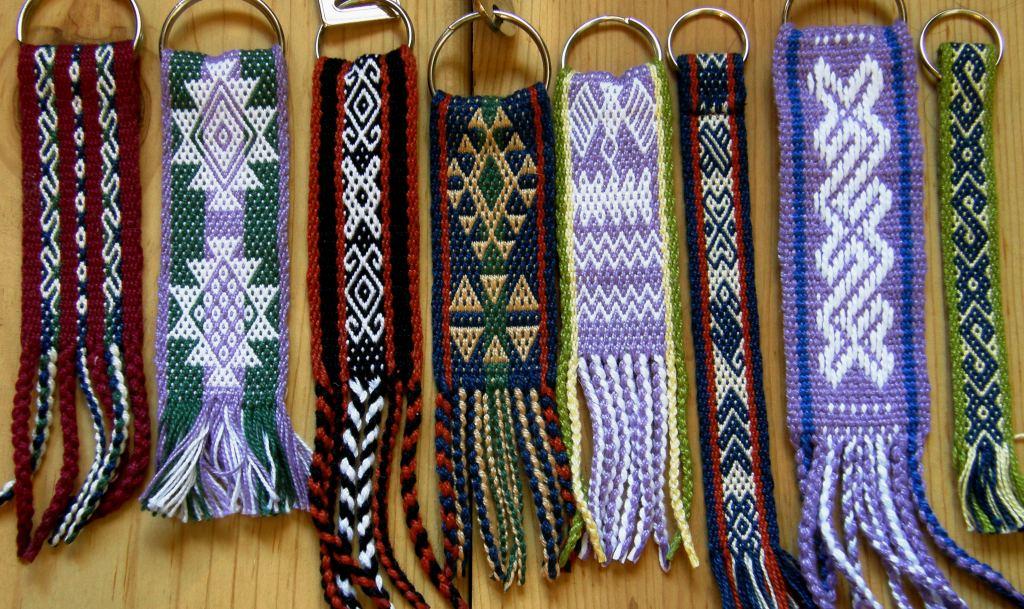
Below are some more key fobs that I have made in a variety of techniques and yarns ranging from 12 wpi mercerized cotton to doubled sewing thread. I weave a few now and then to add to the collection and have them handy as gifts for my friends here, or back in Australia or for other travelers I meet on the road in South America. Some are finished and some are yet to be braided and sewn.
Two can be made on one warp. First I weave one and then I move the shed loop to the other side of the heddles, turn the loom around, pass a needle through the end loops and start weaving from the other end. I cut between the two small weavings when I have finished and then braid the ends or leave them as fringe.
Key fobs in earthy colorsAnd some in brighter colors.
SO WHAT HAVE YOU GUYS BEEN UP TO?
There’s nothing I like better than to see my instructions and charts put to use!
Here are some things that a couple of blog visitors have worked on……..
Amber's mug rugs look good with black motifs on white.
Amber made one African and two South American motif mug rugs on the one warp. She tied up her loom to the ladder on her sister’s bunk bed which I think is a brilliant tie up place. I am thinking about having a sturdy wooden ladder with several rungs built and screwed into a wall so that I can have different tie up places at different heights. When I am not using it for weaving, I can use it to hang things on or display weavings draped over the rungs. Thanks for the idea, Amber.
Courtney tied up her loom to a sofa bed to weave her llama band. You can read more about this project and her furry helper on her blog.
My tutorial for this one-weft double weave technique can be found in the Backstrap Weaving Group at Weavolution.
Courtney's black and red llama motifs.
If anyone else out there is weaving the designs or using the tips from my blog, I would love to hear from you and show off your projects here. Even if you have not woven a project yet, I would love to see the backstrap loom you have put together. I hope to see what you have created with supplementray weft patterning.
Leave a comment for me here or contact me at Weavolution. You will need to join Weavolution to do so-it’s free!
Once again, thanks for visiting and thanks for all the comments! 🙂
Lately I have been playing with supplementary weft patterning and, once again, have been inspired by Weavolution members. One member joined my Backstrap Group as she is interested, amongst other things, in reproducing a Central Asian yurt band. She has introduced me to many beautiful Central Asian designs and often sends me photos of pieces she has seen at reenactmant events that she attends.
Together we figured out the technique on a yurt band she had bought and even wove it simultaneously- all coordinated by email!
When she sent me this photo (at left) of a Central Asian piece she had photographed at one of the historical events, I couldn’t wait to weave the design into something. The technique wasn’t clear in the photo and, as I wasn’t concerned with reproducing the original technique, I decided to weave it in either double weave or supplementary weft patterning. I chose the latter as, since studying this technique in Guatemala in 2008, I hadn’t put it to much use.
In this technique, it is really important to get the right balance between the weight of the warp yarn and that used for the supplementary weft and so I quickly wove a sample and then went ahead and made the table runner below in 4/2 cotton (24wpi) warp with 6 strands of the patterning thread that I had brought back from Guatemala as the supplementary weft. You can see that I added a little embellishment of my own to the pattern.
My colors are rather bland compared with the original. I love that orange zigzag next to the main design. Perhaps I will be more adventurous with color next time!
My table runner with a Central Asian inspired design
My other source of inspiration has been a Brazilian member of Weavolution who has generously shared what she knows about the weavings of the Huni Kuin people who live in the tropical forest of Brazil and Peru. They weave with backstrap looms using cotton that they spin and dye themselves. You can see a video of their work here and a photo of a Huni Kuin weaver here. Although they do not use the supplementary weft technique, I chose to use this method to weave one of their designs into a bag.
A small bag with supplementary weft patterning inspired by a traditional Huni Kuin design.
Here in Bolivia, the supplementary weft technique is used by women to weave bands to decorate their hats. It is in these hatbands that I have seen the widest variety of woven designs. Except for in Calcha, where it seemed that the women had decided on one hatband design to represent their village, I have never seen two hatbands alike.
This Potolo woman is using three hatbands at once.
Hatbands from Bolivia
Sometimes the supplementary weft is used to form the motif as in the small condors on the upper half of the center band above. At other times, it is used to fill the negative space to outline the motif on the ground weave.
From having purchased some hatbands here, I was able to see how they were woven. I made a few sample bands but, as I didn’t get the right warp to weft ratio, I wasn’t too pleased with the results and never really went on to explore this technique further- that is, until I went to Guatemala in 2008 and studied weft patterning with three teachers there. It was my first time in Guatemala and an absolute explosion of color and inspiration was awaiting!
The traditional hair sash of the women of Aguacatan, Guatemala
So I would like to spend the rest of this post introducing you to my first teacher in Guatemala and showing you how I learned supplementary weft patterning with her.
Lidia lives in the very small town of Santa Catarina Barahona near San Antonio Aguas Calientes in Guatemala. The typical blouse, or huipil of the area has designs woven in single and double faced supplementary weft patterning. The large areas of double faced patterning are those that most distinguish the huipiles of this area.
Typical huilpil of San Antonio Aguas Calientes.
Single faced weft patterning. The patterns can’t be seen on the back of the textile.
This double faced patterning looks very much like embroidery. The national bird, the quetzal, is a very popular motif.
Day 1-Lesson 1. I have chosen my colors for my piece and am winding the thread into balls prior to warping
Making a small warp for my lessons
Once the loom was tensioned, the heddles were made.
Lidia’s sister Carmelita showed me how the warps, under which the patterning wefts would be placed, are picked and stored on two additional sticks. The resulting designs are called ”pepenado”.
The first design lesson-Lidia is weaving the ”tijera” (scissors) pattern. She uses a pointed stick to hook theweft tails and pass them under the raised patterning warps.
The finished tijera pattern
Double faced ”abeja”-bee
Three ”abejas” that I wove when I got home
The ”abeja” was topped off with another section of ”tijera” and that completed my second day of classes. Finally, on day three, I learned the ”arcos” (arches) pattern. This is a combination of weft inlay and warp wrapping.
Weaving the ”arcos” designs
The finished ”arcos” design
It looks like my teachers did all the weaving and I just stood around and snapped pictures! Well, I can tell you that it wasn’t so. Lidia was a very ”hands-on” teacher and she would take over only when I got up to stretch and take photos.
But it wasn’t all hard work. Other family members and neighbors came to visit, we paused to make and eat tortillas, chatted and played with the nieces and nephews in Lidia’s shady yard and walked to town to go yarn shopping.
Snack time. While making my way around Guatemala I learned to recognize the ”slap slap slapping” sound of tortillas being prepared.
Small rectangular pieces are covered with double faced designs and closed with a drawstrig to make a baby’s hat.
Whne I got back to Bolivia I finished off the piece that I had been making with lidia and then wove another sampler to consolidate the weft patterning techniques I had learned.
And I used my lesson piece in the lid of my weaving toolbox.
I went on from Lidia’s home to study with two other weavers in Guatemala but, more about that in another post!
Lidia’s daugther Sara and her cousins
I will be doing a tutorial on suplementary weft patterning with lots of step-by-step photos here on my blog in the following weeks so that you can add designs like the Central Asian and Huni Kuin ones, that I showed you above, to your projects.
I hope you enjoyed this little trip from Central Asia, to Brazil, to Bolivia and onward to my teacher’s home in Guatemala. If you did, I would love to hear from you 🙂



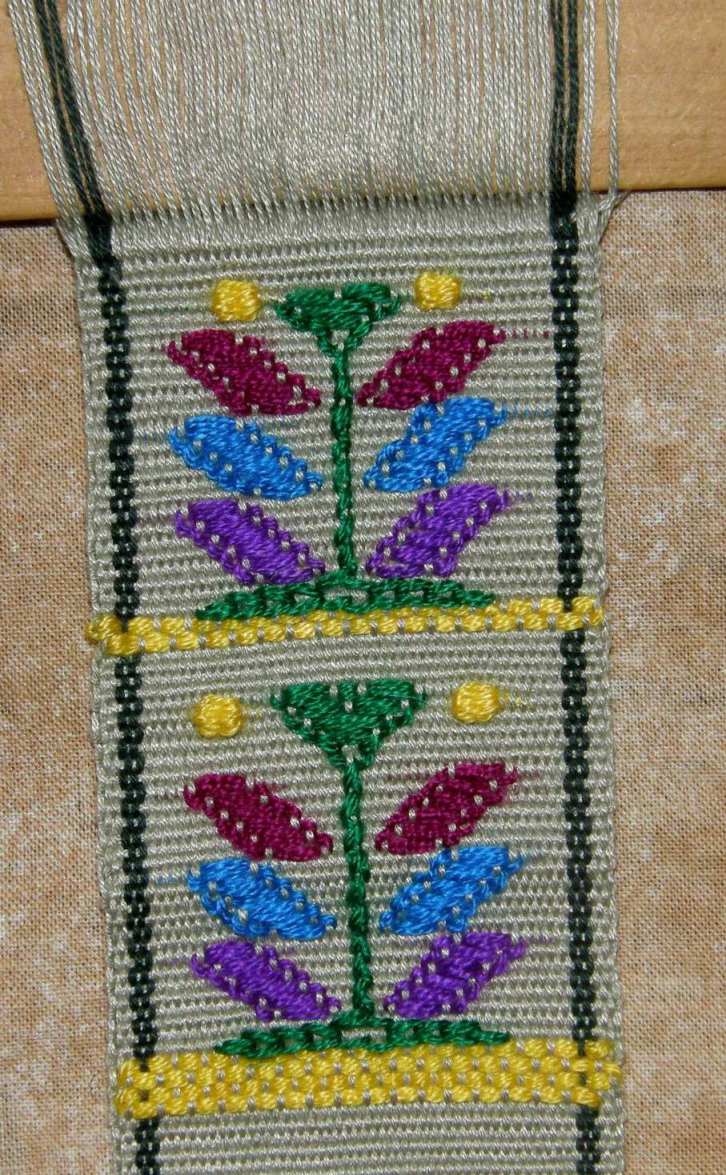


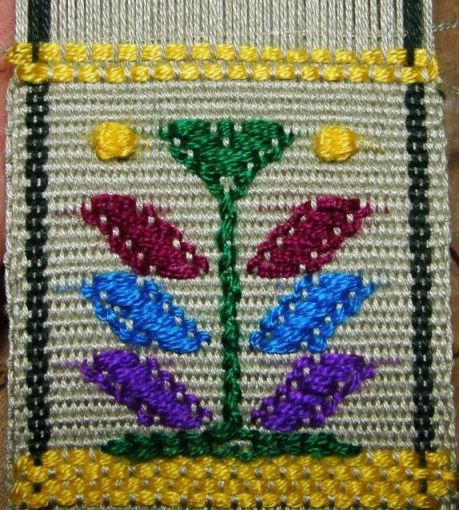 Motifs are usually started and ended with four rows of supplementary wefts in the patterning sheds forming a brick-like design. The colored pattern weft (in this case yellow) is passsed through the pattern shed and then the main weft (in this case light green) is passed through the main shed.