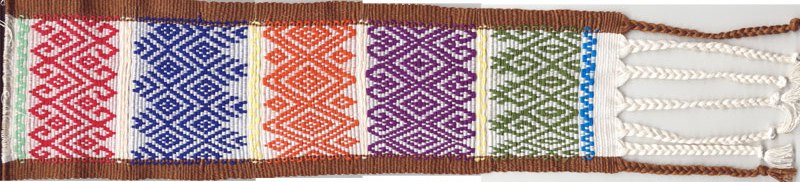
Backstrap Weaving – When the Weft Struts its Stuff

In the kind of weaving that I like to do on my backstrap loom, that is, warp faced weaving with pick up patterns, the poor old weft thread rarely makes an appearance. When it does, it usually means that something has gone wrong…a warp did not get raised in one of the sheds thus exposing the weft in its place, the warps haven’t been well spaced to completely cover the weft or the selvedges have been poorly woven.  I even use weft colors that match the edge of the fabric so that the tiny turns of weft at the edge blend in with the warp color and are, therefore, less visible.

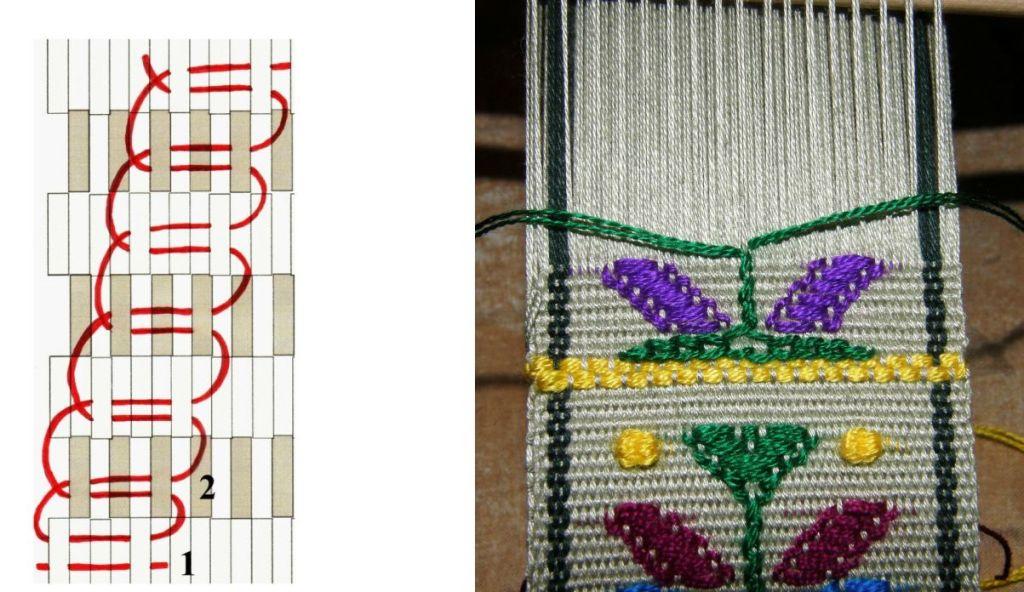
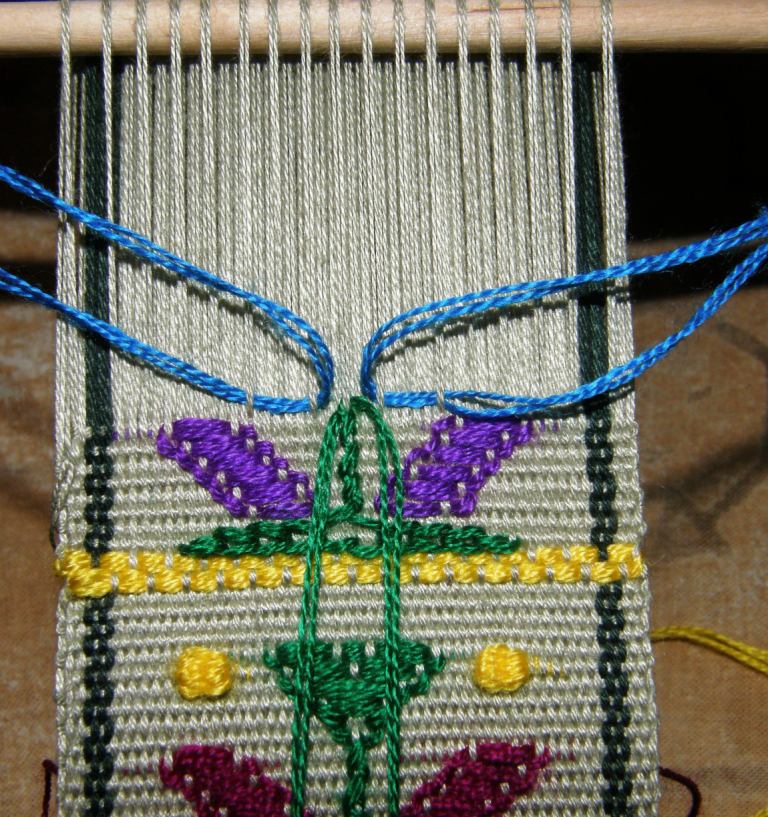
This week I have been playing with a technique that gives one weft at least, the starring role…the supplementary weft. (See the tutorial on this technique here). In some backstrap weaving cultures, everything is about brocade which is created with supplementary wefts, and it is the warp threads that take a back seat.
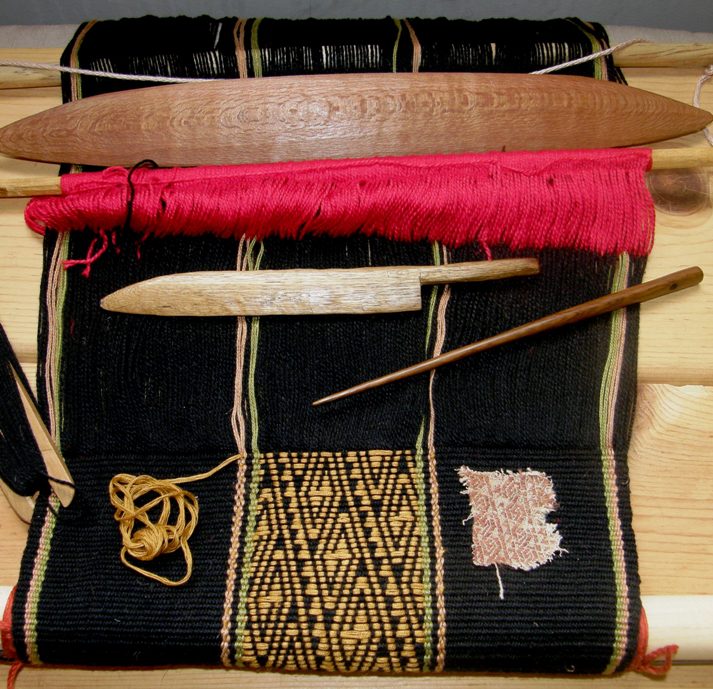
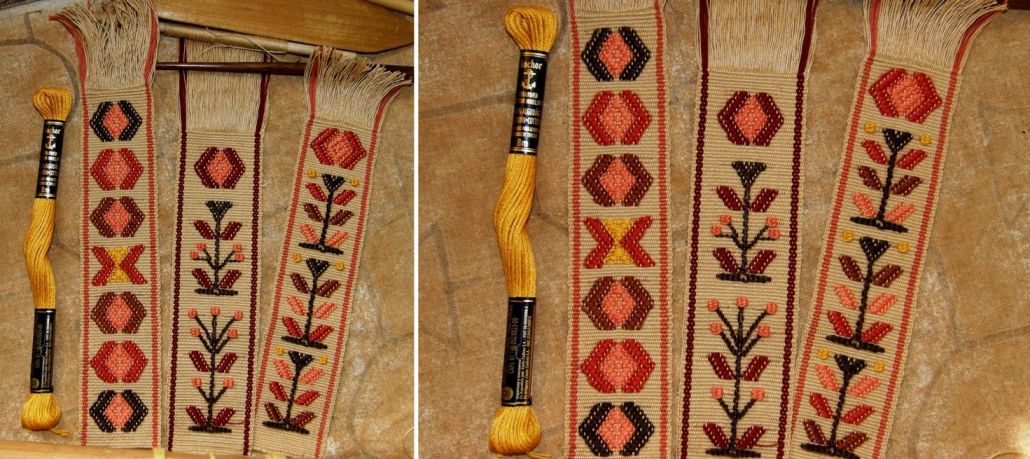
This all started when I uncovered a project lurking in the closet. I wove this supplementary weft piece as an attempt to reproduce a design on an old textile fragment that I have – the only one which has a design in a supplementary weft. I took this loom to show at CNCH last April so it has been hanging about here untouched for some time. Not feeling inclined to continue with this design as the exercise had served its purpose, I decided to use the rest of the warp to sample other traditional designs  which I had been saving in a folder.

Here are some of the textiles that inspired this project…
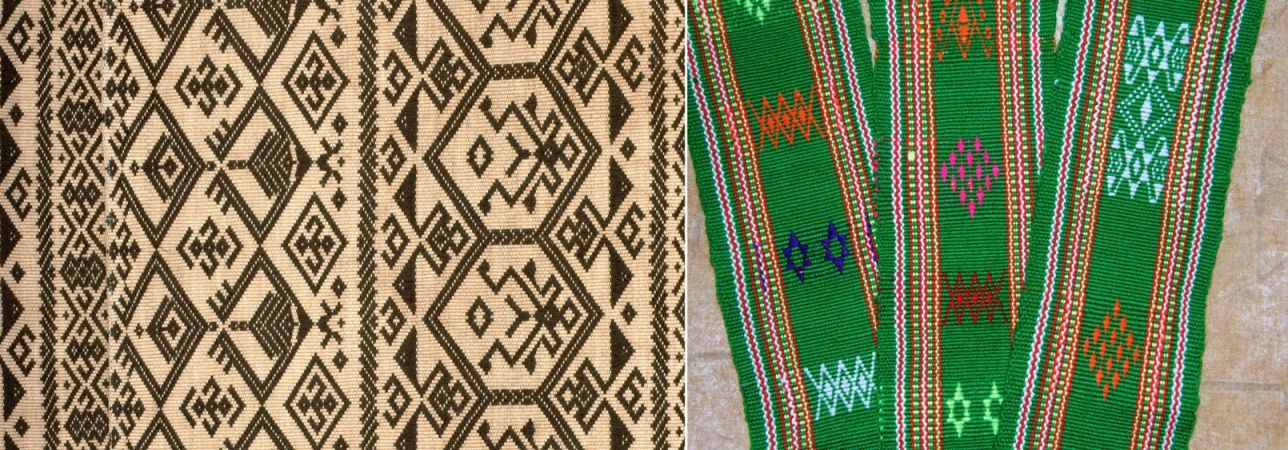
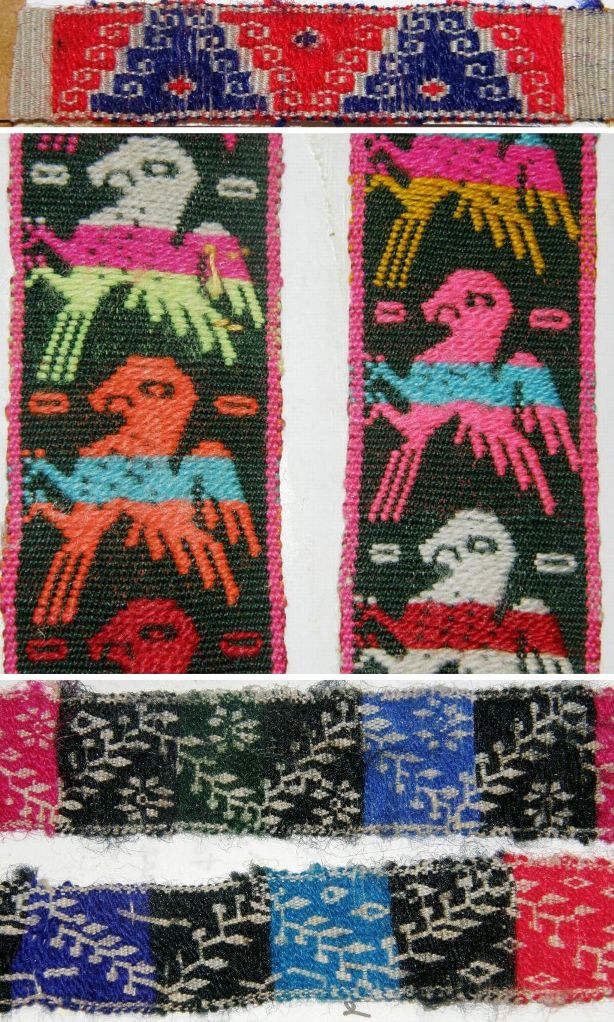
On the left, Chris Buckley had sent me this image of a blanket made by a Li weaver of Hainan Island. Montagnard weaver Ju Nie made this Rhade head band with many small motifs woven with supplementary wefts.
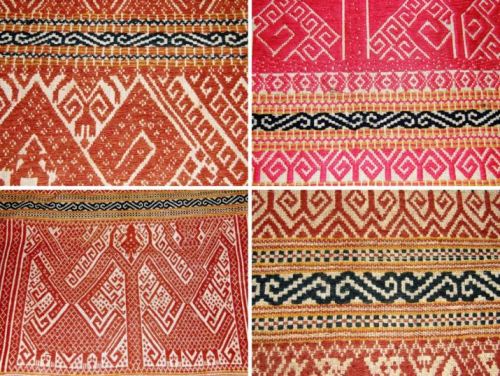
These are some of the many gorgeous Indonesian pieces that I admired at the Dancing Threads stand at Convergence last year.
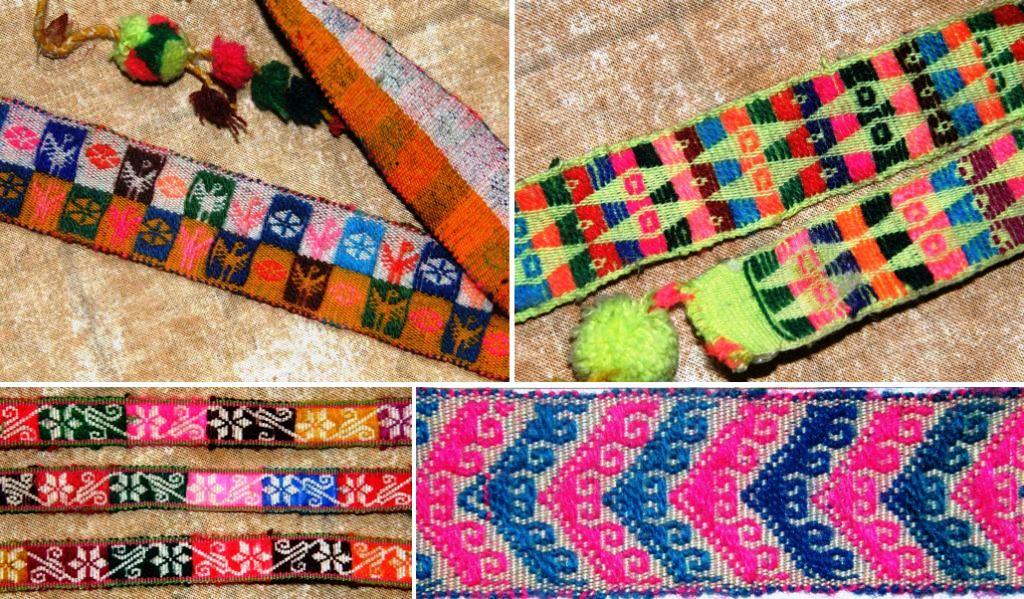
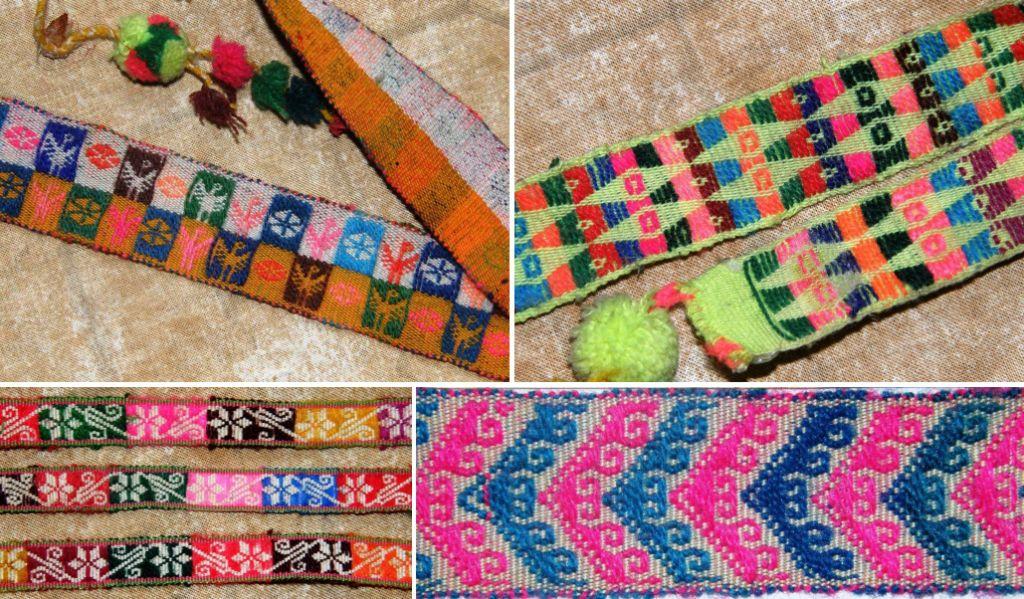
Ladies wearing hats decorated with weft patterned hat bands can sometimes be seen in the streets here and I have managed to purchase a few of the bands in my travels in the highlands.
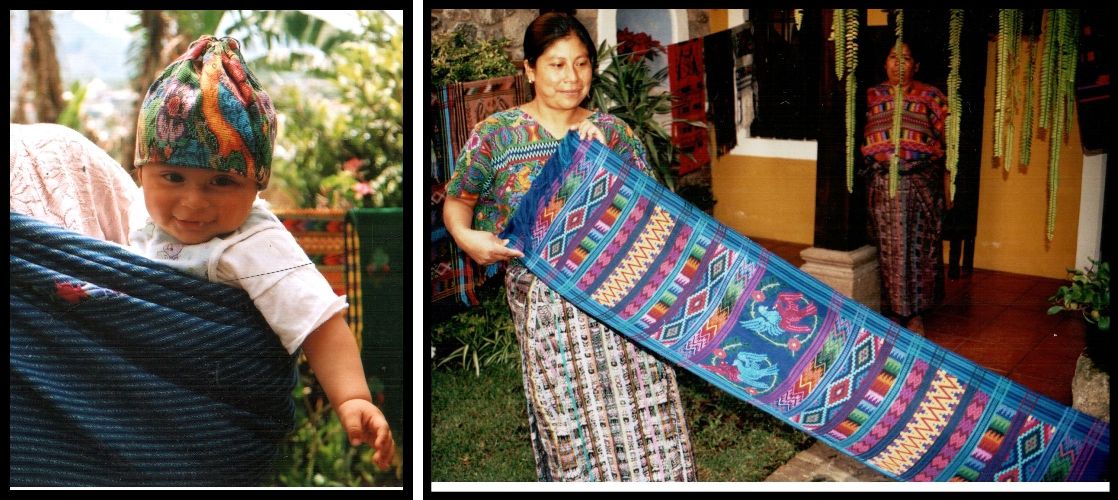
I will never forget the beautiful Guatemalan textiles and the weft patterning techniques I learned with my teachers there.

I even uncovered these cotton Indian pillow covers that my aunt had brought back from Chennai. I had had to put them away as my cat was chewing the twisted ends of the weft twined sections. Here supplementary weft patterns have been combined with small sections of weft twining. The little warp float section is interesting too as very thick and thin warps have been combined, the thick black warp pushing aside the white to expose the white weft.
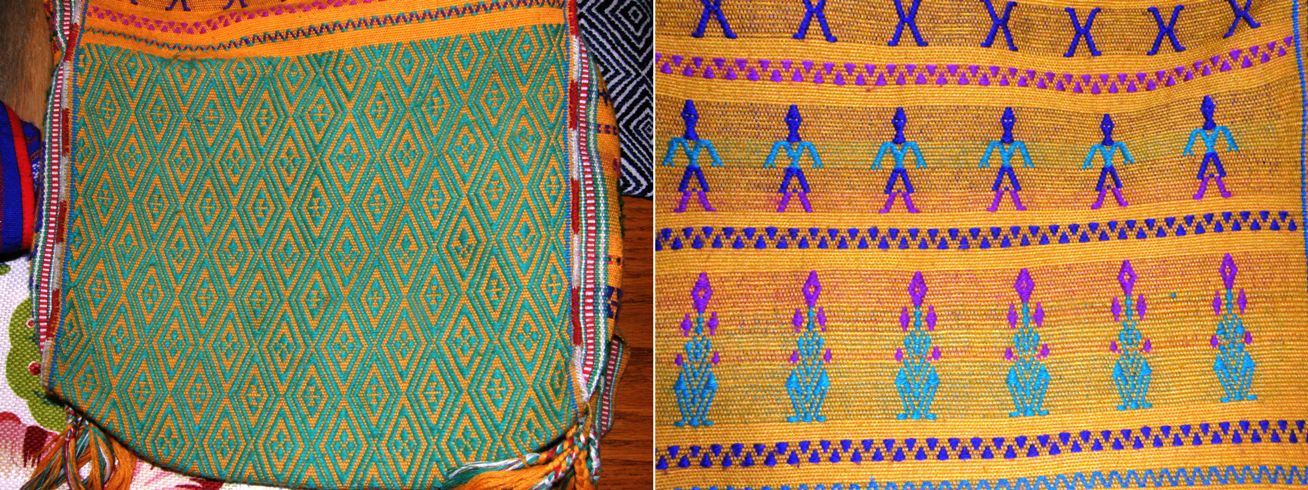
On my last visit with Betsy Renfrew and the Montagnard weavers I got to see these Bunong weft patterned textiles for the first time.

Of course, Karen Elwell’s fabulous Flickr page of Mexican textiles will always inspire me. Someone pointed out to me the other day some Huave pieces with their little suppementary weft figures woven in what appears to be natural white and brown cotton – quite a contrast to the bright and lively colors in most of the pieces above.

So I took a bit of this and that and wove some samples.
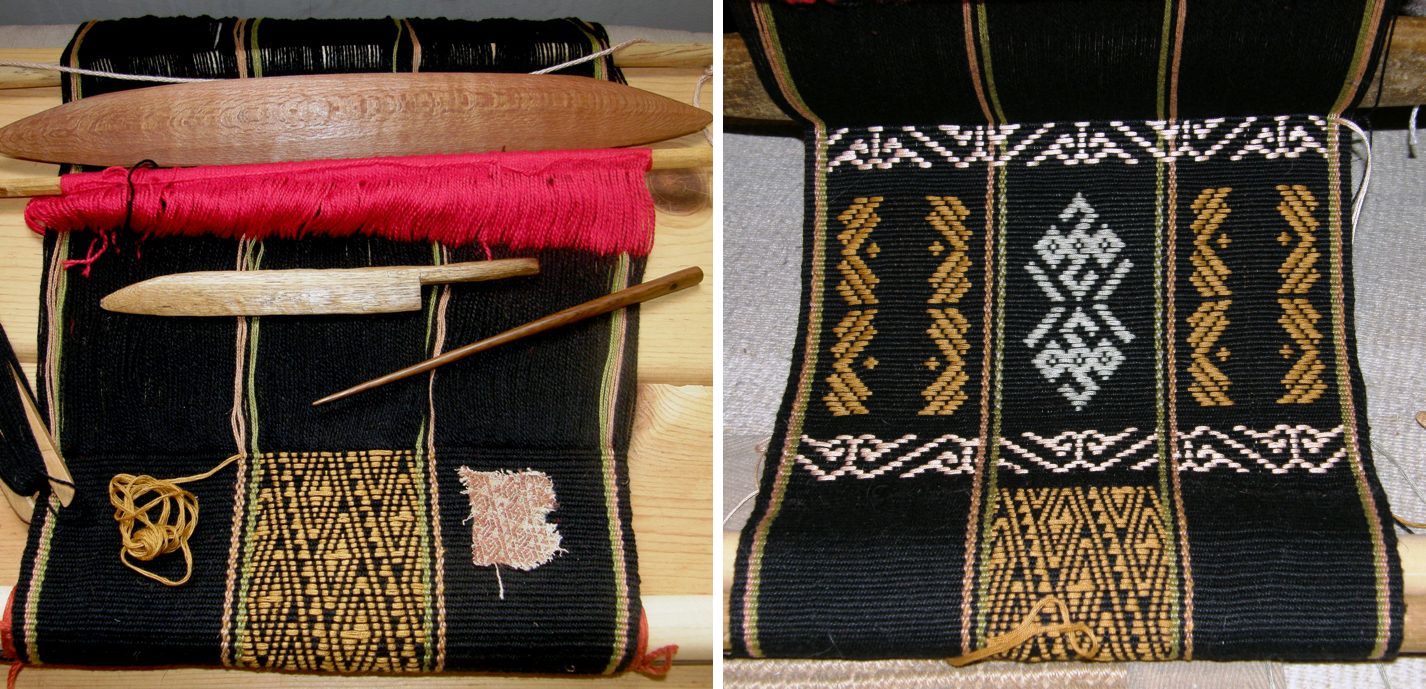
The stripes that I had included in the warp kind of got in the way. First I took an Indonesian motif and tried to weave it in behind the stripes and decided I didn’t like that. Then I put it on top of the stripes…nope, I didn’t care for that either. It was time to move on to a new warp. The designs in between are taken from the Li blanket with some changes of my own.

The ground warp is a 24 wpi crochet cotton with two different kinds of thread for the supplementary wefts.
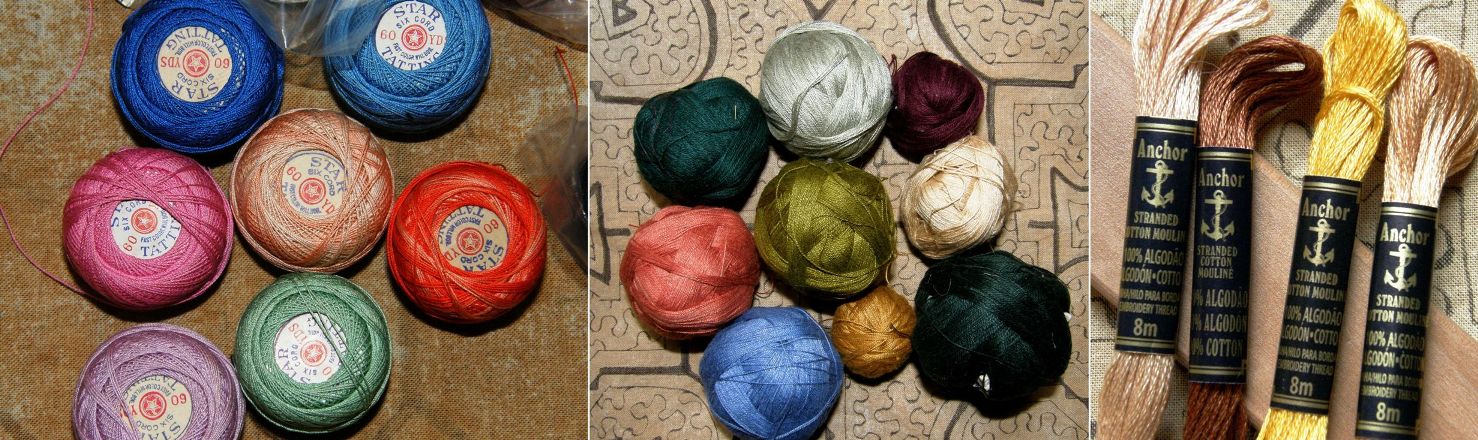
24 wpi ground warp and weft patterned with doubled strands of embroidery floss.

For the textile fragment reproduction I used 6 strands of cotton patterning thread that I bought in Guatemala (center picture). The thread is sold in skeins of single strands. It is easy putting the six threads together and they work well as they lie flat on the surface of the weaving. I used doubled lengths of the embroidery floss (pictured on the right) for the first band of pattern above that. This works well but, as the lengths are ever so slightly twisted, the two pieces tend to separate in the longer floats. If I had no other option, I would pull out each of the individual strands and put them back together again without the twist.

One day my Guatemalan thread will run out and I am thinking that the tatting thread pictured above left  might do the trick.

My friend Sharon in the US sent me an enormous bag of tatting thread recently and it is very similar in size to the Guatemalan stuff although stiffer.

The black warp got cut off the loom and will be a sample piece. I gathered up all the designs I wanted to weave and made a new warp, this time with 35 wpi crochet cotton as the ground warp and weft.
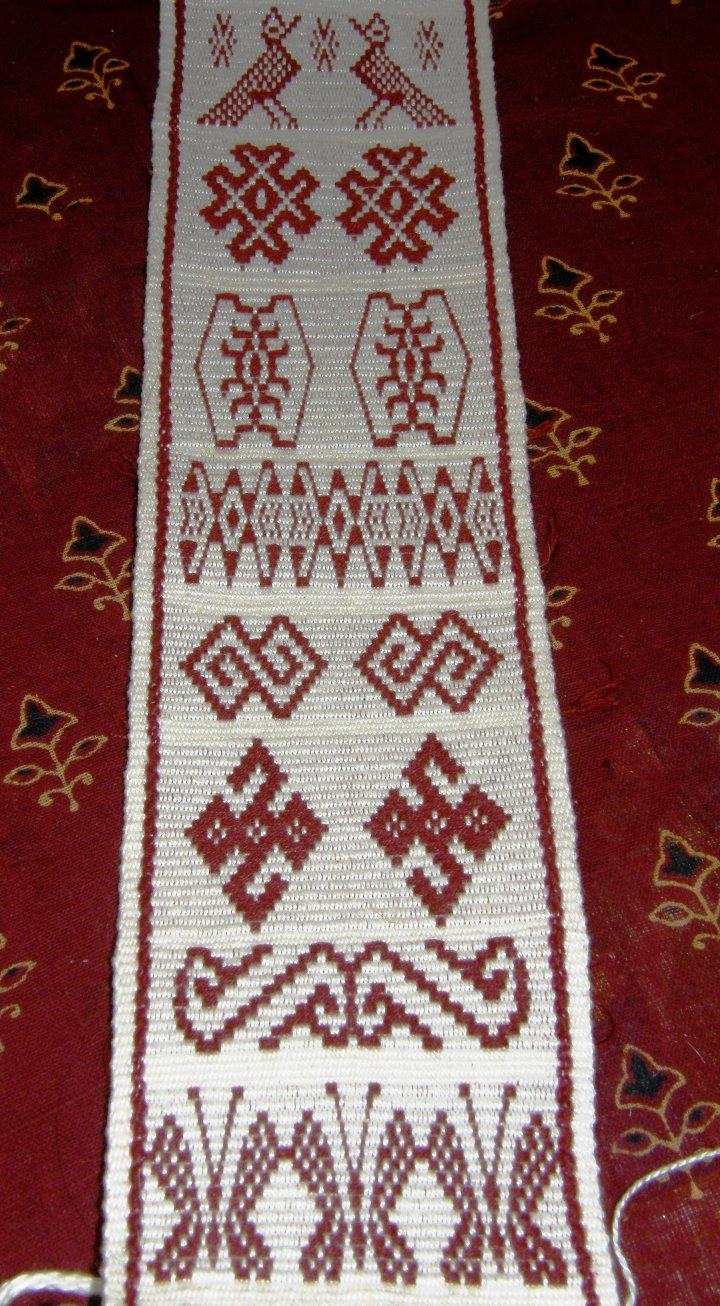
I collected Huave butterflies, Indonesian borders, Central Asian supplementary warp motifs which I adapted to supplementary weft, patterns from Montagnard and Li textiles,  Guatemalan birds, brocade designs from Lithuanian sashes as well as one of my own inventions. I still have some Mexican and Miao motifs to play with and am looking about for more ideas from other cultures.

One thing that I wasn’t quite so aware of was the different kinds of supplementary weft patterning techniques and the ways in which they are classified. I have always wondered about the precise definitions of brocade, inlay and supplementary weft patterning and if, in fact, all three terms refer to the same thing.

Fortunately I have Marla Mallett to put me straight. In her book Woven Structures  A Guide to Oriental Rug and Textile Analysis she says:

Brocading uses extra yarns – supplementary weft yarns – to ornament a ground fabric, with floats on at least one face…….If we want to be fancy, we can call brocading, “extra weft patterning”. But the simple word brocading is adequate.

She then decribes different kinds of brocading: overlay-underlay, underlay, overlay, reciprocal and inlaid, the latter being the kind that I am playing with here. She also notes that in oriental textiles inlaid brocade yarns and knotting often share the same pattern row which makes my head spin with new possibilites!

Another look at my sampler…
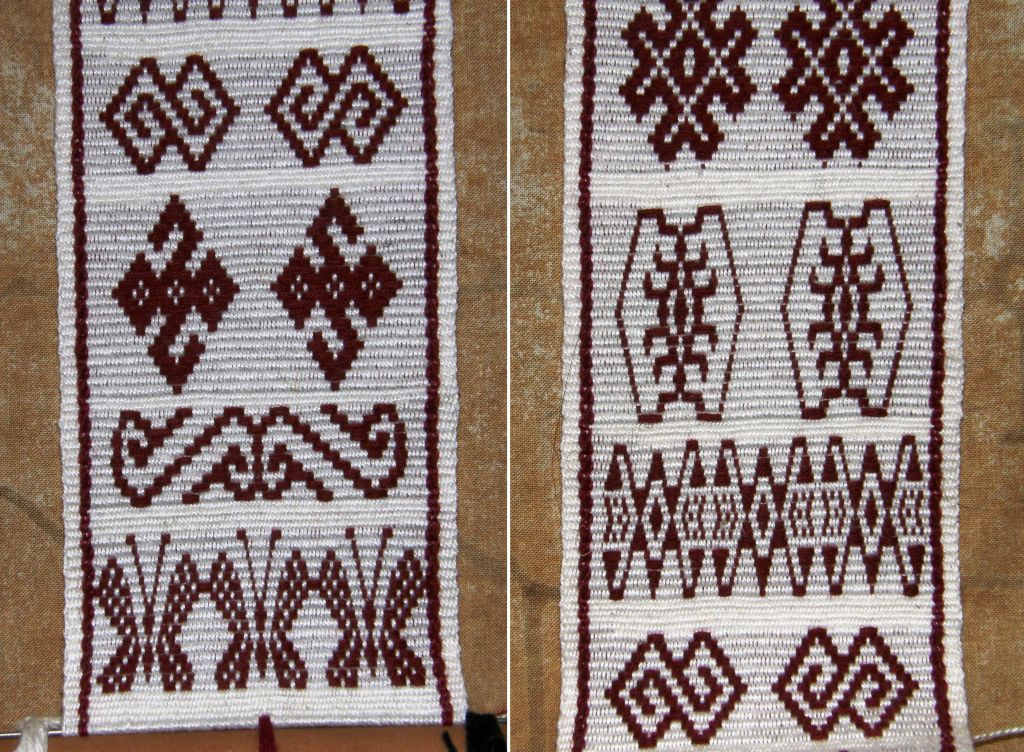
With this 35 wpi ground warp I used six strands of the Guatemalan thread. Once I have finished all my planned designs, I will start experimenting with the tatting thread. What I like about this kind of patterning is that your warp is basically a blank canvas on which you are free to change colors and place designs as you please.
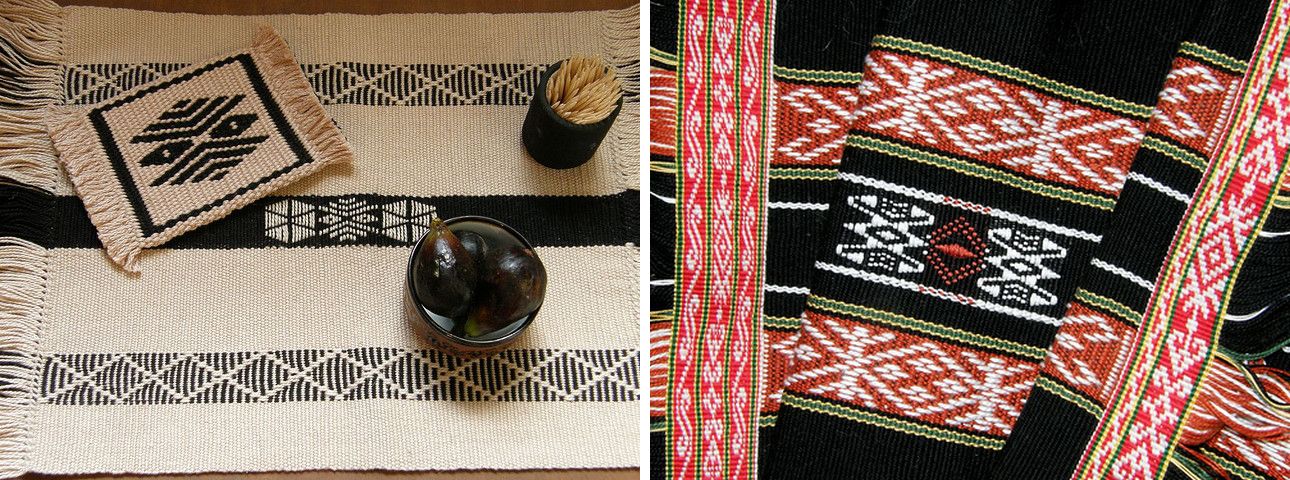
Here are a couple of examples of warps that I prepared for warp float patterning to which I decided to add supplementary weft motifs pretty much as an afterthought. On the piece on the right I used one and half strands of embroidery floss. On the piece on the left I used single strands of the ground weft which left gaps and gave the design the same striped effect as the outer columns of warp float designs.
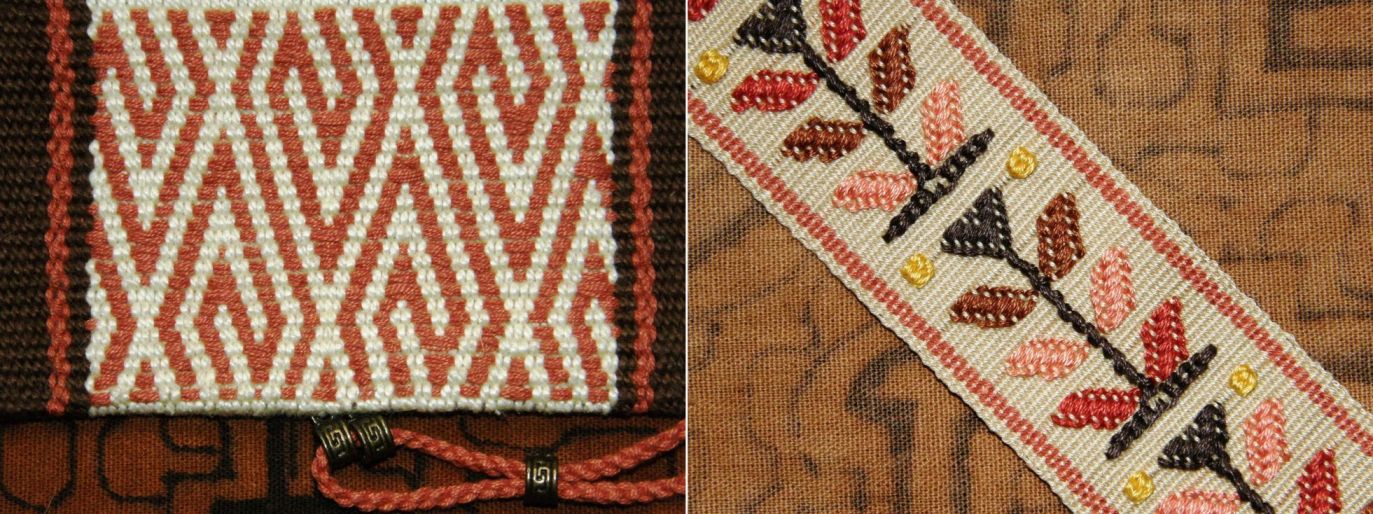
A couple of other brocaded pieces that I wove using the Guatemalan thread on the left and embroidery floss on the right. The piece on the right combines the inlay technique with wrapping to create the long horizontal and fine vertical lines that would not be practical using the inlay method.
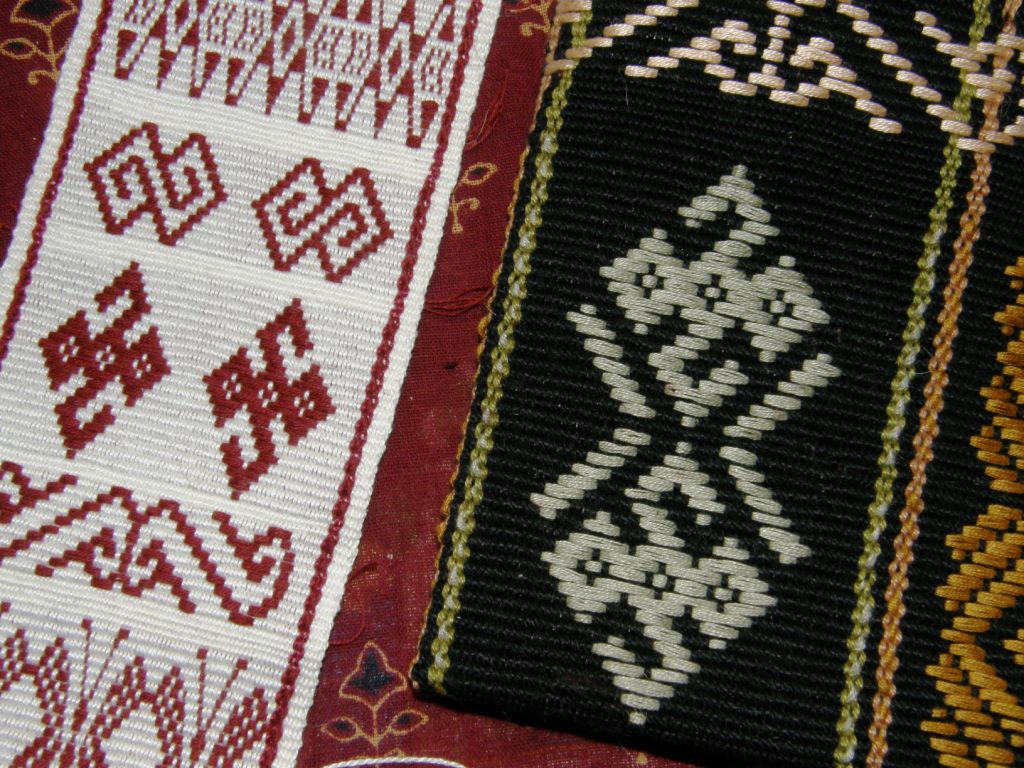
Here is a view of the two samplers showing the difference in the weight of the threads I used.

Why didn’t I do any of the Bolivian hat band designs, you ask? Those have been done in super fine thread which allows them to have very long floats in their supplementary weft. You simply would not get away with such long floats in heavier thread as they would be long, cumbersome and unsightly. You can be sure that another warp in sewing thread will be coming soon so that I can indeed do these designs. I am also looking forward to doing designs where the supplementary weft actually fills in the negative rather than the positive spaces.
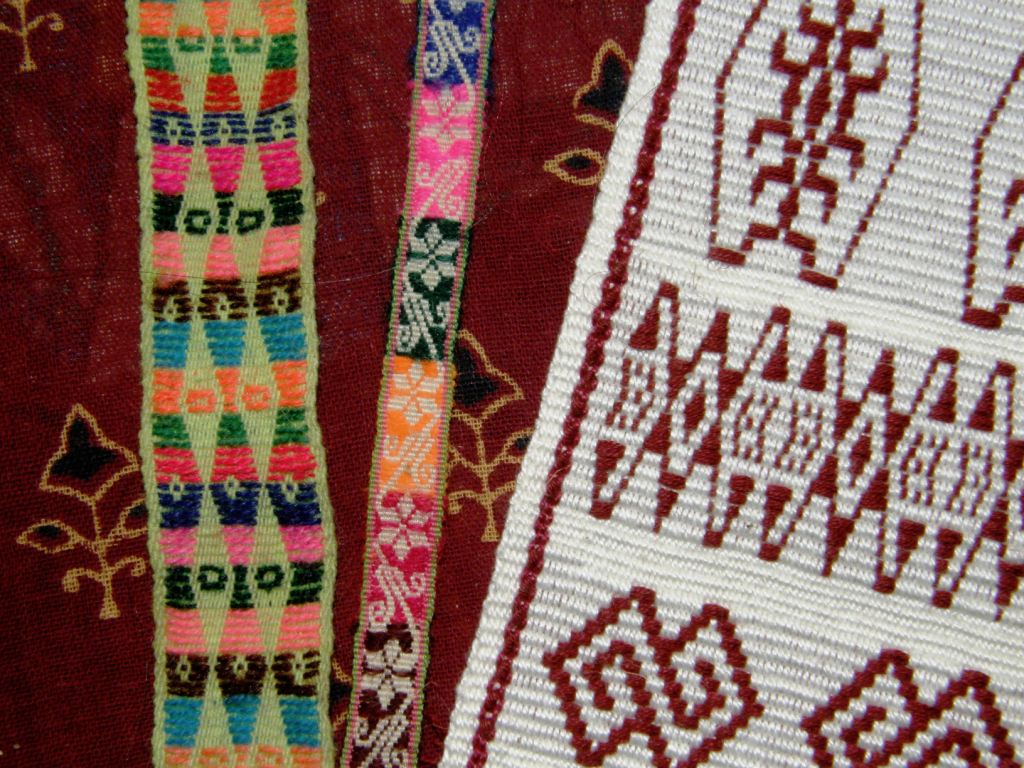
Here you can compare the size of the hat band thread with my 35 wpi thread. And don’t get me started on the mind boggling fineness and complexity of the brocades from Laos!!

From supplementary wefts to supplementary warps….you may recall from last week’s post that I wove my first Sami pattern band in a supplementary warp technique. I want to explore and use this technique more as a supplementary warp patterned sash will be part of my big “sash project”. This is actually one of the techniques where you could allow the weft to play a role if you chose to.

In the examples at left you can see the little orange weft spots showing through as orange weft has been used to match the edges. If yellow weft had been used the background would appear to be a solid color. My weaving teacher liked the decorative effect of the weft spots. The band on the right appears to have a solid background of white as white weft has been used. You can just see the white weft turns on the edge.

For my next supplementary warp experiment I used the handout that we had been given in Robin Spady’s inkle weaving presentation at CNCH last year.

Included is a pattern for a Celtic knot. This experiment served two purposes as I also wanted to try out some tencel that I had received in a swap with a weaving friend in Denmark last year. I really wanted to see how the colors would look together…a light green and a gray-ish purple along with an off-white that I bought at the Mannings. I have never used tencel before and was looking forward to see how it looked and felt when woven. I made this on my backstrap loom.
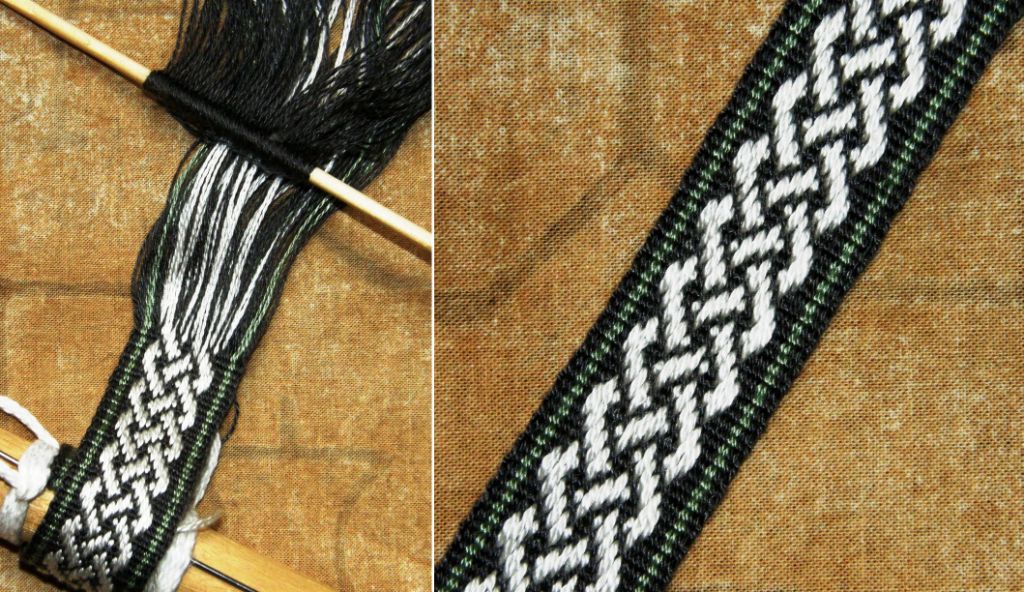
Just as everyone says, it has a lovely sheen and is very sleak. The weft did want to wiggle out a little and I found I had to put it back in place each time I changed sheds but I love everything about this…the colors, the pattern, the texture and the sheen!

This is a thirteen-pattern-thread design which Robyn calls “my all-time favorite pick-up pattern”.

Karen Madigan gives the pattern for a twelve-thread Celtic knot (which she says is based on a design from Sara Lamb) on her Curious Weaver blog. By the way, I know a lot of people have Sara Lamb’s Woven Treasures book.  Sara teaches this supplementary warp technique right there in her book… just in case you missed it.

Take a look at a different version (the pink one) on Annie MacHale’s blog here.
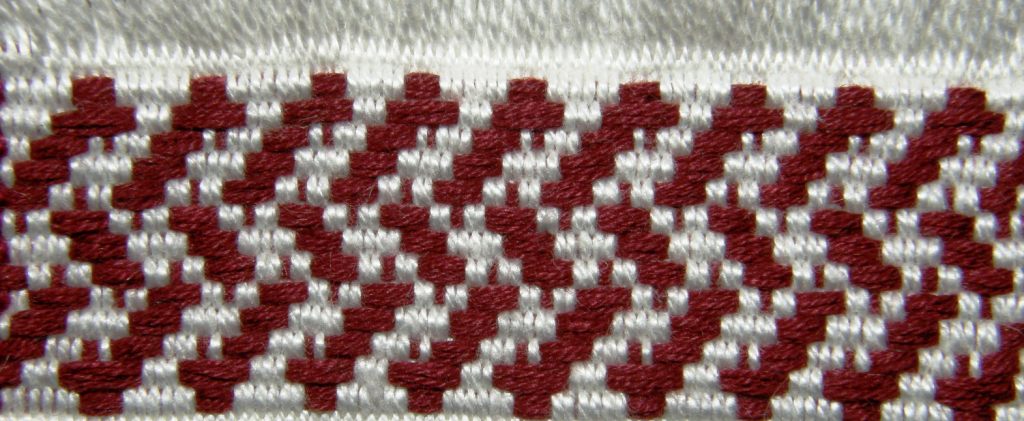
I couldn’t resist tipping this Celtic knot pattern sideways and trying it in a supplementary weft.

I know that I can improve on this if I decrease the spacing and have the edges curling over more. That’s something to work on further this week.

I thought that I would pull out some older pictures of other knotty-like designs I have woven…
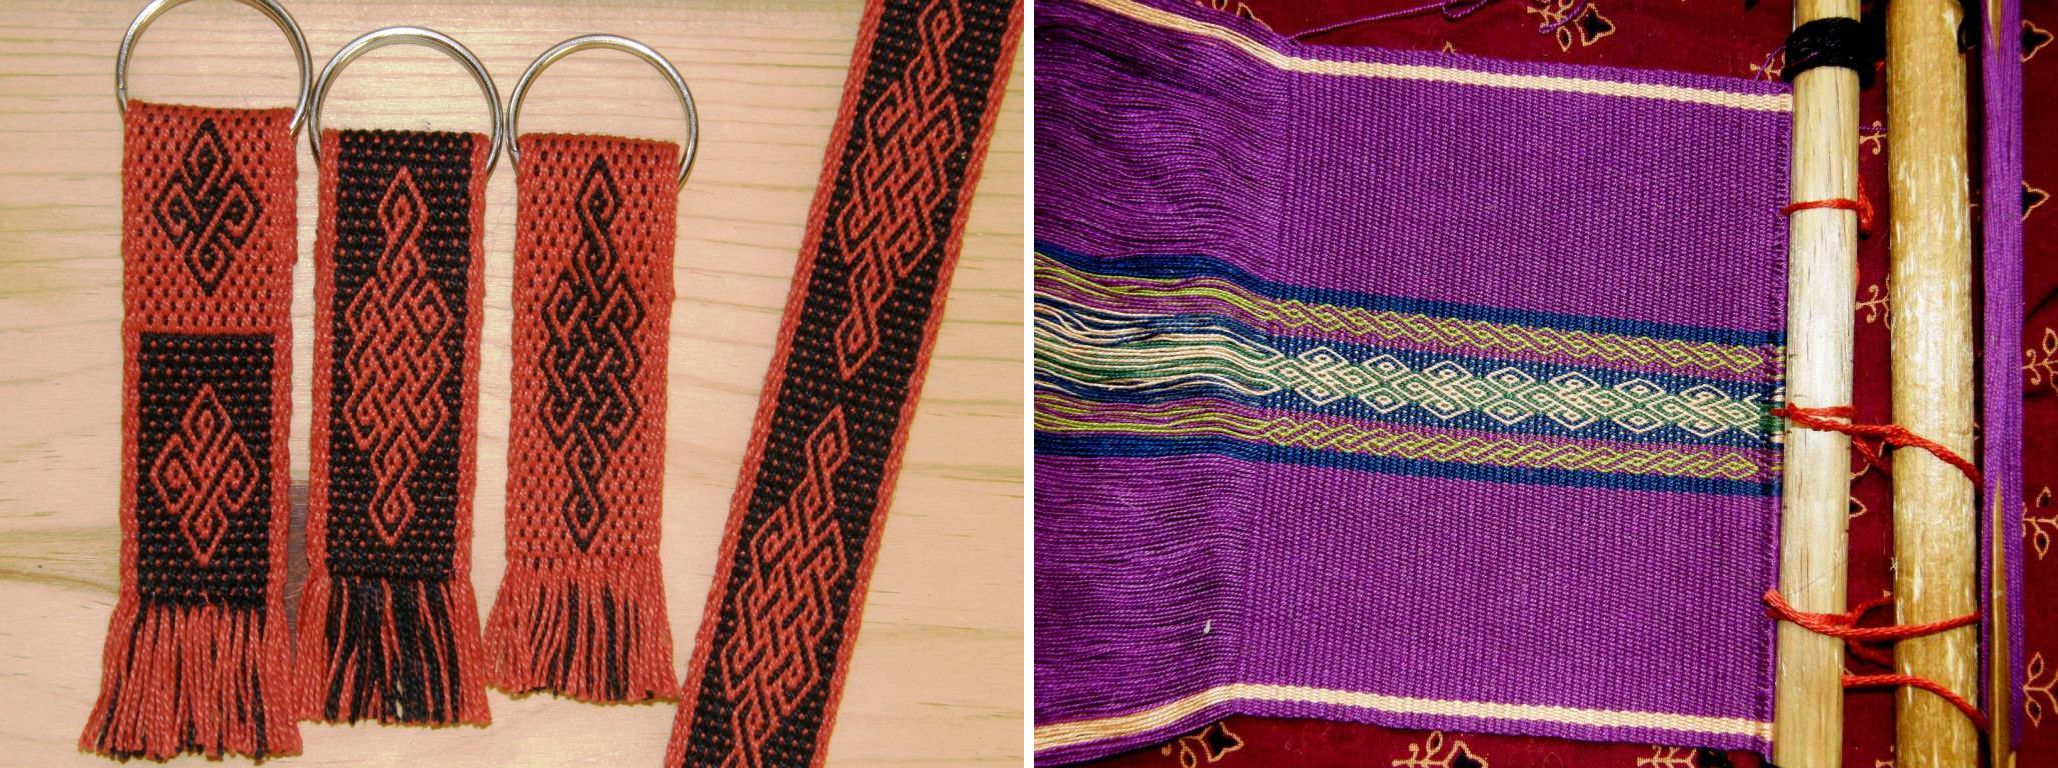
The designs above and below were taken mostly from tablet-woven bands and I wove them using the Andean pebble weave technique that I teach in my book.
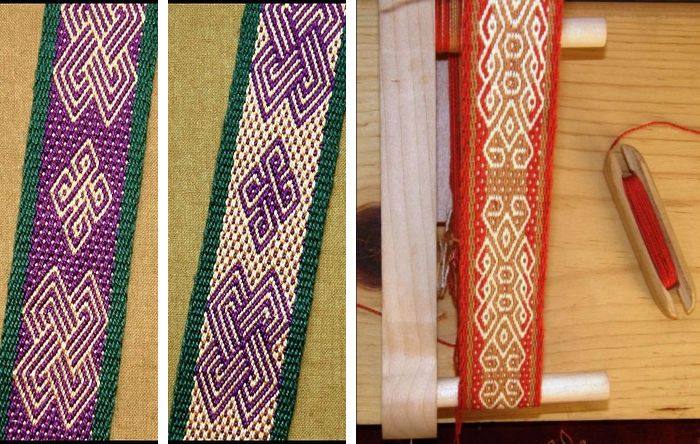
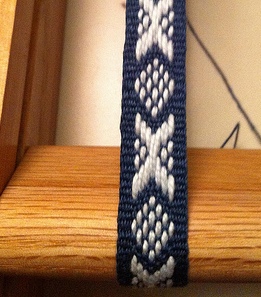
Jennifer from the Weave Along group made her first Sami band on her inkle loom this week (at left) as well as Tanyabe who says that she actually has a drop or two of Sami blood in her. Hopefully we shall see her pictures soon.

The Weave-Along has become rather quiet. I suspect that folks are working on their “secret” project for the grand finale. I also like to think that the Weave-Along has helped create confident independent weavers who are trouble shooting, experimenting and problem solving on their own….let’s see!

And the loom bag project continues. This loom bag will weigh a ton by the time I have all the bits in place!
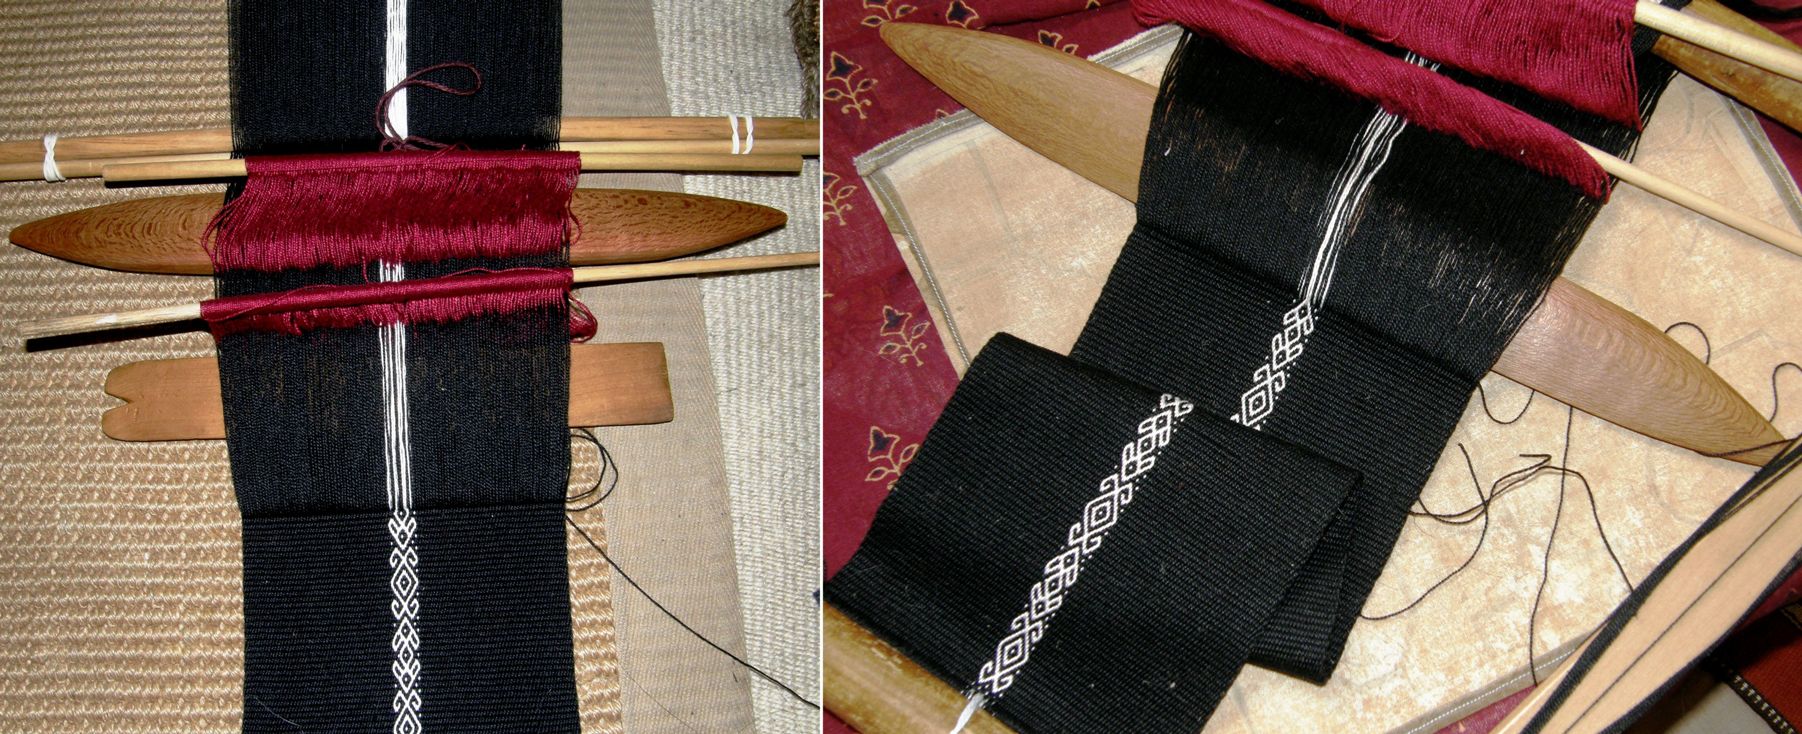
This piece of fabric with its pebble weave design will be used to  make the three zippered pockets on the back of the bag for holding belt shuttles, elastic bands, scissors, tapestry needles and all that stuff.

Finally, I got a nice note from Kathleen on Ravelry with all this information on other articles in the Weaver’s Journal which are available to download free from the online digital archives at arizona.edu

Kathleen says:

Thanks for the references re the Andean braids in Weaver’s Journal. (Actually, we all have Jennifer to thank for these references).I didn’t know they were all available on line. I have some but was happy to find the others.

There are quite a number of other interesting articles that might also be of interest to you or other members of the backstrap weaving groups.

Issue 4 – A Tubular Edge Braiding from Bolivia by Adele Cahlander and Marjorie Cason.

23 – A Special Andean Tubular Trim woven without Heddles by Adele Cahlander, Ed Franquemont and Barbara Bergman (color!)

24 – A Guatemalan Brocade Border

25 – A Braided Strap from Columbia by Adele Cahlander

28 – Gifts from Ancient Peru by Ulla Nass

35 – A unique Finish from an Amazonian Bracelet by Micheline Thabet

37 – Unraveling the Mystery of a 7 – loop Braid by Adele Cahlander

42 – Embellishment of the Rain Scarf (Hopi) by Suzanne Baizerman

45 – Peruvian Technique for Dimensional Knotting by Monica Bravo

46 – Color and Design in Andean Fabrics by Blenda Femenias

Thank you Kathleen!

The downloading takes too too long for me but considering the topic of this week’s post, I think I must look at issue # 24!



Backstrap Weaving – The tail end of the Tinkuy tale.

MORE FROM THE TINKUY DE TEJEDORES

I have been busy since the last post on the tinkuy – weaving, packing and traveling! Yep, I am on the road again…can you guess in which country?

Golden leaves and pumpkins…a common sight for many of you I am sure but certainly not something we ever see in Bolivia especially not as we roll into summer. More about this trip in next week’s post.

For now I will finish off my tinkuy report and show you what I managed to get up to on my loom in my brief stopover at home in Bolivia.

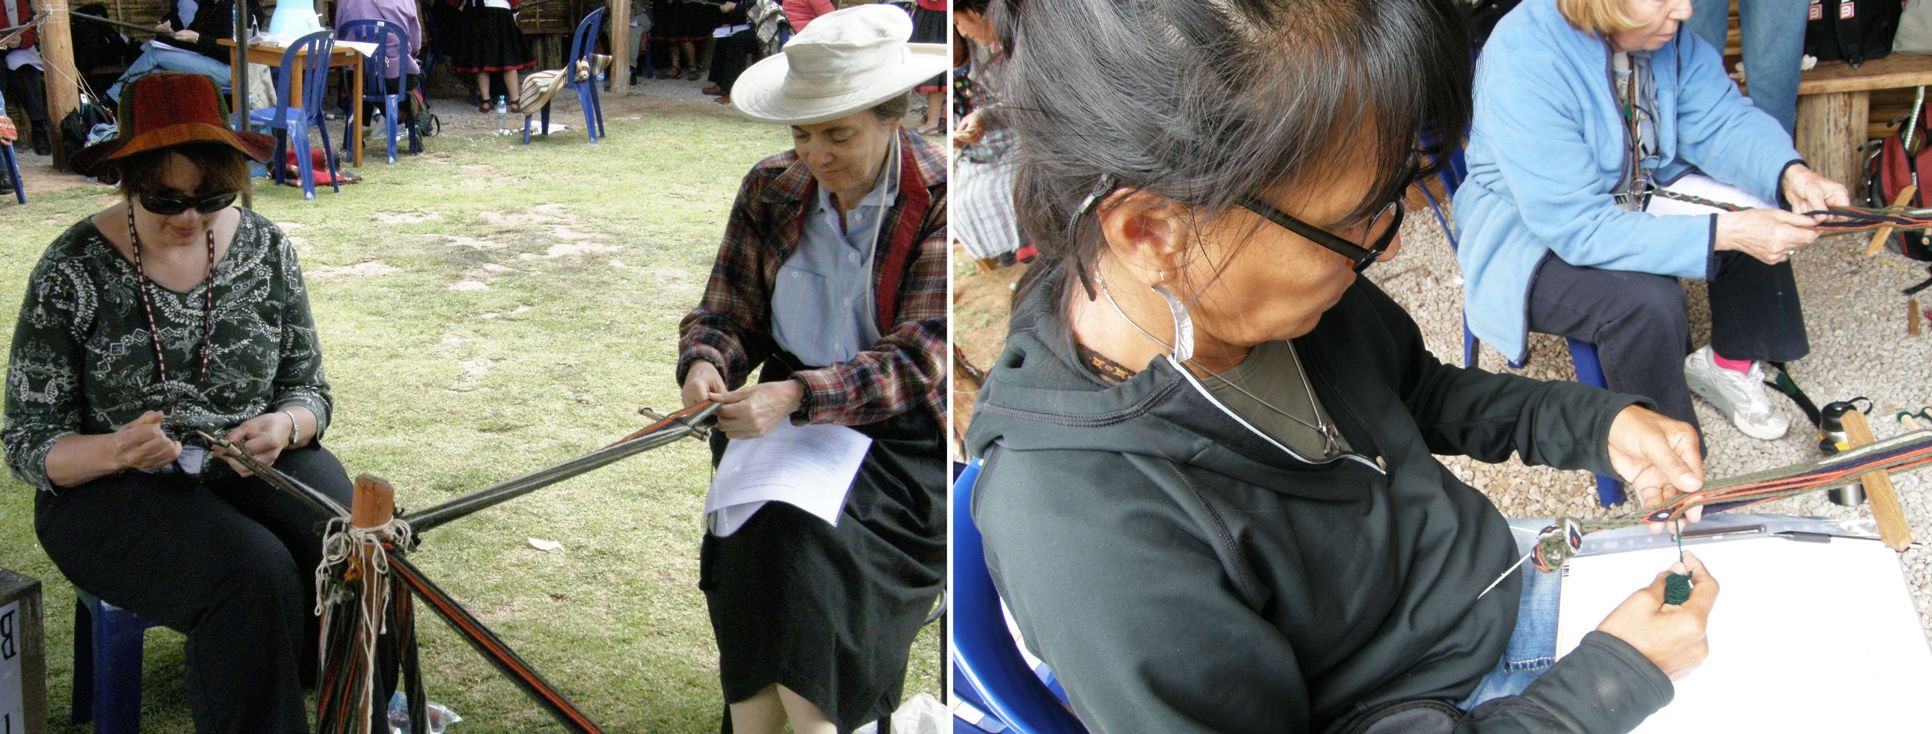
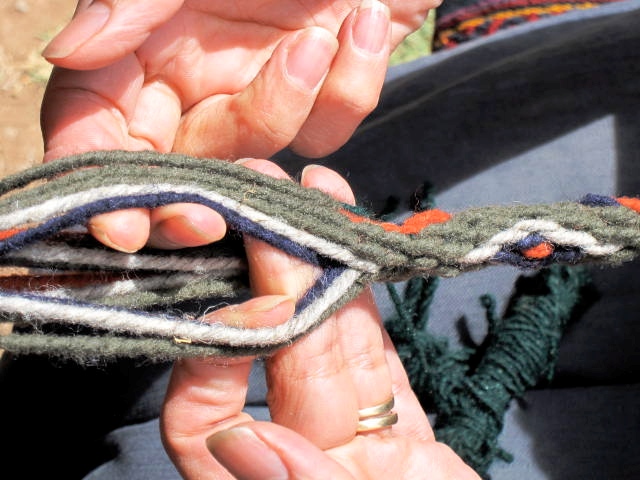
I arrived home with tubular woven bands and discontinuous warps on my mind. I finished off the tubular band that I had started in the tunkuy workshop with Nilda. Nilda was an excellent no-nonsense teacher, commanding our attention and clearly demonstrating and explaining the moves to her twenty-eight participants!. She prepared excellent handouts and got us all up and running on what was a fairly complex sequence of moves which involved, picking up, twisting and diverting warps. We were turning out lovely tubular bands by the end of the session and enjoying ourselves.

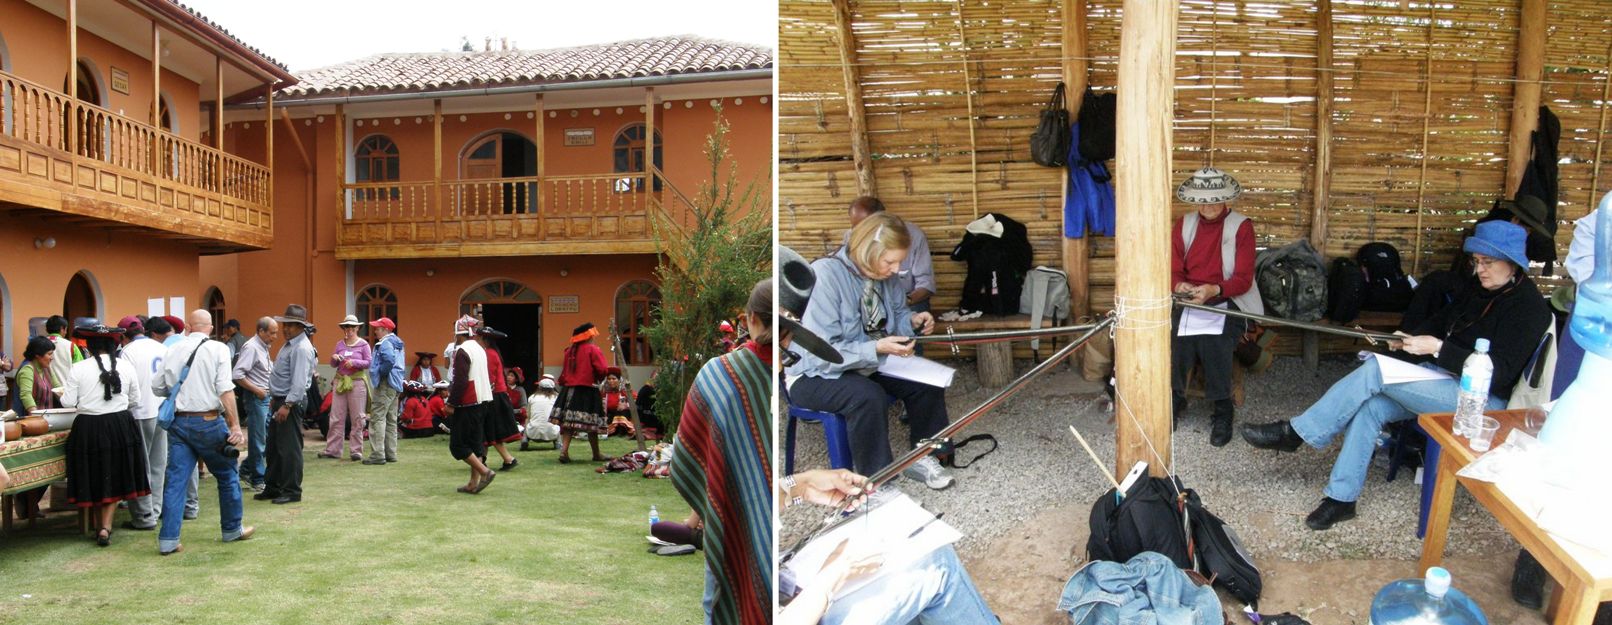
The CTTC has a beautiful center in Chinchero with large courtyards for weaving, warping and dyeing displays, workshop rooms, a store and exhibition area. We were blessed with a gloriously sunny morning and entertained by a sudden and violent change of weather in the afternoon as a storm converted the grassy courtyard to a blanket of white hailstones.
The courtyard where we worked was also alive with the colorful skeins of yarn which had been dyed in the previous day’s workshop.

With the aid of four helpers from the Chinchero weaving community, we all hitched ourselves to posts in the lovely courtyard of the CTTC Chinchero complex and wove away with always someone on hand to help if we got ourselves into trouble and, believe me, we did! Despite Nilda’s clear instructions I managed to start with my warp upside down but, with Jessica’s help, soon got that sorted out and then it was just a matter of following the steps in the well prepared handout.

All were quiet at first as we concentrated on our work only interrupted now and then by pleas for help but, as we became more familiar with the moves and, more importantly, understood better why we were making them, we could relax, chat and compare our progress.

Linda Ligon gets a few tips from one of our good humored helpers.

We started out making bands with very thick yarn – easy to see and handle while we learned the moves. D Y Begay took this picture of me at work and sent it to me.
Some of the weavers from Guatemala and Bolivia were among the participants.

Above left you can see our thick practice band and at right a finer one which we warped  in the afternoon session. After lunch we had the choice of weaving a finer tubular band, which I did, or learning to weave and sew a much simpler tubular band to a piece of fabric. The simpler band’s design was contained in its warps and so did not require any pick up, twisting or warp diversion. This was an excellent sample to use for learning how to manage the simultaneous weaving and sewing. Nilda was wise to give everyone a simpler task in the afternoon with all of us feeling a wee bit snoozy after the delicious lunch spread. The storm woke us up though!

Anita Osterhaug, Ann Rowe, Judith Crosbie and DY Begay at work on their bands. 
Betty Davenport was one of my “pole buddies”.

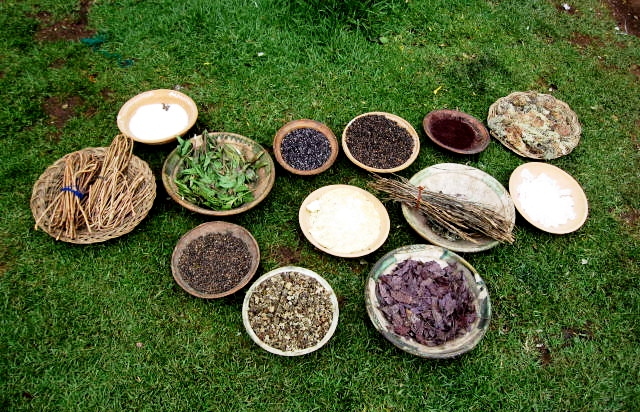
As for the previous day’s dyeing workshop, I saw the dyestuffs, the drying skeins and all the gorgeous colors and that is about all I can tell you for now…sorry! I am hoping that Dorinda will be able to fill me in on what they used to achieve that beautiful collection of colors. Each participant took home seven skeins.

My roommates Dorinda and Maxima participated in the dye workshop as this is precisely something on which Dorinda has been working in Cochabamba in her PAZA project.
And here are the principal dyestuffs that were used.

Another interesting part of the workshop day for me was seeing different warping methods.

I was tickled to see this warping board which is the same as the one I have built for myself at home. This is the one we used for warping our tubular bands.

I was tickled to see this warping board which is the same as the one I built for myself at home. We used this one to warp our tubular bands.

This lady is warping a narrow band around nails driven into to the ground. I noticed that she had the two outer nails leaning very noticeably to the outside to compensate, I would say, for their tendency to lean in as the warping progresses. That is the problem with this kind of warping set up. I am sure that from her vast experience she knows exactly how much to angle the nails when she drives then into the ground.

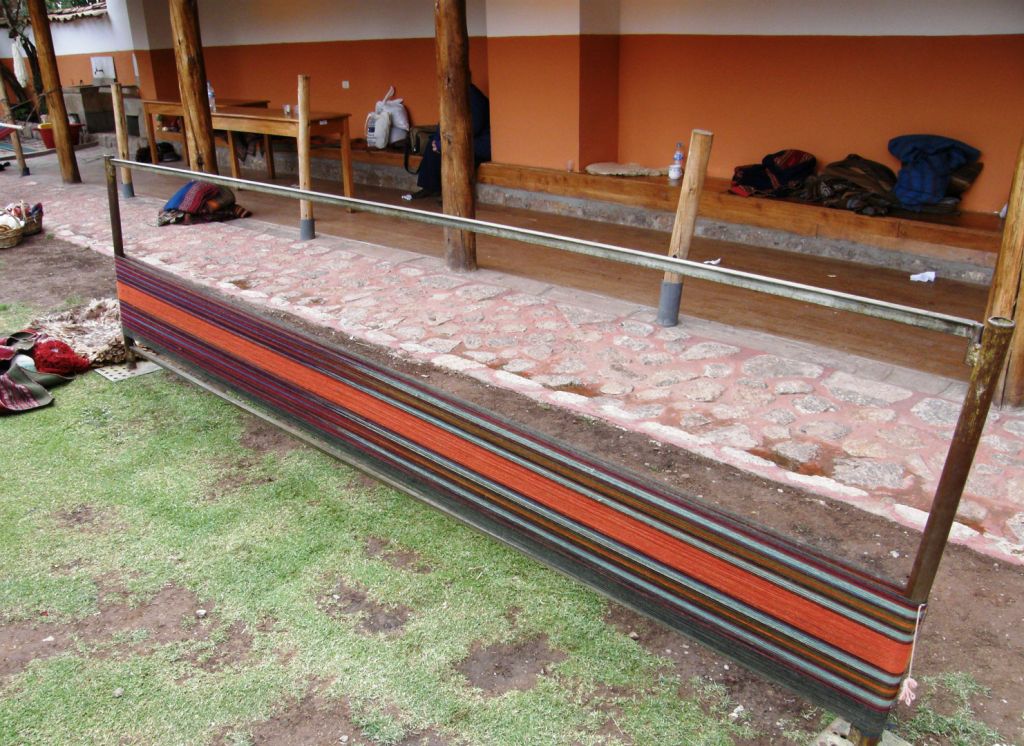
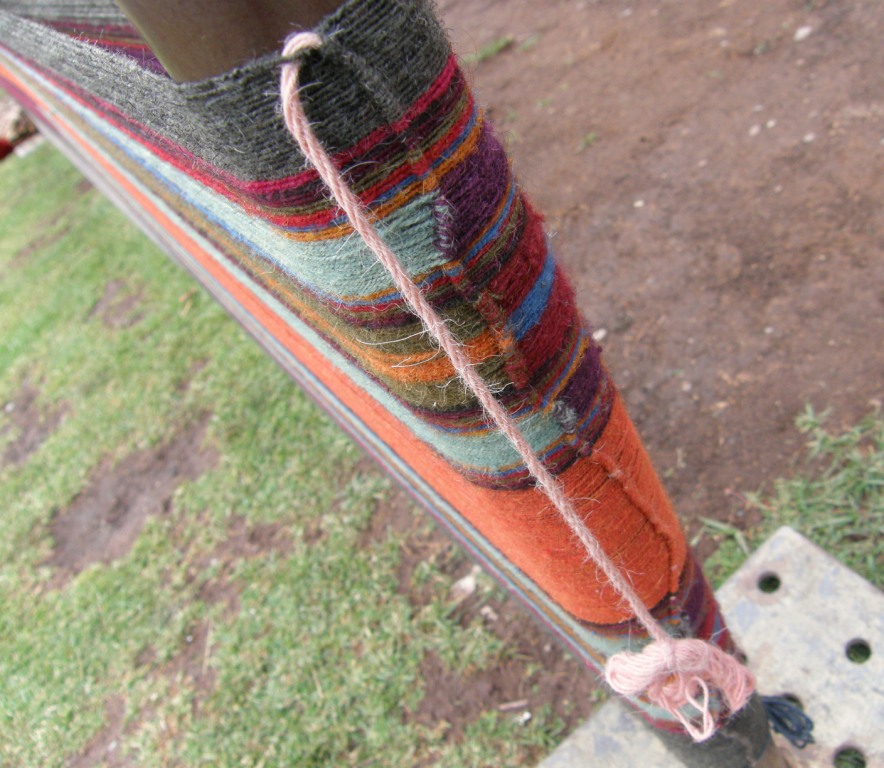
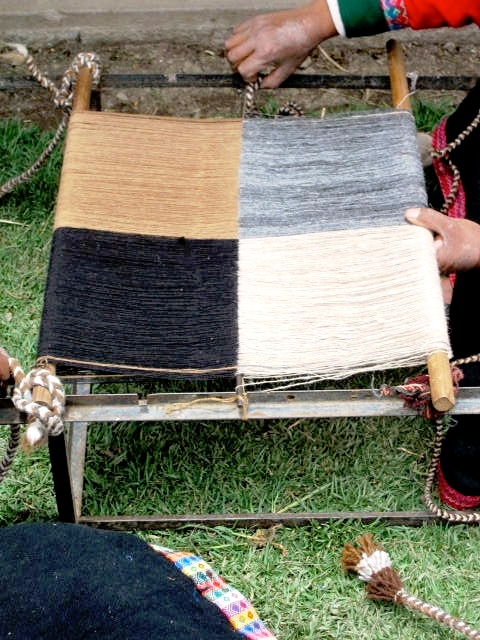
And then there was this large warping set up. Notice the metal bar which extends from one post to the other to stop any possible leaning as the warp is wound up the posts. Judith was watching the weaver warping on this set up and called me over to look. She drew my attention to the fact that the weaver was turning the warps at each end post around a piece of thicker plied yarn. In this way the warps were locked into position and this thick piece of yarn I imagine would be lashed to the loom bars in order to create the third and fourth selvedges.

Judith had been watching long enough to learn how to do it and was then able to help the weaver. I was able to make a short video where Judith shows and explains how it is done.

I am thinking that this would be a great way to wind a warp for ikat.

Here’s a shot of what the warps look like wrapped around this “starter” cord.

So, tubular bands were one item on my weaving list this week and I warped up a few to take away with me. These require nothing more than a string to attach it to your waist while the other end could easily go around a toe. You don’t even need to make string heddles as you work directly from the original cross.

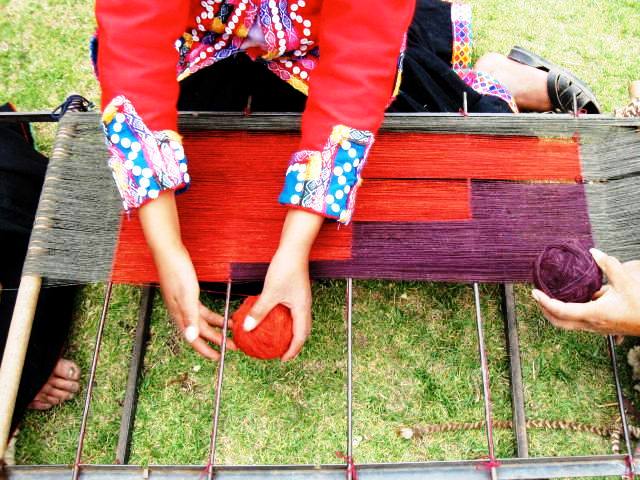
The other thing I was determined to do before I hit the road again was experiment with the discontinuous warp technique. You may have seen the amazing piece being woven by a weaver from Pitumarca in last week’s blog post. She had warped panels of four different warp colors.

I wonder if this technique was born from weavers’ boredom with their warp colors in long pieces. I know what it is like being locked into certain limited colors for the entire length of a warp-faced piece. That is why supplementary weft patterning can be so much fun as you get to change colors as you please.

I got a pretty good idea about how this was warped by looking at the above piece. I also got a good look at Antonia’s piece at Convergence which you can see below and got to talk to her a little about it. This piece is an absolute marvel! She has panels within panels.

This, combined with a very nice photo of warping in progress in Nilda Callañaupa’s book, gave me just enough information to get a project started.

I just happened to have this rough wooden framed which had been abandoned on the terrace of my apartment block about two years ago. Stashed behind the fridge all this time it has finally found its calling! I put nails in it behind which I lodged and then tied the loom bars. I cut a groove into the wooden frame into which I could place a metal rod. This looks very roughly like the frame shown in Nilda’s book. From there it was just a matter of winding two separate figure-of-eight warps which dovetailed around the metal rod. Two people were shown warping in the picture and I must say that I could have done with an extra pair of hands.

Above is my two-panel warp with crochet cotton.

D Y ,whom I met at the tinkuy, went to Pitumarca to check out the warping process after I left Cusco (how I wish I had stayed longer and gone with her!!) and, knowing how interested I am in this, sent me pictures and has kindly allowed me to use them here.

Her picture shows a wool warp in natural colors. You can clearly see how the two yarns take turns encircling the metal rod.

Now here is my piece on the loom…

I was just fumbling around trying to figure it out as I went. It turns out that the winding of the discontinuous warp was not really difficult. What was hard was creating the four selvedges, something which I have not done in years and I have to tell you right now…DON’T EVEN THINK ABOUT DOING IT with cotton!! Creating four selvedges with cotton is horrid!

Just to make clear what this entails, I have made a rough sketch….This is the way I was taught by my teacher in Potosi.

A: You have your loom set up with heddles and shed rod in place.

B: You lash your warps to the two loom bars. I always put a metal rod through the warp ends and lash that to the loom bars.

C:  Weave half to two thirds of the piece.  I have found that the amount woven varies a lot from place to place.

D & E: Turn the loom around so you can start weaving from the other end. You will have to move your shed rod to the other side of the heddles before you do this.

F: Keep weaving with the heddles and shed rod until the space is too small to allow you to continue. Then remove the shed rod and use the heddles to form one shed and needle weave in the other shed. Eventually you will have to remove the heddles and needle weave the last few weft passes.

G: Phew! Finished! Make that a double “phew” . Those last few weft passes are agony!

I had forgotten that the only three times I have ever woven a piece with four selvedges I used hard spun acrylic and wool yarn. These yarns can take the abuse of having the heddles wrenched around when trying to squeeze in weft passes in those tiny spaces and these warps are not so easily pierced and shredded by the needle. Using cotton was a disaster with serious pilling, shredding and breakages. I managed to finish it but it wasn’t pretty. A friend has since told me that over twisted and hard spun wool tends to relax once you take tension off the piece and this better fills out the spaces in the terminal area. Lessons learned.

So, at left is a photo showing only the pretty parts…!! My terminal area is rolled under the loom bar. You can see that I have removed the metal rod and have yarn in its place.

I wove in a pattern using a supplementary weft – a bird which is standing on its head in the picture. The bottom panel has been finished and I have started on the upper one. Of course I didn’t have to make this a four selvedge piece. I could have woven it with fringe at either end. This is perfectly possible with only two panels. With three panels or more you have no choice but to make the center panel/s with four selvedges.

Let’s look at the other more successful four selvedge pieces that I made in the past with sensible hard spun yarns.

My teacher in Potosi is putting in the final wefts in this piece that I wove under her instruction. This was a particularly difficult piece to finish as it had bands of double weave which meant that we had twice the regular number of warps to needle weave. I wove this with the brightly colored overspun acrylic which is the yarn of choice in this area.
The next project with this teacher was a chuspa, again in overspun acrylic, and I stopped weaving the pattern early in order to make the finishing process a bit easier. The horizontal bands show where I started to close the two ends of the weaving. My teacher left me on my own with this one!

My Bolivian teachers told me that the skill of a weaver is evident in how small she can make the terminal area. The challenge is to continue weaving the pick up patterns as long as possible before having to resort to those final rows of plain weave. My terminal area on the chuspa is enormous. I have seen pieces with mind bogglingly small terminal areas. Weavers in Tarabuco, on the other hand, often weave only one side of their chuspa with pick up design and leave the entire other side in plain weave.

The example above was woven with tightly spun Navajo wool warp. I was weaving a supplementary warp technique. It is a looser weave and was a little easier to finish.

Okay, lessons learned….the next discontinuous warp piece I do will be in cotton with two panels and only two selvedges! It will have fringed ends. Then I will get down to spinning some llama fiber or respinning some commercial wool in order to attempt a four-selvedge piece. Maybe I will do three panels with only the center one having four selvedges. I will ease into to the process this way. For now I will stick to plain weave and supplementary weft patterning and slowly build up to do doing warp pick up patterns.

I would love to do a sold color panel with a pick up patterend panel within it as Antonia was doing above.

Here are some more of the pictures that D Y sent me…

The finished two panel warp with natural wool colors.
A gorgeous warp with multi-level panels.
A closer look.

The metal bars around which the warps dovetail are removed at some point leaving a thick piece of yarn in their place.

D Y told me that the yarn lies alongside the metal rods during the warping process so that when the rod is removed the yarn is there to take its place. You can actually see this in the photo in Nilda’s book. I also received a comment on my blog from Janet Willoughby from Ends of the Earth who made a dvd documenting the discontinuous warp process and other weaving in the Cusco area and she also confirmed that this is the way it is done.

I used the umbrella ribs pictured above (yes, I destroyed my umbrella for this) to pull the yarn through as I didn’t know at the time how else to achieve this.  I also used them to help pull the wefts through the sheds in the needle- woven finish. My umbrella wasn’t destroyed in vain. The umbrella ribs have convenient holes on their ends through which you can thread yarn. I just have to taper the ends somehow so that they are more needle-like and then they will be very handy tools. (Thank you to Gladys Miller who told me about using umbrella ribs years ago).

Of course my visit to Cusco area would not have been complete without a trip to the city to visit the CTTC store and museum. The store is a feast of color and gave us yet another opportunity to watch weavers at work at their backstrap looms.

D Y and I spent a day in Cusco together visiting the CTTC, the plaza and the market to buy spindles as well as strolling around the relatively quiet Sunday streets.  The museum at the CTTC is nicely put together and there we got to see the textiles that had been woven as reproductions of the garments worn by the famous Ice Maiden, the young girl whose frozen body was found in the mountains near Arequipa in 1995. It is believed that she was sacrificed and buried on top of Mount Ampato around five hundred years ago. The story of the weavers’ quest to reproduce these textiles was told in detail  at the tinkuy. A tremendous amount of work went into that project and the weavers told of often being reduced to tears as their early attempts to reproduce the structure of the weave failed. They persevered and succeeded and it was amazing to see the results in the museum. There are pictures of these pieces in Nilda’s book.

And now to finish with a few more videos. There probably isn’t anything here that you haven’t already seen in several YouTube videos but I have edited a few snippets together just to give you an idea of the variety of skills we got to see in action during the course of the tinkuy. They are very short as I was concerned about eating up my memory card.

SPINNING AND PLYING…The first group of women is from Patabamba. In the second and third sequences you will see spinners from Chinchero.

MAKING TUBULAR BANDS AND OTHER WOVEN FINISHES AND A SEVEN STRAND BRAIDED ROPE…. The first weaver from Tarabuco is weaving and sewing a plain weave band to the edge of a chuspa. There is no pick up patterning in this band and so she is simply alternating her heddle and shed loop sheds. You can see that one half of the chuspa is decorated with pick up patterns while the other half has simple stripes.

The second weaver is weaving and sewing a patterned tubular band to a finished weaving. She works from a cross which is held on a forked stick where she picks up, twists and diverts the warps to form the designs. She also uses an auxiliary shed stick which you will see in the video. Look at the speed with which she moves the warps!

The third segment shows a lady braiding a rope using seven strands.

DOING PICK UP…three weavers are seen here showing the different ways they pick up their warps to form patterns. The first weaver from Accha Alta picks up warps to form her patterns at the weaving line. She picks with her fingers to help transfer the warps to a stick as she progresses across the warp.

The second weaver from Potolo, Bolivia creates a temporary picking cross at the weaving line. She has a stick under all the black warps and has opened the shed with all the red ones. She picks up the warps using a stick while reading the pattern right at the weaving line.

The third weaver from Tinkipaya, Bolivia works at a permanent cross which is held by cords up beyond the heddles. She picks using her hands while glancing down at the weaving line to read her pattern.

So many different ways with so many beautiful results!

And last of all, here’s ten-year old Juan Miguel weaving next to his grandma. I love this sequence and like to try to imagine the conversation. I imagine grandma is giving her little grandson some tips which he doesn’t seem to be heeding! I love the obvious amusement and pride in her expression and attitude.

In the second sequence, everyone around Juan Miguel is packing up to go into the conference room and I imagine grandma telling Juan to pack up too. Maybe his response is…”Just one more row abuelita, the lady is filming”.  Juan Miguel continues to concentrate and weave away with a quick glance up at me – a true weaver enjoying his work!! At the very end you hear a commanding voice just as I stop filming. That was mom and, at the sound of her voice, Juan Miguel drops everything and hurriedly packs up.

Helena (Telarahna on Weavolution) in Brazil has been weaving yurt band designs following the tutorials here and here and pattern charts here on my blog. She has put the red and blue, as the yurt band weavers do, very nicely together. Helena never ceases to amaze me. English is not her first language but she has searched the net, bought books and used the information on my blog to teach herself to weave. Most of her resources are  in English and she has been a great source of information on indigenous weaving in Brazil for me too.  I hope she will inspire you all!

Part One of this Tinkuy Tale can be seen here.

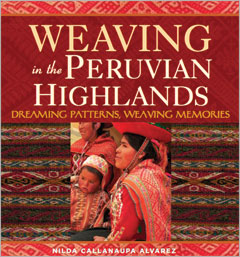
If you have enjoyed reading about the artisans in the Cusco region of Peru in my report on the Tinkuy de Tejedores and are interested in the work of the Centro de Textiles Tradicionales de Cusco, I urge you get a copy of Nilda Callañaupa’s book….

Backstrap Weaving – There is no one “right” way

THERE’S NO ONE “RIGHT” WAY….and A NEW TUTORIAL

I went to visit Angela again (see last week’s post) one morning this week to see how she has been progressing on her wall hanging and give her copies of some of the photos I had taken during the previous visit.

She had several projects going at once and was very pleased as she had just been given an order for 1500 woven greeting cards from her regular Christmas customer. Now she is planning a trip to her hometown of Isoso to organize the other weavers there to help complete the order. She told me that when she took on this task last year she had been able to weave ten cards a day.  Imagine!

The smaller of her two looms is occupied with this gorgeous wall hanging which I watched her warp on my last visit. As I told you last week, the designs that the Guarani women weave in the Moisy technique are nothing like anything you will see anywhere else in Bolivia.

And here is something else she is working on in the Moisy technique…


The band says Centro Cultural Boliviano Americano which is the institute where I taught English for eleven years. The teachers are wearing these around their necks to hold their ID cards. Gee, I wish we had had these when I was there! The band includes a small snake skin design. There are over sixty teachers there and so I imagine that this task is keeping her somewhat occupied as well!

Lettering! I was excited to see that but haven’t taken a good enough photo to get a really detailed look.  I think I will ask her to weave me an alphabet band if she ever has the time!

Another thing about which I am very tickled is that she has put one of her sets of heddles on a stick (see photo above). She had asked me to teach her how to do it on my last visit and now here she is using it. If you watched the pick up video in my last blog post you will see that opening the lower of the three sheds is a little tedious with the loose string heddles that she makes. So now she is using the stick on this lower heddle with the extra hitch as I showed her.

The actual stick that she is using as her heddle stick is a large wooden needle which she uses to pass the weft when she is weaving a four-selvedge piece. When she is closing the final piece of weaving and there is very little room in which to manipulate the sheds, she passes the weft under and over each warp with this needle until there is so little room that she has to use a regular steel needle. I loved this needle and, as she has three, she offered to sell me one.

And then I remembered to ask her about spinning. Yes, of course she knows how to spin cotton and she had a tiny bit of cotton to demonstrate. Just a touch of saliva on the spindle tip got her started. Of course, she is usually seated when she spins. This was just a quick demo. She told me that in Isoso both white and brown cotton is still cultivated (there is not a single boll to be found around Santa Cruz although it used to be a very large and important cotton growing area) and that several women still spin and ply their own cotton and carry their spindles about with them when they are plying.

However, she told me that those who grow the cotton are very careful to keep their hold on the small market and won’t sell it with the seeds. Sounds good to me! Deseeding cotton is not a fun task. I did a bit of that in Ecuador although it was fun there as we sat together in a chatty group and worked.

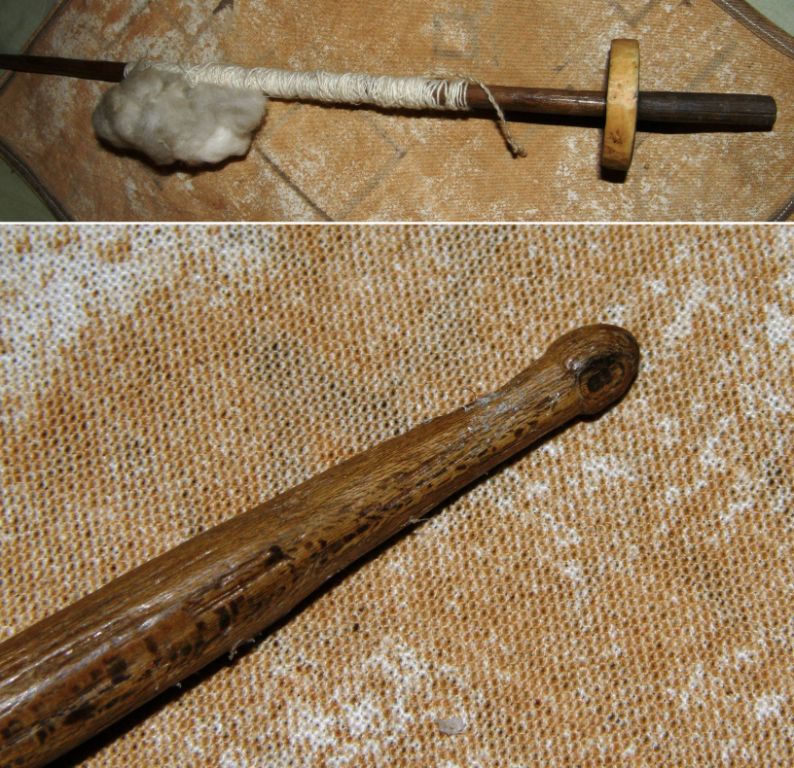
Angela’s whorl is plastic and a spindle that I bought years ago from the store where she used to work has what appears to be a piece of the sole of a shoe as its whorl. However she tells me that in Isoso, clay whorls are used. Guess what I have asked her to bring me from Isoso when she returns next Wednesday.

Above you can see the spindle I bought here in the city. The shaft is essentially the same as that on Angela’s spindle. I love the little knob carved into its end.

I also took home the yellow and black sample pebble weave band that Angela was warping up in the video that I put in last week’s post. She has warped this and set up the heddles quite differently to the way I was taught in Peru and so I can take a closer look at it now at home.

And this is kind of what I am alluding to in the title of this post. There is no one “right” way to do these things and I am constantly astounded by the similarities and differences I see in the way people are setting up their looms and weaving as I travel around. I had never seen anyone make string heddles the way Angela does and she was keen to learn the way I had been taught by my Navajo weaving teacher years ago. There is always room to learn something new and adapt your techniques. I am looking forward to a chance to try Angela’s way of doing pick up. It doesn’t work on the backstrap loom, believe me I tried it!

I wish I could do a tutorial on all the ways I have been shown to make string heddles so that you can try them all and see which way you prefer. Making the string heddles takes practice…string and fingers all over the place and then you just get them done and find that there are some that are woefully short…

I ran into Jamie’s blog last weekend where she had been battling to make string heddles following my video. It’s a good thing that resourceful Jamie came up with her own solution to the problem, made some heddles and wove a pebble weave piece.

Above right you can see the individual string heddles that she made and successfully used on her warp. She says that this way is much faster. Well, I had to tease her about that because I disagree 🙂 but I can definitely see that these are much easier in that you get guaranteed even length heddles. If you are an inkle weaver you probably already have a bunch of these heddles lying around that you can use. If you don’t, Jamie made a nice tutorial on her blog showing you how to make them.

Above left you can see Helena’s (telarahna on Weavolution) solution with her nifty re-useable heddles. She says she needs to clean them after a project as bits of yarn fluff adheres to them but then they are good to go.

So, if you have been trying to make heddles the way I have shown it here and have been getting frustrated, there you have two nice solutions. Try different ways and see which you prefer and, as Jamie so rightly says in her blog, it’s easy “once you get the hang of it”.

Speaking of “getting the hang of ” something, I spent a great part of last weekend trying to get the hang of tubular woven bands and am pleased to say that I succeeded!…eventually.

This is kind of my warm up for the tinkuy (gathering of weavers) which I will be attending in Cusco next week. I signed up for a class on tubular woven bands but, as it is only a morning session I have doubts about whether we will have time to cover the tubular band that I really want to learn.

I used Adele Cahlander’s booklet pictured above. It is still available out there for under ten dollars. I have had this book for at least thirteen years and have never made the tubular bands. I guess I tried at one point as I have scribblings in the margins and have penciled in the colors that I was using but it seems I gave up as I have nothing to show for it.

The book has two versions of the band that I wanted to make. One has a sequence of six steps and the other eight. The problem is that there is not a picture of what the six-step version is supposed to look like. It is in fact a slightly imperfect version of the eight-step one and I spent a lot of time trying to figure out why my six-step band did not look like the bands on the cover of the book. I did not feel encouraged to try the eight-step version if I could not even get the simpler version right but in the end I decided I would just go ahead and try it.

In the pictures above you can see the eight-step version on the left. See how it has two neat diamonds enclosing a center spot. In the six-step version the diamonds are not quite so neat and well defined, they overlap and cross and they actually get progressively messier as you proceed. This is just so you know what to expect if you buy the book and have a go yourselves.

Once I had this sorted I had the crazy urge to edge everything I could get my hands on with this tubular braid! I learned a tubular braid here in Bolivia many years ago but it is a very much simplified version of this one and looks nowhere near as nice.

This is one of those bands that are generally simultaneously woven and sewn to the edge of a textile using the weft as the sewing thread. So this is what I did with my Tarahumara bag and I love it!

I was so excited about having learned how to make these bands that I could have quite easily dug out everything I have woven and edged them all with them . But I resisted and decided to weave a miniature piece where I could put several finishing techniques to use. The Cahlander book also has instructions for crossed warp bands which are very interesting. So I decided to make  a small amulet type of bag, edge it with a tubular band and make a crossed warp band as a strap.

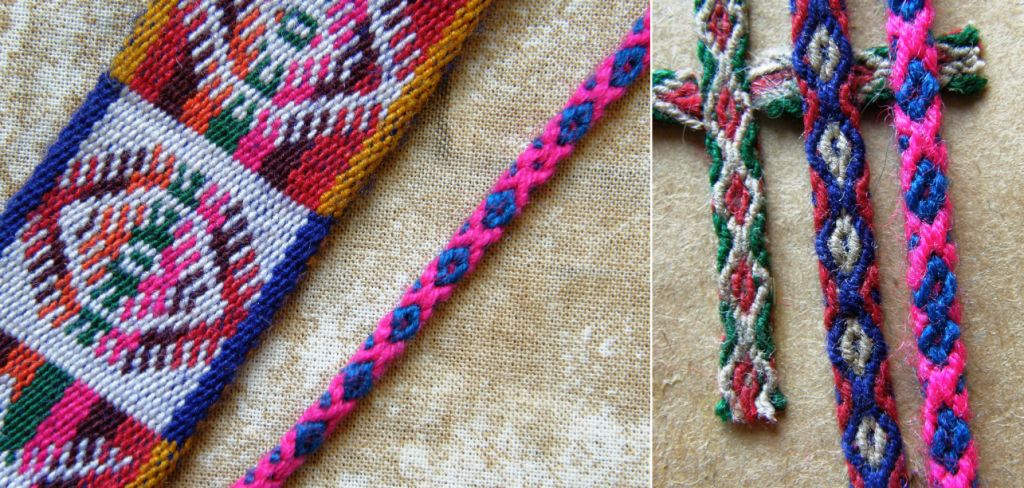
Crossed warp bands are used here in Bolivia as ties on the ends of belts like the one from Potosi seen above left and as chin straps for hats like the two wider bands on the right.

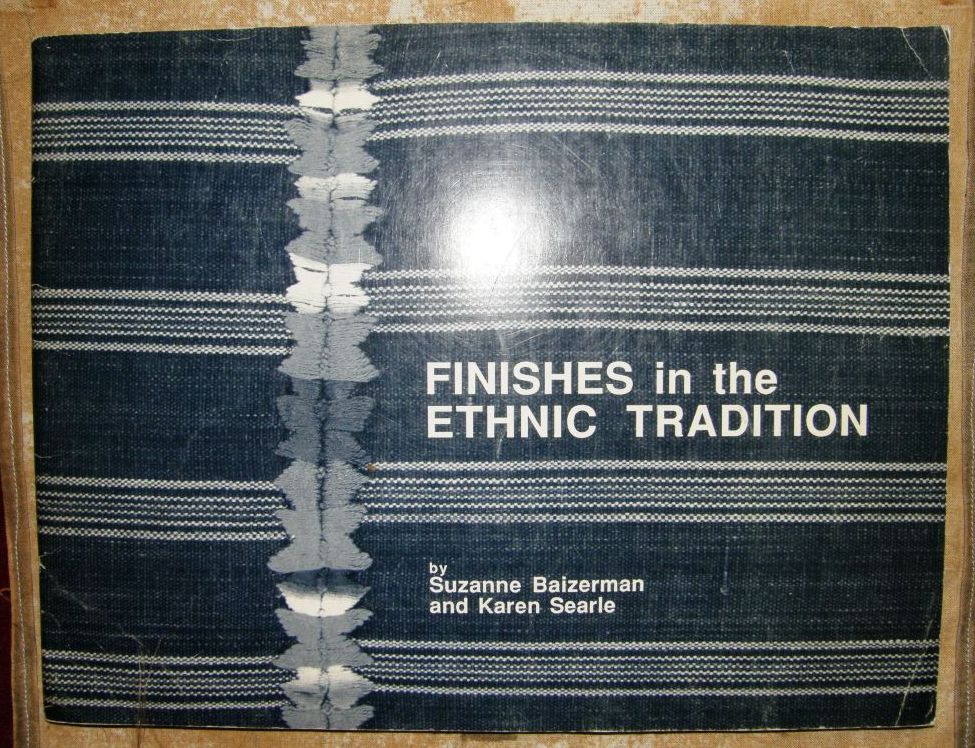
And then I fished out Karen Searle and Suzanne Baizerman’s wonderful work on finishing techniques and found the instructions for Bolivian pompoms I had made years ago to decorate my zampoña.

This book is full of all kinds of useful finishing techniques from around the world

First I had to brush up on the crossed warp techniques.

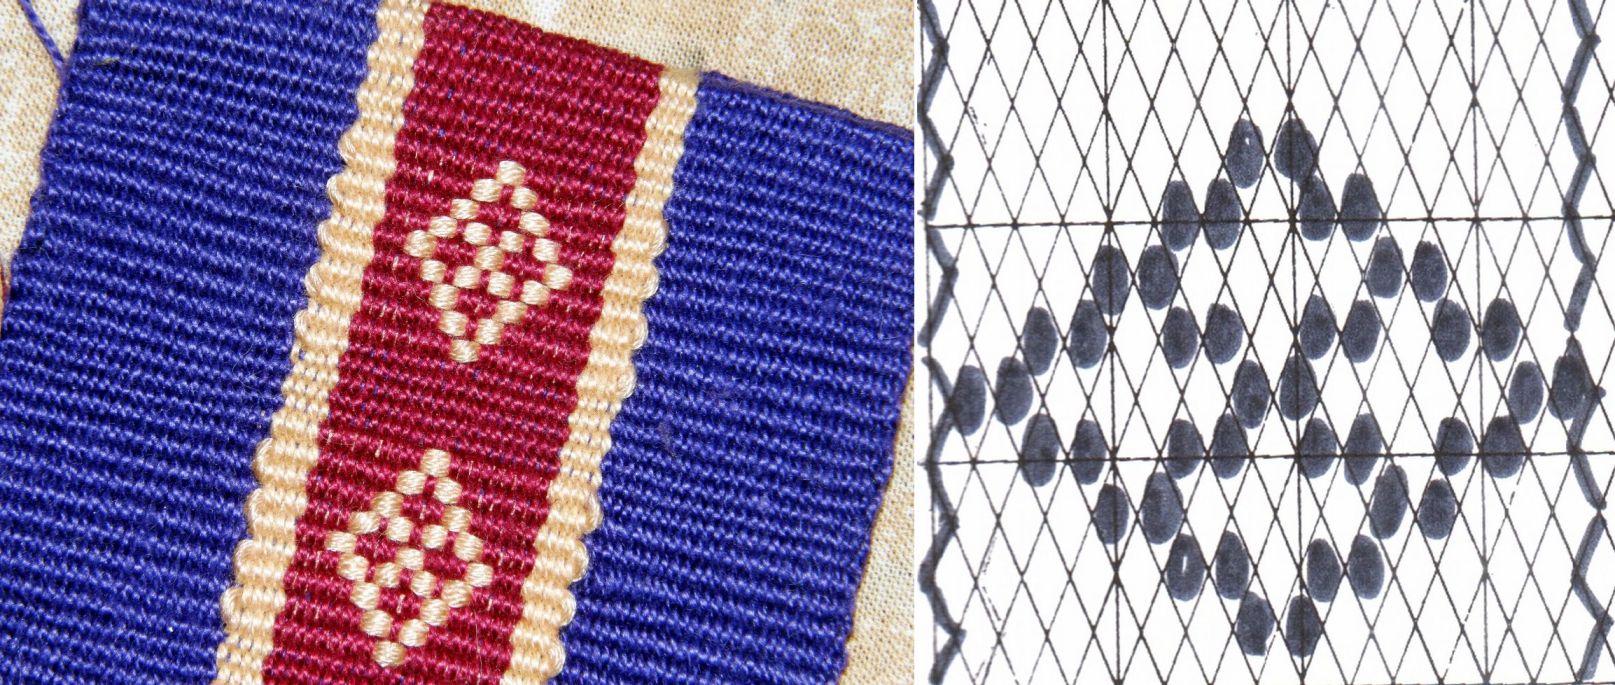
Then I wove the wee bag. I decided to keep it simple and warped up for plain warp faced weave so I could weave in a small motif with a supplementary weft (see the tutorial here).

A very simple design and there’s the pattern chart for you if you would like to use it.

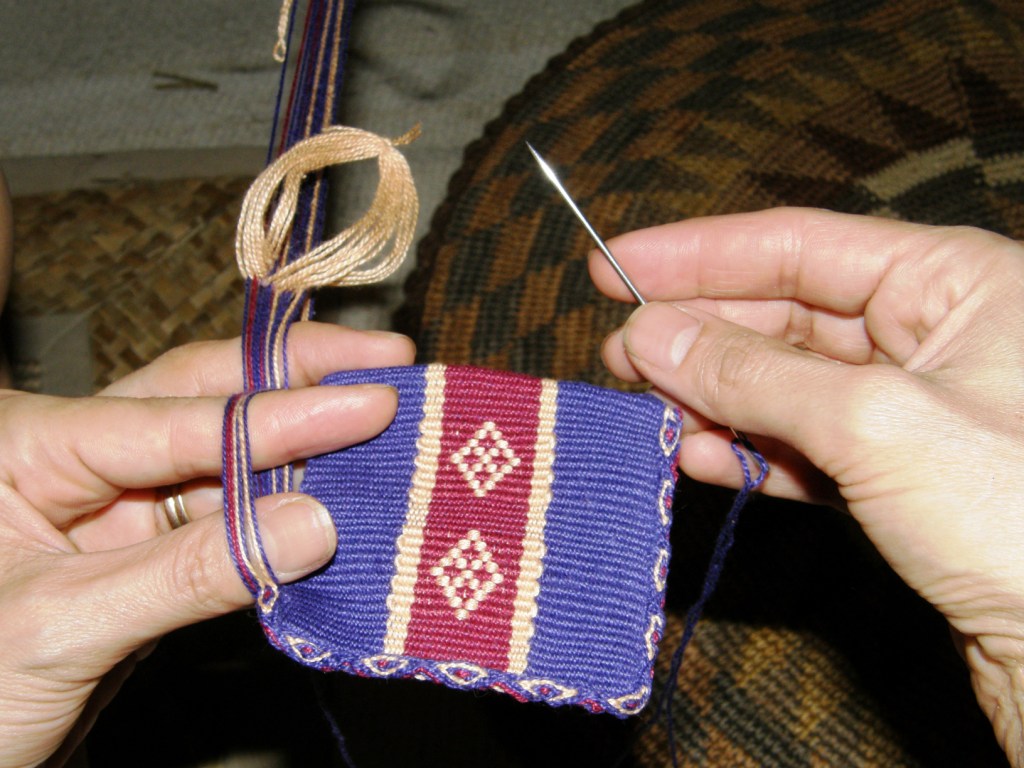
Next I wove and sewed on the tubular band.

And I had fun making and attaching the tiny Bolivian pompoms.

But darn, I didn’t have time to make the crossed warp band for the strap so I have just placed thread there in the photo so you can get the idea. I am thinking of doing cross knit looping as an edging for the top of the bag too. Now I am mad for not thinking about this earlier. I think that these would have made nice gifts to take to the tinkuy- bags covered with little Bolivian techniques (although the suplementary weft motif is not Bolivian).

However I did find time to put together a NEW TUTORIAL. This one is on warp faced weaving with warp substitution which is the technique I used to weave the band with Bedouin designs that I showed you a couple of weeks ago.

Below is the sample band I wove in order to put together a set of instructions for you.

This is a great stepping stone to one-weft double weave.

You will learn the kind of pick up you need to do for one-weft double weave without having to deal with the extra manipulations and steps involved with weaving the doubled layers.

If you are interested in Bedouin weaving Helena (telarahna on Weavolution) gave me a link to an article by Joy Totah Hilden, author of the book on Bedouin weaving from which I got a lot of these designs.

Alaa (weave2 on weavolution and Ravelry) also gave me two great links to follow on this topic here and here.

And for the Spanish-speaking visitors to my blog, I have put up one tutorial so far in Spanish – the one on simple warp floats (although I haven’t found a way to say “simple warp floats” in Spanish. The literal translation sounds ridiculous!). There is a tab on the header photo and side bar.

Para las personas que hablan español he traducido el primero de los tutoriales que puedan ver aqui. De vez en cuando pueden chequear haciendo “click” en la pestaña “tutoriales en español” en la parte de arriba de la pagina. Alli podran ver si he traducido algun otro tutorial mas.

I may have time to squeeze in one more post before I go to Cusco on November 4th, but if you don’t hear from me you will know where I am 🙂

Backstrap Weaving – In pursuit of all things pebbly

A wee milestone to mark today: One year since the publication of my very first weaving article – BACKSTRAP BASICS in WeaveZine. I am hoping that this is the kind of article that will never look “dated”! Backstrap weaving is, afterall, an ancient practice and the project I presented in the article, a backstrap, is not exactly a fashion accessory! I hope that people will continue to find it useful for many years to come.

A million thanks to all those who have used the article and shared pictures of their woven backtraps with me. Some have been content with that one backstrap weaving experience while others have gone on to learn more and have created lovely pick up bands. I have made new online friends through that article and even gotten to travel and meet them. It really is a personal milestone worth marking.

This all comes on the very day that Syne Mitchell, editor of WeaveZine, has announced the details of her exciting new steps onward in the world of publishing.

I have had a couple more articles out since then in the WARP newsletter and Shuttle, Spindle and Dyepot and am working on some things at the moment as deadlines approach which means that this week’s post is a bit shorter than usual. My fingers have been a little bit busier at the keyboard than at the loom these last days but, of course, there was time for weaving (I would go mad if there wasn’t!)

Last weekend I decided to launch into another pebble weave project. You may remember that I showed you some images in a previous post of belts woven by the Tarahumara orRaramuri (he who walks well) people of Mexico…

The belt above in the lower right corner belongs to my friend Annie MacHale. She was wearing it one day at Convergence. The others belong to anthropologist Martha Graham. This was another of those chance meetings. She was at Convergence too and stopped by the Weavolution stand where I was displaying my backstrap woven pieces including some of my pebble weave work. She returned the following day with some of her Tarahumara belts to show me and allowed me to photograph them.

The zig zag design with its adjacent triangles reminded me very much of designs in the weavings of the Guarani people here in lowland Bolivia where I live (pictured at left). The Guarani design is said to represent patterns on snake skins. There are motifs on both the Guarani and Tarahumara pieces that resemble stars. According to an article in National Geographic (November 2008 ) “Each star in the night sky is a Tarahumara Indian whose souls – men have three and women have four, as they are the producers of new life – have all, finally, been extinguished.”

I am, of course, only guessing that the motifs on the Tarahumara weavings are, in fact, meant to be stars. I haven’t been able to turn up much information online about the weavings but am in the process of purchasing an article from the Journal of Anthropological Research. The National Geographic article has a picture of men in ritual costume where you can just catch a glimpse of the woven belts under brightly colored cloth that they also wrap about their waists. I also found images of a women weaving on horizontal wooden frames which they hold on their laps while resting the other end on a rock. There does not appear to be any kind of tensioning device on the loom.

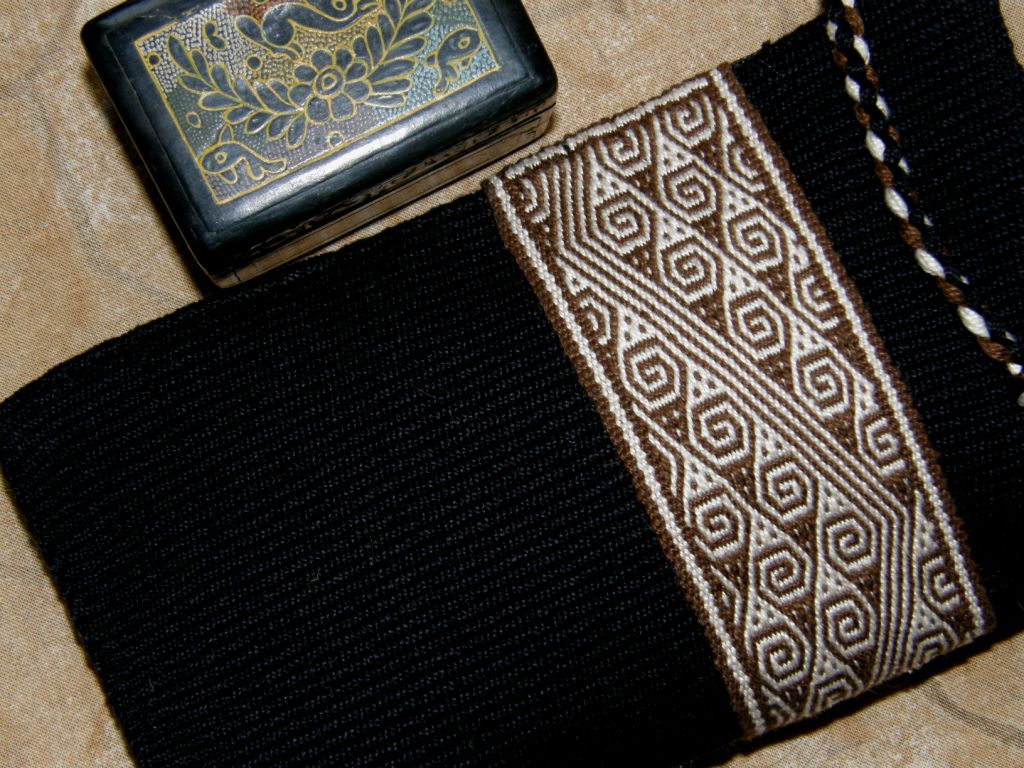
I found an image of a woven  belt that I particularly liked which had been collected in the 1890s and set about charting it. When you  see the design you will understand that after about an hour of this I was not only seeing squares when I shut my eyes from the charting paper but also swirling spirals!

These belts, from what I have seen, are generally 2 – 3 1/2 meters in length but I warped up on one of my shorter warping boards to sample.

Normally, I would weave something like this as a sample and, if I liked it, would then plan a project in which I could incorporate it. Not in this case! Weaving this was hard work!! The spirals went this way and that and I found it impossible to leave the chart and just weave. Just as I got accustomed to weaving spirals in one direction, they would change course so it was a very slow process and I decided that this effort must be put to some use. Fortunately I had a piece of black woven fabric that had been left over from another warp and the band looked pretty good on top of that.

And here is the end result…(as if you hadn’t already guessed! just love sewing in those zippers!)

Having the band separate from the body of the bag allowed me to play around a bit with the placement of the pattern and I decided that it looked nicest off to one side.  I have found other Tarahumara bands with unusual designs so I will get down to charting those so that I can incorporate the designs in  larger projects.

Here’s the long band which started out on Lisa’s four-shaft floor loom and then came home with me to go onto the backstrap loom to be finished. I was hoping to make this into a guitar strap for a friend in Utah. However, it seems that  the standard strap hardware does not come any wider than two inches so I have kind of dropped that idea. Roger didn’t know that he was about to get a guitar strap and he doesn’t read my blog so sshhh! we won’t tell him. Now I am thinking “loom bag”.

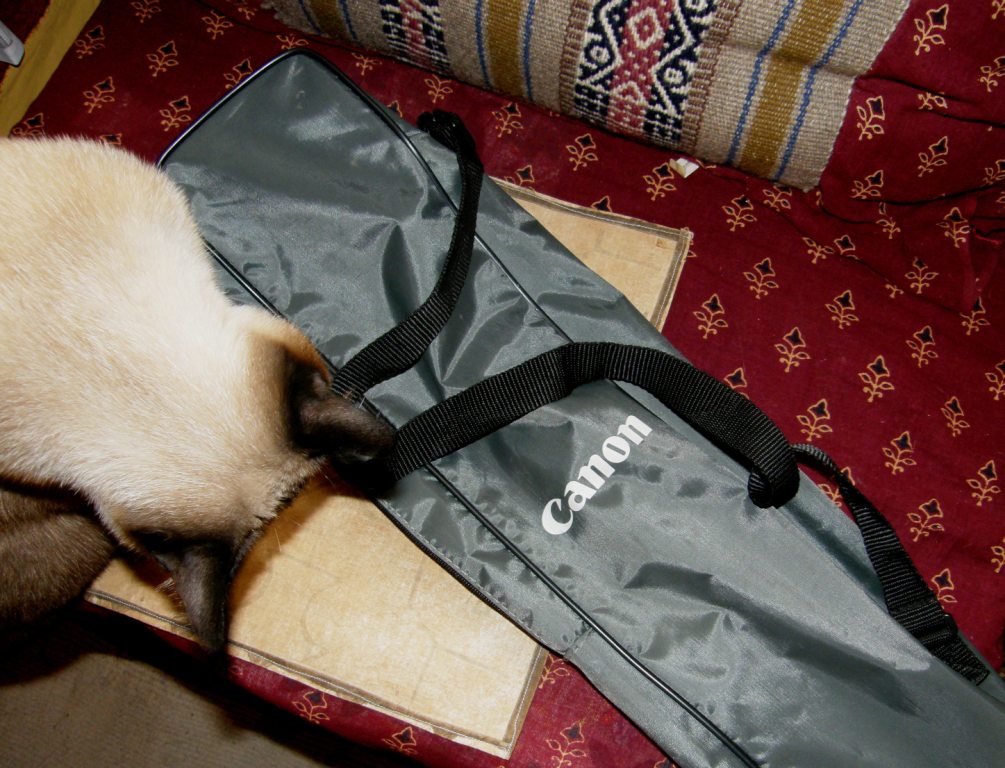
This is my current nifty loom bag, my tripod case. It is perfect with a zippered top and shoulder strap. It is just the right length for a loom and some tool bags and my backstrap. My portable warping board fits in there too but, maybe after all these years, I really need a woven loom bag and I have this one as a model. So I need to weave some plain fabric onto which I will sew my green band or maybe the band could be the sides. I just can’t seem to figure what color fabric would look good with that band.

Ah, so many new projects to get into and I continue to gather up information slowly but surely on past investigations like the woven belts used by the Russian Old Believers. Bits and pieces of information fall into my hands often sparked off by a random comment in a conversation with someone. I love how these things happen!

Here is something  that popped into my inbox the other day…

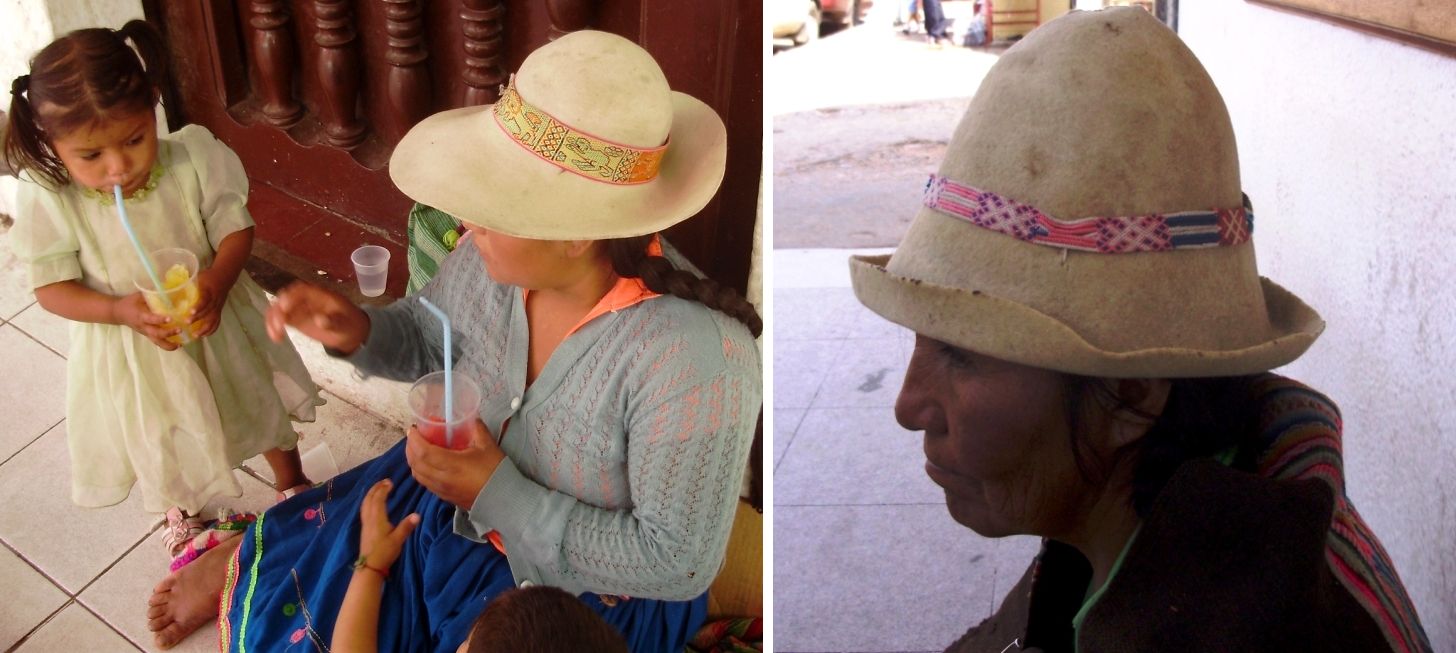
A friend of mine who was out and about snapped a couple of pictures of  ladies in their typical highland felt hats with some interesting hatbands.

You can see that the one at left definitely has a pebbly surface but I strongly suspect that these are factory produced bands. I would so love to talk to this lady and find out more about her hat band. If it is, in fact, factory made I am wondering if there is a growing trend to buying bands now rather than hand weaving them. I had always found the hatbands to be one of the most individual of woven pieces with widths and designs varying greatly.

The other band above has a series of single  woven motifs each separated by braids which is kind of interesting. I can’t get a close enough look to see what kind of weaving it is but it is certainly not the supplementary weft work which is usually used to decorate hat bands here.

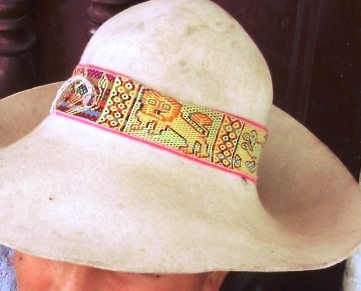
These are the more typical hatbands woven with very fine ground warp thread and decorated with supplementary wefts

More hatbands with their colorful supplementary wefts above. You can see in the top example that the weaver used different weight threads. The red is heavier than the blue and gives better coverage. They key to success in this technique is to find the right weight ratio between your ground warp and main weft and the supplementary weft. Many of these designs are created using very long floats which could be a problem on an item that was destined to be handled a lot. The floats would catch on things. On a hatband this is not such a problem.

You can see that sometimes the supplementary weft creates the motif and other times it is used to fill in the negative space.

A tutorial on this technique (pictured above) can be seen on my blog here.

Here are some pictures from online companions who have been following my tutorials…

Heidai from Norway wove this band in one-weft double weave for the school bell with the school’s name included. She used  four-strand braids to finish it.

Amineko72 in France is  weaving a band from my Andean Pebble Weave book using her inkle loom. If you would like to try this on your inkle loom too, I recommend heading to the Inkle Loom Weavers group on Ravelry where there are a few people working on this together at the moment. Look for the Andean Pebble Weave thread. There is also a larger group working together on another thread called Pick-up using various books to make nice pick-up bands on their inkle looms. They have a very nice helpful community going there.

I just spotted Evelyn Oldroyd’s post on her blog showing one of the large pebble weave designs in my book on her inkle loom. She has made a very interesting warp with a comb design on the edges of the pebble pattern and the colors are gorgeous! I wish I could have posted the picture here but I haven’t gotten her permission yet as I just spied the post. Check it out on her blog.

And now… back to my pebbly pursuits!

Backstrap Weaving-A Bolivian winter of flowers and sunshine and a Guatemalan tree (Part 2)

While people in my online weaving groups are posting pictures of lilies, poppies and butterflies in celebration of the northern summer, here in the southern hemisphere winter is in full swing. The Bolivian President Evo Morales suddenly declared June 21st, the winter solstice, Aymara Day and a national holiday.  Bolivia is now known as Estado Plurinacional de Bolivia rather than La Republica in recognition of the various indigenous groups which it comprises and this has me wondering if we will be having Guarani and Quechua Days as national holidays too.


However, it is hard to believe that we are in the middle of winter here in Santa Cruz, Bolivia where I sit at my laptop in tshirt and shorts wondering whether I should turn on the air conditioner as the suns comes around the building and throws golden rays through my bedroom window.
The highlands are experiencing their dry season and it is COLD. I spent most of one July and August up in Potosi at 4000 meters in a shabby room in a backpacker hostel – bare cement floor, pinned down in my bed under kilos of thick hand woven blankets and still cold! I remember trying to squeeze myself into the thinnest possible package in order to fit under the tiny trickle of hot water that came out of the electric shower head. The lowest possible water pressure was the only way to get  hot water. Washing clothes in the cold water brought tears to my eyes!
At left you see dry, dusty and sparsely vegetated Potosi with its landmark mountain Cerro Rico whose silver deposits sustained the Spanish economy for centuries.

LEFT: Miners keep effigies of the devil, whom they call El Tio, in various places within the mines as they believe that he is the owner of the minerals and needs to be appeased with offerings of cigarettes, coca and alcohol. RIGHT: You can beat the winter chills with a soak in the thermal waters of the volcanic crater lake at Tarapaya. I must confess that this photo was taken on a second visit to Potosi in January when it wasn’t so cold. Rumors that there are whirlpools in the center of the lake which suck people in keep most visitors in the cement pools in the valley below. I kept close to the edge of the lake at all times!
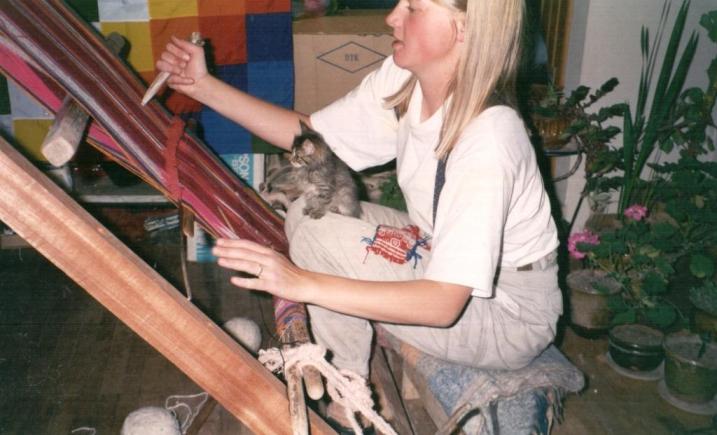
On my first visit to Potosi in 1997, I met Ulla, a Danish girl who was staying on in Potosi after having spent a year there as an exchange student. We learned to weave together with sisters Julia and Hilda. As Ulla didn’t have a patio, she set up an oblique loom in her warm little apartment and was able to weave comfortably there. It certainly beat having to bend over the grond loom. On her lap, apart from the kitten, you can see the “saca” or little woven sample that the weavers use to help them remember how to weave the designs.
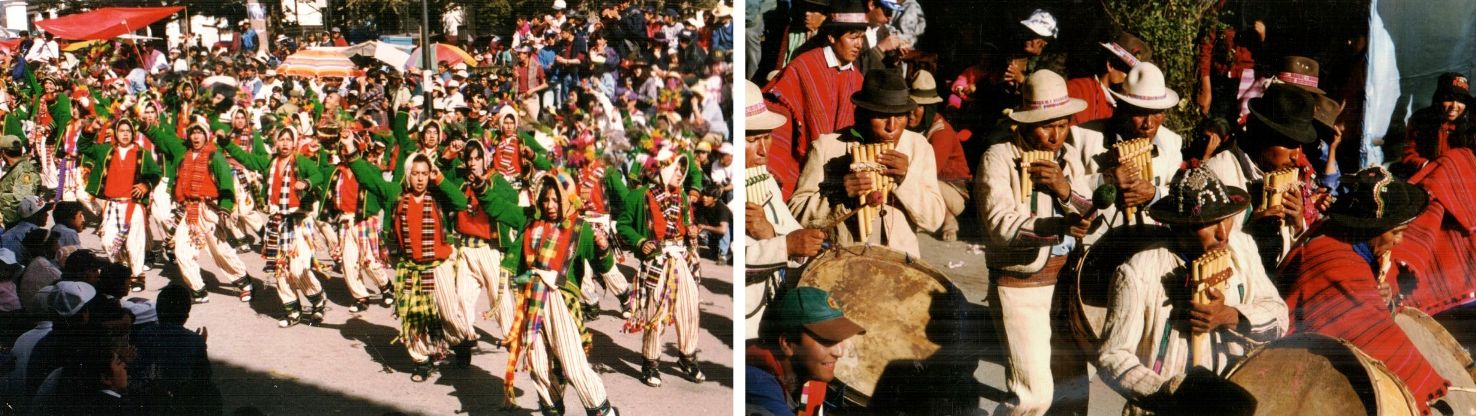
I was fortunate to be in Potosi on August 31st for the Chu’tillos festival which celebrates San Bartolome. Dancers in typical costume from all over the province of Potosi parade in the street on the first day followed by dancers from all over Bolivia on the second. The best part is actually the weeks leading up to the festival as the groups rehearse late at night in the empty streets and laugh and chatter and have a lot of fun while doing so.

Bolivia extends from the dry, dusty highlands to the lush green lowlands known as the “oriente”, where I live. They are like two totally different countries in so many ways. In recognition of that, Bolivia has not one but two national flowers,  the patuju from the oriente (below left) and the kantuta from the highlands (right).

Both contain the colors red, yellow and green, the colors of the Bolivian flag. Santa Cruz abounds in flowers, trees and greenery at all times of year. It just never really feels like winter. Electric cables disappear within mazes of tree branches and it sometimes feels like the city is on the verge of being swallowed by the jungle that lurks on its outskirts.

The “tajibo” and “torobochi” trees that line the streets.
The pattern barely shows on the back of supplementary weft patterned pieces

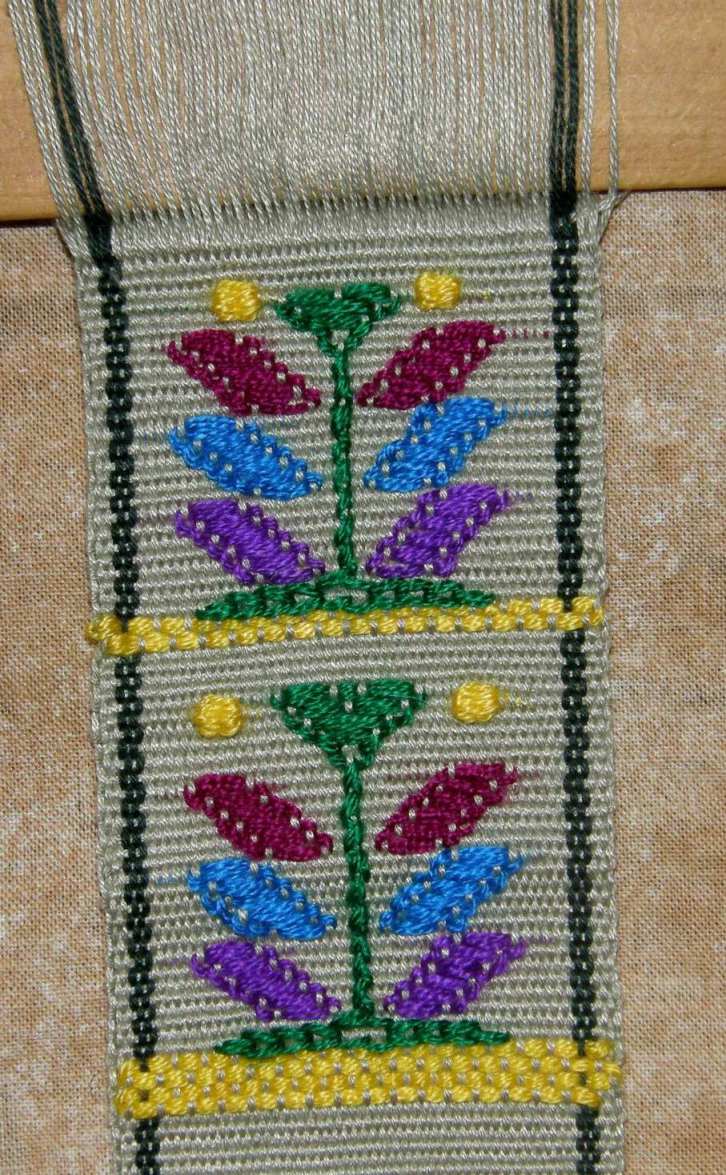
So with all this in mind I have been weaving some sunny tree and flower designs in the single face supplementary weft patterning  technique that I learned in Guatemala in Santa Catarina Palopo.

This is a fun technique with little or no counting involved which allows you to play freely with shapes and colors.

The resulting weaving looks like a piece of embroidered cloth except that the “stitches” only appear on one side of the fabric.

Bookmarks made with Guatemalan tree and sun motifs

Last week when I started the tutorial on this technique, I was using acrylic threads that I had brought back from Guatemala to create bright mutlicolored trees on a green background, pictured at left.

I decided to buy some embroidery floss to work with and it took some time to get just the right thickness to go with my chosen ground weave warp. The ground weave is a 50 wpi cotton and I used 4 strands of embroidery floss to do the patterning.

The 50 wpi warp produces a wonderfully thin cloth just right for bookmarks although the pattern wefts do add some bulk.

So, let’s continue with the tutorial.

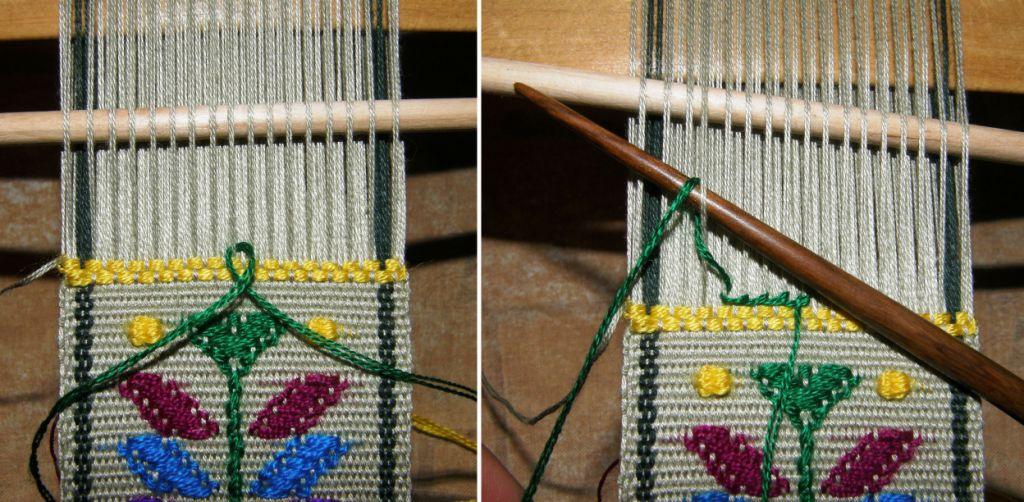
I have done a recap of what I showed you in Part 1 of the tutorial last week on a video. I have used  thick cotton and only a few warps to demonstrate the picking of the warps for the two patterning sheds, the placement of the patterning sticks in the loom, the technique for opening the patterning sheds and the weaving sequence. I don’t recommend using such thick yarn for your own supplementary weft project!

All the colored wefts that form the patterns pass under or wrap around the warps in the two patterning sheds. This green piece has 86 ends between the dark green border stripes.

The base of the little Guatemalan tree is a double horizontal line. STEP ONE: To form this, place a strand of around 40cm/16″ of supplementary weft under the central patterning warp. The two ends on either side should be of equal length. The central warp in my set up just happens to be in patterning shed 2 so I have started in the heddle shed.
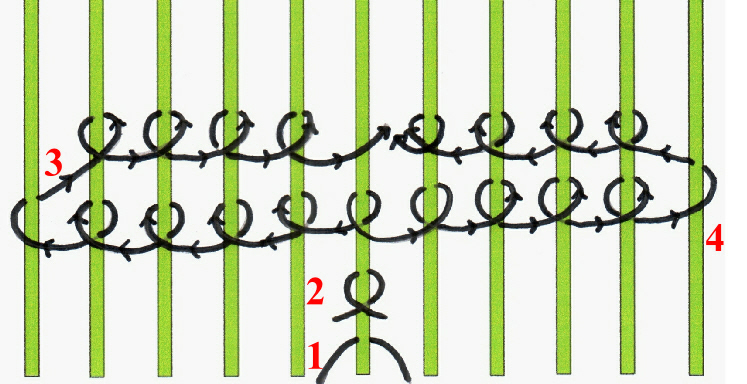
STEP TWO: Cross the ends of the supplementary weft. STEP THREE: Start wrapping the left hand end around the 5 warps to the left of the central warp and return wrapping around 4 warps. The diagram below shows how this is done.
The steps for horizontal wrapping are shown here. The left end of the weft wraps to the left and returns and the right end wraps to the right and returns. These four steps all take place in the same pattern shed. The wefts wrap around four warps on their return journey to the center. STEP 5: Pass the main weft through the complete shed.

Open the next shed, which is, in my case, the shed rod shed and pass the main weft.

Open the heddle shed and raise the patterning warps in patterning shed 2.

Patterning shed 2 contains my central warp.

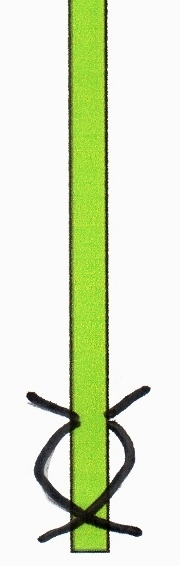
Every time I raise the warps in patterning shed 2, I will wrap my green tree base weft around the central warp to form a stem. The drawing at left shows the very simple vertical wrapping method.

The stem, therefore, is woven only in every second shed.

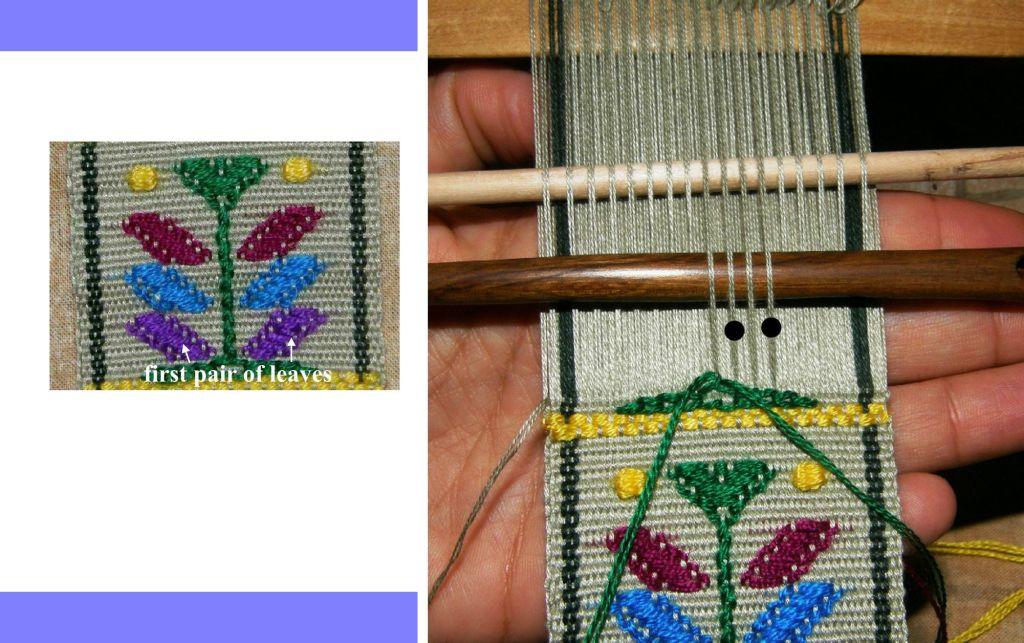
In this shed I will lay in the wefts to form the first pair of leaves.

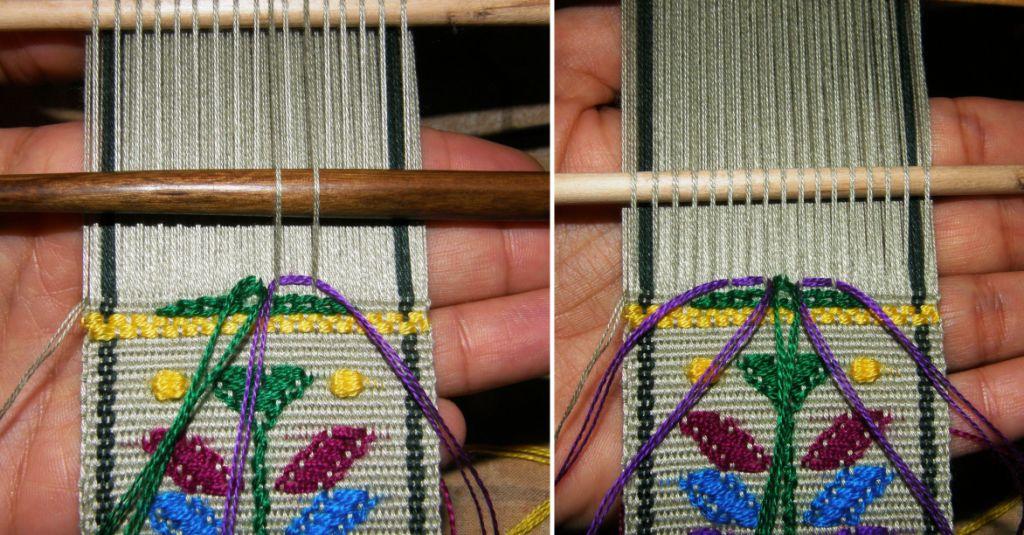
Cut two lengths of weft around 24cm/9 1/2” long for the two leaves.


Starting the second leaf.

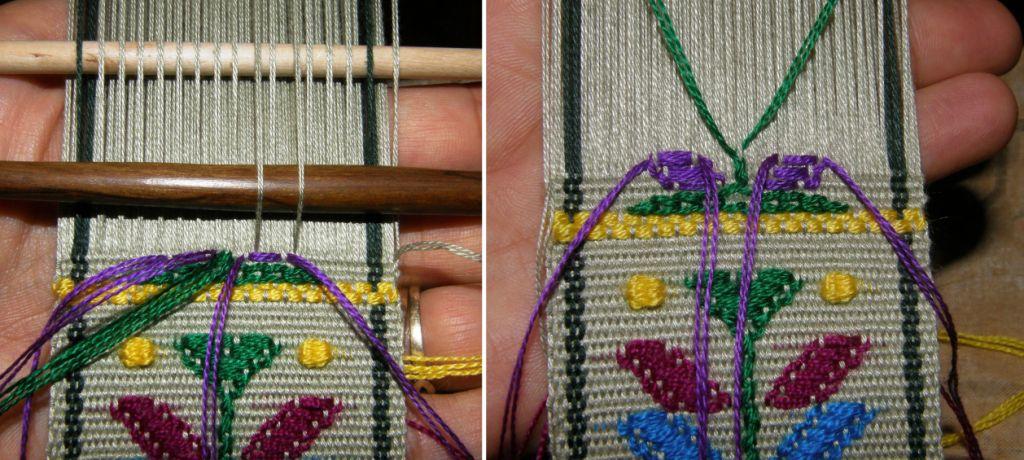
The little Guatemalan tree has three pairs of leaves and the stem continues growing until it eventually widens out into the tree top.

Once you have woven your six leaves, I am sure that it will be very easy for you to see how the tree top is formed.

You are weaving your stem with two strands of weft – one will start traveling to the right and one to the left while filling in the tree top in the same way that you filled in the leaves.

Finally there are the little spots that the Guatemalan weavers like to use to fill in blank spaces between motifs. I used them in my bookmarks as flower buds. You can see two yellow spots in the photo above.


To make a spot, you use two adjacent patterning warps as shown in the drawing above left. Use a strand of weft half the thickness that you would normally use. Around  12cm/5″ length should be plenty. First pass the weft behind the warp on the right as shown. Then join the two ends together and go wrapping them back and forth in the same shed about six times. Pass the ends through the main shed and out the back of the weaving.

The drawing above right shows how to make a diagonal line for a branch.

It is very easy to improvise with this technique. Have fun with it!

#############################################

It seems I was in the mood for autumn colors as I got back to work on the yurt band piece that I started a while ago and really had a good time picking that up again. At first I found it very confusing after having spent so much time on Andean pebble weave lately. Usually one is picking up light warps on a dark background or viceversa  but in this technique you pick up lights for one weft pass and then darks for the next. This is a simple warp float technique ( see this tutorial and this one) that can look a lot like Andean pebble weave but is totally different in structure. I copied the design from an image of a Turkoman yurt band that my friend Lisa had showed me on the net,

The original Turkoman band on the left next to my reproduction. I left out the triangles that run down the sides separating the two main pattern areas.

The other project I worked on this week was finishing off the red and black piece, sewing it up into three coin purses and putting in those dastardly zips! I believe that I am actually getting the hang of these zips now.

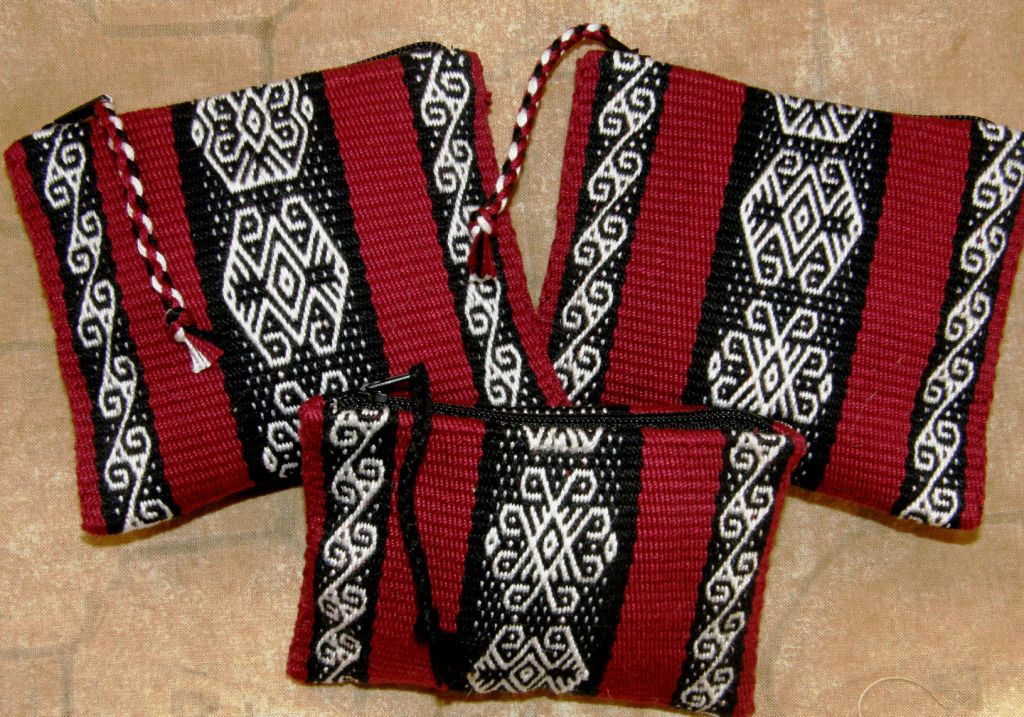
Three coin purses with North and South American motifs in Andean pebble weave.

#####################################################

AND THE BIG NEWS IS…

Today, (July 1st), the appendix to my e-monograph with instructions for weaving Andean pebble weave on a four-shaft loom went out!

Those who have already purchased my monograph will automatically receive it and it will be included in all future downloads of the monograph from now on at no extra cost.

My testers have made some lovely things on their four-shaft looms which I have been showing here on my blog over the last few weeks.

Lisa wove a band with several small motifs. Lydia made a wall hanging with a bird motif of Huancayo and Jennifer is going to turn her piece with the design from one of the Russian Old Believer belts into a backstrap.


########################################################

Finally I would like to show what Helena, who is in the backstrap weaving group at Weavolution, has made  in supplementary weft patterning using various colors and Mexican designs. Beautiful!