Backstrap Weaving – An Early Start on the Finish

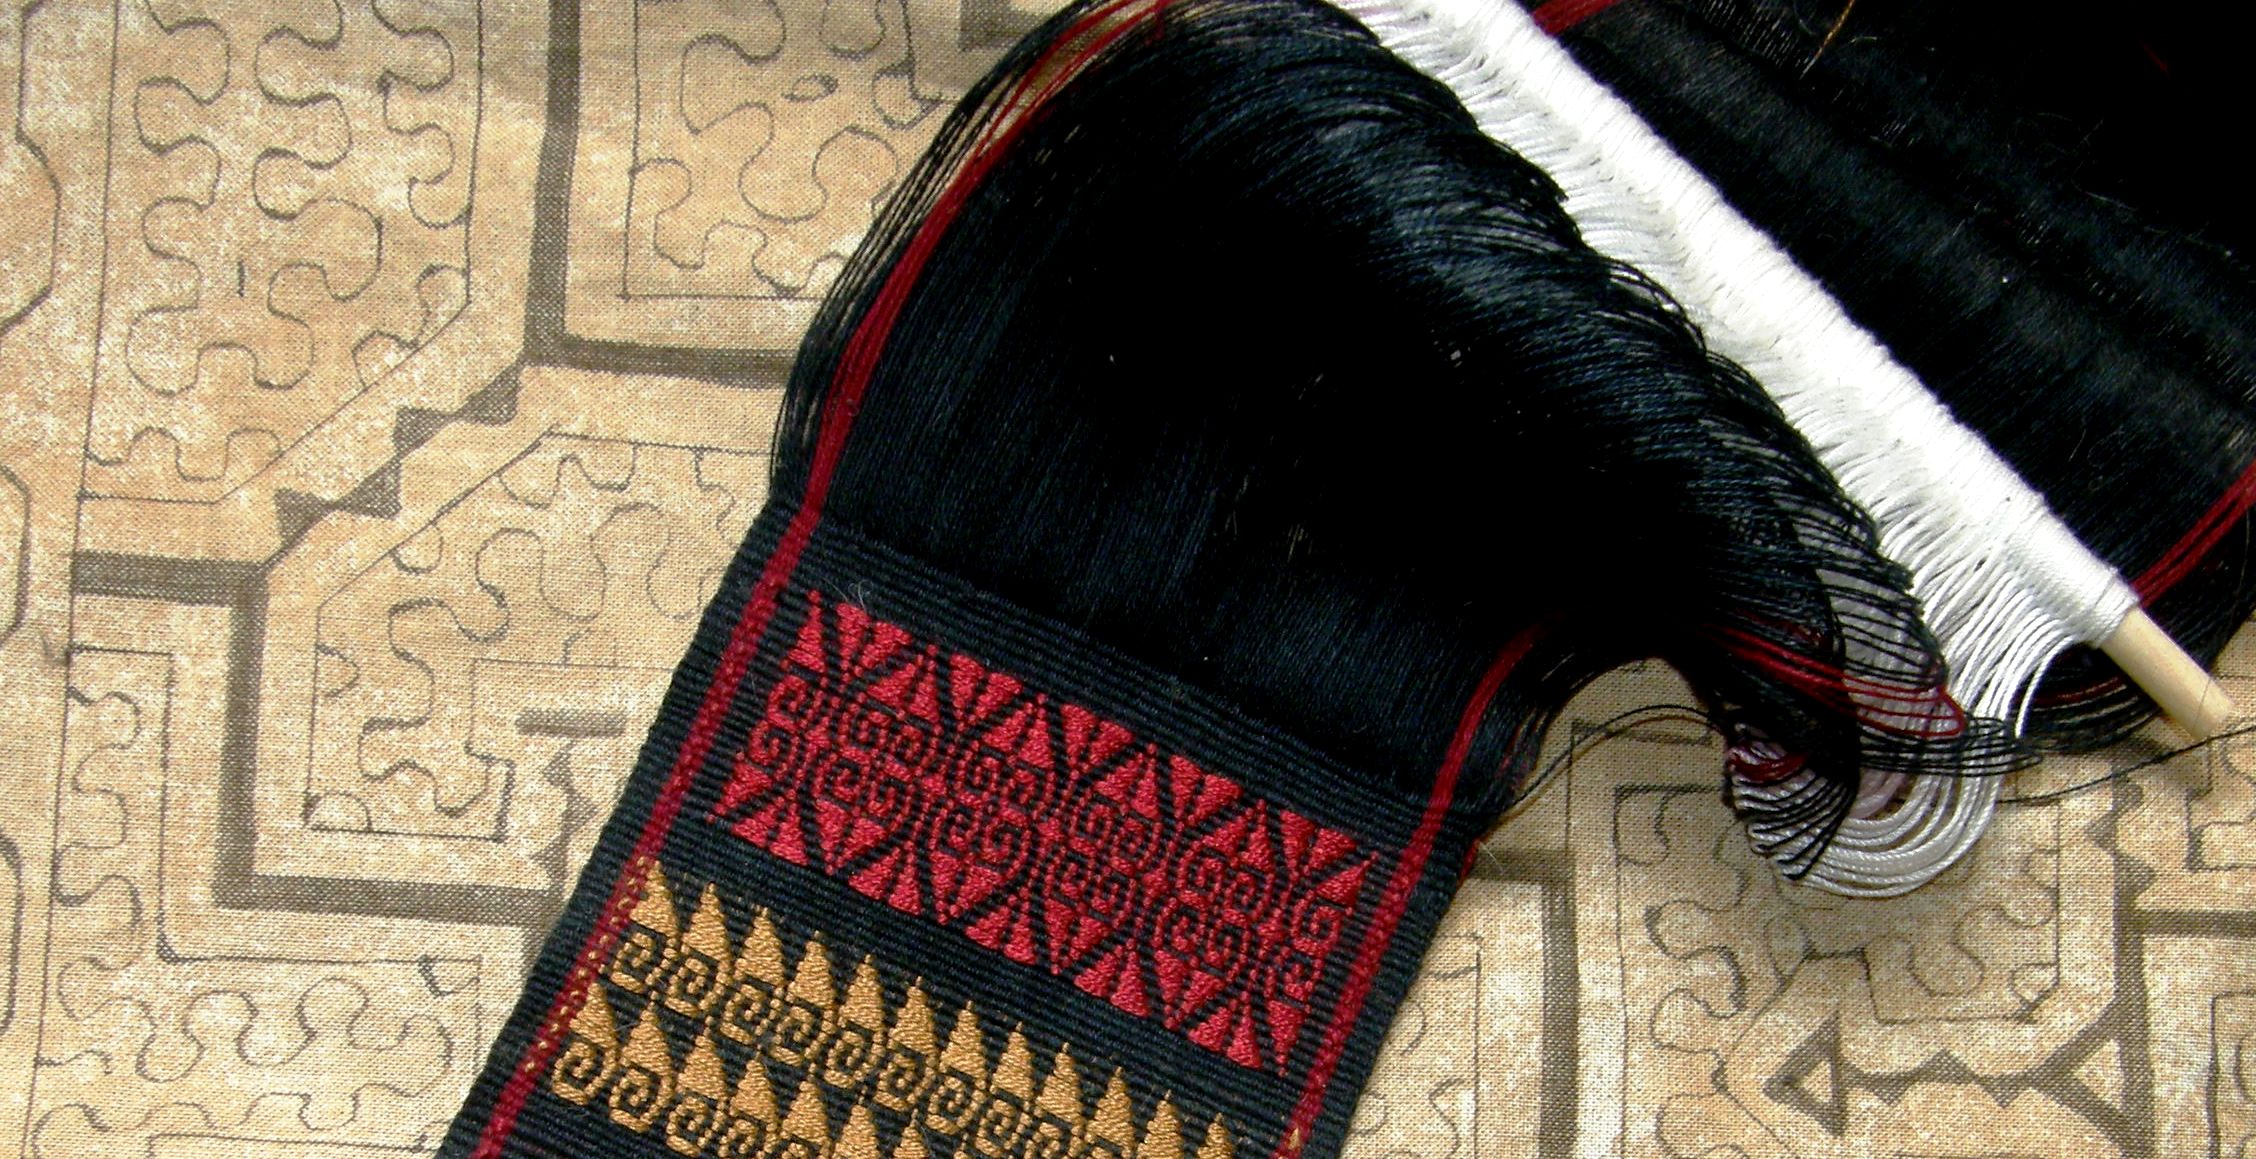
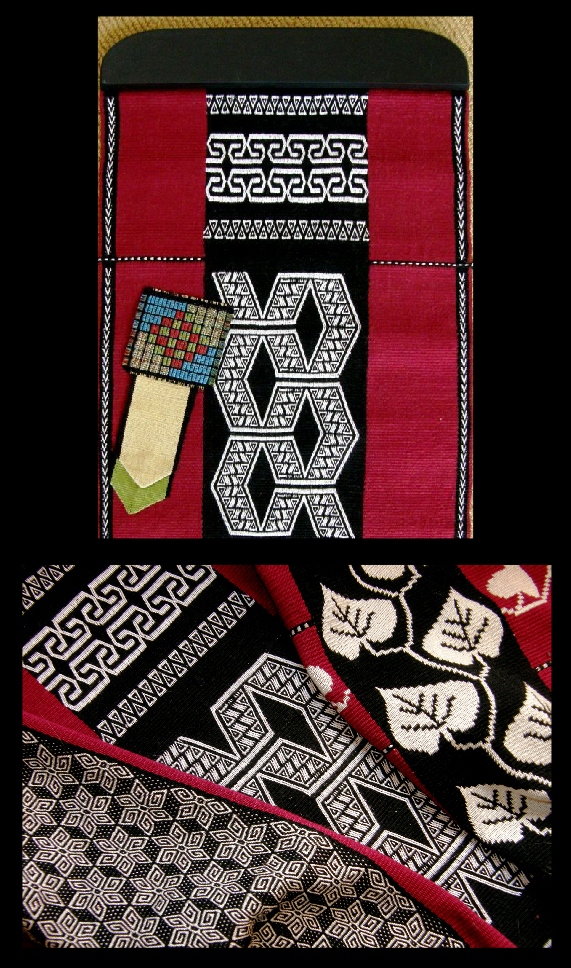
I have two out of three panels for the wall hanging finished. That sounds like a lot but these two panels are just the “quiet companions” for the center black panel which will be heavy with supplementary-weft patterning. So, while it might sound like 66% of the work is done, it isn’t so. Still, it feels good to have this project well under way. I have even wound the warp for the center panel and now need to install 312 heddles and wind 624 ends around the coil rod….it’s worth it!

2 of 3 anels supplementary weft inlayThe black panel will have a lot of supplementary-weft inlay filling both positive and negative space. Then I would like to join the three panels across the top using weft twining and need to plan a design for that which will suit the woven patterns.

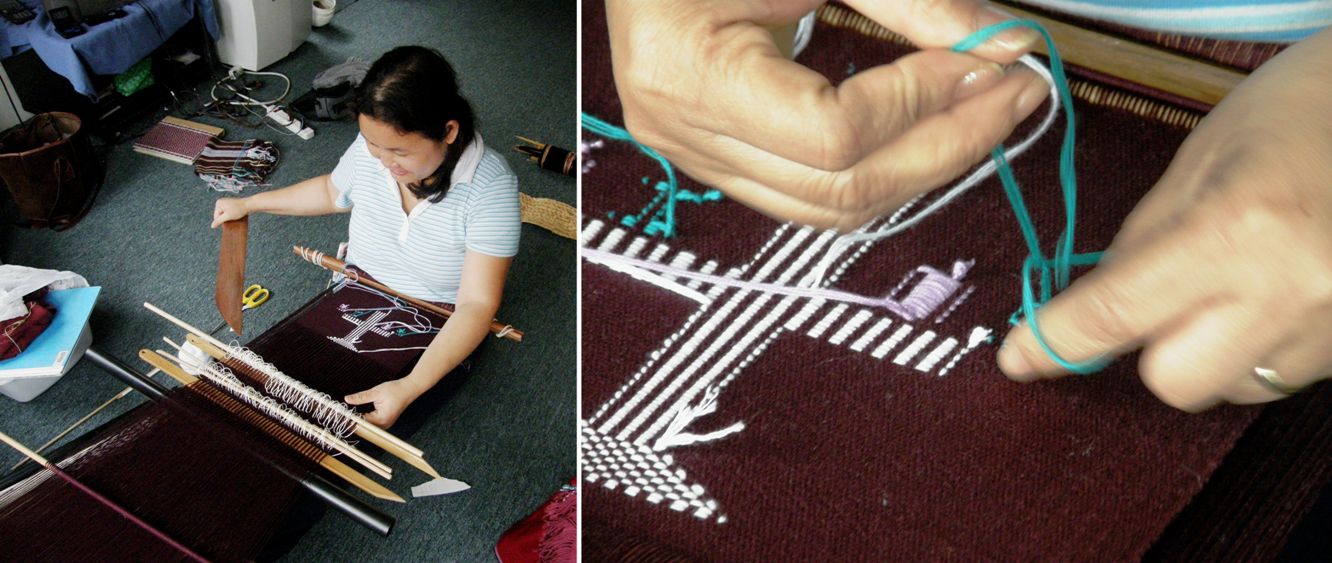
The Montagnard (Vietnamese hilltribe) backstrap weavers with whom I studied in the US use weft twining across the ends of the panels they sew together to make blankets. Two or three panels are sewn together once off the loom and then weft-twined patterns are added to one edge.

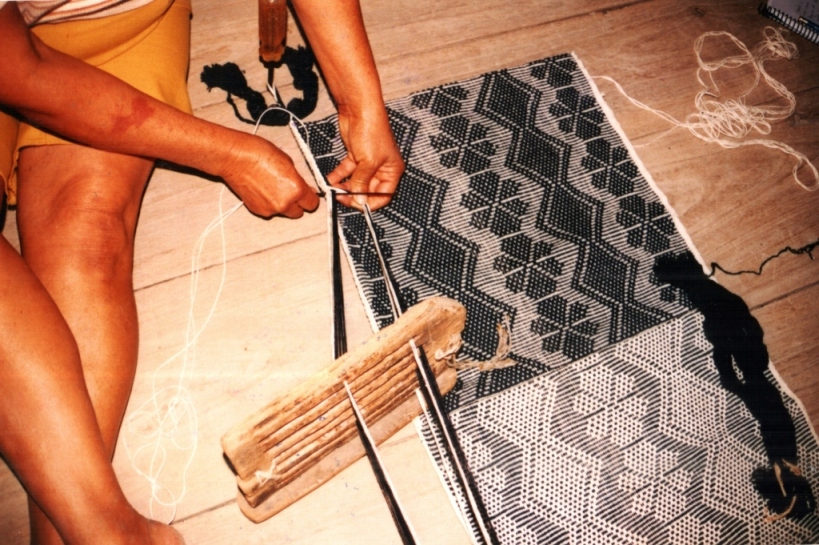
ngach twining set upAbove you can see my teacher Nagch working on a piece draped over a frame. The colored threads that she uses to encircle the hanging warp-ends are held on small cement bobbins that she made.
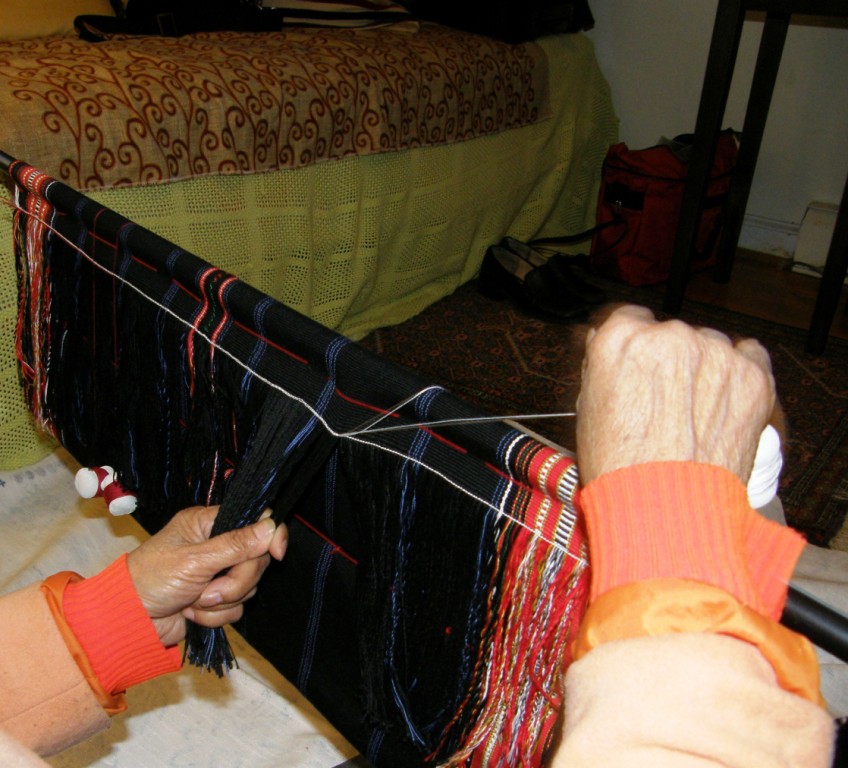
??????????????????????You can see how it is necessary to have the warps-ends under tension while the twining takes place. Nagch pulls the ends tight with one hand while twisting the bobbins with the other.

LEFT: Twining class with Nagch at Betsy's house. At right, Ju shows me how she gathers the warps in groups and sizes them before twining.
LEFT: Twining class with Nagch at Betsy’s house. At right, Ju shows me how she gathers the warps in groups and sizes them before twining.

Here are some the beautiful examples of twining on the edges of Montagnard skirts and blankets made by Nagch and Ju Nie…just the right colors for my project!

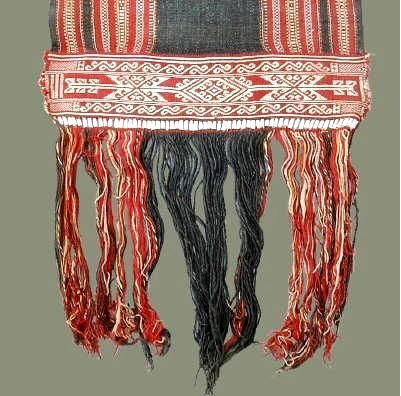
kteh designs

Twining on the bottom of a loin cloth. This image was shared with me by Susan Stem.

I have tried weft twining both on and off the loom and it is far easier for me to control while the pieces are still on the loom with the warp ends under tension. As my wall hanging is nowhere near as wide as the Montagnard blankets and skirts, I will be able to put the three panels on my backstrap loom side by side and twine all the way across them. That will be the only place that the three panels will be connected.

Then I will add some twining to the bottom of each individual panel. Again, it will be fun coming up with a design that works well with those on the panels.

I think they will need the weight of the twining at the bottom to help them hang well. I have always imagined that one of the possible reasons Montagnard weavers add twining and beads to the bottom of the loin cloths they weave is for the added weight. You wouldn’t want the flaps of those loin cloths blowing about in the breeze!

Anyway, that is what I envision for my wall hanging for the time being. Who knows how this plan will be modified along the way.

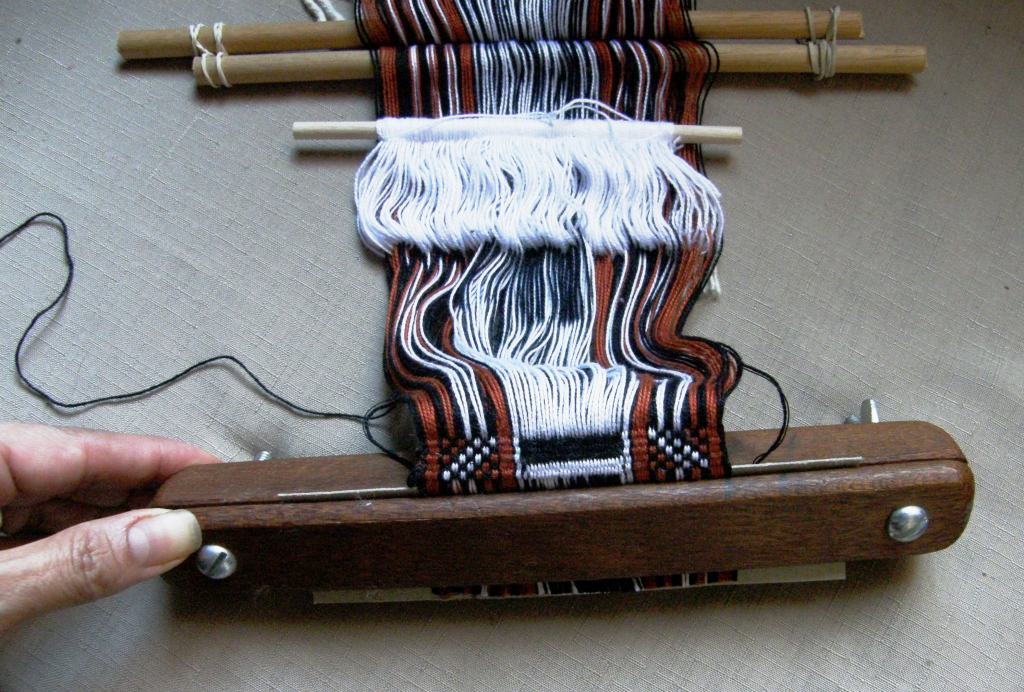
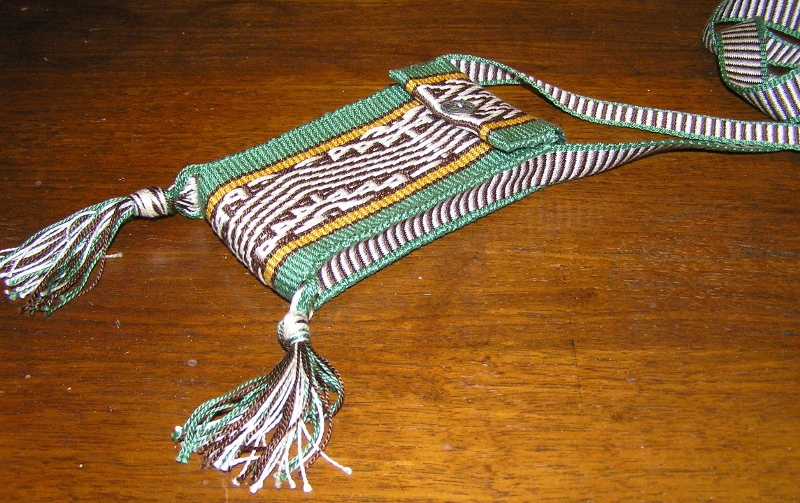
I have other ideas for perhaps edging the piece with a tubular band. So, I took some time off from the wall hanging project and brushed up on a tubular band structure that Marijke van Epen and I studied together when I visited her in the Netherlands last year. We had a picture from a book and were able after a couple of attempts  to figure it out.

As luck would have it, just ten days after I got home from that trip, I went to Peru and came across a weaver from Chahuaytire, in the Cusco region, weaving and sewing one of these very bands to the edges of a large piece of woven cloth. I saw how he had set up the warp and separated the threads into their various heddles and was able to buy a prepared warp from him.

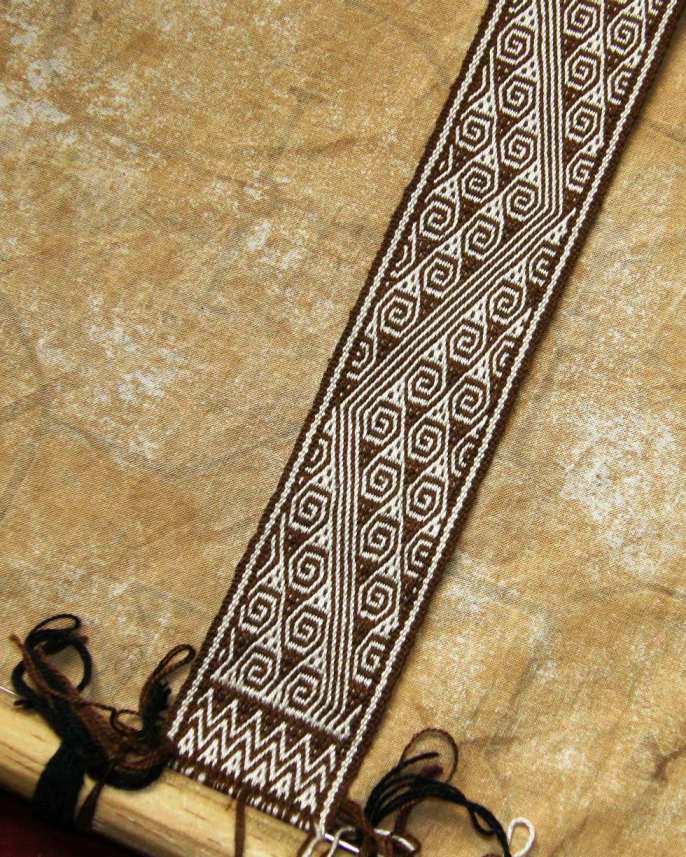
tubular band of Chahuaytire

chahuaytire band three versionsIt was a long loooong warp!

It was designed to go all the way around one of the typical large carrying cloths.

Look at all that luscious handspun thread! The thread was colored with natural dyes and some of the shades of green were very similar. This means that the pattern is a little hard to discern.

The example that Marijke and I had been studying in Nilda Callañaupa’s first book had been done in very bright and distinct colors…six in all counting the border color.

I have made a few examples and have decided that I prefer a quieter version. The minimum number of colors could be as few as two.  That’s just as well as my wall hanging uses only three colors.

I have been sewing them along the edge of a wool band for practice. The one on the right is probably closest color-wise to the one in Nilda’s book. There is one fewer color in my wool version in the center.

Here is the three-color cotton version I made that I would prefer for my project:

three color version of chahuaytire bandHere is one from Chahuaytire that I photographed at the CTTC stall at the Santa Fe International Folk Art Market in July….those colors are so gorgeous!

???????????????????????????????Weft twined bottoms and tops and tubular edgings…it seems that I am more intent on thinking about the finishing touches for this project before I can even get started on the meaty part of it.

And, while on the same break…basically dithering around before getting into what I was really supposed to be doing, that is, winding the warp for the black panel….I decided to continue the three-color Andean Pebble weave sampler. It was coming out so well that I decided that I really needed to use it for something. I will probably sew it onto a woven piece of fabric. Too bad we won’t be able to appreciate the fact that it is reversible that way but it just so happens that all the mistakes are on the back! Never mind, there are some bigger and better projects yet to come using this structure!

???????????????????????????????The flower head motif is the center and I am now working my way backwards repeating the patterns. There you can see the hummingbird sipping from its flower.

Now, if only I were as talented with fabric and sewing needle as Julia….

julias sewing  with pebble weave(2)

julias sewing (1)Julia and Cindy, who are both in the Ravelry group and live on opposite sides of the US, got together at the Mannings to show and share their backstrap weaving work. Cindy lives in the northwest and has woven with me and Julia and I have gotten together a couple of times too. That’s Julia on the left and Cindy on the right.

Julia and Cindy at the ManningsThat’s an impressive display of their collective backstrap weaving work! I see some weft inlay work in there amongst the pebble weave and there must be a bunch of tubular bands there too.

Father Kyriakos in Australia sent me a picture of his Andean pebble weave work. He has both my books and is playing with color changes as well as working on using narrow patterns with reversals and reflections to create wider designs. I would say that he is a natural!

fr kyriakos pebble weaveWell, that’s enough thinking ahead about how my wall hanging will be finished.  It’s time to knuckle down and continue weaving it. I am off to dress up that black warp with its heddles and coil rod….see you next week.
Backstrap Weaving – East and West

IMG_0010EAST AND WEST: THE EASTERN CHAPTER

The problem with not blogging…stuff builds up!! But not as much stuff as you might think this time.

Not blogging indicates that I have  been way too busy having too much fun.

But that also means that I haven’t been able to take as many pictures as I would have liked. Can you believe it? There I am with camera in hand ready to shoot anything that moves but, on this trip, I have been moving too much to keep up.

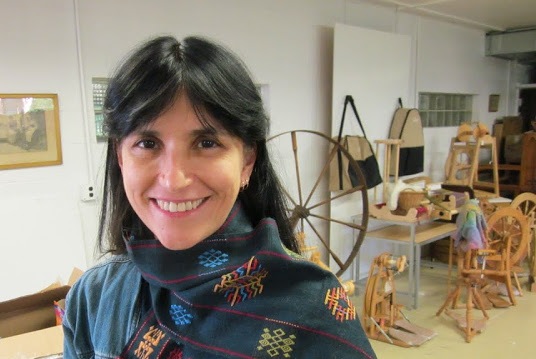
Fortunately people have sent me pictures and allowed me to use theirs. The one above was taken by Marge on a visit. I am modeling the Bhutanese inspired scarf that I wove recently using supplementary wefts to create the patterns.

indonesian textile ikat backstrapEAST AND WEST…the title of this post.

This refers to the fact that I started “back east”, as people in here on the west coast say, in Pennsylvania and then headed over to the west coast, or the “wet” coast, as some people say, to Washington and now, California.

It also refers to the  flow of wonderful eastern textiles that has occurred during this trip into my western hemisphere area of study…textiles from Timor, Laos and Indonesia as well as Central Asia. I have pictures of amazing textiles to show. They have me thinking about tripping off to Asia when next I visit Australia but, every time I think about that, one word pops into my head

 :MEXICO:

and I realize that there is a lifetime’s worth of things yet to be seen on this side of the world.

Above is a picture of a backstrap-woven ikat (yes! that’s ikat) piece from Indonesia, a shoulder scarf from Batuisi, West Sulawesi from friend Judith’s collection. That is just a wee tease and hint of things to come in my next post.

So, here I am in a west coast heat wave on my backstrap weaving friend Janet’s berry farm…

berries

Blueberries! Lovely to be out picking in the cool of the morning. Yes, those are strawberries on top of that pizza. That was brought to the recipe competition by a neighbor who attended the annual Strawberry Jam party that Janet and husband Larry throw. I arrived just in time for that. As you can imagine, there was lots of strawberry based foods and lots of jamming by local musicians. But… more about all that in the next post.

For now, let’s stay EAST.

It all started at the Mannings in Pennsylvania with their annual Spinning Seminar…the 45th one, no less!! I have been to the Mannings in the spring….ah, idyllic!

the-mannings-stream

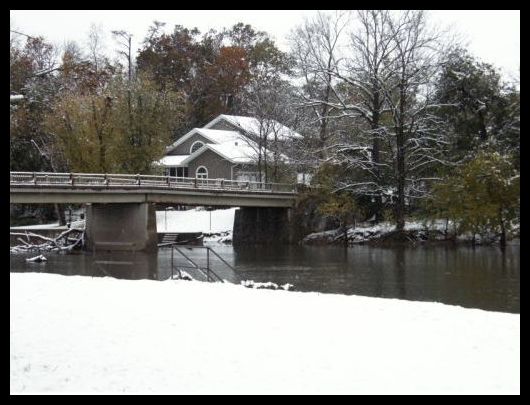
and in the fall….

mannings snow borderedwoven inside and outside on the beautiful lawn down by the creek…

backstrap weaving at The ManningsHere was a first…a chance to set up my backstrap loom in a shady spot down by the creek on a lovely summer’s day and just hang out chatting with people.

Ravelry and Weavolution friends dropped by. I have known Trisha, aka Coolsticks, from the early days of Weavolution back in 2009 and we finally got to meet…

trisha and april at the mannings spinning seminarThere is Trisha on the left with guild buddy April .

Down by the creek things were pretty laid back! I had lots of time to spend with people.

amanda backstrap weaving at the manningsThat’s Amanda having a go at the basics of backstrap loom operation on a narrow band. The tree was adorned with straps and bands and one of my wide projects. Several people could be weaving with warps extended spoke-like from the tree. l liked over-hearing hushed comments while I wove on the big warp…”she isn’t using a chart!” (I smile thinking how I have woven items with that particular motif at least 50 times and goodness knows how many repeats of it there are in this one piece I am currently weaving!) And then there was…”Oh. So, it’s slooooow!”

spinners at the creek mannings spinning seminarSpinners set up camp, grabbing shady spots by the cool water to enjoy a day of spinning and conversation.

Picture by Pinar Miski

And for those who wanted to be in the heart of all the action, there was room to park a whole gaggle of wheels on the shaded front porch of the Mannings store.

Picture by Pinar Miski
One of my sample tables. Picture by Pinar Miski

And, at his point, I am going to hand over to the pictures of Pinar Miski who got to visit almost everybody and took the most wonderful pictures. She has allowed me to share them here. It was late in the day when I finally managed to make my way uphill to the shop to see what was going on. Shadows were long over the outdoor demo area at that hour and the crowds had thinned in the dying day. My pictures didn’t come out well. So, thank you, Pinar for sharing your shots!

Things were anything but laid back up at the store…happy shopping and browsing in yarn paradise. Pinar subtitled her photo album …”and then I died and went to heaven”! I think that says it all.

But, apart from the shopping, there were oodles of things to be touched, explored, and experienced with a wonderful selection of fiber artists and educators both indoors and out. I demand a do-over! I didn’t get a chance to see much of it!! But, I was having a lot of fun chatting with people about my passion…the backstrap loom.

It all starts with fiber. There was this…

Photo by Pinar Miski

Ron Bostek demonstrated sheep shearing. He brought Border Leicester and Cormo sheep to the Seminar.

Picture by Pinar Miski

Here is cotton spinner and teacher (and my fun roommate), Joan Ruane, showing one of many implements with which she spins cotton with ease. For me, who goes to the store to buy cotton for my backstrap weaving, Joan’s comment when she saw me at work at my loom was pretty funny…”oh my god, it’s WORSE than tapestry!”…a comment on the slowness of my weaving. And there she is patiently creating cotton thread!

Pictures by Pinar Miski

Yet another fiber on display ..Mandi Elliott Bird used antique tools to show how to process flax to the point where it can be spun.

Picture by Pinar Miski

Ron Tyler spun wool on a Great Wheel or, Walking Wheel, hoping to encourage people to take the beautiful inherited piece that may be sitting and simply decorating a corner of a room and actually use it.

Picture by Pinar Miski

One of my neighbors creek-side was Carol Ireland with her hip spindle.

Picture by Pinar Miski

This table was a-buzzin’ at day’s end when I went for my walk. It seemed that folks were invited to grab a bit of this and that and create their own batt. That looked like lots of fun. It was Sally Jenkins who demonstrated fiber blending with drum carders.

And boy, does this look like fun. I bet there were people jostling to get a position for this…

Picture by Pinar Miski

I am copying and pasting the description from the Mannings’s newsletter for this one…

Tartan, Tweeds & Waulking the Wool – When wool tweed or blanketing comes off the loom, it is not yet ready to use. The traditional Scottish method of finishing woolen cloth was a social occasion involving a group of neighbors, a large table and probably a little whiskey! The cloth was wetted and passed from hand to hand in a thumping rhythm kept going by suitable songs. We will skip the whiskey at our wool waulking but have lots of songs! Melissa Weaver Dunning will also have a display of her many woven tartans and tweeds.

Apparently it takes three songs to finish the process. Here is inspection time after the first song…

Picture by Pinar Miski

Again, Pinar captures a great moment!

Picture by Pinar Miski

Ah, now here is something a little closer to my heart. Susan Weaver brought along a large selection of tape looms on which she encouraged people to weave. I believe that all the tape looms for sale in the Mannings store went home with new owners that day. Susan and I know each other. She wove with me a while ago and lent me a Mexican band to study from her collection. So, I was eager to connect with her to catch up and return the band.

Picture by Pinar Miski

Mushroom dyeing! Hmmm…wondering what kind of aroma is coming from that pot. This is fascinating. Who knew that you could get such a range of colors from mushrooms and now I know that someone who studies mushrooms is called a mycologist. Susan Hopkins’s interest expanded from mushroom identification to dyeing.

Look at the colors…

Picture by Pinar Miski

Susan’s face says it all…she’s passionate about dyeing with mushrooms. Check out her t-shirt.

Anne Marie Decker was probably not around at the particular moment when Pinar went by. As Pinar says in her album caption, she still doesn’t know what nalbinding is, and neither do I! I have to say that it looks like something I would enjoy.

Picture by Pinar Miski

Indoors, Ron Woolcock gathered spinners to tell them how to keep their wheels happy and there was a display of the stages of silk production and processing. Thanks again, Pinar  for the use of your pictures! Take a look at the entire album here. Pinar’s concise captions are fun.

coil stitch ad pom pomsOne day to rest, and then my Ravelry friend, Julia, came by to weave and sew..

We wove a lot!. I was starting to crash by 4pm with all the things we got into. It’s so much fun putting those finishing touches on things!

We wove tubular bands, sewed and wove tubular bands to edges, sewed coiled stitches, edged and lined pieces with decorative stitches, warped for more bands….phew!

But, rather than get into all that now that she is home, Julia has been practicing the supplementary-weft inlay techniques which I show in tutorials on this blog.

Here are a couple of her projects…

julias supp weft backstrap weaving

The butterfly is one that I charted from an inlay motif on a Huave weaving of Mexico. The pattern on the right is one that I adapted from a motif woven with weft substtution, if I remember correctly, on a textile of Central Asia. I think that it is charted here on my blog. Loving the soothing colors Julia used.

Caroline also used weft inlay techniques to decorate her backstrap. I love how people are taking to this technique!

caroline sacramento supplementary weft inlay backstrap weavingI adapted this particular motif from one on an Indonesian piece of fabric. The backstrap itself is beautifully woven and put together!

More fun weaving with friends that I have met online…Bands got finished with ends braided and all.  Here’s Kathy practicing the four-strand braid on her warp ends.

Kathy braiding backstrap weaving class the mannings

If you have been following my blog, you will know about my recent experiments with weft inlay where I have been filling negative spaces with weft to outline patterns in the ground cloth. Some of the weavers were keen to try this. Another fun thing was combining strands of different colors for the supplementary weft which created interesting effects. Kathy and Bettes put together blues and other jewel-like colors while Nancy put together a very festive, sunny Mexican type of combination.

supp weft class mannings backstrap weaving

Marge came over for a day to weave and try a bit of double weave on her inklette and a touch of intermesh on the backstrap loom…

She brought her band box to show some of the things that she has been weaving on her inkle loom…straps for her musician friends. She plays in a band called Tater Patch and gave me a cd!

Marges bands

marge and her bands backstrap weaving class manningsThere’s the double weave band that we started on the inklette next to a nice knot-work pattern in pebble weave. And then we did a wee bit of intermesh.

Marge went home to finish that double weave sampler with some of her own designs. Guess what instrument she plays in Tater Patch?!

marges double weave bandMeanwhile over in Tom Knisely’s Mannings teaching studio, there was lots of overshot loveliness coming off the looms. Here are a few examples. It is nice to be able to stay on the premises and get to see the weavers working late at night on these pieces.

overshot class manningsSpeaking of Tom, he gave me a wee gifty. You may have seen this before on this blog. Tom showed me this on one of my visits last year and  has now decided that it really needs to belong to me :-)!!

sword

More Ravelry group projects to show…

Cindy tried out the “palma” braid…nice job!

cindyI finally got to meet Cindy on this trip. More about that next time…that’s a “west side story”.

Laura has been practicing pebble weave…

lauraI love the color flips and how she has joined the three single motifs into one long continuous one.

And just to finish and lead into Chapter 2: “West Side Story”, which is largely based on the ANWG conference in Bellingham, Washington followed by fun with my friend Betty at her home in WA and then with my friend Janet in northern CA, let me show you the weavings that I submitted to one of the conference exhibits.

This series is a work in progress. I have many more panels in mind to add. It is entitled “Textile Trails” and each has its little “traily” story to tell. It won the Committee’s Choice Award at the conference. I was thrilled! Thank you to Linda for taking this picture. The beautiful black wooden hangers were made by Terri of Magical Moons. Terri makes the custom swords and other implements that I often show on my blog. By the way, she is making spindles now. They look exquisite.

backstrap weaving Laverne WaddingtonThe fact that I am wearing a black top and a red jacket is just a happy coincidence, I swear!

Here’s the lovely handwoven ribbon…

hangings backstrap weaving Laverne Waddington

See you next week. I am back on top of the blogging now…I hope!

Backstrap Weaving – A Few Unconventional Moves

A Few Unconventional Moves…..If I am to talk about some unconventional things that I did at my backstrap loom this week, I think that I would have to first define what is meant by “conventional” in the world of backstrap weaving….an impossible task!

What is normal, or traditional, or conventional in one backstrap weaving community may not be so on the other side of the world or even within the same region or country.

ju-warpingAdding string heddles as one winds the warp, as Montagnard weaver Ju Nie does, would certainly be  looked upon with wonder as something strange and unusual by backstrap weavers here in Bolivia.

This one of Miguel Andrango's looms pictured here with his granddaughter. You can see the two shed rods above the heddle sticks. The space for the extra shed rod is programmed into the warp by using an extra stake during the warping process.

The way that many backstrap weavers in Ecuador spread the threads in the shed rod shed over two shed rods is something that I have not seen outside of Ecuador. This makes opening the shed rod shed, with its heavy load of wool warps, easier. You can see the two shed rods in Miguel Andrango’s warp above. Unconventional, you might say, but to weavers like Miguel Andrango, this is perfectly normal. And Mr Andrango is up for a bit “unconventionality” in his weaving  too by using motifs that are not traditional in Otavalan weaving.

montagnard_weavers-jpeg-scaled-1000The use of a tiny sweet wooden temple on even the narrowest of warps by the Montagnard backstrap weavers is something else that would seem less than normal to many backstrap weavers on this side of the world.

I have yet to see a circular warp being used by backstrap weavers in Bolivia but it is commonplace in Ecuador as is the use of a foot brace.

Burmese weaver Dar Ku weaves her patterns with supplementary weft while facing the wrong side of the cloth. She kept smiling and telling me how easy it is. I wonder what the Guatemalan weavers with whom I have worked, who also work with supplementary wefts, would think of that!

Dar Ku at work??????????????????????In Ecuador I never saw women weaving wide heavy wool pieces on backstrap looms. This was a task for men. The work is considered too heavy for women, I was told.

In Peru, men do weave at backstrap looms and there are communities where most of the backstrap weaving is in their hands. However, this is the exception rather than the rule.

I wonder what the male Ecuadorian weavers would think coming to Peru and seeing the wide and heavy warps being managed by the female weavers.

I wonder what the belt weavers in Salasaca, who use an enormous meat cleaver type of wooden implement to beat weft into place on their narrow belts with a couple of quick, heavy and powerful slams, would think seeing the way a Bolivian weaver pushes weft firmly into place bit by bit across the wdith of the warp with the tip of a llama bone tool.

3868486832_48e6a1c778All the implements were strange and unusual in my hands the first time. I can’t tell you how many times I forgot to let go of the weft before slamming that meat cleaver tool down….ouch. The llama bone was a bit more subtle but I still ended up with blisters from tightly clenching it and pushing that weft into place with all my strength. My weaving teachers considered tightness of weave to be a very important feature of well made cloth and I was determined to achieve their approval.

On the other hand, it was interesting to watch the gentle tappy-tapping of the beater in Dar Ku’s hands in contrast to the yell of “wham-wham” as Ju Nie showed us how firmly weft should be beaten! Clearly there is no general rule about how firm warp-faced cloth woven on a backstrap loom should feel.

I would love to see my teacher Maxima’s reaction to the set-up and way that weavers in coastal Ecuador add bands to the edges of their fabrics with their wooden rigid heddle that slides from side to sde along the floor to change sheds.

rh edgingSo…conventional? What is conventional in the world of backstrap weaving?

As for my aforementioned “unconventional” moves…let’s just say that I did some things that I haven’t seen backstrap weavers do. Of course, the day will probably come when I see this done somewhere. I have, after all, just scratched the surface of the backstrap weaving world here in Latin America and have had but the slightest glimpse into Montagnard, Burmese and Bhutanese weaving.

I have been finishing off the little supplementary-weft sampler that I have been working on these last couple of weeks. I wanted to get a piece off the loom and make it into a bag to take along on my next trip. I had experimented with positive and negative space. However, there was still a fair amount of warp left and the Guatemalan cotton is precious to me as I am not sure when or if I will be able to get more. I really didn’t want to waste any of it.

So here is what I did…I wove a dowel into the warp so that I could cut off my little bag piece and continue weaving the left over warp.

weaving a dowel into the warpI will probably fold that little flap of cloth over the dowel and tack it down and then lash the dowel to a bigger one. I think that should be sturdy enough to allow me to keep weaving. I have to admit that this wasn’t my idea. There was a discussion in one of the online groups where a floor loom weaver wanted to cut off her first towel on a long warp and then continue weaving. Someone said “weave in a dowel”. I am not sure if what I did is in fact what she meant when she said that but it was enough to have me wanting to try to “weave in a dowel”. I think it will work!

clamp toolI still have this Bedouin patterned embedded double weave piece that I cut and then clamped so that I could continue working on it. It is still there….I feel that that the woven-in dowel is a more secure system. We will see. Now I can compare!

Bedouin design amulet bagHere is the wee pouch that I made with the first part of that warp.

So, the piece of supplementary-weft patterned fabric was cut off the loom. Now to see how best to fold it.

back and front of supp weft pouchThere are the back and front views.  I decided to leave the flap on the front unpatterned as I wanted to edge the whole thing with a tubular band and I thought that things might look a bit too busy with pattern on the flap as well.

design on inside flap backstrap woven pouchHowever, I thought that it would be cute to have a design on the inside when the flap is open.

And that is another place where I got kind of unconventional.

The design on the inside of the flap had to be on the “wrong” face of the fabric to be in the right position once everything was folded. So, I turned the warp over and wove on the other side leaving the heddles on the back side of the fabric.

I wove the flower head pattern that I had been creating in the negative space at the beginning of the piece. I think it gives a nice touch to this little pouch…a nice little surprise when you open it up.

weaving on the back side of the cloth backstrap weavingFolding and then sewing done…it was time to start embellishing.

fron tof pouch with tubular bandThis is all I have done so far… a ñawi awapa tubular band around the outside. The eyes of the tubular band are red on the back side which matches the predominantly red patterning on that side. I will decide what to do with the tassels at the bottom and whether I should add some kind of finish to the bottom edge. Then there is a strap to be made and a button to be found for the front for some sort of closure.

pouch front and back backstrap weavingSo, after that experience with flipping the warp upside down and weaving on the other side so easily, I have a clear idea about what to do with the rest of the warp. I am excited to get started on that. I would like to continue with the supplementary-weft patterning but use both sides of the cloth, flipping back and forth, so that the finished piece has completely different patterns on both faces…or perhaps the same motifs but in completely different color schemes. It would need to become a finished product that would  allow both faces to be visible. This, of course, will be the sampler for a “real” project later.

In between sewing and embellishing, I got something else started on a loom. I am preparing some warps so I can weave at the Spin-In Day at the Mannings in June. Are you coming? I will be weaving away with my warp tied up to a tree. Come and say hello!

two heddle intermesh bhutan designHere is one of the warps I have prepared so far. This one is two-heddle intermesh which will have a large Bhutanese labyrinth design taken from David Barker’s first book (see the RESOURCES page for information on this free download).

pebble weave bandsAnd if you are tired of seeing red and black today, here is a bit of relief.

I have been recycling some of the many sample warps that I use which end up being a chaotic mix of odds and ends of sample motifs.

I unwove some of them and have several more to go. I am  re-weaving them using the same Andean pebble weave motifs along the length of each.

I can also finish this week’s post with some nice pieces in other color combinations too that were sent to me from online friends.

larisa pebble (2)

???????????????????????????????Larisa patterned her piece that is destined to become her backstrap with pebble weave patterns from my first book.

Gmpicket also sent me a picture of a great pouch that she made  using a design influenced by a belt of the Tarahumara people of Mexico that she saw on my blog. I have two Tarahumara patterns charted in my second book but this is not one of them. I love that brown, yellow and green combination.

So, I will be on the road again as from Wednesday next week. .hoping for nice weather and lots of people to chat to about backstrap weaving. If you have backstrap weavings to show me, please bring them along! I probably won’t blog next Thursday but will as soon as I can. I hope to meet lots of online friends at ANWG too and reunite with backstrap weaving friends in Humboldt County California. And then there’s a New Mexico adventure in mind… See you soon!

Backstrap Weaving – Hooked!

I was on the lookout for a simple pattern to continue my sampler of supplementary-weft patterns and the positive/negative space studies that I have been writing about these past two weeks.

After weaving some patterns based on Bolivian hatbands where the weft is used to fill the space surrounding the motif rather than the motif itself, as seen below, I wanted to weave a motif where the same shape appeared as both motif and background

supplementary weft in negative space

hook motif of peru and boliviaSeveral of the classic warp-float designs found in the Peruvian and Bolivian highlands have this very characteristic. In the hook motif pictured at left, it makes no sense to talk about “motif” and “background” as the same hook shape flips and turns and dances along the band changing from red to white and back again. Is it a  series of white hooks on a red background or vice versa or none of the aforementioned?

This was the kind of thing that I wanted to weave with supplementary wefts. So, I set about trying to adapt it to the structure with which I have been working.

As it turns out, it wasn’t that straightforward.

So, I spent a lot of time with paper and pencil and eraser (I still like the old fashioned way). The only way I could get the shapes to interlink well was to make several changes to the basic shape and, even then, the black version of the hook is not exactly the same as the gold one. The gold has an extra warp or two in a couple of places. There was a fair bit of weaving and unweaving involved too. But that’s what “sampling” is all about, right? I had to remind myself about that as I was starting to regret having set myself this challenge as I seemed to be spending more time planning out the design than actually sitting at my loom.

supplementary weft study with hook motifsSo, there it is. Two sets of gold hooks surround and expose black hooks in the ground weave. I am pretty happy with the way it turned out and hope to play a lot more with this hooky shape.

red hooks relected anf flipped in supplementary weft Where to go from there and how to best use all the work I put into figuring out those hooks? Chris Buckley writes about pattern building in traditional textiles in his article on warp-ikat weaving of SE Asia:

A further important feature of ikat, and indeed of most traditional textiles, is that weavers tend to use a narrow repertoire of simple shapes such as dashes, hooks and curls, in a ‘building block’ fashion to create their designs. This approach makes understanding and copying complex designs manageable for the weaver, and aids their transmission from generation to generation. Recognition of this repertoire of basic shapes (which I call primitives) is also of considerable help to the researcher with analyzing and comparing motifs between traditions,…..

So, I took one of my many discarded charts of the hook motif and used it as a “building block” for a new design, joining hooks together, reflecting them and flipping them upside down in the same way that many Andean weavers do with their warp-float motifs. The result is the band of red pattern above the gold in which there are four red hooks with just the hint of a black hook outline around them.

What had brought me, yet again, to Chris Buckley’s interesting article was a romp across the internet in search of hook patterns when my initial attempts at charting something suitable for supplementary-weft patterning were not working out. It is so interesting to see how the hooks show up in all sorts of woven structures and cultures. Of course, certain structures only allow a fairly limited repertoire of shapes to be produced and so, regardless of the culture, it is inevitable that a hook motif will appear if those particular structures are in use. Techniques like ikat,  on the other hand, can be used to produce a limitless variety of shapes and patterns.

hook-motifs-in-southeast-asian-textilesThese pictures by Chris Buckley show hook motifs in various SE Asian warp-ikat textiles.

I have woven the hook motifs used in yurt bands of Central Asia…

??????????????????????I wove the  pieces above and below using the same single-faced warp float structure as the yurt bands. You can see how the basic hook motif can be placed in different ways to create patterns and how dark and light hooks interlink so beautifully…

central asian yurtI have also woven patterns in pebble weave that are loosely based on Central Asian hook motifs…

central-asia-all-stitched-wih-borderas well as in supplementary-weft, double weave and supplementary-warp structures…

central asian motifs in various techniquesI enjoy the challenge of adapting a motif woven in one structure to others.

Chris Buckley writes that Indonesian ikat weavers sometimes copy designs, for example, from imported luxury textiles, particularly those from India…

When copying a design from a foreign source, weavers are likely to re-interpret the copied motif in terms of their own vocabulary of basic shapes rather than produce an exact copy. This is analogous to linguistic borrowing, where the pronunciation of a borrowed word may change from one language to another according to the repertoire of sounds available.

My own particular “weaving vocabulary” comprises the various structures that I am able to produce rather than a group of shapes. I have not dedicated myself completely to a study of the patterns of any one weaving region and so have not developed a vocabulary that is limited to certain shapes.

I love it when I see the Bolivian highland design that I call “rolling river” woven by indigenous weavers in both complementary-warp-float and double weave structures. Perhaps a weaver saw and admired this pattern when she traveled to another region and returned home to interpret it in her own weaving vocabulary which, in this case, happened to be a completely different structure. I can only speculate.

I taught Juan to do pebble weave when I was studying in Salasaca, Ecuador. No one in the area was using this structure. It was part of the deal…I teach pebble weave and they teach me to weave their supplementary-warp patterned traditional belts. Eighteen months later when I returned, Juan showed me his finished pebble weave band. Until then, he had not known how to weave at all. His final motif is a rooster which he took from one of the traditional supplementary-warp belts of Salasaca and interpreted in the only weaving “language” he knew…pebble weave. I thought that was brilliant!

juan pebble weave bandBack to the hooks…I like to think of the following  motifs, that I copied from a belt of the Tarahumara people of Mexico, as a “swirling” hooks…

Tarahumara patternI had not become completely familiar with that swirly hook and made it a part of my vocabulary, as skilled Tarahumara weavers surely would have, before attempting this piece and, as a result, it was very tricky to weave! Just as I got a grip on the swirls going in one direction, they changed to the other direction. It was much easier to weave it using another structure in my weaving vocabulary…double weave…in which it is generally much easier to “read” the cloth. However, I don’t think the pattern is as pretty in double weave….maybe slightly more so in my handspun llama fiber on the right (spearmint leaf and cochineal dye).

5892932496_f074da5701_m

handspun llama cochineal dyed

And so I go playing with structures and shapes. Even as I sit and look at the last red supplementary-weft hook pattern that I wove on my most recent sampler, I see the motif on the very right hand edge and think…hmmm….wouldn’t that look good on a narrow double-weave band?

By the way, many of the patterns I have shown in this post are charted in my second book.

Pebble_Leaves_on_a_Band_medium2Here’s one final bit of lovely hookiness before I go. Julia has been using the tutorials in my second book on creating and charting one’s own or adapted patterns in pebble weave.

Here is one of her bands in which she has adapted a tablet weaving pattern to pebble weave and…yes…there are hooks!

Backstrap Weaving – The Positive and the Negative

I have been working a lot with wool this week as I sew pieces of woven wool bands from Cochabamba into little pouches and dress them up with all kinds of pretty finishing techniques. Some of the finishing stitches are easy but they require precision and doing this work increases my admiration for those who do fine embroidery work. I am using wool for my stitching thread.

Working with wool is wonderful but, above all, working with wool is forgiving! This is one of this fiber’s big positive features for me. It fluffs out happily and fills in tricky spaces. Never mind if you didn’t insert the needle the exact same distance from the edge of the woven piece every single time…wool will forgive this…it has a certain rustic look that forgives even if it doesn’t always hide the imperfections. I love it. I am glad that I have spent years getting my “training” using cotton for these sewing techniques. When you switch to wool, it is all so much easier. My indigenous teachers used acrylic when they taught me these things.

??????????????????????I added multi-color cross knit looping to the top edge of this little pouch and wove a strap. You can just see the grey cross knit looped stitch along the right hand edge.

??????????????????????Here you can see the bottom edges of the two pouches on which I have been working this week. The one on the right has been edged with a tubular band and I added what I am calling a “coil stitch” to the bottom of the other…lots of fun to do albeit rather fiddly. I made a braid with a couple of pom poms for one pouch and added tassels to the other. It was fun weaving the strap. I am using just regular knitting wool for these finishes and am not re-spinning or treating it in any way. It stood up wonderfully well for weaving the straps which were woven on 72-inch circular warps.
Note to the pebble weavers out there: can you see the “blip” in the pattern on the pouch on the right? The weaver used the same pebble shed twice instead of alternating them. You see, even the experts get caught sometimes!

finishing techniques on bolivian pouchesAnd then I played with some decorative joining stitches on some of the left over pieces. That’s where wool really was my friend. It was really hard to count the warps and place the needle accurately on that variegated grey wool. If I had tried this with cotton, it would have looked awful. Wool is Cool! (Too bad that doesn’t really rhyme. But try making it rhyme…it’s kind of funny. Ah, the English language!)

tinkuy 2010Weaving with wool, on the other hand, is a different story. It can be rather unfriendly depending, of course, on your level of expertise in preparing wool for warp-faced weaving.

If not well prepared, each warp will extend its little hairy fingers to grasp its neighbor and protest loudly as you try to open a shed. Worse still, they will start to break. But, you can learn to deal with that stickiness.
Even if you haven’t learned how to prepare the wool to the state of fine, smooth, even, perfection like the spinners in Chinchero do, there  are strategies for dealing with those sticky warps. It can slow things down, and I guess you could call this one of this fiber’s negative aspects. The results, however, are always worth the effort.

Maxima in Cochabamba adds extra twist to her hanspun yarn before winding a warp for a pebble weave band.

Connie's pebble weave1Speaking of beauiful handspun, Janet, Ace, Connie and Gina from the Humboldt backstrap weaving gang got together at Ace’s place in amongst the gorgeous redwoods for a weave-along.

It was a chance to practice among friends and lend a hand to those with a little less experience.

Janet and Connie helped Gina and Ace remember how to make string heddles. Ace is working with his own handspun wool and Gina is using Tahki Cotton Classic to make a backstrap. Janet gave Ace tips on how to handle the wool warp and open the sheds smoothly.

Janet and Connie worked on pebble weave projects. Janet, of course, is using her handspun while Connie used 8/2 tencel to make the lanyard for her name tag for CNCH (pictured at left). I imagine that must feel gorgeously silky in that tencel.

And there they were on Ace’s balcony with their warps attached to the railing calling me to join them from Bolivia via Skype! How cool is that?

Ace and ConnieAbove you can see Ace with his wool warp and freshly installed heddles next to Connie’s latest tencel warp…yummy colors!

Jnet weaving her handspun wool1Janet gets to work on her wool warp while Gina installs heddles on her cotton one. I love that this group is finding time to get together and do this and support each other and I hope that they Skype me every time!

Back at my own loom, I have been sampling supplementary-weft inlay while playing with positive and negative spaces. I showed you in the last blog post how I want to try covering the negative space on a band with supplementary wefts leaving the ground weave exposed to form the motif. So, I have been sampling away and have made some useful discoveries about the changes in weaving width that happen when you do that. This will be something to keep in mind when planning bigger projects later. I have to say that I am loving the way this looks! I am using the 60/2 silk on the Guatemalan cotton warp.

suppleemntary weft in negative spaceI think I will still try to sew this in to something despite the width inconsistencies. I will just keep on sampling and see when I am done what can be made with it. I am keen on dressing it up as I did the wool pouches but I will use cotton instead of wool for that.

positive and negative space inlay in supplementary weft inlay??????????????????????I continued and added a bit of “positive” pattern just to compare.

Now I would like to adapt some Andean warp patterns where both the positive and negative spaces form the same motif and weave those with supplementary wefts.

There are certainly many of those to choose from and I am sure that I can find many on textiles from other cultures too. If you are not sure what I mean, take a look at the motif at left which is from the edge of a belt woven and used by Russian Old Believers.

I will leave you this week with a couple of pebble weave projects.

Larisa has been writing to me via my Andean Pebble Weave Facebook page and sent me pictures of her first pebble weave band using some of the 4 rev patterns from my first book on a wider band. I like the way the hearts look with the border around them. She is going to use this band as the tie for her end loom bar.

larisa pebble weaveAnd Julia continues to adapt traditional Japanese embroidery patterns to pebble weave. She uses the spotted charting system that I show in my second book to sketch the patterns ready to be woven using the pebble weave structure. Inspiring! Background, pattern, positive and negative spaces merge into a spectacular pattern.

julia pebble weave adaptation japanese embroidery

See you next week….