Backstrap Weaving – A Surprising Encounter

A SURPRISING ENCOUNTER
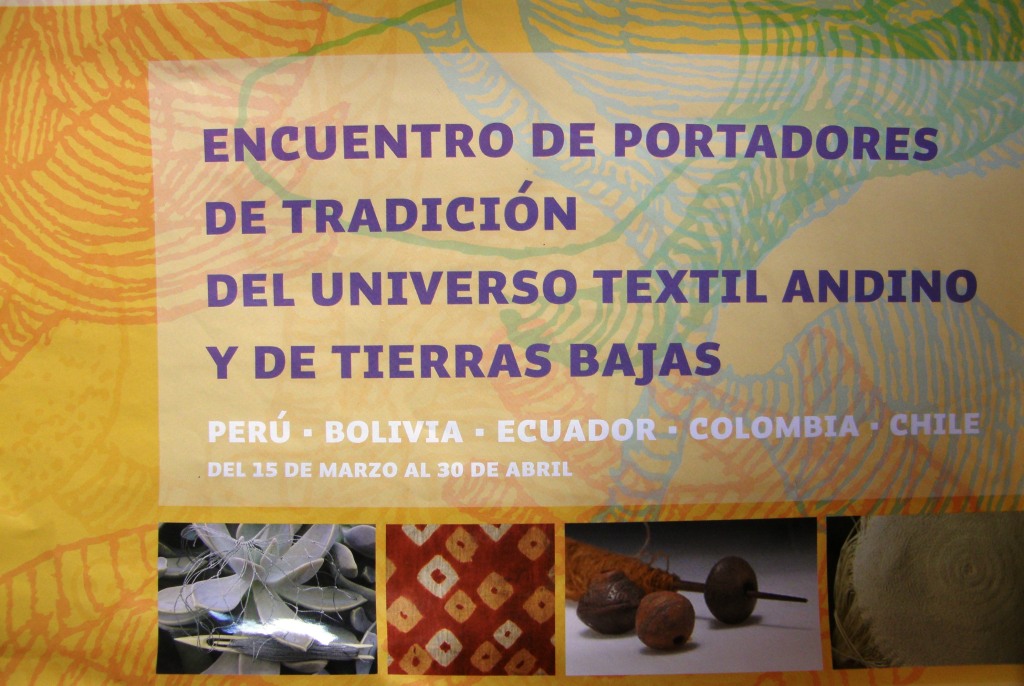
I have been kept from my loom at home this week. Normally this would have left me very agitated but it has been for a very good reason.

I spent my Friday goof-off day and all weekend working on a slide presentation and then woke up on Monday morning to my boyfriend reading to me from the newspaper over breakfast about an Encuentro de Tejedores (gathering of weavers) that was going to happen right here in my home Santa Cruz.

Oh darn I thought with a sinking heart, I bet it’s on when I am due to be away in the US. So, when does it start? I asked, dreading what would surely be a disappointing response.

TOMORROW!

was the shocking reply. Maybe we just missed all the previous announcements. I really had no idea and so there was a mad rush to gather information and make sure that I could be a part of it. The conference is officially entitled…

ENCUENTRO DE PORTADORES DE TRADICION DEL UNIVERSO TEXTIL ANDINO Y DE TIERRAS BAJAS

(A meeting of the bearers of the traditions of the Andean and lowland textile universe)

which brought weavers, artisans, anthropologists and academics from Colombia, Ecuador, Peru, Argentina and other parts of Bolivia to my lowland home. Now this sounds like an enormous gathering but it wasn’t really. Only two to four people came from each place which has made it an extremely intimate experience with plenty of space and time to spend chatting with and getting to know people.

Only a handful of outsiders such as myself have attended which makes me feel even more privileged but at the same time alarmed and saddened although not totally surprised by the apparent lack of local interest in this event. Perhaps it wasn’t widely advertised in order to preserve this intimacy and make it more possible for the weavers themselves to interact more closely. Either way I feel extremely blessed to have been able to participate.
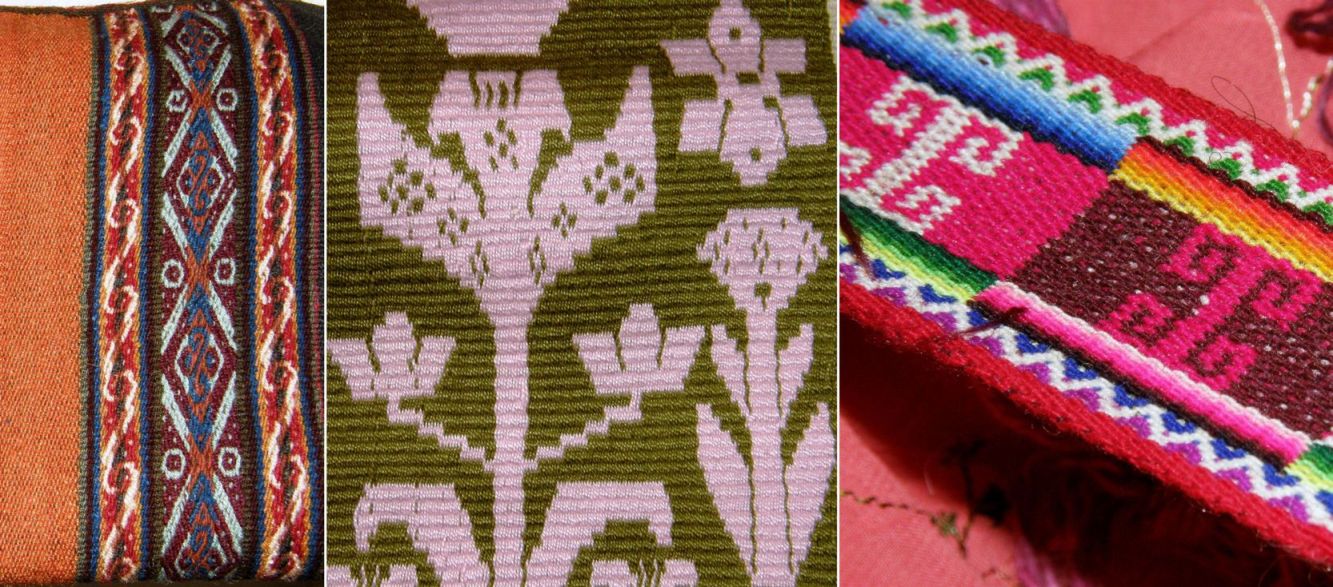
 

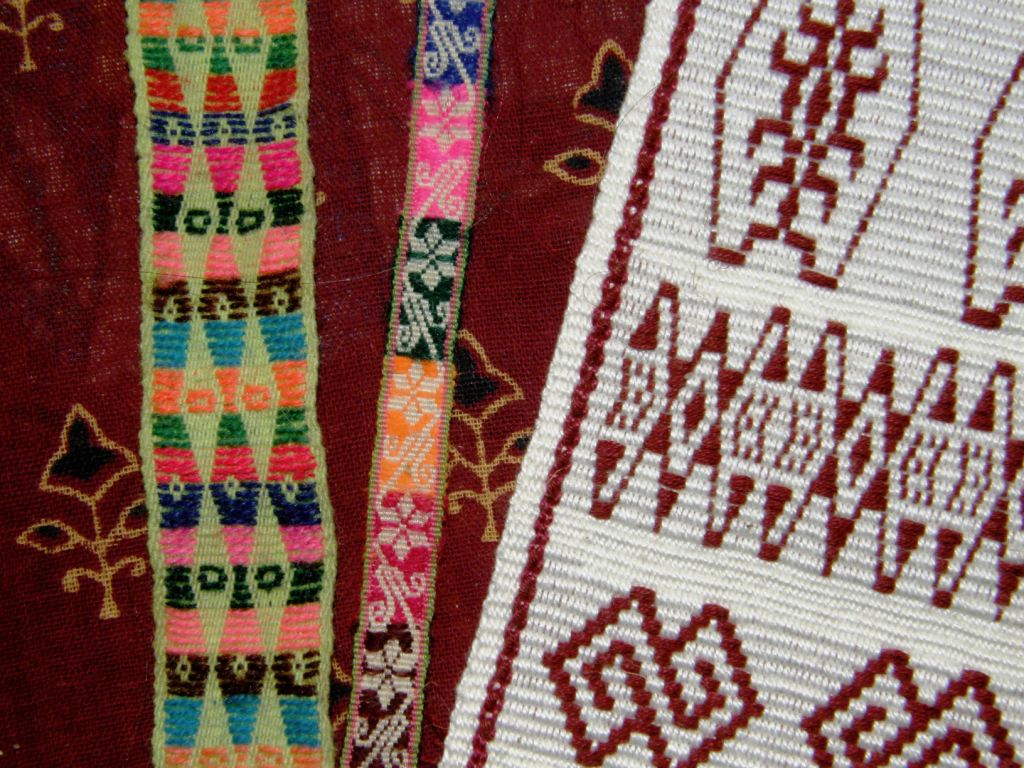
Weavings from highland Peru, lowland Bolivia and the Chilean high plains.


So, this means that this week’s blog post will be rather short as there are still two more evenings and one more day of conference to go. I will give you a few tidbits here to whet your appetite for a full report next week. I am still in the process of gathering information, facts, etc…and would hate to get anything wrong and I apologize if I have misspelled names.

I will tell you now that this whole event was organized by three wonderful Chilean ladies, the idea for which had its roots in an exhibit by Chilean artist Natasha Pons, which will run here for a month, called “Relatos Migratorios”. The Centro Cultural Simon I Patiño made it possible for people like me to experience all this for free. I still haven’t gotten over this fact!
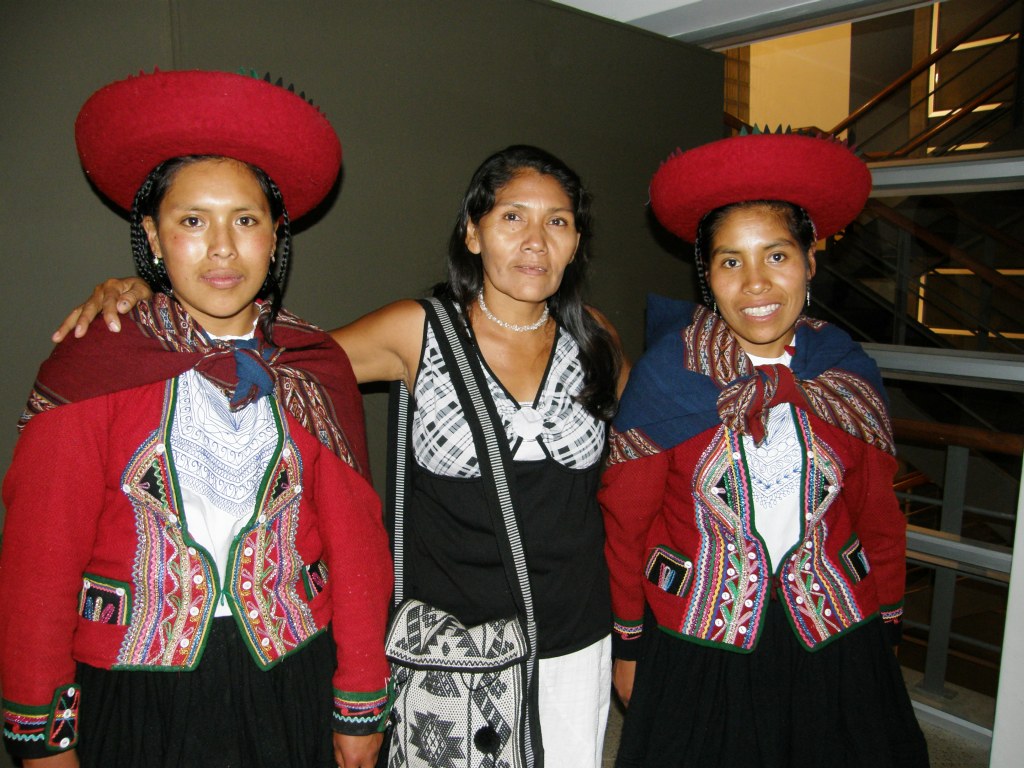
Angela Suarez, a Guarani weaver of the Bolivian lowlands met Chinchero weavers Sonia and Sanaida(sp) at the inauguration gathering.

The inauguration of the conference and exhibit took place on Tuesday. I went along and met up with my Guarani weaving teacher Angela. Walking up the stairs at the cultural center, my heart skipped a beat when I saw two ladies from Chinchero, Peru right behind me.

Last November after a little weaving class with Angela we had to part for some time as I was leaving for the Tinkuy de Tejedores in Peru and she was going to her home of Isoso to organize the weavers to make an enormous order of woven Christmas cards. I had told her about the exciting event in Cusco all the time wishing that I could have gotten my act together and taken her with me although I doubt that she would have gone with the extra responsibilty she was carrying at that time to fulfill the Christmas weaving orders.

So, here now was a little part of Peru coming to her instead! along with Colombia, Chile and Ecuador. And, on top of the beautiful pebble weave bag that she is carrying in the picture above, she brought one her wonderful works-in-progress in the Moisy technique to show to the highland weavers.
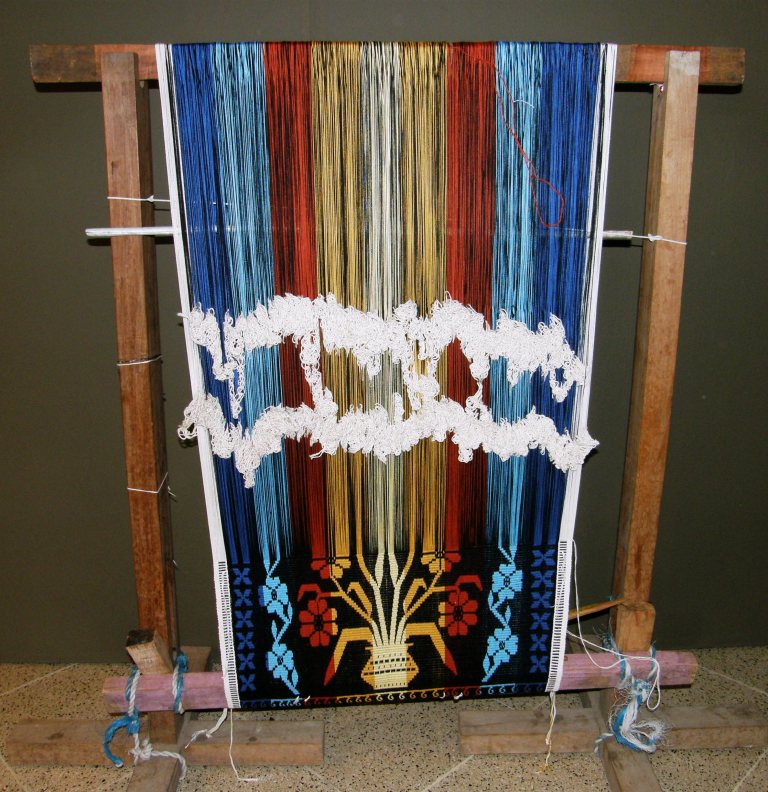
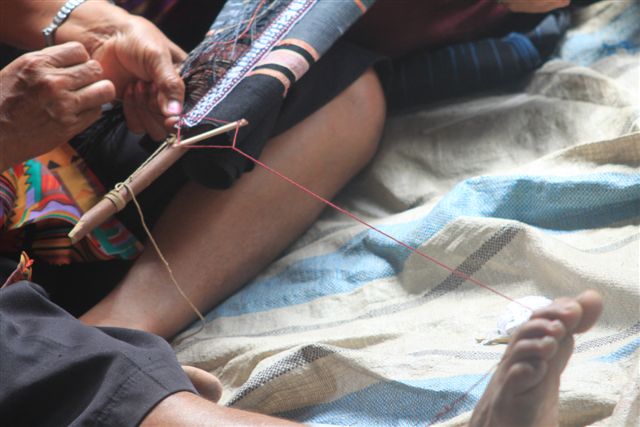
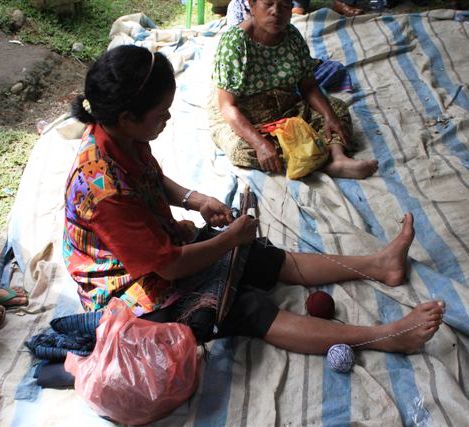
The program comprises three mornings of four-hour workshops along with audio-visual presentations and conferences in the evenings. The first day’s workshop was backstrap weaving which was offered by the ladies from Chinchero along with Celinda and daughter Isobel, Aymara weavers from the northern Chilean highlands.

Organizer Cristina  introduced the workshop and put it very well when she explained that there are many roads that can lead to a single destination and many ways of achieving the same objective. The warping, set up and weaving techniques used by the Aymara and Quechua weavers teaching us here side by side have their differences but our goal, she explained, would be to learn to weave narrow bands, called jakimas in the Quechua language of Chnichero, and what the Chilean weavers call cintillos.
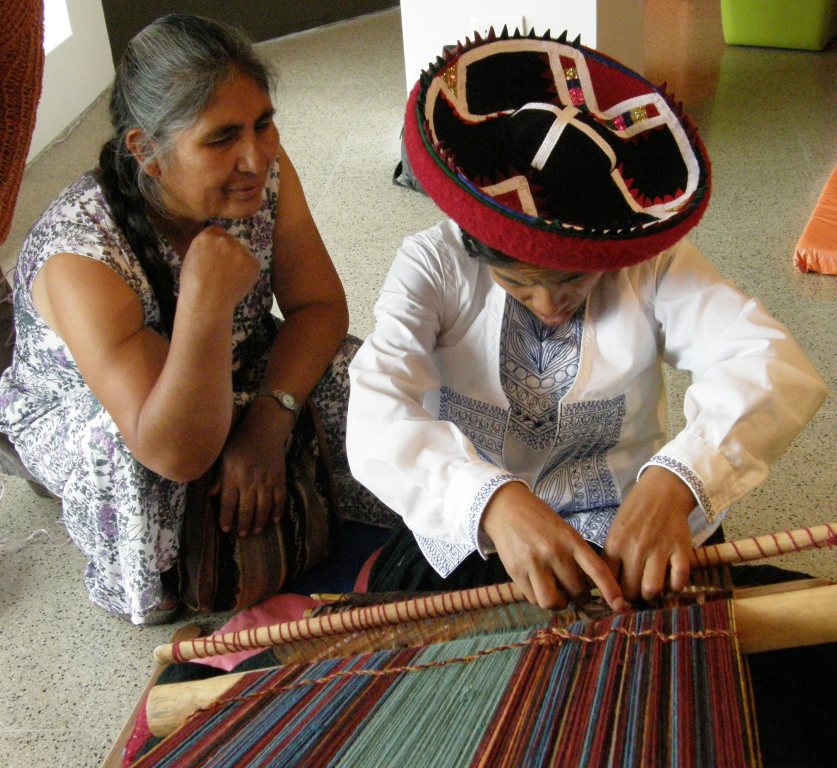
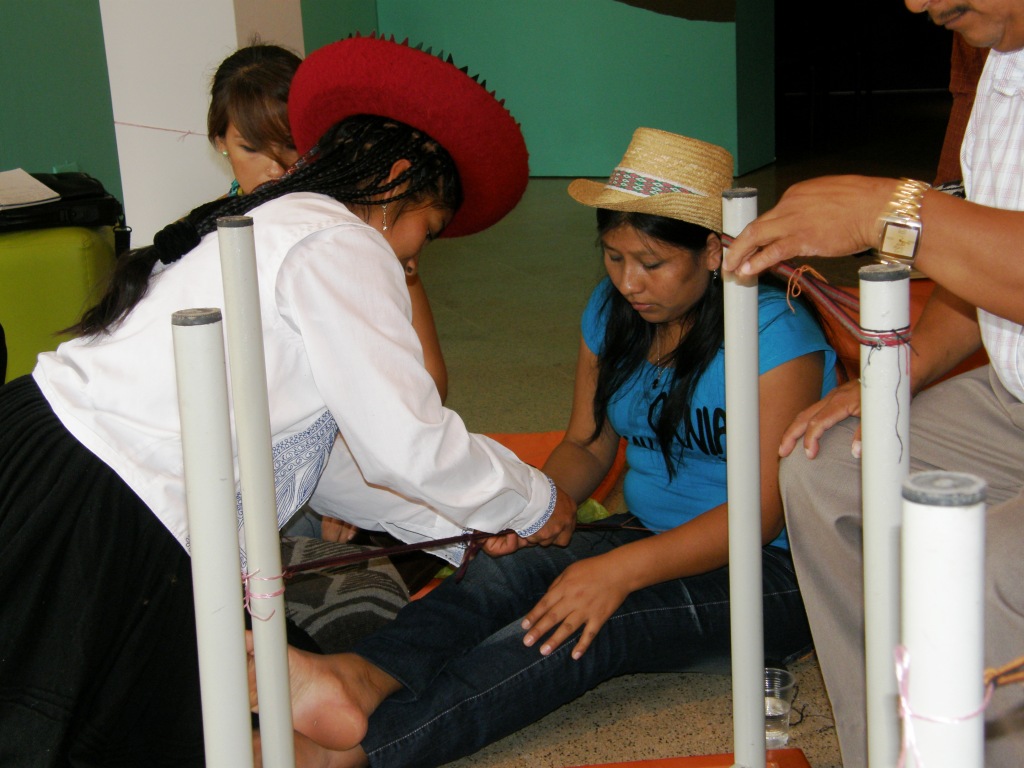
 Aymara weaver Celinda watches with fascination as Chinchero weaver Sanaida works on her pick up weaving. 
Cabuya fiber artisan Maritza from Colombia receives help from Sanaida while one of the Ecuadoran gentlemen prepares his warp around a pair of table legs.
Well, you can imagine that this had me wanting to hop from one group to the next so as not to miss a thing! but I settled finally with Sonia and wove my first flat band with the gorgeous Chinchero handspun (I had used this fiber before to make tubular bands at the tinkuy).
My experience with my own handspun has been almost exclusively with llama fiber and so there were quite a few interesting things to note about this wool warp, the behaviour of the weft, the appearance of the woven surface from the high twist yarn and the different kinds of weft that Sonia and Sanaida were using.
Having the backstrap weaving moves down, I was able to focus very much on the material rather than on the technique. So, I did get to weave this week after all.


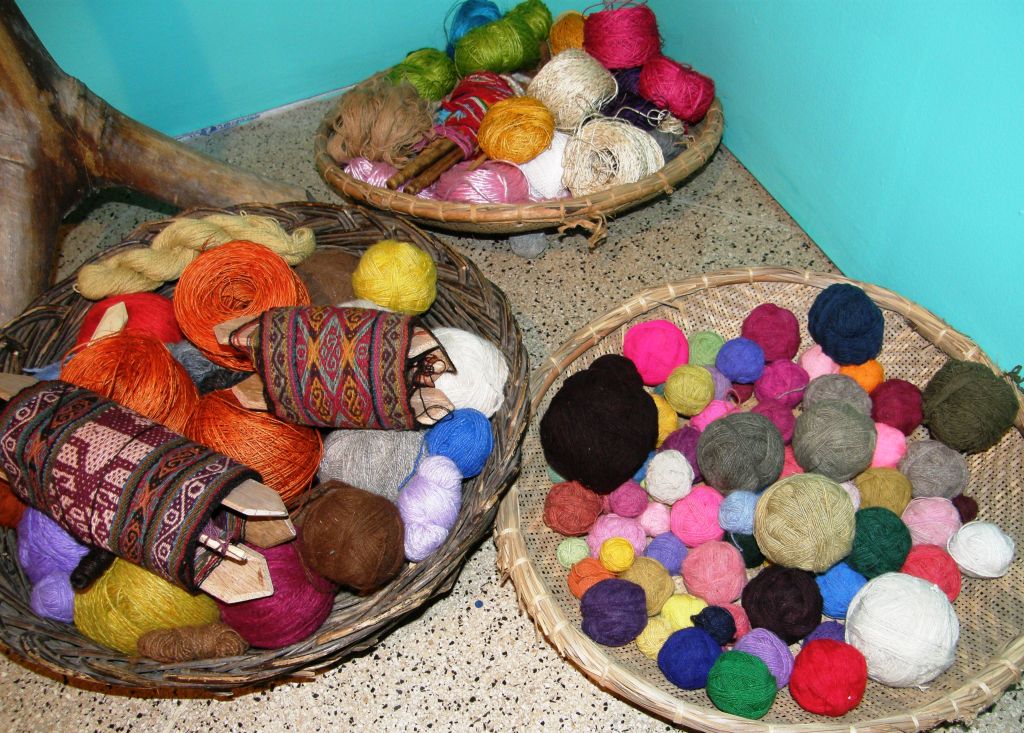
Cabuya fiber from Colombia and handspun wool from Chile and Peru along with other random bits of cord and twine that we used to tie up the warps.

The artisans from Ecuador, Colombia and Oruro in Bolivia joined in enthusiastically as well as a small group of outsiders such as myself and staff from the cultural center. Most outsiders were non weavers and were terrified to beat hard and pull at the warps fearing they would break. The handspun wool was of course wonderfully resistant which was a good thing as there was the usual amount of beginner heddle-sawing going on.
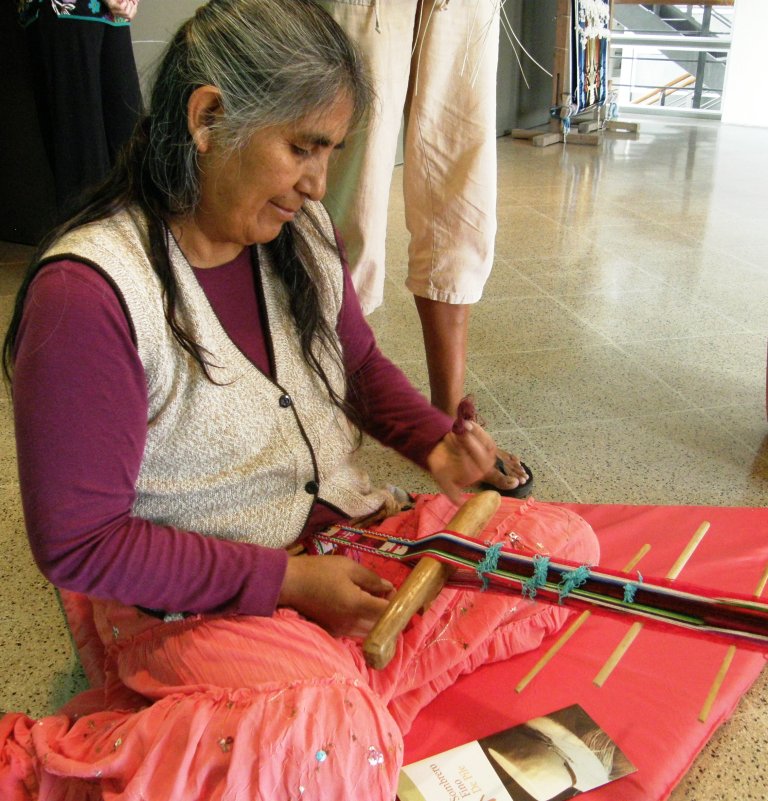
I didn’t have to worry too much about missing out on Celinda and Isobel’s (the Chilean weavers) instruction on day one as today Angela and I got to spend a lot of time with Celinda as she wove.  I found her very tranquil and lovely to watch. Daughter Isobel, on the other hand, is a live wire! You will see and hear more about her next week.

The technique that Celinda was demonstrating is a variation of the Moisy that Angela weaves except with three patterning colors which requires a fourth set of string heddles to manage. This does not create a double faced textile but there are no long floats on the back of the band either.

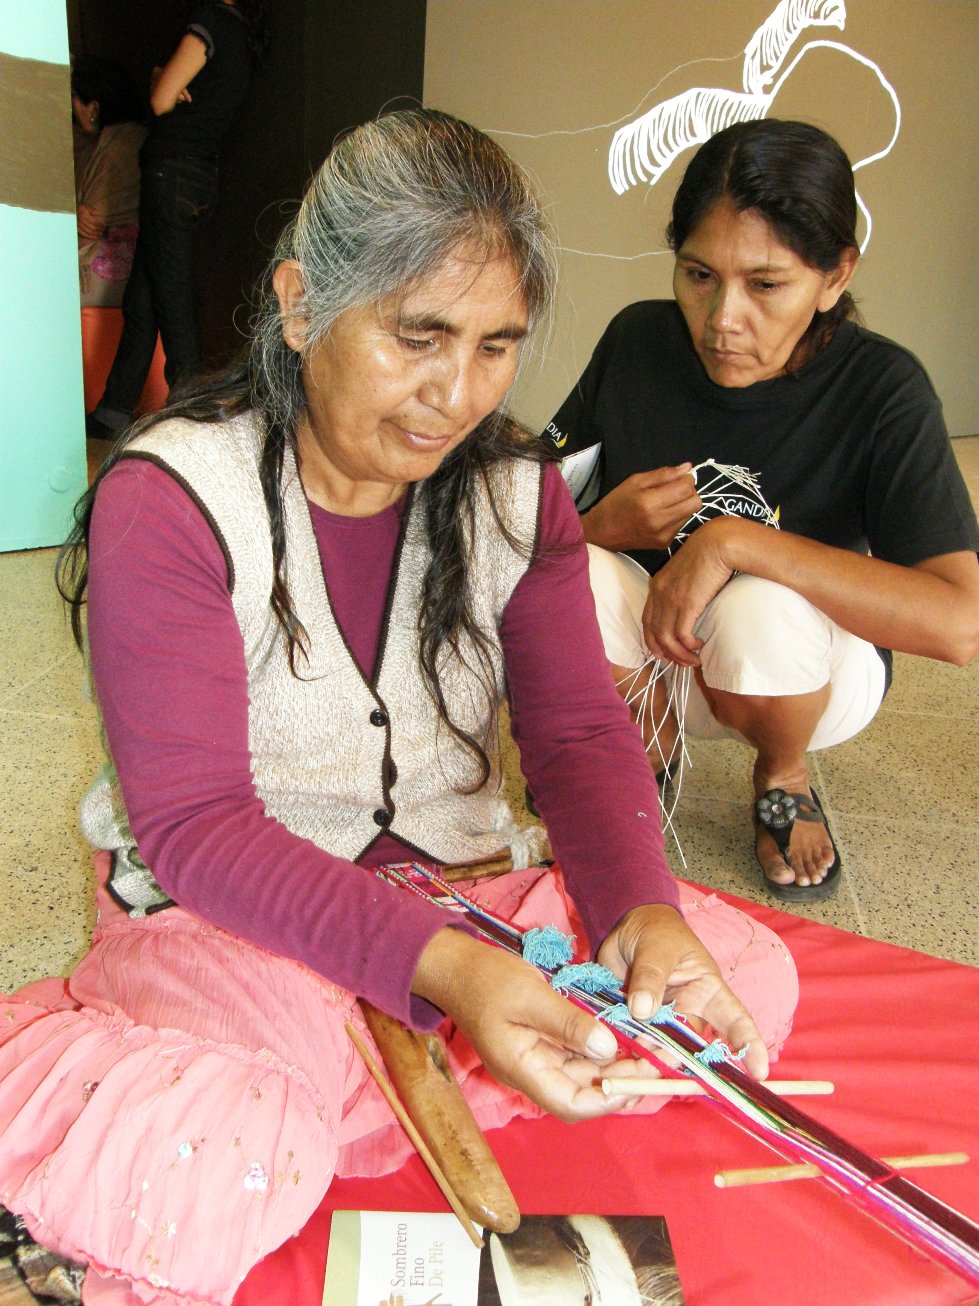
Angela noted that Celinda’s heddle order arrangement was quite different to hers and asked many questions. I could see her soaking it all up.

Finally she wasn’t asking questions but rather pointing things out to confirm that she did indeed understand.  I wouldn’t be surprised to see her adding this to her repetoire and you can be sure that if she believes that any of Celinda’s ways are better she will adopt them. She is already using a stick for her lower set of heddles on her narrow bands after asking me to teach her how to make them on a stick – something she said she had always wanted to learn.
Well, I really must stop here as there are more events to attend tonight and one more day of this conference to go. No doubt there will be much to tell and show next week.

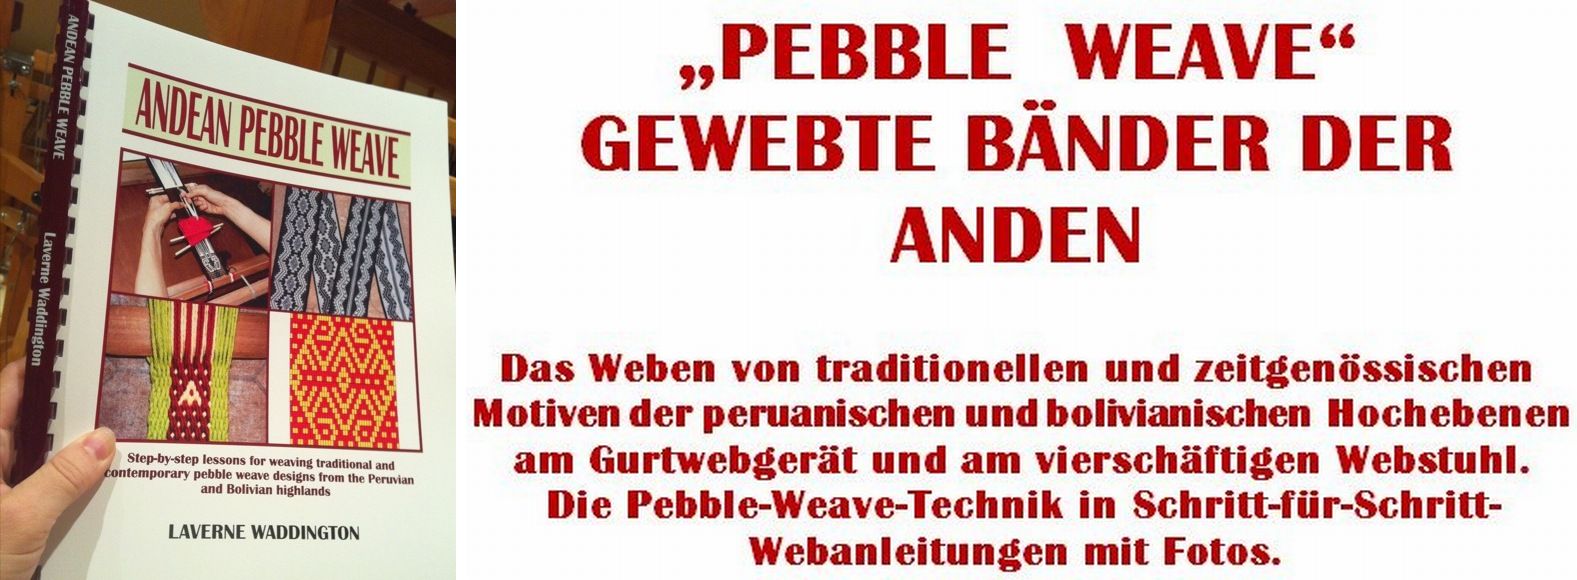
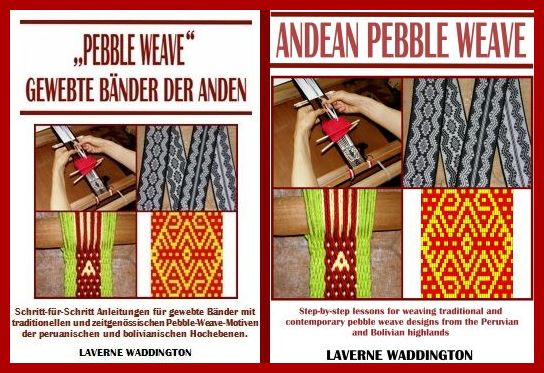
I can’t go without giving my thanks to my online weaving friend Kristina Krenzer who has worked hard to translate my e-book Andean Pebble Weave to German. It is now available on Patternfish. It looks so weird and, at the same time, so great in another language! Of course you can get the English version on Patternfish too.

Ich danke Kristina Krenzer für die Übersetzungsarbeit. Meine Monographie über die Stippenweb-Technik der Anden, auch bekannt als “Pebble Weave”,  ist nun auch in deutscher Sprache bei Patternfish erhältlich .


Backstrap Weaving – When the Weft Struts its Stuff

In the kind of weaving that I like to do on my backstrap loom, that is, warp faced weaving with pick up patterns, the poor old weft thread rarely makes an appearance. When it does, it usually means that something has gone wrong…a warp did not get raised in one of the sheds thus exposing the weft in its place, the warps haven’t been well spaced to completely cover the weft or the selvedges have been poorly woven.  I even use weft colors that match the edge of the fabric so that the tiny turns of weft at the edge blend in with the warp color and are, therefore, less visible.

This week I have been playing with a technique that gives one weft at least, the starring role…the supplementary weft. (See the tutorial on this technique here). In some backstrap weaving cultures, everything is about brocade which is created with supplementary wefts, and it is the warp threads that take a back seat.

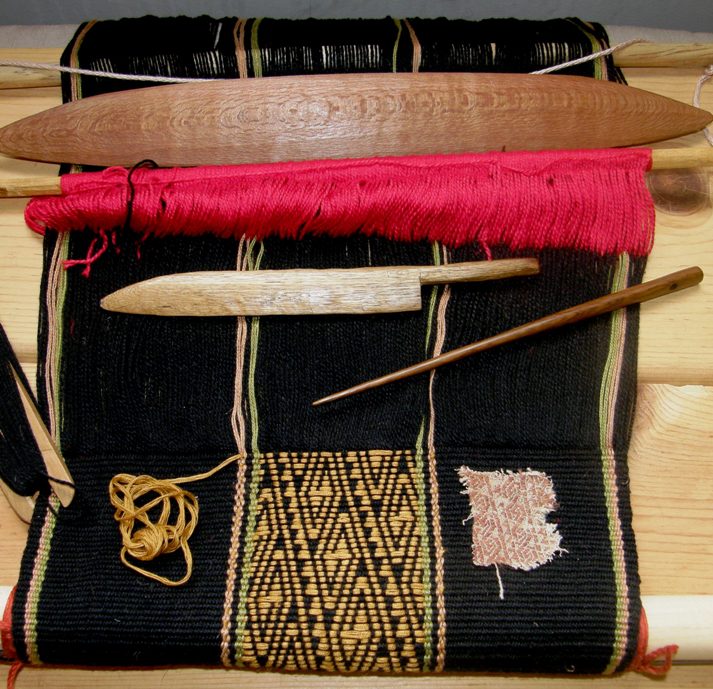
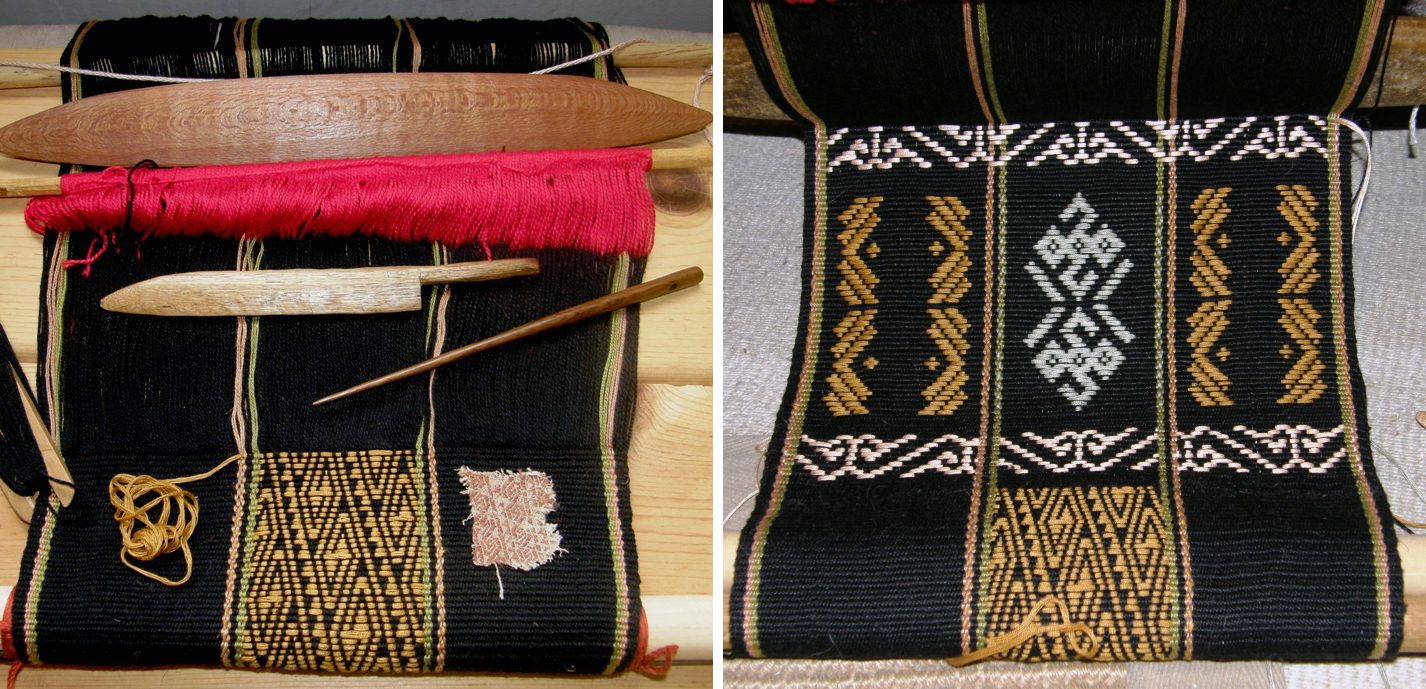
This all started when I uncovered a project lurking in the closet. I wove this supplementary weft piece as an attempt to reproduce a design on an old textile fragment that I have – the only one which has a design in a supplementary weft. I took this loom to show at CNCH last April so it has been hanging about here untouched for some time. Not feeling inclined to continue with this design as the exercise had served its purpose, I decided to use the rest of the warp to sample other traditional designs  which I had been saving in a folder.

Here are some of the textiles that inspired this project…

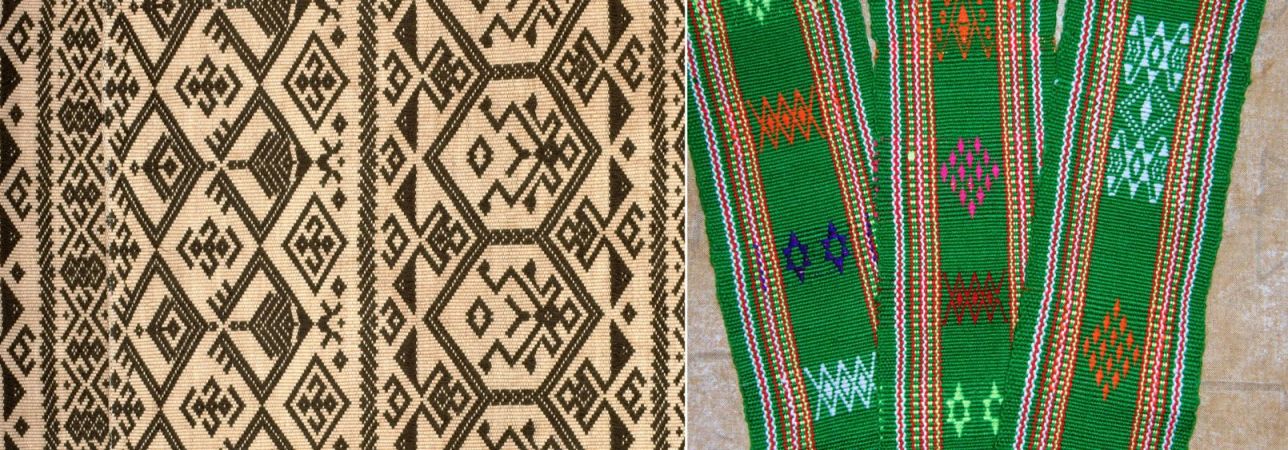
On the left, Chris Buckley had sent me this image of a blanket made by a Li weaver of Hainan Island. Montagnard weaver Ju Nie made this Rhade head band with many small motifs woven with supplementary wefts.

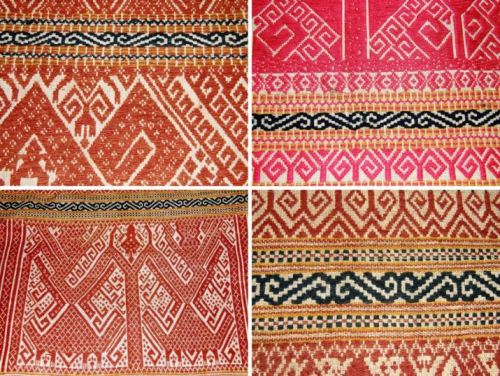
These are some of the many gorgeous Indonesian pieces that I admired at the Dancing Threads stand at Convergence last year.

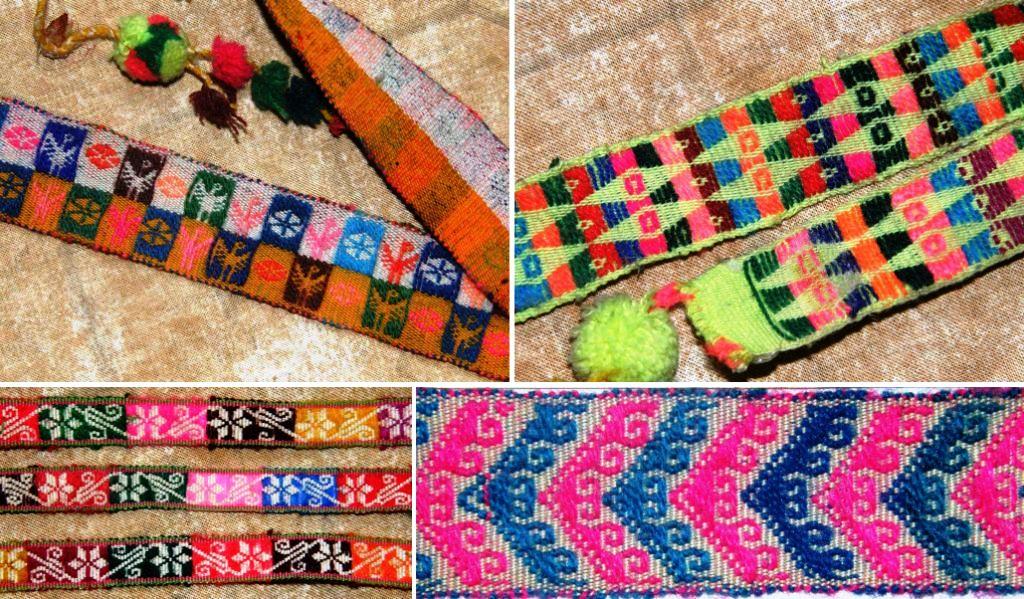
Ladies wearing hats decorated with weft patterned hat bands can sometimes be seen in the streets here and I have managed to purchase a few of the bands in my travels in the highlands.

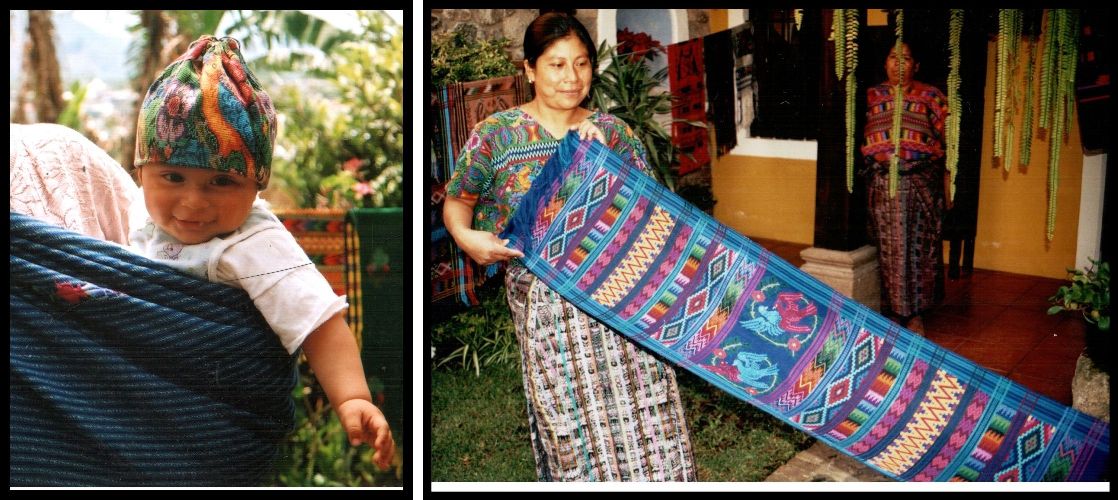
I will never forget the beautiful Guatemalan textiles and the weft patterning techniques I learned with my teachers there.

I even uncovered these cotton Indian pillow covers that my aunt had brought back from Chennai. I had had to put them away as my cat was chewing the twisted ends of the weft twined sections. Here supplementary weft patterns have been combined with small sections of weft twining. The little warp float section is interesting too as very thick and thin warps have been combined, the thick black warp pushing aside the white to expose the white weft.

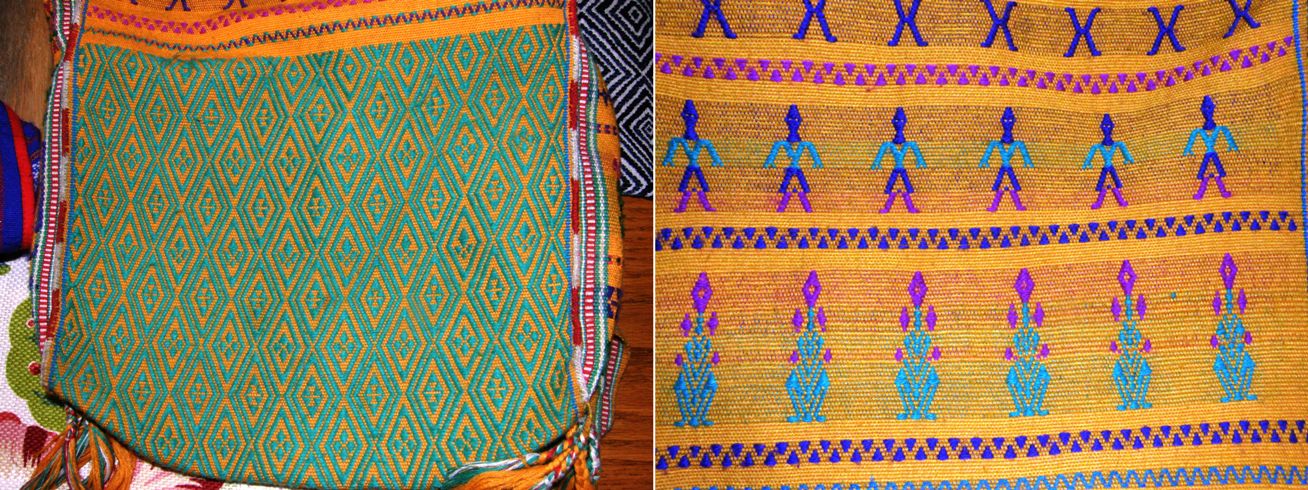
On my last visit with Betsy Renfrew and the Montagnard weavers I got to see these Bunong weft patterned textiles for the first time.

Of course, Karen Elwell’s fabulous Flickr page of Mexican textiles will always inspire me. Someone pointed out to me the other day some Huave pieces with their little suppementary weft figures woven in what appears to be natural white and brown cotton – quite a contrast to the bright and lively colors in most of the pieces above.

So I took a bit of this and that and wove some samples.

The stripes that I had included in the warp kind of got in the way. First I took an Indonesian motif and tried to weave it in behind the stripes and decided I didn’t like that. Then I put it on top of the stripes…nope, I didn’t care for that either. It was time to move on to a new warp. The designs in between are taken from the Li blanket with some changes of my own.

The ground warp is a 24 wpi crochet cotton with two different kinds of thread for the supplementary wefts.

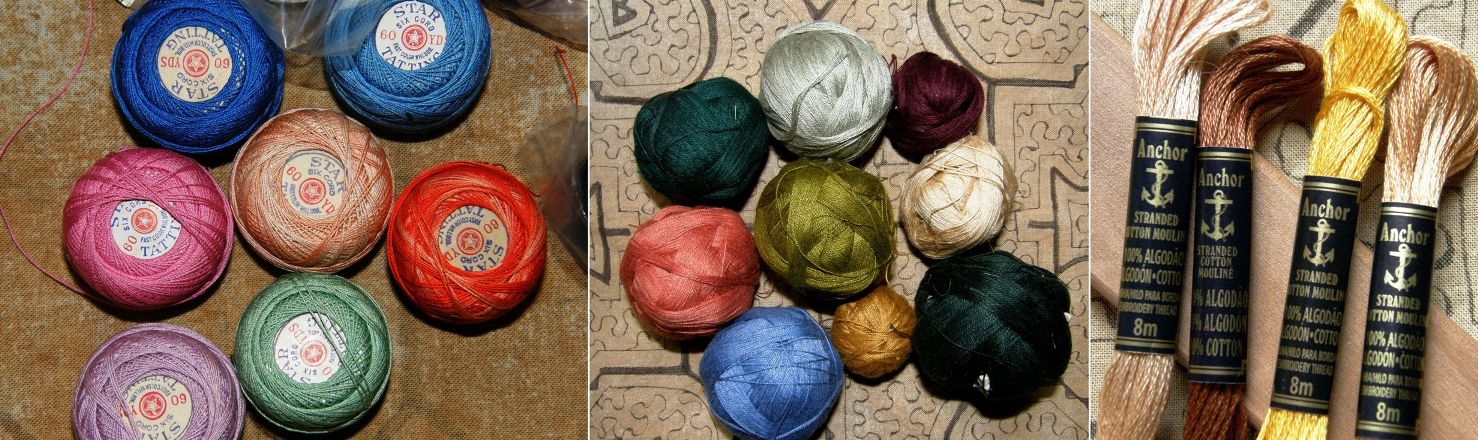
24 wpi ground warp and weft patterned with doubled strands of embroidery floss.

For the textile fragment reproduction I used 6 strands of cotton patterning thread that I bought in Guatemala (center picture). The thread is sold in skeins of single strands. It is easy putting the six threads together and they work well as they lie flat on the surface of the weaving. I used doubled lengths of the embroidery floss (pictured on the right) for the first band of pattern above that. This works well but, as the lengths are ever so slightly twisted, the two pieces tend to separate in the longer floats. If I had no other option, I would pull out each of the individual strands and put them back together again without the twist.

One day my Guatemalan thread will run out and I am thinking that the tatting thread pictured above left  might do the trick.

My friend Sharon in the US sent me an enormous bag of tatting thread recently and it is very similar in size to the Guatemalan stuff although stiffer.

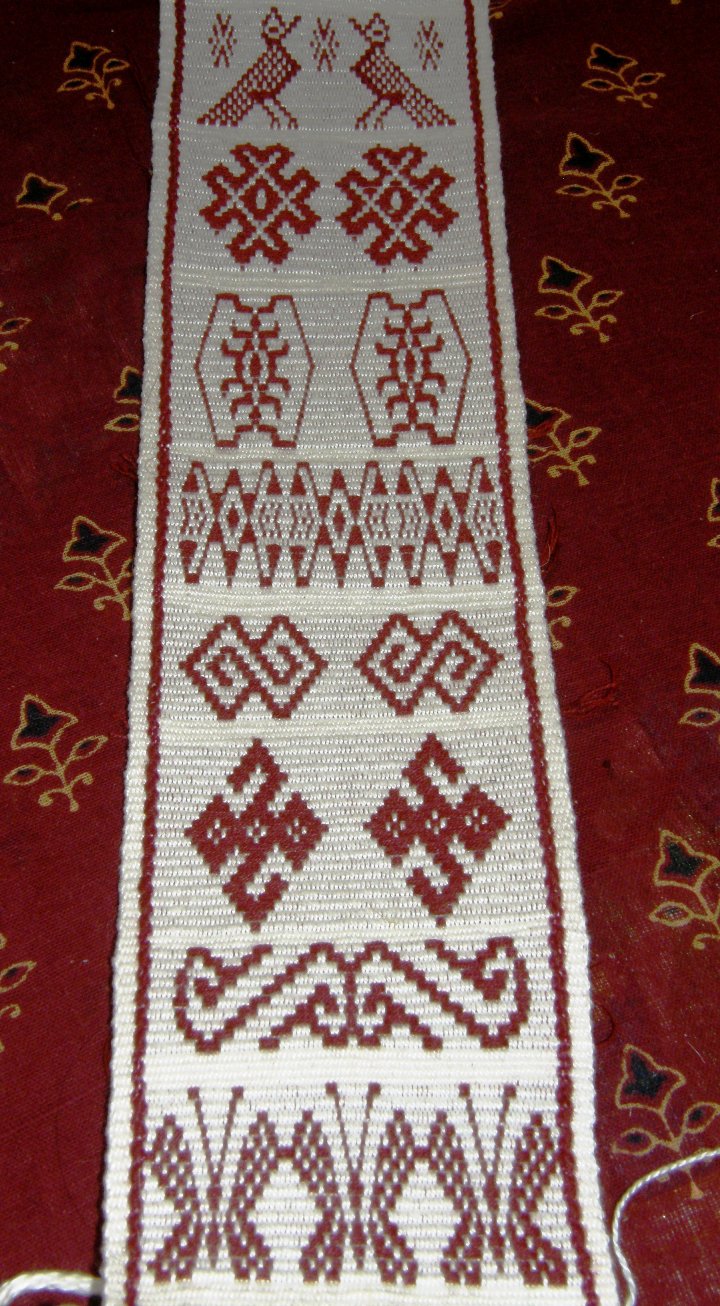
The black warp got cut off the loom and will be a sample piece. I gathered up all the designs I wanted to weave and made a new warp, this time with 35 wpi crochet cotton as the ground warp and weft.

I collected Huave butterflies, Indonesian borders, Central Asian supplementary warp motifs which I adapted to supplementary weft, patterns from Montagnard and Li textiles,  Guatemalan birds, brocade designs from Lithuanian sashes as well as one of my own inventions. I still have some Mexican and Miao motifs to play with and am looking about for more ideas from other cultures.

One thing that I wasn’t quite so aware of was the different kinds of supplementary weft patterning techniques and the ways in which they are classified. I have always wondered about the precise definitions of brocade, inlay and supplementary weft patterning and if, in fact, all three terms refer to the same thing.

Fortunately I have Marla Mallett to put me straight. In her book Woven Structures  A Guide to Oriental Rug and Textile Analysis she says:

Brocading uses extra yarns – supplementary weft yarns – to ornament a ground fabric, with floats on at least one face…….If we want to be fancy, we can call brocading, “extra weft patterning”. But the simple word brocading is adequate.

She then decribes different kinds of brocading: overlay-underlay, underlay, overlay, reciprocal and inlaid, the latter being the kind that I am playing with here. She also notes that in oriental textiles inlaid brocade yarns and knotting often share the same pattern row which makes my head spin with new possibilites!

Another look at my sampler…

With this 35 wpi ground warp I used six strands of the Guatemalan thread. Once I have finished all my planned designs, I will start experimenting with the tatting thread. What I like about this kind of patterning is that your warp is basically a blank canvas on which you are free to change colors and place designs as you please.

Here are a couple of examples of warps that I prepared for warp float patterning to which I decided to add supplementary weft motifs pretty much as an afterthought. On the piece on the right I used one and half strands of embroidery floss. On the piece on the left I used single strands of the ground weft which left gaps and gave the design the same striped effect as the outer columns of warp float designs.

A couple of other brocaded pieces that I wove using the Guatemalan thread on the left and embroidery floss on the right. The piece on the right combines the inlay technique with wrapping to create the long horizontal and fine vertical lines that would not be practical using the inlay method.

Here is a view of the two samplers showing the difference in the weight of the threads I used.

Why didn’t I do any of the Bolivian hat band designs, you ask? Those have been done in super fine thread which allows them to have very long floats in their supplementary weft. You simply would not get away with such long floats in heavier thread as they would be long, cumbersome and unsightly. You can be sure that another warp in sewing thread will be coming soon so that I can indeed do these designs. I am also looking forward to doing designs where the supplementary weft actually fills in the negative rather than the positive spaces.

Here you can compare the size of the hat band thread with my 35 wpi thread. And don’t get me started on the mind boggling fineness and complexity of the brocades from Laos!!

From supplementary wefts to supplementary warps….you may recall from last week’s post that I wove my first Sami pattern band in a supplementary warp technique. I want to explore and use this technique more as a supplementary warp patterned sash will be part of my big “sash project”. This is actually one of the techniques where you could allow the weft to play a role if you chose to.

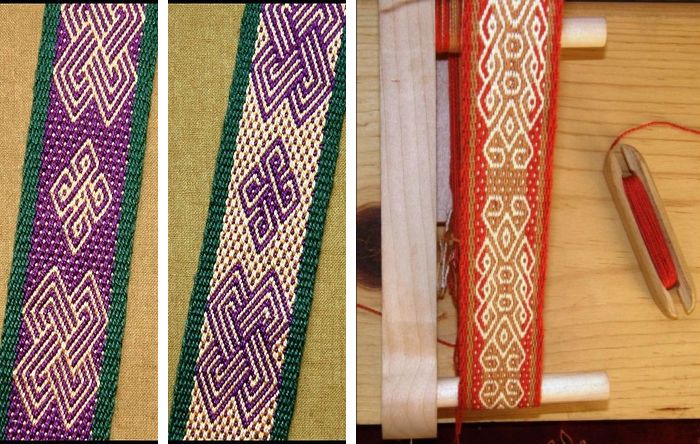
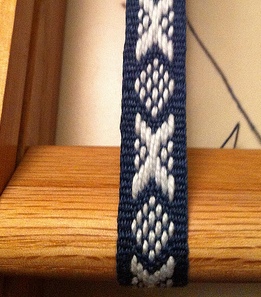
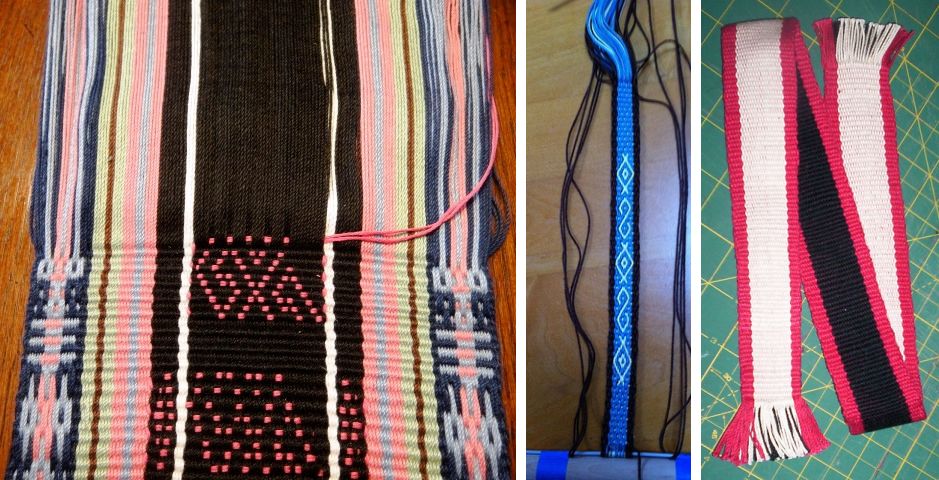
In the examples at left you can see the little orange weft spots showing through as orange weft has been used to match the edges. If yellow weft had been used the background would appear to be a solid color. My weaving teacher liked the decorative effect of the weft spots. The band on the right appears to have a solid background of white as white weft has been used. You can just see the white weft turns on the edge.

For my next supplementary warp experiment I used the handout that we had been given in Robin Spady’s inkle weaving presentation at CNCH last year.

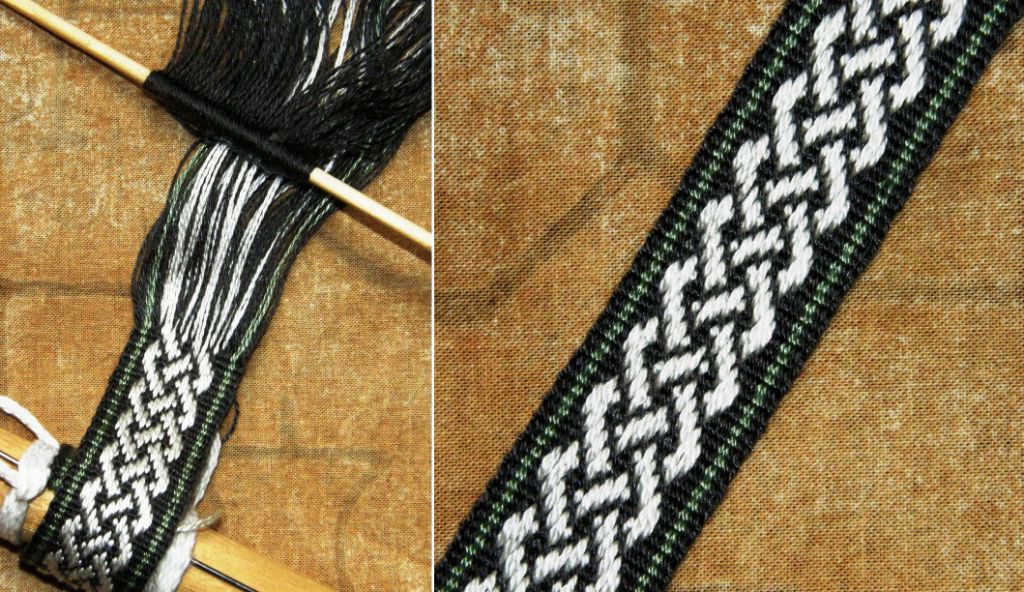
Included is a pattern for a Celtic knot. This experiment served two purposes as I also wanted to try out some tencel that I had received in a swap with a weaving friend in Denmark last year. I really wanted to see how the colors would look together…a light green and a gray-ish purple along with an off-white that I bought at the Mannings. I have never used tencel before and was looking forward to see how it looked and felt when woven. I made this on my backstrap loom.

Just as everyone says, it has a lovely sheen and is very sleak. The weft did want to wiggle out a little and I found I had to put it back in place each time I changed sheds but I love everything about this…the colors, the pattern, the texture and the sheen!

This is a thirteen-pattern-thread design which Robyn calls “my all-time favorite pick-up pattern”.

Karen Madigan gives the pattern for a twelve-thread Celtic knot (which she says is based on a design from Sara Lamb) on her Curious Weaver blog. By the way, I know a lot of people have Sara Lamb’s Woven Treasures book.  Sara teaches this supplementary warp technique right there in her book… just in case you missed it.

Take a look at a different version (the pink one) on Annie MacHale’s blog here.

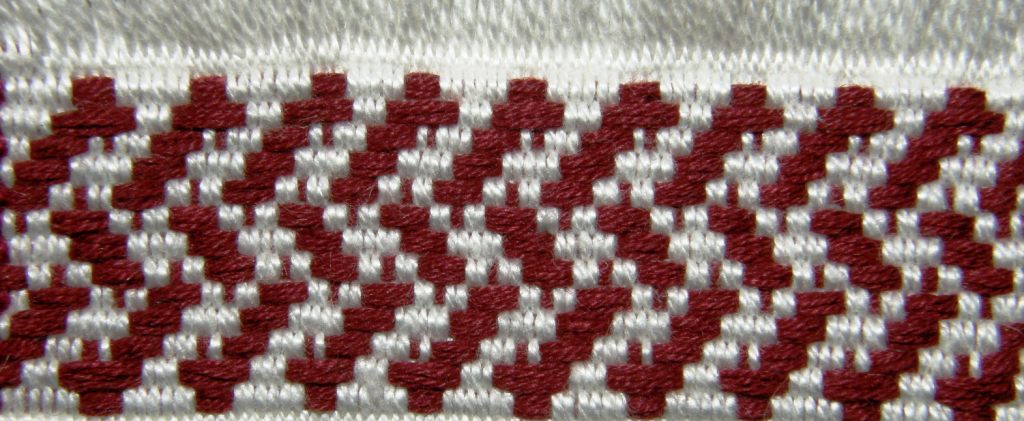
I couldn’t resist tipping this Celtic knot pattern sideways and trying it in a supplementary weft.

I know that I can improve on this if I decrease the spacing and have the edges curling over more. That’s something to work on further this week.

I thought that I would pull out some older pictures of other knotty-like designs I have woven…

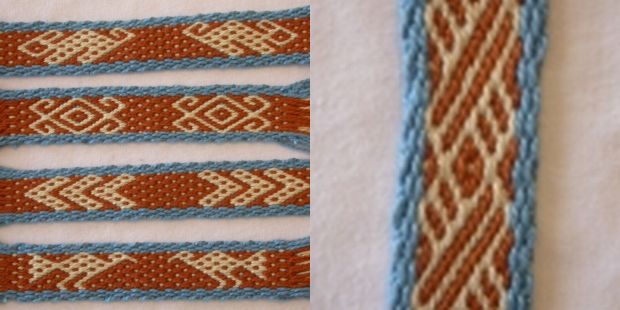
The designs above and below were taken mostly from tablet-woven bands and I wove them using the Andean pebble weave technique that I teach in my book.

Jennifer from the Weave Along group made her first Sami band on her inkle loom this week (at left) as well as Tanyabe who says that she actually has a drop or two of Sami blood in her. Hopefully we shall see her pictures soon.

The Weave-Along has become rather quiet. I suspect that folks are working on their “secret” project for the grand finale. I also like to think that the Weave-Along has helped create confident independent weavers who are trouble shooting, experimenting and problem solving on their own….let’s see!

And the loom bag project continues. This loom bag will weigh a ton by the time I have all the bits in place!

This piece of fabric with its pebble weave design will be used to  make the three zippered pockets on the back of the bag for holding belt shuttles, elastic bands, scissors, tapestry needles and all that stuff.

Finally, I got a nice note from Kathleen on Ravelry with all this information on other articles in the Weaver’s Journal which are available to download free from the online digital archives at arizona.edu

Kathleen says:

Thanks for the references re the Andean braids in Weaver’s Journal. (Actually, we all have Jennifer to thank for these references).I didn’t know they were all available on line. I have some but was happy to find the others.

There are quite a number of other interesting articles that might also be of interest to you or other members of the backstrap weaving groups.

Issue 4 – A Tubular Edge Braiding from Bolivia by Adele Cahlander and Marjorie Cason.

23 – A Special Andean Tubular Trim woven without Heddles by Adele Cahlander, Ed Franquemont and Barbara Bergman (color!)

24 – A Guatemalan Brocade Border

25 – A Braided Strap from Columbia by Adele Cahlander

28 – Gifts from Ancient Peru by Ulla Nass

35 – A unique Finish from an Amazonian Bracelet by Micheline Thabet

37 – Unraveling the Mystery of a 7 – loop Braid by Adele Cahlander

42 – Embellishment of the Rain Scarf (Hopi) by Suzanne Baizerman

45 – Peruvian Technique for Dimensional Knotting by Monica Bravo

46 – Color and Design in Andean Fabrics by Blenda Femenias

Thank you Kathleen!

The downloading takes too too long for me but considering the topic of this week’s post, I think I must look at issue # 24!


Backstrap Weaving – A Little Product Amongst the Processes

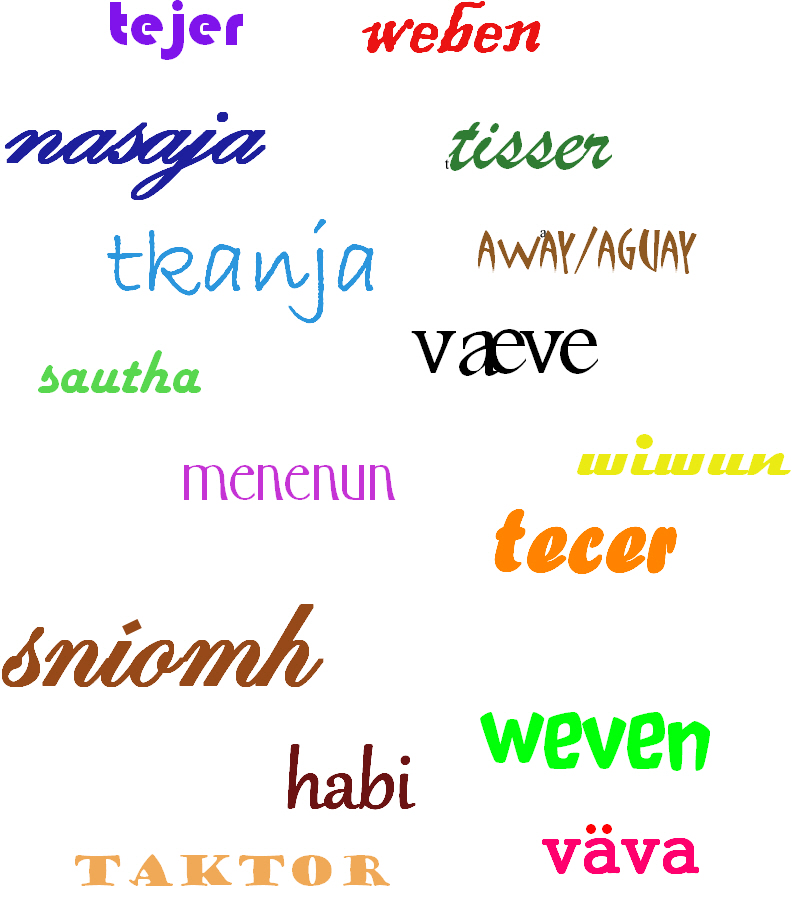
I haven’t wandered off too much around the globe this week but people from around the world, via this blog, Facebook and my online weaving groups, did drop by to help me with my latest twining project…the strap for my proposed loom bag on which I am twining the word “weave” in different languages and fonts.

Here is where I am at so far…

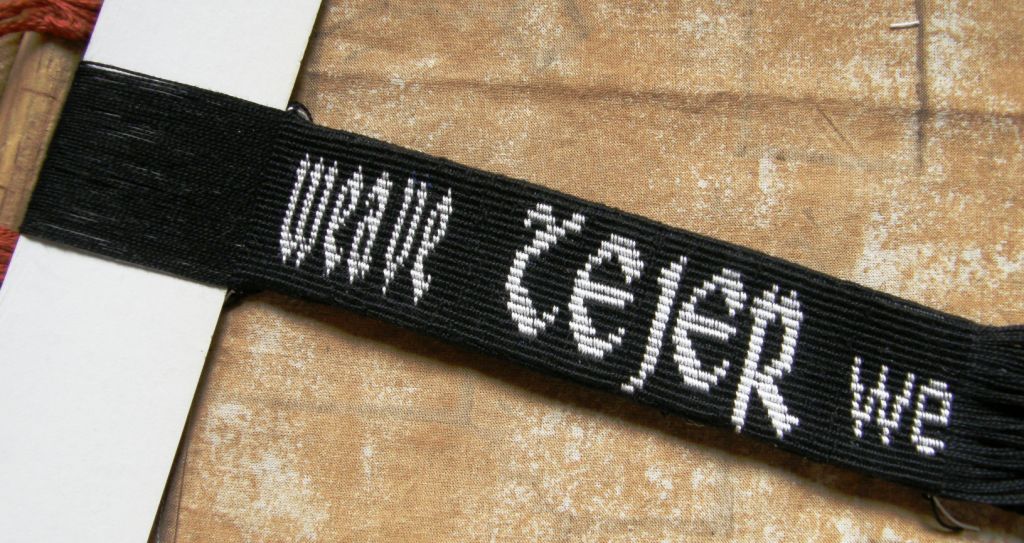
And, if you are thinking that I haven’t advanced very far since last week, you are right! I am used to doing patterns on my backstrap woven pieces in pick up techniques…picking or dropping every single  thread across the width of my warp and I don’t find that slow. However, I have to tell you that twining is SLOW! Reeaaaly slow! But, as you know, I am a process driven gal and what keeps me going on this project is the varying fonts. It is interesting to chart one and then see how it works out on the band. I have, in fact, finished the last word shown above which is “away” or “aguay” (I have seen it spelled both ways) which is the Quechua word for “weave” here in Bolivia.

The next word will be the Gaelic one, sent to me from a Facebook friend in Ireland. I am designing my own lettering form for this one….a cursive hand…and am a bit unsure about how it will look.

Here are the words I have …

Thank you so much to everyone who has contributed so far. I doubt that I will be able to fit all these in and so another project will have to be created. The next one will be in double weave and I will make it all my own lettering style. Double weave will be way faster. See how many languages you can identify. Someone remarked on Facebook that I could just use an online translator. True, but this is more fun. This way I will always remember the person who gave me the word and “carry” them around with me. 😉

While on this multi-lingual topic, I thought I would tell you that an online weaving friend in Germany took on the heavy task of translating my Andean Pebble Weave book to German. How cool is she, and how grateful am I?! I am in the process now of redoing the layout as it seems that German folk are more wordy than English speakers 😉 and hopefully that will be available soon as a pdf.

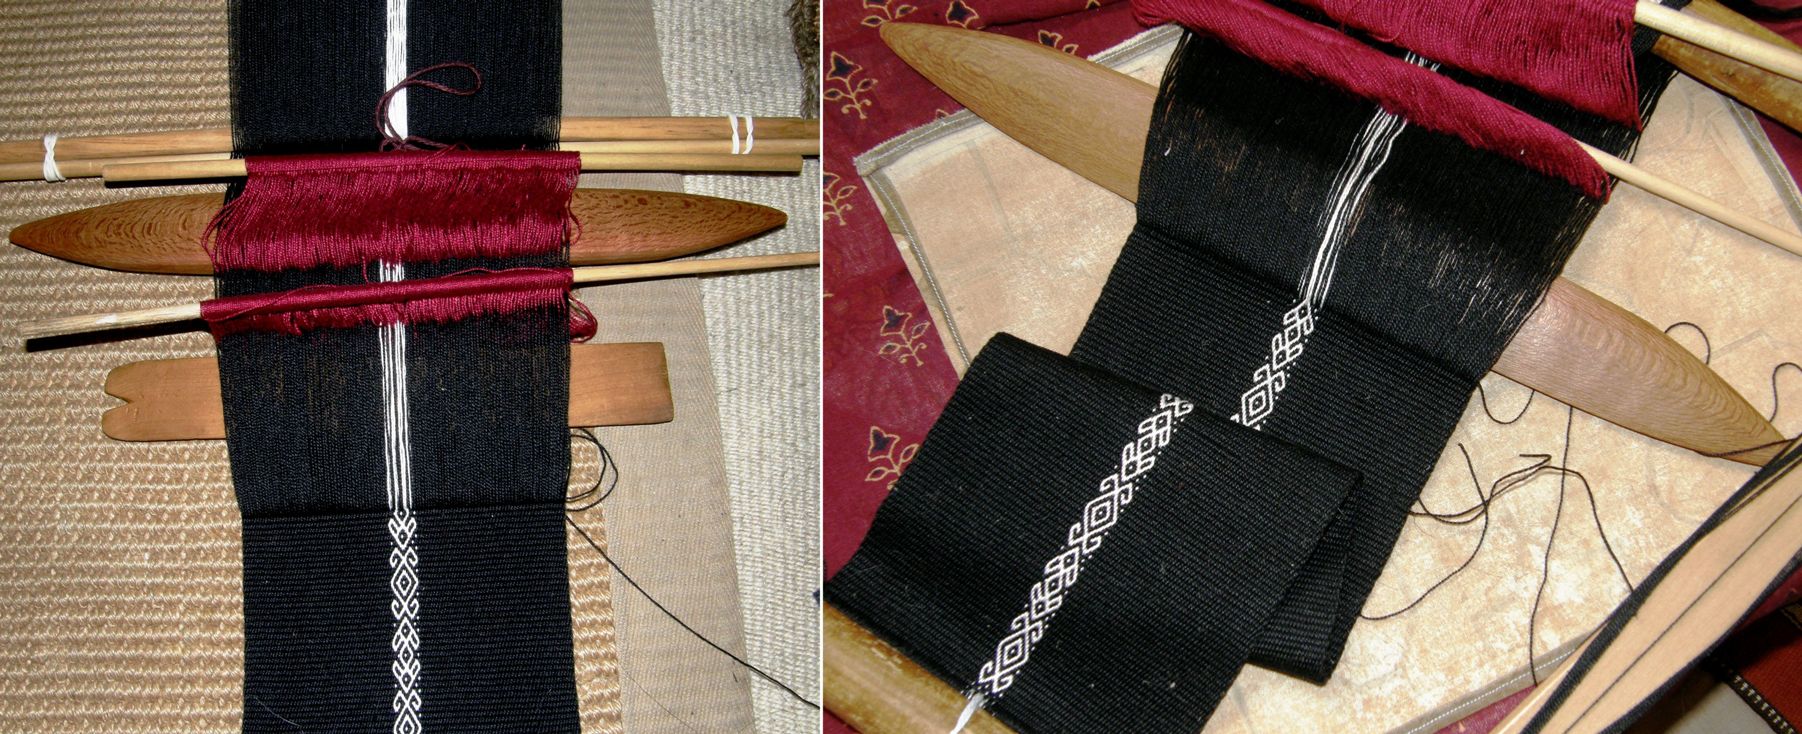
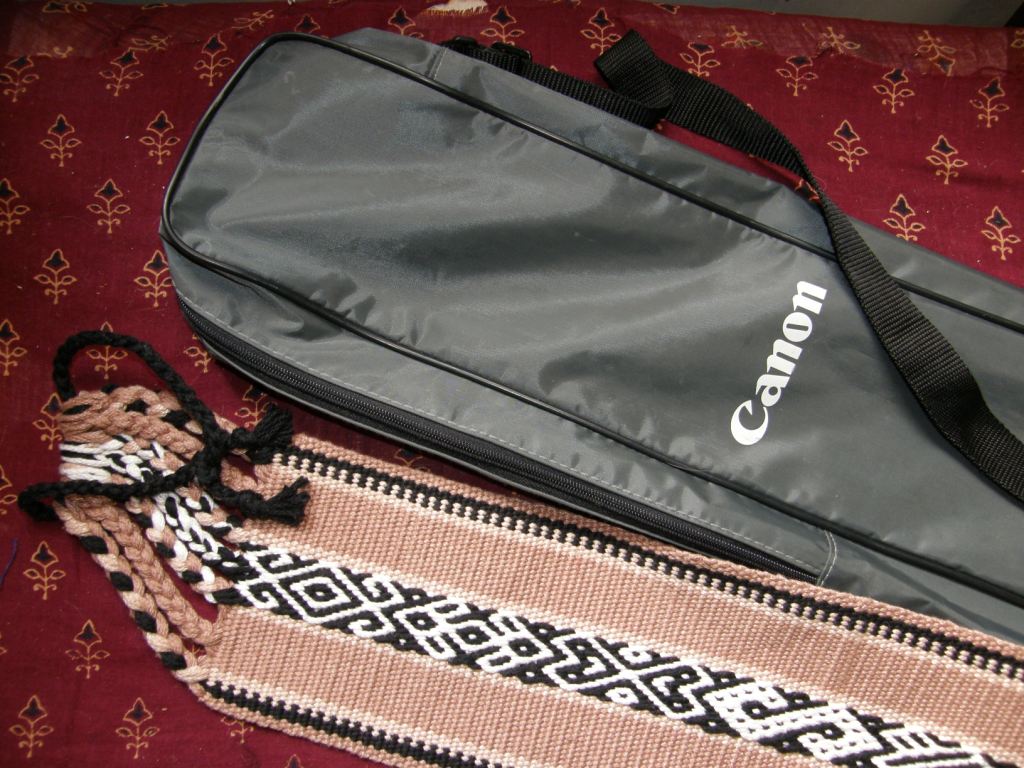
Amongst the processes, there are some real products emerging. The twined band above is going to be a strap for a loom bag which I am modeling on my camera tripod bag.

I discovered that this backstrap that I made ages ago with a 13wpi mercerized cotton, (the same stuff I used in the WeaveZine article), is exactly the right width for the front panel of the bag and so I was easily able to calculate how many warps I needed to get started on the body of the bag. I wanted to keep it relatively simple as the strap will be quite busy with all its woven words.

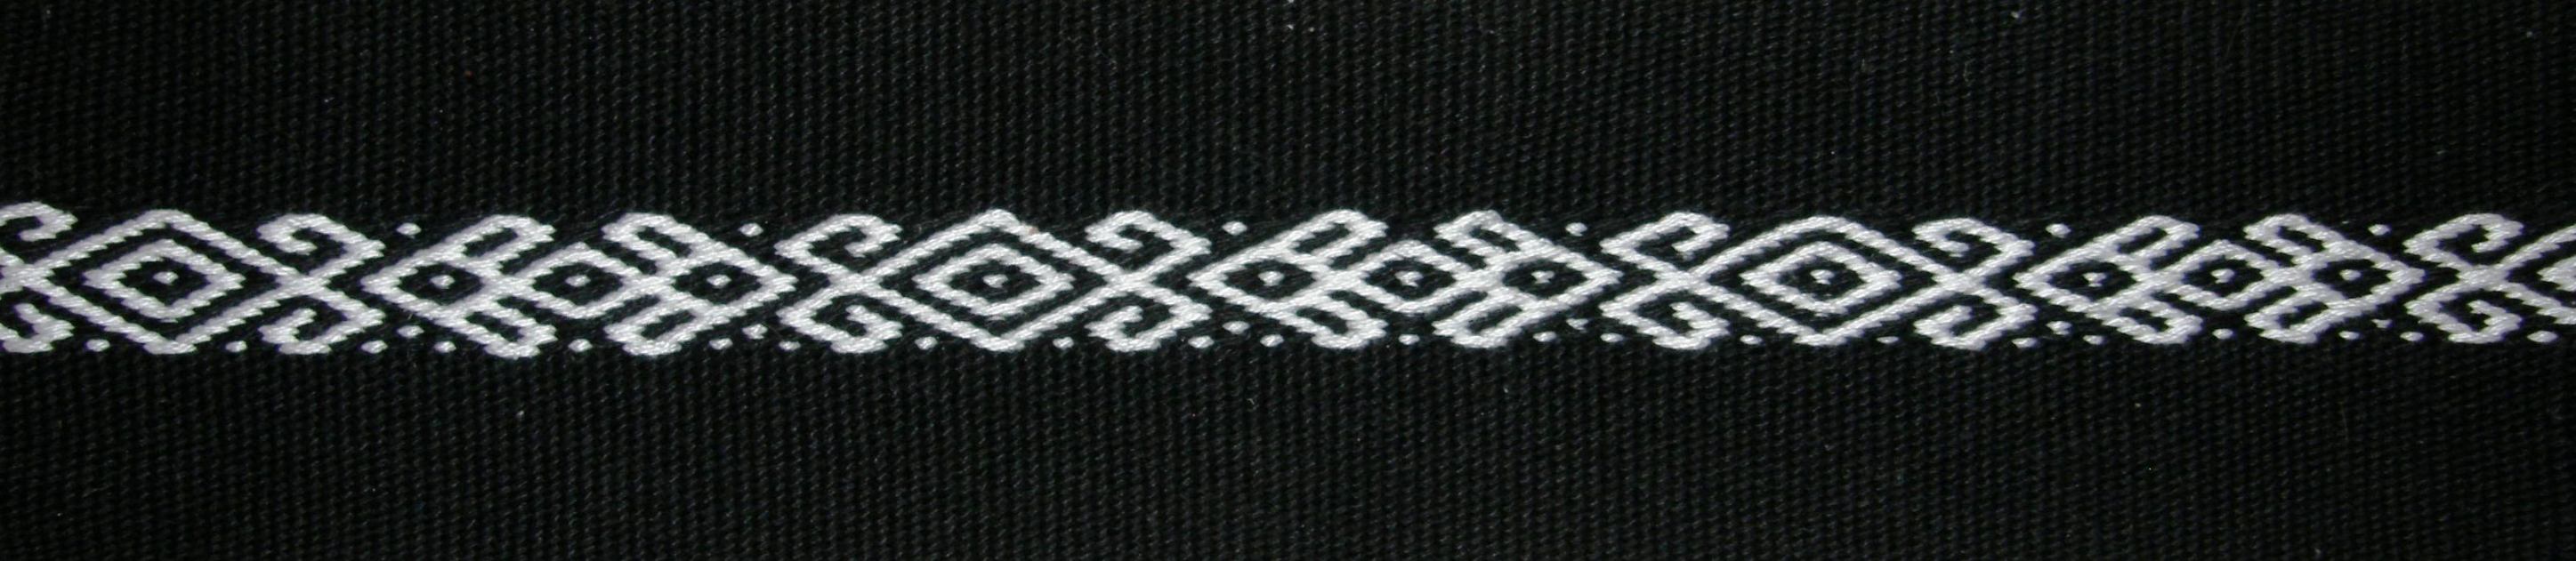
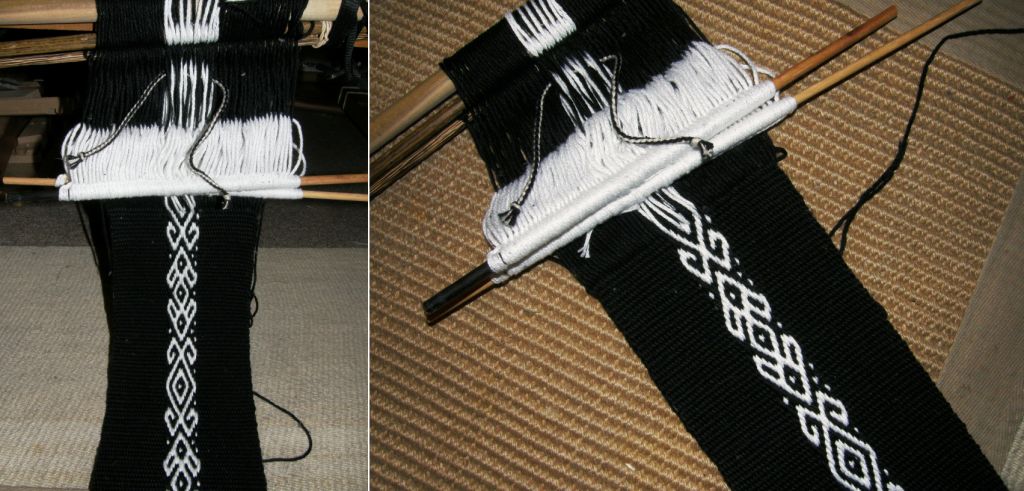
So, here it is…black with just a strip of pebble weave pattern down the middle. These are two of the 8-rev designs that I have in my Andean Pebble Weave book and they look gigantic in this 13wpi thread. What fun it was to weave this up in one sitting in this chunky-ish yarn!

A couple of shots on the loom…

I just managed to get the length I need from my standard 36″ warp. It is wonderful how little waste there is when using backstrap looms. I will make the other large panel and sides in plain black and will then edge it with a tubular band in black and white. There is also a zipper to go in.

Another product to show…yes this is something that I will keep and use myself…

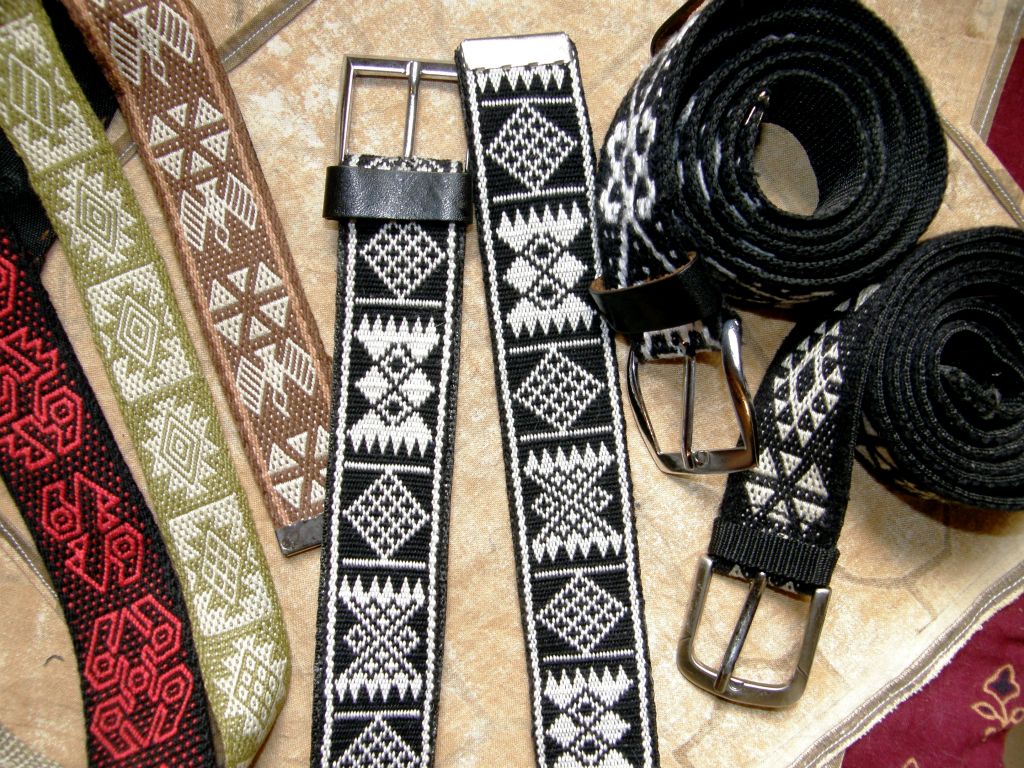
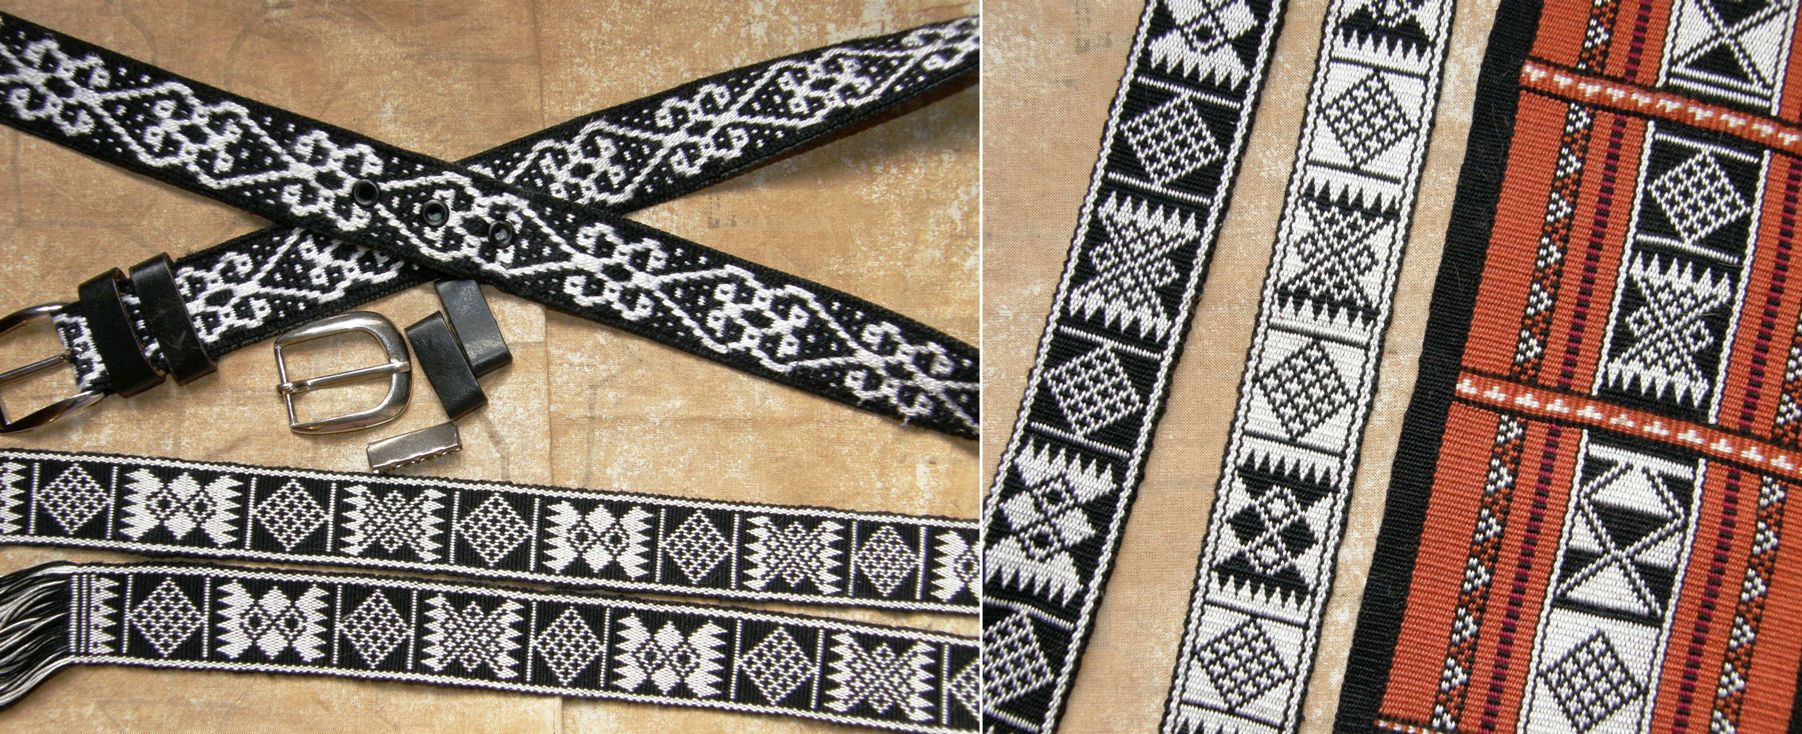
I finished my double weave belt with the Bedouin designs. I had to get an extra wide buckle for it and there weren’t many choices. Fortunately there is a market stall, just down the street from where I live, called “Hebilandia” or, “Buckle Land”! (hebilla being the Spanish word for buckle). Who knew there were so many people out there in want of buckles! The three belts on the left and the one bottom right are patterned in pebble weave. The other one has a design in simple alternating warp floats.

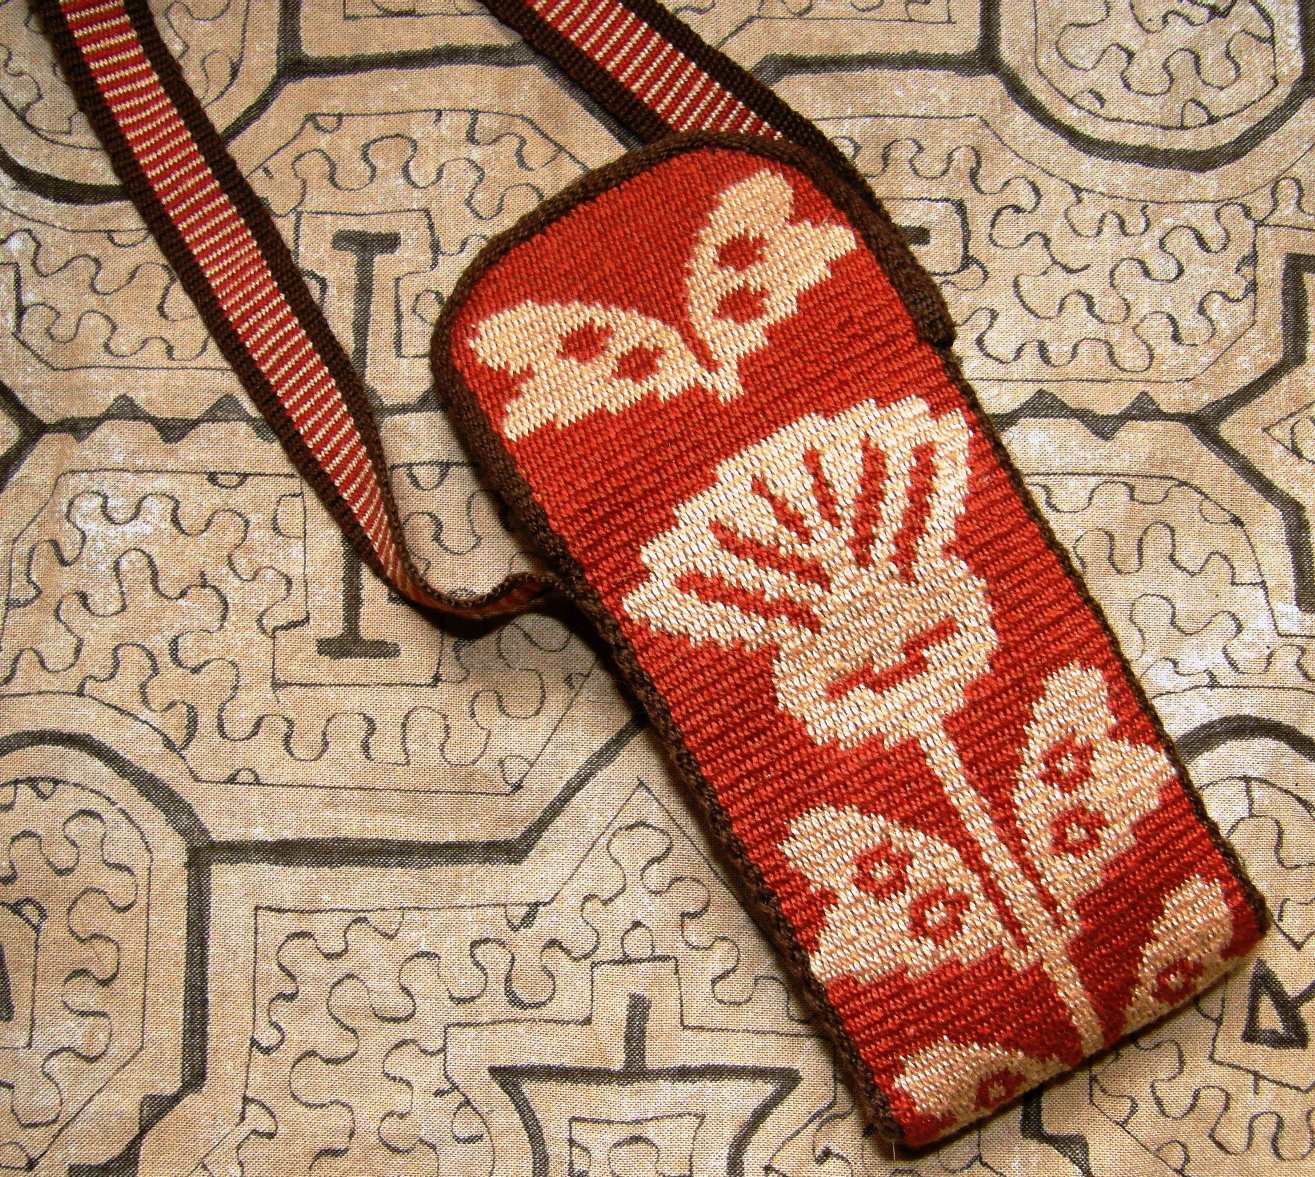
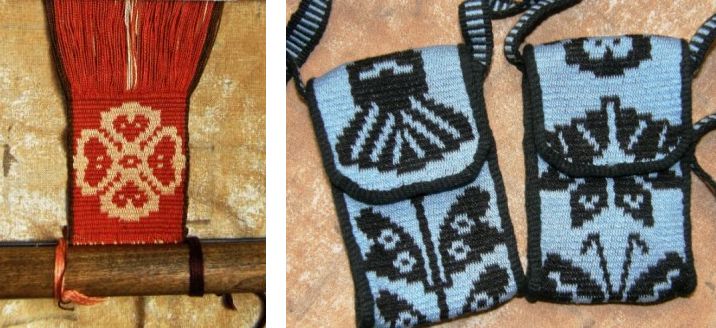
And the final product and my favorite for the week is my cell phone pouch. Yes, my cell phone pouch –  not to be given away or traded.

I finally own a cell phone but it is not for use here in Bolivia. I am happier having my answering machine take the calls here. The cell phone was actually given to me by a friend in the US for use there. As I travel on standby tickets, I really need one in order to let folks know if I have gotten on my flight and am about to arrive. No more begging kind strangers for change for the pay phone or to use their cell phone.

I modeled my cell phone pouch on that made by Guarani weaver, Angela. I bought two of her pouches some time ago, gave one to a friend in the US, and am saving the other for my friend Lisa.

That’s mine above left modeled on Angela’s blue and black one. It is woven in the technique that the Guarnai weavers call Moisy which produces quite a dense fabric.

You may remember that this was the sample piece that I had made to see if I understood what Angela had shown me. I copied her designs with some adaptations, for example, I rounded the flower head and used one of her leaf designs as a butterfly. Angela’s patterns reflect the abundance of lush vegetation here in the Bolivian lowlands. The designs that the Guarani women use on their Moisy pieces are not like any you will see elsewhere in Bolivia. You can read more about my visits with Angela here and here.

Angela had finished her pouch with a plain band which she had woven and sewn simultaneously to the edges using the weft as the sewing thread. I did the same except I used this edging only around the flap. You can see the band with its heddles and shed loop above left. Then came the scary part…

I really loved the shaped flap that Angela had created but couldn’t bring myself to cut the fabric. I was imagining the whole thing fraying away in a jagged mess while I tried to sew on the band and that is precisely what started to happen.

So I sealed all the way around the cut with diluted white glue, waited for it to dry and that did the trick. I will never make a cell phone pouch with a square flap again! This was fun!

I also copied her idea of making a striped band for the sides and strap. A tab of velcro for the flap finished it off.

Something else that has made me smile this week has been following the Weave Along in the Backstrap Weaving Group on Ravelry. There is a lot of enthusiastic participation and sharing, cheers and, sometimes, commiserations. People have been having their successes and frustrations and I think that everyone pretty much agrees that “baby steps” are required…stay with the heavier and friendlier yarns and narrow projects until you really feel that you have the hang of it. There are so many things to think about and get under control before one is ready to move on to new challenges.

Here are a few works-in-progress and finished objects from, from left to right, Firecracker8 (who found that beating harder made her supplementary weft pattern look much nicer and her pebble motif less elongated), Jennifer (who found that size number 3 crochet cotton makes a pretty band and is easy to handle) and Marsha (who used a Gilmore Wave Loom for her first attempt at double weave). We are waiting to see pictures from other participants who can only weave on weekends. No hurry! We will be around 🙂

Lots of cool ideas have been appearing in the forum and I have some more warping options to show you from himalaya and wanderingskopos…

We just had a new member from the UK join the group and the Weave Along. He is a rope and canvas craftsman and net maker. Well, I was curious about this as I had no idea what that entailed and invited him to post pictures of some of his work and he totally blew us all away! I immediately checked out his website. I love the hammocks and rope mats.

In my inbox I found images from Julia who made a band with a bunch of pebble weave motifs using my book. I love the way she has hung it with all the loom parts in place. She did a good job weaving as close to the end as possible which is not easy with cross sticks and two sets of heddles.

I also asked Steve Pretty if I could show the frame loom on which he has been weaving warp faced bands and, most recently, an Andean pebble weave band using my book.

Steve got the idea for this frame loom with its nifty tensioning system from the web site of Dr Carol Ventura. This page on Toba weaving of Argentina on Carol Ventura’s site shows the loom and the technique to produce the band above left. The technique is similar to that which I call Simple Warp Floats.  On the right is Steve’s pebble weave band.

It really puts a big smile on my face to see people in the online groups jumping in enthusiastically to learn these techniques and weave stuff.

I have had the benefit of spending days and, most often, weeks at a time face-to-face with my weaving teachers here.  Not everyone reaches their weaving goals without having that personal contact with a teacher and besides, we all have our different learning styles.

So, I would like to tell you that there are still a few more places available in the Andean Backstrap Weaving class called “Beginning and Beyond” that Abby Franquemont is giving at Beth Smith’s The Spinning Loft in Howell, Michigan from January 28th to 30th, 2011.

Beth tells me that Abby Franquemont first went to Peru around the age of five and was there on and off throughout her teenage years travelling with her anthropologist parents Ed and Christine Franquemont.
She began spinning and weaving immediately upon arriving in the Cusco Region of Peru and, although she is best known as a spindle spinner in the US, she is also a fantastic weaver on the backstrap loom.

######################################################

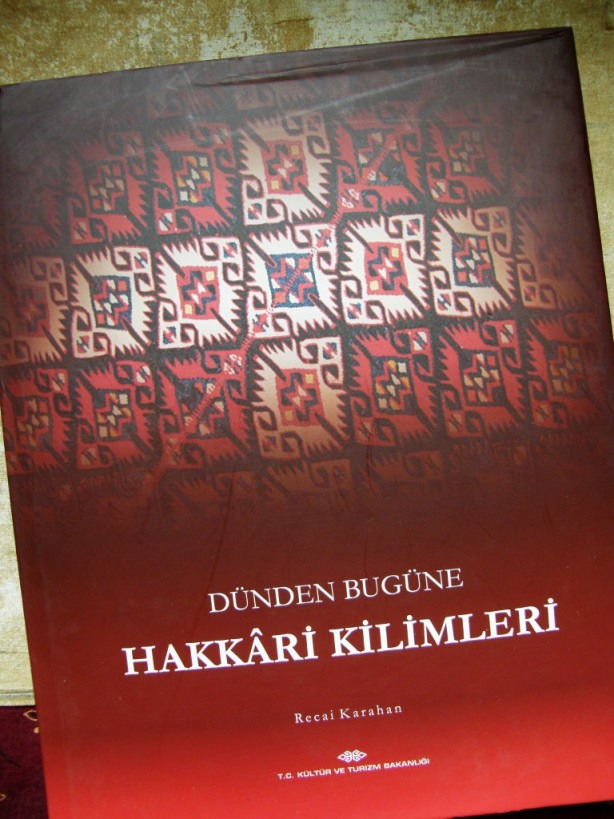
In the post box this week…some inspiration from Turkey. My brother went to Istanbul and got me this locally published book (in Turkish) on Hakkari Kilims. It has lots of luscious photos.

Now to figure out which word from the text is the one for “weave” to add to my band.

And what about those videos that were giving me grief last week?

In the end I had to whittle them down to under ninety seconds so I could load them to my Flickr page and link from there.

So, there is a short video showing warping for one-weft double weave and another on heddle making on the tutorial page.

Nothing new – they are just meant to give further clarification for those who might have doubts.  I also added a video on adding a second cross to stabilize your shed rod to this FAQ page.

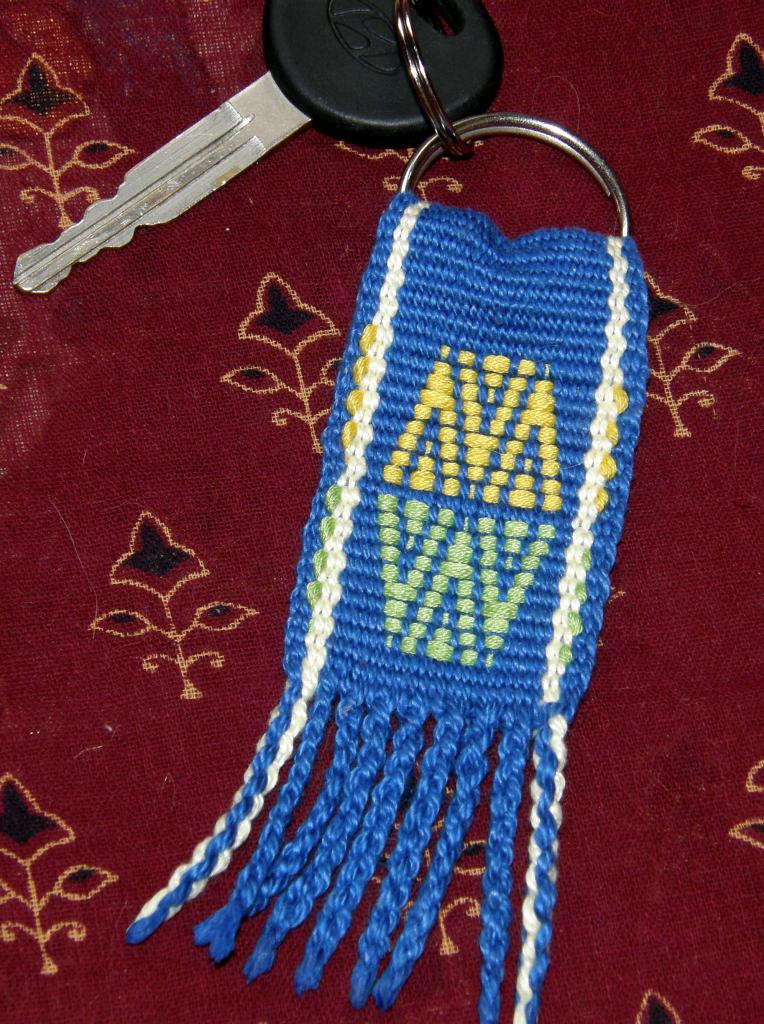
What I am planning next for the tutorial pages here is a full project  – Making a Key fob in Double Weave – from start to finish with a few videos.

But for now…the products are done so it’s back to the process…


Backstrap Weaving – The ‘Tis-Done and the To-Do

I bought myself a good old fashioned acrylic board last year to write my “To-Do” list and hung it on the bedroom wall. It is not that old fashioned when I remind myself that my teaching colleagues are still using blackboards and chalk where I used to teach English here but it is indeed old fashioned in the world of IPads and such gadgets. I really need to have that To-Do list up there in front of me with a list made in brightly colored marker pens. It is so satisfying erasing something and saying ‘Tis done! What I really wanted to do was start the year with a fresh gleaming clean white board instead of one still covered with colorful scribbled lists.

These two weaving “To-Do”s were still hanging there from 2010 and I am pleased to say that one of them is about to be erased…well almost.

The double weave belt at left went on a nice trip with me to the US recently. It came out once for a weaving demonstration with a group of Bhutanese weavers in North Carolina and then went back into its bag for the rest of the trip. So, I was determined to at least get this off the loom. You may remember that this belt is a result of my twining investigations with Montagnard weavers which led me to Bedouin twining and then Bedouin warp substitution designs which I then decided to reproduce in double weave on this belt…quite a journey!

You can see the Bedouin design piece I wove above right. The warp substitution technique (see the tutorial here) produces crisp designs on a background of solid color with long floats on the back. The same designs can be produced in warp faced double weave (see the tutorial here) without the visible floats and with the patterns reversed on the back of the band. I have all the hardware ready for the belt and just have to put it together now. I need to thread one end of the belt through the buckle which means having to cut a slot in the band. What I usually do is paint the area to be cut with diluted white glue which acts as “stop fray” and then go ahead and cut.

The finished belt, with buckle in place, in the picture has been woven with simple alternating warp floats using a design from a yurt band (see the tutorial here). So, I am just about to erase this 2010 project from the board.

The other unfinished project that you saw photographed above is the sample I made after visiting Guarani weaver Angela. I had just wanted to see if I could get my head around the Moisy technique she was using so, basically, that was a mission accomplished, but I still think that I could make something useful from this piece and don’t feel like discarding it. So, that is next.

Of course I still won’t be able to wipe the board completely clean as it is now filled up with 2011 stuff. And that is the way it should be!

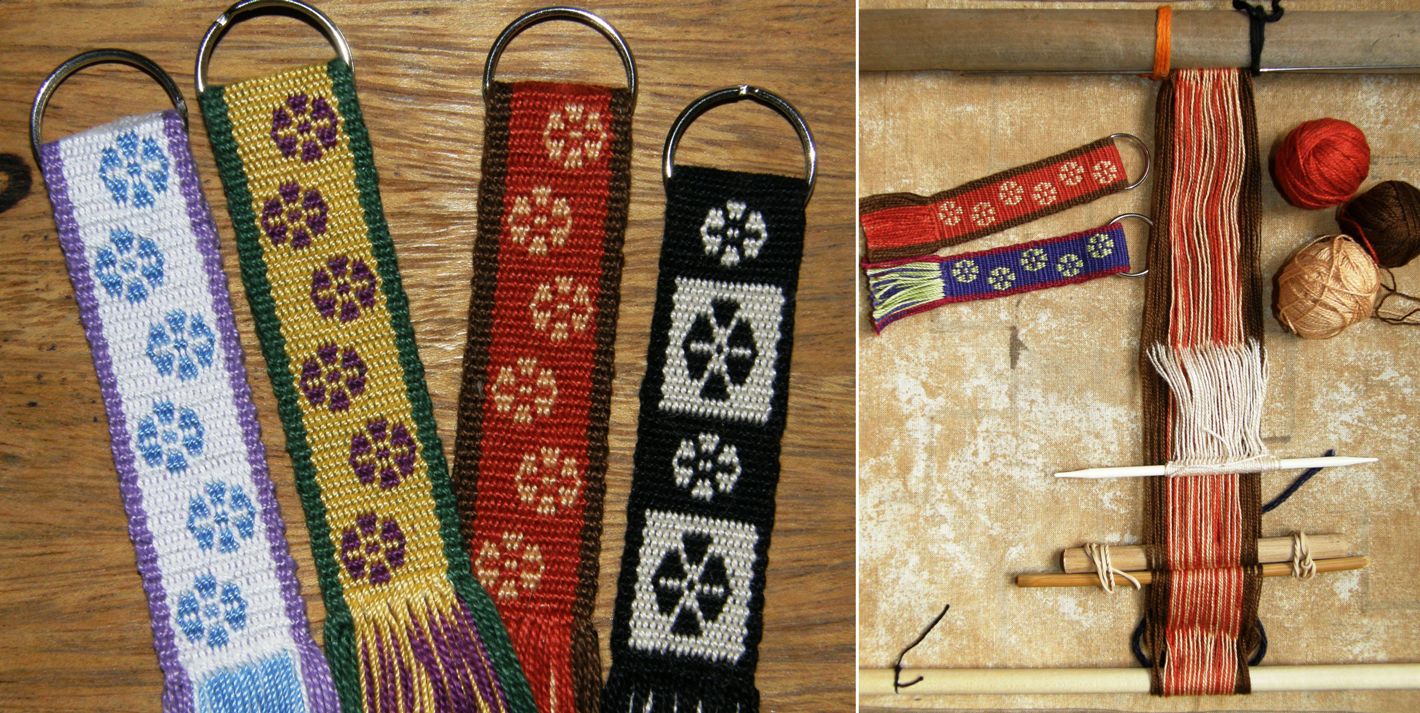
While I was immersed in double weave finishing off my belt, I decided I would make a video showing how to warp for this technique to add to the existing tutorial. Those of you who subscribe to Handwoven may recognize these double weave keyfobs which are shown in the Jan/Feb issue…

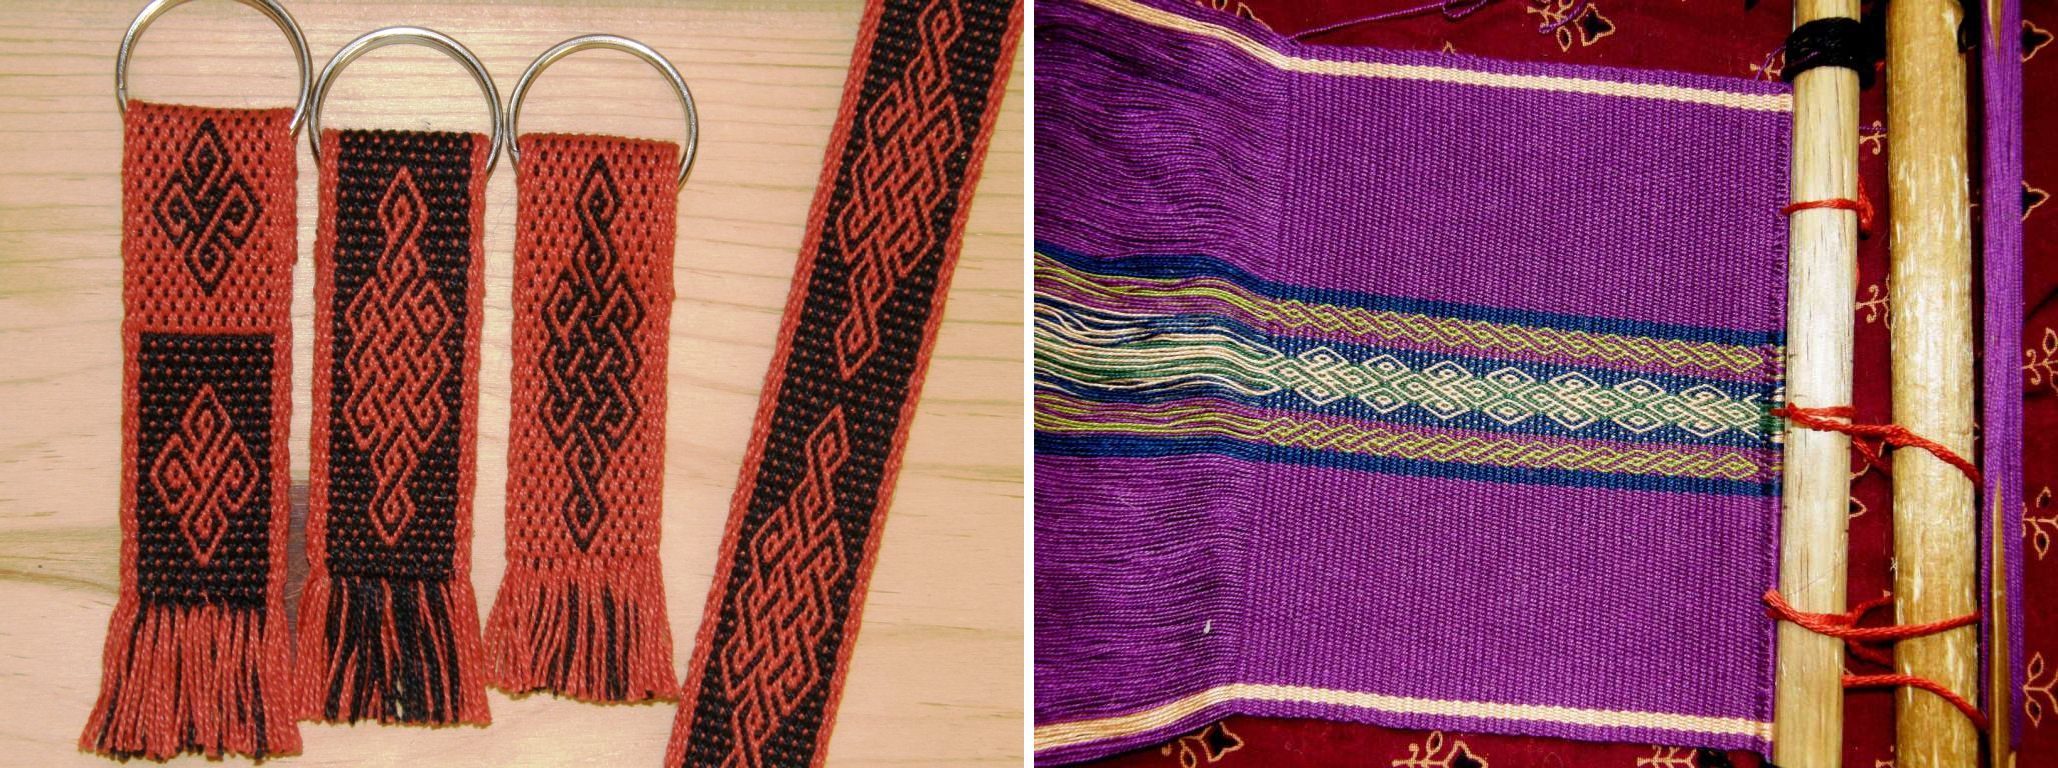
This will probably sound completely ridiculous to those of you who are used to winding warps of several yards or meters for multiple projects on your large looms…I wind a tiny warp for each and every keyfob. Warping for double weave and making string heddles across such a narrow warp is such a breeze for me that it doesn’t bother me at all to have to repeat the process for each and every fob. I love the opportunity to play with colors and not have any two fobs the same. I can create a third selvedge for every fob and save time not having to deal with hemming a raw edge which is tricky and often unsightly in double weave. I did weave thirteen identical fobs on an inkle loom once and won’t do that again.

And, as I always say, the only trouble with double weave is deciding which side you prefer…

Decisions, decisons…which side do I prefer? Here are the backs of some of the keyfobs shown above.

The big problem for those learning double weave is that it can be painfully slow. There are a lot of steps and, until you understand why you are making the moves, it all seems like a terrible amount to have to memorize.

It is easy to miss a step and make a mess or lose your way if you have to leave it for a moment…just part of the learning process.

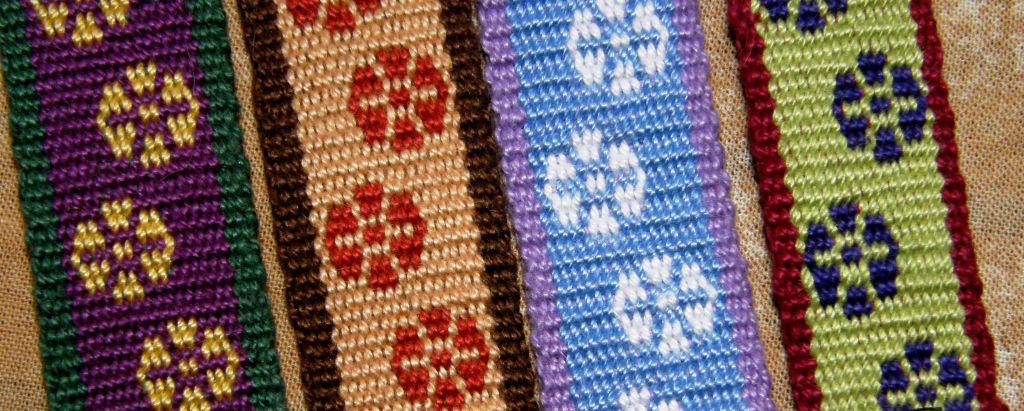
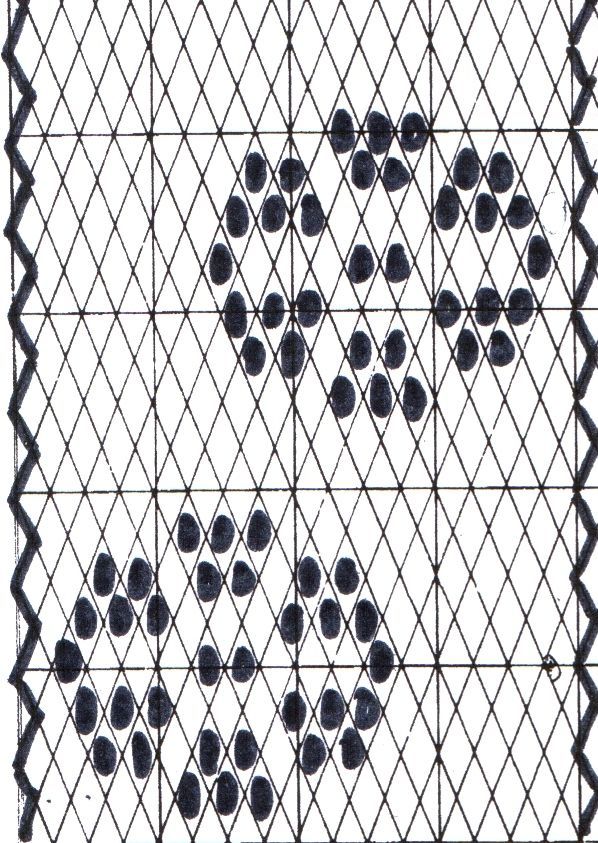
I have been told several different versions of what this little design represents by weavers here in Bolivia and I wrote a little about this here. In any case it is a simple neat design, easy to memorize and fun to weave.

The pattern chart is on the left.

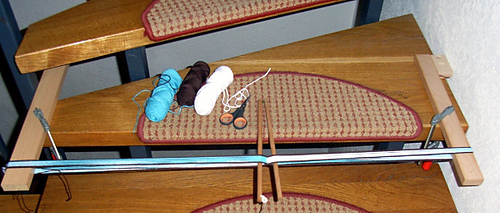
I made several pieces of video covering warping, creating the third selvedge, making string heddles and putting in a second cross to stabilize the shed rod. This week I am trying to just post the warping and third selvedge segments. These videos take so long to upload and my internet connection is not cooperating today. I will add others each week and have them stored on the double weave tutorial page. I hope you find them helpful (once I get them up there).

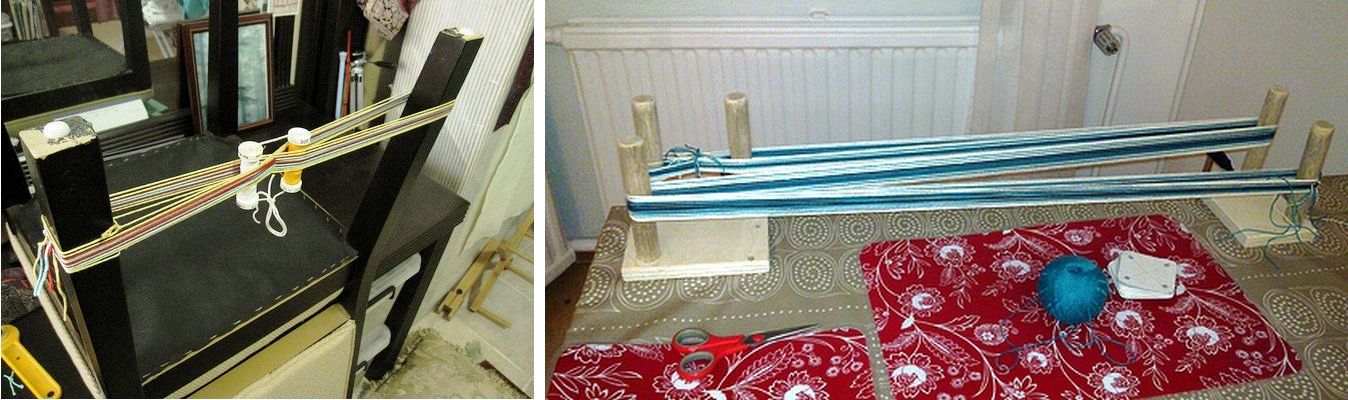
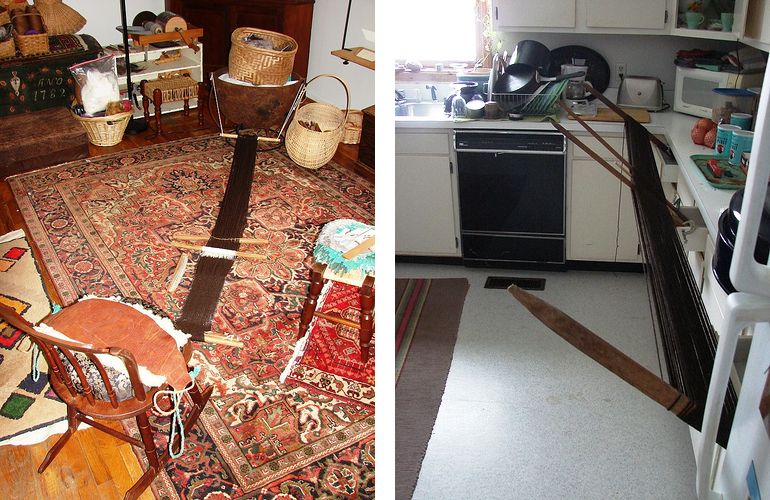
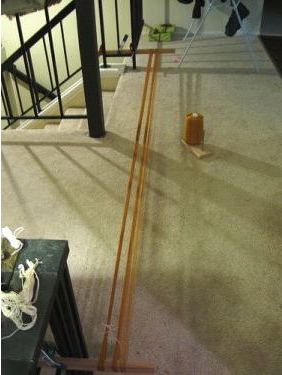
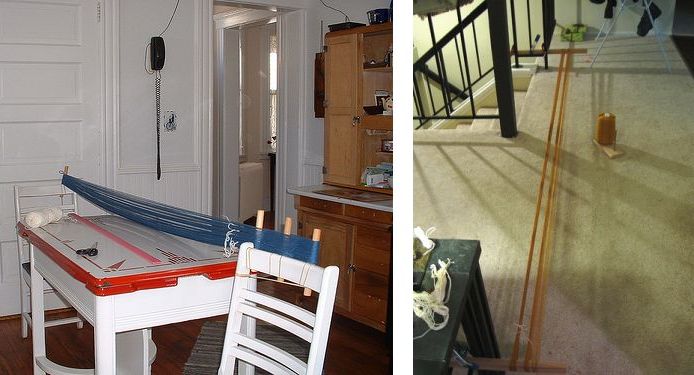
While on the topic of warping, we have started the Weave Along in the Backstrap Group on Ravelry and, hopefully, participants have read my three little tips from last week’s post particularly the one about the importance of having a good stable set up for warping. Some photos of improvised warping have been posted in the online weaving groups in the meantime…

This is from backstrap weaver Fliegenpilz in Germany, whose idea it was to have this Weave Along in the first place. She has warped for a pebble weave band following the instructions in my book.

Phil has himself nicely set up to weave in his rocker. Check out how he wound his warp with stakes lodged in kitchen drawers.

I caught the next picture in another weaving group on Ravelry…


Pancha says that her idea for warping, pictured above, originally sprang from her desire to try backstrap weaving. She has used it for other looms too but is now fed up with bending and walking up and down and has ordered a warping board.

Other weavers from Weavolution have shared their finished projects with me…

Deanna wove these bands decorated with Andean pebble weave designs on her Leclerc Dorothy 15″ table loom following the draft in my book. She also backstrap weaves and ties up her loom to her 40″ sixteen-shaft Macomber loom…a nice sturdy place to attach a loom bar.

Speaking of which, here is Jennifer’s pebble weave warp tied to the castle of her floor loom…

She has it angled  steeply upward which means that she has the warp threads quite close to her for doing pick up and does not need to bend. Each weaver will find their own way. I prefer a gentler angle.

Marsh Knox of PandulaArts has been following the tutorial on simple warps floats and weaves on a Gilmore Mini Wave loom. I have shown many of her finished bands here. Recently she had some of her bands, which she made with alternating floats, sewn into a mini tote bag for a friend…She calls this the “one-skein project” bag.

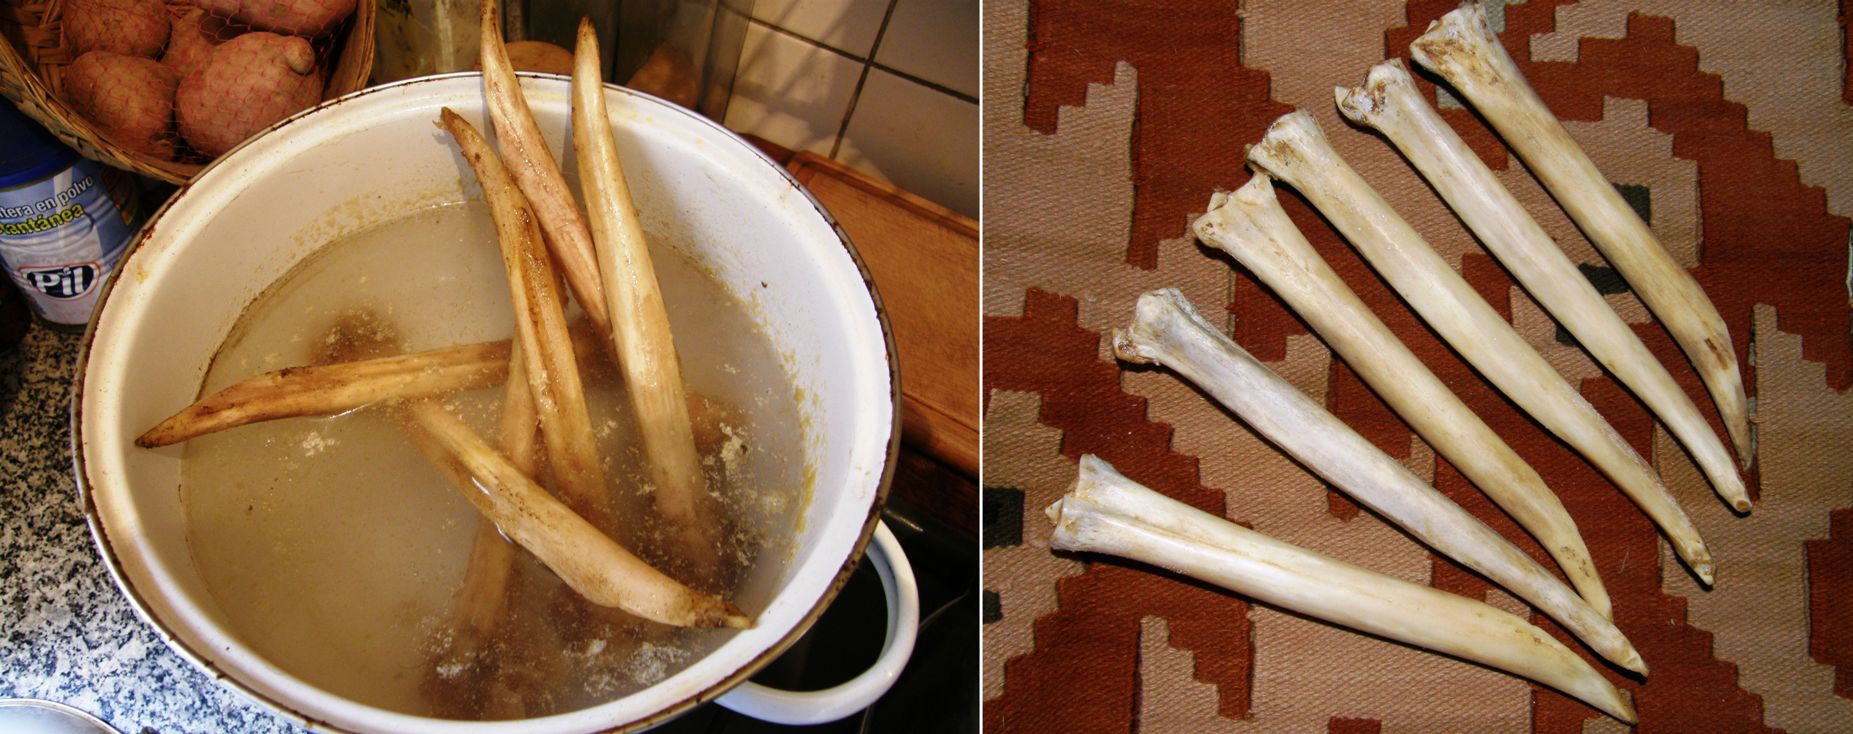
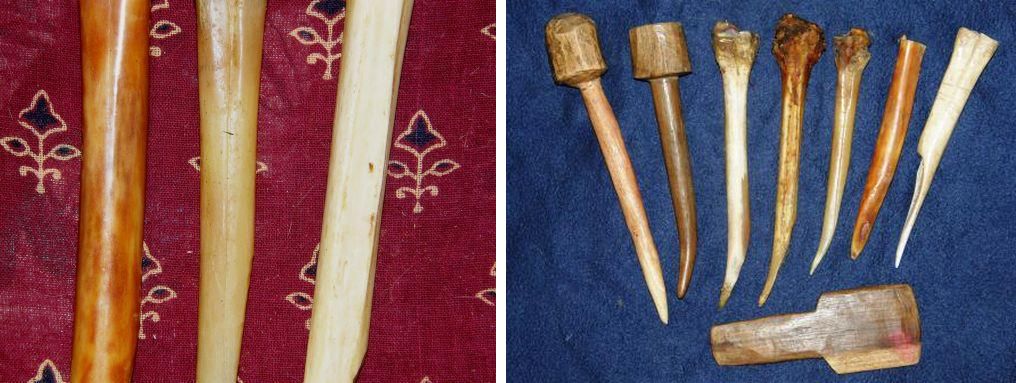
I had a few things going on this week. Firstly we got a short reprieve from the heat and humidity and were able to turn off the a/c and have the windows open for a whole day. This gave me the chance to boil up the nasty llama bones I have had lying around since my friend Anna brought them to me from the highlands a few months ago. These are the wichuñas, the bone tools used by weavers here to beat in the weft and pick up warp threads for patterning. They are also used in Peru where they are called rukis.

Several boilings and changes of water were needed to get them cleaned up. The smell!! There they are on the right –  white and gleaming. The tips could do with a bit of refining but otherwise they are good to go. Several years of use will have them take on the lovely hue of old ivory and I have seen some very old ones that have the tone and shine of polished wood.

That was another 2010 task to gladly erase from the board.

As for the ongoing twining obsession, I started a loom bag project and am twining its strap with letters. Just when I started thinking that I was taking the twining obsession a little too far with this lettering fad, I was shown these fabulous images of Batak twining…The Batak people live in northern Sumatra in the hilly region of Lake Toba.

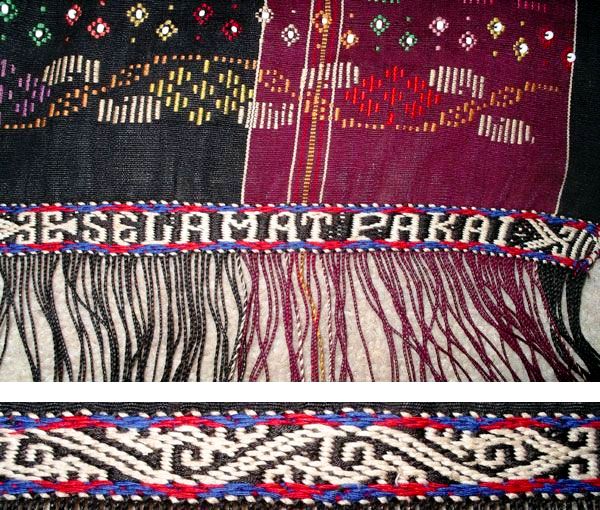
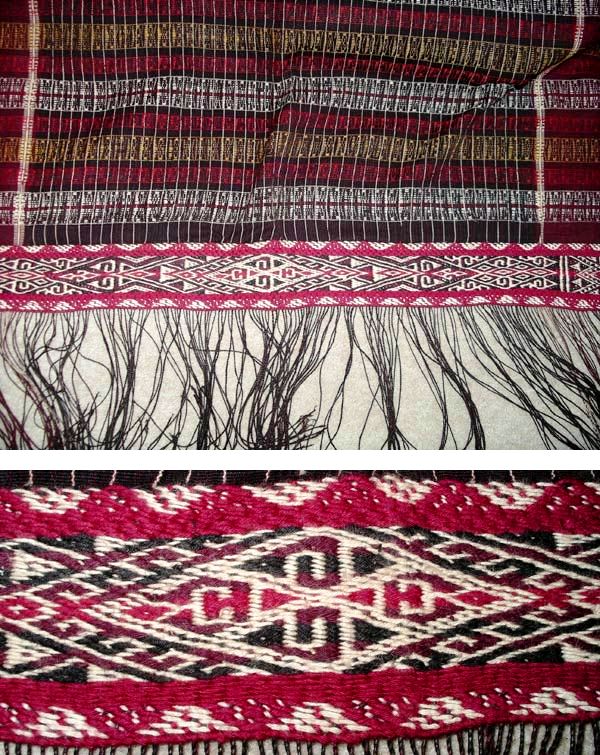
These amazing textiles are part of the collection of Pamela Cross and she has allowed me to show them to you here on my blog. She describes the above piece as a Toba Batak sadum (a woman’s shoulder cloth). Twined lettering! This twining is so very different to that done by the Jarai and Rhade weavers with whom I studied. How beautiful.

Here are some more images that Pamela shared of the twined bands on other Batak textiles…The following one is a ragi hotang which I understand is a shoulder wrap.

Gasp!

The following is a surisuri. Pamela says that the surisuri is one of three types of indigo-dyed textiles used for Toba Batak rituals.

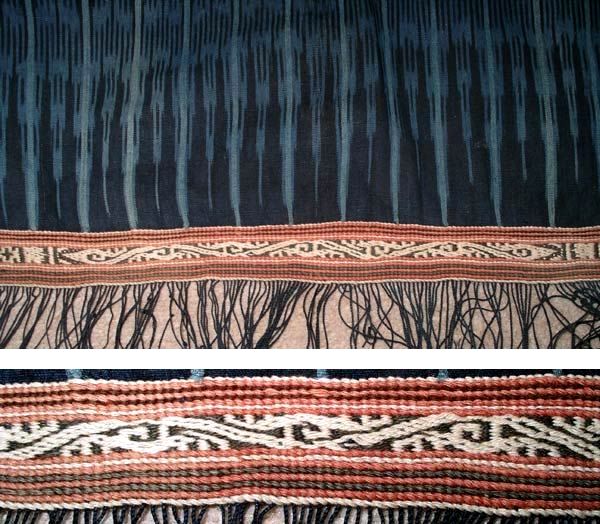
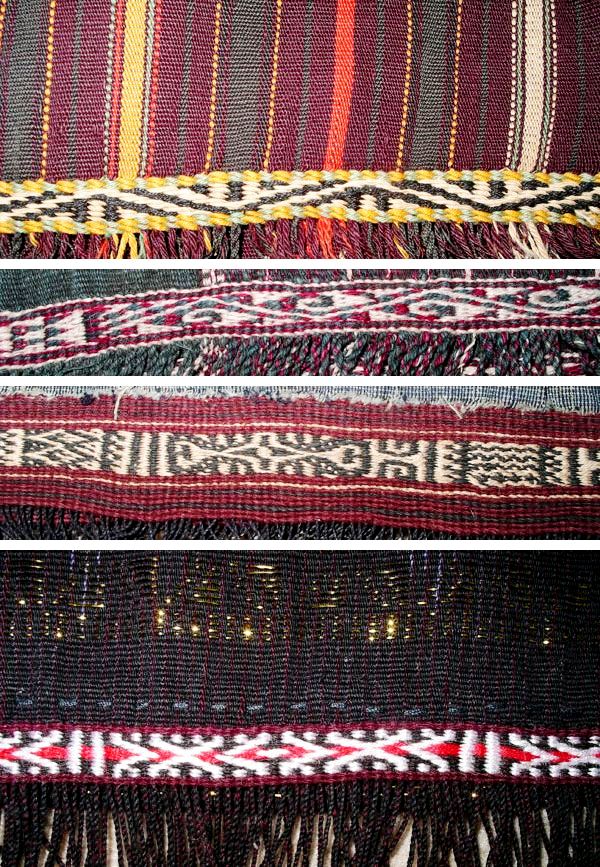
Here are twined bands from several different types of Batak textiles. The design on the second one from the top is so Andean-looking don’t you think?!

It is exciting to know that there is a book available now by writer/researcher Sandra Niessen, PhD on  Batak textiles:

“Legacy in cloth: Batak textiles of Indonesia offers the first definitive study of the woven heritage of the Toba, Simalungun, and Karo Batak.


The most complete analysis of Batak textiles ever published, it provides a record of more than 100 different design types, including archival and contemporary photographs showing how the textiles are woven and how they are used in Batak culture.


Legacy benefits from fieldwork conducted over two decades and consultation of all major European collections of Batak textiles and private collections in Indonesia.”


Even more exciting for me was being able to make contact with Sandra.

She kindly shared some pictures taken by MJA Nashir of a Batak woman twining. The process is not at all like that practiced by my Montagnard friends.

The weft appears to be tensioned between the toes and a small stick seems to be used to aid in the twisting of the two wefts. No doubt Sandra’s book thoroughly discusses the process and I am itching to get the book and have my curiosity satisfied and learn more about the Btak people and their textiles.

Sandra tells wonderful stories on her blog of how she has been returning to the villages where she conducted her research to present copies of her book to the weavers.

Well…after all that eye candy here is the humble twined bag strap I have been making with twined letters.

The idea is to twine the word “weave” in several languages. I have just begun the German version. I hope to do French, Portuguese, Quechua, Aymara, Guarani, Russian, Jarai and many more, if they will fit, with each word in a different font. I would love to hear from blog readers around the world who can tell me how to say “weave” in their language.

The letters are a munched version of those in Linda Hendrickson’s book Please Weave a Message. Remember that Linda’s letters have been designed for card weaving,  not twining, and are far prettier than the ones I have used here. Check out Linda’s page to see her gorgeous lettered bands.

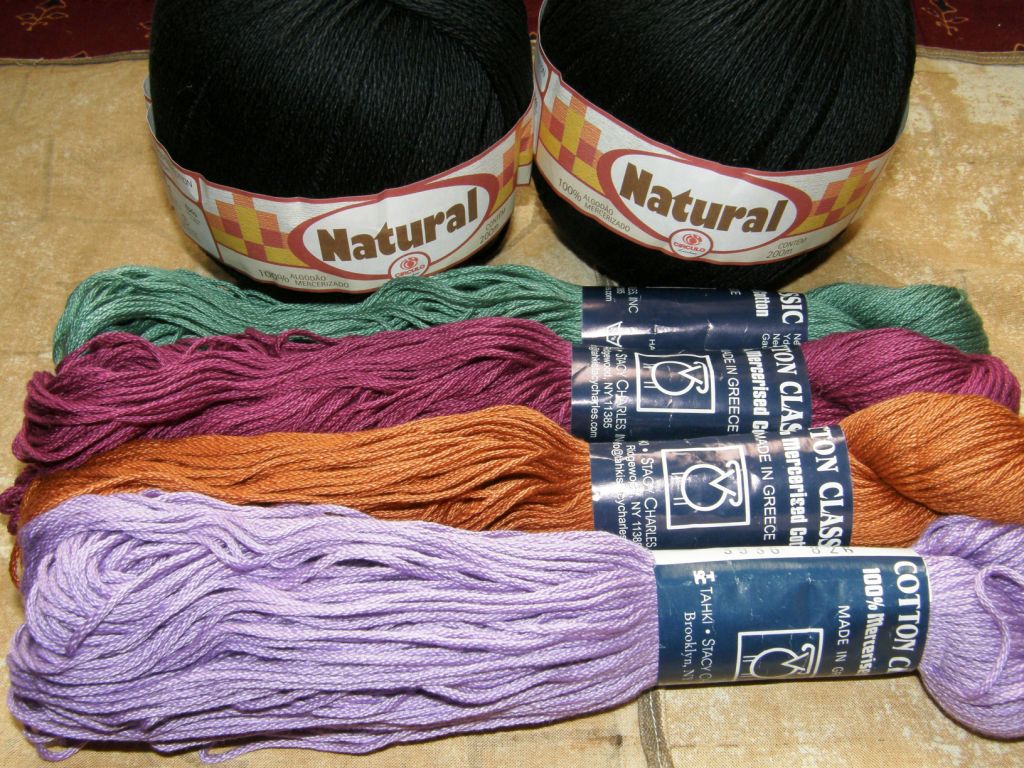
So this will be the strap for the loom bag in which I will carry my backstrap on future trips. The shape will be based on the camera tripod bag which I have been using until now. I haven’t put much thought yet into the body of the bag but I will weave it on my backstrap loom using a heavy-ish black mercerized cotton and some of my new Tahki Cotton Classic thread for patterns and embellishments.

And continuing on the lettering theme,  weaving friend and blog visitor Sharon Kersten completed the chart of letters for the Montagnard warp float lettering tutorial that I did last week and has sent it to me to pass on to all of you. She saw my photo below of various bag straps woven with letters and used it to chart what she thinks the missing letters could look like as well as the numbers. Many thanks!

I will leave you here for this week with this new Bolivian beverage…

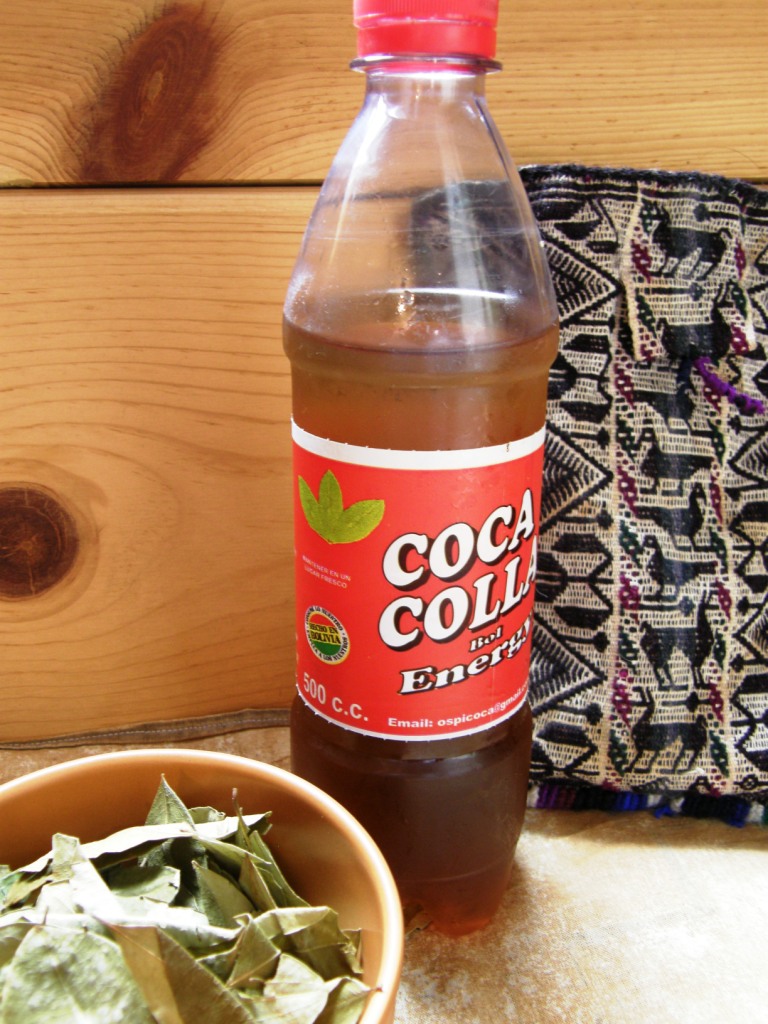
Peru has its Inka Kola and now we have”Coca Colla”! It’s a play on words, not bad spelling…”colla” being the word to describe people of indigenous origins here in Bolivia (pronounced coya- the oy sounds like the oy in “boy”). It is made with coca leaf extract, is heavy in caffeine and slightly carbonated. All I can say is that…weeeel…. it tastes as good as it looks. 😉 Cheers!


Backstrap Weaving – There is no one “right” way

THERE’S NO ONE “RIGHT” WAY….and A NEW TUTORIAL

I went to visit Angela again (see last week’s post) one morning this week to see how she has been progressing on her wall hanging and give her copies of some of the photos I had taken during the previous visit.

She had several projects going at once and was very pleased as she had just been given an order for 1500 woven greeting cards from her regular Christmas customer. Now she is planning a trip to her hometown of Isoso to organize the other weavers there to help complete the order. She told me that when she took on this task last year she had been able to weave ten cards a day.  Imagine!

The smaller of her two looms is occupied with this gorgeous wall hanging which I watched her warp on my last visit. As I told you last week, the designs that the Guarani women weave in the Moisy technique are nothing like anything you will see anywhere else in Bolivia.

And here is something else she is working on in the Moisy technique…


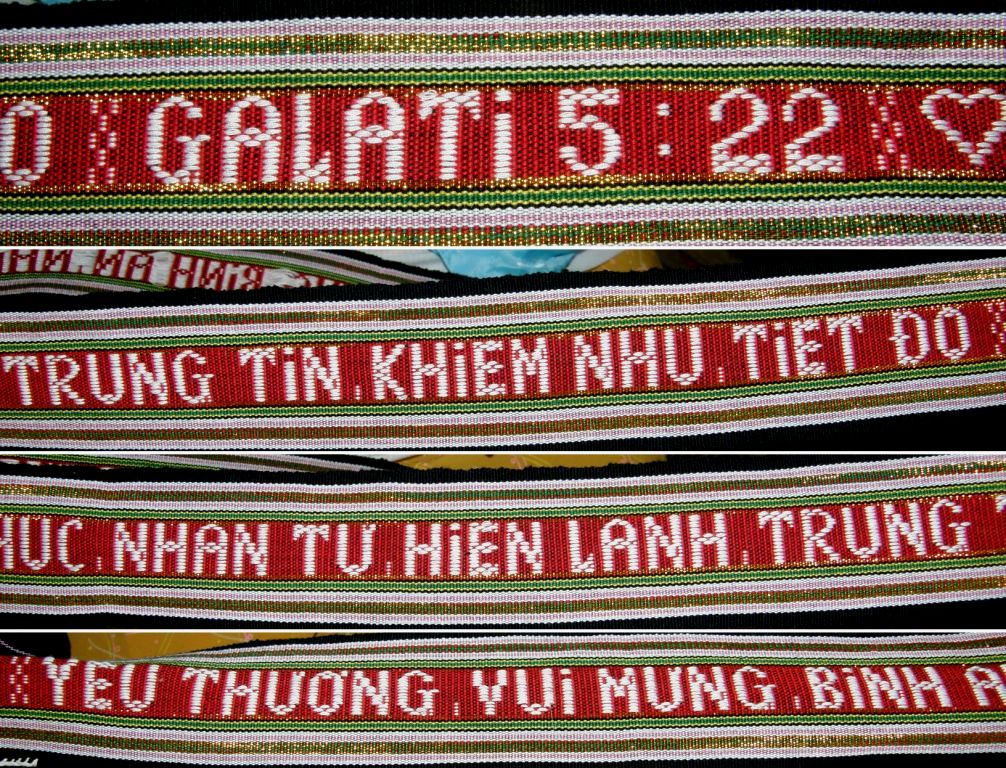
The band says Centro Cultural Boliviano Americano which is the institute where I taught English for eleven years. The teachers are wearing these around their necks to hold their ID cards. Gee, I wish we had had these when I was there! The band includes a small snake skin design. There are over sixty teachers there and so I imagine that this task is keeping her somewhat occupied as well!

Lettering! I was excited to see that but haven’t taken a good enough photo to get a really detailed look.  I think I will ask her to weave me an alphabet band if she ever has the time!

Another thing about which I am very tickled is that she has put one of her sets of heddles on a stick (see photo above). She had asked me to teach her how to do it on my last visit and now here she is using it. If you watched the pick up video in my last blog post you will see that opening the lower of the three sheds is a little tedious with the loose string heddles that she makes. So now she is using the stick on this lower heddle with the extra hitch as I showed her.

The actual stick that she is using as her heddle stick is a large wooden needle which she uses to pass the weft when she is weaving a four-selvedge piece. When she is closing the final piece of weaving and there is very little room in which to manipulate the sheds, she passes the weft under and over each warp with this needle until there is so little room that she has to use a regular steel needle. I loved this needle and, as she has three, she offered to sell me one.

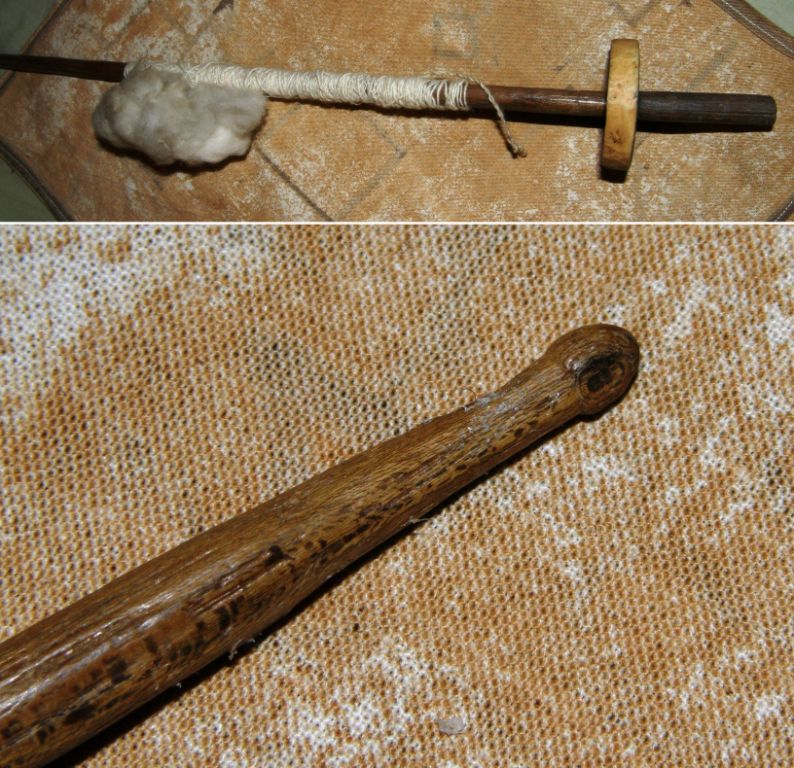
And then I remembered to ask her about spinning. Yes, of course she knows how to spin cotton and she had a tiny bit of cotton to demonstrate. Just a touch of saliva on the spindle tip got her started. Of course, she is usually seated when she spins. This was just a quick demo. She told me that in Isoso both white and brown cotton is still cultivated (there is not a single boll to be found around Santa Cruz although it used to be a very large and important cotton growing area) and that several women still spin and ply their own cotton and carry their spindles about with them when they are plying.

However, she told me that those who grow the cotton are very careful to keep their hold on the small market and won’t sell it with the seeds. Sounds good to me! Deseeding cotton is not a fun task. I did a bit of that in Ecuador although it was fun there as we sat together in a chatty group and worked.

Angela’s whorl is plastic and a spindle that I bought years ago from the store where she used to work has what appears to be a piece of the sole of a shoe as its whorl. However she tells me that in Isoso, clay whorls are used. Guess what I have asked her to bring me from Isoso when she returns next Wednesday.

Above you can see the spindle I bought here in the city. The shaft is essentially the same as that on Angela’s spindle. I love the little knob carved into its end.

I also took home the yellow and black sample pebble weave band that Angela was warping up in the video that I put in last week’s post. She has warped this and set up the heddles quite differently to the way I was taught in Peru and so I can take a closer look at it now at home.

And this is kind of what I am alluding to in the title of this post. There is no one “right” way to do these things and I am constantly astounded by the similarities and differences I see in the way people are setting up their looms and weaving as I travel around. I had never seen anyone make string heddles the way Angela does and she was keen to learn the way I had been taught by my Navajo weaving teacher years ago. There is always room to learn something new and adapt your techniques. I am looking forward to a chance to try Angela’s way of doing pick up. It doesn’t work on the backstrap loom, believe me I tried it!

I wish I could do a tutorial on all the ways I have been shown to make string heddles so that you can try them all and see which way you prefer. Making the string heddles takes practice…string and fingers all over the place and then you just get them done and find that there are some that are woefully short…

I ran into Jamie’s blog last weekend where she had been battling to make string heddles following my video. It’s a good thing that resourceful Jamie came up with her own solution to the problem, made some heddles and wove a pebble weave piece.

Above right you can see the individual string heddles that she made and successfully used on her warp. She says that this way is much faster. Well, I had to tease her about that because I disagree 🙂 but I can definitely see that these are much easier in that you get guaranteed even length heddles. If you are an inkle weaver you probably already have a bunch of these heddles lying around that you can use. If you don’t, Jamie made a nice tutorial on her blog showing you how to make them.

Above left you can see Helena’s (telarahna on Weavolution) solution with her nifty re-useable heddles. She says she needs to clean them after a project as bits of yarn fluff adheres to them but then they are good to go.

So, if you have been trying to make heddles the way I have shown it here and have been getting frustrated, there you have two nice solutions. Try different ways and see which you prefer and, as Jamie so rightly says in her blog, it’s easy “once you get the hang of it”.

Speaking of “getting the hang of ” something, I spent a great part of last weekend trying to get the hang of tubular woven bands and am pleased to say that I succeeded!…eventually.

This is kind of my warm up for the tinkuy (gathering of weavers) which I will be attending in Cusco next week. I signed up for a class on tubular woven bands but, as it is only a morning session I have doubts about whether we will have time to cover the tubular band that I really want to learn.

I used Adele Cahlander’s booklet pictured above. It is still available out there for under ten dollars. I have had this book for at least thirteen years and have never made the tubular bands. I guess I tried at one point as I have scribblings in the margins and have penciled in the colors that I was using but it seems I gave up as I have nothing to show for it.

The book has two versions of the band that I wanted to make. One has a sequence of six steps and the other eight. The problem is that there is not a picture of what the six-step version is supposed to look like. It is in fact a slightly imperfect version of the eight-step one and I spent a lot of time trying to figure out why my six-step band did not look like the bands on the cover of the book. I did not feel encouraged to try the eight-step version if I could not even get the simpler version right but in the end I decided I would just go ahead and try it.

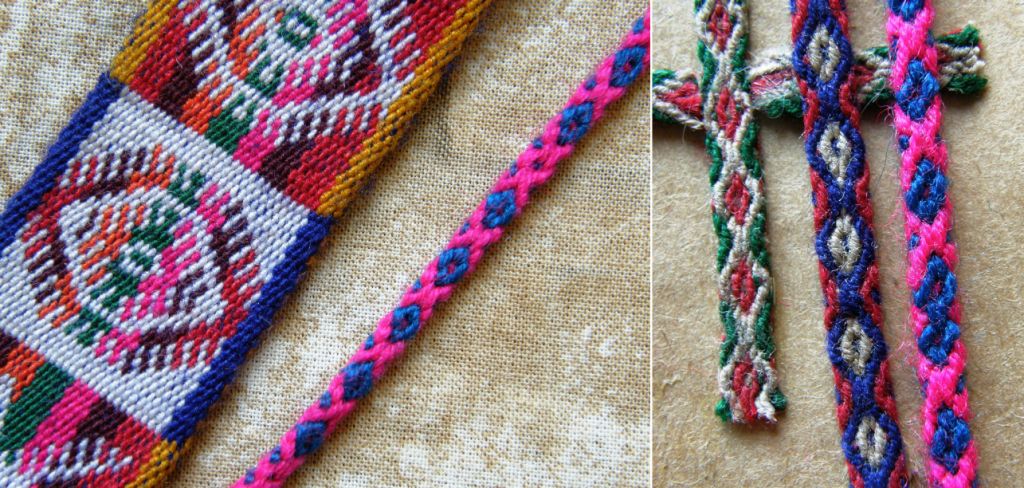
In the pictures above you can see the eight-step version on the left. See how it has two neat diamonds enclosing a center spot. In the six-step version the diamonds are not quite so neat and well defined, they overlap and cross and they actually get progressively messier as you proceed. This is just so you know what to expect if you buy the book and have a go yourselves.

Once I had this sorted I had the crazy urge to edge everything I could get my hands on with this tubular braid! I learned a tubular braid here in Bolivia many years ago but it is a very much simplified version of this one and looks nowhere near as nice.

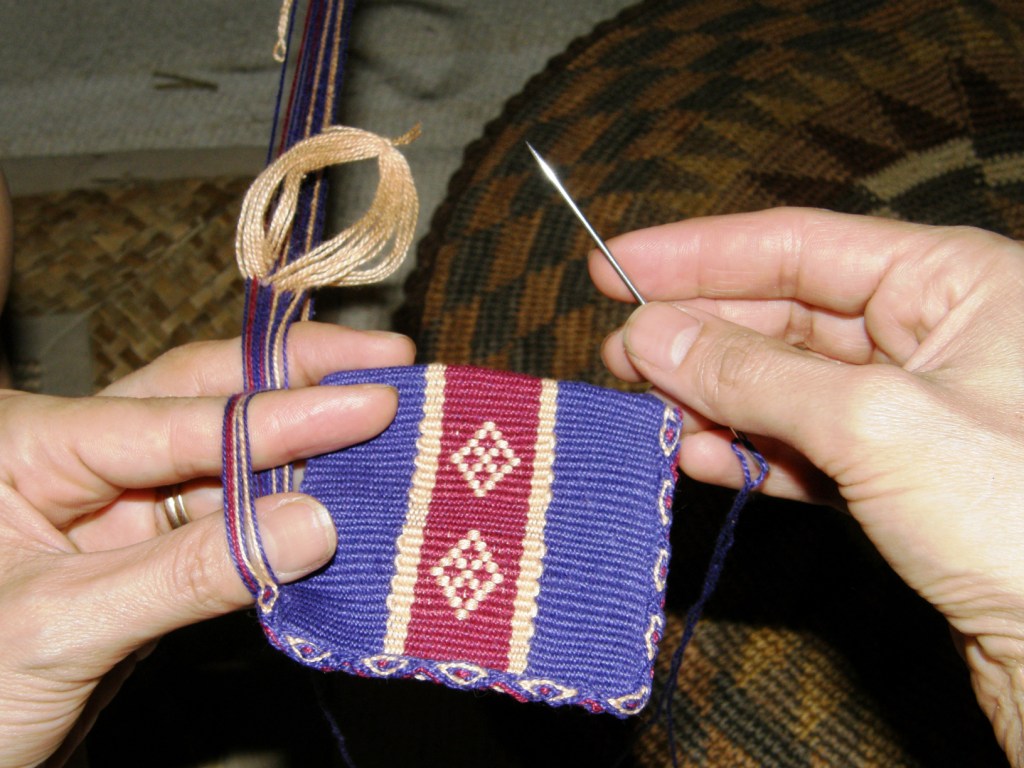
This is one of those bands that are generally simultaneously woven and sewn to the edge of a textile using the weft as the sewing thread. So this is what I did with my Tarahumara bag and I love it!

I was so excited about having learned how to make these bands that I could have quite easily dug out everything I have woven and edged them all with them . But I resisted and decided to weave a miniature piece where I could put several finishing techniques to use. The Cahlander book also has instructions for crossed warp bands which are very interesting. So I decided to make  a small amulet type of bag, edge it with a tubular band and make a crossed warp band as a strap.
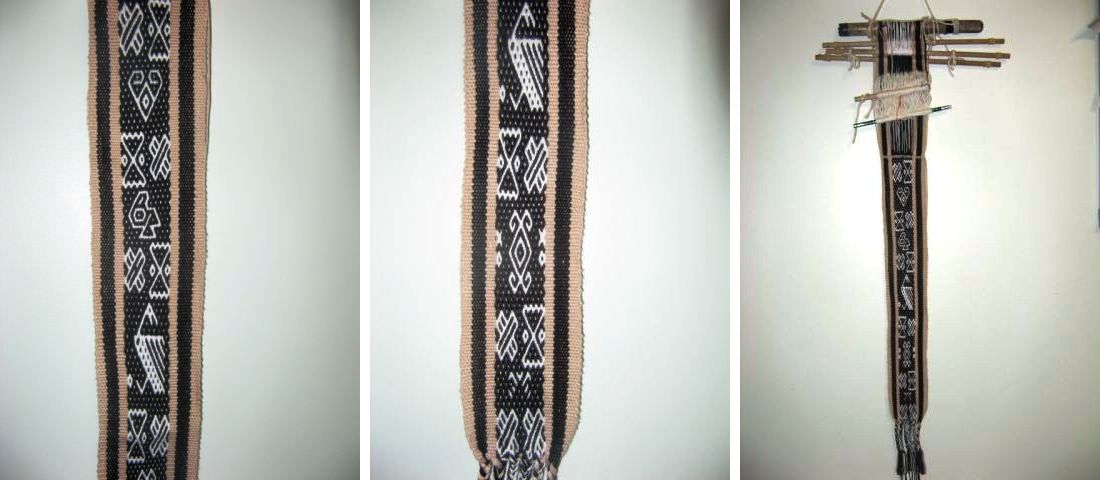
Crossed warp bands are used here in Bolivia as ties on the ends of belts like the one from Potosi seen above left and as chin straps for hats like the two wider bands on the right.

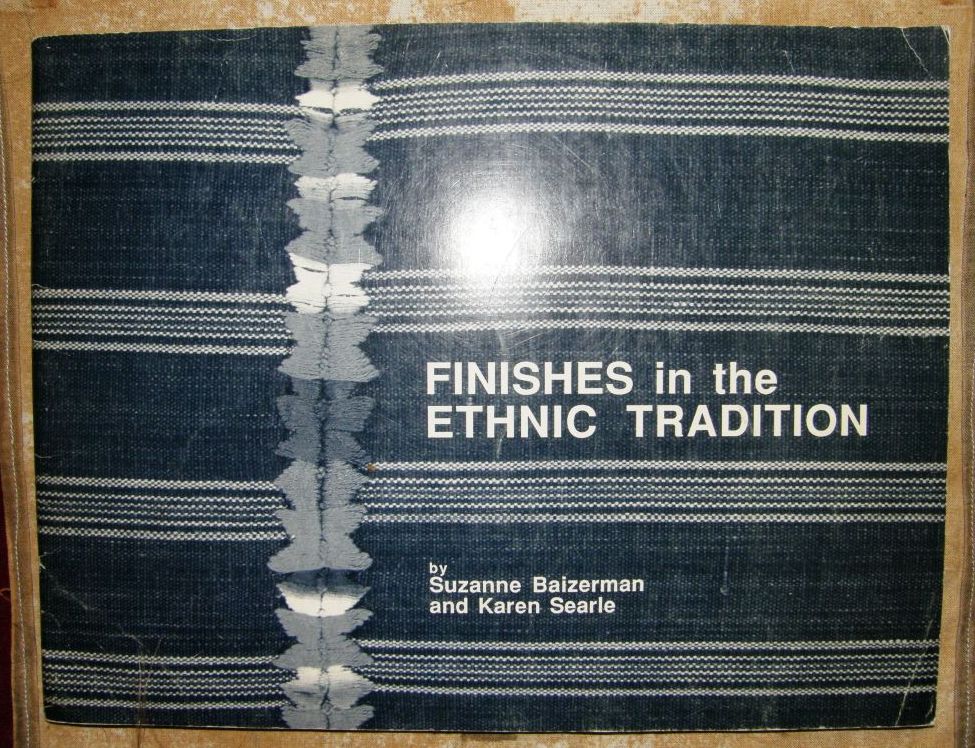
And then I fished out Karen Searle and Suzanne Baizerman’s wonderful work on finishing techniques and found the instructions for Bolivian pompoms I had made years ago to decorate my zampoña.

This book is full of all kinds of useful finishing techniques from around the world

First I had to brush up on the crossed warp techniques.

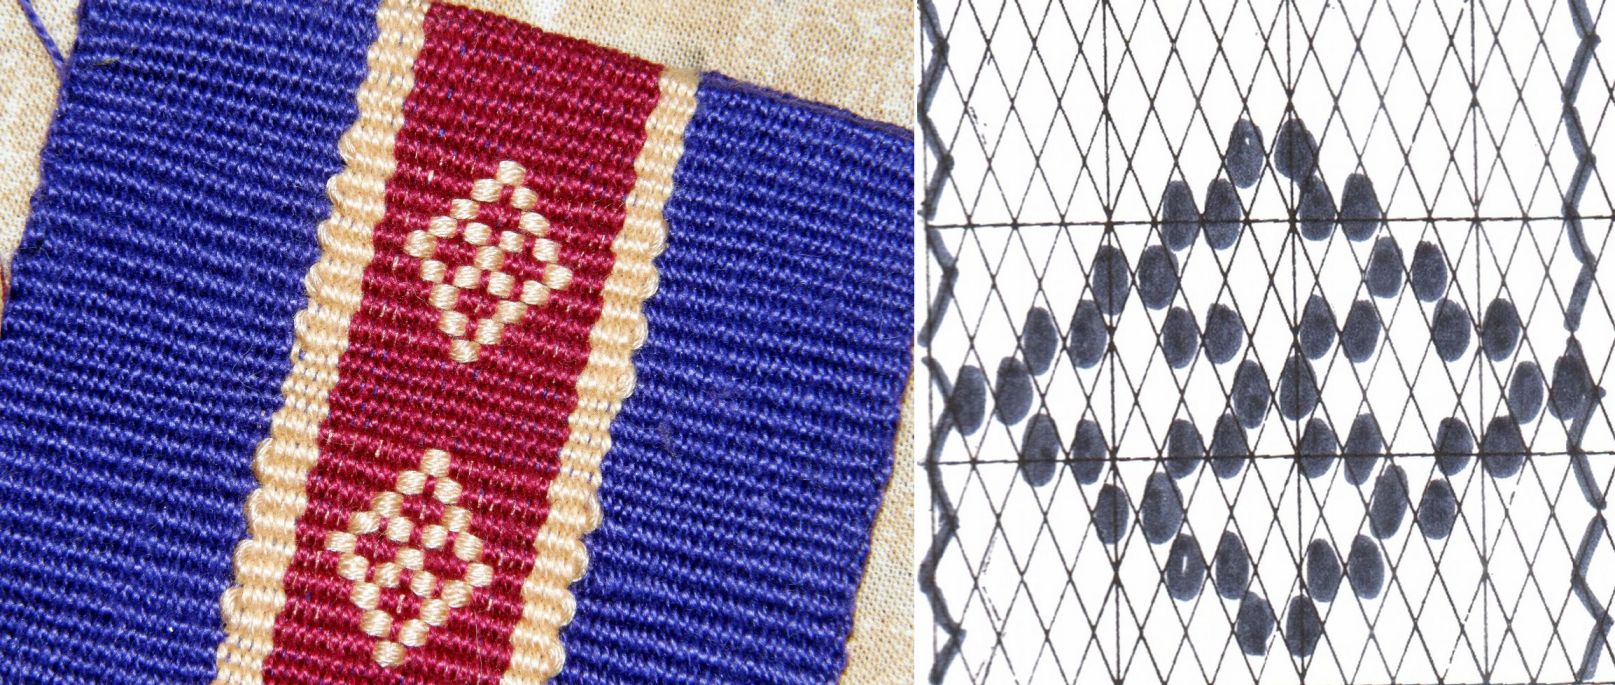
Then I wove the wee bag. I decided to keep it simple and warped up for plain warp faced weave so I could weave in a small motif with a supplementary weft (see the tutorial here).

A very simple design and there’s the pattern chart for you if you would like to use it.

Next I wove and sewed on the tubular band.

And I had fun making and attaching the tiny Bolivian pompoms.

But darn, I didn’t have time to make the crossed warp band for the strap so I have just placed thread there in the photo so you can get the idea. I am thinking of doing cross knit looping as an edging for the top of the bag too. Now I am mad for not thinking about this earlier. I think that these would have made nice gifts to take to the tinkuy- bags covered with little Bolivian techniques (although the suplementary weft motif is not Bolivian).

However I did find time to put together a NEW TUTORIAL. This one is on warp faced weaving with warp substitution which is the technique I used to weave the band with Bedouin designs that I showed you a couple of weeks ago.

Below is the sample band I wove in order to put together a set of instructions for you.

This is a great stepping stone to one-weft double weave.

You will learn the kind of pick up you need to do for one-weft double weave without having to deal with the extra manipulations and steps involved with weaving the doubled layers.

If you are interested in Bedouin weaving Helena (telarahna on Weavolution) gave me a link to an article by Joy Totah Hilden, author of the book on Bedouin weaving from which I got a lot of these designs.

Alaa (weave2 on weavolution and Ravelry) also gave me two great links to follow on this topic here and here.

And for the Spanish-speaking visitors to my blog, I have put up one tutorial so far in Spanish – the one on simple warp floats (although I haven’t found a way to say “simple warp floats” in Spanish. The literal translation sounds ridiculous!). There is a tab on the header photo and side bar.

Para las personas que hablan español he traducido el primero de los tutoriales que puedan ver aqui. De vez en cuando pueden chequear haciendo “click” en la pestaña “tutoriales en español” en la parte de arriba de la pagina. Alli podran ver si he traducido algun otro tutorial mas.

I may have time to squeeze in one more post before I go to Cusco on November 4th, but if you don’t hear from me you will know where I am 🙂