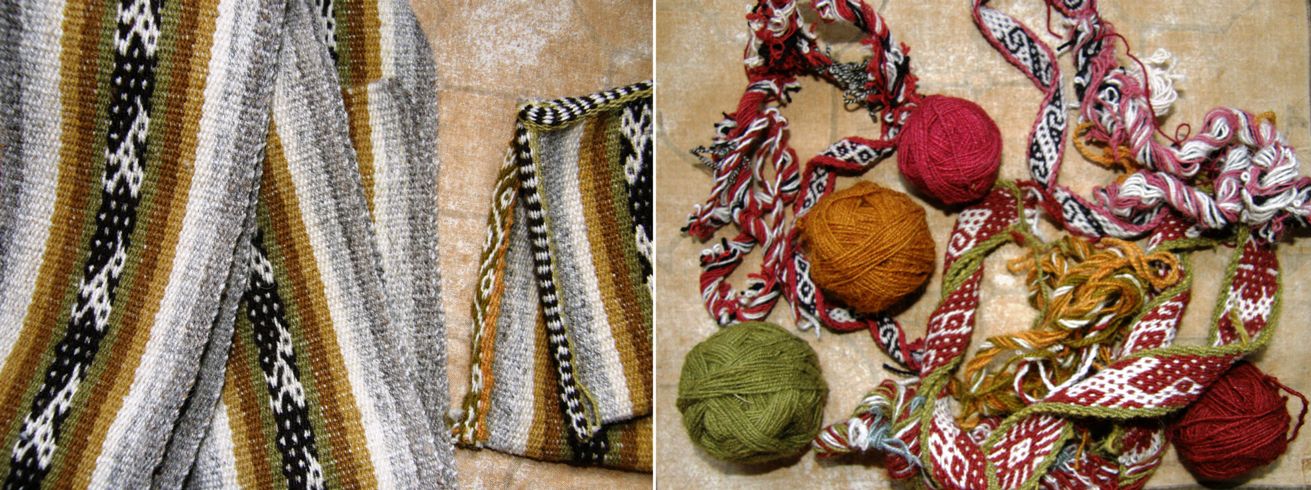
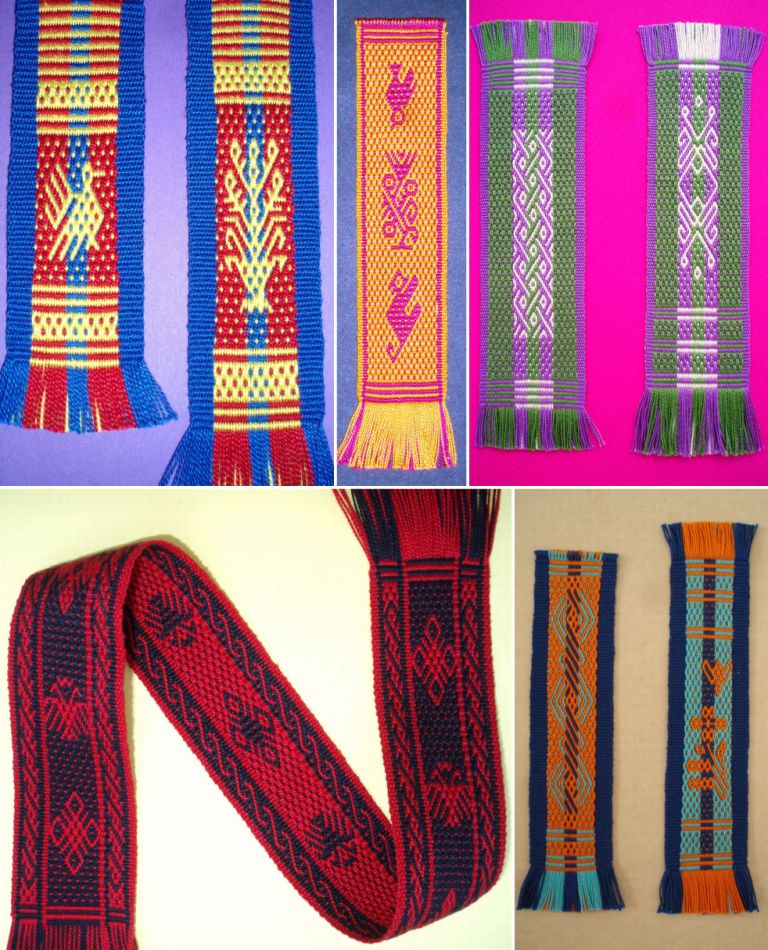
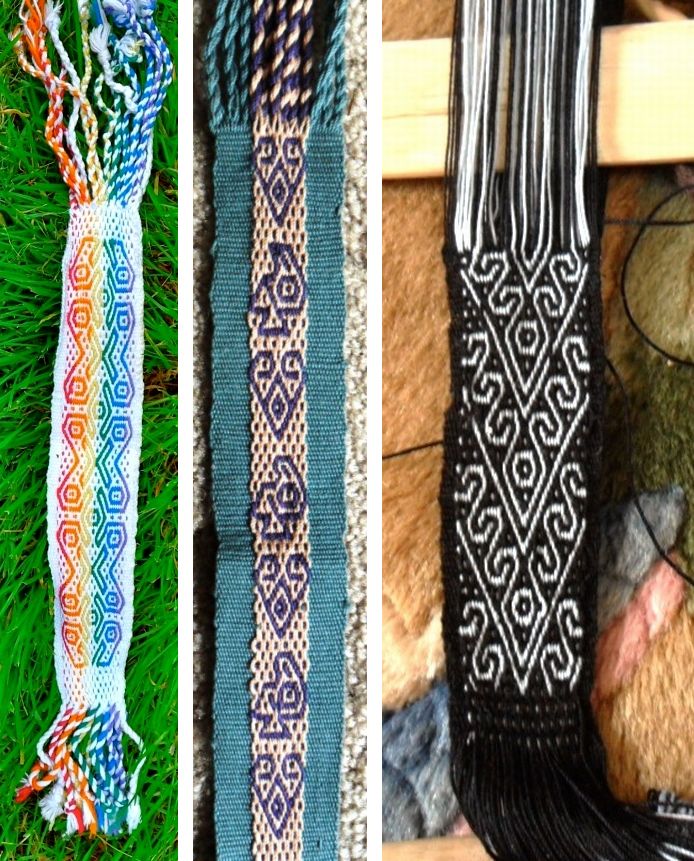
I am keeping this blog post short and sweet…well, at least I will try to. Life definitely got in the way of things this week with some major distractions and, unfortunately, they had nothing to do with weaving. I feel like I have been walloped and am, just like in the cartoons, seeing stars….
By coincidence the little bit of weaving I did this week just happened to involve stars. Following on with my new love affair with the weaving of Tinkipaya in Bolivia, I tried another of their pretty motifs, which I had thought were flowers, but which, according to Cereceda in her book which catalogs the designs on these textiles, are ch’askas, stars, and are a representation of the world above known as janaq pacha.
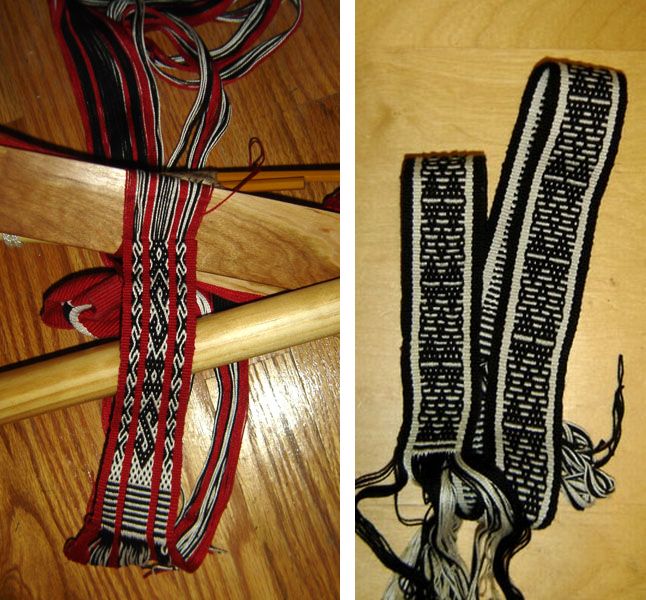
The small band I wove to test the pattern is pictured above with a couple of wooden tools I got in a market in Potosi, the province in which Tinkipaya is located. I was told that the tool on the left is used to push down the warps behind the heddle rod when the weaver is opening the heddle shed. I have never seen a weaver actually use one of these. The one I have has a red stain and I like to think that it might be cochineal from one day when its owner was preparing to dye. The other tool, of which you can only see the tip, is used for beating and strumming and I have seen these in use in several places in Bolivia.
So, sometimes I see flowers where the creators of the designs see the stars in the heavens and sometimes vice versa…
I saw stars when I first saw this pattern but its creator, Kurt Laitenberger who designed it for tablet weaving, calls them flowers. I wove them into what I call my ‘Starry Night” wall hanging. I remember stepping outside my little room on Taquile Island on Lake Titicaca to go to the bathroom on a clear and bitterly cold night and being stunned and almost knocked over by the brilliance and abundance of the stars in the black black sky over that dark little island.
In the pebble weave piece above I used star motifs from Guaraní textiles. I was pleased to recently find a story, translated from Guaraní to Spanish, in a book published by Artecampo, a craft cooperative store, here in Santa Cruz about a legend behind the use of the star motifs in Guaraní weaving…..it says that…
One day the children were taken and placed like stars in the heavens and this is why women cry out about stars in their weaving. The stars not only speak of the sky but also about the richness of nature because one woman, in an attempt to stop her child from being taken, grabbed hold of a finger (or toe, it is not clear in the Spanish translation which). As she pulled on the finger, unfortunately, a piece broke off and this piece was buried. From the burial of this piece a corn plant sprouted. In this way, weaving symbolizes abundance which comes from the piece of the child. And this is why food crops are not only considered elements that feed and sustain men, they are part of Man himself just as the stars are part of Man and Society. Songs name those who are living in the sky and those that sing wear woven cloth to show that they are still with them even though they are distant.
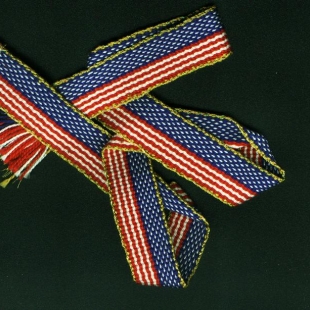
Wikipedia tells me that the stars on the flag of the United States represent the fifty States in the Union. Well, I knew that. I was hoping to find out why exactly stars had been chosen as opposed to some other figure. There doesn’t have to be a reason. I am sure that we could all come up with some kind of symbolic meaning for a star. I swear that some weavers I have spoken to have made up things about the motifs they are using just to please or have a bit of fun with me…I have seen the twinkle in their eyes and the way they look sideways at each other!
Gail from Weavolution wove this very patriotic collar for her dog on her inkle loom. She is forever coming up with clever designs for what must be the best-dressed dog in New York.
Speaking of flags and patriotic weaving, I assume that the next starry piece was made by someone who is proud to be Australian.
I have this very cool cut-pile weaving of a representation of the design on the Australian flag…
The group of stars is the Southern Cross constellation which really is a sight to behold there in the southern sky. I am so happy to be able to see it low on the Bolivian horizon and it makes me feel somehow connected to Australia and the people I know and love so far away. It is little wonder we so love stars and choose to use them in our cloth.
The large single star, which should only have seven points, represents the Nation’s seven states and territories.
This cut pile piece on its beautiful frame is gorgeously dense and I would love to meet its creator.
It was given to my brother as compensation from the Indian owner of a furniture store who went out of business before he could supply all the chairs for my brother’s dining room setting. He then gave it to me. One day I will track him down and see if I can talk to him about this weaving technique.
I don’t know if the weaver intended to continue with the design. There is so little space at this point and the tension on the warp is so high I can hardly imagine being able to do so.
There are a lot of representations of stars in Andean weaving. I took one small motif and combined it with others to make a guitar strap in colors reminiscent of the desert and canyons of the US southwest with a winding river, moon and stars. It took me back to clear, warm nights camping in the depths of Utah canyons with nothing between me and the stars, moonlight bouncing of red canyon walls and with dozens of frogs “ribbeting” away at the waters’ edge.
And then there are motifs that look like stars to our eyes and maybe one day I will find out what exactly they mean to the weaver. There’s an Andean ch’aska on the left with star-like motifs from Central Asian textiles and a motif on a belt from Ecuador on the right.
Enough star gazing…let me show you what Camilla in Sweden made with her pebble weave band…a hair band for a friend. She attached elastic to the ends and covered it. What a sweet project for a band.
Ad here is what Karina in Chile wove using the Bolivian llama patterns that I embellished and charted. They are woven in warp-faced double weave the instructions for which, along with the llama pattern charts, are on this blog.
The uppermost llama is standing beneath a starry sky.
I love Karina’s clever wrapped-warp and pom-pom finish and the braids at the top are a nice touch too. It makes a lovely wall hanging.
It’s nice having these projects to show from people at opposite ends of the globe…how we all come together with this same love of weaving!
As for the thing that had me distracted this week….I have to keep my chin up or I won’t be able to see the stars.
I was reading Anita Osterhaug’s post in the weekly Weaving Today letter about teachers and the knowledge they impart. She quoted ” When the student is ready, the teacher will appear“. I had not heard that before. She then added, “Sometimes you carry a teacher in your head until you are ready“.
This was amazing to me as it is the very thing that has been going through mind this week as I work on my new book. Almost sixteen years ago I learned backstrap weaving with my first indigenous teachers in Peru and I find that even after all this time has passed, certain things they taught me which I have been performing mechanically since then, are suddenly taking on a whole new meaning.
I can take certain processes which I now clearly understand and apply to them to other situations and create things I had not been able to previously envision.
It is hard to explain and I know that this all sounds a little vague but I am much more explicit in the book. It is nice to know that I have been carrying those teachers around in my head, as Anita said, all these years and can still benefit from what they showed me. I wonder how many of my other past teachers will make an appearance as the years go by and what seeds of knowledge are sitting in my head waiting for just the right conditions in which to sprout.
So, I thought I would dedicate this blog post to some of my weaving teachers and say just one or two things that I took from my experience with them.
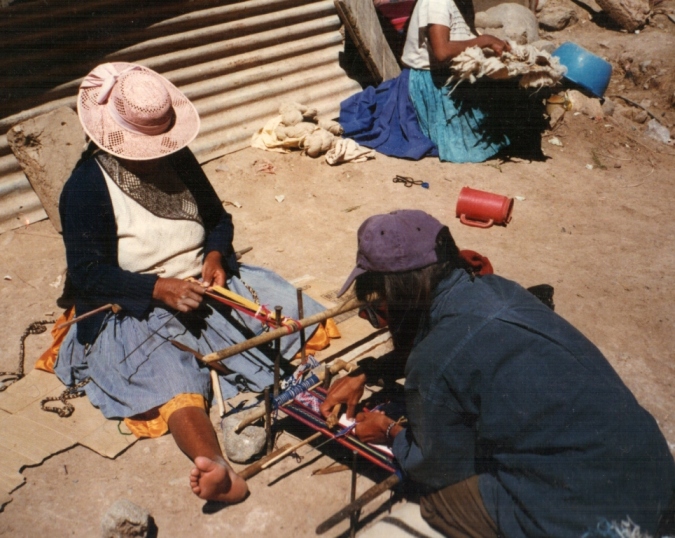
This is Hilda, my teacher in Potosi, Bolivia who taught me “once a weaver, always a weaver”. How must it feel to have been raised a weaver, as Hilda most likely was, having this activity become a part of your very being and identity only to have to abandon it at a relatively young age.
Hilda started out in my lessons by sitting by my side and pointing or calling out the warps that I needed to pick up for my design. Apart from warping with me and setting up the loom, she never once actually sat at the loom and showed me how to weave so there was a lot of “no, not like that” as I was not being given a model to follow. She complained that her eyesight was too poor and her back too weak to weave anymore. Besides, she said that she had forgotten most of the patterns.
However, I started to notice that my piece was growing somehow from the time I left it in the evening to the time I arrived the next morning to pick it up again. Hilda simply couldn’t resist unrolling my work and weaving when I was gone but still felt somewhat shy about weaving in front of me. I am sure that weaving in the low evening light was not helping her. Eventually, she gathered the confidence to start weaving together with me on her own projects in broad daylight leaving me to figure out the pattern for my own work on my own. Happily, I was well on my way by that time.
The other thing I took from Hilda (although it didn’t stick for long) was the idea that cloth should have four selvedges. This is the most natural thing in the world for weavers in Hilda’s world and a weaver finishes her piece without any fuss. Hilda sighed and muttered only because of her poor eyesight.
One doesn’t choose, as I do, whether to have fringes or three selvedges with a fringe at one end. There will be four selvedges and that is that. It gave me the confidence to go straight home and weave a few pieces like that in wool, although, as I said, it didn’t stick, and once I started weaving with cotton, I stopped weaving four-selvedged fabric.
Felipe in Salasaca, Ecuador has been my only male weaving teacher so far. I was most impressed by the fact that Felipe has taught all four of his sons to weave (one son is absent from the picture) and that they all approach it with such enthusiasm and pride in a world where fewer and fewer youngsters in indigenous communities show any interest in learning to weave. I wondered what Felipe’s secret was.
Although the boys didn’t yet have the skill to warp well, they could certainly tell me exactly what was going on as their father demonstrated it to me. Felipe told me that he was self taught and has created some of his own variations of the traditional Salasaca “frutilla” pattern. His bands are cut into pieces to decorate sandals which are made by a local shoe maker.
He is obviously an innovator with plans for the future and perhaps this optimism is what he has passed to his boys.
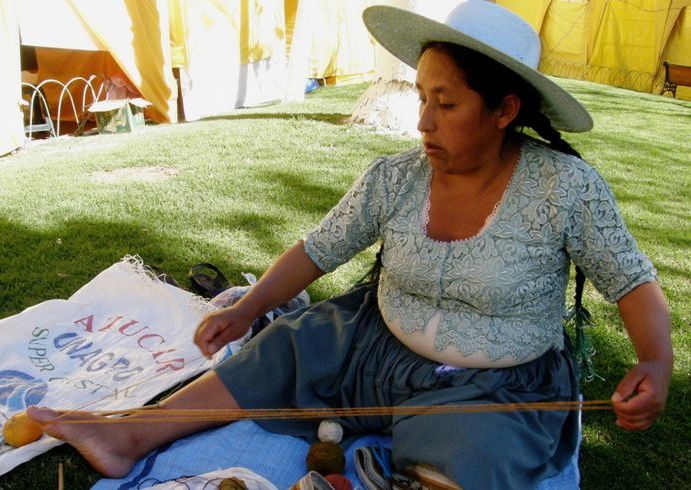
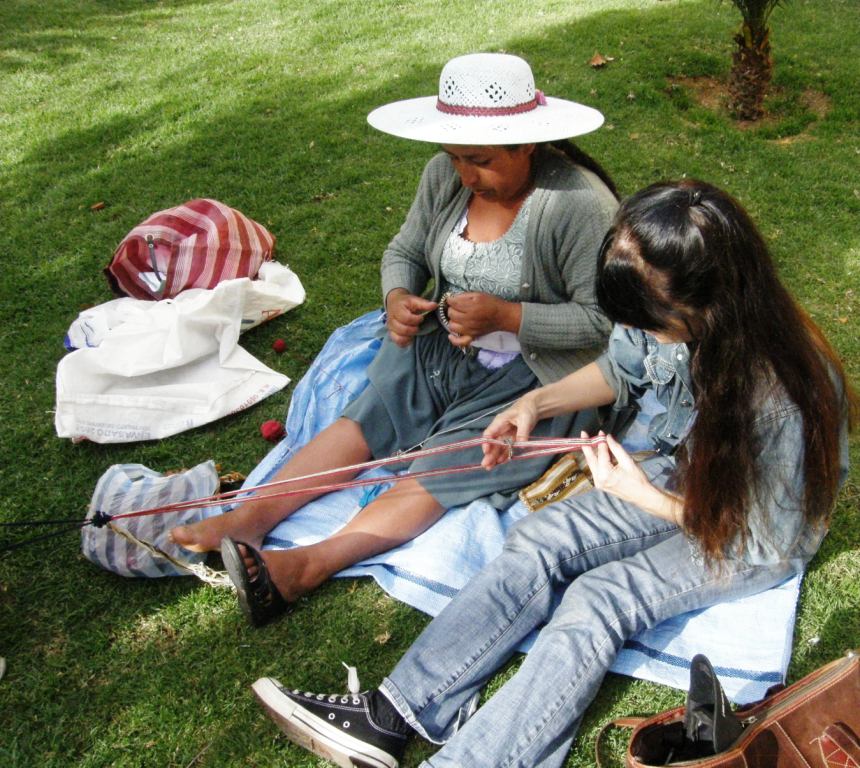
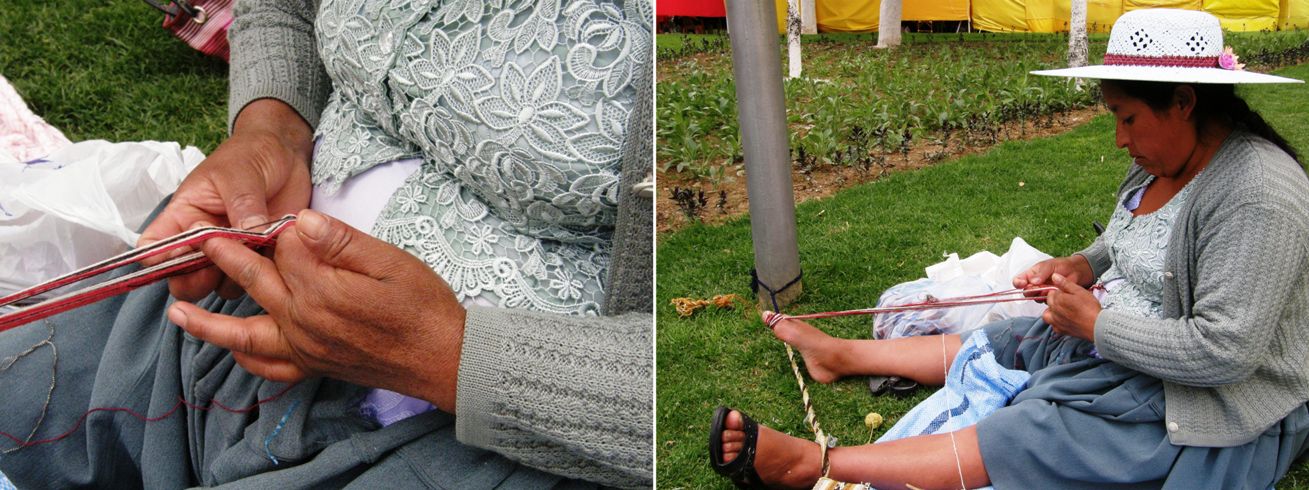
As I prepare to travel and pack my portable warping board, loom bars, dowels, metal rods, beaters and shuttles I remember Maxima in Cochabamba and the ease with which she wound warps on her finger and toe.
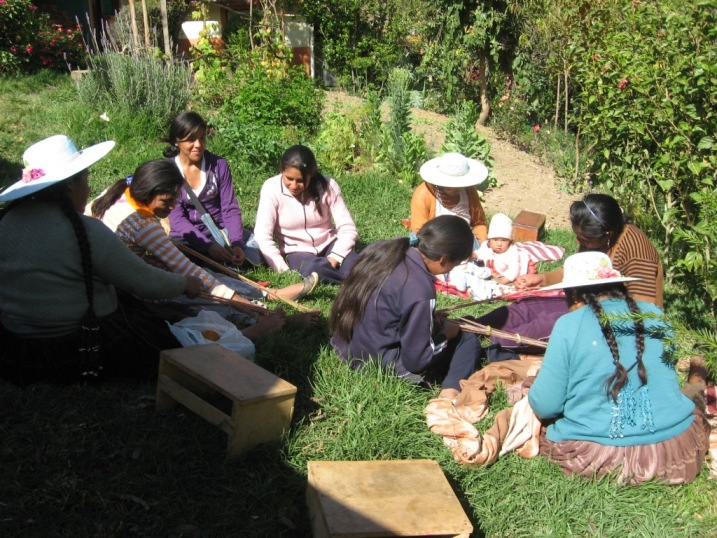
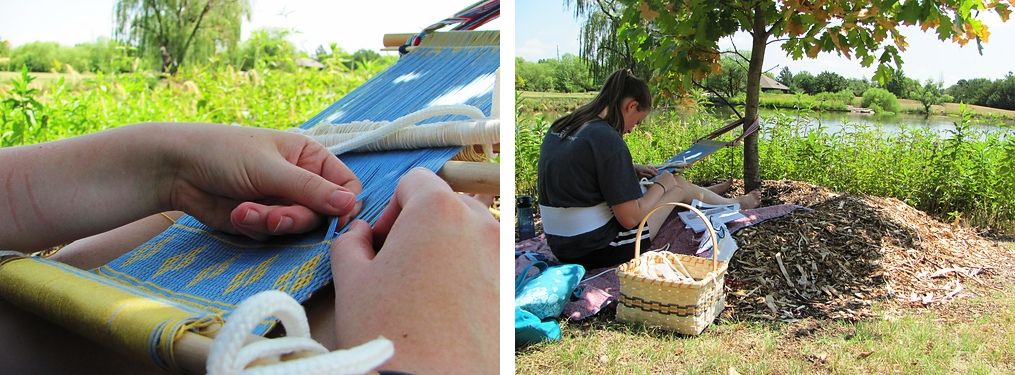
All we had a was a pleasant shady spot outdoors, a few balls of yarn and we were able to spend several lovely afternoons producing pebble-patterned and tubular bands.
Yarn was used for cross sticks, fingers formed picking crosses and a hand moved with a slicing action beat the weft into place…the wonderful simplicity of it all. I went home and looked at my buckets of loom bars and beaters for all occasions! Of course they are needed for wide pieces but I tend to depend on them very much even for the narrowest of bands.
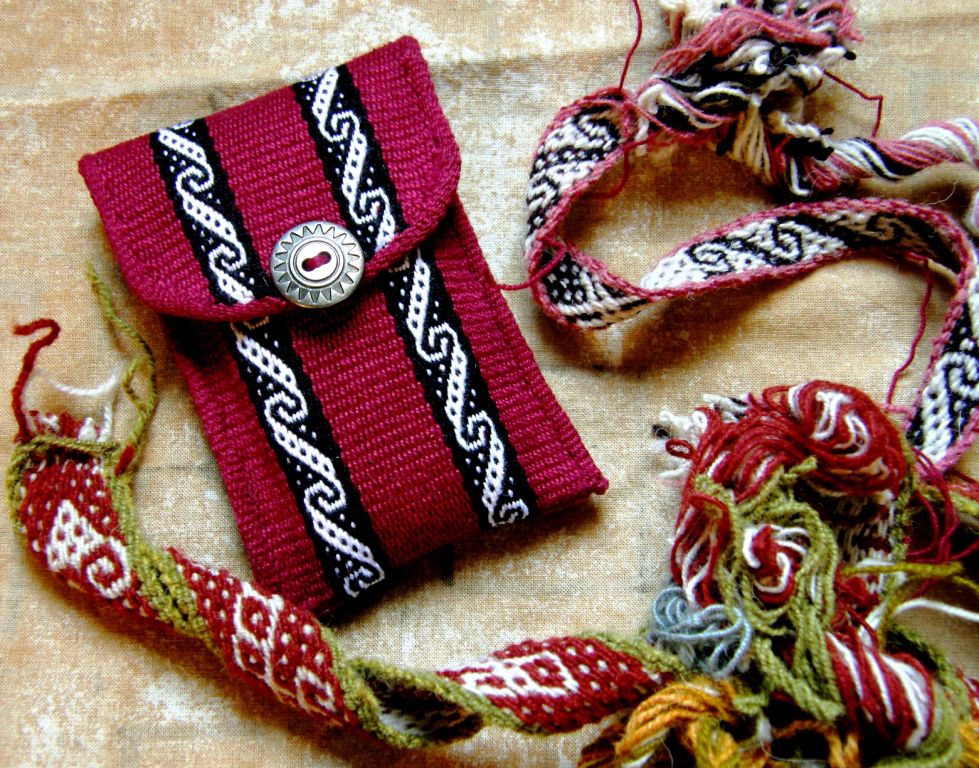
I also took home a new pattern which I used on a cell phone pouch and the knowledge of a new way to do pebble weave.
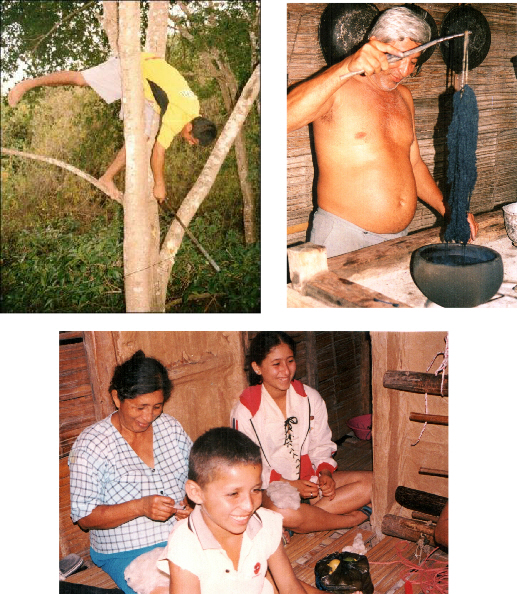
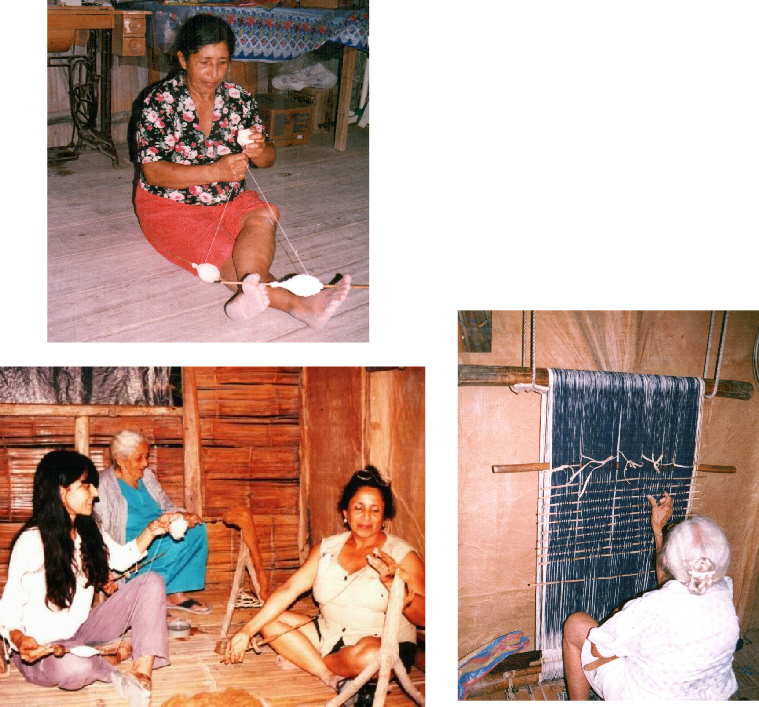
Learning to weave with a family in coastal Ecuador showed me just how much an entire family can become involved in every aspect of the process from cotton boll to finished project….together most of the time sharing the tasks or at least keeping company with the person doing the work with lots of chatter and laughter. I tend to think of weaving as a very solitary process. Don’t speak to me when I am warping for goodness sake! and I can’t even listen to songs let alone chat while I am doing pick-up.
Trini made mistakes while she warped but the discovery of her mistakes only led to teasing and laughter rather than frustration.
Trini is the main weaver but there are plenty of other family members involved in other parts of the process.
A nephew cuts material for dyeing, a brother tends the dye pot and everyone helps to remove seeds from the cotton after the evening meal.
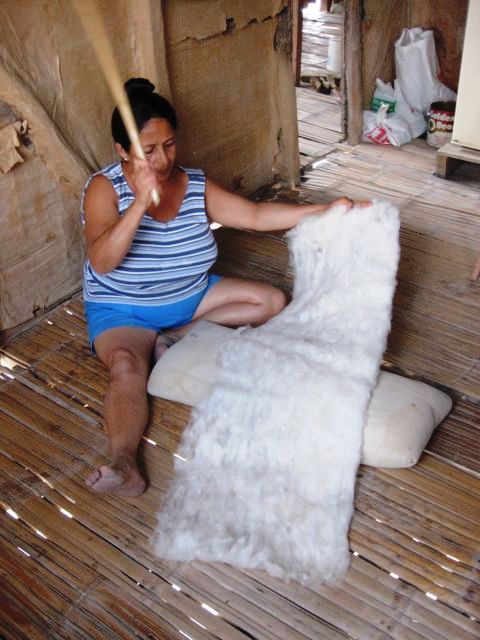
Trini and one of her sister’s share the task of beating the cotton to prepare it for spinning. (photo by K Klumpp)
A sister doubles the handspun cotton singles, all the adult women spin and Mother checks that the pattern-shed warps have been correctly selected. I am trying out spinning on this occasion. How nice it was to be sitting with this group of ladies and spinning the evening away. You can see that pretty much everything takes place on the floor. Wooden chairs hang from nails on the wall but Trini’s mother is the only person who sits in one. Maybe it was this experience that has me now so comfortable doing everything related to my weaving on a small square of bedroom floor.
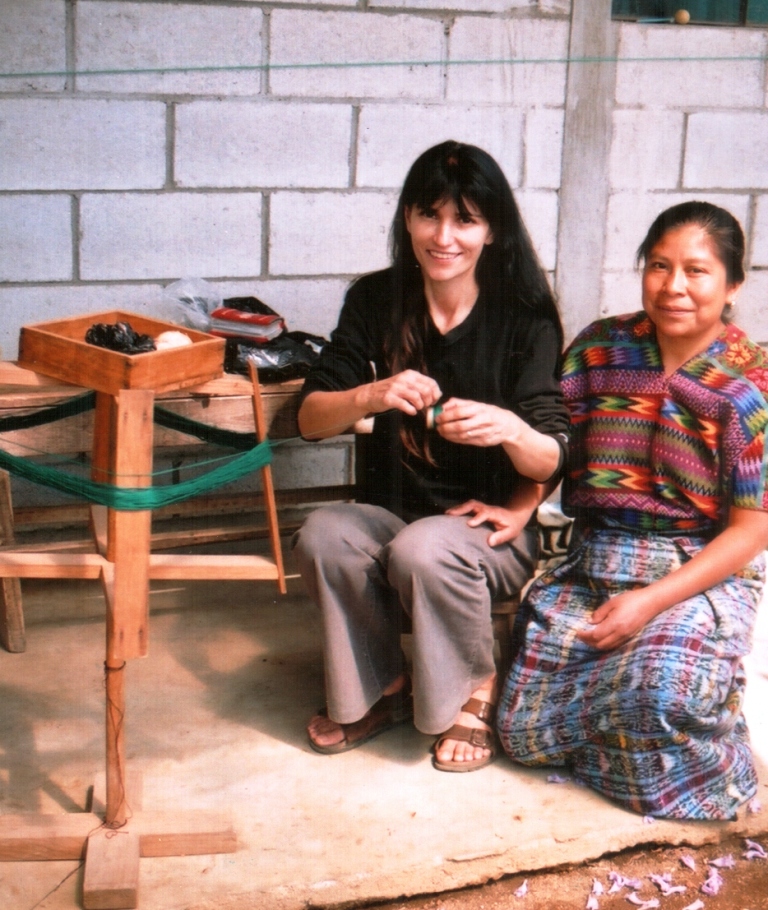
My first Guatemalan weaving teacher, Lidia impressed me with the amount of care and time she took preparing her warp. She is a quiet, calm and graceful person and this all carries over into her weaving. Every single warp thread was patiently and delicately lifted on the tip of a pointed stick and placed in its correct position on the loom bar. She didn’t treat it as the tedious thing that one has to do before the weaving begins. After weaving with Lidia, I started to take everything slowly and really enjoy every part of the process devoting as much time to warp preparation as I am willing to spend selecting the threads to create the patterns.
I loved how Lidia would have me un-weave mistakes. That is just what I like. I have had many weaving teachers who have gotten annoyed at my insistence on fixing errors. In Potosi I would sometimes take my warp home at night to fix an error I had made early in the day that Hilda had not let me un-weave! I have to say that Lidia had a way of spotting a mistake about to happen! She was quite amazing like that and saved me a lot of un-weaving.
I also learned about the efficient use of materials. I have never met a weaver who knows how to measure so precisely the amount of supplementary weft she needs to complete each of the different motifs in a piece.
Angela, my Guaraní weaving teacher, blew me away from day one. She was warping a hammock on a vertical loom and I watched in awe how she passed the warp thread thousands of times up and over the loom, bending down low to pass the thread under the bottom beam and then reaching behind to pass it around the dovetail cord. And then there were the thousands of heddles! Not just one set but three.
Many years later, I got together with Angela again and now she impresses me in other ways with her appetite for learning new techniques and looking for new ways to do things. I could sense that my teacher Maxima in Cochabamba wanted to learn double weave from me but was shy to come right out and ask. She doesn’t know how to do the “eye” pattern tubular band either but did not seem interested in learning that.
Angela saw my string heddles on a stick on day one and, recognizing that knowing how to make them could be useful, said “Teach me that”. She is willing to learn any new method or skill that comes her way.
And I know that she will teach others in her community to make them too if she thinks that they will help make weaving more efficient. I have come across strong competitiveness in weavers between and sometimes within communities where information like this would not be shared. Don’t get me wrong…I am not condemning that. Everyone likes to have that “edge”, right, especially if weaving is putting food on the table.
I taught a young man in Ecuador to do pebble weave. When I returned eighteen months later to see how he was getting on (very well), I had his brothers begging me for lessons as Juan was refusing to teach them!
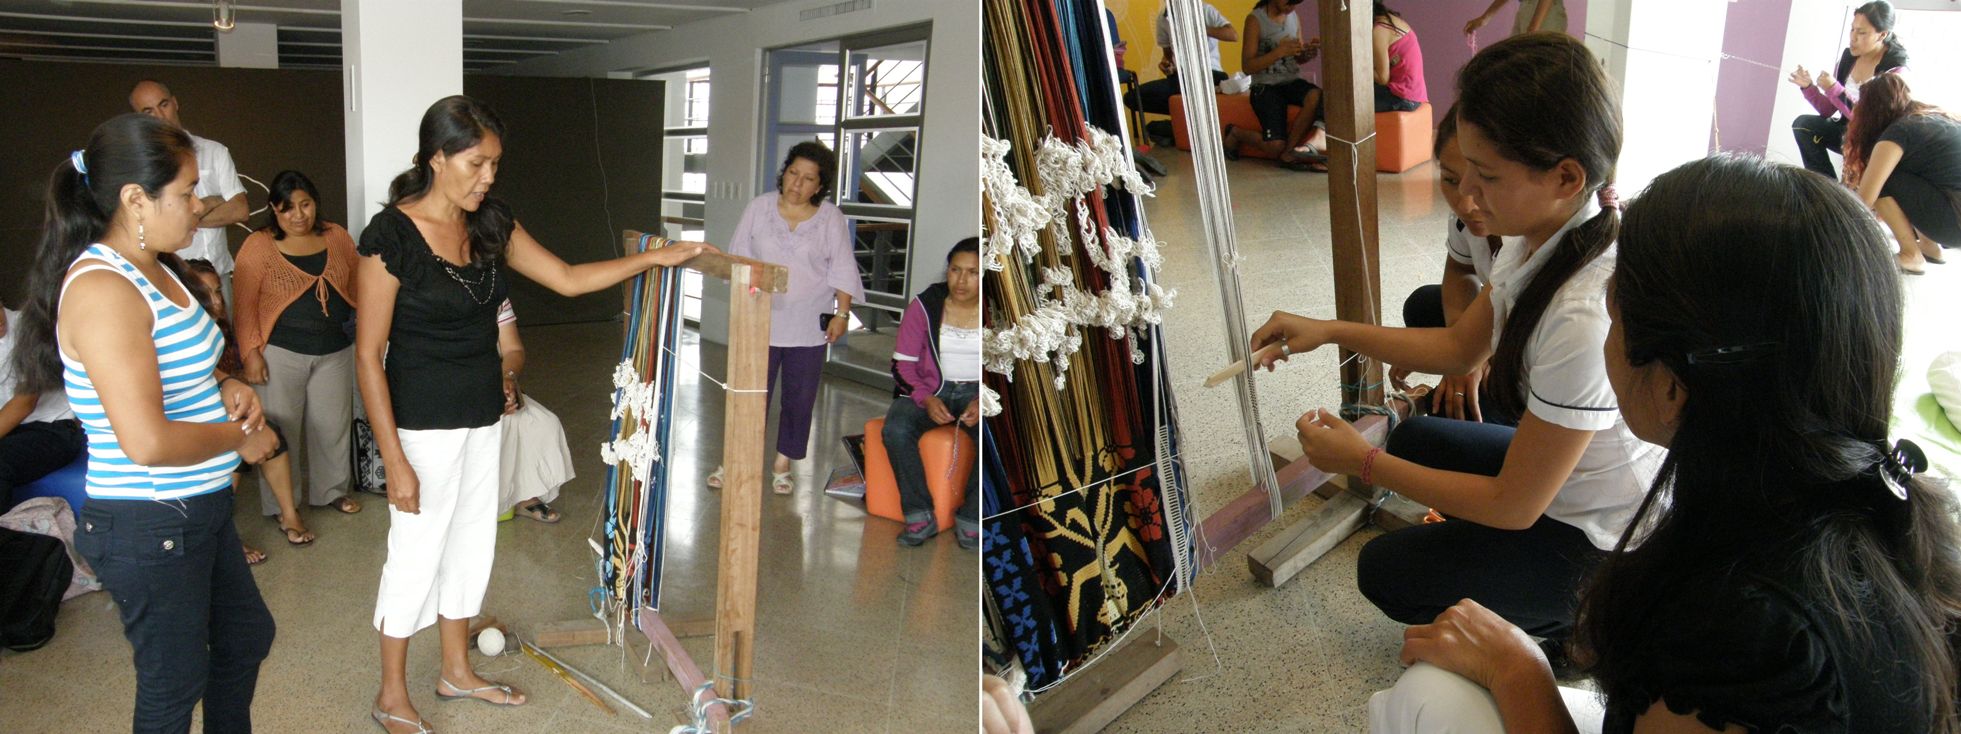
Below you can see Angela talking about Guaraní weaving at a gathering of highland and lowland weavers. School children were able to try weaving on a small warp that she prepared.
Angela is one of a group of people and institutions responsible for the spread of knowledge and the growing appreciation here in Santa Cruz of Guaraní weaving and culture. Even the institute where I used to teach English is now teaching the Guaraní language.
You know I could just go on and on. There are many more teachers to talk about. I carry them all about in my head, as Anita says. I write up all the techniques that I learn in journals when I get home and weave samples and paste in step-by-step pictures. What I don’t write in the journals are the little bits and pieces that I have mentioned here and it is kind of nice to have this blog in which to remember and record such things.
Hopefully I will write a future blog post about some of my other weaving teachers from other parts of Ecuador, Peru, Bolivia, Chile and Guatemala as well as the Asian ladies with whom I have studied more recently in the US. You have already met most of them here.
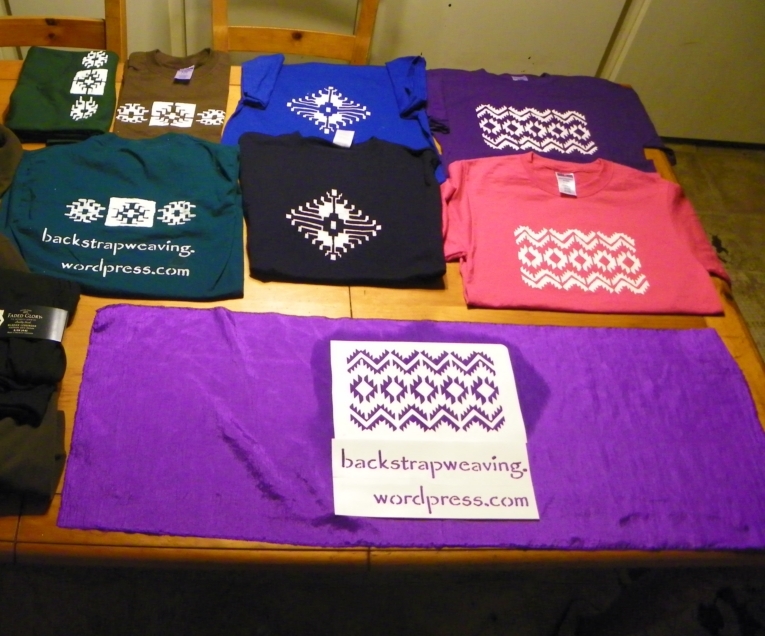
I have one thing to show you before I go. An online weaving friend of mine in Florida made me some t-shirts. She cut the stencils and painted them herself using some motifs from weavings that I have done. One of the designs is the Guaraní snake motif. These are so cool! I look forward to wearing them on my next trip.
“All those sticks! Where in the world do they go and what do they all do?”
I have written posts about all those mysterious sticks and wooden implements, from the basic loom bars to the heddle sticks, shed rods, coil rods, stabilizing rods, shuttles, beaters, swords, pick-up sticks, even “poking sticks” (my own name for an implement my Guatemalan teachers used to create inlaid brocade).
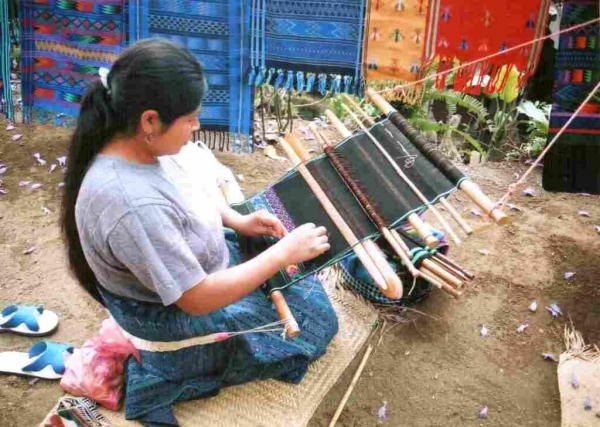
Last weekend I went to the highlands to the city of Cochabamba to experience the ultimate in “stickless” weaving – what I named “barefoot weaving” in a previous post and am now able to add yet another handy dandy tool to my backstrap weaving kit….my humble big toe!
I used to have rather fierce-looking, blister-proof ready-for-anything feet in my old trekking days. They carried me up and down mountains in many places across the globe but I am ashamed to say that they have now gone “soft” on me even though I rarely wear shoes in this climate that I find myself in. So, I didn’t last long with the hard-spun coarse wool chafing my toes and I shall have to put them into training for barefoot weaving.
Maxima, daughter Zoraida and granddaughter Zuni were my weaving companions for my three-day stay in Cochabamba. Maxima was my teacher while little Zuni played at spinning on her "pushka". Zoraida was making a hat for daughter Zuni in tapestry crochet.
I met Maxima at the Tinkuy de Tejedores in Urubamba, Peru last year. She was my roommate along with American ex-Peace Corps worker Dorinda Dutcher. Dorinda, who lives and works with the weavers in the town of Independencia here in Bolivia, had raised funds which had enabled her to take Maxima to the event. You can read about Dorinda’s work and her PAZA foundation here.
Dorinda, Maxima, Zoraida and Zuni were in the city last weekend selling weavings from their cooperative at a handcraft fair and this was a great opportunity for me to make a quick visit and have some classes.
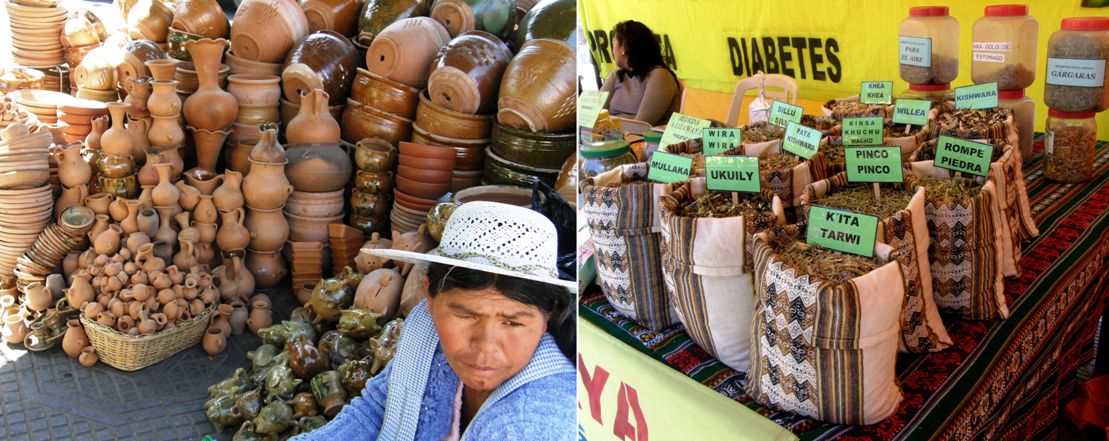
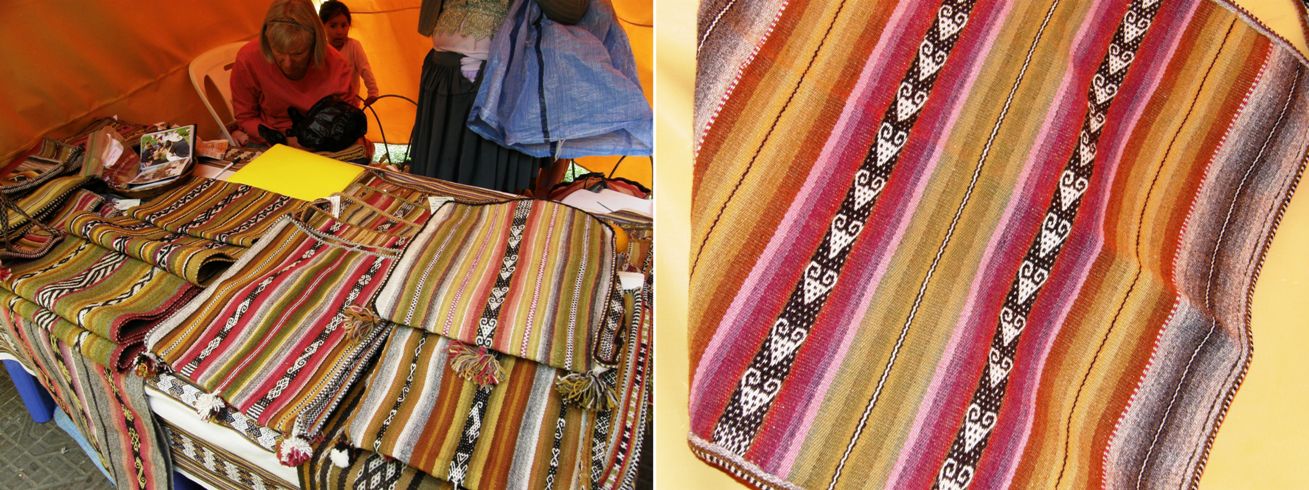
The fair included all manner of handcrafted items as well as grains, and medicinal plants of the famous Kallawaya healers of Charazani.The weavers are recovering the art of dyeing their handspun wool with natural substances and creating large and small bags, pillow covers, hair bands, belts and other woven items which they sell at three such craft fairs that are held in Cochabamba each year.I was excited to be able to buy almost a kilo of handspun and plied alpaca yarn from a neighboring booth at a very nice price . As it has been spun for knitting, I will need to respin it for warp-faced weaving on my backstrap loom. I hope to be able to dye a lot of it too.I spent the mornings walking around the city on this my first ever visit to Cochabamba. I went up the hill to see the Christ the Redeemer statue which is just that little bit higher than the more famous one in Rio de Janeiro. Although the location is not quite as exotic as Rio, there was a nice view of the city in its pleasant valley surrounded by mountains.
That left the afternoons for weaving classes. Our only tools were our fingers and toes, scissors (am I the only one who uses her teeth when no one is looking?!) and a needle for sewing the tubular bands or bordes that we made.
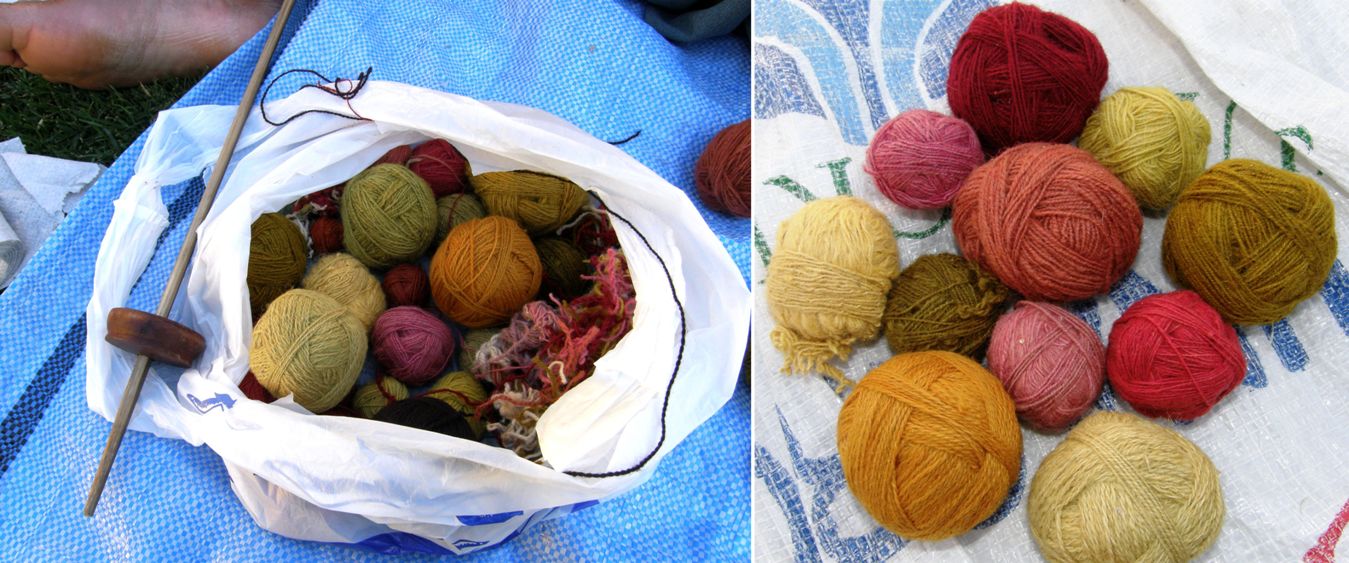
Here are the lovely yarns we got to play with…handspun and dyed with natural substances. A few of the colors were not ready to weave with yet as they had only been lightly plied and so Maxima picked up her large plying spindle and gave the yarn the extra twist needed for weaving. I have some nice video of Maxima doing this seated on the ground using that typical sweeping motion between her two hands to set the spindle in motion. I will show the videos in a future post once I have edited them.
You can see the very high amount of twist in this yarn. The bands, when not under tension, will spiral and the unwoven yarn curls up on itself in an alarming mass.
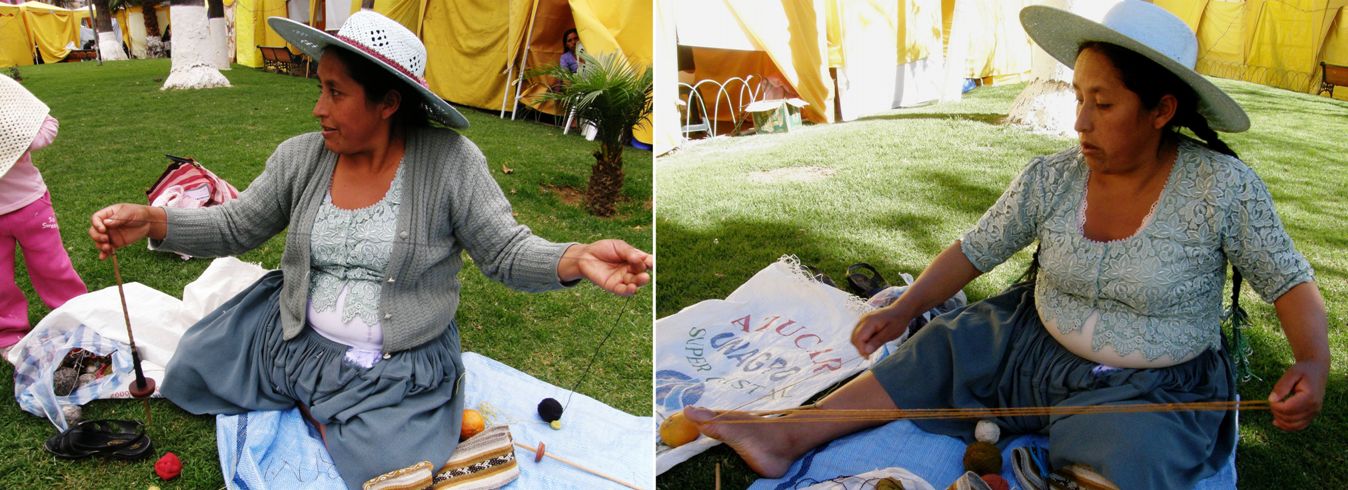
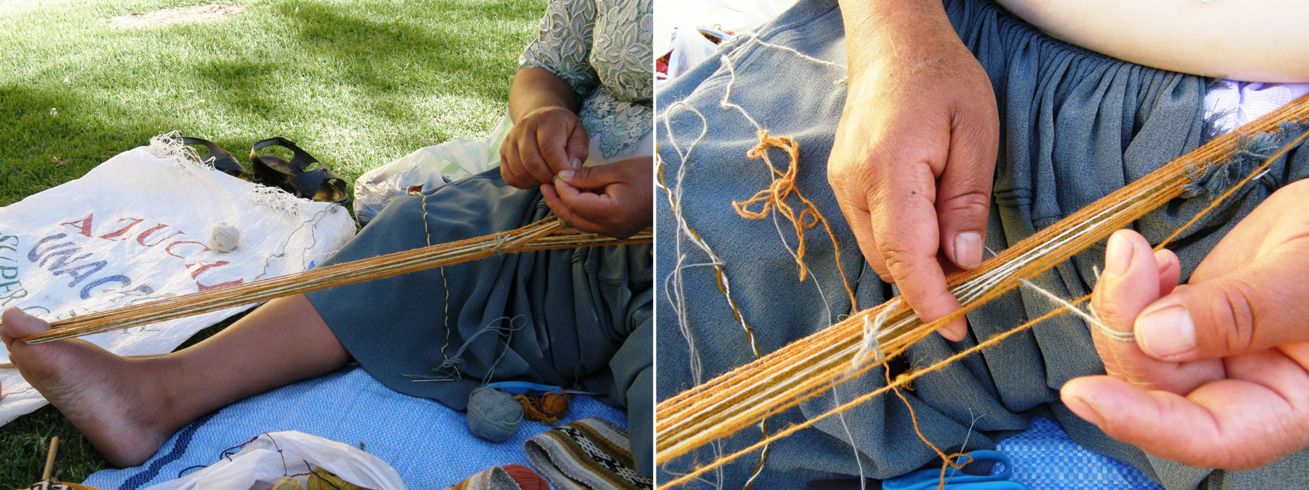
Above left, Maxima is twisting the yarn and on the right she has started warping for a tubular band using her forefinger and big toe as her warping stakes. As she does not have two central stakes around which to separate her colors, she winds her two colors together as doubled strands and then rearranges the cross once she is done. She tucks one end of the warp into the waist band of her skirt while the other ends stays wrapped around her toe. This leaves her two hands free to rearrange the warps into their two sheds.
Maxima then secured one side of the cross in a shed loop and made simple string heddles around the warps on the other side. Once the set up was complete, she removed the warp from her waistband and tensioned it between her forefinger and her toe…no backstrap or waist string was used.
On the first afternoon, I asked to learn tubular bands. I was so absorbed with filming, photographing and noting everything down that I didn't realize that the first band she taught me was actually pebble weave! Her set up and way of doing the pick-up is so completely different to the way I had been taught in the western part Peru. It threw me off at first and I got really confused! Fortunately we started with the design which is known in the Cusco area as "mayo k'enko" and which Maxima calls "linquito" and so it wasn't all totally foreign to me and I was then able to pick it up quite quickly. Maxima's method definitely has its advantages for weaving pebble weave as a finger-tensioned tubular band.
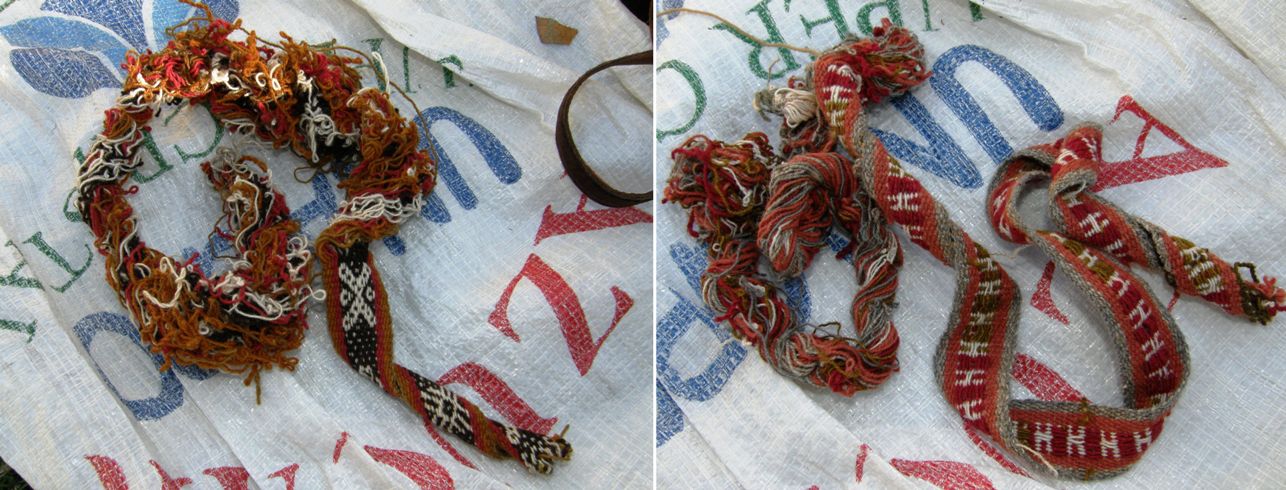
You can see the first pebble weave edging we made in the picture above left. The yarn was way too chunky for the little bag we were edging but it served as a learning exercise. Then we made a much simpler style for the second project. Above right you can see the three pebble weave bands, or huatos, on which we worked on the second and third days of classes, starting narrow and gradually working up to wider designs.
Weaving together on the grassy area behind the market stalls was cool and peaceful. Last Saturday was my birthday and this was a lovely way to spend it. There is a reason why these sensible ladies always wear hats. My poor lips are now a swollen mass of blisters from the dryness and high altitude sun.
While Maxima finishes off my edged pouch, I am weaving the first narrow pebble weave band. You can see how Maxima taught me to use my two fingers in the warp as my “picking cross” (I explained a little about the picking cross in last week’s post).
Maxima has made a picking cross and is selecting the warps from each side of the cross for her design. Her warp is attached to her toe and for a while so was mine. Then I also attached my warp to her toe when mine had had enough! Finally we moved to the post to tie my warp up and later Maxima did likewise.On the left Maxima is using her fingers as cross sticks to rearrange the warp cross. I took my bands back to my hostel to do my homework...yes, there was homework! My bed had a convenient bar to which I could tie up and there would always be my toe if I hadn't been able to find anything that would do. On the third day we worked on wider motifs on the band pictured on the right. Some of the motifs were completely new to me and fun to learn with this "new" way of doing the pick-up.
In my Andean Pebble Weavebook I show how I was taught to create a border for pebble weave of the same thickness as the design area. Maxima also creates a thick border but in a completely different manner. This is the fourth way that I have seen pebble weave being woven…all so VERY interesting!
Maxima with the Club de Chicas. This photo is from the PAZA Bolivia blog written by Dorinda Dutcher.
Maxima was a wonderful teacher. When I asked her if she enjoyed teaching she laughed and told me that when she had taught her daughters she would lose patience and want to slap them! Now she says that she is used to teaching and enjoys starting the young girls in the “Club de Chicas” in Independencia on their first weavings. I have made a tentative date to visit her in Independencia next March during the peach season.
I gave her a couple of key fobs, one of which was in double weave and I think she would like me to teach her that when I visit. I was surprised as there were double weave belts on sale in her stall but she told me that they had been made by other weavers. I have come across this before…weavers learn what their mothers and grandmothers can teach them but are unwilling to ask non-related weavers and their weaving peers to teach them other techniques.
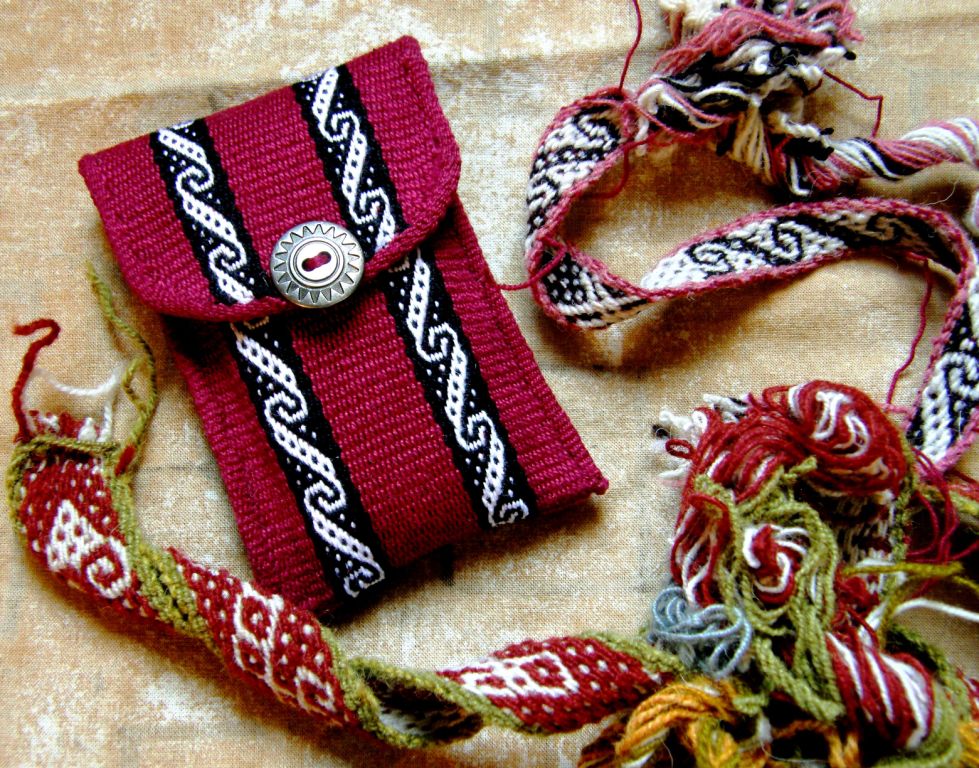
Back at home I wanted to put things I learned into practice but I started off slowly by simply using one of the new designs I had learned in a cell phone pouch. I have made many cell phone pouches and realized that not one of them has been made with a pebble weave design which is, after all, my favorite technique.
Here is my latest cell phone pouch with the new design. You can see it on the pink bordered huato. I wove and sewed a red tubular edging and used a snap closure. I know that we like to apply nice names to these motifs but, of all the designs that Maxima taught me over the three days, only one had a name, the aforementioned linquito and she had no name for pebble weave either to distinguish it from the other weaving techniques practiced in the area.
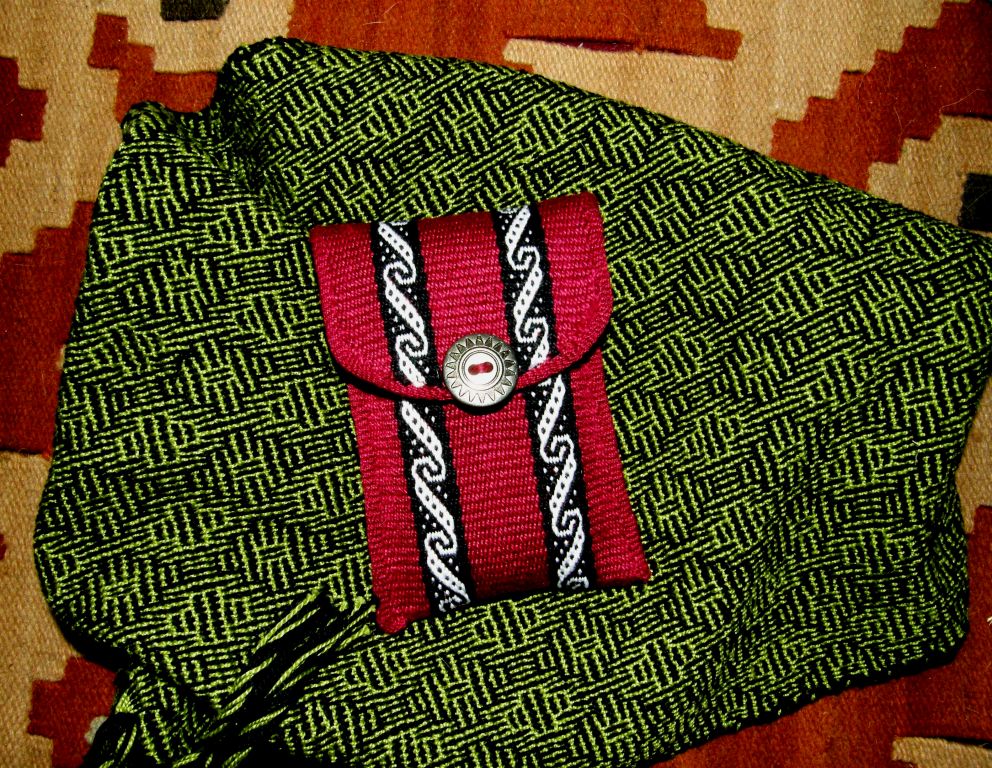
Here is the cell phone pouch on my other finished project for this week - the shadow weave piece.
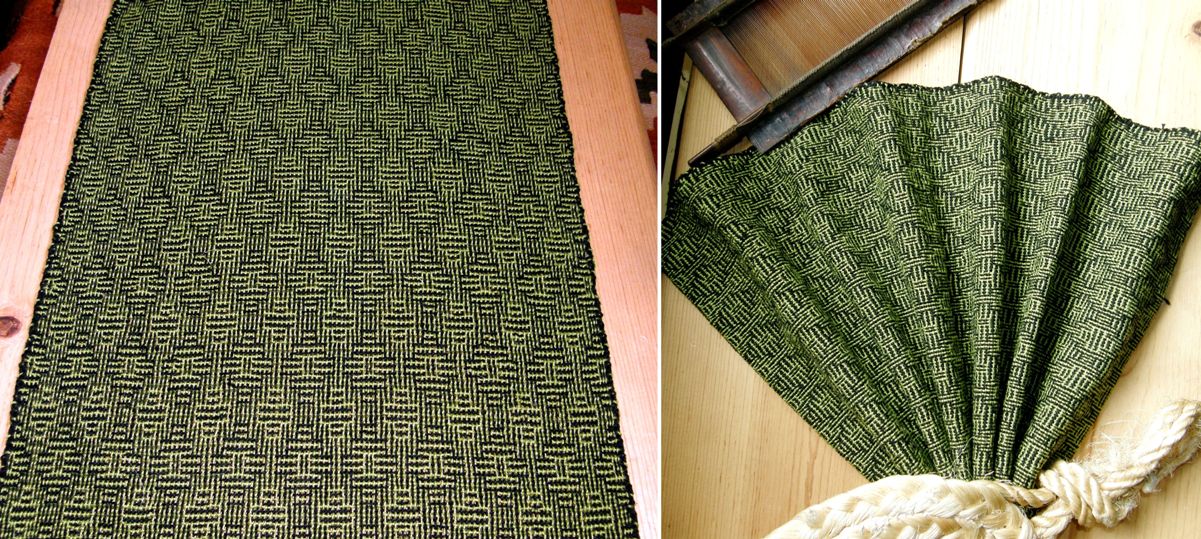
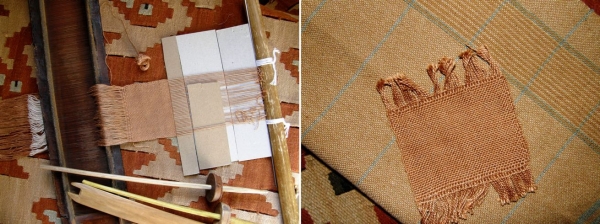
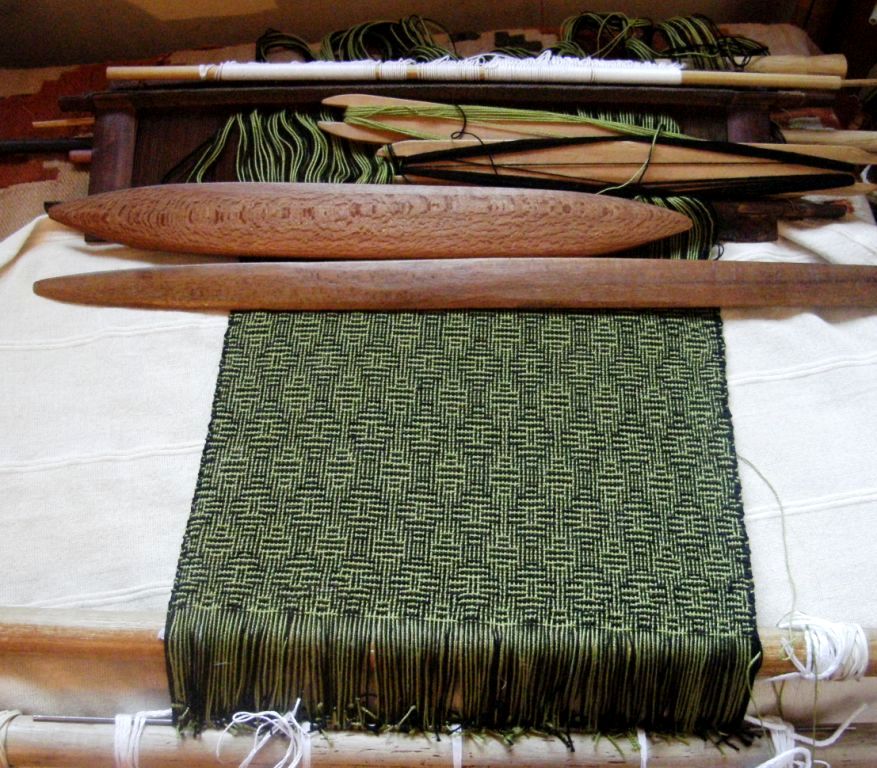
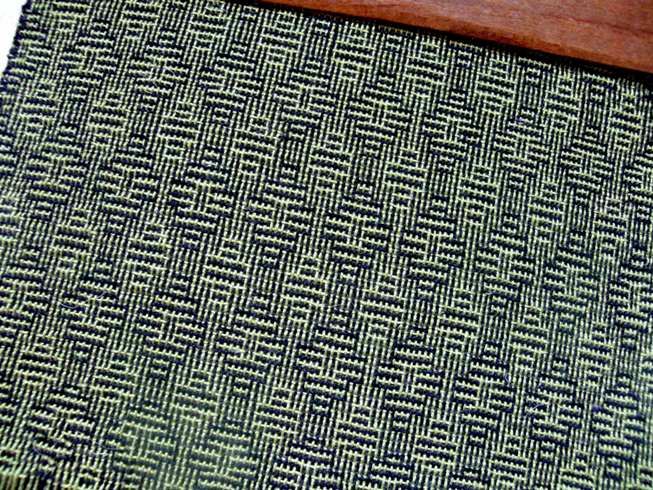
The shadow weave piece also came off the loom this week. You might remember that I had only wound a one-yard warp as it was an experiment. I am ridiculously pleased with it! However, no matter how I tried to photograph it I couldn’t get the shadowy three-dimensional effect to show up so, here it is looking rather flat.
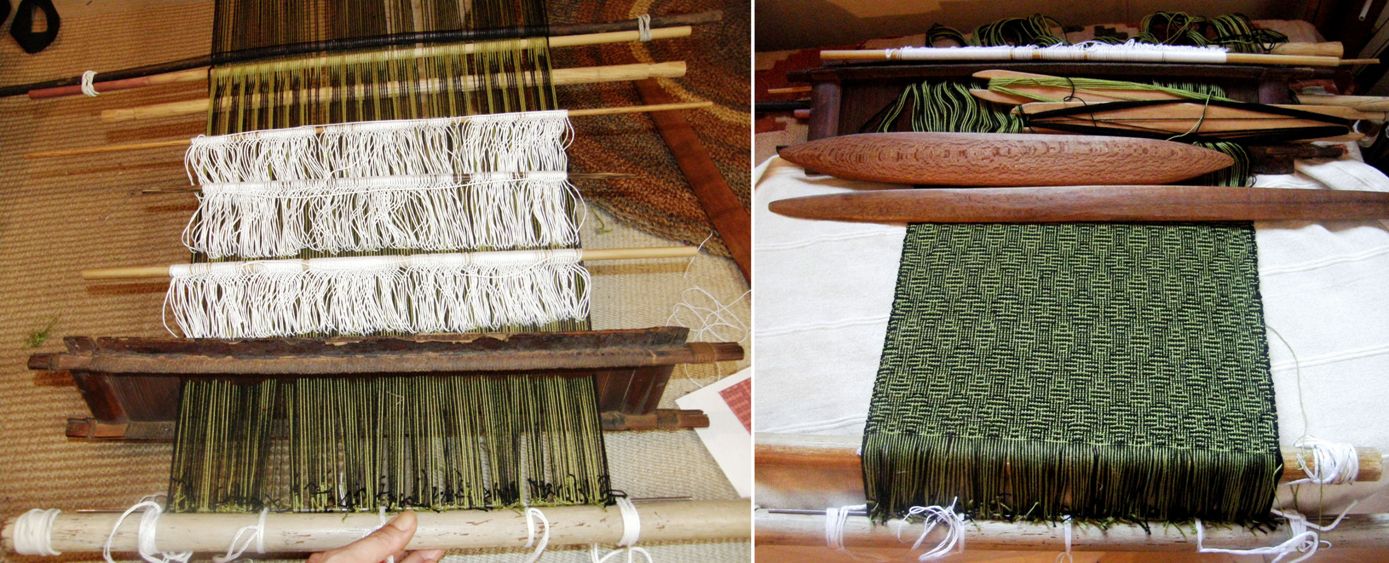
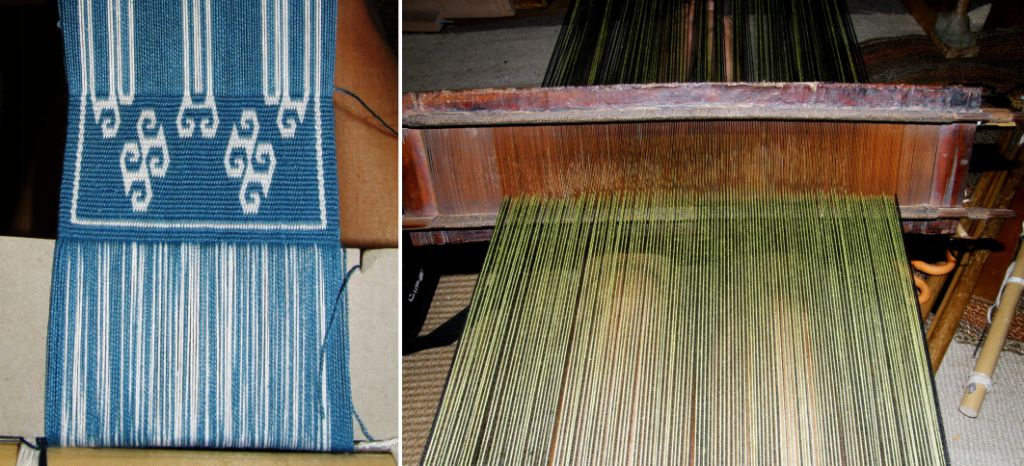
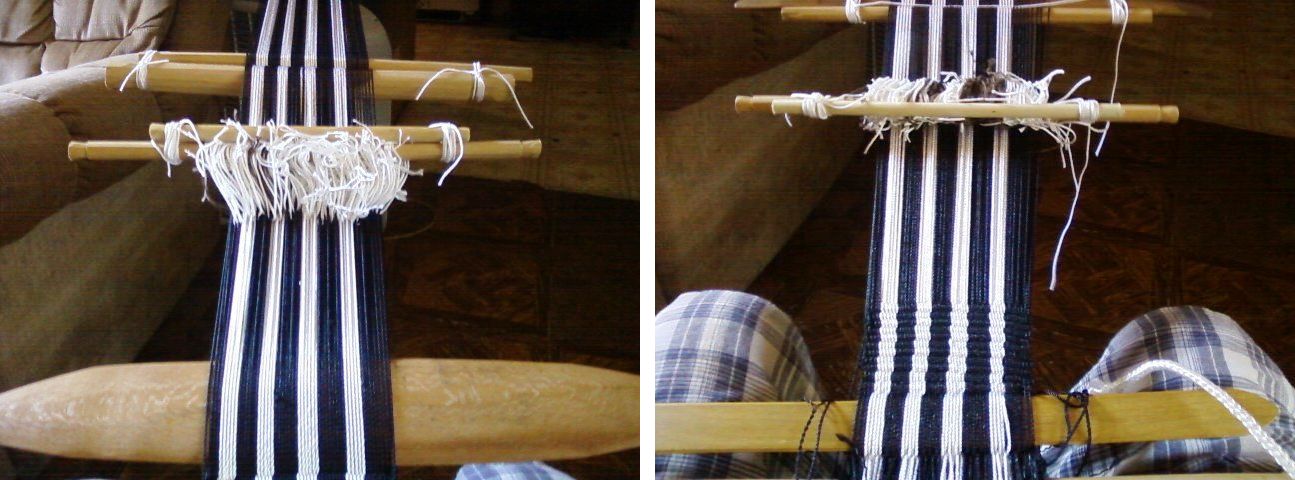
Here is the warp on my backstrap loom with its bamboo reed, three sets of string heddles and shed rod and on the right you can see it in progress.On the left you can see it as it came off the loom and on the right after having been wet finished.
The two doubled black edge ends I used looked a lot better after wet finishing but I am still not sure if doing that was such a good idea. Now, what do I use this piece of cloth for? I am actually thinking of using it as the lining for a bag…would that be nuts?
I LOVED making this! I have another four-shaft draft that I might tackle and then there is the eight-shaft one that has been calling to me for some time now…do I dare?
We are less than two weeks away from the start of our Ravelry group weave-along and I found some wonderfully inspiring pictures today from the Education and More site. Kareanni who works as a volunteer for this organization is in our backstrap group on Ravelry.
These bags are just a few of the latest fair trade products from Guatemalan weavers being offered by Education and More and are wonderful inspiration for our weave- along which will be all about using color and stripes in plain-weave.
I have had a wonderful array of completed backstrap projects coming into my inbox as well as posted in the Ravelry group this week. Where do I start?
Andreas in Greece emailed me telling me that he has been weaving from the tutorials on this blog and from my Andean Pebble Weave book. Not only has he picked up the pebble weave technique, but he has also gone on to make his own terrific designs.
You will recognize some of these designs from my tutorial while others were designed by Andreas. I do hope that we keep in touch as it would be great to learn about traditional weaving in Greece. Andreas told me that there is no warp-faced tradition. How in the world did he shape the bottom of that center band?? That is so cool!
Amber aka lavitaaj on Ravelry has been weaving outdoors making a renaissance design pouch for her sister using the “warp floats galore” technique.
And I am happy to see that she has just posted the finished pouch so I can share it this week…
All that is left to add is the toggle. She has edged it with a tubular band and I love the tassels she has added.
Here is what Jerome aka HeyZ has shown us in his first appearance in the group…a great combination of small pebble weave motifs and a simple and very effective warp float design of his own invention.
Anne and Kateri are working their way successfully through the first lessons in pebble weave while Yonat, who wove with me in Santa Cruz California last spring, has been doing a study in simple warp float patterns with beautiful results.
Speaking of simple warp floats, I received some pictures this week of the weaver who taught me this technique in coastal Ecuador. Kathleen Klumpp, who continues to work with Trinidad and her family to document the ancient spinning, dyeing and weaving techniques used in the coastal region and find markets for their products, sent me these pictures of Trini’s latest work.
In addition to the large satchel-like shoulder bags that Trini has been making she is now producing these cute purses using tagua nut buttons as closures. You can see her on the right weaving and sewing the edging band to the finished textile using her mother's handmade rigid heddle. I would so love to have Maxima see this way of making the "bordes"!
To finish, I would like to make an appeal on behalf of Dorinda, Maxima, Zoraida and little Zuni and the weavers of the Independencia area in Bolivia. The PAZA project is currently experiencing a funding crisis. Sales at the fair last weekend were disappointingly low. I would love for you to visit the PAZA site and see for yourselves that this is a project worthy of support. Even the smallest donation will be very much appreciated. If you have used any of the tutorials here on my blog and enjoyed reading my posts, remember that all the information I am providing comes via weavers like Maxima and Trinidad and this is one small way that we can all give back a little.
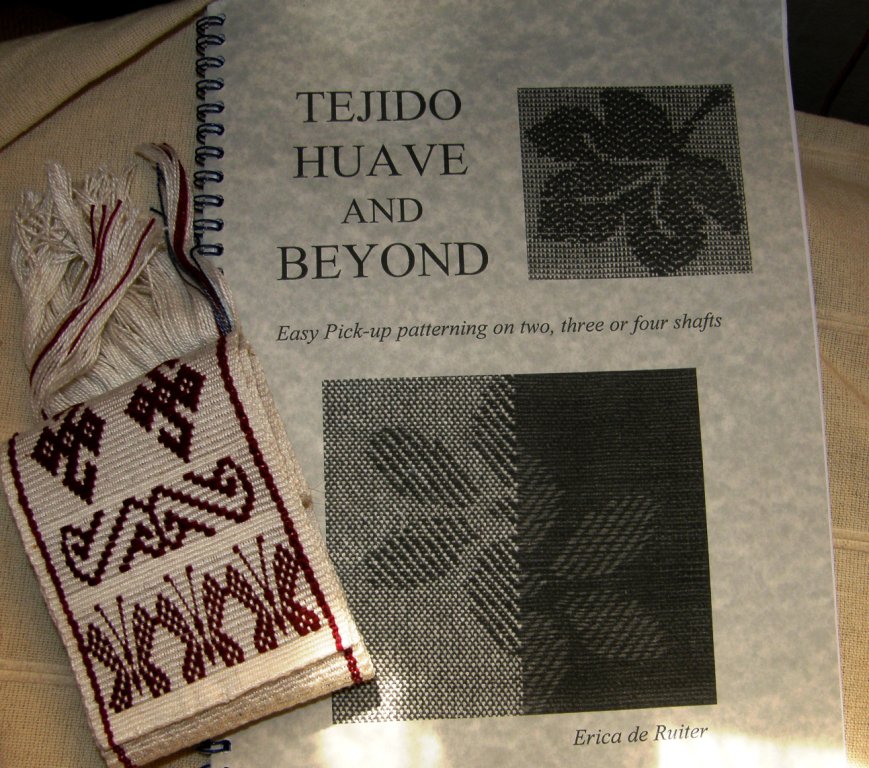
In the mail this week…a book on “Tejido Huave” by Erica de Ruiter which is described as “Easy pick-up patterning on two, three or four shafts”.
I had quite recently seen images online of Mexican Huave textiles decorated with supplementary wefts and used a butterfly motif from one of them on a warp-faced sampler of inlaid brocade patterns.
I am interested in seeing the variations that Erica de Ruiter has developed using the Huave textiles as her inspiration.
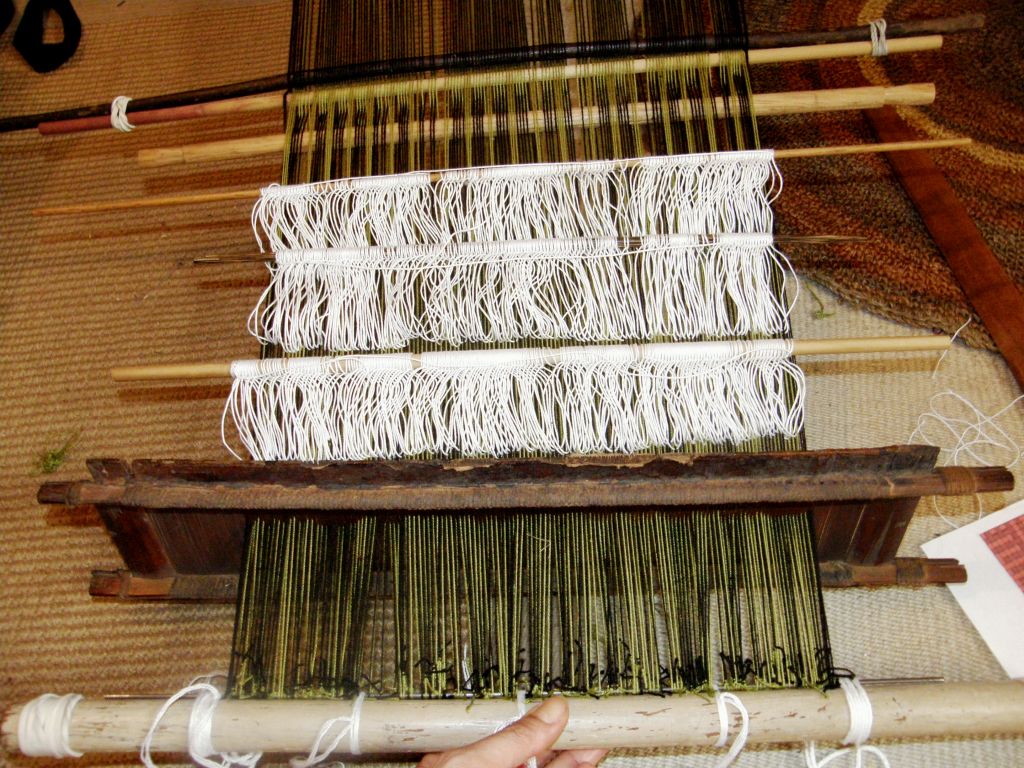
It will be fun to play with more than three sheds on my backstrap loom and, to get into the swing of things, I set up my loom for a four-shed weave this week using three sets of string heddles, a shed rod and my lovely bamboo reed.
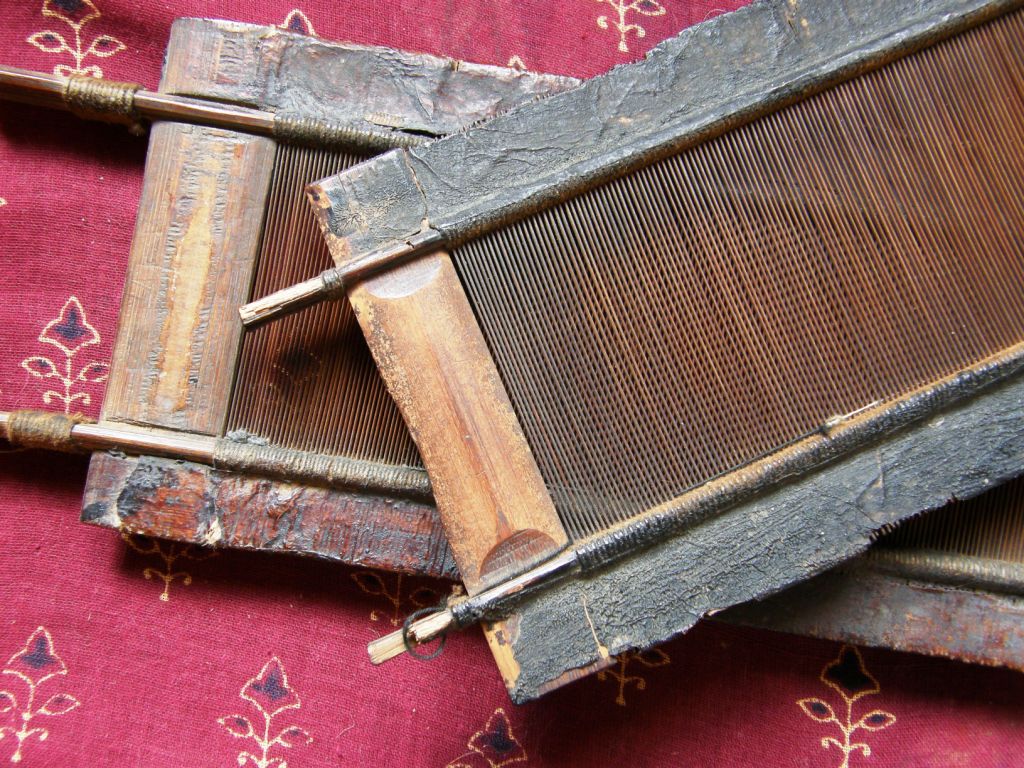
Finally this bamboo reed gets to do some real weaving with its new owner. I got two reeds like this at a stand selling textiles and weaving implements of Chinese minority groups at Convergence last year. My mind wanders off thinking about who may have been the previous owner/s of these reeds, what kinds of warp thread passed through their slots, what kind of weft they beat into place and the fabric they were used to produce.
I made a tiny sample a few weeks ago to see how suitable my thread was for the spacing of the slots and since then have been dithering over what kind of weaving I want to do. This reed is 23 dpi and I am using my #10 crochet cotton. I guess I am working backwards as one usually chooses their yarn, figures the sett for the desired technique and then uses the appropriate reed. I, on the other hand, have the reed and am figuring the rest out with that as my starting point.
You can see my tiny sample above. I wove just enough to be satisfied that my #10 crochet cotton works well in this reed. I was thrilled with how it looked after weft finishing.
I went ahead with a four-shaft, four-treadle shadow weave using a draft I found online. I made string heddles for the threads on the shafts for each of the treadles…three sets of continuous string heddles with threads for the fourth treadle held on a shed rod. So the threads for shafts 2 and 4 (treadle 1) went all together in one heddle and so on.
Of course the whole business is a lot more stable with this width. When I wove the tiny sample it was very awkward handling the wide reed on the narrow warp. The reed sits up nicely on this wider piece and it is really quite a comfortable set-up.
I mis-counted in the sequence at the start before things really got underway. Now I am really enjoying this!
I don’t care for the edges and have yet to find a good way to turn the two wefts. I warped two ends of double- stranded black thinking that that might make a good edge…well, not so much!
This has been all about the process so I had no thoughts at all in the planning stage about what this piece might end up being. I only wound a one-yard warp and now I am thinking that I might use it as lining for a bag.
It is odd for me having to wait to wet-finish this piece to see what it will really look like. In the kind of warp-faced weaving that I do, what you see on the loom is what you get. I am really impatient to get this off the loom, wash it and see the final product but, at the same time I am really enjoying weaving it…just raising heddles and passing wefts…such a change not doing any pick-up!
Two very different projects on the loom this week. One was all about matching designs and the other about yarn and sett for shadow weave…sett and match!
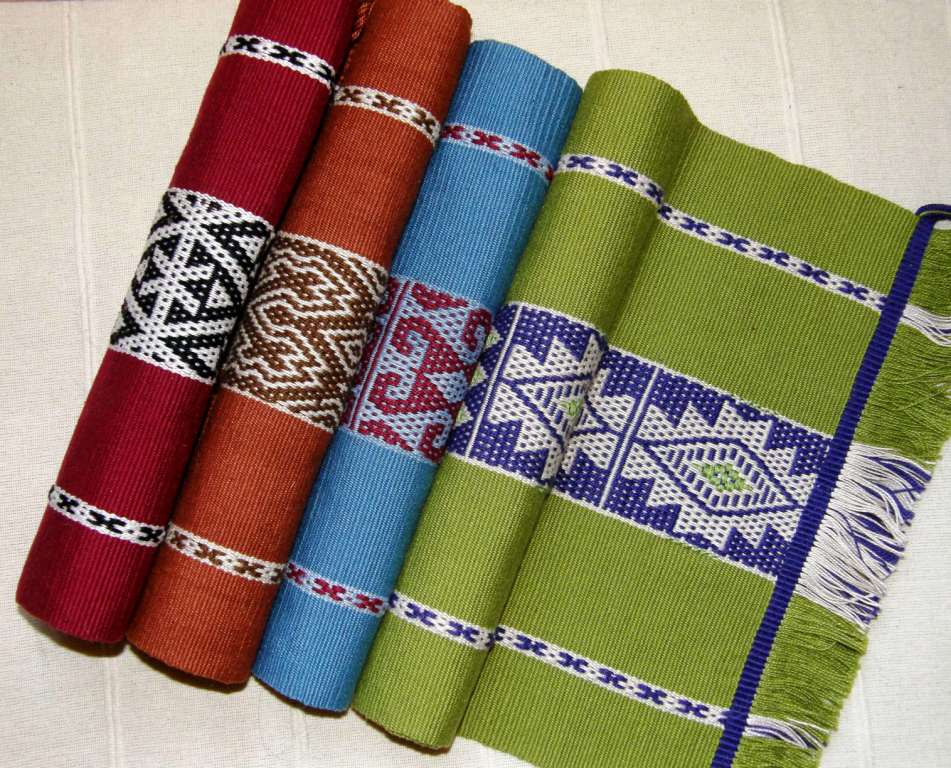
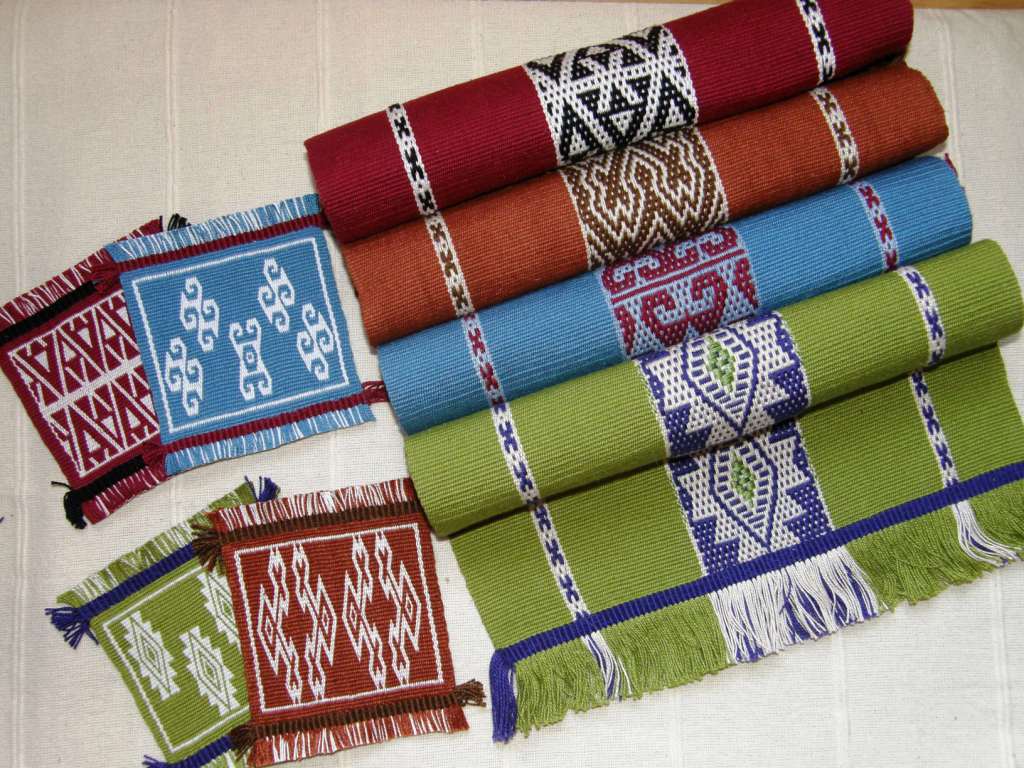
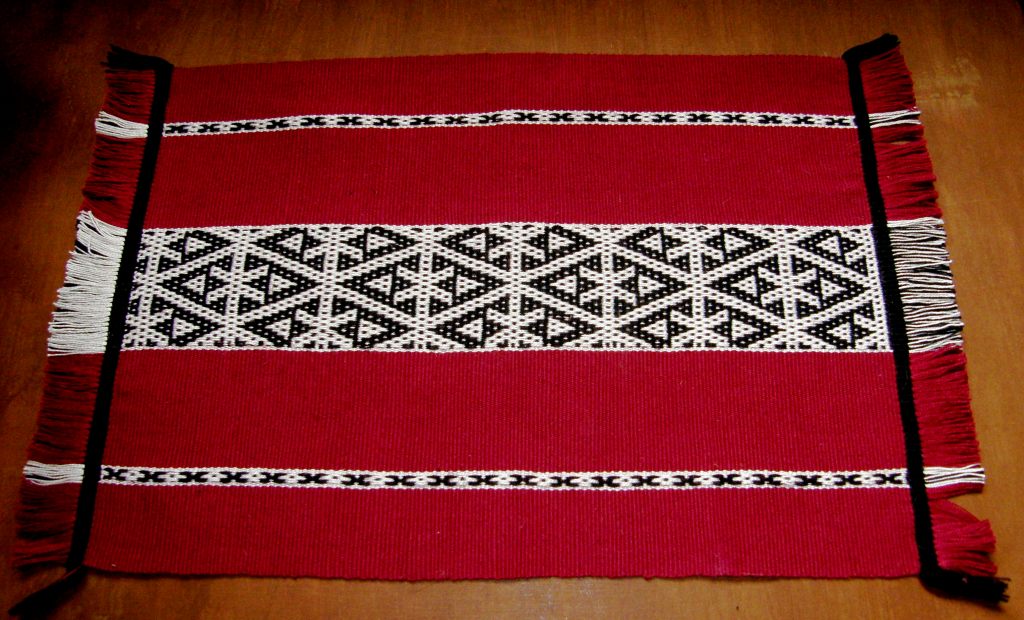
The other weaving I did this week did involve pick-up. I made a set of mug rugs in double weave to match the patterns on the four place mats I recently finished.
The patterns on the place mats were woven with simple warp floats and I tried to include elements of the various motifs in the matching double weave mug rugs.
I used weft twining on the edges of the mug rugs to match the finish of the place mats which also allowed me to incorporate the third color as each place mat had been woven in three colors.
The “Worldwide Weaving Web” has brought all these wonderful patterns into my home which I have seen mostly in images online. A wonderful book on Tejido Huave has come my way as a result of internet wanderings and a box of goodies arrived just today from an online weaving friend.
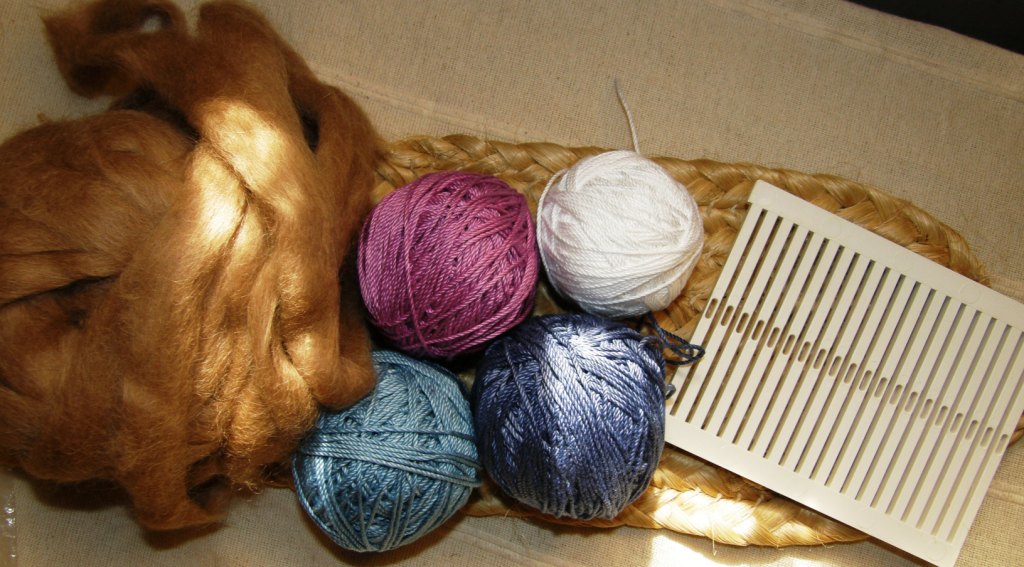
During the Tour de Fleece on Ravelry our Backstrap Weaving Group organized a fiber gift exchange and here is what I got from Bobbie…some suri alpaca fiber to spin…so soft!! and four balls of cotton for my backstrap weaving. The colors were dyed by Bobbie herself. After having met Bobbie online I actually did get to meet her in person when I was in Portland last May.
The rigid heddle segment was not in this box from Bobbie but came to me from another online friend who I haven’t had the chance to meet yet in person…Sharon in Florida.
I have taken this heddle out in preparation for the Weave-Along that we are planning for the Backstrap Group starting at the beginning of September. (Read more about this in last week’s post.) It is a plain-weave Weave-Along in warp-faced or balanced-weave and some participants are going to use these bought plastic rigid heddle segments while others are making their own from sushi mats, popsicle sticks and plastic folders. Others are planning ikat designs, colorful stripes and horizontal bars for their warp-faced pieces.
Home made reed and rigid heddle by Dyggvi and Janet.
We have found some good sources online for the heddle segments for those who would like to do narrow weavings. Some people are going to use the heddles that came with their rigid heddle looms. Janet is planning a 24″ wide shawl.
The segments can be found hereand here(this link was provided by Traudi) and Joanne from Glimakra gave us information about all the heddles that they have available including some beautiful traditional-style wooden ones for band weaving with handles.
And if these gifts aren’t enough from the “Worldwide Weaving Web”, a real live person arrived from the other side of the world…all the way from Doha, Qatar! Fellow Ravelry member Berta aka mountainbird is traveling across South America on her vacation away from the temperatures in the high forties (Celcius) that are typical in her part of the world at this time of year. She is Canadian but has been living in Qatar teaching English for eleven years.
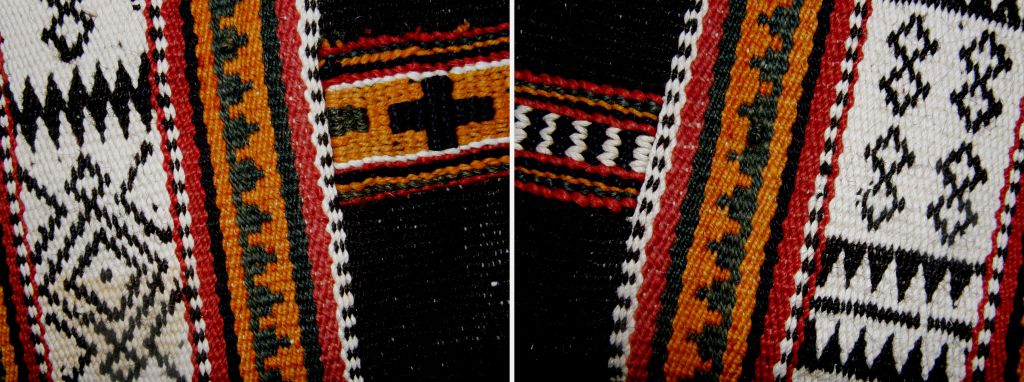
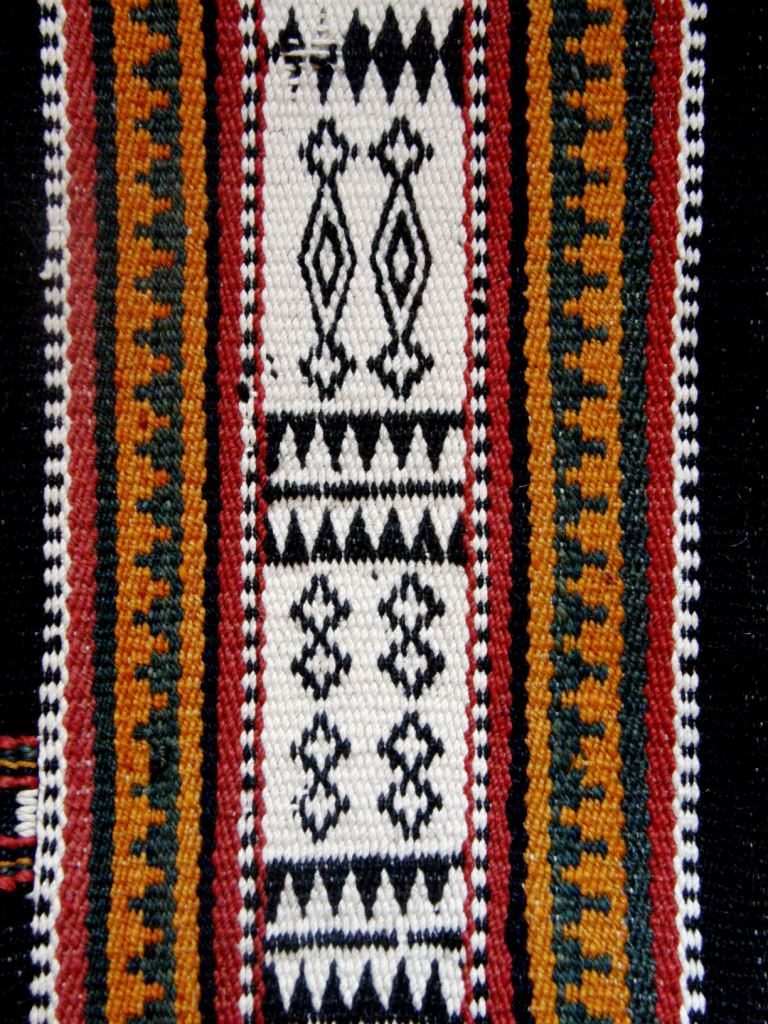
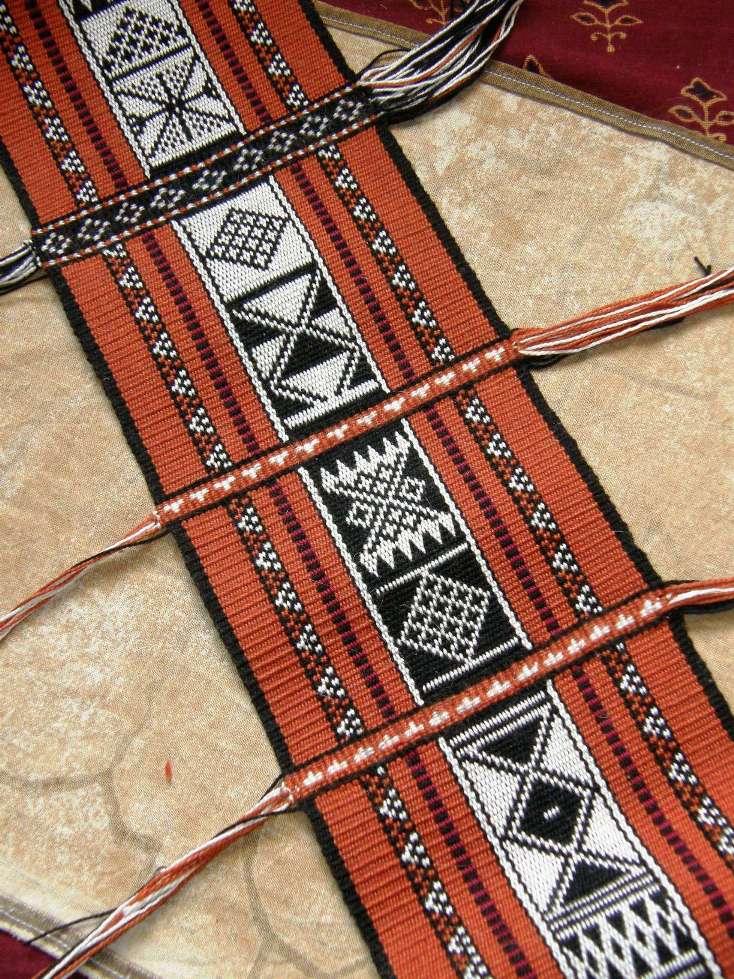
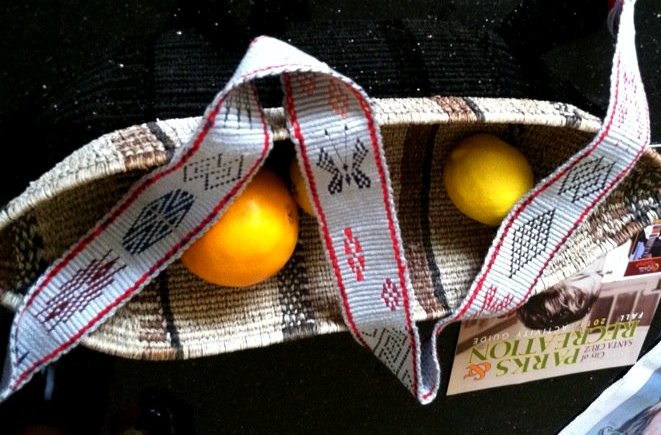
Berta is friends with Tracy who is a Backstrap Weaving Group member and who has been learning to weave Bedouin-style textiles in Qatar and sharing her findings with us in the group. She sent me this wonderful piece of Bedouin weaving with Berta…
This fabric is part of a tent divider which has been cut up to make a bag. The black and white pattern has been woven using warp substitution technique as has the grey and orange “molar” design. You can also see small segments of weft twining which is what brought me to study these textiles in the first place.
I had learned weft twining with the Montagnard (Vietnamese hilltribe) weavers in North Carolina and google searches on the subject led me to fantastic images of Bedouin weaving which I was able to reproduce being already familiar with the warp substitution and twining techniques.
And now many months down the track I am holding a genuine piece of this weaving, a beautiful gift from Tracy all the way from Qatar…what a thrill. I was aware that the yarn used in the traditional pieces is quite heavy but didn’t appreciate how thick it actually is until now. I can now imagine just how terribly heavy a full tent divider must be in this yarn.
There is something so very wonderful about the coarseness and chunkiness of this piece not to mention the gorgeous wool aroma…definitely constructed to withstand some harsh elements
My reproduction piece below in the #10 cotton just doesn’t seem right at all!!
I had a fun couple of days with Berta who, in true Ravelry style, arrived with yarn and knitting in hand with a couple of pairs of socks already finished.
She is overlanding from Lima to Buenos Aires…many many bus hours in which to knit!
We spent August 6th together and invited an Australian girl from Berta’s hostel (home of Simon the toucan) to join us so we had an Argentinean, two Australians and a Canadian celebrating Bolivian Independence Day in a Brazilian restaurant!
Now she is on her way to Iguazu Falls on the border of Brazil and Argentina.
#########################################
To finish this week, I have put together some pictures and video for what will be the start of a new page on intermediate-level techniques and I wanted to start with a short explanation of what is meant by “complementary warp pick-up”. You will probably run into this term when you read about warp-faced backstrap weaving. Andean pebble weave is just one of the techniques that falls into this category.
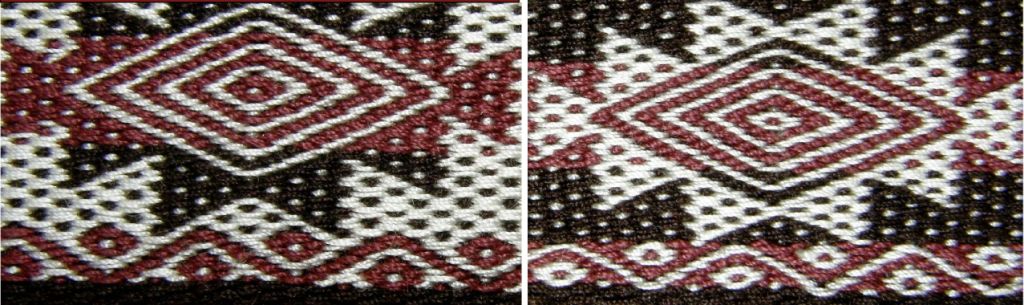
The idea here is not to teach you a specific weaving technique but simply to show you how the weavers pick up the warps to form their patterns when weaving a complementary warp method. Irene Emery defines complementary weaves as those where “two sets of elements play equivalent and reciprocal parts on opposite faces of the fabric,”….
This creates a double-faced fabric. The design on one face of the fabric is mirrored on the other face with its colors reversed as in the pebble weave example below.
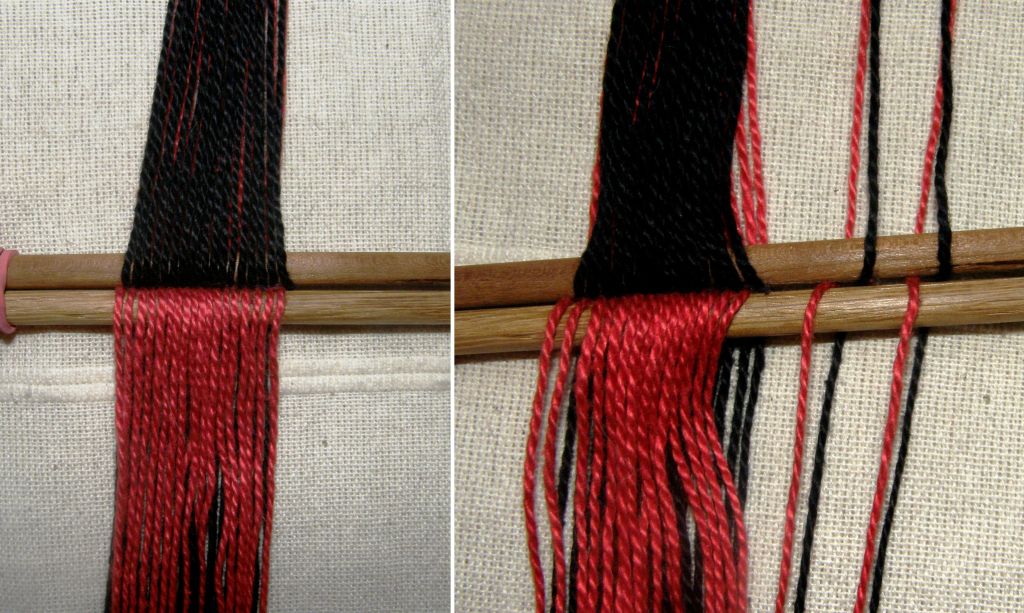
When weaving a complementary warp technique, the warps are generally arranged in two sheds with the colors separated as seen above. The warps in one color will go into string heddles and the other color will be controlled by a shed rod. In the example above, each black warp has a red partner. One black warp together with its red partner is called a complementary pair. In the example, the black warp sits on the right of its red partner. I have separated two complementary pairs from the rest of the warps so you can see how they lie.
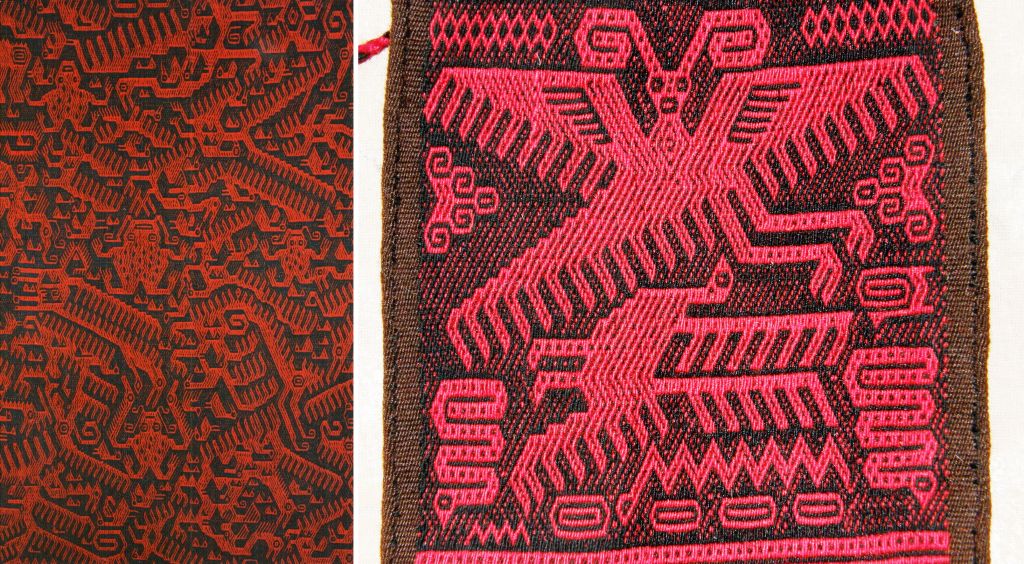
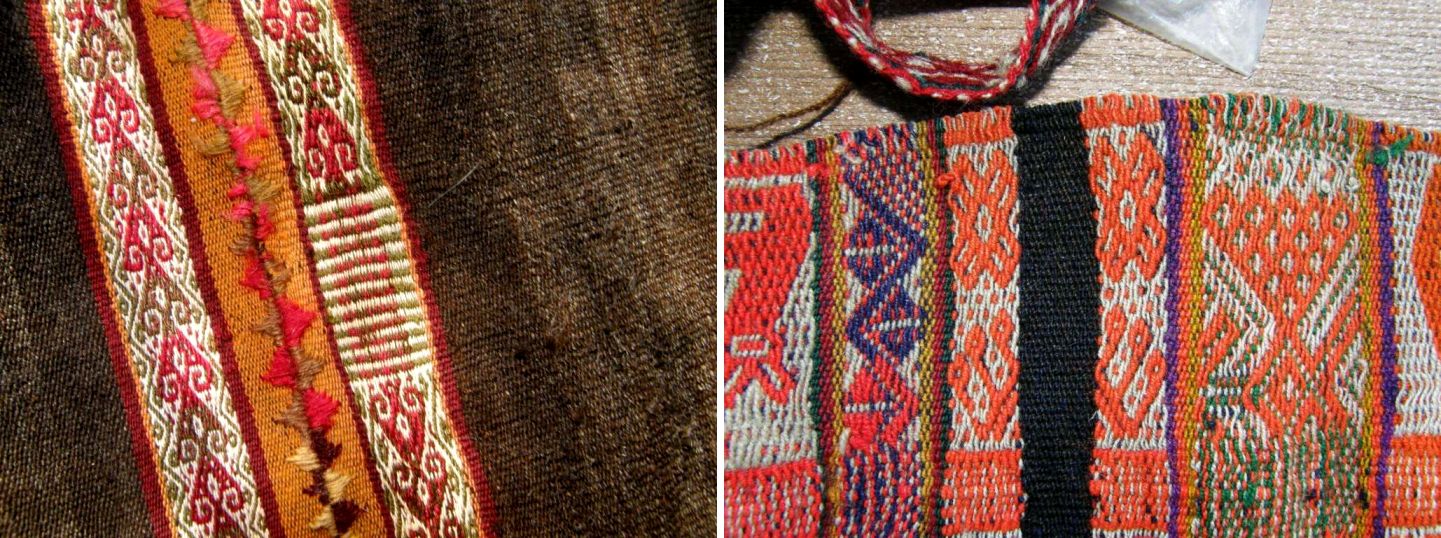
Weavings like these Jalq’a textiles above from Potolo, Bolivia have been woven in a complementary warp technique using red and black threads on a warp that would have looked like my examples above. You can see that the faces of the textiles show red figures on a black background. The back of the textile will show the same figures except that they will be black on a red background.
The pick-up is done with the aid of the cross. The cross keeps the warps in strict order so that the weaver knows which warps are complementary pairs. If the weaver wants black to show on the upper face of her weaving she will pick up the black and drop its red partner. The dropped red will show on the back of the textile.
The way weavers choose to form the cross and carry out the pick-up varies greatly from region to region. There is no one correct way to do it.
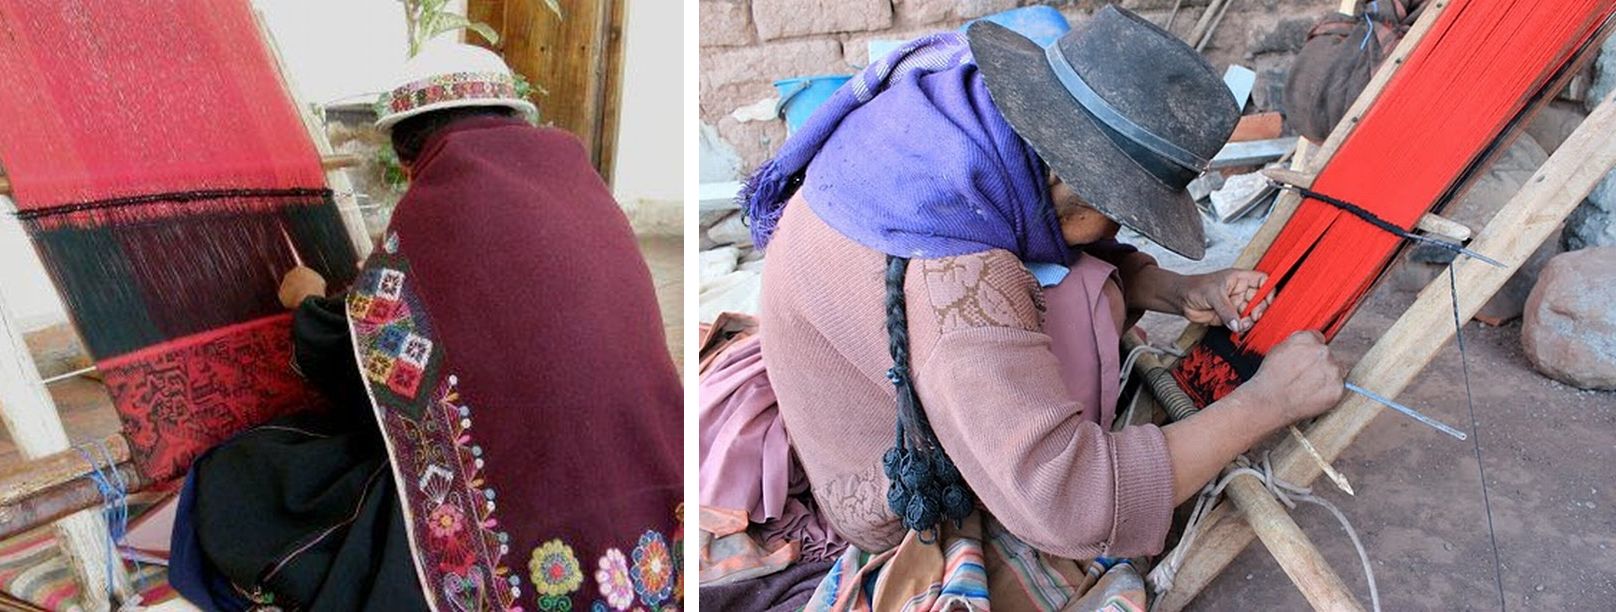
Above you can see two weavers from Potolo with their red and black weavings. The first weaver has created a ”picking cross” down at the weaving line. She has a stick under all the red warps and has opened up the shed with all the black warps. From this cross she will select the warps she needs for her pattern. When she picks a red she will drop its black partner and vice versa. Like this, she will create a shed of red and black warps through which she will pass the weft.
The weaver on the right is doing likewise except that she has inserted a stick under the black warps and has opened the shed with the reds. From this “picking cross” she will select the warps for her design.
Both weavers are using sticks to pick up the warps.
This weaver from Tinkipaya, Bolivia uses her hands to pick and drop the warps for her design. Her weaving has bands of many colors. She has a permanent cross in her warp. You can probably just make it out in the picture. Two cords are holding her cross rather than sticks. She is working her way across the warp picking the color from one side of the cross which she wants to have showing on the front of the weaving and dropping the complementary partner in the other color which will show on the back of the weaving.
This is the way I was taught to do pebble weave in one region of Peru….picking from a permanent cross with my hands. The pick-up method varies from region to region.
Here is a video that I made showing the theory of complementary warp pick-up. This is how I pick one pattern shed of red and black warps through which I will pass the weft to form my design.
Here are several video clips of Bolivian weavers from Potolo, Isoso, Tarabuco and Tinkipaya doing complementary warp pick-up. See the hundreds of threads they are working with and see how fast they go! The first weaver you will recognize from Potolo, followed by a Guaraní weaver from Isoso, a lady from Tarabuco and one from Tinkipaya.
The second weaver in this video is my Guaraní weaving teacher here in Santa Cruz. The Guaraní weavers have their own very special way of doing the pick-up and are the only ones I have seen who don’t pick from a cross when doing complementary warp pick-up. Angela has her two colors, brown and white, separated into two sets of string heddles and simply pulls on the appropriate heddle when she needs a color. Somehow she manages to keep her complementary pairs in order and doesn’t mix up or cross the threads!
Well, I hope that these videos and explanations have been interesting for you. Those who have my Andean Pebble Weave book may like to see the theory of the pick-up I am describing therein with step-by-step pictures, in action here in my video. Note that none of the weavers in these videos are doing pebble weave. Pebble weave is just one of several techniques that fall into this complementary warp category.
I am off to the highlands tomorrow for some weaving lessons and will be meeting up with my Tinkuy roomies Dorinda and Maxima and seeing a bit of the Virgen de Urkupiña festival. I’ll be back next week with some new weaving knowledge and hopefully lots of pictures to share.
I love looking at the four-selvedge textiles that the weavers here in Bolivia and Peru make. They give away some of the little secrets and “back stories”. The terminal area can give information about how the weaver set up the sheds on her warp as well as tell stories about how patient, tenacious and skilled he or she may have been. It generally goes that the smaller the terminal area is, the higher the weaver’s skill level was.
The terminal area is the part on a four-selvedge piece where the weaver finishes. The hand manipulated pick-up patterning suddenly ends and changes to rows of weaving where the weaver is simply passing the weft through the two sheds created by the heddles and shed-rod.
The weaver will have started working at one end of her warp, woven a certain distance and then turned her warp around to start weaving from the other end. As the weaving progresses, the distance between the two ends of woven fabric slowly decreases.
The weaver would eventually come to a point where there was so little space in which to work that it would be impossible to continue picking the patterns by hand. At this point he or she would simply open the two sheds without any patterning manipulations and pass the weft while substituting increasingly thin rods for the big shed stick. It’s the point at which the weaver decides that he or she simply cannot continue picking up warps by hand to form the pattern that shows the weavers skill or perhaps just his or her sheer tenacity.
Some weavers just weave from one end and finish the weaving when they reach the other loom bar.
Eventually the shed rod is removed and only the heddles are raised to open the tiniest gap through which the weft can be fed. The threads for every other shed must be painstakingly picked up one by one. The last few weft passes are actually needle woven. Good eyesight, patience, pride in one’s work and a strong desire for perfection are required.
The terminal area on a plain-weave four-selvedge piece created by a skilled weaver will be difficult to spot.
For people like me who like to look at textiles and figure out how they were woven, the information in the terminal area is a gift.
This fact came to mind this week as I was trying to figure out why the edges on the Bolivian double-weave belts that I have are so much neater than the double-weave pieces I make myself.
I do everything my teachers in Potosi taught me yet there is something missing. Some weavers seem to have some special secret that enables them to create those sharp straight edges. My edge warps have a tendency sometimes to roll off the sides as the weft passes from the upper layer to the lower. This can at times produce bumpy edges although, as my boyfriend likes to point out, I am possibly the only one on this planet who notices them. I think all weavers know how that goes!
Now the problem with examining belts is that they are most often not four-selvedge pieces. The ones I have from Potosi have three selvedges and end in tight braids and there is, therefore, no terminal area. No secrets or treasures of information are given away.
So, this is what I did. I took a deep breath and chopped the braid off one of my Bolivian belts to un-weave and find the hidden treasure. Sorry! Anyone who has done warp-faced double weave will know that un-weaving it is not fun. I made a mess and I won’t even show it to you but the good news is that I think, and I stress “think” I found the secret. I will probably be traveling up to the highlands next month where I hope to meet a weaver who can confirm this.
I have been weaving a double-weave sample this week to see if I can improve the edges and also to see how the Bhutanese motifs that I wove last week with supplementary wefts look when woven in this technique.
The motifs look so much more sumptuous woven with the supplementary wefts. That is how they were woven on the original textile from which I copied them but it was fun to see how they looked in double weave and also gave me something interesting to do as I wove my sample. I am pretty happy with this sample and shall have to find something I can use it for. I do believe the edges on the double weave piece look better than those I normally produce or is that just my imagination trying to justify my chopping up that poor belt?!
I finished the fourth and final placemat in my set and was just about to celebrate when I found yet another lovely Mexican pattern in this warp float technique. But, no, that’s enough for the placemat project. I can use that pattern for something else.
The fourth pattern comes from a storage bag from south west Iran which I saw on this site.
So here is the complete set…
Last week I showed you the blue one and its design which was inspired by Central Asian yurt band patterns. Verena, who wove with me on one of my US visits, has taken classes on how to construct a yurt and she gave me the link to the website of her teachers in Nova Scotia. The web page has wonderful pictures of lessons in traditional weaving in Kyrgystan with images of the warping, set up and weaving.
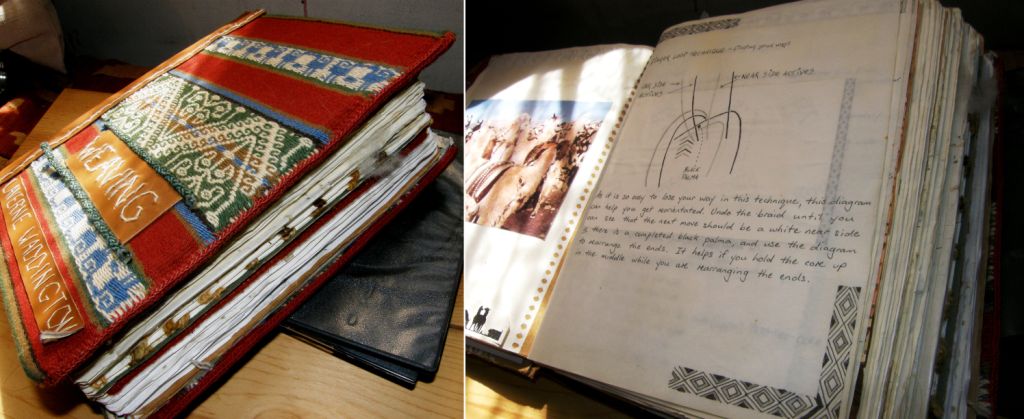
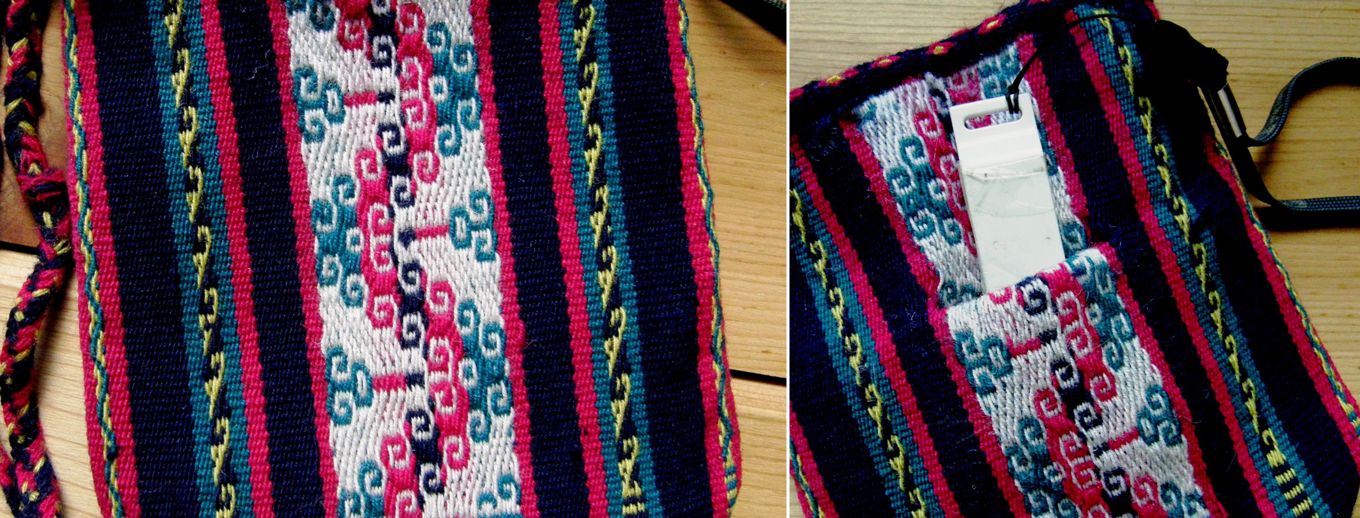
What’s next on the loom? The ideas are swirling around. Lately I have seen some lovely handmade bags which have incorporated all kinds of nifty compartments and pockets and so, I have decided to try and use the technique that my Bolivian teachers taught me for constructing a chuspa, (a bag for carrying coca leaves) with its little built-in pocket to make a bag and pocket all in one piece. I haven’t woven one of these since I studied with Julia and Hilda and so I have had to get out the giant journal to consult.
Hopefully I have done a good job of documenting the process. Sometimes when the memory of the process has started to fade, I return to my written instructions and find that I didn’t include as much detail as I should have. What I normally do is try to consolidate everything immediately on my return by weaving more examples and then I repeat the process at intervals and add to and improve my written instructions.
So, my aim is to make a bag with a pocket all in one piece. A lot of the chuspas here are woven with such pockets. Some of the pockets are so tiny that it is obvious that they were woven as a decoration and couldn’t possibly have any sort of practical use. I guess it is included in many cases simply because it is customary to do so.
This is the chuspa that I made with my teachers. You can see the wee pocket which has been edged with cross knit looping.
The pocket on the traditional chuspa is only accessible from the inside of the bag. I want to have a pocket that I can get into on the outside so that I can easily reach keys, a cellphone or any other treasure that I need to have hidden but in easy reach. When I turn my chuspa inside out I have such a pocket. It was fun seeing the other side of this weaving with its reversed colors for a change which hasn’t seen the light of day since 1997 when I wove this piece.
This probably seems like a ridiculously complicated way to go about having a pocket in a bag but remember that I am pretty much all about process rather than product and this exercise will serve more than one purpose. I would like to weave this bag in the traditional way I was taught by my Bolivian teachers and see if my written instructions are up to scratch. The chuspa I wove in Potosi is a four-selvedge piece. The one I plan on doing now won’t be! Well, not this time anyway. Maybe I will do that later when I have enough handspun. I am going to weave a simple plain test bag first in cotton..
It was interesting to see that even my weaving teachers were forgetting the process and there was much bickering between the two sisters over how it should be done! Here are their two pairs of hands at work setting up the horizontal loom.
As I have been playing around with double-weave this week, I am going to try and put together a tutorial on the two-weft version for the blog next week. I made a tutorial for this on Weavolution ages ago and I think it could use some better photos and an update. The two-weft version allows you to weave bands of double-weave patterns next to regular plain weave.
This piece from Charazani, Bolivia, which is part of Yonat’s textile collection, has been woven in such a way. Motifs can be woven on narrow bands with the smooth solid color background that double weave produces. The bands sit within fields of solid color and stripes which are regular warp-faced plain weave. You can clearly see the terminal area. Finishing a four-selvedge double-weave piece is particularly hard as you have twice the amount of warps to deal with. Trust me, I have done it! This is the technique I wove on the very first four-selvedge piece I made. My teacher and I shared the burden of finishing the piece.
I will leave you here with some projects from online weaving friends and people I wove with on my US trip last spring.
Dwayne was having some problems getting his very first project underway. He didn’t have a nice smooth cotton yarn to work with and was struggling with making the string heddles. Now he is weaving using inkle-type heddles clamped between two dowels. Let’s weave! The continuous string heddles can be practiced later! He has a lovely Guatemalan loom to use.
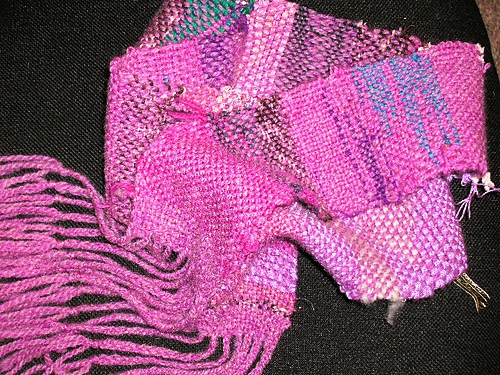
I showed Kathi’s Saori-style project in its early stages last week. Kathi was using a rigid heddle segment on a backstrap loom and look what she has made…
This almost makes me wish I lived in a colder climate so I too can make scarves.
Yonat wove supplementary weft patterning with me in California and has just showed me her band made with #10 crochet cotton on which she has been practicing the technique. She really has this down! I also have a tutorial on this in Spanish.
And Verena has been busy with pebble weave….
And that’s it for another week. Now to get my chuspa idea under way. There are bound to be lots of lessons learned in this project!



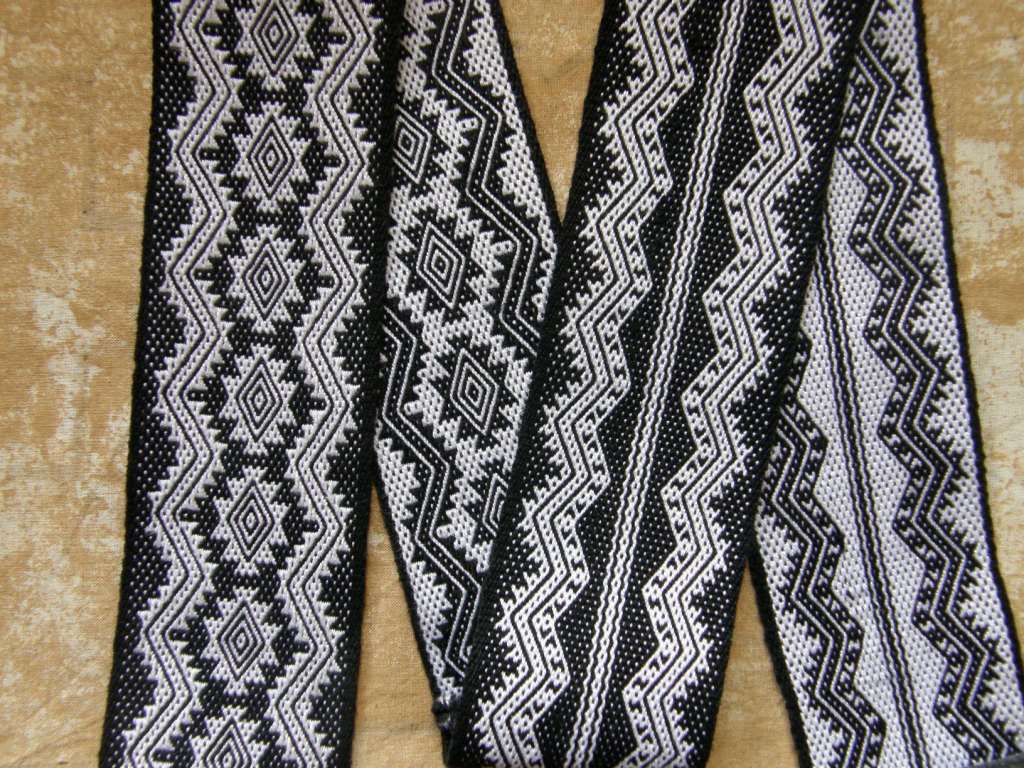
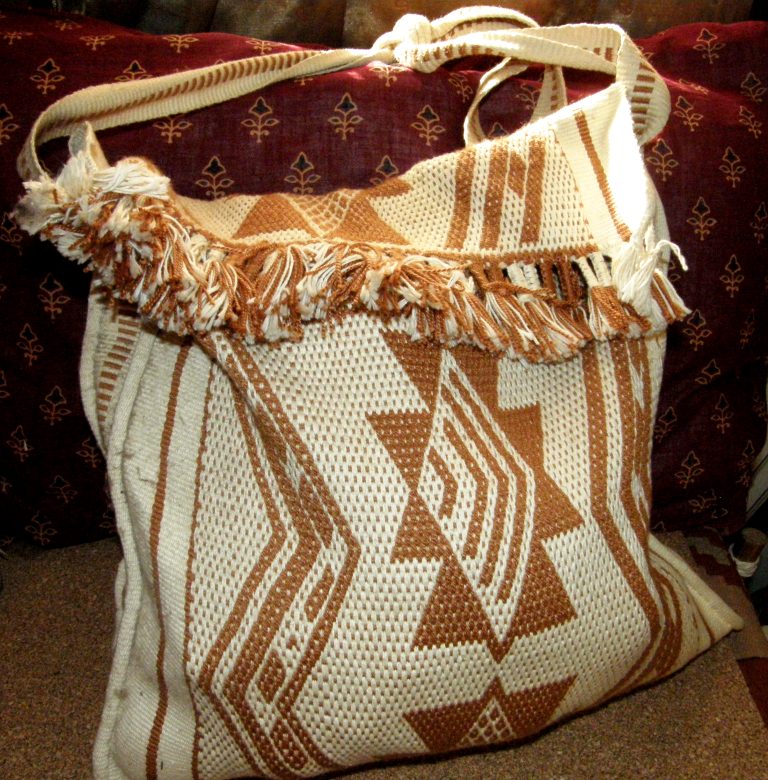 In the pebble weave piece above I used star motifs from Guaraní textiles. I was pleased to recently find a story, translated from Guaraní to Spanish, in a book published by Artecampo, a craft cooperative store, here in Santa Cruz about a legend behind the use of the star motifs in Guaraní weaving…..it says that…
 Wikipedia tells me that the stars on the flag of the United States represent the fifty States in the Union. Well, I knew that. I was hoping to find out why exactly stars had been chosen as opposed to some other figure. There doesn’t have to be a reason. I am sure that we could all come up with some kind of symbolic meaning for a star. I swear that some weavers I have spoken to have made up things about the motifs they are using just to please or have a bit of fun with me…I have seen the twinkle in their eyes and the way they look sideways at each other!
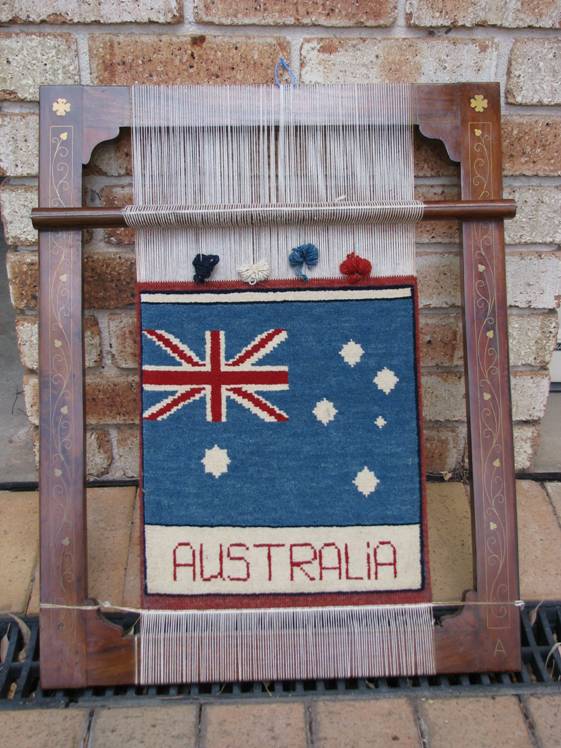
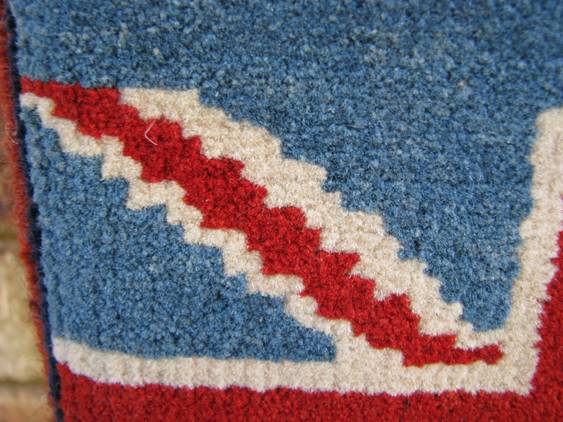 The group of stars is the Southern Cross constellation which really is a sight to behold there in the southern sky. I am so happy to be able to see it low on the Bolivian horizon and it makes me feel somehow connected to Australia and the people I know and love so far away. It is little wonder we so love stars and choose to use them in our cloth.
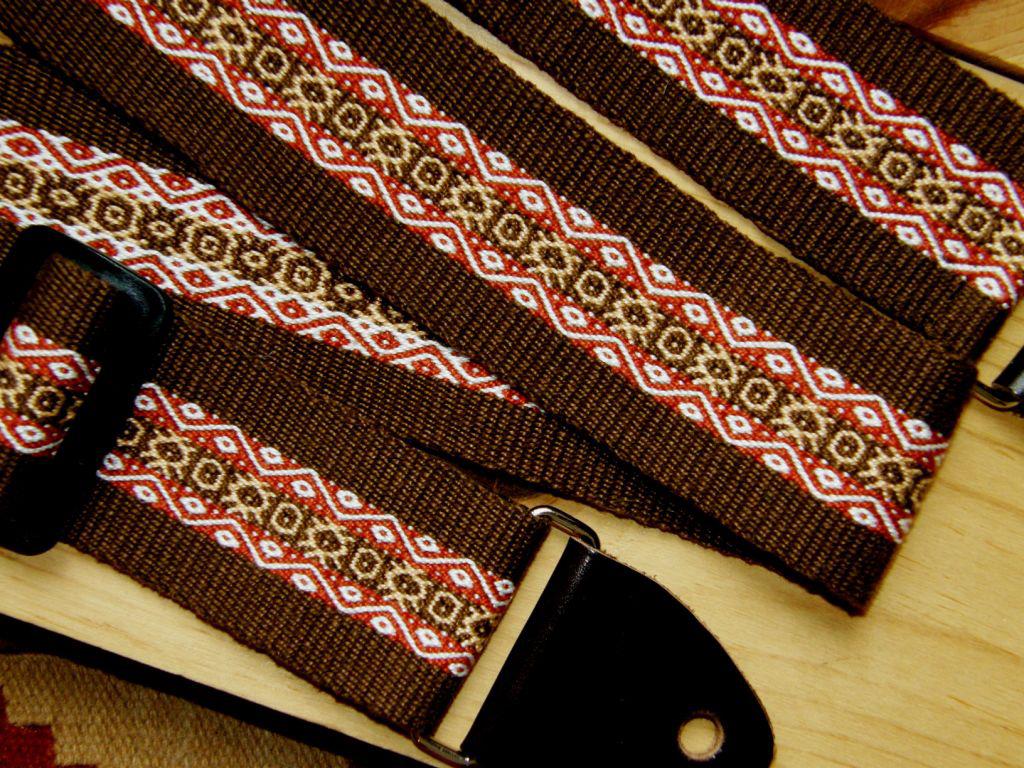
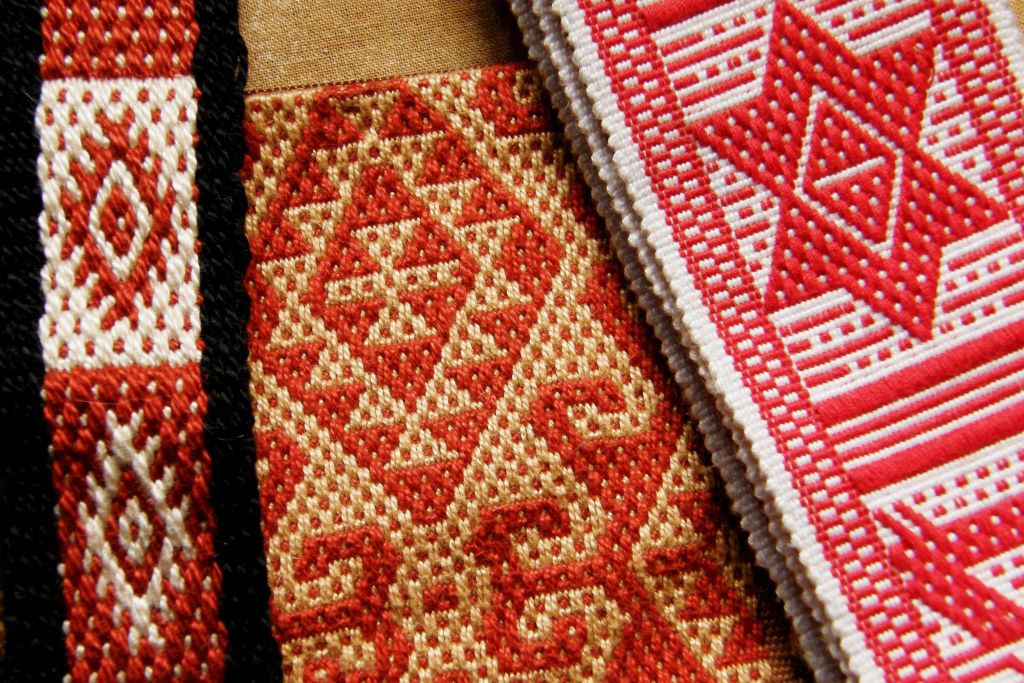

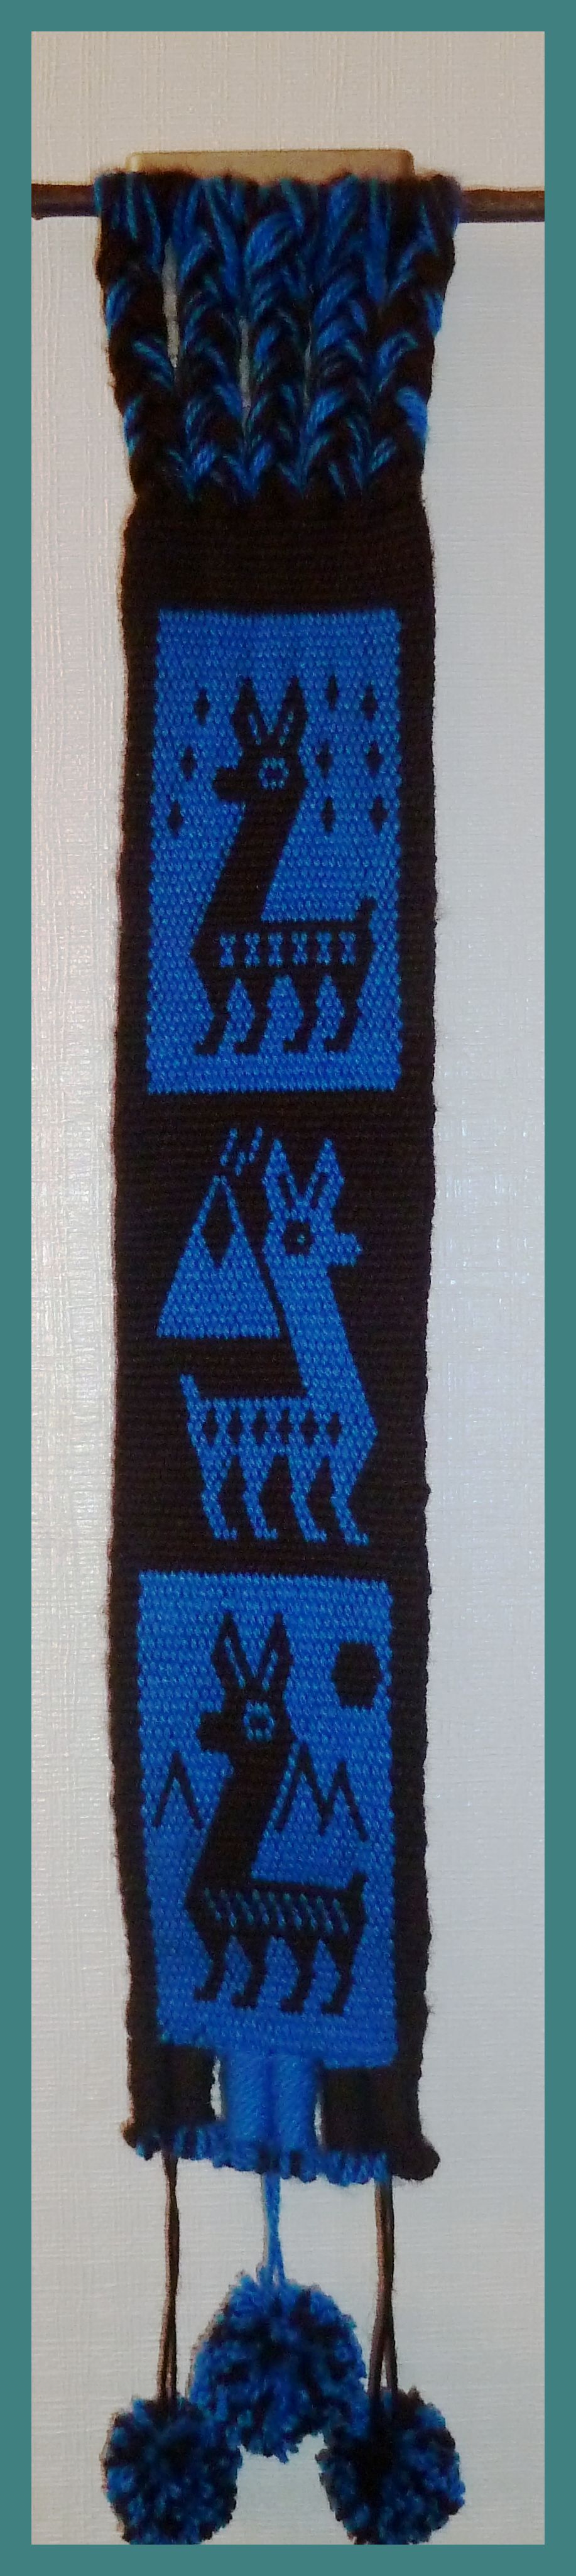 Ad here is what Karina in Chile wove using the Bolivian llama patterns that I embellished and charted. They are woven in warp-faced double weave the instructions for which, along with the llama pattern charts, are on this blog.