Backstrap Weaving – In my own backyard.

IN MY OWN BACKYARD

My weaving explorations seem to be taking me further and further afield these days…outside my city, my country (Bolivia) and even outside the continent and I have found myself visiting SE Asian weavers in the USA and learning about weavers in the Middle East from books.

Sometimes I forget about the treasures that are here right in my own backyard.

I wrote about the Ayoreo people who live in this area and their looped bags in a post a couple of weeks ago and the difficulties I have had in winning their trust so that I could learn more about them and their crafts. I have given up on that for now but hope that I can pursue it again some day. In the same way I was reminded of a Guarani weaver with whom I made contact here over six years ago.

I used to visit Angela, a Guarani weaver, every Saturday morning over a period of a couple of months about six years ago. She had her loom set up in a handcraft store and was warping to make a hammock.

It was such an opportunity to meet up with Angela like this as it is very difficult to find weavers right here in the city let alone a weaver who has a loom and a place in which to use it . Angela’s hometown of Isoso is about twelve hours drive away from here. Angela would weave in the store twice a week. On my Saturday visits I got to see her warp most of the loom, but missed seeing her setting up the heddles. I saw her start the weaving and part of the designs. The white cotton hammock had three bands of green, yellow and black pick up designs. Angela’s motifs included flowers, geometrics, pineapple plants and scenes of people in their typical daily routine.
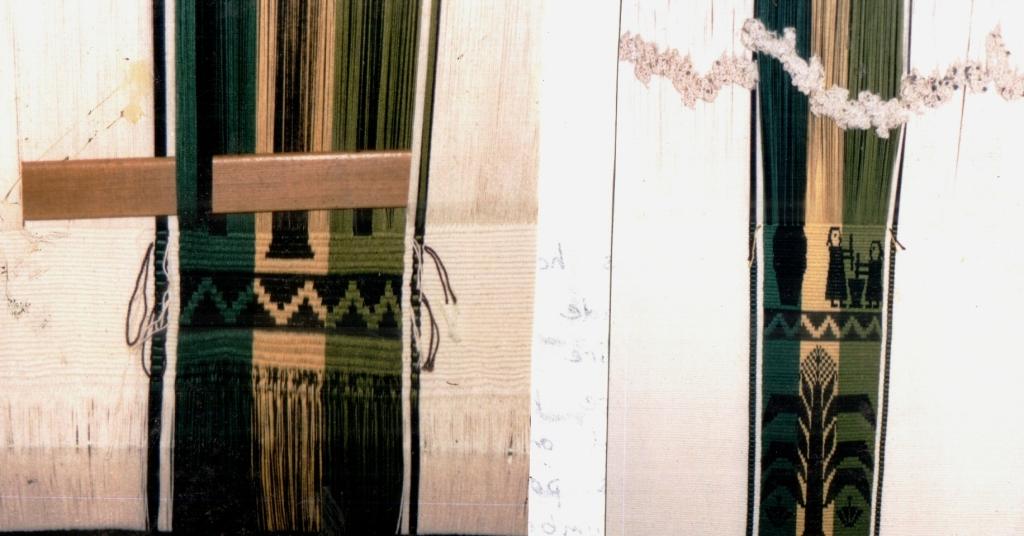
The motifs are hard to see on my scanned photos. On the right you may be able to make out two ladies “machucando”, that is, pounding plaintains, in order to make “masaco”, a typical Santa Cruz snack.

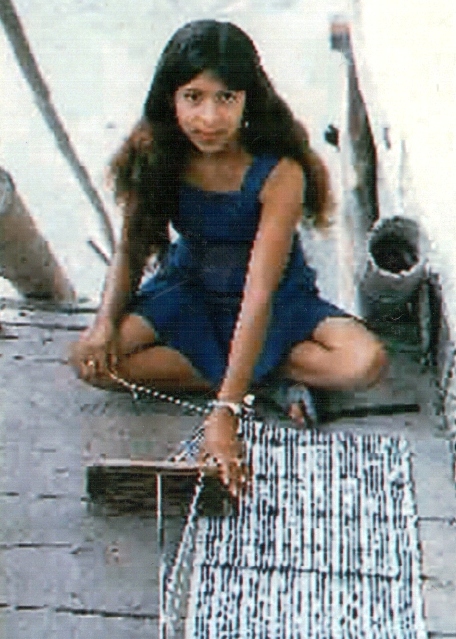
I would ask Angela where she lived hoping that I could maybe visit her at home and have some lessons. She had told  me that she had a small loom in her house. She would stretch out her arm and say “leeeejos” (“lejos” means far) as if to discourage me from visiting. Unfortunately, her son fell ill before we could really bond and she stopped coming to the store. Eventually the loom disappeared and now even the store is closed. I did manage to give her a copy of the photo of herself and her baby boy before I lost touch with her.

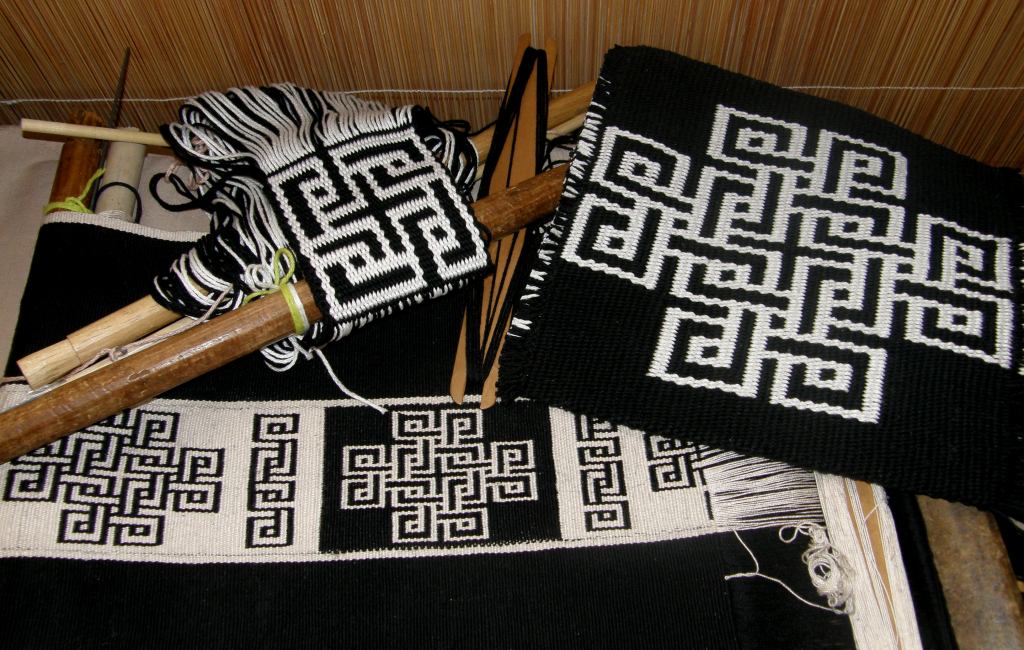
After Angela’s disappearance, I found bits and pieces about Guarani weaving in books and found that the technique she was using to weave her hammock is called Moisy. They also use a pebble weave which in the Guarani language is called Karapepo. I bought a hammock and bag in the Karapepo technique

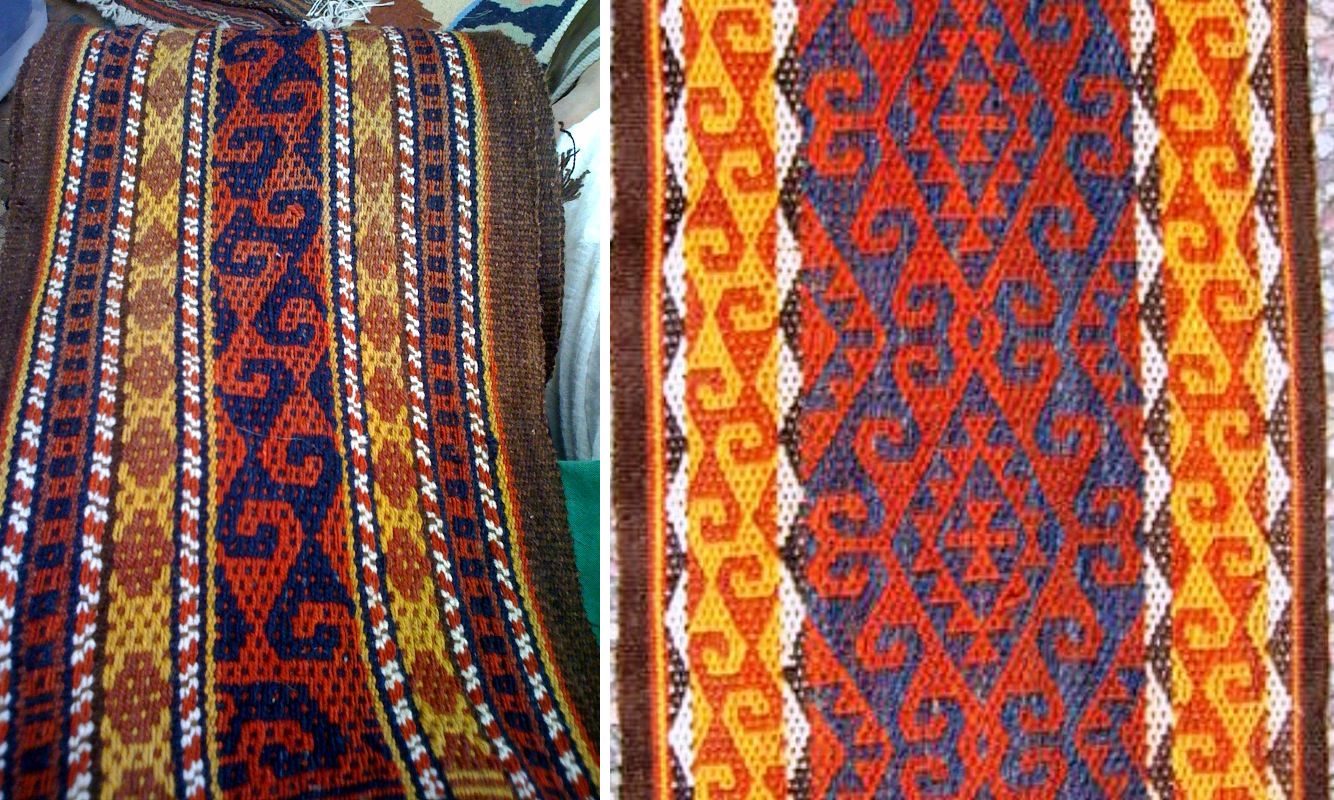
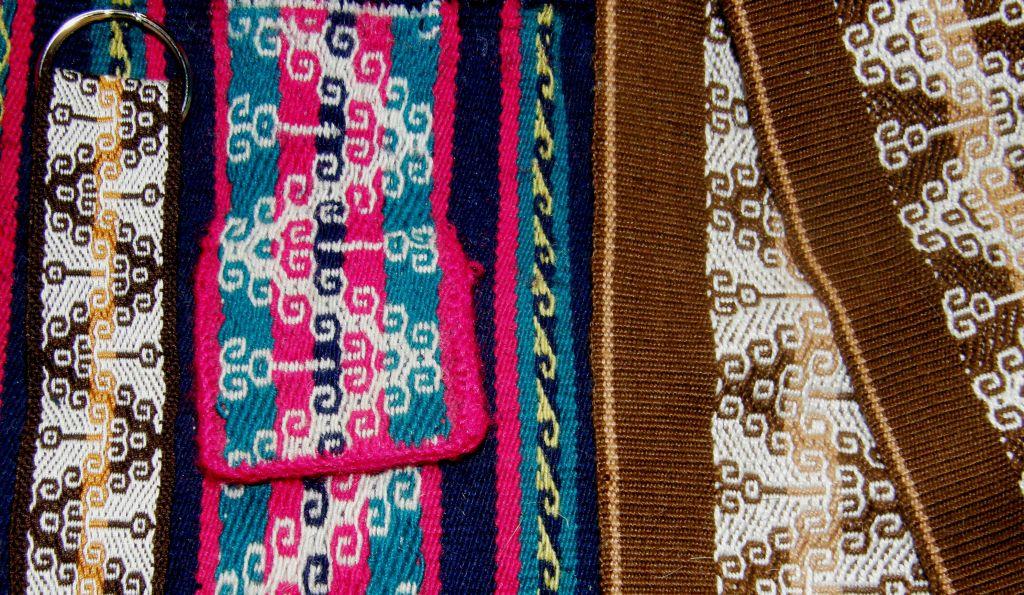
I was able to copy the deigns from the hammock using Andean pebble weave technique and make this guitar strap.

From books I learned that the earth and the cosmos are represented by the star and snake skin designs. These are pretty much the only designs you will see woven in the pebbled Karapepo technique. In the Moisy technique, however, the weavers have a far greater repertoire and the designs are not like any others that you will see any where else in Bolivia. They speak of the lush tropical fruitiness of Santa Cruz! Leaves, flowers, vines, butterflies, animals and people involved in their daily routines or dancing and celebrating carnival are depicted on the hammocks, wall hangings and bags.

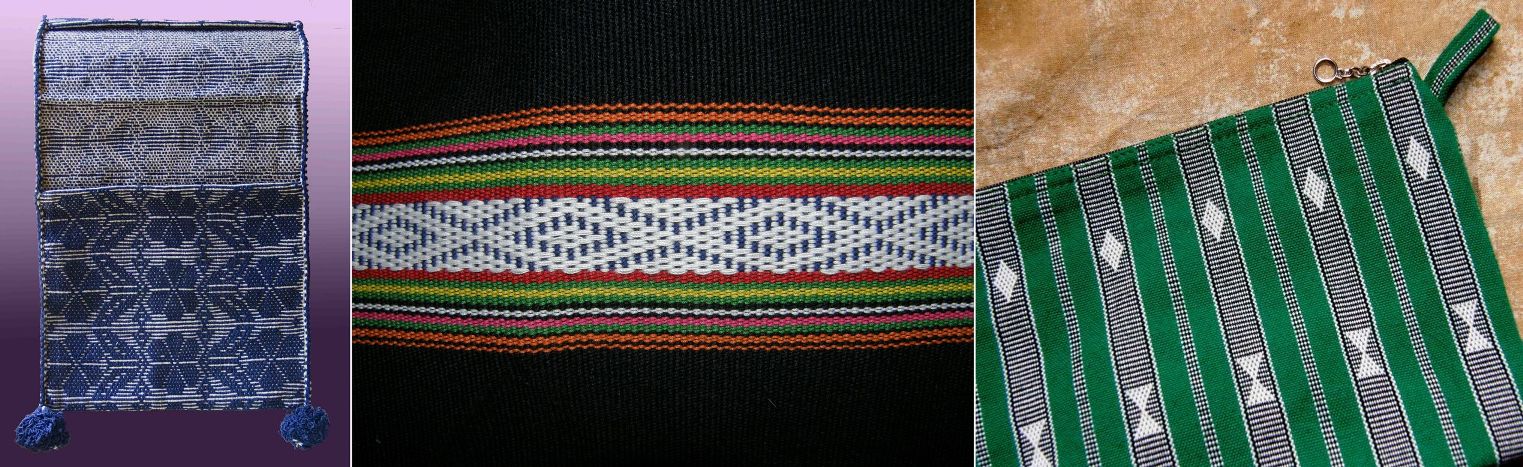
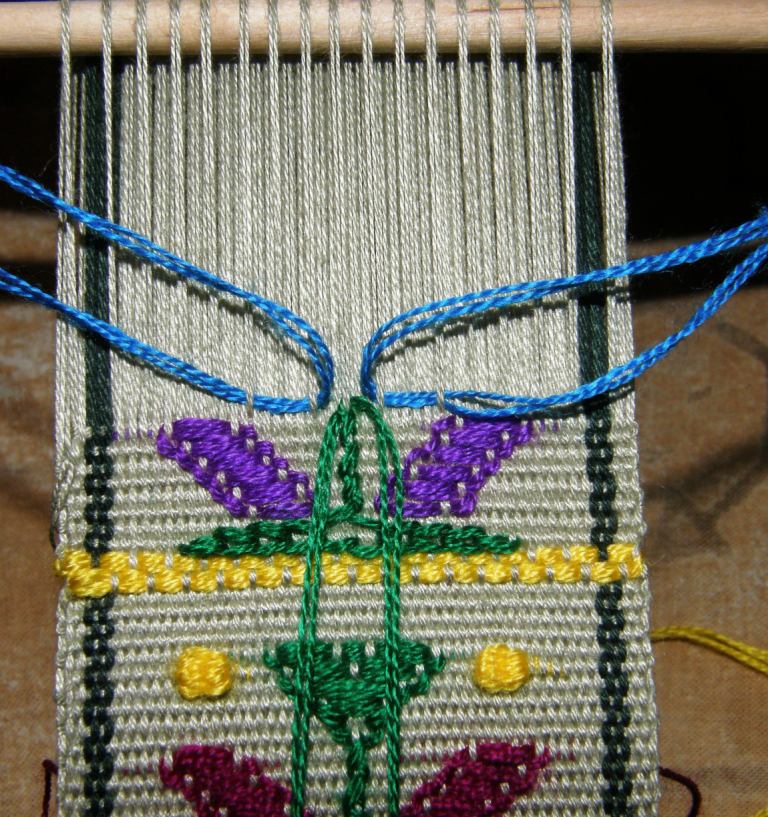
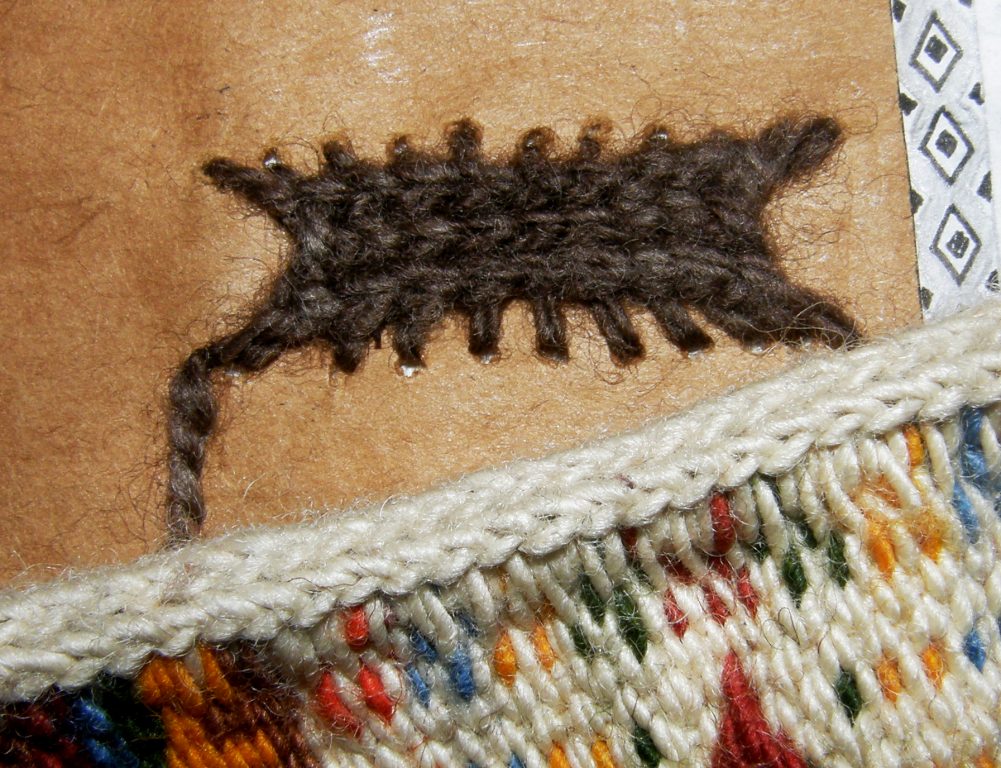
Cell phone pouches made with the Moisy technique with flower and butterfly motifs. A band of horizontal bars serves as the strap and velcro has been sewn on as a closure. A black band was woven and sewn simultaneously to the edges using the weft as the sewing thread to give a very nice neat finish.

And here is the best part of the story…I bought the above cell phone pouches from Angela last weekend at her home. Yes, I found her again, was invited to her home and got to spend the afternoon with her looking at her looms and weaving. The little fellow pictured with her above is now 8 years old and she has since had another son – that makes five sons in all now! Her eldest is married with his own family.
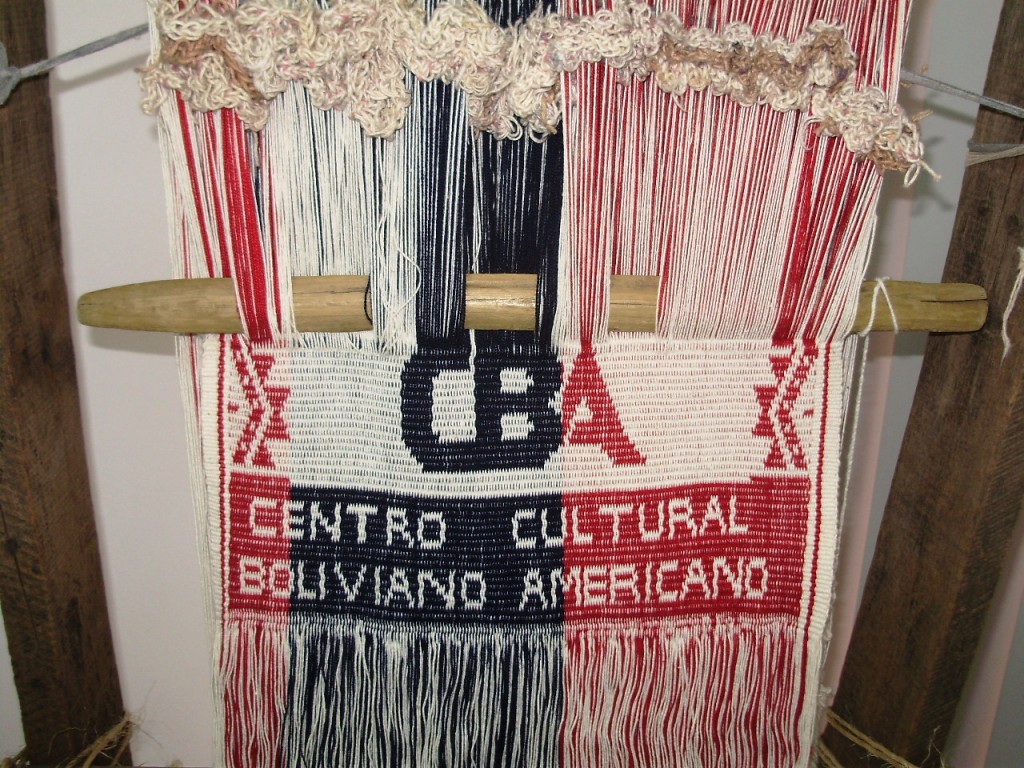
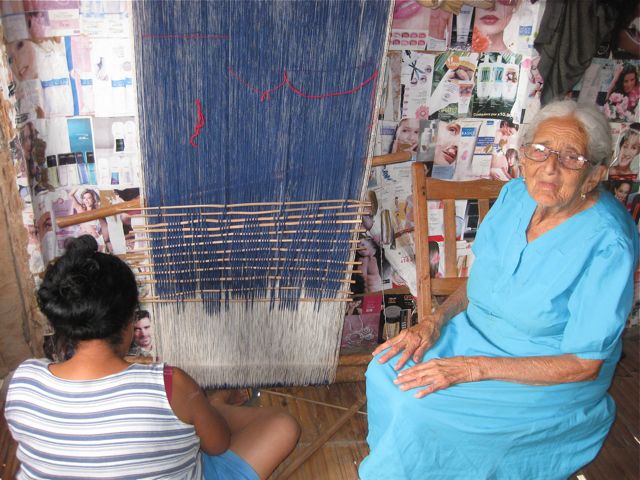
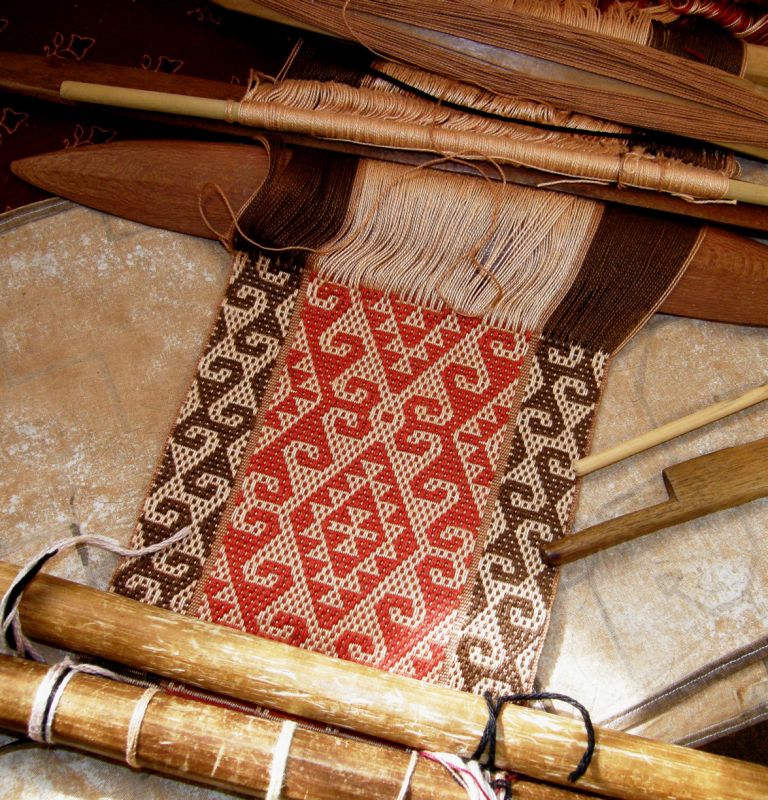
How did I find her? Very much by chance. The English institute where I taught English for eleven years started offering classes in the Guarani language shortly after I left. I recently noticed the loom and weaving pictured at left in the library which had been made and placed there to celebrate the start of the new Guarani program. I asked the receptionists about it they showed me the lovely cell phone pouches that a Guarani weaver had sold them. Fortunately, they had the weaver’s number and it turned out to be none other than Angela.

One of the karapepo cellphone pouches that Angela made for the receptionists – quite a different style to the blue and black ones she made using the Moisy technique.

I was very keen to see how Angela sets up and weaves her pebble weave as well as to learn how to do the Moisy. I was pleased to see that she uses the very same crochet cotton to weave as I do. When I visited her last Saturday, she had just warped up to make a colorful wall hanging on the smaller of her two looms, had just finished a book bag for a university student and was also in the middle of weaving a belt with fighting roosters which had been ordered by a Brazilian business man who mounts the woven pieces on leather and then apparently sells them for a very good price in Brazil. Angela’s enormous hammock loom is there in her patio and she can warp up several small projects on it at a time. She seems to have enough orders to keep her very busy.

She showed us one of her hammocks, the finished book bag, her cell phone pouches, greeting cards depicting carnival celebrations in her hometown of Isoso, pillow covers, belts and purses.

At left, the smaller loom warped for a wall hanging in Moisy technique and at right Angela is warping a narrow band to show me how she sets up for Karapepo technique.

She stretches a cord across the loom around which the start and end loops of the warp dovetail. Except for when she is weaving a hammock, she usually creates a third selvedge by starting her weaving right at the dovetail string.

I filmed her warping, making heddles and weaving the Moisy technique. As usual when I have the camera in front of my face. I find it hard to really absorb what is going on and so I had to come home and watch the movies over and over before I could grasp completely what she had been doing.

I like the way she makes her string heddles chaining them together. You will see her doing this in the video.

Angela’s chained heddles.

She, on the other hand, loved my heddles on their sticks (I had taken my backstrap loom, which she found very amusing, with a double weave piece on it to show her) and so I taught her my way of making heddles.

Here are two short clips of Angela warping using the dovetail string and making heddles. As she makes the heddles she is explaining to me the meaning of the designs on my guitar strap and telling me about the snake skin and how the snake that taught the first Guarani woman to weave in a dream is also embodied in the Parapeti River. Her little boys can be heard chattering in the background in the Guarani language.

In the next video, she is weaving the belt with the fighting roosters in Moisy technique. She has three sets of string heddles and another shed above the cross string. You must see the way she does her pick up. It is quite unique!

The lower of the three string heddles holds a shed through which she simply passes the weft without having to do any pick-up. The two upper heddles hold the separated colors. She pulls on those two heddles working her way from left to right to pick out the colors she needs. Watch her left hand gathering up the selected warps. Her eyes are down at the weaving line watching the design so she knows which colors to pick. Then she opens the shed which the lower string heddle controls. Then she does another row of pick up before opening the shed above the cross string, through which she can pass the weft without having to pick up warps. This shed is a little difficult to open as the warps have become entangled in the string heddles.

So I had to go home and see if I could figure out the Moisy! The best way was to try and reproduce one of her woven motifs. I found that I had to pull the weft really tightly through the shed to have my design look like hers. It makes a very, very sturdy fabric. For those of you who have my Andean Pebble Weave book, I would compare it to the thickness you achieve when you use the three-shed border. In fact, I quickly realized that the three-shed border is the very same structure.

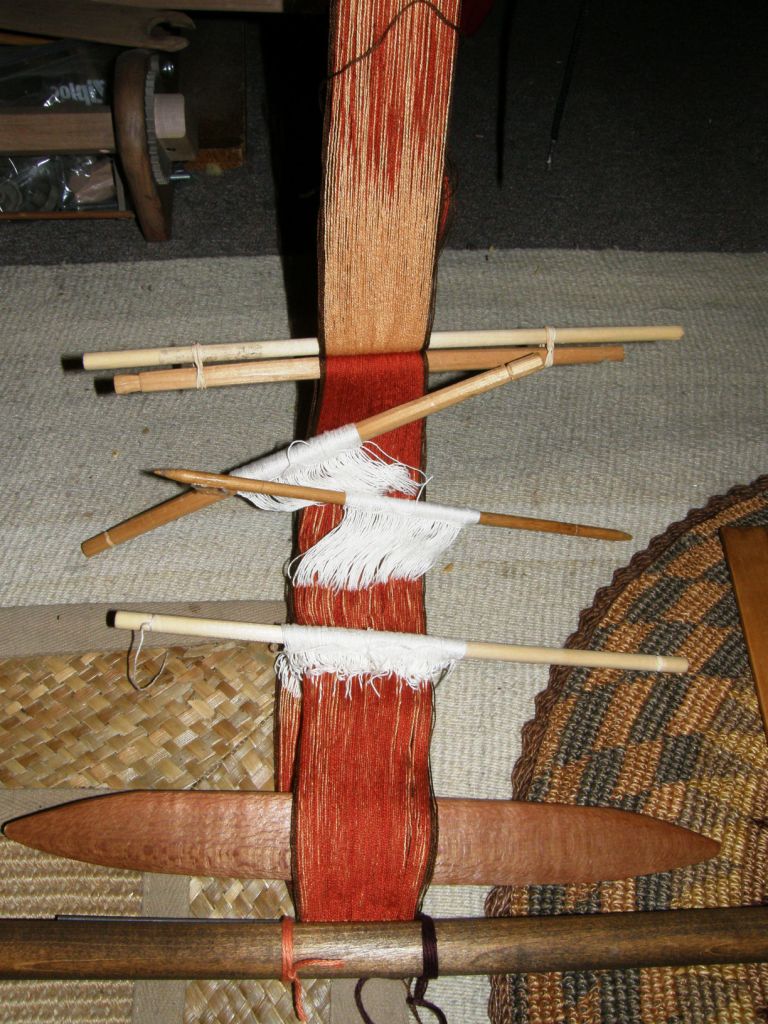
There is my attempt to reproduce the flower on the cell phone pouch. It really helped a lot knowing that we both use the same thread so I knew what width to expect right from the start. I really had to pull the weft tight and force it into that width.

The motif is not exactly the same but I understand the technique.

I tried to chart it and then found my chart was wrong and so ended up just reading it directly off the cell phone pouch which was a really good exercise.

I did notice that Angela is weaving the rooster belt a lot more loosely. .

I confess that, although I started out with my warp set up as Angela showed me with the three string heddles, I found it quite uncomfortable simply because it was so foreign to me…impatient!…  and so I  changed to another set-up after a while with which I felt more at home. I would like to try Angela’s pick-up technique on her vertical loom and hope to visit her again soon. She has invited me to come and see her floral designs on the colorful wall hanging she is making.

In the meantime I will work on my charting as I would like to make a collection of these uniquely Cruceño designs.

###################################

What else have I been up to?

Well I started my double-weave belt using the Bedouin designs that I wove into my wall hanging.
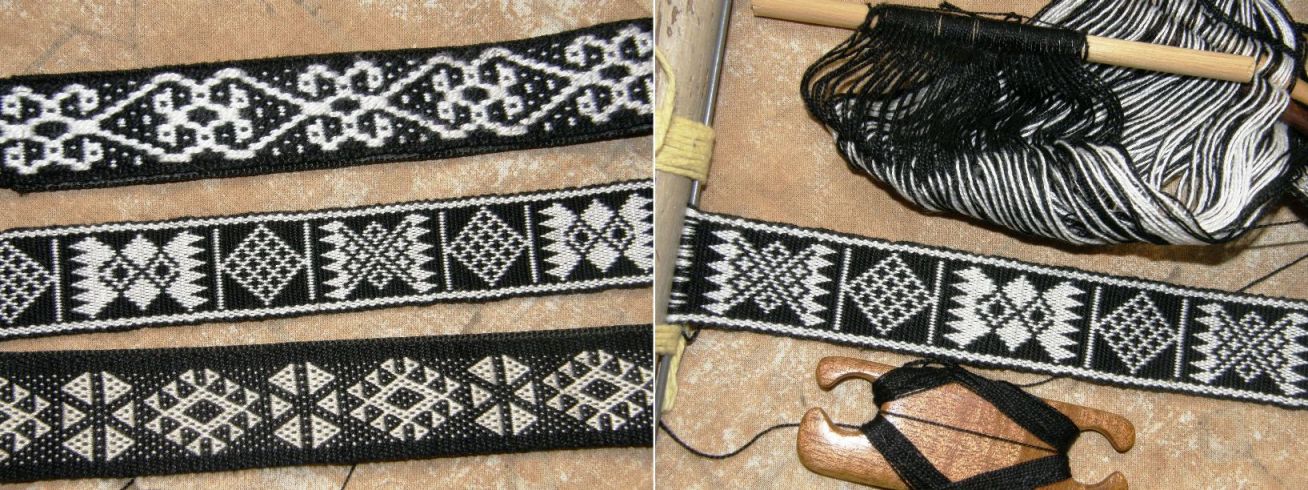

I seem to be gathering a collection of black belts. At least they are all in different techniques with designs from different cultures. The uppermost one is two-color alternating warp floats (my made-up name for it…we could use the Kyrgyz word “terme” for it). The center one is the yet-to-be-finished double woven example with Bedouin designs and the lower one is, as you must all know by now,  Andean pebble weave as taught to me by weavers from Ayacucho, Peru.

I have also been weft twining but using floats this time to make a textured design in one color which is inspired by the alpargatas worked in ply-split darning that I showed you last week.

I am totally unimpressed with the results so far!

I’ll keep at it. Who knows, it may look better as I progress. Maybe I should overlap the floats by two warps instead of just one. What do you think?
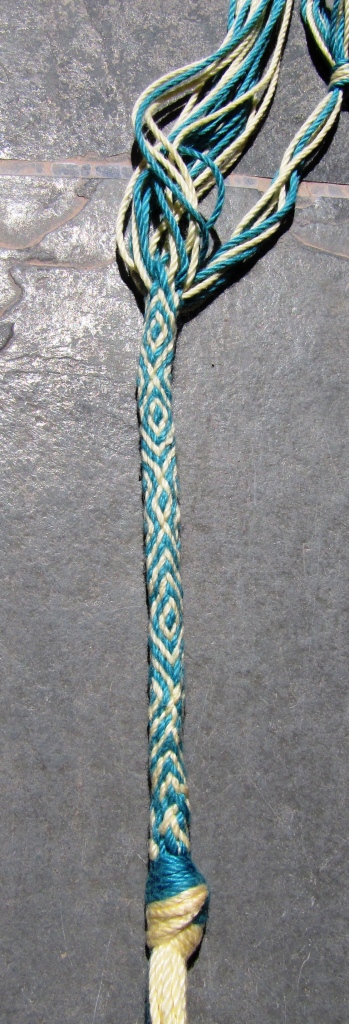
What have my online weaving buddies been up to?

Anna, who is cycling down to Tierra del Fuego has turned up in Salta, Argentina and has added braiding to her skills following my instructions for the Margarita braid.

This is one of the two braids that was taught to me by my sling-making teacher in Peru.

I usually advise people to start with the Palma braid first as a skills builder but she jumped right in and, as you can see, has done really well!

I have gathered up all the information on the Palma and Margarita braids that is embedded in various posts here on my blog and put it all together on one page here.

Zacarias in Yanque Peru taught me these two braids which are used to make the typical slings of the area.

Marsha Knox of Pandula Arts Creations has been playing with simple warp floats in two-color alternating pairs on her Gilmore Wave loom and has created some great designs of her own. More designs like these can be seen on the Guatemalan belt in this post.


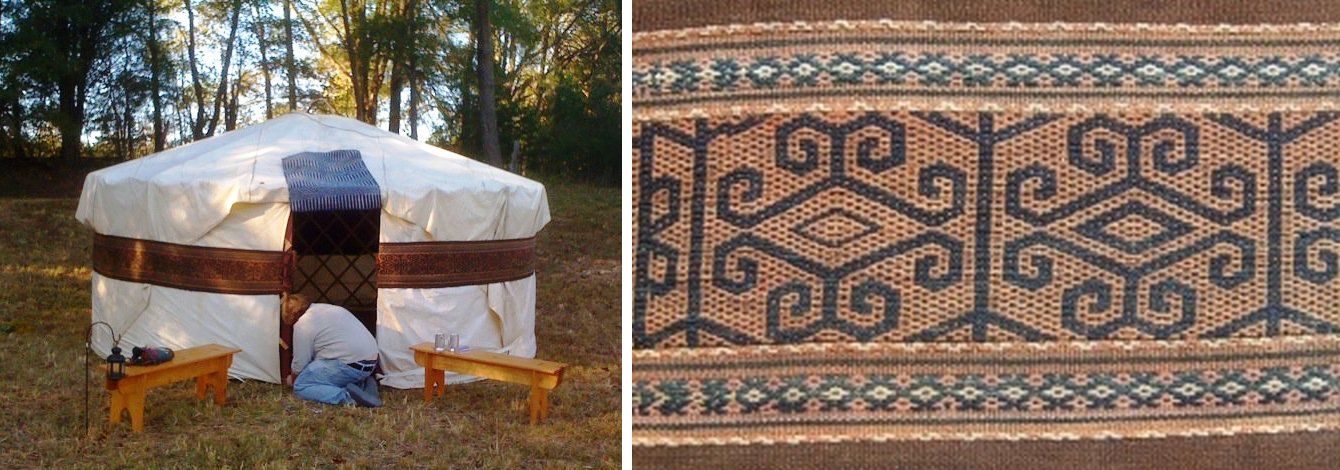
Lisa has been up to her eyeballs in dyeing but took some time out to enjoy a night in her yurt. You will probably recognize the  band encircling the yurt that she was lucky enough to purchase at a reenactment event and which I have shown off many times here on my blog. It is woven in the “terme” technique.
######################################

Finally…you may remember my posting a video some time ago, which had been made in March this year, showing little Melina learning to spin cotton from her aunt in coastal Ecuador. This is the family with whom I stayed in 2007 and learned about the process of weaving cotton saddlebags and the simple warp float technique. I accompanied anthropologist Kathleen Klumpp on this trip and Kathleen has just returned from another trip there with a new video of Melina’s improved skills seven months down the track.

Kathleen tells me that Melina is not yet able to support the weight of the spindle and so rests it on her thigh.

The original video of Melina’s first steps can be seen here. How quickly she has picked up the skills! Aunt Trini and Grandma Luz are master spinners and she is lucky to have such skilled teachers but I think that Melina’s success is largely due to Kathleen’s encouragement. How wonderful too that Kathleen has made and shared these videos so we can all follow this story.

And I have been inspired by a very sweet recent comment from Graciela here on the blog. I don’t know where she is from but she has inspired me to get my act together and put up the tutorials translated into Spanish that I have been promising. Another task for this weekend and I will try try try not to get distracted!

Pssst! There’s a Spotlight article about my backstrap weaving in the latest issue of Handwoven…
 

Backstrap Weaving – Warp floats and Woven Words

Rain at last!

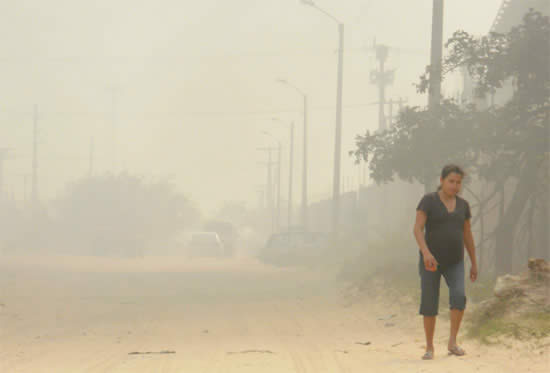
Widespread scrub fires in the countryside here in Bolivia got a dousing recently so that the atmosphere here in Santa Cruz, which looked like that pictured at left during the height of the fires about a week ago, is once again relatively clean.

And just in time for the month of September which is a month of celebration in Santa Cruz.There will be all sorts of cultural activities and fiestas culminating in the Feria Expo, an annual international event, and September 24th, Santa Cruz Day which marks the day of the initial call to take up arms against the Spanish in the fight for independence. This year will be particularly festive as the city celebrates the bicentennial of this event. Along the way the first day of spring will be marked on the 21st which is also Students Day as well Bolivia’s answer to Valentine’s Day.

This week I have been studying the letters worked into the bag strap woven by the Montagnard weavers of Vietnam that I met while in the US. Once again I marvel at the possibilities that the simple warp float technique presents and the way it has been used by different weavers around the world.

From left to right: simple warp floats decorate a cotton saddle bag from Manabi province in coastal Ecuador, the same patterning technique on a blanket woven made by Montagnard weavers of Vietnam and a simple but very effective piece made in Sagada, Mt. Province in The Philippines. The latter was sent to me by Trish who lives in The Philippines. We met and spent many hours together in Los Angeles airport on one of my standby flight sagas.

In the examples above, the technique is seen in its very simplest form, floating single or paired warps of one color over horizontal bars of alternating light and dark warps.

As we have seen here before, the technique can be taken a step further by floating both the light and dark warps in succession, filling in the background to the main motif and thus covering the horizontal bars completely.

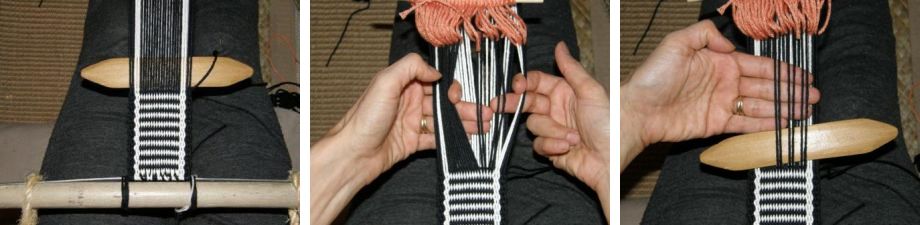
This technique is employed to pattern one style of yurt bands made in Kyrgystan where the technique is called "terme". I wove this sample piece to check if my charting was correct and made it into a small bag.

While doing a bit of a desktop clean up this week I came across an image of a Central Asian piece that Lisa had photographed at one of her reenactment events and sent me about which I had completely forgotten.

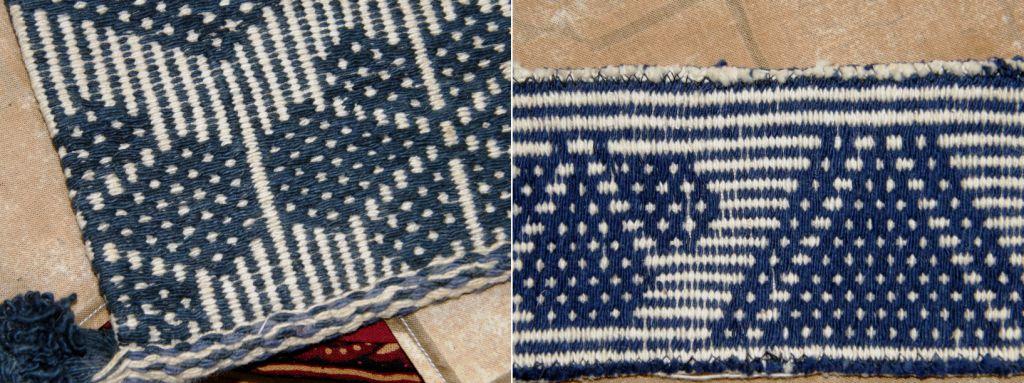
The photo on the right is the one that inspired the small bag that I wove. The picture on the left is the new buried desktop discovery and it is nice to see the same hook design that I copied on this piece too.

Here is a quick summary of the difference between the single color and two-color versions of this simple warp float technique.

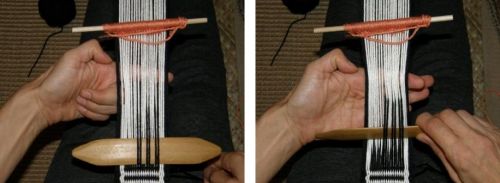
Basically, when you weave the single color version, the weaving sequence can be summarised with four “S”s:

  • Shed….Open the dark shed and pass the weft
  • Select..Choose the dark warps that you wish to have floating and forming a pattern
  • Save….Save these chosen warps on a stick
  • Shed….Open the light shed, add the saved warps to this shed and pass your weft

We could even add a fifth “S” to the sequence which would be Start again.

Here it is again with pictures…
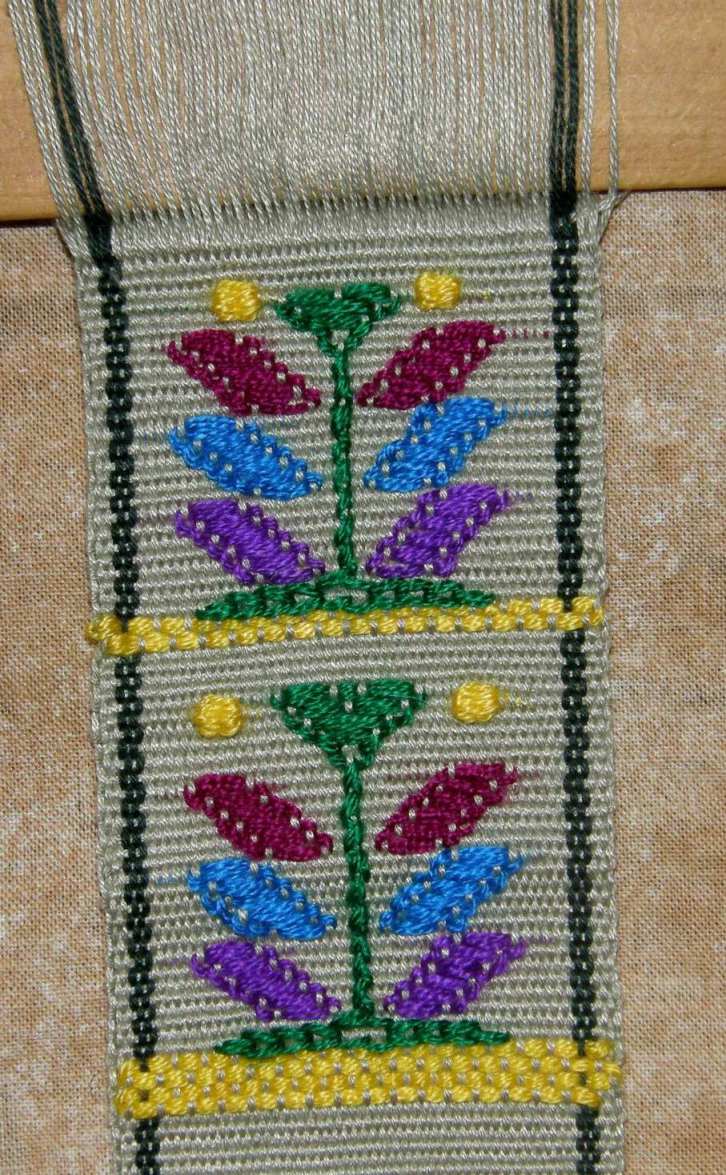
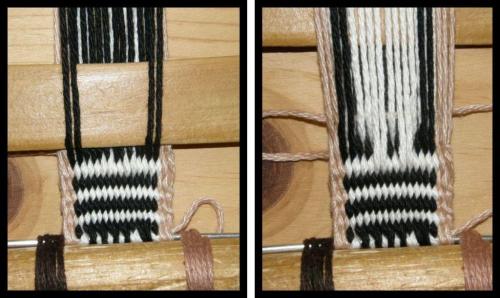
The dark Shed has been opened and the weft has been passed. The dark warps to be floated have been Selected. The selected warps have been Saved on a stick.

The light Shed has been opened and the dark selected warps added to it. The weft is then passed. Then you Start again, that is, open the dark shed etc etc…

Moving on to the two color simple warp float technique, the sequence changes to: (this time I start with the light shed for no particular reason)

  • Shed…..Open the light shed and pass the weft
  • Select…Select the light warps that you want to float to form your pattern
  • Save…..Save the chosen warps on a stick
  • Shed…..Open the dark shed and add the saved light warps to it. Pass the weft
  • Select…Select warps from the dark shed which will float and form the design
  • Save…..Save the selected dark warps on a stick
  • Shed…..Open the light shed and add the saved dark warps to it. Pass the weft. From here move on to the second step: Select.

In pictures:

After passing the weft through the light Shed, two pairs of light warps are Selected, Saved and added to the dark Shed.

Dark pairs are then Selected from the dark shed, Saved and added to the light Shed.

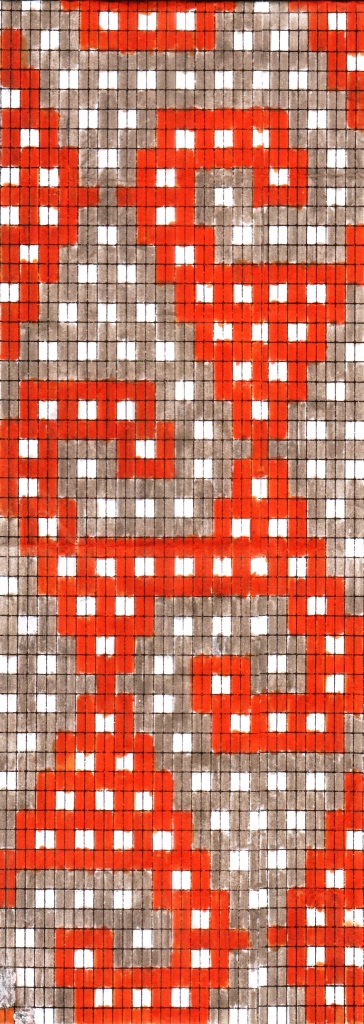
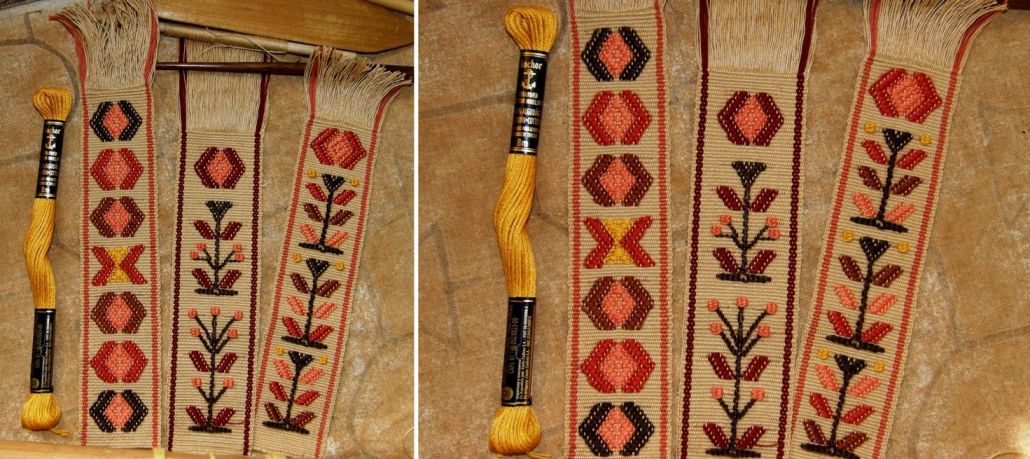
Here is the pattern chart for the hook design taken from the yurt band and woven piece that Lisa photographed.

Full tutorials for both the single and two color warp float techniques are here on my blog.

The single color version has videos too.

Click on the TUTORIALS tab at the top of any blog page here and scroll through the list of tutorial links.

As always, things should be taken in steps and so, before attempting this hook design, I suggest weaving samples in single color floats first. There are so many possibilities for this simple technique using a single floated color and so there is no need to rush into the two-color version until you are good and ready.

With some experience in the single color version under your belt, you can then try the two-color “S” design for which a full step-by-step tutorial is provided here.

I wove the above pouches in order to reproduce some of the motifs woven by the Montagnard weavers with whom I got to spend some time in North Carolina. The technique is a twist on the basic simple warp float technique. Their way of arranging the sheds and selecting the warps produces warp floats on the back of the weaving and exposed weft on the front but the basic steps in the weaving sequence are the same. The resulting bands of pattern are more flexible than those produced by the Philippine and coastal Ecuadoran weavers as they are not truly warp faced.

This week I worked on extracting and charting all the woven letters that I found in the photos I had taken during the visit. I then wove up a sample band.

There are a few unorthodox moves that they use to form nicer curves for the letters. Betsy Renfrew who is working with the Montagnard weavers tells me that someone wove a banner  with the words Montagnard-Dega Association for their office. I am looking forward to seeing that as the letter “s” is amongst the five or six that I am missing. I have been wanting to weave nice letters ever since I saw Linda Hendrickson’s beautiful book on card-woven letters Please Weave a Message. All I have done so far myself is devise a simple stick alphabet which I sometimes weave in double weave. Now I have another alphabet for my repetoire.

Another source for beautiful woven letters is Annie MacHale (aspinnerweaver) who weaves  a line from musicians’  favorite songs on the guitar straps she makes for them on her inkle loom.

Some weavers who employ the simple warp float technique choose to float single warps, others pairs. As the weavers in coastal Ecuador are weaving with their homespun cotton, they float pairs of doubled strands of cotton to form their designs.

This photo was taken by anthropologist Kathleen Klumpp and shows one of the completed saddle bags or "alforjas" . This particular design is called "rosa y hoja de naranja", rose and orange leaf. The piece was woven on a vertical loom using a circular warp.

Kathie is with the weavers right now and has been urging me to go and join her with Doña Luz and her family whom I met on a three-week visit back in 2007. Knowing the amount of laughter that shakes their stilt house every evening when the extended family gets together, I know that they must be all having a wonderful time. Unfortunately I could not get my program to fit with Kathie’s and I am unable to accept her invitation.

In 2007, sharing prints of photos from the 1976 visit.

Kathie has enjoyed a long, close and warm relationship with this family over the last four years visiting them to document the entire process that takes them from cotton boll to finished woven saddle bag and commissioning pieces to encourge them to continue weaving.

However, the story of her contact with these talented weavers started back in 1976 when Kathie was in Manabi province collecting data on village pottery making. She happened to see a gentleman on one of the rural buses carrying a most unusual saddle bag. It immediately stood out from other saddlebags that she had seen which were patterned with simple warp stripes as it was covered with geometric designs in indigo blue.

Her enquiries led her to Doña Luz Parraga and her family, master spinners and weavers in the settlement of Zapote and a friendship was formed.

At left you can see Luz’s daughter Trinidad, at fourteeen years of age in 1976, weaving and sewing an edging onto a finished saddle bag using a wooden rigid heddle fashioned by Luz herself.

After this visit, life interrupted, as it often does, and Kathie had to put her anthropological work aside. It wasn’t until her retirement that she was able to return, thirty years later, to the very same family, rekindle her friendship and continue her research.I would have loved to have been a fly on the wall of that stilt house when Kathie emerged from the vehicle and walked up the dusty slope to meet once again with her old dear friends. The following year  I was able to join her.

Photos taken by Kathie of Luz in 1976 and during her return visit in 2006.
Here we are in 2010 with Luz and Trini at the loom. They have set up the warps which will go into twelve heddles to weave the orange leaf design after several days of studying the samples and struggling with the warps. This is a design which they had not woven for some time and were on the point of forgetting. Luz's eyesight is at the point where it is almost impossible for her to select the warps and Trini had great difficulty at first relating what was on her woven sample to the loom. Her perseverance paid off and, thanks to Kathie's encouragement, this design has been revived.
The rose and chalice design at left is probably the one that is most often woven. This design requires eleven heddle sticks. The warps which are programmed into each of the eleven heddle sticks are recorded on the woven sample at right.
On this latest visit Kathie is helping Trini to develop new products as the market for traditional cotton saddlebags is now virtually non existent. This shoulder bag with a zippered outside compartment and made with factory cotton, has an adaptation of another traditional design of the coastal area. With Kathie's help the family members have planted and are raising 150 cotton plants on their property so that eventually they will once again be able to use their own handspun and pass on the spinning traditions to future generations.

Here is an edited version of a video that Kathie has made during this visit showing Trini making her string heddles and weaving a piece. You will see how she uses a flat stick to help ensure that all her heddles are made the same length. Those of you who have studied the simple warp float tutorial will recognize the moves when she starts weaving although she doesn’t have to select her warps to float as they are already in the heddles. The full version of the video can be viewed here.

I love the way she opens the heddles! They open relatively easily as she is using a smooth factory cotton.

It was never so easy when I was with them in 2007 and we were using their homespun thread.

At left is a flashback to 2007 when I was with the family. I wove quite a lot of this piece as part of my “training” so here you see the two proud weavers in front of their finished work!

Speaking of opening heddle sheds, I have put together a video of my own this week to show a couple of ways that I use to open a sticky shed as well as how I open each of the two sheds when doing Andean pebble weave.

The warp in the Andean pebble weave segment of the video is the one that Maurice, Lisa and I set up on Lisa’s four-shaft loom in North Carolina. I had intended doing something a lot wider but had not anticipated the amount of warp length that was required for the four-shaft loom and so had not bought enough yarn. So I ended up with a piece that happens to be just the right width for a guitar strap and I already know a guitar player who will love it.

As you can see, it ended up back here in Santa Cruz on my backtrap loom and wasn’t as difficult to retension as I had imagined.

Setting up on the four-shaft loom was a bit freaky. Maurice, however, was completely unphased by this mess and soon tamed it into submission. The two dowels you see at left in the picture are part of a previous abandoned project and were later cut out.
Weaving underway...

Using that big loom to weave a narrow band may seem a bit strange but, if this is the only loom you have, you are not keen on trying backstrap weaving but really want to try Andean pebble weave, then all I can say is, why not?

What’s in the mail and the inbox?

Speaking of Andean pebble weave on other looms, Jennifer is weaving another pebble weave band on her inkle loom and has sent me pictures..

Inspired by Jennifer's progress, Marydargie on Ravelry warped up her inkle loom to weave the band in lesson one in my book.

In a discussion in the inkle weaving group on Ravelry we all agreed that mini inkle looms are not well suited to weaving pebble weave. A heavy-ish with a lot of room in front works well for this technique.  My Ashford Inklette needed to be clamped to a table as it was too light and felt very cramped. Although I managed to weave a band on it in pebble weave, it was not very comfortable.

Francois in California, who has been following this blog, sent me a picture of his finger weaving, at left. I dabbled in finger weaving many years ago attracted by the Peruvian bands Ifound in a book and was surprised to see the enormous piece that he has created. I imagine that this comprises several bands sewn together. Another great technique requiring few or no tools.

Another small discussion on Ravelry was started when someone asked about whether people preferred backstrap or inkle looms in general. I could find  advantages for both, naming as one of the inkle loom’s advantages the fact that the heddles are put in place as the warp is wound but…now I have learned a cool way to do that while winding the warp for backstrap weaving thanks to the Montagnard weavers…

I made a video of Montagnard weaver Ju Nie making these heddles, at left, as she warped and, after watching it many many times was finally able to catch her quick movements and make sense of it. On the right are the heddles I made this way using thick yarn so that I could photograph the process for my journal. I have also made step-by-step diagrams and a video of my own showing the process very slowly just in case I forget! I doubt, however, that I will ever use this technique on my own warps as I am a big fan of the extra hitch on the heddle stick bteween heddle loops.
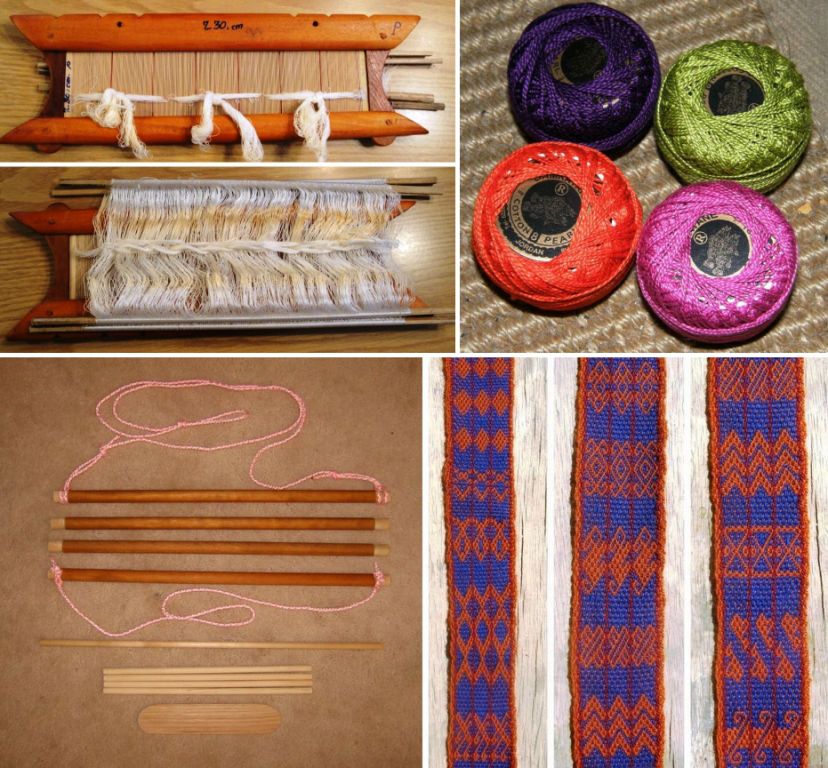
From the inbox and the mail box...Quiltparalegal sent me this picture of a loom that her son bought for her in Laos with its incredibly fine bamboo reed and string heddles. It amazes me that these bamboo reeds are still being made. What a piece of work! Weave2, sent me a lot of thread made in Jordan where she lives. Here are some examples of the rich colors she chose. AJM showed me a backstrap loom he made for a friend even before he can get one for himself finished! Anna, who is cycling from Alaska to Ushuaia, is weaving on the road after having classes in Huancayo. She downloaded my book along the way and has been weaving some of the motifs from it wich you can see on the right. The designs on the left were woven with her Peruvian teacher. She is now in Santa Cruz and is coming to weave with me tomorrow!

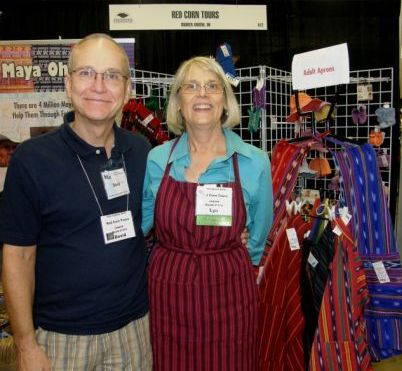
Above you see vivacious, no, REALLY vivacious Lyn Lucas and David Anderson of Red Corn whom I met at Convergence. I showed you one of the beautiful huipiles of Chichcastenango that they had on their stand in a previous post. Recently I discoverd their Facebook page and I highly recommend taking a look and “liking” their page. There they post two to three videos on Guatemalan weaving every week. It is a real treat!

And to finish, I have created a new tab at the top of the page named FAQ INDEX. That is all it is at the moment…an index. What you will find there along with the index is the following notice….

It will take some time to put this together but I am really looking forward to having all this information which I have posted in various places online all in the one place once and for all! Curious about the questions? Hit the FAQ INDEX tab at the top of the page. Maybe you have some questions to add.

Backstrap Weaving-A Bolivian winter of flowers and sunshine and a Guatemalan tree (Part 2)

While people in my online weaving groups are posting pictures of lilies, poppies and butterflies in celebration of the northern summer, here in the southern hemisphere winter is in full swing. The Bolivian President Evo Morales suddenly declared June 21st, the winter solstice, Aymara Day and a national holiday.  Bolivia is now known as Estado Plurinacional de Bolivia rather than La Republica in recognition of the various indigenous groups which it comprises and this has me wondering if we will be having Guarani and Quechua Days as national holidays too.


However, it is hard to believe that we are in the middle of winter here in Santa Cruz, Bolivia where I sit at my laptop in tshirt and shorts wondering whether I should turn on the air conditioner as the suns comes around the building and throws golden rays through my bedroom window.
The highlands are experiencing their dry season and it is COLD. I spent most of one July and August up in Potosi at 4000 meters in a shabby room in a backpacker hostel – bare cement floor, pinned down in my bed under kilos of thick hand woven blankets and still cold! I remember trying to squeeze myself into the thinnest possible package in order to fit under the tiny trickle of hot water that came out of the electric shower head. The lowest possible water pressure was the only way to get  hot water. Washing clothes in the cold water brought tears to my eyes!
At left you see dry, dusty and sparsely vegetated Potosi with its landmark mountain Cerro Rico whose silver deposits sustained the Spanish economy for centuries.

LEFT: Miners keep effigies of the devil, whom they call El Tio, in various places within the mines as they believe that he is the owner of the minerals and needs to be appeased with offerings of cigarettes, coca and alcohol. RIGHT: You can beat the winter chills with a soak in the thermal waters of the volcanic crater lake at Tarapaya. I must confess that this photo was taken on a second visit to Potosi in January when it wasn’t so cold. Rumors that there are whirlpools in the center of the lake which suck people in keep most visitors in the cement pools in the valley below. I kept close to the edge of the lake at all times!
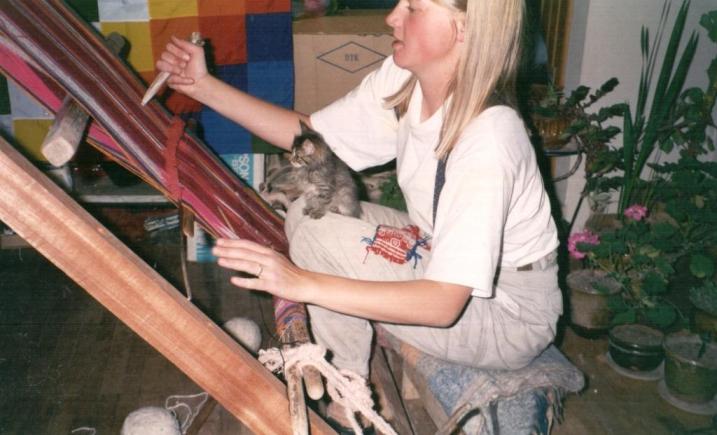
On my first visit to Potosi in 1997, I met Ulla, a Danish girl who was staying on in Potosi after having spent a year there as an exchange student. We learned to weave together with sisters Julia and Hilda. As Ulla didn’t have a patio, she set up an oblique loom in her warm little apartment and was able to weave comfortably there. It certainly beat having to bend over the grond loom. On her lap, apart from the kitten, you can see the “saca” or little woven sample that the weavers use to help them remember how to weave the designs.
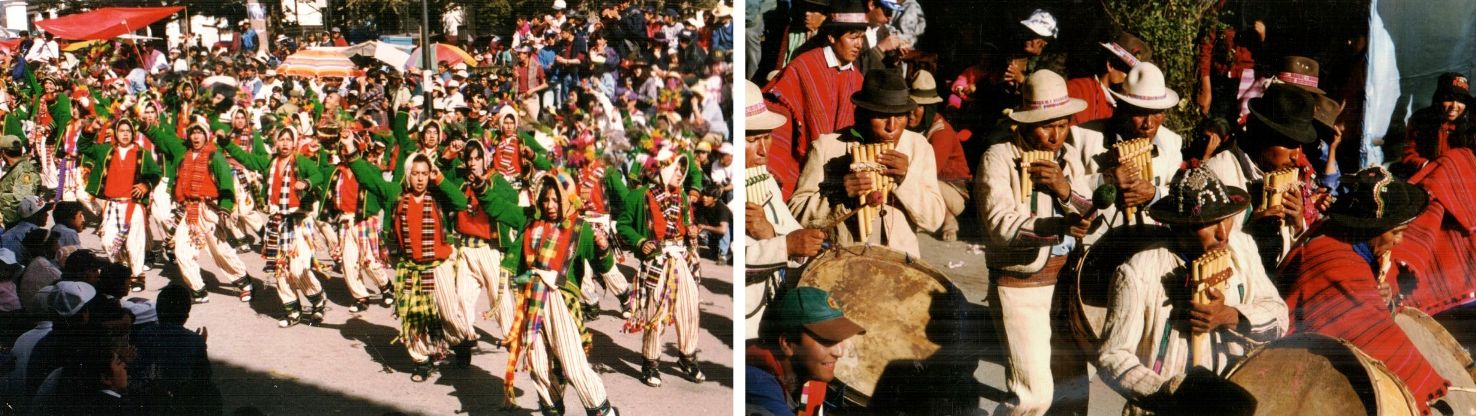
I was fortunate to be in Potosi on August 31st for the Chu’tillos festival which celebrates San Bartolome. Dancers in typical costume from all over the province of Potosi parade in the street on the first day followed by dancers from all over Bolivia on the second. The best part is actually the weeks leading up to the festival as the groups rehearse late at night in the empty streets and laugh and chatter and have a lot of fun while doing so.

Bolivia extends from the dry, dusty highlands to the lush green lowlands known as the “oriente”, where I live. They are like two totally different countries in so many ways. In recognition of that, Bolivia has not one but two national flowers,  the patuju from the oriente (below left) and the kantuta from the highlands (right).

Both contain the colors red, yellow and green, the colors of the Bolivian flag. Santa Cruz abounds in flowers, trees and greenery at all times of year. It just never really feels like winter. Electric cables disappear within mazes of tree branches and it sometimes feels like the city is on the verge of being swallowed by the jungle that lurks on its outskirts.

The “tajibo” and “torobochi” trees that line the streets.
The pattern barely shows on the back of supplementary weft patterned pieces

So with all this in mind I have been weaving some sunny tree and flower designs in the single face supplementary weft patterning  technique that I learned in Guatemala in Santa Catarina Palopo.

This is a fun technique with little or no counting involved which allows you to play freely with shapes and colors.

The resulting weaving looks like a piece of embroidered cloth except that the “stitches” only appear on one side of the fabric.

Bookmarks made with Guatemalan tree and sun motifs

Last week when I started the tutorial on this technique, I was using acrylic threads that I had brought back from Guatemala to create bright mutlicolored trees on a green background, pictured at left.

I decided to buy some embroidery floss to work with and it took some time to get just the right thickness to go with my chosen ground weave warp. The ground weave is a 50 wpi cotton and I used 4 strands of embroidery floss to do the patterning.

The 50 wpi warp produces a wonderfully thin cloth just right for bookmarks although the pattern wefts do add some bulk.

So, let’s continue with the tutorial.

I have done a recap of what I showed you in Part 1 of the tutorial last week on a video. I have used  thick cotton and only a few warps to demonstrate the picking of the warps for the two patterning sheds, the placement of the patterning sticks in the loom, the technique for opening the patterning sheds and the weaving sequence. I don’t recommend using such thick yarn for your own supplementary weft project!

All the colored wefts that form the patterns pass under or wrap around the warps in the two patterning sheds. This green piece has 86 ends between the dark green border stripes.

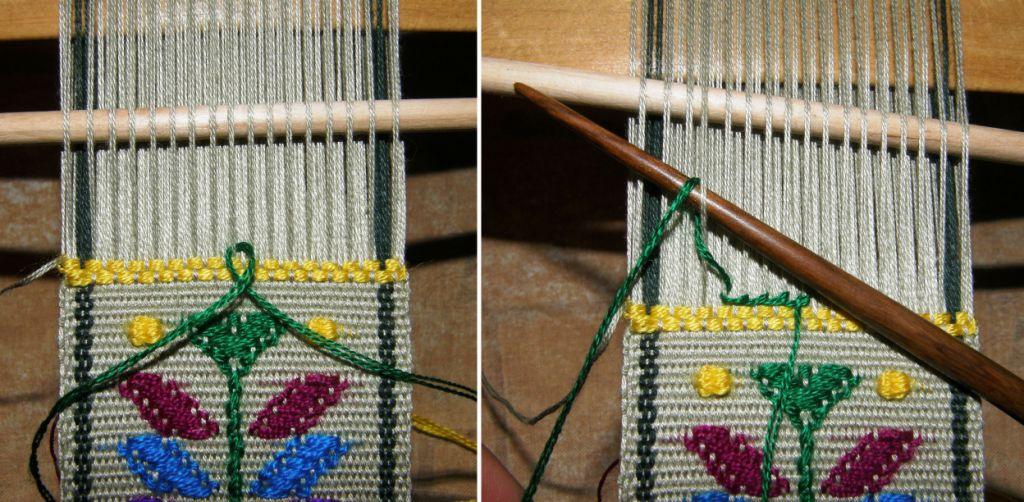
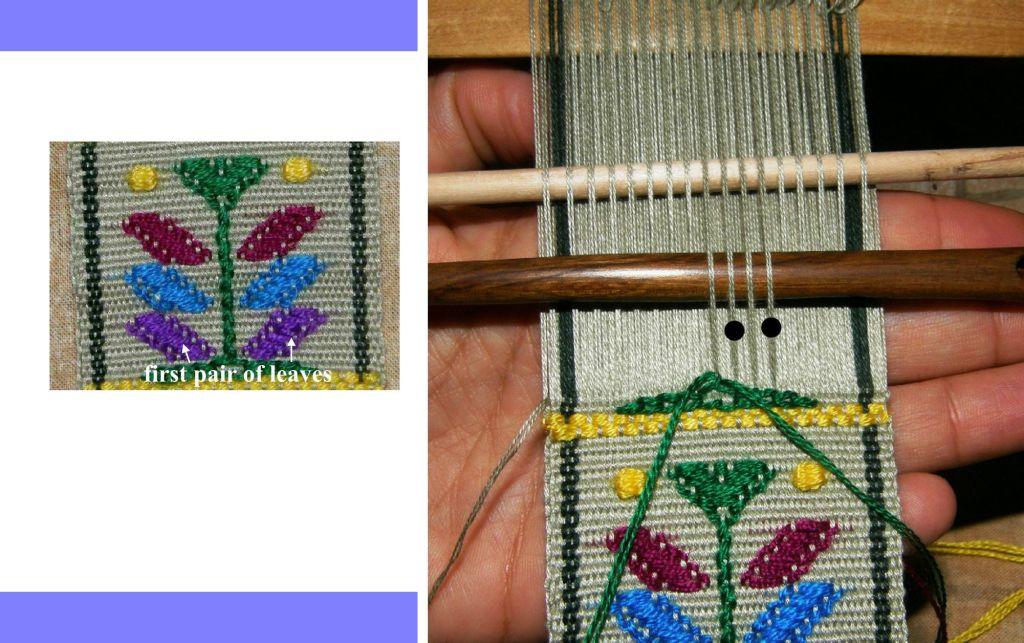
The base of the little Guatemalan tree is a double horizontal line. STEP ONE: To form this, place a strand of around 40cm/16″ of supplementary weft under the central patterning warp. The two ends on either side should be of equal length. The central warp in my set up just happens to be in patterning shed 2 so I have started in the heddle shed.
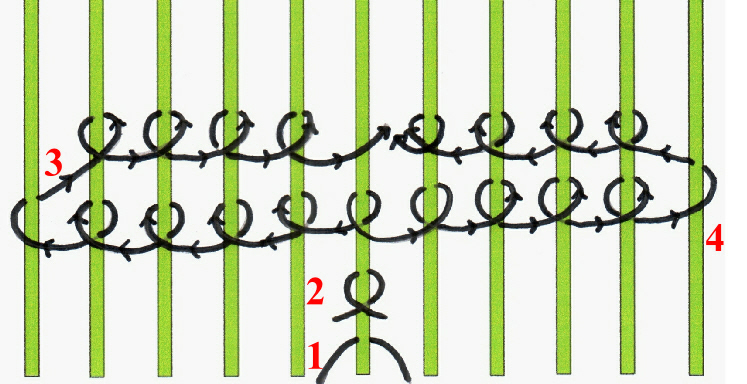
STEP TWO: Cross the ends of the supplementary weft. STEP THREE: Start wrapping the left hand end around the 5 warps to the left of the central warp and return wrapping around 4 warps. The diagram below shows how this is done.
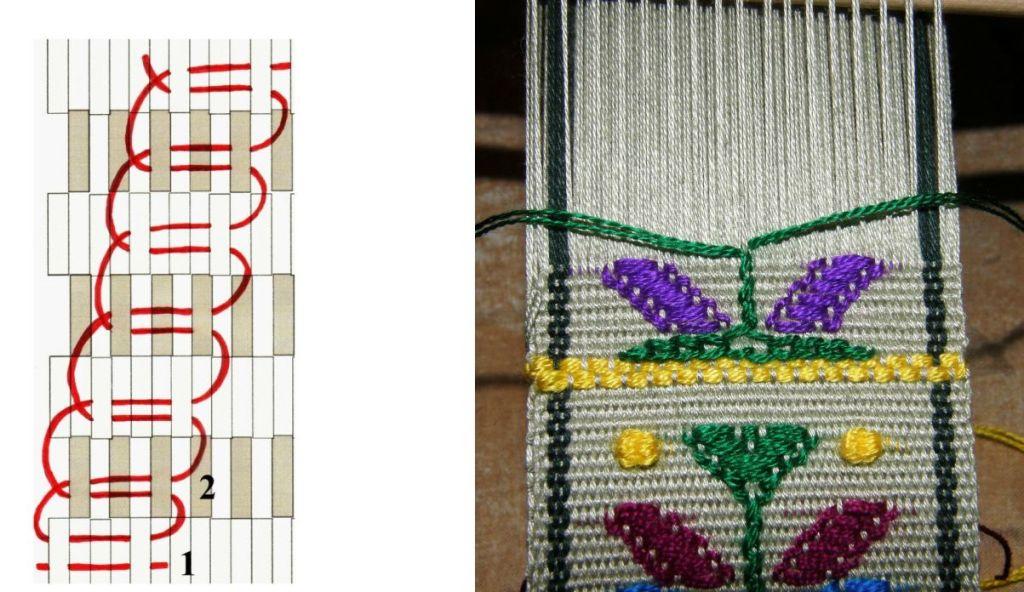
The steps for horizontal wrapping are shown here. The left end of the weft wraps to the left and returns and the right end wraps to the right and returns. These four steps all take place in the same pattern shed. The wefts wrap around four warps on their return journey to the center. STEP 5: Pass the main weft through the complete shed.

Open the next shed, which is, in my case, the shed rod shed and pass the main weft.

Open the heddle shed and raise the patterning warps in patterning shed 2.

Patterning shed 2 contains my central warp.

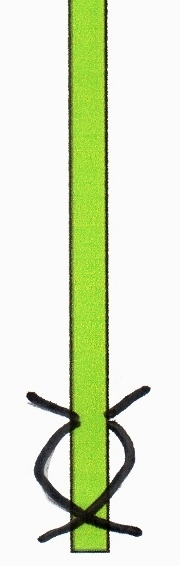
Every time I raise the warps in patterning shed 2, I will wrap my green tree base weft around the central warp to form a stem. The drawing at left shows the very simple vertical wrapping method.

The stem, therefore, is woven only in every second shed.

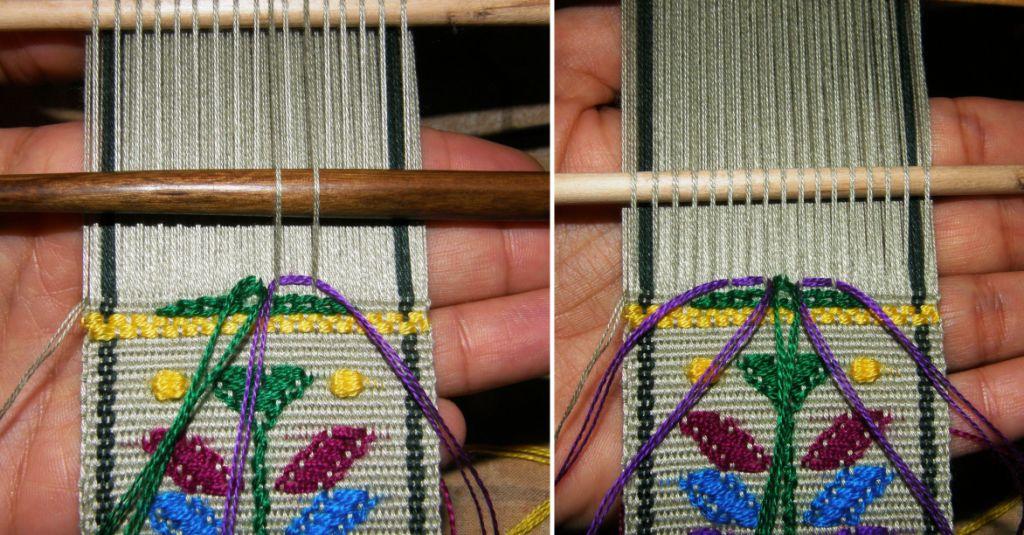
In this shed I will lay in the wefts to form the first pair of leaves.

Cut two lengths of weft around 24cm/9 1/2” long for the two leaves.


Starting the second leaf.

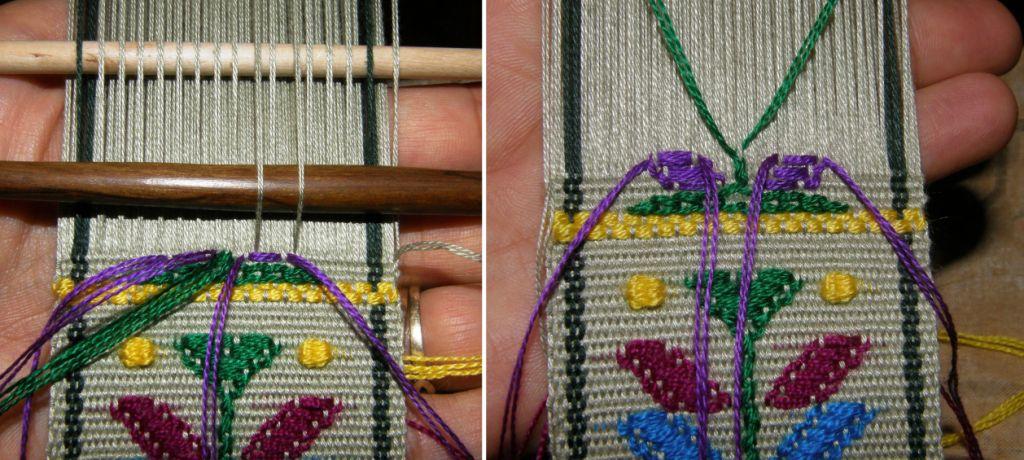
The little Guatemalan tree has three pairs of leaves and the stem continues growing until it eventually widens out into the tree top.

Once you have woven your six leaves, I am sure that it will be very easy for you to see how the tree top is formed.

You are weaving your stem with two strands of weft – one will start traveling to the right and one to the left while filling in the tree top in the same way that you filled in the leaves.

Finally there are the little spots that the Guatemalan weavers like to use to fill in blank spaces between motifs. I used them in my bookmarks as flower buds. You can see two yellow spots in the photo above.


To make a spot, you use two adjacent patterning warps as shown in the drawing above left. Use a strand of weft half the thickness that you would normally use. Around  12cm/5″ length should be plenty. First pass the weft behind the warp on the right as shown. Then join the two ends together and go wrapping them back and forth in the same shed about six times. Pass the ends through the main shed and out the back of the weaving.

The drawing above right shows how to make a diagonal line for a branch.

It is very easy to improvise with this technique. Have fun with it!

#############################################

It seems I was in the mood for autumn colors as I got back to work on the yurt band piece that I started a while ago and really had a good time picking that up again. At first I found it very confusing after having spent so much time on Andean pebble weave lately. Usually one is picking up light warps on a dark background or viceversa  but in this technique you pick up lights for one weft pass and then darks for the next. This is a simple warp float technique ( see this tutorial and this one) that can look a lot like Andean pebble weave but is totally different in structure. I copied the design from an image of a Turkoman yurt band that my friend Lisa had showed me on the net,

The original Turkoman band on the left next to my reproduction. I left out the triangles that run down the sides separating the two main pattern areas.

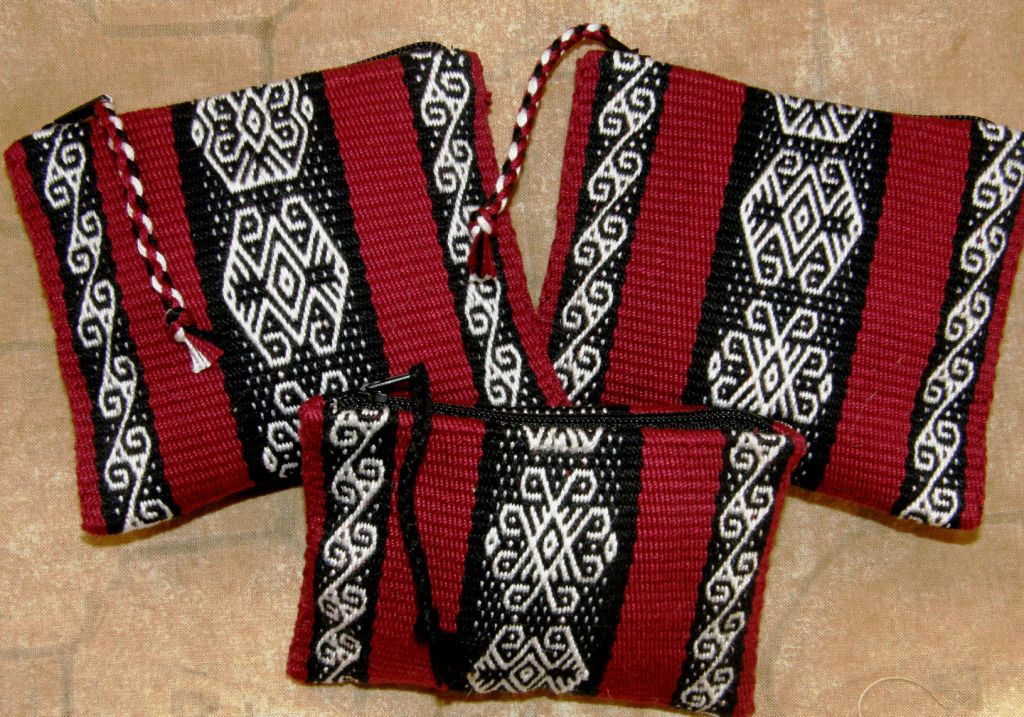
The other project I worked on this week was finishing off the red and black piece, sewing it up into three coin purses and putting in those dastardly zips! I believe that I am actually getting the hang of these zips now.

Three coin purses with North and South American motifs in Andean pebble weave.

#####################################################

AND THE BIG NEWS IS…

Today, (July 1st), the appendix to my e-monograph with instructions for weaving Andean pebble weave on a four-shaft loom went out!

Those who have already purchased my monograph will automatically receive it and it will be included in all future downloads of the monograph from now on at no extra cost.

My testers have made some lovely things on their four-shaft looms which I have been showing here on my blog over the last few weeks.

Lisa wove a band with several small motifs. Lydia made a wall hanging with a bird motif of Huancayo and Jennifer is going to turn her piece with the design from one of the Russian Old Believer belts into a backstrap.


########################################################

Finally I would like to show what Helena, who is in the backstrap weaving group at Weavolution, has made  in supplementary weft patterning using various colors and Mexican designs. Beautiful!


Backstrap Weaving- Back in Beautiful Bolivia

Back in beautiful Bolivia and already thinking about the next trip to the US for Convergence in mid July! But, first things first. In keeping with my policy of “new things in, old things out”, I have spent a few days tossing things to make room for the books and bits and pieces I brought back from the US. I do believe I have tossed out more things than I brought back – ah, more space…that is a nice feeling.

The other policy is to finish all the projects that I started on the road and I am pleased to report that I am ninety-nine percent on the way to completing them.

Project number one…the larger backstrap piece I was using for my demonstrations.

Demonstrating, finishing the pebble piece at home and the new tool bag, front and back.
Needed - one more tool bag for my new collection of shuttles. Two months ago, I didn't have a single small shuttle. Always happy for an excuse to weave something!

I had warped this up with nothing in particular in mind. I just needed something to demo with at the Maryland Sheep and Wool Festival. This poor band had a bit of a hard life having been set up at different angles, worked under different tensions and constantly picked up, woven, and put down. My weavings always turn out better if I weave on them for a couple of hours at a time and having them tied up and worked on in the same spot helps a lot too.  In any case, I got this off the loom and decided I needed another tool bag. Anyone who saw me rummaging around in my tool bags for that “special stick” or beater will agree. This new

I wove an inkle band with designs in Andean pebble weave on a couple of road trips and at the beach.

bag should help to sort out the confusion a bit. I wove a narrow blue band which served as the sides of the tool bag. All that is left to do is make a braid and sew on a button for a closure.

Project number two…the inkle band that I wove on road trips and at the beach. I completed this with twelve spaced motifs so that I could cut the band and sew it into key fobs. It was woven in Andean pebble weave with pre-Columbian and contemporary motifs.

This was a bit fiddly as I hadn’t woven quite enough plain pebble weave at the start of some of the pieces for threading through the metal ring, turning over and sewing so I had to cheat and glue some of the ends down.

So now I have twelve purple and green fobs. To be honest, I think I prefer making two at a time on my backstrap loom as I can change color and offer people more choices but…there are those times when there isn’t anywhere to tie up a backstrap loom and I can weave on my new inklette instead.

The twelve finished key fobs.

Hmmm, seems that I was in a very purple-ish mood when I was traveling as, the third project which I was weaving to show Andean pebble weave at its simplest on a very narrow band, is in an eggplanty purple shade with apple green designs. I had no idea what to do with this band when I got home  – more key fobs? No…And then I remembered a wee twill-weave sample I had made ages ago. It is nothing special at all but it was the very first balanced weave I had ever attempted on my backstrap loom and I had gotten quite a kick out of it. It was also the first time I had ever wet finished something. I had not been in the habit of wet finishing warp faced wall hangings and shoulder bags so it was all new territory.

UPPER LEFT: The thin band. UPPER RIGHT: The twill piece on the loom. I wrapped black yarn between the warps on the loom bar in order to space them for the twill. LOWER LEFT: This little bag will hold my business cards. Many people were amused to see me carrying my cards around in an Altoids tin while I was traveling. I shall probably replace this pouch at some stage with another in pebble weave with two pockets so that I can also carry my e-monograph cards.
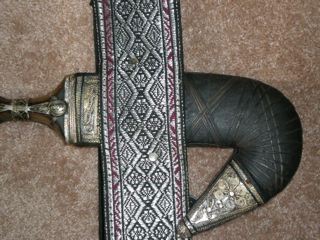
Yemeni knife belt

The band served as sides for the pouch as well as to decorate the center. The picture at bottom right shows two other looms with projects that I took to show in the US. You may remember having seen these in other posts and I shall be getting down to finishing these in the next few weeks. The one on the left is the supplementary weft reproduction of a pre-Columbian fragment and the other is a warp float reproduction of a yurt band. I was lugging around quite a lot of sticks and string!

So those will keep me busy for some time and I have already decided on what will probably come after that. I would love to try and reproduce the Yemeni knife belt pictured above. It has been woven with a supplementary weft with a silvery sheen and is spectacular.

Now what about those yarn experiments? I have even had time to weave a few things in Andean pebble weave with two of the yarns I purchased in the US.

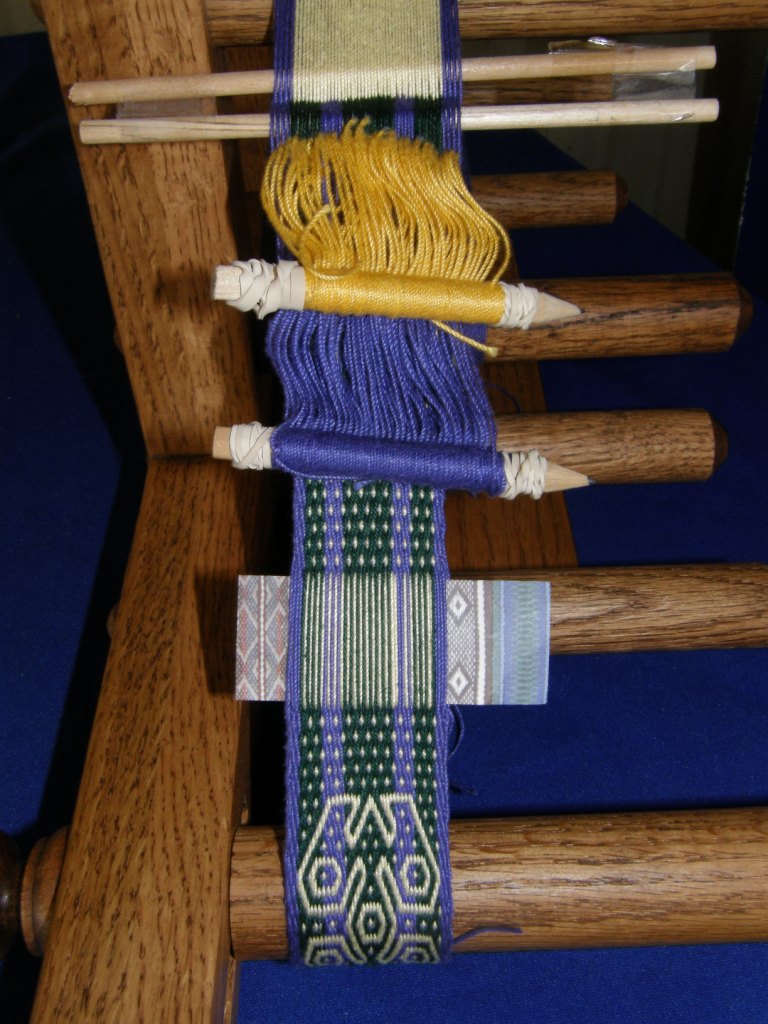
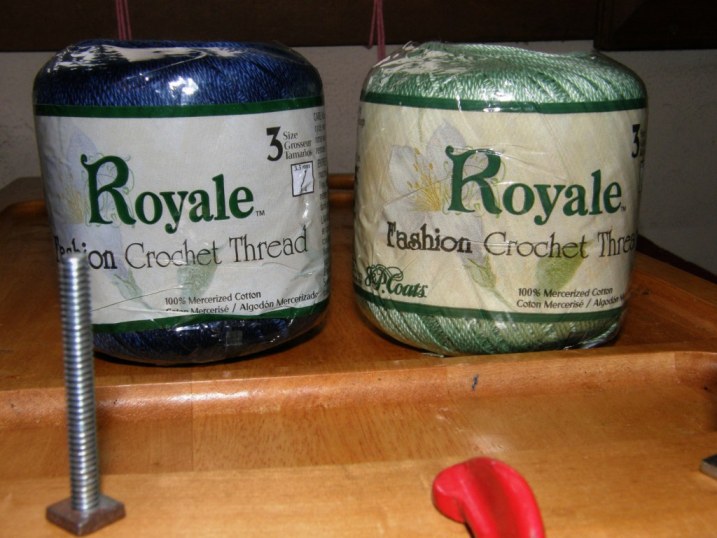
I got this Patons Grace yarn at Michael's-yikes! purple again! What can I say?-there wasn't a good color choice. On their site, Paton's decribes this yarn as super soft or ultra soft and I would not have bought it based on that description as soft yarn and warp faced weaving don't usually get on. I wove two key fobs with it and it is lovely. Zero pilling on the heddles and, being mercerized, it has a lovely sheen. It is a number 3 crochet yarn. These photos show how I make my keyfobs two to a warp so that both fobs have a clean edge. I weave one, then turn the loom around and rearrange the shed stick. I retie the knots at the other end so that they are right at the start of the weaving. When finished, the knots are untied and those ends get passed through the end loops once the metal needle is removed.
A few more pictures showing the weaving process and the two fobs on the loom. The finished fobs are at bottom right along with two others I made using Coats Royale number 3 mercerized crochet cotton also from Michael's - not many colors to choose from for this brand either. I would buy it from the website. Thumbs up for this yarn too.

I have a finer number 10  merc cotton, also by Coats, to try out for next week and not in purple as well as some wool. People often ask me about respinning commercial wool for backstrap weaving so we can take a look at that too.

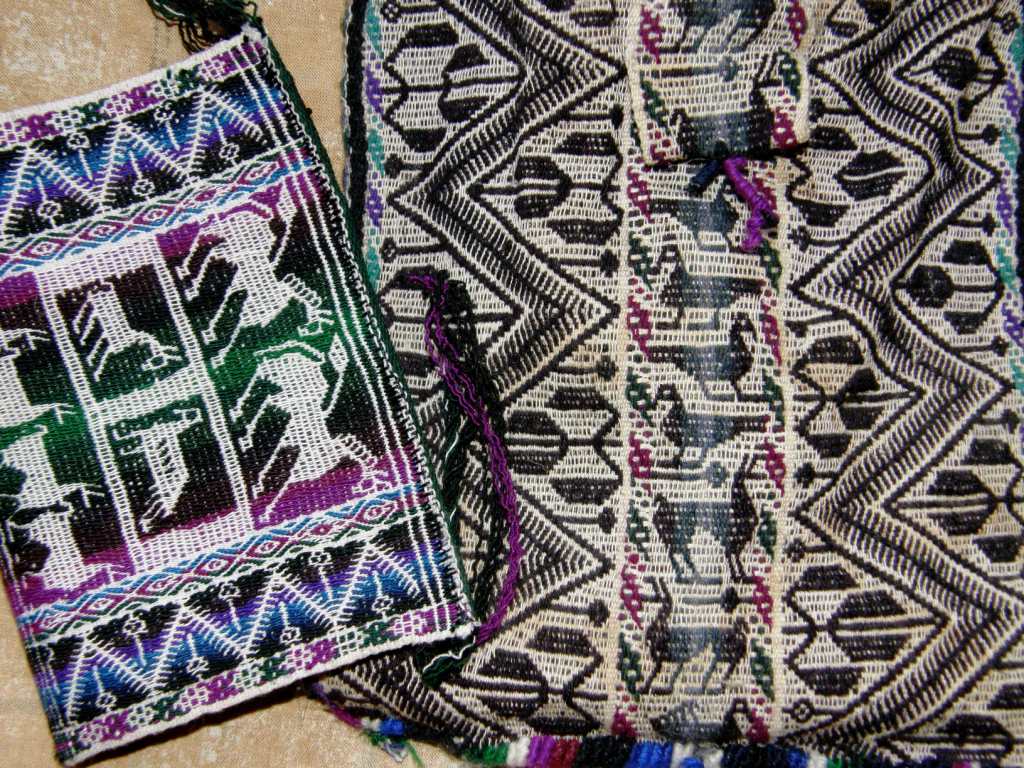
Other tempting project ideas that have been appearing in my inbox are pictures of belts and bags woven by the Huichol of Mexico as well as drawings of motifs woven by the Cayapa of Ecuador.

Teyacapan, too, continues to inspire me with her gorgeous photos of Mexican crafts and textiles.

#########################################

Now it has occurred to me that this blog has been filled with images of the US the last few weeks and that it was about time I showed you all a little of Bolivia. I recently contributed some photos and information to Handwoven for a piece they wrote on Sucre, the constitutional capital of Bolivia, and its attractions for tourism related to weaving. How frustrating it was having to narrow down the images to just three or four pictures! In May last year,  I went to Sucre for what was probably my fourth visit but, this time, I went with my brand new and first ever digital camera.

So here is a little whirlwind photo tour of Sucre…

Sucre, the "White City of the Americas"

Sucre sits in a valley at around 3500 meters and it is obvious how it earned its nickname. From the hill tops to down at street level, both inside and out, Sucre is white – almost blindingly so in the mid morning sun! Wooden enclosed balconies adorn most of the downtown buildings as well as black wrought iron window coverings and flower filled window boxes. It has quite rightly been declared a UNESCO cultural heritage site.

The most well known weavings of the area are made by the Jalq'a people of Potolo, upper left, whose textiles depict wild mythical creatures which completely cover the woven surface. Those made by the people of Tarabuco, on the other hand, have designs that are placed in well organized columns and depict common every day objects and events. These textiles are woven by the women on oblique looms while the men weave the brightly colored tapestries, lower right, on floor looms.

More examples….

Weavers from Tarabuco and Potolo demonstrate weaving at the ASUR museum in the heart of the city and it is also possible to travel to the town of Tarabuco or, further, to the villages of Candelaria and Potolo to see weavers at work and purchase their textiles.
Shopping! Traditional weavings and knits from floor to ceiling as well as items produced with traditional based designs for tourists.


More shopping...the Sunday market in Tarabuco, a couple of hours away, is a textile lover's heaven. Again, you can find traditional pieces as well as weavings made specifically for tourists. At bottom right you can see one of the market stalls in the Sucre campesino market where you can buy llama fiber, spindles, cochineal and bone weaving tools called "wichunas".
People in and around Sucre...weavers from Tarabuco and Potolo, a woman spinning in Tarabuco on her way home from the market with her granddaughter wrapped in her carrying cloth, an elderly Tarabuqueno wearing the leather hat or "montero" which is said to be based on old European style helmets, men performing ritual offerings to "pachamama" on Sunday morning in a plaza in downtown Sucre.
A visit with Felicia and her mother in the village of Candelaria. Felicia's cousin, also called Felicia, taught me to weave the pick up technique of Tarabuco way back in 1998. She and her family have long since left Candelaria and I was lucky to run into her cousin who welcomed me into her home to sit and watch her weaving. I took weavings and photos to show and her mother, who is not a weaver, was delighted looking at my things.

I have spent many years traveling around and spending time with weavers here in South America. It is not so easy finding a weaving teacher especially in the cities and not all my attempts to learn to weave have been entirely successful. One thing is finding the weaver, another is finding one who has the time to teach you and, lastly, finding one who is also a good teacher is something else all together.  I have almost always found a good weaver and teacher with some time to spare within a few days of my arrival in a place.

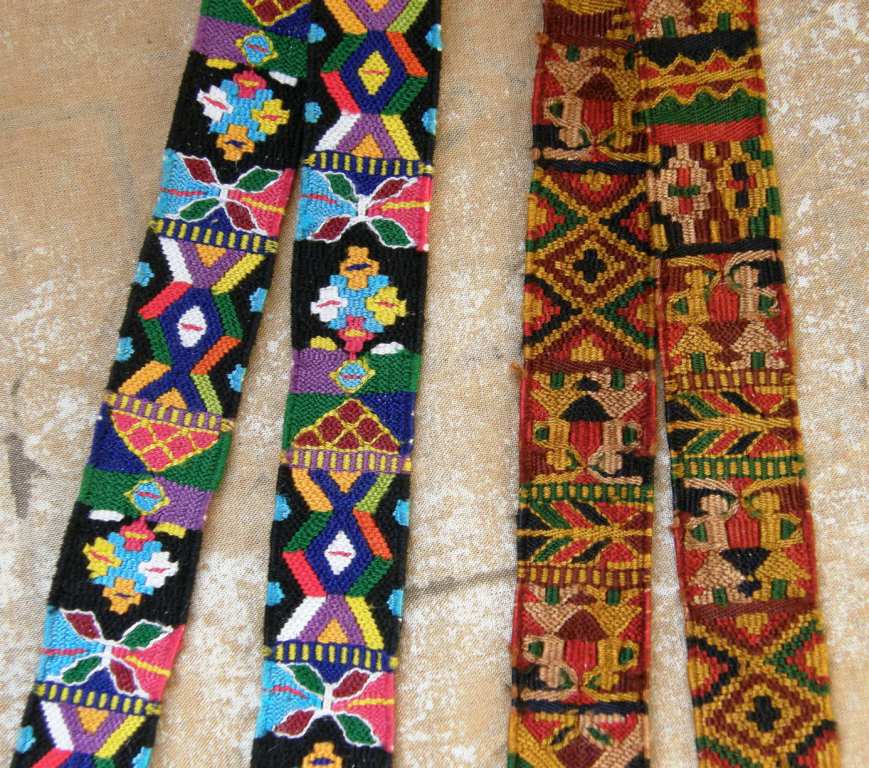
Typical textiles of the Tarabuco area.

On my second trip to Sucre in 1998, I found that I had enough time to look for a weaving teacher. The museum in Sucre had given me the name of a weaver in Candelaria but I bumped into  Felicia while I was waiting for transport from Tarabuco to Candelaria ,we struck up a conversation and she persuaded me to come and weave with her instead. I doubt that Felicia herself knew what she was letting herself in for when she took on the task of teaching me to weave. Youngsters generally learn by observation rather than through explanation and Felicia seemed to have long forgotten which designs she had learned first, how difficult it was to learn from scratch, and I doubt that she had contemplated how time consuming and possibly boring it would be sitting for hours with me and having to help me along with every little thing!

The first classes...Felicia would sit at her loom picking up her pattern warps on a metal needle. All I could see was the long end of the needle flicking to and fro as it emerged from her fist. I couldn't for the life of me figure out how she was forming and reading the patterns. Finally I was able to persuade her to set up a miniature warp for me on another loom and picked out the simplest design I could find from a book I had bought at the museum. I was being a stubborn gringa and I wanted her to teach me MY way.
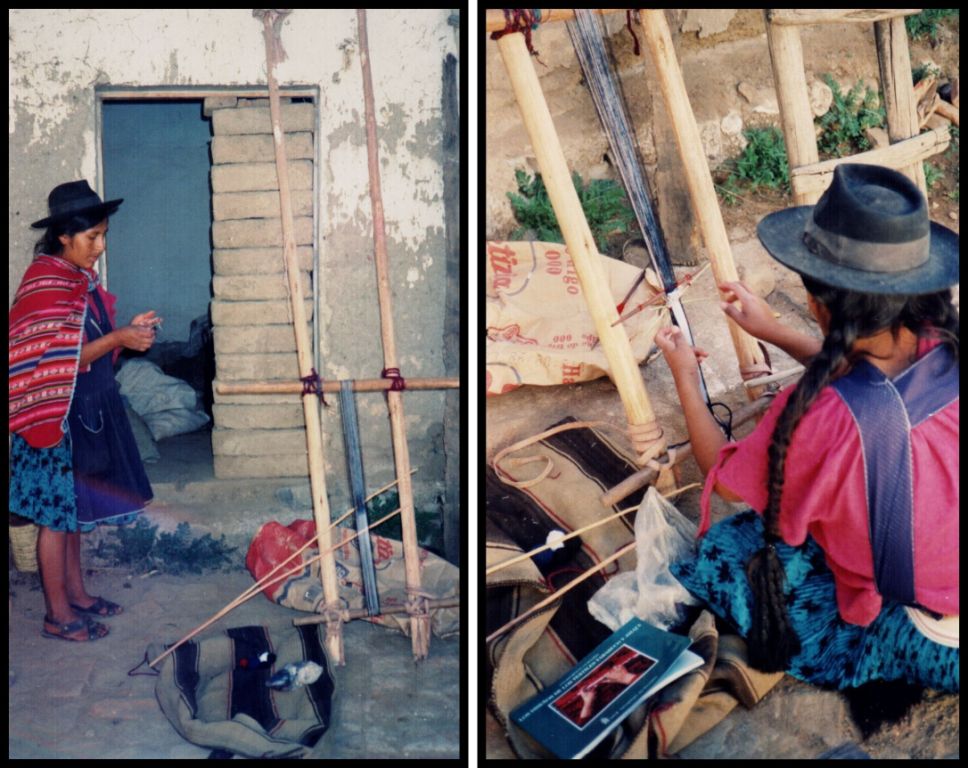
Here are the loom and mini warp that Felicia set up for me in the yard . But things still did not go well...Felicia still flicked her needle around, sighed with impatience when I didn't get it and rolled her eyes at my questions! Finally I figured that I could slip the warp off the loom bars at night when everyone was asleep. I tied the warp to my bed rail, set myself up with my backstrap and unwove. In a couple of nights, I got it figured out and once I had made a chart of the motif, I was on my way. I decide after that, that I would leave the weaving classes and just enjoy my stay in the village. There was no transport out anyway until the market day the following Sunday.
So I joined in with Felicia's chores instead and learned a few things. I am sure she was relieved that I had suddenly stopped asking for lessons and no questions were asked! We made bread. I am eternally grateful that she didn't have me get my hands into the dough which was made with globs of pig fat from a sack in the corner-that apparently was grandma's job. She showed me how to peel wafer thin slivers of skin off their tiny potatoes with a knife and get the kitchen fire going. Can you tell I am a city girl? I also learned how to use the stone to grind the chili peppers to make 'llajua"-a spicy sauce which she served with the bolied potatoes. Then there were the neighborhood kids to mind. I would go out for walks with a long train of them behind me.

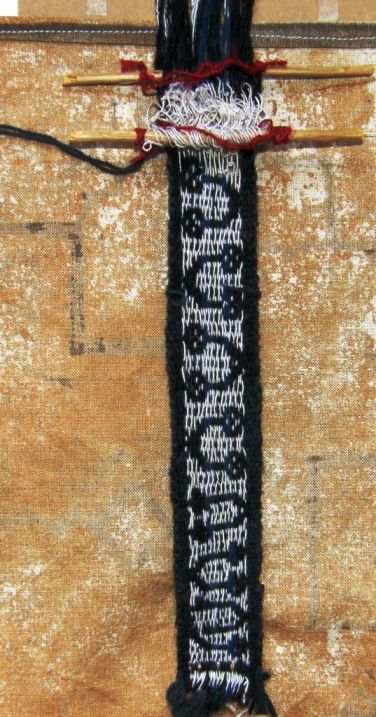
Somehow we ended up hitting it off and I finally showed her the motifs I had been secretly weaving at night. She was pretty happy about that but did not praise me by calling me “machita” as my other weaving teachers had. Probably not surprising as you can see at left all that I managed to weave in a week!

The white yarn used in the background area  is a highly overspun cotton. You can see how the heddle strings, which are made from the same yarn, are curling up on themselves with the overtwist. The pattern warp is overspun acrylic-about three times thicker than the ground weave and not as tightly spun.

We just used twigs from the yard for the shed rod and heddle stick.

I was very surprised to receive a phone call from Felicia’s husband when I returned to Santa Cruz telling me that he had sent me a package by bus. Inside was a chuspa (coca leaf bag) and a wichuna which belonged to Felicia’s mother. Wow! I wonder if Felicia took on any other gringa students after I left!

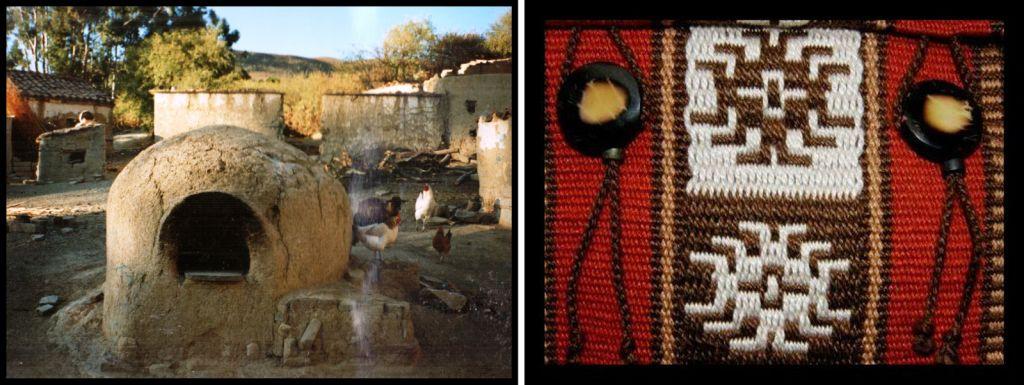
The bread oven in Felicia's yard. A piece I wove using the technique I learned during my stay in Candelaria. I used the same weight yarn for both the pattern and background colors which gives it a very different look.

###########################################

Two hair sashes that I had bought in the market at Chichicastenango. I particularly liked the one on the right in its soft autumn colors. I later discovered that it was originally woven in bright primary colors and then overdyed to suit the taste of foreigners. I have been told that sometimes textiles are simply soaked in tea to tone down the colors. Now I would like to wash this band and recover the orignal hues.

One of the things I enjoyed a lot on this trip to the US, was the chance to play on other looms. I had a great time on what I had been calling my “first encounter” with a four-shaft loom but I had completely forgotten the quirky little four- shaft/backstrap loom that I had woven on in Zunil, Guatemala.

While staying in Guatemala’s second largest city of Quetzltenango, I heard about the hair sash weavers of Zunil and the strange four shaft loom that the weavers used.

The warp is attached to and tensioned by the weaver’s body.

I was intrigued by the loom but also keen on learning how to make the lovely sashes.

Zunil is a twenty-minute bus ride from Quetzltenango and I arrived to market day madness. You can see some of the women there using their hair sashes. A short walk uphill brought me to the relatively peaceful town square and church where I found the weaving cooperative. There I was politely told that classes would not be possible as women were not permitted to weave during Semana Santa (Holy Week). Disappointed, I left, only to be chased down the street by a woman who told me she would take me to a teacher. And so I was led up the hill to Clara’s house which had a gorgeous view over the town and surrounding valley. We negotiated the price and when I questioned the Semana Santa thing I was simply told that “some people get jealous”.

So here is the rickety and very squeaky loom. The warp stretches from the weaver's waist through the reed and shafts around a hook in the door frame, back to the weaver's waist via another hook in the side of the loom. The warp is cotton which is sized with something that smells truly awful - corn starch and other ingredients - and the weft is acrylic. The reed is made from bicycle spokes.

Amazing to think that a weaver using such a loom can produce these beautiful even sashes.

The band on the left is what I wove in my classes. An experienced weaver using exactly the same warp and weft would produce those fine, narrow bands on the right. The sashes are finished with large heavy tassels.
So that was my first four-shaft loom experience. Here are the loom parts that I bought in the hope of making my own one day. Clara was an excellent weaver and teacher.

#######################################

In the coming week on Weavolution I will be running a Weave Along. This will be for those of you who have been working their way through my e-monograph on Andean Pebble Weave and are wanting to extend their skills and  weave a wider piece. It is also for those who have purchased the monograph but have been feeling a bit hesitant about getting started. Join in and weave with the group!


Backstrap Weaving-Coca leaves, chuspas and more double weave

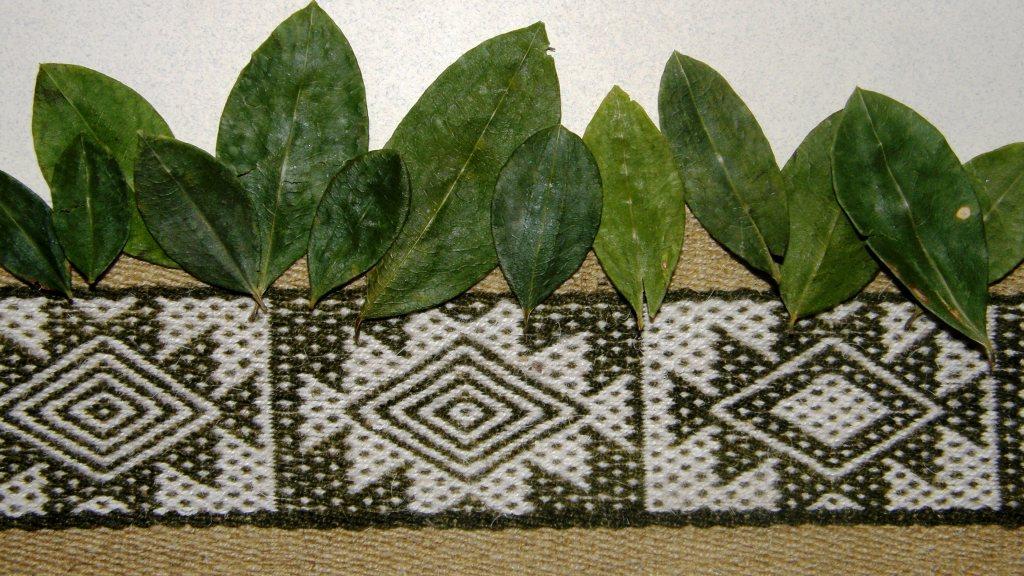
The coca leaf – I have enjoyed it brewed in tea, chewed it on hiking trips and used it to dye my handspun llama fiber above.  However, a  foreigner like myself can not even begin to understand the role that this humble leaf plays in Bolivian life and culture.

Lately there has been a lot more talk than usual about this piece of Bolivian cultural heritage as Bolivian President Evo Morales has recently announced plans to launch a new carbonated energy drink on the market which has the beloved coca leaf as one of its main ingredients. It should make an appearance in the next four months and will be called “Coca Colla” (the ‘olla’ in Colla being pronounced like the ‘oy’ in boy). “Colla” is the word commonly used to describe people from the altiplano of indigenous origins. This is President Morales’s attempt to erradicate coca’s unfortunate association with cocaine and drug trafficking, increase its cultivation and have it  recognized instead, as stated in the new Constitution, as  “cultural heritage, a natural and renewable resource of biodiversity in Bolivia and a factor of social cohesion”.

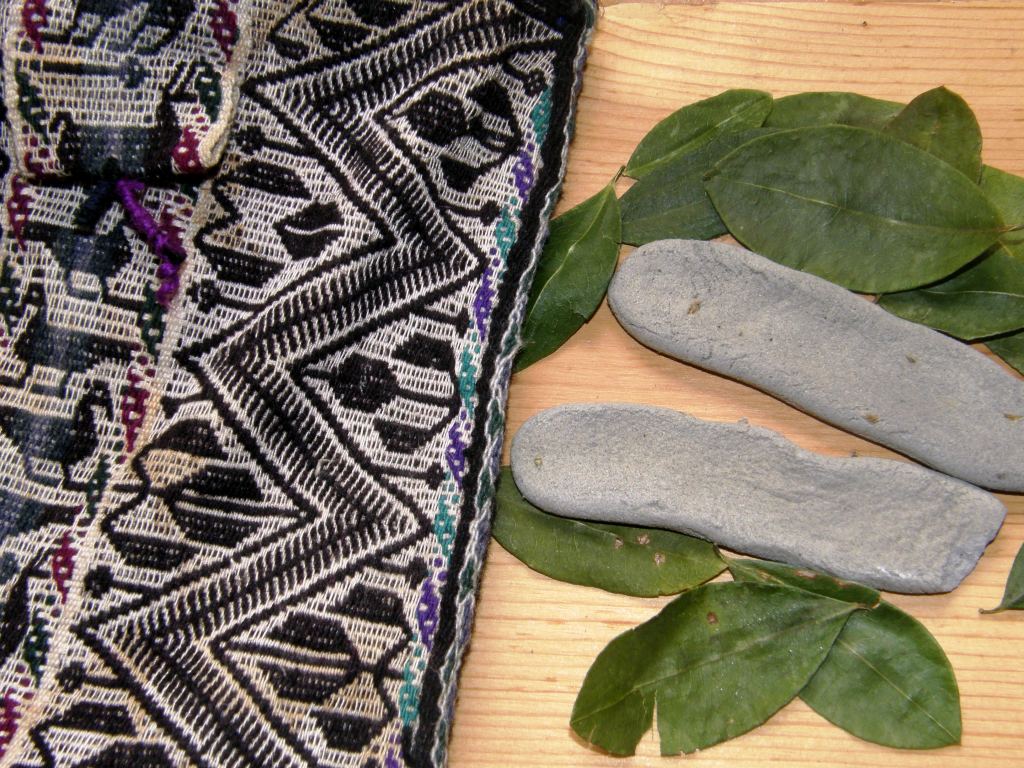
Coca is used to make tea, plays a part in religious rituals and is chewed in order to suppress hunger, thirst and fatigue as well as to alleviate the symptoms of altitude sickness. I have chewed it myself on hiking trips and I have to tell you that there is knack to getting a wad of it tucked neatly away in your cheek and not all over your teeth thus completely ruining your smile for the day! Bags of coca leaves are sold with lejia-the gray colored bar seen at left, comprising compressed ash and other substances, which is chewed along with the leaves and acts as a catalyst.

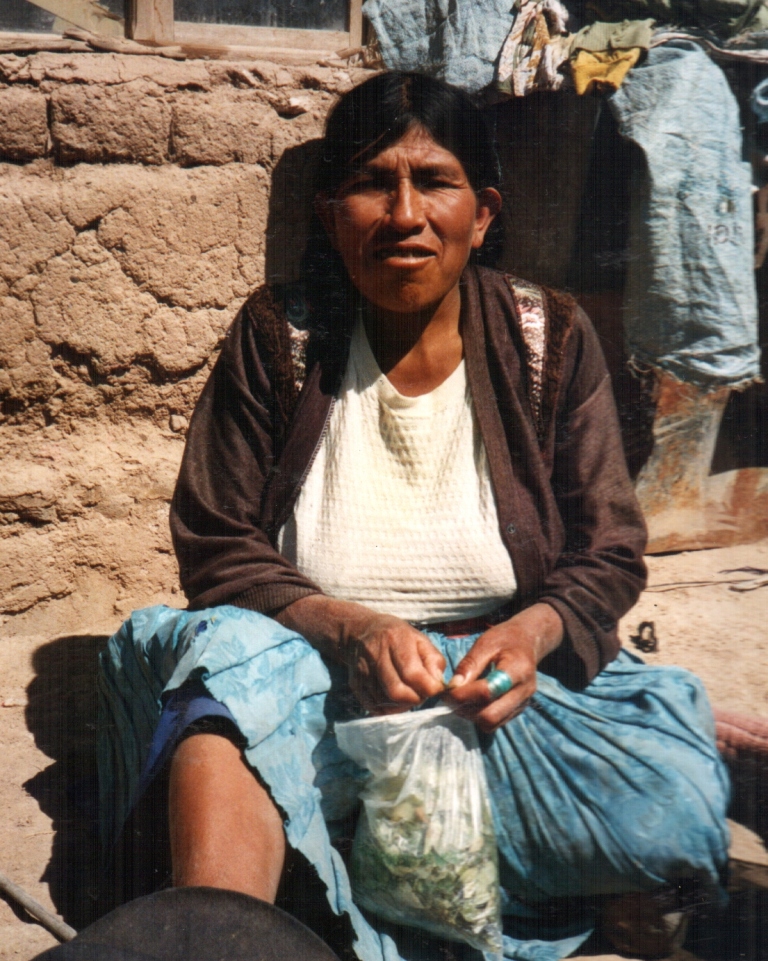
A special woven bag called a chuspa is used to carry coca leaves but I have only seen these in use at festivals and other celebrations. On a normal day, it is more usual to see people taking their coca leaves directly from a regular plastic bag. My weaving teacher, Julia, at right, is taking a break from classes to enjoy some coca.

While Julia and her sister Hilda both know how to weave a chuspa, strangely neither of them actually owns one. When I expressed interest in learning to weave one, they had to consult with each other in order to remember how to wind the warp. What is special about warping for a chuspa is the fact that most chuspas include a small pocket which is designed to carry a piece of the lejia or perhaps a few coins and allowance must be made for this in the length of the warp.

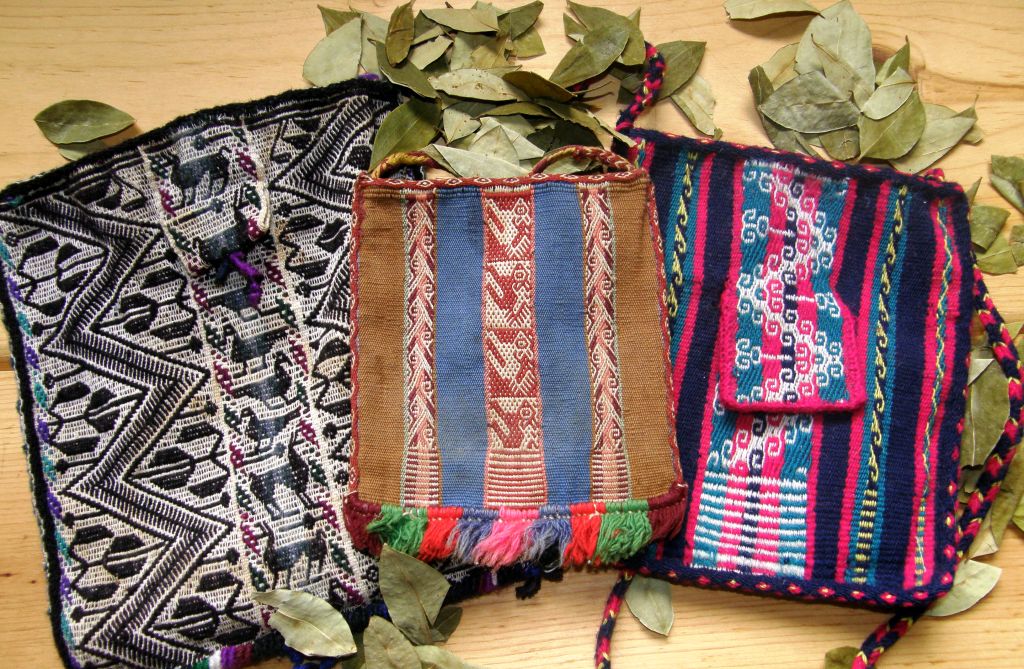
Three Bolivian chuspas, each woven with a different complementary warp technique. The one on the left was made by my weaving teacher in Candelaria and has a pocket. While the one in the middle was bought in Potosi,  I am not sure of its exact origin. It does not have a pocket. The one on the right with a pocket is the one I made in Potosi under Julia and Hilda’s instruction.
Julia and Hilda are preparing the warp for my chuspa. You can see the extended piece of warp on an extra stake which will become the pocket. We are using the brightly colored respun acrylic yarns that are very popular in this area. 
We are all at work here. I am working on my chuspa, Hilda is backstrap weaving a band while Julia, in the background, is cutting fleece to spin. My chuspa is a four-selvedge piece so I wove from one end, turned the piece around and wove from the other end and then had the usual agony of trying to squeeze weft into those last few rows to close the gap.
Hilda taught me to weave the ”rolling river”design into my chuspa. Once off the loom, the sides and pocket are joined using a variety of decorative techniques.We used triple crossed knit looping to edge and sew the sides of the pocket. This is a very pretty technique that not only binds the sides but also completely curls over and covers the edges.
You may be able to see the crossed knit looping more closely here on the edge of another bag that I wove. The brown sample shows how it would look worked flat rather than curled over an edge.
A tubular band was woven with the weft being used to sew it to the sides and base of the bag as it was woven.  A six-strand flat braid was made for the bag strap. The chuspas that I have seen being used in festivals are highly embellished with pom poms, tassels and multi colored fringes.
A small selection from the variety of braids, bands and tassels used to decorate Bolivian chuspas
The ”rolling river” design has since become a great favorite of mine and I have woven it into tool bags, sashes and key fobs on my backstrap loom.

In 1998, I spent some time with a weaver in the village of Candelaria near Tarabuco and learned the weaving technique that is used in their chuspas and carrying cloths.

A Tarabuco style chuspa made by my teacher Felicia . The pocket is so small it is hard to see it being of any real use. The other piece is a small purse which has been woven specifically to be sold to tourists. Note the cute strolling llamas along the bottom.

I returned to Candelaria last year. Felicia is no longer there but the first person I met as I entered the village was Felicia’s cousin-also called Felicia! who took me to her home and graciously allowed me to film her weaving on her oblique loom. The next day I went to the market in Tarabuco where there was a cultural festival and was able to capture a small piece of video of a weaver warping for a chuspa. She was constantly being interrupted by ladies asking her questions so the clip is very short.  I don’t know how well that warp could have turned out with all those pauses. When I warp, no one can speak to me!

So here is the short video (yippy! I have finally figured a way to get around my erratic internet service and upload heavier videos). The first part is the weaver warping for a chuspa with two colors around four stakes. You will see the extra stick she uses on which to warp the extra long part for the pocket.

The second piece is Felicia-keep an eye out for the kitty snuggled in her lap while she picks up those warps with lightning speed!


WHAT’S ON THE LOOM?-AN UPDATE

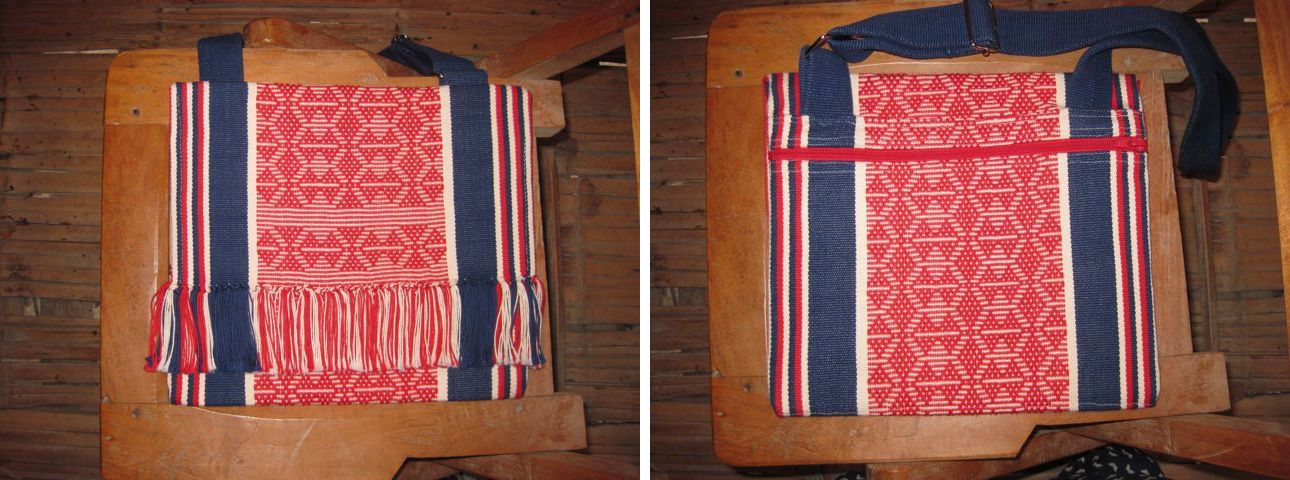
I have been working away on my Abba Yohanni inspired piece and have decided that I am going to make a table set to take as a gift on my next visit to Australia. So, the piece you saw last week will be a table runner. I have made some progress on that and have reversed the design and am just starting the final motif. In the meantime I couldn’t resist seeing how the motif would turn out in 12wpi cotton and so wove it into a (rather large) hot pad using one-weft double weave technique and then wove a small portion of the motif into a mug rug. I am thinking about weaving four placemats to go with the set with a piece of the motif woven with a supplementary weft in the center of each.

Abba Yohanni inspired set in progress