Backstrap Weaving – Adventures in the North West

I love traveling by train and I love traveling with a reserved seat. As I wasn’t in a real hurry to get anywhere, I took the opportunity of traveling the slow way on Amtrak’s Coast Starlight route from San Jose, California up north to Portland, Oregon.

I was disappointed that the train left at night and that I would miss what I imagined would be beautiful coastal and ocean scenes but couldn’t complain when I awoke the next morning to views like this!…
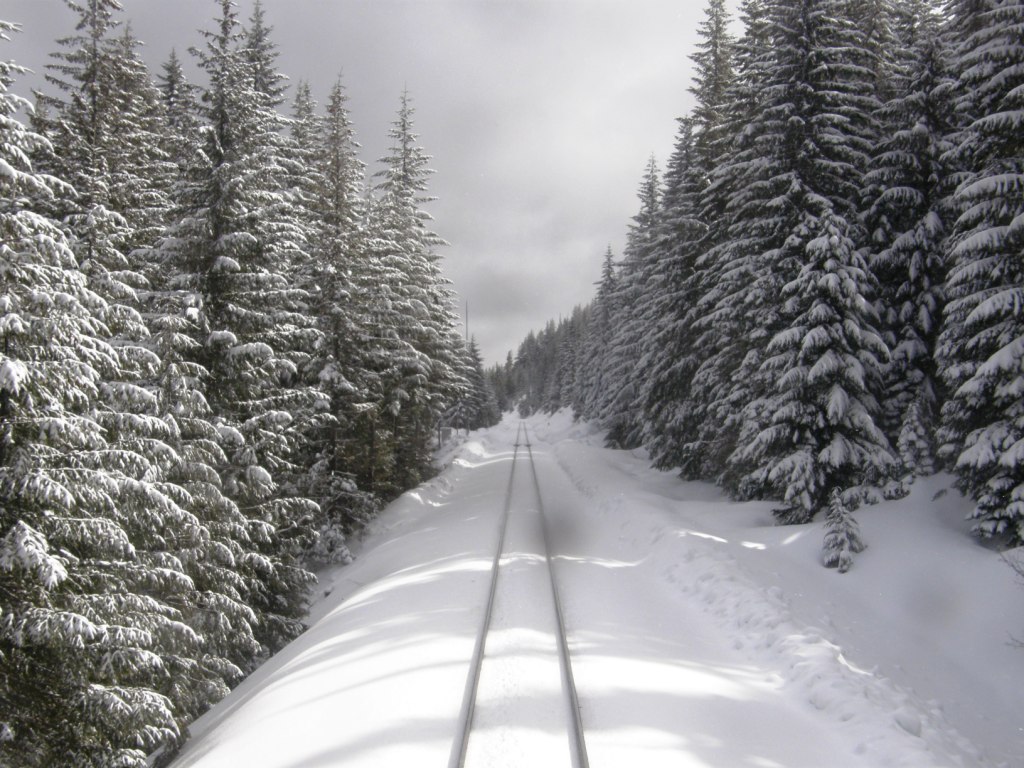
I was fortunate that the Portland and Seattle passengers were seated in the last car which meant that I could stand at the back door and watch the track roll away through these magical wintry scenes. The other passengers had very “been there, done that” attitudes but, for this gal who lives in tropical lowland Bolivia, it was an absolute treat! This meant that I could pretty much hog that back door view for the entire day. I was so tempted to press the door button to see if it would open especially when it started to snow and the glass got covered.

Slowly we rocked our way across mountains, passing through numerous tunnels, emerging to views of deep valleys sweeping away to the right…gorgeous!!

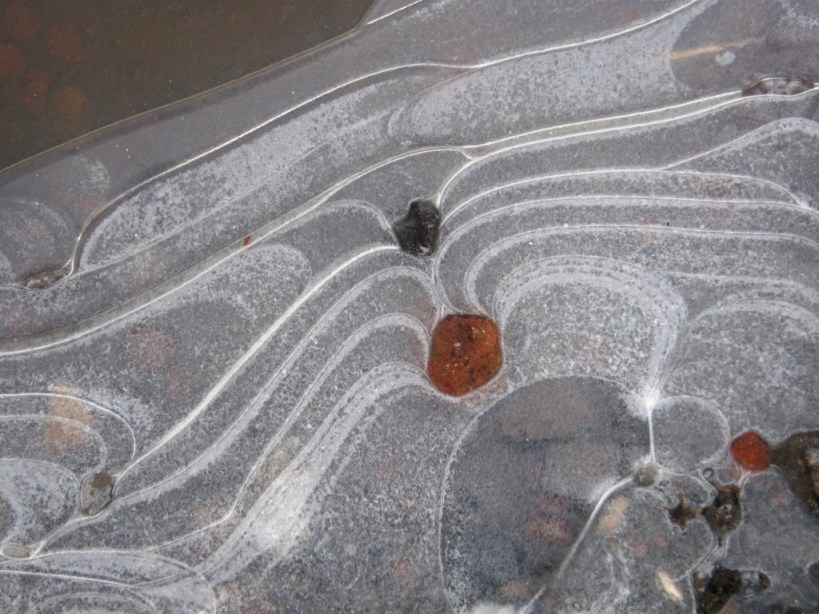
There were plenty of ‘fresh air” stops where we could get out and stretch and see “ice art” in the puddles. It’s probabaly all very “ho-hum” for north-west natives but it was all new and delightful to me.
After Eugene, the snow was over and soon we started to pass through ever increasing suburbia until finally rolling into Portland where I was met by Betty  who was having me as her guest for the next couple of weeks in her home just over the river in Washington state.

While I loved looking at the snow, I was glad to be out of it and into the cool, shady green with hints of spring of Betty’s tree farm.

And this is where my faithful camera friend of the last three years decided to die :-(.

“Internal sensor failure” was the problem I was told…too expensive to make a repair worthwhile. This problem was giving a pinkish hue to my pictures when the camera was in a good mood and weird color-streaked images when it was not. Luckily I have a wee Casio point-and-shoot as a back-up camera but I have to learn its particular quirks and get used to using it…darn!

Those of you who follow my blog may remember that I stayed with Betty on my spring trip last year and showed pictures of many of the fabulous weavings that she has collected in her travels over the years. I would have to be here for months to be able to see and photograph them all. In fact, last time I looked at too many and was quite overwhelmed. You get to the point where you stop seeing the beauty of each individual piece and so it has been great to have this chance to go over the collection again.

Actually there are enough beautiful things hanging on her walls to keep me occupied without even thinking about going through the pieces that have been carefully stored away.

Here are just a few bits and pieces….

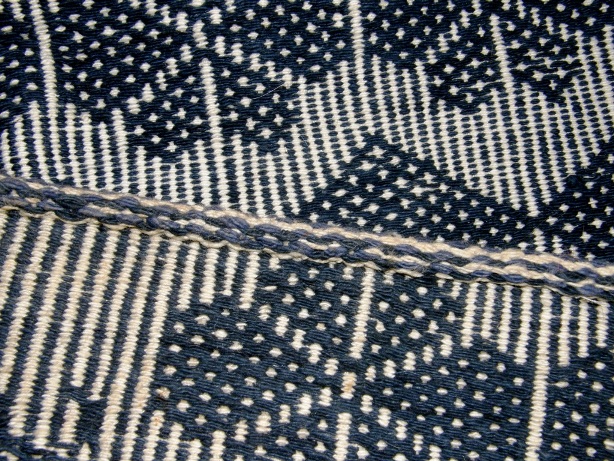
I love the simplicity of the striped incredibly fine cotton warp-faced piece on the left with the card-woven strap, which Betty bought in a Tibetan refugee center in India. It’s an apron that forms part of a Tibetan traditional costume with a card-woven waist band. It contrasts with  the riot of color and intricate supplementary weft patterns on the Bhutanese bed cover  on the right.

This is a small selection of textiles from Peru, Bolivia and Ecuador. This group includes an ikat shawl from Ecuador, a double weave belt from Taquile Island, Peru and a small striped poncho from Tarabuco, Bolivia among other things.

I just LOVE the piece from Bhutan above left which has supplementary wefts woven into a twill base…that technique is still on my to-do list along with the discontinuous-warp technique you can see in the piece from Pitumarca Peru on the right (the figure in the center is an adornment that was added by Betty). I have made a few experiments in discontinuous warp after seeing the fabulous work of the Pitumarca weavers at the Tinkuy in 2010…multi-paneled pieces covered in pick-up patterns but I find this simple plain-weave piece in Bettys’ collection particularly inspiring and this following one even more so….

Betty thinks that this piece may be one of those that were made when the Pitumarca weavers were first attempting to recover this ancient technique. It is warp dominant rather than warp faced…you can see the weft and see through the fabric when it is held up to the light. It is nothing like the sturdy heavily-beaten warp-faced cloth that is typically produced. It has been edged with a simple single-color plain-weave tubular band. The over-twisted handspun yarn is still causing the corners to curl.

You can see above left what I am guessing would be called the discontinuous weft where the panels join vertically. The brown weft which is being used in the panel below right turns around the grey weft on the left when the two wefts meet at the join. This means that the color of each panel can be solid. You can also see how the warps dovetail at the horizontal joins between panels.

Betty is not sure how many years ago she bought this piece, but this is the progress that the Pitumarca weavers have made in this technique since then….

This piece has four panels of discontinuous warps with supplementary warp patterning in each.

More treasures on the walls of the rooms and halls of Betty’s home…

Belts and sashes from the Andes and Guatemala and a reverse-applique Mola from Panama.

And then some fun stuff…

I loved this little hanging which is in the guest bathroom. It turns out that this is one of the first weavings that Betty ever made. Knowing the legendary status that Betty has achieved in the world of weaving, this was quite wonderful to see. The other piece is a dear little purse that has been woven from recycled plastic bags in Guatemala.

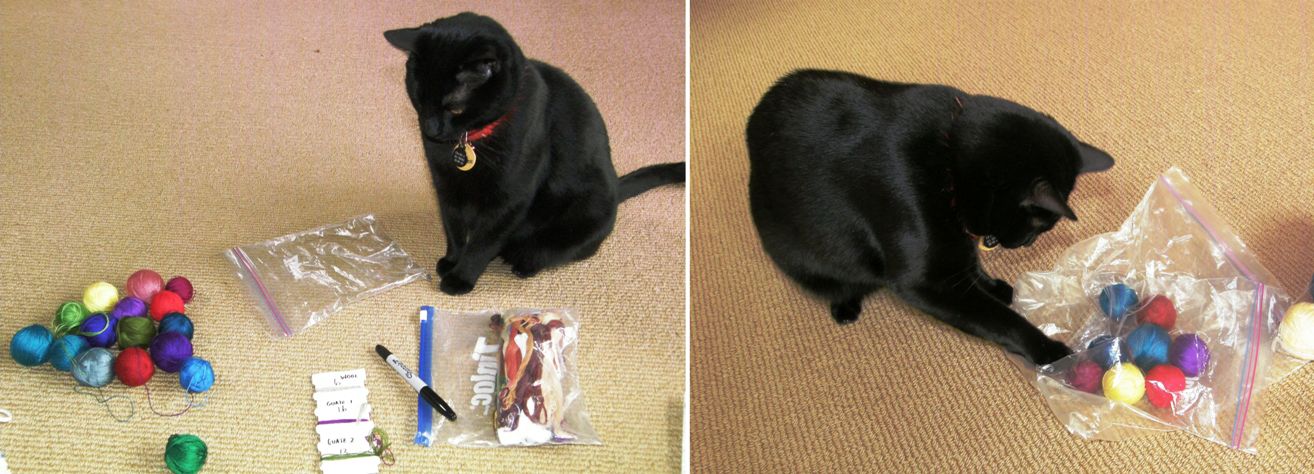
Between all the textile and fiber wanderings in Betty’s home and studio (I got to sleep in the studio again!), I had some organizing to do…not an easy thing among so much distraction! I was emptying bags and bags of yarn and warps on the floor much to the amusement (or perhaps indignation) of Trouble the cat who stood guard in case one of the balls decided to wander off.
Here are a couple of the ladies who came to weave…Sasha (who wants to learn backstrap weaving as it is part of her heritage…any guesses as to where her roots may lie?) and Emi who is interested in all aspects of primitive technologies.

It was great to meet Jenny on the left and Linda who are both members of the Ravelry Backstrap Weaving Group. That’s Judy next to them. All three are working on their second weft patterned bands.

Weaving away! Jenny pauses to figure her next move in her simple warp float pattern. Rona is checking the cross on her four-stake warp before removing it from the stakes. It is funny how people often unconsciously choose yarns that match their outfit.

On the way home from the weaving group, Mt Hood and Mt St Helens put on the most fabulous show for me. Both are heavily laden with snow and looked spectacular in the soft evening light. But there was no where to stop and photograph them!  My back-up point-and-shoot camera does not have the zoom capacity to have done a worthy job in any case. I got to climb a rather different looking Mt Hood in the summer of 1992 as well as fly around Mt St Helens in a friend’s private plane but I much prefer the way these two beautiful peaks look in their winter coats.

Most of the people in this weaving group also promised to come to another the following weekend. I had a busy and fun time in the five days between.

On Tuesday and Wednesday I had a visit from some other Ravelry pals. These are two Backstrap Weaving Group members who have been around since the early days.

Jennifer and Bobbie are strong and very active members, head cheerleaders, back-patters, welcoming committee and “commiserators” and I am so grateful for their continued support and participation. It really was a thrill to have them with me for those two days.

They brought a few of their backstrap woven pieces to show and we marveled at how far they have come since joining the group and that very first weave-along we did in January last year.

We wove patterned tubular bands on Tuesday and I know that they have been hard at it at home since then. Bobbie also brought along the beautiful wide Guatemalan piece with its super fine cotton yarn on which she has been working.

First, lets look at some of Jennifer and Bobbie’s woven work…

On the left is Bobbie’s Bedouin-style runner with al’ouerjan patterning. I think she may have warped this when we had an al’ouerjan warp-along weekend. Next to that is her plain-weave striped piece that I am guessing was part of the plain-weave weave-along we did in the fall of last year. She added some weft twining to that. Jennifer’s backstrap is a gorgeous combination of stripes and colors which was also influenced by Bedouin textiles that we have been looking at in the group. I am pretty sure that this also formed part of the plain-weave weave-along.

Trouble decided to nap on Bobbie’s pebble weave bag. This is the piece she made as part of the very first pebble weave weave-along in January last year. At left you can see her rolled up Guatemalan warp and here she is working on it….
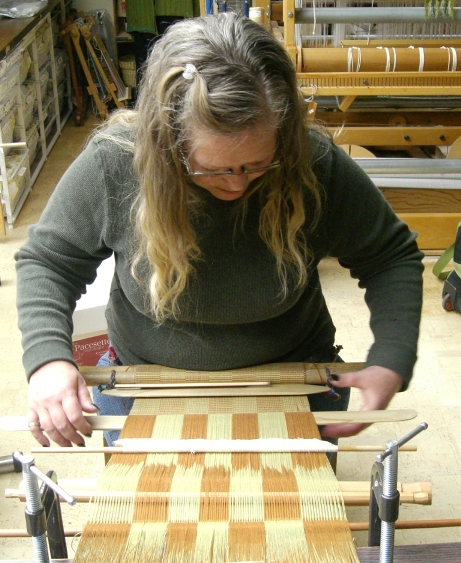
She has a long tale of mishaps to tell of when she was trying to put this warp together but you would never know by looking at it now! She is doing a simple warp pattern which Jennifer showed us in the Ravelry group. She had seen and admired it on the Education and More website. It caught Bobbie’s eye and she asked for suggestions for how to set it up. As the same warps are always floated, she has them permanently stored on a pattern stick. Looking at the sticks in the above picture from bottom to top you see the stick that holds the second cross, the pattern stick, the shed rod, the heddle rod and then the sword.

Certain warps from the shed-rod shed are floated with the warps from the heddle shed. You can see the warps sitting on top of the pattern stick below.
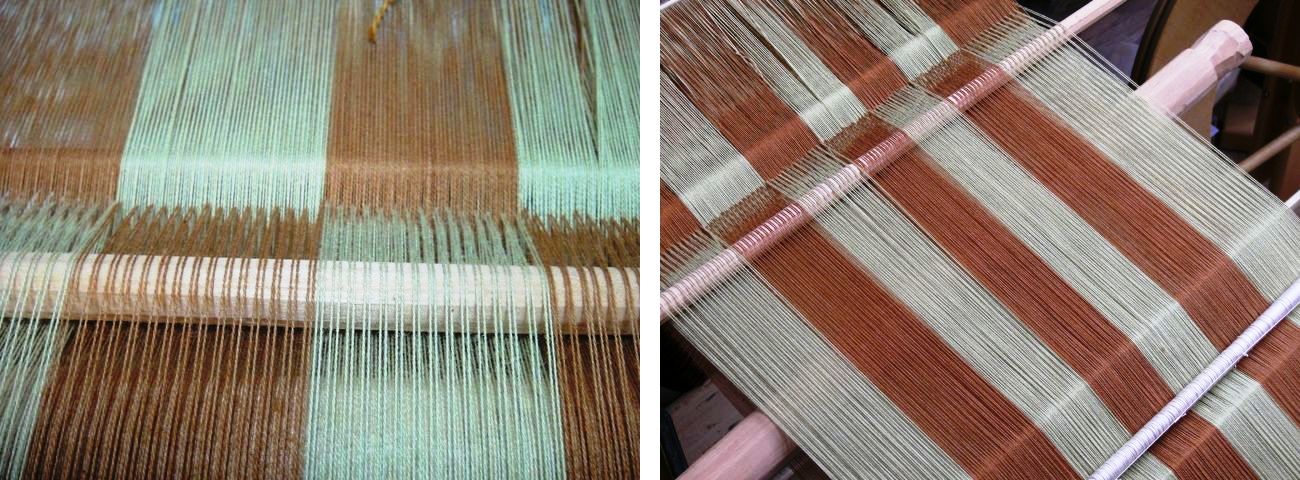
Isn’t that a great looking warp?! Bobbie bought this naturally dyed cotton warp yarn from the Education and More site. Beware! It is very fine stuff. Bobbie shared some with Jennifer who has started a plain-weave piece with it and I believe that some has also gone off to Popsicletote (another Ravelry group member) and maybe we will see a project from her soon.
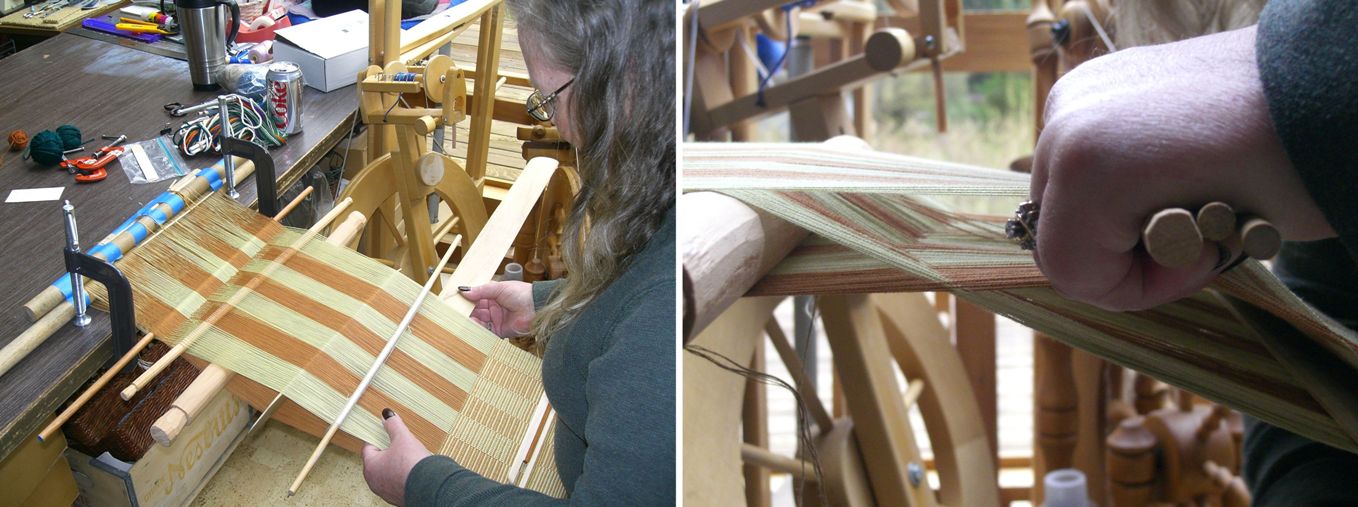
And just a few days after we all met up, Bobbie announced on Ravelry that she had finished her piece.

Woo hoo! Look at that! She posed a couple of her tubular band practice pieces on top of the finished piece.

Jennifer came alone the following day and we sorted out some questions she had on complementary-warp weaves. These guys have learned so much from just using my online tutorials and books but it is a real help to be able to see things being done in person and ask some more specific questions. It was good going over four-stake warping with them. And it was great just talking!!

On Friday I had a fun day with Emi. Emi joined in with all the weaving groups.

I will let Trouble the cat tell the story…

“Well, this is strange….just when I was getting my wee cat head around all this stick-and-string business, this gal comes along and throws her toes into the mix up.” (Of course this way of tensioning the warp is used in many South-East Asian weaving cultures but most often when using a circular warp).

“As nice as it is weaving here in Betty’s sun-drenched studio, you must realize that you are wasting a perfectly beautiful day out there. It ain’t raining and you know that that has been a kind of rare occurrence around here lately. Won’t you step outside?”
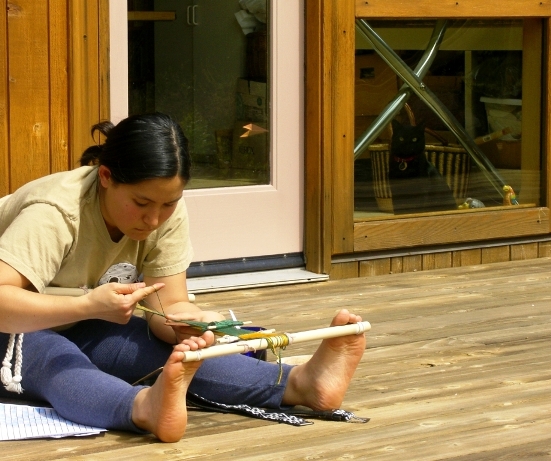
“Thank you but, ahem!…I was sort of hoping that I would get to go out too…”

“Ahhhh….now that’s more like it!”

We wove two-color simple alternating floats weaving designs like those I have copied from Krygyz yurt bands. Emi worked on trying to read the pattern directly from my woven belt rather than from a chart and she did a good job! Later on we did some braiding.

And finally, she went home having gotten some practice with handling a wide warp with fine threads. She wove quite a bit on my sample warp learning to operate the sheds smoothly and handle the fine yarn. I think that the two major obstacles that backstrap weavers in my online groups have are fear of finer yarns and wider warps. I am hoping that Emi will be able to pass that obstacle having had this experience with the wider warp.

Here she is using a nice technique to gently and cleanly open the heddle shed.

Before going home she treated me with a lesson in something from her Japanese heritage. I got a demonstration of the tying of the traditional furoshiki cloth and an explanation of what this cloth, and its use in wrapping items, means in Japanese culture.

She showed me one of the wrapping styles and then demonstrated how a Japanese person would present the wrapped goods to another person…beautiful!

And then she showed me how the same piece of cloth with a few clever twists and folds can be transformed into a shoulder bag.

Isn’t this the coolest thing! And just when I was thinking of the best way to weave a special wrapping cloth for myself, Emi showed up to the next weaving group and gave me my very own furoshiki cloth!

The one on the left is the piece that Emi gave me and Betty showed me one that a friend of hers in Japan had given her. I think we all need to have a furoshiki! I am sure that if I Google this I will find a book on 101 ways to fold and tie a furoshiki!
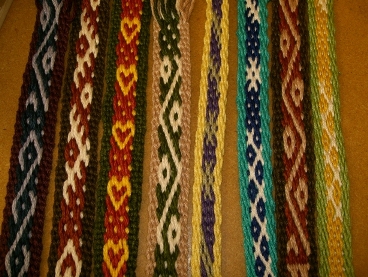
And then it was on to the pebble weave.

We had a beautiful sunny day once again with light streaming through the skylights and all of us wishing we were wearing shorts by mid afternoon.

Most of the first group returned and we also had Anita join us.

We dove right into two-heddle pebble weave and had two days of fun.
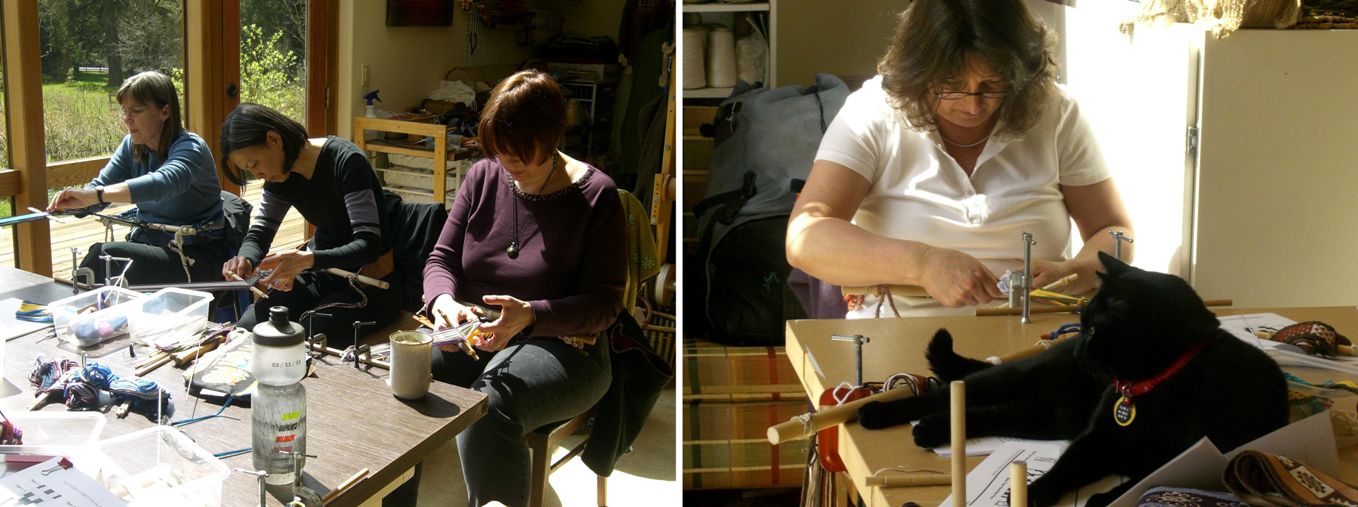
That’s Jenny, Sharon and Anita with Linda on the right. Linda took a break from weaving to try drawing designs onto charting paper directly from the sample textiles I had on hand. Emi settled into her warp on the floor and even Betty threw on a backstrap and wove.

Sasha, who wove super fast and found herself ahead of the rest of the group, decided to remake the heddles on her large warp. There is, of course, a story behind that warp which I will tell in a future blog post. She has promised me some pictures in the meantime to make the story more even more interesting.

And there were other gifts!

Sarah, pictured above, gave me an example of her weaving in a lovely lined pouch made with fabric that she wove with sixteen shafts. Anita brought me a fabulous sword/beater cut from South American marblewood…so smooth and glossy, it feels wonderful in my hands.

Last night Betty and I were invited for dinner at Carol and Jim’s home. We listened to their exciting travel stories and saw pieces created by Carol using her handspun yarn…all kinds of fiber from rabbit to camel. Carol and Jim have traveled the Silk Road from China through Uzbekistan and Kyrgyzstan…imagine how my ears pricked up at those names! I was even wearing the belt I wove based on the Kyrgyz yurt band. I got to see a fabulous felt piece that they bought there that has been edged with a band in the two-color simple warp float technique.

I try hard to keep up with happenings on the Ravelry group while I am on the road and there has been a bit of activity lately to report. Jentide has been weaving bands with Bedouin designs. She wove the shajarah motifs in double weave rather than in the traditional warp substitution technique.

Double weave creates a double faced band rather than one with long floats on the back which the latter method produces. She also wove a band with al’ouerjan patterning.

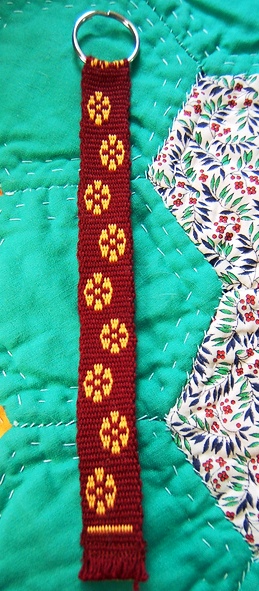
While snooping around her project page I found her double weave key fob woven on a backstrap loom using the sweet Bolivian flower motif that I have charted here in the tutorials.
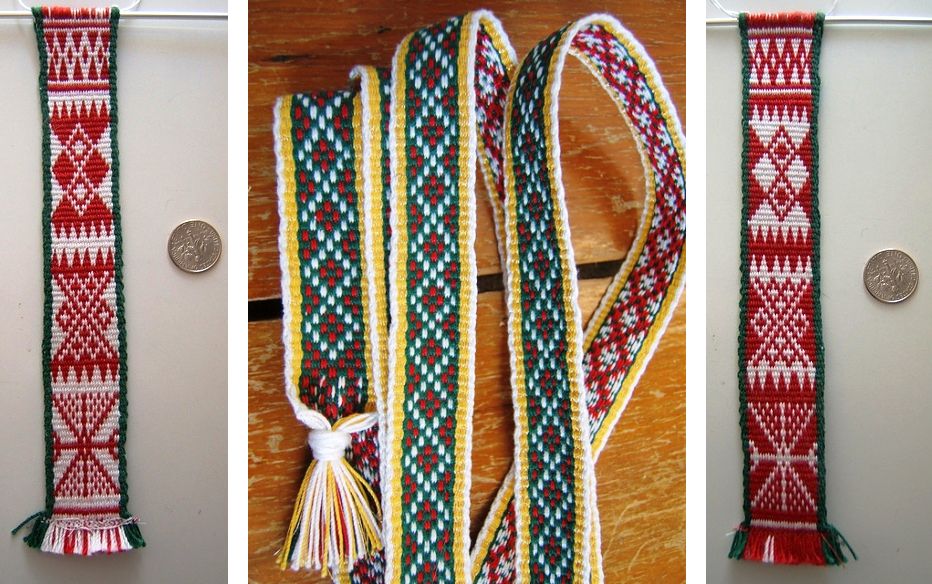
The small band was woven on her backstrap loom and the longer one on an inkle loom.

Heidai continues to weave pretty scarves on her Scandinavian-style backstrap loom with its rigid heddle.
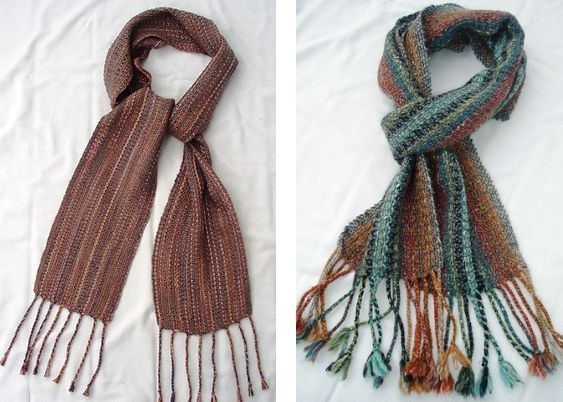
On the left is her scarf in alpaca and silk and on the right in noro silk garden.
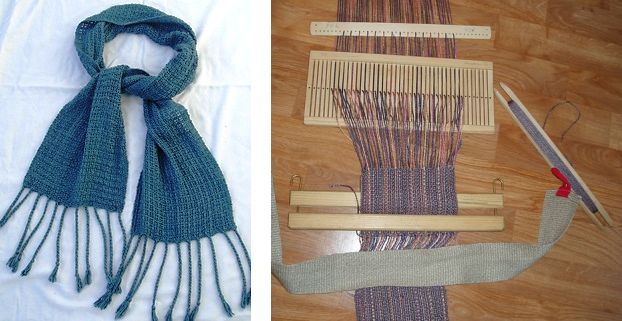
Here’s one more in silk along with the backstrap loom set-up that she has been using…so simple!
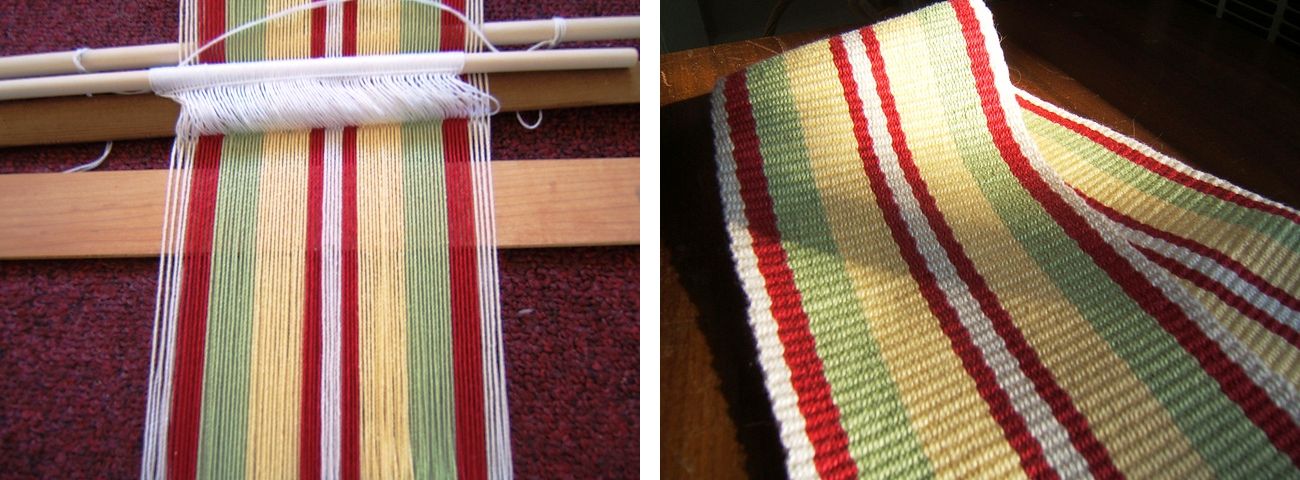
A backstrap by backstrap…also by jentide.

Tracy finished her backstrap woven ikat piece for our current weave-along and Alison has just started out using my book for pebble weave and has made her first band on a loom on which she feels more comfortable…the inkle. She followed the instructions for setting up the warp and is using her inkle loom  to tension it.

I think that wraps it up for this week. This is what happens when I miss a post….stuff really starts to accumulate but I am so pleased to see the Ravelry guys weaving away and what a treat it has been to be able to weave with four of them right here in Oregon and Washington! Hopefully, some of the people who wove with me here who are, in fact, already Ravelry members,  will join the Backstrap Group and become active participants…there’s always room for more cheers and encouragement. 🙂

I have had a couple of days free to blog, catch up on mail, and then I will be meeting with a basketry group on Thursday. I am looking forward to seeing their baskets. We have a small group of talented basket makers in the backstrap group too. I am not one of them!

I will see you soon with more backstrap weaving.
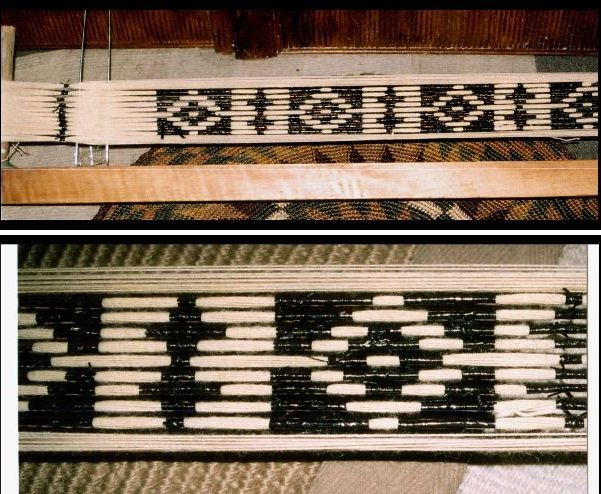
Backstrap Weaving – Ikat – Turning “Blips” into Beauty

IKAT! Ikat can be a little hard to deal with for someone like me who is into planning, charting and precision. I count my warps carefully…this one needs to be floated, this one doesn’t and, oh no, I made a mistake and must un-weave and…. darn!, the design is not looking as I thought it would…better un-weave and re-chart. I am not one for “winging” it or just throwing a warp on the loom and seeing where it takes me. I am even less crazy about letting a “blip” become a “design element” although my work often has such blips!

When I have tried ikat, the tie-dyed warps wandered off as they pleased once I started weaving, blurring the design to the extent that the original planned pattern became totally unrecognizable! You can wrench the warps about and try to get them to behave or just let them go and appreciate the beauty in the “blips”. You can probably guess which one I am more inclined to do.

Way back when I first tried ikat on the above warp I thought that it was all about the tying and dyeing and I was so nervous. Had I used the right wrapping material? It took me a while to settle on cassette tape after trying cabuya fiber (a kind of agave) and then strips cut from plastic supermarket bags. Had I tied tight enough? Was I using the right kind of dye (answer: NO…I used cotton dye on wool which gave me a wishy washy pink instead of  the Mexican red promised on the package). Would the wrapping allow the dye to seep?

Once I had dyed the warp and unwrapped part of it to see my lovely crisp and sharp pattern I was delighted. Now to get to the weaving…the easy part, right? Just plain weave, a piece of cake. And that is when everything went quite mad. The warps slipped around out of position with every move I made, the parts of the design wouldn’t line up and I was terribly disappointed.

Then came this….

On my trip to Guatemala in 2008 I bought this…a prepared ikat warp ready to go on the loom. “Ikat the easy way”! I exclaimed. This warp had been prepared by the experts and surely it would turn out nicely. I took just one section of it and put it on my loom….it was coming out even worse than my own experiment. At least on mine the first motif looked kind of okay. I put it aside very quickly. I just couldn’t bear the thought that someone had gone to all the trouble to tie and dye this warp only to have me come along and mess it up. It’s still there in the closet.

Once you have had an ikat disappointment, it is not really something that you feel like launching into again in a big hurry…all that time spent tying, dyeing, waiting for it to dry. In any case, I felt that I hadn’t really learned anything from the exercise to warrant another attempt. I needed to do some thinking about what needed to change about the way I was handling the warps.

But I did take something away from the experience – a growing awe and respect for the ikat weavers around the world! My gosh, the work they do creating those amazing images in their cloth. The motifs  have that wonderful fuzziness in their outlines which is what makes the technique so attractive.

This is a piece from Indonesia from a collection  of textiles owned by Phil Willett that he and the late  Dennis Penley collected. Of course the warps move out of alignment but not so much that the image is completely lost as mine was. Just the right amount of shifting is what makes this piece beautiful.

I saw an ikat bed cover that my weaving teacher in Candelaria was weaving with both hers and her husband’s names spelled out in the tie-dye technique, watched ikat weavers with their backstrap looms in the towns around Cuenca in Ecuador, saw ikat warps being prepared for floor looms in Salcaja in Guatemala, gazed at the amazing Central Asian ikat robes at the recent exhibit at the Textile Museum in DC and got to touch and examine a Mapuche ikat warp for a poncho on the loom at an exhibit at the National Museum of the American Indian in DC late last year.

The Mapuche ikats are known for the minimal shifting of the warps in the design and the relatively clean and crisp outlines the patterns have as a result.

Ikat! Sigh! I read an article here just today that describes it as “as trendy as anything ancient can ever claim to be”. I am not trendy by any stretch of the imagination and wasn’t aware that it was so. In any case, the “trend” does not appear to have reached Santa Cruz, Bolivia. The article says that “this kind of pattern now lends interiors a kind of dressed up Bohemian vibe”.

Let’s hope that this is good news for the artisans and that people are aware of the incredible amount of time and skill that goes into the pieces and will be prepared to pay fair prices accordingly.

This video, which was embedded on Ravelry recently, shows one group’s enterprising way of mimicking the appearance of ikat. They produce large lengths of cloth with large fuzzy-outlined ikat-like images without the long tying and dyeing process….

Schumacher – Darya Ikat Weaving Process from Schumacher on Vimeo.

And I have seen other interesting ways to imitate the look of ikat in the online weaving groups…the “faux ikat” using painted warps. Weaver Bonnie Tarses has a video here that shows how to set up for what she calls “almost ikat”.

In this WeaveZine article Syne Mitchell shows how to create an ikat effect with painted skeins on a rigid heddle loom.

The beauty of the piece is all about the very misalignment of the colored warps that I have been struggling to avoid.

See how the “blips” are turned into beauty!

I would love to weave something like that but I know that I would spend the whole time fussing with the warps and trying to get them to line up! I just wouldn’t be able to stop myself!

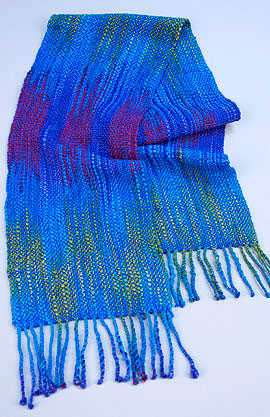
Ravelry member jtellier wove a faux ikat scarf on her rigid heddle loom, which you can see below, and shared it with us for inspiration when we were planning  our plain weave weave-along in the Backstrap Group.

Now we are doing an ikat weave-along and have four participants so far.

In this current weave-along we are trying to do true ikat by tying and dyeing the warps. We recognized that we needed to go into it with the right attitude. I didn’t want people to end up as disappointed and frustrated as I did after my first attempt and so we are all participating with the idea that we will definitely create something “interesting” if not exactly what we had in mind in the planning stage.

I have got some ideas and theories together about how to create my ikat pattern with a minimum of blurring in the design. My weaving friend Tracy and I discussed how the Mapuche weavers appear to leave all their ties in place on the warp and only unwrap enough of a bundle to give them the minimum of space in which to open the sheds and pass the weft. I have tried weaving without unwrapping everything beforehand (the warps still slipped) but not to the extent that the Mapuche weavers do.

I was also intrigued by this picture on the Education and More website, on their backstrap weaving page, of a warp in Guatemala which has been glued to the loom bar with corn masa. (Karen from Education and More tells us that it is used as a paste to secure the threads).

Hmmm… I thought. Maybe I can use diluted white glue to do the same.

Karen from Education and More shared this image with us in the Raverly Backstrap Weaving Group:

It shows how some ikat weavers, with whom she works in Guatemala, tie cotton around the sections of dyed warps to stop the warps from moving. I suspect that cotton against cotton holds well and does not slip. I have tried doing that with the cassette tape. The tape is far too slick to be effective. Doesn’t that warp look gorgeous!

And the final inspiration came from a Chilean lady on Facebook. A Facebook friend of mine “liked” her picture which is what allowed me to see her at work on an ikat piece on a wooden frame loom. I so wish I could have posted the picture here but I have not yet made contact with the weaver and, if I do, I will post the picture next week. I saw that she too was working in a very small space between the partly unwrapped ties and the weaving line.

She had a separate bar which appeared to part of the frame loom which was her shed rod. Unfortunately only a very small part of the loom can be seen. What interested me was that she had multiple sets of small heddles around  the groups of warps that she had wrapped. Each group had its own string heddle rather than having one large string heddle across the entire warp.

So I decided to use all these tactics in my project. As an experiment, it is not a very well conducted one as I will never be sure which of the new tactics will be responsible for the result…one or any combination of all of them.  Ah well.

First came the warping and wrapping. I set up the warp on a frame to wrap with cassette tape…still my favorite medium. I did not get carried away with the size of the warp. I guess that tells you something about my confidence, or lack thereof, in the success of the project! This is a cotton warp.

Here it is after dyeing with Dylon Olive Green cold water dye. I had dyed a skein of Plymouth Yarn with the green and this warp got tossed in at the end. The color is a little uneven and I kind of like the sort of washed-out look.

So here is the first motif. I was very pleased but still reserved in my excitement as I know from experience that the first motif generally works quite well. Things tend to go mad after the frst one.

My friend Annie will recognize the business card that she gave me back in 2010 which I am using to start the weaving and as a wee shuttle. I still have it, Annie and I hope you will give me a new one when I see you in March!

The warp at the loom bar is stiff with white glue which never entered the dye bath. The cassette tape ties down there are fairly ineffective. The warps just slide right through those but I like to think that they help a little. Cotton ties like the Guatemalan use would have been better. You can just see the bunches of white string heddles.

And I used a very fine weft. The warp is similar to a #10 crochet cotton. Of course I forgot to dye yarn for weft. I wove with this fine weft to start and finish the rep weave piece I showed last week and I really liked the feel of the fabric it produced.

Here are three finished motifs and all is well. The motifs are all a little different. I was not precise in my measuring and wrapping of the segments. The space in which I open the sheds is tiny and I am thankful for the fine sword that came with a Guatemalan backstrap loom that Linda in California gave me. I am using shed loops for the non-heddled shed. One shed loop for each section.

Three more motifs to go and I will be done…short and sweet! Very sweet! I am pretty happy with this. Now, which tactic or tactics produced these pleasing results? Good question!

What about the backstrap weavers who just go and unwrap all the ties, throw the warp on the loom and weave away producing beautiful results?…no “glue” or teeny tiny weaving spaces with teeny tiny bunches of heddles. I am completely in awe of these people.

And what about the ikat weavers in Uzbekistan?

My friend Pam took this picture in Uzbekistan and has allowed me to show it here. The ikat Master marks the mordanted warp and the ladies do the tying. Often the warp is mounted in layers on the frame so that multiple layers can be included in each wrap to repeat the patterns along the length of the entire warp. I got the idea of mounting my warp on a frame to wrap from seeing this picture.

The Education and More site which I linked to above and Flickr page have lots of beautiful pictures of Guatemalan weavers and textiles including many images of ikat weavings.

Did you know that Education and More is selling naturally dyed cotton from Guatemala on their website now?


Bobbie who is in the Ravelry group is not joining us for the ikat WAL.

She has just received her shipment of naturally dyed cotton yarn and has launched herself into a new project which has been inspired by this Guatemalan piece.

It is from the Education and More page and Jennifer discovered and shared it with us. It is the simple warp float technique and very effective.

I am sure Bobbie is going to do a beautiful job with it. Look at the Bedouin piece that she just finished:

As for ikat….will I go to all this trouble again? Yes! Now I am thinking multiple colors and trying to figure out how best to do the layering….it will be another sample. I will probably sew the current piece onto a piece of woven fabric. It is fine enough to do so, I think, and I would really like to use it.

In the meantime, I have started the next part of the si’ira inspired piece. All that counting had me procrastinating I am afraid…576 ends in the pattern area. The first row of pick-up is crucial. All other rows are picked up relative to that one and I can tell you that it is not fun to discover on row 20 that the lines in the motif are not meeting as they should because the first row was picked up incorrectly! So I really have to be in the right frame of mind to work on that first row…check and re-check.

And, it is done! and I am off and running.

Backstrap Weaving – Weaving Wanderings and Wonderings

The Worldwide Weaving Web brought a new book into my home last year which has inspired my third wall hanging project.

If you can’t bear to look at yet another of my red, black and white warps on the loom ready to be woven, you had better look away now because here we go again!

There isn’t a whole lot to show for a week of work, is there? What you don’t see is the reading, sampling, un-weaving, re-warping, charting, erasing and Googling. In fact, as I sit in front of this warp, I have the uneasy feeling that I may be jumping the gun and launching into the big project too early. I have actually unwoven the first line of pattern twice and made adjustments. Clearly my sampling didn’t cover all I had in mind.

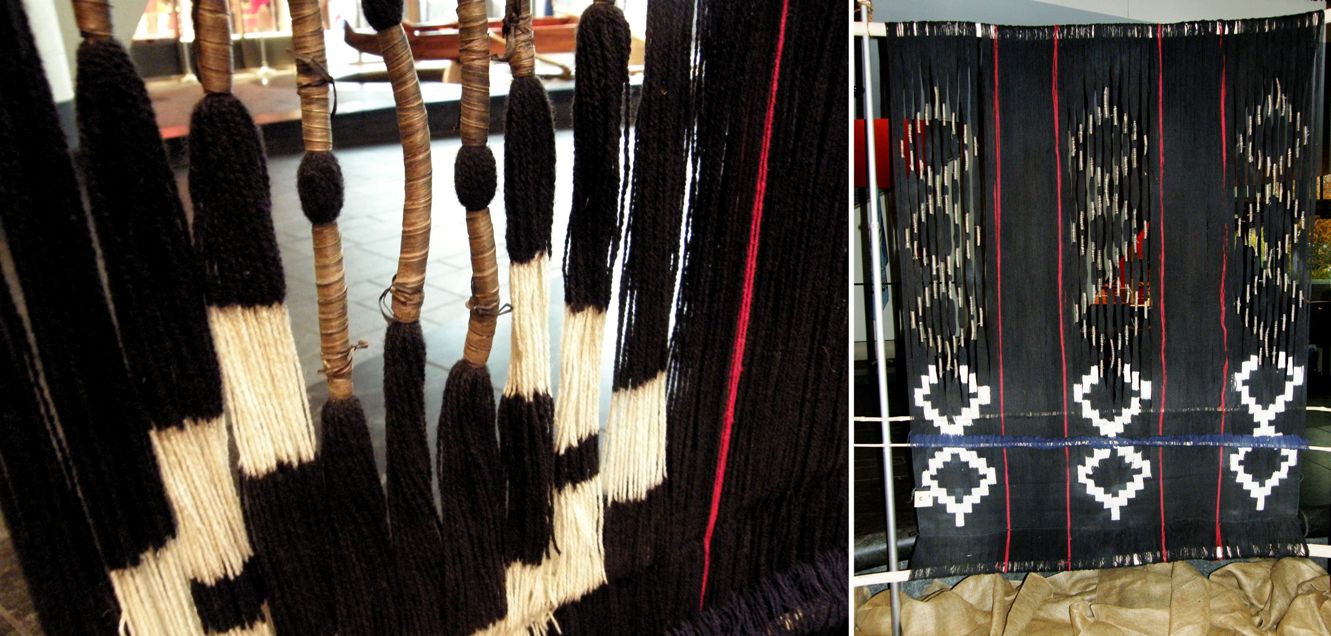
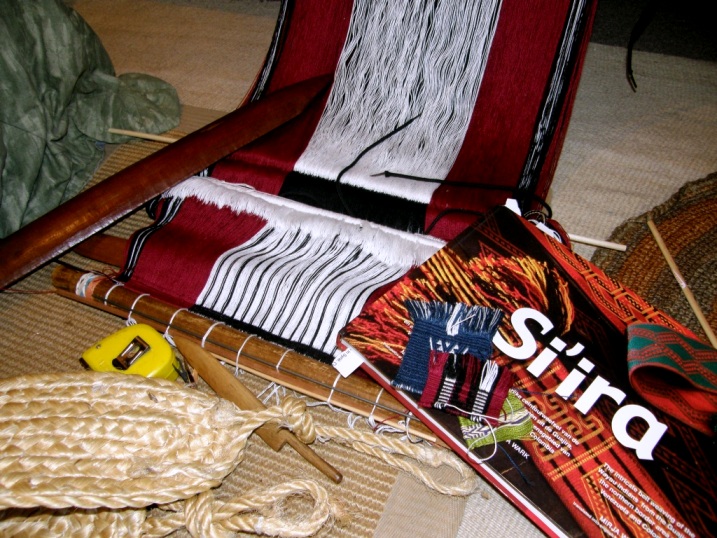
I am using the work of the Wayuu people of Venezuela and Colombia as my inspiration for this project through Dutch author Mirja Wark’s book Si’ira. A lady in one of the Ravelry weaving groups posted about the existence of this book in the middle of last year and I was on a mission to get hold of it. My friend Anna in Australia, who is from The Netherlands, took care of the local payment and then offered the book to me as a birthday gift. Thank you, Anna!

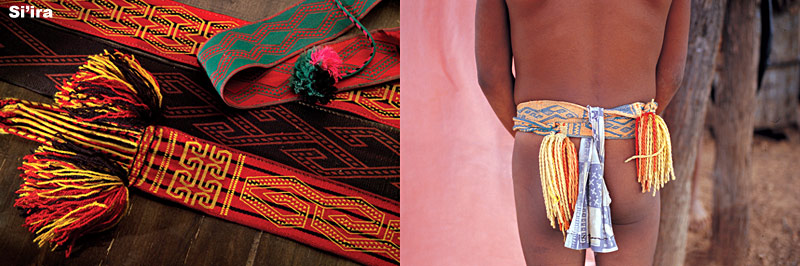
It is a beautiful hard cover book full of drawings and photos of the si’ira which are worn by men, their designs, the weavers and the vertical looms that are used to make them. The skills required to make a si’ira  include weaving, twining, braiding and tassel making.

This image is from Mirja Wark’s web page.

The Wayuu live on the Guajira peninsula which is the northernmost border between Colombia and Venezuela. Wark describes this area as a flat, dry semi-desert over which a continuous hot wind blows. It is always interesting to me to know more about the people, weaving and textiles of lowland regions of this continent.

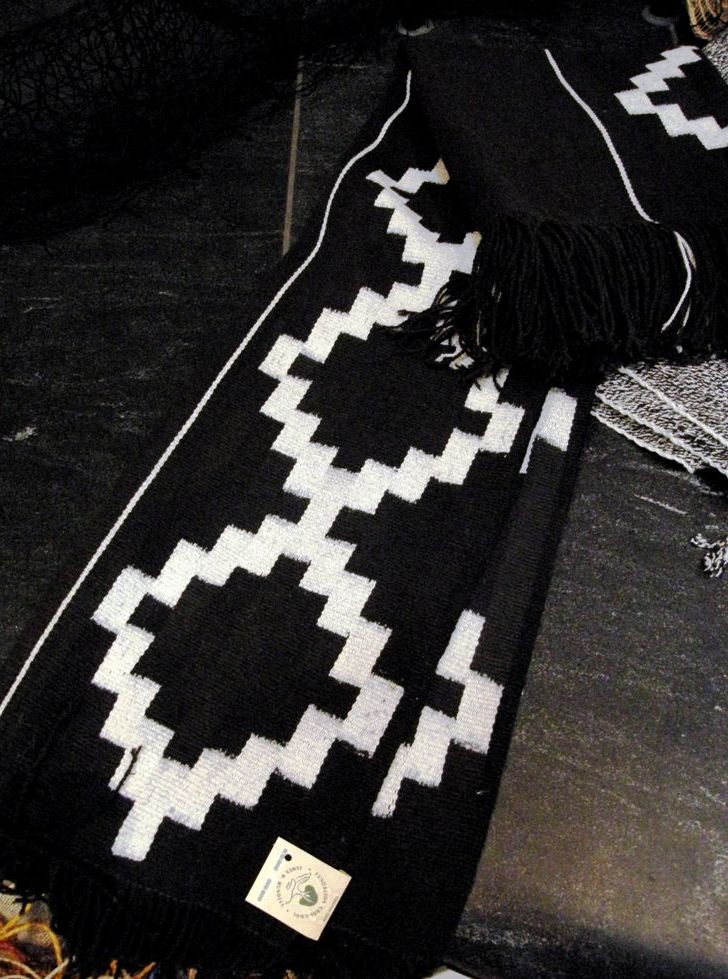
Many different colors are used and I especially love the pictures of the si’ira in the book that comprise a red and black background on which yellow motifs have been woven. Other belts are black with red motifs…very striking…and so they are perfect for the color theme of my wall hanging project.

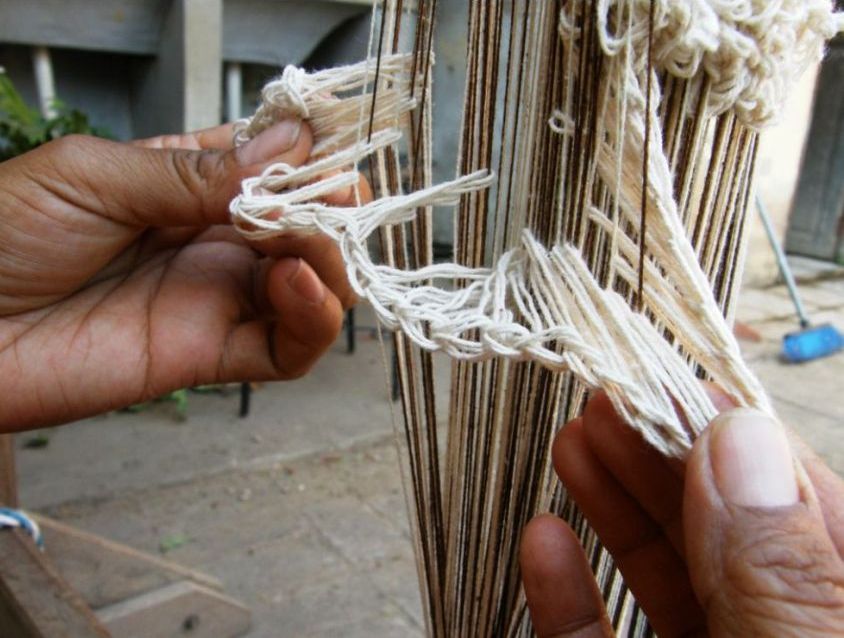
It is also interesting for me to see that the Wayuu weavers use the same style of joined loop heddles used by the Guaraní weavers, another group that inhabits lowland regions, here in Bolivia.

At left you can see my Guaraní teacher, Angela, showing me the unusual way her string heddles are chained together.

What I would like to see is how the Wayuu weavers manipulate the heddles and if it is the same method that Angela and other Guaraní weavers use.

Angela most often has three sets of string heddles on her loom which are required by the technique she employs for the kinds of structures that she weaves. Watching Angela do her pick-up work jumping between two sets of the string heddles is fascinating!

The Wayuu weavers use one set of these kinds of string heddles on their warps but I imagine that they would need to work them in a similar fashion to the way Angela does.

I can’t help but notice some small similarities in some of the motifs of the Wayuu and Guaraní people although the weaving structure employed is different.

So, this will be the basis for wall hanging number three in the red, white and black series.

Another of the many interesting things about the si’ira is that they are woven with what Wark calls a “hollow selvedge” which serves to strengthen the edge of the belt. It is funny that on a visit with my friend Pam in Massachusetts we had talked about a rolled selvedge that Harriet Tidball describes in Shuttlecraft Monograph 26. Pam was trying it out on a band of her own.

Tidball writes that it was used by the ancient Peruvians and that available evidence shows that it was used on bands and belts.

The rolled selvedge creates a thick tubular edge.

Separate tubular bands like the one on the edge of the purse pictured at left are often applied to Bolivian and Peruvian weavings  for various reasons, one of them being to strengthen and reinforce the edges of the textiles.

You may be able to make out the thick edge which is the hollow selvedge on this image from the cover of the Si’ira book.

How clever to think of a way to form the tubular edging from the band itself so that it forms as weaving progresses and does not need to be added later. I wonder why this technique fell out of use in Peru.

I love seeing how these things turn up here and there, disappear here, remain there, evolve further there, are replaced by something even more ingenious somewhere else…The fact that these heddles are used by the Wayuu in their arid lowland home and also by the Guaranì here in steamy jungly lowland Bolivia, so far away, fascinates me.

The Worldwide Weaving Web, about which I often speak, means that I can have a new online weaving friend in rural Turkey asking me about backstrap weaving and telling me about the catalog of woven Turkish motifs that his mother has while a weaver and clothing designer in Bangladesh shares with me what he knows about backstrap weaving in his country. Techniques and information are shared instantly across the globe. I wonder how in ancient times designs and techniques were transported and shared and adapted among the weavers of this continent.

And then you have weavers who live along the relatively short length of Ecuadorian coastline who apply bands to strengthen the edges of their cotton saddle bags. Different techniques are used to both set up the loom to create the patterns and finish the woven pieces in different areas along the coast.. I am familiar with the way the members of one family of weavers in Manabi province finish their work by applying a woven band using a home made rigid heddle which I have shown many times here before. Yet it is worth looking at again..it is so cool!

This picture, taken by Kathleen Klumpp, shows my weaving teacher Trinidad weaving and sewing a band to the edge of a small bag.

This is how the edging looks on the fabric.

And then I see from an article in the Textile Museum Journal that further north on the Ecuadorian coast, on the Santa Elena peninsula, weavers also apply bands to the edges of their saddle bags but use a very different method which requires an extra pair of hands.

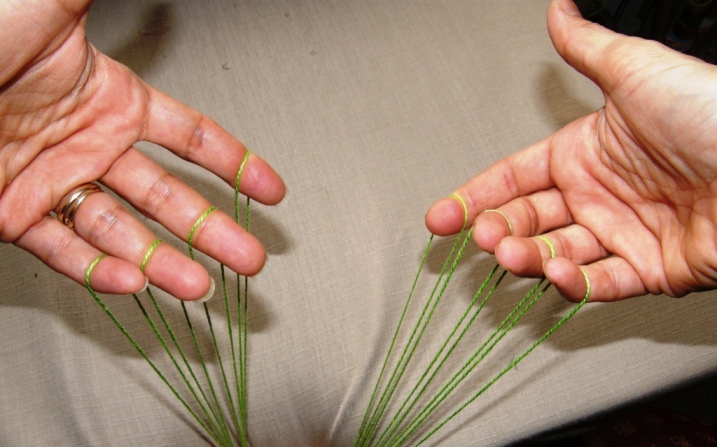
While one person sews the band to the fabric, another person manipulates the warp threads  passing the warps which are looped on the fingers of their two hands from one hand to the other. The extra pair of hands would look like mine above (modeled on a drawing in the Journal article).

These are two very different ways to add a reinforcement band to the edge of a woven textile and both are being used within a relatively small area.

Do similar techniques develop independently or do they travel and get shared and eventually adopted and adapted? Why do some methods remain so different within relatively small areas? I know there are people who devote themselves to studying just this kind of thing. Me? I sit here and ponder!

Something that seems common in certain areas of Asia is the addition of string heddles to the warp while the actual warping is in progress on the stakes. Was it developed simultaneously in various areas or did it travel and get adopted? It seems like such an ingenious and time-saving thing to me. However, it is not something I have ever seen in use in my part of the world.

I know how to do it as I watched the Montagnard weavers warp when I visited them in North Carolina and, more importantly, filmed the process so I could study it over and over when I got back home….it was all happening so fast!

Even though I say it is clever and time-saving, I have not adopted this technique for my own weaving. I stubbornly cling to my favorite way of making heddles with the extra hitch which has the heddle loops  held snugly on the heddle rod.
In the same way, perhaps the weavers of Manabi province in Ecuador and those on the peninsula further north are aware of each other’s techniques yet stick with their own methods believing them superior…who knows? My anthropologist friend Kathleen Klumpp no doubt can tell us that.

Here is the video I made of Ju Nie warping with two colors and making her heddles around one of the two as she goes. That is followed by a video I made in which I do it slowly and explain the process.


Angela, my Guaraní weaving teacher, certainly didn’t hesitate to ask to be taught how to make the kind of string heddles I use when she saw them on my loom and she started using them on her warp to replace one of her sets of chained string heddles straight away. She had seen string heddles on a stick before, wondered about them, but didn’t have anyone to show her how to make them.

And she was keen to learn how to do the three-color version of the technique she employs when an Aymara weaver visited from highland Chile.

And so, techniques and methods travel and get shared and then I guess one day no one will remember anymore how that particular technique managed to cross the Andean high plains and descend to the Bolivian jungle.

Well, enough pondering. Let’s see what has been happening in the Ravelry group where some weavers are still having fun with the Bedouin techniques.

Here’s Jennifer’s wall hanging which uses the al’ouerjan pattern and shajarah techniques. Many of the motifs in the central section were created and charted by Jennifer herself.

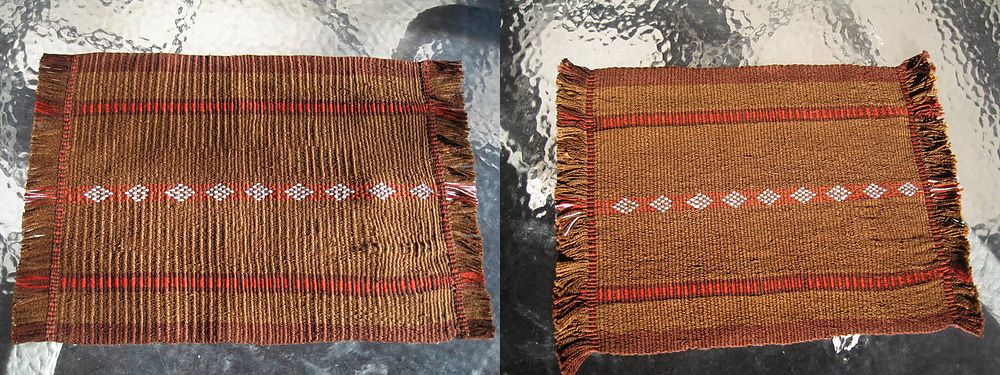
Traudi provided us with helpful pictures of her piece before and after washing. She made a placemat and had some tension issues and a bit of puckering, which didn’t all come out in the wash but, what is nice to see, is that the severe ridging that had formed in her cotton cloth disappeared with washing and pressing.
She used weft twining on both ends before leaving the fringe and her center pattern is the traditional Bedouin al’ouerjan design.
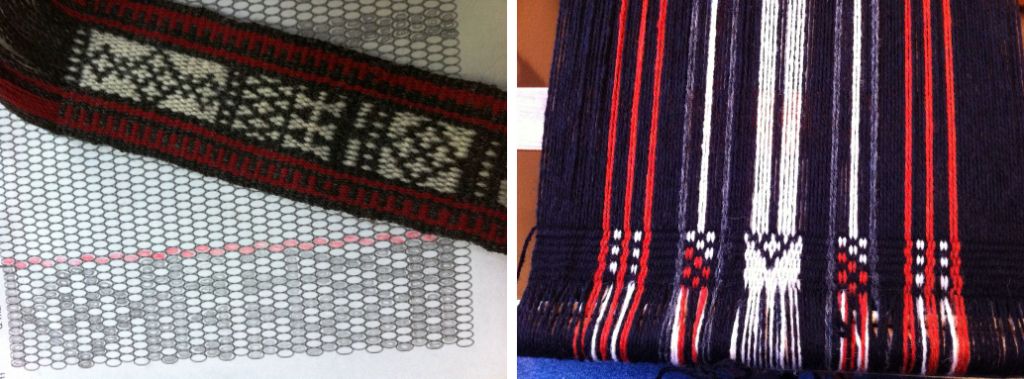
And to finish, I ‘ll just let you know that I put one more tidbit on my RESOURCES page this week. I am slowly but surely gathering up all those links.

Backstrap weaving – Staying on Track

I have been trying to resist the urge to warp up for an al’ouerjan project and join in on the fun in the Ravelry group. You may remember that a couple of weeks ago, after having posted the warping tutorial for these traditional Bedouin patterns, Tracy suggested a weekend warp-along. Now we are seeing the increasingly large and impressive results of all that warping practice. Take a look at the bag strap that Tracy made at left.

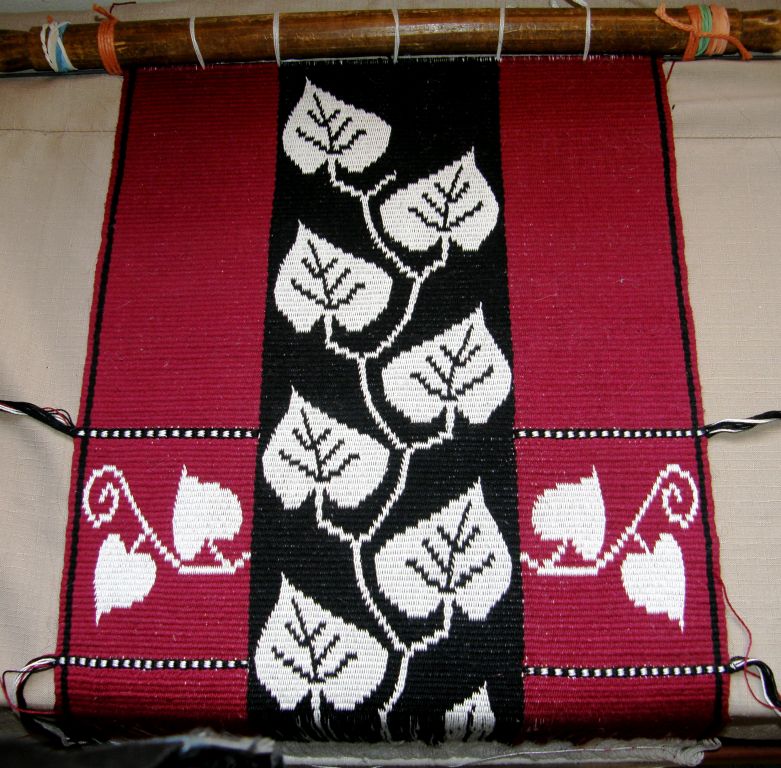
But…I am staying on track which means that I am sticking to my chamanto-style leaf-patterned wall hanging (although I couldn’t resist throwing in a bit of weft twining). I finished the first pebble weave hanging in this set with weft twining and so I decided that, apart from the common color scheme, the weft twining would be another theme that would tie all my planned wall hangings together.

While I sit and pass the shuttle, strum the warps, beat and coax the sheds open I think about what will be next in this series. I have no problem whatsoever in coming up with ideas…the problem is that I want to weave them all at once!

I stand back and look at this piece and I still can’t get used to it.

It’s not quite like anything I have done before but I have to say that I am having fun with it especially adding in that twined section with the motif within. I had to stop for a bit to chart those smaller leaves on their vine, sample them etc…It took a while to get them right.

I think that all my planned red, black and white pieces will look pretty nice when hung all together. The question is….where? Although I have been doing some major cleaning out, I still haven’t managed to uncover any significant amount of wall space.

Next on the clean up list is my dear old Ashford traditional wheel. Yes, I have a spinning wheel…who knew? It has been sitting there so long unnoticed, dusty and in desperate need of oil…poor thing. It was born in New Zealand and made its way all the way over to the Falkland Islands before finding its way into my home in southern Chile. I left a lot of stuff behind in Chile but the spinning wheel came up to Bolivia where it has sat in the corner for almost 14 years…shameful! I won’t take a picture of it now in its pitiful state. I will clean it up and get it back into shape. I have room to use it now!

I only had it for four months before leaving Chile and just got into using it and being able to turn out something consistent. I did, however, spin enough yarn to construct a vest, knitting the natural colored front and weaving the dyed brown back. The edging has been worked in cross knit looping.

This, too, sits neglected here in this hot steamy climate. It is a souvenir at least of the Patagonian sheep.

But, back to the al’ouerjan and let’s see what else the Ravelers have been up to…

So, there’s the strap that I showed you earlier on the gorgeous bag that Tracy made. She will line the bag  to protect the warp floats on the inside. She used an additional weft to secure the floats on the strap. You can see details about how that is done here. One of Tracy’s other warp-along products is the pillow cover which includes some tapestry-style twining in  the lower left hand corner and a striking and beautifully executed joining stitch.

Aunt Janet’s piece above left is in her own handspun wool. She has three sets of al’ouerjan patterning and that blue looks amazing.

Traudi so loved Tracy’s piece that she got into the act too using brown instead of black which looks fantastic. She twined along the bottom of the piece too. We are seeing more and more twining in this group…cool. Here is the tutorial for basic weft twining.

Jennifer did some charting and planning for the shajarah patterns before warping a wide piece that also includes an al’ouerjan design.

The charting paper with ovals which is useful for double weave, warp substitution and supplementary weft patterns can be found here. A tutorial for weaving these kinds of warp substitution patterns is here.

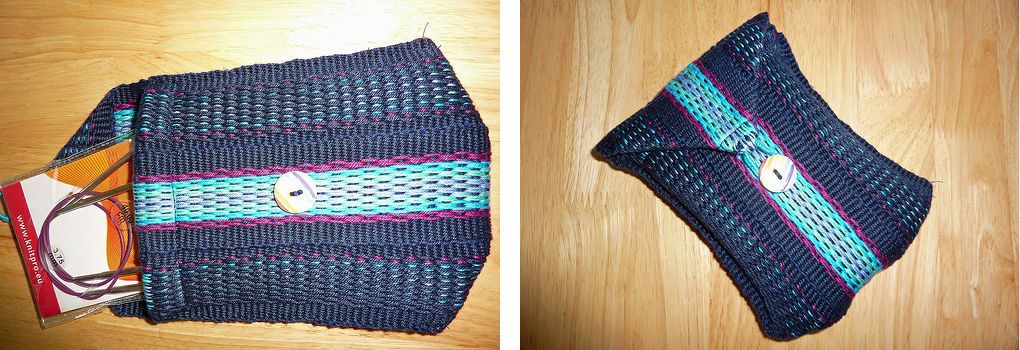
So, January has gotten off to a great start in the Ravelry group! Pantoffels has been wrangling with what she calles an ancient inkle loom and still managed to make this pretty needle pouch with plain pebble weave patterning.

And then she got a new inkle loom under the Christmas tree and will now try the pebble weave patterns in my book Andean Pebble Weave.

While I have been weaving my “leaf” piece based on the Chilean ponch known as a chamanto, I have been getting out other pictures of ponchos that I have to study the design layout that weavers use on these large pieces.

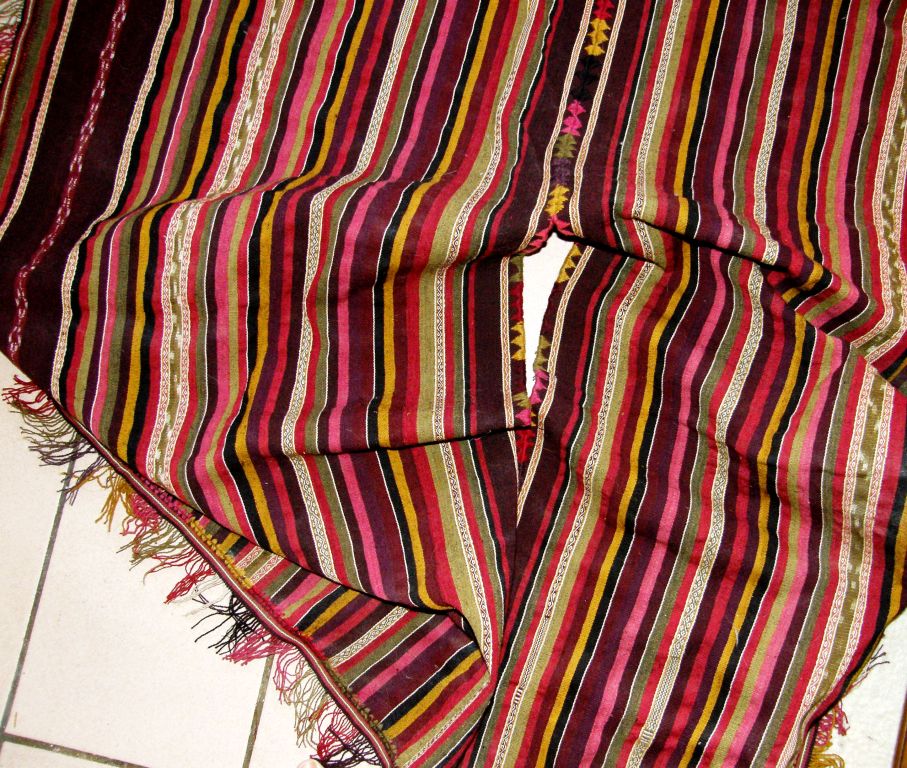
I own one poncho which I bought in Calcha, Bolivia many years ago. It is made from very fine handspun wool which has been colored with natural dyestuffs. It is patterned with simple stripes, some very narrow and simple ikat bands as well as several very narrow strips of pebble weave.

It has been woven as two panels with four selvedges each and a woven band has been sewn around the four edges with an added fringe. Don’t you love that decorative stitch that has been used to join the panels?

There is definitely an art to stripes. You can see the clever placement of fine white stripes to break up some of the richer colors.

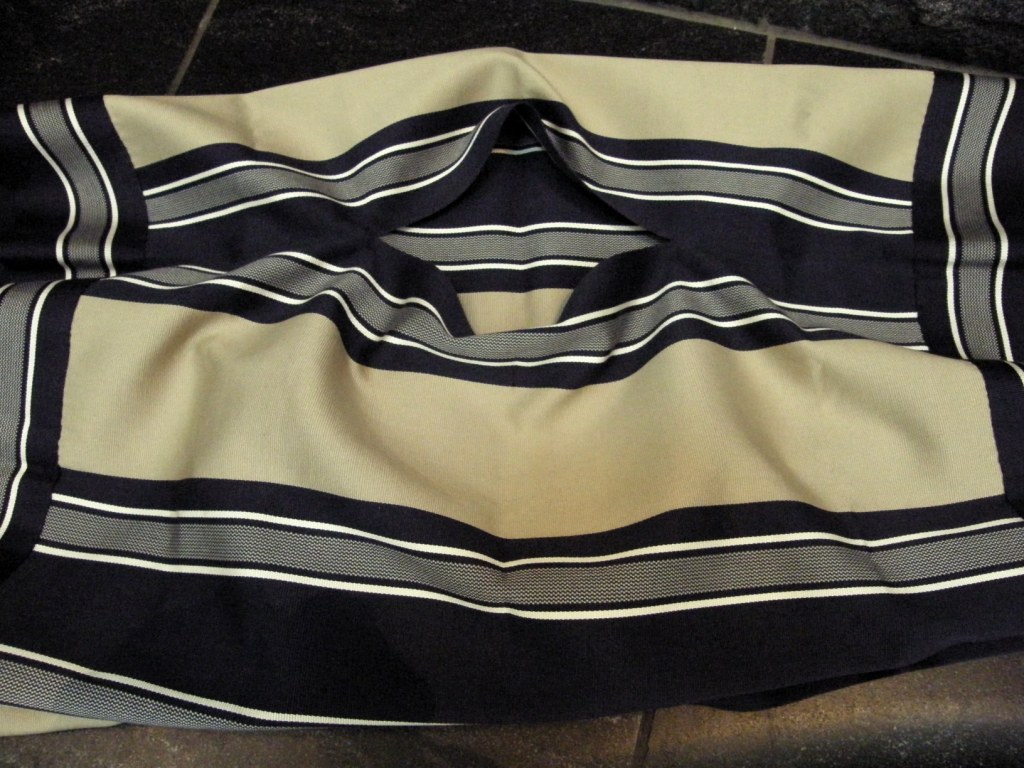
 An extremely fine and simply patterned manta from Chile. It is always interesting to see how the colors and stripes are distributed. As is typical, a broad band has been woven and sewn to the four edges of the piece and there is no fringe.

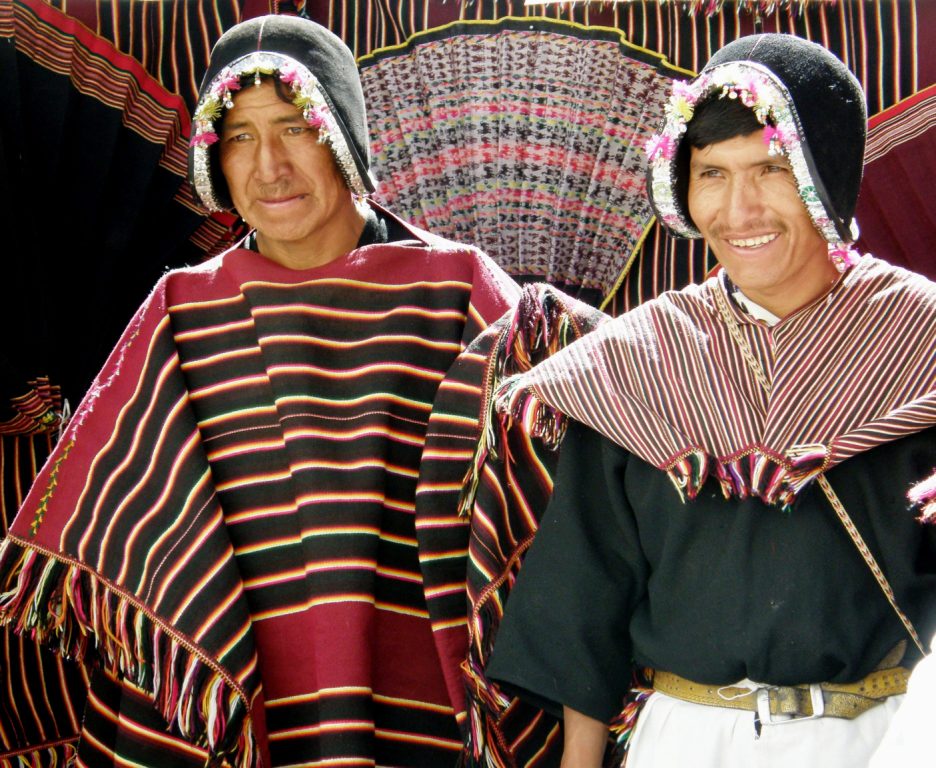
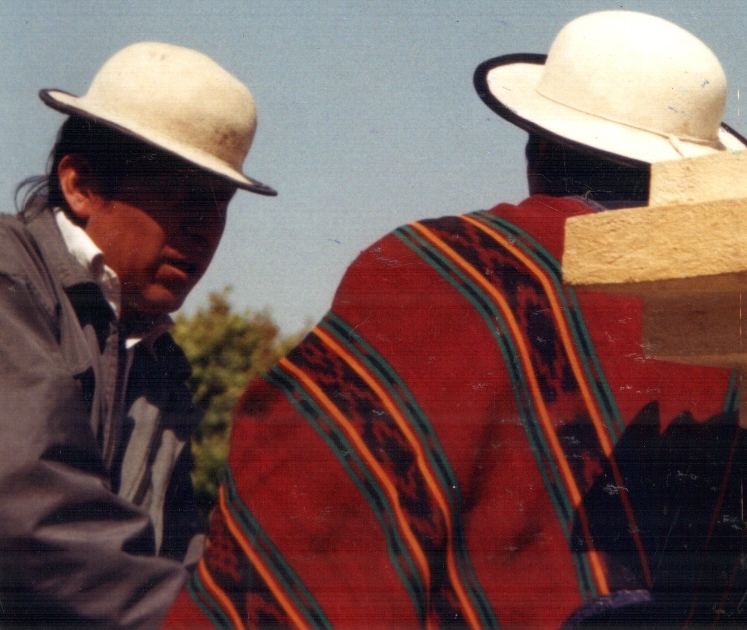
The typical poncho of Tarabuco and the smaller version known as unku can be seen above.

At a handcraft fair in Tarabuco I saw weavers making the long poncho panels. My friend, Anna, showed me the unku on the right that she had bought in Tarabuco when she came to visit me.

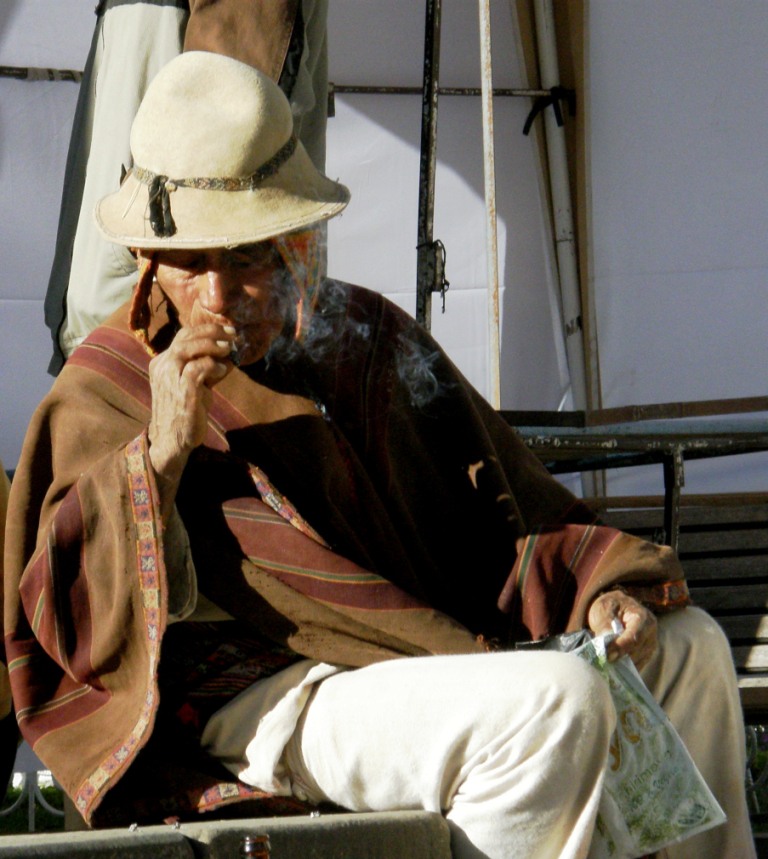
I spotted this gentleman in his much more subdued woolen poncho in a small plaza in Sucre. He was performing an offering to Pacha Mama in the early morning. How wonderfully simple and light the poncho looks although I am sure it is extremely warm and virtually waterproof.

And then you have the incredibly intricately patterned calf-length ponchos woven and worn by the men of Chahuaytire in the Cusco area of Peru.

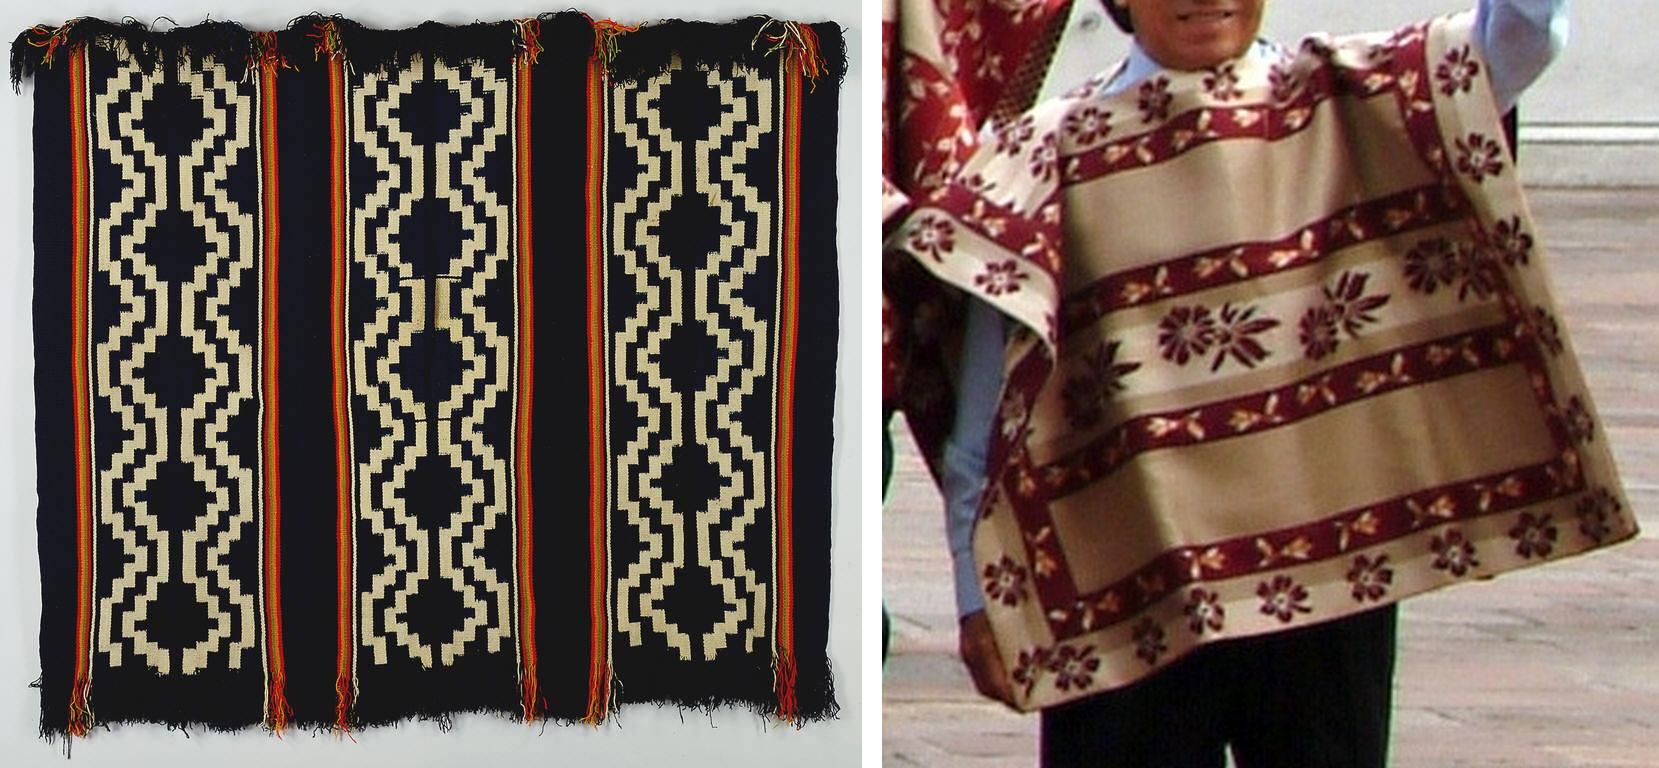
From Argentina and Chile we have the Mapuche makuñ with its ikat patterning technique executed in such a way that there is virtually no blurring of the design. The popularization of the poncho, from what I have read, is generally attributed to the Mapuche who wove them for their own use as well as for barter. On the right you see the chamanto of the Chilean huaso, with its leaf, fruit and floral motifs, which are said to have both indigenous and Spanish roots.

I have  a few pictures from Ecuador too…scans of old prints…

This is the “jijon” poncho which is factory-made in Quito and worn by those men who can afford one in Otavalo. You can see it being worn with its grey plaid face showing by the gentlemen on the left and with its darker face outward on the right. These men were wearing their ponchos to the market on a regular day. Apparently there is a much more costly blue double-faced poncho which is woven on the backstrap loom made-to-order. The ownership of one of these special ponchos indicates wealth and high social status.

On Sunday, which was both market day and church day in Cañar, a very social time around the main square and surrounding streets, I saw quite a few ikat-patterned ponchos being worn.

And finally there’s Juan below, (my pebble weave student!) with his mother and neighbor. Juan put on his  narrow, black fringe-less poncho and felt hat especially for this picture. On another visit during a festival all the men were wearing their ponchos for the occasion.

You can see the backstrap looms on which I was teaching Juan and Natalia pebble weave tied to the pole. In exchange Anita introduced me to her cousin on my next visit and he taught me to weave the typical supplementary warp patterned belts of Salasaca.

Okay, so I promised you some double weave edge samples this week, right? I am sorry, I didn’t get those done. I was busy trying to stay on track and not get “dis-track-ted” by all the goings-on in the Ravelry group. I want to finish my leafy hanging. but I must say that I have a bowl of tencel calling to me wanting to be made into a scarf…

That blue ball is indigo-dyed Japanese silk…a fabulously thoughtful gift brought to me from Japan by one of my old teaching colleagues here.

Hopefully I will get the leaf piece off the loom this week, plan and warp the next hanging, play a little with my tencel, get the Ashford Traddy up and running and do those double weave samples for the tutorial too….phew!

Oh, and I have started a new page for RESOURCES. You will see the tab for that on the header and I am slowly extracting all the links to interesting sites, articles and products that I have linked to in my 105 posts so far. This is quite a job but I hope to add two or three links to the page every week. I hope you find it useful.

.


Backstrap Weaving – Two Faces to Every Story

One of the most exciting things for me about finishing a pebble weave piece is looking at the other side. Sure, I do take a peek at it when I first start the piece but I try not to do so again until I have the finished fabric off the loom. Nine times out of ten, I am astonished that I like the other side better but I think that just comes from having gotten so used to seeing the “right” side.

So here is the Starry Night piece off the loom so you can see both faces…

Which side do you like better?

I decided to finish it with some very simple twining rather than twine a motif as originally planned as I felt it would look too cluttered.

I am still deciding on whether to edge it with tubular bands and I am not sure what to do with the fringe.

I do like the look of a full fringe and, as it will be a wall hanging, it shouldn’t cause problems but then, I like braids too.

Maybe I should let it sit for a while and see what it says to me!
I have spent most of the time after taking this off the loom charting and sampling motifs for the next chamanto-inspired piece.

I have been looking at examples online and trying to figure out scale in my charting.

As I have mentioned in other blog posts, chamantos are ponchos woven in one particular region of Chile which have come to be part of the national costume of the huaso, the Chilean cowboy.

One description I read online says that it a “summary” of indigenous and Spanish textile influences. I also discovered when researching these some time ago that they are also worn occasionally by Texan cowboys. Take a look here. 😉

That was at an APEC conference in 2004. Imagine all those participants each with their uniquely patterned poncho. How I would love to see each and every one up close. I have seen a few of the motifs repeated from one chamanto to the next. There are certain flower and leaf designs that turn up quite a lot but each weaver creates her own unique piece in her choice of colors and layout.

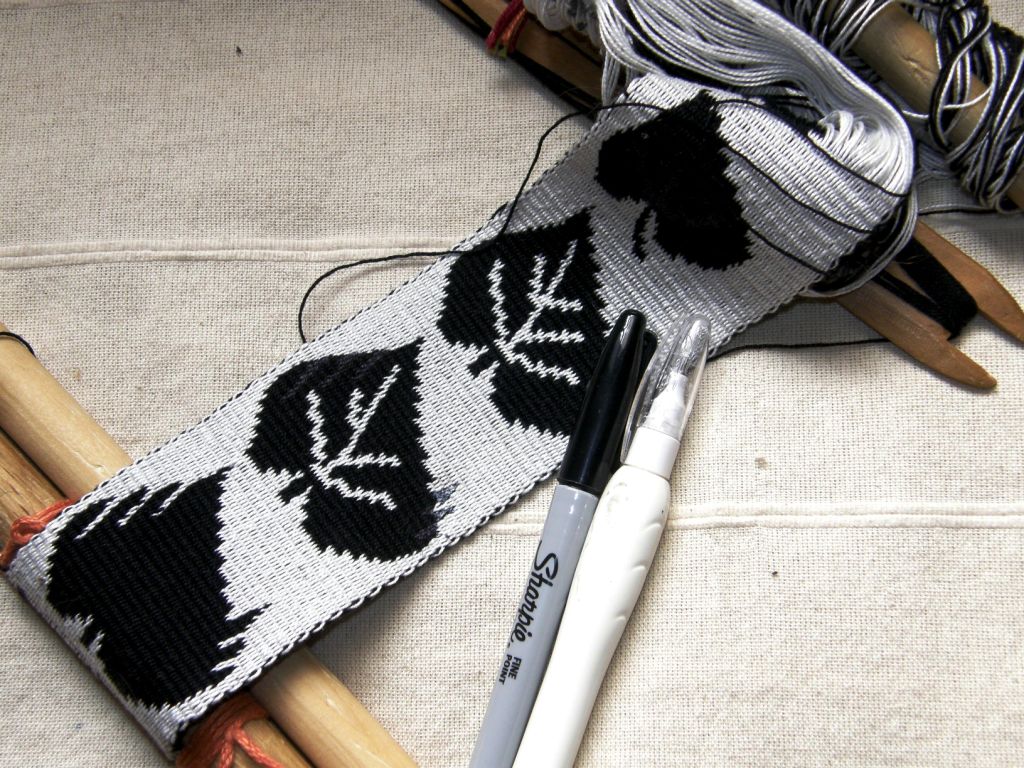
I hope to use my adaptation of one of the grape leaf patterns in my next wall hanging and so I have been charting and weaving, correcting, charting and weaving and using two of my handy sampling tools…my black Sharpie and white correction pen.

With these I can make adjustments on the cloth before changing my chart and trying again.

I know that the Chilean weavers use much finer thread than I do as I am not able to get as much detail  as they do in motifs of the same size.

I also know about the thread they use as I got to see one of the ponchos, which was woven without pick-up patterns, at the exhibit of Chilean crafts in Washington DC recently.

The striped warp-faced ponchos are called mantas.

So, that is my next project. I have made my calculations…my goodness, what a job that was. My head just wasn’t functioning well the day I got the calculator out and I made a fine mess of it but fortunately caught all the blunders before I got the warp off the stakes.

Prepare for another onslaught of red, white and black…

I warped my piece in three sections. Here is the first one completed and about to be taken off the warping stakes.

Above you can see the first section placed on the loom bar and wire that I use in place of a header cord. And then you can see the three sections on the floor on the loom. What I do next is transfer the cross on all three sections to one long pair of cross sticks and lash the wire to a loom bar.

And now I am ready for heddle making. While tidying up the other day I came across this ball of very fine nylon that weaver Deb McClintock gave me a long time ago when I met her at the MD Sheep and Wool Festival. From what I remember, she brought this from Laos and gave it to me as I was interested at the time in having a bamboo reed made and this is the thread that the reed makers in Laos use to space the bamboo slivers.

Well, I didn’t get the reed made as I managed to buy two beauties and so I am thinking of trying this as heddle string. You might already know that I hate nylon for heddle string although all my Guatemalan weaving teachers use it happily. It’s just that I haven’t tried any as fine as this and would like to see how it goes. I hope it works as there are a heck of a lot of heddles to make!

So, there I was planning and planning, but, you know what?…a bit of spontaneity is good too! And that is what hit us thanks to Tracy in the Ravelry Backstrap Weaving Group last weekend following my blog post with the tutorial for warping the traditional Bedouin al’ouerjan patterns.

Tracy suggested a warp-along for the weekend and a few people jumped in with enthusiasm while others watched-along and cheered. Some people chose to use the seven-square warp above right for which I gave instructions in the tutorial while others warped wide pieces with several strips of al’ouerjan patterns in different widths.

Some used their handspun wool, Tracy used handspun wool that she bought in the Souk in Doha, while others used crochet or perle cotton. We had both traditional and non-traditional color combinations, Some didn’t quite get it straight away but soldiered on and were able to declare success by the end of the weekend. It was fun.

Janet used her handspun. I love the way the grey looks against the red and white. Renate Petra chose the three-square warp and wove what I call the triangle design. She admits that the design would show better if she had chosen colors with higher contrast but the design is there and she has done a great job.

Above left is Tracy’s piece made from handspun wool she bought in the market and on the right is another piece she warped using perle cotton that she happened upon. What a contrast! Tracy has difficulty tracking down suitable yarn in Doha and so is constantly coming up with these surprise finds.

Jennifer really went to town warping up three projects, the first with three strips of al’ouerjan pattern, and partly weaving two of the warps.

I think Traudi was the last to jump in but she finished her band and even did some weft twining along the ends.

And then Tracy added some twining to the mix….

Maybe some day we will be making things like these….

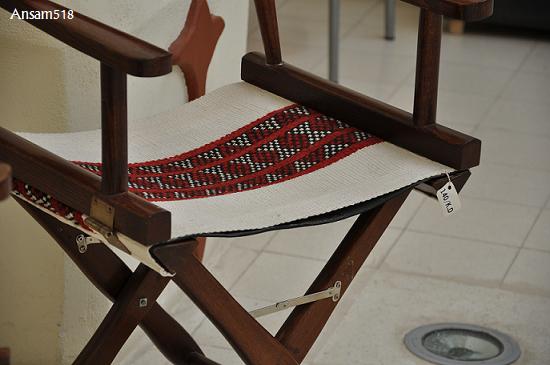
Look at the beautiful al’ouerjan patterns in this chair seat fabric.

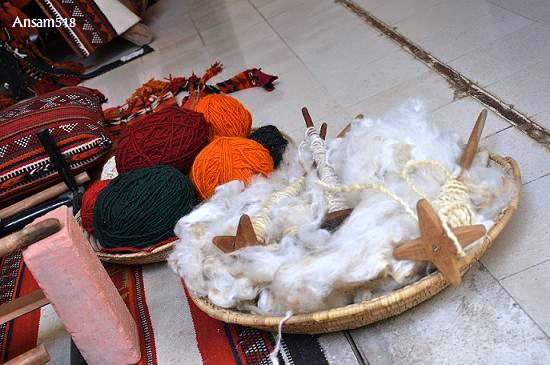
Ansam518 has allowed me to show these pictures from her blog post about a visit to an Open House event at the Beit Al Sadu, home of the Al Sadu Weaving Cooperative Society in Kuwait. Their Honorary President says that “We aim to promote and to celebrate Kuwait’s cultural and textile heritage. To tell the story of the land. To speak the languages of the arts … of the soul … ”

It was Alaa from the Ravelry group, who has been to visit this place, who gave us the link to another blogger’s repost of this report which led me to Ansam518’s original post which is packed with pictures. She shows us images from the gorgeous building itself which houses the cooperative to the displays of textiles, dye sources, books and crafts. Take a look at the stunning meeting room. I think I need to toss out all my furniture and put cushions on the floor (well, I pretty much live down on the floor as it is anyway!)

It looks like there will be more black, red and white on the horizon. Jennifer has just showed us her loaded spindles with yarn waiting to be warped for her next project (once she gets her three warp-along pieces done, I suppose).

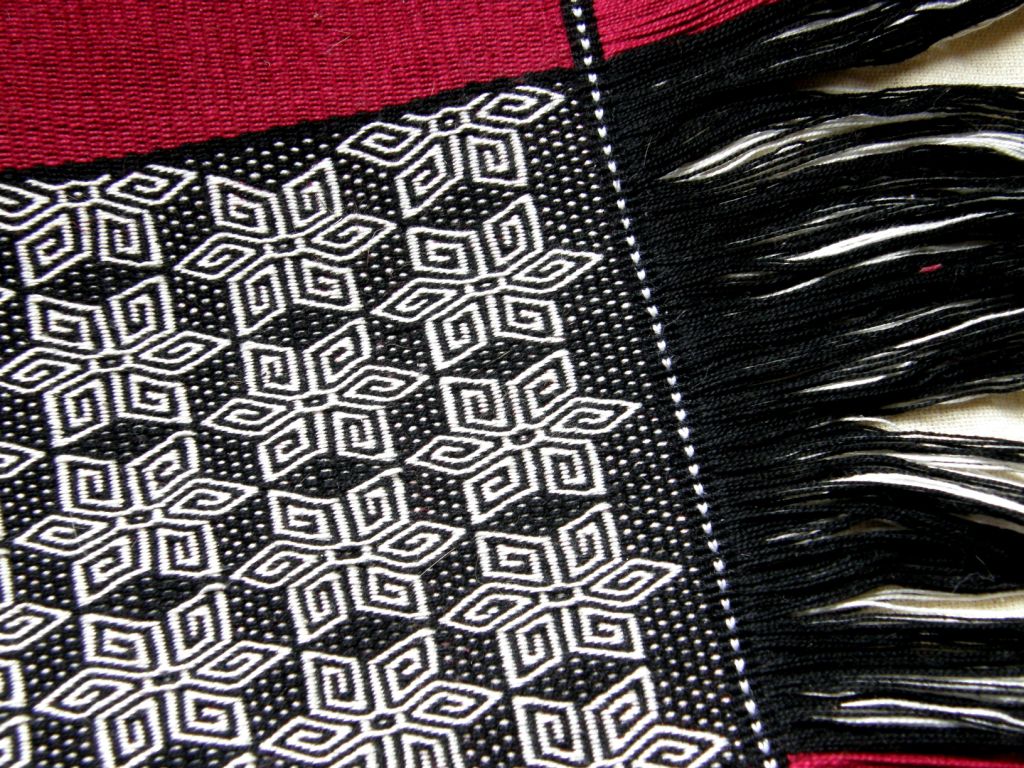
You may remember my showing you how one of the features of the warp substitution technique, by which the al’ouerjan patterns are created, is the creation of long warp floats  on the back of the textile.

We may find them bothersome but obviously the Bedouin people don’t.

You may also remember that Tracy showed us an Omani textile, which was made for sale in a textile cooperative, on which the weaver had used a clever way to secure the floats.

Having seen all this, Phil from the Ravelry group posted a picture of a textile that was collected on a trip to Indonesia. This textile forms part of the greater collection of his and the late Dennis Penley’s now owned by C.Philip Willett.

You can see the front and back of a warp-faced textile patterned with supplementary warp floats. Now, I would have been there forever scratching my head trying to figure out how they managed those color changes if I had only seen the front of the textile. At first, I thought I was looking at supplementary weft floats as the image had been posted side on which didn’t make the color changes difficult to understand.

There are two faces to every story, right?

And then Janet took a look at both front and back, figured out that the picture should be turned around, and that we were looking at warp floats which were all woven in off-white and then colored orange and blue after the weaving was completed. The long floats on the back are secured by a red weft in much the same way, I would imagine, as the Omani weavers in the cooperative are securing the floats on their pieces. Of course Phil already knew all this and was teasing us by not telling!

Dyeing the warps after the weaving? This had never occurred to me. At first I was rather disillusioned by what I perceived as “cheating”. But, then again, all sorts of embellishment can be added to a piece of fabric once it is off the loom…embroidery, stamping, beadwork, painting, resist dye patterns to name just a few so why is this any different?

#########################################

To finish, here are a few odds and ends…pictures from the groups and my other online weaving acquaintances, interesting links etc…

Tracy and Pam shared pictures of their backstrap weaving set ups.

It is always helpful to show these kinds of pictures to give people ideas of what they can do in their homes.

Tracy gets down on the floor while Pam sits up on her sofa. She sits cross-legged (jealous!).

Tracy made some adjustments by adding an extension to her far loom bar as she said that she was tired of banging her head on the table as she neared the end of her warp.

Pam was fed up with the card table always toppling over and so has wood pieces wedged between it and the sofa.

And here is super flexible Karla weaving in Chinchero where she was working as a volunteer for the CTTC.

She looks perfectly at home there, doesn’t she?

Some finished projects…

Another super guitar strap by Annie MacHale. Pam made a bunch of keyfobs from a pebble weave band she wove using four-shafts on her table loom. I like the hardware. Those tabs just clamp onto the ends and the rings are added…one little bit less sewing to do and less band used up in what would normally be fed through the ring and sewn down.

Ben has not only been braiding but has been making entire Peruvian-style slings. Here is one of his latest ones….

It looks to me like the Margarita braid but don’t take my word on it…there are so many variations to these braids and I would hate to give you the wrong information. I will have to ask Ben about that.

Some great links!….

This one comes to you via Kaz Madigan who writes the curiousweaver blog.

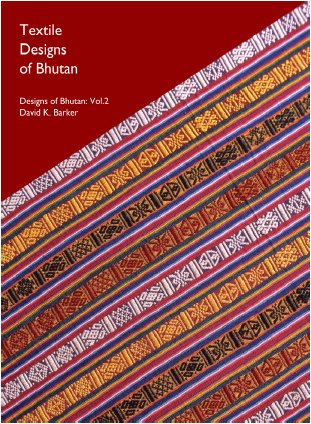
This link is for a free download of David K Barker’s 2nd Volume of Textile Designs of Bhutan. I have the first volume which I don’t think exists as a download but which can still be purchased as a hard copy.

The file is 73MB and even I with my erratic internet connection was able to get it quite quickly and with no interruptions…lucky!

And on the subject of Bhutan, this is a link to a blog which I recently found and which I think is sure to  develop into an incredible textile resource. I have been trying to contact the author, Wendy Garrity, but I guess that she is out of internet contact and can only get online now and then to add to and update her information. I would love to talk with her and know more about her life.
And finally, a little information about my book, Andean Pebble Weave.

The download is available as usual from Patternfish.com with the version in German here.


And then there is the follow up book that I am working on!

So, I will leave you now with all the very best wishes for the holidays with this Mexican weaving showing a nativity scene (courtesy of Karen Elwell aka Teyacapan.) It is blue indigo-dyed cotton with silk figures and is from the coastal Mixtec community of Pinotepa de Don Luis, Oaxaca