Backstrap Weaving – Little Things, Big Smiles

I was going to name this post “Taming the Tube” and that would have possibly been one of the weirdest titles I have come up with for a blog post so far but I decided to go with “Little Things, Big Smiles” as I have had a few things to smile about this week. They reminded me that it is often the little things that bring us most joy. Like the fact that my friends are on a road trip in Colorado and Wyoming and post pictures of every step of the way on Facebook so that I can be with them and share a little of the experience. And it seems that the Santa Cruz winter is over and I am back in shorts and tshirts before I can even run out of clean socks.

As for the tube that needed taming, well, I am talking about tubular bands. I have been following on with the experiments I was doing last week. These little things have brought a smile to my face as I figured out at last how to stop them from spiraling. Yes, it’s just a small thing but it gave me quite a kick!

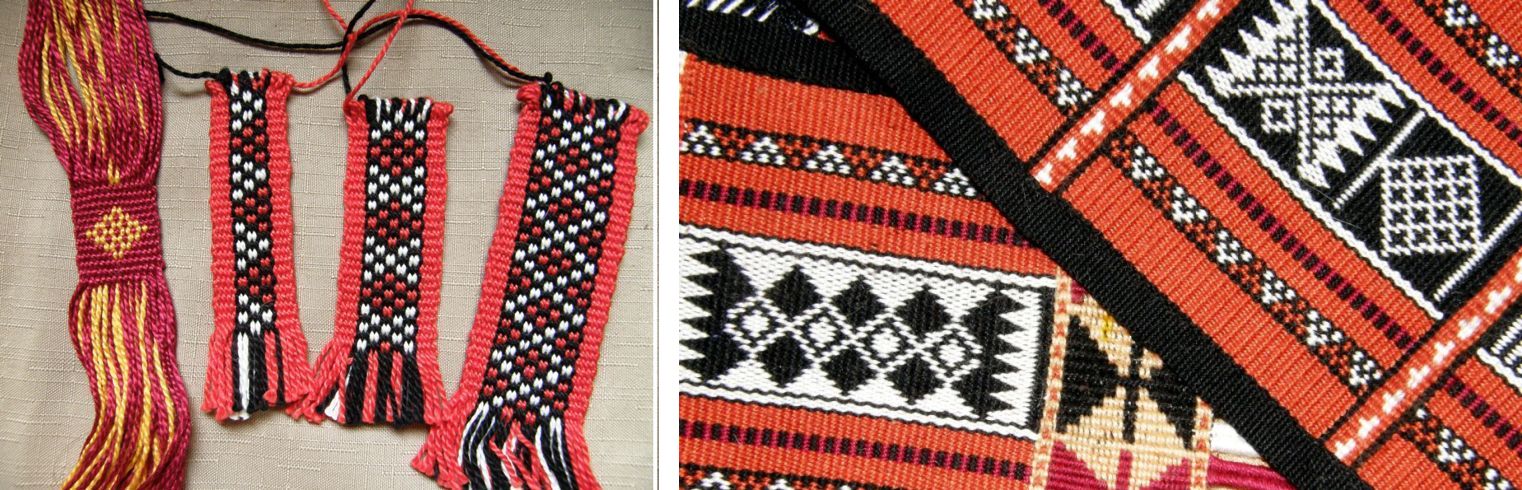
Of course some bands look great when they spiral and that is precisely the effect that you want.

But that wasn’t what I wanted when I made a pebble weave tubular band. I wanted the woven design to lie straight along the tube so that it could be seen if the band was worn as a wristlet.

I am forcing the design to lie straight in the upper picture. As soon as I let it go, it spirals. I suppose the spiral version has its own charm but that is not what I wanted.
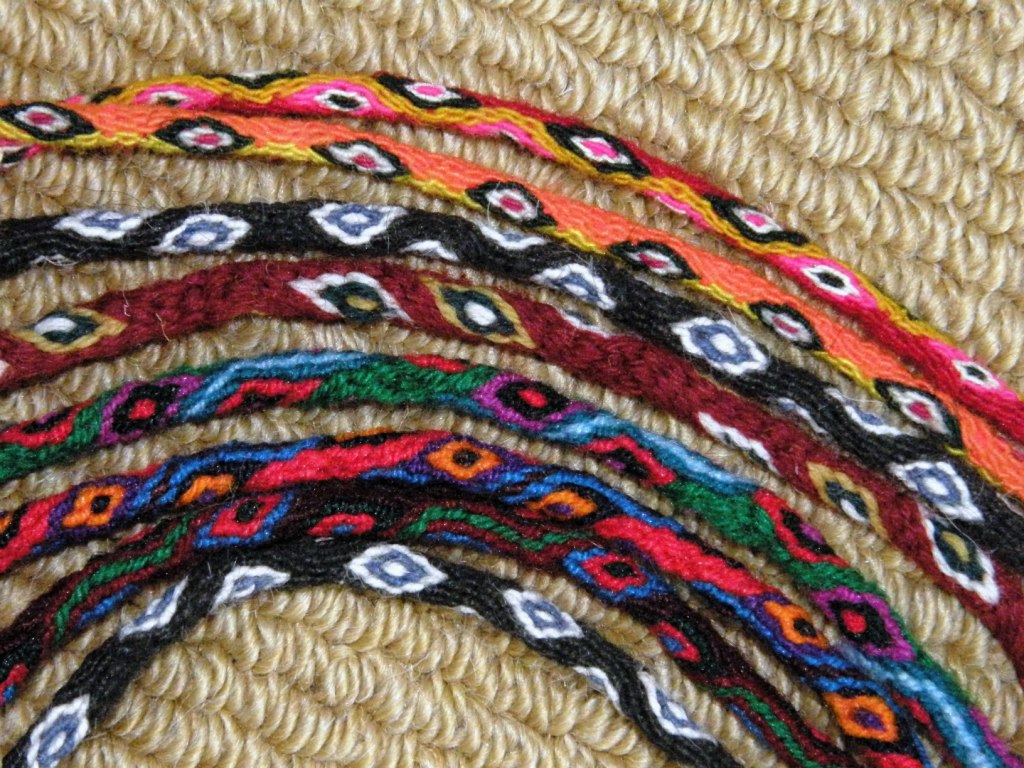
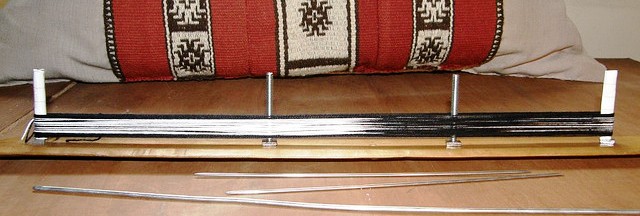
Most ñawi awapa bands that I have seen spiral…some to a lesser degree than others but there are some that pretty much don’t at all as you can see above. The more colorful ones in the center of the group spiral a lot while those above and below them have little or no twist. I LOVE that black one! So, clearly, there is a trick to getting them to lie straight.

I fiddled with this and that. Many warps went into the trash. Luckily I have my mini warping board and so was able to quickly and easily set up tiny two and four-stake warps so not a whole lot of yarn was wasted. And then I got it! He he…big smile.
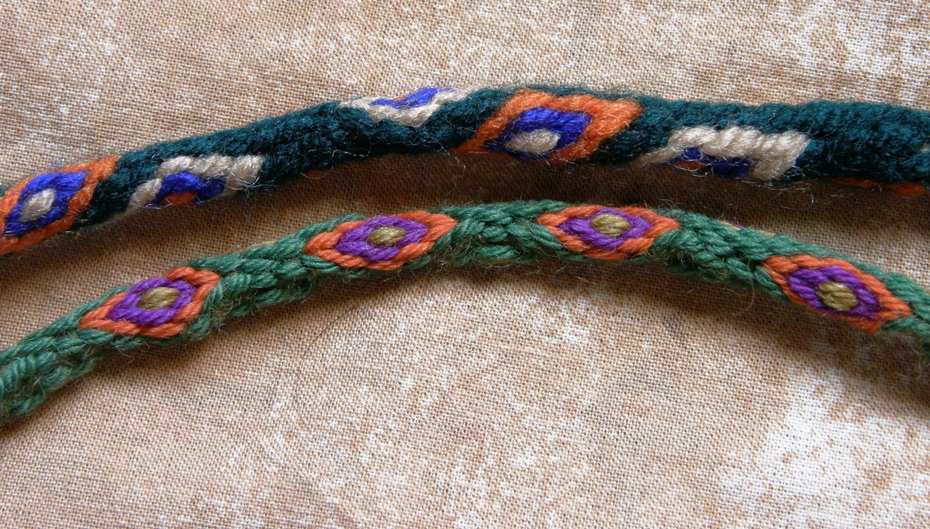
So there’s a spiraling ñawi awapa band that I made ages ago and, below it, one I made this week that behaves nicely and lies straight. Again, I say that both types have their charms…it just depends what you want and now I have options.

Of course, when tubular bands are sewn to cloth as in this example from Peru, they are forced to lie straight. I was told by Nilda Callañaupa in Peru that tubular bands are sewn to pieces of cloth to help stabilize the edges and corners which tend to curl due to the highly overtwisted wool warp yarn that is used. Now I am wondering if the spiraling in the tube counteracts the curling in the cloth and is what allows the fabric to then lie flat.

I have always sewn my tubular bands to very sturdy material…edges of bags which are doubled pieces of woven cloth so the spiraling nature of the band has not had any effect on the finished piece….no twisting or distortion of the fabric has resulted.

So, after that, I just had to play with my new discovery and make some more tubular bands.

Thick ones, thin ones, in cotton and wool. The wool ones are much smoother and prettier….ñawis with their diverted and twisted warps, plain-weave, pebble weave and warp substitution tubular bands.

Maybe next time I am in the US I will get some caps and clasps and make some wristlets with these although maybe I should just go down to the Buckle Land  store in the street market here and see what I can find.
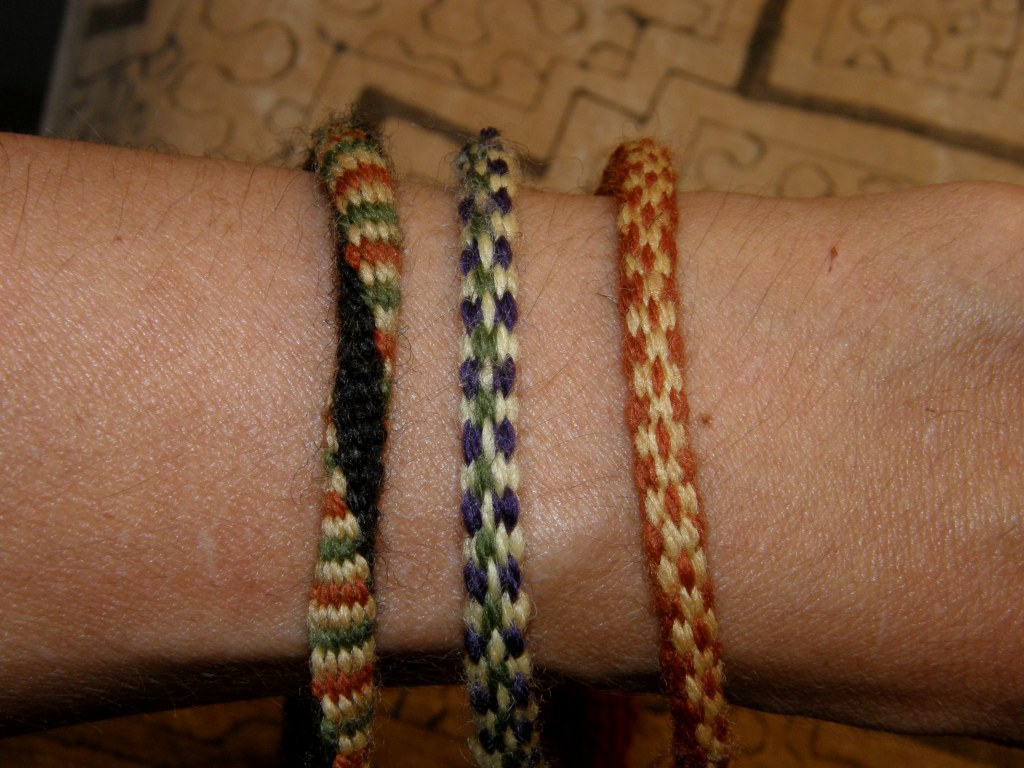
However, if I am going to wear a wristlet, I think that I would rather make one of these…
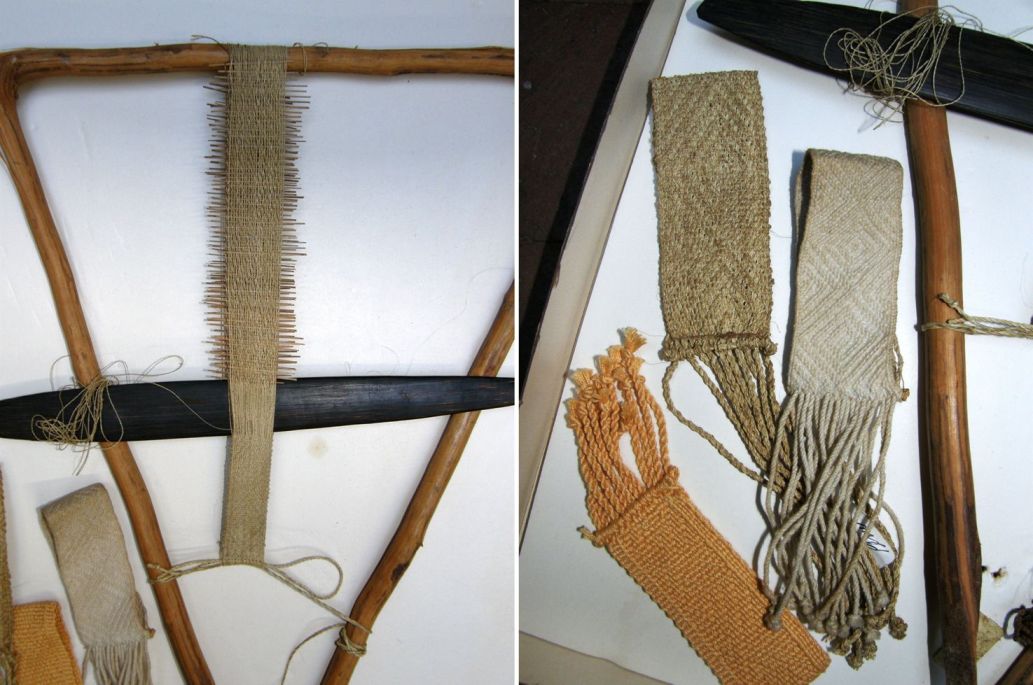
These were collected and also reproduced by Anne Blinks and Nora Rogers and now form part of Martha Stanley’s collection. I believe that they were made by the Mayoruna Indians of Peru who live in the same region as the Shipibo in the Upper Amazon Basin. I was given one of Nora Rogers’s pieces in progress on the loom as well as a booklet on the technique from my friend Betty’s vast collection of resources on ethnic weaving techniques.
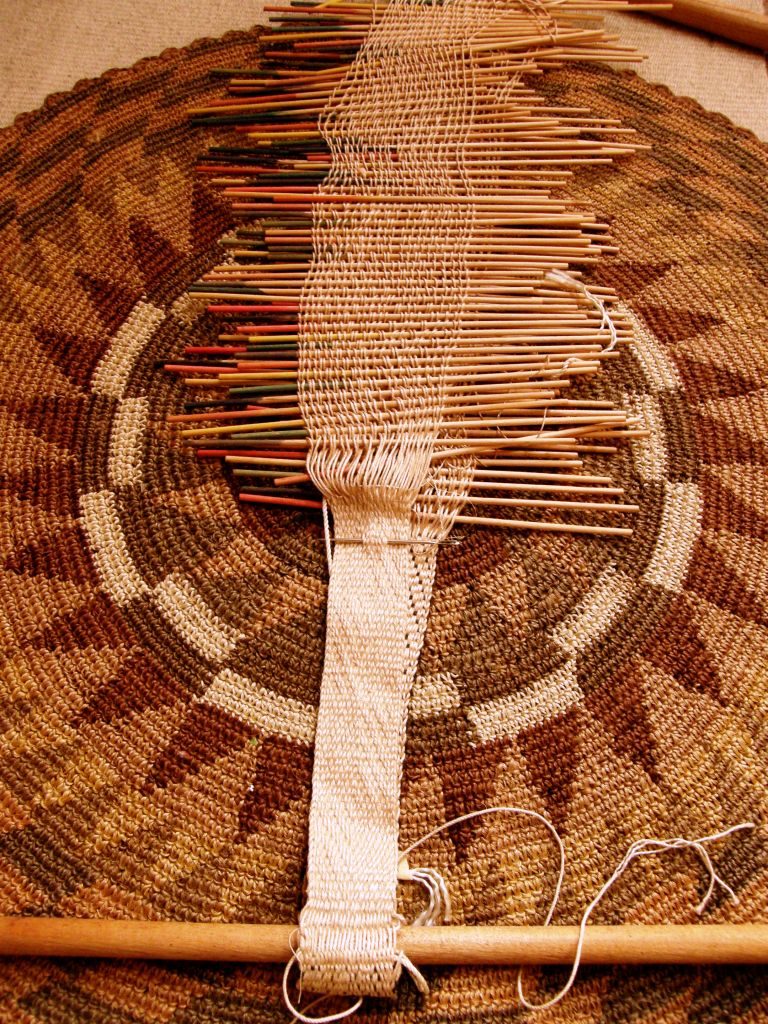
There it is all ready to be studied!

From tiny to tremendous, I pulled out this monster project this week too….
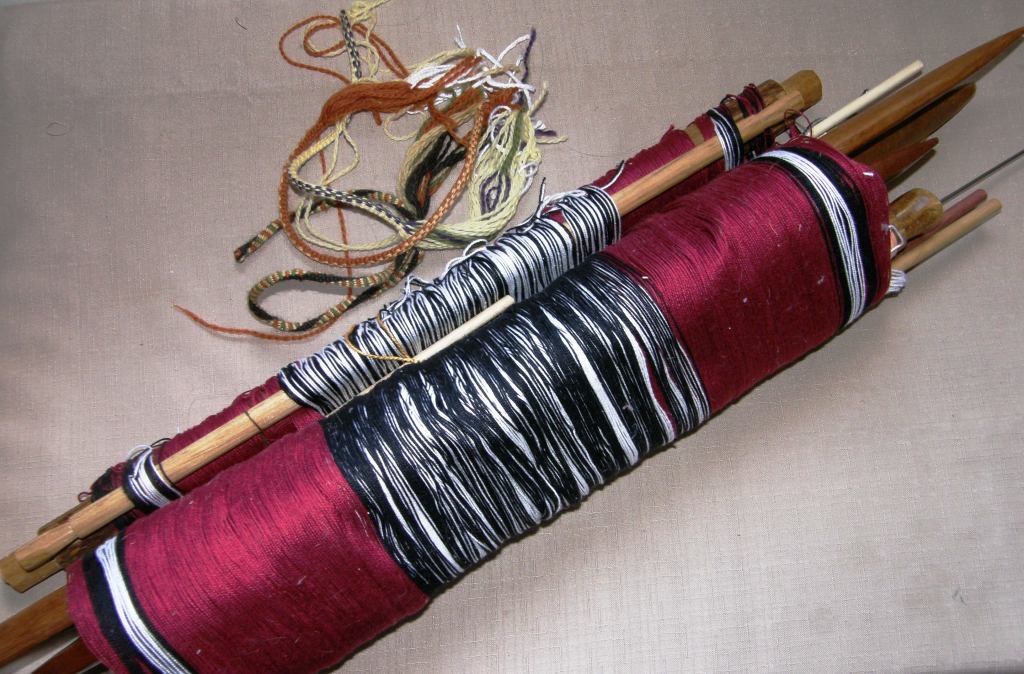
My tubular bands look quite ridiculous next to it!

That thing is heavy! It is was very weird sitting down to it after not having touched it for so long. It took me a while to get back into the rhythm…which swords do I use when and what sequence of moves had I decided were the most efficient?

Once I was back into it, the first thing I noticed was a mistake in the new pick-up pattern I am weaving which would have had very sad results further down the track. That meant that my first task was to un-weave….sigh! but I am smiling about having caught it in time.

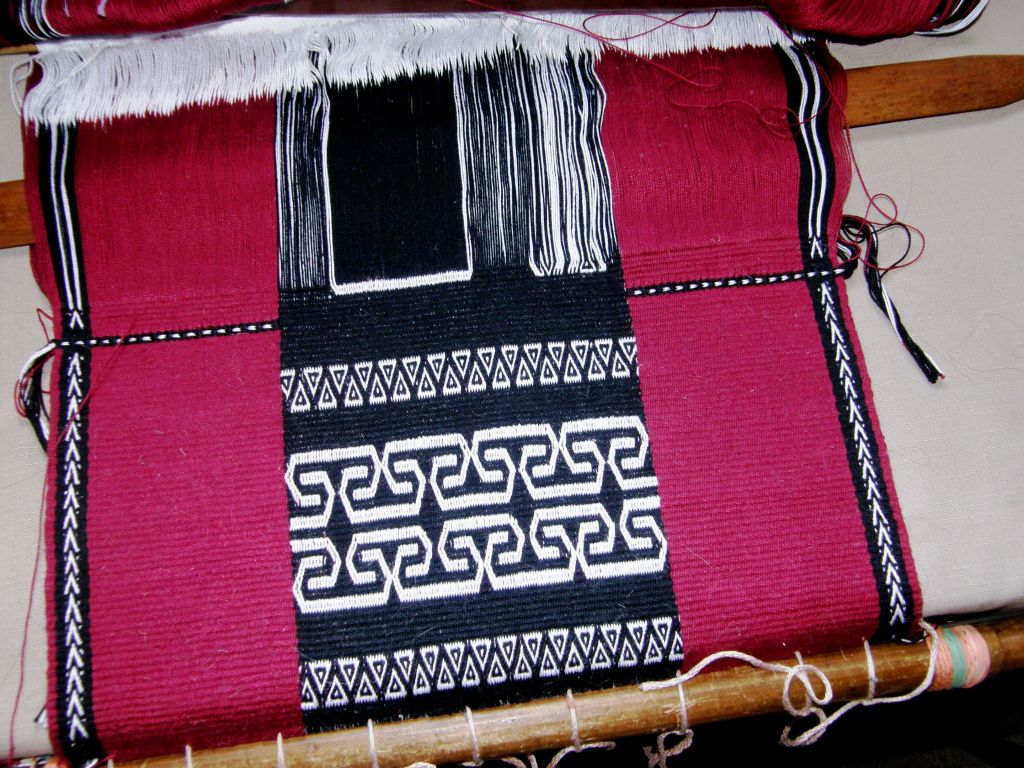
Yes, progress is slow on this piece but if you are thinking that I am getting nowhere, let me show you that I have least gotten the design established. Most of the major scary counting is now over as each row of pick-up is now done based on the last, if  you know what I mean….simply moving a little to the right or the left as the diagonal lines form. It is always exciting to be doing a new design and especially this one as it is my own adaptation of a traditional si’ira pattern of the Wayuu people from Mirja Wark’s book. After all the adjustments I made to have it fit my piece, it now has a lot of my own touches and so I am curious to see just how it will turn out.

So, this week I “tamed the tube” and smiled at many things…like seeing  Jeen zooming on after having woven with her and enjoying herself with my pebble weave book  using her rigid heddle loom. She is now an active member of the Ravelry group.
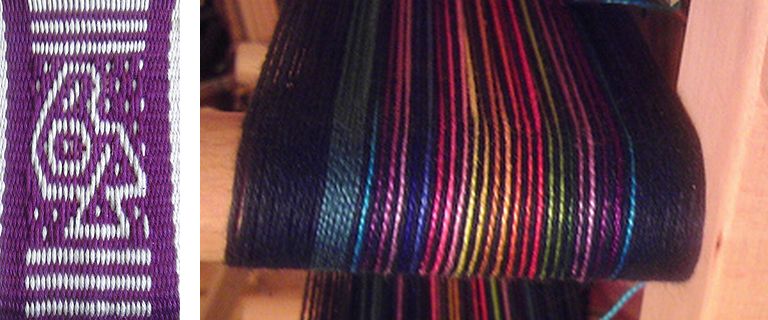
Now that she has woven the bird motif, she plans to try it with that gorgeous multi-color warp.

And Marge, who also wove with me, is trying warp substitution with Bedouin patterns as a warm-up to double weave.

She was a bit dismayed by the long floats on the back until we  assured her that that is what happens with warp substitution.

She will be able to take the skills she learns from this experience a step further when she tries double weave.

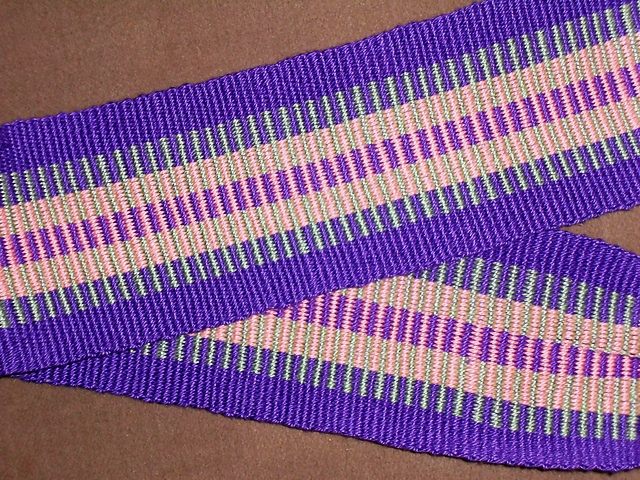
Alison wove a backstrap with a striking pattern and beautiful edges…
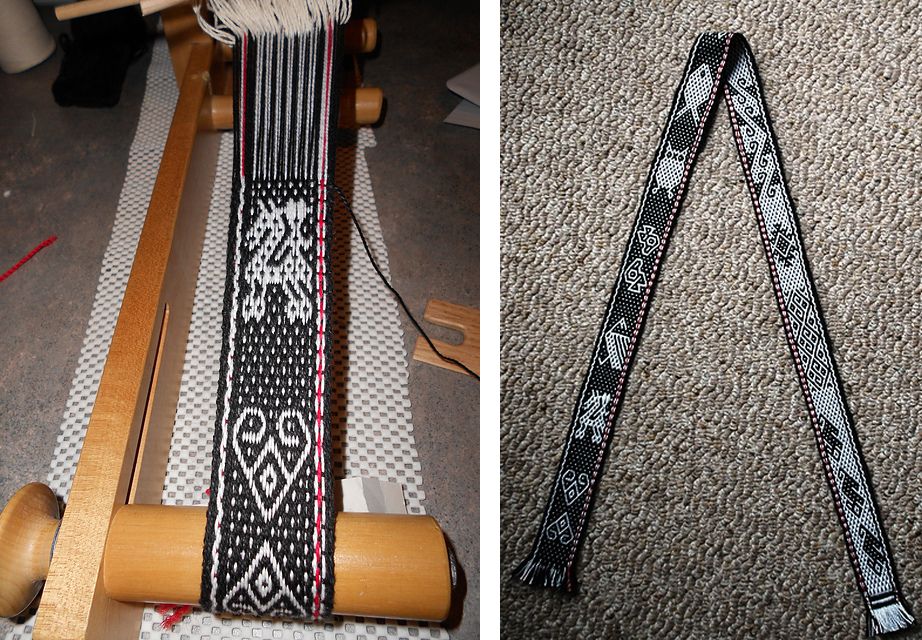
And then made a pebble weave band on her inkle loom using many of the motifs from my book.
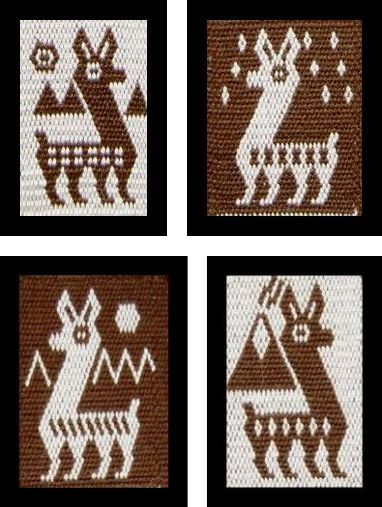
Jenibug blew me away by taking the llama patterns that I have charted here for warp-faced weaving and adapting them to balanced double weave pick-up on her floor loom…

Here they are in warp-faced double weave…the little llama heads come from a Bolivian band. I added the body embellishments and backgrounds.
And here is Jenibug’s balanced weave project…How neat is that?!
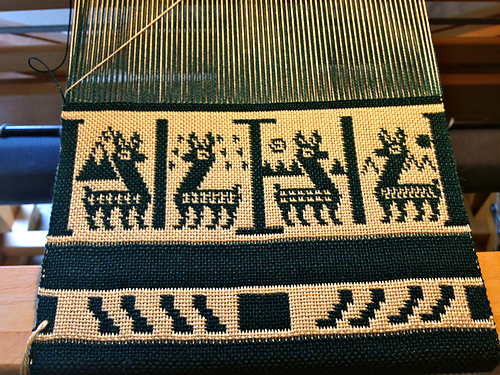
And here it is off the loom and wet finished. Are you sitting down???
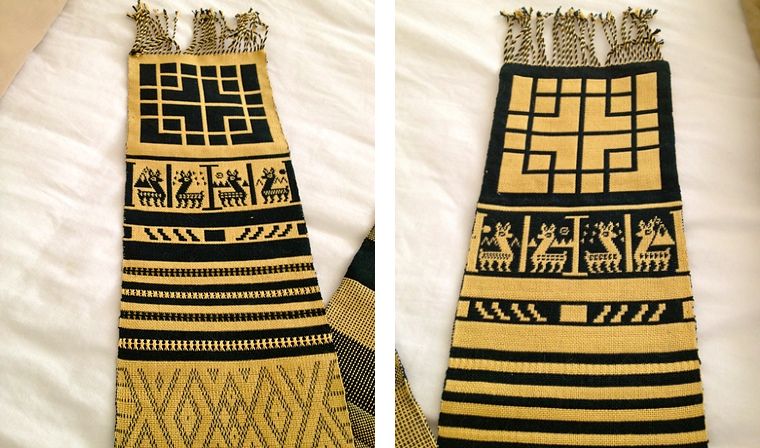
Isn’t that spectacular? She took my charts and translated them to balanced weave pick-up…blows me away!

And here are Loli’s pebble weave projects…beautiful bands!
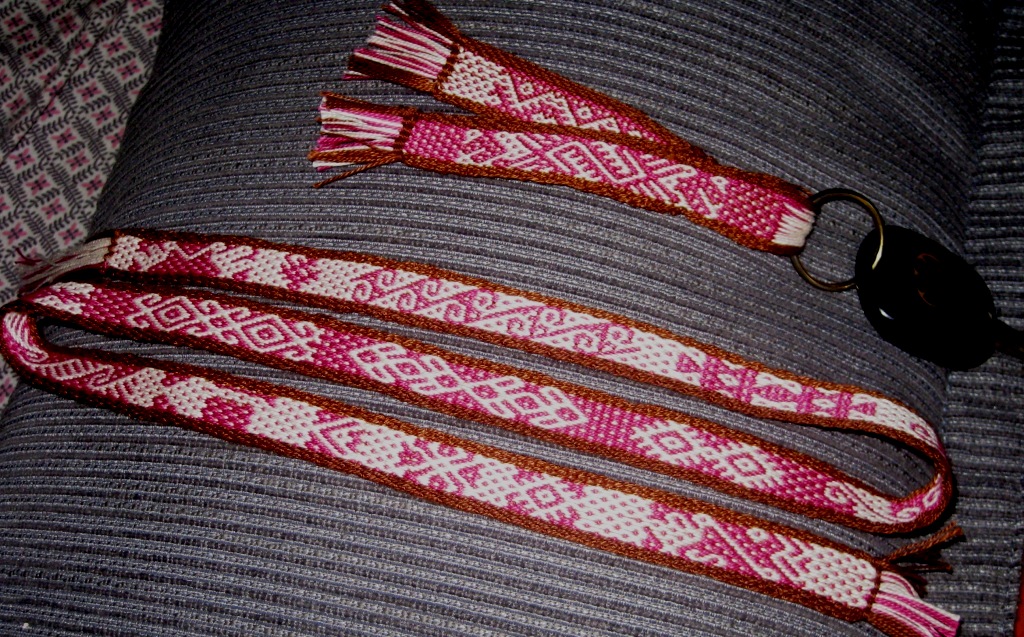
Now can you understand why I am smiling big smiles?!! My experiment with tubular bands brought a smile but seeing cool stuff being made by the Ravelry folks is the best weaving therapy of all.

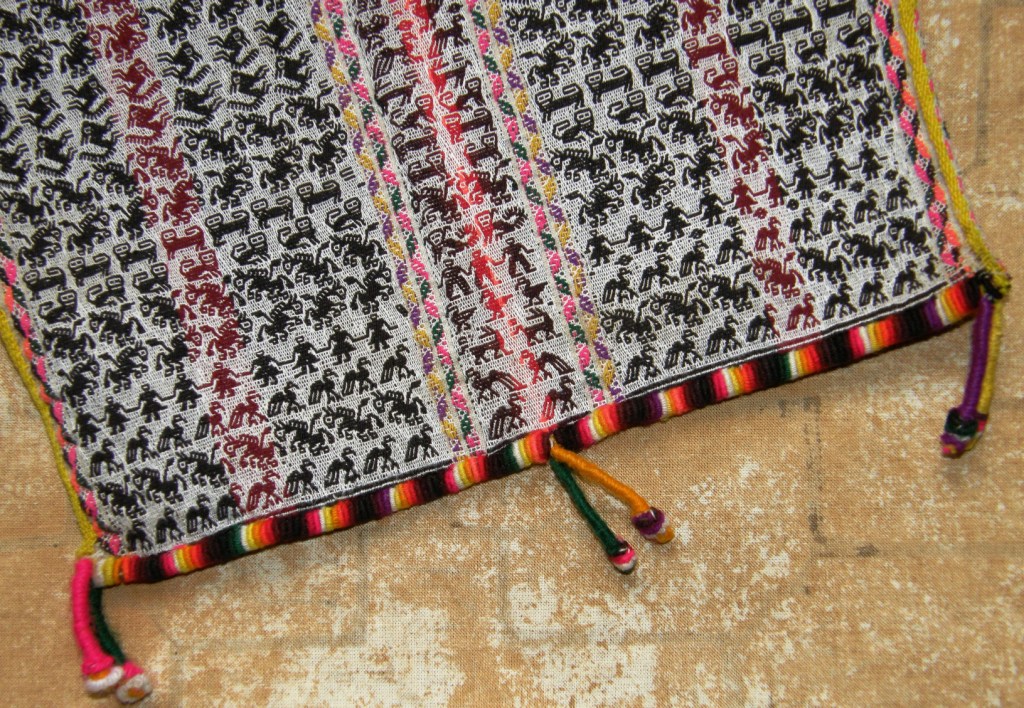
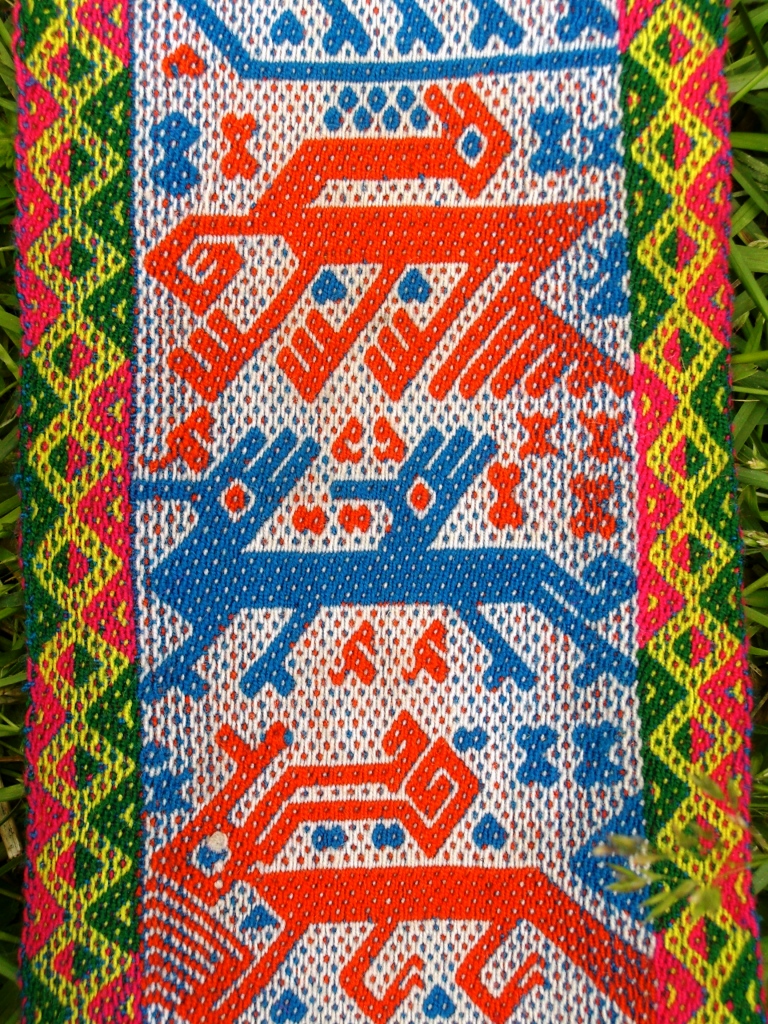
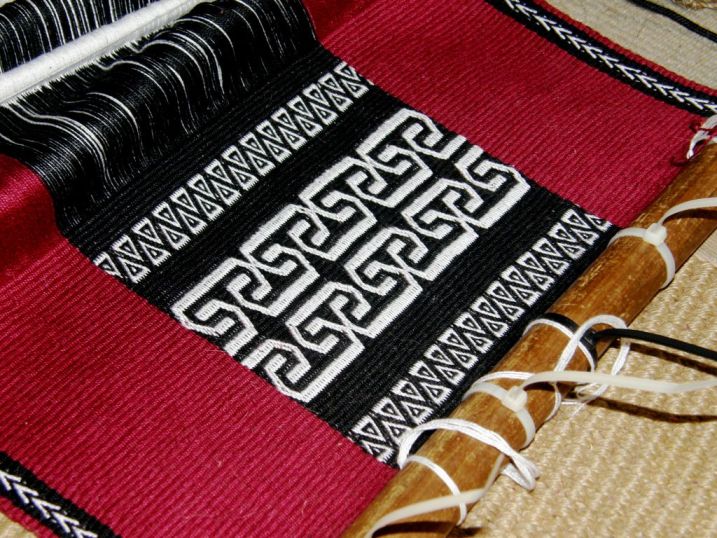
And just in case your socks are still on after seeing all that, I will leave you with another picture of one of the stunning bands from Ayacucho, Peru that I saw at Maryland Sheep and Wool Festival. I will leave you with bright cheerful colors and these playful figures, one of which is so similar to the ones I was taught when I studied pebble weave in Peru.
Backstrap Weaving – Picking, Dropping, Counting,Twisting….Pattern!

Did I mention last week that this latest piece I am working on is SLOW going? It’s a complementary warp pick-up technique, not one of those friendlier partly-loom controlled ones, and I have almost 600 ends in the pattern section. So, if I show you a picture of where I am at this week you can be excused for thinking that I have done nothing, or at least very little!

I had, in fact, progressed further but I un-wove a fair bit after discovering that the next pattern I had chosen wasn’t coming out anywhere near as big and bold as I had envisioned. I will need to re-chart it at twice its size. It is heartbreaking un-weaving after having picked all those threads but it is bound to be worth it in the end.

And as if the pick-up isn’t slow enough, I have decided to add some weft twining. What is slower than picking and dropping?…twisting and enclosing.

So far I have only added that one thin strip of twining which is one of the elements which will link all the hangings I am making in this series. I am thinking of adding yet another broad strip of patterned twining that will go from edge to edge. I shall think carefully about this as undoing twining is probably the worst kind of ripping out there is!

The Wayuu twine along the bottom of their si’ira belts but I am undecided about whether to use their technique or the one with which I am more familiar.

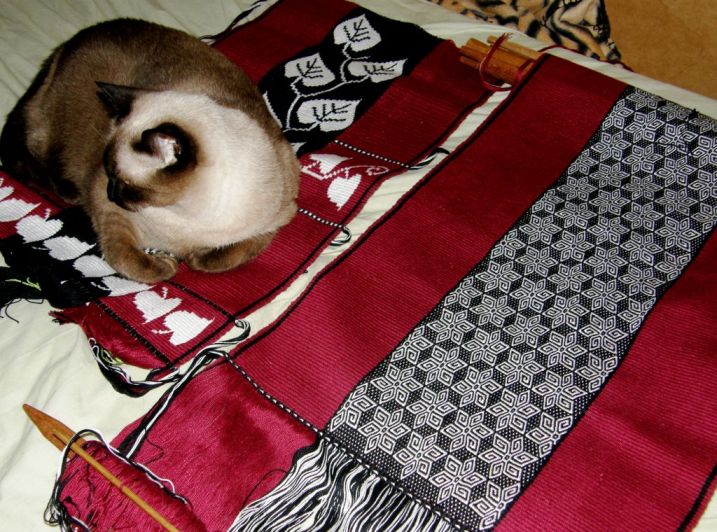
In the meantime my cat is determined to get as much of her hair as possible over the other two almost finished pieces.

This all had me thinking about this process of  picking, dropping, twisting and enclosing to make patterns and why I love it so much.  It occurred to me as I was writing the first few paragraphs here that I was making the process sound somewhat painful and frustrating when in actual fact it is both relaxing and stimulating.

I have been emphasizing the slowness of it all which may give some an impression of tedium…quite the opposite in fact.

What has made the work on this piece slower than it should be is the lack of planning on my part…it’s all my fault…thus the weaving and un-weaving and yes, that part can definitely be described as frustrating and tedious.

Take a look at this video of weavers in Bhutan (link provided by Toby from the Ravelry group) doing weft inlay patterning. Their tiny picking movements are graceful and delicate and rather than think “oh my gosh, how painfully slow and tedious that must be!” I think “how incredibly beautiful, skillful and relaxing. I want to do that too!” I wonder if I look quite so calm and peaceful as I work!

I do find that I need to stand up from this piece more frequently and take a walk around. I definitely don’t progress the four fingers width that weavers here in Bolivia have told me is the measure of a good day’s work. Sometimes I spend an entire day charting what I think will be the next part of the design only to abandon it! Lets see how far I get with it this coming week.

Fortunately not all the patterning techniques involve picking and dropping every single warp thread across the width of the loom. Many techniques can use pre-programmed patterning sheds and be partly loom-controlled.

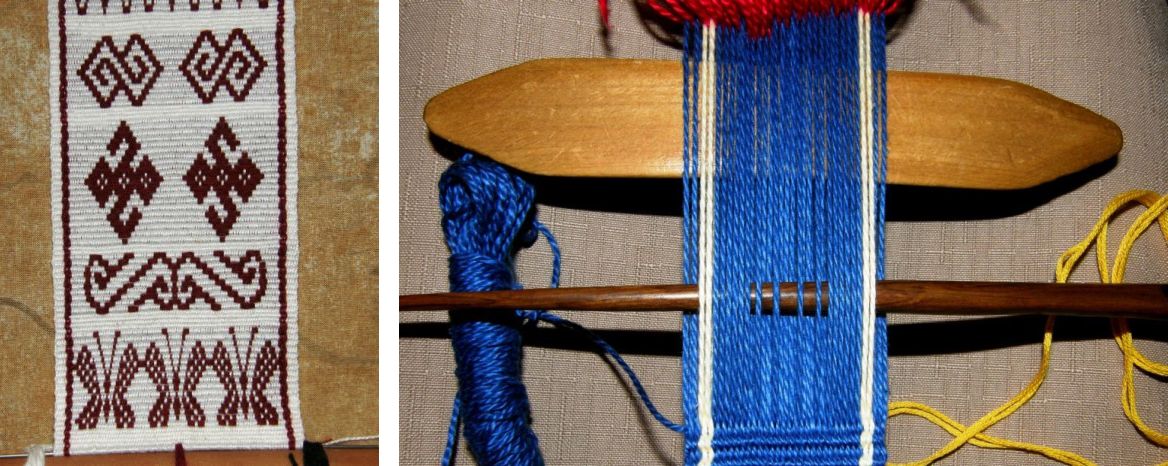
Pebble weave is one such technique in which many of the designs can be woven with the aid of two sets of string heddles meaning that you only need to do pick-up in every other shed….pick-up warps by hand in one shed and then enjoy a free ride in the next by simply raising a string heddle and passing the weft.

The Moisy technique which my Guarani weaving teacher Angela uses is another one that rewards the hard work of a row of pick-up with a “free ride”, that is, a weft pass every other row through a heddle controlled shed.

And then there are those techniques which I have nick named “drop-down” rather than “pick-up” methods. Warp substitution is one of them. The weaver simply drops a warp thread out of the open shed in order to create the pattern rather than having to select and pick one up.

Basic supplementary weft inlay is also a technique that I would nick name “drop down”. The weaver drops certain warps out of a shed which creates gaps through which the colored inlaid weft can be exposed to form a pattern.

The simple warp float technique, in the way I was taught to do it, also falls into my invented “drop down” category. Warps are dropped out of the open shed. Those that are kept will float to form the design.

These are all nice ways to get used to counting and handling the warps, dropping, selecting, saving and picking them to form the patterns. Some people may find that one of my so-called “drop down” techniques is the one with which they feel most comfortable.

Others may find that they like the added challenge of selecting, picking and dropping the warps while also being able to enjoy that loom controlled “free ride”.

Yet others will become so enamored with the pick-up process and the patterns it enables them to create that they will be more than happy to sit for hours and be proud of their four fingers width progress each day. Check my tutorials page for links to the various instruction pages.

Here is some beautiful pick-up inspiration from weavers of Peru and Bolivia…

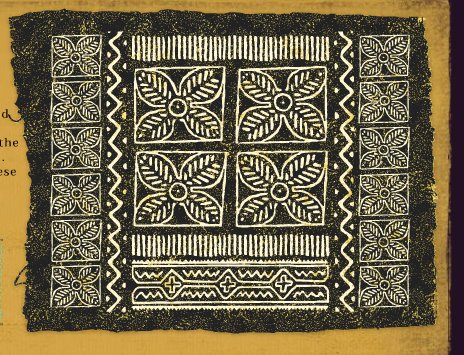
Last week’s mindless fun for my breaks from the loom was juggling. This week I played around online on a site which allows you to create your own mudcloth design. This link was provided by someone in one of the Yahoo groups and apart from a few minutes of fun, it also gave me some nice bold designs which, who knows, could form part of a future weaving.

Here is what I created…

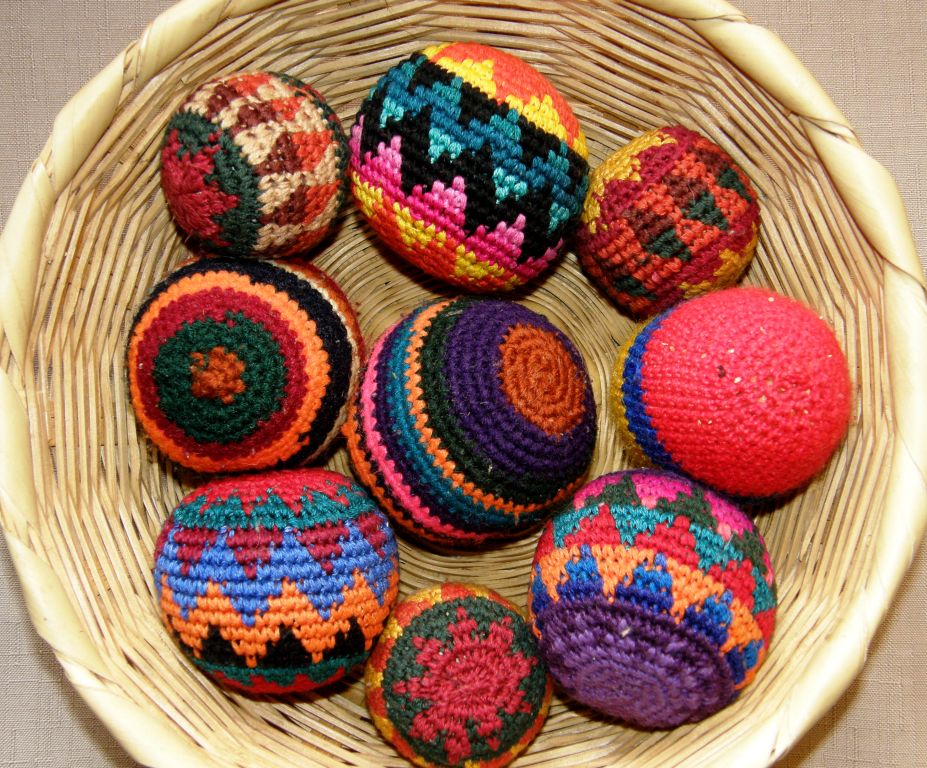
And, thinking back to last week’s post and the crochet work and juggling balls, I see that Education and More are offering some unique crocheted Guatemalan juggling balls on their site.

The crocheted designs on the Wayuu susu bags I showed last week are still enticing. If you are contemplating getting out your hook and trying to make something similar here is Carol Ventura’s (author of Tapestry Crochet) video on a technique that can be used to create such designs. I can’t say for sure if this is in fact the technique used by the Wayuu to make their bags but you could certainly use their designs and colors as inspiration for something in tapestry crochet.

So, what will you be into this coming week…hooking, picking, dropping, twisting, juggling, or clicking the mouse and gathering resources?

Gathering resources?…I have posted more goodies to my RESOURCES page. Take a look 🙂

Backstrap Weaving – Juggling!

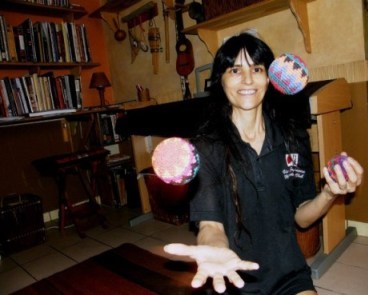
Juggling! Yes, here I am juggling…weaving my wall hanging project, warping, writing and taking pictures for my new book, putting together the translated versions of my first book, planning articles, answering online questions from new backstrap weavers. I have had to come up with some new routines to fit all this in.

Most people roll their eyes and sigh in dismay at the word “routine”…dull, boring repetitive. I, on the other hand, am all for it, that is, if it is a routine of my own making and not one that is imposed. Having a fixed routine is the most efficient way in which I can operate.

And I do take time out for a little mindless fun!

Juggling is both relaxing for the mind and a darn good work-out for the body…at least for an inexpert juggler as indeed I am….with lots of crawling around on the floor picking up dropped balls.

What prompted me to drag out the Guatemalan juggling balls from the depths of one of my woven storage bags?….They are crocheted and I wanted to take a look at how they had been made.

We talk about the simplicity of the backstrap loom and what can be achieved with a loom comprising just a few sticks, or sometimes no sticks at all.

What about the wonders that can be created with one small stick with a hook on the end?

And what led me to all this?… pictures in Mirja Wark’s book on the woven belts of the Wayuu people of northern Colombia and Venezuela. The designs on these belts are the inspiration for my latest wall hanging project. One picture shows a man wearing a belt with a small patterned bag at his side which Wark says is crocheted. She describes crocheted cotton bags that are used by both men and women. The women carry a medium-size bag called susu. Men have smaller crocheted money pouches called susuchon and other pouches which can hold tobacco, keys and amulets.

So it was off to Google and Youtube Land to learn more. I have decided to do without air conditioning and pay for a faster internet service instead so Youtube viewing does not make me want to tear out all my hair anymore! But, finding time to watch all those videos is yet another ball that must be added to the juggling mix.

These images of Wayuu susu, which are also sometimes referred to on these sites as mochilas, are from the online store of the Wayuu Taya Foundation.

I found that these traditional crocheted bags became very popular outside Colombia a couple of years ago and even prompted an article in the NY Times.

On many sites the bags are described as having been “woven”, “knitted” or “woven in crochet” but we have Mirja Wark who tells us that they are, in fact, crocheted. One article describes the straps as having been created on looms.

I love the big bold designs! The bag at left is from CordoBags.

The following is probably the nicest video I found in my alotted Youtube time showing the Wayuu people and their terribly harsh environment. A woman can be seen carrying her susu, there’s a little weaving showing those loose joined heddles that I talked about last week, some fast and efficient twining in progress (love that part!) and there are two brief segments showing the women crocheting bags.

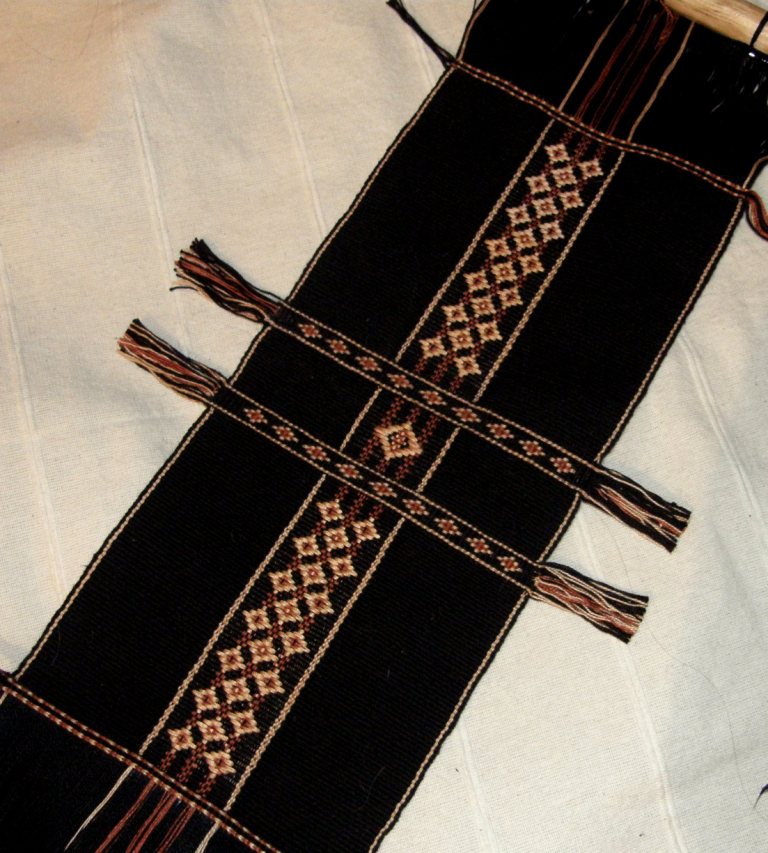
So, here is my latest project which has been inspired by the work of the Wayuu people and the beautiful designs on their woven si’ira which I have been able to see in Mirja Wark’s book.

I have made a few adaptations of my own. The triangular “border” design is my own pattern as I wanted something bolder than those shown in the book. The larger design is one of many “block patterns” as Wark calls them and, as I charted this one myself, I cannot be absolutely sure that it is faithful to the traditional design. It falls into a group of patterns called schichirujuna paa which means “like the nose of a cow” in which there are eleven variations.

I like how the herringbone design on the edges is similar to the weft-twined design I plan to do along the bottom edge.

This is slow work, I can tell you….lots of threads to count and pick up!! I was very unsure about this piece last week and was on the point of putting it aside for a while and working on something else to clear my head. But, I persevered and am now happy with the result.

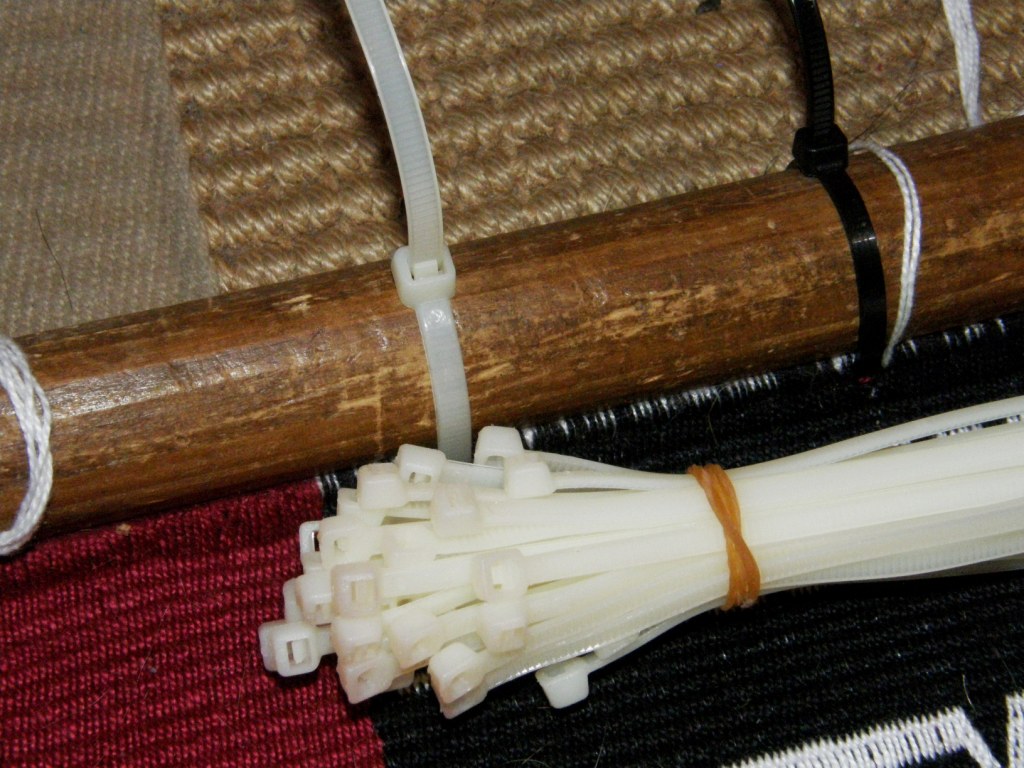
And you may have noticed my new favorite addition to the toolbox at left…cable ties.

These are absolutely brilliant for lashing the warp on its piano wire to the loom bar and creating a third selvedge. I was getting really fed up with my lashing cords on this project working their way loose.

They always do and I usually just wedge thin dowels between then and the loom bar to tighten them up. This time for some reason, nothing I did was solving the problem.

In my recent home de-clutter mission I found a bag full of these cable ties in the junk drawer in the kitchen. They are perfect for lashing but, unfortunately, can only be used for one project as they will have to be cut in order to remove the finished weaving. I wouldn’t use them to lash right from the start as they are wide and space the warps. I would only use them once the weaving has progressed an inch or so to replace the lashing string, which has probably already started to work its way loose.

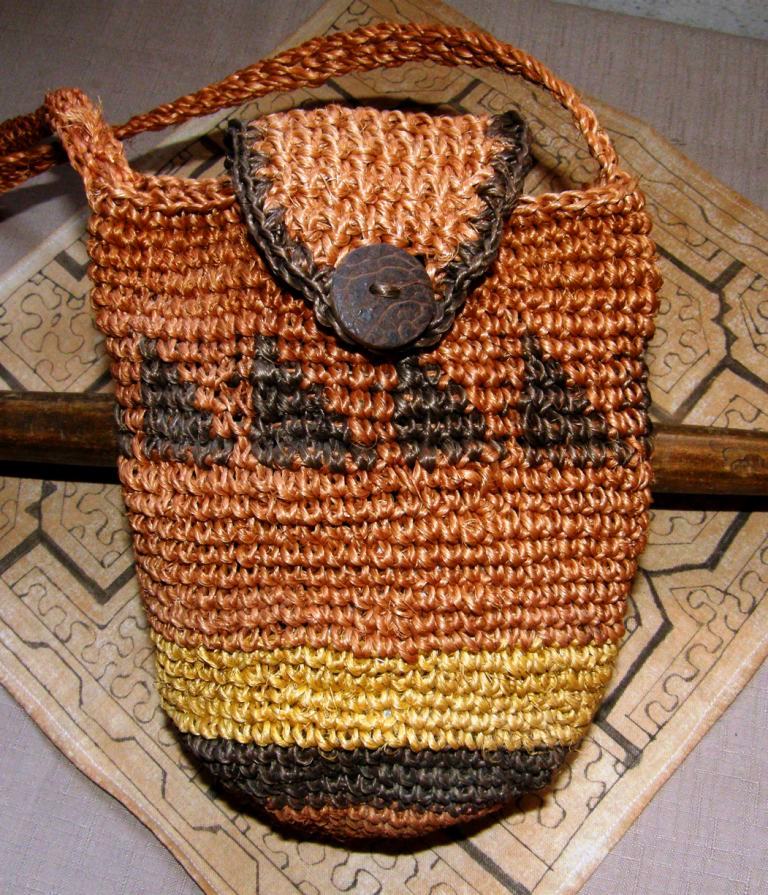
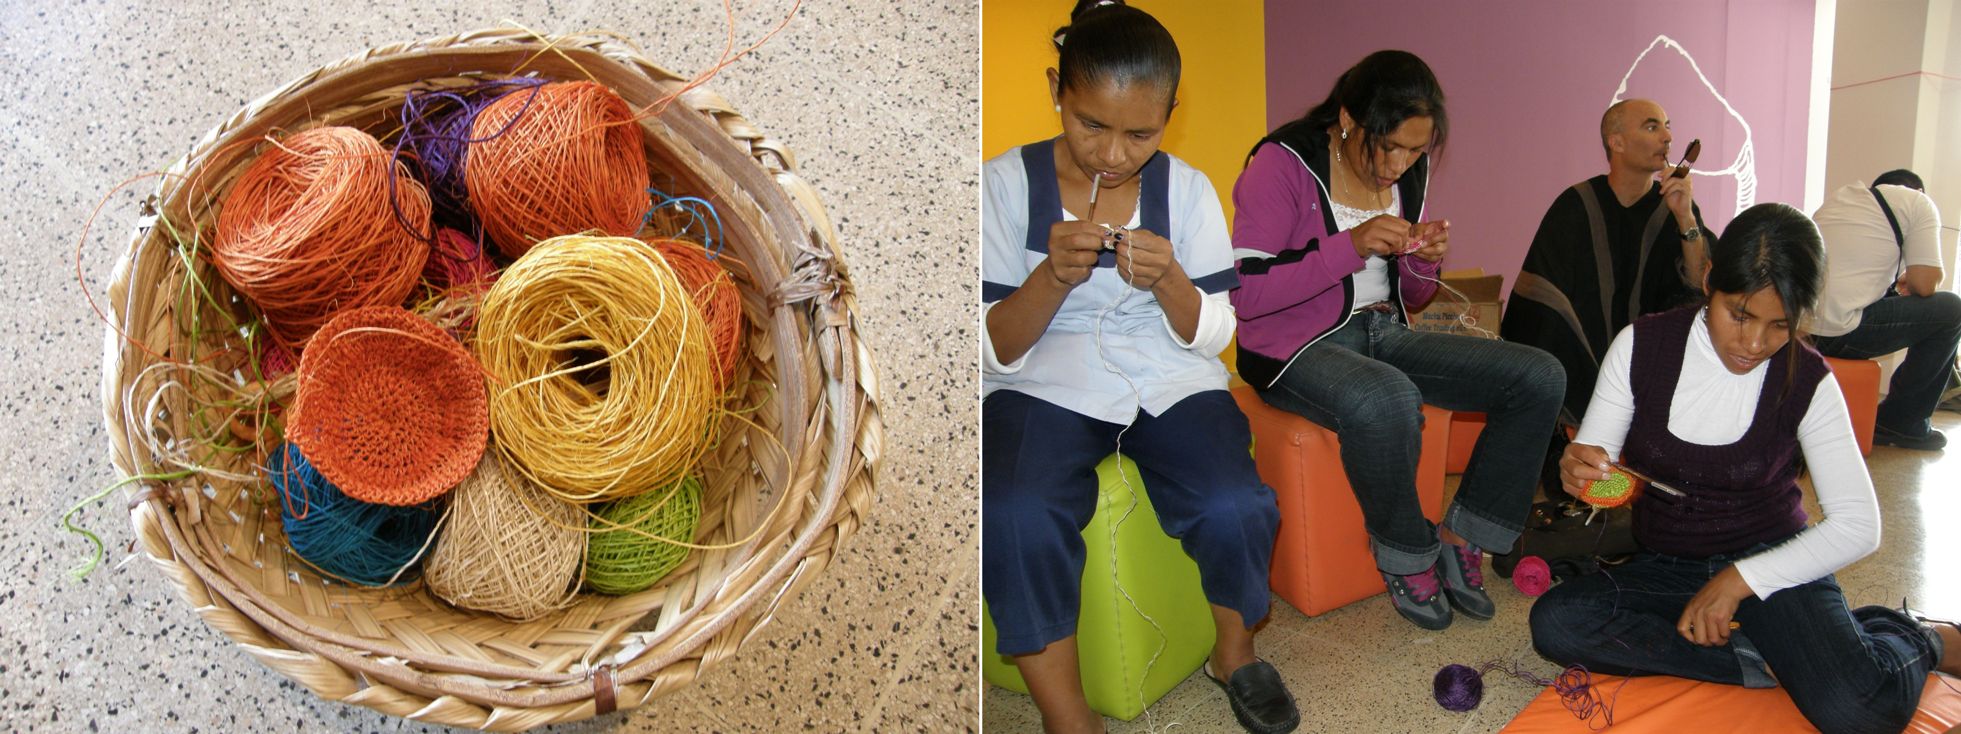
Now back to the crochet. No, I am not about to add this to the juggling act! But, who knows, the next time I am thinking about some on-the-road projects, maybe I will toss a hook in my bag. I know the very basics of crochet. When I went to Ecuador and visited the artisans who work with cabuya fiber, I stayed with a lady who taught me how to crochet this little pouch.

She was kind enough to say that it wasn’t too bad for a first attempt. The button is made from the tagua nut and the dye for the cabuya fiber comes from natural sources.

I was happy to learn how to do color changes and carry the thread. Whether this color change technique is what is known as tapestry crochet, I do not know. I noticed that there is a group for tapestry crochet on Ravelry and another for fair-isle crochet. I am guessing that indicates that there are differences in techniques.

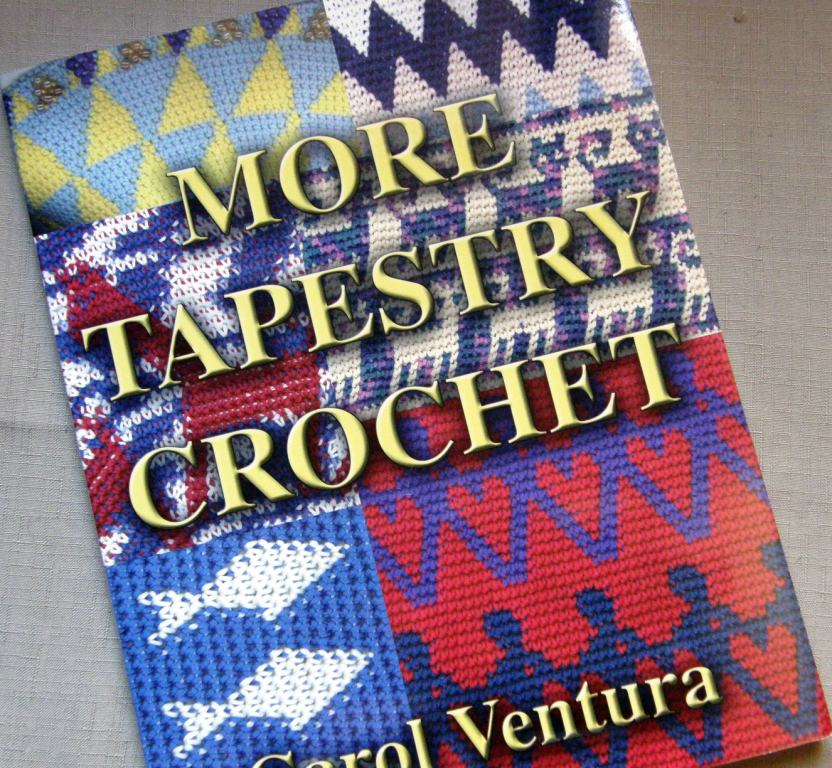
I was given Carol Ventura’s second book on the tapestry crochet technique many years ago and, although I have enjoyed looking through it, I haven’t used it yet. There are some beautiful projects in there for those of us who like imagery and bold geometrics in our handwork.

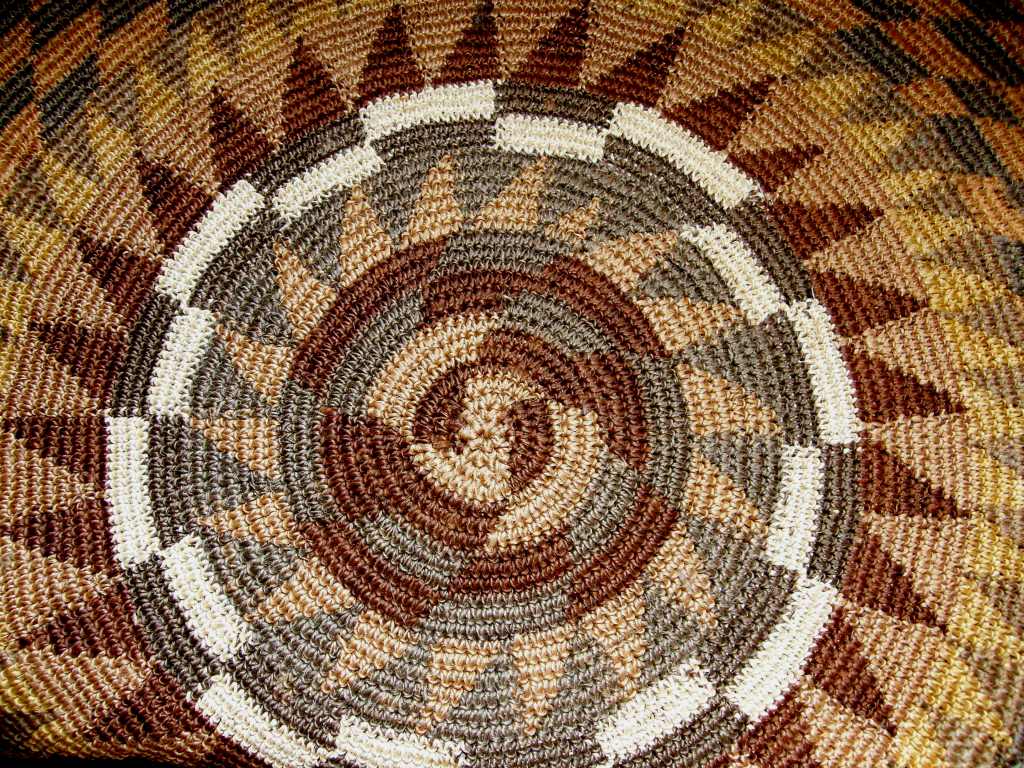
Here is some of the beautiful crochet work that the cabuya fiber artisans from the Intag valley of Ecuador do…a round mat on my bedroom floor…

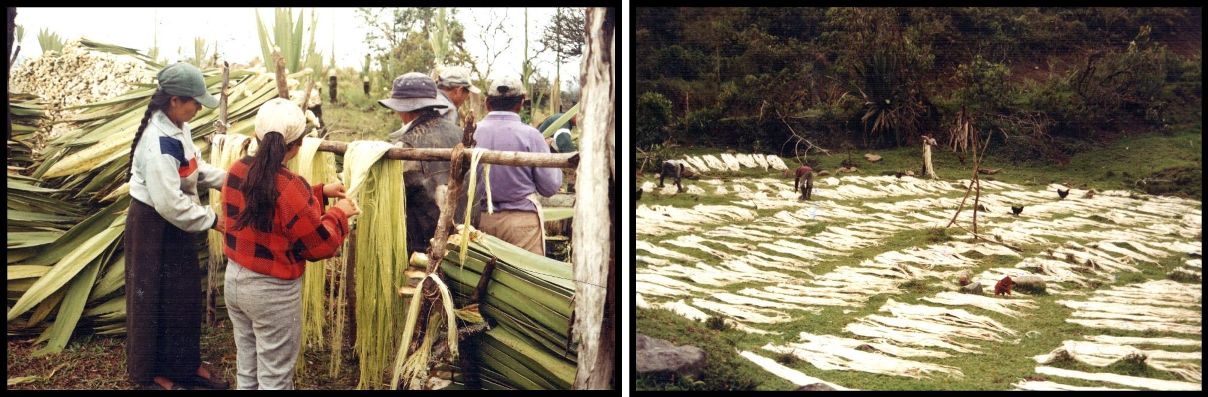
I wrote a post some time ago about the cabuya fiber and how it is processed if you would like to know more.

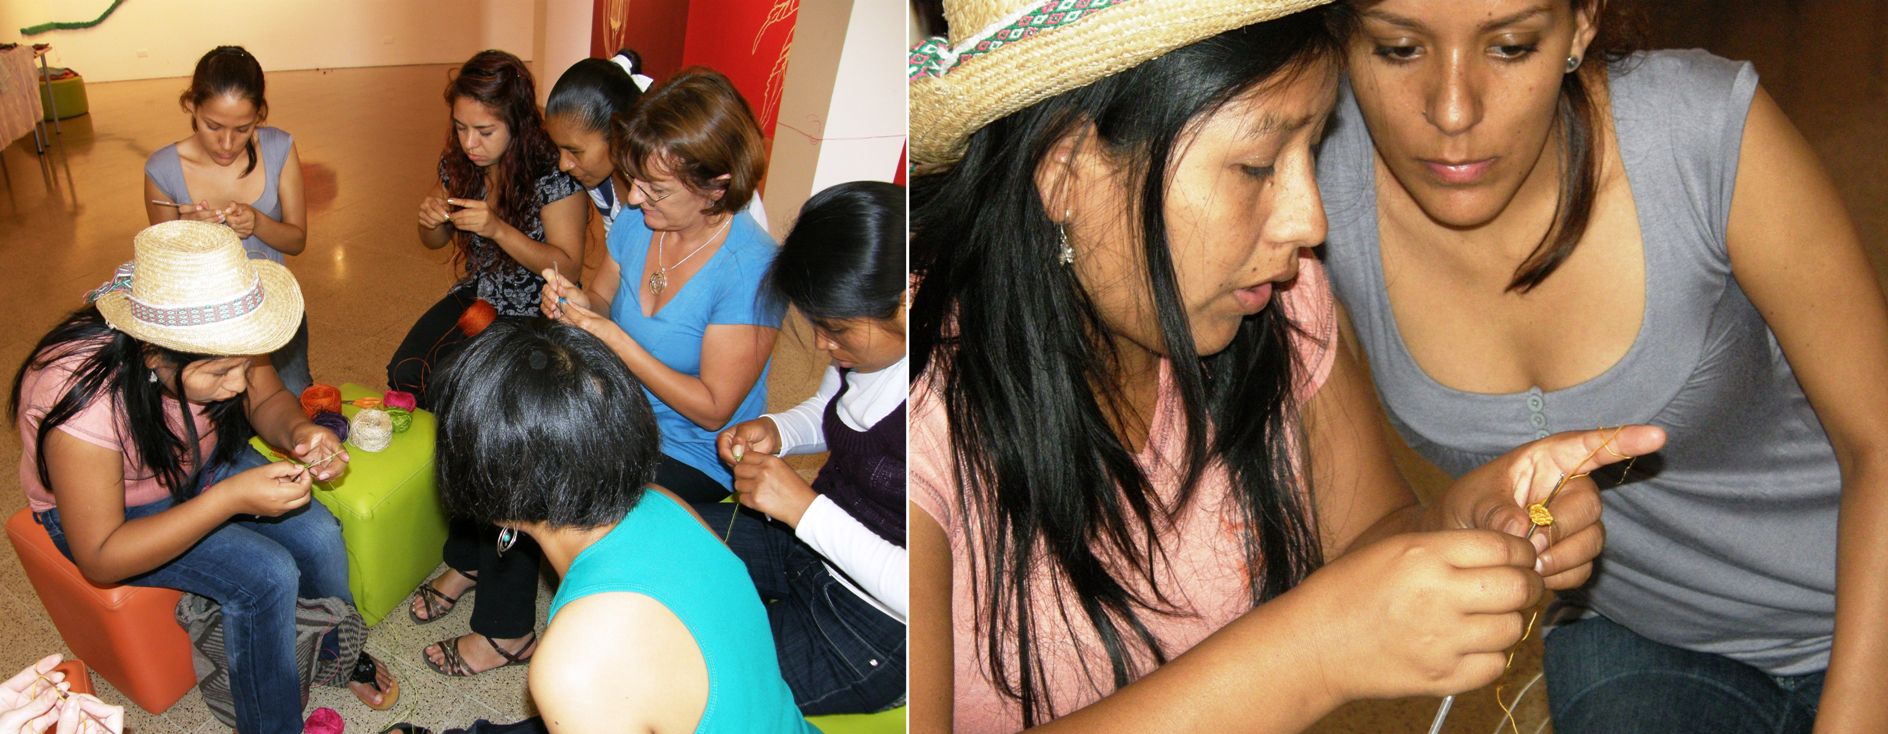
Last year we had a gathering of artisans here in Santa Cruz and Maritza came from Colombia to show us how to crochet with cabuya fiber. Weavers and craftspeople from Chinchero in the Peruvian highlands, coastal Ecuador, the highlands of northern Chile and lowland Bolivia as well as Santa Cruz locals joined in to learn.

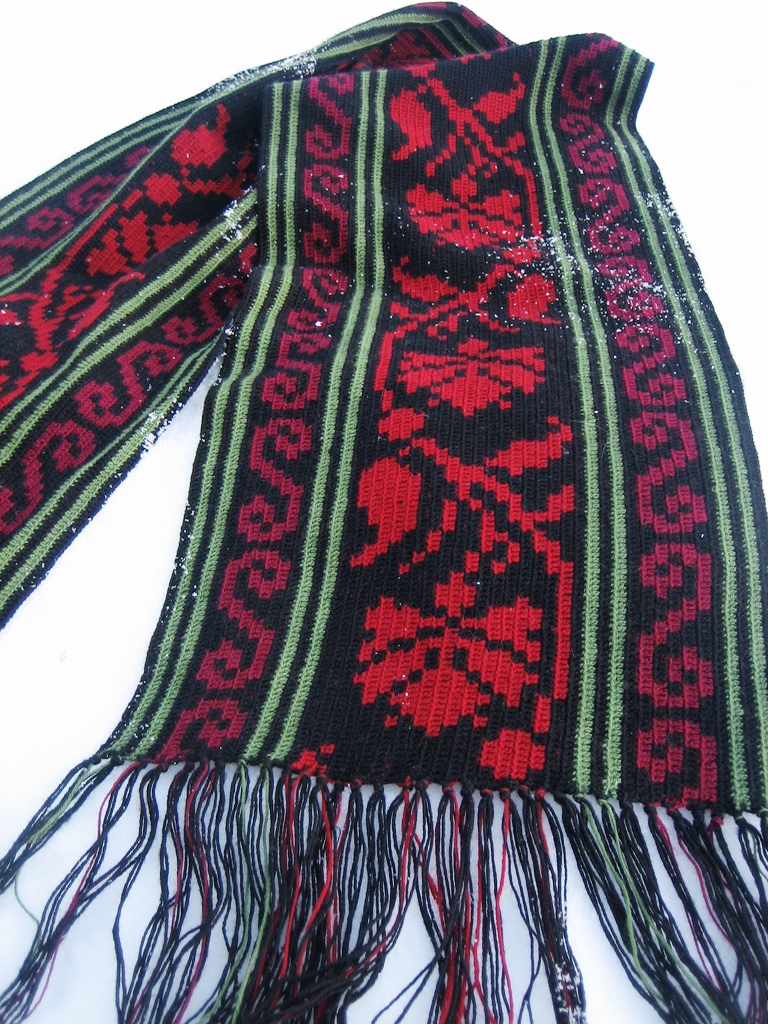
I think the thing that has most gotten me all charged up about crochet this week is the beautiful crocheted scarf that Marit from Norway, aka yarnjungle on Ravelry, recently finished and posted.

There’s that black and red again! Doesn’t this make you want to grab your hook?

In Marits’s own words…I saw a picture of a crocheted men’s scarf from Sweden in a magazine about nordic folk costumes. It had a flower pattern in tapestry crochet technique, worked lengthwise, but with double crochet stitches instead of single. Made my own version by throwing together some antique cross stitch patterns.

I have come across images online of belts in Mexico woven with flower designs that are quite similar to this. I notice them as, to my eye, they look “un Mexican”, if you know what I mean (funny how we form this idea of what “Mexican” should look like). Again, I wonder, as I was wondering last week, about how patterns may travel and turn up in unexpected places or how they may just develop independently on opposite sides of the globe. Some of the motifs in Huichol weavings are so similar to traditional Scandinavian finnweave ones.

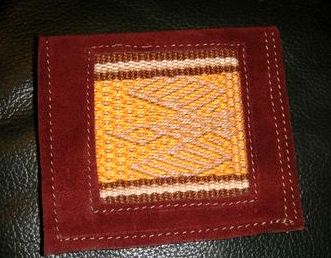
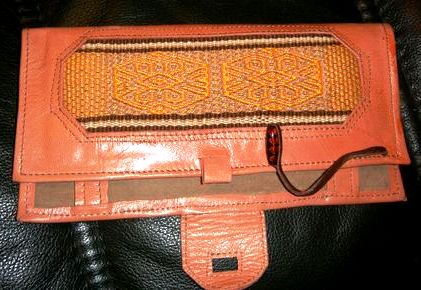
Well, I shall finish this week with some pictures of beautiful work that Sylvie in France has been doing combining her woven bands with leather to make a wallet and purse.

This bird motif in pebble weave is in  my book and comes from the island of Taquile on the Peruvian side of Lake Titicaca. What a lovely job Sylvie has done.

This motif is also in the book and is one that I invented for a wall hanging. These are great projects and Sylvie definitely has the hang of pebble weave! As this motif is one of the last ones in my book, I expect that Sylvie may be wanting more….hold on, a second book is coming!

It seems that this is a shorter post than usual as I have finished early and so have a gap in my schedule…what shall I do? I think I’ll go and look for my crochet hooks and sit down and have a good read of Carol Ventura’s book. 🙂

Backstrap Weaving – Bag Mad

Look out…I have been sewing again. I challenged myself in my blog post last week by saying that I need to sew this piece, with its supplementary weft pattern and weft twined bands…..


into something that would extend my meager sewing skills. So, I had to resist the temptation to simply fold it, flip the end over to make a flap and sew up the sides…done, easy, onto the next project. I decided that I wanted to make a kind of sausage bag, that is, one with a flat bottom and rounded sides – a sewing challenge indeed for this inexperienced sewer. I Googled away for instructions and found none. How to get the straight edge of the main piece to bend neatly about the rounded ends??….for me it was kind of like trying to get the square peg to fit the round hole.

I will show the still unfinished bag to you a bit later and then you can judge for yourself whether I succeeded!

And now I can even better appreciate why so many bags made by the weavers I have met here are simple rectangles, folded in half and sewn up the sides. Of course, it makes perfect sense after having worked weeks to weave a piece to want to use it ALL…not cut it up, tuck and pull it about to make an ”interesting” shape and besides, it will hold more that way too.

So, I have been looking through some of my photos of weavings and here and there online and have some bag pictures to show you. What a wonderful variety of designs, structures and materials I saw but all with the same highly practical shape…a basic square or rectangle.

The bag on the left is knotted using a fiber extracted from a plant related to the pineapple which is called “garabata” here and is made by the Ayoreo people of eastern lowland Bolivia. The one on the right, from Betty’s collection, was made by people of the hilltribes of northern Thailand and appears to be made up of several bands sewn together.

The Ayoreo work their pieces as rectangles which are folded and then sewn together at the sides. According to Peter Collingwood in The Maker’s Hand, bags or bilums, some made with the same knotting technique used by theAyoreo, are made in Papua New Guinea but worked as a tube rather than a flat piece….only one seam to sew.

Above left is a dual-pocket cotton saddlebag or alforja from coastal Ecuador. Both ends of the woven fabric are folded in toward the center to form the two pockets. On the right is a cotton bag from tropical lowland Peru. You might recognize the design from my recent placemat project.
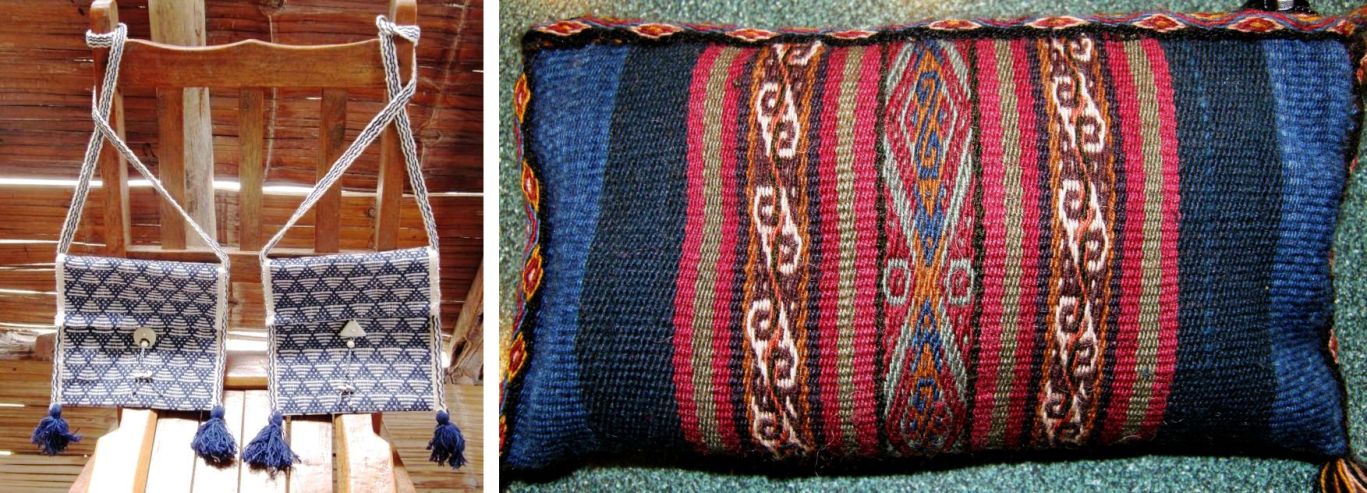
Two coca leaf bags or ch’uspas from highland Bolivia and Peru made with cotton, acrylic and wool.

The Montagnard (Vietnamese hilltribe) weavers make what they call “Bible bags” with commercial cotton thread. Verses from the Bible are often woven into the straps. Cotton satchels with zippered compartments and buckles are being made by one family in coastal Ecuador for the tourist market using ancient weaving techniques and often their own homegrown and spun cotton.

I would say that the bag made in Tinkipaya, Bolivia on the left is destined for the tourist market too. The double weave bag on the right is from Mexico and has motifs that are commonly woven by the Otomi and Huichol people.

I think that the weavers make up for what may be seen as a lack of “shapeliness” in their bags by using various finishing techniques. I am a big fan of finishing techniques and I too enjoy “dressing up” a piece with pretty straps, pom poms, baubles, braids, tubular bands, cross knit looping, fringes, tassels and other frills, fluff and stuff.

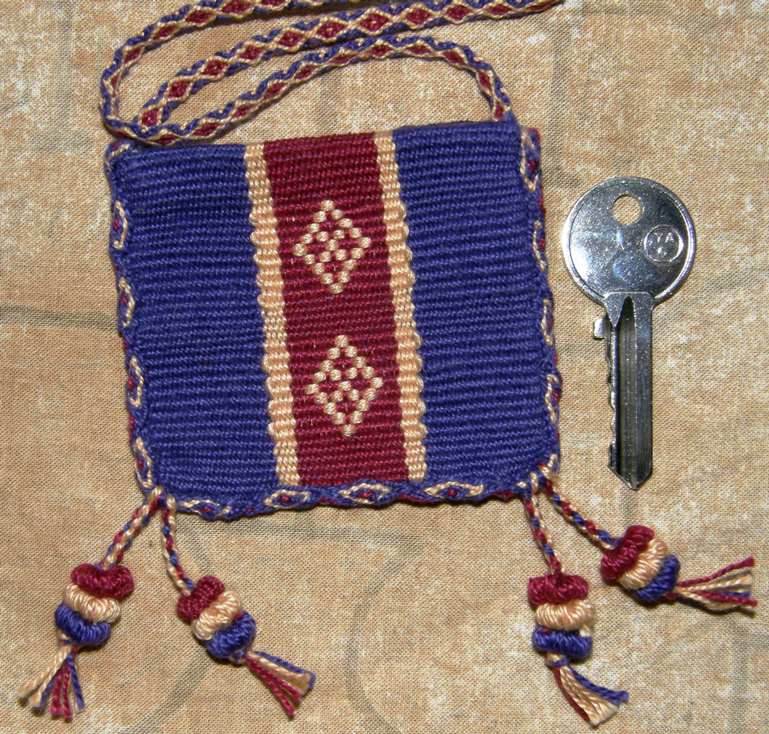
The tiny amulet bag at left has a crossed-warp strap, tubular band edging, braided tassels and Bolivian-style pom poms.

The body of  ceremonial ch’uspas are quite often completely dwarfed by a myriad of tassels, giant pom poms, braids and coins making them both colorful and musical as they jiggle about on a dancer’s hip.

I love the braided treatment of the warp ends on the Mexican bag.

Colorful edgings are added to pieces sometimes to strengthen and reinforce the edges or prevent the tendency for fabric which has been woven with overtwisted yarn to curl . And sometimes it is there solely for decoration.

The cotton bags above left from coastal Ecuador, which have been made for the tourist market,  have been edged with plain-weave bands and have had large tassels added at the corners. The technique is the same as that used on the traditional saddlebags where the bands are used to strengthen the edges. I have been told that tubular woven bands are added to large pieces in Chinchero to help stop curling. I would say that one has been added to the small zippered purse above for decoration.

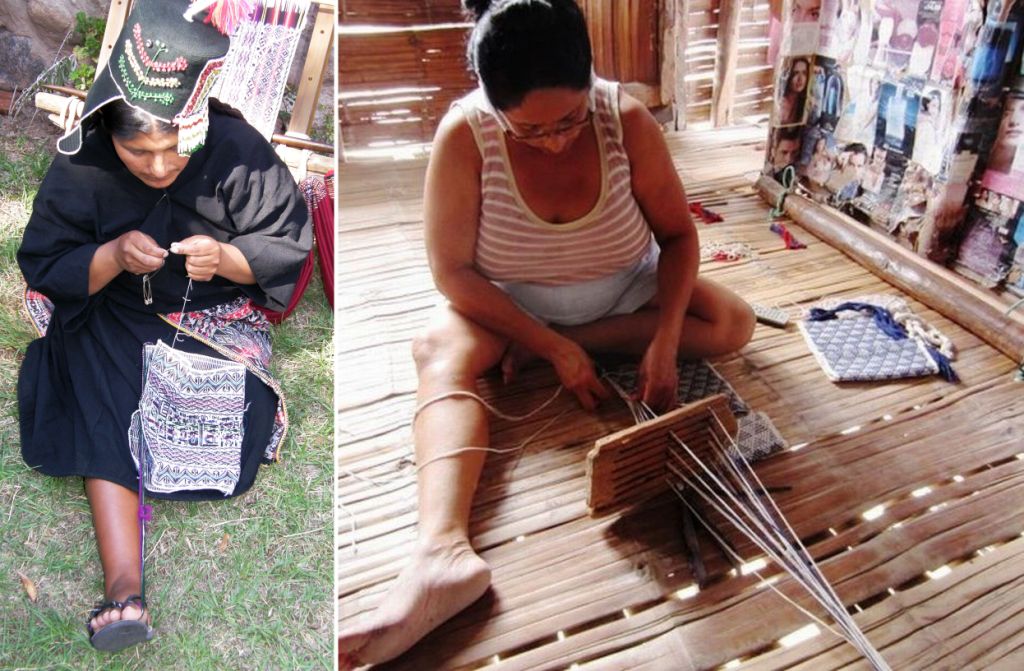
Here you can see highland and lowland weavers adding bands to the edges of their woven pieces using different techniques. The edging bands used by both weavers are sewn and woven at the same time using the weft as the sewing thread. (see the videoshere ). The weaver from  the Tarabuco area of Bolivia uses a toe and finger-tensioned warp with a heddle and loop shedding system. Trinidad from Manabí province in Ecuador uses a homemade rigid heddle to create her sheds. One end of the warp is generally attached to a screwdriver which is wedged between the floor boards and the other end to a wall beam or other fixed point.

I have yet to get a zip I like for my bag creation this week. I have just pinned a metal zip into place for the time being.

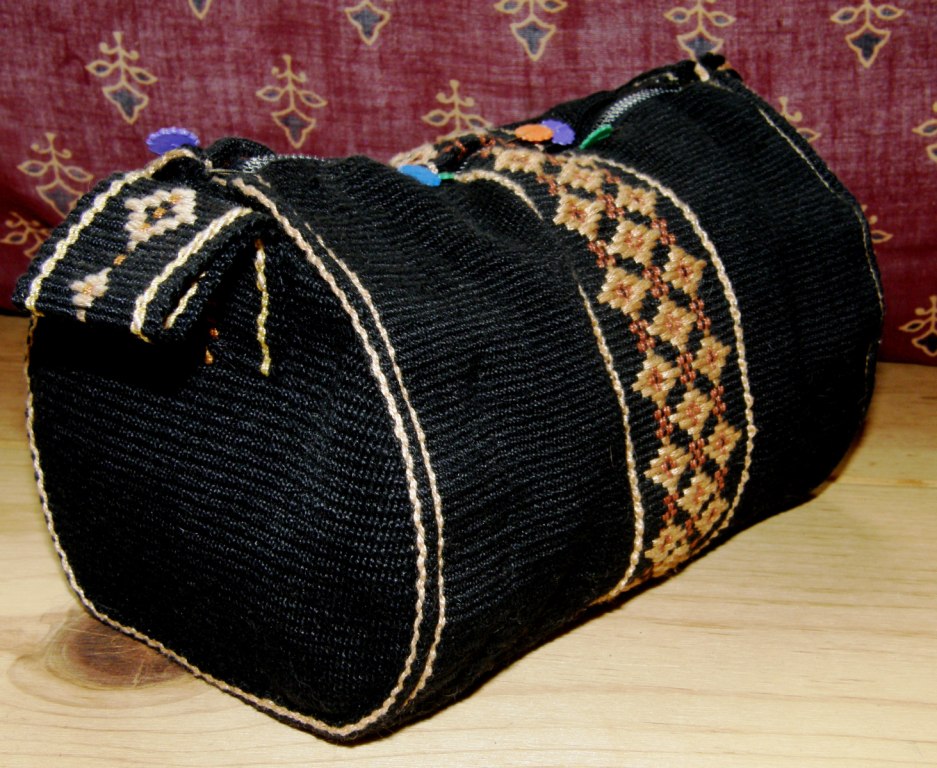
This looks like a giant sports duffel bag, doesn’t it, but it actually only measures 7″ x 4 1/2″. It’s a nice size for a travel cosmetics bag. The sides are made from left over material from one of my purse projects and were woven using the three-shed method that I describe in my Andean Pebble Weave book. This produces a nice dense piece of cloth which worked well for this purpose. I cut them after a generous application of a “stop fray” product and then came the fiddly sewing process. I made use of my sample band to add a tab…something to hang onto while pulling the zip open.

I added black-and-beige tubular bands to both sides to outline the rounded inserts but, darn, you can’t even tell they’re there!! And sadly, the weft twining ended up on the bottom. That will teach me for weaving away with no end product in mind! But, sewing skills were extended and that was the post- weaving plan.

My Huichol piece is slowly moving along…

You may remember me saying that this finnweave technique behaved very well for me in that I did not need to use a reed to maintain the warp spacing. Well, it turns out that I may need to rethink that. You can see that the warps are spaced wider in the center than on the sides and I am having to fight a little with the right hand edge where the warps are threatening to scoot over next to each other.

All in all I am pretty pleased with it. I will just weave on until there is no more room to make the manipulations and see what kind of bag I can make from this. I have been searching about online for the kinds of designs that the Huichol and Otomi weave in this technique and have only come across bags and belts…..the kinds of items where you would ideally want a fairly sturdy fabric. The piece I am weaving would stand up quite well as a bag. I certainly wouldn’t call it light and “drapey” but not sturdy either. So, I was blown away this morning when I saw this on Teyacapan’s Flickr page…

An Otomi shawl, or rebozo made in what I am guessing is the same technique. Look at the braided fringe treatment. Now my question is “what’s on the other side?” (see last week’s post). The other side of my piece shows the same motifs with their colors reversed but they are clearly imperfect. That is the nature of this technique. I have seen Huichol belts online that have the same “flawed” motifs on the back while on others the motifs are clearly perfectly reversible. I shall ask Karen if I may have a peek at the other side.

Doramay Keasbey described in a recent article in Handwoven magazine (Jan/Feb 2011) five different types of double weave pick-up showing both sides of the fabric to compare the motifs. Some have varying degrees of feathering around their edges but are reversible while the motifs in the finnweave example have smooth edges but are not reversible. I wrote about this article in a previous post but I thank Marsha Knox, who has been making her own experiments in double weave pick-up, for reminding me about it.

Ah well, I shall just continue with my ten-inch wide piece and dream about one day being able to make a rebozo!

Something else I played with a little this week was two-color alternating warp floats. This comes via the “Worldwide Weaving Web”.

Yonat cast the first strand in the web by weaving some bands in this technique and posting them on Facebook.

Annie (ASpinnerWeaver) picked it up and went from there creating her own piece, a guitar strap, and posting it on Facebook too.

That’s her piece pictured at left.

I saw it and immediately loved it. It reminded me so much of something but I couldn’t quite pin it down.

Someone on Facebook commented that it looked Egyptian while Annie herself remarked that it reminded her of some Hmong designs she had seen.

Yet another said it looked like a person standing with open arms and legs.

In any case I wanted to weave it.

And then I remembered a motif from Bhutan that I have in a book which has some of the basic elements. This is what Annie’s piece reminded me of.

I wove something based on Annie’s design making some changes to make it my own version.

I used a solid color stripe down the center and added in a five-span float on the outside.

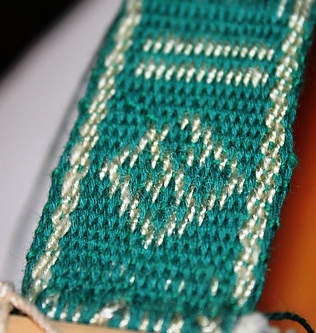
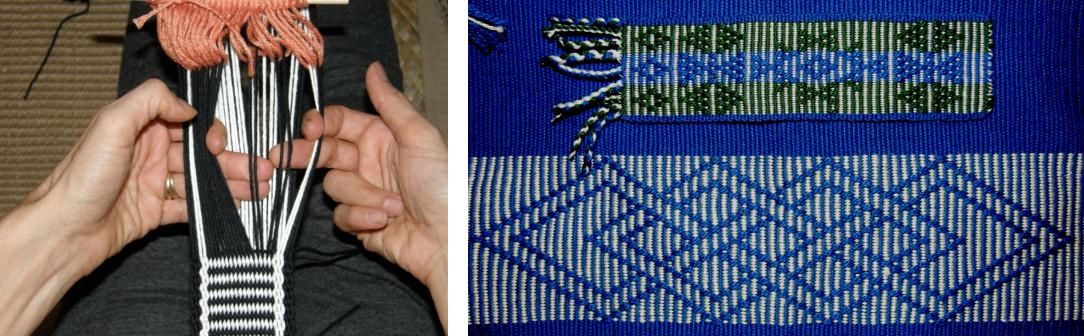
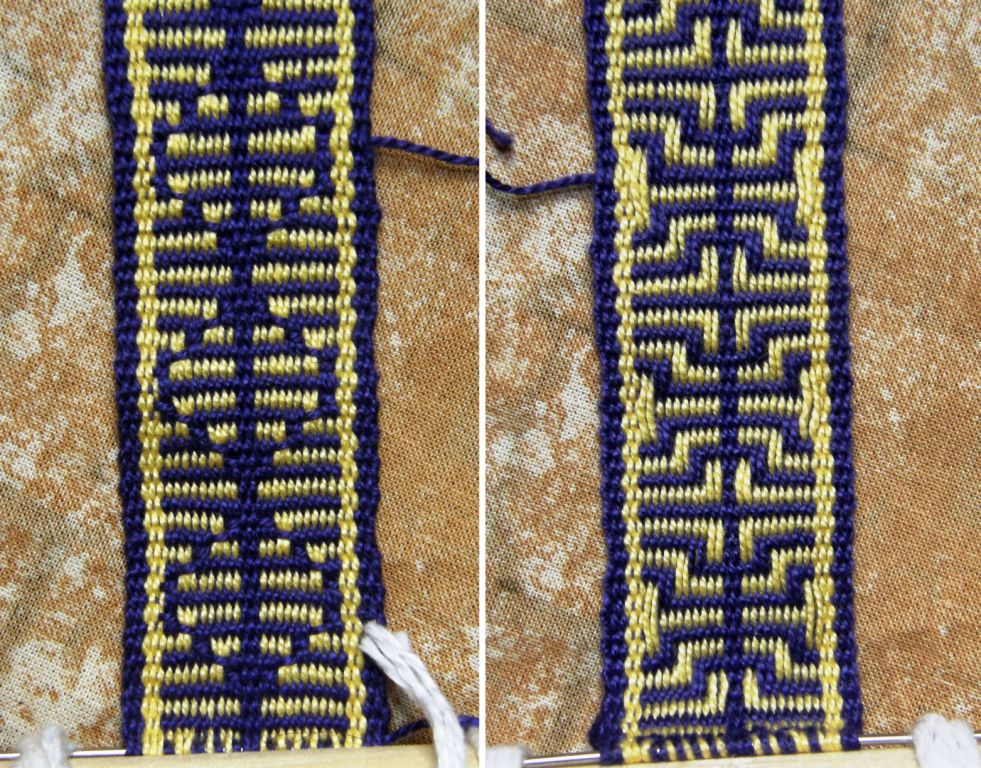
What I didn’t realize was that by adding that single-color center stripe I had changed it into one of those “eye-bending” designs which changes when you shift your focus somewhat like those 3-D designs years ago that we all used to go cross-eyed over. It was only when I turned the band over to see “what’s on the other side” that I saw the other design. I wonder if you see it too.

Look at the image, below left, of the back of the band with its diamonds for a while and then look at the one on the right of the front. What do you see now? Do you still see the stick-like patterns or do you see diamonds?

After that, all I could see was diamonds!!

I had to go take a break and come back to be able to see the nice stick pattern once again.

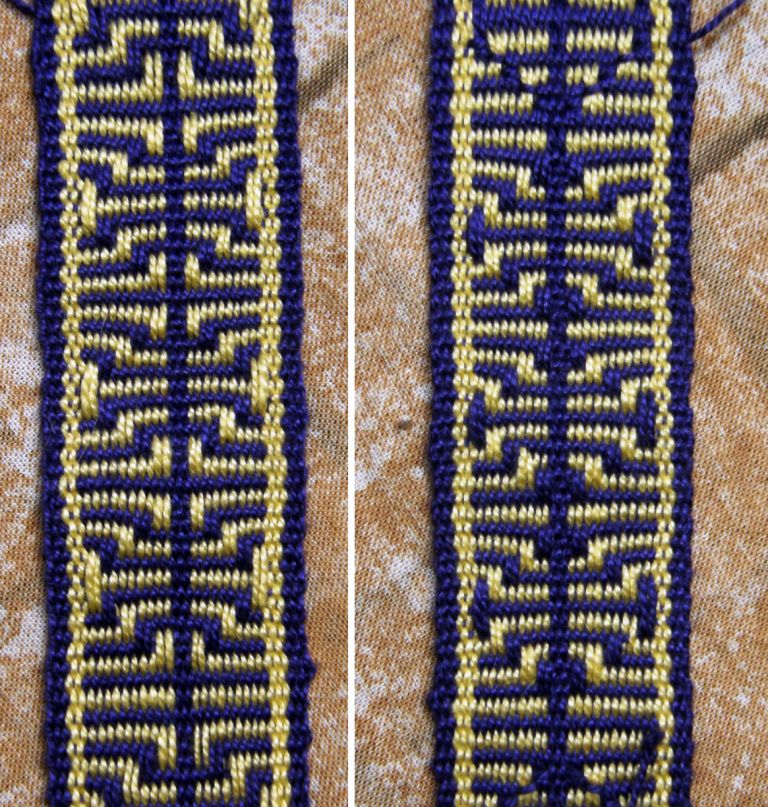
Then I continued weaving it as a complementary warp technique which made the design reversible. It also compressed the motif so that the five-span floats were less cumbersome.

Looking at it now all I can see is diamonds once again.

The design is just made up of floats of alternating colors starting in the center and working their way out to the edges. Here is a chart for a very large version of this pattern.

So that was all a bit of a fun distraction!

I have a band that I bought in Guatemala where the weaver has made use of some of these eye-bending motifs. It is in basic black and white which is very unusual in Guatemala where bright colors abound. I bought this belt in the same town that is famous for  hair sashes which scream with color and are heavily laden with supplementary weft designs.

When the black and white floats alternate in succession they produce quite a three-dimensional effect.

I have lots to report on the Ravelry group backstrap Weave-Along but I will save it for next week except for Amber’s amazing finished work which is in keeping with the bag theme in this week’s post. Look at her gorgeous lined tote bag! Okay, lining has to go on my list of sewing skills now….

Oh, and one more thing –  another delicious distraction arrived, this time in the post…a birthday gift from my friend Anna in Australia. My goodness it was hard not to drop everything and get into this but I shall do so on the weekend. All my off-loom time this week has been spent sewing,  trying to get that square peg into the round hole!

 This book, by Dutch author Mirja Wark, is about the si’ira, which is the intricate belt weaving of the Wayuu Indians from the Guajira, the northern border area of Venezuela and Colombia.

I flicked through and was immediately struck by a couple of things. It appears that the Wayuu make and operate their heddles in the same way as the Guaraní weavers here do, a way that is completely different to anything I have seen in the highlands or elsewhere. (see the pictures and video in this post) One of the Wayuu designs strongly resembles the design in the Ayoreo bag in this post. I imagine the Wayuu inhabit lowland regions like the Ayoreo and Guaraní….I need to stop here and go read!

Backstrap Weaving – Ready, Set…Weave Along!

I fear the truth in the adage ”out of sight, out of mind”. You wouldn’t believe my computer desktop! It is a cluttered mass of folders and icons. I just know if I put anything away into a file, I will forget about it and I have new ideas coming up all the time.

The same goes for my bedroom/work space. We have had to come up with some interesting solutions to the lack of space in this little home which means we have two single beds side by side, one of which folds away during the day so I can have some floor space on which to work.

Everything has to be rolled up, picked up and put away at the end of the day so the bed can come back out. You would think that that would keep things fairly orderly…

I still seem to end up with piles of stuff on the floor everywhere…weaving sketches, books, tools, baskets of yarns, things I don’t dare put in a cupboard or closet because they serve to remind me of the latest new weaving idea I have had. They have to be covered so the cat won’t get at them. It is a merry mess, it lives and grows and never stagnates. But, it’s time for a change!

The fact is that there simply isn’t anywhere to put things anymore as my books have completely taken over…no more floor, shelf or closet space left but aha! there is wall space!

So, I am going to have lovely woven storage bags hung on the wall to hold my project bits and pieces and, on the whiteboard, a nice orderly list of what’s waiting to be explored. The bedroom will start to look like some kind of crazy textile bazaar! Actually it kind of does already.

Storage bag ideas: I love the woven sacks that are used up in the highlands for storage, transport and display in the markets and fairs. I have been searching for ideas for interesting bag shapes but I have to admit in the end that a rectangular piece of cloth folded in half and sewn together at the sides is probably the most economical if not the most elegant way to create a practical bag from a piece of handwoven fabric.

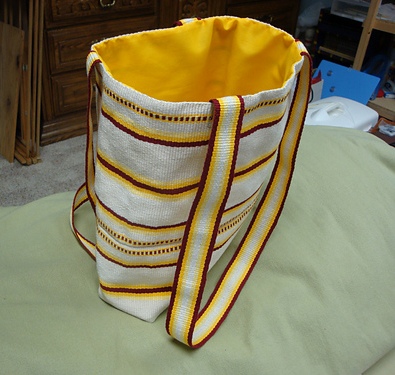
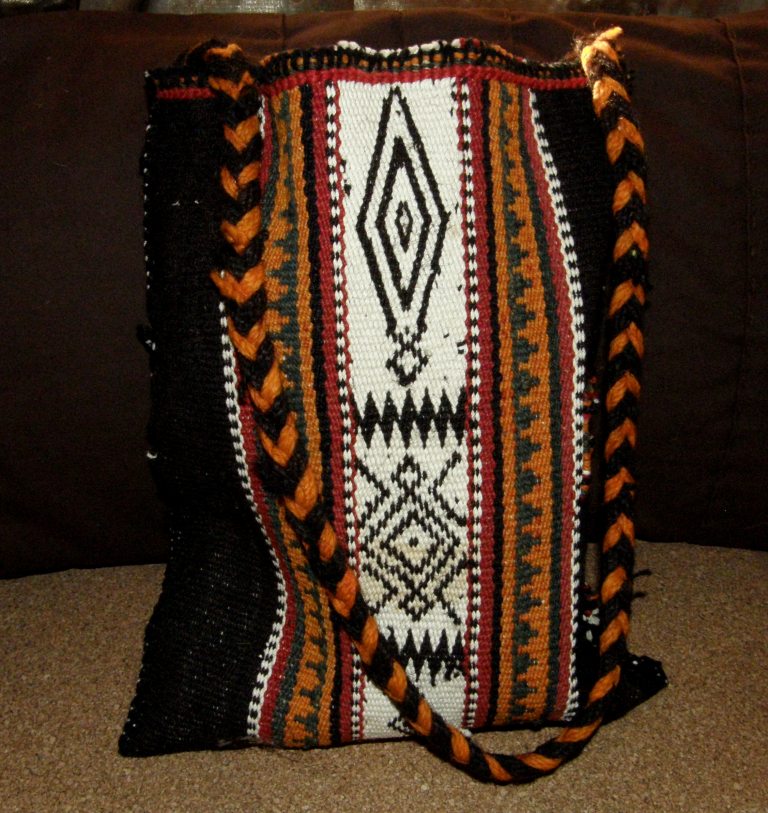
You can see one deep storage bag that I have at the top of this post that Tracy sent me from Qatar. The wool fabric is part of a Bedouin tent divider. That currently holds all my Tour de Fleece gear.

This wool bag that I made years ago with  Mapuche designs woven with supplementary warps hangs on a doorknob and holds all my camera stuff…battery recharger, cables, tripod attachments etc.

This gigantic cotton bag with Guarani pebble weave designs, which was bought here in Santa Cruz, hangs off one of the bed posts.

So there are more bags to be made so I can get everything off the floor and onto the walls! Well, you all know that I am just looking for an excuse to weave more things.

So, I am in the process of weaving a hanging strap, which I couldn’t resist decorating, for what will be a new storage bag made from a piece of fabric I wove some time ago as an ikat experiment. The strap has motifs from Bhutan as does the bag fabric.

It will also need a back and some sides in plain black…it will be very fast to weave those.

This will hang on the wall and hold what is currently being stored in a large basket on a shelf. The basket will go and yes! that way there will be more room for books or at least something that is currently on the floor. (I have a new book coming in the mail…thanks Anna!)

The motifs have been woven using supplementary wefts. I used one and a half strands of embroidery floss as the supplementary weft with my 35wpi cotton warp and weft. Veeeery slowly things may become a little better organized.

I have been admiring the designs made by the Huichol people of Mexico in balanced double weave for a long time ever since I first ran across their work in a museum in the US in 2007. They make bags on which they add large corner tassels and have an unusual way of braiding the warp ends.

These are a couple of samples I made in this technique some time ago.

 I prefer the patterns that they use in their belts and so I will probably try to make a storage bag in this double weave with motifs from their belts. I wonder if I can figure out how they work those warp ends.

The other project I worked on this week was the mug rug set.

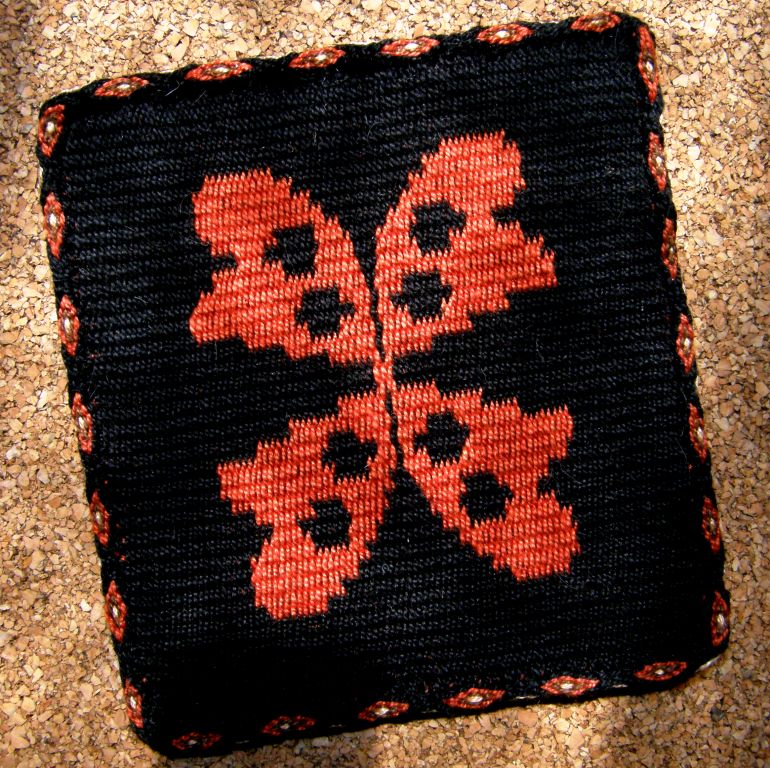
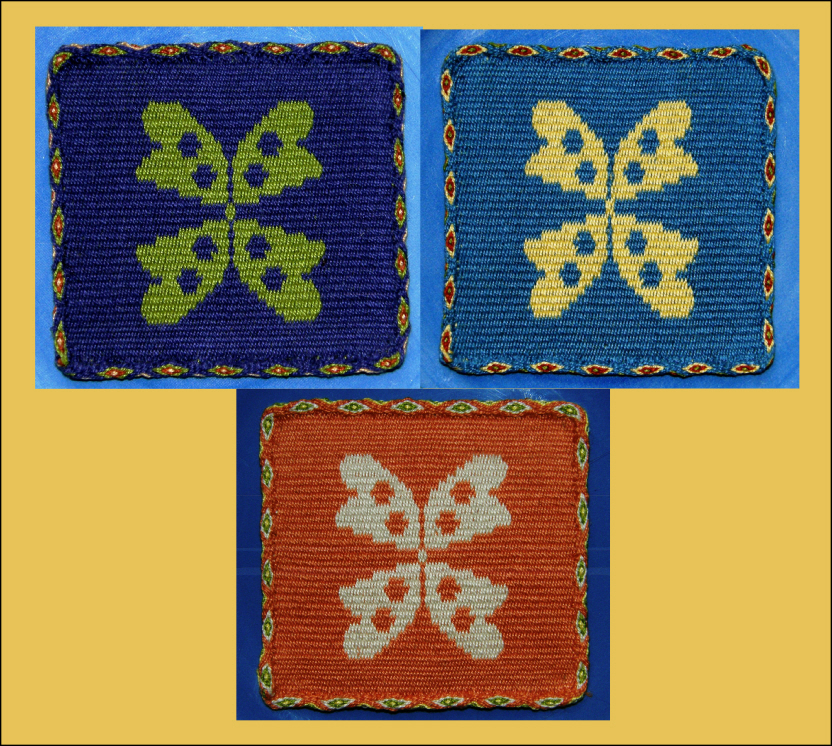
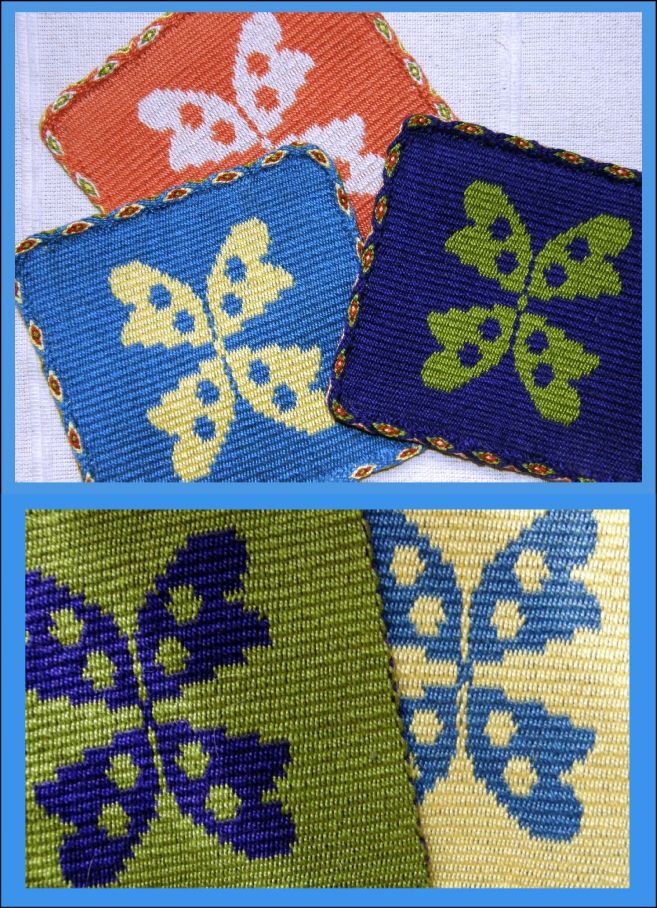
My friend, who has decorated her kitchen with flower and butterfly motifs, saw the prototype I had woven (at left) and asked for a set for her breakfast bar. Now she tells me that they are too pretty to use and that she will put them on her wall.

I have made three and will wait for her to choose the colors for the fourth. The motif is neither butterfly nor flower and is based on a Guaraní leaf design which I wove one way and then mirrored.

The red and black sample, which is larger than the other three, will stay here as my tea mug rug where I work on the floor and the other three will go to Evelyn with a fourth one yet to be made. They have all been edged with tubular bands.

Evelyn’s kitchen is yellow with bits of green and blue in the wall tiles so I think these will look nice there.

It’s hard to decide which face to make the “right” side.

There is another commissioned piece that I have been working on, which I can’t show here yet, but this piece has made me even more enthusiastic about the simple string heddle.

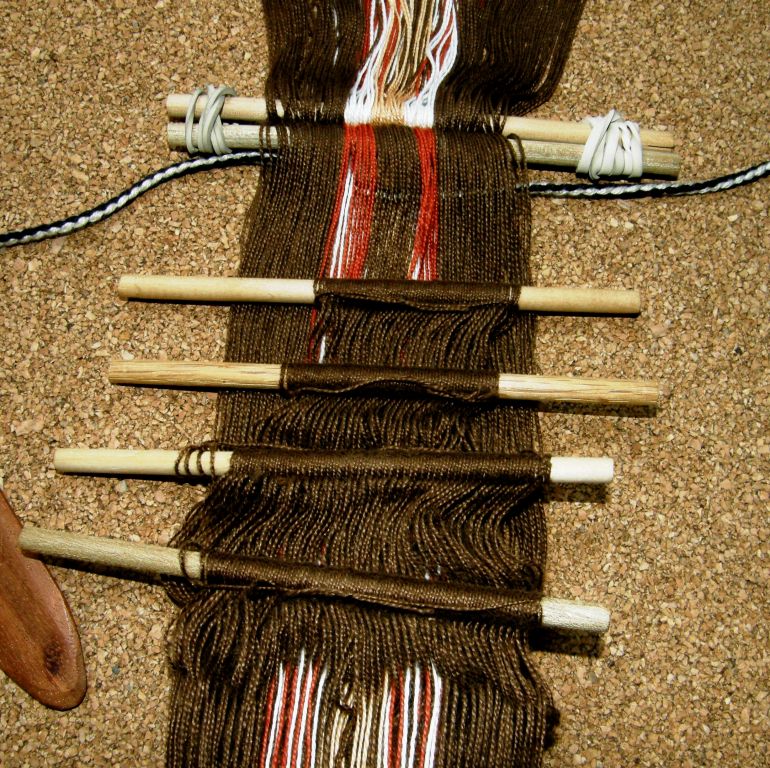
This is a particuarly long but narrow piece that I am weaving in Andean pebble weave and I have set up the warp with four sets of string heddles (two more than I would normally use for pebble weave), and what an incredible time saver this has been! This project is simply zooming along!

The black and white cord that you see in the warp is my “saver cord”. By using these two additional sets of heddles and the saver cord I actually get to do seven consecutive weft passes without having to do any pick-up for this particular design.

String heddles are so cool! I love how they allow you to put one warp thread into multiple sets.

No matter how they are made, whether they are single or continuous, I love them.

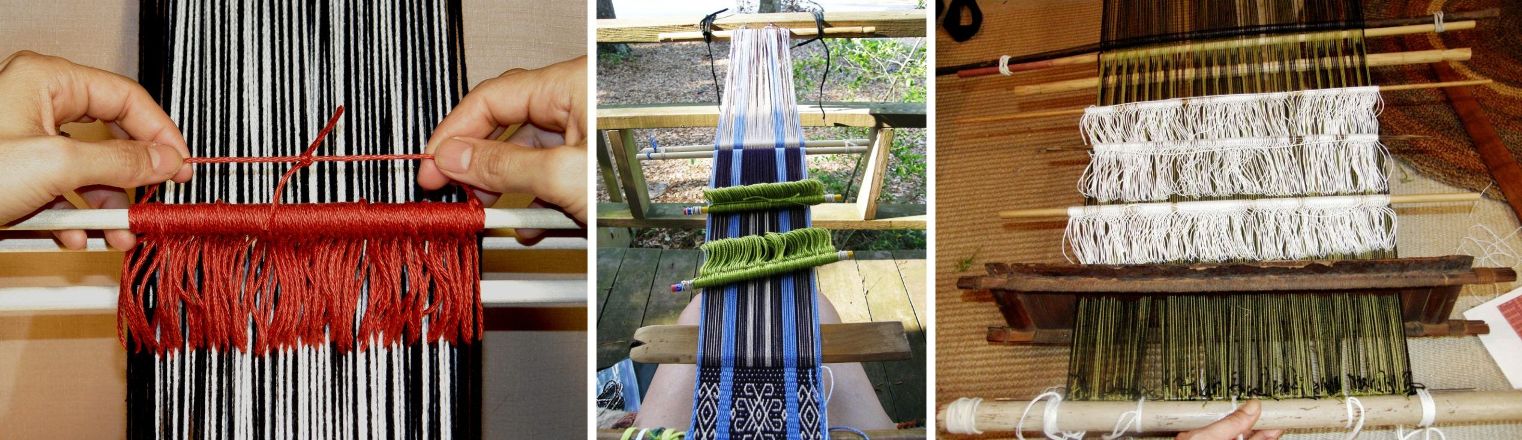
You can use one, two, three or four as I am currently using. I am not sure what limit I would put on the number that I would personally consider comfortable or practical for my own backstrap weaving. I have seen backstrap weavers in pictures with many more.

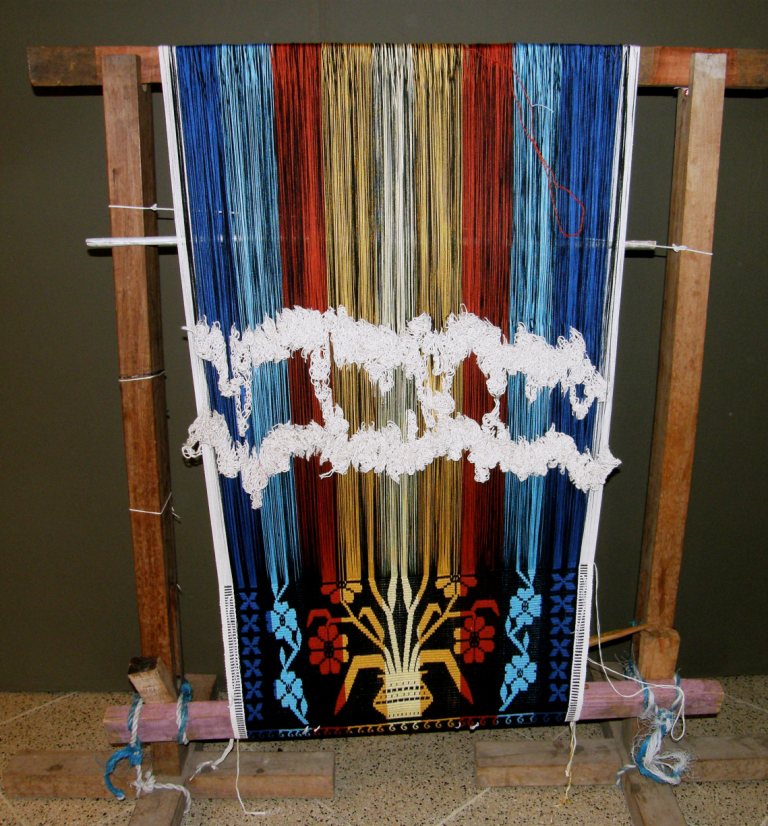
The warp on this vertical loom in Ecuador will have eleven sets of patterning heddles plus one that will control one of the two plain weave sheds.

They can be made on a stick, made around the fingers and knotted into a bunch or chained together.

There are so many different ways to make them with no one particular way being the “right” way. I have chosen my favorite ways over the years but love seeing and learning new ones.

Education and More has just posted the following video on YouTube showing a Guatemalan weaver teaching her foreign student the way she makes her string heddles.

While on the subject of Guatemala, it is always fun for me to go to Facebook and see the latest video that Red Corn Tours has posted on Guatemala…weaving, costume, festivals and different aspects of simple daily life from the making of tortillas to the washing all those beautiful hand woven huipiles.

And now for our plain-weave backstrap loom weave-along progress….

We started this week with more people, so far, opting for the balanced weave project after a flurry of pre weave-along DIY reed and hole-and-slot heddle making activity.

Warp-faced projects for the color and stripes challenge from Bobbie in cotton and Jennifer in her homespun wool.

Those who have not joined the weave-along have been turning out projects on their backstrap looms as well.

Jennifer is weaving a balanced piece using hemp yarn and a reed made for her by Janet. She has also finished three plain weave warp-faced panels with her homespun wool which will be joined into a bag.
Here's the beautiful reed that Janet made. Kathi has set up her loom with a rigid heddle with different kinds of yarn for her balanced weave project.
Cindy has joined in showing us her warp wound on its stakes and there she is with loom set up and ready to weave a warp-faced band.
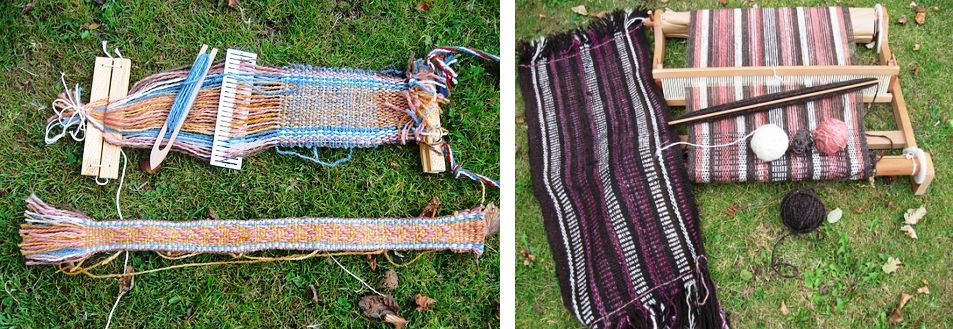
Blomster is using wool in a piece she is weaving with a rigid heddle on her backstrap loom. It is pictured next to the warp-faced band she made with the same warp. She is making a bigger wall hanging using her rigid heddle loom and natural color and madder-dyed wool as, being new to backstrap weaving, she does not feel ready to attempt such a wide piece yet on a backstrap loom. Her wide piece is inspired by the hanging you see nearby which she bought in Oman. She thinks that it was probably made with goat hair.

Both Amber and catknitlatte have reported that they are on their way and we hope to see progress pictures soon.

Fiall and WannaGTD finished these backstraps before the weave-along started but these backstraps could easily be weave-along projects as they fit the plain weave criteria.

The instructions for weaving these backstraps are in my WeaveZine article.

Janet is making a shawl using her 24" rigid heddle and a bunch of different yarns. Her warp is cotton and her indigo-dyed weft will come from her homespun stash. This is really amazing! She will weave it in several panels.

Knitnfrenzy and ElizArtist have both checked in. Knitnfrenzy is going for a warp-faced project while spindleori showed us her homespun, at left, which she will weave up with a rigid heddle to make a bag.

Dygvvi is going to weave fabric which will go around a frame to make a yarn storage bucket.

We are waiting to see what Franco, AuntJanet and Phil have been up to. We know that Phil has a painted warp and can’t wait to see how that is going.

Marsha and Traudi have been working on their patterning techniques on projects outside the weave-along. Marsha's band has designs in both simple and two-color alternating floats ("warp floats galore") while Traudi has been playing with supplementary weft patterns.

And what about my weave-along project? Blush…I had better get going and go warp one up!