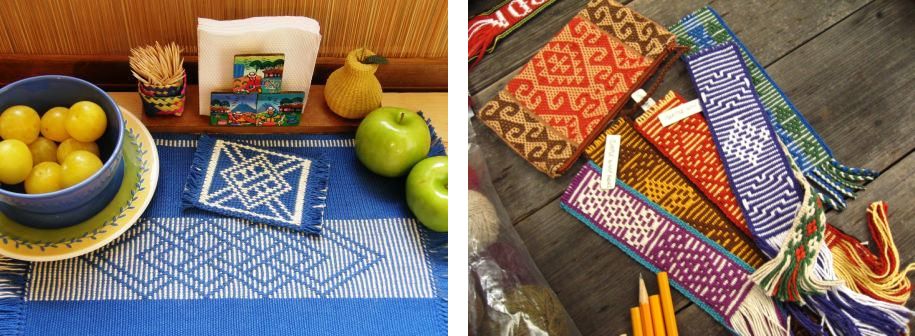
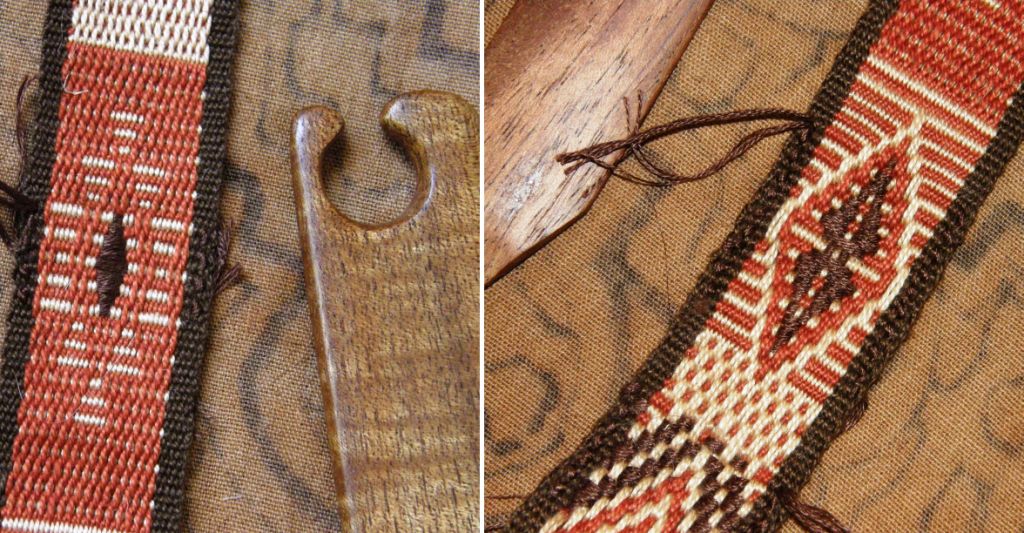
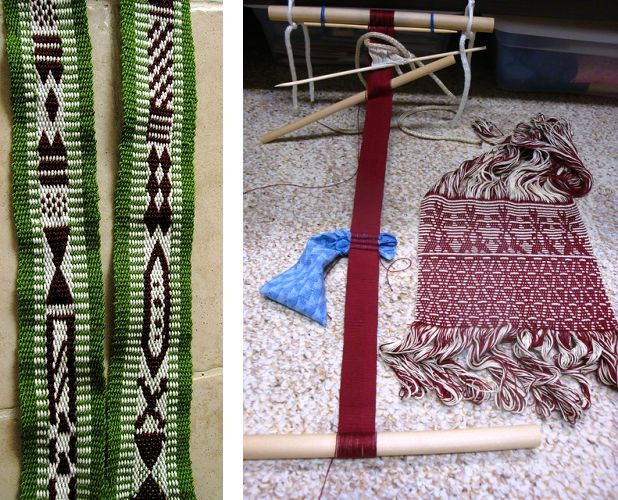
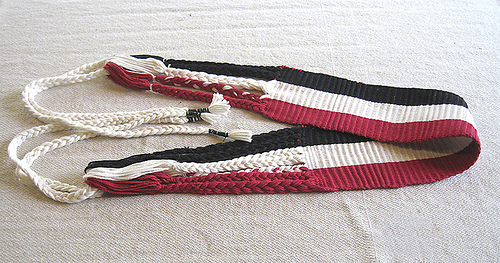
Backstrap Weaving – Bag Mad

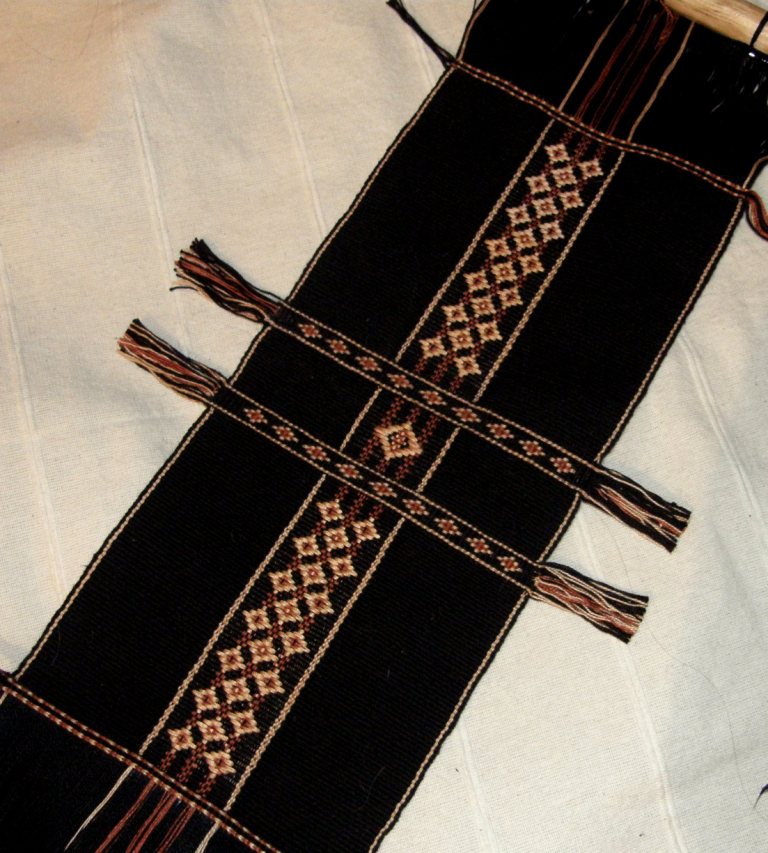
Look out…I have been sewing again. I challenged myself in my blog post last week by saying that I need to sew this piece, with its supplementary weft pattern and weft twined bands…..


into something that would extend my meager sewing skills. So, I had to resist the temptation to simply fold it, flip the end over to make a flap and sew up the sides…done, easy, onto the next project. I decided that I wanted to make a kind of sausage bag, that is, one with a flat bottom and rounded sides – a sewing challenge indeed for this inexperienced sewer. I Googled away for instructions and found none. How to get the straight edge of the main piece to bend neatly about the rounded ends??….for me it was kind of like trying to get the square peg to fit the round hole.

I will show the still unfinished bag to you a bit later and then you can judge for yourself whether I succeeded!

And now I can even better appreciate why so many bags made by the weavers I have met here are simple rectangles, folded in half and sewn up the sides. Of course, it makes perfect sense after having worked weeks to weave a piece to want to use it ALL…not cut it up, tuck and pull it about to make an ”interesting” shape and besides, it will hold more that way too.

So, I have been looking through some of my photos of weavings and here and there online and have some bag pictures to show you. What a wonderful variety of designs, structures and materials I saw but all with the same highly practical shape…a basic square or rectangle.

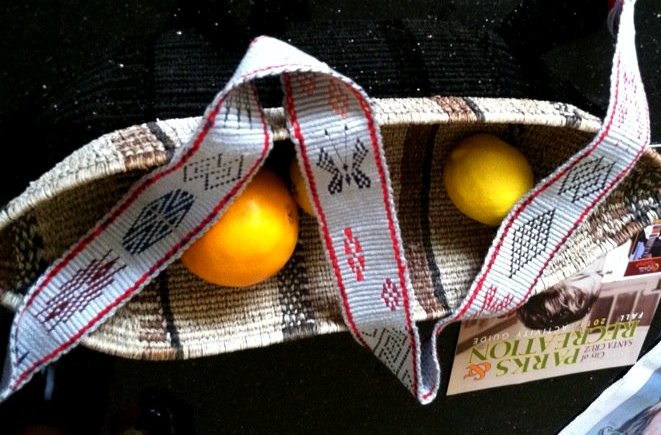
The bag on the left is knotted using a fiber extracted from a plant related to the pineapple which is called “garabata” here and is made by the Ayoreo people of eastern lowland Bolivia. The one on the right, from Betty’s collection, was made by people of the hilltribes of northern Thailand and appears to be made up of several bands sewn together.

The Ayoreo work their pieces as rectangles which are folded and then sewn together at the sides. According to Peter Collingwood in The Maker’s Hand, bags or bilums, some made with the same knotting technique used by theAyoreo, are made in Papua New Guinea but worked as a tube rather than a flat piece….only one seam to sew.

Above left is a dual-pocket cotton saddlebag or alforja from coastal Ecuador. Both ends of the woven fabric are folded in toward the center to form the two pockets. On the right is a cotton bag from tropical lowland Peru. You might recognize the design from my recent placemat project.

Two coca leaf bags or ch’uspas from highland Bolivia and Peru made with cotton, acrylic and wool.

The Montagnard (Vietnamese hilltribe) weavers make what they call “Bible bags” with commercial cotton thread. Verses from the Bible are often woven into the straps. Cotton satchels with zippered compartments and buckles are being made by one family in coastal Ecuador for the tourist market using ancient weaving techniques and often their own homegrown and spun cotton.

I would say that the bag made in Tinkipaya, Bolivia on the left is destined for the tourist market too. The double weave bag on the right is from Mexico and has motifs that are commonly woven by the Otomi and Huichol people.
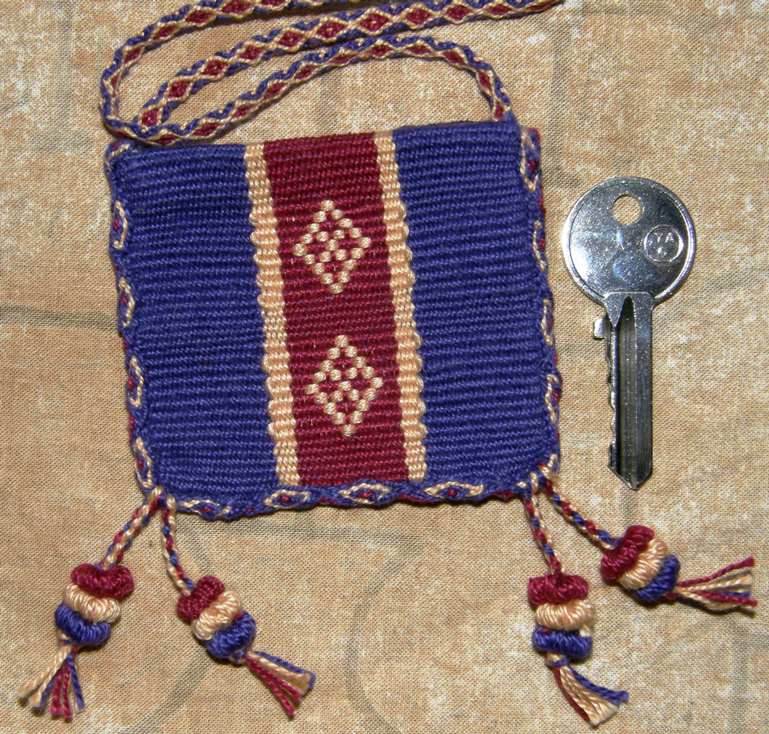
I think that the weavers make up for what may be seen as a lack of “shapeliness” in their bags by using various finishing techniques. I am a big fan of finishing techniques and I too enjoy “dressing up” a piece with pretty straps, pom poms, baubles, braids, tubular bands, cross knit looping, fringes, tassels and other frills, fluff and stuff.

The tiny amulet bag at left has a crossed-warp strap, tubular band edging, braided tassels and Bolivian-style pom poms.

The body of  ceremonial ch’uspas are quite often completely dwarfed by a myriad of tassels, giant pom poms, braids and coins making them both colorful and musical as they jiggle about on a dancer’s hip.

I love the braided treatment of the warp ends on the Mexican bag.
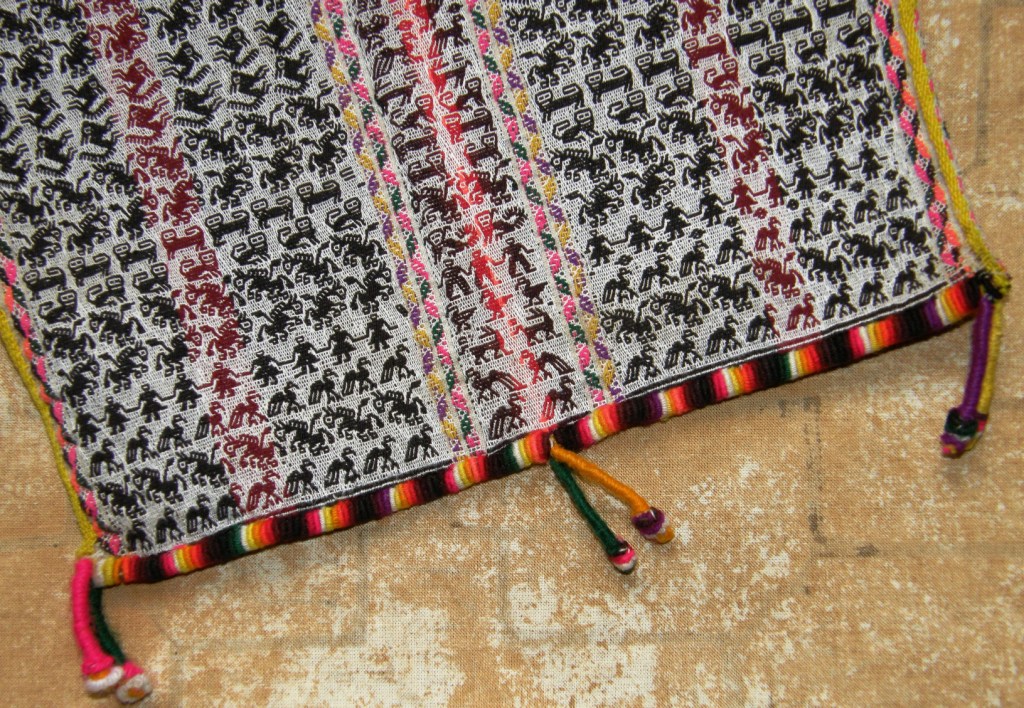
Colorful edgings are added to pieces sometimes to strengthen and reinforce the edges or prevent the tendency for fabric which has been woven with overtwisted yarn to curl . And sometimes it is there solely for decoration.
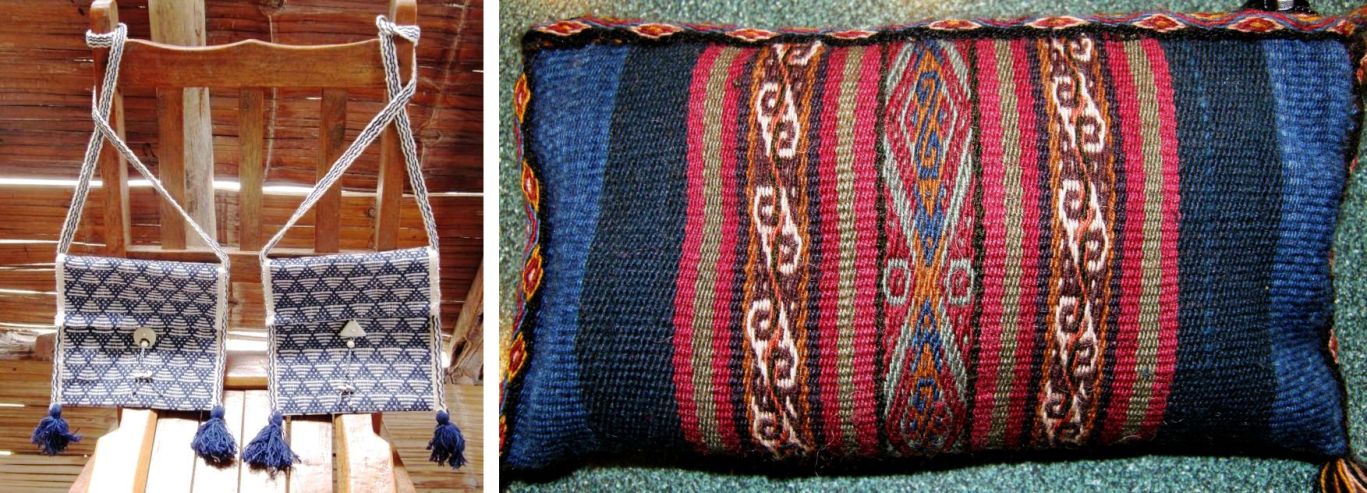
The cotton bags above left from coastal Ecuador, which have been made for the tourist market,  have been edged with plain-weave bands and have had large tassels added at the corners. The technique is the same as that used on the traditional saddlebags where the bands are used to strengthen the edges. I have been told that tubular woven bands are added to large pieces in Chinchero to help stop curling. I would say that one has been added to the small zippered purse above for decoration.
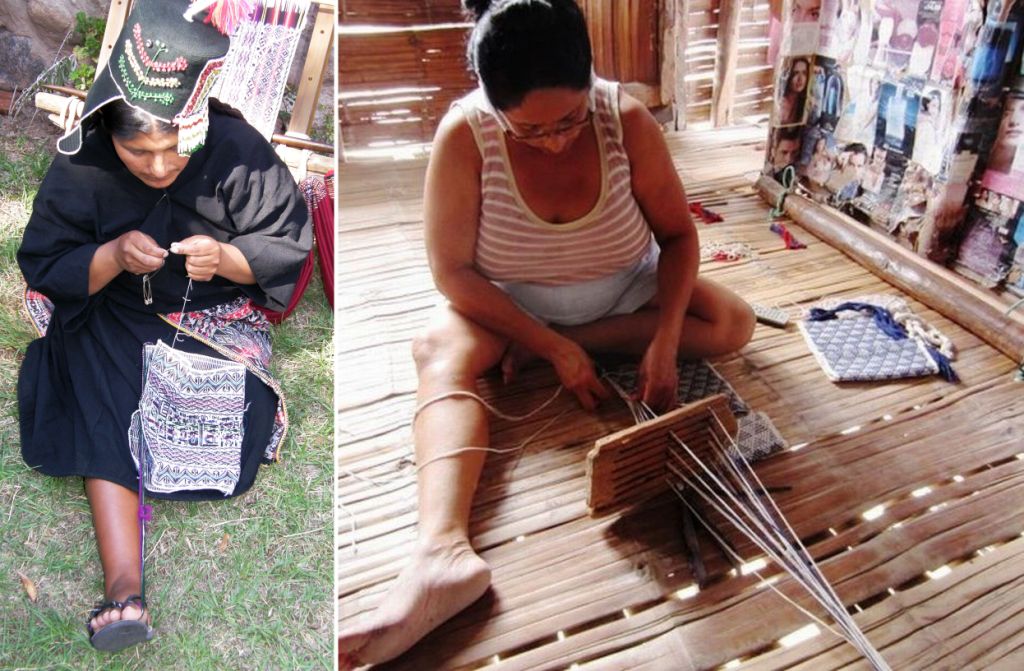
Here you can see highland and lowland weavers adding bands to the edges of their woven pieces using different techniques. The edging bands used by both weavers are sewn and woven at the same time using the weft as the sewing thread. (see the videoshere ). The weaver from  the Tarabuco area of Bolivia uses a toe and finger-tensioned warp with a heddle and loop shedding system. Trinidad from Manabí province in Ecuador uses a homemade rigid heddle to create her sheds. One end of the warp is generally attached to a screwdriver which is wedged between the floor boards and the other end to a wall beam or other fixed point.

I have yet to get a zip I like for my bag creation this week. I have just pinned a metal zip into place for the time being.
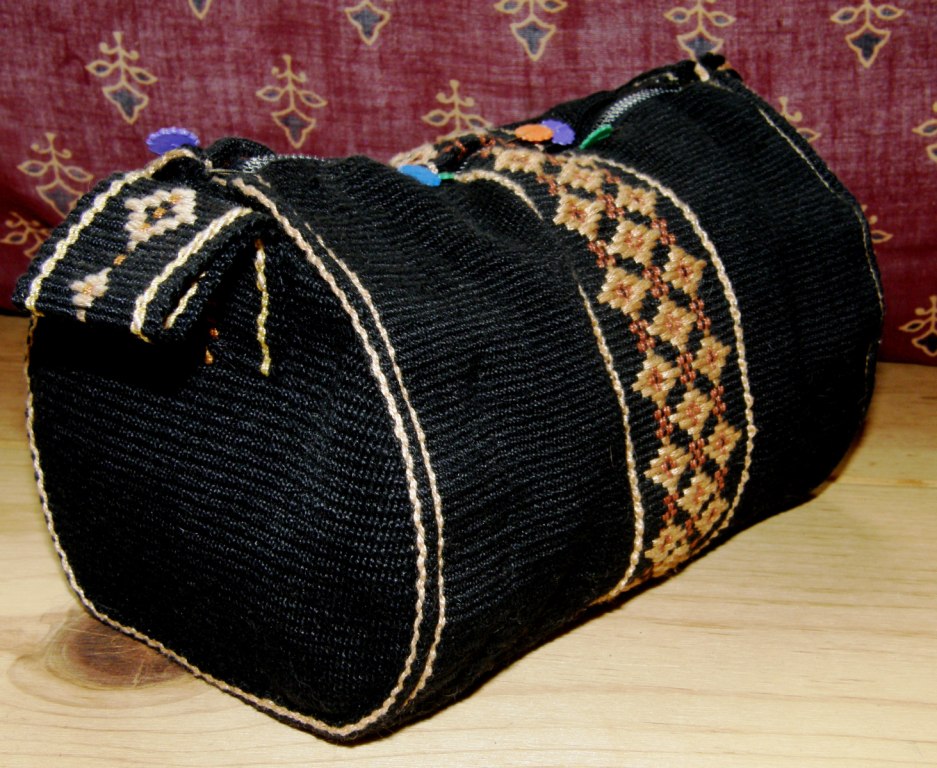
This looks like a giant sports duffel bag, doesn’t it, but it actually only measures 7″ x 4 1/2″. It’s a nice size for a travel cosmetics bag. The sides are made from left over material from one of my purse projects and were woven using the three-shed method that I describe in my Andean Pebble Weave book. This produces a nice dense piece of cloth which worked well for this purpose. I cut them after a generous application of a “stop fray” product and then came the fiddly sewing process. I made use of my sample band to add a tab…something to hang onto while pulling the zip open.

I added black-and-beige tubular bands to both sides to outline the rounded inserts but, darn, you can’t even tell they’re there!! And sadly, the weft twining ended up on the bottom. That will teach me for weaving away with no end product in mind! But, sewing skills were extended and that was the post- weaving plan.

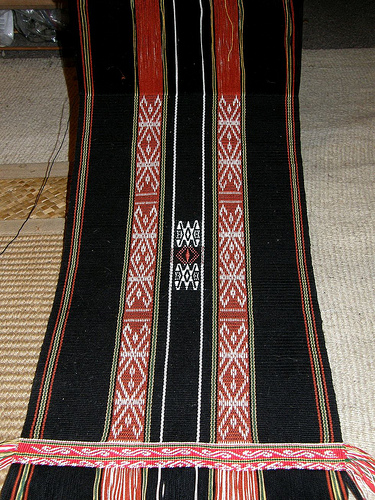
My Huichol piece is slowly moving along…
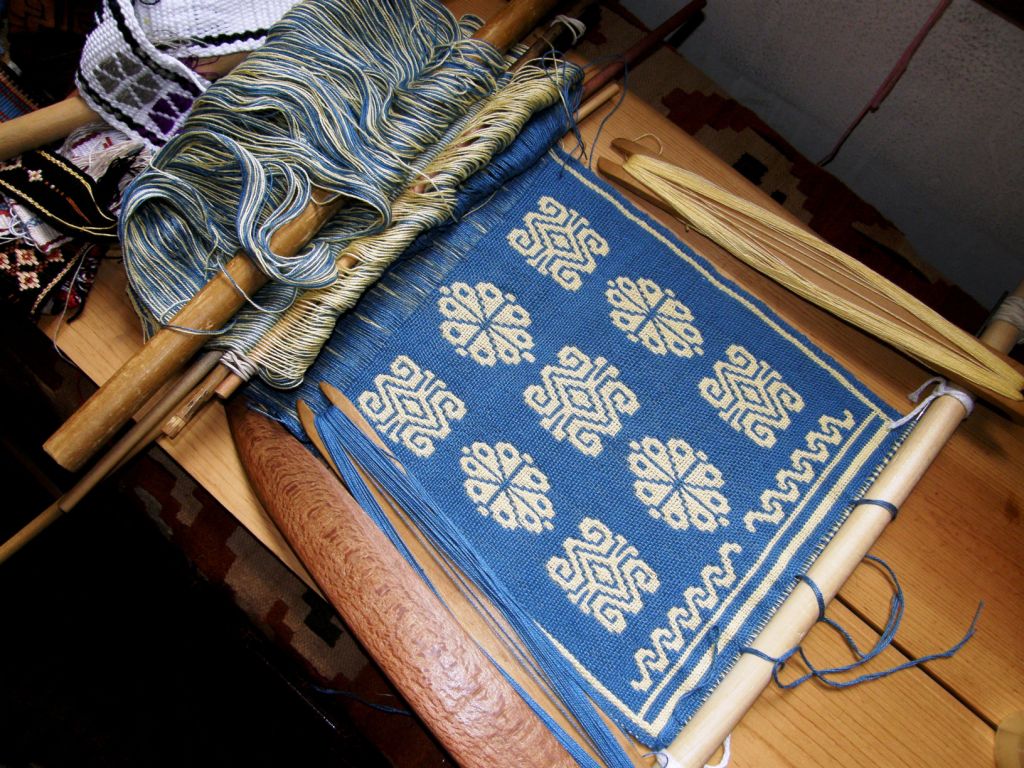
You may remember me saying that this finnweave technique behaved very well for me in that I did not need to use a reed to maintain the warp spacing. Well, it turns out that I may need to rethink that. You can see that the warps are spaced wider in the center than on the sides and I am having to fight a little with the right hand edge where the warps are threatening to scoot over next to each other.

All in all I am pretty pleased with it. I will just weave on until there is no more room to make the manipulations and see what kind of bag I can make from this. I have been searching about online for the kinds of designs that the Huichol and Otomi weave in this technique and have only come across bags and belts…..the kinds of items where you would ideally want a fairly sturdy fabric. The piece I am weaving would stand up quite well as a bag. I certainly wouldn’t call it light and “drapey” but not sturdy either. So, I was blown away this morning when I saw this on Teyacapan’s Flickr page…

An Otomi shawl, or rebozo made in what I am guessing is the same technique. Look at the braided fringe treatment. Now my question is “what’s on the other side?” (see last week’s post). The other side of my piece shows the same motifs with their colors reversed but they are clearly imperfect. That is the nature of this technique. I have seen Huichol belts online that have the same “flawed” motifs on the back while on others the motifs are clearly perfectly reversible. I shall ask Karen if I may have a peek at the other side.

Doramay Keasbey described in a recent article in Handwoven magazine (Jan/Feb 2011) five different types of double weave pick-up showing both sides of the fabric to compare the motifs. Some have varying degrees of feathering around their edges but are reversible while the motifs in the finnweave example have smooth edges but are not reversible. I wrote about this article in a previous post but I thank Marsha Knox, who has been making her own experiments in double weave pick-up, for reminding me about it.

Ah well, I shall just continue with my ten-inch wide piece and dream about one day being able to make a rebozo!

Something else I played with a little this week was two-color alternating warp floats. This comes via the “Worldwide Weaving Web”.

Yonat cast the first strand in the web by weaving some bands in this technique and posting them on Facebook.

Annie (ASpinnerWeaver) picked it up and went from there creating her own piece, a guitar strap, and posting it on Facebook too.

That’s her piece pictured at left.

I saw it and immediately loved it. It reminded me so much of something but I couldn’t quite pin it down.

Someone on Facebook commented that it looked Egyptian while Annie herself remarked that it reminded her of some Hmong designs she had seen.

Yet another said it looked like a person standing with open arms and legs.

In any case I wanted to weave it.

And then I remembered a motif from Bhutan that I have in a book which has some of the basic elements. This is what Annie’s piece reminded me of.

I wove something based on Annie’s design making some changes to make it my own version.

I used a solid color stripe down the center and added in a five-span float on the outside.
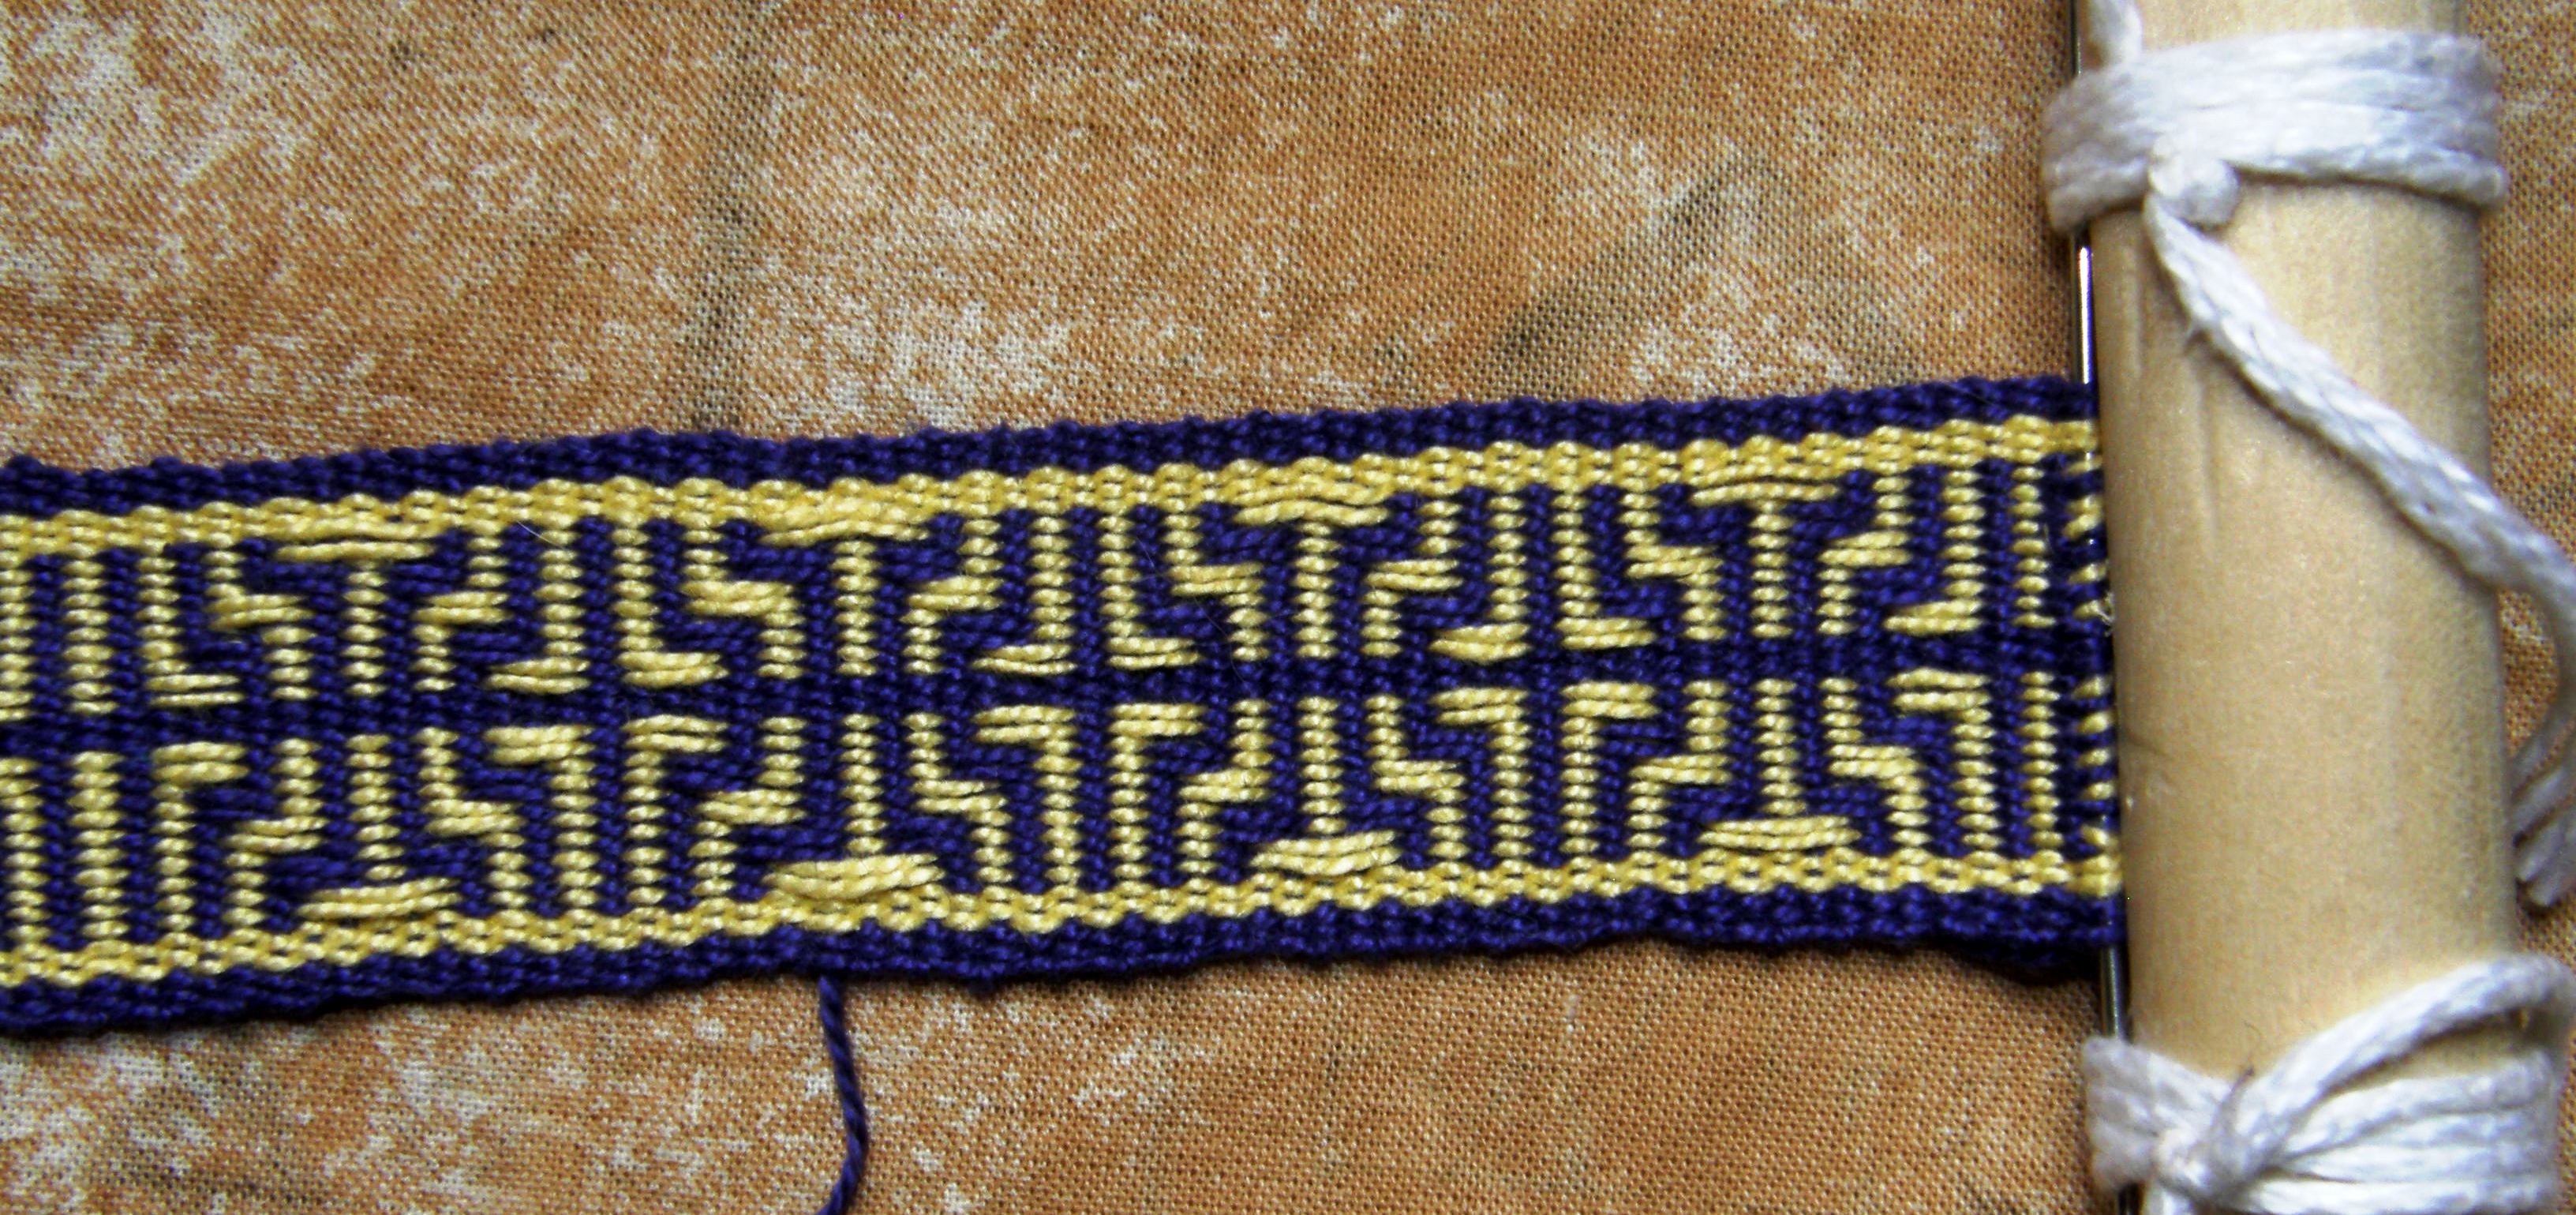
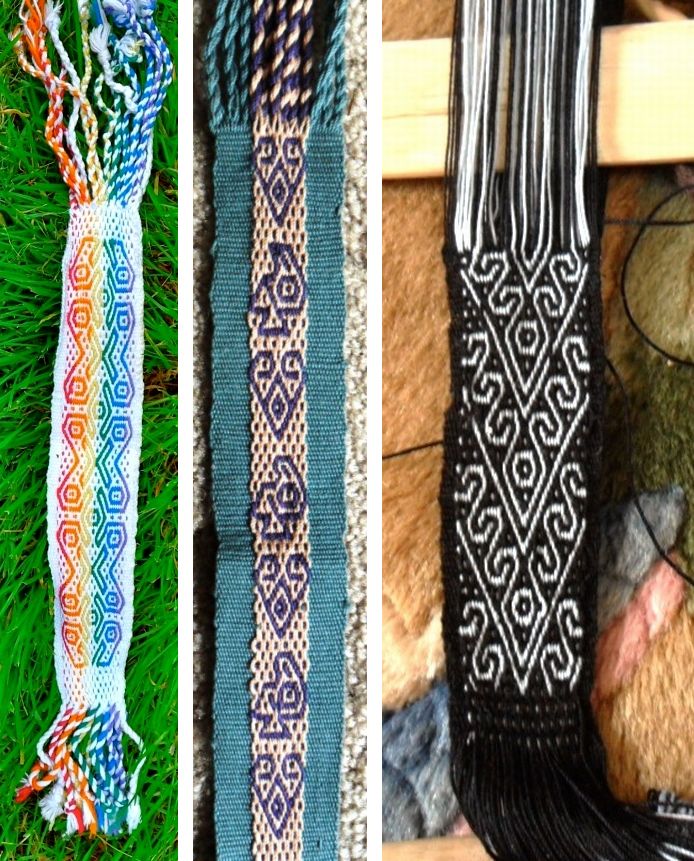
What I didn’t realize was that by adding that single-color center stripe I had changed it into one of those “eye-bending” designs which changes when you shift your focus somewhat like those 3-D designs years ago that we all used to go cross-eyed over. It was only when I turned the band over to see “what’s on the other side” that I saw the other design. I wonder if you see it too.

Look at the image, below left, of the back of the band with its diamonds for a while and then look at the one on the right of the front. What do you see now? Do you still see the stick-like patterns or do you see diamonds?
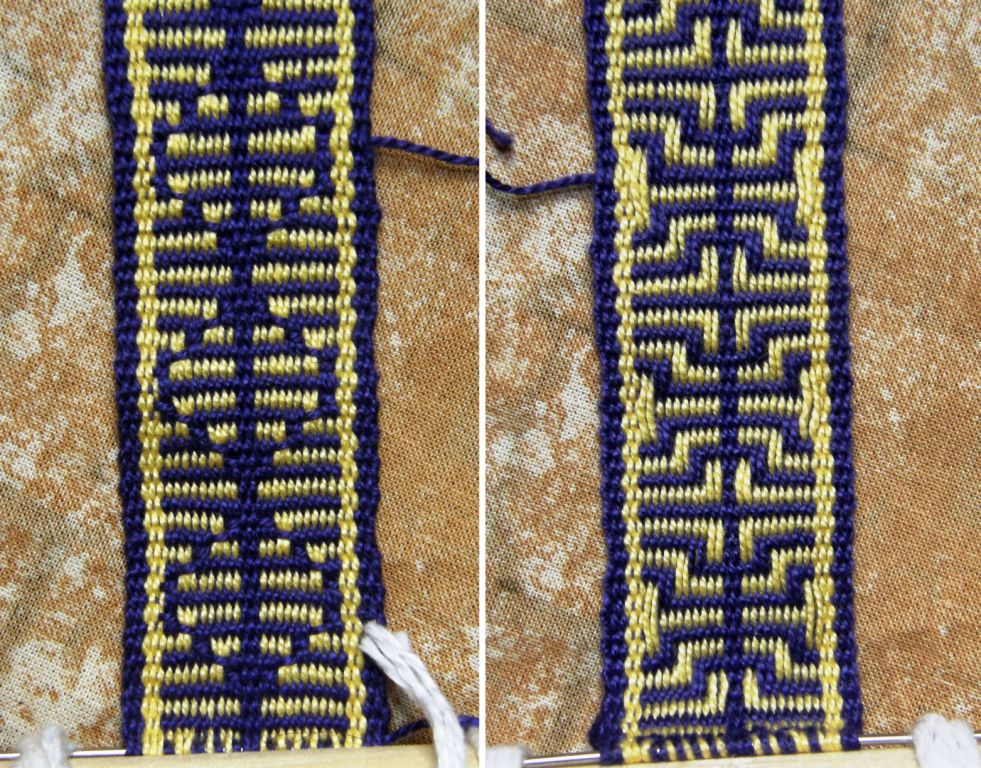
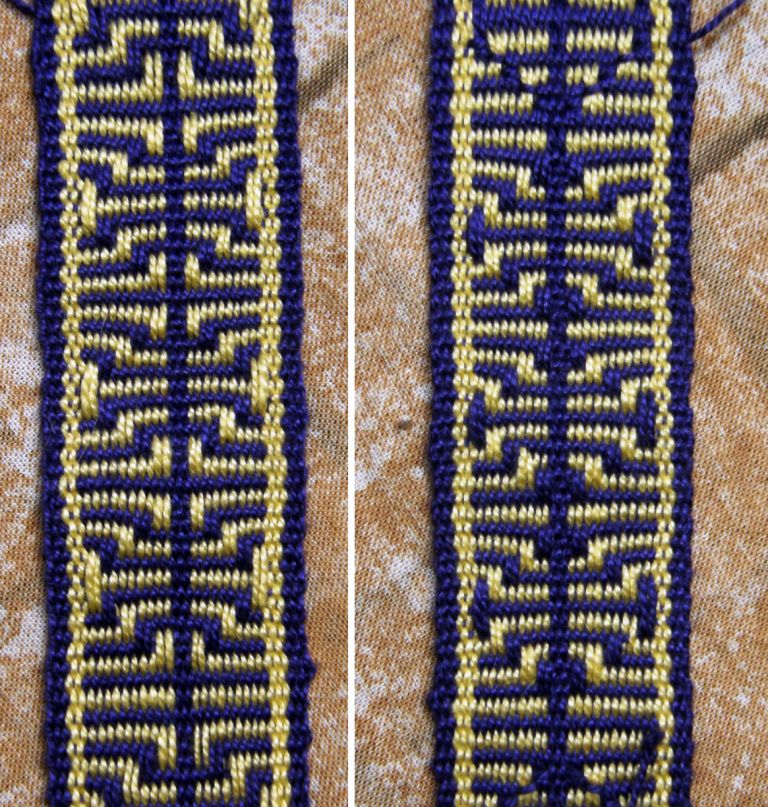
After that, all I could see was diamonds!!

I had to go take a break and come back to be able to see the nice stick pattern once again.

Then I continued weaving it as a complementary warp technique which made the design reversible. It also compressed the motif so that the five-span floats were less cumbersome.

Looking at it now all I can see is diamonds once again.
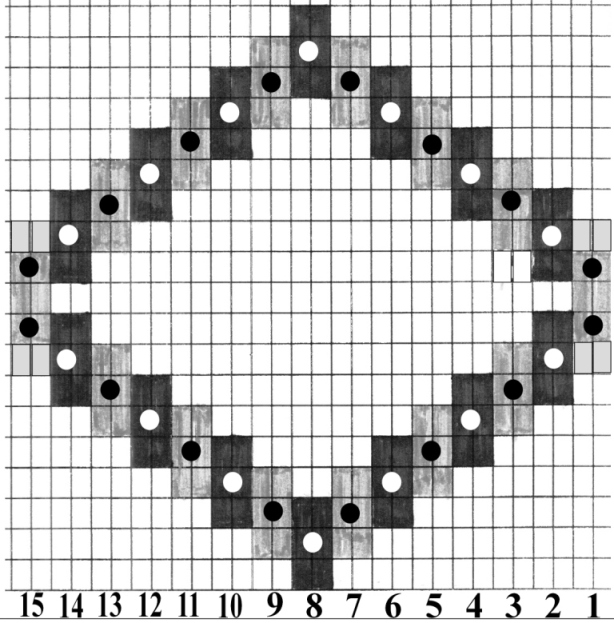
The design is just made up of floats of alternating colors starting in the center and working their way out to the edges. Here is a chart for a very large version of this pattern.

So that was all a bit of a fun distraction!

I have a band that I bought in Guatemala where the weaver has made use of some of these eye-bending motifs. It is in basic black and white which is very unusual in Guatemala where bright colors abound. I bought this belt in the same town that is famous for  hair sashes which scream with color and are heavily laden with supplementary weft designs.

When the black and white floats alternate in succession they produce quite a three-dimensional effect.

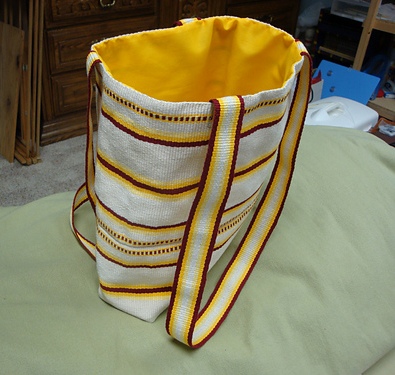
I have lots to report on the Ravelry group backstrap Weave-Along but I will save it for next week except for Amber’s amazing finished work which is in keeping with the bag theme in this week’s post. Look at her gorgeous lined tote bag! Okay, lining has to go on my list of sewing skills now….
Oh, and one more thing –  another delicious distraction arrived, this time in the post…a birthday gift from my friend Anna in Australia. My goodness it was hard not to drop everything and get into this but I shall do so on the weekend. All my off-loom time this week has been spent sewing,  trying to get that square peg into the round hole!

 This book, by Dutch author Mirja Wark, is about the si’ira, which is the intricate belt weaving of the Wayuu Indians from the Guajira, the northern border area of Venezuela and Colombia.

I flicked through and was immediately struck by a couple of things. It appears that the Wayuu make and operate their heddles in the same way as the Guaraní weavers here do, a way that is completely different to anything I have seen in the highlands or elsewhere. (see the pictures and video in this post) One of the Wayuu designs strongly resembles the design in the Ayoreo bag in this post. I imagine the Wayuu inhabit lowland regions like the Ayoreo and Guaraní….I need to stop here and go read!
Backtrap Weaving – Hidden Treasures

I love looking at the four-selvedge textiles that the weavers here in Bolivia and Peru make. They give away some of the little secrets and “back stories”. The terminal area can give information about how the weaver set up the sheds on her warp as well as tell stories about how patient, tenacious and skilled he or she may have been. It generally goes that the smaller the terminal area is, the higher the weaver’s skill level was.

The terminal area is the part on a four-selvedge piece where the weaver finishes. The hand manipulated pick-up patterning suddenly ends and changes to rows of weaving where the weaver is simply passing the weft through the two sheds created by the heddles and shed-rod.

The weaver will have started working at one end of her warp, woven a certain distance and then turned her warp around to start weaving from the other end. As the weaving progresses, the distance between the two ends of woven fabric slowly decreases.

The weaver would eventually come to a point where there was so little space in which to work that it would be impossible to continue picking the patterns by hand. At this point he or she would simply open the two sheds without any patterning manipulations and pass the weft while substituting increasingly thin rods for the big shed stick. It’s the point at which the weaver decides that he or she simply cannot continue picking up warps by hand to form the pattern that shows the weavers skill or perhaps just his or her sheer tenacity.

Some weavers just weave from one end and finish the weaving when they reach the other loom bar.

Eventually the shed rod is removed and only the heddles are raised to open the tiniest gap through which the weft can be fed. The threads for every other shed must be painstakingly picked up one by one. The last few weft passes are actually needle woven. Good eyesight, patience, pride in one’s work and a strong desire for perfection are required.

The terminal area on a plain-weave four-selvedge piece created by a skilled weaver will be difficult to spot.

For people like me who like to look at textiles and figure out how they were woven, the information in the terminal area is a gift.

This fact came to mind this week as I was trying to figure out why the edges on the Bolivian double-weave belts that I have are so much neater than the double-weave pieces I make myself.

I do everything my teachers in Potosi taught me yet there is something missing. Some weavers seem to have some special secret that enables them to create those sharp straight edges. My edge warps have a tendency sometimes to roll off the sides as the weft passes from the upper layer to the lower. This can at times produce bumpy edges although, as my boyfriend likes to point out, I am possibly the only one on this planet who notices them. I think all weavers know how that goes!

Now the problem with examining belts is that they are most often not four-selvedge pieces. The ones I have from Potosi have three selvedges and end in tight braids and there is, therefore, no terminal area. No secrets or treasures of information are given away.

So, this is what I did.  I took a deep breath and chopped the braid off one of my Bolivian belts to un-weave and  find the hidden treasure. Sorry! Anyone who has done warp-faced double weave will know that un-weaving it is not fun. I made a mess and I won’t even show it to you but the good news is that I think, and I stress “think” I found the secret. I will probably be traveling up to the highlands next month where I hope to meet a weaver who can confirm this.

I have been weaving a double-weave sample this week to see if I can improve the edges and also to see how the Bhutanese motifs that I wove last week with supplementary wefts look when woven in this technique.


The motifs look so much more sumptuous woven with the supplementary wefts. That is how they were woven on the original textile from which I copied them but it was fun to see how they looked in double weave and also gave me something interesting to do as I wove my sample. I am pretty happy with this sample and shall have to find something I can use it for. I do believe the edges on the double weave piece look better than those I normally produce or is that just my imagination trying to justify my chopping up that poor belt?!

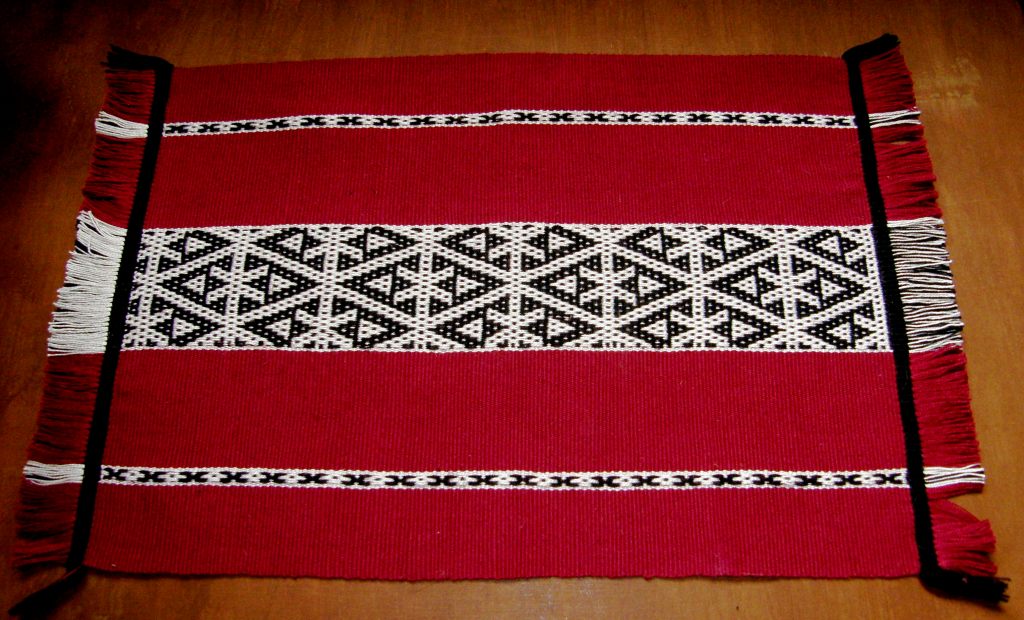
I finished the fourth  and final placemat in my set and was just about to celebrate when I found yet another lovely Mexican pattern in this warp float technique. But, no, that’s enough for the placemat project. I can use that pattern for something else.

The fourth pattern comes from a storage bag from south west Iran which I saw on this site.

So here is the complete set…


Last week I showed you the blue one and its design which was inspired by Central Asian yurt band patterns. Verena, who wove with me on one of my US visits, has taken classes on how to construct a yurt and she gave me the link to the website of her teachers in Nova Scotia. The web page has wonderful pictures of lessons in traditional weaving in Kyrgystan with images of the warping, set up and weaving.

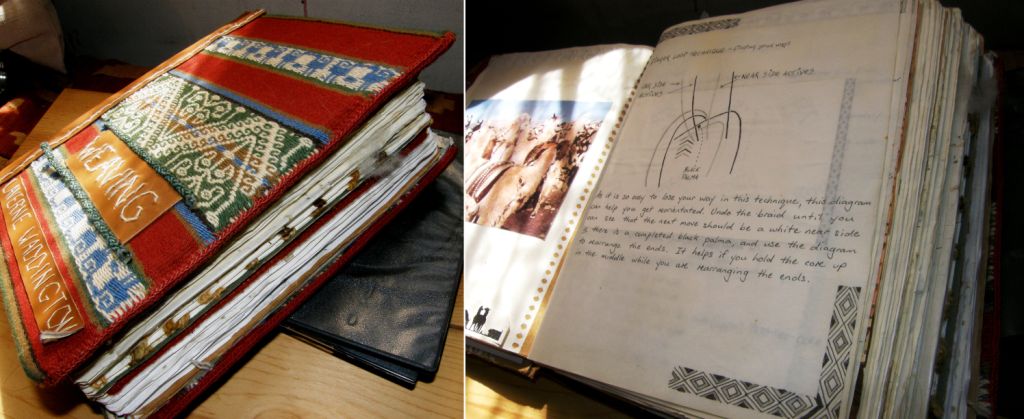
What’s next on the loom? The ideas are swirling around. Lately I have seen some lovely handmade bags which have incorporated all kinds of nifty compartments and pockets and so, I have decided to try and use the technique that my Bolivian teachers taught me for constructing a chuspa, (a bag for carrying coca leaves) with its little built-in pocket to make a bag and pocket all in one piece. I haven’t woven one of these since I studied with Julia and Hilda and so I have had to get out the giant journal to consult.

Hopefully I have done a good job of documenting the process. Sometimes when the memory of the process has started to fade, I return to my written instructions and find that I didn’t include as much detail as I should have. What I normally do is try to consolidate everything immediately on my return by weaving more examples and then I repeat the process at intervals and add to and improve my written instructions.

So, my aim is to  make a bag with a pocket all in one piece. A lot of the chuspas here are woven with such pockets. Some of the pockets are so tiny that it is obvious that they were woven as a decoration and couldn’t possibly have any sort of practical use. I guess it is included in many cases simply because it is customary to do so.

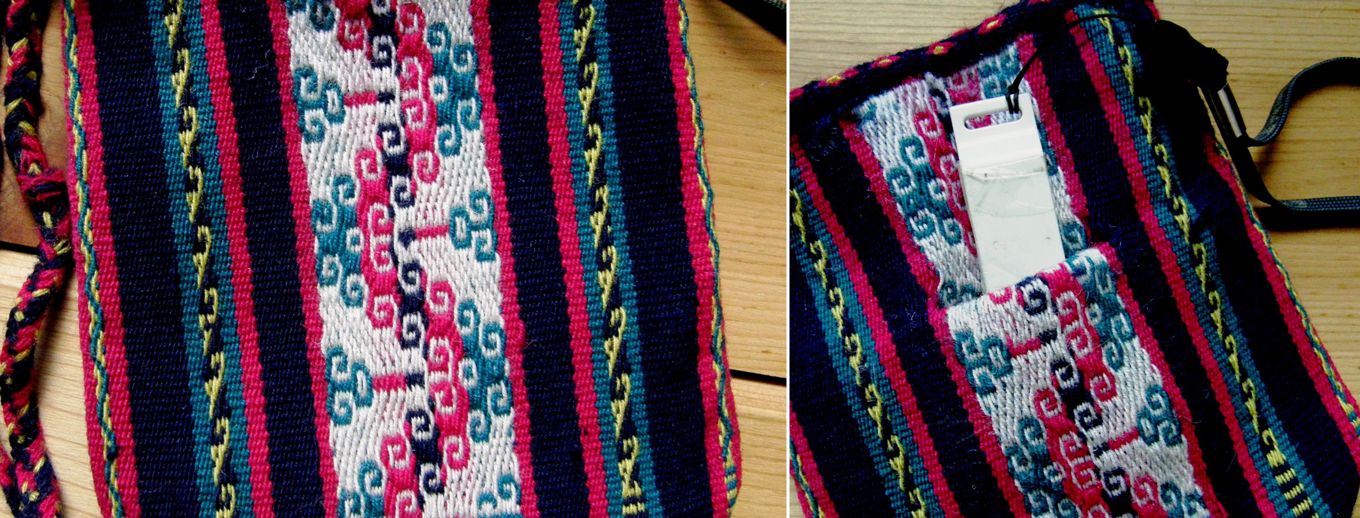
This is the chuspa that I made with my teachers. You can see the wee pocket which has been edged with cross knit looping.

The pocket on the traditional chuspa is only accessible from the inside of the bag. I want to have a pocket that I can get into on the outside so that I can easily reach keys, a cellphone or any other treasure that I need to have hidden but in easy reach. When I turn my chuspa inside out I have such a pocket. It was fun seeing the other side of this weaving with its reversed colors for a change which hasn’t seen the light of day since 1997 when I wove this piece.

This probably seems like a ridiculously complicated way to go about having a pocket in a bag but remember that I am pretty much all about process rather than product and this exercise will serve more than one purpose. I would like to weave this bag in the traditional way I was taught by my Bolivian teachers and see if my written instructions are up to scratch. The chuspa I wove in Potosi is a four-selvedge piece. The one I plan on doing now won’t be! Well, not this time anyway. Maybe I will do that later when I have enough handspun. I am going to weave a simple plain test bag first in cotton..

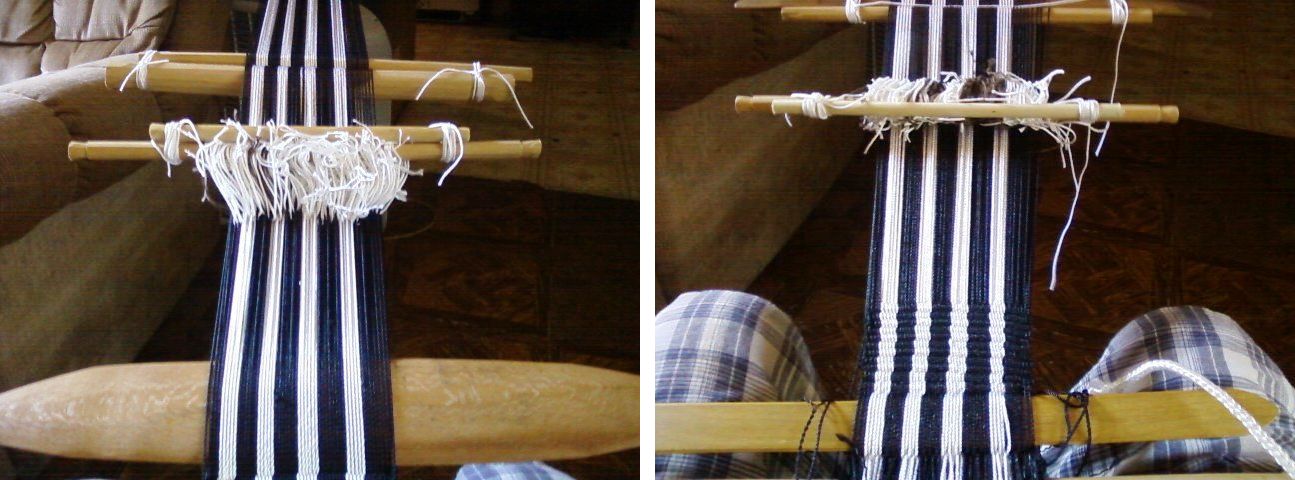
It was interesting to see that even my weaving teachers were forgetting the process and there was much bickering between the two sisters over how it should be done! Here are their two pairs of hands at work setting up the horizontal loom.

As I have been playing around with double-weave this week, I am going to try and put together a tutorial on the two-weft version for the blog next week. I made a tutorial for this on Weavolution ages ago and I think it could use some better photos and an update. The two-weft version allows you to weave bands of double-weave patterns next to regular plain weave.

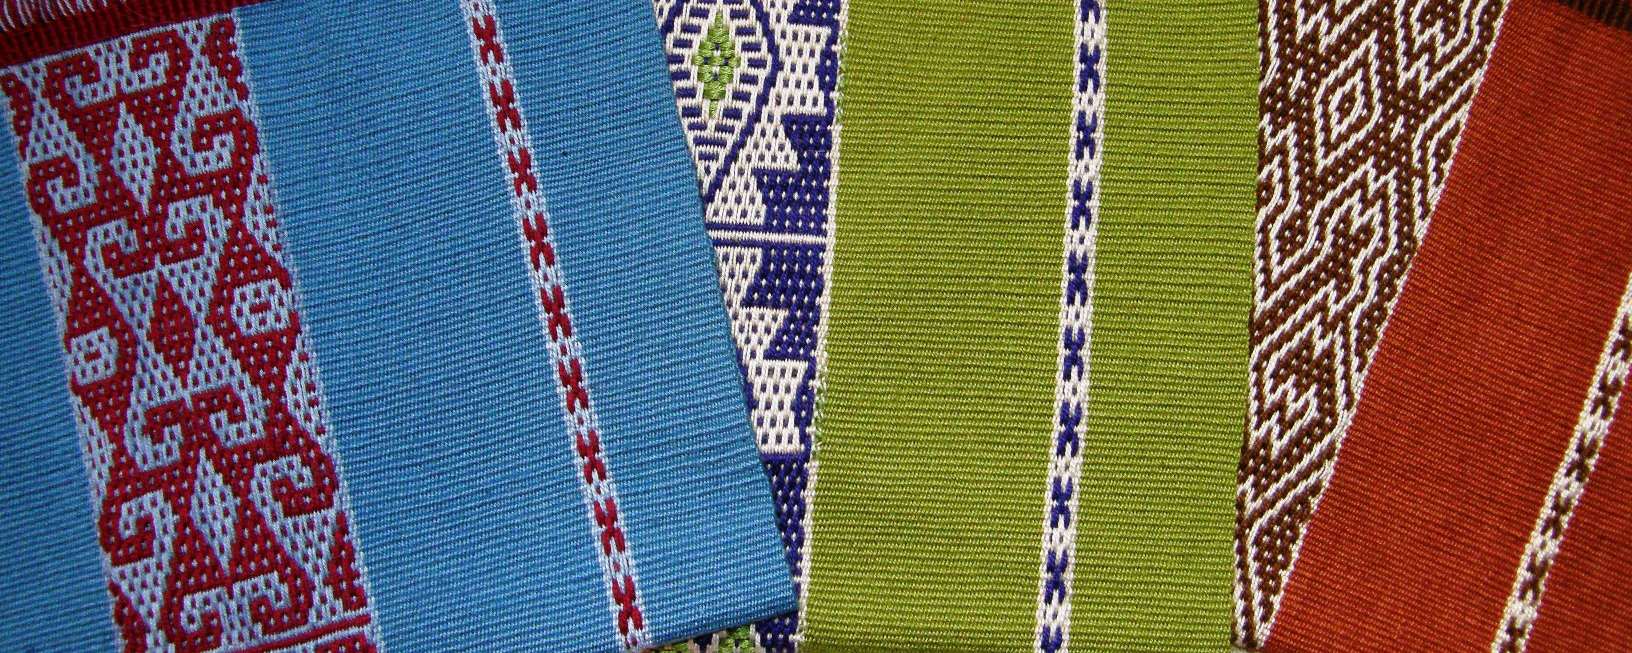
This piece from Charazani, Bolivia, which is part of Yonat’s textile collection, has been woven in such a way. Motifs can be woven on narrow bands with the smooth solid color background that double weave produces. The bands sit within fields of solid color and stripes which are regular warp-faced plain weave. You can clearly see the terminal area. Finishing a four-selvedge double-weave piece is particularly hard as you have twice the amount of warps to deal with. Trust me, I have done it! This is the technique I wove on the very first four-selvedge piece I made. My teacher and I shared the burden of finishing the piece.

I will leave you here with some projects from online weaving friends and people I wove with on my US trip last spring.

Dwayne was having some problems getting his very first project underway. He didn’t have a nice smooth cotton yarn to work with and was struggling with making the string heddles. Now he is weaving using inkle-type heddles clamped between two dowels. Let’s weave! The continuous string heddles can be practiced later! He has a lovely Guatemalan loom to use.

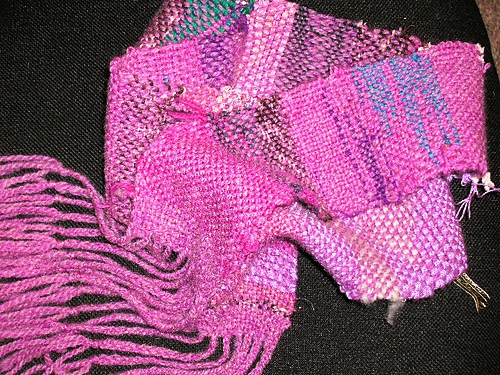
I showed Kathi’s Saori-style project in its early stages last week. Kathi  was using a rigid heddle segment on a backstrap loom and look what she has made…

This almost makes me wish I lived in a colder climate so I too can make scarves.

Yonat wove supplementary weft patterning with me in California and has just showed me her band made with #10 crochet cotton on which she has been practicing the technique. She really has this down! I also have a tutorial on this in Spanish.

And Verena has been busy with pebble weave….


And that’s it for another week. Now to get my chuspa idea under way. There are bound to be lots of lessons learned in this project!


Backstrap Weaving – “Click, Click” weave weave.

“Click Click” weave weave! “Click Click” is the sound of the mouse as we navigate the internet finding all kinds of free resources for weaving. It is astounding how much information is out there and I struggle to keep the “click click” time to a minimum and the “whack whack” of the beater on my backstrap loom to a maximum. When I look at my blog stats behind the scenes I see that my tutorials are by far the most visited pages and wonder about all the people out there silently following along and hopefully making nice things on backstrap or other looms.

Anne’s first pebble weave band

Every now and then I am surprised by a letter that makes its way into my email inbox from a weaver on the other side of the world showing me what he or she has been weaving using my tutorials.

They have been silent followers on the blog but manage to track me down to share what they have woven.

This week Anne triumphantly showed me her first ever pebble weave piece. This arrived late at night and her enthusiasm simply made my day!

Dwayne wrote to get some yarn tips, Anna, who came to spend time with me in Bolivia and who always stays in touch, sent me pictures of what she is up to and Natasha sent me a bunch of photos of her backstrap weaving adventures.

Take a look…


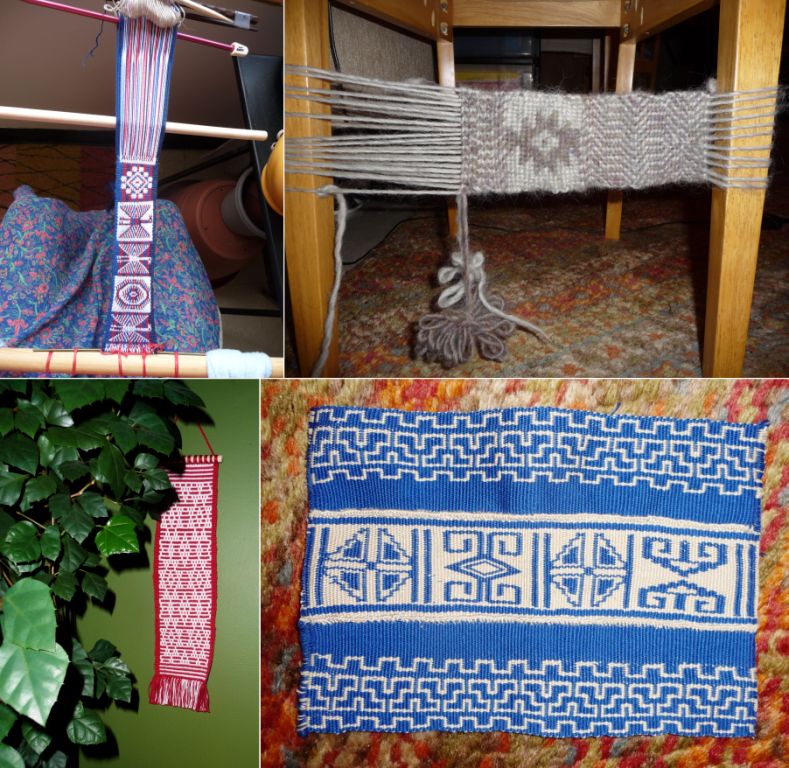
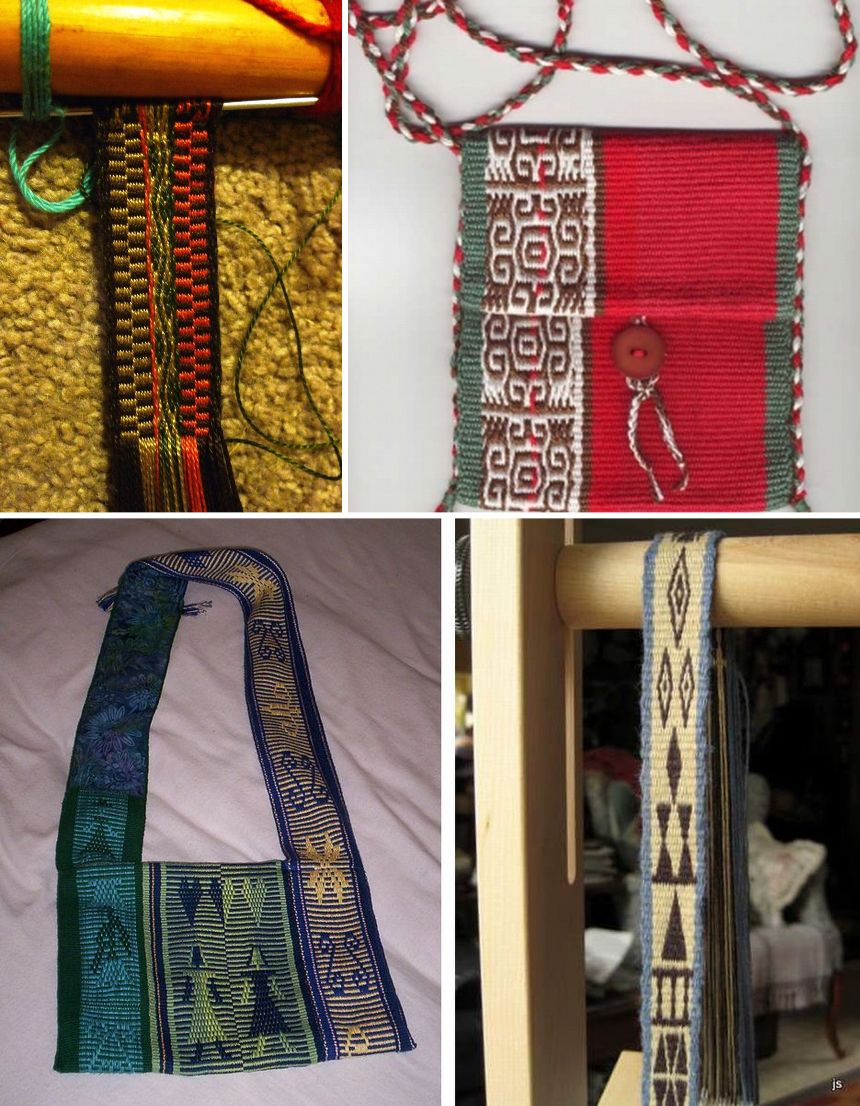
From  top left you can see Natasha’s double weave band on her backstrap loom and next to it some weft twining (there are lots of posts here about that). She is hoping to create earflaps for a knitted hat with this twining. Below left is a hanging in simple warp float technique and  finally she took the motifs from my Mexican mug rug pattern chart page and wove three bands which she put together with cross knit looping.

But this wasn’t her first encounter with pick up weaving. She has clearly mastered the supplementary warp technique. Just look at the Latvian design band at left which she wove on a backstrap loom for the first time.

You have no idea how wonderful it is to receive this kind of feedback from something that started with a simple “click click”.

It makes me smile when people tell me how they have struggled for days to get the technique to work and how fortunate I am to have been able to learn by watching people doing it here in South America.  I think that sometimes they forget or don’t realize that my learning experiences involved quite a bit more than a simple “click click” in my living room!!

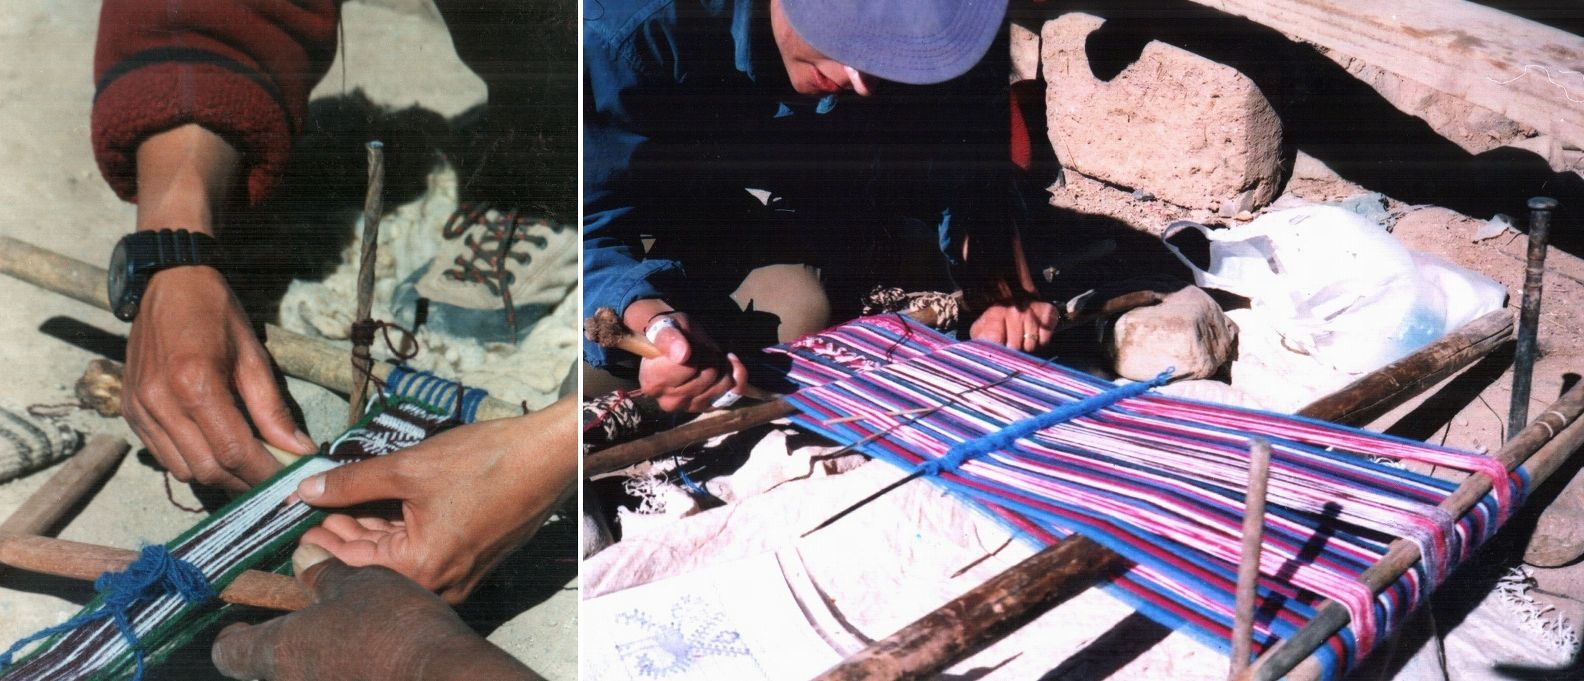
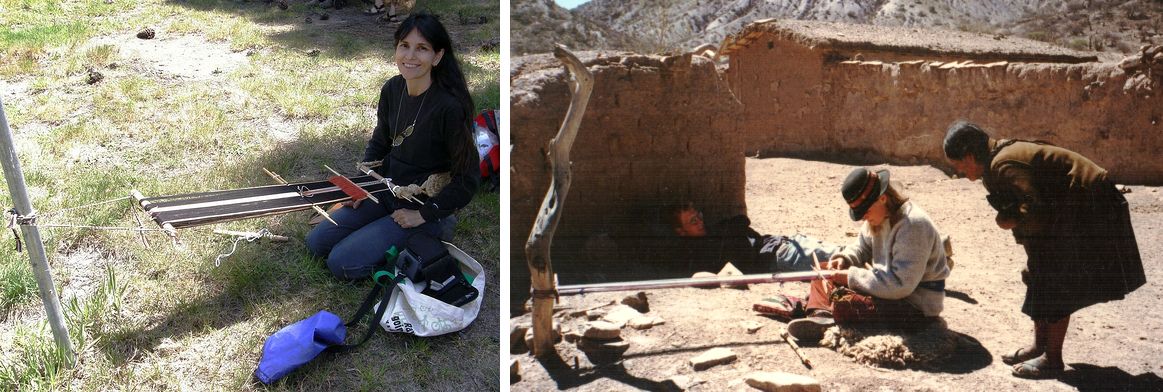
Here I am, for example, during the six weeks I spent with my teachers in Potosi, Bolivia learning double weave and a complementary warp patterning technique bent over the loom…

On the left I am learning the basics of double weave on a narrow band. My teachers wove this technique on a horizontal loom staked out on the ground. At this stage I wasn’t quite sure how to position myself at this awkward loom…one knee up and one down. Then it was on to the wider piece you can see on the right, on my knees on the hard baked ground up at 4000 meters. I spent some of the time quite ill. My teachers would offer me food and, as it would have been offensive to refuse, my poor gringa stomach suffered a lot! I lost a lot of weight on that trip! After rejoicing in the completion of the double weave piece for a day it was back down on my knees to learn another technique…

You can see how strong the high altitude sun is…my hands are baked as brown as my teacher’s. Compare them to the picture on day one where I am weaving the band. So yes, I was lucky as I did get to watch and learn how to do this kind of weaving but most times there were no explanations! Most talk would be in a mix of Quechua and Spanish from my teachers but we formed a nice relationship, found things to share and laugh about and my six weeks there with Hilda and Julia were fun. Ah, the stories I could tell of the fun, mishaps, joy, lonely times, moving times, exciting and even scary encounters I have had along this journey learning to weave here!……

So, I aim to make my tutorials as visual as possible with both step-by-step pictures and in many cases videos so you too can watch and learn and I try to be as available as possible to answer questions and give further explanations in the online groups, here on the blog, on Facebook or through my personal email. And more recently, I have been traveling to meet weavers face-to-face…you just can’t beat that kind of contact and the chance to meet many of the silent visitors to this blog.

Fortunately there is time to weave too! So, this is what I have been up to this week…

I finished the third in my set of place mats. I fiddled all day to get the blue for the patterned portion of the newest place mat using freeze dried indigo. Again, with a “click click” I found instructions and muddled my way through it. I don’t think I did it quite right as I had no way to measure the temperature of the dye bath but in the end I got the tone I was looking for. I have been wanting to weave red on blue for a long time as that is quite typical of a lot of the Central Asian pieces I have seen but the shades of blue that I can buy here just wouldn’t work well with the reds that I have available.

So, there are the three pieces so far…from left to right, a Central Asian yurt band design, a motif taken from a Mexican belt and a Shipibo pattern. The last one in this set will go on the loom this week. I have found the design I want to weave and chosen the colors and I will show that to you next week.

I kind of got into”dyeing mode” after the indigo day and also after having dyed that gorgeous terracotta color for the Shipibo piece. That is a Dylon cold water dye. I decided that since the package of Dylon was open, I may as well do an ikat experiment.

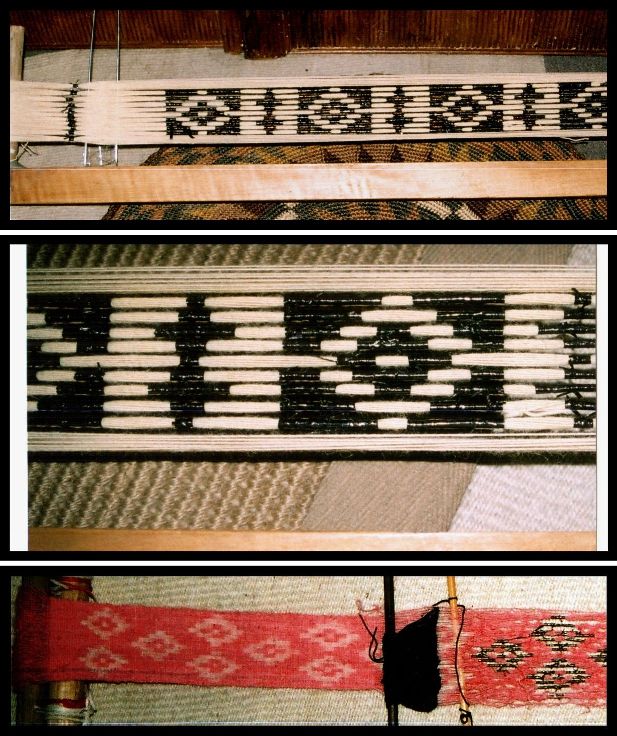
I played a bit with ikat some years ago. For some reason, which I will never understand, I decided back then that I should do it with my handspun llama fiber. As I had nothing else to use, I dyed my piece with a cotton dye which meant that the gorgeous Mexican chilli pepper red that I had been hoping to obtain turned out an awful Barbie pink which gave barely enough contrast to see the ikat pattern. I tied the warps with cassette tape after trying many things none of which were to my liking.

The uppermost project never got dyed after the Barbie incident and did not stand up to the test of time in my closet unfortunately. The lower piece went along just fine except I couldn’t stand the color and, as I can’t find it anywhere now I expect that it got tossed out at some point. I must have really hated it to have done that!

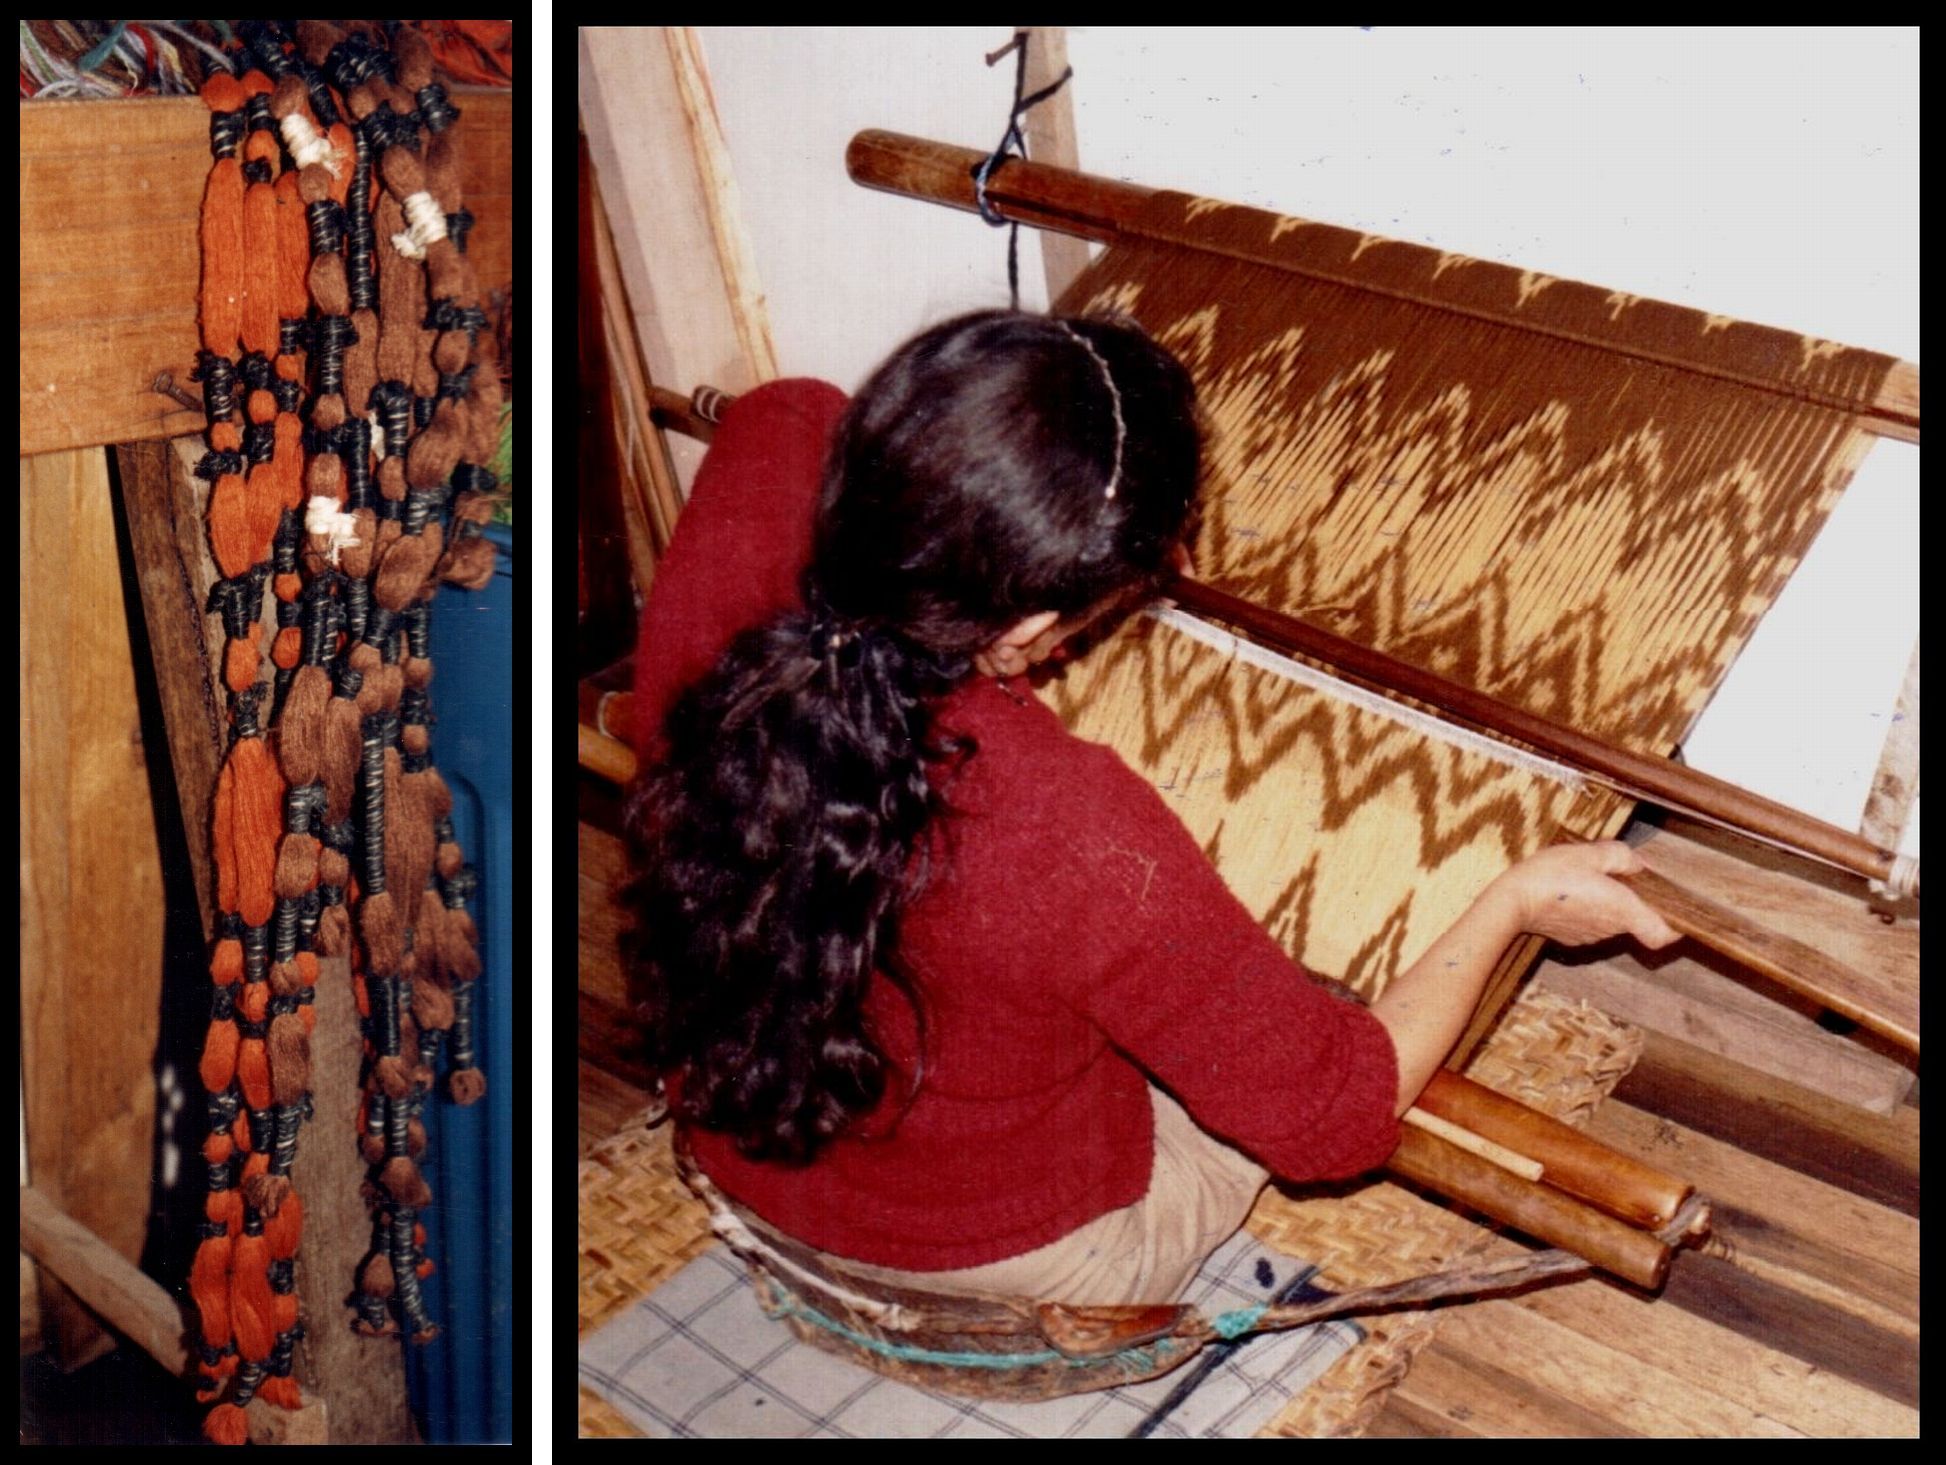
In my wanderings through Latin America I have seen ikat weaving here and there but have never been in the right place at the right time to see the preparation part in progress.

I guess the most time I spent in an ikat weaving area was in the towns and villages around Cuenca in Ecuador.

I was at least able to spend some time watching this weaver in Bulcay at her loom and see and handle one of her prepared warps. A lot of these pieces are woven specifically for tourists but local cholas wear a typical shawl or paño which is patterned with motifs in the ikat technique. The name cholo refers to the group of people who fall between indigenous and whites in the social-economic hierarchy. Besides the intricate ikat designs, an outstanding feature of these shawls is the long fringe which quite often measures a third to half the length of the shawl itself. Once the shawl is off the loom, the fringe is knotted in a decorative form and this work is often starched so that the beautiful designs can be more clearly seen.

Dutch weaver Agaath, whom I met through this blog and then again in person at the Tinkuy, sent me this image of a woman knotting the fringe of an ikat shawl which she took on her own travels in Ecuador. The picture at right is one of the knotted motifs that are worked into the fringes. This textile is part of the collection of the late Dennis Penley, author of Paños de Gualaceo. Sometimes the fringes are knotted into a simple mesh onto which figures are embroidered which you can see below right.

These pictures were also sent to me from Mr Penley’s collection.

I am told that the simple white and indigo-dyed cotton shawls are the oldest and I was able to see these in antique stores in Cuenca and in the museums but one day I was lucky to see a woman walking down the street in quite a hurry with one slung over her shoulder and only by trotting along behind her was I able to get a good look and a quick picture!

I dream about being able to create ikat designs like these but there is no need to get crazy and go tying bunches of intricate designs all at once. One has to start somewhere, keep it simple and experiment. I think that even my Barbie band was over ambitious.

Someone who had a strong influence on me was Linda Hartshorn whom I met at CNCH last year. She showed me one of her ikat woven pieces…a carnival of gorgeous colored stripes with simple bands of ikat between. This taught me that the textile did not need to be all about ikat. The ikat patterning could be used simply as a decorative feature on a large piece of fabric. Here are a couple of photos of Linda’s ikat pieces which she has allowed me to show. My encounter with Linda also had me looking at color in new ways.

The piece on the left has been made with commercial cotton and the other is natural dyed silk. The next time I am in Linda’s neck of the woods (Humboldt County where my friend Janet lives) I think I really should take a dyeing class with her.

Anyway, I created a few strips of ikat and incorporated them in a wider piece of warp and decided to weave some supplementary weft motifs in the center. These designs are from Bhutan copied from a textile in a friend’s collection.. While I think the ikat could stand much improvement, and I have some ideas about how to go about doing that for the next experiment, I am on the whole very pleased with this piece. I wove this with my standard crochet cotton and used the appropriate dye this time!


This form of weft patterning is an inlay technique and so the design is not seen on the reverse of the fabric.
It was a fun project even though I am still working out the mystery of aligning the ikat design warps in both sheds. I didn’t use any of the aids that I have seen backstrap weavers use when doing ikat as I wanted to see how the warps behaved. In the next experiment I will use some of those “tricks”.

Another thing that I have just started playing with is the selvedges on double woven bands. I am trying out something looking at several Bolivian double weave bands that I have here to see if I can create a neater edge. As the weft in double weave has to turn and travel around the edge in order to pass through the shed in the lower layer it often pulls the edge warps out of position on its way particularly if those edge warps are a little slack. So, I am looking for something that can sort of bridge the gap between the upper and lower layers. I will show you the results of this experiment next week if, in fact, there is anything worth showing!

Here is what some of my online weaving buddies have been up to…

At top left, Anna in Australia showed me the pebble weave motif she is doing bordered by an alternating comb design. This is cool! Helena in Brazil has made a purse using a design charted by Adele Cahlander. Marsha and Janet are both in the US and Marsha‘s super seamstress friend, Dana sewed three of her simple warp float bands into an amazing bag while Janet is using the tutorial here on my blog to practice double weave. She is weaving it and getting the technique well established on her inkle loom before transferring the skills to her backstrap loom.

The Ravelry group is still spinning away on the Tour de Fleece and, as tomorrow is “challenge” day they hope to warp their looms with their handspun and see how their yarn behaves. I hope my sticky sheds videos will come in handy!

We have a new member, Kathi Pecor aka fiberdance who is doing Saori style weaving on a backstrap loom using a sweet little rigid heddle segment which you can see at left.

And finally, I have embedded a beautiful video about handcrafts of Colombia. This was shared by two of my Facebook friends, Sharon and Danielle. I told you all some time ago about how little I knew about Colombia with a lot of my impressions being sadly tainted by stories of kidnapping and drug trafficking and all kinds of nastiness. And then I met a Colombian weaver at the Weavers’ Gathering that was held here in Santa Cruz some months ago and everything changed.

This is a really lovely piece of video narrated in English and I hope you have time to take a look.

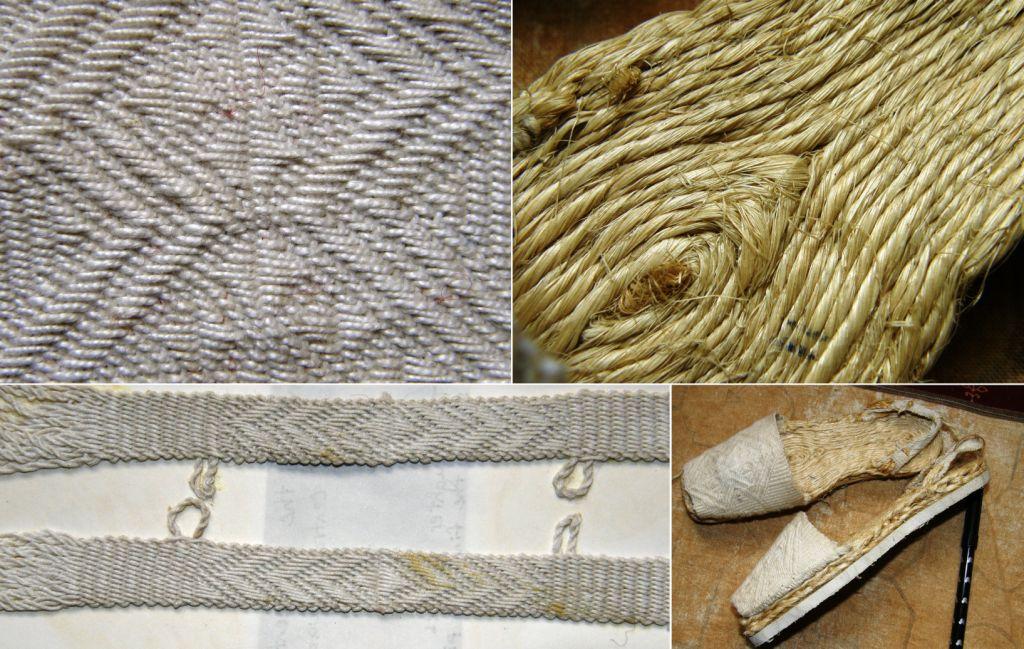
In the video I was excited to see alpargatas being made in what seems to be much the same way as they are in Ecuador.

I spent a lovely day in Ecuador visiting with one of the few remaining alpargata artisans. You can read about that in this post.

And so, here’s the video and thanks Sharon and Danielle for showing me this story with its haunting final phrase “I want to remember with my hands”.

THE HANDS OF COLOMBIA from Club Colombia on Vimeo.

Backstrap Weaving – Spinning Up Some Woolly Winter Warmth

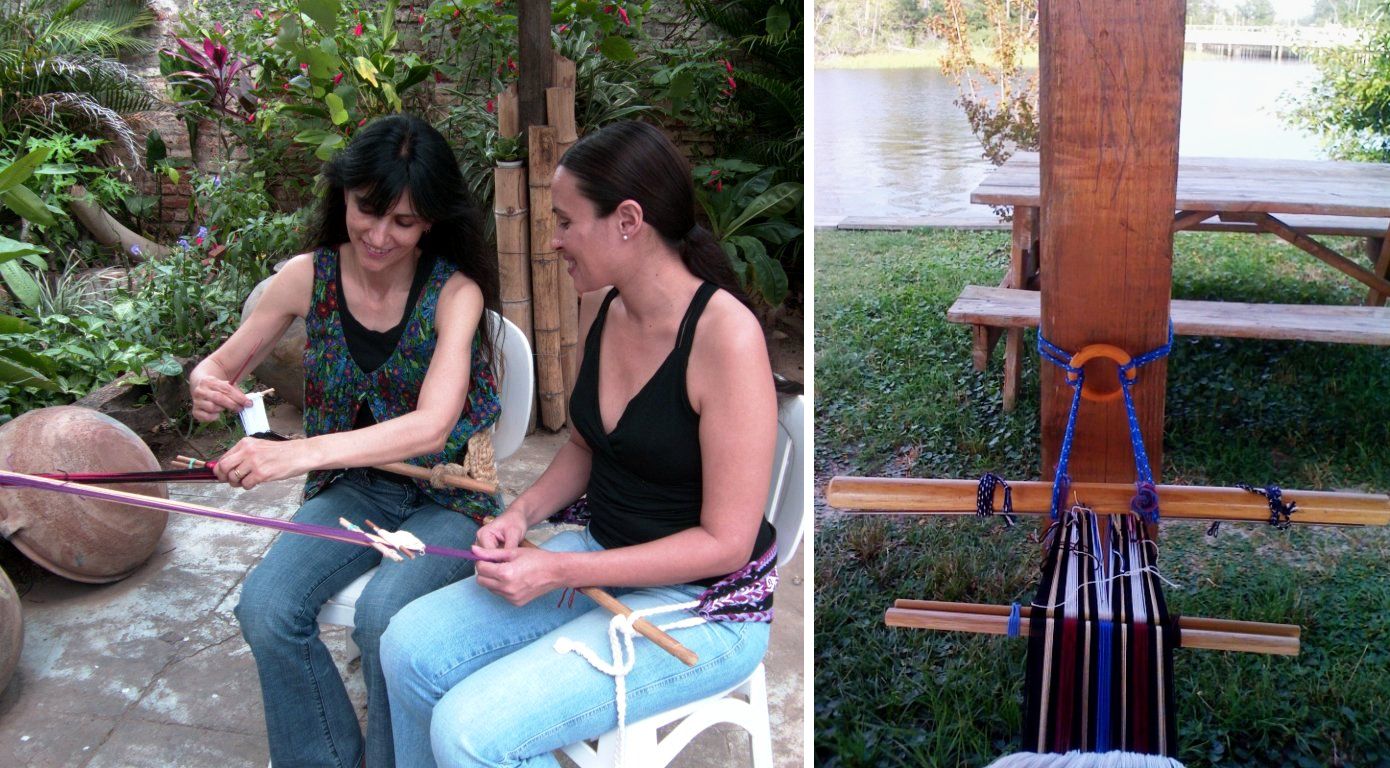
It seems that I must have gone too far taunting the weather gods last week when I posted a picture of my friend Lalenya and I weaving in our summer gear in her beautiful flower-laden patio.

BAM! It got cold. Well, cold at least for here in banana land which means temperatures in the high 50s and low 60s. It’s sounds like a joke, I know, but we suffer here when the temperature drops that low in homes that are designed to stay cool rather than warm…cold ceramic floors, no hot water in the kitchen and electric shower heads that give tepid water at best unless you are willing to turn the pressure down to a dribble. And it is not only the people who are feeling it…thousands of fish turned up dead in the local Pirai River and Lalenya woke up to find her dog in a cramped up ball and had to take him to the vet.

Well, at least it has put me in a woolly frame of mind for the Tour de Fleece spinning challenge on Ravelry and it is fun reading posts from other wintry southern hemisphere folks in South Africa, New Zealand, Australia and other South American countries who have been participating. And it is nice seeing the summery pictures from the northern hemisphere too.

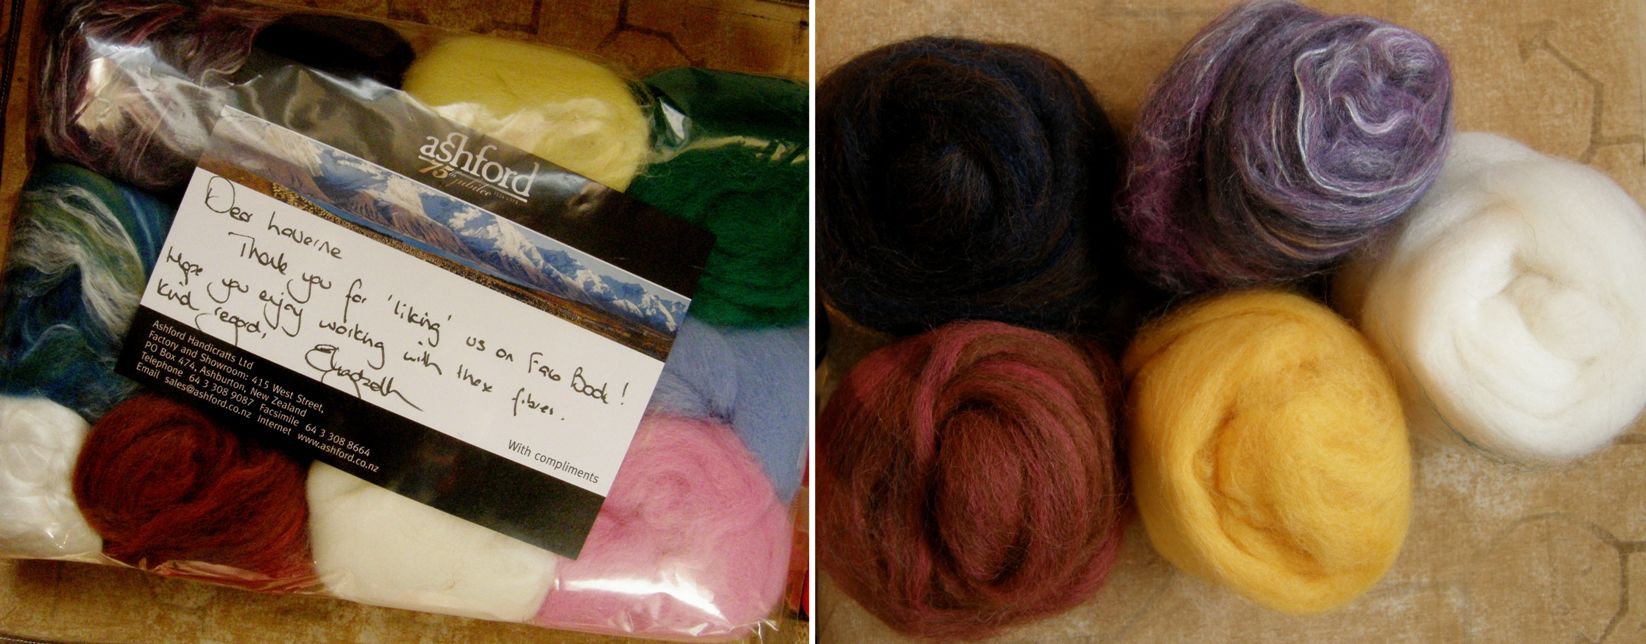
My Tour de Fleece challenge is spinning up the colors I like in this package of roving that I won from Ashford.

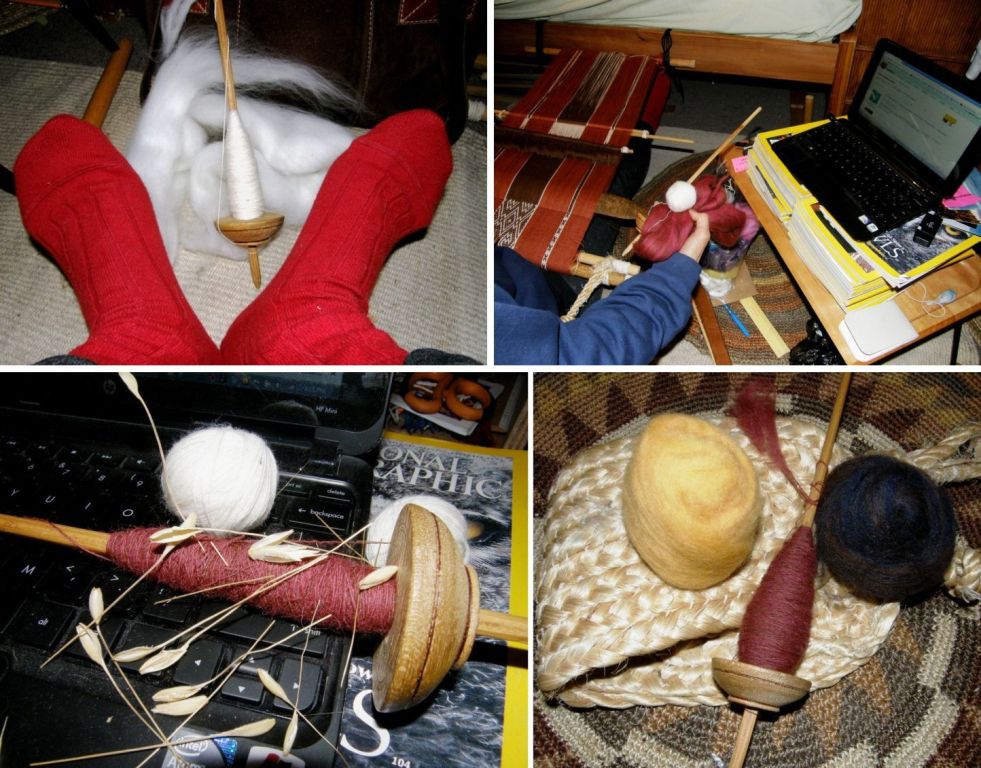
I got my socks on and spindle out and joined in what can only be described as a spinning frenzy. Everyday spinners post pictures of their progress. Some days have had over a thousand posts and while reading through and admiring the creativity of some of the shots, I have come to the conclusion that I am not a true spinner at heart. Again, I tell you that I don’t have a “refined palate” for spinning. All those pictures start looking the same to me after a while yet I do enjoy soaking up everyone else’s excitement and have looked at my own thread-laden spindle with a slightly more critical eye after reading a discussion on the beauty of the shape of a cop.

But the truth is…all I want to do is get this stuff spun and onto my loom!

Above you can see my progress so far…nothing compared to the majority of folks out there. On day one it was all rather novel , the cold, the wearing of socks, the spinning – that white roving was smooth as silk and so easy to spin.

On day two I really wanted to be weaving and so set myself up at the loom so I could follow online discussions and put in a turn or two on the spindle without even having to take off my backstrap.

In keeping with the Tour de France bicycling metaphor, my bike took a bumpy cross-country detour off the smooth race route with some crashes into bushes and rolls in the grass on the third day…that was a kind of rough and stubborn piece of roving. On day four I took my feet off the pedals and just coasted along… didn’t see much progress I am afraid but I was finally able to show off a fat cop on day five (very pleased with this new addition to my meager spinning vocabulary “cop”).

While others spoke eloquently of the breed of sheep and exquisite blend of fine fibers they were spinning, all I could say was that the white stuff was nice and the red was a bit tricky. (Again I can relate this to those of refined palate and taste who can make elaborate descriptions of wine while I simply know it as red or white).

I am pretty happy with the fact that I am spinning wool and can now add this to my fiber spinning experience which so far comprises llama….

and, more recently alpaca…

Although I have been spinning cotton in the way I was taught in coastal Ecuador, I need a lot more practice with that before I feel I will be able to weave with it.

In the midst of the spinning madness I was, of course, weaving and I have finished the first of what will be four placemats. This is not the first time I have made table ware and I have a few table runners and place mats, hotpads and mug rugs stashed away as gifts. I often forget I even have them.

I pulled out this one to remind myself of how to do hem stitching which is a finishing technique that I love and learned thanks to my friend Franco Rios who told me about this video. While rustling around in my gift basket, I discovered a bunch of bag projects that I had never completely finished as they are missing tabs, straps or buttons…out of sight out of mind. Some of them are now looking rather square-ish to me and I think I will try to cut and round off the flaps in the way my Guarani teacher showed me.

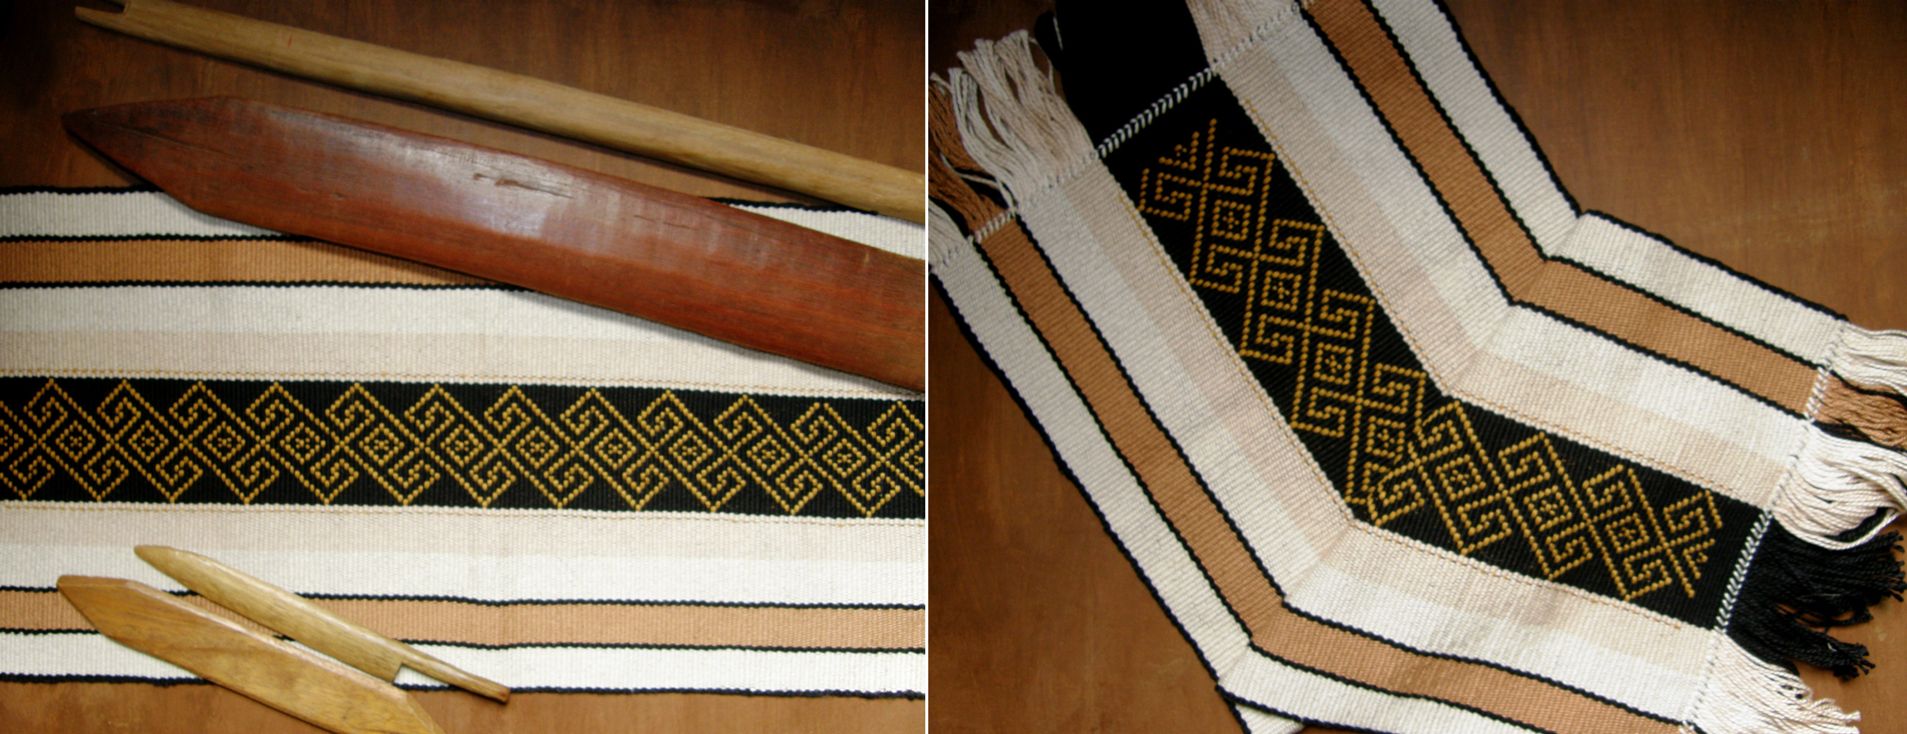
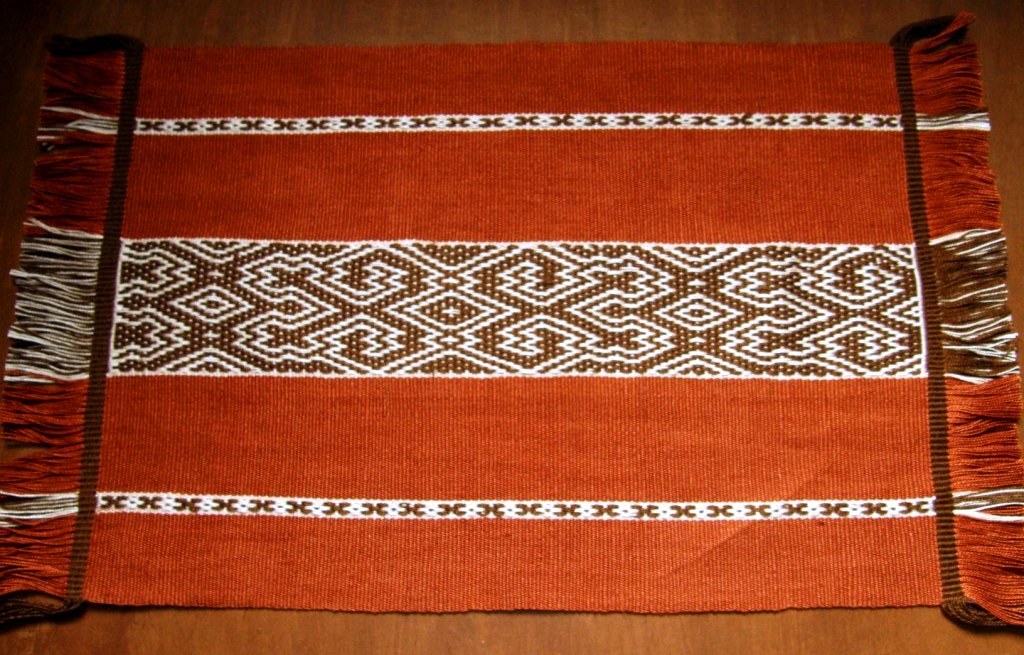
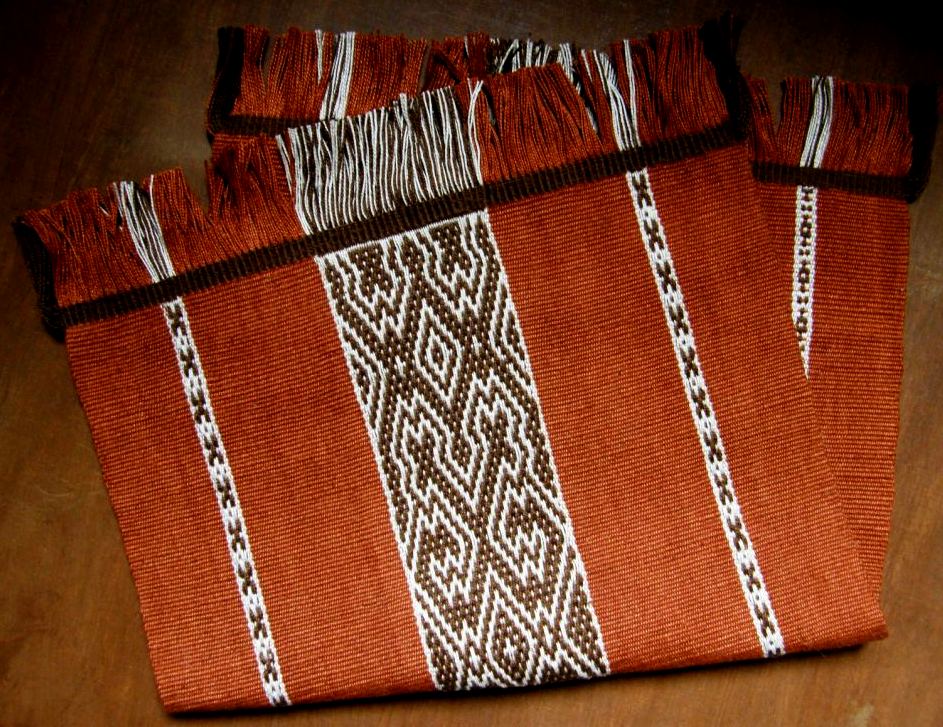
But, back to the new finished project, the place mat. The design is one that I saw on a woven bag made by the Shipibo people of tropical lowland Peru. I am hoping to make four placemats, each one being in a different color scheme and having a design from a different culture.

You can see that in the end I didn’t hem stitch the edges. I had originally wanted to twine the edges with a design based on the main motif much the same as I had done with this Montagnard piece…


That was the plan but when I finished the weaving I decided that I wanted to keep it simple and so twined in just plain brown instead.

I used the same yarn as I had for the warp and weft in the weaving and twined around groups of six warps.

In the past I have twined around four and the twined sections have ended up wider than the woven piece. A group of six warps seems to be the right size.

This was a nice way to protect the edges although a lot more time consuming than hem stitching. I am always happy for a chance to keep up the twining skills.

The design on the next place mat in the set will be based on a Mexican belt and these are the colors that I have chosen…

I hope to include a few small spots of supplementary weft patterning among the warp floats as I did in the small band experiment at left.

I really enjoyed this place mat project. It has been a while since I last wove a wide-ish piece and that terracotta color was such a pleasure to weave with. This is the first one I have made with #10 crochet cotton.

This was a new design for me and it is always exciting to see the pattern appearing. The designs I have planned for the next three are all new too.

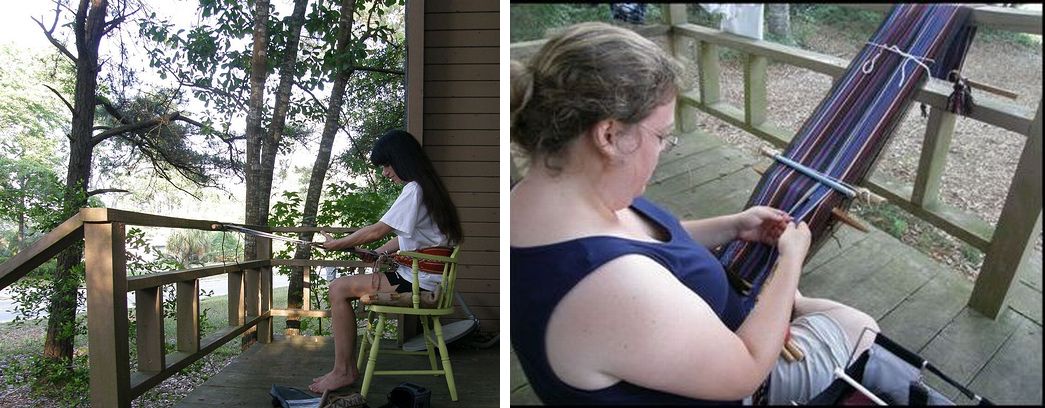
Well, I hope all you northern hemisphere folks are having a lovely summer. I thought I would post a collection of pictures of backstrappers enjoying the outdoors and I hope you will feel inspired to gather up your sticks and go outside.

Sometimes you are lucky to come upon a random post or tree trunk in an unexpected place to which you can attach your warp. That’s my friend Ulla on the right with whom I traveled in Potosi.
There weren’t any trees on the Uyuni salt lake so Carolin used her bike. Janet has no need for such things…as a truly independent backstrapper, she uses her feet!
Anna by a Chilean lake and me at the beach…Okay, so I didn’t find anything to tie up to in the sand. I inkled instead.
Bobbie has been camping at Sand Dune State Park and found something in the sand to tie onto. Sometimes you just have to get creative. Carolin’s  warp is tied to a small table against which she is pushing with her feet.

 It’s always nice when there is a deck rail to hitch to. Here at Lisa’s beach house we could listen to the birds and smell the ocean.

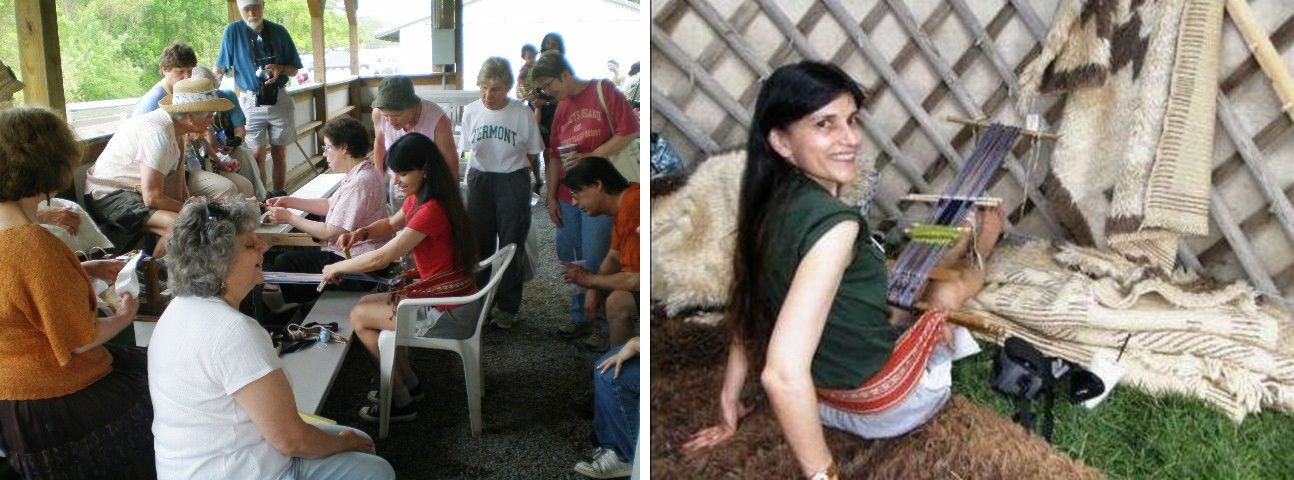
Semi-outdoors. Weaving in the bunny barn and in the yurt at Maryland Sheep and Wool Festival. The yurt had a hole on its top through which I could look up and see the sky.

I am risking upsetting the weather gods again but if you had a patio or a view like this how could you not weave outdoors! If you have an outdoor weaving shot, please send it to me. Meanwhile those of us south of the equator will huddle indoors.

Happy weaving to all where ever you are. 🙂

Backstrap Weaving – Sampling: Short, Sweet and Simple

I don’t mind sampling before I take on a new project. I usually end up making something with the sample…count the zippered purses I have around here! They are just a fraction of all the sample projects I have made. Those little zippered purses make great gifts and swap items.

I know how important it is to sample width when trying a new pick-up technique on my warp-faced weavings.

With a backstrap loom it is so easy to wind a twelve-inch long warp or even shorter and test this out before warping up the major projects.

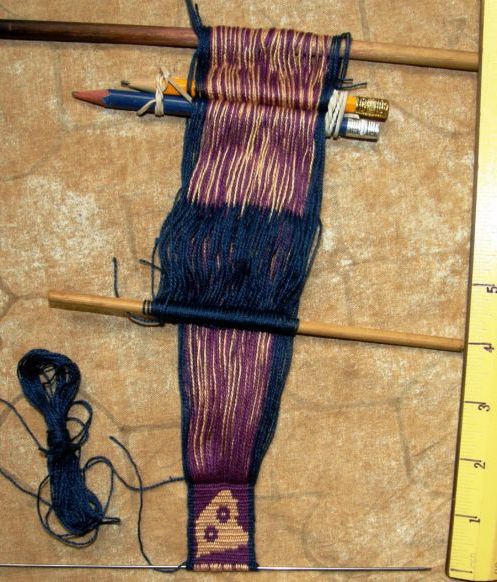
Sometimes I just need to see if I have gotten the scale right when I am charting a new design which is what I was doing on the sample pictured above.

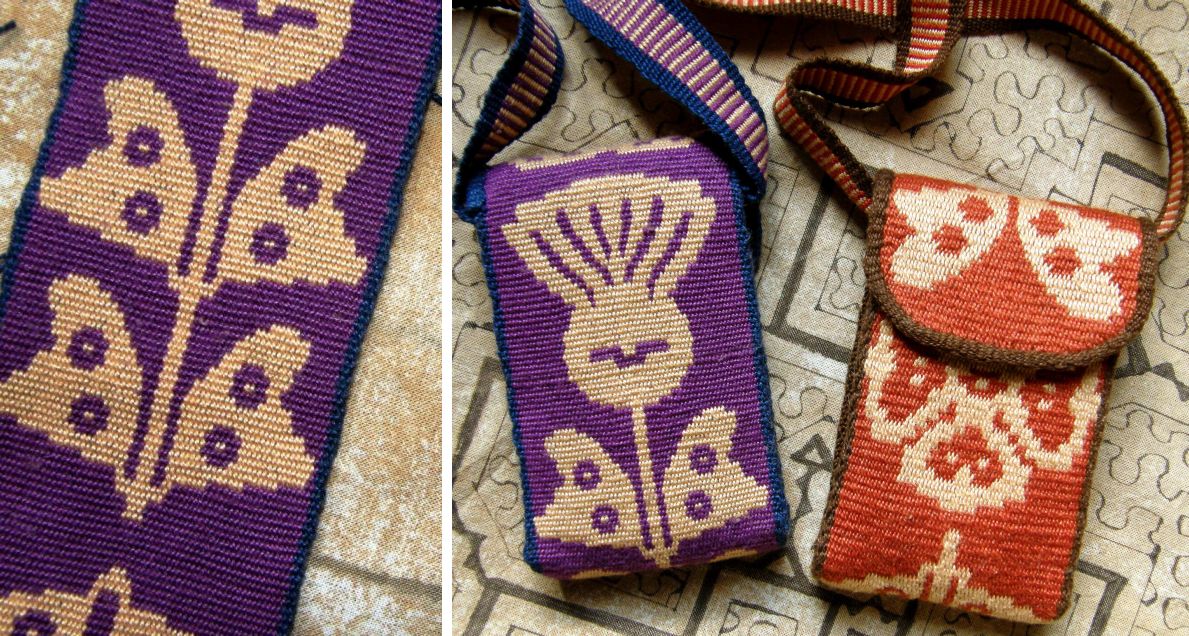
That sample was enough to show me that I was on the right track and from there I finished the chart and wove my cell phone pouch.

Right now I am agonizing over colors, trying to find the right combination of red and blue to weave a Central Asian design that I have had my eye on. It doesn’t matter how long I sit here and stare at my color options, nothing helps. In the morning I favor one combination and in the evening it is another. I even pleaded with the online backstrap weaving group to make the decision for me only to be reminded of my own words…”make a wee sample” (thanks Jennifer).  I will never really know how this will turn out until I make a warp and start weaving.

So it has come time to sample again.

First those shades of red and blue and then my handspun alpaca. I have to say it is a lot harder to sample and risk wasting that precious handspun especially when I am not someone who gets terribly excited about the process.

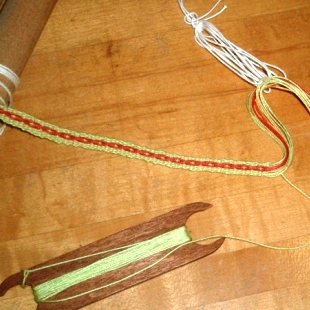
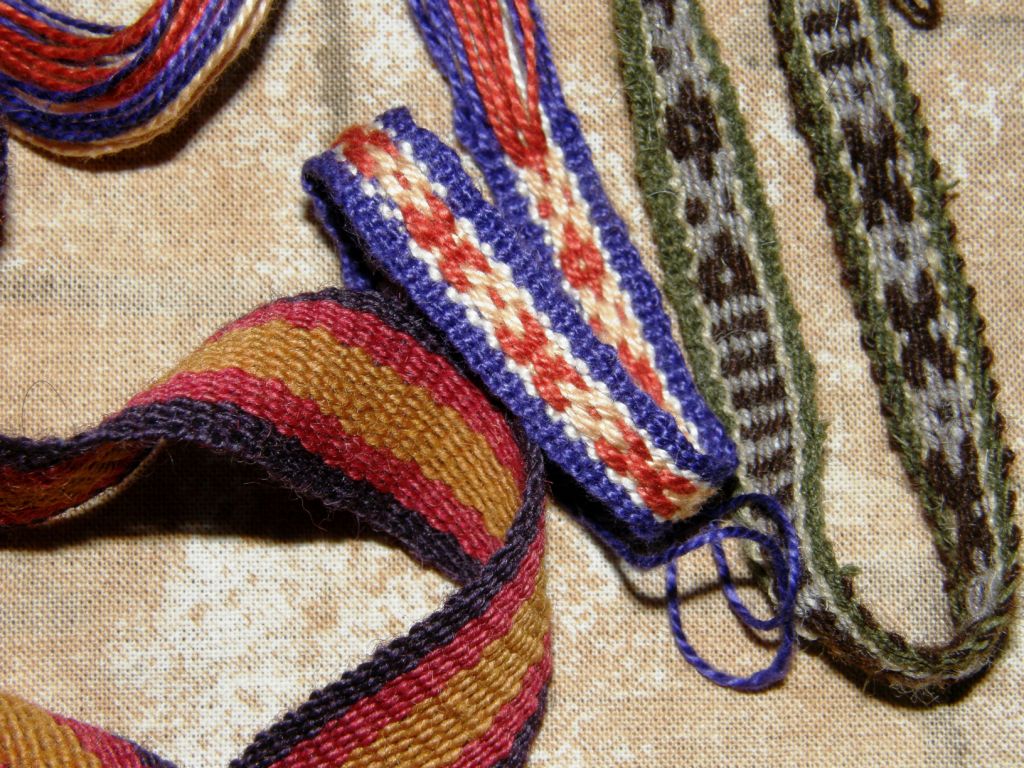
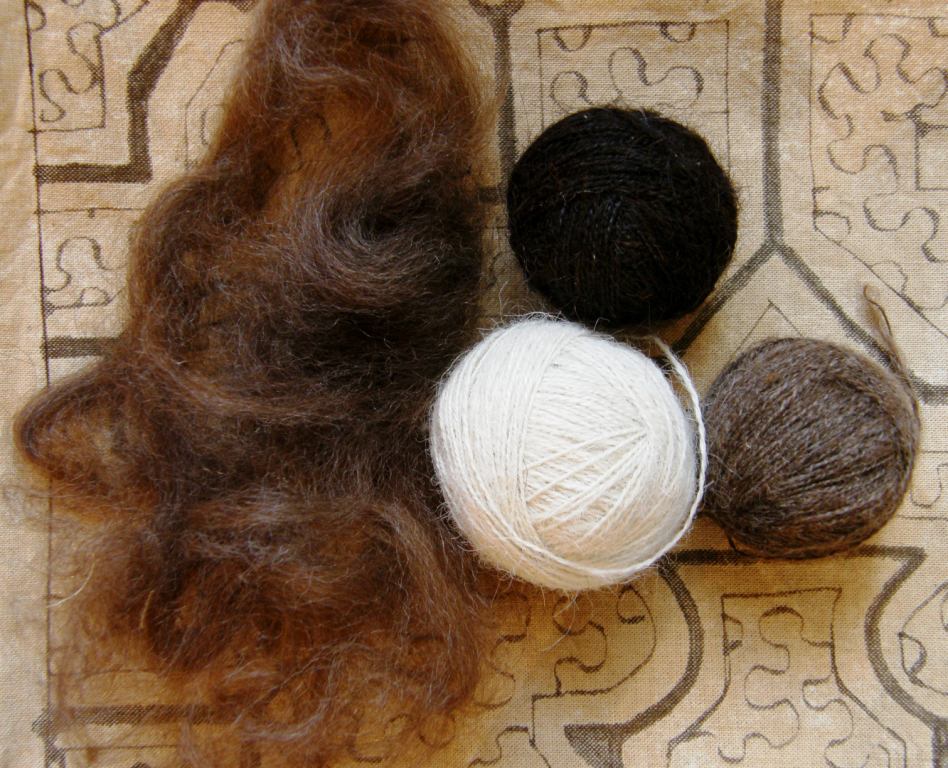
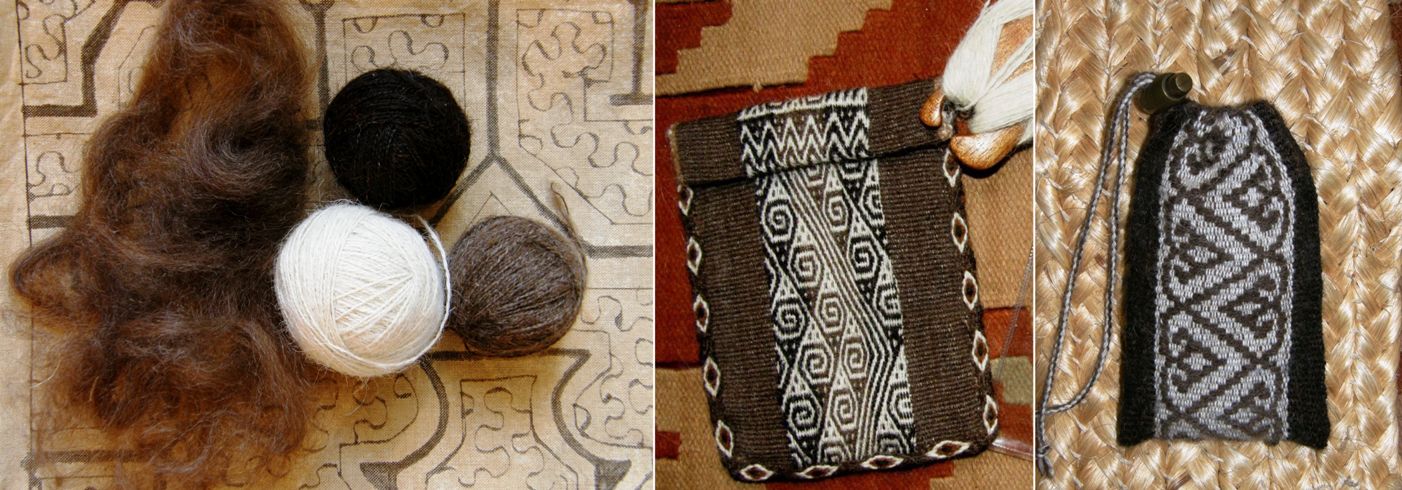
As I said last week I just want to get it done and go weave with it.  So far I have a ball of white, dark brown and black ready to go. There will be a slight delay with the medium brown as I had to turn the house upside down looking for one of the balls of spun single that my cat had made off with. I am lucky to have something to which I can aspire. Some Aymara backstrap weavers from northern Chile brought some of their handspun alpaca with them when they came to attend a weavers’ gathering here in Santa Cruz last March. I was able to weave with and keep some of it. I wove the grey and brown band above with their yarn – a short and simple sample.

Once again I am grateful to the backstrap loom which will enable me to weave the tiniest sample with my own handspun before warping the main project. I have selected my pattern. I even have a product in mind and can’t wait to get started although I still have a couple more colors to spin.

As I said last week, spinning seems to be calling me. Thanks to Jennifer and Naomi the Backstrap Group on Ravelry now has a TDF 2011 team. If you don’t know what TDF is, don’t worry. I didn’t either until last week. I started noticing that avatars on Ravelry were being changed to show special TDF buttons with team names. TDF stands for Tour de Fleece and is a spinning frenzy that runs in conjunction with the Tour de France. The idea, from what I gather, is to set spinning goals for yourself, step outside your comfort zone, share, learn and have fun.

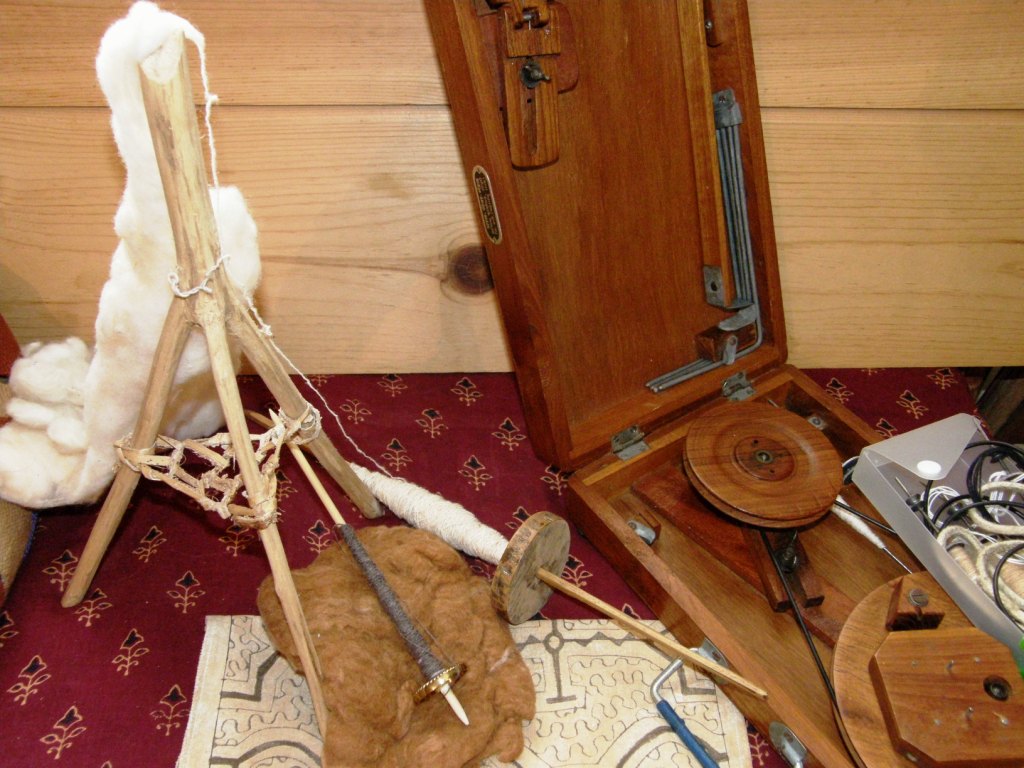
I haven’t set any goals yet but I am thinking that I should do something with cotton. There is a lot of expertise in my group and, as I have the above tools to play with and some nice cotton that I have been given in swaps and which I brought back from Ecuador, I should take advantage of this opportunity to learn.

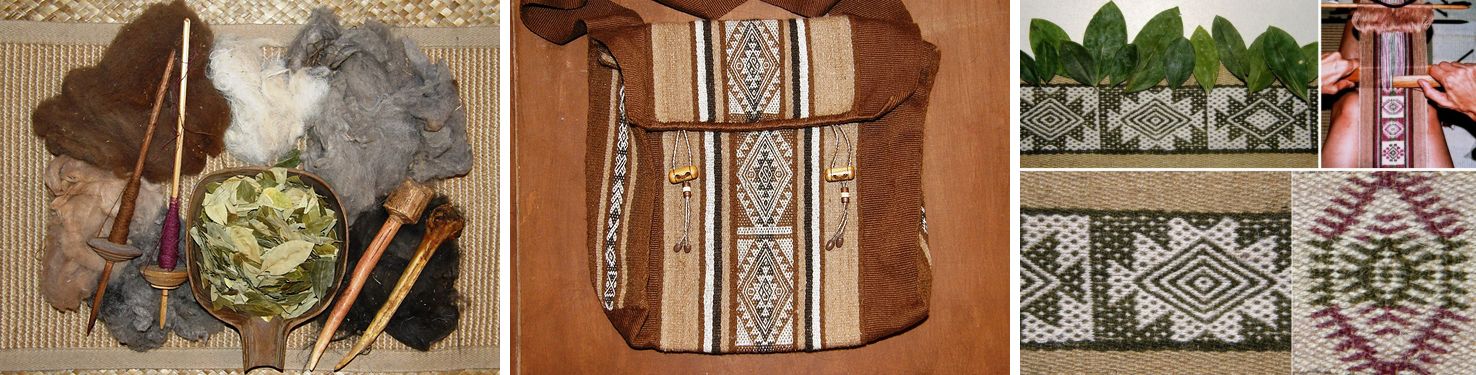
I learned to spin cotton in coastal Ecuador in 2007 where spinning is done on the larger of the two spindles seen above and using the rueca, or distaff, fashioned from a three-pronged branch.

Getting back into this alone would be a good enough challenge for the TDF as I haven’t done this in ages.

The smaller spindle in the first picture was sent to me as part of the swap package and I am told that it is a homemade tahkli which is a lightweight support spindle. I have never used it nor have I used the Indian charkha which was given to me in the US (although I take it out very often just to admire!) While this one calls to my Indian roots, I think that I should get a good grounding with the other spindles first.

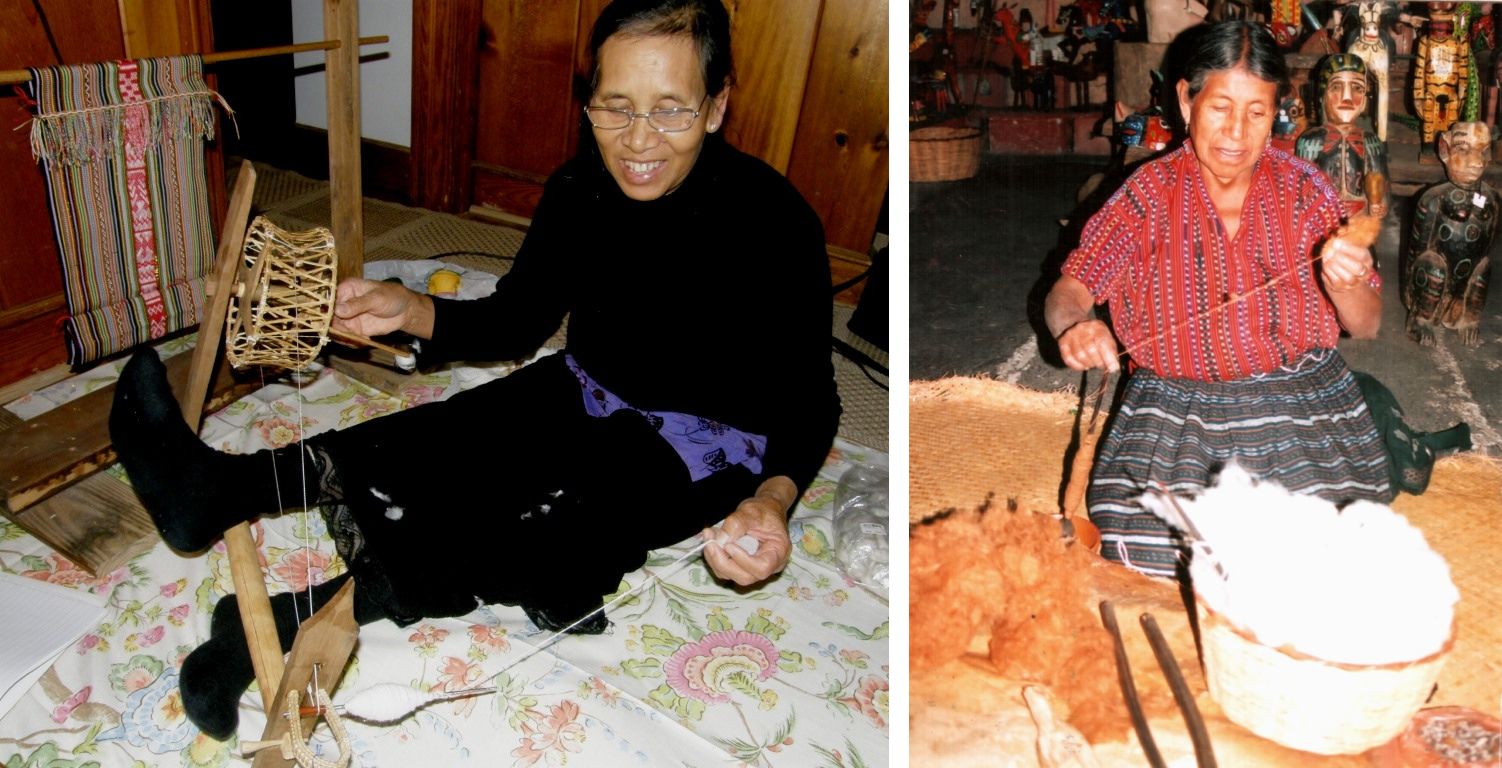
Cotton spinners I have met in my travels…Above left is Montagnard weaver Ju Nie and on the right is a lady spinning natural brown cotton with a support spindle in Guatemala. My Guarani weaving teacher also spins cotton with a support spindle.

But first things first…I will get that alpaca done, a sample made and the project warped!
Here is last week’s project off the loom…

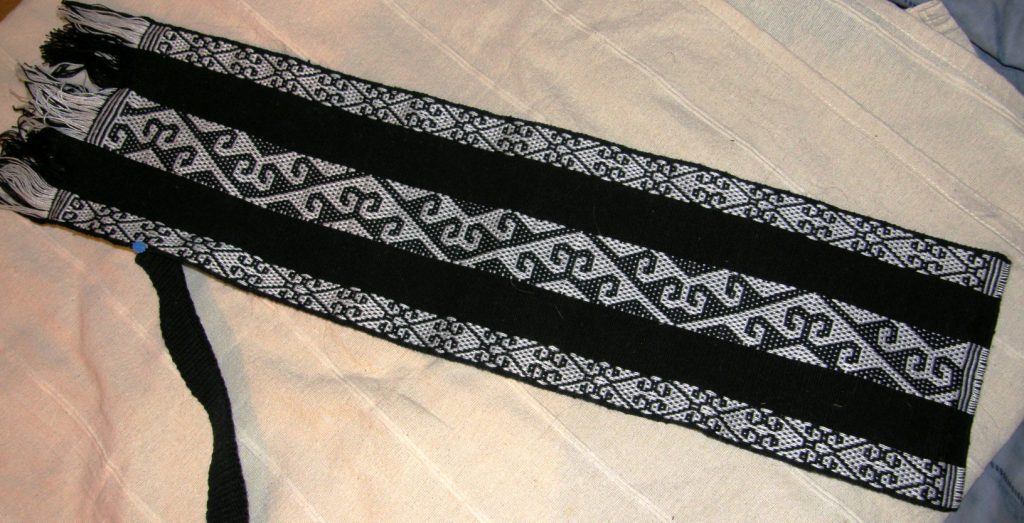
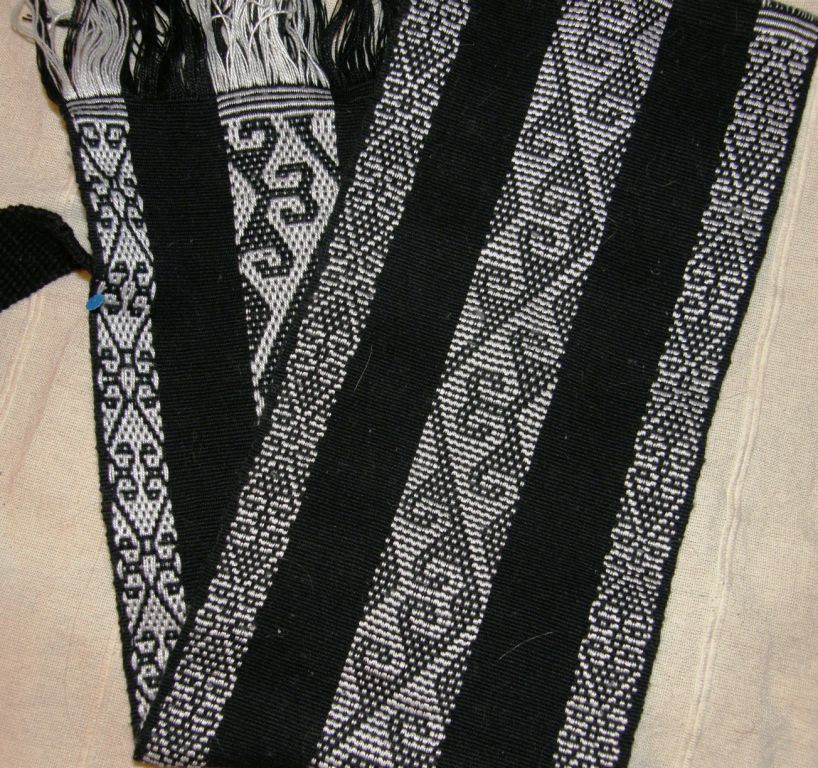
This is a Central Asian design woven in a simple warp float technique where both colors in the warp are floated to create the motif and fill in the negative space. It is not a double faced technique as gaps are left on the reverse of the fabric by the floating warps which expose the weft. Nevertheless the back of the weaving can look quite attractive…

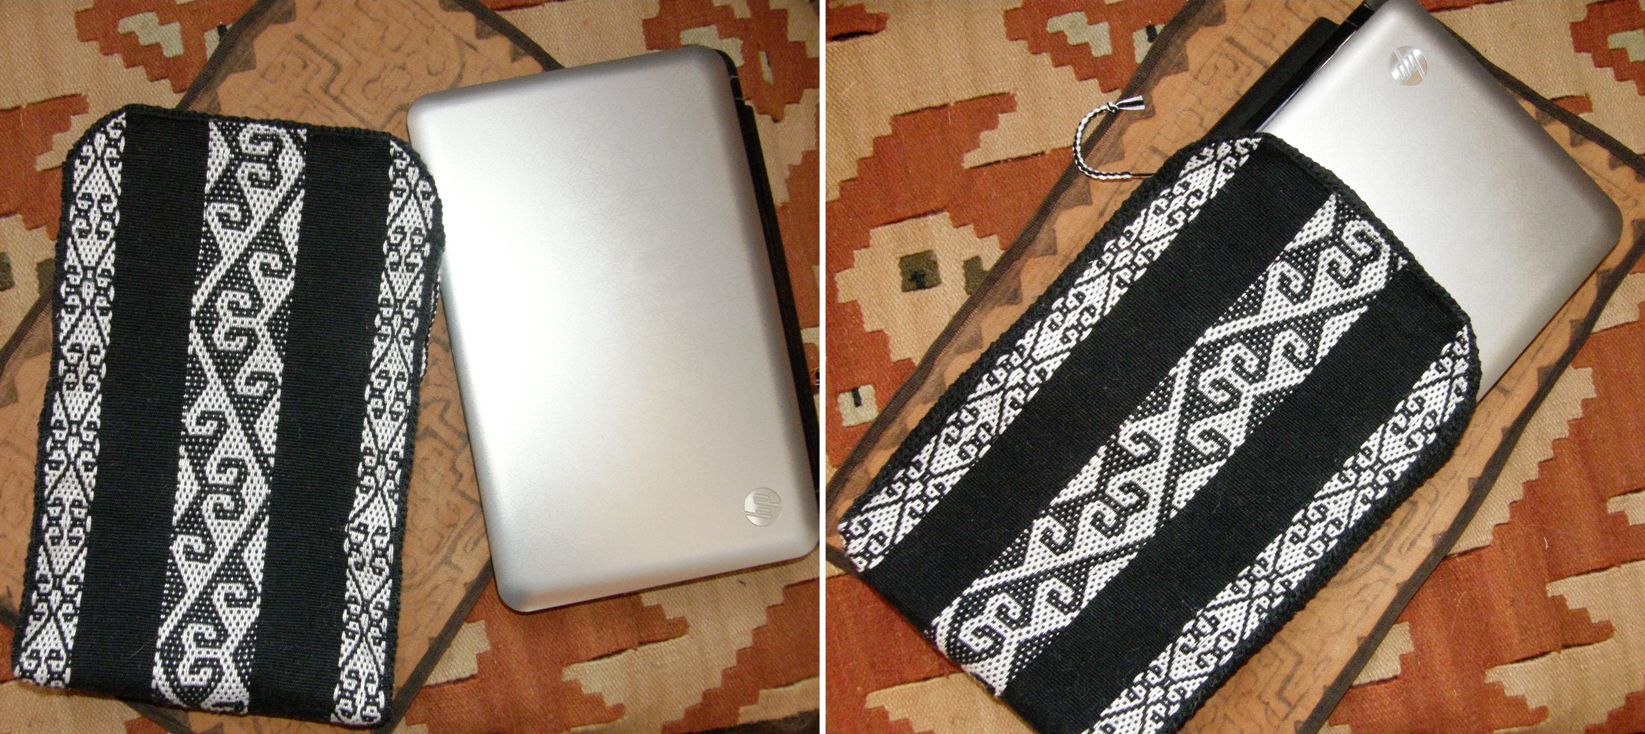
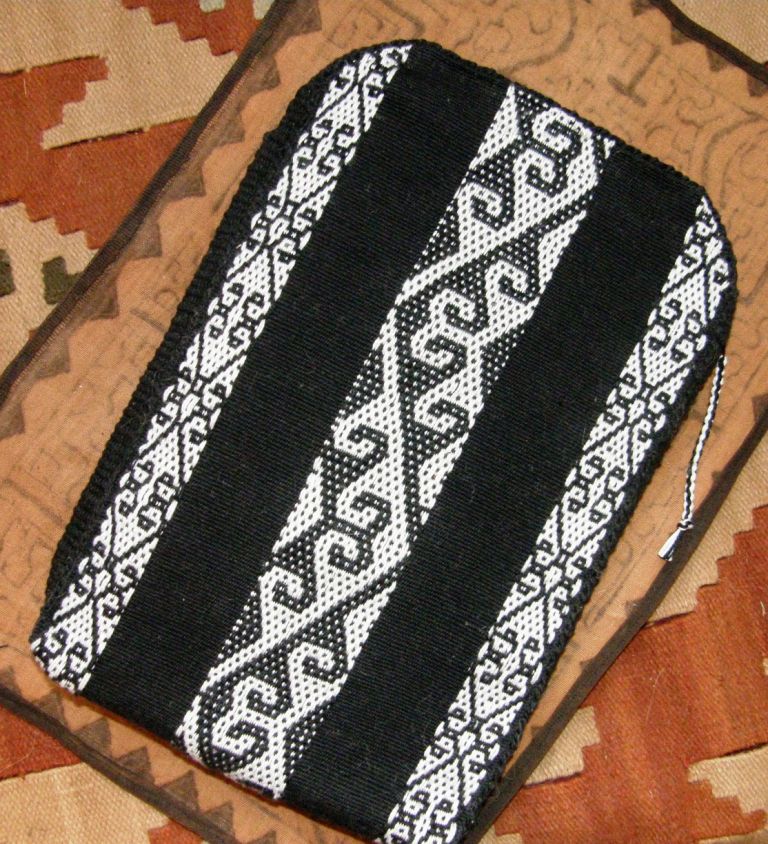
Anything made in black in my home attracts every stray cat hair! I made this into a sleeve for my notebook computer and so you can see the band I wove for the sides positioned and pinned ready for sewing. I rounded the top and added a zipper. You can see the zipper pull below….that is where the zip starts.
This was made from the demo backstrap warp that I took with me to the US on which I showed different techniques for opening the sheds. This case will protect my computer from dust and scratches but what will protect it from the cat hair?!

I am all about simple warp floats at the moment being influenced by two things I saw while I was away…

On the left…a Native American sash that Pam in Massachusetts showed me from her collection where the weaver has allowed the horizontal bars to shape the motif rather than the floats. Quite often we think of those horizontal bars as an annoying distraction from the motif which has been formed from floats and wish that we could somehow cover them up and make them go away. Here the weaver has used them as the design. Below you can see the more typical warp float designs that I have made where the floated motif sits on a background of horizontal bars.

The other piece that I found intriguing is the old Mexican (we assumed) belt that Susan showed me in Eureka. Here both colors in the warp have been floated just like in the Central Asian piece I made. However, we could just make out the remnants of a purple supplementary weft that had been used to fill in all the places where the warps had not been floated and, therefore, horizontal bars had been exposed.

The supplementary weft had almost completely deteriorated in this belt but you can probably better make out some of its remains in the above picture. That made me curious about the possibilities of combining supplementary weft patterning with simple warp floats, maybe not in exactly the same way as the Mexican weaver had, but it could be a way to add an interesting third color accent to a structure that is normally restricted to two warp colors. The best part about supplementary wefts is that you can change the color at will meaning that you could have a base warp of say red and gold and then add a turquoise accent, later a purple…any color you want, when you want. And, if you don’t like the third color accent you can just cut it out without affecting the structure.

So, I warped up this red and yellow band and played…no charting or planning, just messing around. I used a brown supplementary weft to add in some small accents. I had originally filled in the bottom diamond completely, decided that that was over the top and just cut it out. This was fun!

I tried the design on the red and black Native American belt but I think it might look better with stronger contrasting colors and/or heavier thread. Floating single threads instead of pairs, as I did in the example on the left, was an interesting exercise too. In this 35wpi cotton, it almost gives the appearance of a solid color background.

Sampling done! I want to plan a larger project now and see what else I can do with this.

It is amazing how many places this simple warp float technique turns up…

When I was in Santa Cruz California, Yonat showed me an Indonesian ikat textile in her collection which had a border of simple warp floats. On the right is one of the textiles made by the Burmese backstrap weavers in Massachusetts.

I learned this technique from the cotton saddlebag weavers of coastal Ecuador and have used designs from the coastal region in my own work above left. The Montagnard backstrap weavers with whom I studied in North Carolina float warps to create patterns. They use a slight variation in their warping set up and weaving. In the above piece I used a motif woven with a suplementary weft alongside the warp float patterns. The end has a design in twined wefts.

Here are two pieces woven by people who follow my blog. Eladio in Mexico wove the bird pattern from coastal Ecuador and a hook pattern which are charted here. Jeannine in Belgium designed her own warp float pattern.

Recently, Lydia in Texas sent me a picture of the piece on the left that a friend had bought in Madagascar. Apparently a Danish group has taught the local weavers this technique. The bag on the right is Betty Davenport’s and was collected in the hilltribe area of Thailand.

Amber in the Ravelry Backstrap Weaving Group showed us her finished piece above right on which she has used the motifs of coastal Ecuador. Now she is weaving a band which will be the sides of her pencil pouch.

Tracy finished her band in the warp substitution technique after studying with a local weaver in Doha, Qatar where she lives. Check out her blog to read about her visits to Souq Waqif in Doha.

And Traudi, after having already completed a few backstrap weavings, decided it was time to have her own woven backstrap. She wove this following the instructions in my Backstrap Basics article.

A couple of other things I have been pondering…

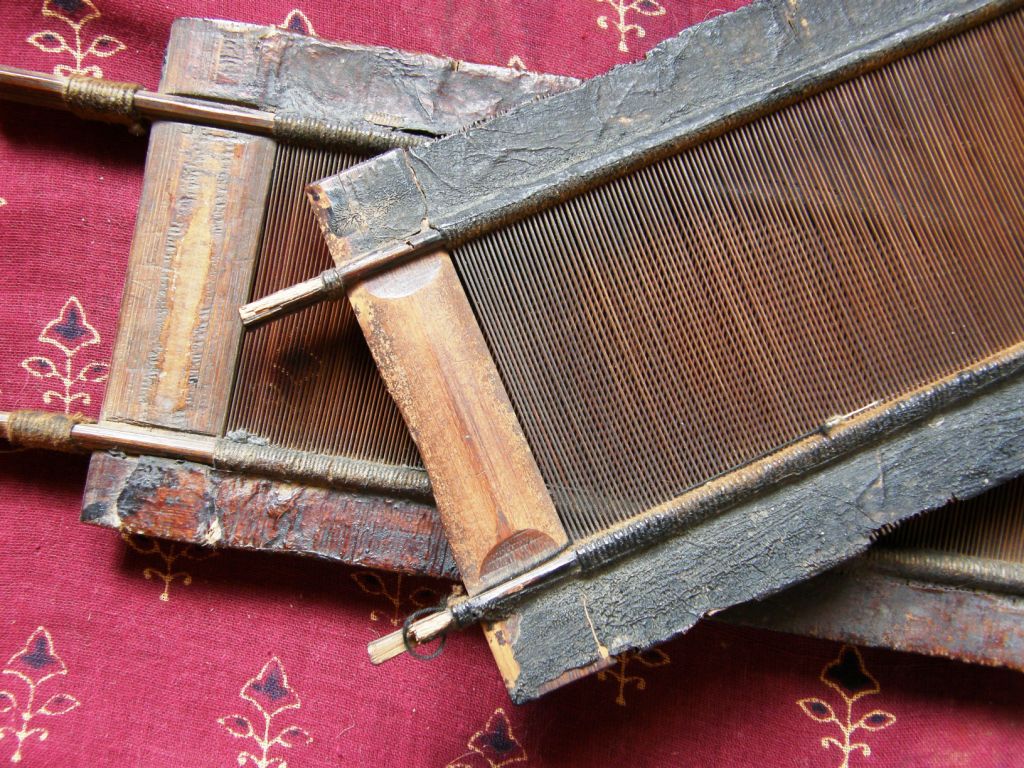
Here are my gorgeous bamboo reeds. I finally cut them down off the wall where they have been on display. They are a size 20 and I really want to use one to make some kind of balanced type weave…maybe a colonial overshot pattern after the inspiration I got from my recent visit to the National Museum of the American Coverlet in Pennsylvania and there’s always shadow weave.

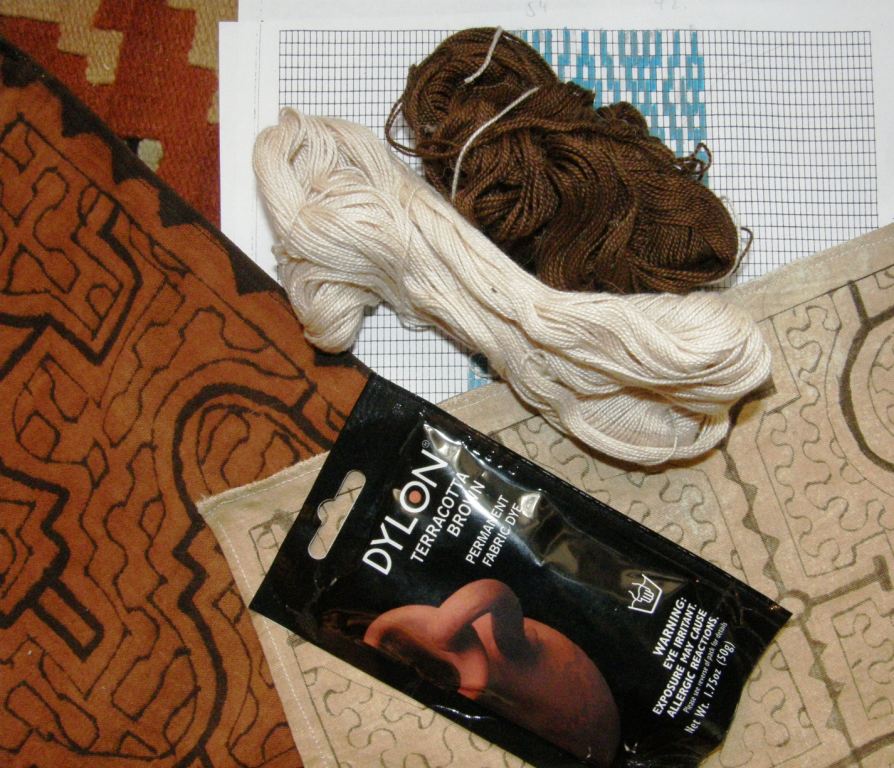
Another thing that is percolating…I just finished charting a Shipibo design from a piece that is woven using two-color simple warp floats (the same technique as the Central Asian piece I just finished). I want to use the colors that are in the two pieces of Shipibo fabric above so it will be either a beige and brown combination or I might try that Dylon dye that I got in the US to see if it makes anything resembling the terracotta in the other Shipibo fabric piece.

There is plenty to keep me busy, you see!