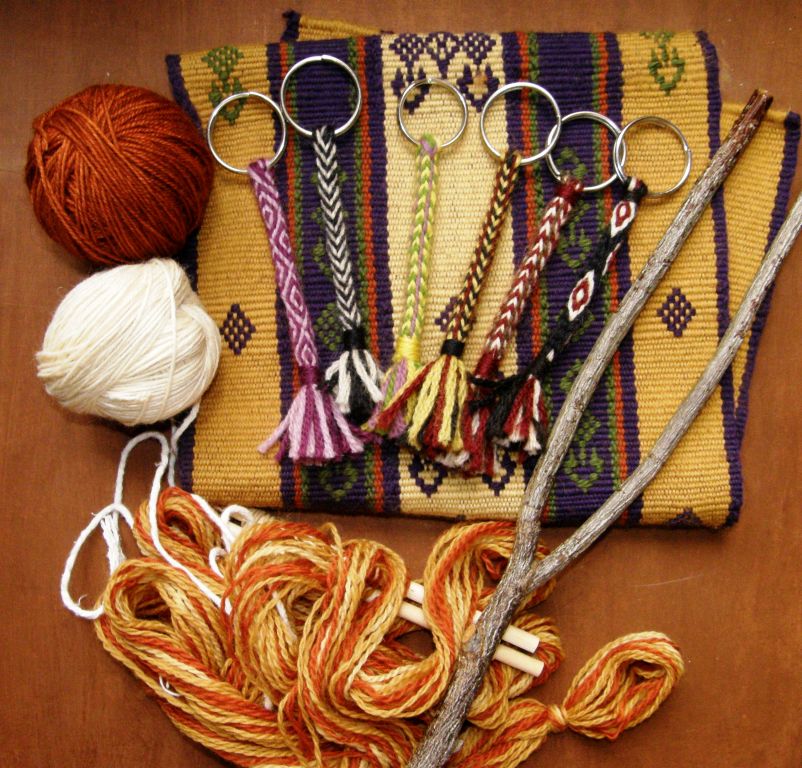
Backstrap Weaving – If I were to do it over….

“If I were to do it over”….

I know that I am trouble if I find myself sitting in front of a warp and saying that phrase before I can even throw the first shot of weft or, in the case of my current ikat project, before I can apply the first tie to the area that will resist the dye. As I set the warp on the loom bars, I was thinking that I would warp it slightly differently “if I were to do it over”.

As I wrapped the warp threads, I was wondering why I had automatically started placing the knots at the edge of the wrap rather than in the center as I had  in past ikat projects where I used cassette tape. Would it make any difference? Yes it did. “If I were to do it over”, I would put the knots in the middle of the wrap. There is far less chance of nicking or cutting a warp thread with scissor tips when unwrapping if the knot is in the center rather than at the edge.

wraps for new ikat project?The wrapping part didn’t take as long as I had thought. It was fun watching the design appear and satisfying seeing it take on the same proportions as my sketches. I had calculated and measured corrrectly…yay. No thoughts about do-overs there.

ikat motif backstrap weaving“If I were to do it over”, I would wash the thread in hot water before starting the project. I have dyed a lot of cotton in my time. I guess it has all been knitting yarn and crochet thread. Those have all dyed beautifully with the Dylon cold water dyes that I buy in small packets. However, my supplier of  the UKI 20/2 weaving yarn that I am using in this project told me that this yarn is finished with a coating of wax. I only found this out by contacting them after my failed attempt to dye the warp black.

That explains the medium shade of blue I got with navy blue dye last week more than the fact that I had used a very watery solution. With this new warp, all I could turn out was an ugly steely grey instead of the black at which I had been aiming. What a waste of dye. I then overdyed it with far more dye than was necessary to ensure that I got black the second time around….another waste.  So, that’s the end of my black dye supply…no do-overs possible for that part of the process.

spots of dye under ikat tapeAs the ikat tape was close to transparent, I was able to see dark spots under the tape before I could even start removing it. That was very disheartening.

Clearly, the dye had seeped under the tape in several places.

However, it wasn’t that bad after all. A very noticeable concentrated spot of color on a group of threads all squished together and tied, turns into a vague smudge when the individual threads are untied and fanned out. It is not like the marks disappeared, but they were something with which I could live. I couldn’t see why those particular parts had allowed dye to seep in, and so it is not a problem that I would expect to be able to eliminate “if I were to do it over”.

ikat motif on backstrap loomIt was time to make heddles, put the shed rod in place and then unwrap. The unwrapping part was nerve-racking….take it easy and don’t snip a warp thread for goodness sake!  And then it was time to weave! And this is where the “if I were to do it over” turned to “when I do it over” and there are several reasons for that.

woven ikat motif backstrap weavingI placed many…too many… thin strips of cardboard within successive sheds to start with. I can see now that not all those strips were perfectly straight and the accumulation of this flaw had the effect of having me start the weaving with a slightly askew weaving line.

I didn’t notice. Iwas concentrating so hard on the ikat motif and the alignment of the warps that I didn’t even notice until the whole motif had been woven. I had to weave in some short rows to get things straightened out for the supplementary weft patterning…NOT GOOD. It looked awful. Then I noticed that the ikat motif itself had also been thrown slightly off center. Oh well.

Maybe only I can see it but it just isn’t good enough. It was time to start the list headed “When I do this over” and get used to the fact that this will go on the sample pile.

However, I have to say that I am really pleased with the way the ikat pattern turned out. I didn’t get any of the dreaded “railway tracks” (my name for repeated single rows of lines and spots of undyed thread that get completely detached from the main motif.) There is fuzziness…perhaps more like a raggedness…it looks like ikat! Yay!

When I fished out my silk thread for the supplementary-weft patterning, it was plain to see that there are many levels of off-white-ness. The UKI thread is closer to white and the silk weft closer to cream. They weren’t going to look good together but I wove some patterns anyway. This piece is now a sampler and I may as well use it to learn as much as I can.

ikat figure with supplementary weft patterning backstrap weavingIn the picture above, I have flipped the loom around and made new heddles so that I can add the supplementary-weft patterns to the other side of the ikat motif. More short rows had to be added to get things straightened out….stupid cardboard strips! grumble, grumble.

So, WHEN I do this again, I shall adopt some different ways of doing things, starting with the warping. Add to the list….don’t forget to dye the weft!! Weft went into the steely grey bath but not the black one which wasn’t such a problem until I broke two warp threads while weaving and had nothing with which to replace them.

ikat tapeI have loads of thread, a lifetime supply of ikat tape, and I think that I could probably get some embroidery floss here to match more closely the color of the UKI thread. What is missing is enough black dye…darn. Do you think that mixing navy blue and dark brown would work?

In the midst of this I had visitors who had not seen my weaving before.

I hate having to feel all squirmish about showing my work to people because I know what kind of questions and reactions I always get from local Santa Cruz people when I do so.

They are fascinated and delighted at first until they eventually ask how much time I spend on this kind of thing. And, when they find out that I don’t intend selling my work, and won’t even be hanging my wall hangings in this home (I am saving them for some vague future home-of-my-dreams!), well, that is the end of the story. Heads are shaken in bewilderment and I am left feeling a little deflated and almost foolish. My explanation of the ikat process was sheer madness to them!

painted tshirt ethnic motifWhich had me thinking once again about process versus product.

Of course this and pretty much all my projects are all about the process.

I want to experience the ikat process and not merely create a large solid white motif on a solid black background. I could, after all,  paint a white motif on black woven  fabric if that is all I wanted,  like my friend Sharon did when she hand-cut stencils and painted a beautiful set of tshirts for me with ethnic motifs.

Or, I could use the warp-faced double-weave stucture which would allow me so much freedom to create motifs on solid-color backgrounds…made up of straight lines that can be put together to resemble curves, like those in my last Shipibo-inspired wall hanging and other projects.

Below, you can see an experiment with curves and Celtic motifs that I made a long time ago.

first-curve-experiments-in-double-weave

abba-yohanni-curtain-and-reproAnd another not-so-curvy one from the archives at left…

Double weave, of course, creates a thick fabric when what you might really be after is something finer and more flowing.

It also does not favor the use of a lot of unpatterned area. The parts of the double-weave fabric that do not have pick-up patterning will sit as separate layers of cloth simply joined at the edges. This can create a sort of ballooning effect over large areas.

The simpler little brother of the warp-faced double weave technique is warp substitution. With this structure, you won’t have to worry about layer separation in large unpatterned areas but most people do not like the awkwardly long floats that  form on the back of the cloth.

Another structure that allows motifs to sit on solid-color backgrounds is intermesh….

bhutan-collage-11It’s a warp-float structure that creates rather dense fabric….not something I would describe as light and flowing. The motifs can be very linear or curvy like the ones below.

intermesh with curved designPatterning with supplementary weft allows you to have a light piece of solid-color fabric patterned with soild motifs. The drawback is that in order to make the woven piece practical, the length of the weft floats needs to be limited and that will restrict the kinds of motifs you can create. Large solid-color areas will need to be broken down into segments of short weft floats.

tubular_band_on_ticlla_pieceAnd then, leaving warp-faced options aside all together, there is always tapestry technique…

greca design on a pillow coverThis is a pillow cover woven on a floor loom by a  member of the Hipolito family of Zapotec tapestry weavers in California. (Which reminds me…my weaving friend Dorothy is currently in Peru studying tapestry techniques with master weaver Maximo Laura… can’t wait to hear more about it).

I love comparing the fine double-weave belt from Argentina, below, with its bold black and white pattern, to the precise black and white ikat work done by the Mapuche weavers of Argentina and Chile…two completely different processes that create superficially similar results.

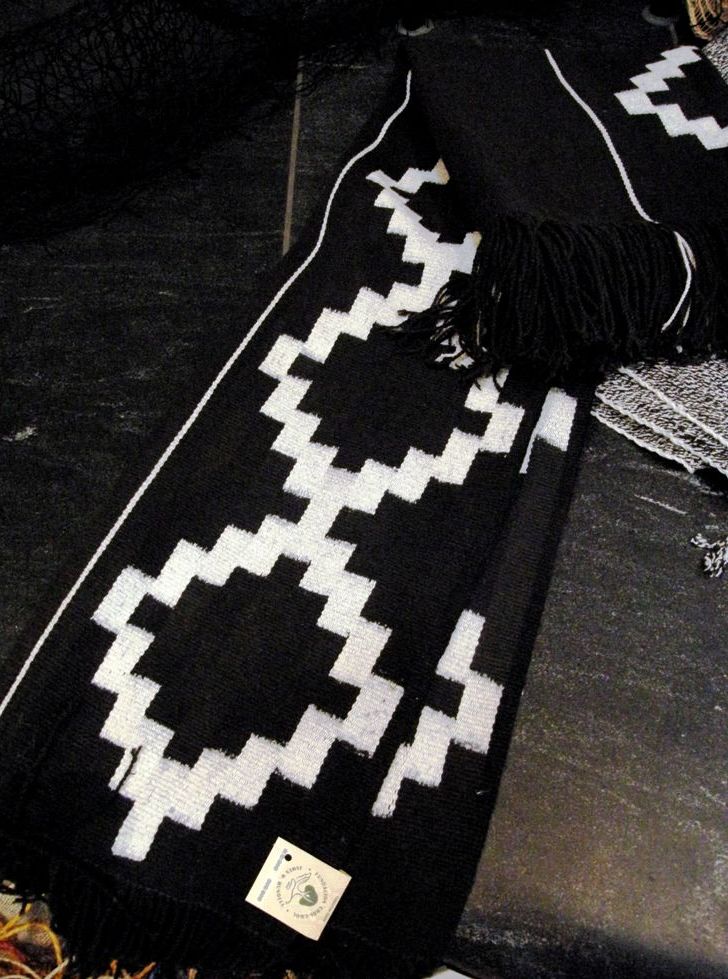
OLYMPUS DIGITAL CAMERA

mapuche-ikat-11And so, I will finish this post this week by showing you a fabulous ikat poncho created by Argentinean master weaver, Guillermina Cabral, from Victorica, La Pampa province and thank the Ministerio de Cultura de la Nación Argentina, to whom the image belongs, for allowing me to show it to you here. I found it on the Facebook page of MATRA (Mercado Internacional de Artesanías Tradicionales de la Argentina). The page has other images of beautiful ikat work along with other exquisite handcrafts of Argentina.

10564839_1546978602191639_385201088_nSo, it’s all about process for me. But, concentrating too much on one particular part of the process can mean carelessness in others which are of equal importance…stupid pieces of cardboard! 😉


Backstrap Weaving – Simply Red (and Black and White)!

These are the best light conditions I could find for photographing the red-on-red pattern on the two side panels of my wall hanging.

The late, low, winter sun was drifting in through my bedroom window and I looked up from my weft twining to discover how well the light and shadow brought out the relief pattern. I have posed these pieces all over the place…on the floor, on the table, in this room and that…used natural light and flash, held the camera in my hand, and used a tripod, and was not happy with any of the results. All I got was a flat red mass.

And then, there I was, happily seated with my backstrap in place and the warp stretched out before me. The light came to me through the window and gave me the shot at last.

sunlight on red panels backstrap weavingIt was great after all this time to be able to see how the red panels looked beside the center one. The tricky part was lining the three panels up precisely and have them suspended under the same amount of tension so that I could twine across the top of all three at the same time.

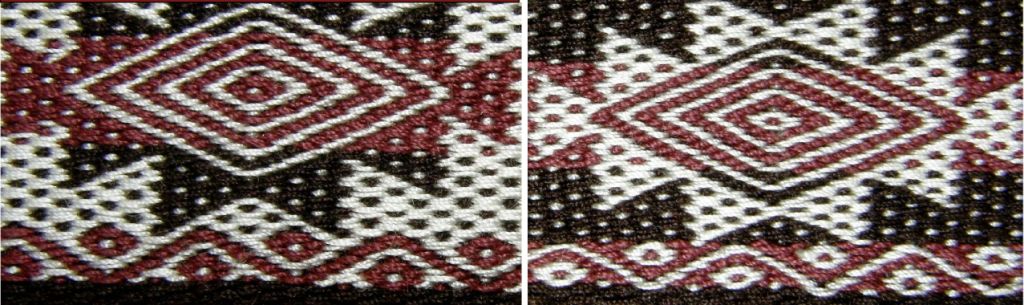
I still can’t decide which face of the double weave looks better…

back of double weave panelI used the solid stepped lines and the arrow motif as part of the weft-twined pattern in much the same way as I had in the red panels…

finished weft twining on backstrap loomI need to do a bit more solid black twining to finish. That will be the part that gets clamped within the wooden hanger. Once off the loom, I will decide how to finish the ends of the twined wefts and how I will cut the fringe around those long woven tabs at the other end (see below).I need to contemplate that for a while. Once cut, that will be that, and I want to get it right!

finishing the shipibo backstrap pieceSo, it is time to move on to the next project….a clean slate and a bunch of sticks…exciting!

I bought a large cone of UKI 20/2 cotton for the next project with which I have never woven before. That means it is time to sample the yarn while I play with ideas for the ikat  in the next wall hanging. I’ve been at the sketch book creating hooky designs. Whether I am creating a design that is way beyond my limited wrapping skills, remains to be seen.

First, I need to get an idea of what kind of width I can get with X number of ends in the 20/2 cotton and so I wound a short-ish warp as a sample.

To make it more interesting, I decided that I could play a bit with the silk that I recently bought at CNCH and try a new-to-me supplementary-weft technique that is used for decorating hair sashes from Jacaltenango in Guatemala. Dr Carol Ventura has written a book about the Jacaltenango hair sashes. I have owned this book for years and once dabbled with the technique many, many years ago. As is always the case when using supplemental weft, the success of the project is very much dependent on finding the right kind of material for the supplemental weft for the weight of the ground cloth. While I understood the technique, my sample was downright ugly because my supplemental weft was too “light” for the ground cloth and there were large gaps between the rows of pattern. Then, I got distracted and wandered off in another direction.

I don’t even know where that sample is now. It was obviously not worth keeping. However, seeing a Jacaltenango hair sash that one of my students brought to class in Seattle last spring re-ignited my desire to try this technique….

jacaltenango hair sashI have made mistakes in my new sample and my count is off. I will un-weave this and start again now that I have a better feel for handling and counting these fine warp threads.  Hopefully the next attempt will be better. In the meantime,  this 20/2 white sample will give me a good idea of how many ends I will need to wind for my next wall hanging panel. I like two-fers.

backstrap sample with new cottonAnd, do I feel confident about this next ikat project? No, not at all! My experience with ikat has been quite limited but I figure that I may as well just jump in there. I do know from my own experience that the wrapping and dyeing part, although painfully slow, is relatively easy. For me, the hardest part has been keeping the warps well enough aligned while weaving so that my motif remains recognizable. Yet, I don’t want them to be so rigidly aligned that I lose the feathery outlines that make ikat so charming. This is one of my tiny attempts…

three ikat motifsHere are some narrow strips of ikat that I placed in a piece that includes supplementary-weft patterns…

strips of ikat backstrap weavingAnd finally, this experiment involved dyeing and then removing some of the wraps to dye again for a second color.

ikat book coverWay back in 1998, my weaving teacher in Candelaria, Bolivia showed me the first piece of ikat I had ever been able to handle. It was a  bedspread on which she had been working on and off for several years. This was something she was weaving for herself rather than the usual pieces that she weaves for the store in the museum in Sucre.  She was weaving with rather coarse handspun wool and her name and her husband’s had been worked in amongst the flower motifs..

stitched-ikatI’ve examined the wrapped warps, the finished cloth, and watched the weavers at work in many different places in my travels in South and Central America, trying to capture the secret of limiting the amount of  movement of the warp threads and the resulting image distortion. Below are examples from Chile, Ecuador and Peru.

mapuche-ikat-2

ikat weaver Bulcay Ecuador

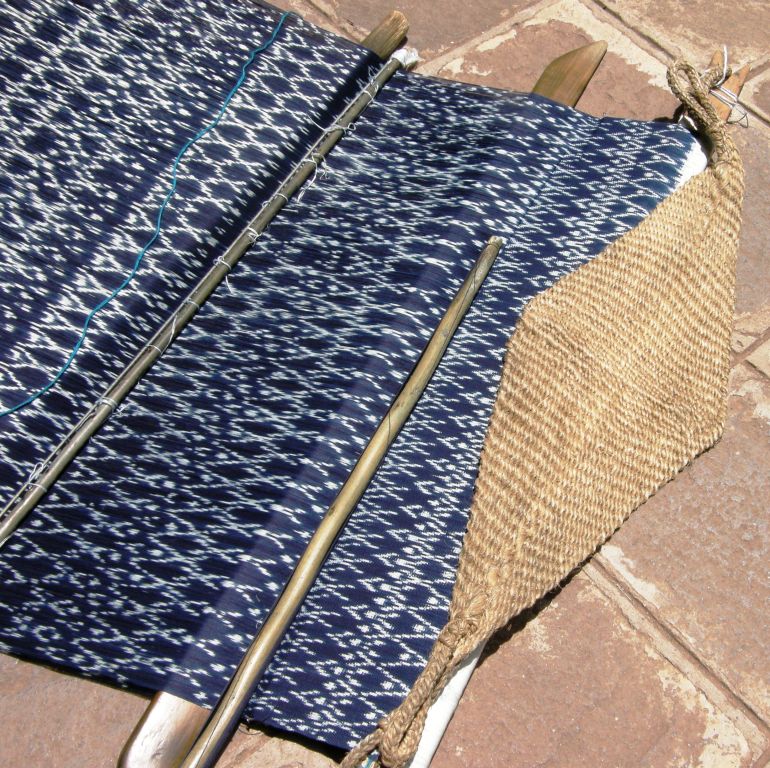
The simple backstrap loom of Tacabamba, Peru on which the indigo ikat-patterned "panones" are woven. They are up to one-meter wide, covered with tiny motifs and have patterns knotted into their fringes.
The simple backstrap loom of Tacabamba, Peru on which the indigo ikat-patterned “panones” are woven. They are up to one-meter wide, covered with tiny motifs and have patterns knotted into their fringes.

So, that is what I have been up to this last week….

Meanwhile, there has been a fair bit of red, black and white appearing online in the various places where band weavers hang out.

Cheryl wove with me last spring and now she is already designing her own motifs and weaving more than just samples.

cheryl (3)She designed the gecko figure and I love the arrow motifs at the bottom which remind me of little boomerangs. This will be a strap for her camera. I showed you some weeks ago the sample bands that she wove in preparation for this project. Here is the completed weaving…

cheryl finished camera strap pebble weave backsrapThe center motif is charted in my second book and is a pattern that I adapted from tablet-woven band by Louise Ström.

Ann Mester created this enticing warp for backstrap weaving which could be used for complementary-warp pick-up techniques like Andean Pebble Weave, or simple warp floats, or just to create attractive horizontal bars of black and white…

ann mester fb (2)Rufio, the kitten (who would look very stylish with a red collar) was rescued from Pet Rescue of Mercer.

Susan AndersonAnd, if you are wondering about what I call “simple warp floats, the technique that I used on the red-on-red panels, Susan Anderson’s example. above, very clearly shows the single-faced nature of this pick-up technique. Susan has floated the warp threads singly. For me, this gives a more delicate yet solid look to the motifs than that which is achieved by floating pairs. The pattern is from Anne Dixon’s The Weaver’s Inkle Pattern Directory. Susan wove this on an inkle loom and has done a beautiful job.

So, it will most likely be all about winding the warp and then finding a comfortable position and set-up for wrapping many many threads for ikat this coming week…

cropped-ikatThis was my first ever attempt, around eight years ago, I would guess. It’s wool warp…Navajo warp…wrapped with cassette tape. The wrapping and dyeing were successful…the weaving was not! This is another sample that has disappeared!…nothing to show for those hours of work except this picture and “experience”.  And I am sure that there will be much more experience to be gained and  many more lessons to be learned in this coming week.

See you next week…


Backstrap Weaving – Lucky Finishes

Sometimes it is just all about luck.

closing gap discontinuous warp four selvedgeYou may remember from last week’s post that I was happy about having been able to weave my pick-up pattern uninterrupted all the way from one selvedge to the other on this discontinuous-warp four-selvedge piece. Whether I would be able to pull it off on the other half of the warp remained to be seen.

I measured and estimated. The were four weft shots in the sequence for this tiny motif and I wanted to see if I would be in just the right shed to be able to close the gap between the two woven ends without interrupting the pattern. My estimates told me that it wasn’t going to work. What to do? Well, just weave on and see what I can come up with at the very end. There was nothing at that point that I could have done about it and I might have been able to find some kind of creative solution.

discontinuous warp finishedAs it turns out, it worked! My estimates had told me that it wouldn’t, which only goes to show you how little control I really had over it and how much depended in the end on pure luck. The terracotta wool is rather streaky. The ties were too tight on the skein when it was dyed. I am okay with the resulting rustic look. It goes with other defects such as the change in tone when I ran out of white weft and had to use terracotta. It has been a fun experiment.

??????????????????????Bolivian and Peruvian weavers, as far as I have seen, never bother to try and match up their patterns in this way on four-selvedge pieces. My tiny motif is nothing compared to the complex patterns that they generally weave into their pieces. A typical finish on a complementary-warp piece looks like this….(this piece is from Calcha, Bolivia)

??????????????????????The weaver  abandons the pick-up pattern and uses the two basic sheds, in this case, one in each color, to close the gap. The last few weft passes create horizontal bars. That small piece of plain weave  comes out wider than the warp-float patterned areas.

Supplementary-warp patterning requires less space in which to maneuver as the weaver does not need to create a picking cross. He or she simply reaches down with fingers or stick to the lower layer of threads and picks up the warps that are needed for the pattern while dropping others from the top layer. As I showed you last week, some weavers who use this structure weave the design uninterrupted right to the very end of the piece and abandon it to the basic sheds only for the last three or four weft passes (the example below is from Pitumarca, Peru).

finishing-backstrap-weavings

terminal-areasThis piece from the Cusco region of Peru has both supplementary and complementary-warp patterns and the weaver has chosen to end all in the same way and place.

Double weave is something else again! My teacher in Potosi showed me when to abandon the pick-up and start using the two basic sheds, each with double the amount of threads for the two layers of cloth now being squeezed into a single layer. The needle-weaving part was horrendous! Here you can see my dear teacher Hilda, poor eyesight and all, showing me the final steps….

hilda finsihing a pieceSo, my terracotta piece was taken off the loom and I was ready to weave and attach the tubular band . I had created a warp for a tubular band for another piece that I had woven a few weeks ago and had decided not to use it. Although I think that a band with a dark brown base would have suited this piece a lot better, I simply didn’t have any suitable dark brown wool. This was the next best thing.

??????????????????????First, a wee sample…I had lots of this warp which had been originally planned for a much larger piece so I was able to weave an independent band and lay it along the edge to see if the colors really did suit. As you know, a tubular band is generally woven and sewn to the cloth at the same time using the weft as the sewing thread. I have a tutorial on that here.

tubular band on ticlla pieceIt’s done, and that heralds the end of the summer wool adventure. I learned a lot and have three study pieces to remind me of that.

woolstudy pieces four selvedge and ticllaNow it is time to get on with other things.

I have ideas swirling in my head about my next piece in the wall hanging series. When I finally have something to show you, you will see that the word “swirl” is very appropriate for describing the design on which I am working.

As is my custom, I am belly down on the floor with charting paper and pencil and a small mountain of accumulated eraser dust. They say that the third time is the charm. Not so. I go to bed thinking that I have everything in place but then wake up next day to see that something very obvious needs changing. I am weaving samples as I go which is a good thing as many of the needed changes that were not so obvious on paper scream at me from the woven fabric!

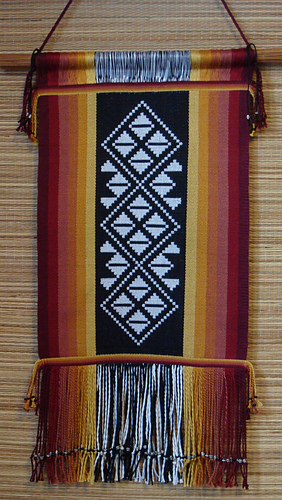
I plan to weave this fifth wall hanging in three panels and join them with weft twining just as I did for hanging number four. With this piece I hope to represent techniques and design influences from  tropical lowland regions of Peru.

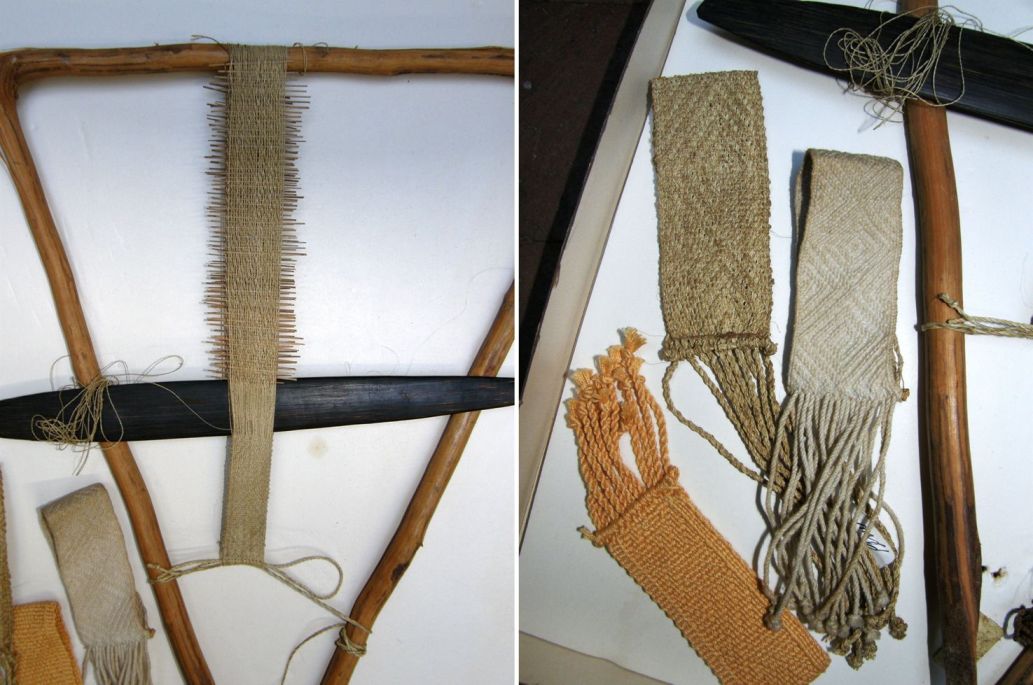
Nora Rogers experimentThis study piece of a wristlet woven by the Mayoruna people of Amazonian Peru,  made by the late Nora Rogers, will help me design the red side panels.

shipibo wristletsI won’t be using the traditional type of loom, though! All those tiny sticks hold the pattern sheds. The weaver picks up the threads for a pattern shed, passes the weft, inserts a stick and stores it at the end of the warp. He/she continues doing this for every shed. I tried to count the sticks on the above piece and got at least sixty. When the weaver reaches the mid-way point of the pattern he/she can then satrt drawing the sticks forward to open the shed, pass the weft and then discard the stick. The next stick in sequence is then drawn forward and so on until all sticks have been removed. Then the process of inserting the sticks starts again. 

I can’t wait to get started but I want to finish charting the pattern for the center black and white panel first.

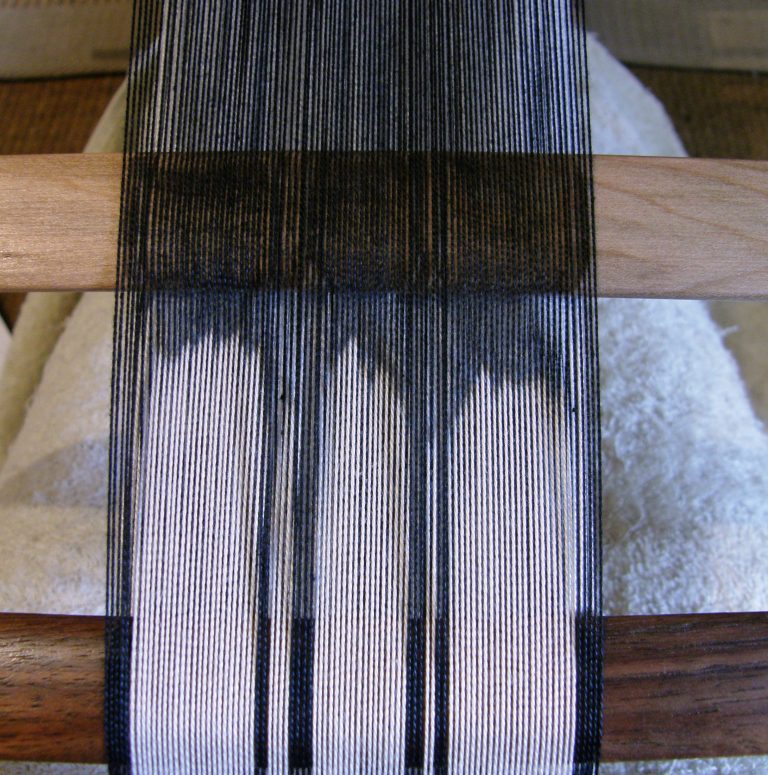
Here is my sampling warp in black and white….

???????????????????????????????I told you a few weeks ago that I was seeing swirly patterns in my wool warp as I stared down at the lines of warp threads. Those swirly lines are what have led me to this latest project idea and, funnily, also led a friend of mine to write and ask me if I was suffering from some kind of medical condition! Now I stare down at the warp lines in this new sample and, as I open the shed and clear it down to the weaving line, I see ikat-like patterns. I am wondering if this is trying to offer up clues to me as to why warps shift in different ways while weaving (despite your best efforts to stop them!) causing ikat patterns to develop their characteristic feathered effect.  

Team Backstrap is starting its weave-along in the Ravelry Group tomorrow as the Sochi Winter Games commence. I have something in mind to make with a sports theme but we will have to see if I can get out to buy the yarn tomorrow. So far, I know that Jennifer is planning to weave a strap for a bag and Julia has something planned with a colorful Guatemalan theme. She was given some 10/2 thread in many colors which she used in this wall hanging…

julia bhutan intermeshThe motif was inspired by designs from Bhutan which you can find in David K Barker’s free downloadable pattern books. Check my RESOURCES page for the links. I love everything about this….the gradation of colors which border the pattern which she also cleverly used in the weft twining. She used the intermesh structure for both the solid and patterned areas. Those of you who have my Andean Pebble Weave book will know the intermesh structure described there in the section on thick borders. I teach intermesh as a patterning technique in my second book. I like the neat braided ends of Julia’s weft twining. I usually leave mine in a state of wildness.

And to finish, as I have been talking about luck in this post, here are two people who have had extraordinary luck rummaging about at thrift stores and garage sales in California….

1157544_10203147433553344_313383261_nMy friend Yonat posted this to one of the finger-weaving groups on Facebook in order to be able to identify it for the friend who had picked it up at a garage sale in the seventies. It caused high excitment in that group, I can tell you! One of the experts thinks that it was probably made during the period of Standardization from 1830-1850 and, because of the pink thread that has been used, was most likely made in the region of Lanaudière. What a treasure!

I am so thankful to Lausanne and Brian who took me to Quebec last fall to meet two sash weavers in L’Assomption.

And then, a Facebook acquaintance showed me a lucky find in a flea market in Pasadena in 2001….

huichol otomi bandIsn’t that gorgeous?! The Huichol, Cora and Otomi people of Mexico weave these kinds of pieces using a balanced double-weave pick-up structure. From internet sources alone, it is not yet clear to me which motifs in particular belong to which group or if the same motifs are woven by all. After only being able to look at examples online, I would love to touch and handle this belt! I used examples of Huichol and Otomi work that I had found online as well as a surprsingly similar motif from Scandinavia to weave the piece below. It is exciting to be able to see what looks like an old piece in such fine condition. 

huichol otomoi inspired backstrap weavingThat’s all for this week. Here’s wishing you all lashings of good luck in your projects this week! 

Backstrap Weaving – Two-fers

One of the things I like about the discontinuous-warp technique I have been playing with lately is that it gives me not one, but two opportunities to practice creating four selvedges….a two-fer. So, with the new piece that I warped this week I get two more chances, which makes five in total these last few weeks. I think my skills are improving. At the very least the process is becoming much less intimidating to me. I wonder if one day I will shrug it off and say that it is “normal” as my young teacher  from Pitumarca, Peru did.

Four-selvedge bands woven by Bolivian teenagers-in-training.
Four-selvedge bands woven by relatively new weavers…Bolivian teenagers-in-training.
The first piece on which I learned the four-selvedge technique in Potosi, Bolivia
The first piece on which I learned the four-selvedge technique in Potosi, Bolivia.

discontinuous warp ticlla closing the gapHere’s where I was at last week when I wrote my blog post. I still had the heddles in place and and had just removed the shed rod from the left hand side.

??????????????????????And here is the piece with the gaps closed. There are a few wobbles here and there but I am pretty pleased with it. Next came the tubular edging band and it took me five attempts to settle on the pattern and size. Part of the problem is that I don’t have much of a wool stash and the colors are very limited so, in the end I had to go with a heavier tubular band than I would have liked.

sewing tubular bandLate night weaving and sewing with poor lighting…not a good idea! I had to unpick a fair bit next day. You can just see near the upper left corner the end of the tubular band. I was left with the problem of what to do with all those warps ends. They are easier to deal with when you sew a tubular band to a bag. The band can be continued down into the bag, its end sewn over and hidden away inside. When you look at an Andean textile that has been finished this way, you have to look  hard to find the start and finish of the tubular edging. On all the pieces I have seen, the end has been sewn over and over and the unwoven warps cut. It has been done so neatly that you can barely tell that the resulting blunt end is there. This is something on which I need to work!

So, I wrapped the place where the start and finish of my band collided. It was obvious and ugly and I wanted to hide it. The small bit of  wrapping looked pretty awful. My solution was then to extend the wrapping to about an inch and wrap all four corners  the same way. This would  transform the wrapping into what we weavers like to call, with tongue in cheek, a ”design element”. You can see two of the wrapped parts below.

threaded in tubular band patternI created a threaded-in pattern for the tubular band rather than do something with pick-up. I warped the pattern off center so you can see the whole design sitting next to the upper face of the cloth rather than having to tip the edge to view it. The band on the back side of the cloth is in a solid color. Underneath all  that you can see this week’s new discontinuous-warp project…another two-fer.  It looks like I will be able to use that discarded tubular band warp from last week after all. I think the colors match this new project well.

What am I going to do with these pieces? Nothing! They are samples, practice pieces, notes and lessons in cloth. I would like to have one of the pieces in my wall hanging series represent the ticlla, or discontinuous warp technique, and so, the pieces I am currently weaving are part of my warm-up for that.

???????????????????????????????I so love sitting in front of a fresh warp like this!…terracotta and natural discontinuous warp in the same Navajo wool warp yarn that I used for the Four Seasons piece. This time I warped for a tiny strip of simple pick-up down the center and re-spun some brown wool to match the twist of the Navajo warp to use as the border color. I wanted to use a complementary-warp technique.

I wanted to decorate this one with supplementary-weft patterns again but I chose a “discontinuous” method this time in that the weft does not travel all the way across the warp to turn at the edge. The weft-turns shadow, or outlines, the motif.

discontinuous supplementary weft weft turnsThe terracotta supplementary-weft yarn that I used could have been thicker. I didn’t get as good  coverage with it as I did with the lighter color. The light bumps at the edge of the terracotta half of the cloth are the main weft turns. I had to go back and forth between white and terracotta weft as I didn’t have enough of either alone to complete the project. Those contrast color weft-turns will get covered by the tubular band later. The turns of the supplementary weft lie beside the motifs in a nice outline.

I wove the pick-up pattern wondering if there was a way I could close the gap between the two woven ends without interrupting the pattern. It was a four-shed pattern and I hoped that I would be able to fix things so that I would be in just the right shed for the last weft pass. I think a lot of it came down to luck in the end. The weaving fairies were with me :-).

gap closed on oe side of discontinuous warpIt worked! Now, let’s see if I can manage it on the other side. Hey, weaving fairies, don’t go away yet. I am disappointed with how noticeable the change from white to terracotta weft is in the white section…oh well.

I am very happy with my wee bit of pick-up on this piece but, before I get too carried away, here’s a reminder of what the Pitumarca weavers achieve as far as pick-up is concerned….

Pitumarca ticlla with supplementary warp pick upGranted it is a little easier to weave supplementary-warp pick-up in the small space at the finish of a four-selvedge piece but, oh my gosh, look at that! I would say, and this is just my guess, that the weaver closed the gap at the outer edges where you can see the tiniest fraction of an inch that is without pattern. The natural alpaca colors are so gorgeous. I don’t remember where the start and finish of the tubular band is located on this piece but your eye is certainly not drawn to any obvious spot where the weaver may have finished.

finishing-backstrap-weavingsAbove you can see a weaver from Pitumarca, Peru nearing the end of the warp. You can see how small the space in which she  picks up the patterns and operates the heddles is. One the right you can see how a four-selvedge piece with supplementary- warp patterns (part of a discontinuous-warp piece) has been finished.

While waiting for the brown yarn to dry and have its twist set, I thought about other possible ways to hide the join in tubular bands on these flat woven pieces. Maybe some cross knit looping? I practiced on one of the braided keyfobs that I have been making, the first one which was bit on the loose side. It could be sacrificed for this experiment.

OLYMPUS DIGITAL CAMERAI am not convinced but I will keep it up my sleeve just in case. I think it looks cute, as if I had knitted a wee wool sweater for the braid! I added another Margarita braid to the collection in red and black. 

Jennifer finished her stunning hemp piece with pick-up patterns of Chinchero, Peru. I have charted these in my second book. I like to think of complementary-warp structures as two-fers…one weft shot produces pattern on two beautiful faces.

jennifers chinchero pattern finishedNow she has to choose which face with be the outside of the bag she is planning. I am afraid that none of us in the Ravelry group were helpful when she asked us for opinions. We all liked both sides equally, of course! 

And speaking of bags, Julia once again wowed us with her weaving, piecing together and sewing skills….her creativity!

Julias bag with tubular band strapThe main fabric was woven on her floor loom and is stunning in itself. CindyQ, also in the Ravelry group, wove the blue supplementary-warp pick-up band and had given it to Julia as a gift. Julia’s idea for making a shoulder pad for the slim tubular band strap is so clever. She wove the band for the strap in tubular form and then wove it as a flat band for a while. She braided the flat band  to form the shoulder pad. How cool is that?

Kim varland rabbitbrushstudio dot blogspot dot com(2)Kim Varland, yet another Ravelry weaving buddy, has been playing with the yurt band border pattern that I have charted and explained in one of my tutorials. I love her color combination and she shows more examples on her blog.

Kim has used what I call a simple warp-float technique. While the pattern on the back side of the band is attractive and interesting, it is not truly double-faced. I have shown these patterns to weavers who all love the way it looks on the back.

The other day I was explaining to one of our new Ravelry group members what was meant by a “complementary-warp structure”. I was thinking that surely I had put a description of this somewhere on my blog with lots of pictures. I found it in a post back in 2011 which I had written just before going to Cochabamba to weave with my teacher Maxima. I had promised to start a tutorial page on my return which explained some of these terms which are used for some of the common structures woven by backstrap weavers here in South America.

pebble a and bIt turns out that I never did and so , I will copy that portion of the blog post to a new page and will add some other structures to it this week….only two and a half years overdue! Above you can see the double-faced, or two-fer nature of complementary-warp structures.

Backstrap Weaving – Another Woolly Week

Another woolly week in the middle of summer! What’s going on? I have friends in Pennsylvania and Vermont writing and telling me about the extreme cold they have been suffering, shoveling endless amounts of snow, using crampons to get about in their yards and feeling almost like they can’t breathe. And then there’s all the talk about the Winter Olympics, although I have to admit that I am not feeling too festive about that right now with the way things have been going in the lead up.

Perhaps the chilly scenes in my head have had my hands reaching for wool. I am on a roll and can’t stop! I have to say that I actually felt more uncomfortable handling fine silk in the heat last summer. So far the wool has not been bothering me.

four selvedge wool warp backstrap weavingHere is where I was last week with a couple of inches left to go on this four-selvedge wool fabric. The next step was removing the shed rod. It is a little heart stopping removing that rod. I clung and clung to it. With one swift movement the cross was gone! It felt like the safety net had been pulled out from beneath me and I was left floundering in a mass of threads.

closing the gap discontinuous warpHowever, there are benefits to removing the shed rod. It means that when you raise the heddles to create a shed, you can actually insert two weft shots. One shot, if you look at the picture above, will weave the fabric on the left and the other will weave the fabric on the right….the two sides that I am attempting to join. And then you use a needle to pick up the threads that were formerly held on the shed rod. Again, two weft shots can be placed within that shed. Eventually the heddles are removed and it’s all needle weaving after that.

Finally, I got to the point where I could see that just two more shots would do the trick. The problem is that you can’t finish with two shots in the same shed. You have to squeeze one more between them. So, I could either put in one more shot or three more. One more was not going to be enough and three more would be too many. This happened when I finished the alpaca ticlla piece on which I had studied in Peru (see picture above). I squeezed in too many weft threads and it really looked too tight. I removed one and was left with two in the same shed, removed one more and was left with a noticeable gap and a weak spot in the fabric.

discontinuous warp piece off the loomHere is the finished piece. The gap is most noticeable in the white section (notice how the fabric curls due to the over twisted yarn that was used).

So, I decided to go with one fewer weft shot than I felt was necessary and had a slightly sleazy weak spot in the middle of the piece.

Two things marked the spot where the last weft shots lay…a darkish spot right in the center which was a dimple in the cloth, and  wobbly edges. The edge warps simply ended up being too long once I started closing the gap and there wasn’t a whole lot I could do about it at that stage. Loose edges would not support  the weft turns well.

I didn’t like the dimple. I didn’t like the loose weak feel of the fabric in the middle. What to do?

??????????????????????And then it occurred to me…if I needed to stuff more weft into that space to firm up the fabric, why not make the weft a colored supplemental one? So, that is what I did. I needle-wove in a motif with supplemental weft. It turned out to be surprisingly easy to use the blunt end of a needle to get under the warps and weave in the motif. I can’t see myself ever getting away with that with cotton. But wool is friendly and stretchy!

The dimple disappeared but the wobbly edges didn’t. Everything  is a bit on the wobbly side in that area but at least the fabric is now stable. Believe me, it is really firm now! You can see the purple motif in the center flanked by green ones on the sides.

four selvedge piece second finishAnd I did have problems as anticipated with splitting the ply with the needle when needle-weaving. I thought that I had it under control only to find five skips on the back of the fabric where one of the strands in the 2-ply had not been caught on the needle. Oh well.

Lessons learned….when weaving a four-selvedge piece, keep an eye on the edge warps as you go so that you don’t end up with loose ones as the gap is closed. Avoid loosely plied thread. I split the ply so many times and had to back the needle out for a do-over and then there were several times that I didn’t even notice that it had happened.

This piece will be set aside until I can get more purple KnitPicks Palette for the tubular edging band and the sides. I have not one scrap left! I am still hoping to use this as a sleeve to protect a laptop computer.

??????????????????????As I said before, I was on a roll…a woolly roll. I found the wool warp yarn for Navajo-style weaving that I had bought at the Mannings last spring. During my stay there, Carol, Tom and Sara had let me dye it using their dye workshop supplies. I found it strangely heavy for Navajo warp but it had a good firm twist..no chance of splitting those strands apart…and any overtwist seemed to have settled.

I had bought it to use for a discontinuous warp project. In order to benefit from the lessons learned in my latest four-selvedge experience, I thought that I may as well  dive into a ticlla project, as the discontinuous warp technique is known in Pitumarca, Peru . The ticlla technique would give me the fun of weaving not one, but two, four-selvedge panels in the one piece.

Of course, my piece would be very, very simple! Nothing like these masterpieces!!…..

weaver from Pitumarca with discontinuous warpThis piece has multiple four-selvedge panels each incorporating complex continuous pick-up patterns.

bhutan-and-discontinuous-warp-from-peruThis ticlla piece, from the collection of my friend Betty, is stunning in the simplicity of its plain weave structure. However, the layout is anything but simple. Betty has adorned its center with a small brooch from Peru which matches so perfectly the colors of the yarn.

So, here is my warp…..

ticlla discontinuous warpI wish I had had a warping buddy to help with this. I finished it late at night and put the two sets of cross sticks, one for each panel, in place. You can see that I had used a metal rod around which to dovetail the threads in the center. I guess I was bleary eyed as, when I got up the next morning I could clearly see that despite my best efforts to keep everything straight and even, the metal rod had become distorted. I unwound the whole thing and started again using a wooden rod in place of the metal one. 

Below, there is a reminder of the warping path for one kind of ticlla warp so you can better understand what is going on above. You can see that the ladies from Pitumarca are  using a wooden rod for their center stick. I have seen pictures of weavers preparing these kinds of warps with metal rods but I think that two pairs of hands might be needed in those cases to help keep the tension on the rod balanced.

ticlla warp pitumarca peruI had four colored panels and, perhaps because I have had my mind on crazy weather patterns lately,…the extreme cold in the north and the extreme heat in Australia… I came up with a Four Seasons theme and designed some very simple motifs. There were relatively few warps to work with so I couldn’t include much detail and the weft floats could not span more than five warps without being awkwardly long.

??????????????????????There are the Spring and Summer motifs  in place…flowers and suns. The bulky turns of the wool supplementary weft on the edges will hopefully be covered later by a tubular edging band. In this picture I have already removed the dovetail stick and woven on both sides of center for stability. 

As for the edge threads, I did not secure them in any permanent way when I finished warping. I have them hitched to the loom bar so that I can easily get at them and pull to take up any slack as I go. Hopefully they will be as taut as all the other threads when it comes time to close the gap in the weaving. I want to avoid having wobbly edges on this piece.

Four seasons discontinuous warpFall and Winter…leaves with breeze lines between them and a snowflake. Now, all that there is left to do is keep an eye on those edge warps and close those gaps.

discontinuous warp ticlla closing the gapWith less than a quarter inch to go, I just removed the shed rod from the left hand side (I was using a fine metal rod as shed rod at this point). I might just be able to get one shed out of the heddles before removing them and needle weaving. Exciting!

More woolly pursuits….

wool work backstrap weavingI made another keyfob braid. The terracotta and white Navajo warp is standing by for another. I also wound a seven-foot warp with the KnitPicks Palette for a tubular edging band. I was impatient to edge that computer case piece. I went as far as weaving and sewing it to the top edge before I decided that the edging band really need to be based on purple. I will just have to be patient and wait until I can get the purple yarn. Maybe I can use this warp to edge something else.

I uncovered the forked stick that Janet found for me in our garden ramblings when I was on her farm last spring. I had tied the prongs to train them to hold the right shape and it looks like it worked. Should I strip its bark or does this more rustic look contrast nicely with the smooth forked stick that fr. Kyriakos made for me?

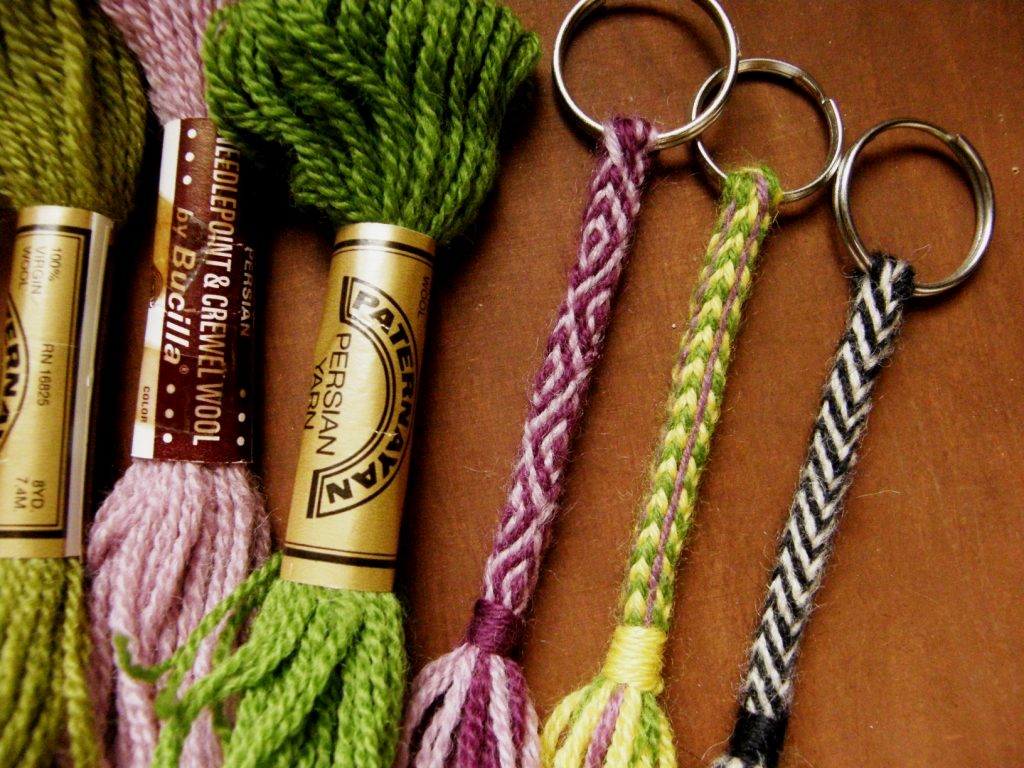
Margarita braid Peruuvian slingsOne of my weaving friends gave me a bag of Paternayan and other wool yarn from her stash and it works beautifully for my keyfob braids. The latest one on the left is the pattern that  my sling braiding teacher in Peru called “Margarita”. There is a tutorial for it here but I recommend starting with the Palma braid first.

I have not 3ven scratched the surface of the world of Peruvian sling braids. In fact, what I learned in Peru is not even a pin prick on the surface! That is why we are all eagerly awaiting the book on Peruvian sling braids on which Rodrick Owen is currently working. In the meantime I will practice the ones that I was taught by Zacarias. Dare I try the Margarita with color changes?  I haven’t tried it since my instruction in Peru in the nineties and am wondering just how good my notes are. We’ll see.

Using that Navajo warp yarn reminded me that when I was in Australia, I got to see a Navajo-style weaving that I had made in 1995 when I lived in Chile. I had given it to my brother when he visited me in Bolivia in 1998 and he has placed under glass on his dining table. How long ago all that seems and there’s my weaving looking like it has just come off the loom!

??????????????????????And there’s more wool in the closet! But, it is time to start planning wall hanging number five.

To finish, I have a rather strange story to tell about peering at my wool warp threads as I wove. As weaving progressed, the wool became hairier. Little fingers of fluff extended and accumulated on the threads creating a sort of shadowy effect. In the shadows I started to see wavy lines…not just random wavy lines, but lines that sort of made sense. They started to remind me of something and suddenly I realised what it was. And there was born the new inspiration for hanging number five! I have abandoned the idea on which I have been pondering all this time and am going with this new one. I’ll let you know more when it is all a bit more concrete.

Now….back to the needle weaving…..