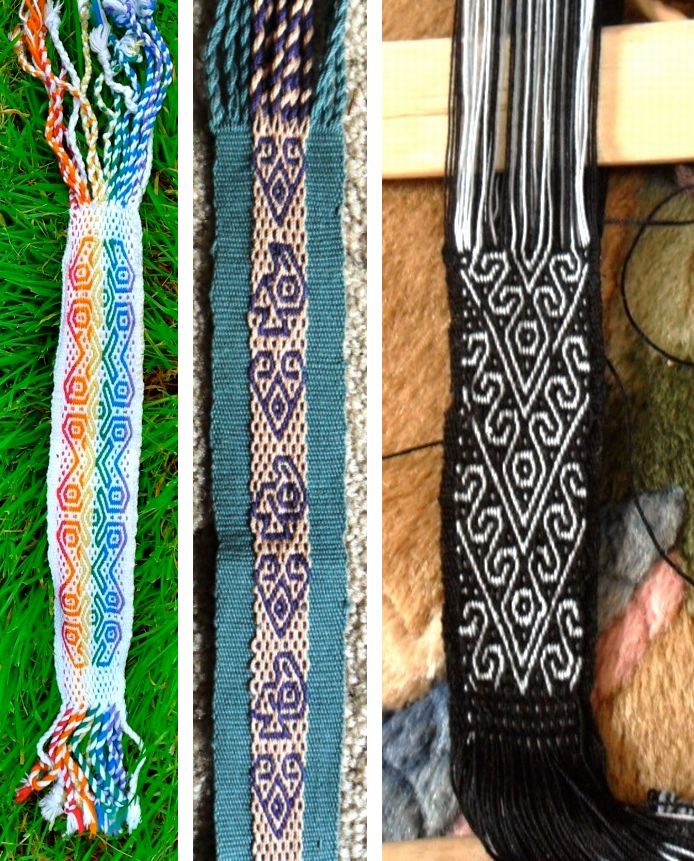
Backstrap Weaving – Songs from the Lowlands

While scrambling to prepare for my up and coming travels, I have a little time to show you the latest progress on my Shipibo-inspired piece. I have spent some time looking about online for more information about the Shipibo designs and my head is reeling with the variety of information that is out there on the meaning of the patterns.

I have heard several version from my weaving teachers about the name and meaning of this Bolivian motif. explaations of the
I have heard several versions from my weaving teachers about the meaning of this Bolivian motif.

It doesn’t surprise me. I have written here before that I can ask five weavers here in Bolivia the meaning of a certain motif and receive three different answers. I have heard different stories about designs from people even within the one small community. The real question is, do the weavers even want to share this special information with me?

My warping activity is fairly mindless. I wind warps, make heddles, and sometimes weave a few rows to get the piece started. I don’t need to concentrate except to count revolutions on my warping board and so, it is an activity that allows me to put on some music and sing. And, after having read one of the web pages that has information about Shipibo patterns, it is fun to imagine the woven designs in the cloth in my latest piece singing back at me. I will explain that a bit later…

Unfortunately, I can’t sing while I weave this piece. It involves a lot of concentration… jumping back and forth from chaotic curvy lines to orderly straight ones. One miscount, that may seem insignificant at first, can add up to a big blooper further down the track. I’ve learned that the hard way!

shipibo inspired wall hangingNow…about the songs and the singing. The Center for Shamanic Education is one of the sites from which I learned a little about the Shipibo patterns and their relationship to music. According to this site, the Shipibo people, who live in the Amazon Basin region of Peru, believe that everything is a song and that everything can be sung.

Image from the web site thestorybehindthefaces.com

“In the Beginning a giant anaconda swam through the darkness. She sang the patterns on her back and the patterns fell from her mouth in her song. The patterns took form and created the universe and the people – The Shipibo.”

The patterns are called Icaro (another site calls them Kene) and they are woven into or embroidered on cloth and painted on ceramics, houses and skin.

At the Encuentro de Tejedores that I attended in Cusco in 2012 anthropologist Dr Luisa Elvira Belaúnde, who also called the designs Kene, talked about the patterns that are tatooed on the skin saying that the Shipibo-Konibo people believe that patterns already exist within the person and are simply made to emerge on the skin. A woman’s body is wrapped in design either in the form of tatoos or by wearing patterned cloth.

The Center for Shamanic Education also writes that the Icaro carry healing energy and are a form of musical notation.It says that the Shipibo do not differentiate between seeing and hearing which means that the Icaro patterns in the cloth are constantly singing. What a lovely concept! In rituals, Shamans can hear and sing the tunes of songs from the labyrinth of lines in the patterns.

The labyrinth of lines…what I have been calling a “curvy chaos” in my own piece…is musical notation to the Shipibo people.

One Youtube video which shows a number of pieces of patterned cloth created by the Shipibo people is accompanied by song and the wonderful sounds of the forest.

I have a couple of very small pieces of Shipibo cloth that I bought in a store in Ecuador. I have never been to the Amazon Basin region of Peru.

???????????????????????????????My friend, Yonat, has a gorgeous piece of Shipibo embroidery in her textile collection…

shipibo-embroidery 1

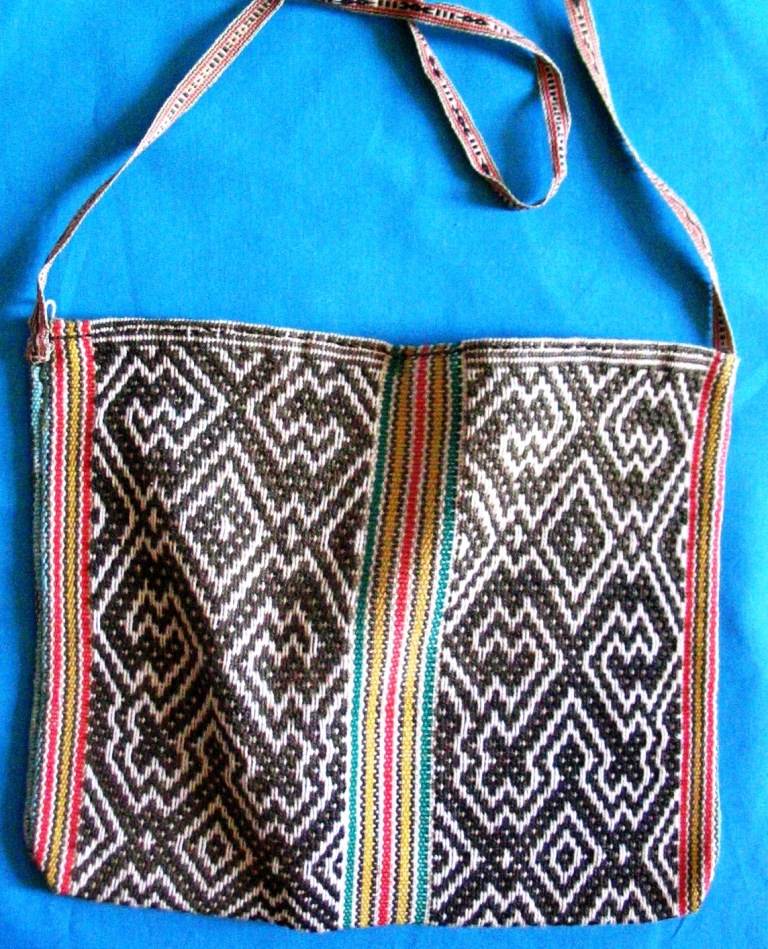
shipibo-embroidery 2The painting and embroidery are now done on  industrially-produced fabric. I wondered if there was anyone still weaving among the Shipibo people. Teyacapan posted a picture of a woven bag from the Peruvian Amazon Basin on her Filckr page. As I had done with my pieces of painted cloth, she had bought the bag in a gallery in Quito, Ecuador. The designs on this bag appear on some of the painted cloth pieces that I have seen.

Z (11)I am guessing that this is the single-faced warp-float technique only because all the lowland weavers that I have encountered so far in Peru and Ecuador who use this structure  weave the single rather than double-faced version.

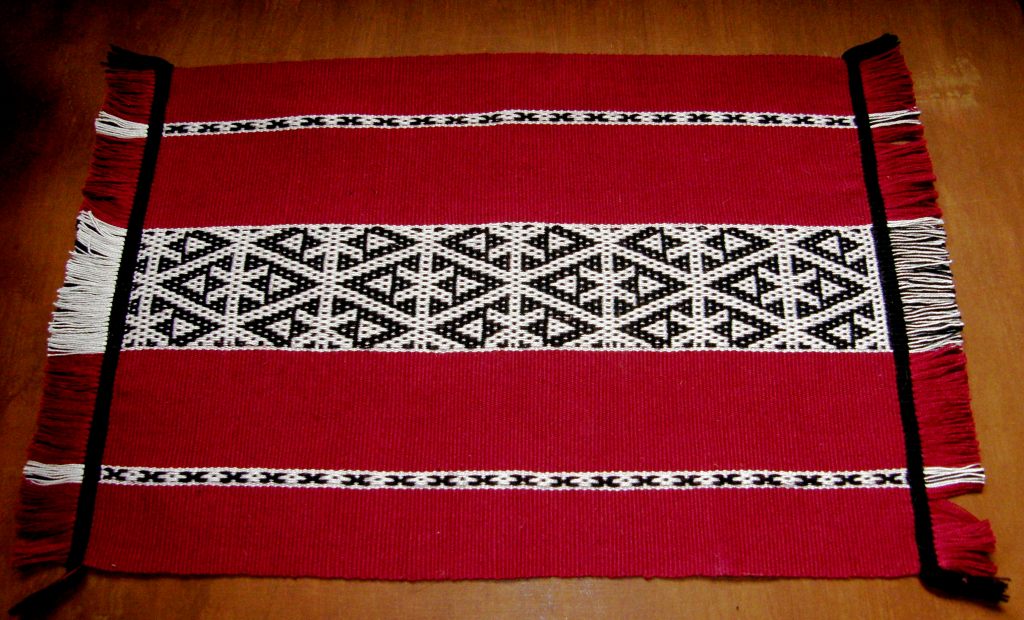
I used this design on a placemat that I wove along time ago….

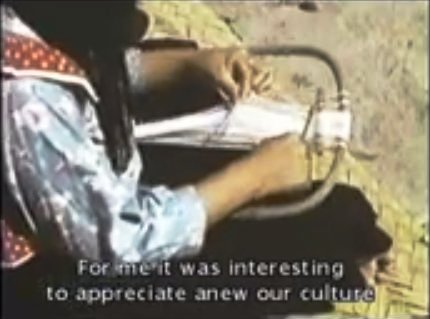
???????????????????????????????I wasn’t able to find other images of Shipbo woven pieces or weavers until I came across a video, made in 2011, which is the trailer for  a documentary on footage that was shot by anthropologist Harry Tschopilc Jr in 1953. The footage has been uncovered in the archives of the Field Museum of Chicago and the documentary covers a project which involved taking the footage and showing it to the Shipibo people. The documentary captures the reaction of the Shipibo people, both young and old, to seeing aspects of their culture and lifestyle that have been lost in the last 60 years. The 60-year old footage shows a Shipibo woman weaving using a backstrap loom as well as one weaving on a small frame that could have been made from a bent tree branch. There is also recent footage of a woman using a backstrap loom to weave a very long and colorful narrow band.

Here are a couple of screen shots from the old film…

video trailer 1

video trailer 2And here is the complete trailer…

I try to imagine the sounds of the forest that you can hear on the first Youtube video in this post as I sit at my loom. The weavers most likely have the songs of the Icaro in their heads as they work. Right now, I hear planes droning overhead, the sounds of car alarms and the rumble of the big plastic trash bins as they are wheeled out to the street…life in the city!

There are two quite long Youtube videos, parts 1 and 2, that show the process of creating the painted patterns on the cloth here and here. Again, there is song and forest sound in the background…lovely.

So, I will continue with my wall hanging panel. It will be flanked by panels of deep red and I will join the three panels at the top with weft twining. I hope to twine a pattern that has been inspired by the work of the Shipibo people.

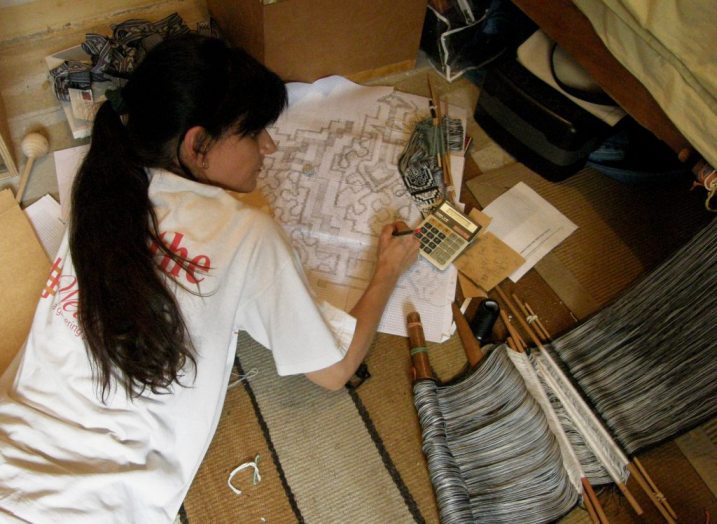
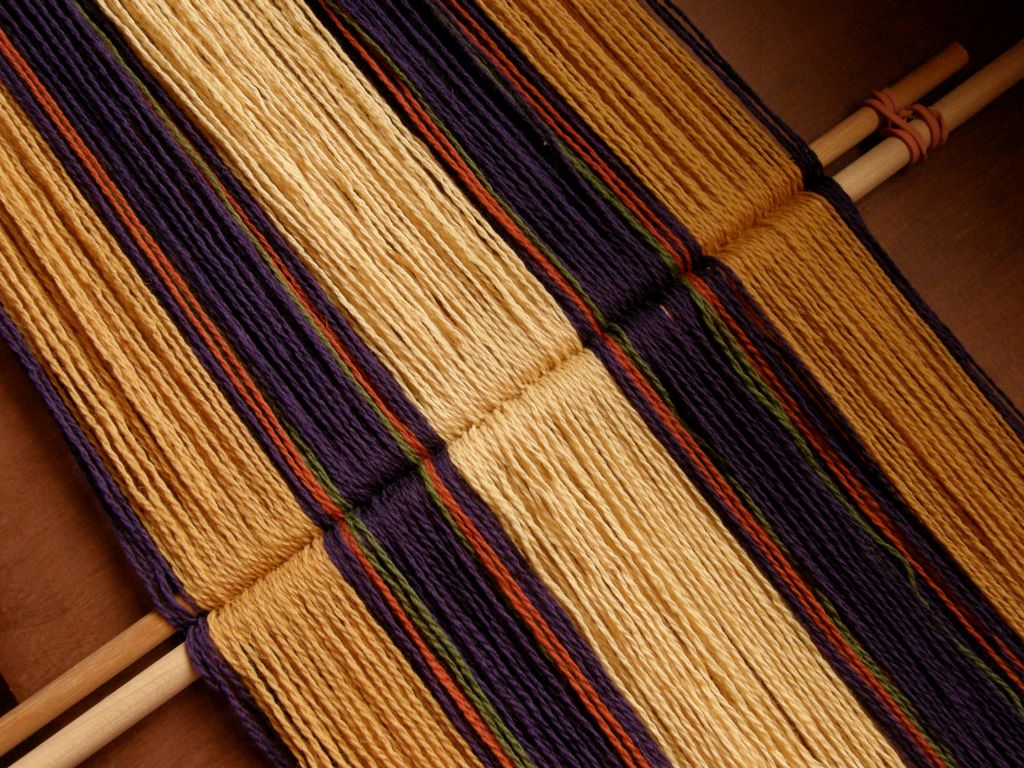
Maybe now you can understand better what I was doing when I was on the floor a few weeks ago drawing squiggles. I had seen wavy lines amongst the hairy wool warp threads on which I had been working a few months ago and  from that was born the idea for this Shipibo-inspired work.

???????????????????????????????See you next week! 

Backstrap Weaving – Sunny Side Up


The only “problem” with double-faced structures, like Andean Pebble Weave, is that you sometimes don’t get to see and enjoy both faces of the fabric. I wove the above piece (using a non-Andean pattern) and then folded and sewed it into a bag. I had to decide which was the “sunny side” or, the side I would have on the outside of the bag while the other side, sadly, would be hidden forever on the inside. Actually, in this case, I guess I ended up choosing what you might call the “shady” side, the one on the right, the darker of the two options. The lighter, or sunny side, went on the inside.

Some of the structures I weave have two acceptable faces but there is one that is obviously the “right” one. What I call the simple warp float structure is one such structure.

central asian backstrap weavingThis is the piece I wove and sewed into a case for my little notebook computer.

central asian simple warp floats both sidesBoth sides are attractive in their own way. The “right” side on the left is patterned with warp floats. The other face shows exposed weft.  So, in the end, I didn’t have to hesitate over which side to use as the outside of the bag.

The same goes for the latest computer bag that I have been weaving.

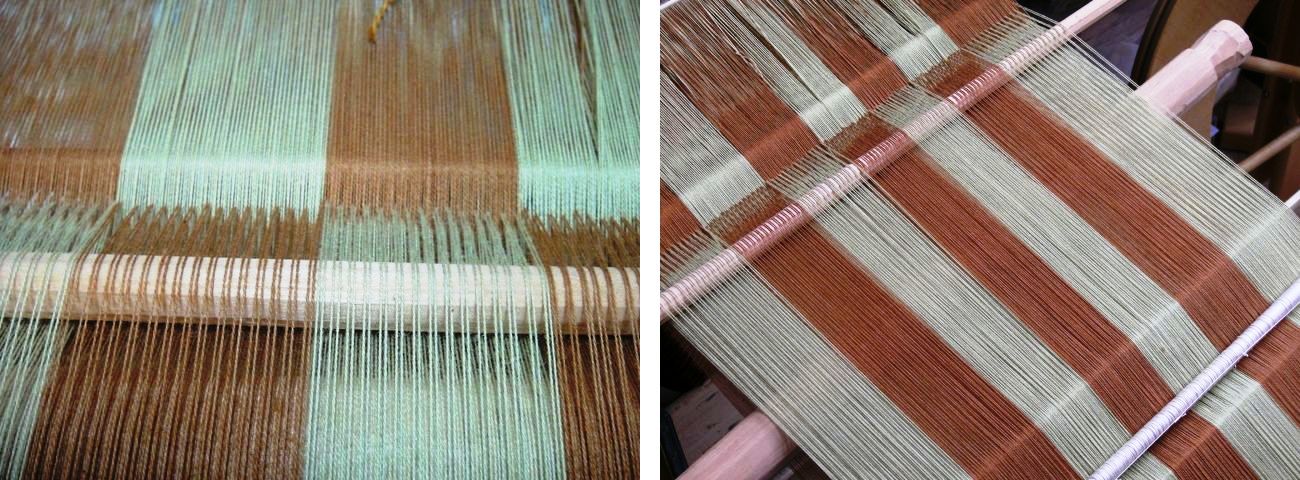
wool warp backstrap weavingRemember the wool warp that I showed in last week’s post? It really was just supposed to be an experiment in weaving with loosely spun and plied wool. I was nervous about it but, as soon as I started weaving, I could tell that it was going to work out. I could open the sheds carefully and achieve nice clean openings without stressing the wool much at all. I used nylon heddles (yes, shock, horror…you know how much I hate nylon heddles!).

No fluff accumulated on the heddles but it did between the cross sticks and at the point where I pressed down on warps to help raise the heddles. I just gently removed the fluff each time I had to slide the cross sticks up the warp. This didn’t become a problem as I advanced the warp as often as I could so that the points of pressure and friction  and resulting fluffing were never in the same spot for too long.

???????????????????????????????So, I decided that this warp was going to be  a keeper and that I may as well add some patterns with wool supplementary weft. The technique I used is single faced so I won’t have to make a decision about which face is the sunny side.

As you can see below in this cotton example I wove some time ago, the back side of this single-faced technique is plain (which I suppose could be the side you chose to show if you went over the top with your supplementary-weft design and made something that you felt was garish).

???????????????????????????????The only problem with the wool project was that I had used up most of this little wool stash in the warping and only had a bit of terracotta yarn left with which to make patterns.

You can see that I used a coil rod to prevent corrugation. I wouldn’t really expect ridging with wool as it is so springy and forgiving but I wasn’t taking any chances. The wool was behaving nicely and I didn’t want to push it by having to unweave and start over if ridges appeared.

wool warp with pattern color changes backstrap weaving supplementary weftTwo warp ends broke while none of the others looked particularly worn at all.

Eventually I had to change to green supplementary weft. That was okay as I also had a green stripe in the warp into which I could hide the weft turns.This allowed me to save the little remaining terracotta to weave the same design at the other end.

And then just to make things more “interesting” I decided that, since I weave with wool so infrequently, I should use this piece as an opportunity to practice making something with four selvedges.  I turned the whole thing around and started weaving in from the other end.

four selvedge wool warp backstrap weavingBring out the little sticks, the skinny shuttles, the umbrella ribs, the needles and a large serving of patience!

In the above picture there are just under two inches left to weave and I am still, thankfully, able to use both the shed rod and string heddles. I think doing all that twining last week was a good warm-up to this. It was taking me forty minutes to twine a single row. Opening the sheds and weaving in this small space, so far, is a lot faster! I expect that to change pretty soon!

I thnk I might have trouble needle-weaving the last rows as the yarn is plied so loosely. I fear that I will be continually splitting the two strands with the needle.

creating the shed with a needleI suspect that the overspun and tightly plied yarn created by the weavers in Pitumarca, Peru would be easier to work with in this case. I needle wove the two ends of the discontinuous-warp piece shown above (my teacher Yaneth is demonstrating in the picture). Now I will be able to see how it compares with using store-bought yarn.

Will my wool project end up being the computer slip case that I had planned? I am not sure. I definitely want to decorate all four edges with a tubular band and am hoping that I can scrape together enough of this wool to do so. We will see what it wants to be when finished.

As for the twining that was giving me trouble…..

???????????????????????????????….it is done. I have yet to find a spot with good light to stretch this out to full length for photgraphing. Neither of the reds in the above picture are the true color.

After having problems with either the twining buckling or the fabric getting a pleated look, I twined and untwined and finally found the right formula. So, now the three panels are joined across the top and I shall set it all aside while I decide what to do at the bottom. Most likely I will make masses of tiny braids which is how I chose to finish the other three pieces in this series.

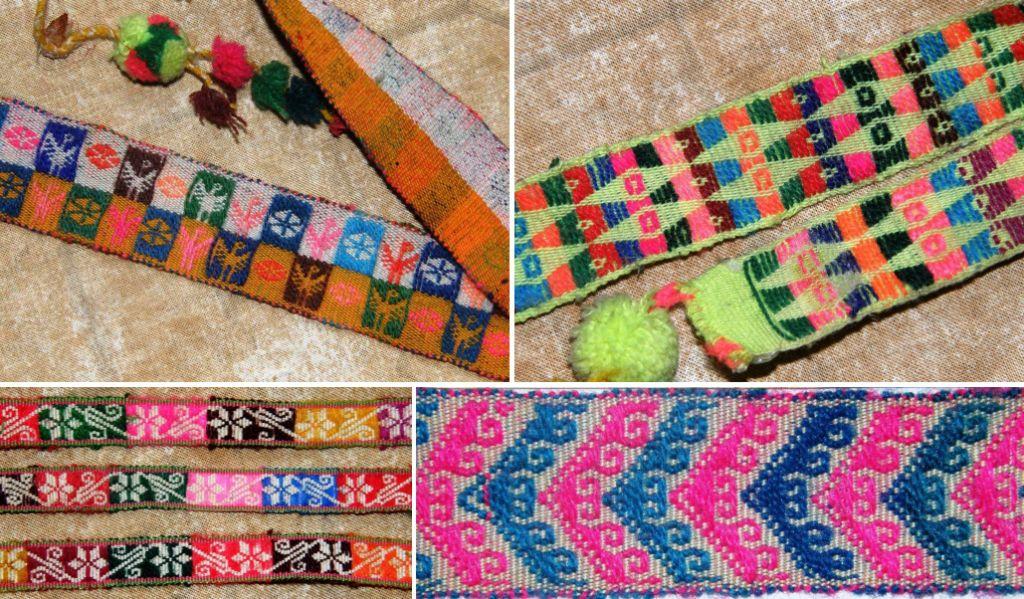
hatbands boliviaThis fourth hanging was inspired by hatbands used by the women in the Bolivian highland community of Calcha (the one bottom left in the picture at left).

I visited Calcha in August 1997.  It was a festival weekend and I hadn’t known. Because of the big party in progress, none of the women were weaving. A small boy ran home and brought back a hatband to show and later sell to me when I asked about weaving. I always wonder if he had taken it right off his mother’s hat and if he had gotten in trouble over it later. 

???????????????????????????????Now to dye some cotton red for  number five in the wall hanging series. Thank you, Bobbie, for giving me some of your Guatemalan cotton so that I can over-dye it for my projects.

So, we will see the end of the woolly adventure next week. If it gets frustrating, I will get up and do some more keyfob braids. I added one more to the collection this week…the one on the left. It is simply the Palma braid done with only two colors instead of three.

And if the wool project all goes horribly wrong, I shall cut the piece in two and use the two pieces as front and back for a computer slip case anyway.

I think I will be looking more closely at wool when I am visiting the Mannings yarn store. I can usually quite safely breeze through the store without getting too tempted by anything.  I would like to see what other wool I can find that works so nicely on my backstrap loom (the wool for this current project is KnitPicks Palette, by the way. It comes in so many colors! I am almost scared to name it. Every time I fnd a wool designed for knitters that I like to use for weaving, it gets discontinued!).

Last time I was at the Mannings I was checking out the Harrisville Shetland as I had had success using it for warp-faced weaving straight off the cone on a floor loom. I made this band with it on my friend Pam’s floor loom. It felt so good!

warp-faced wool bandI have had success with Navajo warp on my backstrap loom too. I bought a ball in natural white and dyed it and made the bag with Mapuche designs below when I was still living in Chile. It was overtwisted and easy to use and made a good sturdy fabric for a bag but I am looking for fabric with a softer, kinder feel now.

mapuche-bag-front-and-backScreenHunter_003Why am I buying wool and not spinning it myself? One reason is that there simply isn’t any available here to spin in lowland Bolivia where I live.

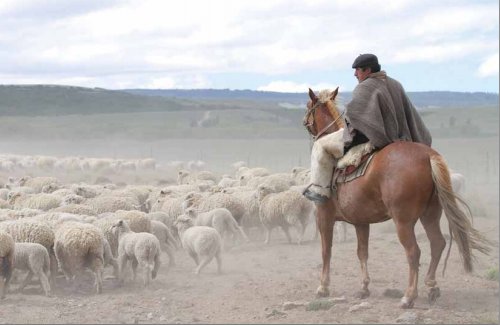
I think of all those years I lived in the Chilean Patagonia and all the sheep! Wool? It was everywhere! My boyfriend down there  worked as a shepherd for many years. I could have all the fleece I wanted. I did spin some of it and wove it as a plain balanced-weave piece that became the back of a vest. I used the rest of the handspun to knit the front. And then…. I moved to the tropics!

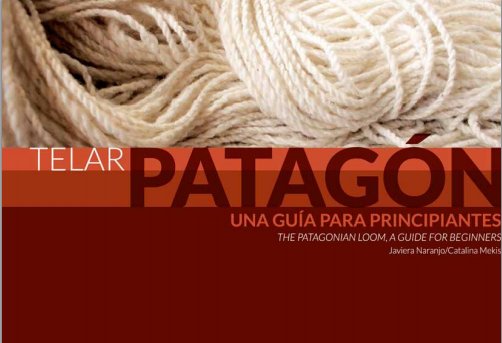
The picture above is from a free e-book entitled The Patagonian Loom, A guide for Beginners the link for which Weaving Southwest shared on Facebook today. It describes the continuing weaving tradition in the southern parts of Chile (not as far down south as where I was living where, unfortunately, I never came across anyone weaving). 

It’s a lovely book crammed with pictures with text in both Spanish and English. It gives a short history of the loom and then describes, the spinning, dyeing and weaving processes. It also provides instructions for warping and setting up the loom for projects that are typical of the region…saddle blankets, saddle bags, sashes, even a poncho. Thank you Weaving Southwest for sharing the link!

ScreenHunter_001Look at that gorgeous chunky handspun on the cover of the book which is used for warp-faced weaving on the vertical Patagonian loom. It reminds me of the fabulous yarn that Ace, one of my US friends, spun to weave into a backstrap. I had a lot of fun weaving with that yarn. It looked hairy and scary but wove up beautifully!

???????????????????????????????Now to get back to the loom and get my hands into that wool warp. Enjoy the e-book with its glimpse of life in the Chilean Patagonia.

Backstrap Weaving – Adventures in the North West

I love traveling by train and I love traveling with a reserved seat. As I wasn’t in a real hurry to get anywhere, I took the opportunity of traveling the slow way on Amtrak’s Coast Starlight route from San Jose, California up north to Portland, Oregon.

I was disappointed that the train left at night and that I would miss what I imagined would be beautiful coastal and ocean scenes but couldn’t complain when I awoke the next morning to views like this!…

I was fortunate that the Portland and Seattle passengers were seated in the last car which meant that I could stand at the back door and watch the track roll away through these magical wintry scenes. The other passengers had very “been there, done that” attitudes but, for this gal who lives in tropical lowland Bolivia, it was an absolute treat! This meant that I could pretty much hog that back door view for the entire day. I was so tempted to press the door button to see if it would open especially when it started to snow and the glass got covered.

Slowly we rocked our way across mountains, passing through numerous tunnels, emerging to views of deep valleys sweeping away to the right…gorgeous!!

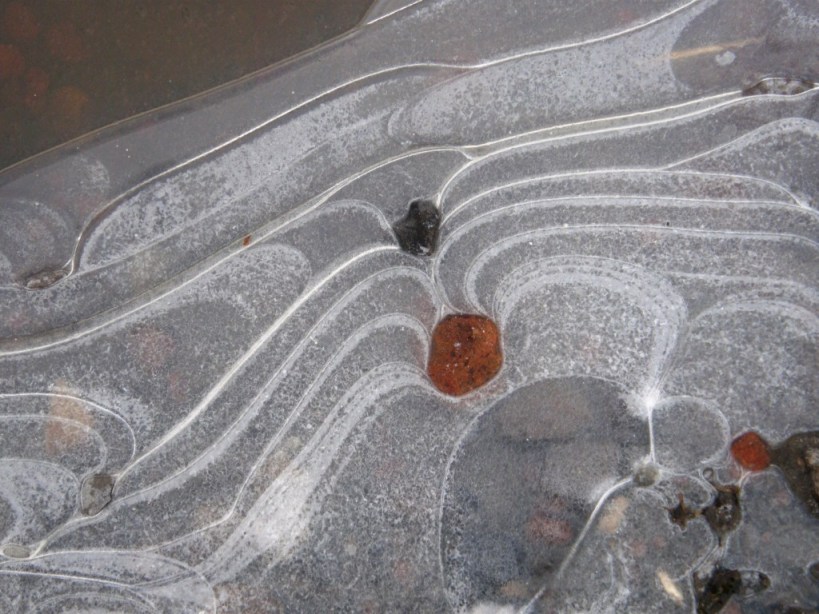
There were plenty of ‘fresh air” stops where we could get out and stretch and see “ice art” in the puddles. It’s probabaly all very “ho-hum” for north-west natives but it was all new and delightful to me.

After Eugene, the snow was over and soon we started to pass through ever increasing suburbia until finally rolling into Portland where I was met by Betty  who was having me as her guest for the next couple of weeks in her home just over the river in Washington state.

While I loved looking at the snow, I was glad to be out of it and into the cool, shady green with hints of spring of Betty’s tree farm.

And this is where my faithful camera friend of the last three years decided to die :-(.

“Internal sensor failure” was the problem I was told…too expensive to make a repair worthwhile. This problem was giving a pinkish hue to my pictures when the camera was in a good mood and weird color-streaked images when it was not. Luckily I have a wee Casio point-and-shoot as a back-up camera but I have to learn its particular quirks and get used to using it…darn!

Those of you who follow my blog may remember that I stayed with Betty on my spring trip last year and showed pictures of many of the fabulous weavings that she has collected in her travels over the years. I would have to be here for months to be able to see and photograph them all. In fact, last time I looked at too many and was quite overwhelmed. You get to the point where you stop seeing the beauty of each individual piece and so it has been great to have this chance to go over the collection again.

Actually there are enough beautiful things hanging on her walls to keep me occupied without even thinking about going through the pieces that have been carefully stored away.

Here are just a few bits and pieces….

I love the simplicity of the striped incredibly fine cotton warp-faced piece on the left with the card-woven strap, which Betty bought in a Tibetan refugee center in India. It’s an apron that forms part of a Tibetan traditional costume with a card-woven waist band. It contrasts with  the riot of color and intricate supplementary weft patterns on the Bhutanese bed cover  on the right.

This is a small selection of textiles from Peru, Bolivia and Ecuador. This group includes an ikat shawl from Ecuador, a double weave belt from Taquile Island, Peru and a small striped poncho from Tarabuco, Bolivia among other things.

I just LOVE the piece from Bhutan above left which has supplementary wefts woven into a twill base…that technique is still on my to-do list along with the discontinuous-warp technique you can see in the piece from Pitumarca Peru on the right (the figure in the center is an adornment that was added by Betty). I have made a few experiments in discontinuous warp after seeing the fabulous work of the Pitumarca weavers at the Tinkuy in 2010…multi-paneled pieces covered in pick-up patterns but I find this simple plain-weave piece in Bettys’ collection particularly inspiring and this following one even more so….

Betty thinks that this piece may be one of those that were made when the Pitumarca weavers were first attempting to recover this ancient technique. It is warp dominant rather than warp faced…you can see the weft and see through the fabric when it is held up to the light. It is nothing like the sturdy heavily-beaten warp-faced cloth that is typically produced. It has been edged with a simple single-color plain-weave tubular band. The over-twisted handspun yarn is still causing the corners to curl.

You can see above left what I am guessing would be called the discontinuous weft where the panels join vertically. The brown weft which is being used in the panel below right turns around the grey weft on the left when the two wefts meet at the join. This means that the color of each panel can be solid. You can also see how the warps dovetail at the horizontal joins between panels.

Betty is not sure how many years ago she bought this piece, but this is the progress that the Pitumarca weavers have made in this technique since then….

This piece has four panels of discontinuous warps with supplementary warp patterning in each.

More treasures on the walls of the rooms and halls of Betty’s home…

Belts and sashes from the Andes and Guatemala and a reverse-applique Mola from Panama.

And then some fun stuff…

I loved this little hanging which is in the guest bathroom. It turns out that this is one of the first weavings that Betty ever made. Knowing the legendary status that Betty has achieved in the world of weaving, this was quite wonderful to see. The other piece is a dear little purse that has been woven from recycled plastic bags in Guatemala.

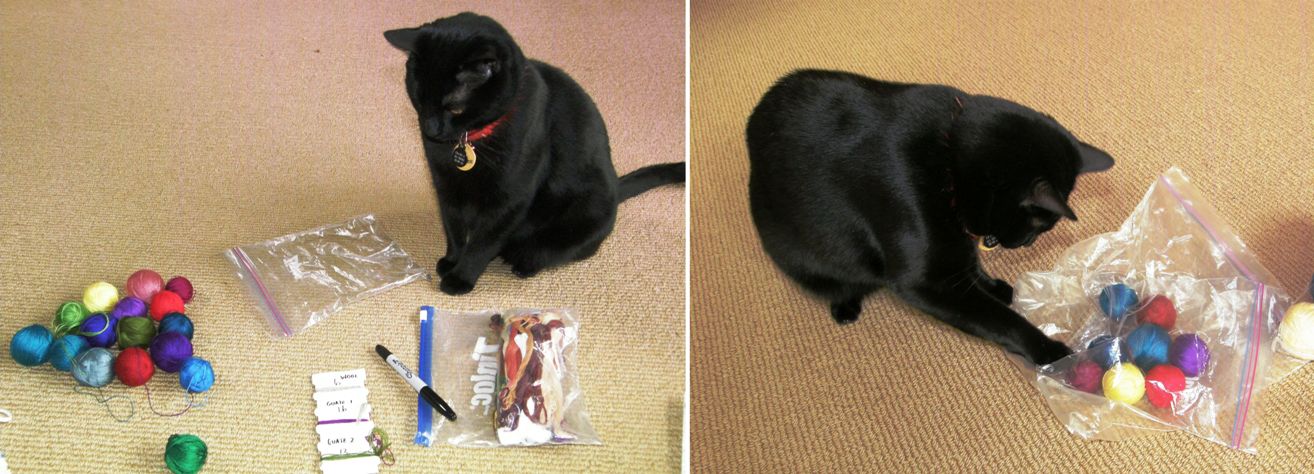
Between all the textile and fiber wanderings in Betty’s home and studio (I got to sleep in the studio again!), I had some organizing to do…not an easy thing among so much distraction! I was emptying bags and bags of yarn and warps on the floor much to the amusement (or perhaps indignation) of Trouble the cat who stood guard in case one of the balls decided to wander off.

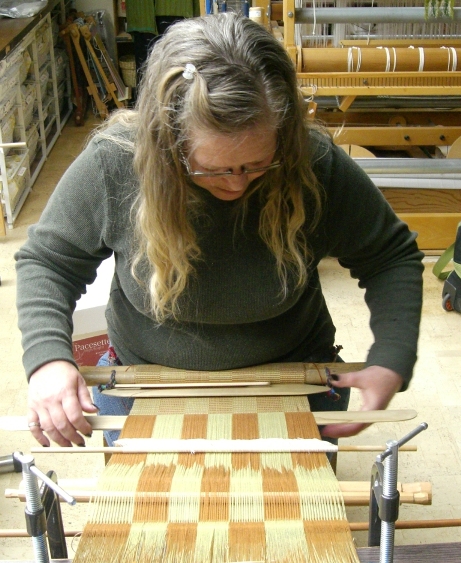
Here are a couple of the ladies who came to weave…Sasha (who wants to learn backstrap weaving as it is part of her heritage…any guesses as to where her roots may lie?) and Emi who is interested in all aspects of primitive technologies.

It was great to meet Jenny on the left and Linda who are both members of the Ravelry Backstrap Weaving Group. That’s Judy next to them. All three are working on their second weft patterned bands.

Weaving away! Jenny pauses to figure her next move in her simple warp float pattern. Rona is checking the cross on her four-stake warp before removing it from the stakes. It is funny how people often unconsciously choose yarns that match their outfit.

On the way home from the weaving group, Mt Hood and Mt St Helens put on the most fabulous show for me. Both are heavily laden with snow and looked spectacular in the soft evening light. But there was no where to stop and photograph them!  My back-up point-and-shoot camera does not have the zoom capacity to have done a worthy job in any case. I got to climb a rather different looking Mt Hood in the summer of 1992 as well as fly around Mt St Helens in a friend’s private plane but I much prefer the way these two beautiful peaks look in their winter coats.

Most of the people in this weaving group also promised to come to another the following weekend. I had a busy and fun time in the five days between.

On Tuesday and Wednesday I had a visit from some other Ravelry pals. These are two Backstrap Weaving Group members who have been around since the early days.

Jennifer and Bobbie are strong and very active members, head cheerleaders, back-patters, welcoming committee and “commiserators” and I am so grateful for their continued support and participation. It really was a thrill to have them with me for those two days.

They brought a few of their backstrap woven pieces to show and we marveled at how far they have come since joining the group and that very first weave-along we did in January last year.

We wove patterned tubular bands on Tuesday and I know that they have been hard at it at home since then. Bobbie also brought along the beautiful wide Guatemalan piece with its super fine cotton yarn on which she has been working.

First, lets look at some of Jennifer and Bobbie’s woven work…

On the left is Bobbie’s Bedouin-style runner with al’ouerjan patterning. I think she may have warped this when we had an al’ouerjan warp-along weekend. Next to that is her plain-weave striped piece that I am guessing was part of the plain-weave weave-along we did in the fall of last year. She added some weft twining to that. Jennifer’s backstrap is a gorgeous combination of stripes and colors which was also influenced by Bedouin textiles that we have been looking at in the group. I am pretty sure that this also formed part of the plain-weave weave-along.

Trouble decided to nap on Bobbie’s pebble weave bag. This is the piece she made as part of the very first pebble weave weave-along in January last year. At left you can see her rolled up Guatemalan warp and here she is working on it….

She has a long tale of mishaps to tell of when she was trying to put this warp together but you would never know by looking at it now! She is doing a simple warp pattern which Jennifer showed us in the Ravelry group. She had seen and admired it on the Education and More website. It caught Bobbie’s eye and she asked for suggestions for how to set it up. As the same warps are always floated, she has them permanently stored on a pattern stick. Looking at the sticks in the above picture from bottom to top you see the stick that holds the second cross, the pattern stick, the shed rod, the heddle rod and then the sword.

Certain warps from the shed-rod shed are floated with the warps from the heddle shed. You can see the warps sitting on top of the pattern stick below.

Isn’t that a great looking warp?! Bobbie bought this naturally dyed cotton warp yarn from the Education and More site. Beware! It is very fine stuff. Bobbie shared some with Jennifer who has started a plain-weave piece with it and I believe that some has also gone off to Popsicletote (another Ravelry group member) and maybe we will see a project from her soon.

And just a few days after we all met up, Bobbie announced on Ravelry that she had finished her piece.

Woo hoo! Look at that! She posed a couple of her tubular band practice pieces on top of the finished piece.

Jennifer came alone the following day and we sorted out some questions she had on complementary-warp weaves. These guys have learned so much from just using my online tutorials and books but it is a real help to be able to see things being done in person and ask some more specific questions. It was good going over four-stake warping with them. And it was great just talking!!

On Friday I had a fun day with Emi. Emi joined in with all the weaving groups.

I will let Trouble the cat tell the story…

Well, this is strange….just when I was getting my wee cat head around all this stick-and-string business, this gal comes along and throws her toes into the mix up.” (Of course this way of tensioning the warp is used in many South-East Asian weaving cultures but most often when using a circular warp).

As nice as it is weaving here in Betty’s sun-drenched studio, you must realize that you are wasting a perfectly beautiful day out there. It ain’t raining and you know that that has been a kind of rare occurrence around here lately. Won’t you step outside?

Thank you but, ahem!…I was sort of hoping that I would get to go out too…

Ahhhh….now that’s more like it!

We wove two-color simple alternating floats weaving designs like those I have copied from Krygyz yurt bands. Emi worked on trying to read the pattern directly from my woven belt rather than from a chart and she did a good job! Later on we did some braiding.

And finally, she went home having gotten some practice with handling a wide warp with fine threads. She wove quite a bit on my sample warp learning to operate the sheds smoothly and handle the fine yarn. I think that the two major obstacles that backstrap weavers in my online groups have are fear of finer yarns and wider warps. I am hoping that Emi will be able to pass that obstacle having had this experience with the wider warp.

Here she is using a nice technique to gently and cleanly open the heddle shed.

Before going home she treated me with a lesson in something from her Japanese heritage. I got a demonstration of the tying of the traditional furoshiki cloth and an explanation of what this cloth, and its use in wrapping items, means in Japanese culture.

She showed me one of the wrapping styles and then demonstrated how a Japanese person would present the wrapped goods to another person…beautiful!

And then she showed me how the same piece of cloth with a few clever twists and folds can be transformed into a shoulder bag.

Isn’t this the coolest thing! And just when I was thinking of the best way to weave a special wrapping cloth for myself, Emi showed up to the next weaving group and gave me my very own furoshiki cloth!

The one on the left is the piece that Emi gave me and Betty showed me one that a friend of hers in Japan had given her. I think we all need to have a furoshiki! I am sure that if I Google this I will find a book on 101 ways to fold and tie a furoshiki!

And then it was on to the pebble weave.

We had a beautiful sunny day once again with light streaming through the skylights and all of us wishing we were wearing shorts by mid afternoon.

Most of the first group returned and we also had Anita join us.

We dove right into two-heddle pebble weave and had two days of fun.

That’s Jenny, Sharon and Anita with Linda on the right. Linda took a break from weaving to try drawing designs onto charting paper directly from the sample textiles I had on hand. Emi settled into her warp on the floor and even Betty threw on a backstrap and wove.

Sasha, who wove super fast and found herself ahead of the rest of the group, decided to remake the heddles on her large warp. There is, of course, a story behind that warp which I will tell in a future blog post. She has promised me some pictures in the meantime to make the story more even more interesting.

And there were other gifts!

Sarah, pictured above, gave me an example of her weaving in a lovely lined pouch made with fabric that she wove with sixteen shafts. Anita brought me a fabulous sword/beater cut from South American marblewood…so smooth and glossy, it feels wonderful in my hands.

Last night Betty and I were invited for dinner at Carol and Jim’s home. We listened to their exciting travel stories and saw pieces created by Carol using her handspun yarn…all kinds of fiber from rabbit to camel. Carol and Jim have traveled the Silk Road from China through Uzbekistan and Kyrgyzstan…imagine how my ears pricked up at those names! I was even wearing the belt I wove based on the Kyrgyz yurt band. I got to see a fabulous felt piece that they bought there that has been edged with a band in the two-color simple warp float technique.

I try hard to keep up with happenings on the Ravelry group while I am on the road and there has been a bit of activity lately to report. Jentide has been weaving bands with Bedouin designs. She wove the shajarah motifs in double weave rather than in the traditional warp substitution technique.

Double weave creates a double faced band rather than one with long floats on the back which the latter method produces. She also wove a band with al’ouerjan patterning.

While snooping around her project page I found her double weave key fob woven on a backstrap loom using the sweet Bolivian flower motif that I have charted here in the tutorials.

The small band was woven on her backstrap loom and the longer one on an inkle loom.

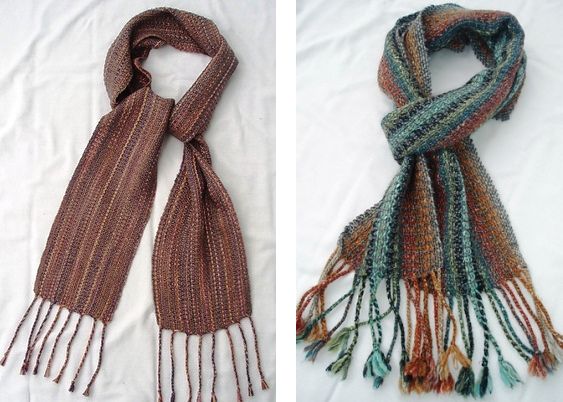
Heidai continues to weave pretty scarves on her Scandinavian-style backstrap loom with its rigid heddle.

On the left is her scarf in alpaca and silk and on the right in noro silk garden.

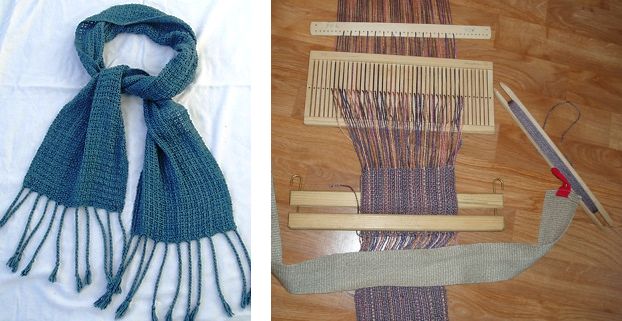
Here’s one more in silk along with the backstrap loom set-up that she has been using…so simple!

A backstrap by backstrap…also by jentide.

Tracy finished her backstrap woven ikat piece for our current weave-along and Alison has just started out using my book for pebble weave and has made her first band on a loom on which she feels more comfortable…the inkle. She followed the instructions for setting up the warp and is using her inkle loom  to tension it.

I think that wraps it up for this week. This is what happens when I miss a post….stuff really starts to accumulate but I am so pleased to see the Ravelry guys weaving away and what a treat it has been to be able to weave with four of them right here in Oregon and Washington! Hopefully, some of the people who wove with me here who are, in fact, already Ravelry members,  will join the Backstrap Group and become active participants…there’s always room for more cheers and encouragement. 🙂

I have had a couple of days free to blog, catch up on mail, and then I will be meeting with a basketry group on Thursday. I am looking forward to seeing their baskets. We have a small group of talented basket makers in the backstrap group too. I am not one of them!

I will see you soon with more backstrap weaving.

Backstrap Weaving – Travel Tidbits from Massachusetts

Well, I am here in Massachusetts with my friend Pam in her peaceful home in a lovely rural area. It was a rough trip with burning smells in the aircraft cabin forcing the flight to land in Orlando where swarms of Brazilian children clutching Mickey Mouse dolls were also stranded due to thunderstorms. This meant arriving in Boston in the wee hours of the morning where I probably caught about 90 minutes of sleep on the airport floor before the early flight check-ins brought in the excited hordes.

But…I am here and I have a few tidbits to share…some interesting things that I have seen in the day and a half I have been here so far.

Firstly, the skies cleared today and I got to go out and see Pam’s indigo crop. Hopefully we will harvest some leaves and do some dyeing during my stay. Pam has done it before with her own plants and so I am looking forward to learning a lot.

We pulled off a leaf today and scrunched it about and left it to see if there were any signs of blue as this is apparently a way to see if the leaves are ready for picking and, yep, a few hours later when we remembered to go look at it, the signs were there.

And this is what we are going to dye….silk! all the way from Uzbekistan.
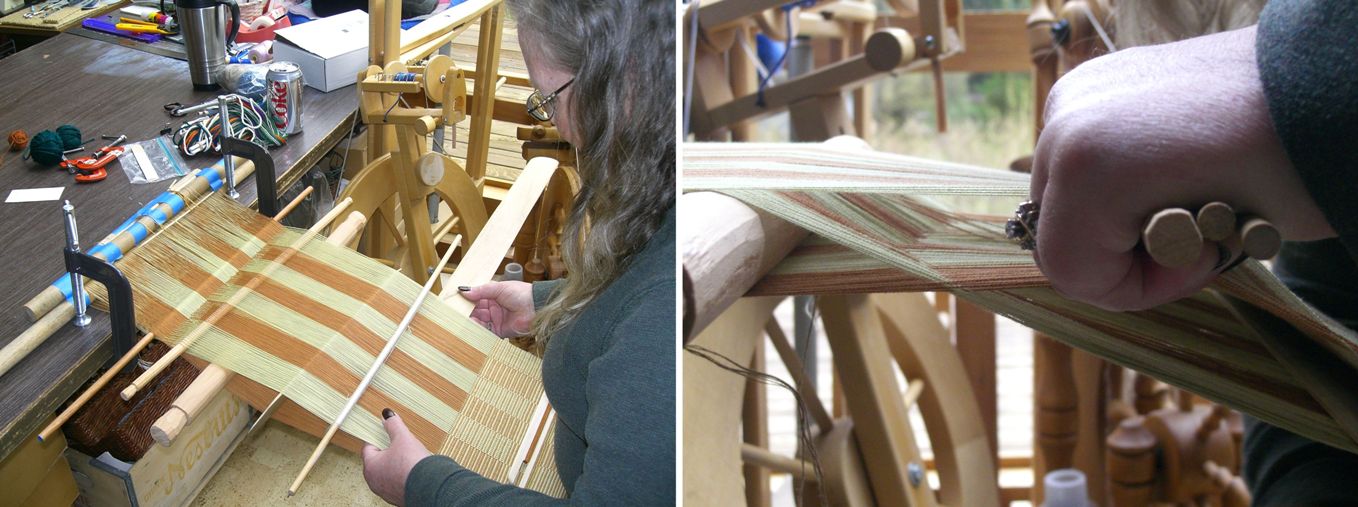
Here is the silk with its coating of sericin. I had no idea that this is how it looks and feels…stiffish…before being scoured with washing soda in simmering water.

Fortunately Pam also has a lot of beautiful soft scoured silk all ready to be skeined for dyeing.

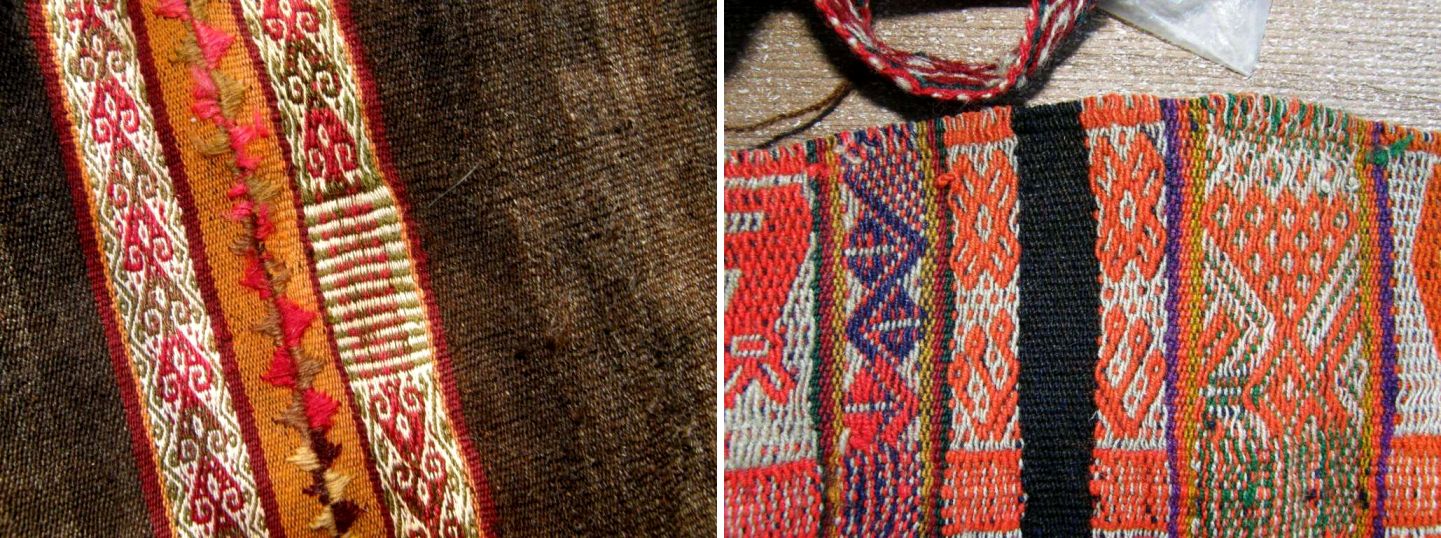
I spent the afternoon revisiting Pam’s collection of textiles from Uzbekistan. I posted them in a previous blog post but getting to see them again with fresh eyes is always welcome. Even though these pieces were all bought on the three trips that Pam has made to Uzbekistan, some of the textiles actually originated in Turkmenistan.

The rug and rug piece which has been sewn into a bag caught my eye as both have been made with the warp substitution technique. Who cares about long floats on the back when you have weaving in this beautiful handspun yarn and gorgeous color combinations.

This is one of several rugs on the floor of the office in which I am sleeping. I love the fact that the long floats on the back of the piece give me a chance to feel and closely inspect the yarn.

This is a piece of rug that has been made into a bag. You can see both faces of the fabric. I just love those washed-out reds and blues. The rug was cut and then a woven band was folded lengthwise and sewn to the raw edges to cover and protect them.

The strap is interesting. Doesn’t that look like finger weaving?

I am pretty sure that this motif was done in three-color warp substitution. You can just make out two colors in the motif along with the red background. Only by looking on the other side where the colors were still bright you could clearly see the orange and green warp threads that alternate in this design.

This bag is my favorite…

I am definitely going to cut a fancy flap and add some tassels to the next bag I make. I have just been getting confident with cutting and edging rounded flaps. Now look at this shape! This piece, which Pam says used to be part of a rug, is woven using the two-color alternating warp float method which I have been calling, for lack of a better name, “warp floats galore”. You may recognize the “S” motif from a belt, cell phone pouch and notebook cover that I made. The woven band has been sewn on beautifully and it all feels very secure.

Little “comb” patterns separate the warp float bands and a simple warp substitution design has been woven into the edging band.

The fabulous tassels…one has embroidery on the outside and the one on the right includes copper wire in its wrapping.

Here is a close-up of some of the warp float designs.

The bag strap has the same simple warp substitution design that appears on the edging. There is so much to be enjoyed in this one piece!

There is plenty more to show and tell from Pam’s lovely weaving space and home but I told you that this would just be about tidbits and so I will end with something that Pam’s friend Joan showed me on  a quick visit to her home in Worcester. I stayed with Joan and her husband Attila last spring. Joan introduced me to Saori weaving and took me to see Dar Ku, a Burmese weaver now settled in the US.

Joan is involved with new settlers in her area coming from all parts of the world. She has recently made friends with a basket weaver from Burundi as well as with textile weavers from Bhutan. An Ethiopian lady showed her how she spins cotton and gave her a spindle, some of her spun thread and a piece of Ethiopian woven cloth…all gorgeous!

 A close up of the end of the spindle and the woven cloth…I didn’t have the right conditions in which to photograph this well.

Unfortunately, lack of time won’t permit a return visit with Burmese weaver Dar Ku but I have posted a video I took last spring of Dar Ku at her backstrap loom weaving a supplementary weft design on warp-faced fabric.

I am so glad to be finally able to show this. It took forever to upload!

She weaves with the wrong side of the cloth facing her and carries her supplementary weft from place to place across the back to weave the parts of the pattern. She has a very soft beat and her tension seems to be quite relaxed.

I am told that these weavers usually weave with their legs braced against something and that this has been difficult to set up in their homes. For now they are just doing without the foot brace. I am sure it must feel weird for them weaving that way.

I wove once with Salasaca weavers in a shop rather than in their home where they have everything set up. They spent the whole time scrabbling about on the floor with their heels trying to get some purchase so that they could push and tension the warp more. Dar Ku on the other hand looks quite at home weaving with her feet crossed and not pushing against anything.

I love the way she opens the pattern heddles so delicately and smoothly. Everything just pops open so easily! It looks like the most relaxing effortless thing in the world. It is lovely to watch.

The Ravelry backstrap weavers and my other online weaving friends are hard at it turning out gorgeous projects…

How’s this for contrast…Jennifer is weaving a myriad of colored cotton stripes while Tracy just finished a pebble weave hanging with her handspun wool.

Verena has also been weaving pebble weave and hopes to sew this into a pouch.

Verena was my student here at Pam’s place last spring and has been getting on very well with her pebble weave since then.

And lastly, I have some charting paper to share.

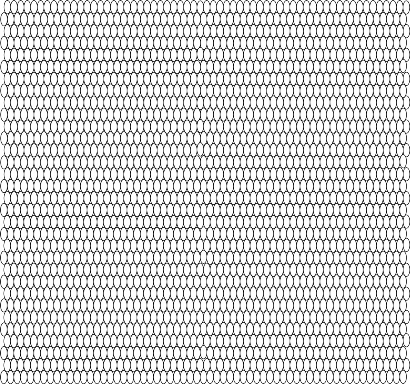
Lately, I have been charting my double weave, warp substitution and supplementary weft patterns on paper with elongated ovals rather than diamonds.

I made a sheet of ovals on a drawing program that I have and have posted it on this page for you all to use.

I am so used to the diamonds but I think that these ovals may be easier to use. I have had people tell me that they go cross-eyed with the diamonds!

I hope that this new charting paper helps.

Here is what it looks like. The page with the full version is is linked above.

Back with more travel tidbits next week.

Backtrap Weaving – Hidden Treasures

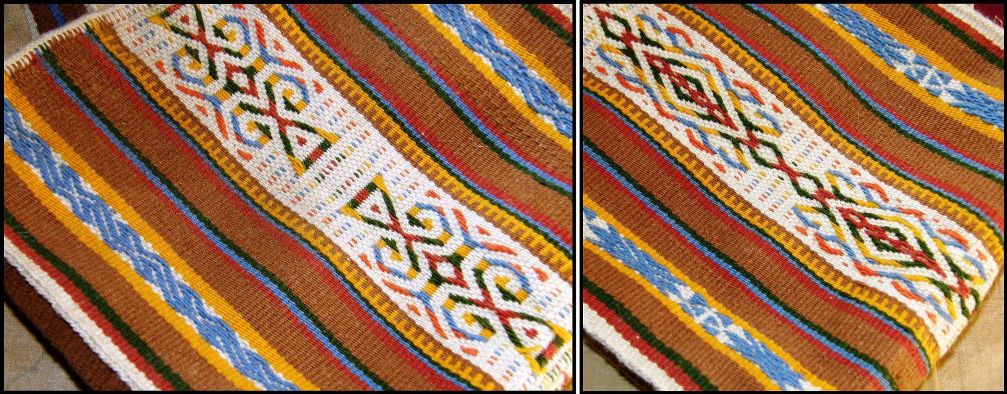
I love looking at the four-selvedge textiles that the weavers here in Bolivia and Peru make. They give away some of the little secrets and “back stories”. The terminal area can give information about how the weaver set up the sheds on her warp as well as tell stories about how patient, tenacious and skilled he or she may have been. It generally goes that the smaller the terminal area is, the higher the weaver’s skill level was.

The terminal area is the part on a four-selvedge piece where the weaver finishes. The hand manipulated pick-up patterning suddenly ends and changes to rows of weaving where the weaver is simply passing the weft through the two sheds created by the heddles and shed-rod.

The weaver will have started working at one end of her warp, woven a certain distance and then turned her warp around to start weaving from the other end. As the weaving progresses, the distance between the two ends of woven fabric slowly decreases.

The weaver would eventually come to a point where there was so little space in which to work that it would be impossible to continue picking the patterns by hand. At this point he or she would simply open the two sheds without any patterning manipulations and pass the weft while substituting increasingly thin rods for the big shed stick. It’s the point at which the weaver decides that he or she simply cannot continue picking up warps by hand to form the pattern that shows the weavers skill or perhaps just his or her sheer tenacity.

Some weavers just weave from one end and finish the weaving when they reach the other loom bar.

Eventually the shed rod is removed and only the heddles are raised to open the tiniest gap through which the weft can be fed. The threads for every other shed must be painstakingly picked up one by one. The last few weft passes are actually needle woven. Good eyesight, patience, pride in one’s work and a strong desire for perfection are required.

The terminal area on a plain-weave four-selvedge piece created by a skilled weaver will be difficult to spot.

For people like me who like to look at textiles and figure out how they were woven, the information in the terminal area is a gift.

This fact came to mind this week as I was trying to figure out why the edges on the Bolivian double-weave belts that I have are so much neater than the double-weave pieces I make myself.

I do everything my teachers in Potosi taught me yet there is something missing. Some weavers seem to have some special secret that enables them to create those sharp straight edges. My edge warps have a tendency sometimes to roll off the sides as the weft passes from the upper layer to the lower. This can at times produce bumpy edges although, as my boyfriend likes to point out, I am possibly the only one on this planet who notices them. I think all weavers know how that goes!

Now the problem with examining belts is that they are most often not four-selvedge pieces. The ones I have from Potosi have three selvedges and end in tight braids and there is, therefore, no terminal area. No secrets or treasures of information are given away.

So, this is what I did.  I took a deep breath and chopped the braid off one of my Bolivian belts to un-weave and  find the hidden treasure. Sorry! Anyone who has done warp-faced double weave will know that un-weaving it is not fun. I made a mess and I won’t even show it to you but the good news is that I think, and I stress “think” I found the secret. I will probably be traveling up to the highlands next month where I hope to meet a weaver who can confirm this.

I have been weaving a double-weave sample this week to see if I can improve the edges and also to see how the Bhutanese motifs that I wove last week with supplementary wefts look when woven in this technique.


The motifs look so much more sumptuous woven with the supplementary wefts. That is how they were woven on the original textile from which I copied them but it was fun to see how they looked in double weave and also gave me something interesting to do as I wove my sample. I am pretty happy with this sample and shall have to find something I can use it for. I do believe the edges on the double weave piece look better than those I normally produce or is that just my imagination trying to justify my chopping up that poor belt?!

I finished the fourth  and final placemat in my set and was just about to celebrate when I found yet another lovely Mexican pattern in this warp float technique. But, no, that’s enough for the placemat project. I can use that pattern for something else.

The fourth pattern comes from a storage bag from south west Iran which I saw on this site.

So here is the complete set…


Last week I showed you the blue one and its design which was inspired by Central Asian yurt band patterns. Verena, who wove with me on one of my US visits, has taken classes on how to construct a yurt and she gave me the link to the website of her teachers in Nova Scotia. The web page has wonderful pictures of lessons in traditional weaving in Kyrgystan with images of the warping, set up and weaving.

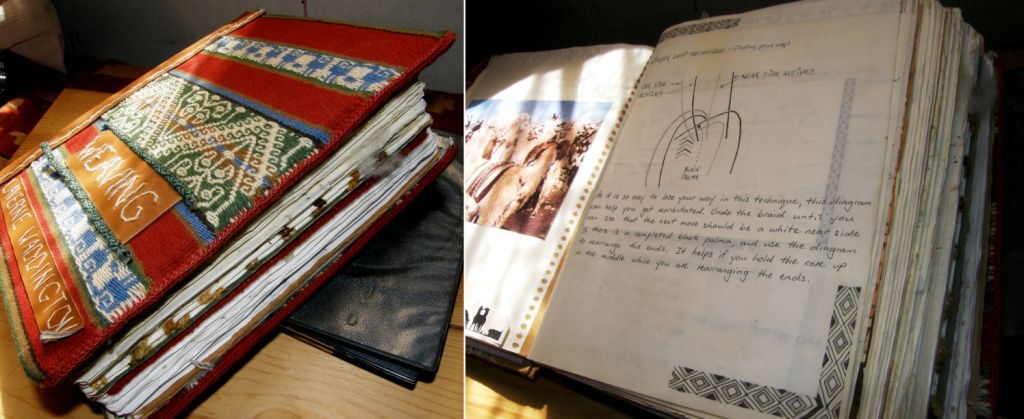
What’s next on the loom? The ideas are swirling around. Lately I have seen some lovely handmade bags which have incorporated all kinds of nifty compartments and pockets and so, I have decided to try and use the technique that my Bolivian teachers taught me for constructing a chuspa, (a bag for carrying coca leaves) with its little built-in pocket to make a bag and pocket all in one piece. I haven’t woven one of these since I studied with Julia and Hilda and so I have had to get out the giant journal to consult.

Hopefully I have done a good job of documenting the process. Sometimes when the memory of the process has started to fade, I return to my written instructions and find that I didn’t include as much detail as I should have. What I normally do is try to consolidate everything immediately on my return by weaving more examples and then I repeat the process at intervals and add to and improve my written instructions.

So, my aim is to  make a bag with a pocket all in one piece. A lot of the chuspas here are woven with such pockets. Some of the pockets are so tiny that it is obvious that they were woven as a decoration and couldn’t possibly have any sort of practical use. I guess it is included in many cases simply because it is customary to do so.

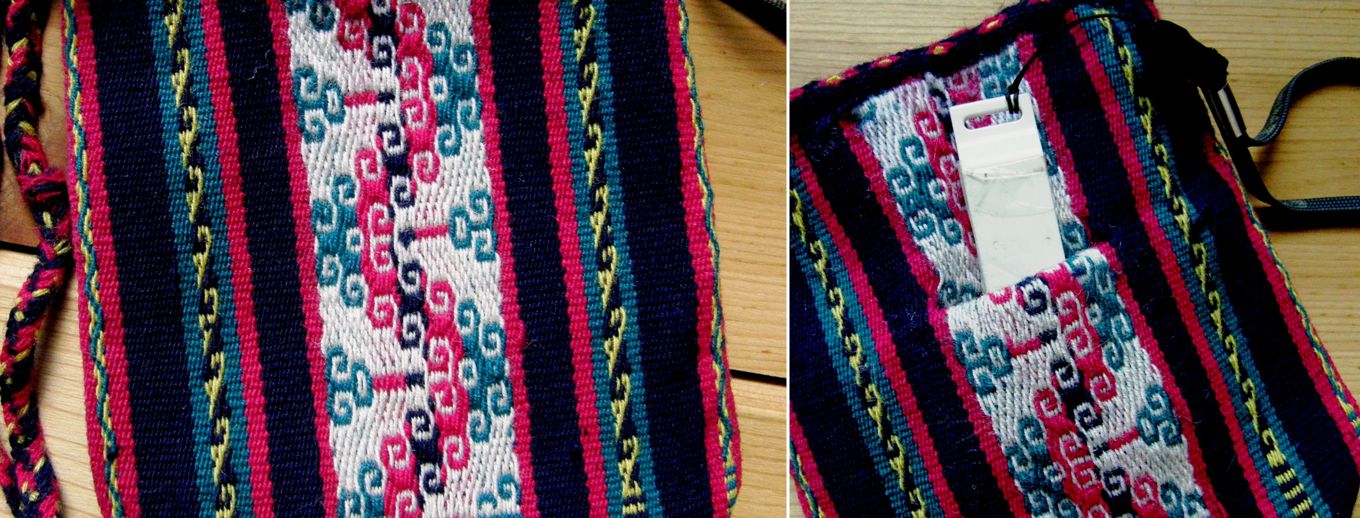
This is the chuspa that I made with my teachers. You can see the wee pocket which has been edged with cross knit looping.

The pocket on the traditional chuspa is only accessible from the inside of the bag. I want to have a pocket that I can get into on the outside so that I can easily reach keys, a cellphone or any other treasure that I need to have hidden but in easy reach. When I turn my chuspa inside out I have such a pocket. It was fun seeing the other side of this weaving with its reversed colors for a change which hasn’t seen the light of day since 1997 when I wove this piece.

This probably seems like a ridiculously complicated way to go about having a pocket in a bag but remember that I am pretty much all about process rather than product and this exercise will serve more than one purpose. I would like to weave this bag in the traditional way I was taught by my Bolivian teachers and see if my written instructions are up to scratch. The chuspa I wove in Potosi is a four-selvedge piece. The one I plan on doing now won’t be! Well, not this time anyway. Maybe I will do that later when I have enough handspun. I am going to weave a simple plain test bag first in cotton..

It was interesting to see that even my weaving teachers were forgetting the process and there was much bickering between the two sisters over how it should be done! Here are their two pairs of hands at work setting up the horizontal loom.

As I have been playing around with double-weave this week, I am going to try and put together a tutorial on the two-weft version for the blog next week. I made a tutorial for this on Weavolution ages ago and I think it could use some better photos and an update. The two-weft version allows you to weave bands of double-weave patterns next to regular plain weave.

This piece from Charazani, Bolivia, which is part of Yonat’s textile collection, has been woven in such a way. Motifs can be woven on narrow bands with the smooth solid color background that double weave produces. The bands sit within fields of solid color and stripes which are regular warp-faced plain weave. You can clearly see the terminal area. Finishing a four-selvedge double-weave piece is particularly hard as you have twice the amount of warps to deal with. Trust me, I have done it! This is the technique I wove on the very first four-selvedge piece I made. My teacher and I shared the burden of finishing the piece.

I will leave you here with some projects from online weaving friends and people I wove with on my US trip last spring.

Dwayne was having some problems getting his very first project underway. He didn’t have a nice smooth cotton yarn to work with and was struggling with making the string heddles. Now he is weaving using inkle-type heddles clamped between two dowels. Let’s weave! The continuous string heddles can be practiced later! He has a lovely Guatemalan loom to use.

I showed Kathi’s Saori-style project in its early stages last week. Kathi  was using a rigid heddle segment on a backstrap loom and look what she has made…

This almost makes me wish I lived in a colder climate so I too can make scarves.

Yonat wove supplementary weft patterning with me in California and has just showed me her band made with #10 crochet cotton on which she has been practicing the technique. She really has this down! I also have a tutorial on this in Spanish.

And Verena has been busy with pebble weave….


And that’s it for another week. Now to get my chuspa idea under way. There are bound to be lots of lessons learned in this project!