Backstrap Weaving-Coca leaves, chuspas and more double weave

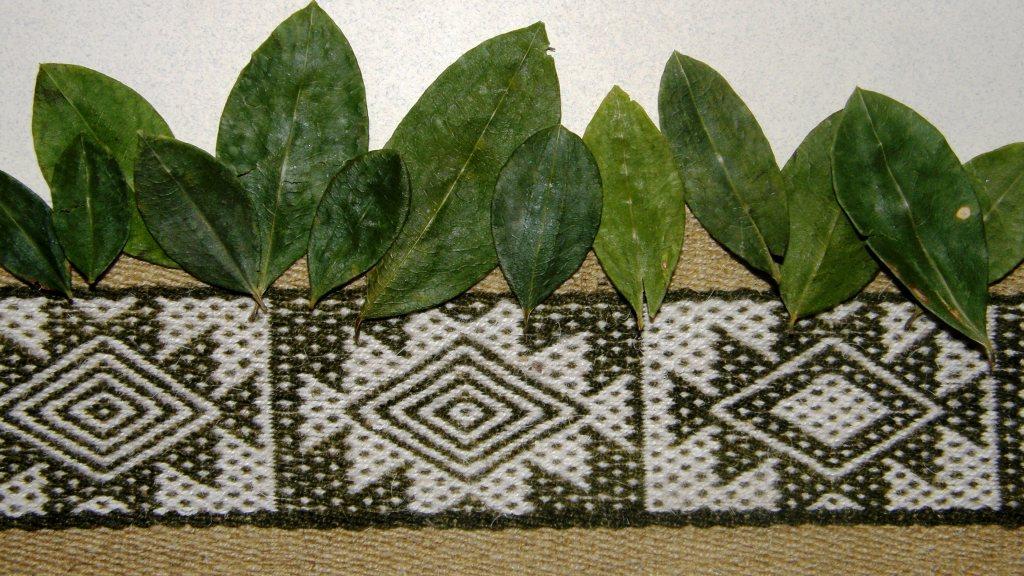
The coca leaf – I have enjoyed it brewed in tea, chewed it on hiking trips and used it to dye my handspun llama fiber above.  However, a  foreigner like myself can not even begin to understand the role that this humble leaf plays in Bolivian life and culture.

Lately there has been a lot more talk than usual about this piece of Bolivian cultural heritage as Bolivian President Evo Morales has recently announced plans to launch a new carbonated energy drink on the market which has the beloved coca leaf as one of its main ingredients. It should make an appearance in the next four months and will be called “Coca Colla” (the ‘olla’ in Colla being pronounced like the ‘oy’ in boy). “Colla” is the word commonly used to describe people from the altiplano of indigenous origins. This is President Morales’s attempt to erradicate coca’s unfortunate association with cocaine and drug trafficking, increase its cultivation and have it  recognized instead, as stated in the new Constitution, as  “cultural heritage, a natural and renewable resource of biodiversity in Bolivia and a factor of social cohesion”.
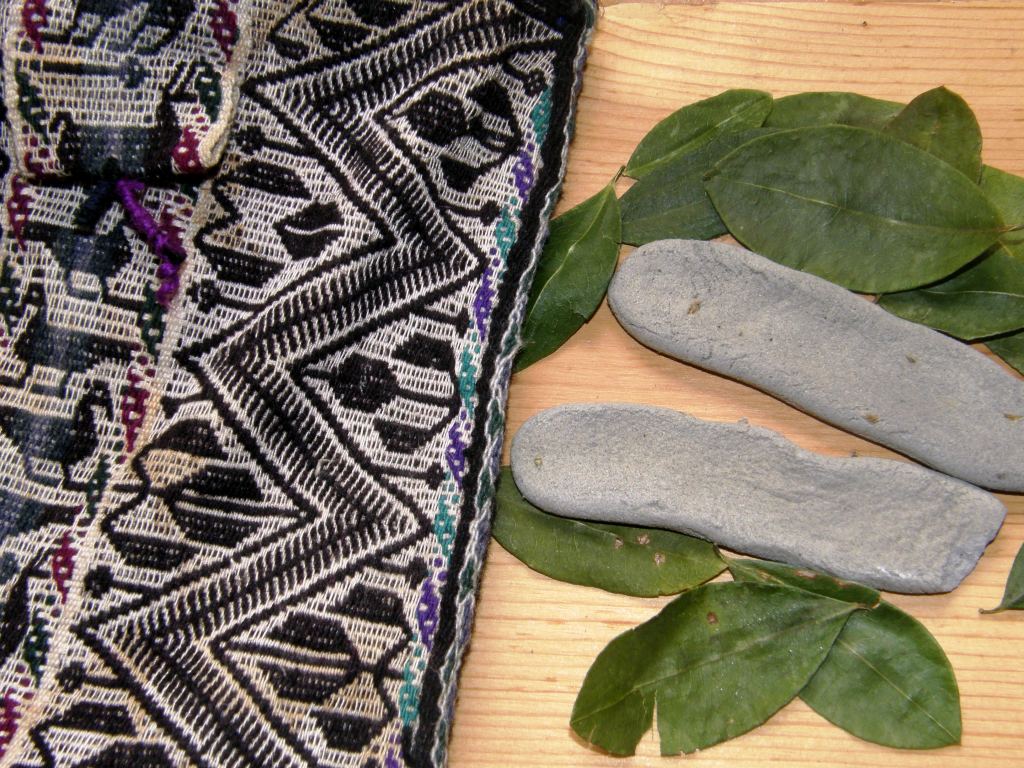
Coca is used to make tea, plays a part in religious rituals and is chewed in order to suppress hunger, thirst and fatigue as well as to alleviate the symptoms of altitude sickness. I have chewed it myself on hiking trips and I have to tell you that there is knack to getting a wad of it tucked neatly away in your cheek and not all over your teeth thus completely ruining your smile for the day! Bags of coca leaves are sold with lejia-the gray colored bar seen at left, comprising compressed ash and other substances, which is chewed along with the leaves and acts as a catalyst.

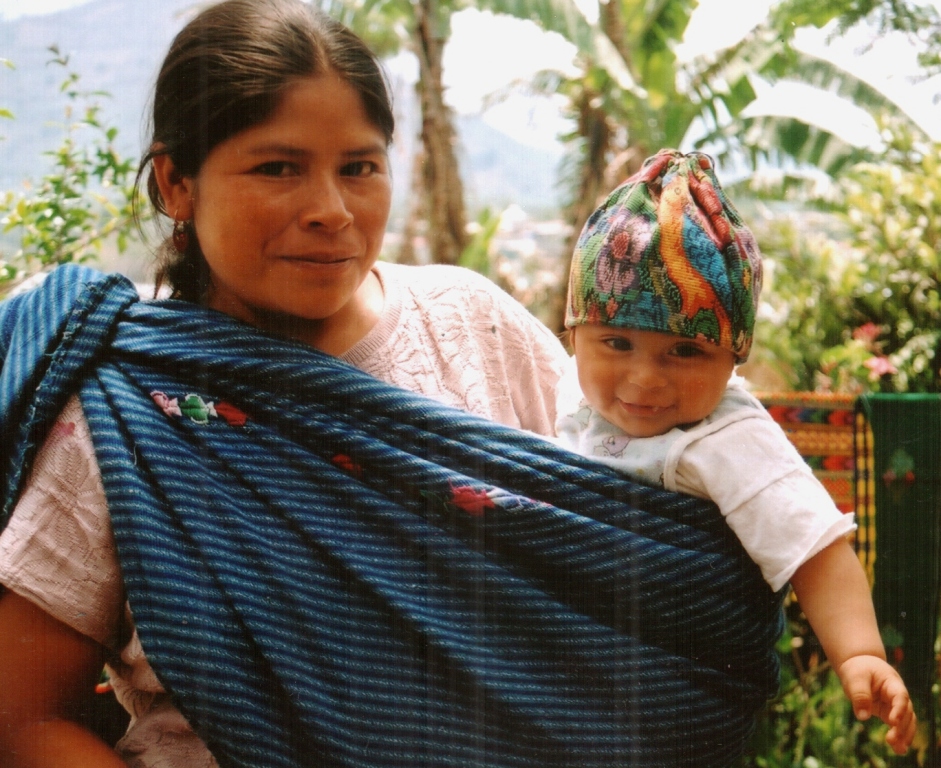
A special woven bag called a chuspa is used to carry coca leaves but I have only seen these in use at festivals and other celebrations. On a normal day, it is more usual to see people taking their coca leaves directly from a regular plastic bag. My weaving teacher, Julia, at right, is taking a break from classes to enjoy some coca.
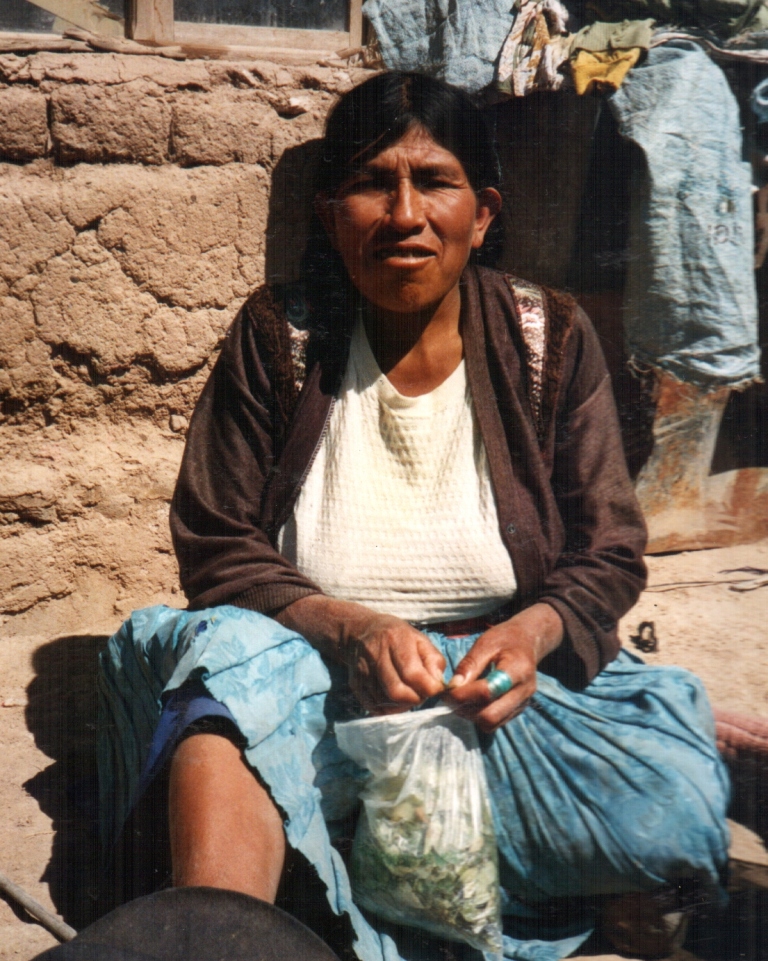
While Julia and her sister Hilda both know how to weave a chuspa, strangely neither of them actually owns one. When I expressed interest in learning to weave one, they had to consult with each other in order to remember how to wind the warp. What is special about warping for a chuspa is the fact that most chuspas include a small pocket which is designed to carry a piece of the lejia or perhaps a few coins and allowance must be made for this in the length of the warp.
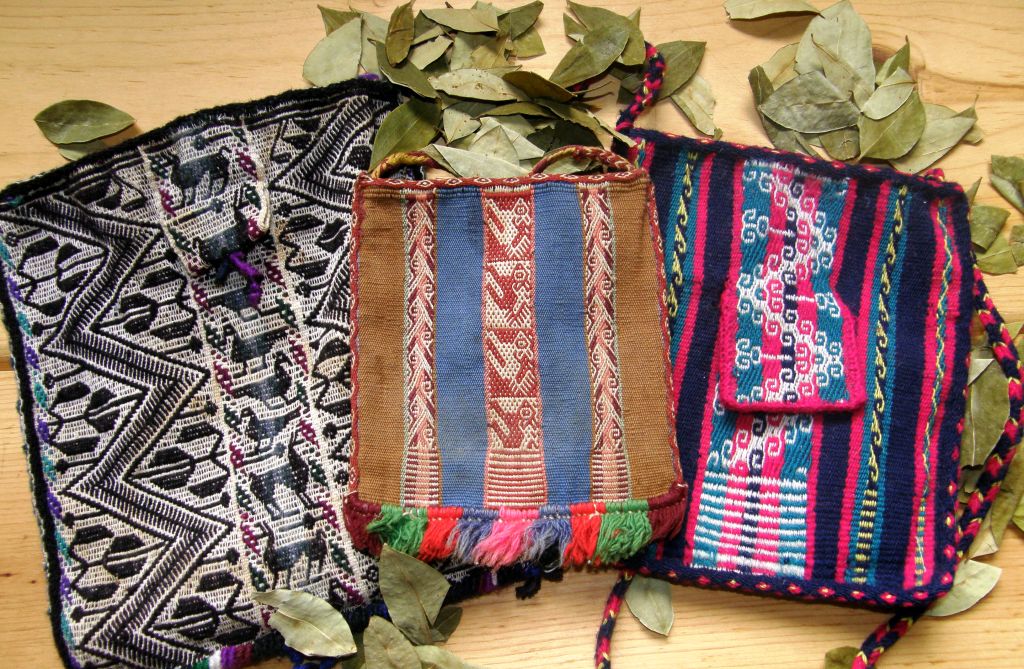
Three Bolivian chuspas, each woven with a different complementary warp technique. The one on the left was made by my weaving teacher in Candelaria and has a pocket. While the one in the middle was bought in Potosi,  I am not sure of its exact origin. It does not have a pocket. The one on the right with a pocket is the one I made in Potosi under Julia and Hilda’s instruction.
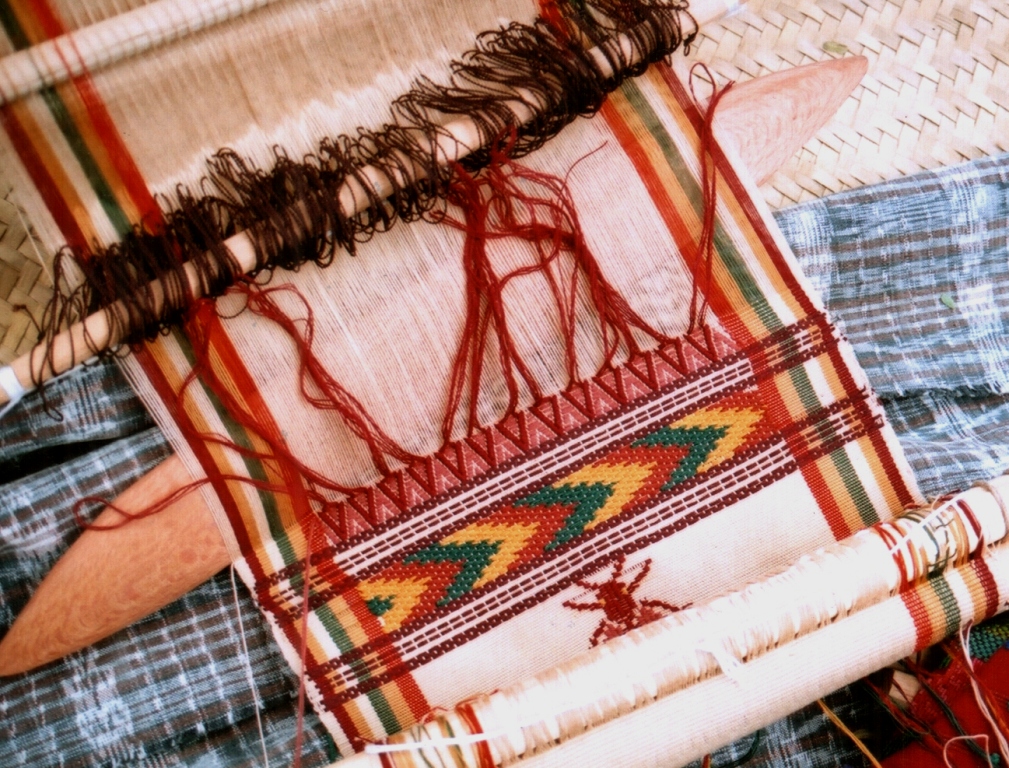
Julia and Hilda are preparing the warp for my chuspa. You can see the extended piece of warp on an extra stake which will become the pocket. We are using the brightly colored respun acrylic yarns that are very popular in this area. 
We are all at work here. I am working on my chuspa, Hilda is backstrap weaving a band while Julia, in the background, is cutting fleece to spin. My chuspa is a four-selvedge piece so I wove from one end, turned the piece around and wove from the other end and then had the usual agony of trying to squeeze weft into those last few rows to close the gap.
Hilda taught me to weave the ”rolling river”design into my chuspa. Once off the loom, the sides and pocket are joined using a variety of decorative techniques.We used triple crossed knit looping to edge and sew the sides of the pocket. This is a very pretty technique that not only binds the sides but also completely curls over and covers the edges.
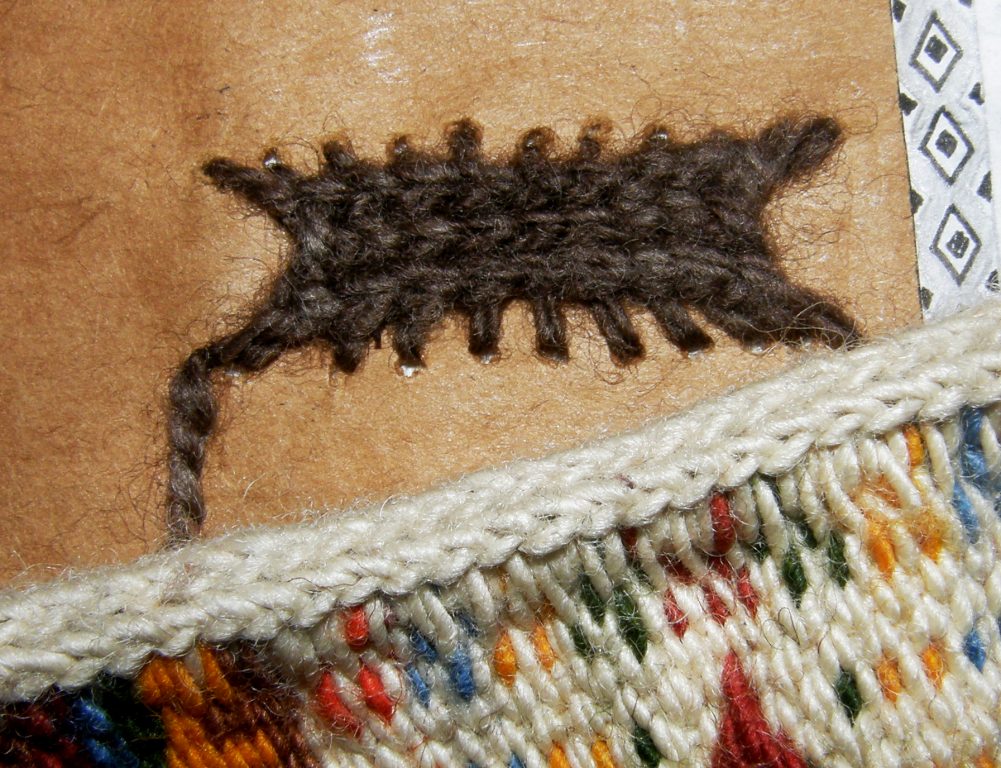
You may be able to see the crossed knit looping more closely here on the edge of another bag that I wove. The brown sample shows how it would look worked flat rather than curled over an edge.
A tubular band was woven with the weft being used to sew it to the sides and base of the bag as it was woven.  A six-strand flat braid was made for the bag strap. The chuspas that I have seen being used in festivals are highly embellished with pom poms, tassels and multi colored fringes.
A small selection from the variety of braids, bands and tassels used to decorate Bolivian chuspas
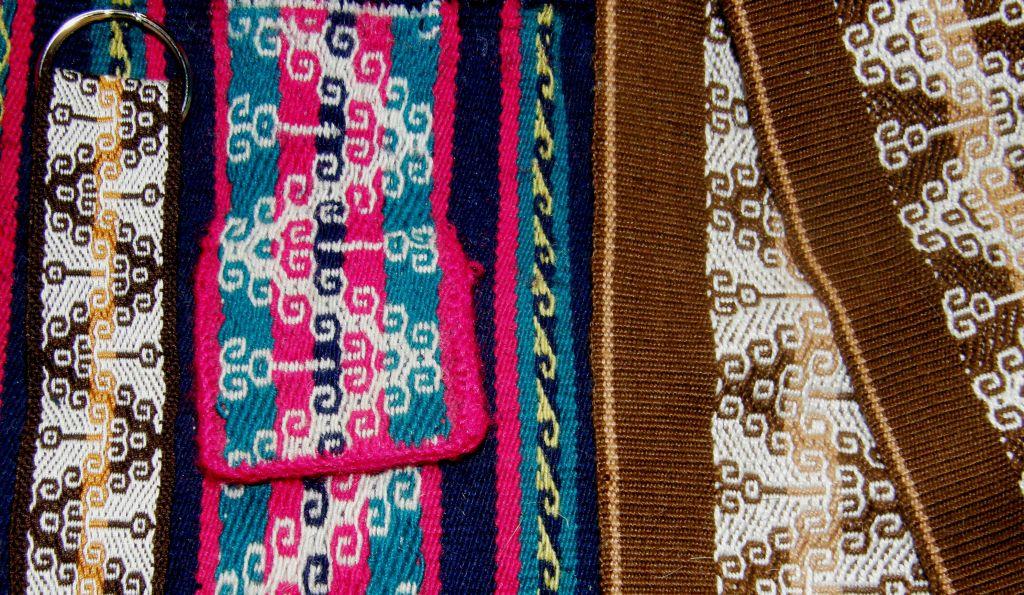
The ”rolling river” design has since become a great favorite of mine and I have woven it into tool bags, sashes and key fobs on my backstrap loom.

In 1998, I spent some time with a weaver in the village of Candelaria near Tarabuco and learned the weaving technique that is used in their chuspas and carrying cloths.

A Tarabuco style chuspa made by my teacher Felicia . The pocket is so small it is hard to see it being of any real use. The other piece is a small purse which has been woven specifically to be sold to tourists. Note the cute strolling llamas along the bottom.

I returned to Candelaria last year. Felicia is no longer there but the first person I met as I entered the village was Felicia’s cousin-also called Felicia! who took me to her home and graciously allowed me to film her weaving on her oblique loom. The next day I went to the market in Tarabuco where there was a cultural festival and was able to capture a small piece of video of a weaver warping for a chuspa. She was constantly being interrupted by ladies asking her questions so the clip is very short.  I don’t know how well that warp could have turned out with all those pauses. When I warp, no one can speak to me!

So here is the short video (yippy! I have finally figured a way to get around my erratic internet service and upload heavier videos). The first part is the weaver warping for a chuspa with two colors around four stakes. You will see the extra stick she uses on which to warp the extra long part for the pocket.

The second piece is Felicia-keep an eye out for the kitty snuggled in her lap while she picks up those warps with lightning speed!


WHAT’S ON THE LOOM?-AN UPDATE

I have been working away on my Abba Yohanni inspired piece and have decided that I am going to make a table set to take as a gift on my next visit to Australia. So, the piece you saw last week will be a table runner. I have made some progress on that and have reversed the design and am just starting the final motif. In the meantime I couldn’t resist seeing how the motif would turn out in 12wpi cotton and so wove it into a (rather large) hot pad using one-weft double weave technique and then wove a small portion of the motif into a mug rug. I am thinking about weaving four placemats to go with the set with a piece of the motif woven with a supplementary weft in the center of each.
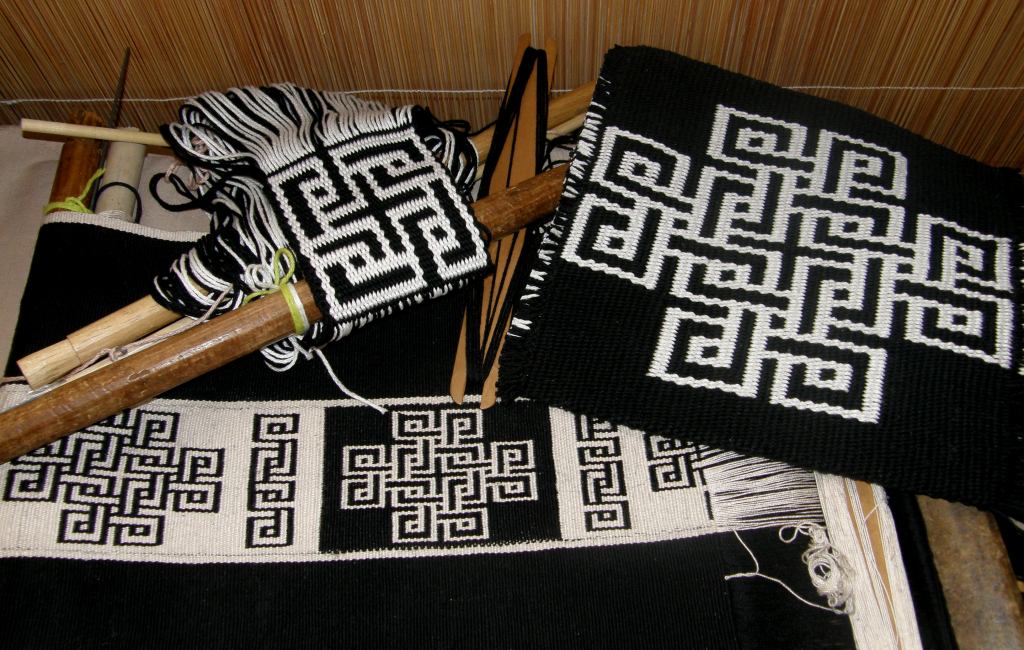
Abba Yohanni inspired set in progress


Backstrap Weaving-Supplementary weft patterning and learning to weave in Guatemala

SUPPLEMENTARY WEFT PATTERNING

Lately I have been playing with supplementary weft patterning and, once again, have been inspired by Weavolution members. One member joined my Backstrap Group as she is interested, amongst other things, in reproducing a Central Asian yurt band. She has introduced me to many beautiful Central Asian designs and often sends me photos of pieces she has seen at reenactmant events that she attends.

Together we figured out the technique on a yurt band she had bought and even wove it simultaneously- all coordinated by email!

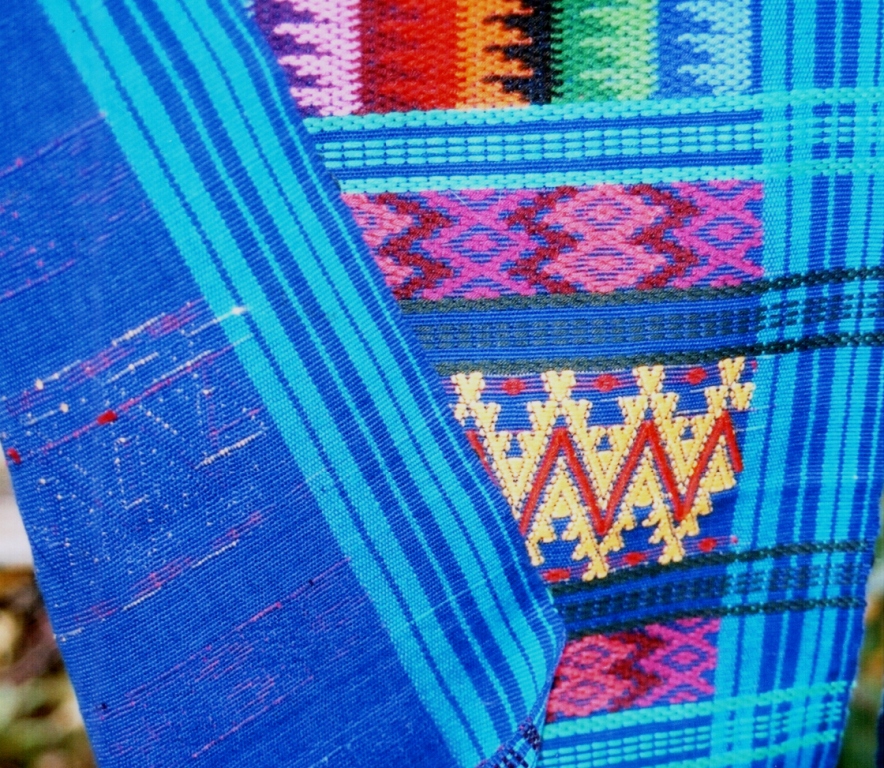
When she sent me this photo (at left) of a Central Asian piece she had photographed at one of the historical events, I couldn’t wait to weave the design into something. The technique wasn’t clear in the photo and, as I wasn’t concerned with reproducing the original technique,  I decided to weave it in either double weave or supplementary weft patterning. I chose the latter as, since studying this technique in Guatemala in 2008, I hadn’t put it to much use.

In this technique, it is really important to get the right balance between the weight of the warp yarn and that used for the supplementary weft and so I quickly wove a sample and then went ahead and made the table runner below in 4/2 cotton (24wpi) warp with 6 strands of the patterning thread that I had brought back from Guatemala as the supplementary weft. You can see that I added a little embellishment of my own to the pattern.

My colors are rather bland compared with the original. I love that orange zigzag next to the main design. Perhaps I will be more adventurous with color next time!

My table runner with a Central Asian inspired design

My other source of inspiration has been a Brazilian member of Weavolution who has generously shared what she knows about the weavings of the Huni Kuin people who live in the tropical forest of Brazil and Peru. They weave with backstrap looms using cotton that they spin and dye themselves. You can see a video of their work here and a photo of a Huni Kuin weaver here. Although they do not use  the supplementary weft technique, I chose to use this method to weave one of their designs into a bag.

A small bag with supplementary weft patterning inspired by a traditional Huni Kuin design.

Here in Bolivia, the supplementary weft technique is used by women to weave bands to decorate their hats. It is in these hatbands that I have seen the widest variety of woven designs. Except for in Calcha, where it seemed that the women had decided on one hatband design to represent their village, I have never seen two hatbands alike.

This Potolo woman is using three hatbands at once.
Hatbands from Bolivia

Sometimes the supplementary weft is used to form the motif as in the small condors on the upper half of the center band above. At other times, it is used to fill the negative space to outline the motif on the ground weave.

From having purchased some hatbands here, I was able to see how they were woven. I made a few sample bands but, as I didn’t get the right warp to weft ratio, I wasn’t too pleased with the results and never really went on to explore this technique further- that is, until I went to Guatemala in 2008 and studied weft patterning with three teachers there. It was my first time in Guatemala and an absolute explosion of color and inspiration was awaiting!

The traditional hair sash of the women of Aguacatan, Guatemala

So I would like to spend the rest of this post introducing you to my first teacher in Guatemala and showing you how I learned supplementary weft patterning with her.

Lidia lives in the very small town of Santa Catarina Barahona near San Antonio Aguas Calientes in Guatemala. The typical blouse, or huipil of the area has designs woven in single and double faced supplementary weft patterning. The large areas of double faced patterning are those that most distinguish the huipiles of this area.

Typical huilpil of San Antonio Aguas Calientes.
Single faced weft patterning. The patterns can’t be seen on the back of the textile.
This double faced patterning looks very much like embroidery. The national bird, the quetzal, is a very popular motif.
Day 1-Lesson 1. I have chosen my colors for my piece and am winding the thread into balls prior to warping
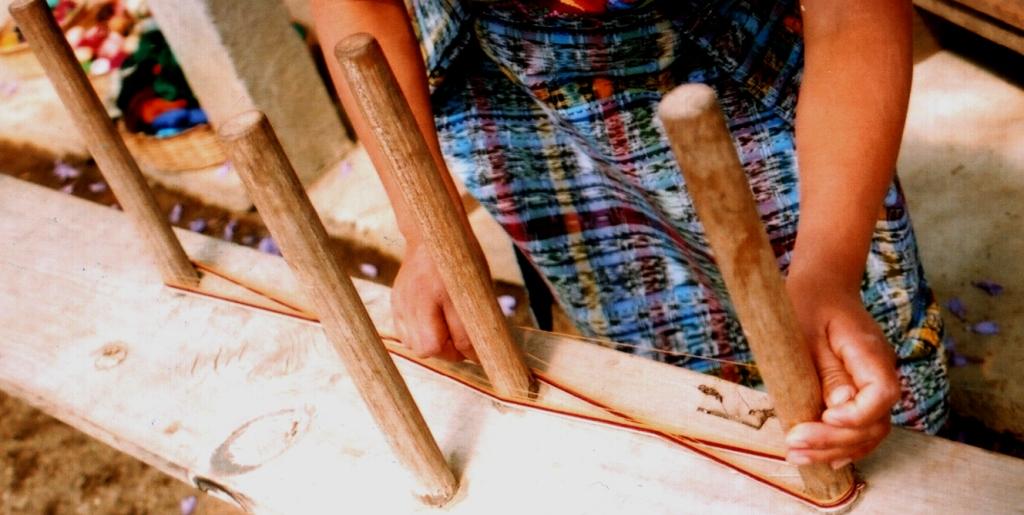
Making a small warp for my lessons
Once the loom was tensioned, the heddles were made.
Lidia’s sister Carmelita showed me how the warps, under which the patterning wefts would be placed, are picked and stored on two additional sticks. The resulting designs are called ”pepenado”.
The first design lesson-Lidia is weaving the ”tijera” (scissors) pattern. She uses a pointed stick to hook theweft tails and pass them under the raised patterning warps.
The finished tijera pattern
Double faced ”abeja”-bee
Three ”abejas” that I wove when I got home

The ”abeja” was topped off with another section of ”tijera” and that completed my second day of classes. Finally, on day three, I learned the ”arcos” (arches) pattern. This is a combination of weft inlay and warp wrapping.

Weaving the ”arcos” designs
The finished ”arcos” design

It looks like my teachers did all the weaving and I just stood around and snapped pictures! Well, I can tell you  that it wasn’t so. Lidia was a very ”hands-on” teacher and she would take over only when I got up to stretch and take photos.

But it wasn’t all hard work. Other family members and neighbors came to visit, we paused to make and eat tortillas, chatted and played with the nieces and nephews in Lidia’s shady yard and walked to town to go yarn shopping.

Snack time. While making my way around Guatemala I learned to recognize the ”slap slap slapping” sound of tortillas being prepared.
Small rectangular pieces are covered with double faced designs and closed with a drawstrig to make a baby’s hat.
Whne I got back to Bolivia I finished off the piece that I had been making with lidia and then wove another sampler to consolidate the weft patterning techniques I had learned.
And I used my lesson piece in the lid of my weaving toolbox.

I went on from Lidia’s home to study with two other weavers in Guatemala but, more about that in another post!

Lidia’s daugther Sara and her cousins

I will be doing a tutorial on suplementary weft patterning with lots of step-by-step photos here on my blog in the following weeks so that you can add designs like the Central Asian and Huni Kuin ones, that I showed you above, to your projects.

I hope you enjoyed this little trip from Central Asia, to Brazil, to Bolivia and onward to my teacher’s home in Guatemala. If you did, I would love to hear from you 🙂

Backstrap Weaving-Beyond Bands, Weaving Wide!

WEAVING WIDE-Placemats and table runners.


Simple projects for extending your skills beyond bands


I happened upon a Wikipedia description of a backstrap loom recently and was disappointed to find that the author had limited the description of the loom to one that is used with a rigid heddle for making primarily narrow bands. It is quite likely that this person has only seen the commercially available backstrap loom kits, most of which seem to come with a small rigid heddle and it is true that a lot people use the loom only for making bands. Indeed I have had people ask me on several occasions why one would bother using a backstrap loom at all when an inkle loom can produce the very same bands.Well,I answer them by saying that one of the many beauties of  this loom is that you can also use it to go wide. Just how wide? Take a look at some weavers I have met in my travels……….


Cabanaconde, Peru


Gualaceo, Ecuador


San Antonio Palopo, Guatemala


San Roque, Otavalo, Ecuador


Well, you probably don’t want to go that wide at this stage!  I certainly haven’t contemplated attempting anything like that (yet!) In fact, the widest of the table runners I have made lately measures only 15 inches but, by branching out beyond band width, there are so many more neat and useful things you can make on your backstrap looms.  Just add a litte pick up to a plain weave background to make bags, pillow covers and table ware.

I see a lot of my students learning a pick up technique, weaving a few bands, moving on, learning another more advanced technique, adding to their collection of bands and so on and so on. While there are many beautiful and practical things that can be made with bands, I always hope that they will return some day to the simpler pick ups and use them in wider pieces-exploring and exploiting the techniques and going beyond bands.  I think the secret to successfully weaving on progressively wider warps is, first and foremost, to keep it simple. You will notice that all except one of the weavers here are weaving plain weave. The poncho weaver (below) in Otavalo has chosen simple warp stripes, the Guatemalan lady (left) has stripes and strips of ikat in her piece while the weaver in Gualaceo (above) is weaving up her ikat design entirely in plain weave. Only Estela in Cabanaconde is weaving very narrow bands of supplementary warp patterns in her carry cloth.

One of the simplest patterning techiques is the simple paired warp floats that I learned in coastal Ecuador and I think this is the ideal technique to use for the first experiments in wider pieces. You will find my tutorial for this technique here. There are also pattern charts here on my blog pages should any of you be feeling adventurous. I hope I have inspired you to be so!

Here is what has come off the loom recently………….


placemat and mug rug with a ''knot'' design


Those of you who have seen the tutorial will recognise the simple warp float technique. The mug rug, of course was woven in double weave. I fell in love with this knot pattern on a card woven band and also reproduced part of it on the mug rug.


placemat and mug rug with simple diamond design


You can’t get much simpler than this basic diamond warp float design, yet it looks very effective on this wide piece. Going wide doesn’t necessarily mean increasing the pattern area and, therefore, the amount of pick up you need to do. I did a small amount of supplementary weft patterning in the the center black stripe and wove the mug rug motif based on that. Don’t worry, I will be doing a tutorial here on supplementary weft patterning in the near future!

Here are some other projects to help get you started in simple warp float patterning and then, hopefully,on your way to wider weaves………


warp float patterning on a hat band


coin purse and bookmark with simple warp float patterns


I have short videos and pattern charts on my Flickr page to supplement the tutorial instructions at Weavolution.

And, by the way, I added to and edited that Wikipedia post so no one will miss out on knowing about the versatility and potential of this fabulous loom. 🙂

A LITTLE BACKGROUND……..Learning the simple warp float patterning.


Luz checking the warps selected for the eleven heddles


I stayed with a family of weavers in coastal Ecuador for three weeks in 2007 to study their saddle bag making process. Eighty-six year old Luz is the only weaver in the area who still makes the saddle bags with warp float patterning. Luz and her family prepare the raw cotton, spin it on simple hand spindles, double it and dye it , ready to be wound on the vertical loom and woven into a saddle bag. They were very generous in allowing me to study their techniques and, in fact, insisted that I be involved in every part of the process. It was a wonderful learning experience!

The typical pattern that they use has twenty-two rows and is horizontally symetrical which enables Luz to program half the design on eleven heddle sticks. Luz sets up the heddles and then steps back while her daughters do the the more physically demanding weaving.

The saddle bags would be slung over horse and donkey back and used to carry tools for a day at work in the fields. Men would often carry them on their shoulders on a trip into town. While saddle bags are still used, the cotton ones have been virtually completely replaced now by a plastic version and the art of weaving the warp float patterned bags is on the verge of being lost.


Trini opening the main heddle shed


Quite a bit of strength is needed to open that shed and look at the size of that sword!! Talking while weaving often led to disaster as the order of the eleven heddles would get hopelessly confused. But weaving was a family activity with everyone gathered around in the evening to watch and chat and the inevitable mistake brought laughter and teasing rather than frustration.


Trini and I at the loom with the finished weaving


Finally, Luz’s son Leonardo is modeling the finished saddle bag for us………………..


With saddle bag slung on his shoulder, Leonardo is ready for a a trip to town


while Trini and Catalina head off to the market with one of the new woven plastic versions on the the mule’s back.