Backstrap Weaving – Travel Tidbits from Massachusetts

Well, I am here in Massachusetts with my friend Pam in her peaceful home in a lovely rural area. It was a rough trip with burning smells in the aircraft cabin forcing the flight to land in Orlando where swarms of Brazilian children clutching Mickey Mouse dolls were also stranded due to thunderstorms. This meant arriving in Boston in the wee hours of the morning where I probably caught about 90 minutes of sleep on the airport floor before the early flight check-ins brought in the excited hordes.

But…I am here and I have a few tidbits to share…some interesting things that I have seen in the day and a half I have been here so far.

Firstly, the skies cleared today and I got to go out and see Pam’s indigo crop. Hopefully we will harvest some leaves and do some dyeing during my stay. Pam has done it before with her own plants and so I am looking forward to learning a lot.

We pulled off a leaf today and scrunched it about and left it to see if there were any signs of blue as this is apparently a way to see if the leaves are ready for picking and, yep, a few hours later when we remembered to go look at it, the signs were there.

And this is what we are going to dye….silk! all the way from Uzbekistan.
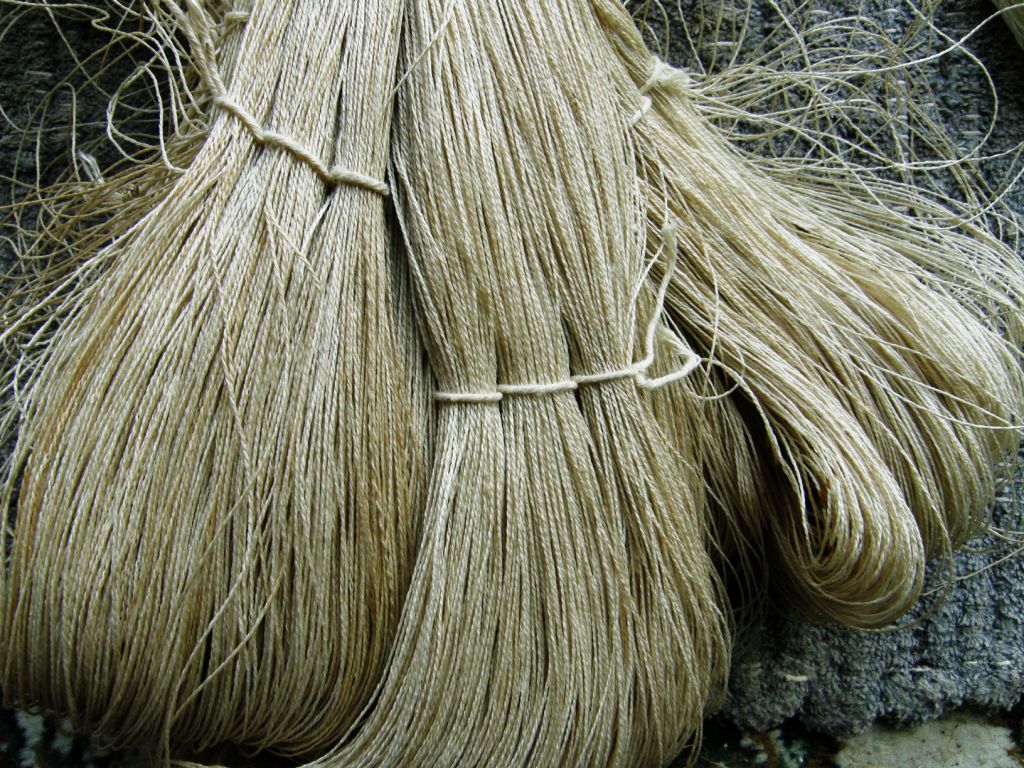
Here is the silk with its coating of sericin. I had no idea that this is how it looks and feels…stiffish…before being scoured with washing soda in simmering water.

Fortunately Pam also has a lot of beautiful soft scoured silk all ready to be skeined for dyeing.

I spent the afternoon revisiting Pam’s collection of textiles from Uzbekistan. I posted them in a previous blog post but getting to see them again with fresh eyes is always welcome. Even though these pieces were all bought on the three trips that Pam has made to Uzbekistan, some of the textiles actually originated in Turkmenistan.

The rug and rug piece which has been sewn into a bag caught my eye as both have been made with the warp substitution technique. Who cares about long floats on the back when you have weaving in this beautiful handspun yarn and gorgeous color combinations.

This is one of several rugs on the floor of the office in which I am sleeping. I love the fact that the long floats on the back of the piece give me a chance to feel and closely inspect the yarn.

This is a piece of rug that has been made into a bag. You can see both faces of the fabric. I just love those washed-out reds and blues. The rug was cut and then a woven band was folded lengthwise and sewn to the raw edges to cover and protect them.

The strap is interesting. Doesn’t that look like finger weaving?

I am pretty sure that this motif was done in three-color warp substitution. You can just make out two colors in the motif along with the red background. Only by looking on the other side where the colors were still bright you could clearly see the orange and green warp threads that alternate in this design.

This bag is my favorite…

I am definitely going to cut a fancy flap and add some tassels to the next bag I make. I have just been getting confident with cutting and edging rounded flaps. Now look at this shape! This piece, which Pam says used to be part of a rug, is woven using the two-color alternating warp float method which I have been calling, for lack of a better name, “warp floats galore”. You may recognize the “S” motif from a belt, cell phone pouch and notebook cover that I made. The woven band has been sewn on beautifully and it all feels very secure.

Little “comb” patterns separate the warp float bands and a simple warp substitution design has been woven into the edging band.
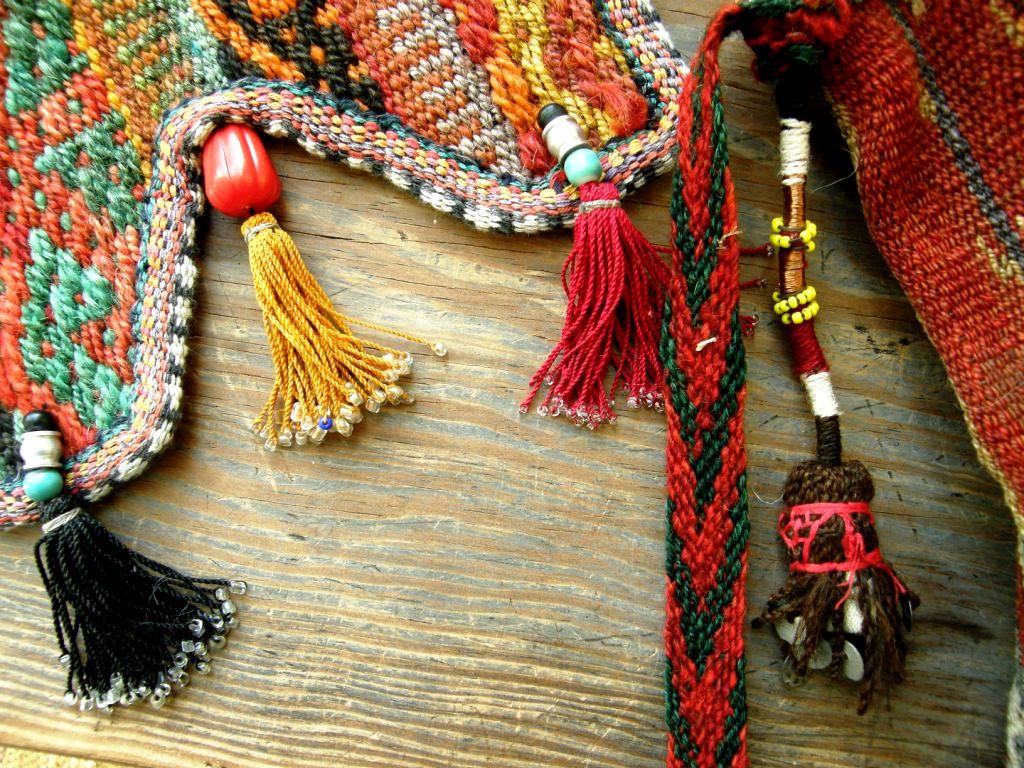
The fabulous tassels…one has embroidery on the outside and the one on the right includes copper wire in its wrapping.
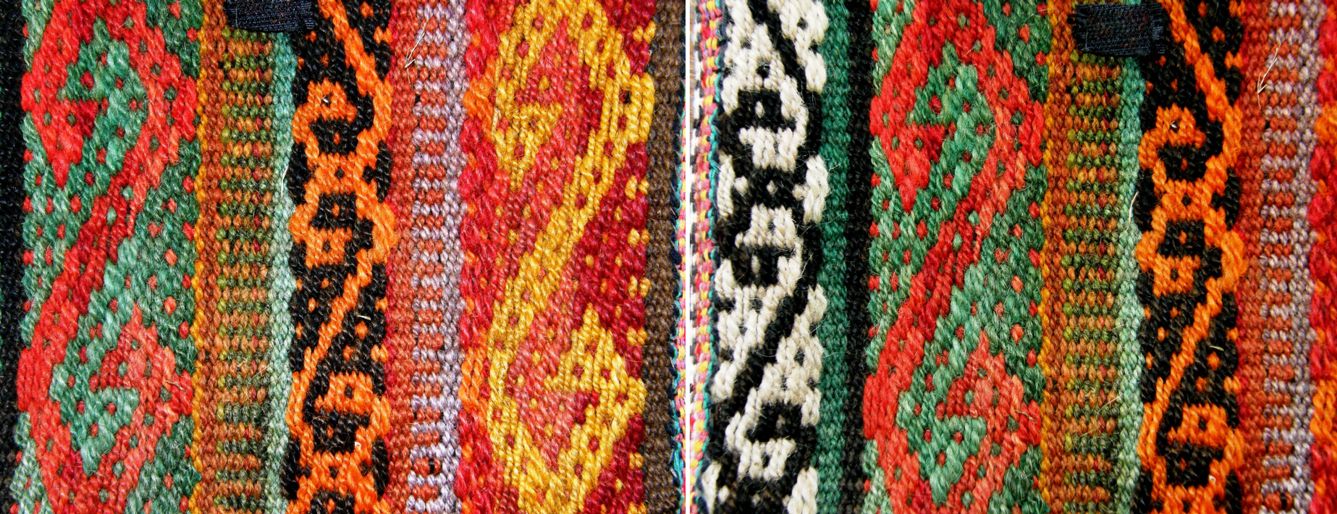
Here is a close-up of some of the warp float designs.

The bag strap has the same simple warp substitution design that appears on the edging. There is so much to be enjoyed in this one piece!

There is plenty more to show and tell from Pam’s lovely weaving space and home but I told you that this would just be about tidbits and so I will end with something that Pam’s friend Joan showed me on  a quick visit to her home in Worcester. I stayed with Joan and her husband Attila last spring. Joan introduced me to Saori weaving and took me to see Dar Ku, a Burmese weaver now settled in the US.

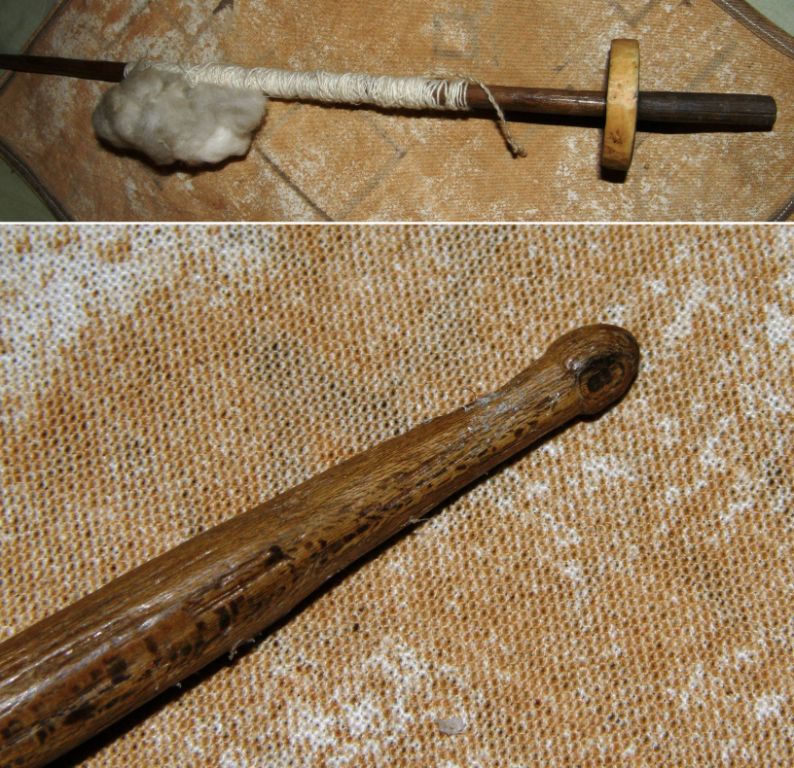
Joan is involved with new settlers in her area coming from all parts of the world. She has recently made friends with a basket weaver from Burundi as well as with textile weavers from Bhutan. An Ethiopian lady showed her how she spins cotton and gave her a spindle, some of her spun thread and a piece of Ethiopian woven cloth…all gorgeous!

 A close up of the end of the spindle and the woven cloth…I didn’t have the right conditions in which to photograph this well.

Unfortunately, lack of time won’t permit a return visit with Burmese weaver Dar Ku but I have posted a video I took last spring of Dar Ku at her backstrap loom weaving a supplementary weft design on warp-faced fabric.

I am so glad to be finally able to show this. It took forever to upload!

She weaves with the wrong side of the cloth facing her and carries her supplementary weft from place to place across the back to weave the parts of the pattern. She has a very soft beat and her tension seems to be quite relaxed.

I am told that these weavers usually weave with their legs braced against something and that this has been difficult to set up in their homes. For now they are just doing without the foot brace. I am sure it must feel weird for them weaving that way.

I wove once with Salasaca weavers in a shop rather than in their home where they have everything set up. They spent the whole time scrabbling about on the floor with their heels trying to get some purchase so that they could push and tension the warp more. Dar Ku on the other hand looks quite at home weaving with her feet crossed and not pushing against anything.

I love the way she opens the pattern heddles so delicately and smoothly. Everything just pops open so easily! It looks like the most relaxing effortless thing in the world. It is lovely to watch.

The Ravelry backstrap weavers and my other online weaving friends are hard at it turning out gorgeous projects…

How’s this for contrast…Jennifer is weaving a myriad of colored cotton stripes while Tracy just finished a pebble weave hanging with her handspun wool.
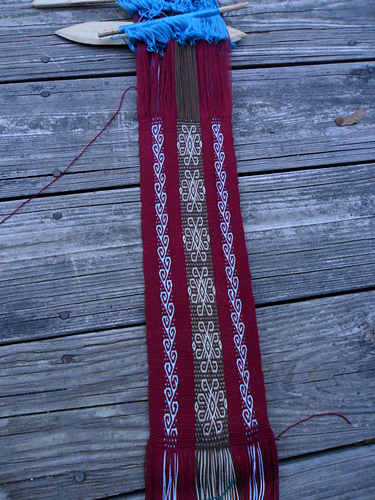
Verena has also been weaving pebble weave and hopes to sew this into a pouch.

Verena was my student here at Pam’s place last spring and has been getting on very well with her pebble weave since then.

And lastly, I have some charting paper to share.

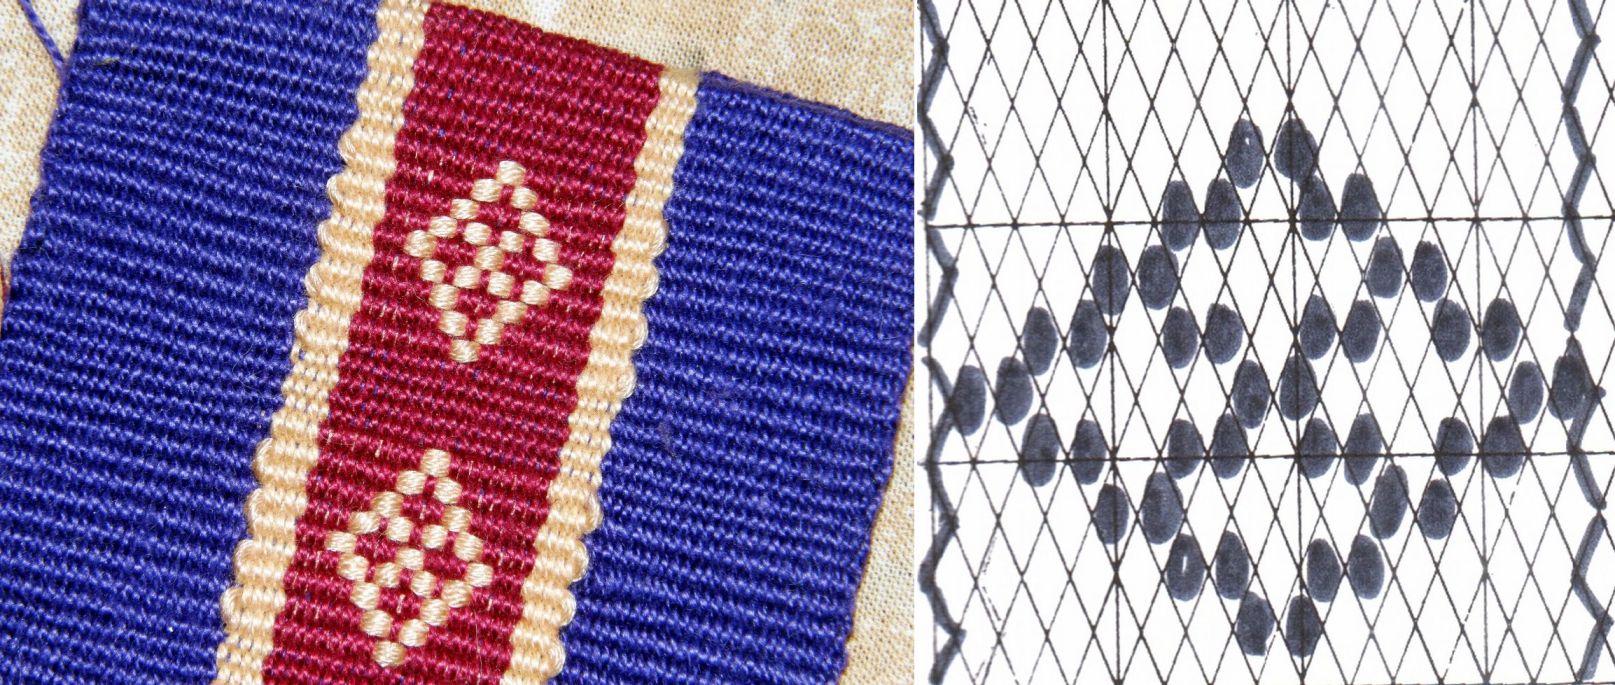
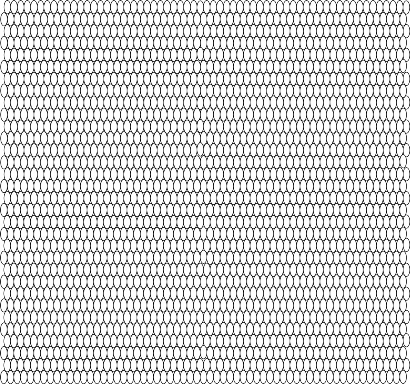
Lately, I have been charting my double weave, warp substitution and supplementary weft patterns on paper with elongated ovals rather than diamonds.

I made a sheet of ovals on a drawing program that I have and have posted it on this page for you all to use.

I am so used to the diamonds but I think that these ovals may be easier to use. I have had people tell me that they go cross-eyed with the diamonds!

I hope that this new charting paper helps.

Here is what it looks like. The page with the full version is is linked above.

Back with more travel tidbits next week.
Backstrap Weaving – Great Lengths for Good Results


The more you weave on a backstrap loom, the more you come to realize the importance of good warping. I so wish I had photographed the great lengths I had gone to to warp for the four-color pebble weave piece above. It was a mad never-to-be-repeated combination of knitting machine tension rods planted in bottles, planks, toes and stakes! It was the time when I lived in southern Chile with little experience or materials on hand. All I knew was that good even tension was essential to a successful project and I was determined to achieve that. Well it worked and I was pleased with the results.

There are so many parts and tools for the backstrap loom that can be made from bits and pieces that one already has lying around the house. And even a warping set up can be easily constructed…just whack a few stakes into the ground in the backyard….and in one’s enthusiasm to get a warp onto the loom and start weaving one may be tempted to ignore the fact that the stakes leaned inward ever so slightly while the warp was being wound.

You learn after that first wonky warp that it is worth going to great lengths to make a suitable warping board if you want to have good results. I consider this the most important part of your backstrap weaving kit.

You can see at left my first warping attempt in Chile after returning from my first backstrap weaving lessons in Peru. Look at that crooked end! I had been warping successfully for Navajo weaving until then and tried to adapt that system to four-stake warping for pebble weave….didn’t work!

Even though that was fifteen years ago, I haven’t come up with any terribly sophisticated ways to warp. Sophistication isn’t necessary. I just make sure that my stakes are well grounded and cannot move or lean in.

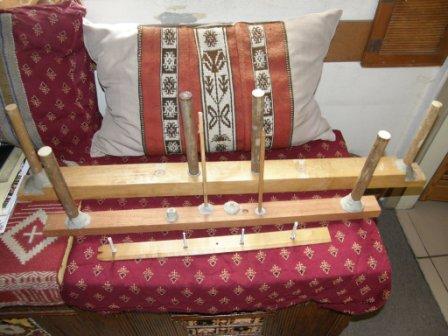
This family of simple warping boards has served me well over the years. Even when I need a longer warp for a belt or guitar strap I manage to combine the boards somehow to fit the bill. I made the middle board to accommodate the multiple sticks that are needed to warp for the supplementary warp technique that I studied in Salasaca Ecuador. The mini board in the foreround is the one that goes traveling with me. The ”stakes” are long screws which are bolted to the wood and can be removed for travel. I also use it at home for keyfobs and bookmarks.

It seemed that all my needs were met with these three simple boards. However, recently I have been weaving with my handspun alpaca yarn. All you spinners out there will understand my desire to not waste a single inch of this stuff!

Last week I showed you the passport pouch I made with my first lot of handspun. I warped it on the middle warping board and it was tough cutting the project off and “wasting” all that handspun. Normally I warp longer than the project requires…there is always that “just in case” factor and so what if a little cotton gets thrown away? But not my precious handspun!

So, I kept all the cut off alpaca yarn thinking I would use it as supplementary weft and that is just what I did this week. I had just enough handspun left to make a cell phone pouch. The dilemma was that I did not have a warping board that would allow me to warp just the right amount for this project. There wasn’t enough yarn to get the right width on the larger warping boards and the mini was too small for a cell phone pouch.

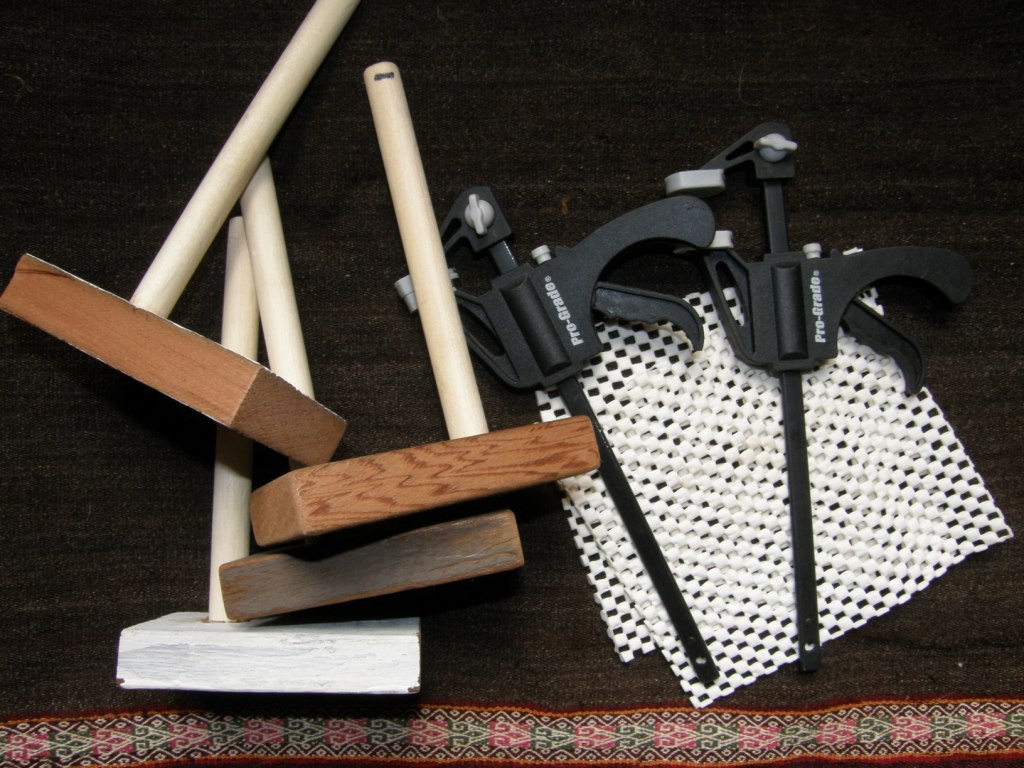
And then I remembered the nifty single warping pegs that my friend Janet and her husband Larry made for me. These can be clamped to a table to warp any length. My problem is that there isn’t a free table here to do that but I managed to use the tray table on which my computer sits and that was the perfect length.

This worked like a dream. I must warn you that clamps can slip while you are warping, quite often imperceptibly, and it won’t be until your warp is on the loom that you notice that one side is hanging slack while the other side is taut. I solved this problem by using that rubbery draw liner stuff that you see pictured above on both the top and bottom surfaces of the table…no slipping…beautiful warp.

I have a lot more about warping and the different ways my indigenous weaving teachers warp in this previous post and also here.

As I told you last week, I put only the slightest amount of overtwist in this yarn so you can see here that the warp can lie quite flat and not go curling up on itself. It is hairy, though, and I did have to work to clear my sheds. I had to put glue on the knots at the color changes after having the knots in this sleek fiber work their way undone multiple times and drive me nuts!

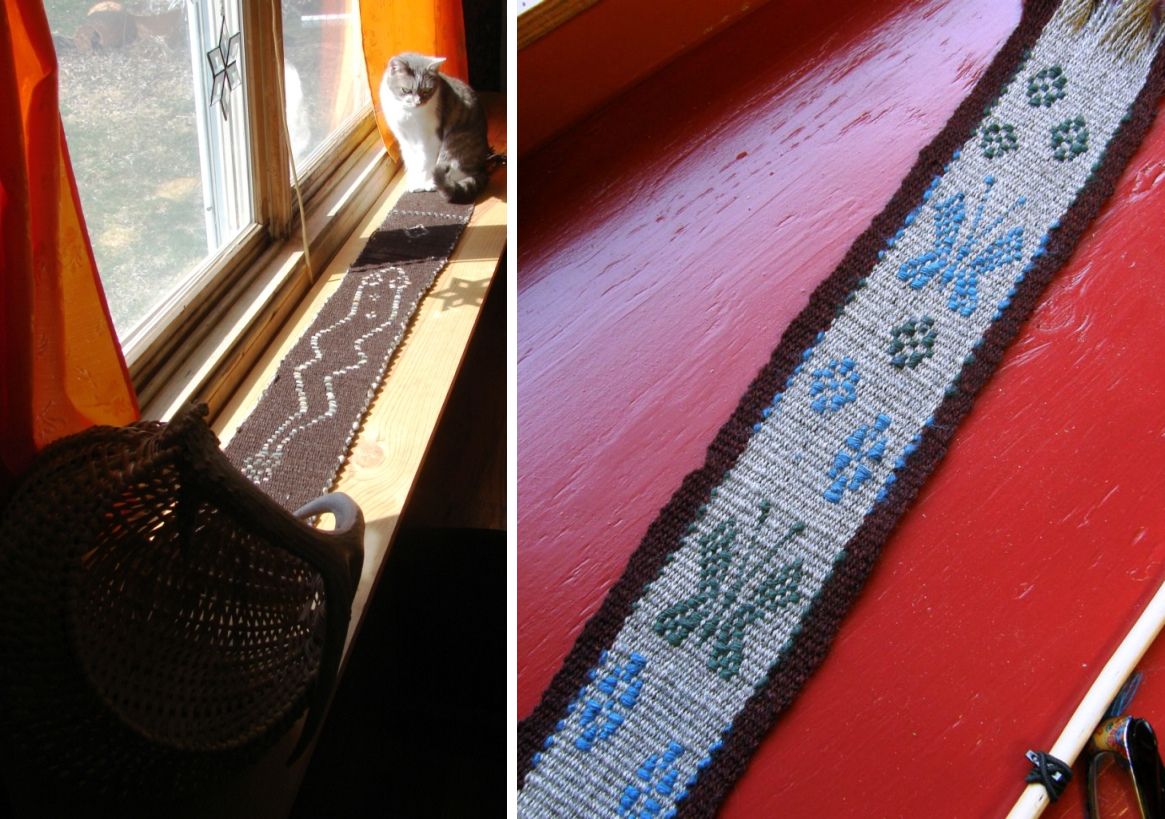
So, this was to be a cellphone pouch with supplementary weft patterning. I would never have thought of doing a piece in wool or fiber with this technique had it not been for Phil in our backstrap weaving Weave-Along on Ravelry who wove a band with his handspun which he decorated with a snake motif using his handspun as the supplementary weft. Then when I was staying with my friend Janet, who is an awesome spinner, I was further inspired when she wove a band with her handspun with silk supplementary wefts.

So, many thanks to Phil and Janet for giving me this idea.

And here is the finished cell phone pouch…

All the other pouches I have made have had flap closures. I decided on something different for this one and added a drawstring instead – an alpaca drawstring, of course!

The design is actually Indonesian. It was a scroll that repeated itself across the width of a piece that I saw at Convergence last year. I stacked the scroll and inverted it to make this new design.

The turns of the supplementary wefts are on the face of the weaving but are quite well camouflaged in the darker warp color. I dabbed glue on the supplementary weft ends as they exited on the back side of the piece. Again, the yarn is so sleek, I didn’t feel secure just cutting and leaving short ends as I would if I were working in cotton.

I am very happy with the way this turned out!

And that was the end of my alpaca yarn…now back to the spindle to make some more and just in time for the Tour de Fleece that starts this weekend.

I have quite a collection of cell phone pouch projects now influenced by Vietnamese hilltribe weavings, Central Asian yurt bands, Guarani designs and Indonesian textiles. Half of them have been given away. Hmmm…as I type I am getting ideas for a couple more!

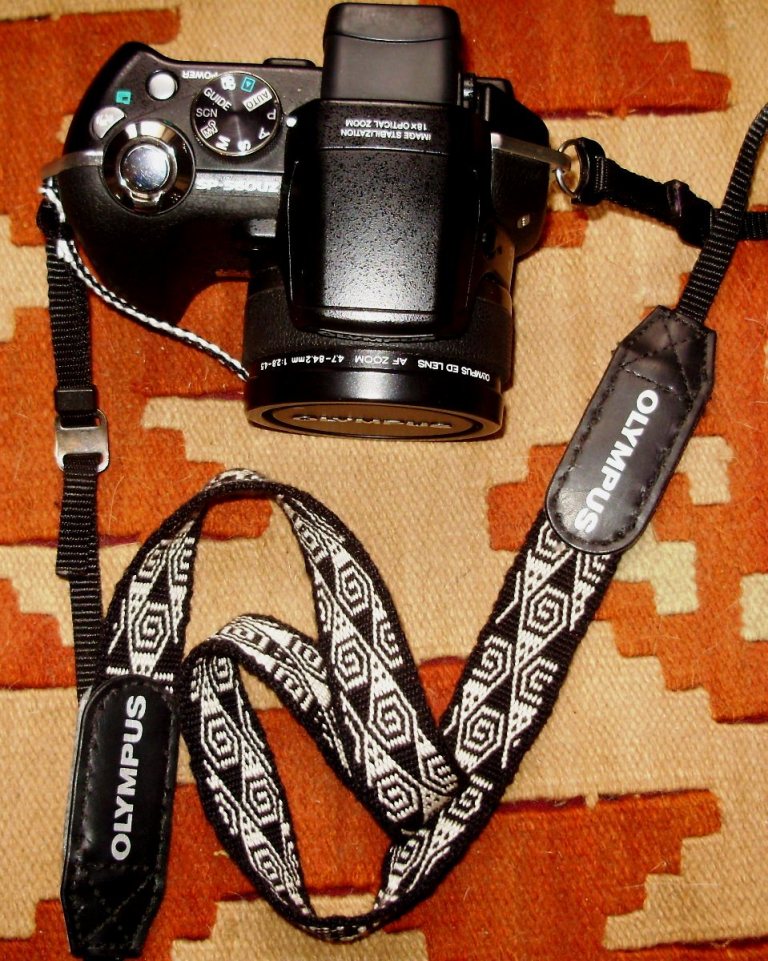
Last weekend I completely ignored my to-do list and launched myself into a new project. What brought this on? Some friends sent me pictures from my recent visit to the US and I realized that in almost every picture of me I was clutching my camera. I decided that my camera needs a bit of dressing up…well, to tell the truth, I probably do too but that ain’t gonna happen!

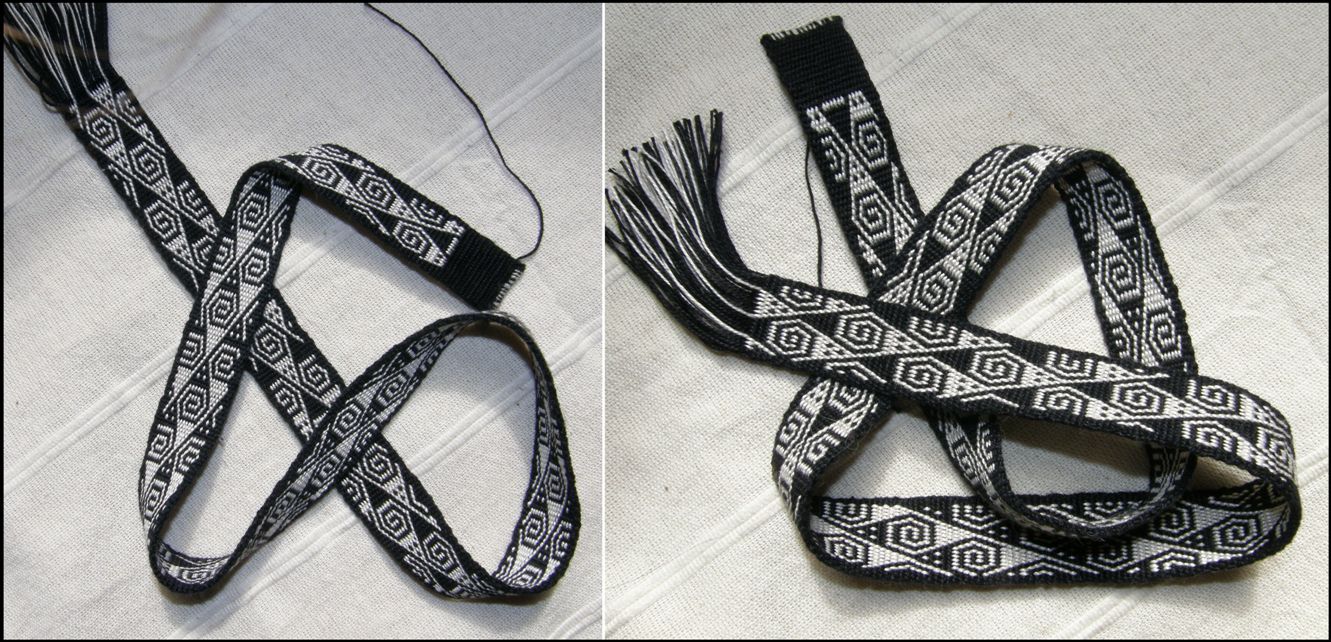
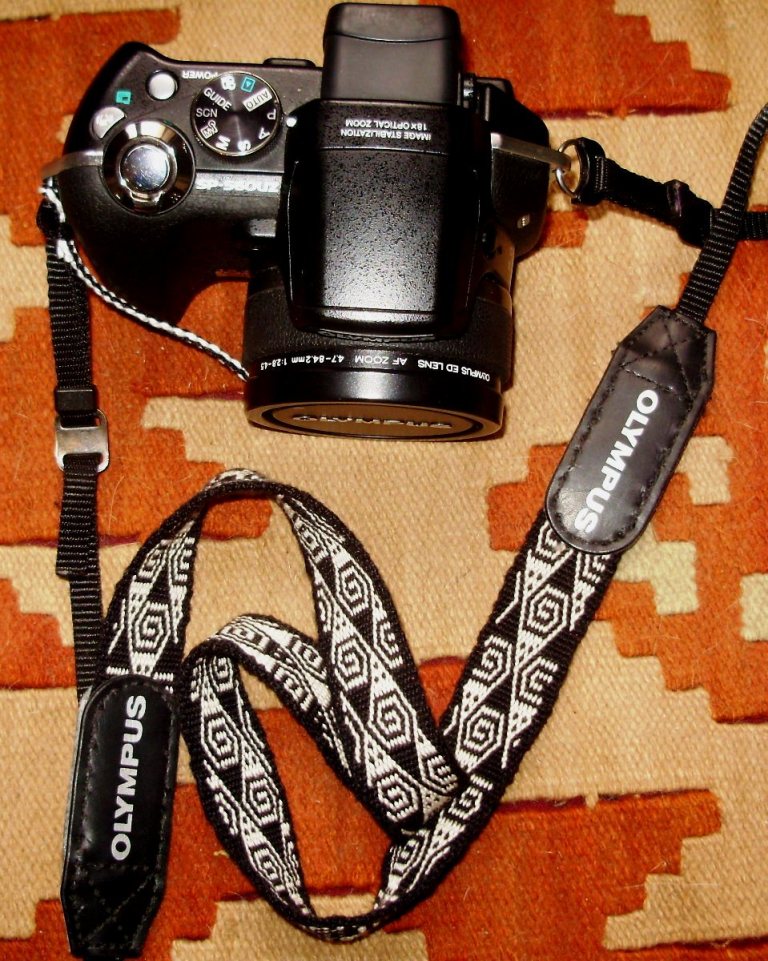
So, I wove a strap and braided a tie for the lense cap.

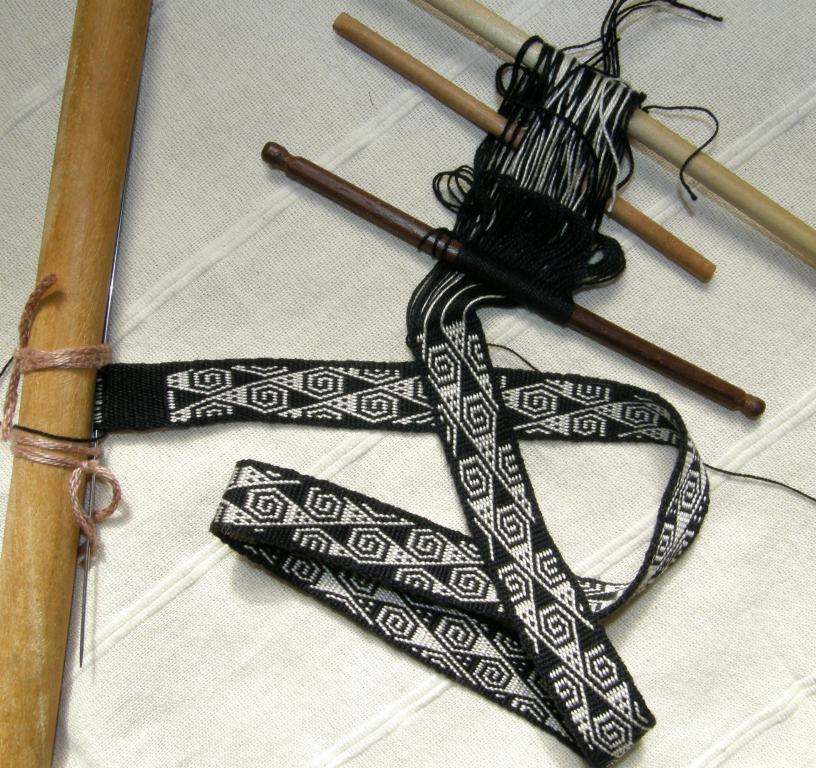
 I wove this in one-weft double weave and you can see that it is based on the float pattern that I used on the passport pouch I wove last week. I think that this design would also make a good project for warp substitution. Those of you  who have dabbled in warp substitution will know that one of the technique’s drawbacks is that you end up with long floats on the back but, if you are weaving an item where the back of the piece won’t be seen (unlike my camera strap project), the floats won’t matter.

Here is my dressed up camera…


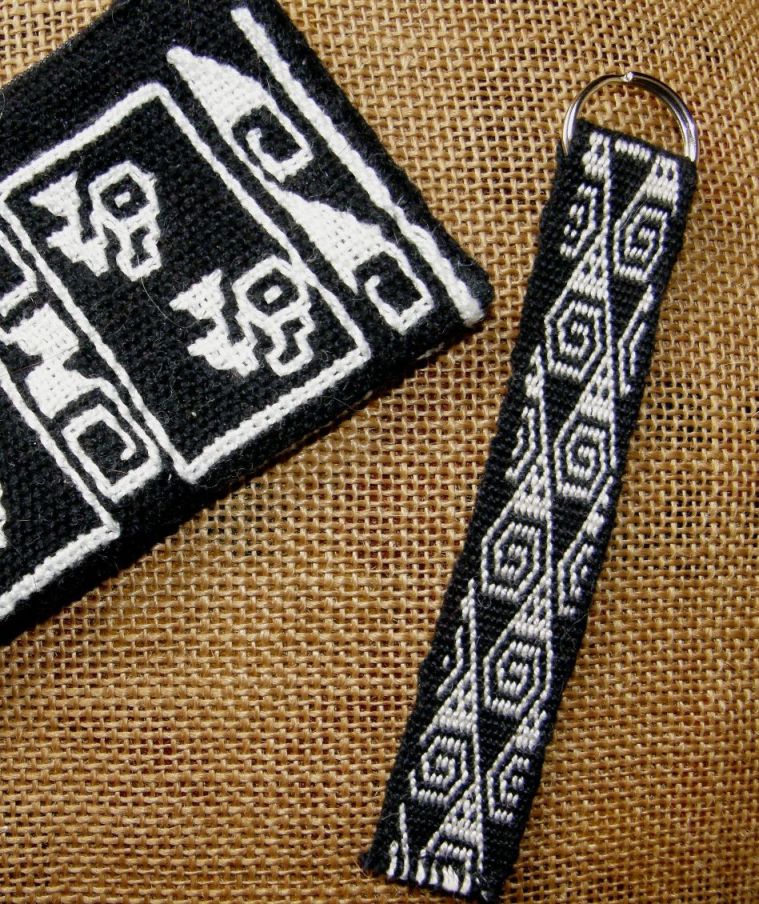
I wove more length than I needed for this strap and so made a keyfob from the left overs and you can see above that not much warp was wasted.

Actually I could have woven more but I had had enough of these swirls by that time!

I have added this double weave pattern chart to this page. Take my advice and extend the chart if you plan on weaving it.

The design did not repeat at all for the entire length of the band and it is easy to go on weaving and forget when to start weaving the design as it enters from the right edge. You need to weave a fair bit before the design starts sinking in.

I just hand stitched across the bottom to seal the end.

Let’s go back now to the original topic to show you a couple of nifty warping ideas from some of my online weaving buddies.

Sometimes you have to get creative according to your budget, your lifestyle or living situation…lack of space and considerations like that. Above left is Marsha’s new warping set up using long screws and drilled holes and segments that can be joined together to accommodate a variety of warp lengths. It all comes apart for travel. Marsha is a terrific DIY-er and is also making lovely beaters and pick up sticks so, you know where to go if you would like to have some made.

And now you will see what I mean about going to great lengths…

Tracy and her husband lugged a bed frame onto the roof of their home in Qatar. That looks like a great sturdy set up and adding extra stakes to that for four-stake warping should be easy. The two extra stakes don’t need to be firmly grounded. In fact, I have seen a picture of a weaver warping seated on the ground with the two extra stakes lodged between his toes.

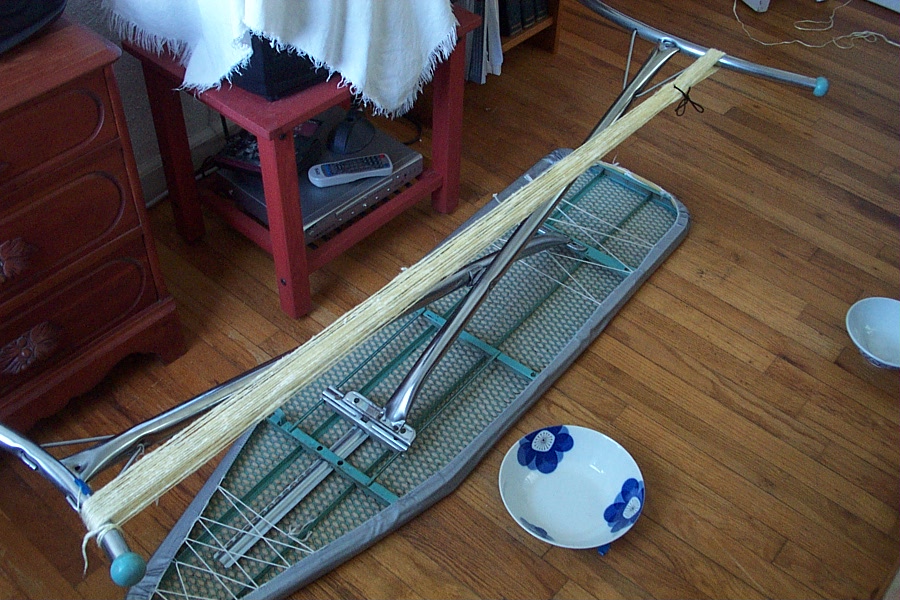
This set up was spotted today, by Dyggvi (from the Ravelry group) on this blog (it wasn’t wound for backstrap weaving)…Not sure about this being a good option as the legs look curved.

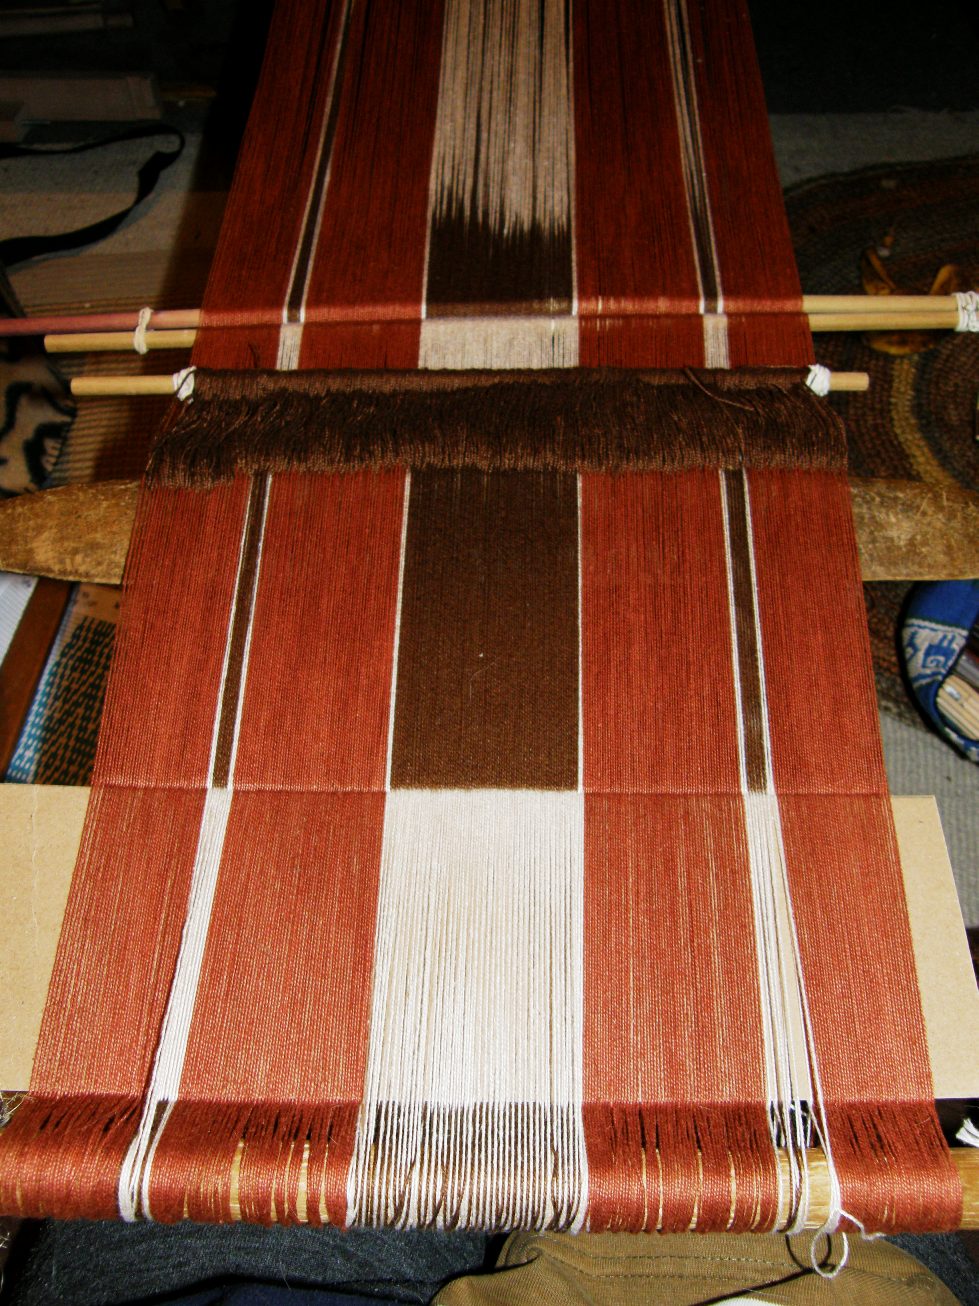
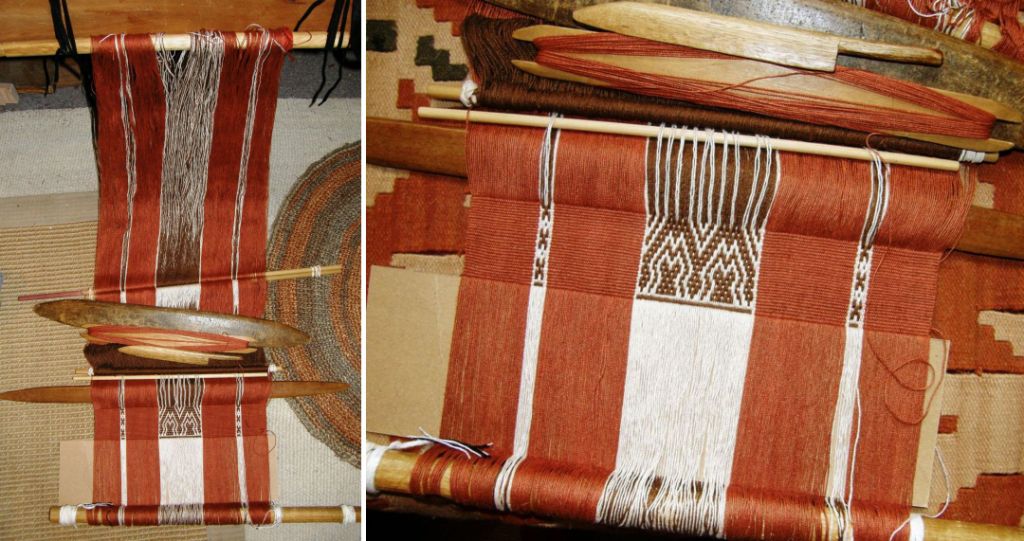
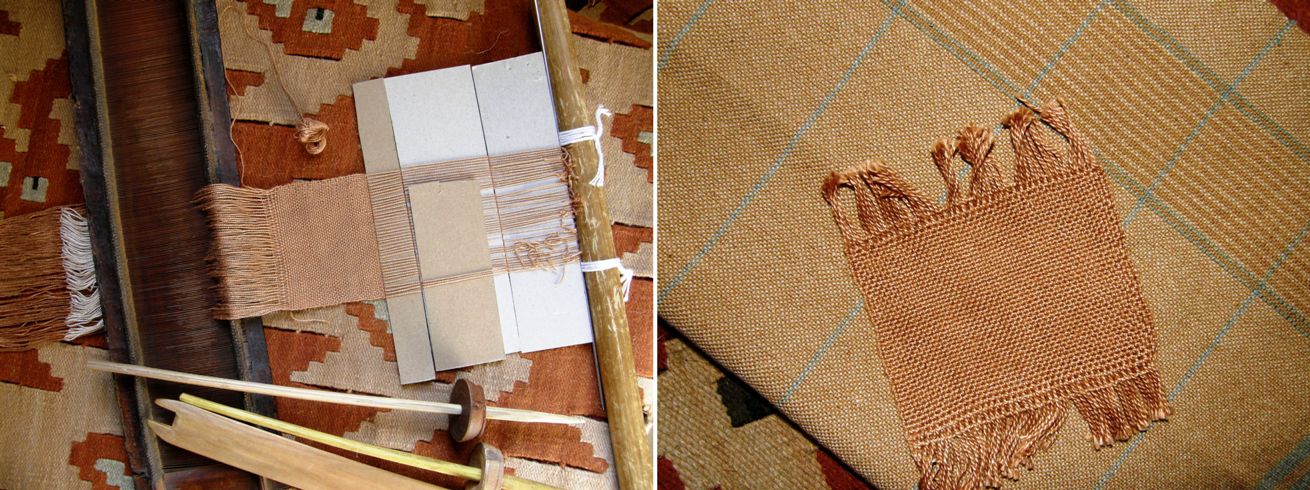
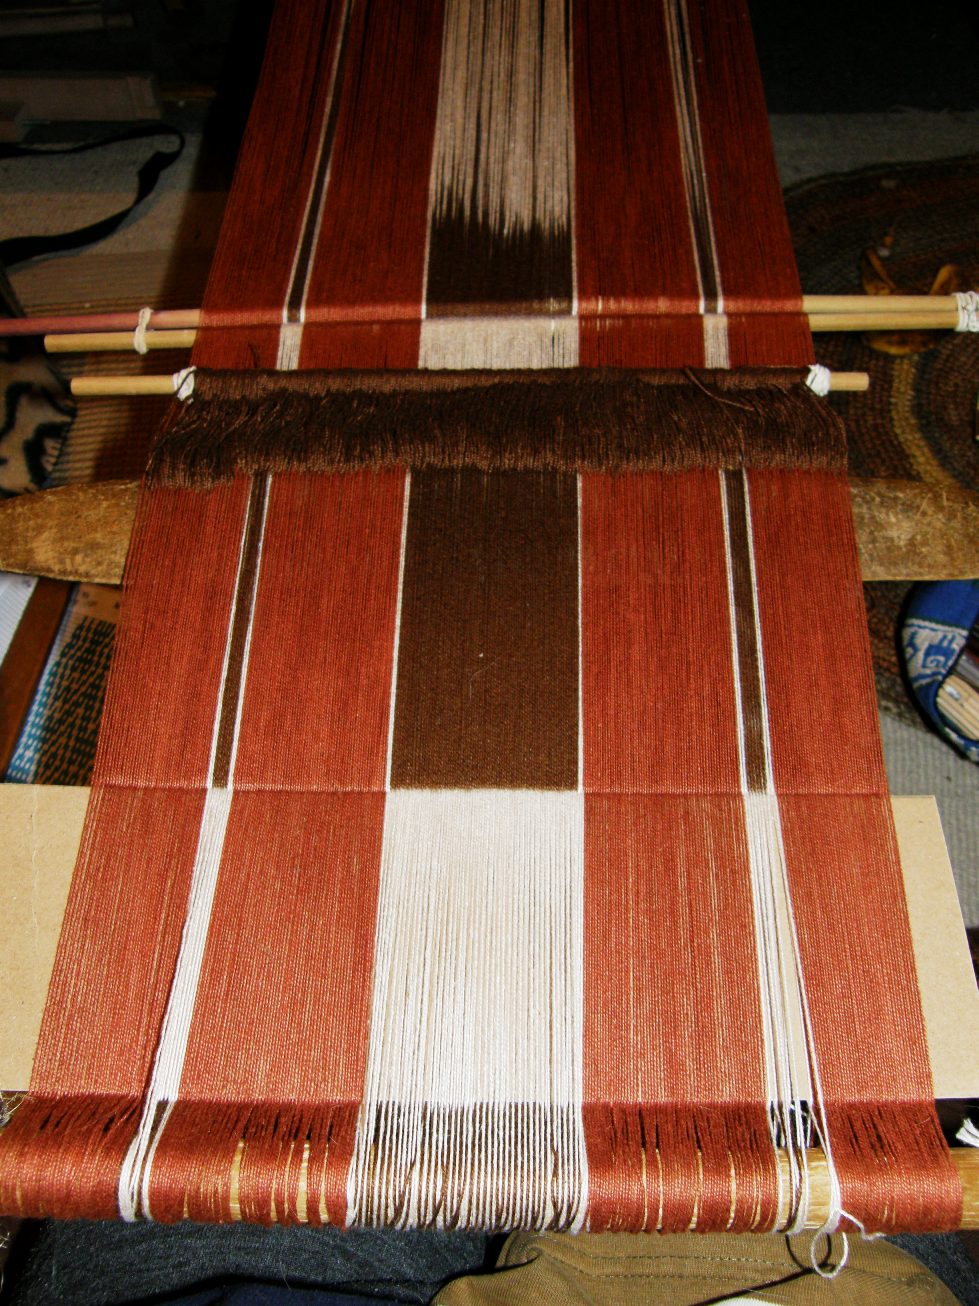
I warped up the widest piece I have done for a long time yesterday. It was warped in two sections and transferred to the loom bars. This will hopefully be the first of a set of four placemats all using the two-color warp float technique. Each one will be in a different color with a motif from a different culture.


I am leaving a pretty big fringe as I plan to twine a design on each end and will dye some of my Cebelia #20 thread brown for that (doesn’t seem to come in brown, does anyone know if that is a fact?)

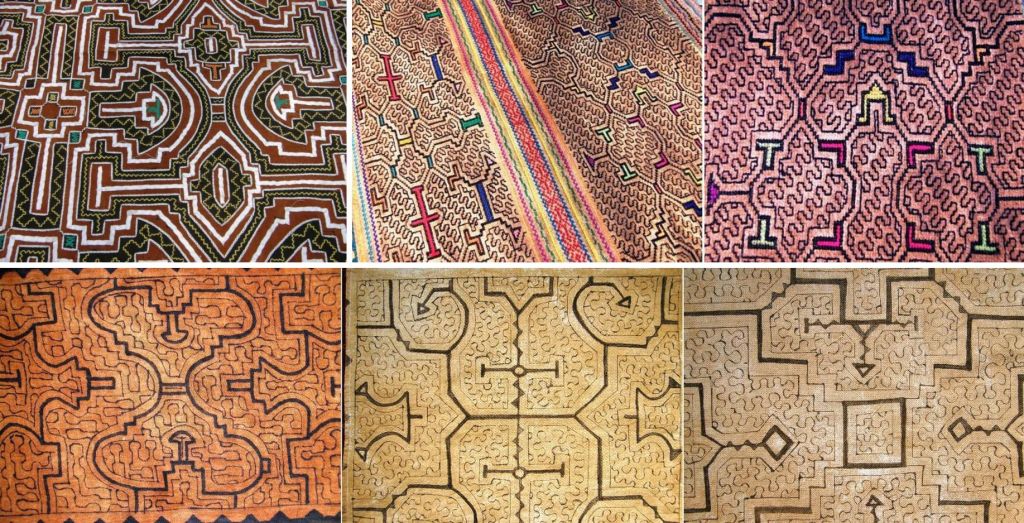
I am using that gorgeous terracotta brown color that I dyed last week which I wanted to have resemble the color of the Shipibo cloth pictured below left. The design is from what I am pretty sure is a Shipibo bag woven using the same technique. I have not seen many Shipibo textiles and have not traveled to the area of Peru where these people live but I have bought a few small pieces of their painted cloth and was shown some of their embroidered work by Yonat who has some of their textiles in her collection.

I would love to go and learn more about the Shipibo people and their work with textiles as these days I feel quite drawn to the weavings of the people of the lowland areas of this great continent which is very often neglected.

I would like to share a link with you which was sent to me by Yonat after the inclusion of some braids and Andean and Tibetan slings in my post last week. I definitely want to try some of those braids.

Also, Dyggvi, one of the group members on Ravelry, shared a couple of interesting links to images of backstrap weavers in Taiwan and their very unusual loom set up. The first picture in this link is of an Atayal weaver but there are backstrap weavers from other countries on that page too.

Tracy has written a blog post about the al’ouerjan weaving that is practiced by Bedouin weavers. It is a warp substutition technique and her post shows lots of lovely variations of the design.

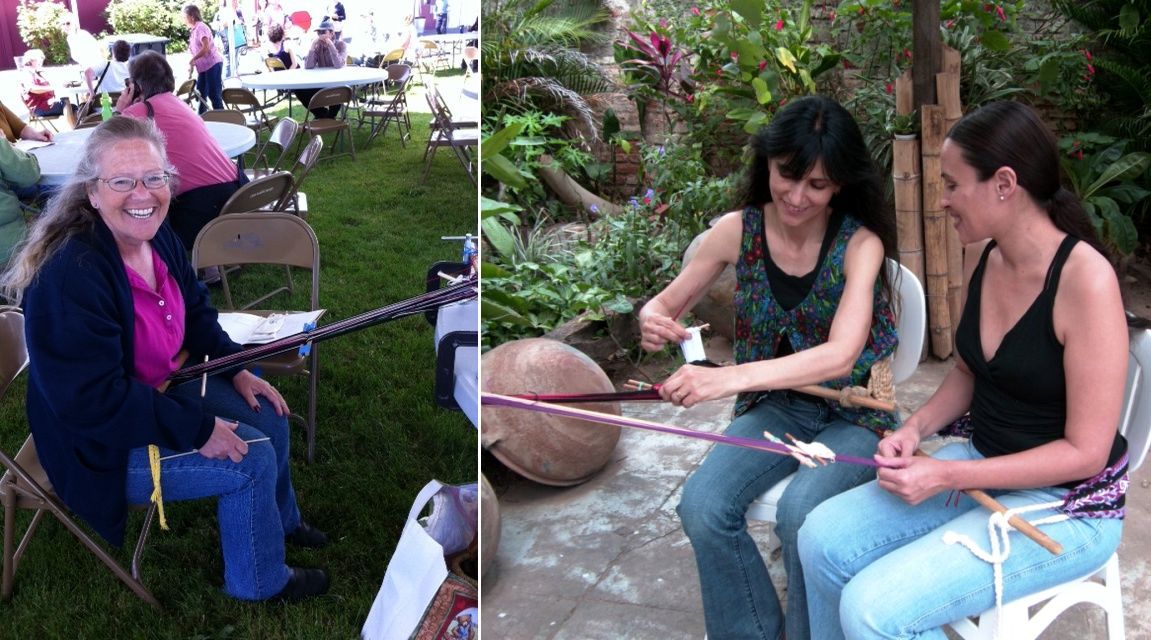
I will leave you here with some outdoor backstrap weaving shots from both sides of the equator….

That’s Bobbie at the Black Sheep Gathering in Eugene Oregon last weekend. She met up with Jennifer and Janet, a couple of other Ravelry backstrap weavers and they were able to spend some time together weaving. That’s the early Oregon summer, still a little cool in the shade. Here in Santa Cruz Bolivia we are in the depths of winter as you can see on the right! I spent an afternoon weaving in the patio at my friend Lalenya’s house. There are only about ten cold days in winter here and that wasn’t one of them!

Thanks to everyone who visited my Andean Pebble Weave Facebook page. I am constantly posting photos and bits and pieces there. I hope you will continue to drop by and hit the “like” button.

Backstrap Weaving – Colors from Camelids and Cotton

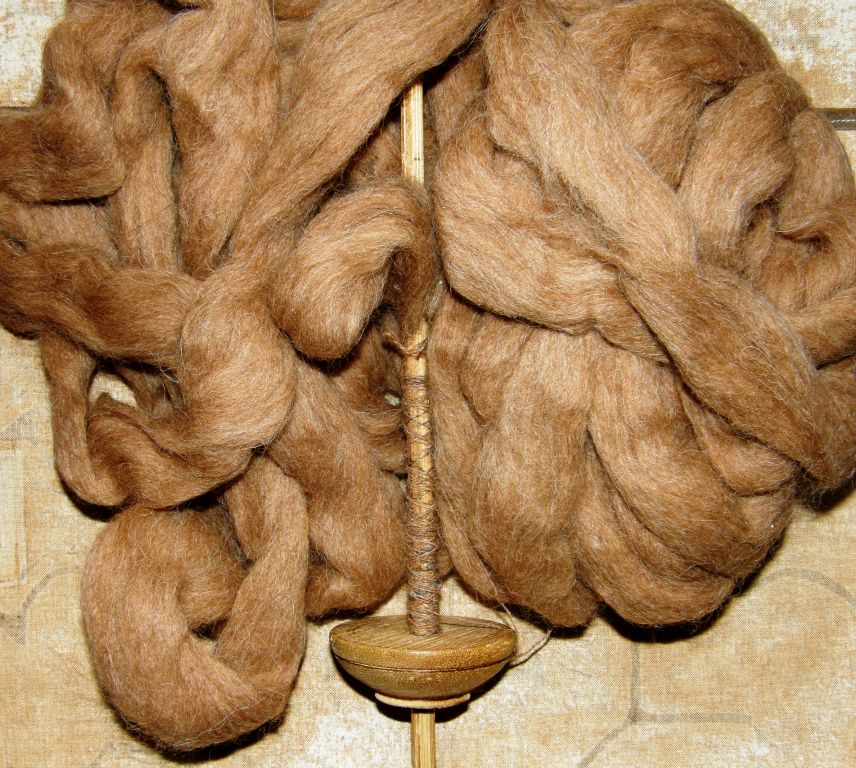
This week’s blog post is brought to you by these fine fellows…

and their beautiful fiber but also by…

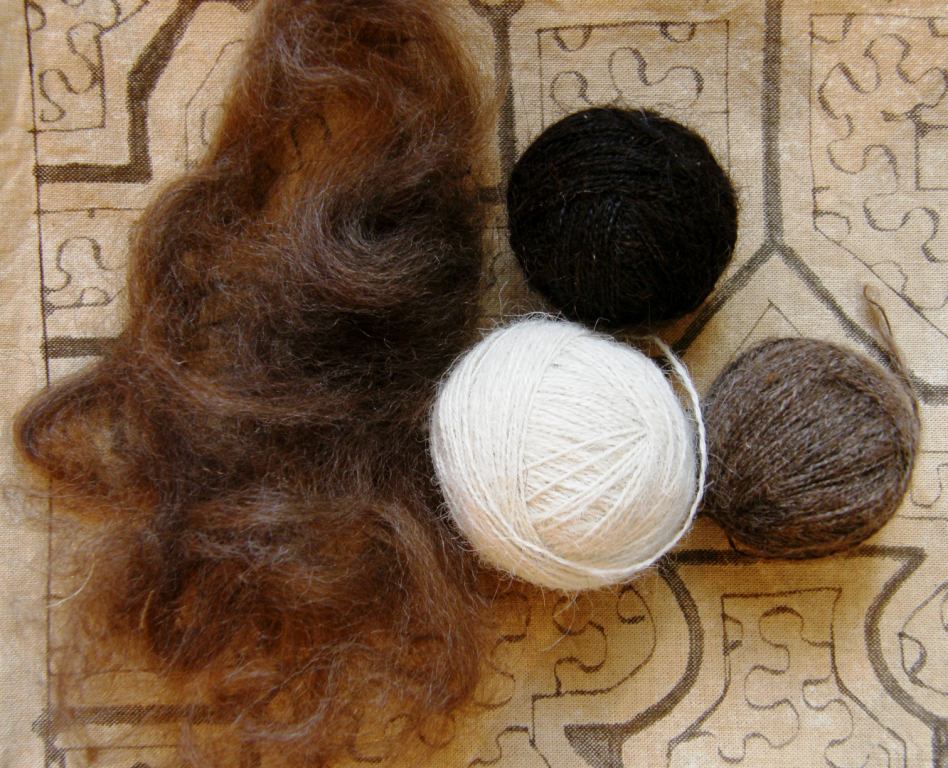
my friend Janet in northern California who gave me a ton of alpaca fiber last year, Celinda, an Aymara weaver who swapped some of her handspun alpaca yarn with me for one of my woven keyfobs and the weavers of Peru who got me started in spinning on drop spindles back on my first visit to Peru in 1996. I also have to thank Gladys Miller in Colorado who encouraged me to spin while she taught me about Navajo weaving in 1995.

Now I am thoroughly spoiled with this gorgeous alpaca fiber that Janet gave me. A lot of it was already beautifully prepared by Janet herself in her mill. For the stuff that hadn’t been prepared, all I had to do was tease the tips open using my hand carders.

Until now, all I had spun was wool that was readily available from the farms where I lived in Patagonia and llama fiber that I bought from  little villages outside of Uyuni, Bolivia many years ago…bags and bags of it which I have cleaned and carded, spun and even dyed to weave with as the years have gone by. I thought it was pretty good but now that I have had the experience with the alpaca fiber I look at the poor old llama stuff with a very critical eye…dry, coarse and filthy!

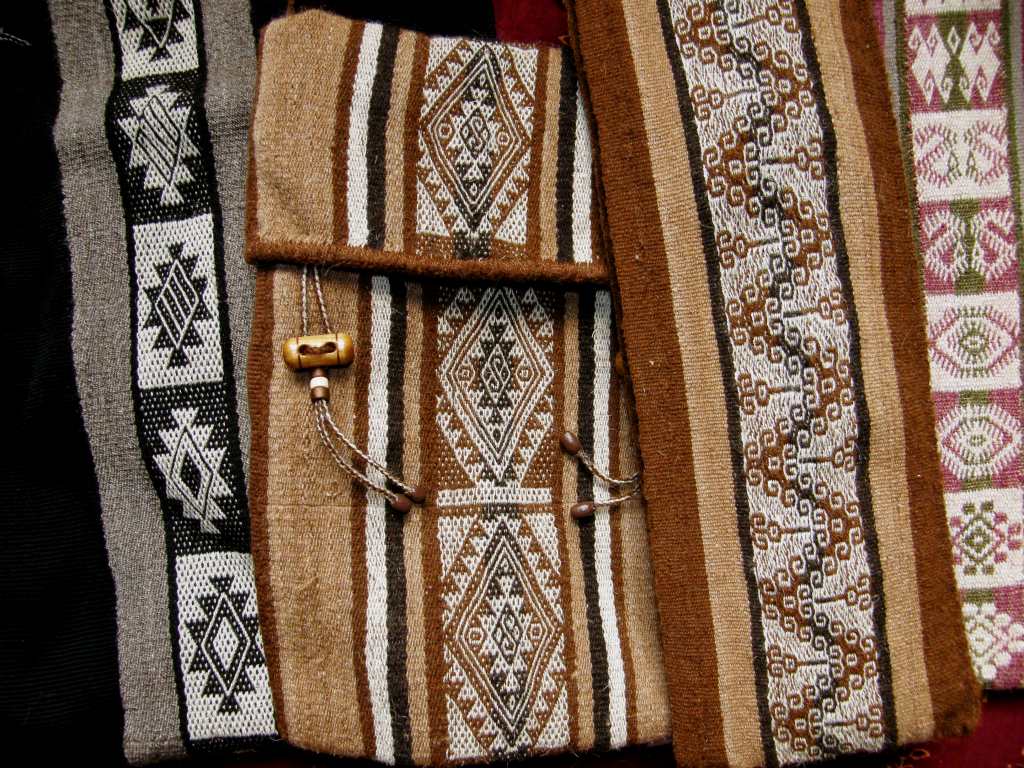
Nevertheless I did manage to weave some nice things with it…

And I also like to weave llamas although these guys were woven in cotton…

I still have tons of llama fiber left so I don’t want to get too spoiled!

So, I have spent some time lately spinning the alpaca mostly because we have been having a Spin-Along in the Backstrap Weaving Group on Ravelry with a lot of discussion about just how much over twist one needs to put into the yarn to make it suitable for warp-faced weaving on the backstrap loom. And this is where Celinda, the Aymara weaver from northern Chile came in. The yarn that she gave me was quite hairy and not heavily overspun. I wove with it and it was soft and luscious. That is how I wanted my yarn to be, not like the hard severely twisted llama thread I had been making.

And then it was down to the all-important sampling. Would it be too hairy to work with? Would it be a lot of really hard work clearing the sheds? Would it shred and would I have broken warps because the yarn couldn’t stand up to the abrasion of warp-faced weaving?

Thankfully, I didn’t get a “yes” response to any of the above questions. Of course, the sheds were more difficult to clear than those in a mercerized cotton warp but they were manageable. You can see the warp at rest above and the yarn is not curling up on itself. One thing I regret is my decision to use white weft as it did show through the brown a bit. I didn’t mind it showing at the edges as I knew that I was going to cover those with a tubular band. I used an alpaca weft that was balanced.

None of the warps broke but, then again, my warp was only 24″ long. The only problem I had was with some of the knots at the color changes which slipped undone as the yarn was so silky.

This is the alpaca warp for the tubular band and there it is being woven and sewn to the edge of the piece.

Now my passport gets to travel in first-class luxury even if I don’t. I made this sample piece into a passport pouch which is a vast improvement on the plastic wallet I have been using until now. It feels lovely!

Cutting the piece off the loom was the hardest part! There was still enough warp there to weave a little something. This was my precious handspun and I didn’t want to waste a bit but then I got the idea of using the leftover bits as supplementary wefts in another project and, with that in mind, I cut away.

Now with the Tour de Fleece approaching do I keep spinning the alpaca, go back to the nasty llama or take up the cotton?  Decisions…

Actually, I am thinking of spinning some heavier yarn from the llama fiber to use, as it often is up in the mountains, to make slings. Well, I probably won’t make a whole sling, although I have made one before with a teacher in Yanque, Peru using llama fiber. It would be nice to have yarn suitable for making the braids rather than the whole sling. This will be challenging as I have been aiming for fine thread all along and now I am not sure if I can spin thick.

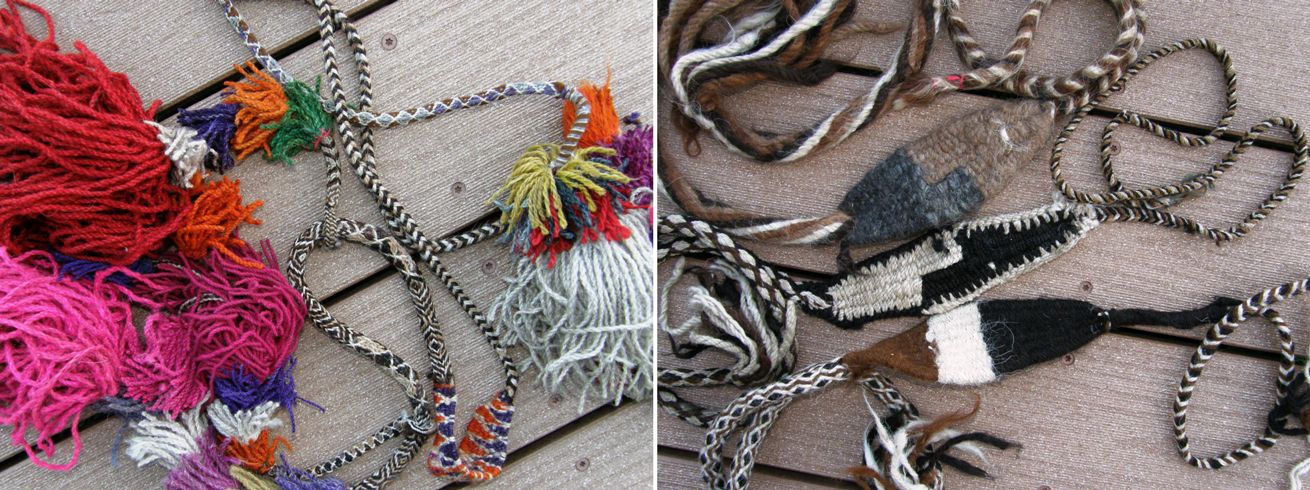
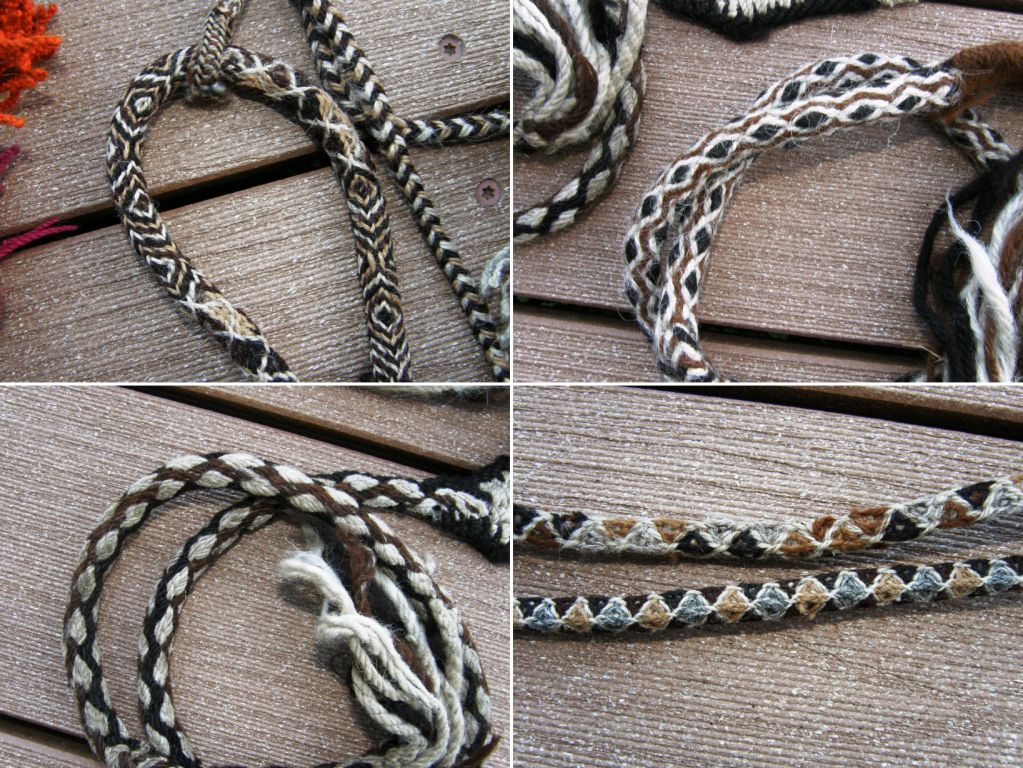
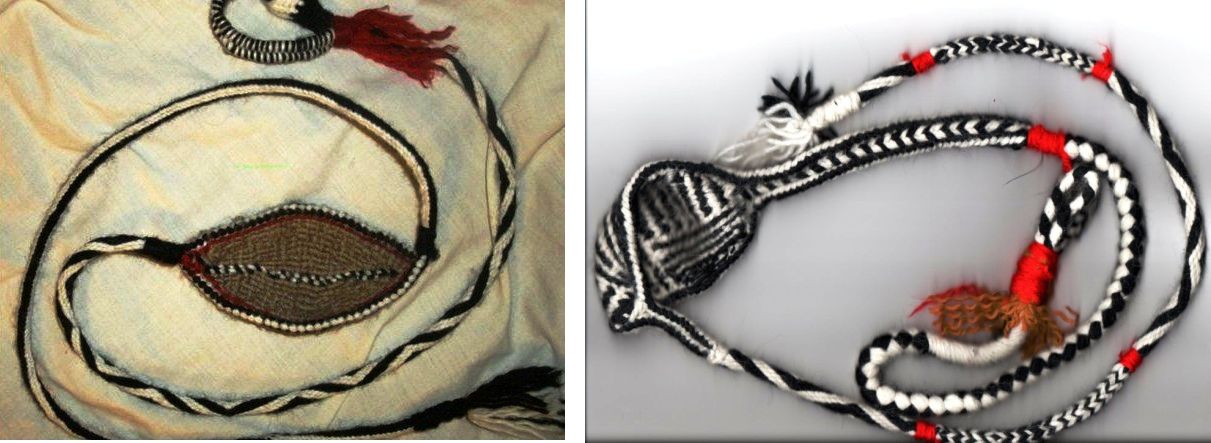
When I was in southern California, Martha shared her collection of South American textiles with me which included a number of beautiful Andean slings…

They have been made with such a variety of gorgeous braids and with the beautiful natural colors of the llama…

Ben Turner in Australia showed me two Tibetan style slings that he has constructed. While the cradles of the Andean slings that I have seen have been woven weft-faced, Ben tells me that Tibetan slings usually have twined, braided or felted cradles. The cradles of his two examples here have been twined.

I must ask him what yarn he uses for these.

And now on to cotton, the material most available to us “lowlanders” in Bolivia…

Another piece of sampling I did this week was using the bamboo reed on my backstrap loom. This was extremely clumsy especially with such a narrow piece but I will eventually come up with some kind of system for this. I am tenacious with these kinds of things and I am determined to make this work. I so rarely weave plain balanced cloth and I get ridiculously excited about it! I have a cotton shadow weave project in mind and later I would like to use some 10/2 tencel that I received in a swap to weave something.

This is all I have used the tencel for so far…a supplementary warp band, but I am hoping that there is enough contrast in the green and grey for shadow weave (I don’t have all that much of the ivory).

This experiment is with the cotton that I usually weave my warped-faced pieces with, more or less equivalent in size to the #10 crochet cotton that is available in the US. Above right you can see it wet finished and lying on top of a beautiful cotton dish towel that Betty Davenport wove. That towel is my inspiration and I can tell you right now that it won’t be going anywhere near a dish!

Betty wove this towel using cotton from Sally Fox Vreseis Ltd line of 10/2 in camel, coyote and green…all natural cotton colors! I had not heard of Sally Fox until Betty told me about her and her experiments with developing colored cottons (which reminds me that I did a spindle swap with a lady in the US who sent me natural green and caramel cotton sliver…must get down to spinning that).

Betty has a collection of small skeins of cotton in an incredible range of natural colors…all kinds of browns, greens and even a mauve from Peru. Some of the skeins come from Sally Fox’s experimental supply when she first started developing her standard colors. There are reddish-browns from Guatemala and dark browns from Peru as well as colors from some of the US southern states.

So, a four-shaft shadow weave with my nifty reed in place will be an up-and-coming project.

Well, until someone comes up with a natural terracotta-colored cotton, I have no choice but to dye some. So, this week I dyed some of my crochet cotton with the Dylon Terracotta Brown dye. The color is perfect! It is exactly what I was wanting for my Shipibo piece so that will be on the loom this weekend too.

That is the color below on the string heddles…yummy!

The Ravelry gang continues to weave and spin…

Naomi has tacked three plain warp-faced pieces together for cutting and sewing into a zippered bag. She is also weaving a pebble weave strap for another bag project.

Amber finished her pencil pouch. She wove the fabric for this using the simple warp float technique. Jennifer is piecing together a bag patterned with pebble weave motifs.

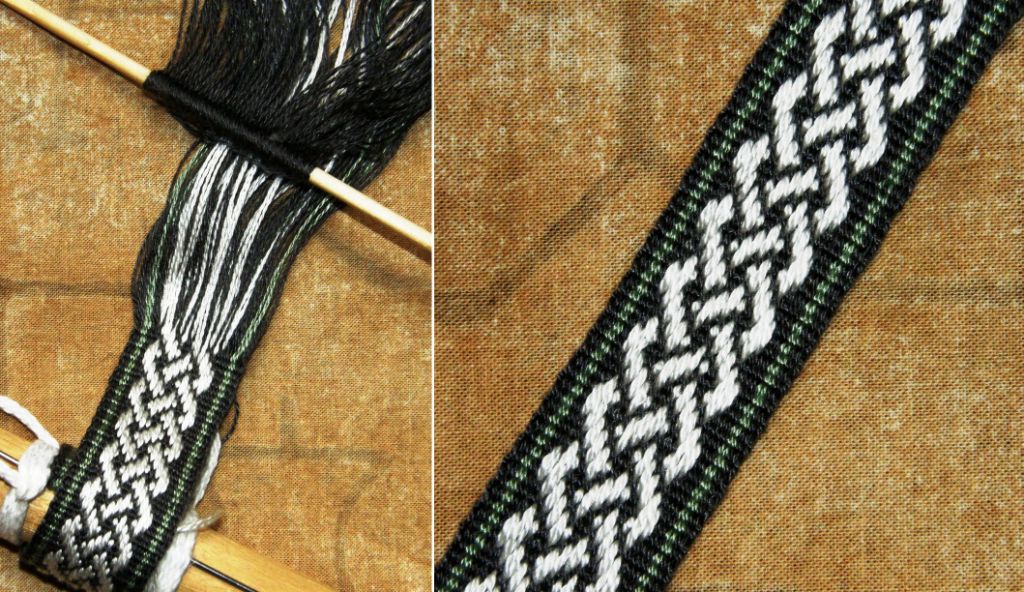
Tracy wove a sample band for the traditional Bedouin al’ouerjan technique which is simple and stunning. I have added some information about this to the warp substitution tutorial page which will be more meaningful to those of you who have already followed the initial instructions on that page. Helena in Brazil kindly provided a link to a pdf by Joy Totah Hilden, author of the book on Bedouin weaving pictured in Tracy’s picture, in which the draft for the al’ouerjan structure is provided on the last page.

After Jennifer and Tracy’s beautiful weavings I have no more fear of putting red and blue together! They have given me the courage to get that red and blue Central Asian piece I have been planning underway soon.

####################################################

And finally, I have a wee favor to ask of you all…I just started a page on Facebook for my Andean Pebble Weave book and would love it if you would take a moment to go there and hit the “like” button. Things like this could really help me in my future publishing endeavors.

I have a few exciting things on the drawing board. 😉

#####################################################

Backstrap Weaving – There is no one “right” way

THERE’S NO ONE “RIGHT” WAY….and A NEW TUTORIAL

I went to visit Angela again (see last week’s post) one morning this week to see how she has been progressing on her wall hanging and give her copies of some of the photos I had taken during the previous visit.

She had several projects going at once and was very pleased as she had just been given an order for 1500 woven greeting cards from her regular Christmas customer. Now she is planning a trip to her hometown of Isoso to organize the other weavers there to help complete the order. She told me that when she took on this task last year she had been able to weave ten cards a day.  Imagine!

The smaller of her two looms is occupied with this gorgeous wall hanging which I watched her warp on my last visit. As I told you last week, the designs that the Guarani women weave in the Moisy technique are nothing like anything you will see anywhere else in Bolivia.

And here is something else she is working on in the Moisy technique…


The band says Centro Cultural Boliviano Americano which is the institute where I taught English for eleven years. The teachers are wearing these around their necks to hold their ID cards. Gee, I wish we had had these when I was there! The band includes a small snake skin design. There are over sixty teachers there and so I imagine that this task is keeping her somewhat occupied as well!

Lettering! I was excited to see that but haven’t taken a good enough photo to get a really detailed look.  I think I will ask her to weave me an alphabet band if she ever has the time!

Another thing about which I am very tickled is that she has put one of her sets of heddles on a stick (see photo above). She had asked me to teach her how to do it on my last visit and now here she is using it. If you watched the pick up video in my last blog post you will see that opening the lower of the three sheds is a little tedious with the loose string heddles that she makes. So now she is using the stick on this lower heddle with the extra hitch as I showed her.

The actual stick that she is using as her heddle stick is a large wooden needle which she uses to pass the weft when she is weaving a four-selvedge piece. When she is closing the final piece of weaving and there is very little room in which to manipulate the sheds, she passes the weft under and over each warp with this needle until there is so little room that she has to use a regular steel needle. I loved this needle and, as she has three, she offered to sell me one.

And then I remembered to ask her about spinning. Yes, of course she knows how to spin cotton and she had a tiny bit of cotton to demonstrate. Just a touch of saliva on the spindle tip got her started. Of course, she is usually seated when she spins. This was just a quick demo. She told me that in Isoso both white and brown cotton is still cultivated (there is not a single boll to be found around Santa Cruz although it used to be a very large and important cotton growing area) and that several women still spin and ply their own cotton and carry their spindles about with them when they are plying.

However, she told me that those who grow the cotton are very careful to keep their hold on the small market and won’t sell it with the seeds. Sounds good to me! Deseeding cotton is not a fun task. I did a bit of that in Ecuador although it was fun there as we sat together in a chatty group and worked.

Angela’s whorl is plastic and a spindle that I bought years ago from the store where she used to work has what appears to be a piece of the sole of a shoe as its whorl. However she tells me that in Isoso, clay whorls are used. Guess what I have asked her to bring me from Isoso when she returns next Wednesday.

Above you can see the spindle I bought here in the city. The shaft is essentially the same as that on Angela’s spindle. I love the little knob carved into its end.

I also took home the yellow and black sample pebble weave band that Angela was warping up in the video that I put in last week’s post. She has warped this and set up the heddles quite differently to the way I was taught in Peru and so I can take a closer look at it now at home.

And this is kind of what I am alluding to in the title of this post. There is no one “right” way to do these things and I am constantly astounded by the similarities and differences I see in the way people are setting up their looms and weaving as I travel around. I had never seen anyone make string heddles the way Angela does and she was keen to learn the way I had been taught by my Navajo weaving teacher years ago. There is always room to learn something new and adapt your techniques. I am looking forward to a chance to try Angela’s way of doing pick up. It doesn’t work on the backstrap loom, believe me I tried it!

I wish I could do a tutorial on all the ways I have been shown to make string heddles so that you can try them all and see which way you prefer. Making the string heddles takes practice…string and fingers all over the place and then you just get them done and find that there are some that are woefully short…

I ran into Jamie’s blog last weekend where she had been battling to make string heddles following my video. It’s a good thing that resourceful Jamie came up with her own solution to the problem, made some heddles and wove a pebble weave piece.

Above right you can see the individual string heddles that she made and successfully used on her warp. She says that this way is much faster. Well, I had to tease her about that because I disagree 🙂 but I can definitely see that these are much easier in that you get guaranteed even length heddles. If you are an inkle weaver you probably already have a bunch of these heddles lying around that you can use. If you don’t, Jamie made a nice tutorial on her blog showing you how to make them.

Above left you can see Helena’s (telarahna on Weavolution) solution with her nifty re-useable heddles. She says she needs to clean them after a project as bits of yarn fluff adheres to them but then they are good to go.

So, if you have been trying to make heddles the way I have shown it here and have been getting frustrated, there you have two nice solutions. Try different ways and see which you prefer and, as Jamie so rightly says in her blog, it’s easy “once you get the hang of it”.

Speaking of “getting the hang of ” something, I spent a great part of last weekend trying to get the hang of tubular woven bands and am pleased to say that I succeeded!…eventually.

This is kind of my warm up for the tinkuy (gathering of weavers) which I will be attending in Cusco next week. I signed up for a class on tubular woven bands but, as it is only a morning session I have doubts about whether we will have time to cover the tubular band that I really want to learn.

I used Adele Cahlander’s booklet pictured above. It is still available out there for under ten dollars. I have had this book for at least thirteen years and have never made the tubular bands. I guess I tried at one point as I have scribblings in the margins and have penciled in the colors that I was using but it seems I gave up as I have nothing to show for it.

The book has two versions of the band that I wanted to make. One has a sequence of six steps and the other eight. The problem is that there is not a picture of what the six-step version is supposed to look like. It is in fact a slightly imperfect version of the eight-step one and I spent a lot of time trying to figure out why my six-step band did not look like the bands on the cover of the book. I did not feel encouraged to try the eight-step version if I could not even get the simpler version right but in the end I decided I would just go ahead and try it.
In the pictures above you can see the eight-step version on the left. See how it has two neat diamonds enclosing a center spot. In the six-step version the diamonds are not quite so neat and well defined, they overlap and cross and they actually get progressively messier as you proceed. This is just so you know what to expect if you buy the book and have a go yourselves.

Once I had this sorted I had the crazy urge to edge everything I could get my hands on with this tubular braid! I learned a tubular braid here in Bolivia many years ago but it is a very much simplified version of this one and looks nowhere near as nice.

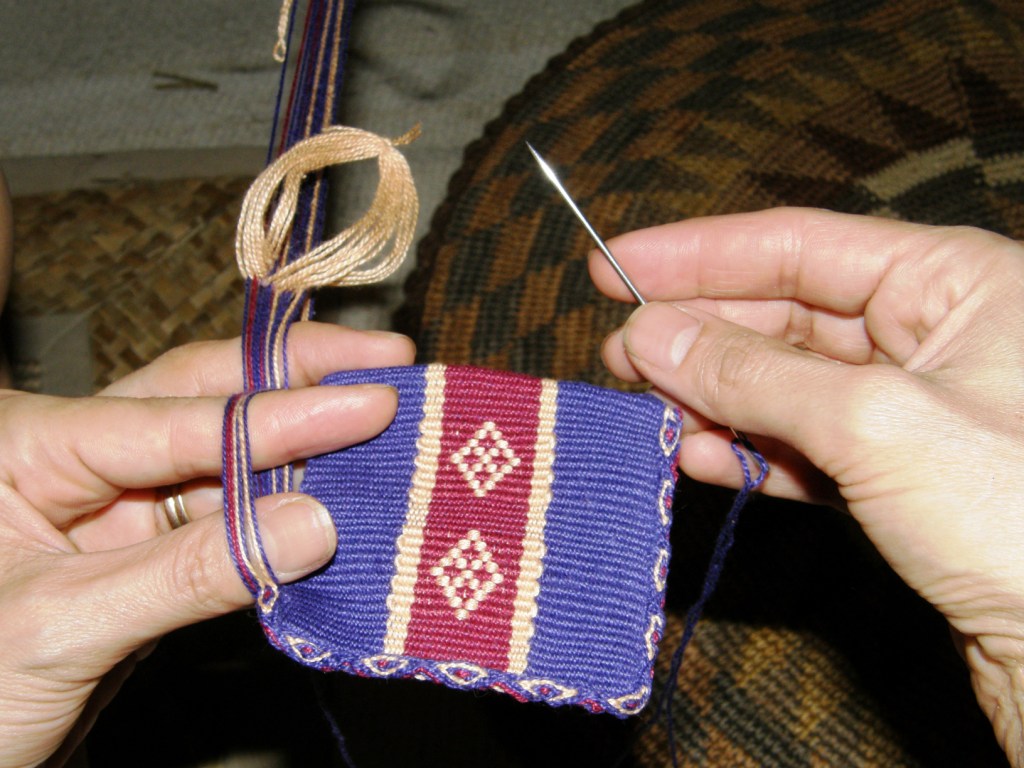
This is one of those bands that are generally simultaneously woven and sewn to the edge of a textile using the weft as the sewing thread. So this is what I did with my Tarahumara bag and I love it!

I was so excited about having learned how to make these bands that I could have quite easily dug out everything I have woven and edged them all with them . But I resisted and decided to weave a miniature piece where I could put several finishing techniques to use. The Cahlander book also has instructions for crossed warp bands which are very interesting. So I decided to make  a small amulet type of bag, edge it with a tubular band and make a crossed warp band as a strap.

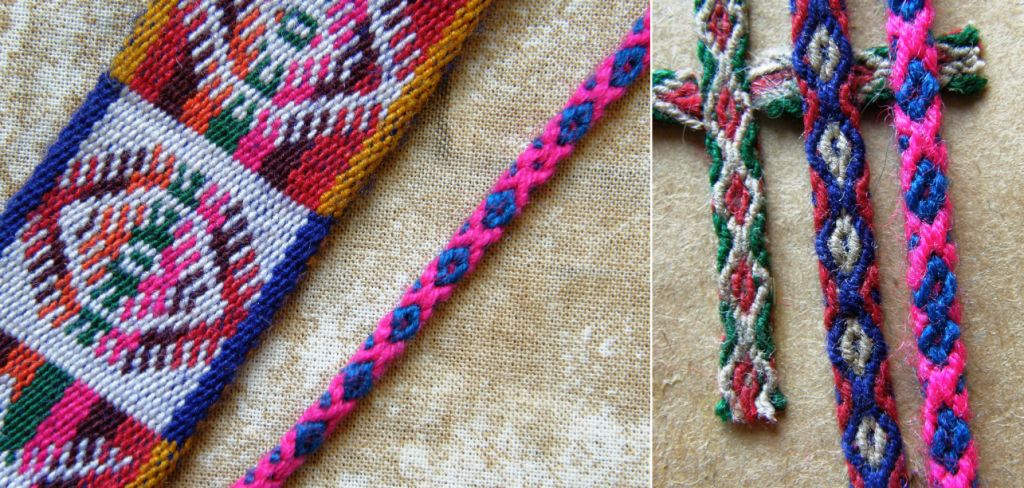
Crossed warp bands are used here in Bolivia as ties on the ends of belts like the one from Potosi seen above left and as chin straps for hats like the two wider bands on the right.

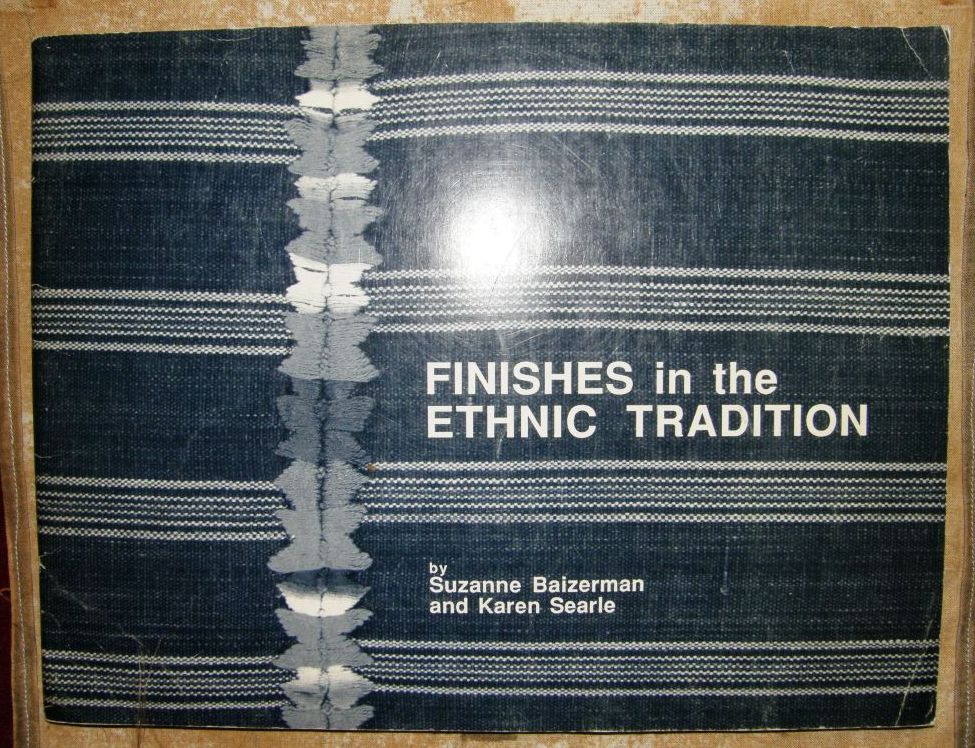
And then I fished out Karen Searle and Suzanne Baizerman’s wonderful work on finishing techniques and found the instructions for Bolivian pompoms I had made years ago to decorate my zampoña.

This book is full of all kinds of useful finishing techniques from around the world

First I had to brush up on the crossed warp techniques.

Then I wove the wee bag. I decided to keep it simple and warped up for plain warp faced weave so I could weave in a small motif with a supplementary weft (see the tutorial here).

A very simple design and there’s the pattern chart for you if you would like to use it.

Next I wove and sewed on the tubular band.

And I had fun making and attaching the tiny Bolivian pompoms.

But darn, I didn’t have time to make the crossed warp band for the strap so I have just placed thread there in the photo so you can get the idea. I am thinking of doing cross knit looping as an edging for the top of the bag too. Now I am mad for not thinking about this earlier. I think that these would have made nice gifts to take to the tinkuy- bags covered with little Bolivian techniques (although the suplementary weft motif is not Bolivian).

However I did find time to put together a NEW TUTORIAL. This one is on warp faced weaving with warp substitution which is the technique I used to weave the band with Bedouin designs that I showed you a couple of weeks ago.

Below is the sample band I wove in order to put together a set of instructions for you.

This is a great stepping stone to one-weft double weave.

You will learn the kind of pick up you need to do for one-weft double weave without having to deal with the extra manipulations and steps involved with weaving the doubled layers.

If you are interested in Bedouin weaving Helena (telarahna on Weavolution) gave me a link to an article by Joy Totah Hilden, author of the book on Bedouin weaving from which I got a lot of these designs.

Alaa (weave2 on weavolution and Ravelry) also gave me two great links to follow on this topic here and here.

And for the Spanish-speaking visitors to my blog, I have put up one tutorial so far in Spanish – the one on simple warp floats (although I haven’t found a way to say “simple warp floats” in Spanish. The literal translation sounds ridiculous!). There is a tab on the header photo and side bar.

Para las personas que hablan español he traducido el primero de los tutoriales que puedan ver aqui. De vez en cuando pueden chequear haciendo “click” en la pestaña “tutoriales en español” en la parte de arriba de la pagina. Alli podran ver si he traducido algun otro tutorial mas.

I may have time to squeeze in one more post before I go to Cusco on November 4th, but if you don’t hear from me you will know where I am 🙂