Backstrap Weaving – New Challenges: Wider, Longer, Finer.

While doing some house keeping in my album of weavings on Facebook, I came across a picture I took of the first red, black and white wall hanging I made entitled “Starry Night”. My caption read that I was weaving this in order to push myself beyond my current width comfort zone. That was a nice reminder as I am now on the third piece of similar width in this series and I have to say that I feel very comfortable with this width now! Seems that I need to go wider.

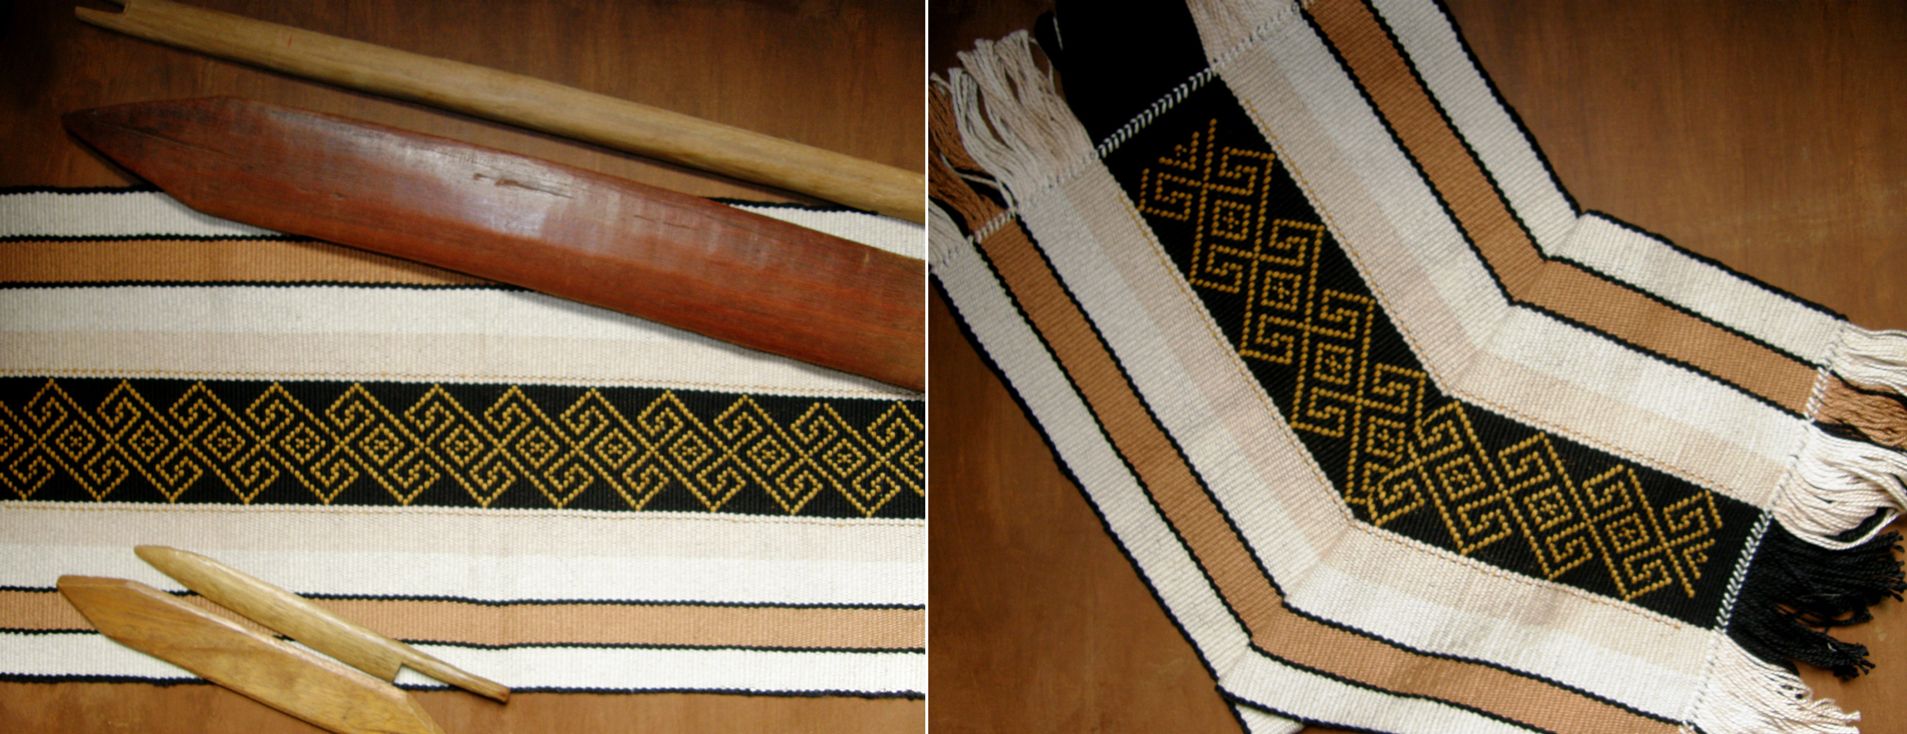
The first two pieces in the wall hanging series
The first two pieces in the wall hanging series.

Here is where I stand with piece number three. That snake continues to slither its way up the cloth.

O

The pick-up is a piece of cake now…really! There’s nothing like repetition to firmly embed a design in your head and fingers. It began with lots of tedious chart reading which was made a lot easier with the use of removable highlighter tape. Then I played a favorite game…read the cloth and guess what comes next. Then, before passing the weft, sneak a peek at the chart to see if you are correct. Next comes reading the cloth, deciding what comes next and going for it. Beat, pass the weft and then look at the cloth, not at the chart, to see if you were correct. Eventually you reach that chart-free happy place.

But then….you finish the weaving, you start something entirely new with a totally different structure and the fun begins again!

As for going wider….there are still quite a few more pieces I want to make in this current series, but when I do get to the point when I am ready to break out of the old comfort zone, I will need some new equipment…longer loom bars for a start. I already have some pretty long swords.  I would also love to have the kind of backstrap that some of the weavers in Peru use.

Chiclayo and Santiago Atitlan

With its two sets of straps, it was designed to accommodate different widths of weaving.

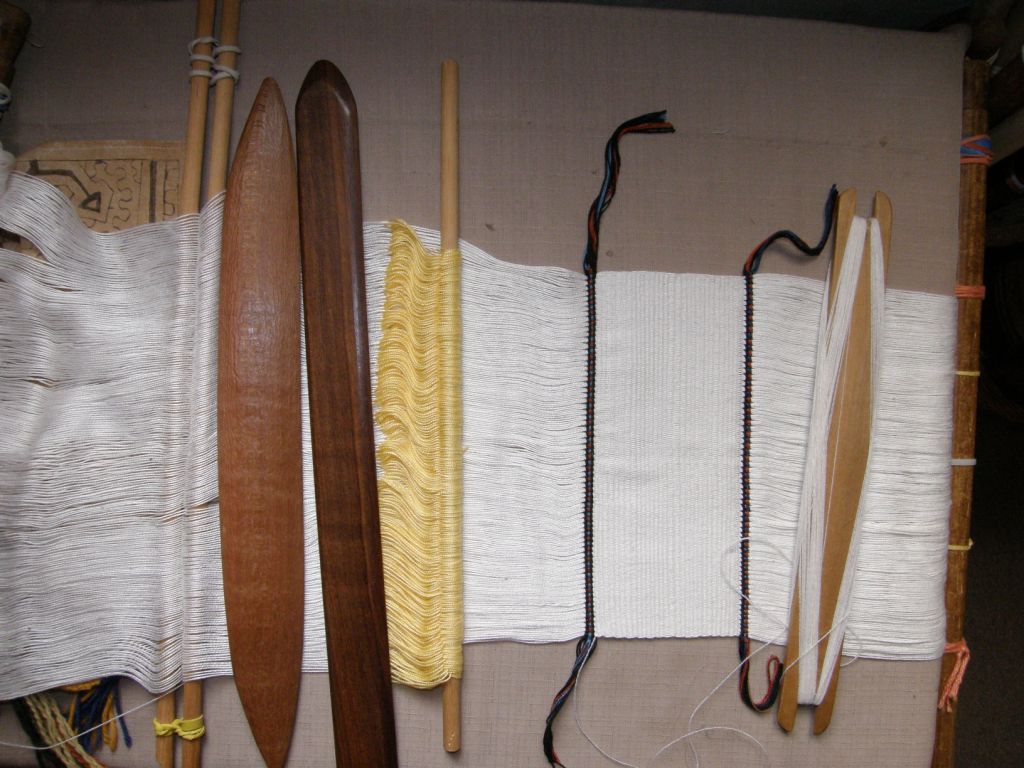
And, I would like to weave longer pieces. The scarf that I recently made had me extended to the limits of my weaving space. I rolled up part of the warp at the far loom bar but I really prefer to have the warp unrolled at full stretch.

backstrap warp for scarf project

There was just enough space to put my cushion and sit with my back against the closet door. So, if I am to go longer, it is a simple matter of using a circular warp. I have woven on these kinds of warps on a few occasions. Anyone who does inkle weaving certainly knows about circular warps.
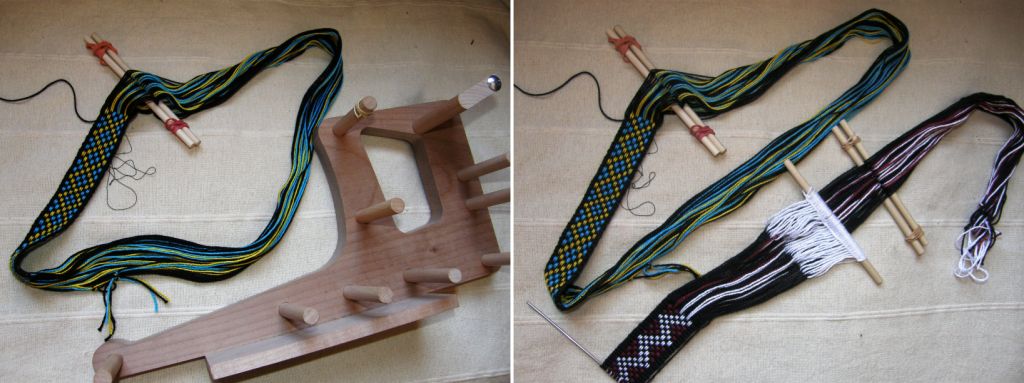
circular-and-single-plane-warps

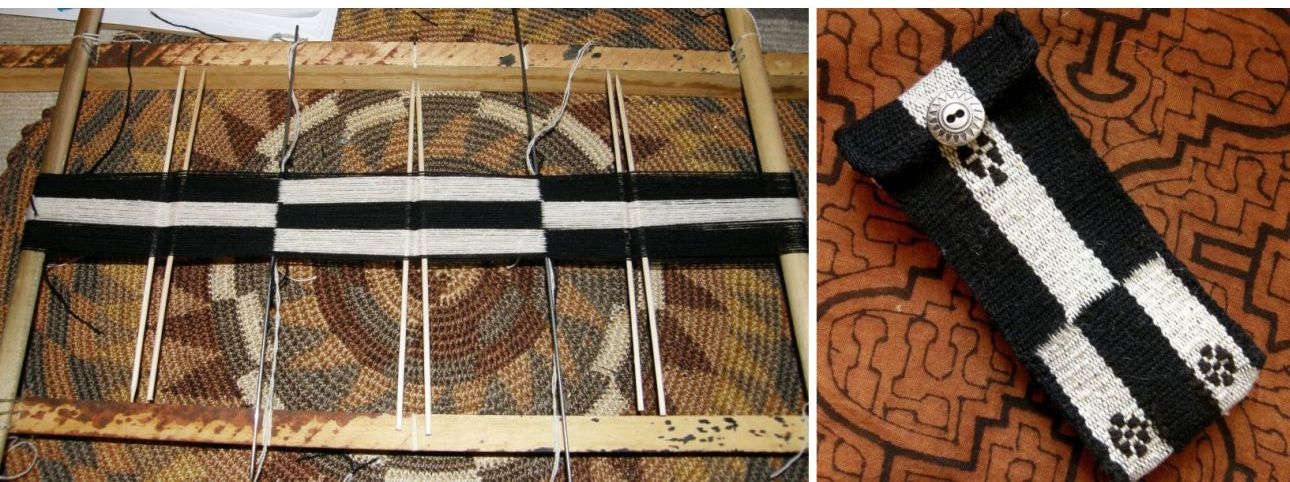
The pictures above show a band on which I was working on my inkle loom. The warp is a complete circle. The black band next to it has been warped in a single plane in the same way as the long black scarf warp. Once weaving is finished, the circular warp is cut apart and the band can be extended to its full length.

The Montagnard weavers with whom I studied use circular warps for their long blanket and skirt panels.

montagnard weaver opening heddle shedYou can see Ju Nie above weaving the top part of her circular warp.

Probably the most time I spent weaving on a circular warp was when I learned to weave the typical belt of Salasaca, Ecuador. My teacher, Felipe, wove on his narrow front porch and his way of setting up a circular warp allowed him to sit and weave the very long belt even in that small space.
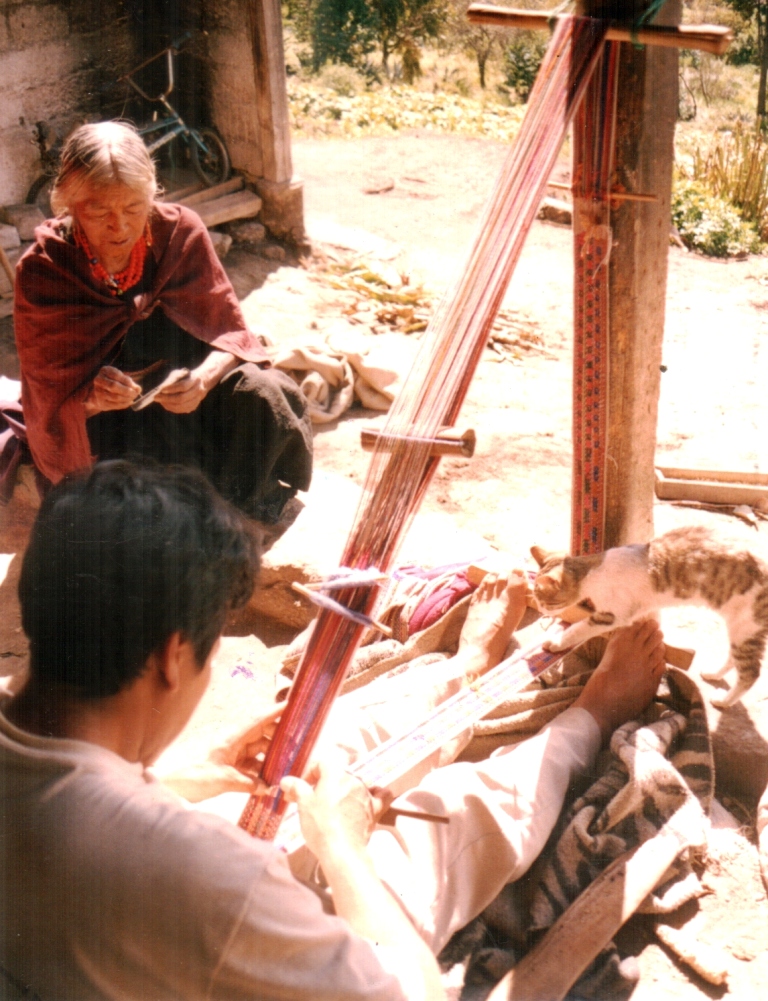
dovetail warp Salasaca Ecuador

Felipe’s belt will not have to be cut once the weaving is finished. He has warped in what is known as “dovetail”  fashion.

dovetail warp set-up

The following diagram will show you how he is using five of the six sticks you can see in the above picture to wind the warp for the white ground weave. The stick marked with the red arrow is the one around which the warps “dovetail”. When weaving is finished, the stick will be removed and the belt can be opened out. You can see the dovetail stick in the photo of Felipe weaving. It is in the section of  band that lies along the porch post.

dovetail warping path

And, if you are wondering about the sixth stick…that stick is used to hold the colored supplementary warps. Salasacan belts are woven in a supplementary-warp technique.

my salasaca belt

The diagram above shows the path of the white warps in the ground weave. The following diagram shows the path of the colored supplementary warps. In Salasaca, the supplementary warps all go together in a heddle of their own rather than being split between the two ground weave sheds.

dovetail warp path 2

angela-and-hammock-loomYou can see that when the dovetail stick or cord is removed, the end loops of the warp will stay intact. The loops can be very useful for finishing the woven item.

Guaraní hammock weavers here in Santa Cruz use the dovetail warping method and use the intact end loops for attaching the cords from which the hammock will be suspended.

So, longer warps are on the drawing board for me which will mean building a new warping board or modifying my existing ones.

I would really like to have a set-up like Felipe’s. Too bad I don’t have a porch on which to sit (and, yes, the view was lovely from there). I have seen pictures and videos of many Asian weavers with similar “triangular” set-ups. I will have to see into which wall I can drill holes in a place where I can still get good light! The idea of raising my bed way up high to give myself more space is gaining more and more merit.

The third challenge is to use finer yarn and I am already in training for that with my scarf projects made from Guatemalan cotton. I have a ball of fabulous indigo-dyed silk that an English teaching colleague brought back for me from Japan years ago. It is heavier than the 60/2 silk that I have been using as supplementary weft and I think that it is a good weight for a first large silk weaving experiment.
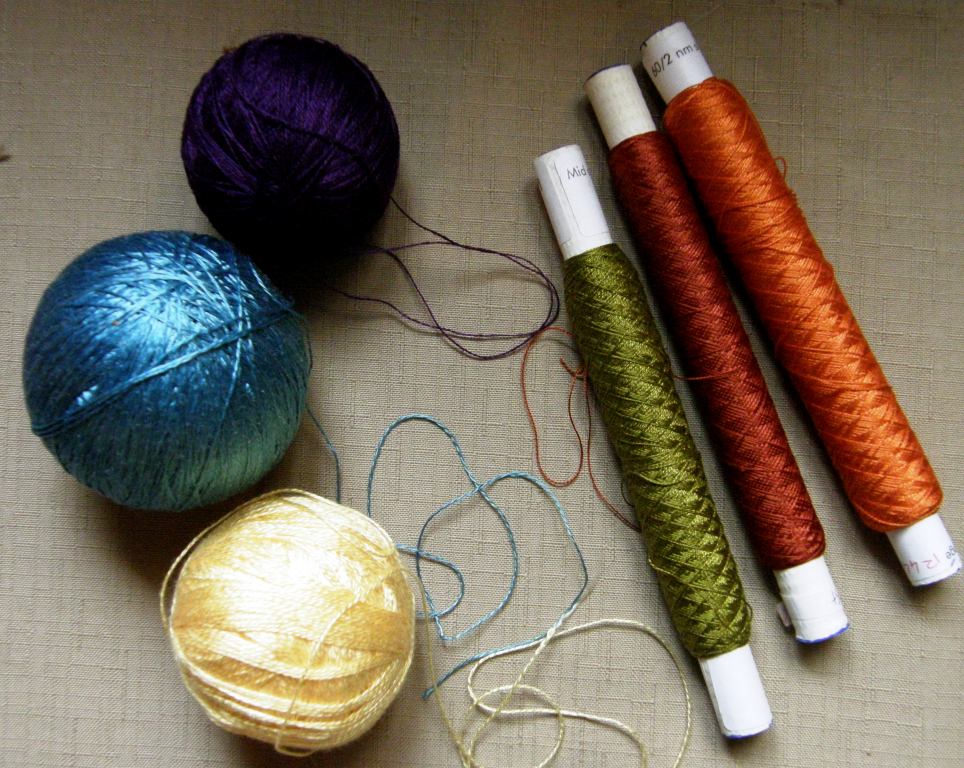
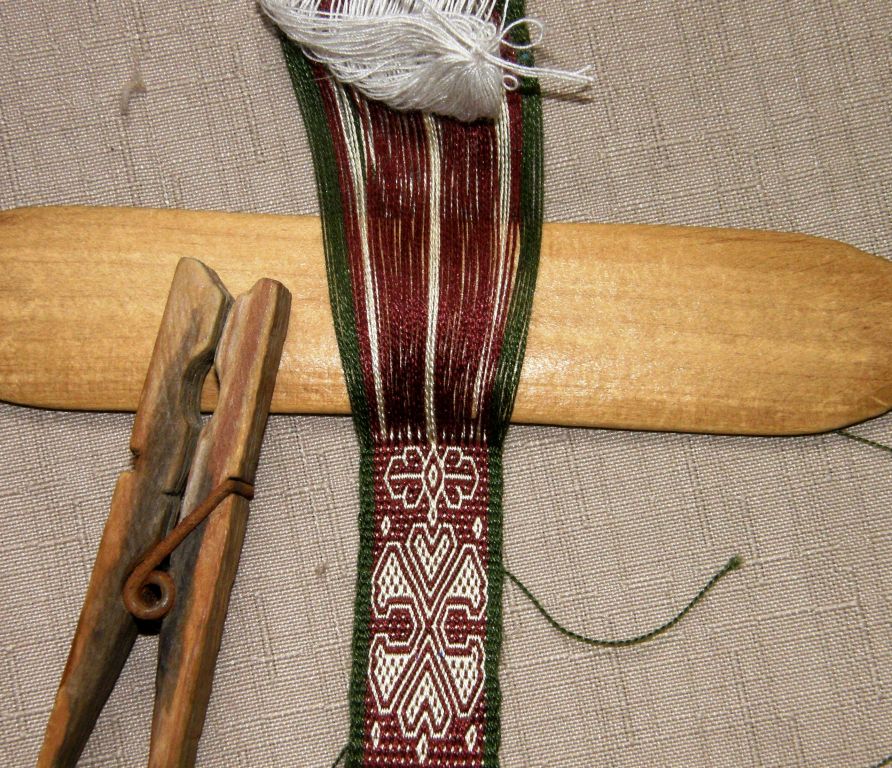
Light blue Japanese silk, spools of 60/2 silk, yellow 8/2 tencel and purple Guatemalan cotton.

pebble weave with silkHowever, this doesn’t mean an end to band weaving! I love weaving bands just for the pure fun of it and don’t care if I don’t have a particular use for them.

Narrow bands are a good way to test new yarn or check the proportions of a newly charted motif.

I love weaving miniatures too and have already used the 60/2 silk in a small pebble weave band (at left) to test the yarn, check how difficult it might be to see for doing pick-up as well as to try out a new pebble weave motif.

Band weaving for me is also a nice way to take a break from large pieces on which I might be working…only 16 threads to pick up rather than the 286 in my current project and I can attach to a toe and weave on the sofa.

Much of last year was spent finishing my second book which involved a lot of weaving of samples… mostly bands and a few larger pieces. I have buckets of bands here! They won’t be made into anything. Some of them are very useful in that they travel to my workshops and make good teaching tools.

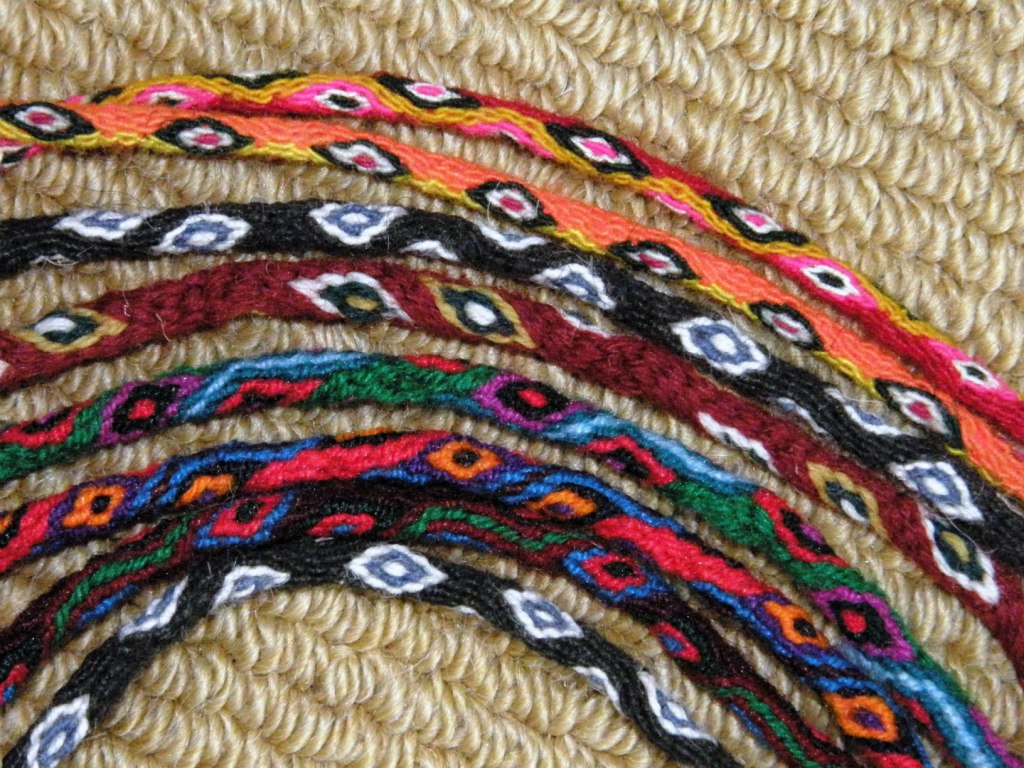
I took this next idea from my friend Yonat who put together a display of her inkle bands to photograph. I  put together a few of the bands that went into my book last year. They are of different widths and lengths…some barely two inches long… and so, my display is not as pretty and uniform and Yonat’s.
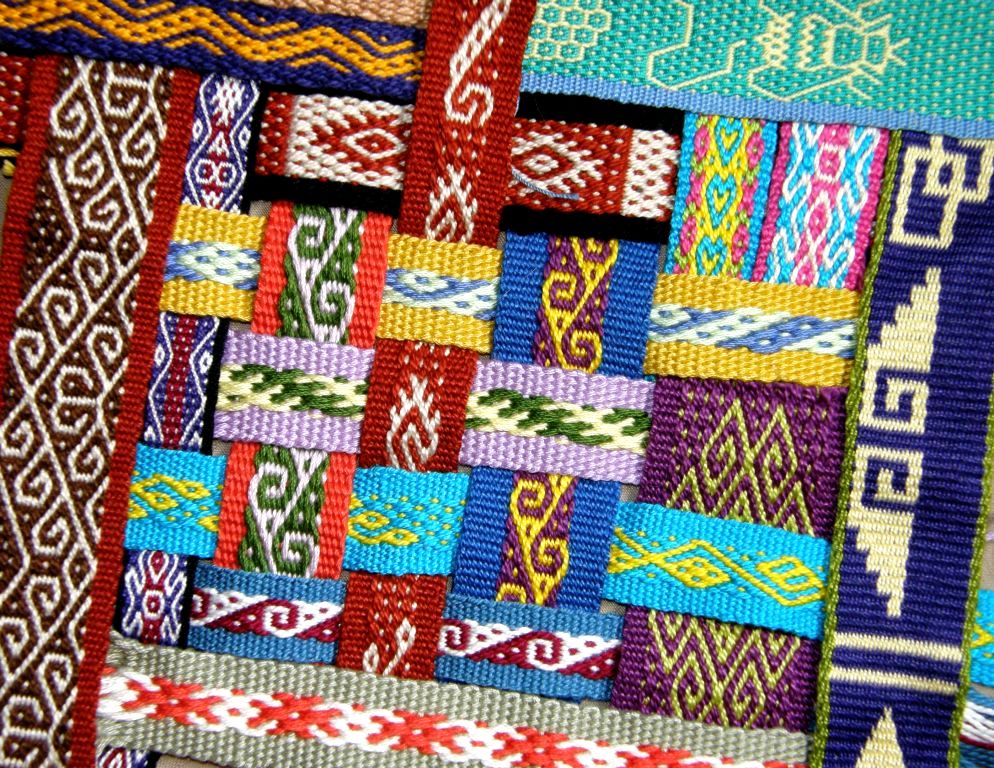
backsrap woven bands for book

The resulting book with yet more bands on the cover…

More adventures book cover dsz

You can download it from Patternfish.com.
ANWG 2013

The North West Weavers Conference, which will be held in Bellingham, Washington this June, recently opened its registrationI am going and hope to see you there!

To finish, here are some great projects from members of the Ravelry group…
carrie

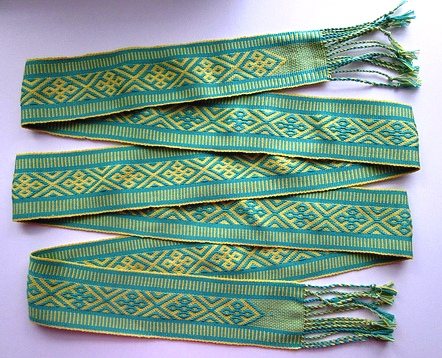
Carrie wove this warp-faced band using the frame of her rigid heddle loom on which to extend her warp. She used string heddles and a shed rod rather than the rigid heddle. The patterns were created with supplementary warps. Gorgeous! We all love the soft colors she chose.
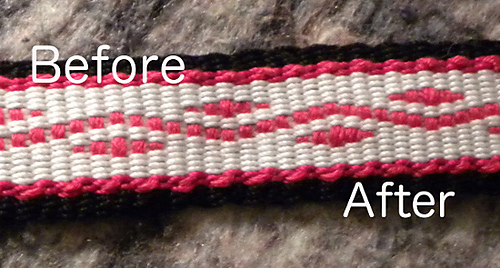
amandaAmanda kindly shared part of her band with her first attempt at creating patterns with supplementary wefts. She shows the difference that applying less tension to her warp made to the amount of coverage she achieved with the supplementary weft. She is using #10 crochet cotton for warp and embroidery floss as her supplementary weft.
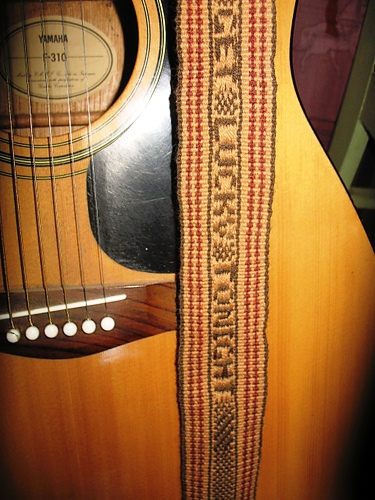
janet

Janet wove this guitar strap for her husband with her own hand-spun and dyed wool. She used instructions for the pick-up patterns from Anne Dixon’s inkle weaving book.  She included words from a song which her husband wrote in the design and used guitar strap hardware made by our friend Annie MacHale to put it all together.

Speaking of Annie, she has been dazzling us on Facebook with the gorgeous straps she has been making on her inkle loom to sell at a big guitar show this weekend in California. Annie is all about color…I will leave you with just four examples of the more than forty guitar straps she will have for sale!
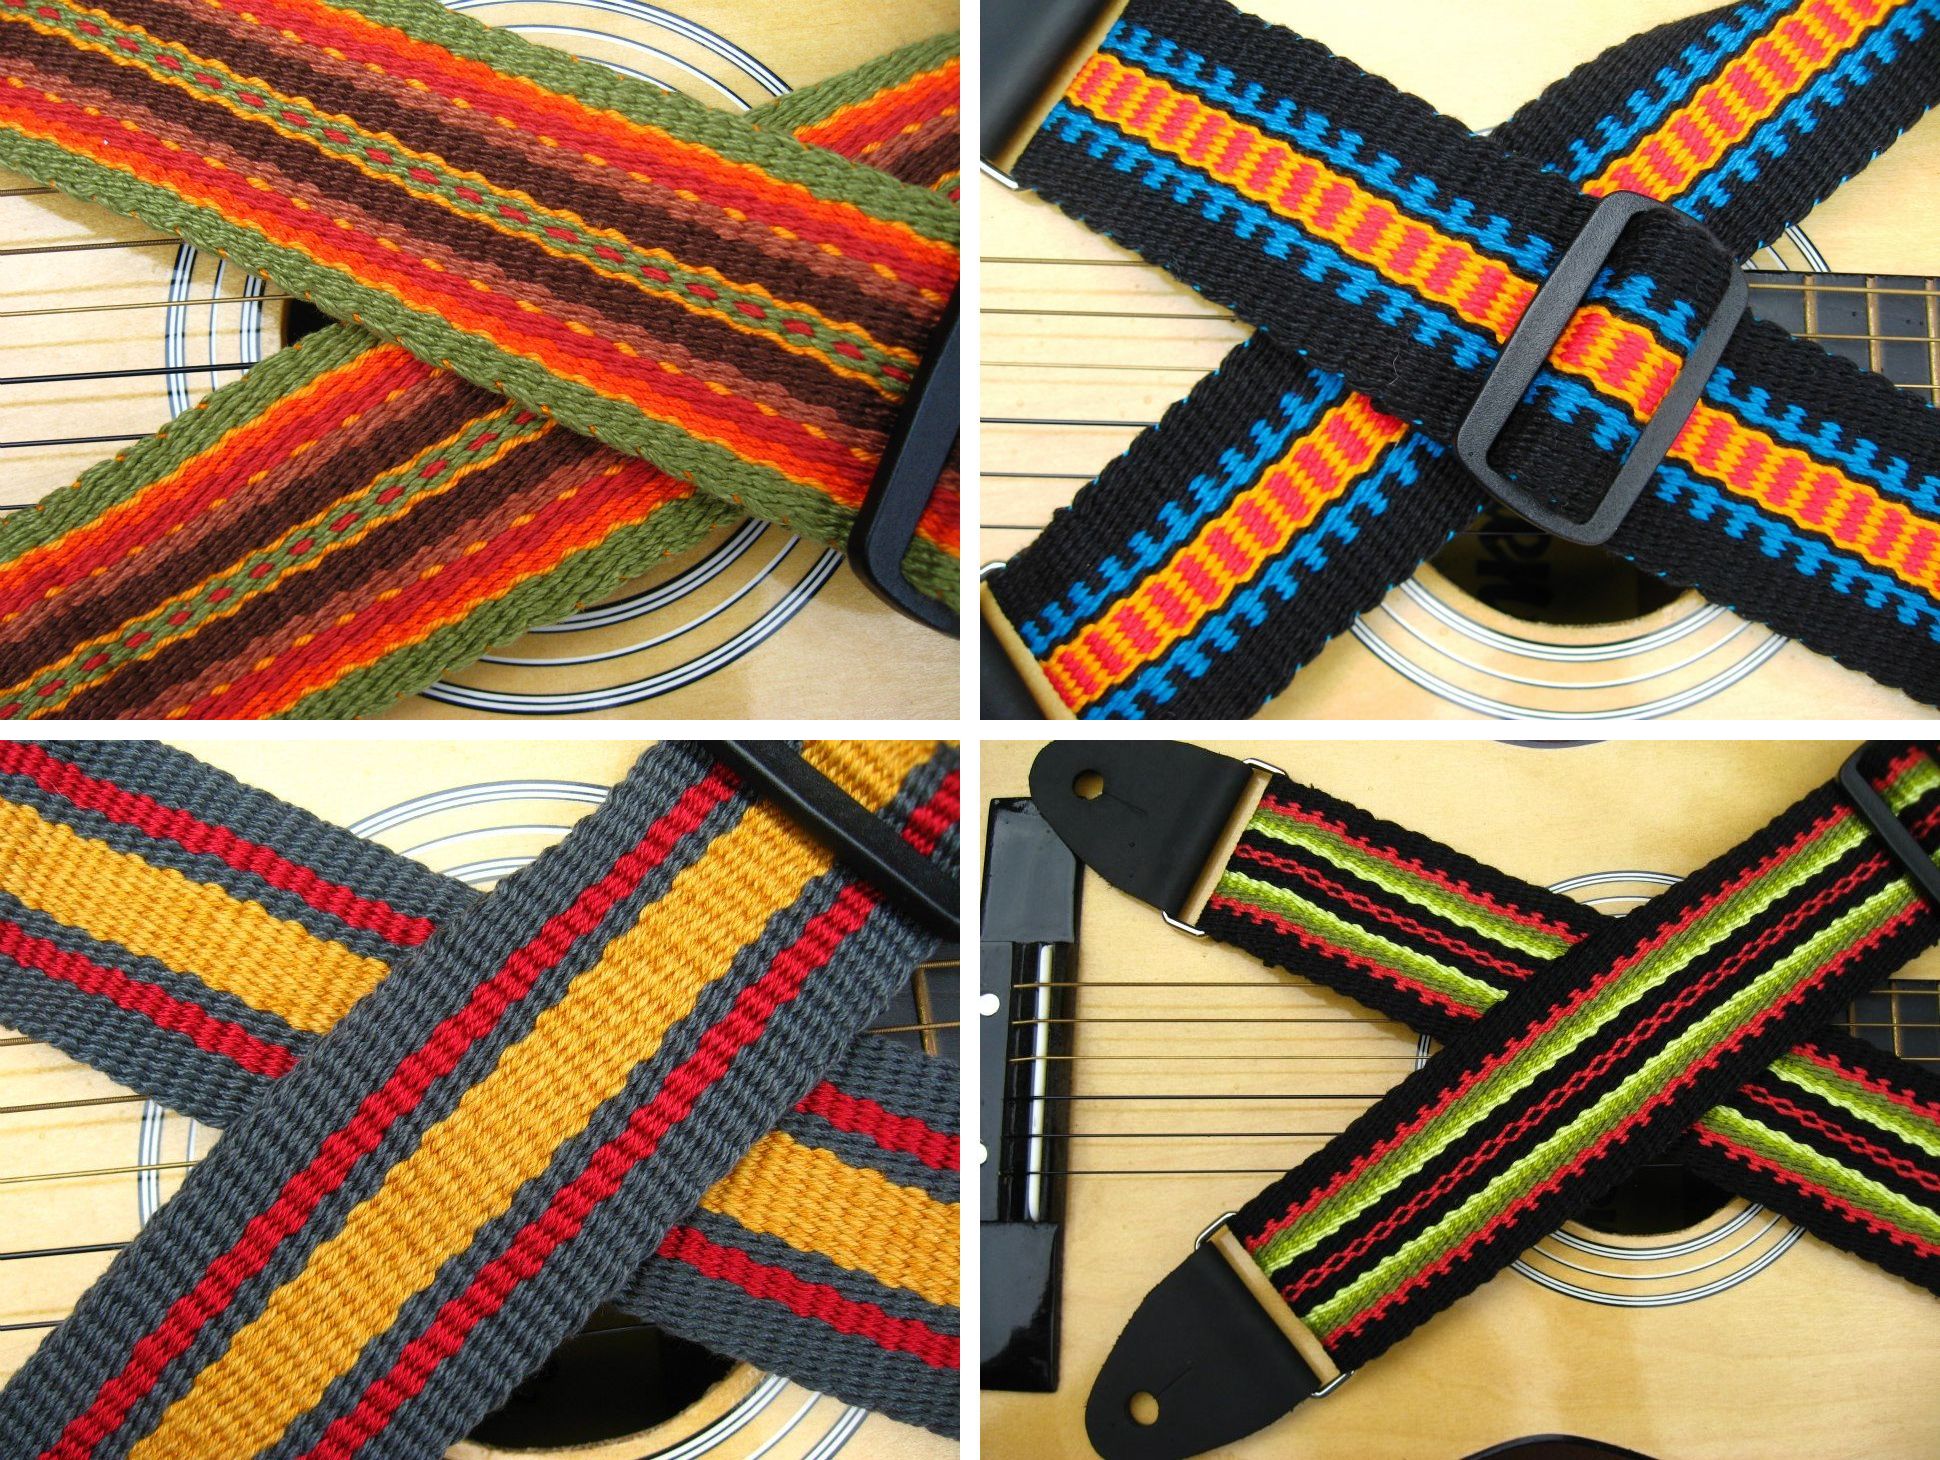
annies straps

So, my challenges are longer, wide, finer. What are yours?

Backstrap Weaving – Encuentro de Tejedores de las Americas – Part Two – the cloth and the looms.

Read Part One of this story here.

ARE YOU GOING TO WEAVE TODAY?

I probably make a thorough nuisance of myself at weaving events like the Encuentro de Tejedores in Cusco Peru earlier this month. I have so many questions and want to be into everything and not miss a thing.

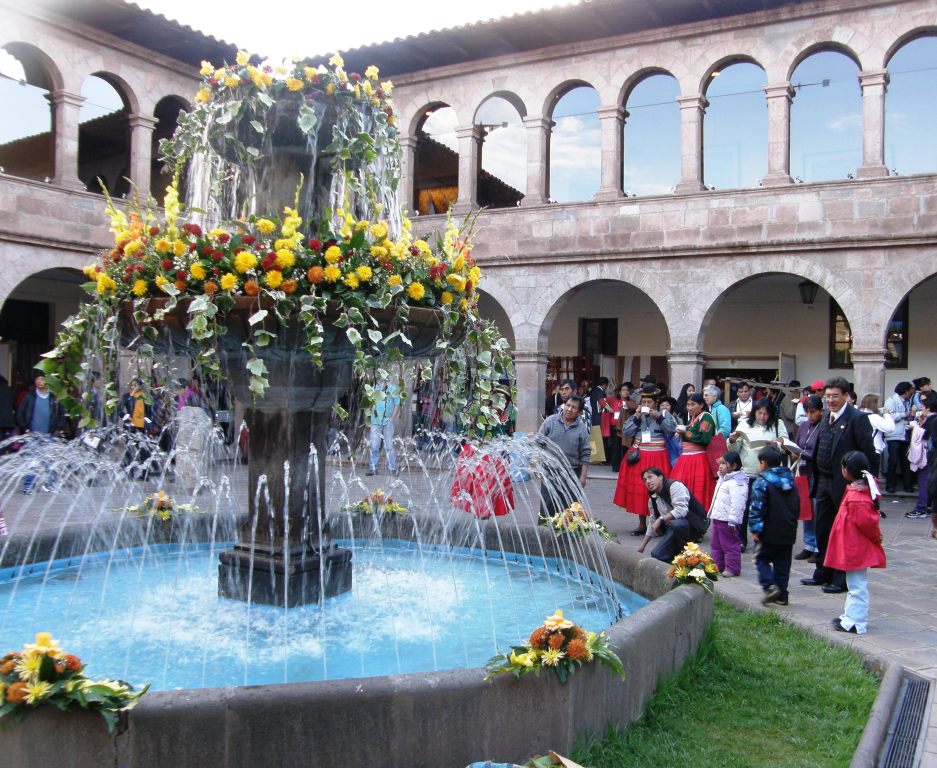
Calm and serene despite being in the very heart of the city of Cusco, the venue for the conference was beautiful both by day and night. There were plenty of pillars to which looms could be attached for weaving displays and shaded areas under the arches where weavers could show their textiles.

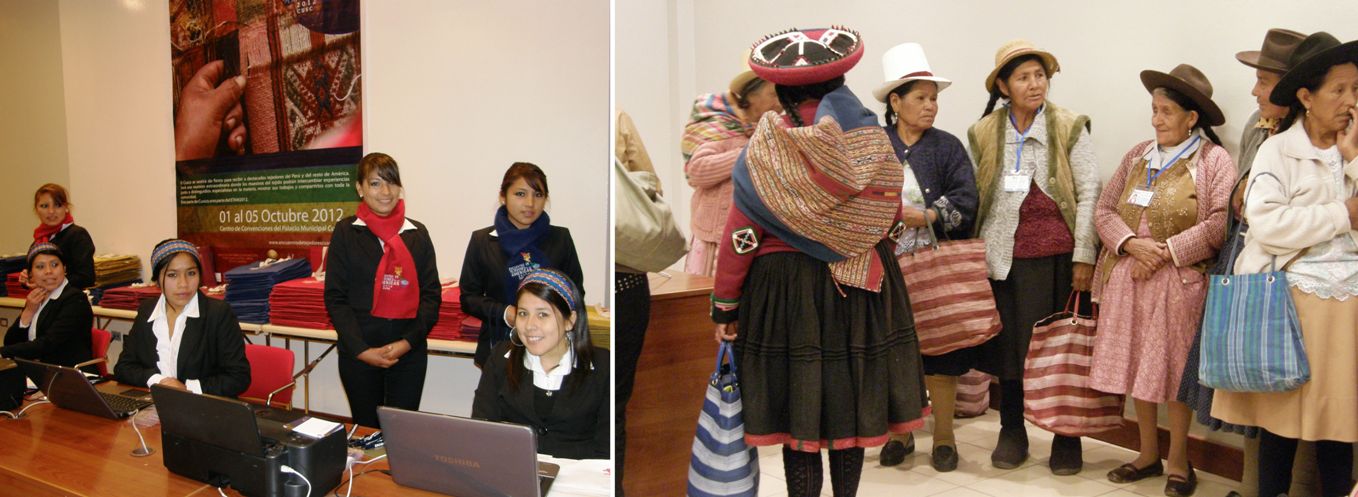
 Bright and early on day one, I registered along with other participants. The receptionists, looking smart in their uniforms with colored conference scarves and headbands, were efficient and clearly trained to be able to handle anything. The whole process was very slick and it was interesting to hear all the different Spanish accents and Quechua being spoken in the line-up of participants from all over Peru and South America. I recognized fondly the accent from Chile where I lived for five years as well as the song of the Argentinean-style of speaking used by my ex-boyfriend and the special way that Bolivian highlanders pronounce “rr”.

I then stepped outside to the courtyard to another world…a buzz of colorful activity… where I watched all the stands being assembled by weavers from all over Peru, Bolivia and Latin America, saw all the marvelous textiles emerging from travel sacks and being arranged and labeled, touched the fiber, tools and implements which were used to create the colorful cloth and spoke with the creators themselves. Some of them seemed somewhat overwhelmed by the high level of interest in and admiration for activities that are quite normal and commonplace, almost passing without remark, in the communities, villages and towns where they live.

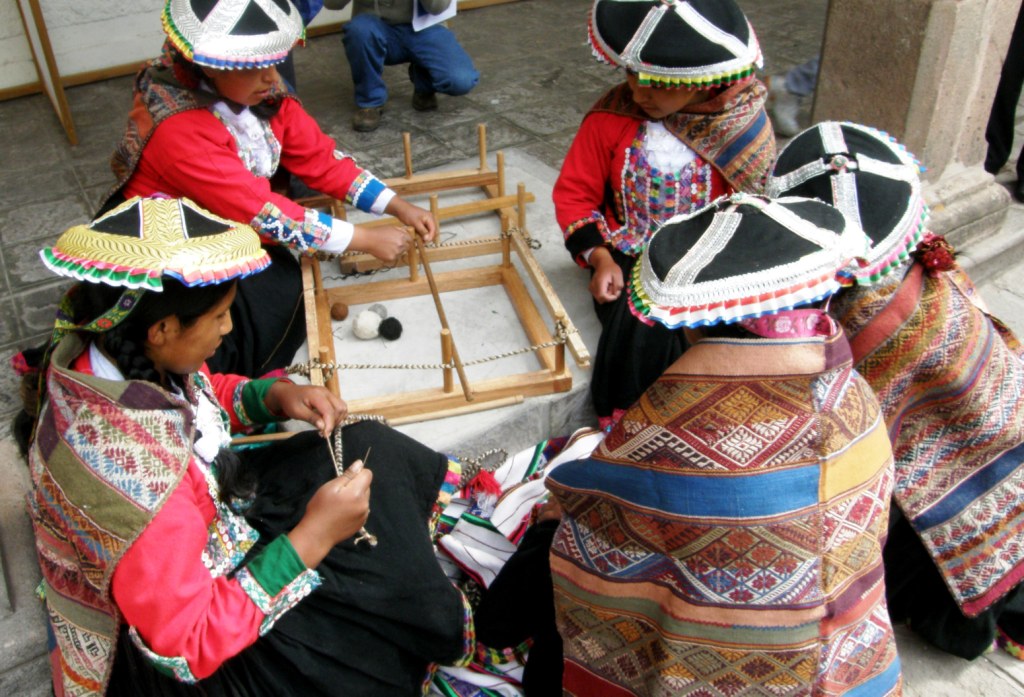
Weavers and knitters from Taquile Island wearing and displaying their textiles and the creators of the wonderful ikat pañones of Tacabamba, Peru

The question that I really wanted to ask everyone right there and then is “Are you going to weave today?” Is today the day when we will get to sit by you and see how you created all these exquisite textiles? And all the while the  excitement is building as I see more and more gorgeous textiles and looms being extracted and arranged. I had already seen at least ten things that I wanted to explore further after having passed just once quickly by each of the twenty-two half-erected stands.

Weavers and spinners from the Navajo Nation, my friend from the Tinkuy, DY, and TahNibaa and Albina from San Ignacio de Loyola showing the crocheted “chullos” and the belt loom full of sticks which is typical of her community. 
The Chol Chol Foundation of Chile was present bringing with them textiles made by the Mapuche weavers that they support including a spectacular ikat- patterned “manta cacique”. Lowland areas of Peru were also well represented with a group of Matsigenka cotton spinners and weavers from Echarate, Bajo Urubamba.

The looms!……

A horizontal loom with a broad belt patterned with double weave and complementary-warp pick-up patterns of Taquile Island and a backstrap loom with a cotton warp-float piece in progress from Echarate.
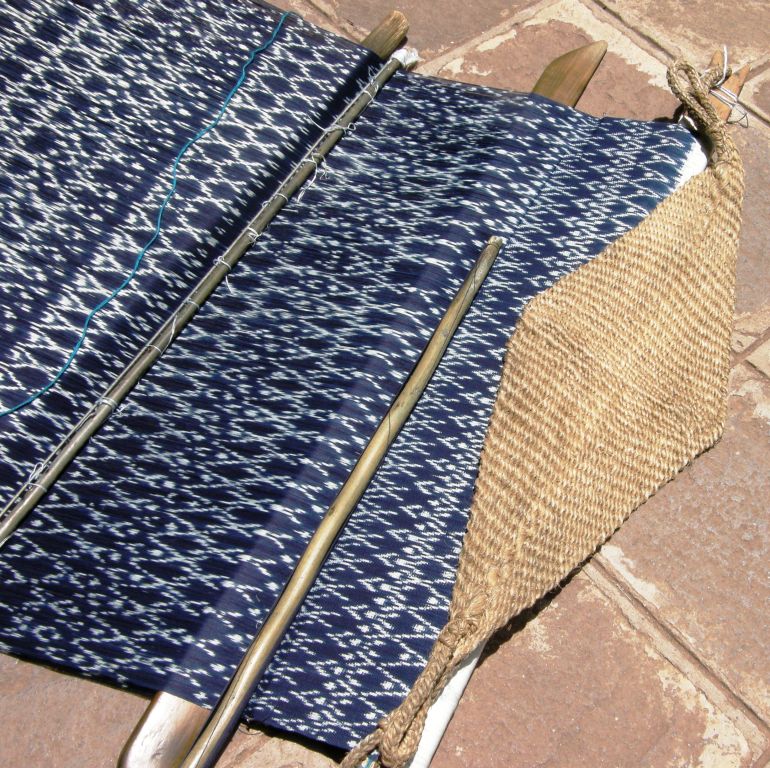
The simple backstrap loom of Tacabamba, Peru on which the indigo ikat-patterned “pañones” are woven.  The process of creating a pañon is anything but simple. They are up to one-meter wide, covered with tiny motifs and have patterns knotted into their fringes.
A floor loom from Ayacucho, Peru with a tapestry in progress and the leaning vertical loom of Tarabuco, Bolivia.
The cotton weavers of Chiclayo managed to preserve their native cotton despite the fact that its cultivation was banned for many years in Peru. The backstrap loom is used to weave their natural brown and white cotton into saddle bags, belts and table ware for their own use. The Guatemalan loom from Santiago Atitlan holds brocaded cotton cloth destined for the typical woman’s blouse or “huipil”. Panels are sewn together and the neckline embroidered with birds.

Wide warps, narrow warps and everything in between… A Tinkipaya weaver’s leaning vertical loom, holding fabric covered n complementary-warp pick-up patterns, rests on the ground. A weaver from Pitumarca speedily edges her finished woven lliclla with a tubular woven band using three sets of string heddles and a shed loop.

A backstrap weaver from Ayacucho, Peru, creates a belt patterned with supplementary warps. She uses a forked stick to hold a secondary cross, the manipulation of which helps her to open the heddle shed quickly and efficiently. The wide backstrap loom parked against the pillar is from Tanta, Peru where handspun alpaca yarn is often combined with bright synthetic threads to make shawls, ponchos and blankets.

And then there was that tantalizing backstrap loom with its twenty-four heddle sticks…Señora Araceli, are you going to weave today?

First Araceli has to make the twenty-four sets of heddles on this fresh warp. The pattern has already been picked up and saved on sticks.

Just before lunchtime one day when we were indoors listening to speakers, I got the uneasy feeling that I really needed to be somewhere. I got up and tip-toed out at the start of the morning’s final presentation by Manos del Uruguay to find Araceli seated and preparing her warp for an afternoon session of weaving.

Well, you know that I am fascinated by the entire process and so I was happy to be able to sit alone with her and watch her make her heddles. I was tickled to see that she makes her heddles with the extra security hitch just as I have chosen to do. I have seen and learned so many ways to make string heddles for backstrap and other kinds of weaving and this method is by far my current favorite. I always say “current” as who knows what cool new method I will find tomorrow.

Here is a short video clip of Araceli making her heddles. She certainly has a smooth and elegant way of doing so. I know some people don’t like making heddles and dread that part of the process…I like it!

And what about the woven cloth produced by these looms and the pieces produced by talented hands using knotting, braiding and crochet?

Head gear…Crocheted “chullo” from Peru and a woven hatband from Bolivia.

There are four countries represented here….cloth from Mapuche weavers in Chile,  Salasaca, Ecuador,  Taquile Island, Peru and Tinkipaya, Bolivia.

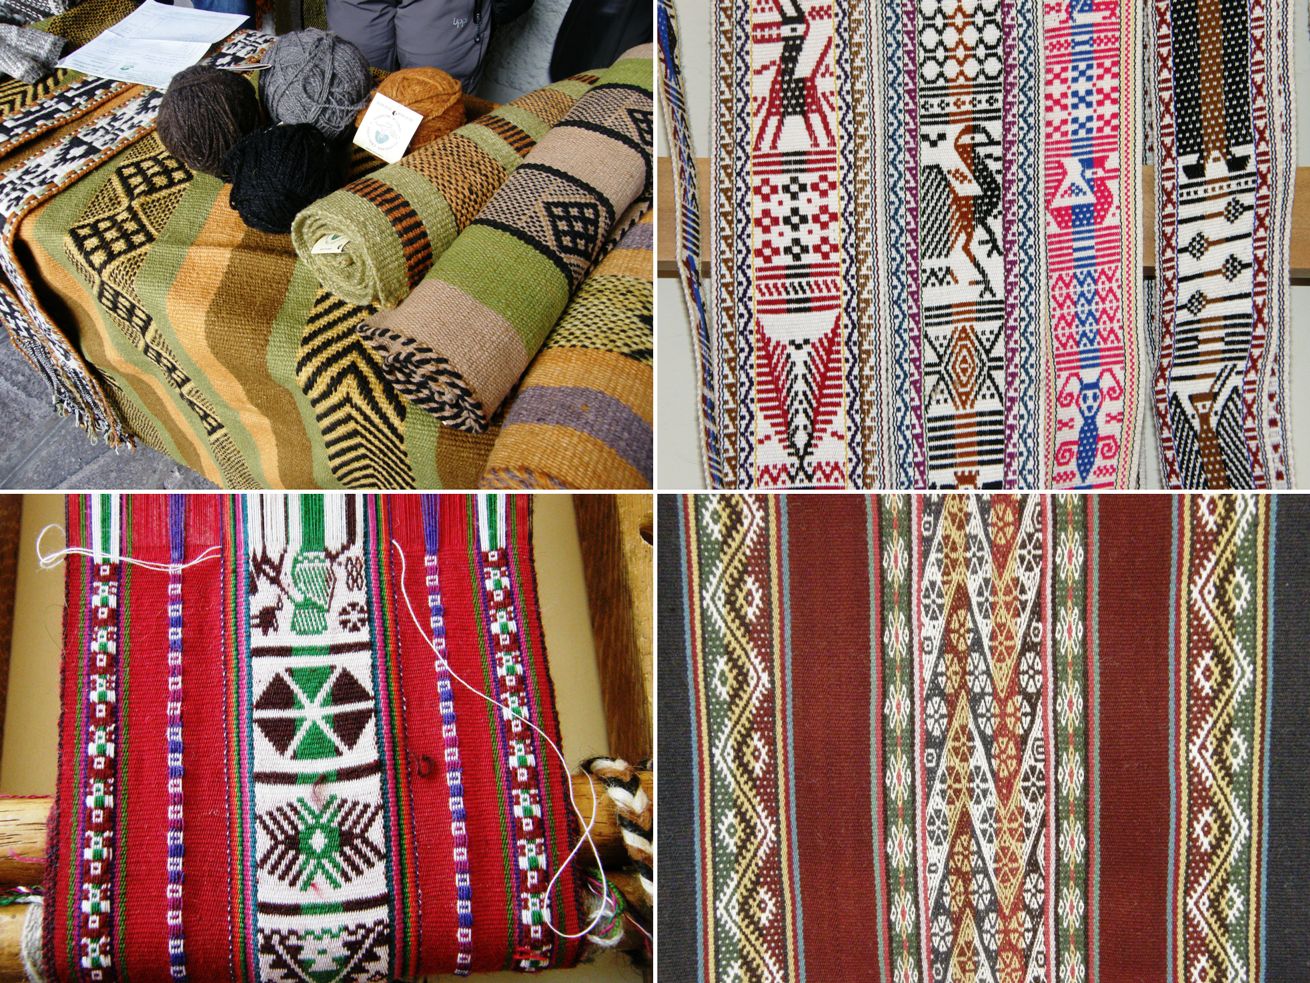
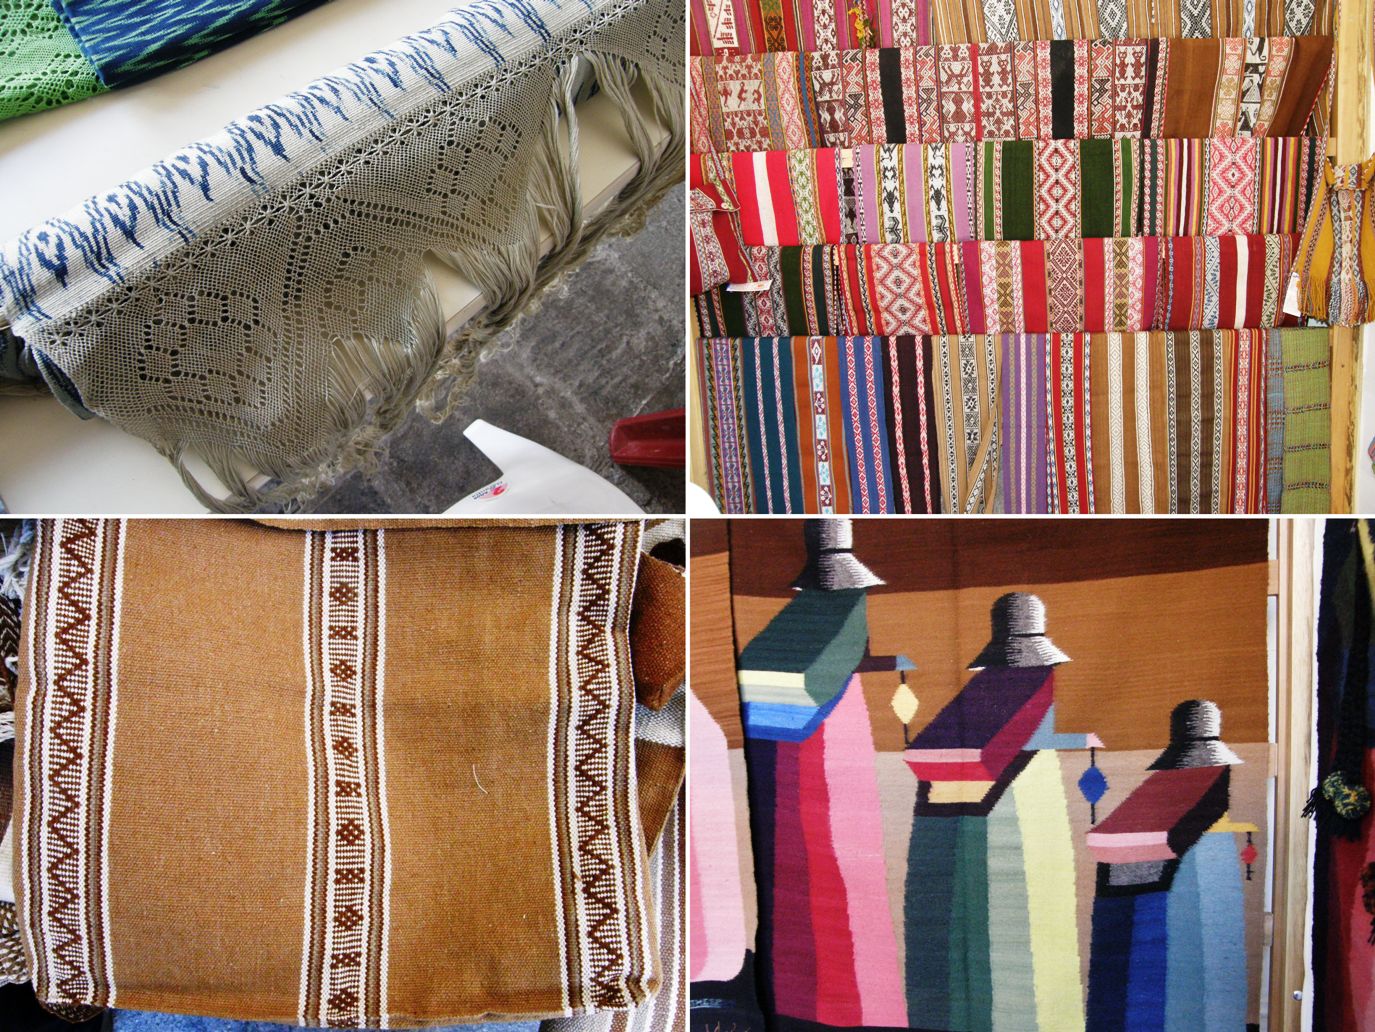
Cloth from different corners of Peru. The variety!

Of course, each piece has its story and it was those stories that we were told in the weavers’ own words in the seminar sessions that were held in the mornings and afternoons. The stories were very inspiring and educational, often with very personal touches which brought life and meaning to the fabric that simply could not be transmitted from the market stall or loom alone. All told of hope, perseverance, strengthening of ethnic identity and a revival of pride in oneself and culture and were often very moving.

The faja sara ( the one created with the twenty-four string heddles) has its own fascinating story. It is part of an unbroken weaving tradition that dates back at least 500 years to Incan times. The belt is described in the chronicles of Mercedarian Friar Martín de Murúa in 1590 A.D. and the knowledge of how to create one has been passed on ancestrally over all these years.

Lynn Meisch has written an article about her research on these belts here. We were told by the weavers that the name “sara’ comes from the verb ”sarear”, although I have never come across this verb before, which means to choose, or in a weaving context,  to pick-up.

Interesting to me from a structural point of view is the rolled edge of the belts which is surprisingly easy to create. I am guessing that it serves the same purpose as the woven bands I have seen added to other textiles in that it strengthens the edge. When I was in Holland, Marijke van Epen and I followed Mirja Wark’s explanation of the rolled edge used by the Wayuu people of the Guajira Peninsula in Colombia and Venezuela and the way the weavers of the sara belts create theirs is equally as interesting and practical.

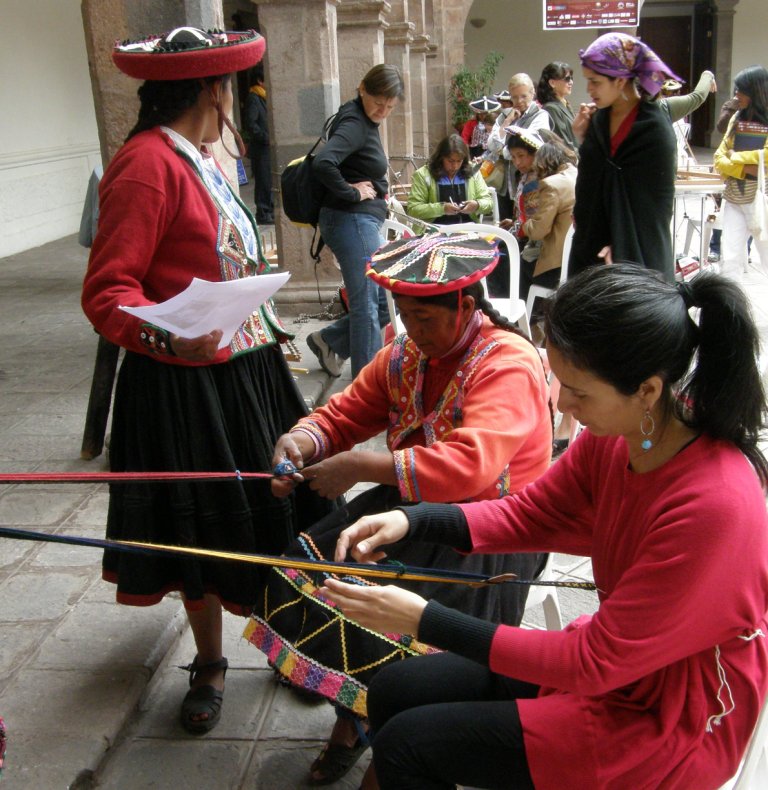
Here is Araceli in action with a band of spectators. When doubt was expressed by the onlookers about the quality of the cloth since Araceli does not use a ruki, the llama bone tool, to beat in her weft, Araceli immediately invited them all to feel the belt. They were all surprised and impressed by the firmness of the weave. It is a very dense piece of weaving.

The poncho shown above is from Catamarca Argentina and represents the recovery of the exquisitely fine work done with handspun vicuña fiber on floor looms which has the made the poncho Catamarqueño famous for centuries.

Two people weave the pieces side by side and have to coordinate the strength of their beat perfectly to maintain a consistent weave. With the fine vicuña thread a piece that measures 2 meters by 1.30 meters weighs only 320 grams and takes up to eight months to complete.

Fine vicuña shawls are also woven and embroidered using designs copied from old colonial textiles.

We had a chance one afternoon to handle and clean pieces of vicuna fiber and everyone was invited to try their hand at spinning it on the  25cm spindles.

More cloth…..

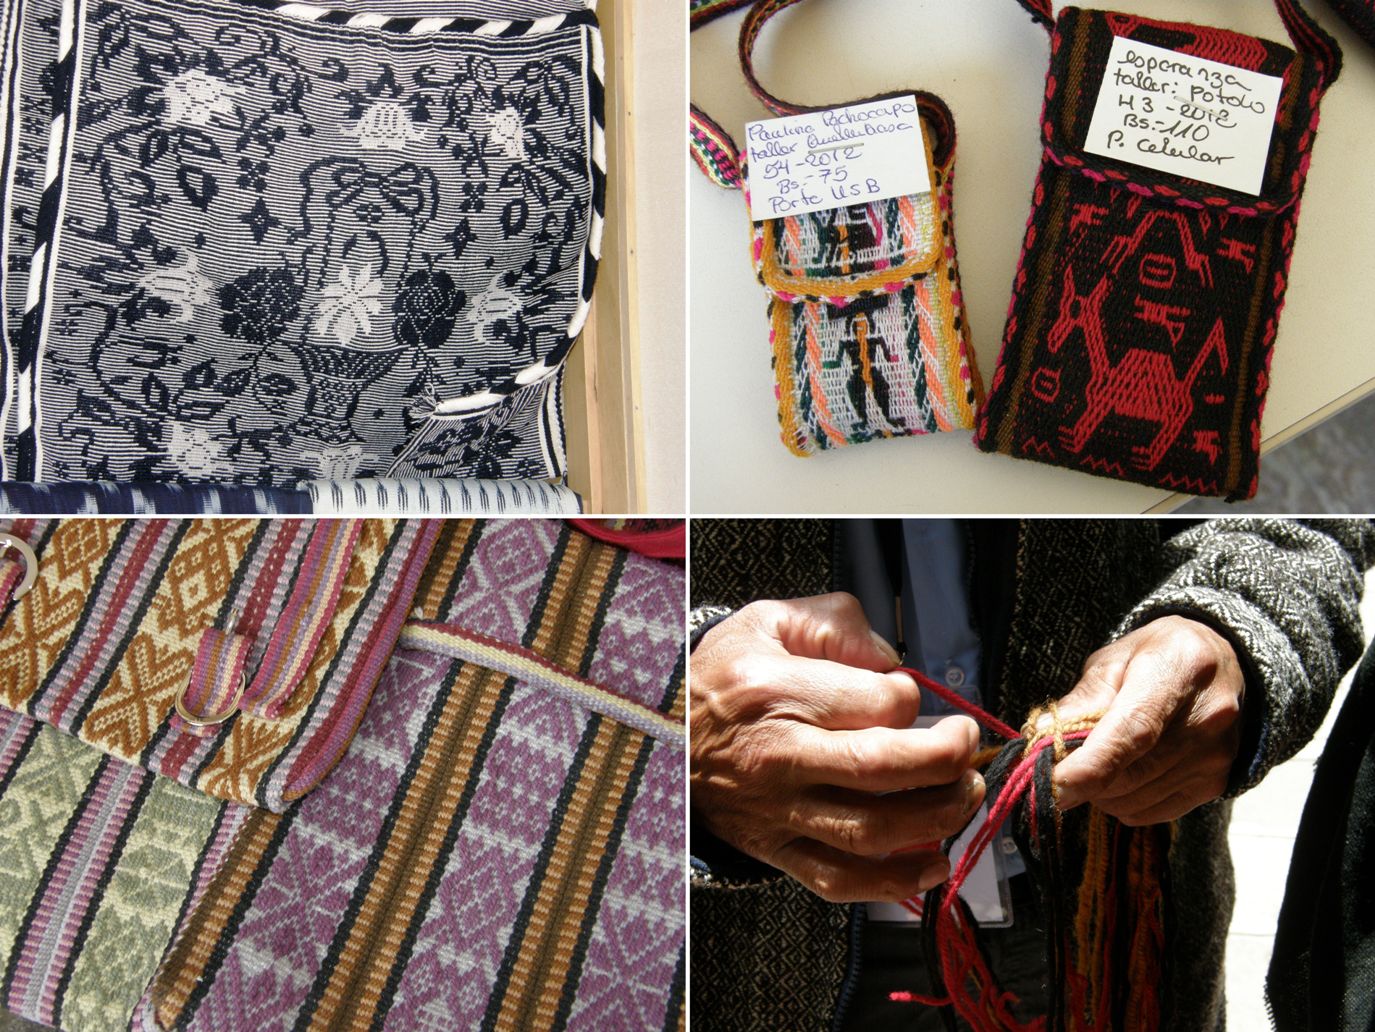
…. a bulsico , or cotton double-pocket saddle bag from San Ignacio de Loyola with beautiful patterns in simple warp floats worked in two colors. The weavers from Tarabuco and Potolo in Bolivia of course brought large fine examples of their textiles. I decided to show you here some very small and practical pieces that they also brought to sell. The tiny USB pouch is from Tarabuco and the cell phone pouch with its woven khuru figures is from Potolo.

The supplementary-warp patterned pieces in lovely pastel colors are from Ayacucho, Peru and the last shot is of an impromptu sling-braiding demonstration from one of the Peruvian presenters in the coffee break.

More lessons along the way…

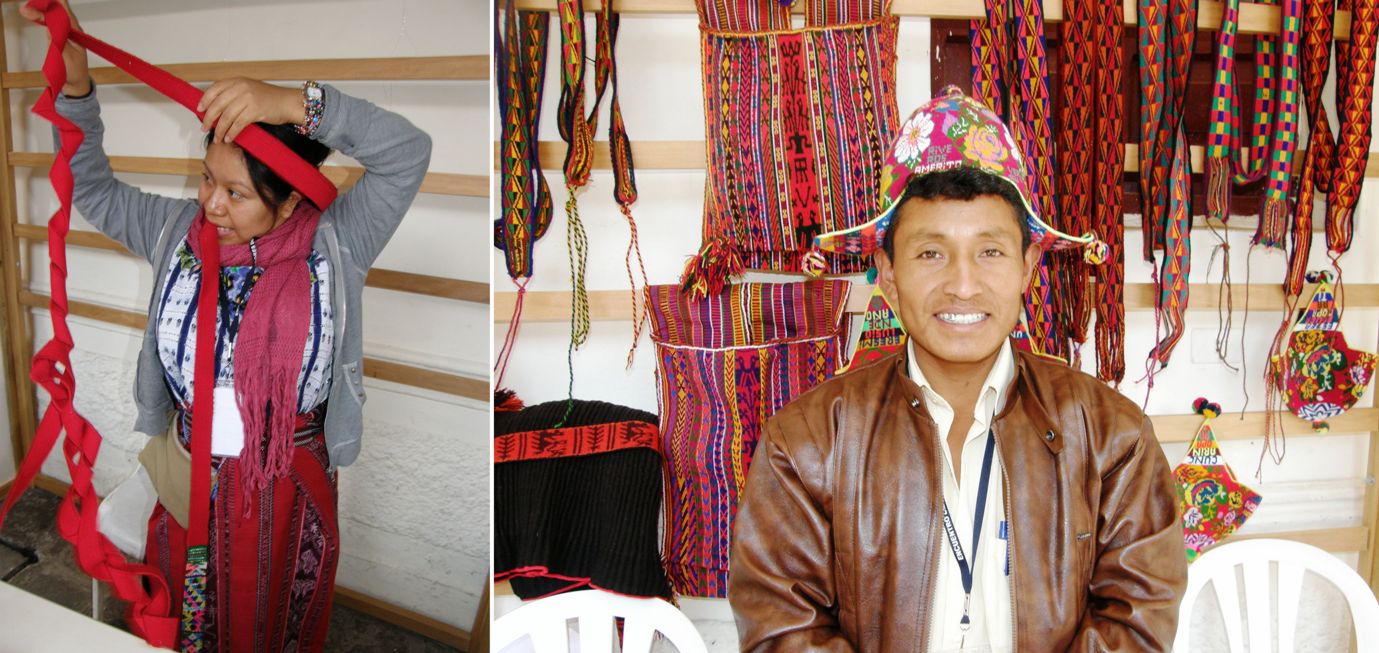
Diana from Santiago Atitlan in Guatemala showed me how to wrap her hair and head with a woven hair sash. You can see that most of the band is plain red with just the last part, which will be seen on the outside, decorated with pattern. Albina’s husband showed me how married men wear the typical chullo of his home…with the flaps standing out sideways. A single man will wear his with the flaps pointing out front and back.

So, now you have seen a selection of the stands, looms and textiles and heard a few backgroud tidbits about some of the weavings and the people who produce them. You are probably dying now to see the weavers in action, right?

ARE YOU GOING TO WEAVE TODAY?

Sorry, but I am saving that segment for the next blog post as uploading the video will be so much easier for me when I am in the US.

In the meantime I am packed and ready to leave tomorrow and I did manage to finish the discontinuous warp piece that I started in the workshop on the last day of the Encuentro. Handling alpaca fiber is not a nice business in this heat with sweaty hands, I can tell you!

Here is my ticlla piece off the loom and all curled up…

The overspun alpaca yarn made the grey and black panels curl in and the other two panels curl under. You can see my finish line on the white panel. I ended up removing one weft as I had packed too many in. I really need to remove two as now I have two wefts in the same shed. The finish line isn’t as noticeable on the other panels. I am really pleased with this!

I wove and sewed on a tubular band to the edges….… in the same way as the Pitumarca weaver that I showed earlier in this post, using three sets of string heddles and a shed loop. See how nicely the piece lies flat now? I hemmed the sides before applying the tubular band because I didn’t like the way the warp stripe at the edge was interfering with the color of the tubular band.

Here’s a better look at the tubular band and that lovely dovetail join of colors…

Done! I am keen to try this all again!

See you next time from the US 🙂

Backstrap Weaving – Encuentro de Tejedores de Las Americas – Part One – The Workshop

Back from Cusco!

Bleary-eyed from the long road trip and slightly spinning out from the altitude, I had a little time to wander the streets of Cusco on the Sunday of my arrival before the start of the weavers’conference on October 1. The trip from my home to my hostel had involved fourteen changes of transport including an overnight bus ride, the highlight of which was watching the big ol’ yellow harvest moon rising over Lake Titicaca. Stunning! I don’t think I have ever seen such an intensely bright moon before.

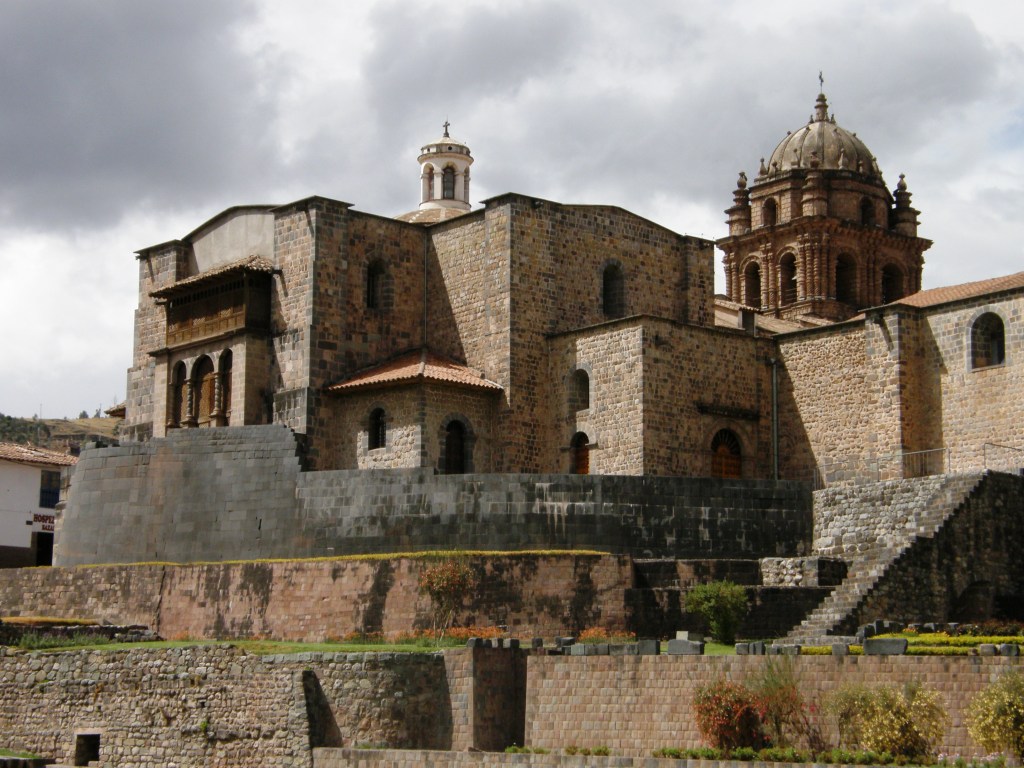
Needless to say, there is plenty to tell about that journey and my first hours in town but it will all have to wait.  Of course a trip to the CTTC (Centro de Textiles Tradicionales de Cusco) was a must. The walk down to the CTTC is impressive in itself. It sits right next to this…

This is the church of Santo Domingo built by the Spanish colonists on top of the stonework foundations of the demolished Inca temple Qorikancha. The inca stonework has apparently survived earthquakes which the Spanish construction was not able to withstand.

The CTTC is one of those strange and wonderful black holes where you lose all sense of time! I sat with the weavers all afternoon and learned so much. A weaver from Chahuaytire let me sit by and watch while she wove and sewed a tubular band to the edge of a finished weaving. You can see how a thread toward the end of the cloth extends to her toe which helps the weaver hold the cloth taut as she sews.

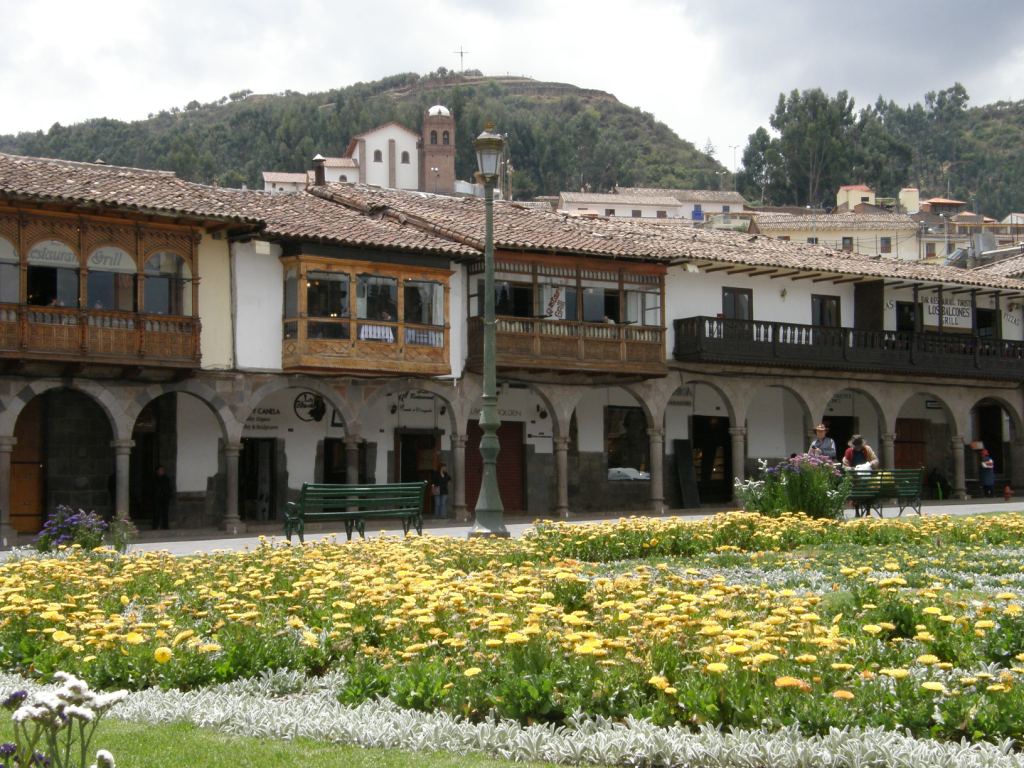
Eventually, fatigue started to set in and I spent a little while in the evening trying not to nod off in the pleasant flower-laden main square of Cusco before admitting defeat and crawling into bed. I had no trouble sleeping in my cheapo “party hostel” in a room with seven strangers!

But back to the present for a moment….I had fully expected to slip back into the old routine when I got back home late last Sunday. I thought that I would have no problem spending a couple of days going through and editing my pictures from The Encuentro de Tejedores de las Americas and that I would get my blog post out on Thursday night as usual. You would think that I would be bouncing around with energy with all those rich red blood cells that I must have grown during my week up at high altitude. Unfortunately it doesn’t work that way!  I was tired after the week of intense activity and the long road trip back and very much wilted by the Santa Cruz heat.

However, the thing that was most to blame for my failure to get back on track quickly was this…

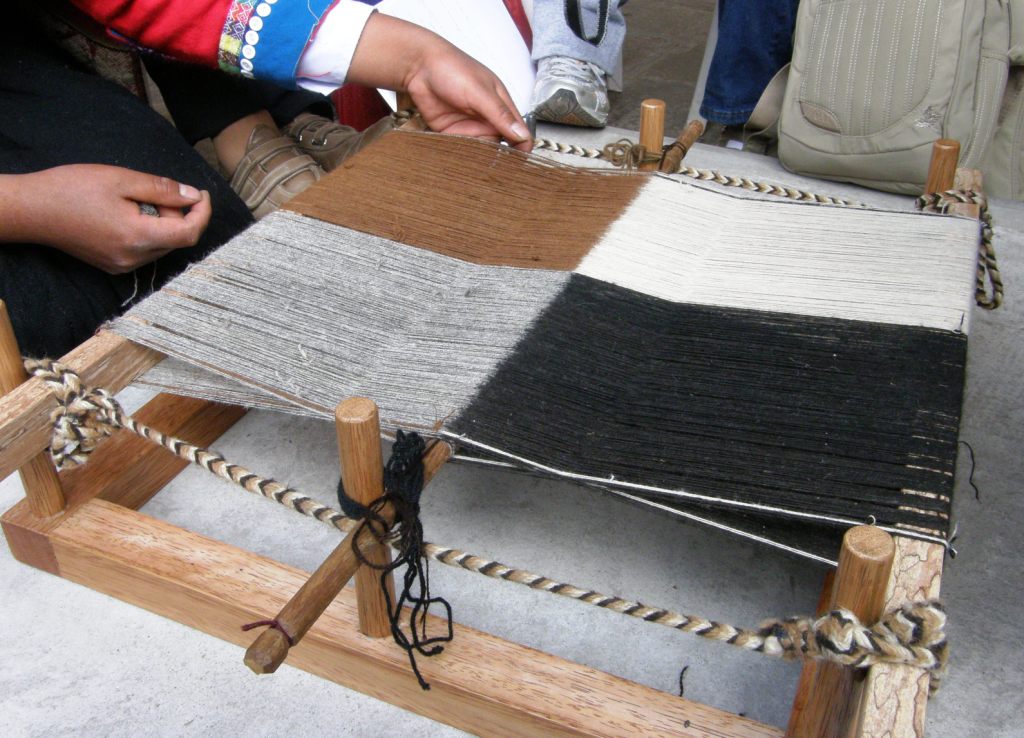
This is one my favorite souvenirs of the trip… the piece on which I worked on the last day of the conference which was Workshop Day. The weaving technique is called ticlla, or, discontinuous warp, and it allows changes of color along the length of the warp.  As you can see above, the piece is divided into panels of color along its length. The white panel changes to black and the grey to brown. Both halves of the piece, that is, the grey and white and the black and brown, will be woven with four selvedges.

It was very exciting arriving on Friday morning and seeing these sitting on the table…..and yes, I was the first one to get there!

And there were our teachers from Pitumarca sitting in conference, possibly reviewing some teaching strategies, each wearing a stunning lliclla decorated with pick-up patterns on panels of discontinuous warps. If you think that they look very young, you are right! Our two instructors, Janet and Petra are twenty-two and eighteen years old. Janet has been weaving for fourteen years and started weaving ticlla when she was twelve.

We were split into groups and Janet and Petra showed my group the warping process. This process of warping is something that I had only ever seen in pictures some of which, like the one below, had been taken and sent to me by my friend DY when she visited Pitumarca in 2010.

The pictures were enough for me to be able to make some small experiments of my own with this technique at home but there is, of course, nothing like seeing the whole thing unfold before your eyes. How much nicer and simpler it is when there are two pairs of hands at work! I warped three panels on my own at home and had to call several toes into use to hold tension on warps of one color while my two hands worked with warps in another color.

Janet, the more talkative of our two instructors, explained that the natural alpaca colors that we were using are called yoro (white), ch’umpi (brown), o’que (grey) and yana (black) in Quechua. How deftly the two ladies passed the balls of yarn back and forth falling naturally into a rhythm which they were able to maintain even as we plied them with questions.

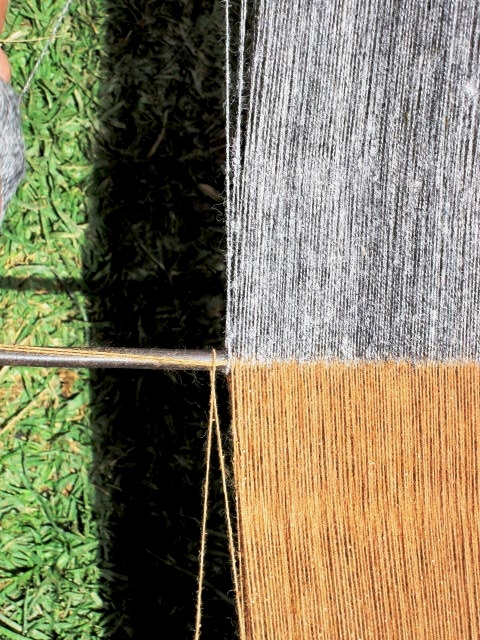
Black and grey warp threads are being wound simultaneously with each color following its own figure-eight path. They are passed in turn around a central rod in dovetail fashion. This allows the creation of panels of different colors. Each half of the piece will have its own shed rod and set of heddles and will be woven with four selvedges.

While we watched the creation of this warp, other ladies from Pitumarca were busy setting up the prepared warps on which each of us would weave. We stood up from the demonstration to find twelve warps stretched out and ready to go.

The pretty courtyard of the convention center was conveniently surrounded by pillars to which we could attach our looms.

And now you will find that there is a sudden lack of photographs on my part…I was far too absorbed in my weaving to stop and take pictures! Here’s one I took on a short break…nearby, weavers from Chinchero were giving a workshop on making jakimas with pick-up patterns.

Above you can see a couple of jakima students with their instructor. Beyond them you can see my “pillar partner”, Marcela with the head scarf and cloak of her Mapuche people in Chile. There is something special about sitting all day and weaving next to someone who shares your passion. The preceding four days of conference had been hectic…so much to see and do. This last day allowed us all to slow down and take some time to talk and get to know each other while working at our looms. Janet had to come and pry us out of our chairs to take a lunch break.

The discontinuous warp piece had been started with a few rows of weaving at each loom bar as well as at the center cord that held the dovetailed warps.  Therefore, the four selvedges on each half of the piece had been set. Our task, therefore, was to weave to fill in the gap between the loom bar and the center.  As the gap got smaller and smaller, naturally it became increasingly difficult to open the sheds and pass the weft. The later part of the afternoon session of the workshop was spent watching a demonstration of how to go about creating sheds and passing the weft as the space in which to work decreased.

I have to tell you that there are no secrets or magic solutions to this…it’s simply a matter of plain old determination, tenacity and patience. When the shed rod is too big for the small space in which you are working, replace it with a thinner one. When the shuttle is too thick for the shed you are creating, pass the weft on a needle. When it is impossible to open the shed by pulling on the heddle rod, remove the heddles and rod and create the shed thread by thread with the blunt end of the needle. Save the shed on a stick and then pass two wefts…one on the each side of the gap.

Plod along like this and you will slowly but surely get there!

By the way, I was not happy at first about having to use brown weft to weave the grey and white panels as the brown could be seen slightly between the white warps. However, once I got to the needle-weaving stage I was very grateful to have that contrasting color weft as it clearly showed me under which warps I needed to pass the needle. It is much harder to see the warps for needle-picking in the grey section than in the white. I am guessing that doing the other half (the black and brown one) is going to be REALLY tough as the black will be hard to see and I won’t have the benefit of contrasting color weft in the brown section…oh boy.

Here I was at home on Monday inching my way to closing the gap. The metal rod is a long Navajo weaving tool that I have that came in very handy with its flattened shovel-like nose. It held the shed open while I passed the two wefts on the needles.When that rod became too thick for the shed, I changed to an umbrella rib. It was all guess work and experiments at this stage as Janet did not get to this point in our class. We ran out of time.

The final weft went in alone on a needle…over, under, over, under. It’s funny that I had expected the finish area to be noticeable because the wefts would not be as tightly packed as they are in the rest of the piece. As it turns out, it is exactly the opposite! I packed in too many wefts in the gap and that part is more tightly woven than the rest! Do I dare undo all that hard work and remove two wefts? I don’t think so!!

Now to attack the other side. I have high hopes of finishing this before I leave for the US next Wednesday. I want to attach a patterned tubular band around the piece.

Here is a video of Janet showing her skill with the needle as she teaches us how to go picking up the warps to create a shed…

So that was the Workshop Day. What about the rest of the conference? Oh my gosh…I have SO much to show and tell but this is enough for this first installment…my loom is calling as well as prep for my US trip. I plan to write more before I leave about….

one meter-wide backstrap woven pieces, backstrap looms with 24 heddles, gorgeous ponchos made from handspun vicuña fiber, cotton ikat-patterned shawls with intricate knotted fringes, double weave on horizontal looms, Tinkipaya weavings, cotton weavers from the lowlands dyeing their yarn with strange and amazing substances, all kinds of ways to set up and operate backstrap looms and make string heddles, tapestries from Ayacucho, new books…. and lots of weavers, wonderful weavers interacting and learning from each other! I met some of my blog followers from Chile and Argentina…what fun!

A couple of pictures to finish…I can’t resist!…a weaver and spinner from Puno, Peru shows Navajo weaver and spinner DY Begay how to spin yarn “Puno style” using DY’s Navajo spindle. This created a lot of laughter and fun…hand movements and sound effects overcame all language barriers.

After another long day, a weaver from Tinkipaya, Bolivia who uses a leaning vertical loom, contemplates the backstrap loom with its twenty-four string heddles used to weave the traditional belt of San Ignacio de Loyola, Peru. More about that next time! I wonder what she was thinking.

Backstrap Weaving – A Little Weaving Therapy

I guess that two months isn’t really such a long time to be away from home. It’s just that I haven’t done an extended trip like that in a long time. I am reminded of the times when I lived at the southernmost tip of continental Chile and used to go up to Peru and Bolivia for the winters. I would spend months away wandering about, only going home when I had become too skinny and undernourished (I always traveled on a typical backpacker’s budget!). It is always bewildering after you have seen so much, experienced so many different things, met so many cool people and learned so much to go home and find that everything is the same!

How could this be when you feel so different?! However, returning home this time was a little different because things had changed. Stuff happened, people disappeared, things accumulated….one of them being DUST…two months of the wretched stuff!

But now I am back into the old routine. Yes, here I am blogging away on Thursday in socks and sweaters. Fifty-five degrees…that’s COLD for Santa Cruz. The palm trees look rather forlorn against the grey sky.

Time for some weaving therapy!

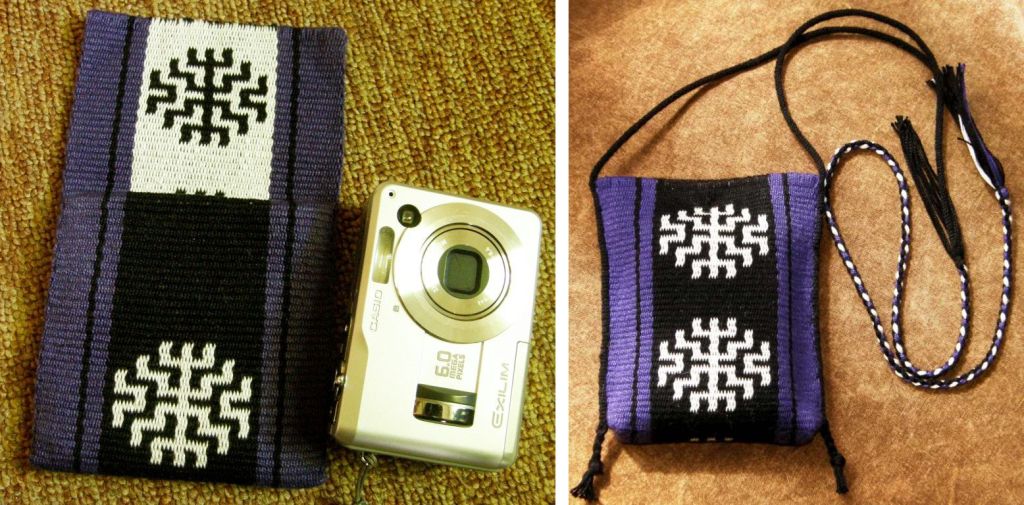
I made up the bag for the wee Casio camera.

This project accompanied me on the road and was hitched to numerous places along the way. I finished the weaving while I was up in Massachusetts. The pattern is one from Bhutanese textiles. Now, how to sew it up?

The first idea was the one on the left…a bag with a flap which I would cut and shape and edge with a tubular band. However, the motifs were not ideally placed for that and so I ended up with the style on the right.

I squared off the bottom of the bag and added a single large  snap closure on the inside. It is edged with a sixteen-end black plain-weave tubular band. I continued weaving the tubular band after covering the edge so that I could also use it as a strap and then added a four-strand braid to that for extra length.

The transition from tubular band to four-strand braid is covered by a tassel…a trick I learned from my sling braiding teacher in Peru.

I think these tubular bands are very cool and so handy. I have been playing with some other plain-weave ones in different materials. The one on my bag is in #10 crochet cotton and here are a couple of others that I made in wool.

The yellow and blue one is woven with a DK weight wool I love the way the simple stripes spiral.

The other one is in a lighter weight wool and you can see that even a lightly twisted yarn works. As the warps are so narrow, the problems of stickiness that usually occur when using wool in warp-faced projects are not a big deal. The warps did not break but my weft did once from pulling it very tightly but that was not a  problem.

Another cool thing about tubular bands is that it does not matter what the lower face of the band looks like. That gets hidden within the tube.

I wove a ñawi awapa band (see some ñawi awapa bands pictured on the left) as an experiment as a flat rather than tubular band and saw the chunky chaos of crossed and twisted floats that is created on the back side of the band from all the strange warp crossings and manipulations.

But that does that matter? No! All that gets hidden within the tube.

Now what other technique do I know that has a pretty “right” side and a messy “wrong” side of awkwardly long floats?…the warp subsitution technique, of course!

Actually, any warp-faced band whether it be plain or patterned with any kind of pick-up can be made into a tubular band but, since the warp substitution technique is often overlooked because of the long floats that are created on the reverse of the fabric, why not use it for tubular bands where none of that matters?

So, the other band pictured above has three-color horizontal bars which I was able to create with the warp substitution technique.

All the cumbersome long floats are hidden within the tube.

These bands are fast and fun to weave, quick to warp and can be stretched between a toe and finger to weave.

If that doesn’t suit you, you can attach one end to your waist with a cord through the end loops.

If you don’t fancy using your big toe, as the weaver from Tarabuco pictured at left is doing, a cord can be passed through the end loops at the other end of the warp which can then be wedged inside a drawer or looped over a “C” clamp.

I am going to use these tubular bands as pretty ties for my loom and any other time I need cord for my weaving projects and I hope to experiment a lot more with designs and colors.

So, that was one on-the-road project finished. My other demo warp is something quite different. A big white canvas looking at me and asking to be decorated…

There is something very lovely and somehow “earthy” about creating this plain and simple warp-faced white cloth and I want to make any patterning minimal. I have added a couple of weft-twined sections. Perhaps I will do some more weft-twining or maybe some soumak with a bit of added patterning with supplementary wefts. I left a lot of unwoven warp at the start in case I want to add a large weft-twined pattern later. As usual I don’t have plans for the finished piece. I will just see what happens.

Then there was time to do something with a sample piece that I had completed shortly before leaving.

You may remember the ikat weave-along that we were having on Ravelry.

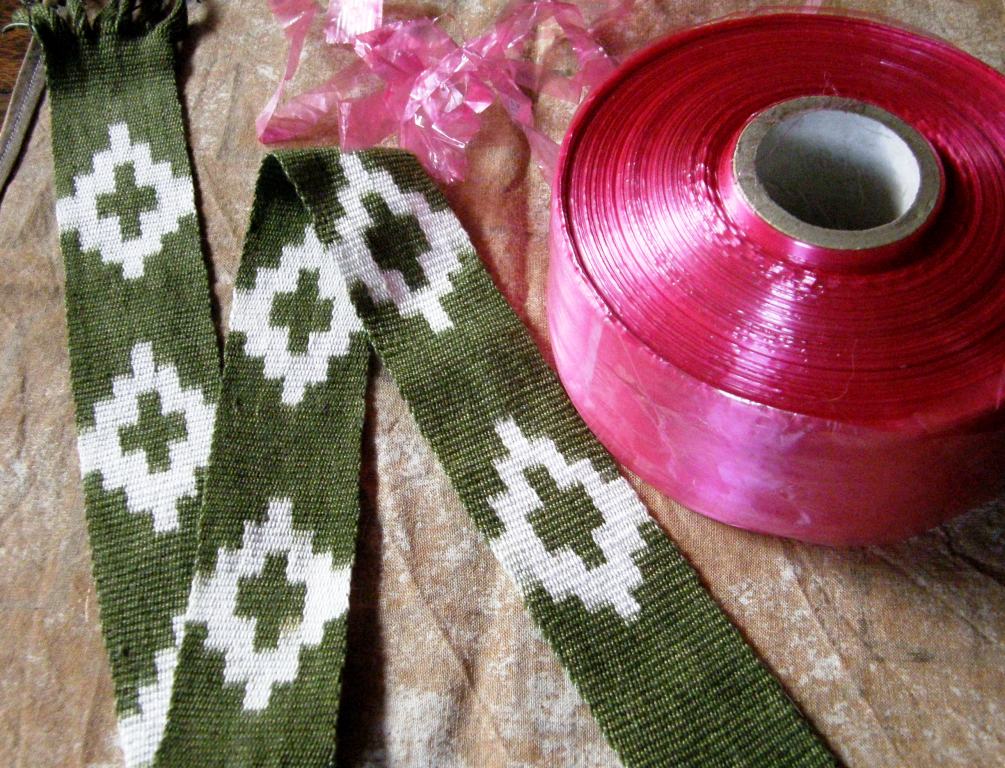
My friend Betty in the US gave me a huge roll of ikat wrapping tape so there will be many more ikat experiments in my future!

I have been using cassette tape until now and had a small “oopsy” in my last project when my dye solution was too hot for the tape.

I am sure that this special tape has been designed to stand up to being boiled in dye baths. It is very wide but tears easily into perfectly straight narrower strips…what a dream!

Here is the second warp which I tried after the green one above. This was my first time trying over-dyeing with a second color and spot dyeing.

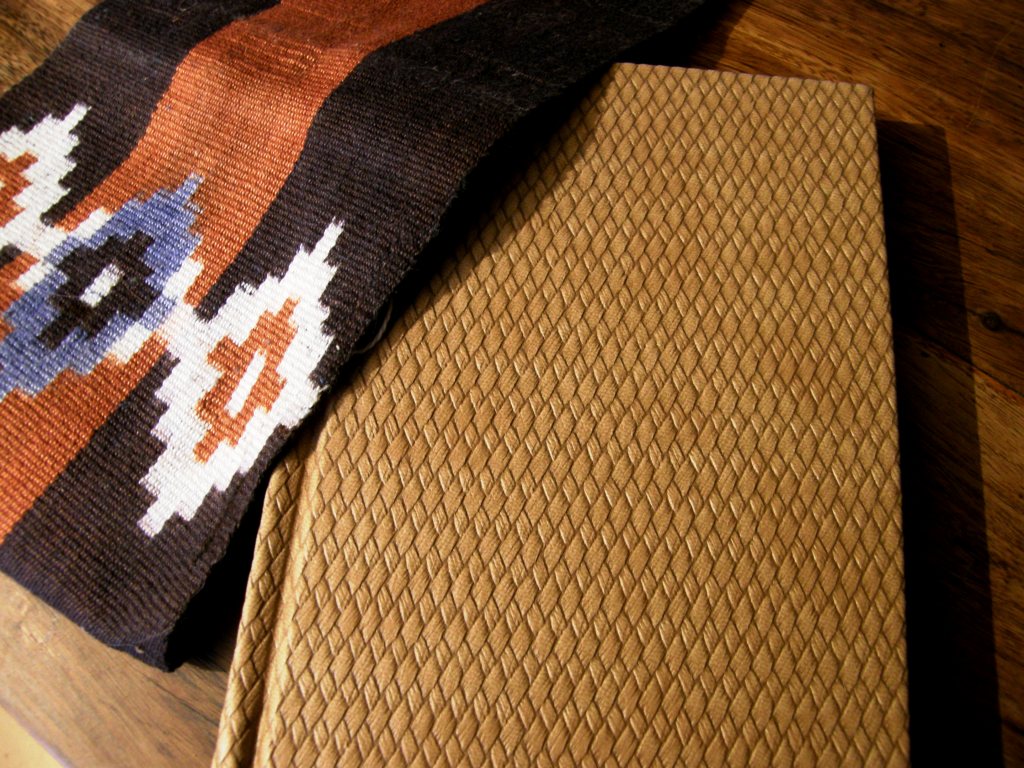
My friend Jeen in the US gave me a lovely travel journal and, even though its cover is very beautiful, I decided that my experimental ikat piece would make a wonderful jacket for this book.

I have to admit I was a little nervous. Was I about to ruin both sample and journal?

I used contact cement which is pretty strong stuff. Would it eat into the material on the journal’s cover and destroy it? Would I mess up and glue it on crookedly?

I have done that before with contact cement when gluing cork sheets to a table top. Once that stuff is ready to go you are pretty much committed and it won’t forgive any mistakes! Fortunately it all came together and I am very happy with the result.

The little vessel in the picture was a gift from a friend in Ecuador. The pen is made from sandalwood and was brought to me from India over forty years ago! Goodness knows how I have managed to hang onto it after all these years of moving around and having to abandon possessions along the way. The mug rug on the far right is part of a set inspired by African designs that I made on my backstrap loom in double weave.

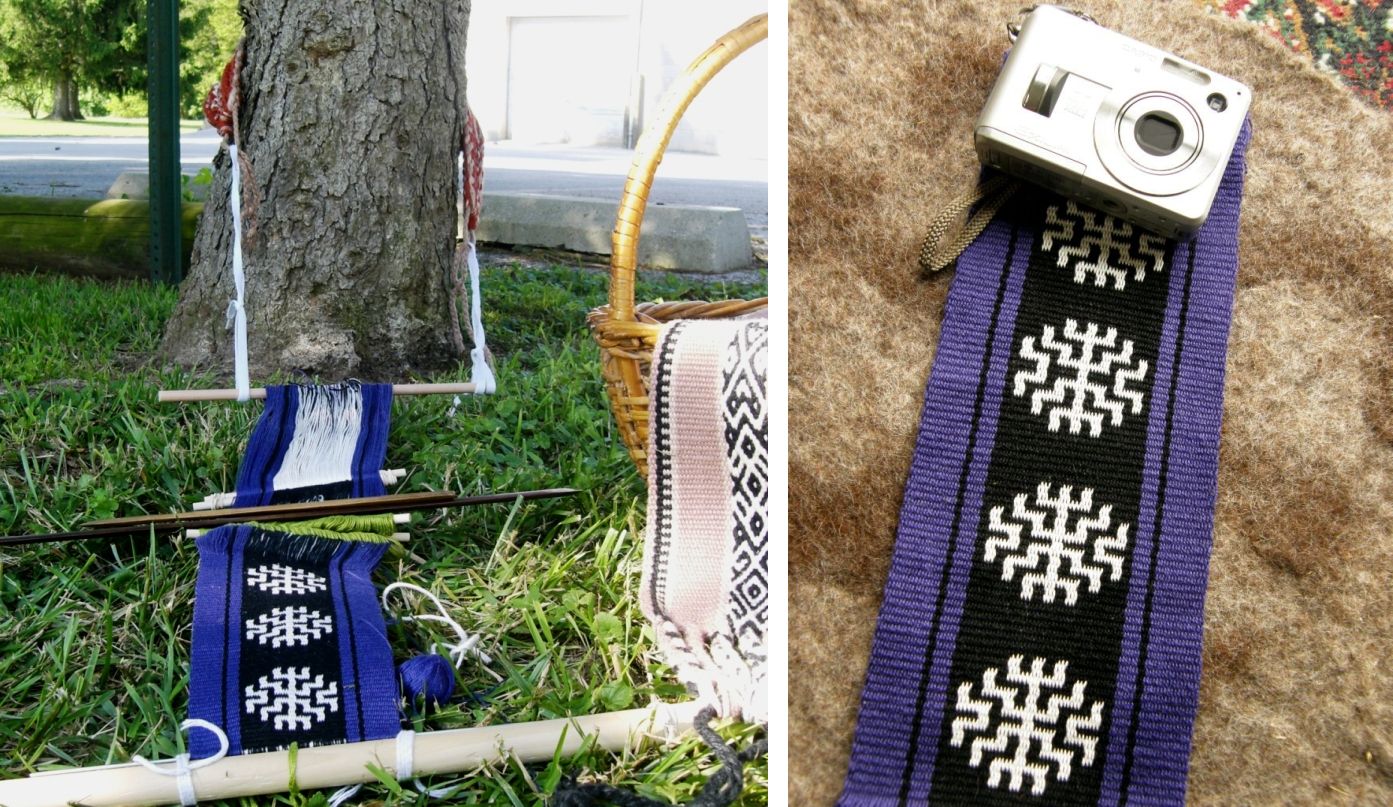
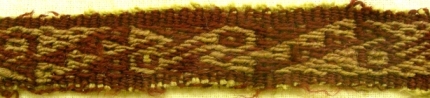
My new-to-me used camera got a dressing up too with a new strap. I was happy to have a chance to weave that bird design again…the one on the old fragment that Tom Knisely showed me…

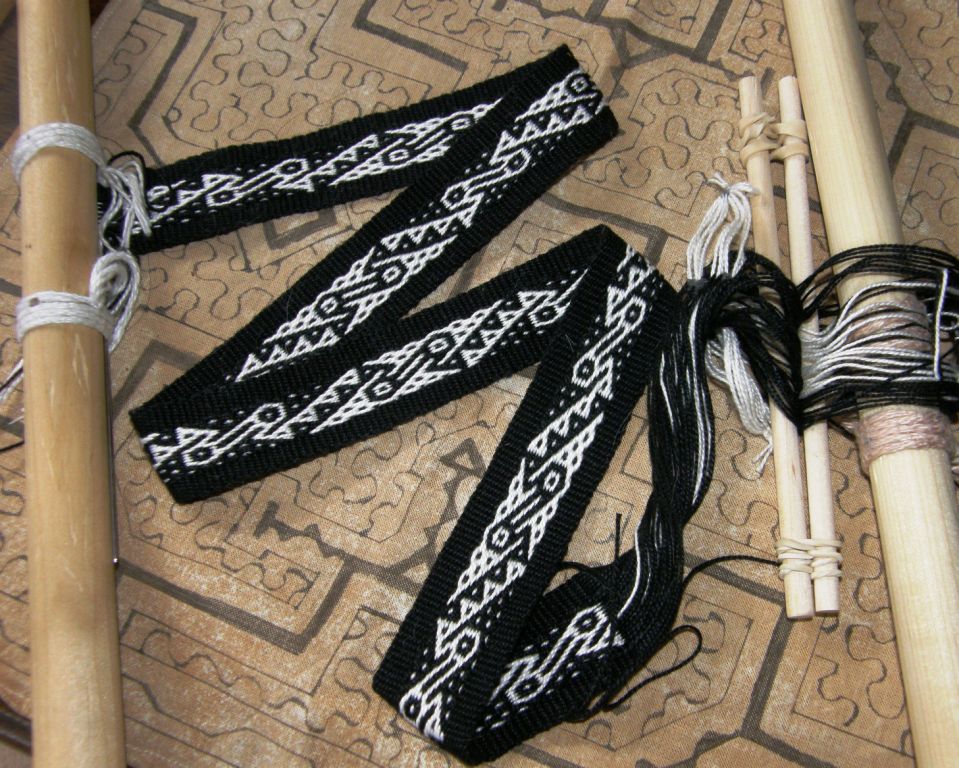
Here it is off the loom and on the camera…

And here it is on my backstrap loom. I love the way the bird motif changes from black to white along the length of the band.

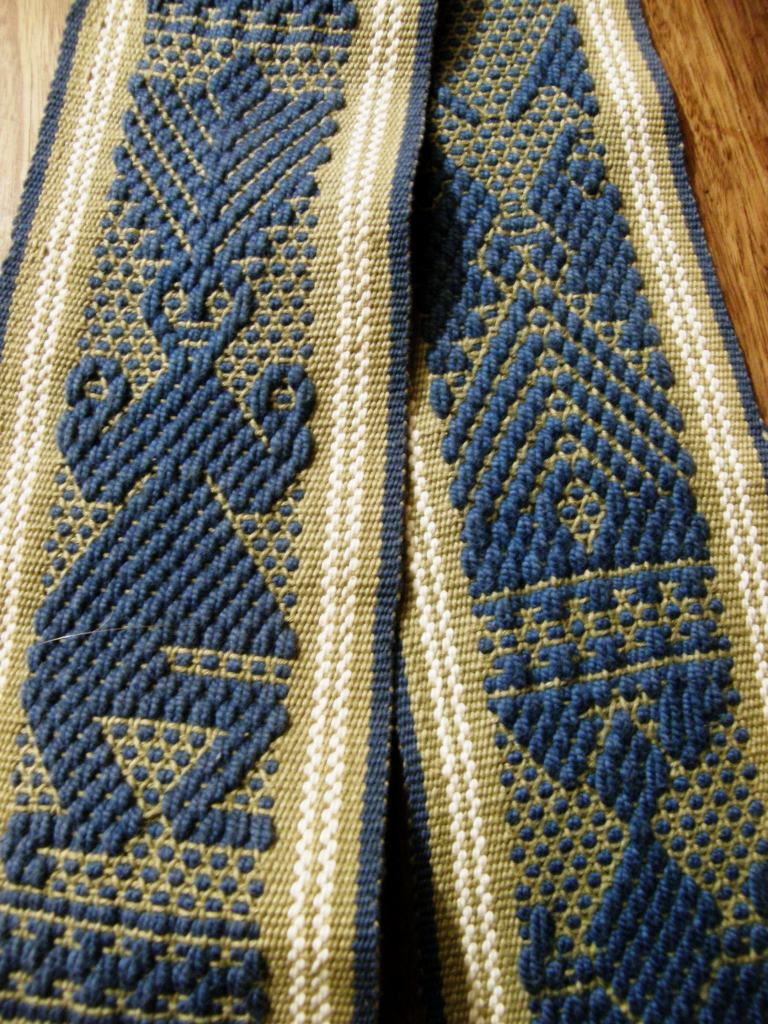
And now I have a new strap to study which was lent to me by Susan  who visited me when I was traveling. She brought it along and I was delighted to be able to see both sides of it. There are so many pictures online of these bands from Oaxaca, Mexico but you never get to see the back side. There are many more examples of these on Teyacapan’s Flickr page of Mexican textiles.

Perhaps this structure is woven somewhere here in South America too but I have never come across it so this is a great opportunity to take a good look. Maybe it was woven here in pre-Columbian times. She urged me to take it home and just send it back to her when I am done. How cool is that?

I have this urge to go back to some simpler things and explore them more…like the white plain-weave piece I am doing, some more very simple ikat motifs which again involves just plain weave and I have been also looking again at simple warp floats.

One of my weaving friends in the US wove this cool backstrap after having woven simple warp floats with me.

We just played a little with floating both colors and she went on and ran with it.

At left you can see various parts of Kristi’s backstrap which is patterned with floats in two colors. She used it the second time we wove together.

When I was at Maryland Sheep and Wool I got to see many people of all ages being introduced to fiber activities.

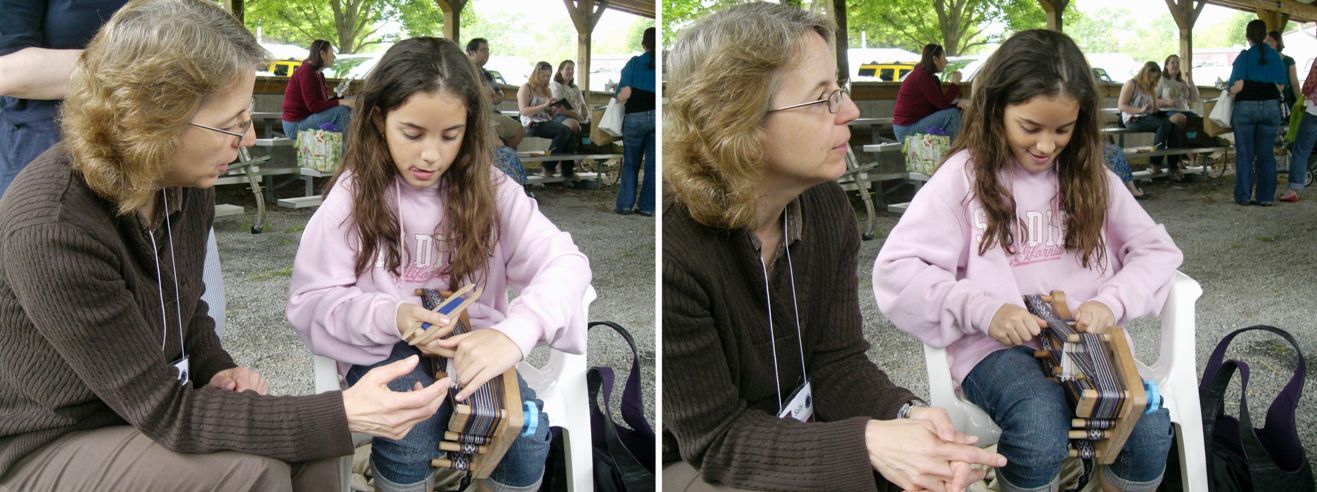
Elisabeth Hill, who I have known some time online and whose fabulous work on deflected double weave I always follow on her Flickr page (she’ll be teaching it at Convergence), came to Sheep and Wool with her niece Kylie. Kylie got a class in inkle weaving from Sally Orgren on her famous and well-traveled loom when we had a Weavolution meet-up at midday. Look at that smile. It looks like a new weaver has been born.

One of Elisabeth’s deflected double weave pieces won first prize in the exhibit at Sheep and Wool. I don’t think the picture I took does it justice so please take a look at her Flickr page to see all her beautiful creations.

Some lessons, like the one Kylie had, were completely impromptu. I wonder if as Kylie grows and continues to weave (and what wonderful inspiration she has in her aunt Lisa) she will remember her very first lesson there in the Rabbit Barn at Sheep and Wool on Sally’s “Inky”. Other classes were more formal…

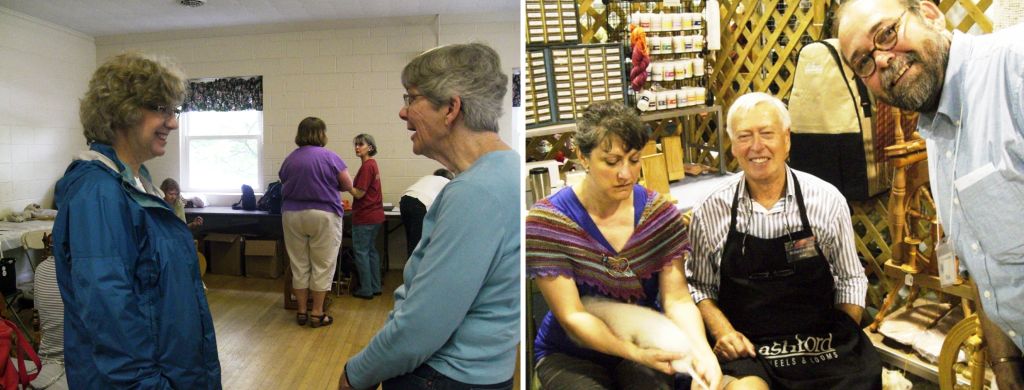
There’s my friend Claudia chatting with spinning teacher Maggie Casey before class and Richard Ashford was at The Mannings booth giving spinning tips with Tom Knisely looking on.

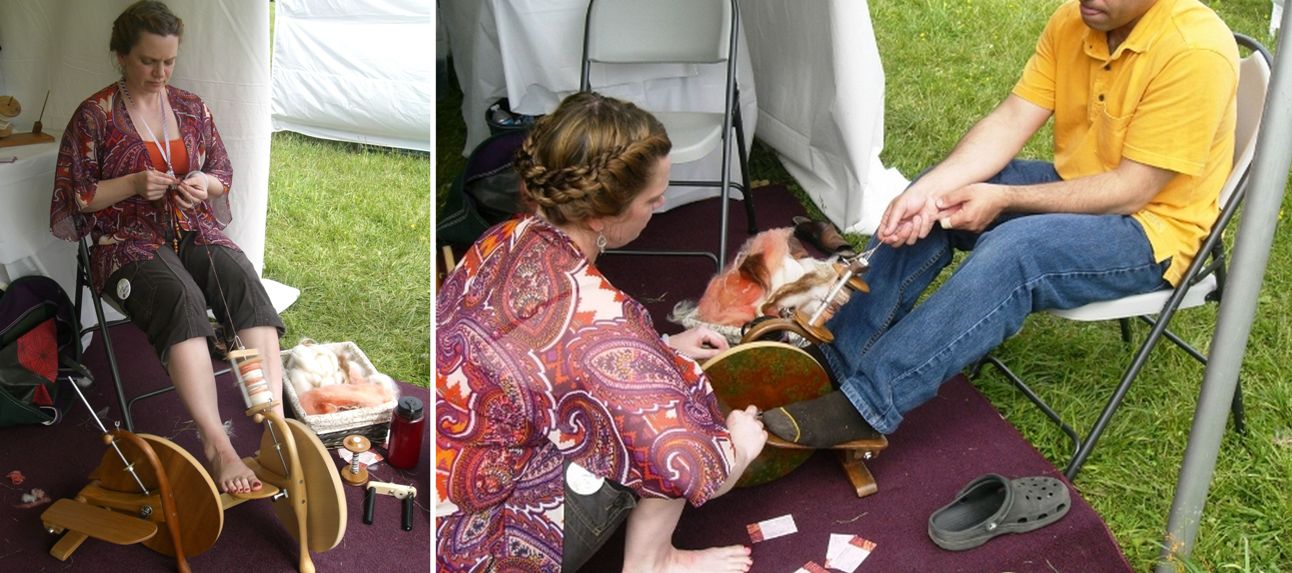
And the guys were into it too. Here is a gentleman having a spinning class on the ”Pocket Wheel” which was a big hit.

It was fun to see the team of young guys and gals who entered the Sheep to Shawl Competition this year.

Some things I saw at Sheep and Wool inspired this little project this week…

A simple little pebble weave band, right? But wait until you see the band that inspired this…

Isn’t that spectacular! Now you can see where my little purple and yellow band fits in! This was woven in Ayacucho, Peru and is probably from the same area or at least very close to the place from which my pebble weave teachers originated. Although they taught me in Huancayo, they are natives of Ayacucho and the little animal motifs on this band are very much like the ones they taught me. I would guess that this band was woven with the same two-heddle method that I learned in Huancayo with some additions for the third color.

The quality of the weaving is superb. Sadly it probably won’t be “popular” with some tourists who generally seem to prefer handspun wool and natural dyes. There is so much weaving in Peru that we just don’t get to see and coming across these bands at the Sheep and Wool festival was such a treat for me especially since I have not seen anything like the motifs I was taught back in 1996 in the books I have on Peruvian weaving.

Except for the purple and yellow section, it is a three-color pebble weave. Aren’t those braids and pom poms beautiful?!

Here is a little something I picked up from the same stand. I was tipped off by braider Rodrick Owen that these were available there….a sweet braid with tassels from Ayacucho being sold as a keyfob.

And finally, here is a wonderful display of bands made by Yonat. Yonat feels more comfortable on an inkle loom and so takes what she weaves with me and transfers it to her loom. Not everything here was originally backstrap weaving. Some bands, for example, are from the workshop on Sami weaving by Susan Foulkes and others are Yonat’s original creations.

See you next time. I hope that all of you can take some time off for a little weaving therapy this week.

Backstrap Weaving – Spinning Up Some Woolly Winter Warmth

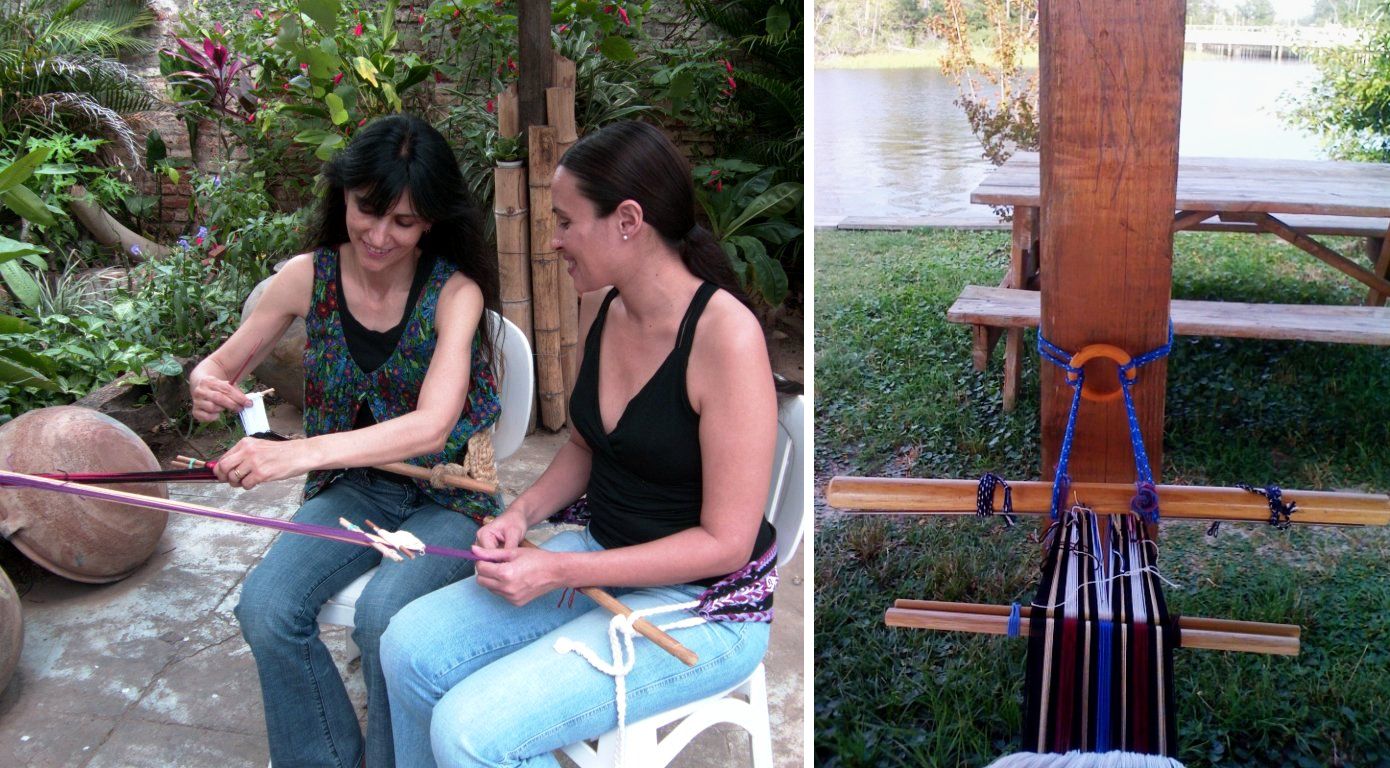
It seems that I must have gone too far taunting the weather gods last week when I posted a picture of my friend Lalenya and I weaving in our summer gear in her beautiful flower-laden patio.

BAM! It got cold. Well, cold at least for here in banana land which means temperatures in the high 50s and low 60s. It’s sounds like a joke, I know, but we suffer here when the temperature drops that low in homes that are designed to stay cool rather than warm…cold ceramic floors, no hot water in the kitchen and electric shower heads that give tepid water at best unless you are willing to turn the pressure down to a dribble. And it is not only the people who are feeling it…thousands of fish turned up dead in the local Pirai River and Lalenya woke up to find her dog in a cramped up ball and had to take him to the vet.

Well, at least it has put me in a woolly frame of mind for the Tour de Fleece spinning challenge on Ravelry and it is fun reading posts from other wintry southern hemisphere folks in South Africa, New Zealand, Australia and other South American countries who have been participating. And it is nice seeing the summery pictures from the northern hemisphere too.

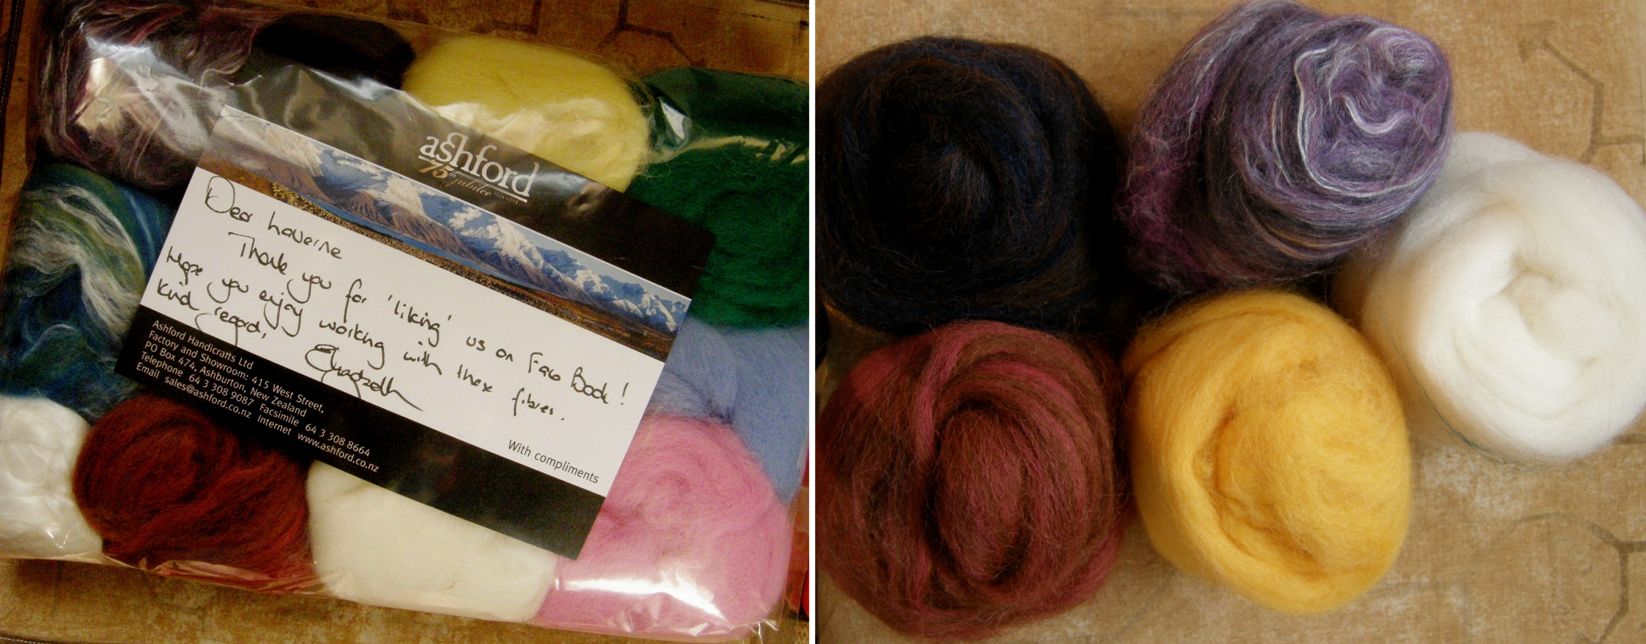
My Tour de Fleece challenge is spinning up the colors I like in this package of roving that I won from Ashford.

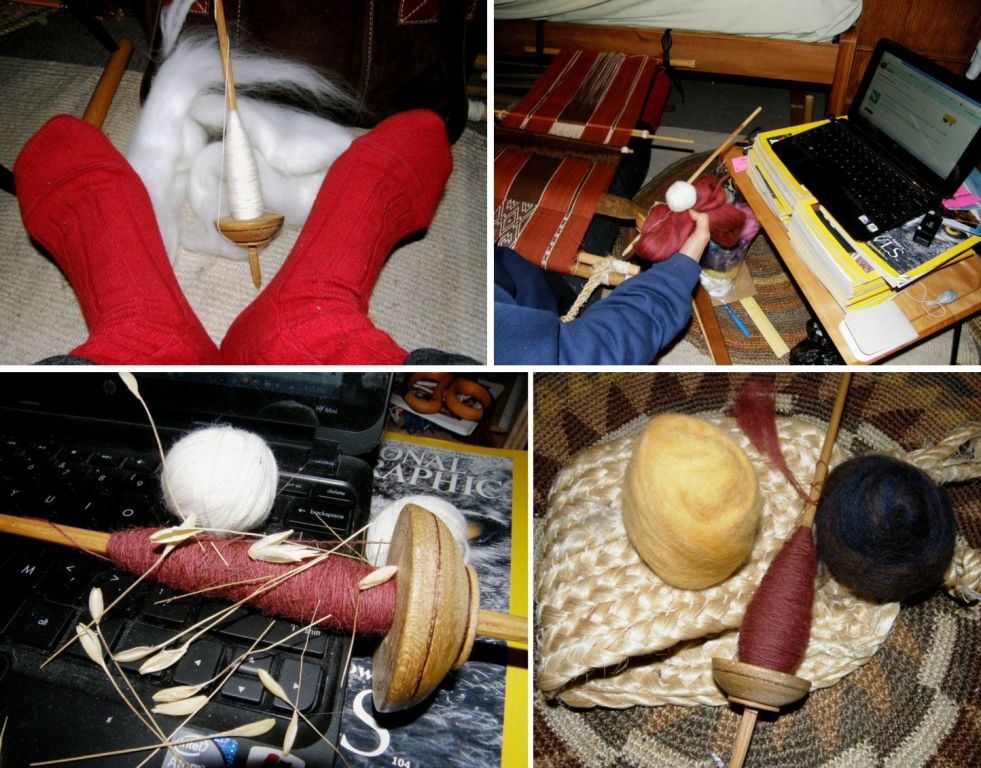
I got my socks on and spindle out and joined in what can only be described as a spinning frenzy. Everyday spinners post pictures of their progress. Some days have had over a thousand posts and while reading through and admiring the creativity of some of the shots, I have come to the conclusion that I am not a true spinner at heart. Again, I tell you that I don’t have a “refined palate” for spinning. All those pictures start looking the same to me after a while yet I do enjoy soaking up everyone else’s excitement and have looked at my own thread-laden spindle with a slightly more critical eye after reading a discussion on the beauty of the shape of a cop.

But the truth is…all I want to do is get this stuff spun and onto my loom!

Above you can see my progress so far…nothing compared to the majority of folks out there. On day one it was all rather novel , the cold, the wearing of socks, the spinning – that white roving was smooth as silk and so easy to spin.

On day two I really wanted to be weaving and so set myself up at the loom so I could follow online discussions and put in a turn or two on the spindle without even having to take off my backstrap.

In keeping with the Tour de France bicycling metaphor, my bike took a bumpy cross-country detour off the smooth race route with some crashes into bushes and rolls in the grass on the third day…that was a kind of rough and stubborn piece of roving. On day four I took my feet off the pedals and just coasted along… didn’t see much progress I am afraid but I was finally able to show off a fat cop on day five (very pleased with this new addition to my meager spinning vocabulary “cop”).

While others spoke eloquently of the breed of sheep and exquisite blend of fine fibers they were spinning, all I could say was that the white stuff was nice and the red was a bit tricky. (Again I can relate this to those of refined palate and taste who can make elaborate descriptions of wine while I simply know it as red or white).

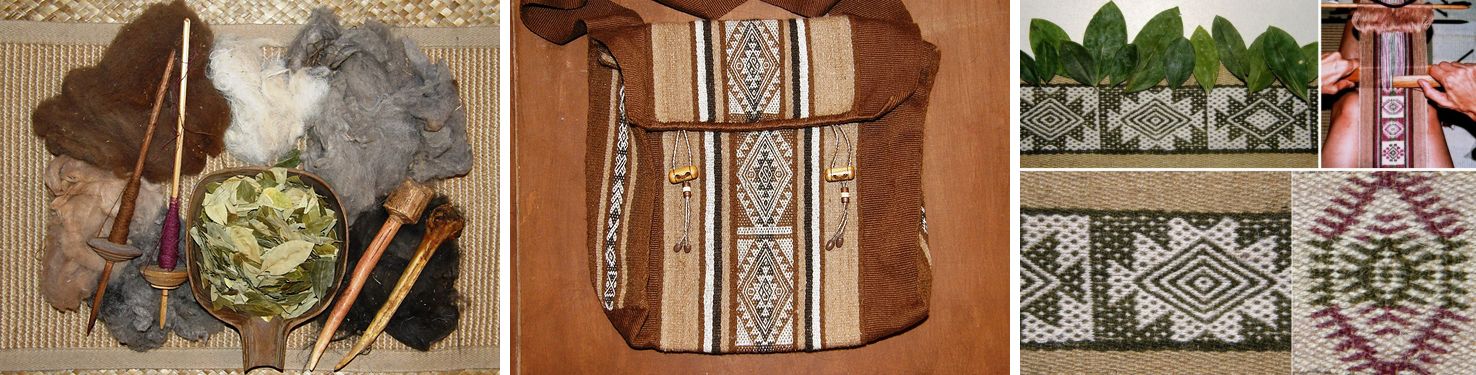
I am pretty happy with the fact that I am spinning wool and can now add this to my fiber spinning experience which so far comprises llama….

and, more recently alpaca…

Although I have been spinning cotton in the way I was taught in coastal Ecuador, I need a lot more practice with that before I feel I will be able to weave with it.

In the midst of the spinning madness I was, of course, weaving and I have finished the first of what will be four placemats. This is not the first time I have made table ware and I have a few table runners and place mats, hotpads and mug rugs stashed away as gifts. I often forget I even have them.

I pulled out this one to remind myself of how to do hem stitching which is a finishing technique that I love and learned thanks to my friend Franco Rios who told me about this video. While rustling around in my gift basket, I discovered a bunch of bag projects that I had never completely finished as they are missing tabs, straps or buttons…out of sight out of mind. Some of them are now looking rather square-ish to me and I think I will try to cut and round off the flaps in the way my Guarani teacher showed me.

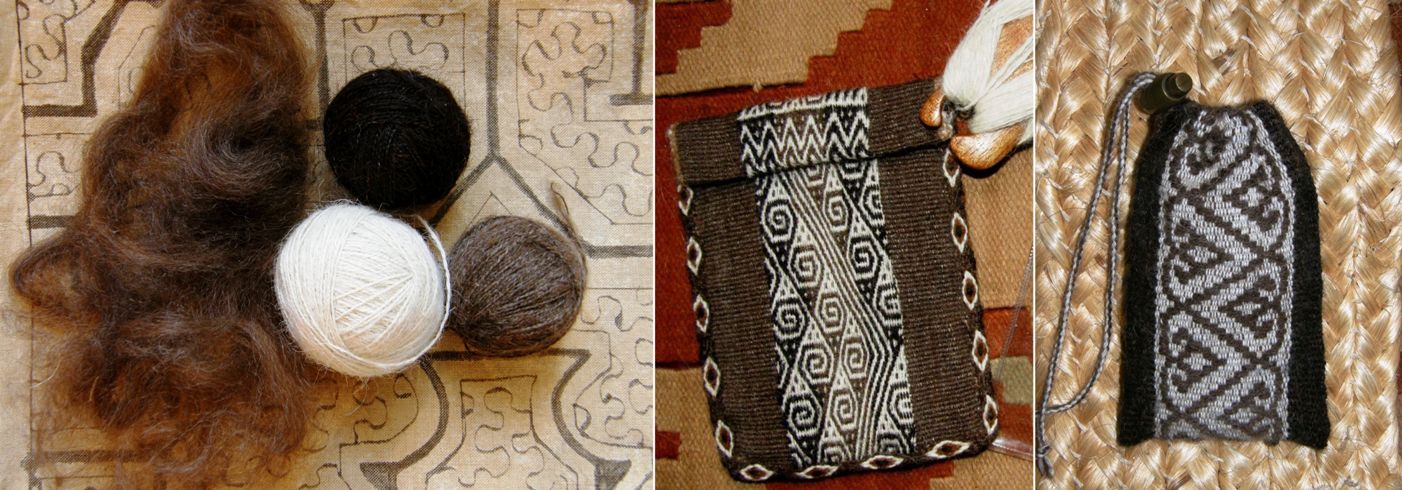
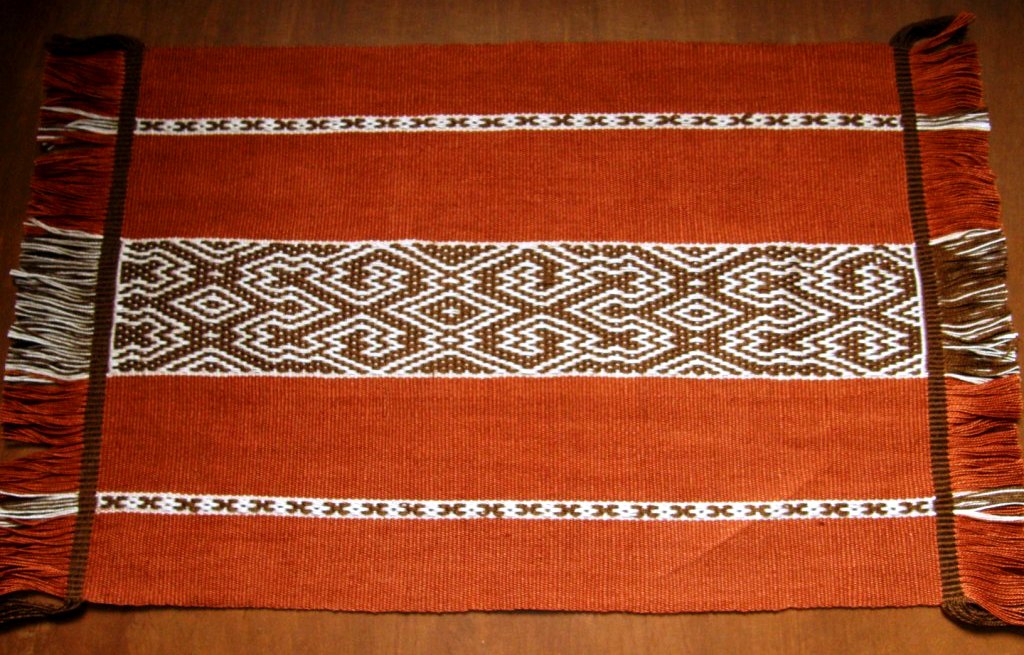
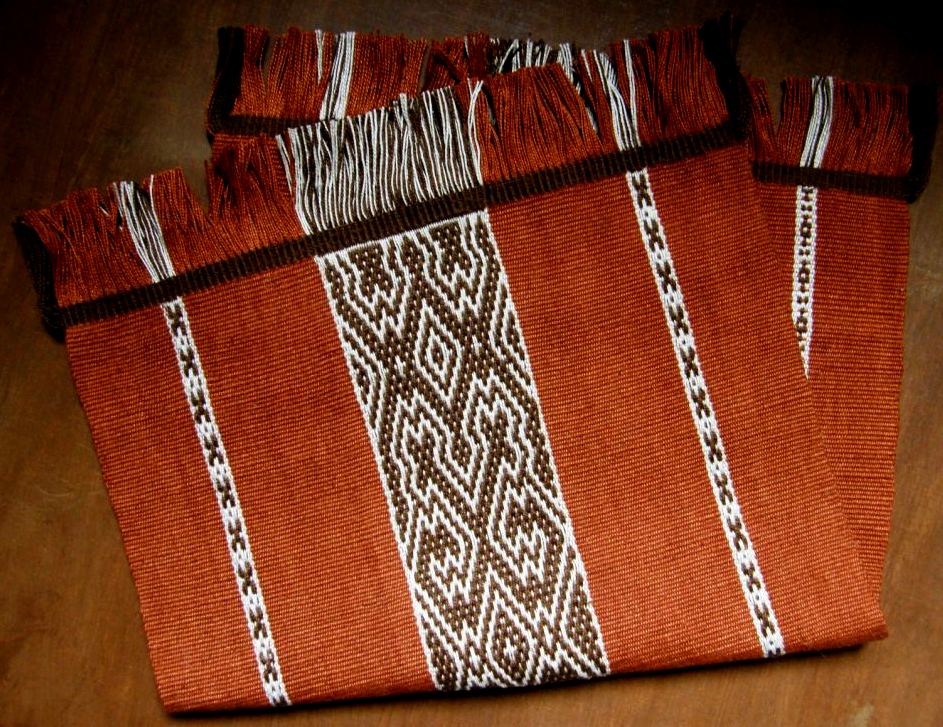
But, back to the new finished project, the place mat. The design is one that I saw on a woven bag made by the Shipibo people of tropical lowland Peru. I am hoping to make four placemats, each one being in a different color scheme and having a design from a different culture.

You can see that in the end I didn’t hem stitch the edges. I had originally wanted to twine the edges with a design based on the main motif much the same as I had done with this Montagnard piece…


That was the plan but when I finished the weaving I decided that I wanted to keep it simple and so twined in just plain brown instead.

I used the same yarn as I had for the warp and weft in the weaving and twined around groups of six warps.

In the past I have twined around four and the twined sections have ended up wider than the woven piece. A group of six warps seems to be the right size.

This was a nice way to protect the edges although a lot more time consuming than hem stitching. I am always happy for a chance to keep up the twining skills.

The design on the next place mat in the set will be based on a Mexican belt and these are the colors that I have chosen…

I hope to include a few small spots of supplementary weft patterning among the warp floats as I did in the small band experiment at left.

I really enjoyed this place mat project. It has been a while since I last wove a wide-ish piece and that terracotta color was such a pleasure to weave with. This is the first one I have made with #10 crochet cotton.

This was a new design for me and it is always exciting to see the pattern appearing. The designs I have planned for the next three are all new too.

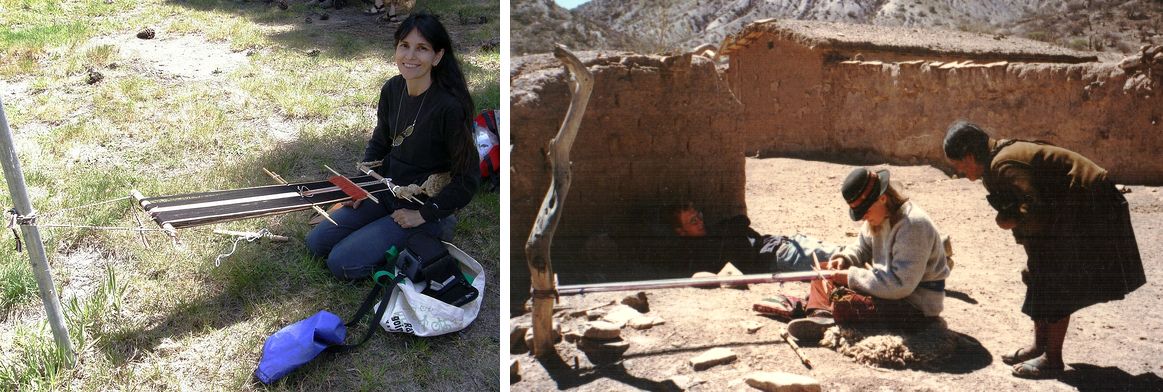
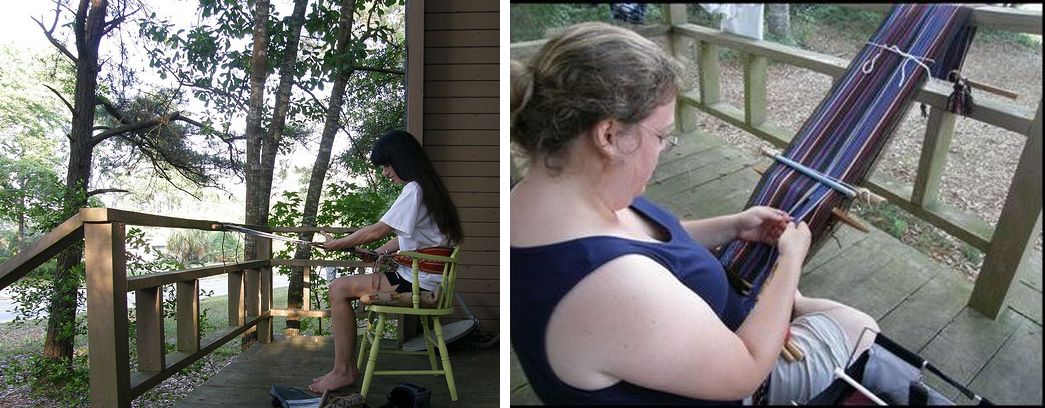
Well, I hope all you northern hemisphere folks are having a lovely summer. I thought I would post a collection of pictures of backstrappers enjoying the outdoors and I hope you will feel inspired to gather up your sticks and go outside.

Sometimes you are lucky to come upon a random post or tree trunk in an unexpected place to which you can attach your warp. That’s my friend Ulla on the right with whom I traveled in Potosi.
There weren’t any trees on the Uyuni salt lake so Carolin used her bike. Janet has no need for such things…as a truly independent backstrapper, she uses her feet!
Anna by a Chilean lake and me at the beach…Okay, so I didn’t find anything to tie up to in the sand. I inkled instead.
Bobbie has been camping at Sand Dune State Park and found something in the sand to tie onto. Sometimes you just have to get creative. Carolin’s  warp is tied to a small table against which she is pushing with her feet.

 It’s always nice when there is a deck rail to hitch to. Here at Lisa’s beach house we could listen to the birds and smell the ocean.

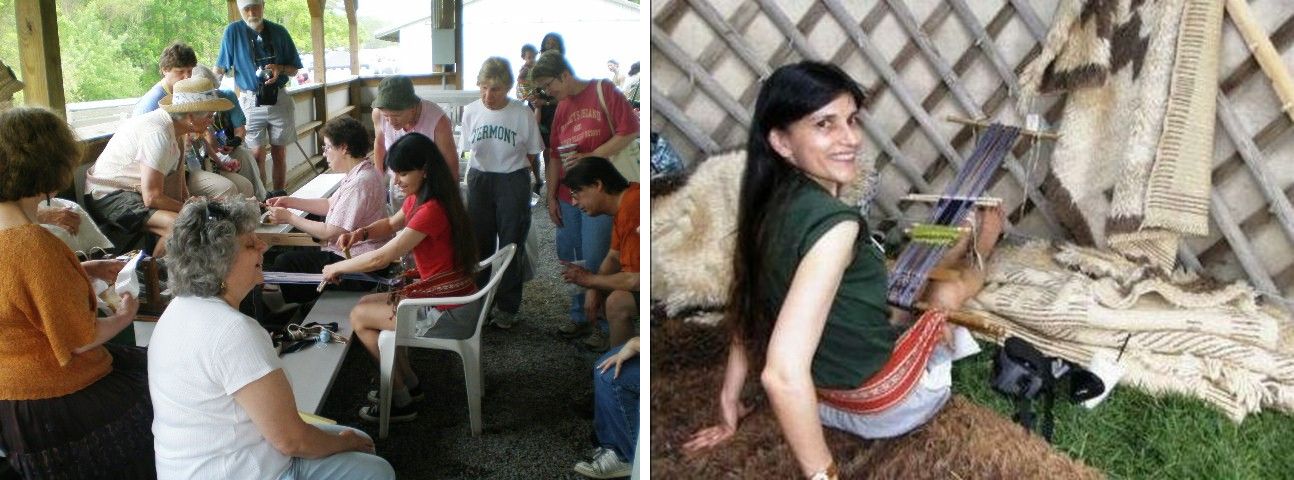
Semi-outdoors. Weaving in the bunny barn and in the yurt at Maryland Sheep and Wool Festival. The yurt had a hole on its top through which I could look up and see the sky.

I am risking upsetting the weather gods again but if you had a patio or a view like this how could you not weave outdoors! If you have an outdoor weaving shot, please send it to me. Meanwhile those of us south of the equator will huddle indoors.

Happy weaving to all where ever you are. 🙂