Backstrap Weaving – Delightful Distractions

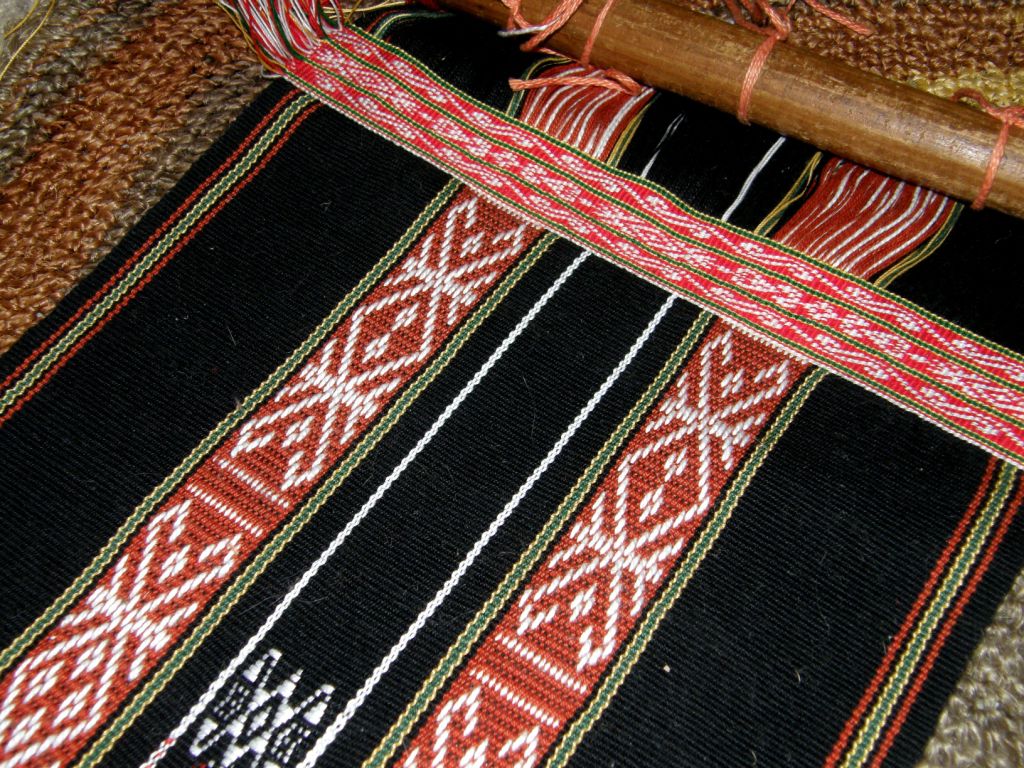
If all had gone to plan, I would have had one and a half storage bags done by now as part of my three-bag goal for the month of September. My black bag with the supplementary weft motifs from Bhutan should have been sewn and ready to stuff and hang and my Huichol design bag in finnweave should have been at least half woven.
However, some delightful distractions came my way and had me wandering off in other directions. That Worldwide Weaving Web that I am always talking about came a-knockin’ and the Band Weavers’ Grape Vine came a-tappin’.

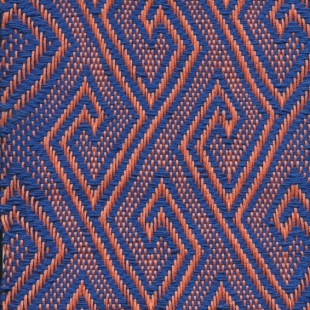
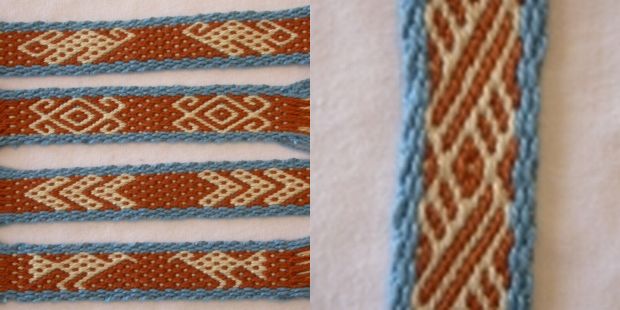
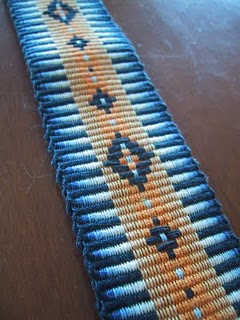
At left you can see a band woven by JacQueline Teller on her inkle loom. You may remember that I recently posted a picture of a bag she had made by sewing several plain-weave inkle bands to canvas which we were using in our Weave-Along group for inspiration.

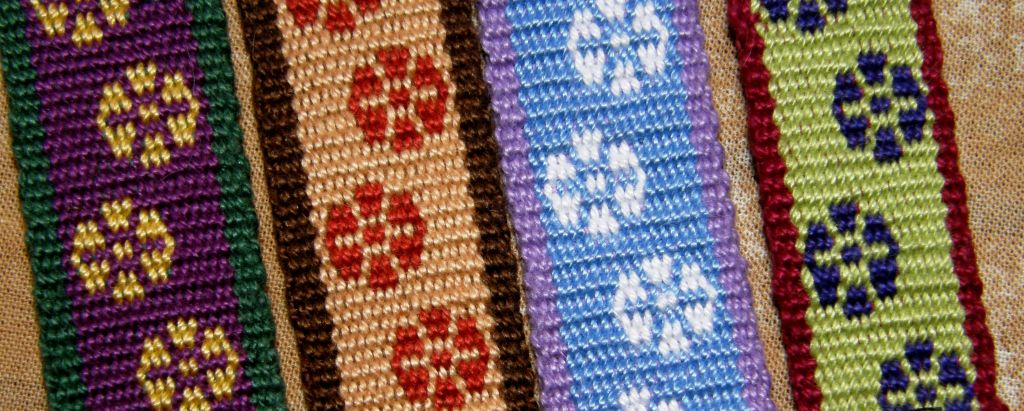
Annie MacHale (ASpinnerWeaver), queen of sashes, drew my attention to the band at left on JacQueline’s blog and, apart from the gorgeous multiple tones of blue and peach that she has used, I was fascinated by the fact that she had used spots in her warp to enhance her supplementary weft pattern.

Whenever I have started a supplementary weft patterned piece I have always created a blank canvas of single color weave on which to place my patterns. It never occurred to me that the canvas doesn’t necessarily need to be blank and that colors that have been incorporated into the warp can be used to supplement the inlaid weft patterns. JacQueline has used the light blue warp spots as part of her design and I love how she used the dark blue supplementary weft to create alternating color spots between the main motifs.
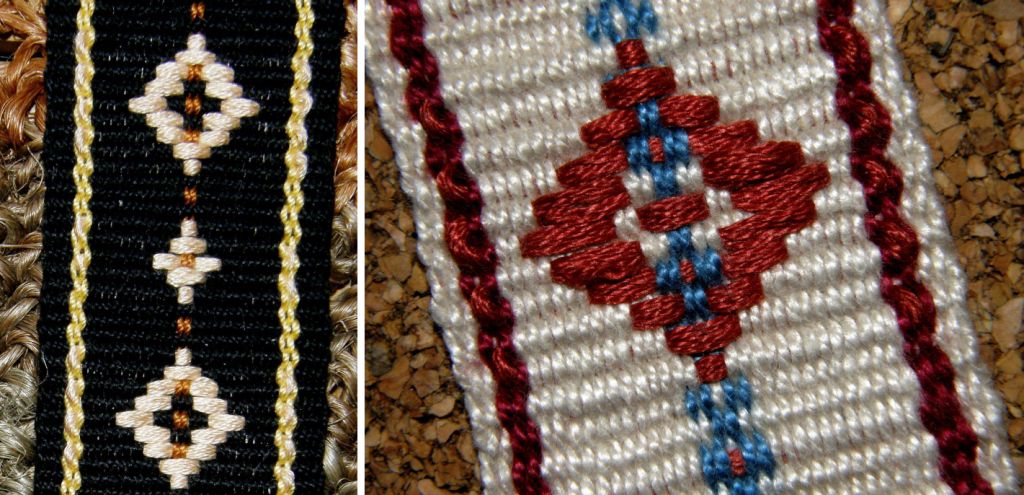
So, I wanted to play with this and, again, I just have to point out what a wonderful thing the backstrap loom is for making tiny samples.

The experiment grew from one column of warp dots to three and I found that when I made samples in black, a Sharpie was very handy for making adjustments to the pattern, blacking out unwanted exposed weft to get different effects.
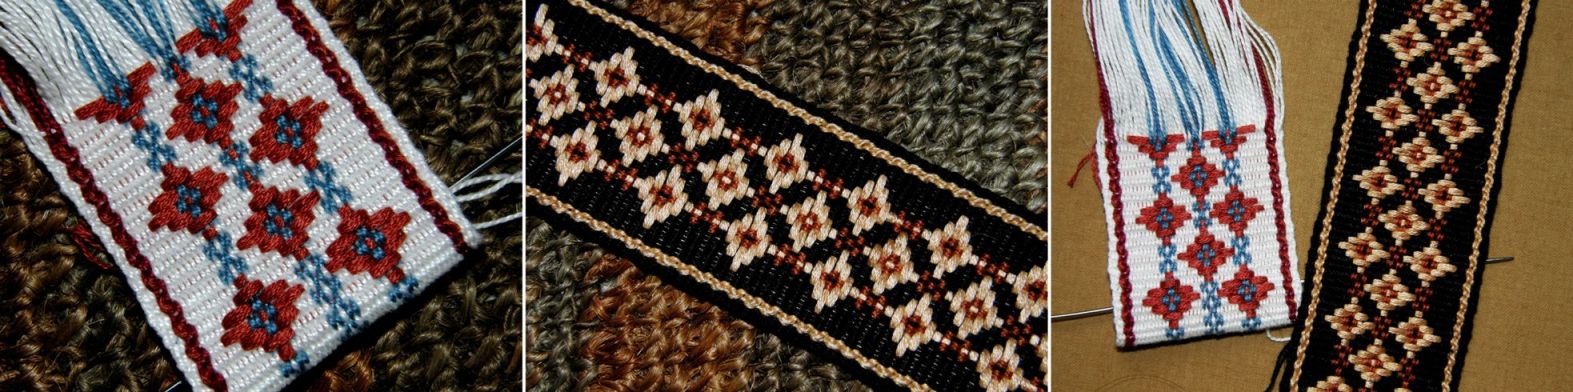
The three columns of warp spots grew to three columns of three and after some applications of Sharpie to the black one, I decided on the design I liked for a bigger project.

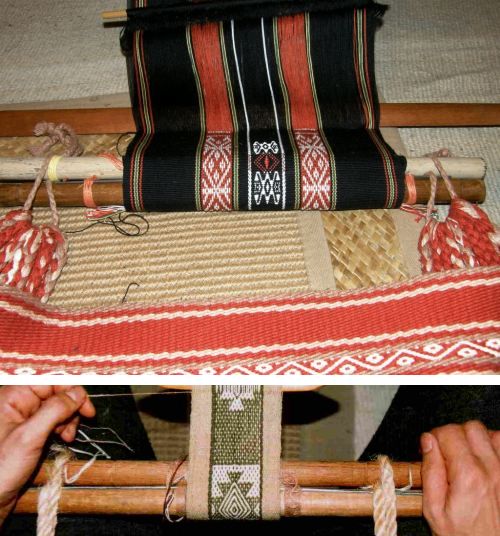
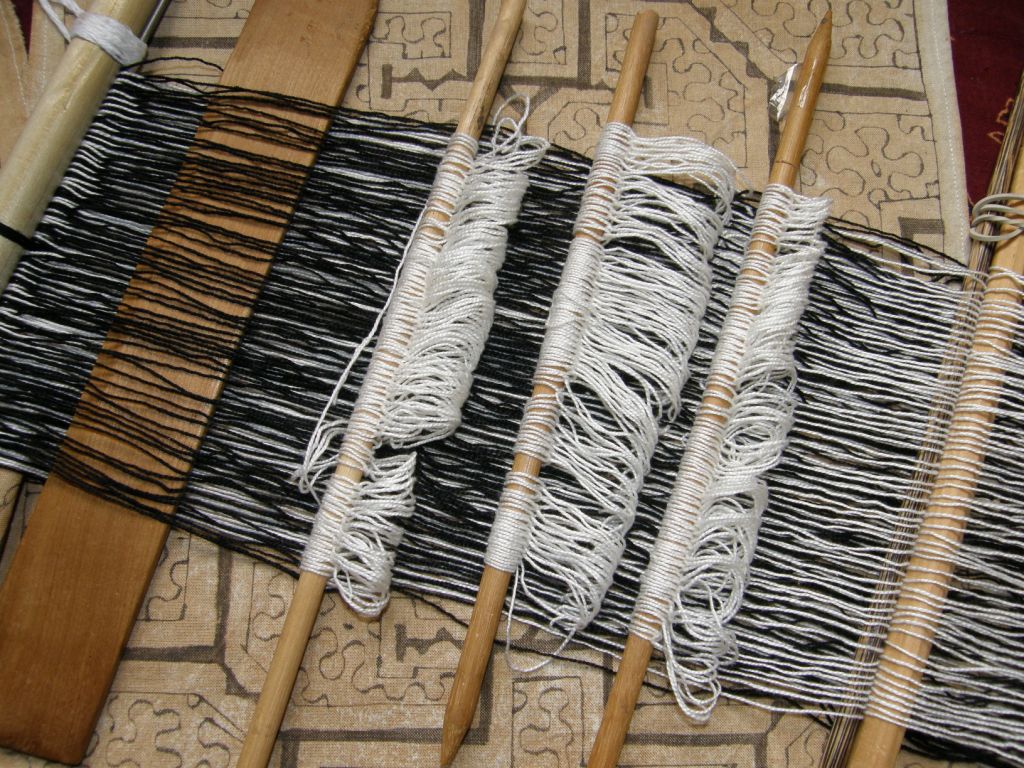
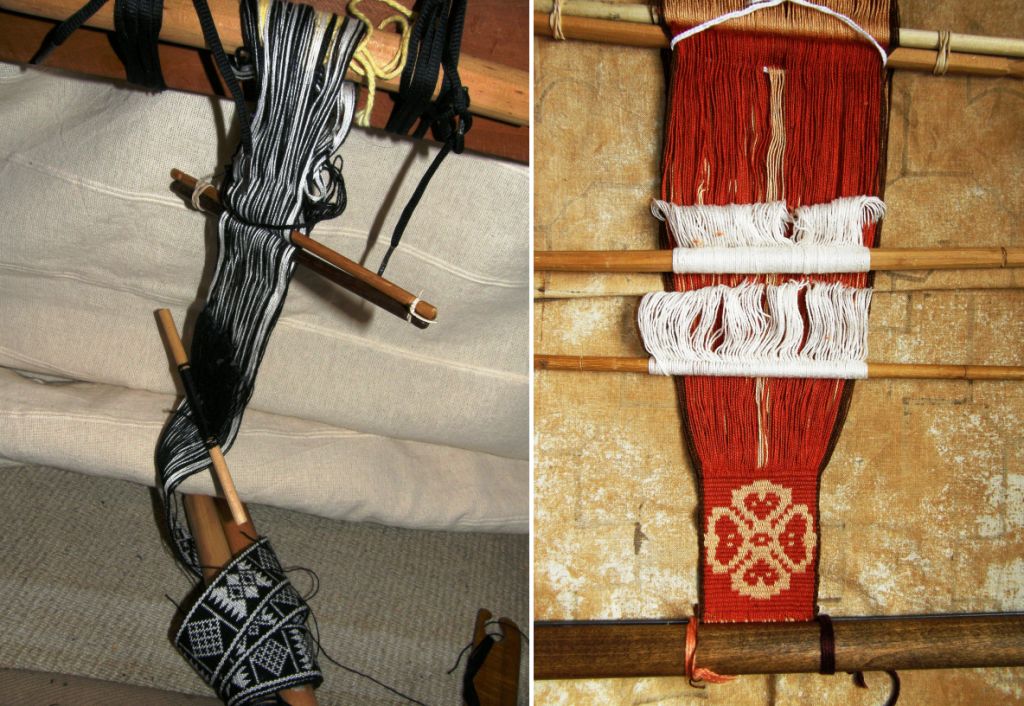
So, this is what is on the loom at the moment…(speckled with fluff and stuff)….see what you started JacQueline? This is the black thread that I had just bought for my Huichol design bag!
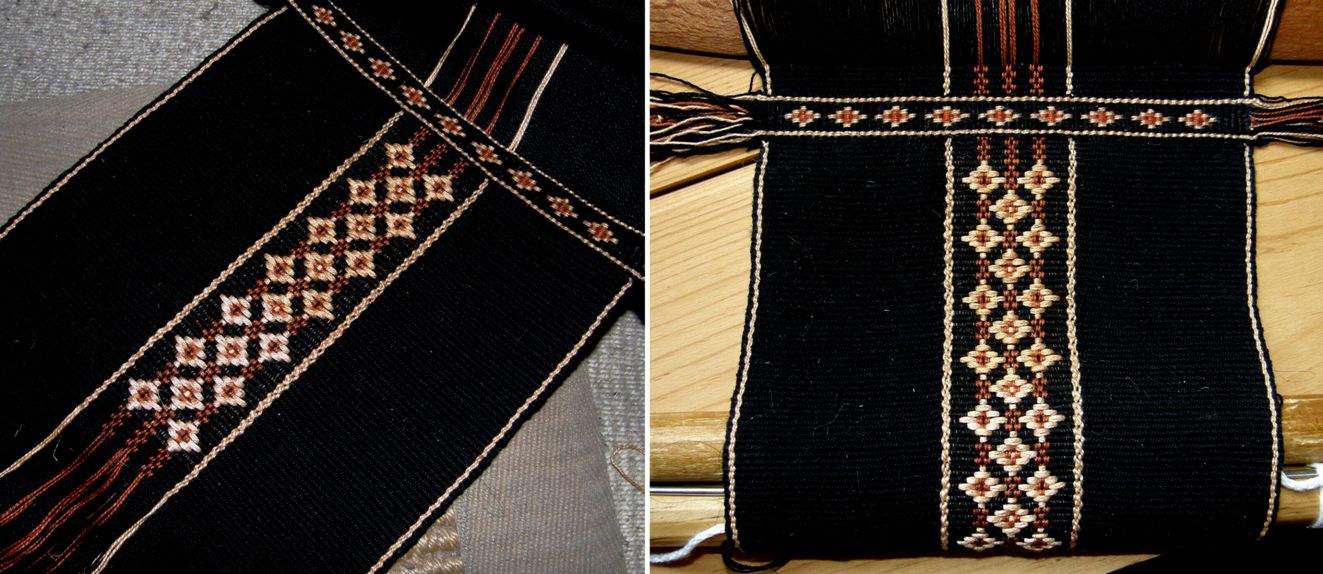
I have just finished adding a band of weft twining and I will twine that same design along the beginning edge when I have finished weaving.

I think I will do a single large supplementary weft motif in the very center followed by another band of twining and then repeat the beginning. What is it going to be? I have no idea but it has been fun getting back into the weft twining. This is the first time I have done three colors together in one row of twining in #10 cotton. What to do with all those weft ends?…I will try to bunch them into a nice tassel as the Bedouin weavers do. You can read about how I learned the twining technique and watch a video of my teacher Ngach at work in this blog post.

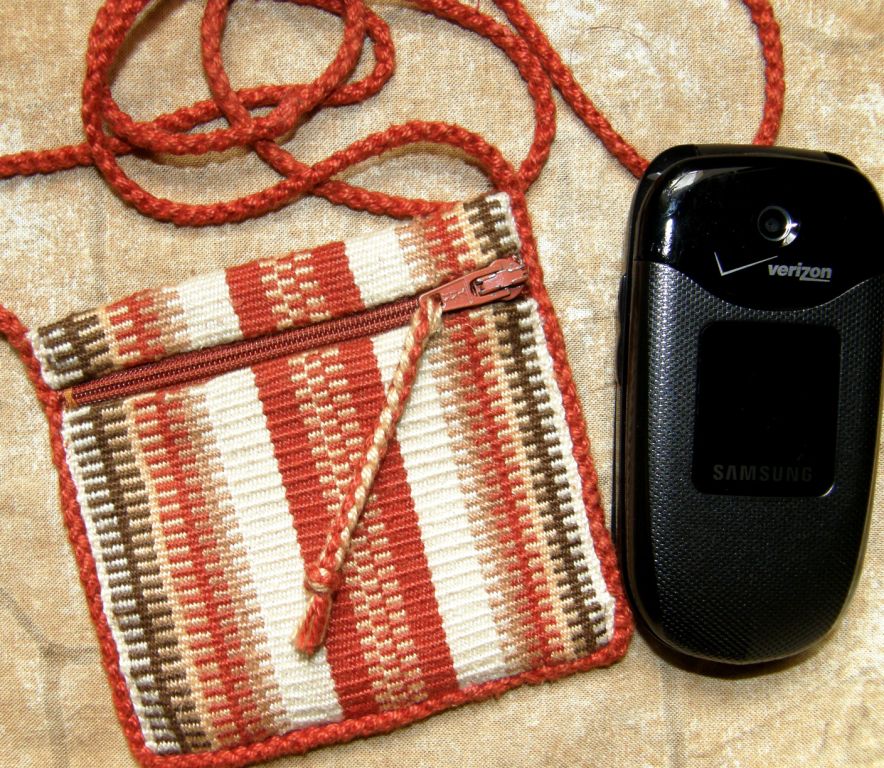
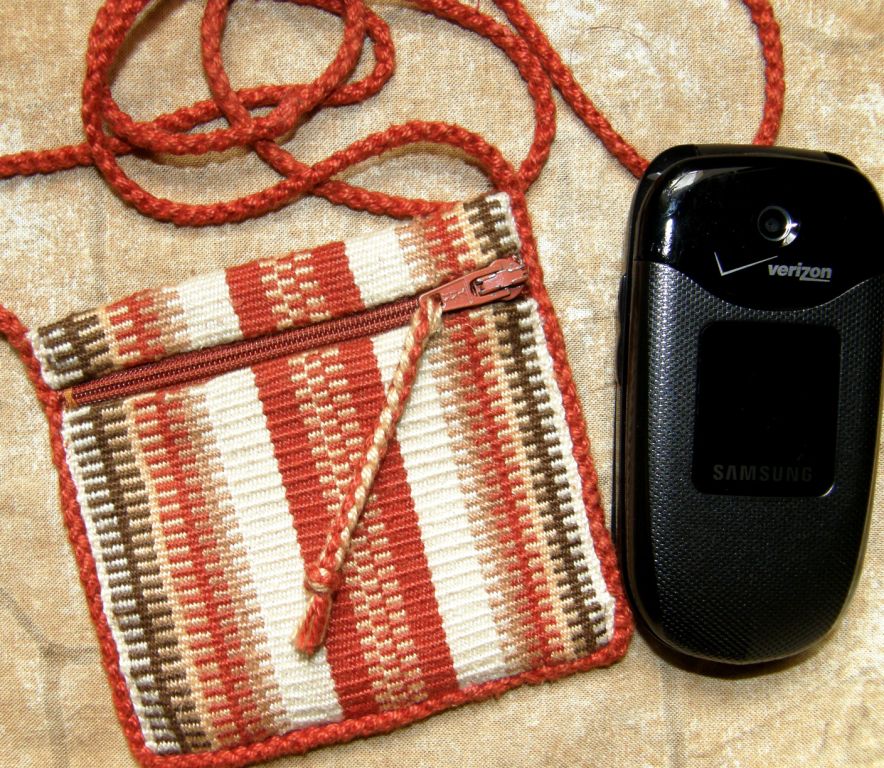
Before the distractions completely took over my weaving week, I did manage to sew up my weave-along projects into little zippered purses.
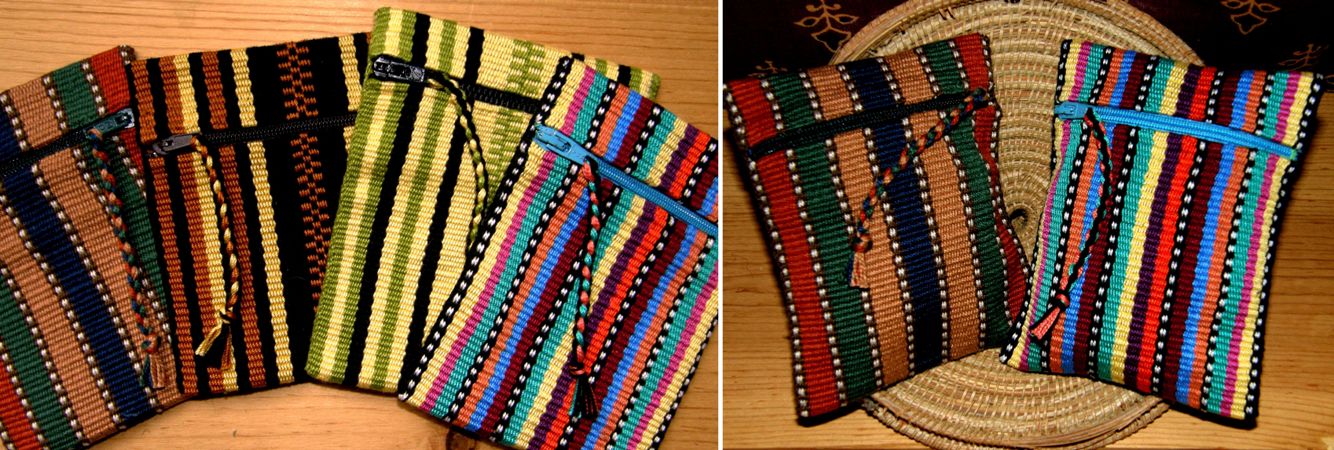
And I wove the back panel of my black Bhutan/ikat bag before my new ball of black thread got swallowed up by the distraction. And that was when I got side tracked yet again by jentide’s weave-along project which you can see at left.

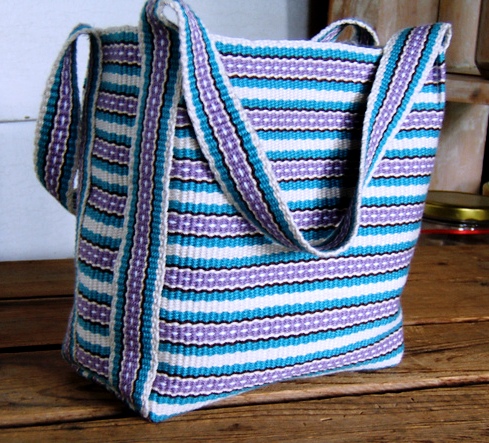
She made the fabric for this fabulous mini tote bag on her backstrap loom with the strap made on her inkle loom.

I love her stripe design but, apart from that, I am completely in awe of people who can sew. Of course I had to pester her with a bunch of questions about the construction of this bag and she pointed me to this wonderful web page where you can learn how to create a flat bottom for a bag.

This has had me pulling out the Reader’s Digest sewing book, that I had just about forgotten I owned, determined  to learn once and for all some basic sewing skills (without the aid of a sewing machine, that is)and pinning and folding and pulling my poor Bhutan bag into all shapes.

Here is its latest pinned form…

Meanwhile I am looking out for other suitable materials to use as supplementary weft. I have some gorgeous hand painted 10/2 tencel that my friend Lisa gave me that works beautifully and one skein goes a long way. Wool works well too as it fluffs out on the surface to give good coverage without “fattening” the shed in which it is laid.

And then I remembered the fine loosely plied and fluffy skeins of acrylic that I had bought in Guatemala.
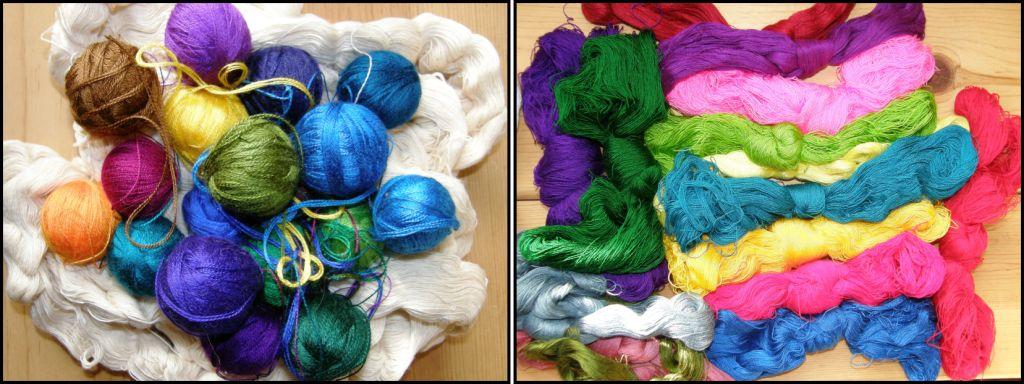
What I would really like to do is make super fine supplementary weft pieces using sewing thread as the ground warp and weft just like the ladies do here in Bolivia to make their hat bands. Their supplementary wefts are acrylic and much the same as the Guatemalan thread that I have.

The fineness of the weave means that they can get away with having quite long weft floats.

I love how the wefts are often used to fill in the negative spaces and outline the motif in the ground weave rather than forming the motif itself.

The floats are particularly long when they do that and I have not been able to reproduce these ”negative space” designs  yet as my patterning material has been too heavy and would have resulted in long and cumbersome floats. I have not yet reproduced any of the pretty Bolivian hat band designs.

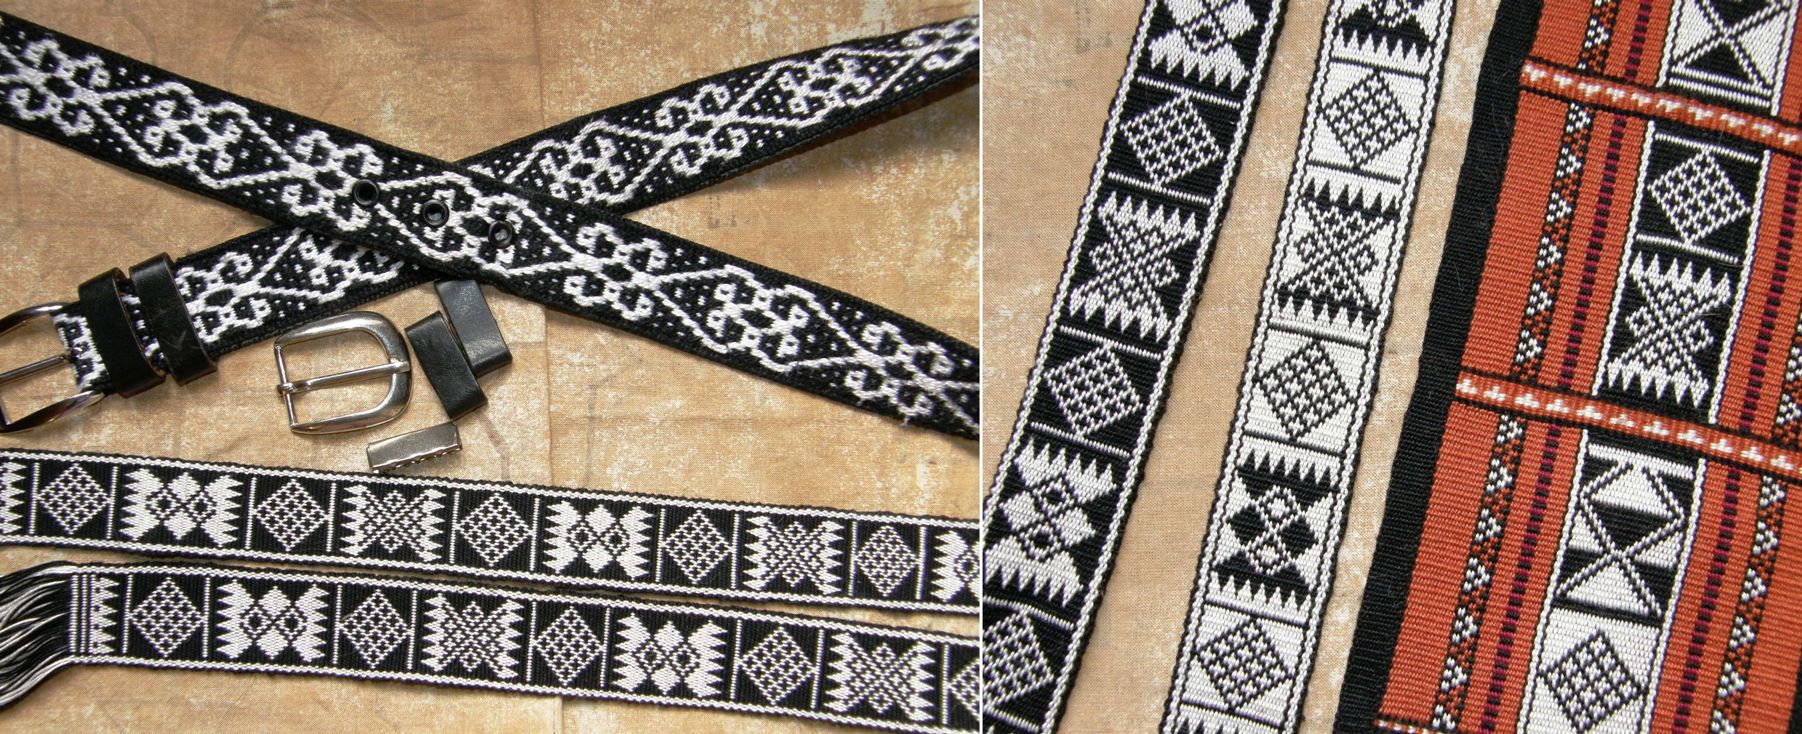
One more thing I did this week was to experiment with the traditional Bedouin al’ouerjan patterns using non- traditional colors. The most common color combination I have seen is black, red and white.

Can you tell that black, terracotta and yellow is my current favorite color combination?

This warp substitution technique produces long floats on the back of the fabric which are not so bad in #10 cotton.

It is interesting to look at the many different variations of this design to see which one produces the shortest floats.

###########################################

I will finish with this week’s Weave-Along round-up…
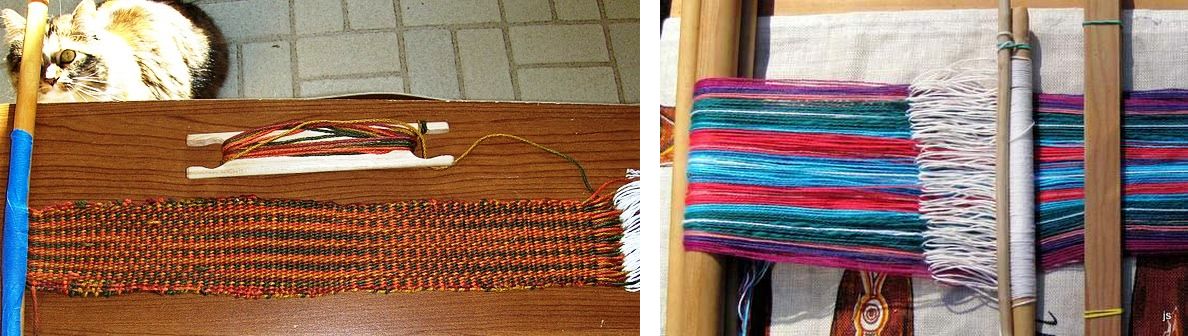
Peg is weaving on a backstrap loom for the first time ever and using Plymouth Yarn Fantasy Naturale mercerized cotton which I think is just perfect for first projects. See how quickly she has tamed that warped and how much she learned about laying in the weft and controlling the edges in such a short space. That yarn is so pretty. I have never woven anything with these multi-color type yarns. On the right, Janet has warped colorful stripes inspired by a piece of Guatemalan fabric that she has.

Dyggvi turned her narrow striped band into a neat zippered pouch and gave us the link to the instructions. Sylvie in France posted a picture of the making of her continuous string heddles on a gorgeous bright striped warp.

Jennifer’s homespun piece is under construction and Karri, who just completed her third ever backstrap woven piece is casting her critical eye over everything she produces and learning lots of lessons. We think her third project looks wonderful.

Both Amber and Marsha continue to turn out consistently straight, smooth, beautiful and useful pieces. Amber’s piece is one of two that will be sewn together to make a seat cushion. Marsha has hung her piece on a section of twisted vine. She has plans to modify it for its ultimate use. We’ll see about that next week.


Jennifer has taken the leap from homespun wool in natural colors to wild cotton stripes while Yonat, outside the weave-along, has been experimenting with those eye bending alternating warp float patterns.

Phew, quite a job winding all those colors! Many of us have come to know the “fun” of adding in all those strips of colors on the warping board and the special challenge all that cutting and tying makes for creating even tension. “Perfect” tension is something we all strive for and I think that we all come up with clever ways to somehow compensate for uneven tension once the warp is on the loom long before we are able to create that perfectly tensioned warp on the warping board. Unfortunately uneven tension will show up immediately in warp-faced plain weave in the form of ridging and cotton is particularly unforgiving.
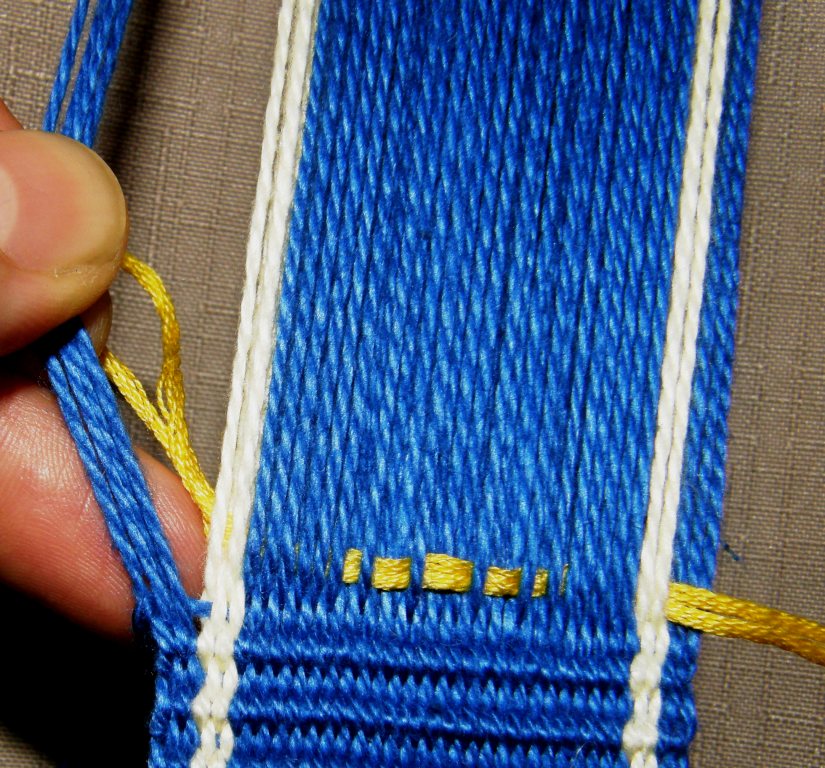
All we can do is make sure that our warping stakes are firm and sturdy and then just practice, practice, practice. Some days are good warping days and some not!

Ridging will turn up unexpectedly and most annoyingly in a piece I am working on and I have found that a worn out hole and a leaning stake on my mini warping board has been the culprit on quite a few occasions. Cranking up the edge warps too tightly caused the particular ridging problem in the piece pictured at left.

Fortunately the ridging shows up in plain weave and not in float patterning which is what I mostly do.  On the other hand, I know people who actually like the effect of the ridging. It’s a pesky and temperamental phenomena! I tried to weave a band specially for this blog post to show the ridging that results from crammed warps. The darn thing refused to ridge!

I suppose we could always do as my Montagnard weaving teacher, Ju Nie, does…
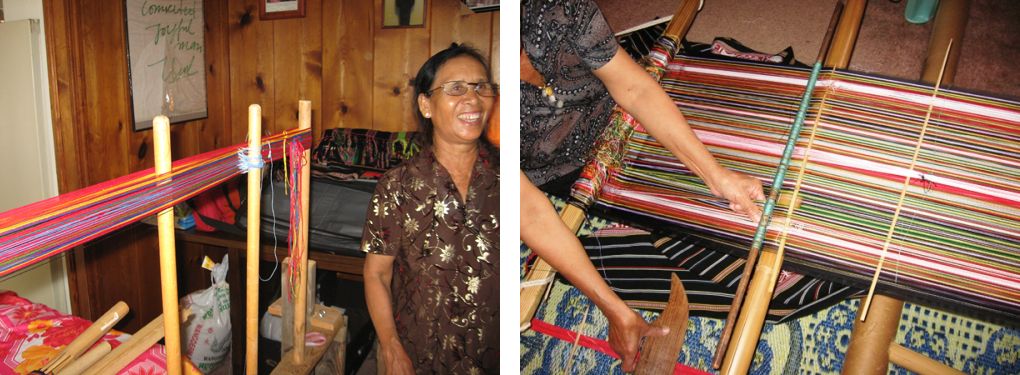
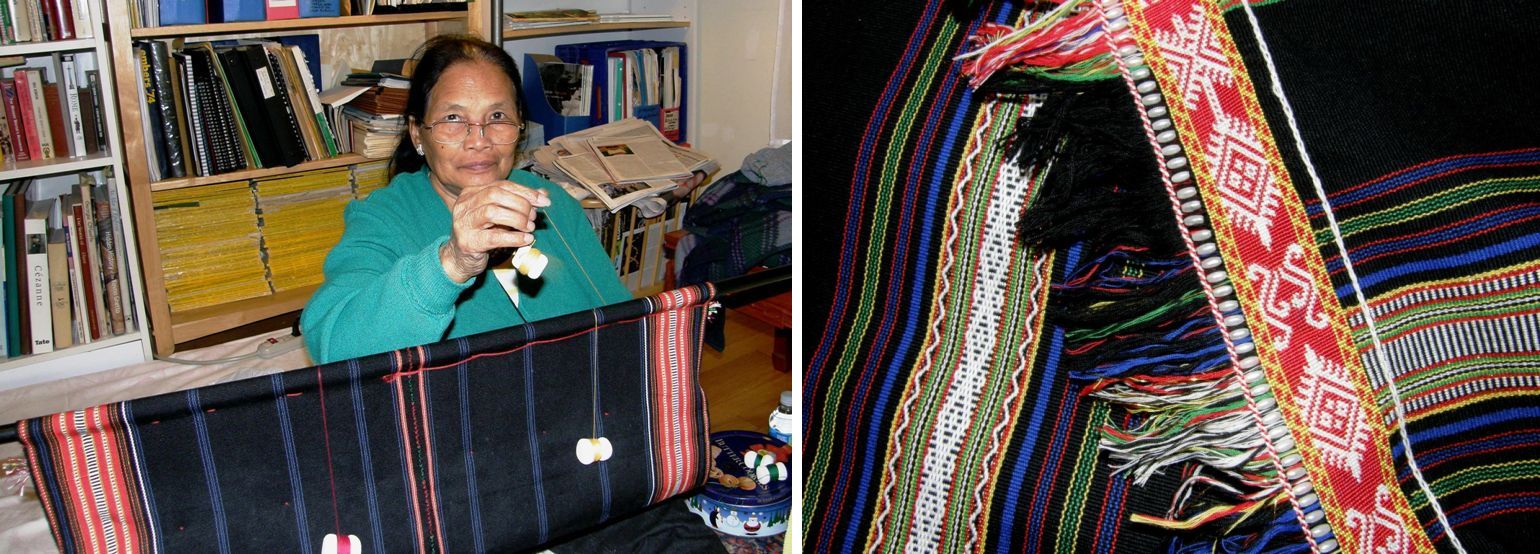
Many Montagnard pieces are woven with a multitude of fine stripes. Ju Nie joins the colors on the warping stakes with slip knots and then, once the warp is on the loom, she unties each and very knot, adjusts the tension and reties. It is not tedious for her. This is the way she was taught to do it and her large pieces woven in that “unforgiving” cotton are perfect!

Oh, and one more distraction to speak of before I go…one of my online friends just came back from Mexico where she bought a Huichol woven bag and is going to send me pictures. So, I am thinking it is just as well I didn’t get my bag project underway as her pictures are bound to have me changing my design plans. Thank goodness for those delightful distractions!

Backstrap Weaving – Oh, Those Sticky, Sticky Sheds.

Oh, those sticky, sticky sheds.

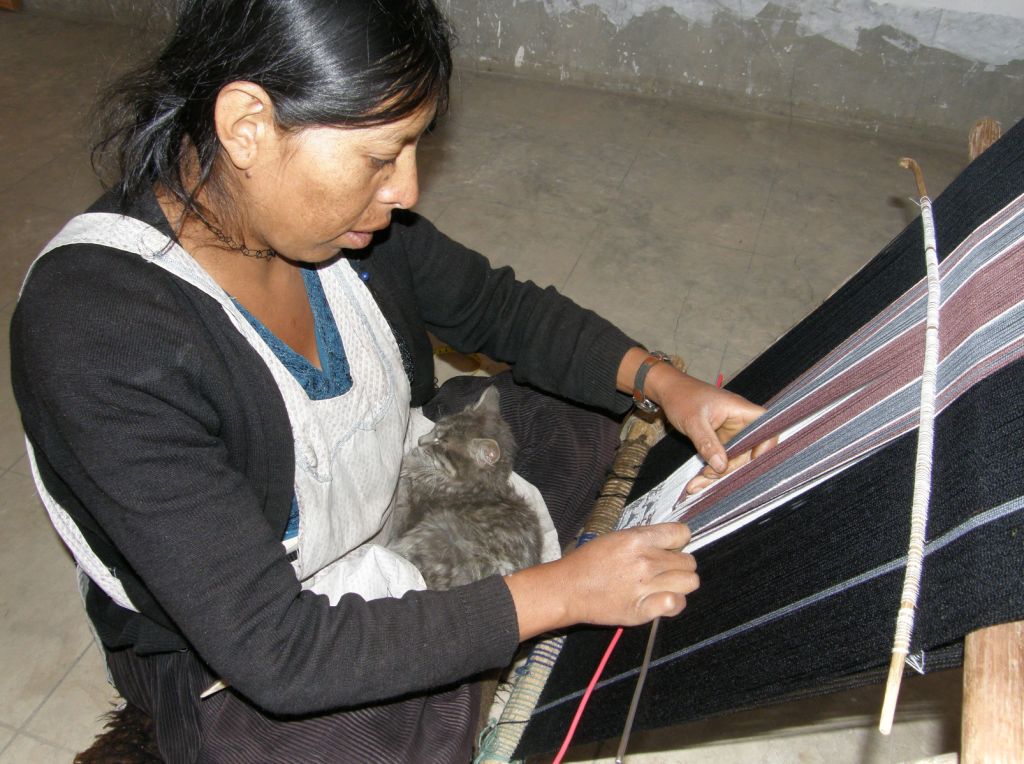
I am sure you all know what I am talking about if you have done warp-faced weaving with fiber like wool, llama or alpaca. I have not been heavily over-twisting my hand spun yarn and the advantage of that is a nice soft fabric but the disadvantage is hairy warps which make clearing the sheds a bit more challenging.

And it is not only the woolly stuff that can create this sticky problem. When I get into wide-ish warps with fine cotton, there is also a certain resistance, created by all those warps rubbing up closely against each other, to deal with too.  I had to apply a few different strategies to get the sheds to open on the warp pictured above.

So, this week I made a very short video on the “strumming” that I employ to help open the shed rod shed.

I am quite gentle with my strumming and just use my fingers for this width of warp.

After my video segment I have added a short clip of Felicia in Candelaria using the tip of her wooden tool to strum the warps on her oblique loom. When I start working on wider warps, I will need to use my wichuña (llama bone tool) to strum. For now I just like to use the ready-made tools that I have quite literally “on hand”.

I have added this video to the FAQ page on this topic. That page already has a video I made showing how to open the heddle shed on wide and/or sticky warps. Hopefully these tips will help you to create clean sheds without any kind of heddle wrestling and the pilling and possible warp breaks that that can cause.

I also added another thing to the FAQ pages behind the scenes in response to people who were having trouble rolling up their warps. There is an FAQ page here on my blog showing how to roll up your weaving as you advance so that you can always be in easy reach of the heddles and weaving line. The method I show is dependent on two things: the second stick which you use to roll up the weaving needs to be of similar girth to the loom bar and the cords on your backstrap loom need to be chunky.

However, some people just use string or twine for their backstrap cords and so I have put together some step-by-step pictures for another, and far more common, way to roll up the warp. You can see that here.

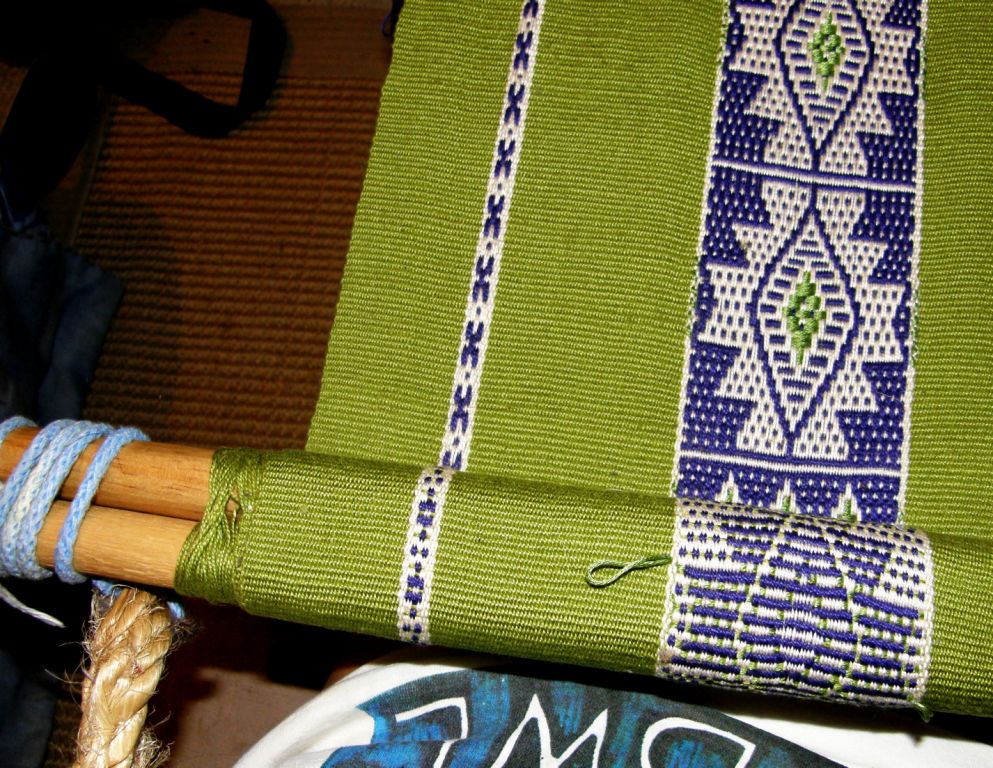
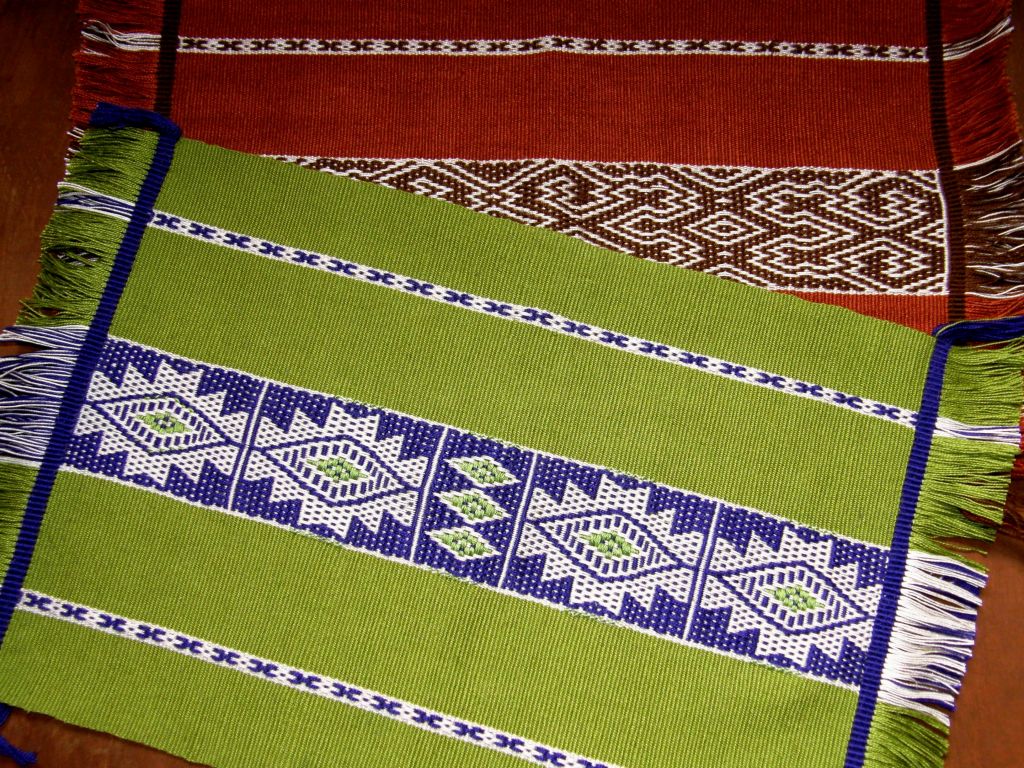
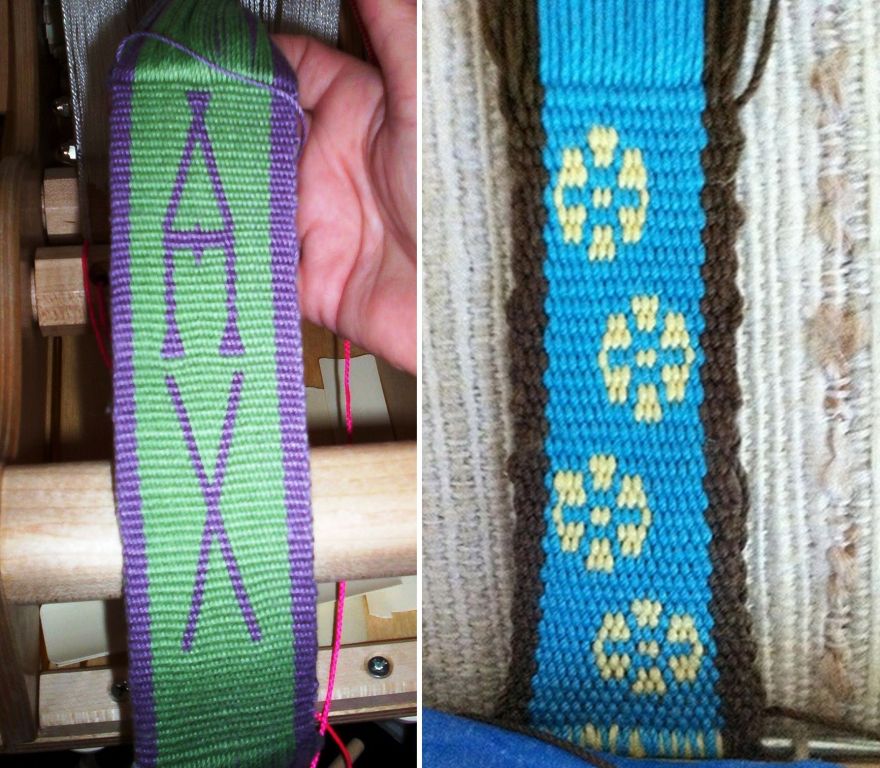
You may be wondering about this green apple and eggplant warp that keeps appearing in this post. That is the second place mat in the set of four that I am making.

The design is based on what I am assuming was a Mexican belt that I was shown when I was traveling in the US recently. The belt was also made in purple, green and white but the tones of purple and green were completely different to those I used and were subdued and worn with age. I used the same two-color alternating warp float technique. It all looks very pebbly but it isn’t pebble weave. This is not a complementary warp structure.

What I particularly liked about the Mexican belt was the weaver’s use of supplementary weft along with the warp floats to introduce a third color. Some of the supplementary wefts had in fact deteriorated thus exposing parts of the horizontal bars and I liked the way this looked and so incorporated a little of all these features in this place mat design.

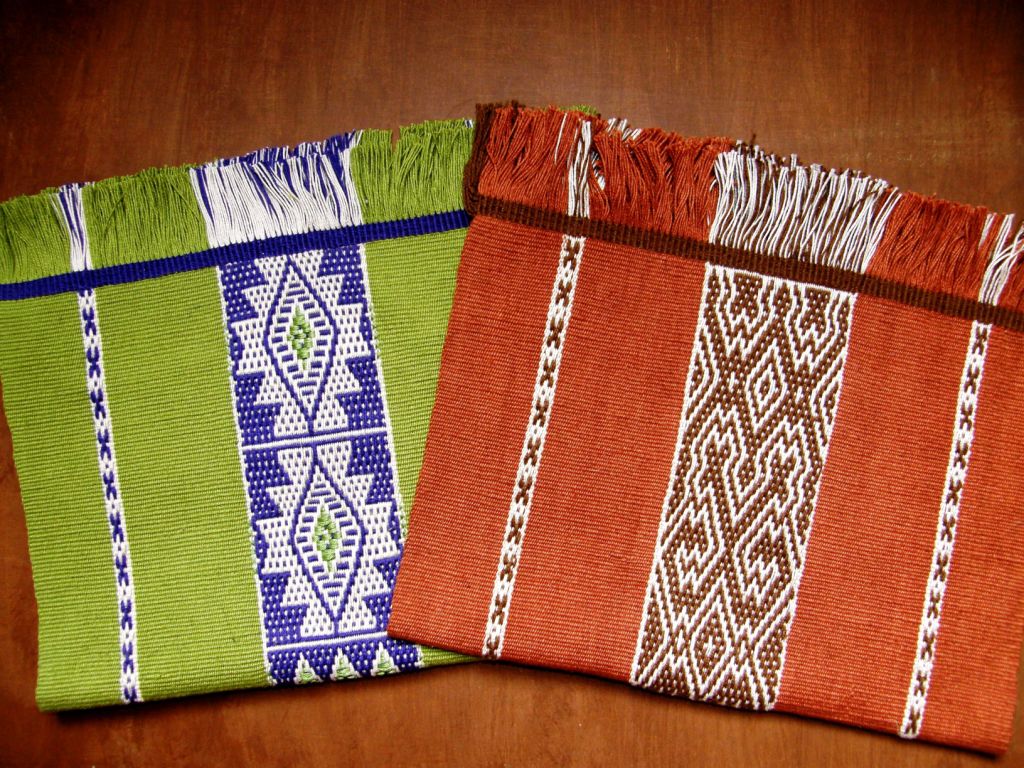
So, these two are part of a set. The first was influenced by Shipibo design of Peru. Could they be any more different?! I am looking forward to seeing a table with my four colorful and vastly different place mats and I am already planning the runner for the center. Actually, there are a few elements that tie these two pieces together. The pick-up technique in both is the same, that is, two-color alternating simple warp floats (or “warp floats galore” as I called it on my tutorials here). The little “X” design on the sides will be common to all as well as the weft-twined ends.

I have chosen the colors for the next one which are inspired by the culture from which I am taking its design…

I confess that I spent a lot more time at my loom this week than at the spindle. Maybe it’s because we have returned to our warm tropical splendor (although my Montagnard weaving teacher, Ju Nie, rolls up her warp for the summer and won’t touch it until cold winter weather once again keeps her indoors).

I did put in a bit of spinning everyday but have pretty much run out of colors in my Ashford prize package with which I would like to weave. Looks like I will need to do some dyeing which is always fun.

I don’t have access to this kind of prepared roving here in Santa Cruz and I really haven’t paid much attention to this stuff before.

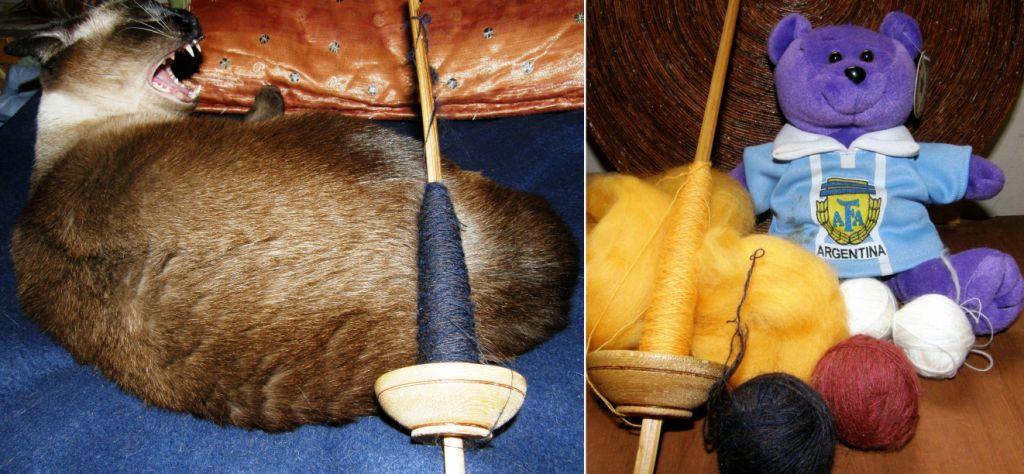
I pulled out a strange blend of pink and brown from the package and was surprised to see the nice even kind of red that spinning it produced. Then there was an odd combination of what I am calling “Siamese cat brown” and “blankie blue” and that spun up into something rather nice too. Now you can see that I am into a straight yellow…a winner’s color in the Tour de Fleece. I can imagine combining all these colors in a piece.

The rest of the stuff in my bag will have to be dyed. As you may know, the Tour de Fleece is being run in conjunction with the Tour de France cycle race but there is very little interest in that over here when we have the Copa America in progress especially since I live with the Argentinean team’s number one fan.

I am very pleased about having woven this first Shipibo design in my place mat set as I would like to learn more about the textiles and the people who live in the lowland regions of South America and be able to show it all to you. Highland weaving, particularly that of the Cusco area, has been very well promoted and exposed to the world. It is a shame that not more is known by the general public about the textiles being produced by people in the lowland areas too.


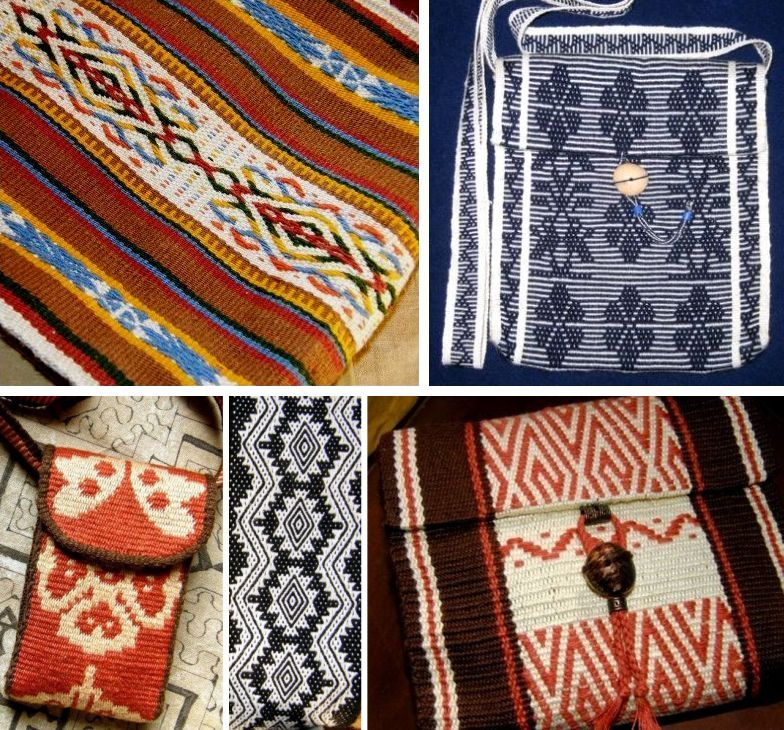
Above are a few pieces I have made that have been influenced by textiles created by weavers living in the low-lying valleys, coastal regions or tropical interior of this continent.

These people include the Mapuche of central Chile and Argentina, the cotton weavers of coastal Ecuador, the Guarani of lowland Bolivia and the Huni Kuin, or Kene, of tropical lowland Brazil.

While I have used motifs of the Kene in my weavings, I have not used their technique and I give many thanks to Helena who introduced me to these people and their work.

Helena has woven pieces employing their techniques an example of which can be seen above. She also gave me a link to the following video showing the Kene at work.

I hope to be able to study one day with weavers of the Shipibo, Mapuche and other lowland cultures as I have with my weaving teachers here in lowland Bolivia and coastal Ecuador…thanks to Kathleen Klumpp who invited me to accompany her to Manabi province, Ecuador in 2007. And this is all just a tiny part of it.

And while I ponder the multitude of places  to see, weavers to meet and textiles to admire here in South America, where I have barely scratched the surface, I am forever grateful to have been able to meet and study with weavers from the other side of the planet like Ju Nie and Ngach from the highlands of Vietnam and Dar Ku of Myanmar.

Betsy Renfrew, who is working with backstrap weavers from various Vietnamese hilltribes who have now settled in the USA, has just put a new video on You Tube about the Montagnard weavers in her community in North Carolina.

Please take a moment to watch the video and I will also give you a glimpse here of Ju Nie and Ngach at work during my visits and the beautiful textiles that they now have the means and motivation to continue creating thanks to the work of people like Betsy. I also met Naomi Northrop of WRAP Weavers in Massachusetts who does similar work with weavers among communities of refugees from Myanmar.

And finally, here is Colleen’s (aka Pancha on Ravelry) daughter Kira Luna showing off “this key tool in her make-believe job as a fairy messenger”. Colleen wove the body of the messenger bag using the tutorial on a yurt band border in two-color warp floats and finished it with weft twining (I am so happy that folks are trying the weft twining!) The strap was woven in double weave with a Bolivian flower motif. How cute is this?! Maybe this fairy messenger will leave me a comment.

Backstrap Weaving – Smoothing out the rough.

SMOOTHING OUT THE ROUGH.

SAMPLE! My own words are ringing in my ears….if you are using a new yarn or a new technique on your backstrap loom….sample, sample, sample. And don’t trust your first samples for making width measurements for future projects. You have yet to settle into the new technique and things are still bound to change. Keep practicing while you slowly smooth out the rough bits. Sample away happily knowing you can probably make something from the samples, no matter how small or silly! If not, put it in your notebook with lots of notes beside it…believe me, you will forget if you don’t write it all down.

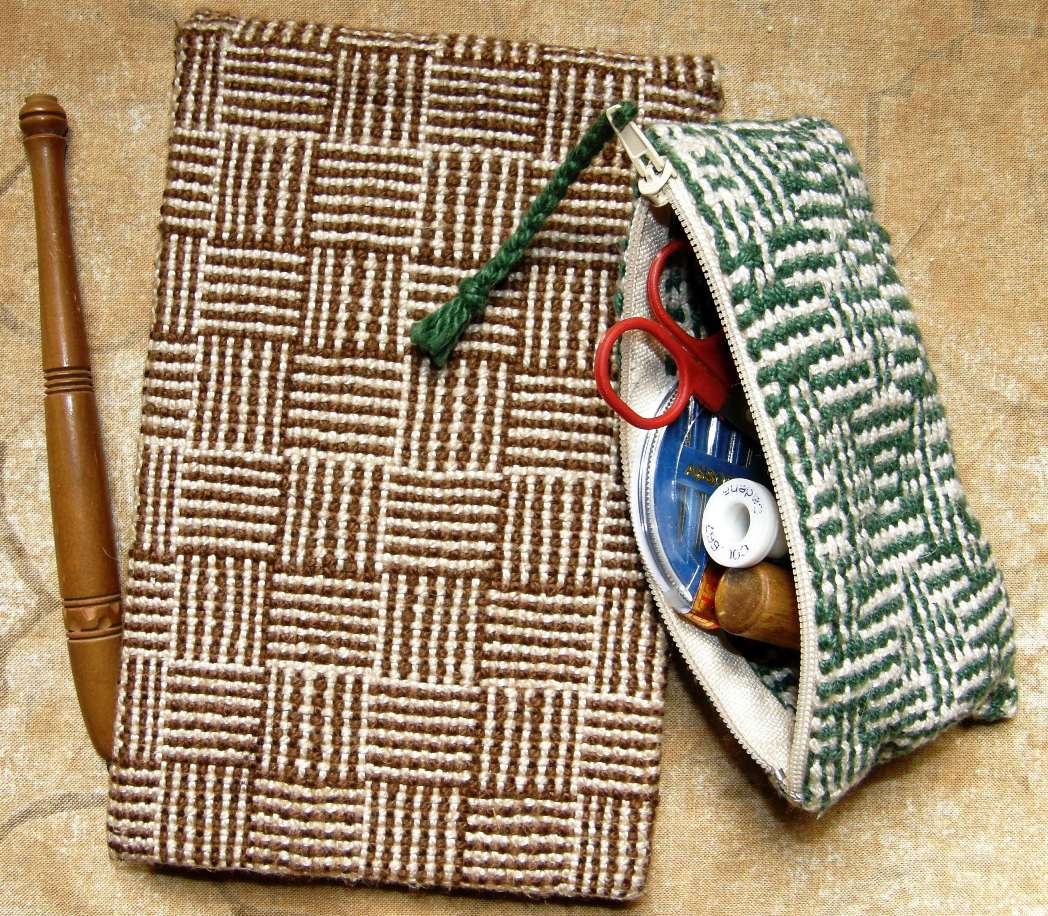
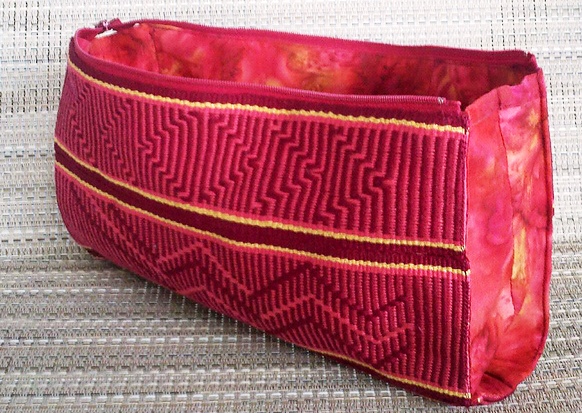
Here are a couple of small samples that I managed to make into decorative and useful things. My log cabin sampler got used as the cover of a flip notepad that always goes with me on my travels. This notebook is now full and I need to get the cover off so I can somehow fix it to another notepad. My first ever shadow weave sample got pulled off the loom as I was satisfied once I saw that it was working and I didn’t really care for the color combination. It got made into a small sewing kit purse which also goes traveling with me.

And never mind if your sample ends up with wonky selvedges and you don’t know what to do with  those pesky raw edges. There is usually a way around all that. The edges of my log cabin piece were turned around the ends of the notebook cover and glued down. Another piece of fine cardboard glued to the inside covered those edges for a neat finish. The zip took care of hiding and protecting the raw edges of the shadow weave piece.

I thought I would show in this blog post some of the finishes that I have used for my pieces, uses I have found for samples and different ways that I have dealt with raw edges.

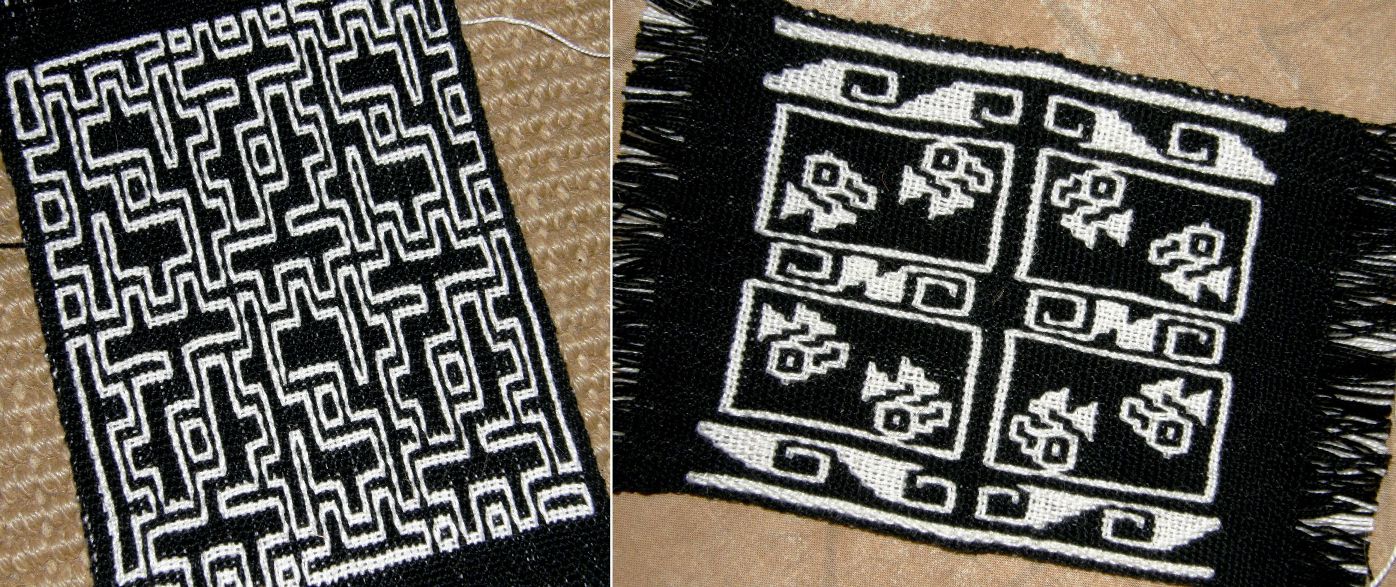
You may remember from these previous posts here and here that I have been trying out finnweave on my backstrap loom. My first samples did not prove trustworthy for calculating the dimensions of my next project and so, what I had hoped would turn out as squares, ended up being more rectangular. Here is my warp set up for my square design samples…

And here are the rectangular results…

Width needed some adjustments and I learned to beat a bit harder as I progressed. I learned a lot about how to read from the weaving rather than from the chart with the design on the left. This is from one of the Prairie Wool Companion 1982 issues. There is a Chinese lattice work design charted and then three variations provided so that one can weave a set of four placemats. The version I chose is the one furthest removed from the original Chinese design. The design on the right is one I invented using the little pre columbian birds that I wove before and gave me more practice with filled-in shapes.

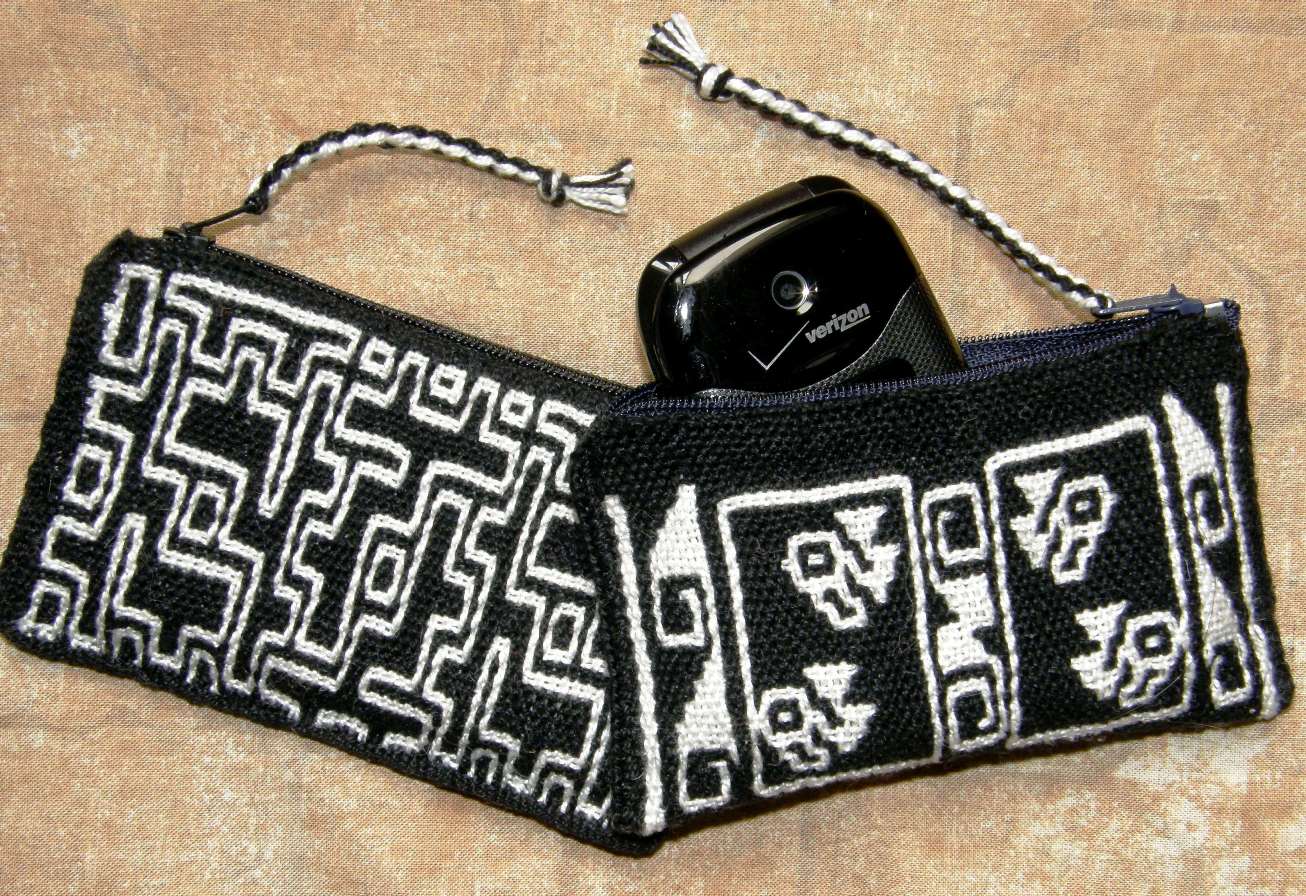
I was able to make something cute from the two samples…

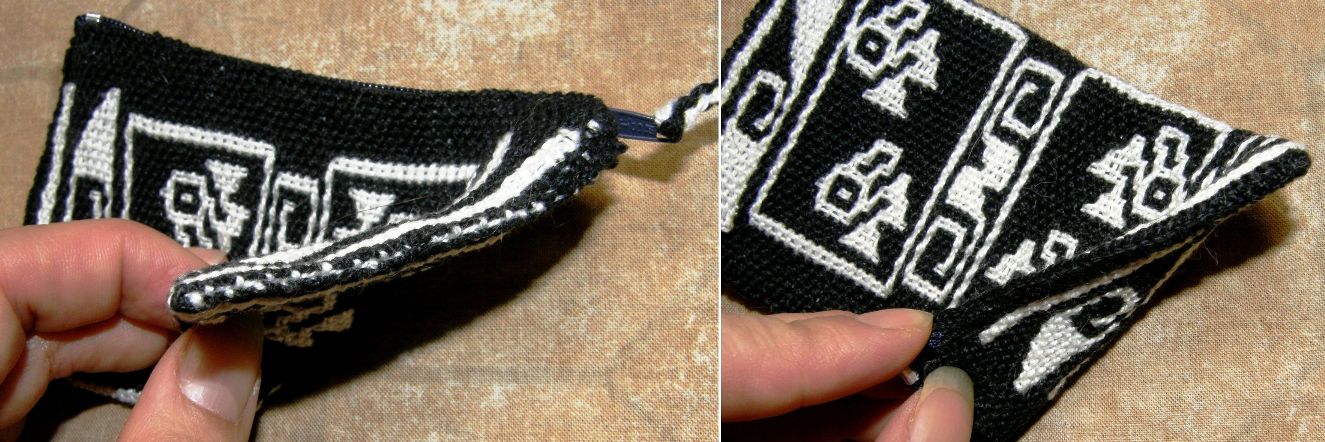
This is a double weave and it is particularly tricky dealing with its raw edges. Folding over two layers to hem is bulky and unsightly and so I followed the advice that I read in an article and wove the start and finish of each piece as two separate layers with open edges.


The idea is to turn both edges inward and sew them together like that. However, I didn’t do that. As I was going to sew in a zip, I cut the white layer back as far as I could and then simply turned the black layer over it. The black turned edge got sewn down and hidden under the zip so all is well and protected and nice and neat to boot.

One thing I was not so happy about was the edges…

This may just be something that I am goofing up, but to my eye, the edge is ugly as you can clearly see how both layers of contrasting colors come together. A row of single cross knit looping covered that up nicely as you can see on the right. However, my eyes just about fell out…black on black. I had to stand right by the window in good light to do this.

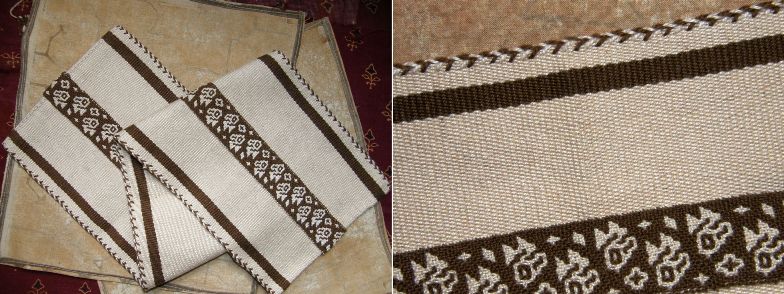
So that was one solution to the ugly edges. On the other little bag, I added one of those woven bands that are woven and sewn simultaneously using the weft as the sewing thread. I used it down the side and along the bottom and it broke the design up nicely between the two faces. A four-strand braid for the zipper-pull was the finishing touch.

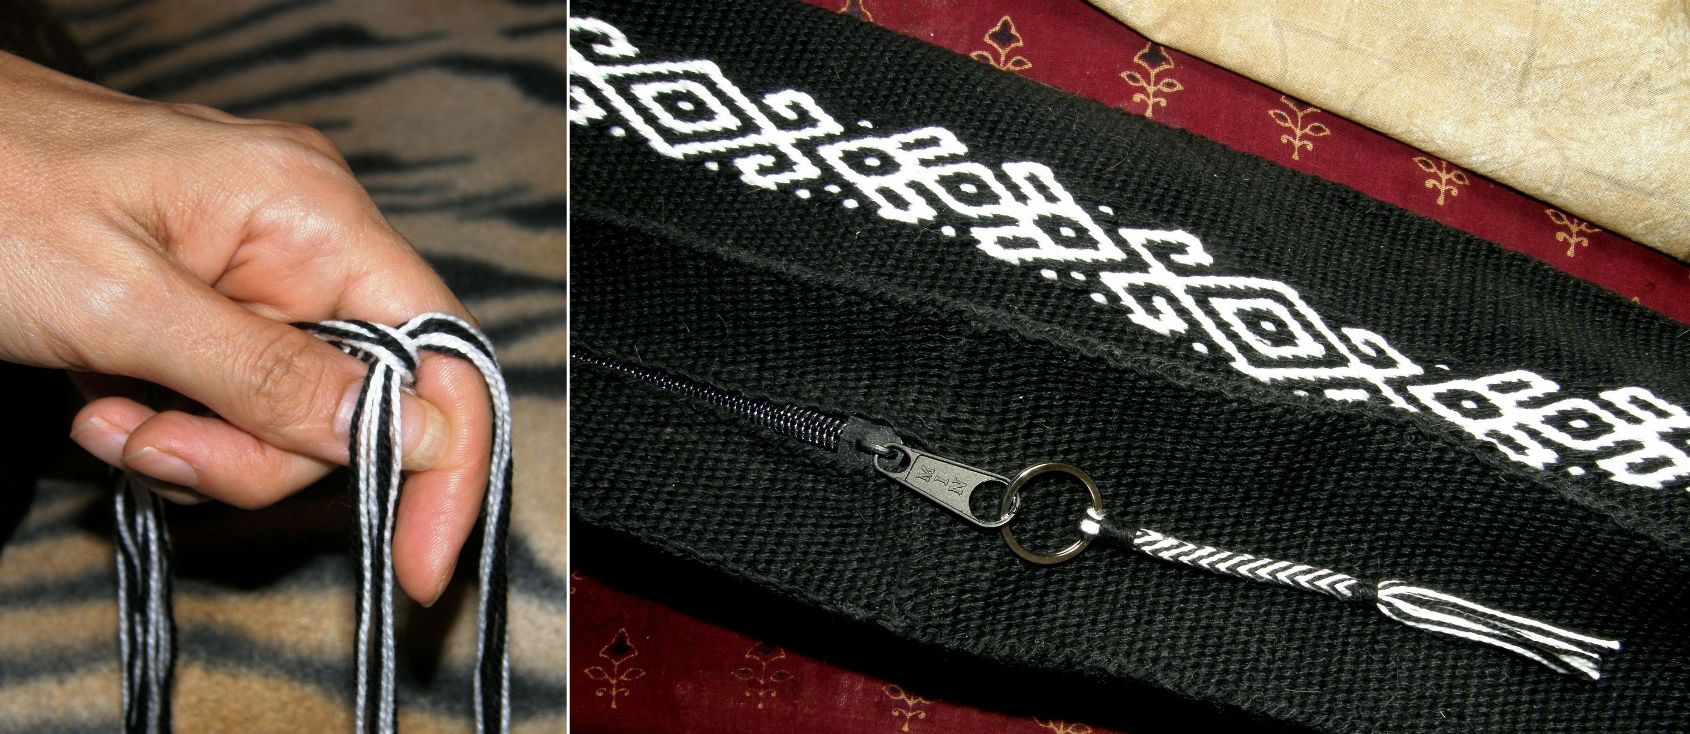
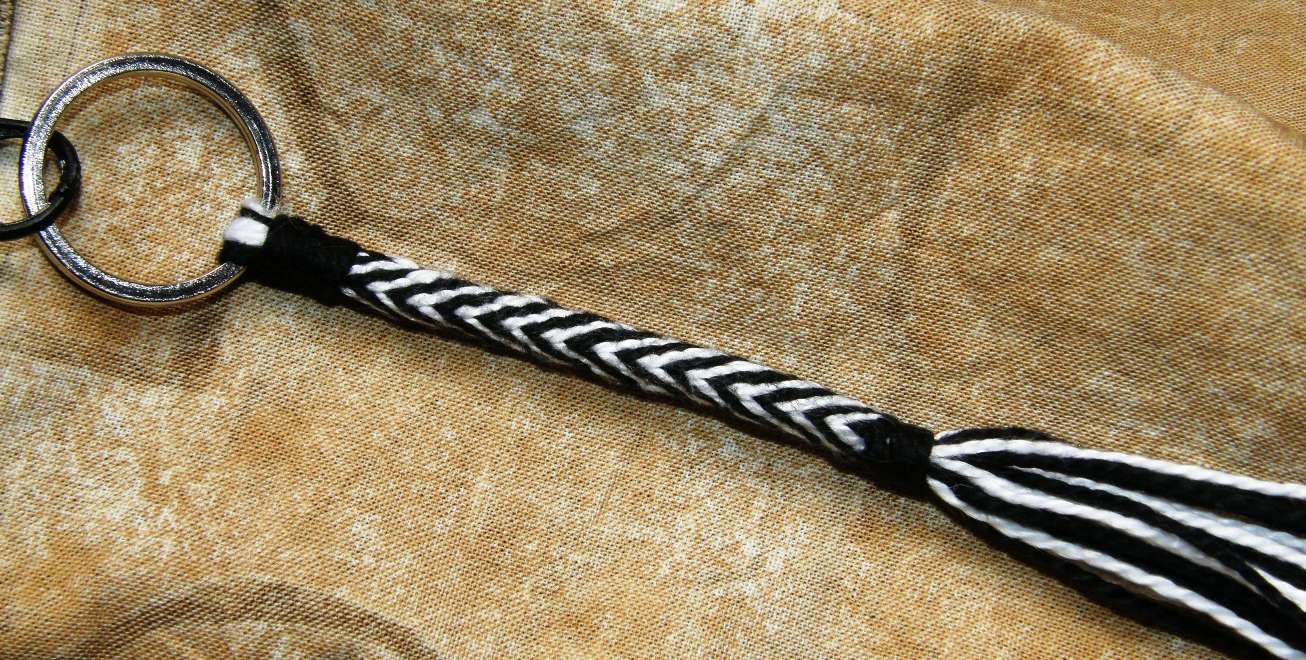
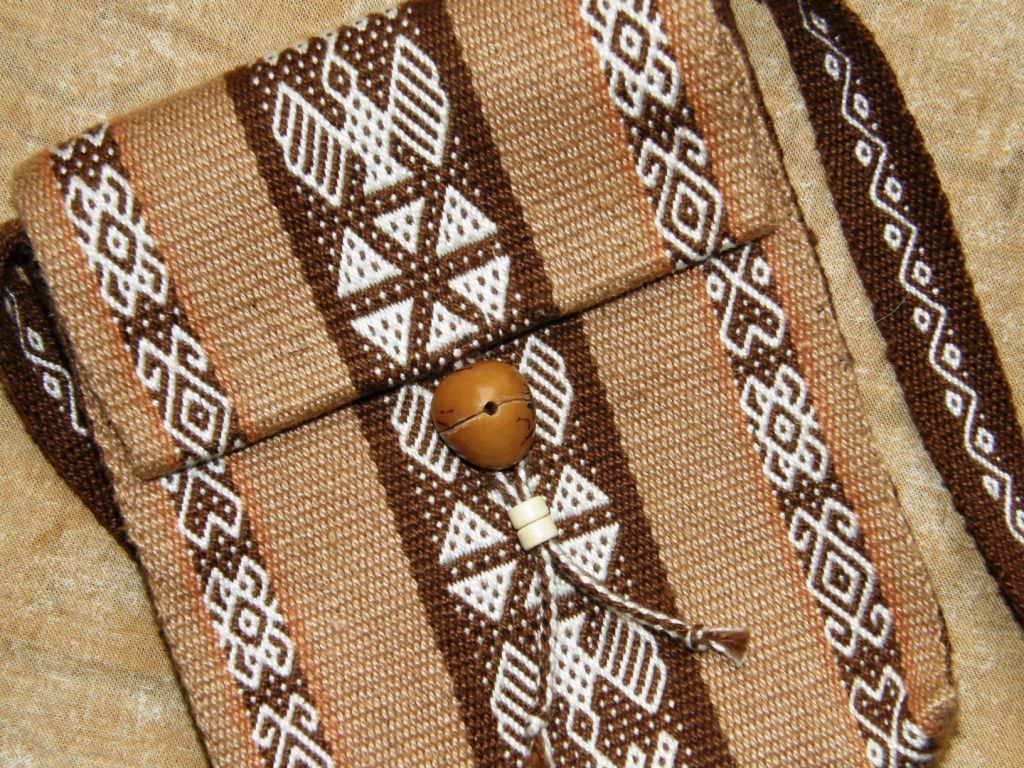
Speaking of braids I made the zipper-pull for my loom bag project…remember? – woven bag, braided zip-pull and twined strap.


It’s a 24-strand braid worked in the hand as my Peruvian sling braiding teacher had shown me.

I had not done this kind of braid in this size yarn before and so it was a bit of a challenge.

This is the base of the Margarita braid but as, I was so focused on just keeping everything in order while muttering the moves to myself, I did not venture into doing the changes in sequence that produce the diamond designs on the Margarita-style braid.

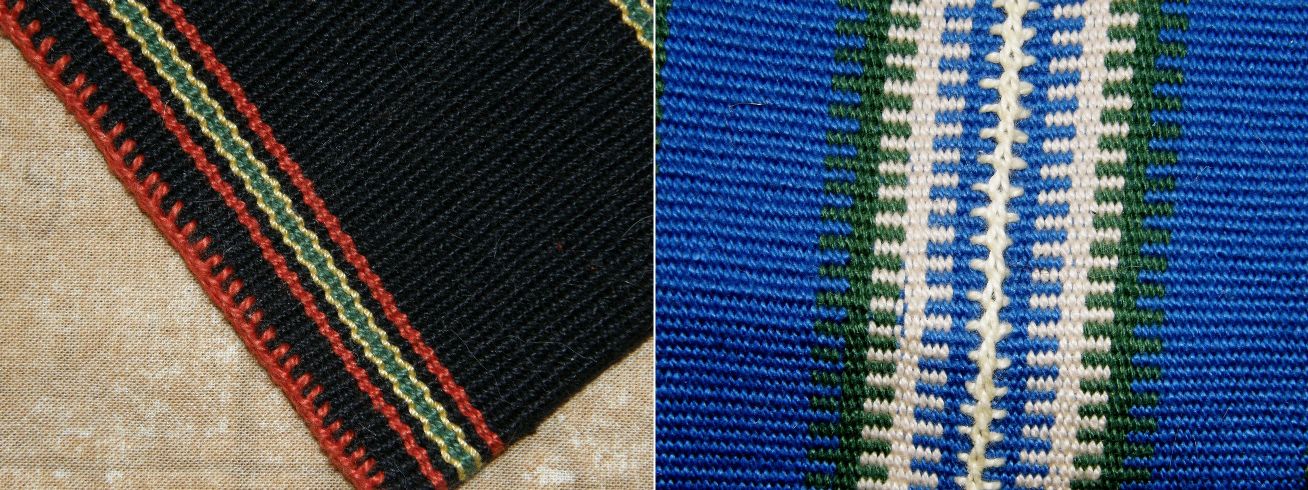
The cross knit looping that I used to hide the ugliness on my finnweave piece can sometimes be added to perfectly good looking selvedges as an extra decorative feature or it can be used to draw attention to or hide the place where two pieces of fabric are joined. This is also known as Van Dyke stitch in embroidery (see the video embedded in this blog post).

Other things that can be used to disguise a less-than-perfect edge or brighten something that is a little too plain are braids.

A two-color stitch can look good on the edge of a very plain one-color piece or hide its wonkiness if necessary!


This was a sample I made for a plain warp-faced weave weave-along. I sewed a four-strand braid around the edges which also served as a strap. Again, the zip handily hides and protects the raw edges.

This little pouch was started with a third selvedge which you can see on the right. I sewed across the raw edge with very visible stitches as neatly as I could by hand and then sewed that edge down.


Then there’s good old hem stitching which I only learned fairly recently from this video. I got such a kick out of learning and doing this the first time, I wanted to go around and hem stitch everything!

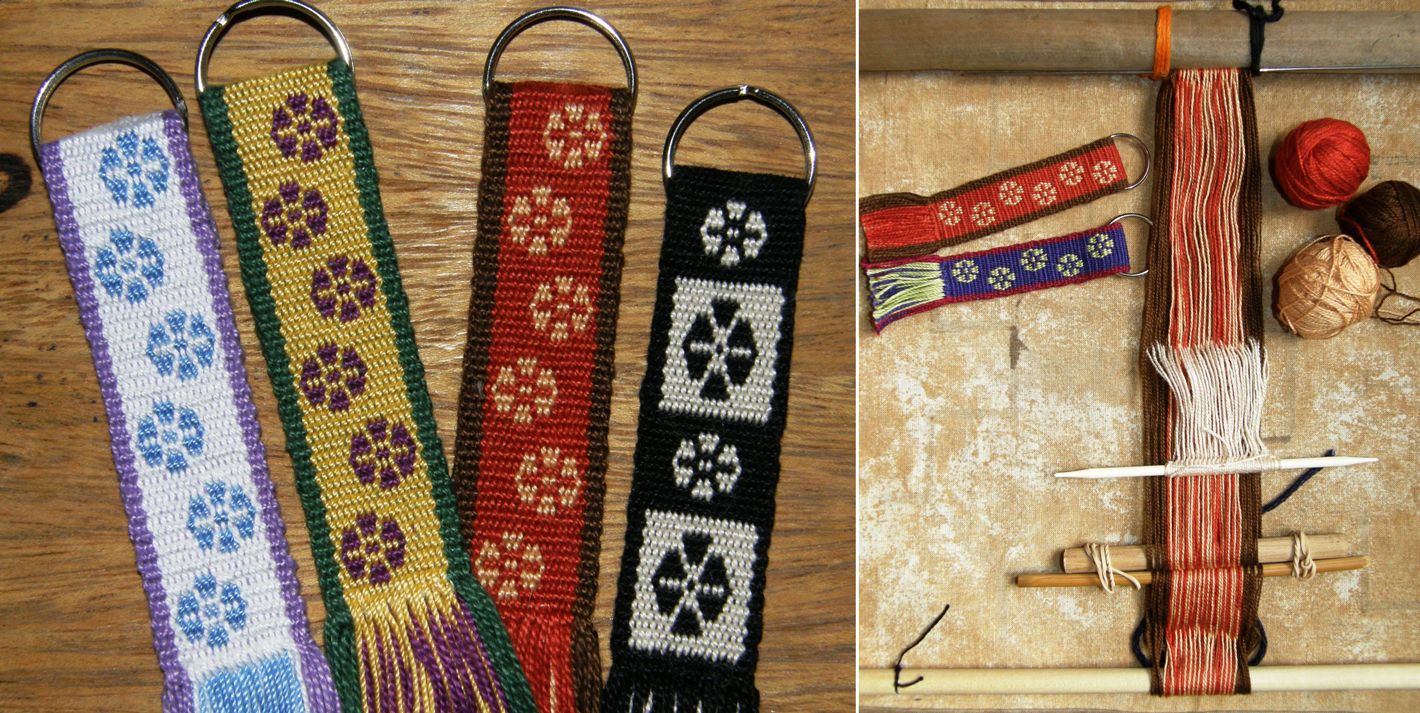
Teeny tiny “invisible” hand stitches seem to work well at the bottom of book marks and keyfobs. Warp ends can also be braided. I like to dab the ends of the braids with diluted white glue and squeeze them into a tapered shape as they dry. I think it looks better than having knots in the ends.


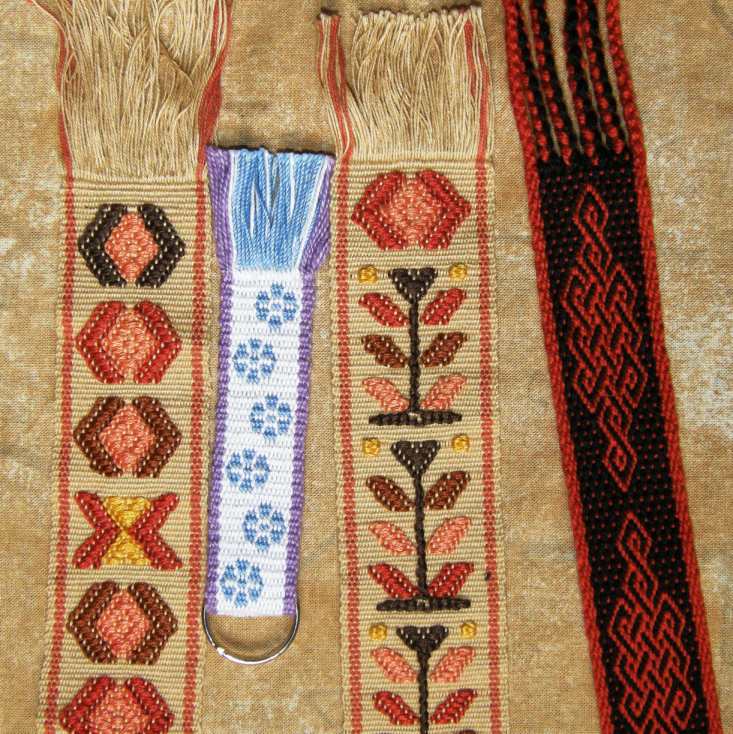
Above are some bookmarks decorated with Guatemalan supplementary weft designs, a double weave key fob and a pebble weave Celtic knot pattern.

I am not so convinced about the way that I chose to deal with the raw edges on these very thick double weave mug rugs.

This came after many attempts to sew them neatly and invisibly. They are too thick for the method I suggested earlier where you weave the two layers separately and turn them in on each other.

I figured if I couldn’t make the stitches invisible I would go for very visible and decorative, and something in keeping with the ethnic nature of the design.

This is the back side. The brown thread cannot be seen on the front.

I sewed these while they were still stretched out on the loom and had to put a mirror in my lap so I could see how the stitches were being placed on the back.

I am open to suggestions for improving this!


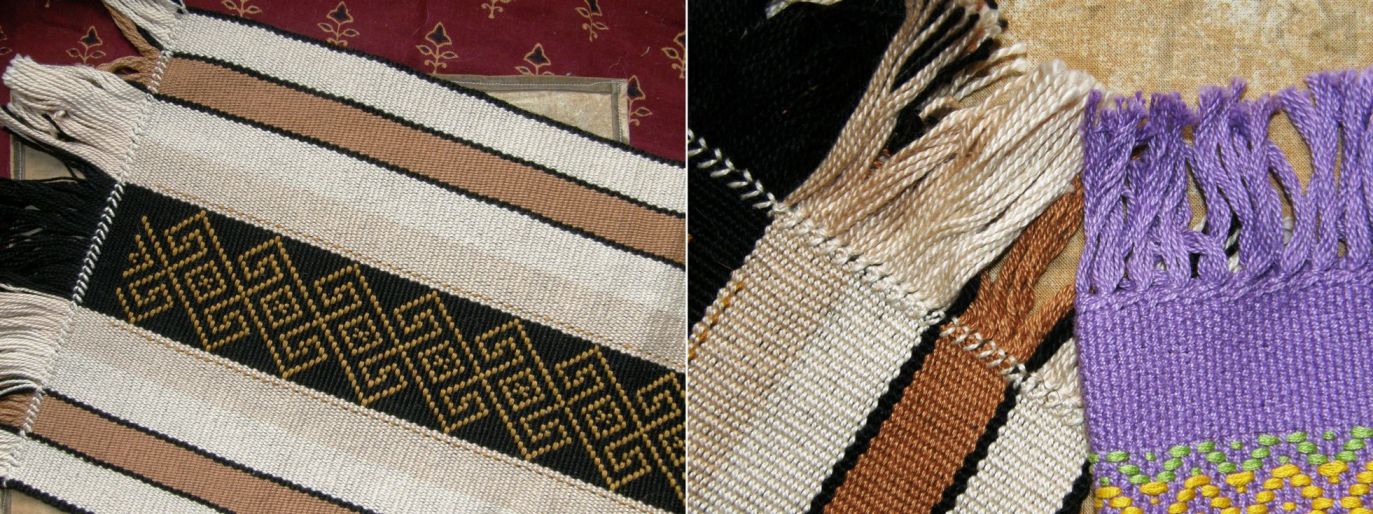
Montagnard (Vietnamese hilltribe) weavers often finish their weavings with weft twining. They then add beads and often a few more rows of weft twining. I wasn’t convinced that the weft twining would stand in place on its own and sufficiently “finish” a piece until I tried it myself. It is firm and sturdy and there is no way those twined wefts are going to work their way loose. Here is some twining I did in a traditional Jarai design on the end of a warp-faced piece…

On the Bedouin design wall hanging that I did on the right I also twined the edge and finished it off with wrapped warps.

Warp wrapping, braiding and other finishing techniques are covered in Finishes in the Ethnic Tradition by Karen Searle and Suzanne Baizerman.

My latest favorite edging which I learned at the tinkuy de tejedores in Cusco last November is the tubular woven band which is woven and sewn simultaneously to edges shown below on the right. This is another one that totally grabbed me. I had to stop myself from tubular banding everything in sight!
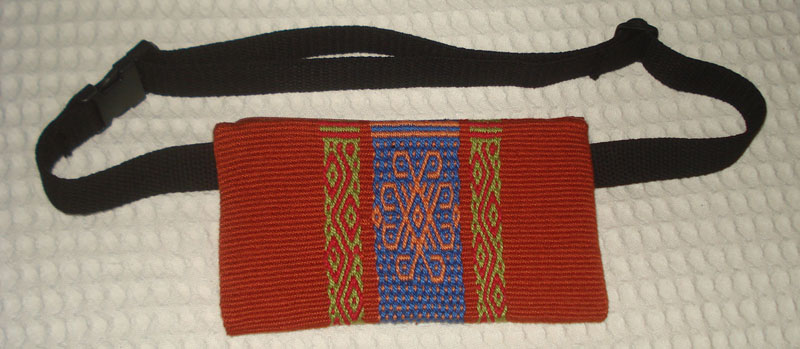
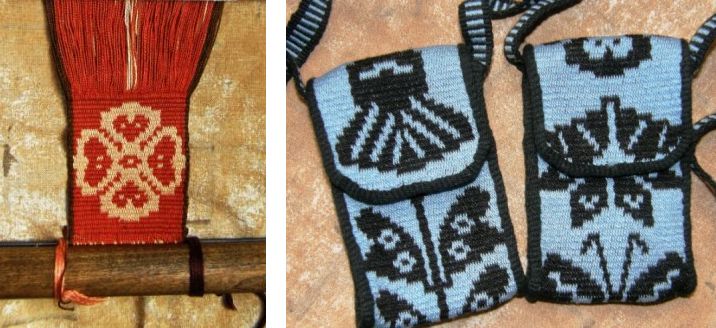
I decided to try a plain weave single-color band as an edging after seeing how Guarani weaver Angela edges her pieces and I used it on the cell phone pouch above. It very nicely covers and protects the raw edge where I cut and shaped the flap.

Well, enough about smoothing out the rough, brightening the plain and taming those wild warp ends. Back to finnweave. I am still enjoying the Cora and Huichol pieces and traditional Scandinavian patterns and have just learned that another Mexican group, the Otomí, also practice this technique. However, I am returning to my original goal now and am about to chart my first pre columbian design based on one of my textile fragments. This will be another sampler and I will wet finish this one.

#############################################

What have the weave-alongers been up to?

Linda wove her first band with horizontal bars getting warmed up for simple warp floats. She also made supplementary weft samples so she could learn about the scale of her charted designs against the woven fabric before launching into a project. Bobbie finished her piece with the central supplementary weft pattern. The chart for this design is here. I really like the effect of the different colored horizontal bars design that she used on the edges.

After finishing another pebble weave piece, Jennifer shifted to double weave and enjoyed sampling the technique in #3 crochet cotton. The llamas are charted here.


Tracy is back from her trip and back at the loom doing pebble weave.

Tracy’s latest band is on the left and Jennifer’s finished piece is on the right. You can see that her knitting needle is not standing up to the task of creating her third selvedge. You can read some tips about starting with a third selvedge here.


Both Marsha and Jennifer tried double weave in #10 thread but decided it was too fine to tackle yet. Marsha is doing a double weave band, her first with a pattern, in #3 thread. She is writing the name of her roommate on what will be the strap for a camera bag. Jennifer made a keyfob as her first attempt with #10 thread and is happy to continue sampling with #3.

And just wait until you see this…

Helena in Brazil finished her pouch and has attached an adjustable band with buckle for her sister to use on her trip to Australia. I love that orange! There are ideas here for fun ways to combine colors, right?

The central design is one I invented and include in my book. I made it to go in a wall hanging along with the adaptation I made of a Huichol motif. This design includes the diamonds, spokes and curls that were also elements in the Huichol pattern.

I will leave you with our Weave-Along group’s learning mantra:

Short, Narrow Warps and Sample, Sample, Sample!


Backstrap Weaving – The ‘Tis-Done and the To-Do

I bought myself a good old fashioned acrylic board last year to write my “To-Do” list and hung it on the bedroom wall. It is not that old fashioned when I remind myself that my teaching colleagues are still using blackboards and chalk where I used to teach English here but it is indeed old fashioned in the world of IPads and such gadgets. I really need to have that To-Do list up there in front of me with a list made in brightly colored marker pens. It is so satisfying erasing something and saying ‘Tis done! What I really wanted to do was start the year with a fresh gleaming clean white board instead of one still covered with colorful scribbled lists.

These two weaving “To-Do”s were still hanging there from 2010 and I am pleased to say that one of them is about to be erased…well almost.

The double weave belt at left went on a nice trip with me to the US recently. It came out once for a weaving demonstration with a group of Bhutanese weavers in North Carolina and then went back into its bag for the rest of the trip. So, I was determined to at least get this off the loom. You may remember that this belt is a result of my twining investigations with Montagnard weavers which led me to Bedouin twining and then Bedouin warp substitution designs which I then decided to reproduce in double weave on this belt…quite a journey!

You can see the Bedouin design piece I wove above right. The warp substitution technique (see the tutorial here) produces crisp designs on a background of solid color with long floats on the back. The same designs can be produced in warp faced double weave (see the tutorial here) without the visible floats and with the patterns reversed on the back of the band. I have all the hardware ready for the belt and just have to put it together now. I need to thread one end of the belt through the buckle which means having to cut a slot in the band. What I usually do is paint the area to be cut with diluted white glue which acts as “stop fray” and then go ahead and cut.

The finished belt, with buckle in place, in the picture has been woven with simple alternating warp floats using a design from a yurt band (see the tutorial here). So, I am just about to erase this 2010 project from the board.

The other unfinished project that you saw photographed above is the sample I made after visiting Guarani weaver Angela. I had just wanted to see if I could get my head around the Moisy technique she was using so, basically, that was a mission accomplished, but I still think that I could make something useful from this piece and don’t feel like discarding it. So, that is next.

Of course I still won’t be able to wipe the board completely clean as it is now filled up with 2011 stuff. And that is the way it should be!

While I was immersed in double weave finishing off my belt, I decided I would make a video showing how to warp for this technique to add to the existing tutorial. Those of you who subscribe to Handwoven may recognize these double weave keyfobs which are shown in the Jan/Feb issue…

This will probably sound completely ridiculous to those of you who are used to winding warps of several yards or meters for multiple projects on your large looms…I wind a tiny warp for each and every keyfob. Warping for double weave and making string heddles across such a narrow warp is such a breeze for me that it doesn’t bother me at all to have to repeat the process for each and every fob. I love the opportunity to play with colors and not have any two fobs the same. I can create a third selvedge for every fob and save time not having to deal with hemming a raw edge which is tricky and often unsightly in double weave. I did weave thirteen identical fobs on an inkle loom once and won’t do that again.

And, as I always say, the only trouble with double weave is deciding which side you prefer…

Decisions, decisons…which side do I prefer? Here are the backs of some of the keyfobs shown above.

The big problem for those learning double weave is that it can be painfully slow. There are a lot of steps and, until you understand why you are making the moves, it all seems like a terrible amount to have to memorize.

It is easy to miss a step and make a mess or lose your way if you have to leave it for a moment…just part of the learning process.

I have been told several different versions of what this little design represents by weavers here in Bolivia and I wrote a little about this here. In any case it is a simple neat design, easy to memorize and fun to weave.

The pattern chart is on the left.

I made several pieces of video covering warping, creating the third selvedge, making string heddles and putting in a second cross to stabilize the shed rod. This week I am trying to just post the warping and third selvedge segments. These videos take so long to upload and my internet connection is not cooperating today. I will add others each week and have them stored on the double weave tutorial page. I hope you find them helpful (once I get them up there).

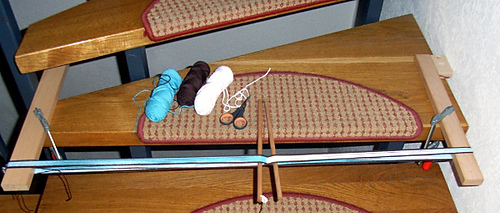
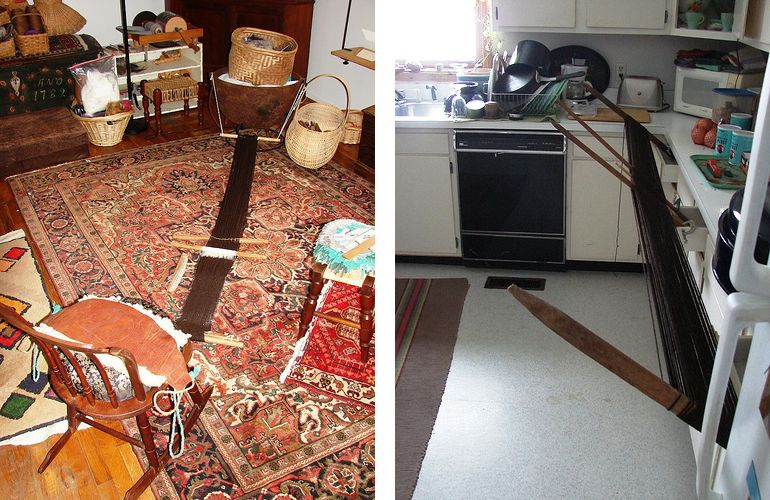
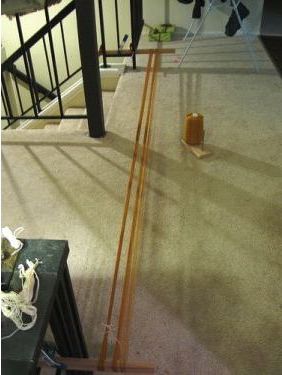
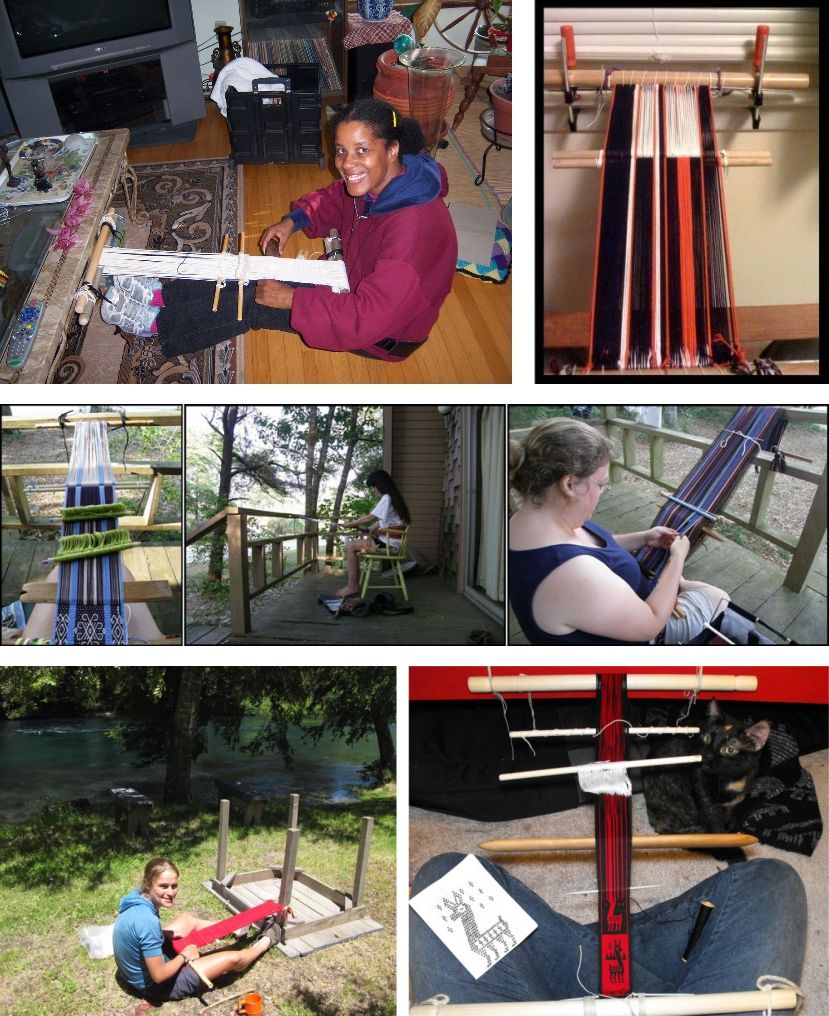
While on the topic of warping, we have started the Weave Along in the Backstrap Group on Ravelry and, hopefully, participants have read my three little tips from last week’s post particularly the one about the importance of having a good stable set up for warping. Some photos of improvised warping have been posted in the online weaving groups in the meantime…

This is from backstrap weaver Fliegenpilz in Germany, whose idea it was to have this Weave Along in the first place. She has warped for a pebble weave band following the instructions in my book.

Phil has himself nicely set up to weave in his rocker. Check out how he wound his warp with stakes lodged in kitchen drawers.

I caught the next picture in another weaving group on Ravelry…


Pancha says that her idea for warping, pictured above, originally sprang from her desire to try backstrap weaving. She has used it for other looms too but is now fed up with bending and walking up and down and has ordered a warping board.

Other weavers from Weavolution have shared their finished projects with me…

Deanna wove these bands decorated with Andean pebble weave designs on her Leclerc Dorothy 15″ table loom following the draft in my book. She also backstrap weaves and ties up her loom to her 40″ sixteen-shaft Macomber loom…a nice sturdy place to attach a loom bar.

Speaking of which, here is Jennifer’s pebble weave warp tied to the castle of her floor loom…

She has it angled  steeply upward which means that she has the warp threads quite close to her for doing pick up and does not need to bend. Each weaver will find their own way. I prefer a gentler angle.

Marsh Knox of PandulaArts has been following the tutorial on simple warps floats and weaves on a Gilmore Mini Wave loom. I have shown many of her finished bands here. Recently she had some of her bands, which she made with alternating floats, sewn into a mini tote bag for a friend…She calls this the “one-skein project” bag.

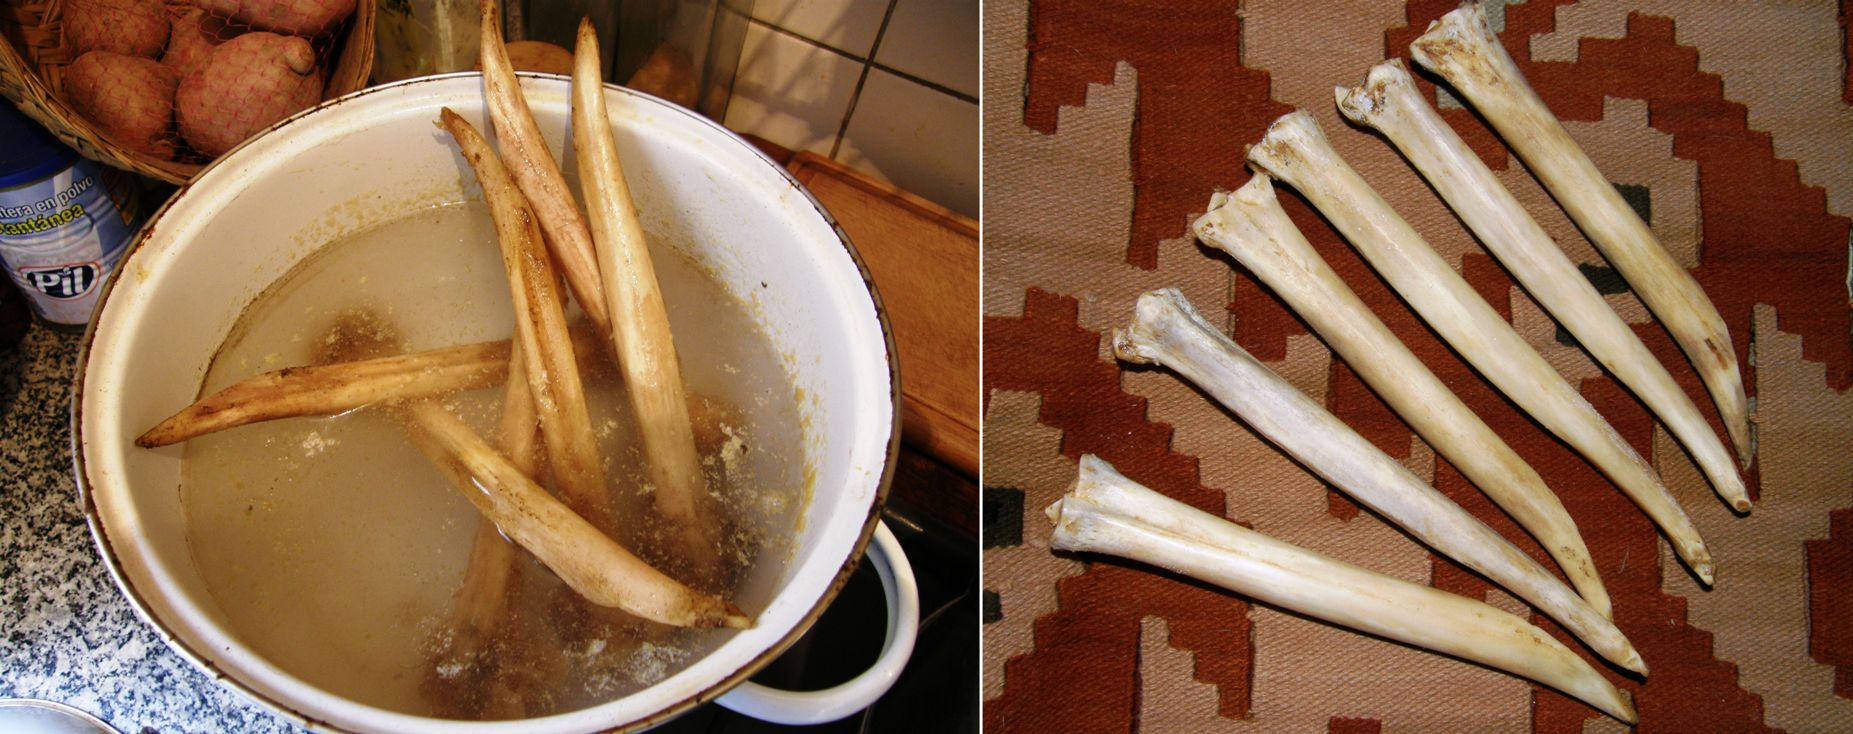
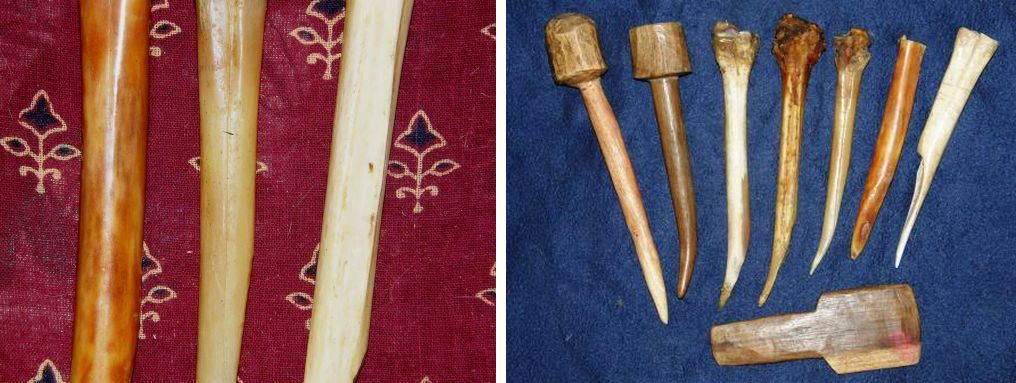
I had a few things going on this week. Firstly we got a short reprieve from the heat and humidity and were able to turn off the a/c and have the windows open for a whole day. This gave me the chance to boil up the nasty llama bones I have had lying around since my friend Anna brought them to me from the highlands a few months ago. These are the wichuñas, the bone tools used by weavers here to beat in the weft and pick up warp threads for patterning. They are also used in Peru where they are called rukis.

Several boilings and changes of water were needed to get them cleaned up. The smell!! There they are on the right –  white and gleaming. The tips could do with a bit of refining but otherwise they are good to go. Several years of use will have them take on the lovely hue of old ivory and I have seen some very old ones that have the tone and shine of polished wood.

That was another 2010 task to gladly erase from the board.

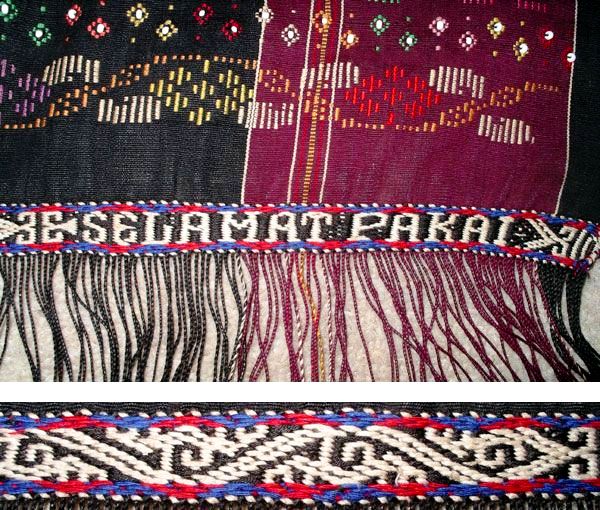
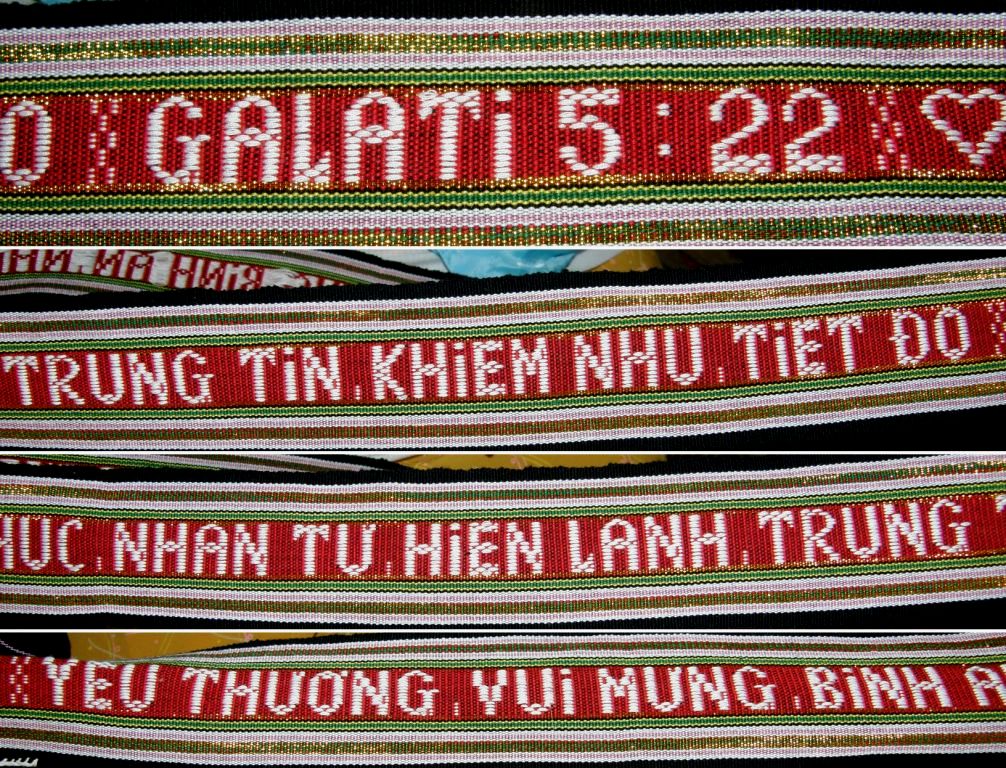
As for the ongoing twining obsession, I started a loom bag project and am twining its strap with letters. Just when I started thinking that I was taking the twining obsession a little too far with this lettering fad, I was shown these fabulous images of Batak twining…The Batak people live in northern Sumatra in the hilly region of Lake Toba.

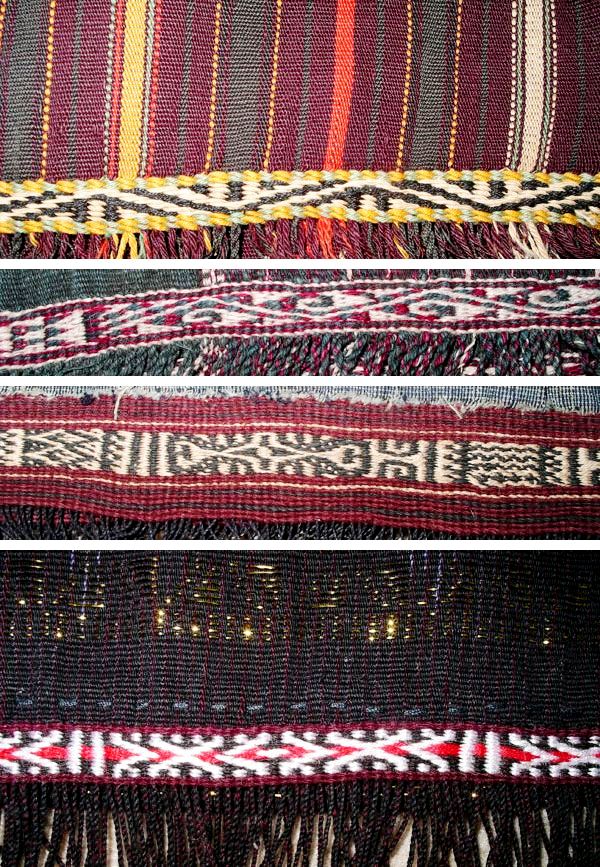
These amazing textiles are part of the collection of Pamela Cross and she has allowed me to show them to you here on my blog. She describes the above piece as a Toba Batak sadum (a woman’s shoulder cloth). Twined lettering! This twining is so very different to that done by the Jarai and Rhade weavers with whom I studied. How beautiful.

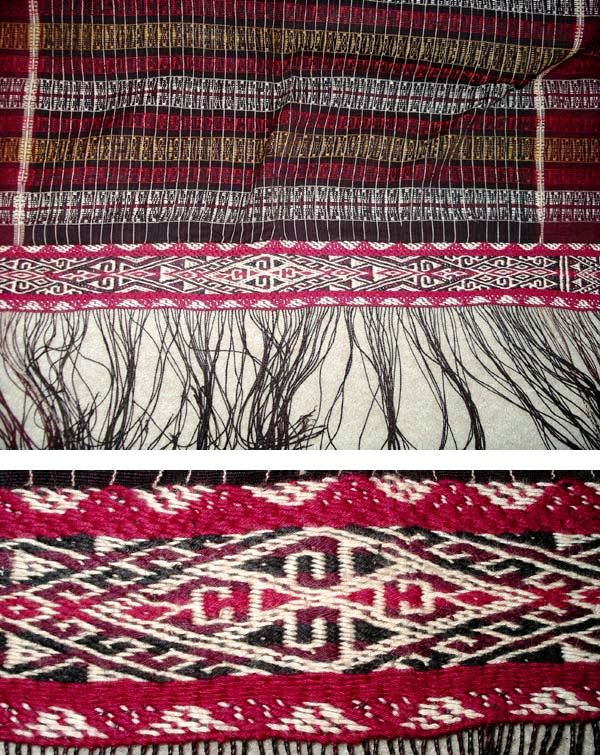
Here are some more images that Pamela shared of the twined bands on other Batak textiles…The following one is a ragi hotang which I understand is a shoulder wrap.

Gasp!

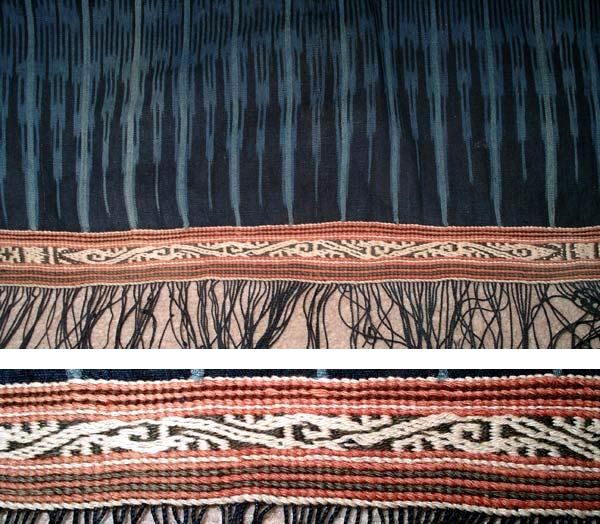
The following is a surisuri. Pamela says that the surisuri is one of three types of indigo-dyed textiles used for Toba Batak rituals.

Here are twined bands from several different types of Batak textiles. The design on the second one from the top is so Andean-looking don’t you think?!

It is exciting to know that there is a book available now by writer/researcher Sandra Niessen, PhD on  Batak textiles:

“Legacy in cloth: Batak textiles of Indonesia offers the first definitive study of the woven heritage of the Toba, Simalungun, and Karo Batak.


The most complete analysis of Batak textiles ever published, it provides a record of more than 100 different design types, including archival and contemporary photographs showing how the textiles are woven and how they are used in Batak culture.


Legacy benefits from fieldwork conducted over two decades and consultation of all major European collections of Batak textiles and private collections in Indonesia.”


Even more exciting for me was being able to make contact with Sandra.

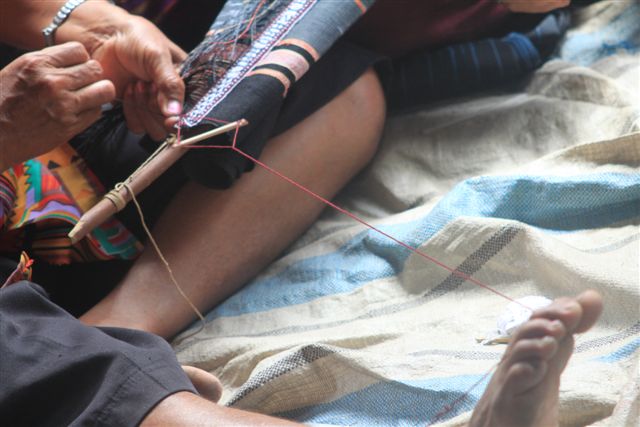
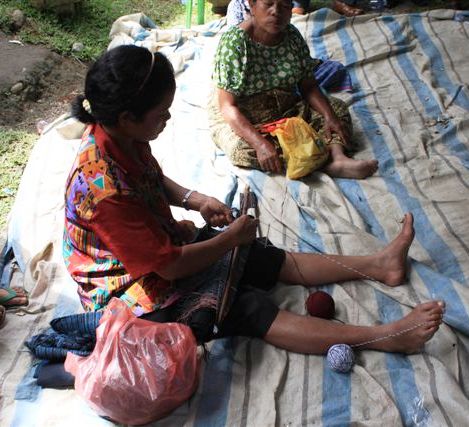
She kindly shared some pictures taken by MJA Nashir of a Batak woman twining. The process is not at all like that practiced by my Montagnard friends.

The weft appears to be tensioned between the toes and a small stick seems to be used to aid in the twisting of the two wefts. No doubt Sandra’s book thoroughly discusses the process and I am itching to get the book and have my curiosity satisfied and learn more about the Btak people and their textiles.

Sandra tells wonderful stories on her blog of how she has been returning to the villages where she conducted her research to present copies of her book to the weavers.

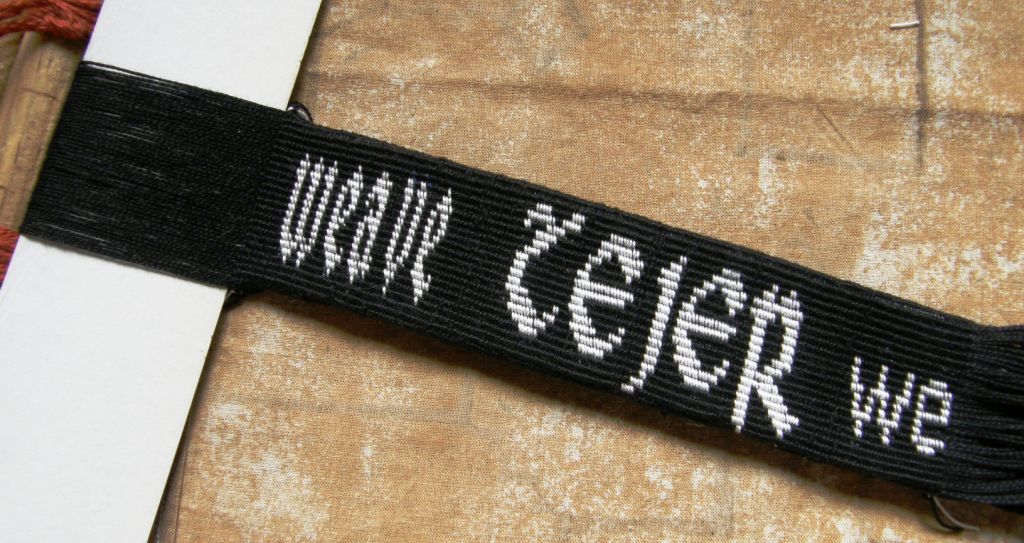
Well…after all that eye candy here is the humble twined bag strap I have been making with twined letters.

The idea is to twine the word “weave” in several languages. I have just begun the German version. I hope to do French, Portuguese, Quechua, Aymara, Guarani, Russian, Jarai and many more, if they will fit, with each word in a different font. I would love to hear from blog readers around the world who can tell me how to say “weave” in their language.

The letters are a munched version of those in Linda Hendrickson’s book Please Weave a Message. Remember that Linda’s letters have been designed for card weaving,  not twining, and are far prettier than the ones I have used here. Check out Linda’s page to see her gorgeous lettered bands.

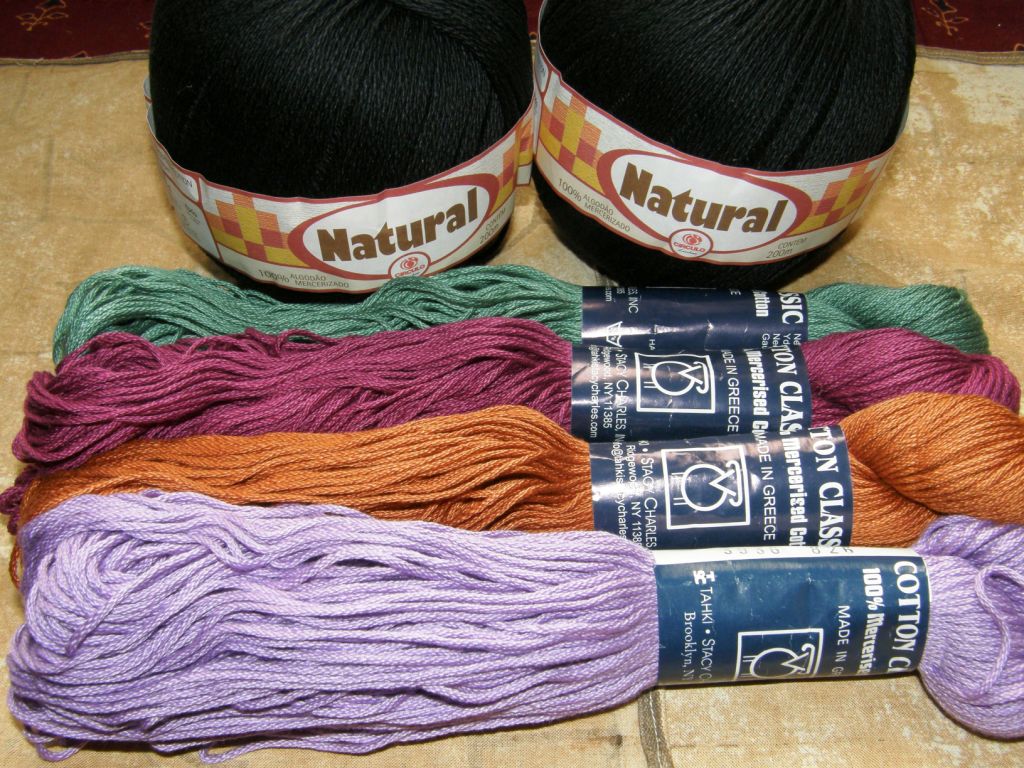
So this will be the strap for the loom bag in which I will carry my backstrap on future trips. The shape will be based on the camera tripod bag which I have been using until now. I haven’t put much thought yet into the body of the bag but I will weave it on my backstrap loom using a heavy-ish black mercerized cotton and some of my new Tahki Cotton Classic thread for patterns and embellishments.

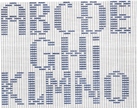
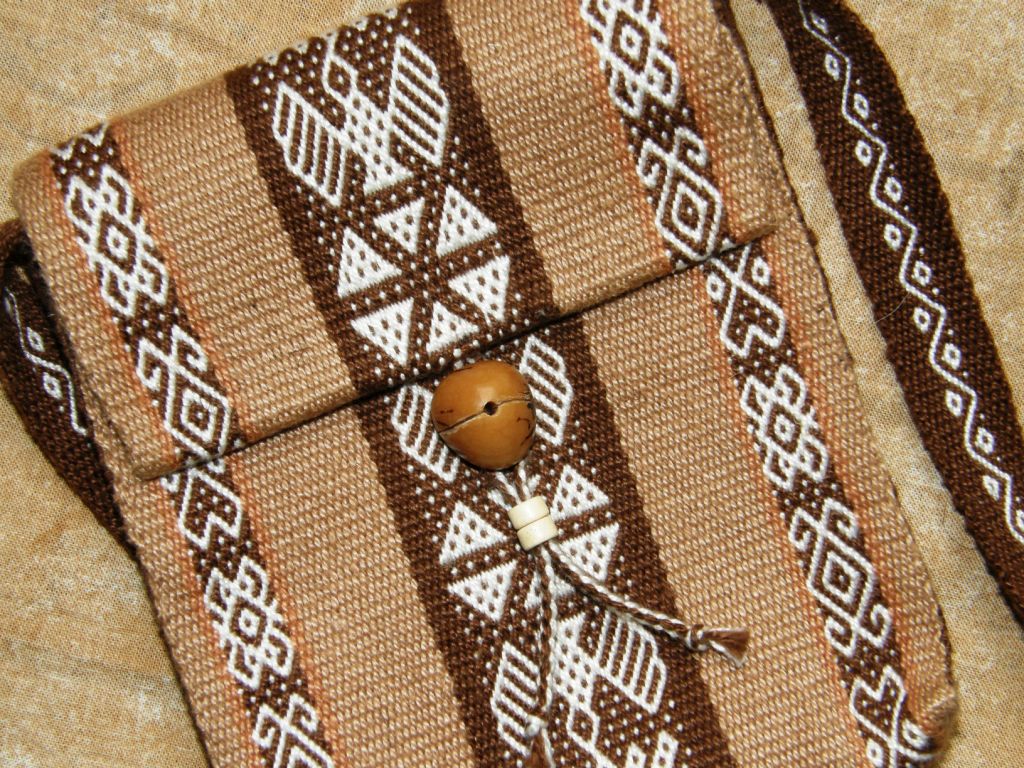
And continuing on the lettering theme,  weaving friend and blog visitor Sharon Kersten completed the chart of letters for the Montagnard warp float lettering tutorial that I did last week and has sent it to me to pass on to all of you. She saw my photo below of various bag straps woven with letters and used it to chart what she thinks the missing letters could look like as well as the numbers. Many thanks!
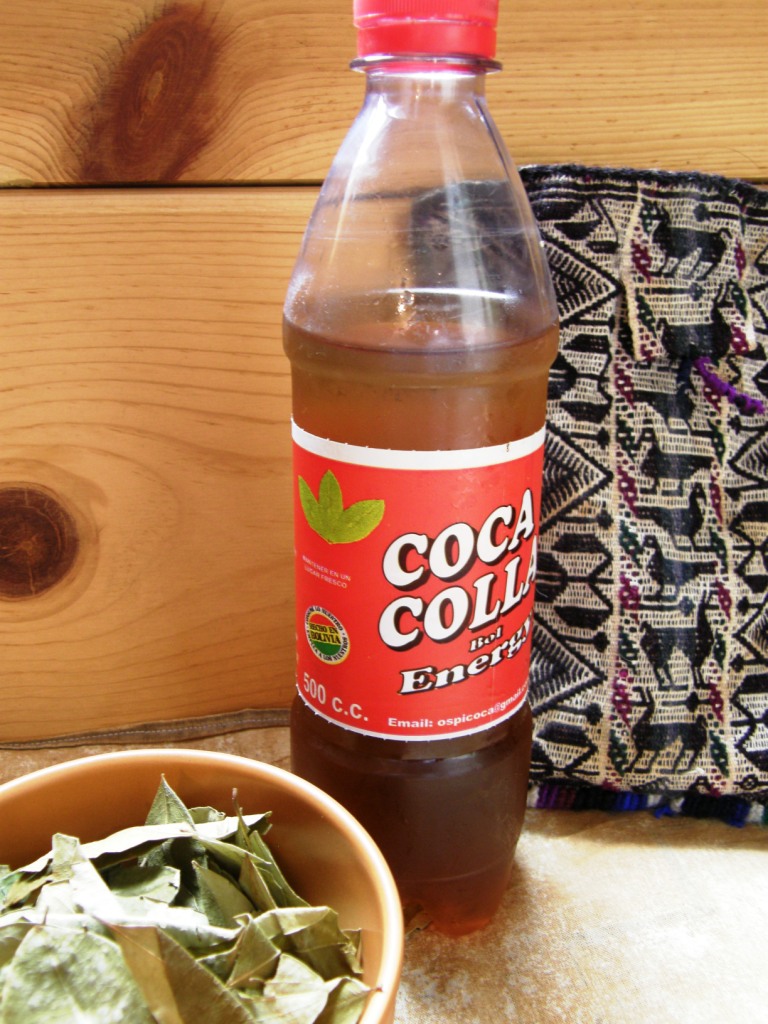
I will leave you here for this week with this new Bolivian beverage…

Peru has its Inka Kola and now we have”Coca Colla”! It’s a play on words, not bad spelling…”colla” being the word to describe people of indigenous origins here in Bolivia (pronounced coya- the oy sounds like the oy in “boy”). It is made with coca leaf extract, is heavy in caffeine and slightly carbonated. All I can say is that…weeeel…. it tastes as good as it looks. 😉 Cheers!

Backstrap Weaving – Three Tips, Twining and a Tutorial


Central Asia, Mexico, Vietnam and the Middle East were new weaving territories for me this year.

I am not one for making New Year resolutions but I got caught up in the moment last year at this time and went public with three weaving resolutions in one of the online weaving groups. I am happy to say that I did not even come close to fulfilling them. I say “happy” because my weaving path for the year took me off on several tangents and led me to interesting and unexpected places.

I am not going to make new resolutions. I do have  two or three things mapped out for the coming year and I will happily allow the gaps in between to be filled with whatever comes my way. I have to say that a lot of those gaps are being filled by you guys, my blog readers, who email me with video links, images and ideas from all corners of the world.

What was on the loom this week?…firstly, I will show you what was on the weaving –

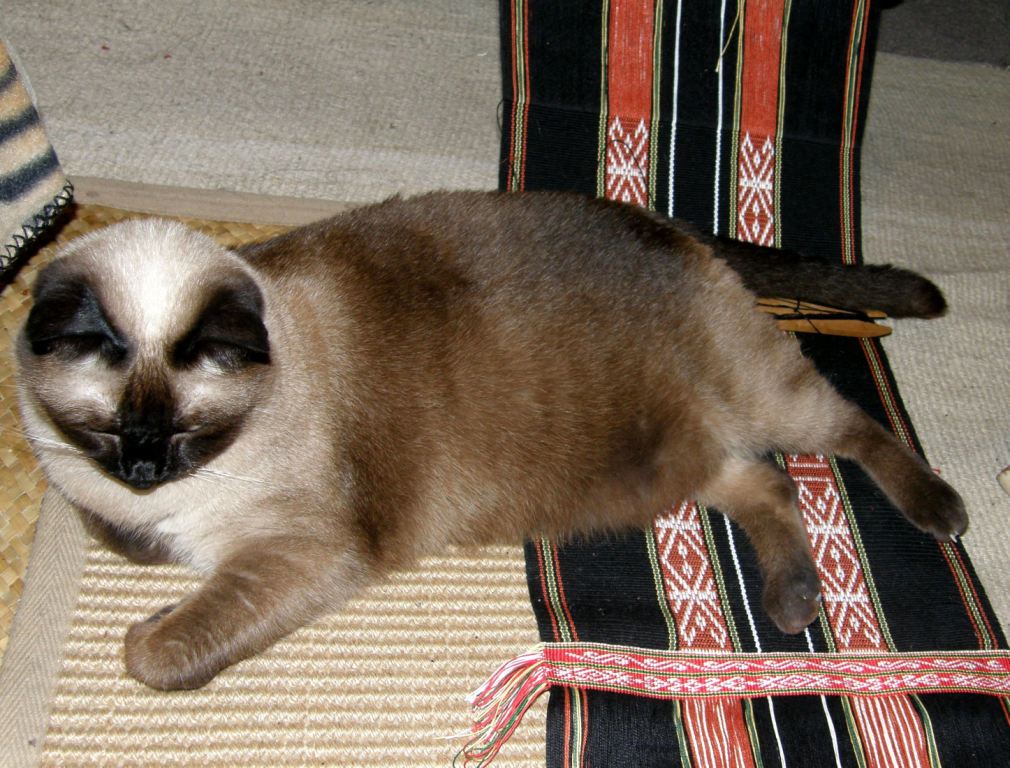
My cat loves to leave all her little beige colored hairs on my black weavings. You can see the twining at the bottom of this piece where I have finished the second part of the design.

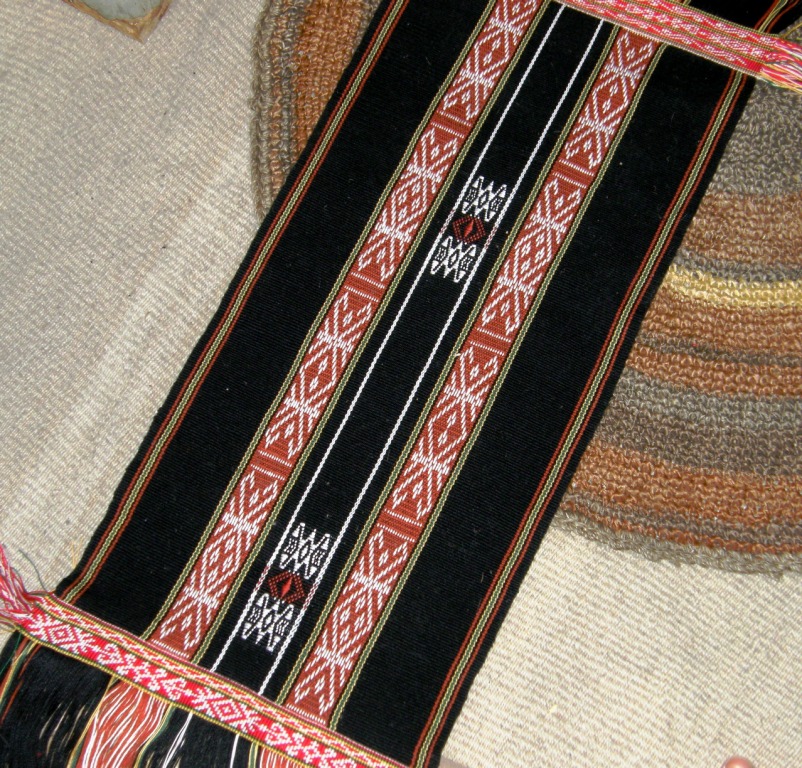
Above you can see the three parts finished. I was still debating at this stage what to do with this piece. You may remember my mentioning table runner and then center piece. Who am I kidding?

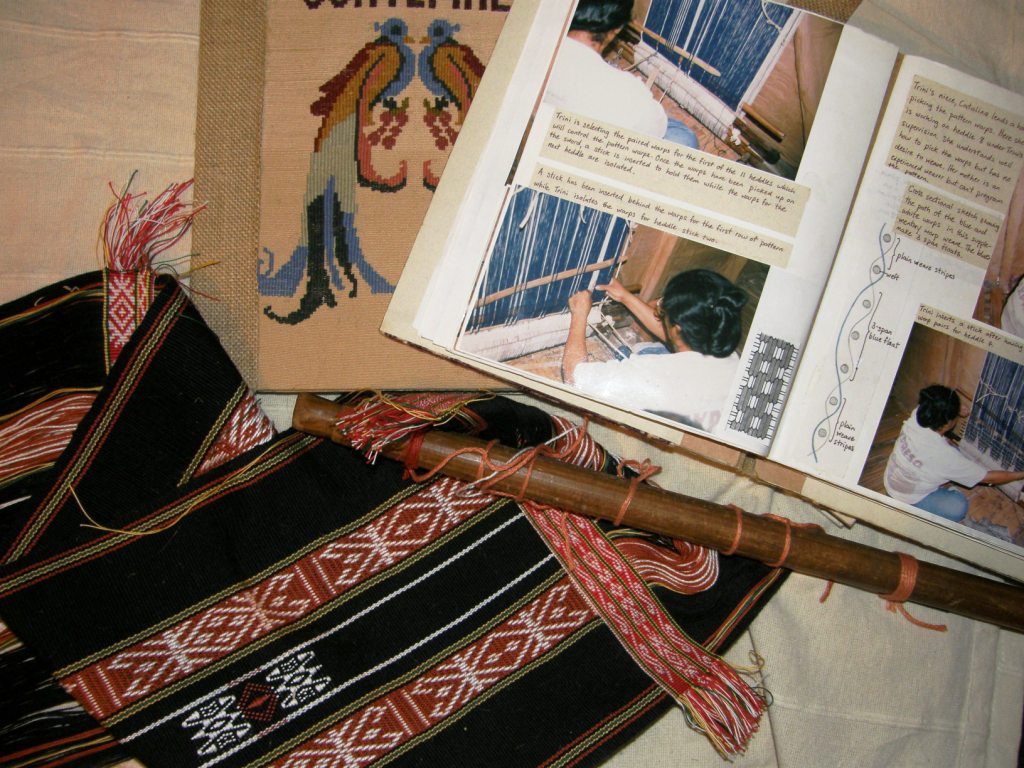
This was never about the product. I just wanted to weave something to put the various Montagnard weaving techniques into practice. So I finally decided that the piece would be cut in two and used as the cover for the journal in which I will document the processes. I have over twenty supplementary weft motifs to chart from photos I took when I visited the Montagnard weavers as well as their warp float designs and twined motifs which I will put in the journal along with step-by-step photos.

Above left are a couple of my finished journals from other weaving trips. One has a woven cover which I made to practice the double faced supplementary weft patterning that I was taught in Guatemala and the one on the right documents all I learned in coastal Ecuador.

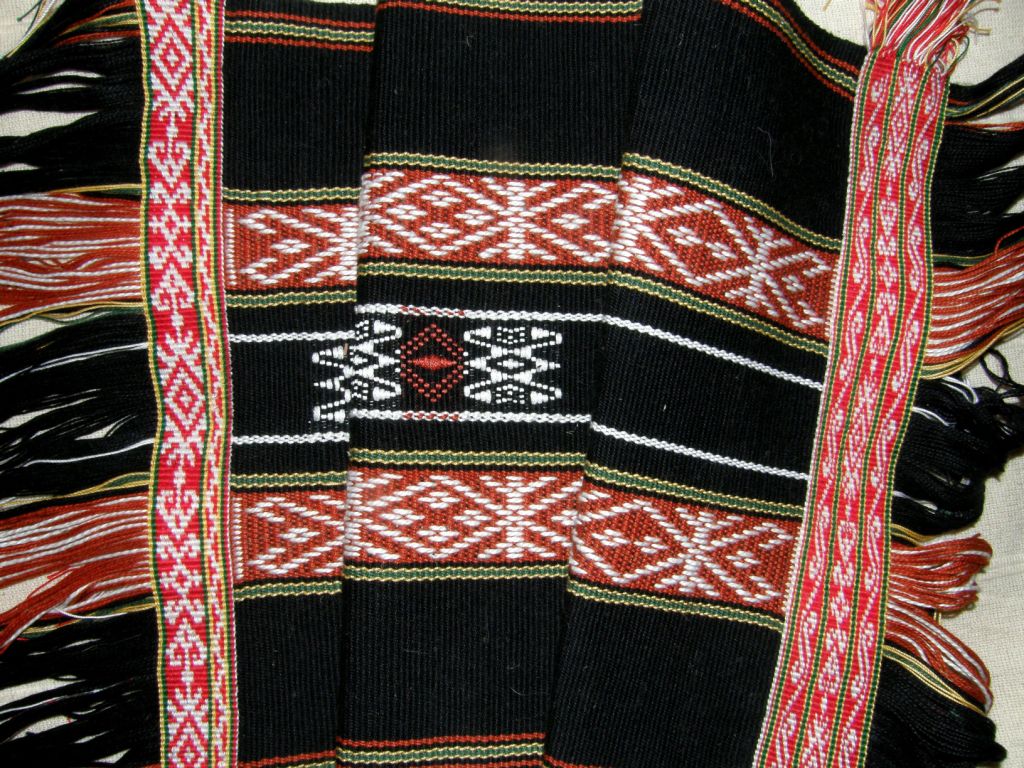
But first I had to twine the other end of the piece. I needed to weave some more in order to have enough fabric for the book cover and then I twined the edge using one of the same patterns from the other end but doubling it, that is, I twined two rows for every row of pattern. What a difference that made!

You can see that the design on the center strip of twining on the first end is the same as that on the second end.  A closer look…

I have the pages, now I just have to get the cardboard for the journal’s cover. I stitch and bind everything together myself. Then I have to get the scissors out, take a deep breath and cut the weaving in half  – yikes.


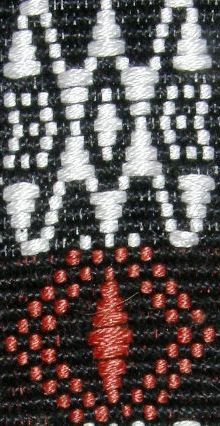
An interesting thing about the supplementary pattern on this piece…usually I don’t recommend having weft floats of less than two warp spans as they barely show up on the fabric but I had to have floats that only spanned one warp on this piece in order to faithfully reproduce the Montagnard motif and, to my surprise, the design shows up very well. My base warp and weft are number 10 crochet cotton and I used one and a half strands of embroidery cotton as the supplementary weft. The white thread for the warp floats is number 3 crochet cotton and the twining was done with number 20.

Staying on the topic of Montagnard pick up weaving, I have put together a tutorial on the woven letters that some of the Montagnard weavers are using to weave biblical phrases on their woven bag straps. I really like the shape of these letters and it is quite a simple pick up technique. The drawback is that there are some longish floats on the back of the piece which doesn’t bother me too much as bands with letters are essentially single faced anyway with the letters being reversed  and unreadable on the back. The technique does not produce an entirely warp faced fabric.

You can see the tutorial here.

One weft double weave can also be used to weave letters which don’t have long floats on the back. The one weft double weave tutorial is here and the chart with some basic stick letters is here.

These letters, which were woven by Guarani weaver Angela, are the ones that I really want to learn…

These are woven with the same technique that I used to weave this copy of Angela’s cell phone pouch design…

I would like to have Angela weave a complete alphabet for me to use. I really like the solid “blocky” nature of these letters.

Other beautiful, fluid and non-blocky letters can be found in Linda Hendrickson’s book Please Weave a Message with charts designed by Linda as well as adapted by her from the work of Michael Cook for card weaving. I have just set up warps to make my first attempt at twining Linda’s lettering. Her charts don’t work for the double weave pick up that I like to do on my backstrap loom but should work perfectly for twining. Hopefully next week I will have some progress to show and I will try to make something useful from the sample!

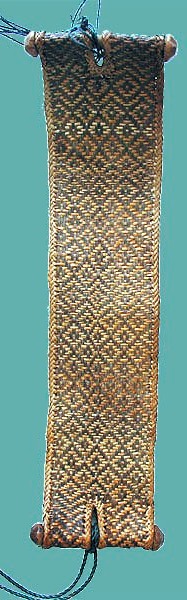
You may remember in last week’s post I showed you pictures of Li weavers from Hainan Island and their looms. I have since found someone else who owns one of these looms who also has the backstrap. I don’t remember seeing one at Pam Najdowski’s stand. Susan Stem of Tribal Trappings has this photo of a Li weaver’s backstrap…

The one on the extreme left is the Li backstrap, made from fiber, which is believed to be from the weavers who speak the Meifu dialect according to collector Pamela Cross. The one on the right is probably from a completely different part of the world. This was gifted to Tracy who lives in Qatar and who unfortunately does not know anything about its origin. I love them both and wish that the weavers here in Bolivia had such interesting ones! Most weavers I have met here have had no interest whatsoever in constructing any kind of special backstrap and have been quite content to use any old piece of sacking that is lying around.

I find backstraps almost as interesting as the textiles that are being made on the looms. I really like the way the two backstraps above have been constructed with the pieces of wood on the sides. So, I dug around and found a weaving that has been sitting neglected at the bottom of the basket. Another one of those things that I wove for my interest in the process rather than for any real interest in the finished product…


It started off as an experiment on my friend Lisa’s four-shaft loom. I wanted to weave a long Andean pebble weave piece after having made only tiny sample bands in order to put the draft together for my Andean Pebble Weave book.  It came home with me to Santa Cruz and went onto my backstrap loom to be finished…

When it was done, it was too wide to be a guitar strap and too long for anything else that I could think of. So, it got shelved to be later made into a loom bag of some sort…again, I was kidding myself.

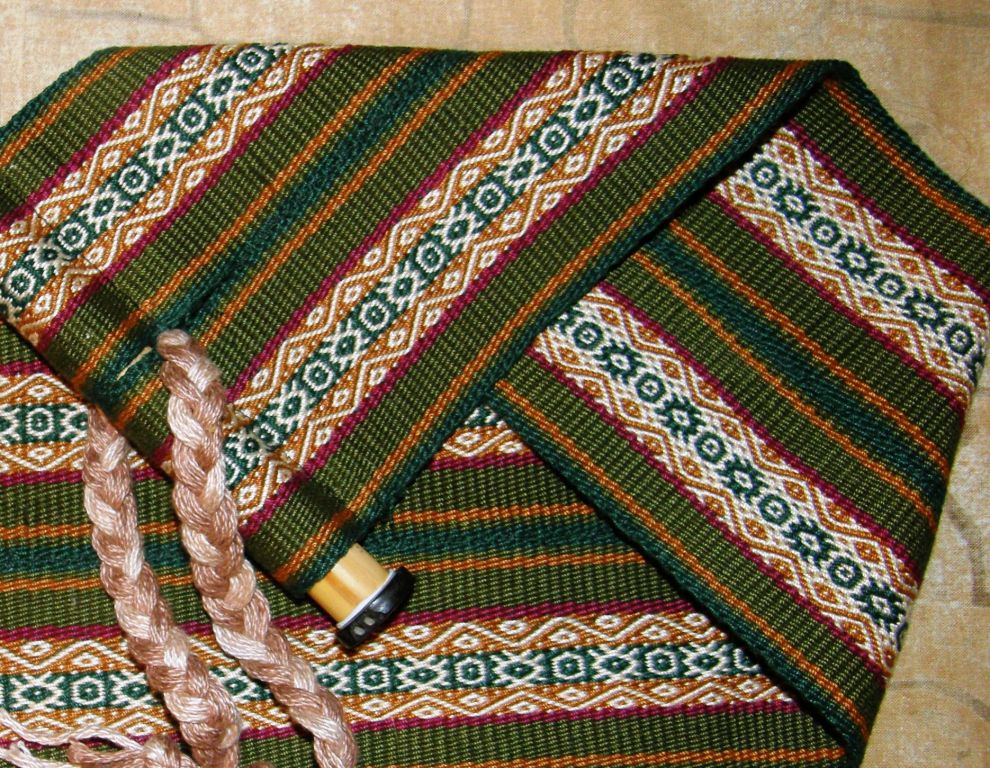
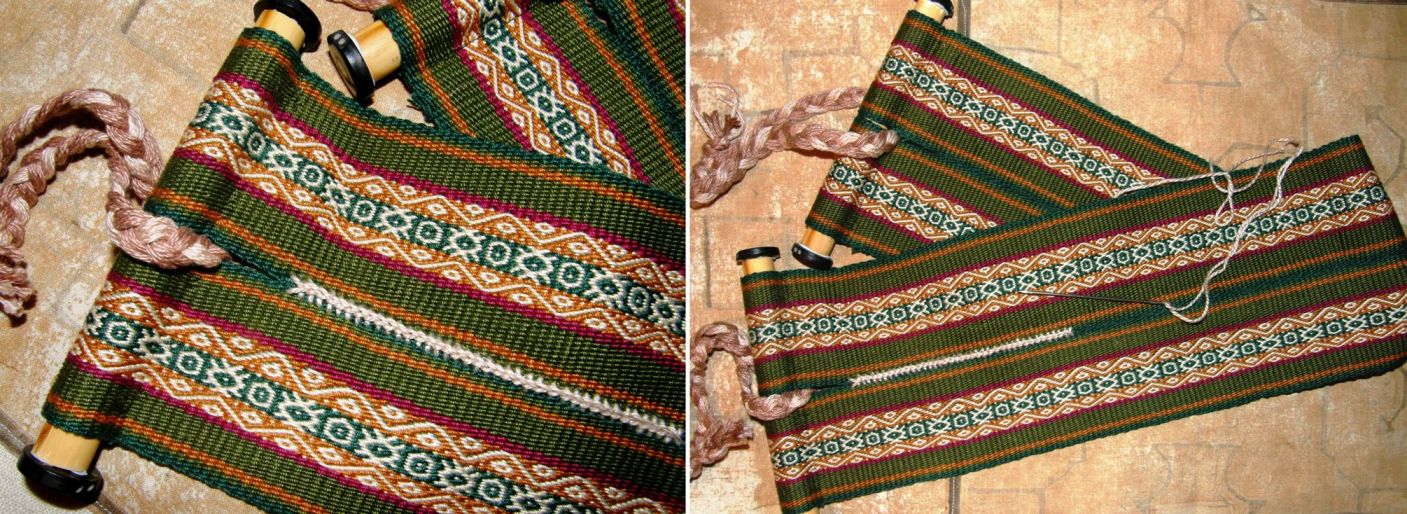
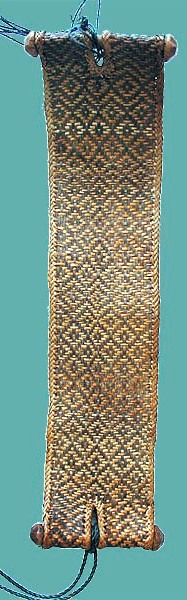
Now here it is resurrected as….my new backstrap…

It isn’t quite finished yet. I have just joined the two pieces together with rough tiny stitches and am now using the cross knit looping or Van Dyke stitch to make a stronger and more decorative join. You can see a video on the Van Dyke stitch in this blog post. I used bamboo sections on the ends of the strap stolen from a cheap set of panpipes and the dark ends on the bamboo are pieces of tagua nut that I bought in Ecuador which are only held on with Blutack until I can get some strong glue.

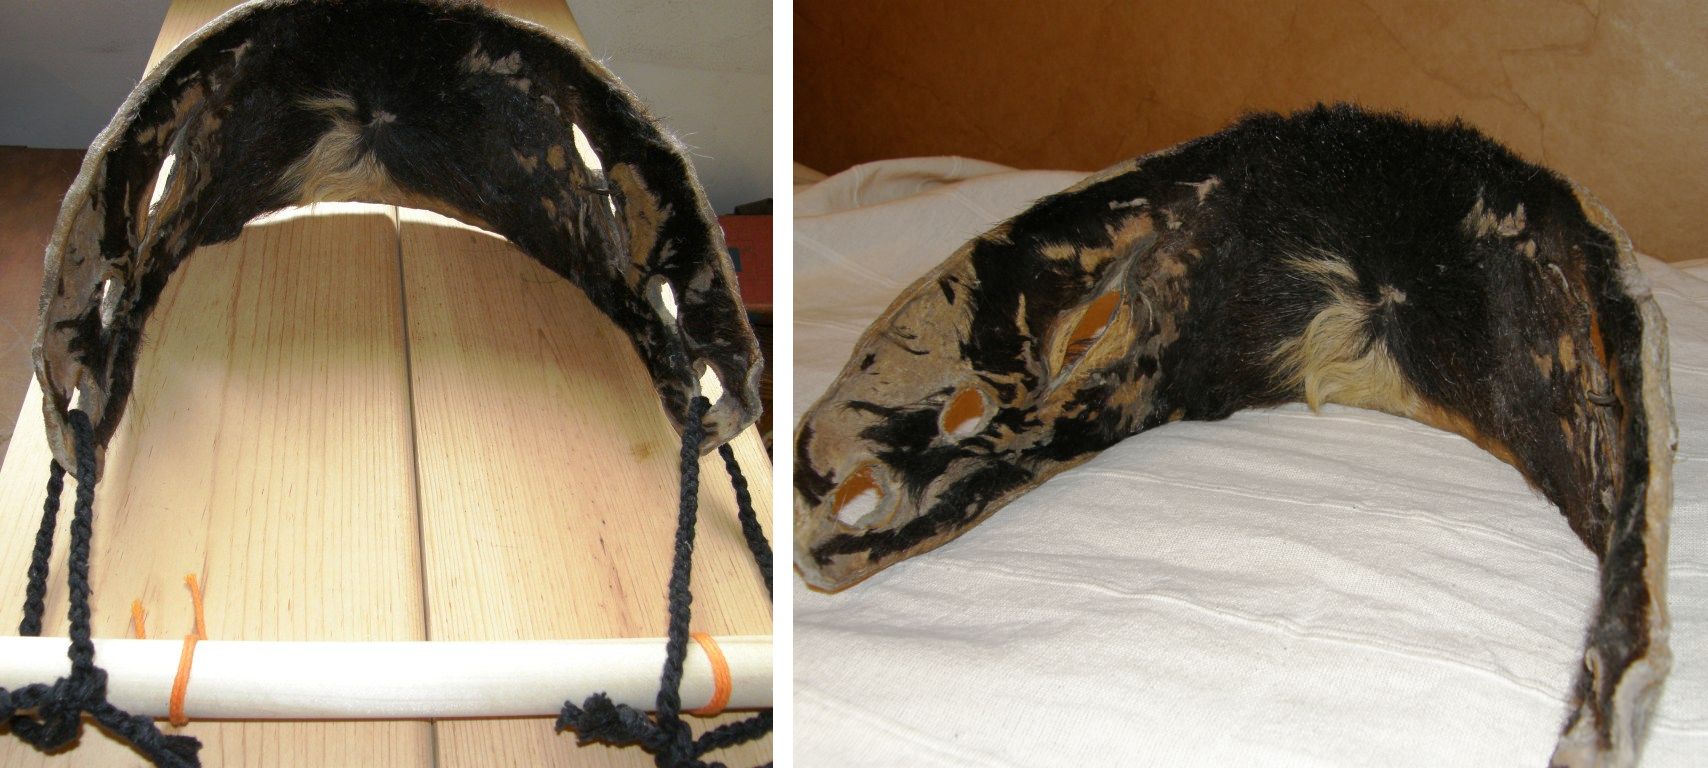
I have collected nice backstraps from a few other countries – a fiber one from Peru, a leather one from Guatemala and a very unusual hide one from Ecuador but nothing interesting from Bolivia.

A nice sturdy hide backstrap from Otavalo, Ecuador. The hairs tend to tickle while you are weaving.

I found the image at left on this site about backstrap weaving in Timor.

Timor is so close to my former home in Australia. I am seriously thinking about making a trip there the next time I go back to Sydney.

In the picture it looks like the weaver is making two pieces at once side by side as Montagnard weaver Ju Nie often does.

I love the backstrap. Ju uses a large pad which I think is stuffed with some kind of fiber. She just passes a rope behind it to hold it to her back which she then loops around her loom bars. It is very comfortable. You can just make it out in this picture…

Some blog readers, Weavolution and Ravelry members have made backstraps this last week…

Claudia from Weavolution finished her backstrap (on the left) and found a good place to tie up her loom in the process…to the bottom of the sofa (but with her back to the tv!). Anna who you may remember is cycling down to Tierra del Fuego wove her own backstrap while on the road. She has been weaving pebble weave and double weave until now and told me how lovely it was to cruise along with plain weave for a change. Anna does not, of course, have a regular tie up spot for her loom and I always look forward to seeing where she is weaving. You may remember seeing her warp tied to her bicycle on the Uyuni salt lake in a previous post.

Jennifer has her backstrap on the loom right now and I caught this image of Melisende’s “ceinture” on a French forum called Tricofolk. I didn’t ask her permission to post this here and hope she doesn’t mind!

Bonjour et bienvenue aux tisserands de la France!

I know that at least Jennifer is getting ready for a backstrap Weave Along that was proposed in the Backstrap weaving Group on Ravelry some weeks ago. We all agreed that post holidays would be the best time to start and we should be underway in January. The exact date is yet to be announced.

This will be a chance for beginners to make their own bands and backstraps with lots of support and advice on the forum. Those who have already woven their first pieces on a backstrap loom can try their hand at a project or two. I will be putting several proposals and ideas in the forum based on the tutorials here on this blog. A few weavers have asked about forming a group to work through my Andean Pebble Weave book too. So, all levels are welcome to join in.

As the WAL (weave along) approaches, I have three tips for you as you prepare…

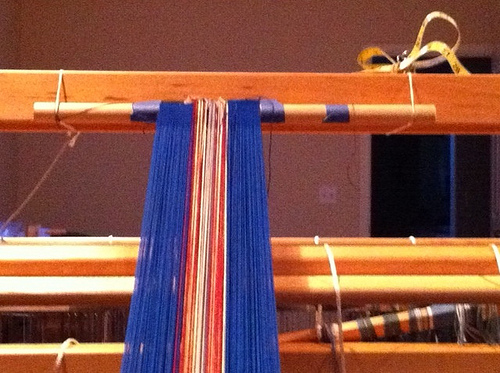
1. Think about how you are going to wind your warp…

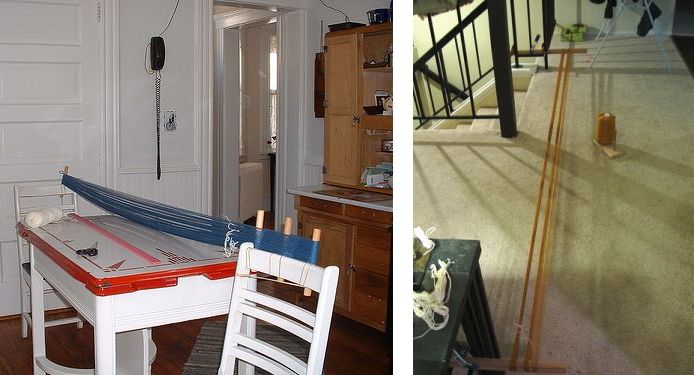
An evenly tensioned warp is essential. The warp will not be cut, threaded and retensioned once it comes off the warping stakes so you need to get it as evenly tensioned as possible while you are winding it. Beware of using stakes that are loose and may lean in as you are warping. The photo above right is from Franco’s blog. I am sure that Franco made sure that those stools were heavy enough to not move during the warping process. You can read more about warping and see videos here.

2. Find a strong and secure place to tie up the far end of your loom. It is always better in my humble opinion to lash your entire loom bar to something rather than have it swinging in space. Experiment with the angle of your warp and find what is most comfortable for you.

Read more about this here.

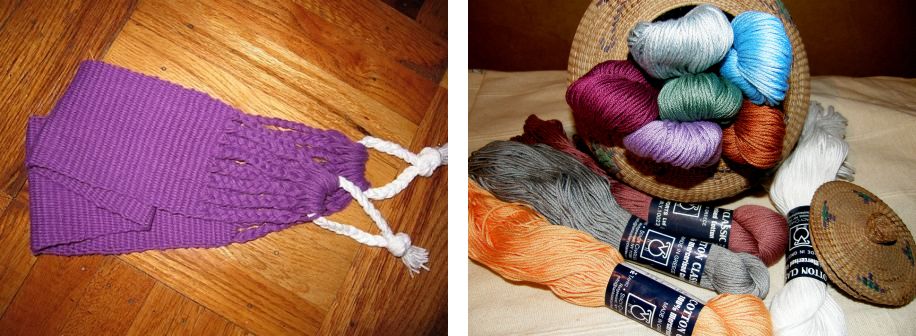
3. Choose your yarn carefully. Don’t use wool for a first project. Try to find a mercerized crochet cotton. Size 3 crochet cotton is good for beginner practice bands. Heavier cotton is better if you want to make a backstrap. Don’t use the cottons that are sold for dishcloth projects.

Tahki Cotton Classic is a good choice for making a backstrap. Cathyz made the purple strap above with this thread. WEBS recently had a sale on Tahki Cotton Classic and I got a grab bag of ten skeins.

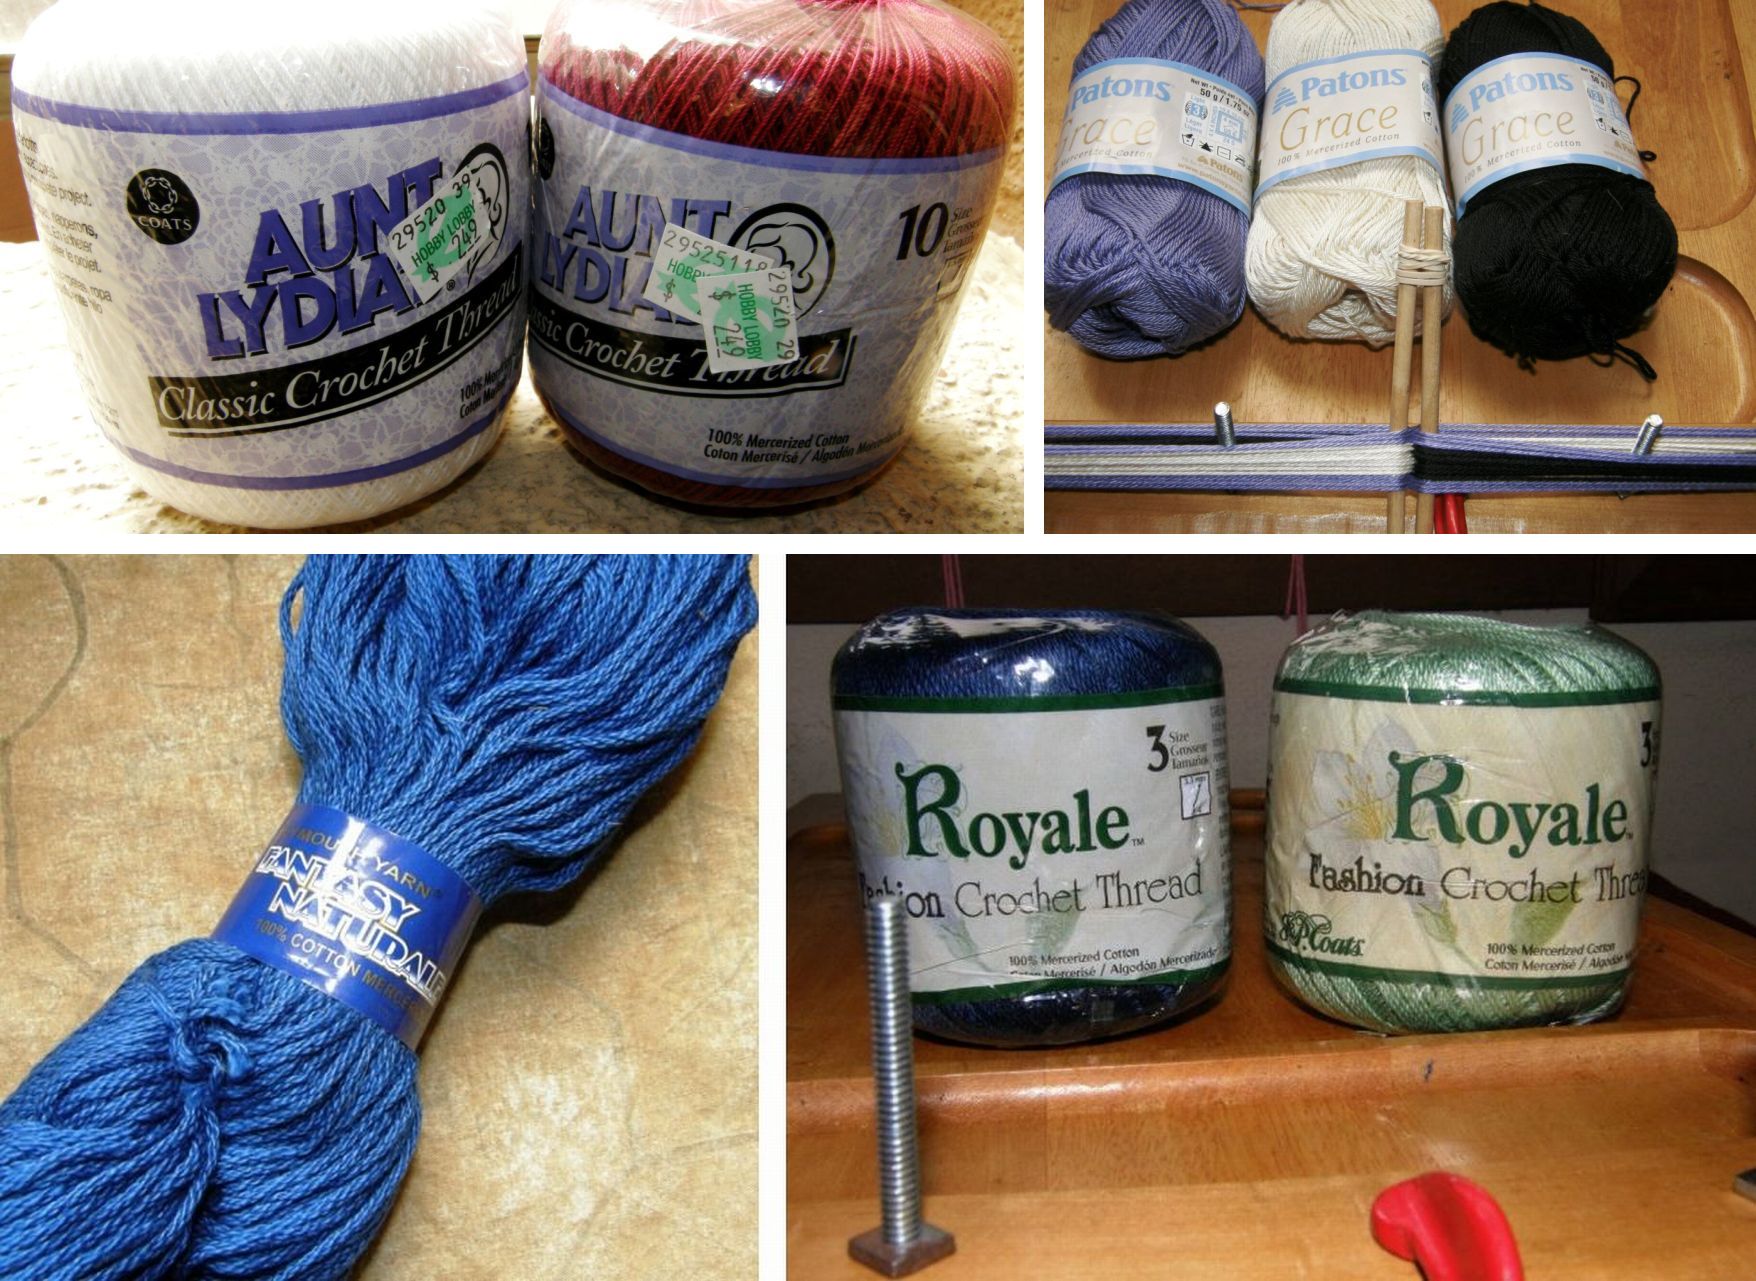
Other brands that are readily available at Michael’s, Hobby Lobby and such places that I have tried and recommend are pictured below…The Fantasy Natural is a good weight for backstraps. I got that at The Mannings.

Read more about yarns including some information on using wool here.

My new backstrap was made with this thread pictured below…love this stuff!

Read more about suitable cotton thread and wool here.

Don’t forget the lettering tutorial.

Many thanks to all those who visited and left me Christmas greetings last week.

A very happy new year to everyone!