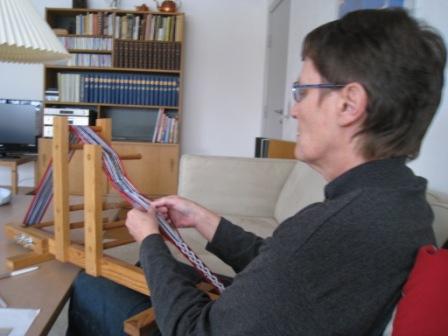
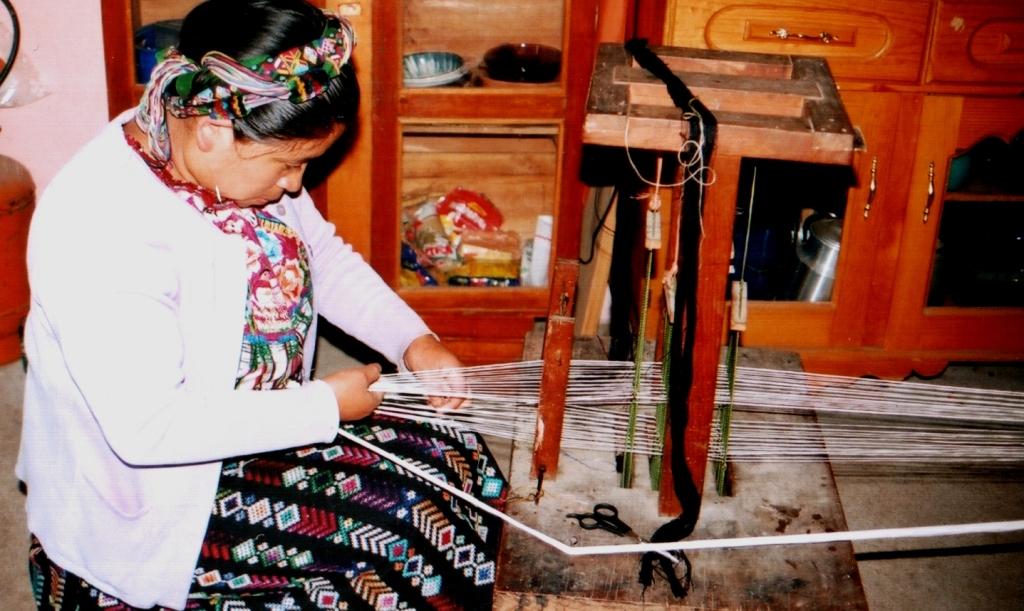
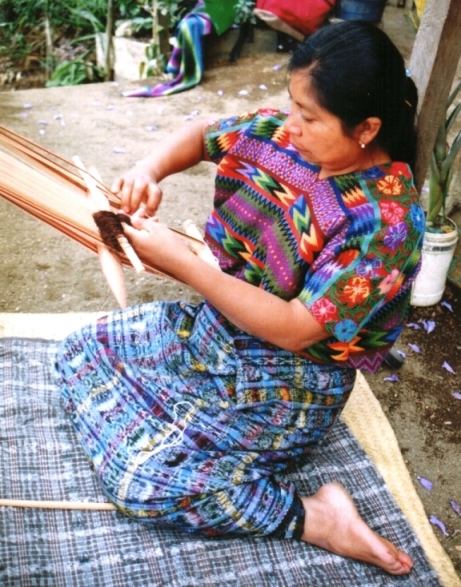
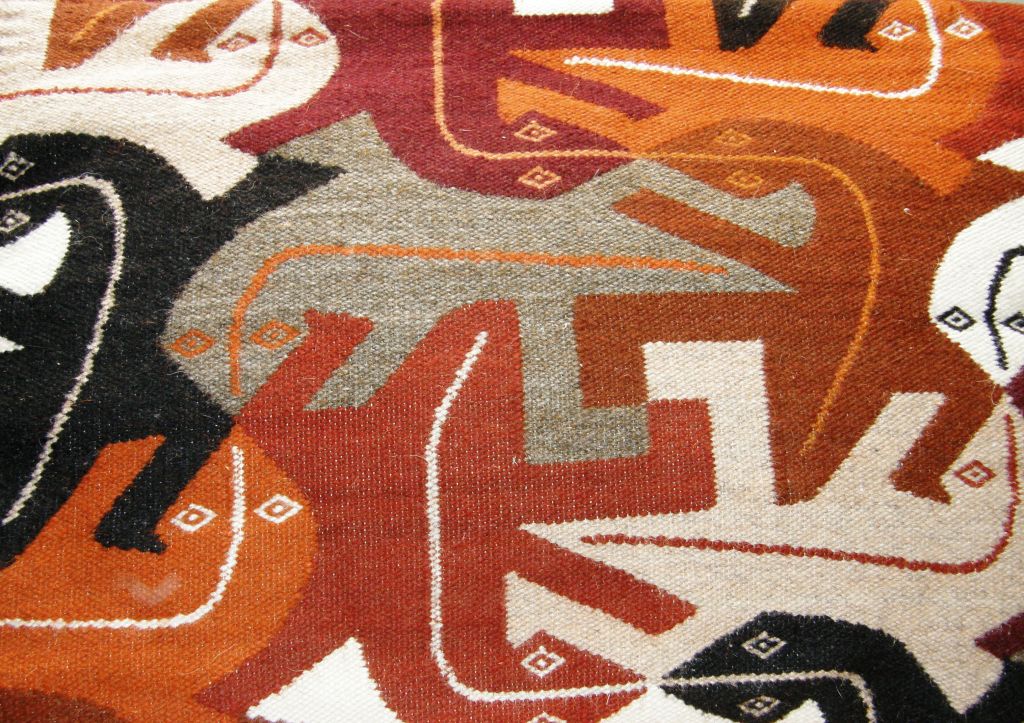
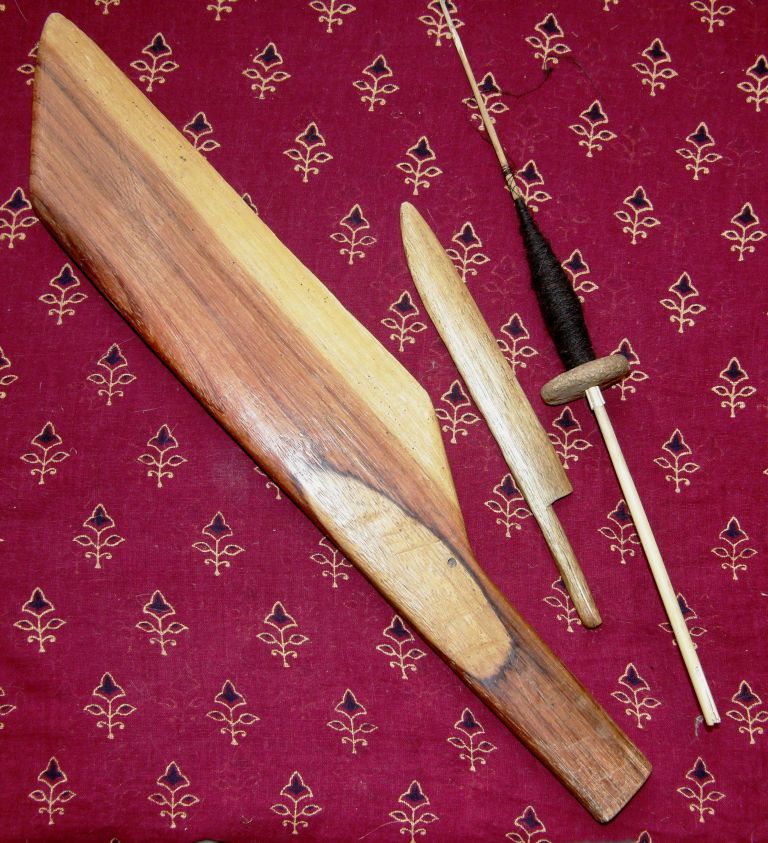
A short post this week as I get my sticks, strings, shuttles and spindles together for another trip to the US flying out tomorrow (Friday the 16th).
Andean Pebble Weave is now in print! It will also be available for purchase in its e-version on the WeaveZine site. (UPDATE: Now it is available in 4 languages at Patternfish.com along with the follow-up book, only in English.)
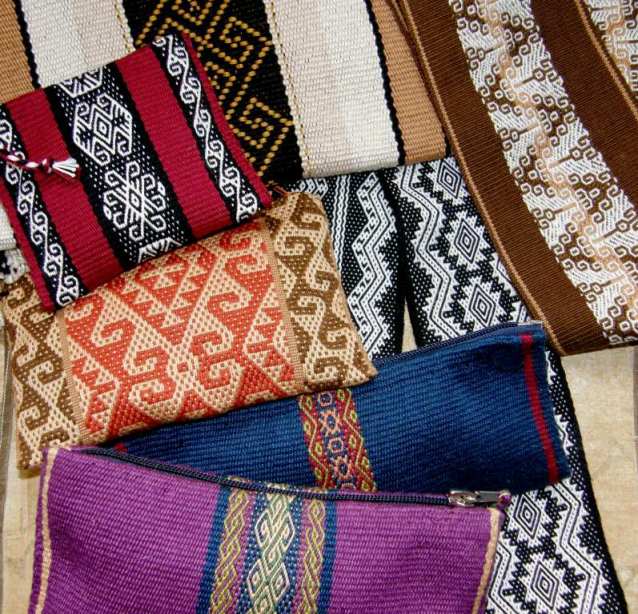
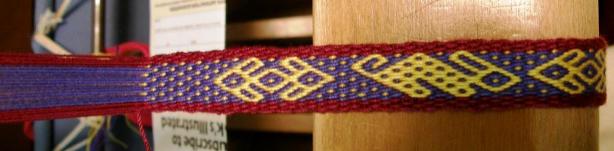
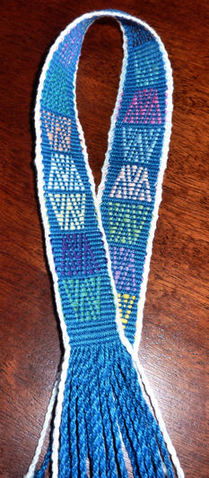
With all the loose ends that needed tying up and the time spent working with Syne Mitchell to get the print version of my monograph ready, I didn’t expect to get any weaving done this week. But then I had an idea and ended up weaving a bunch of keyfobs. I thought it would be fun to give a keyfob away with the first 20 copies of Andean Pebble Weave. So I sat with my basket of cotton thread and had a great time combining all sorts of colors to make the 20 keyfobs to accompany the books. I combined several small pebble weave motifs and now I can definitely see the benefits of weaving the same design over and over as some indigenous weavers do. I could probably weave this with my eyes shut now!! As long as there were new colors to combine it never got boring. Only one or two color combinations are repeated as I made tiny warps and wove one at a time.
And I didn’t stop at twenty as I thought that these fobs would make nice gifts all year round. I will be weaving these where ever I can find a spot to tie up my loom – in the Vendor Hall and probably to my bunk bed in my hostel!! as I am packing my mini warping board and crochet cottons.
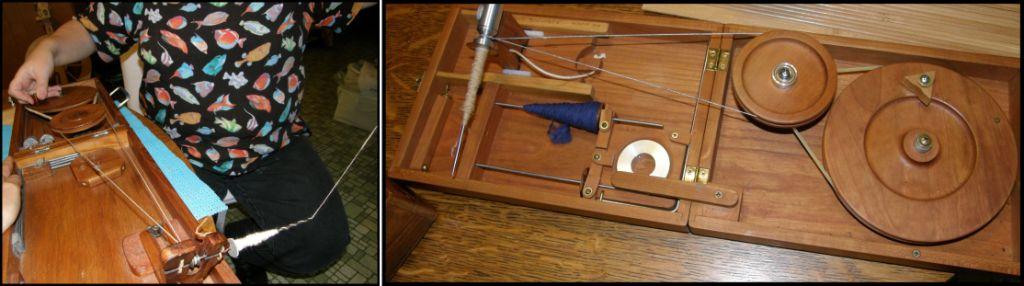
I am also taking my wobbly Bolivian drop spindle and some of the alpaca fiber that my friend Janet gave me on my last visit. I just spun a little to get it started on the spindle and it is so so beautiful to spin! This is not the first alpaca I have ever had to spin. I bought some many years ago in Peru and it was in a dried-out, brittle and filthy state. I lost a good third of it in the cleaning process and I knitted rather than wove with it. Now I have this prepared smooth luscious fiber to work with – what a dream! It almost feels like cheating! I’ll be spinning it to weave with on my backstrap loom.
I am hoping to squeeze some of my smaller weavings into the backpack to show people who drop by the Weavolution booth at Convergence. I am also taking them to show some folks in North Carolina. I found out about a group of Montagnard people who have a small community in North Carolina. This is wonderfully convenient as North Carolina is on my trip route on my way home after Convergence. My good weaving buddy Lisa lives there and we have been invited to go visit the Montagnard community as there are backstrap weavers among them. What’s more, it seems that they have been recently joined by Karen and Nepali weavers. We hope to share our textiles and backstrap techniques and I am so excited about this opportunity. You can read a bit about the Montagnard people here and watch a video on one of the weavers in the North Carolina community here.
Betsy Renfrew who has been working with the weavers, and who extended the invitation to me after my initial enquiries, has started a blog about the group’s activities.
My backpack will also be full of sticks as I will be staying with one of the Weavolution founders in Washington and she may have some friends over to weave. I have loom bars and backstraps for several people so we can all weave together.
So…come and visit me at Convergence!! I will be with Weavolution founder Alison at the Weavolution booth or wandering about most likely with a bunch of sticks protruding from my tote bag. I would love to meet you and show you my weavings and loom. You can check out the new print version of my book. I hear that there will be a weaver from the Textile Center in Cusco demonstrating backstrap weaving too so I will definitely be there watching her.
Hopefully next week’s post will be full of Convergence events to report and stories of all the wonderful weavers I have met.
Spring has sprung in North Carolina! I am spending some time here in Lincoln County with my online buddy Lisa and her family. Lisa’s father owns and runs the local newspaper and is a wealth of information on local history and its colorful characters and has kept me highly entertained with stories throughout my stay over breakfasts and dinners of typical southern treats. He tells me that North Carolina, while being one of the ten most populous states in the US, is also one of the most forested. This town looks like a gorgeous well manicured and landscaped park in which people have been graciously allowed to place their homes – luscious, expansive green front lawns, azaleas in full bloom, majestic oaks, show-case flower beds and vegetable and herb gardens abound. You can barely see the houses amongst the trees and shrubs – so gorgeous!..so spacious! Oh, and I heard a mocking bird yesterday! – To Kill A Mockingbird is my favorite book.
And I have been treated to helping upon helping of southern hospitality. I am so tickled everytime someone calls me ma’am! I was eager to try some typical southern food – all those names that we hear in movies and TV shows and have no clue about – so Lisa’s husband made me a batch of “biscuits” which we enjoyed with Lisa’s homemade berry jams. We have biscuits in Australia but our biscuits are what people in North America call cookies.
LEFT: Homemade buttermilk biscuits…RIGHT: A good southern breakfast.
We went out for a good southern breakfast. The largest plate in the above picture is mine! – biscuits with gravy, corn grits and country ham. I still can’t believe I ate all that! I asked about chitlins as I have always wondered about those but the general reaction at the table made me think that I would be better off not trying them!
For something different, Lisa and Ryan took me to their favorite Thai restaurant as I had mentioned that south-east Asian food is something that I miss in Bolivia.
On entering the restaurant, Lisa and I were drawn immediately to the textiles that decorated the walls and tables. The owner was so pleased by our interest in Thai weaving that he gave us each a woven bag from Thailand!
So, what has been planned for my visit apart from eating? – lots and lots of fibery fun! Lisa and I met online through a discussion on her fabulous yurt band which you may remember from a previous post. Finally my little yurt band border bands get to meet their inspiration. You can see them there at right next to the huge forty-eight foot yurt band. There is nothing like seeing something like this “for real” after having admired it for so long online. The colors are so much richer and I am suprised at how loose and flexible the weave is compared to South American bands which are beaten hard into a stiff firm fabric.
So Lisa and I met on Ravelry where she was trying to figure out the structure of the yurt band weave to see if she could reproduce it. Photos were flying back and forth in cyber space and it was only after seeing the back side of the textile that I finally recognized it as simple warp floats. We then set about weaving a tiny reproduction – the “s” motif on which I made a tutorial here. We laugh about the fact that a chica in South America helped a gal in North America figure out a weave from Central Asia – and all online! And thus a friendship was formed.
By the way, my friend Caroline in Australia has been doing her own investigation into other kinds of yurt band construction which you can read about here. She wove a three-color reproduction band recently.
Inkle, cardboard, tapestry, card, backstrap, frame and rigid heddle looms!
Lisa is a felter, spinner, knitter, painter, braider, weaver and loom gatherer. In an attempt to clear some space so we could use her four-shaft floor loom, we pulled no less than fourteen looms out of her studio! Now what am I , the backstrap weaver doing on a four-shaft loom? I will tell you more about that little adventure later on.
In the meantime, check out Lisa’s fabulous felt work above. Lisa is in the local fiber guild and SCA group and so her projects tend to involve historical reproductions with her SCA companions as well as work with the fiber guild which gives her an outlet for more contemporary pieces.
Lisa’s felted pouch and inkle loom woven strap. I can’t wait to make one and decorate it with a backstrap woven band. The yurt design cell phone pouch I wove for Lisa is next to it with her iphone inside – a perfect fit.
The piece above on the left has a Scythian design. The Scythian people existed on the Central Asian steppe around 500 BC and a feature of their animal motifs is the twisted hindquarters.
The piece above on the right is a Viking design.
There are a lot of felted pieces in Lisa’s home. I am seated on a felt cushion with my feet on a felted rug and, hopefully, if time permits, Lisa will teach me to make a felted pouch like the one at left. I will do a South American motif – shock! – and weave a strap on my backstrap loom.
I have my fingers crossed for a cut pile lesson or two while here too! Lisa has one started on her Mirrix loom which you can see on the left. The felt rug in the center is one she bought and is from Kazakhstan and I think it is splendid. At right, check out her grin as she peruses her newly arrived catalog from the “Secrets of the Silk Road” exhibition currently at the Bower Museum in Santa Ana.
Did I mention that she is also a terrific spinner? Here are a few of her most treasured spindles – Turkish and Tibetan styles, phangs from Ladakh, a Kundert, which is her workhorse spindle, and sentimentally valuable ones gifted by her husband as well as a bead whorl crafted by 5 1/2 year-old Joshua.
Lisa loves to teach and share and I got to see her in her element at an Earth Day Festival last weekend, where she showed and taught her crafts.
Lisa has taught me that finger loop braiding need not be limited to short braids as I had thought. She has a nifty way of hooking the end around her toe and an even niftier way of tamping down the braid which I will show you in a video. Here, she is teaching a five-strand braid to girl scouts, Carolie and Julia who had a ball with it.
When my weaving tecaher in Potosi taught me a six-strand finger loop flat braid, I would make the braid while she would tamp it down using the side of her hand with a slicing action. So it seemed that two people were required to work together to make the braid nicely. Not so… check out Lisa’s cool foot action in this video!
I got to demonstrate backstrap weaving and that was a lot of fun. There was a convenient pole in our area to which I could tie up.There was music and the weaver eye, forever on the lookout, spotted the ikat guitar strap
I wove pebble weave to promote my new e-monograph and it was quite a different experience to weaving at CNCH where my audience was largely weavers.
At this Earth Day event a lot of the people had never seen weaving demonstrated in any form and we attracted quite a lot of onlookers.
Lisa was spinning and explaining the felting process while I knelt on the floor and wove.
Caught up in the excitement of it all, I completely forgot that that kneeling position is not something I can maintain for longer that five minutes at home! I sat there happily for a couple of hours!
Kids were kept busy painting Earth Day flags. I was quite taken with a lady who was selling cards on recycled paper with photographs of her cats-eye-glasses-1960’s youth and with a wicked sense of humor. She gave a pair of cats-eye sunglasses to her vistors and that led to this photo op with me there in the center. Becca, from Shiele Museum, who was making paper flowers with kids, kind of caught the whole sunny spirit of the day with her colorful clothes and radiant smile.
The next day I was invited to visit with British couple Maurice and Ursula. Those of you who are on Weavetech may know Maurice and the superbly crafted looms he made for himself. Maurice, on hearing that there was another “British Subject” in town, promptly invited me to tea and then lunch and a visit with his four and eight-shaft floor looms and weaving studio. Ursula’s passion is quilting.
Maurice in his studio. He also built the spinning wheel in the center. Ursula posed with her quilt which she has finished piecing together but has yet to quilt. She is still experimenting with designs on her recently purchased quilting machine. Maurice and Ursula can work side by side on their fiber pursuits in the studio. The photo does not show the true colors unfortunately. The main colors are deep purple and apple green and they are stunning together.
Since putting out my e-monograph on Andean Pebble Weave, I have had a couple of enquiries about whether the technique can be worked on a four-shaft loom. Sadly, I didn’t feel qualified to answer those questions well and so I was determined to get educated about that on this part of my trip and Maurice was extremely helpful. I had never seen a four-shaft loom “in person” and I don’t think that Maurice was all that familiar with a backstrap loom. So together we muddled through and came up with a possible way to get the pebble weave going on this kind of loom if you simply didn’t have any other kind of loom to work with.
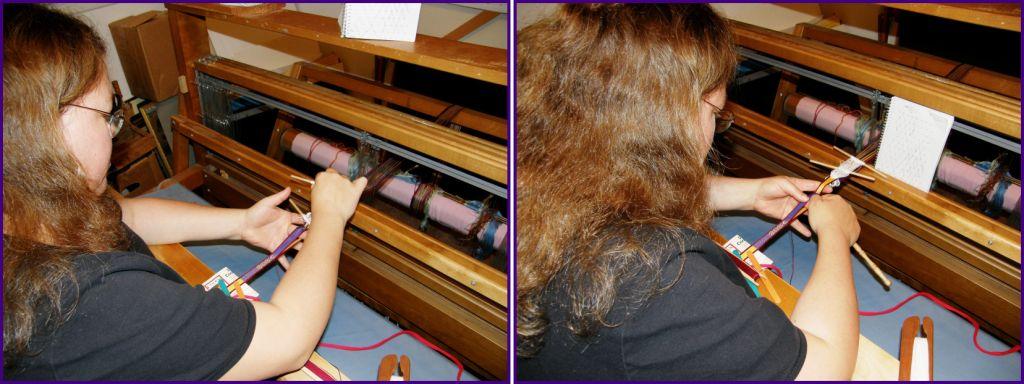
Here Lisa and I are ready to attack this project. I got a lesson in warping one of these looms with this tiny narrow warp. We warped front to back with Lisa sitting on a stool behind the harnesses while I fed the yarns to her. We only used two harnesses and set up the pebble sheds in those.All set up and on our way. We used a pair of string heddles in front to form the picking cross and removed the reed and away we went. All went very smoothly starting off with plain pebble weave. We are using an eight-revolution warp which gives us sixteen warps from which to pick patterns. This wee band looks quite funny on this large loom.The first motif is started and Lisa’s smile says it all.More motifs start to take shape and all is working well, The tension is just right as the motifs are not elongated and there is enough room to get hands and sticks in to do the pick up.Opening the heddle sheds to form a picking cross and then using a stick to pick up the pattern warps.More motifs. This center one is a “viscacha”, a rabbit-like creature with a long tail found at high Andean altitudes . The pattern charts for these are in my e-monograph.
So, we had fun with this. Lisa learned to make patterned bands (she had graciously tested my instructions for plain pebble weave before I published my e-monograph) and I learned a little about the workings of a four-shaft floor loom. What a lovely wide shed those harnesses create with the minimum of effort.
EDIT…..As I get more familiar with this loom and its workings, I have had the famous aha! moment and figured a way to do away with the string heddles and get everything into the four shafts. However it won’t make the actual weaving any faster. It is still, after all, a pick up weave and individual warp threads need to be handled. When I get back here from MSWF and a short stay in DC, I shall get another band on this loom.
Lisa is not the only weaver in this household. Above you can see five-year old Joshua making a scarf on an Easy Weaver rigid heddle loom. The scarf has been finished and hopefully he will find it so I can show it to you here before I publish this post.
I had another encounter with this Easy Weaver loom this week as Brian Jones in England sent me a picture of an Andean pebble weave band he has been weaving following my e-monograph. I can’t tell you all how ecstatic I am about seeing the monograph being put to use!! 🙂
LEFT: Brian’s warp set up on his Easy Weaver loom. He is weaving a band from lesson 2. RIGHT:Jennifer Jordan made a key fob with the plain pebble weave band in lesson 1.
I told you before that Lisa pulled out her collection of looms so that we could get at the four-shaft one and this gave me a chance to play with and think about looms, other than backstrap ones, on which pick up bands can be woven.
You may know Franco’s clipboard loom at left. Lisa also has a somewhat sturdier frame loom on which she has been weaving a band with simple warp floats.
If some kind of tensioning system could be rigged on these so that tension could be eased off as weaving progressed, they would be wonderful. As is, the amount of take up in the warp makes it increasingly difficult to open the shed and pick the warps as weaving progresses.
I set up a warp for Andean Pebble Weave on Lisa’s frame loom to see what it would feel like and wove some pre-Columbian birds. The pattern charts for these are in my e-monograph.
As I warped up quite firmly, I think I will only be able to weave half this warp before everything gets too tight. I think it is a nice loom for sampling and short bands.
Here are some pick up bands on inkle looms. The one on the left above was made by Karren from the Weavolution Backstrap Weaving Group some time ago. She made this into a cell phone pouch. This motif is charted in my e-monograph.
On the right is Lisa’s “s” yurt band design on her inkle loom. I warped up a narrow pebble weave band on an inkle loom when I was in California and enjoyed doing all manual pick up. I have just started winding a warp for a wider one on one of Lisa’s looms and will use additional string heddles this time. I’ll keep you updated on that.
Above, you can see a picture that Ellen sent me from Denmark where she is weaving one-weft double weave on her inkle loom following my tutorial on Weavolution.
Carolyn sent me these pictures of her first Andean pebble weave band, following lesson one in my e-monograph, which she lashed to her rigid heddle loom.
Then there are tapestry looms, or this Navajo loom onto which I lashed a four-color pebble weave warp. My Navajo loom has a tensioning device so I could ease off on the tension as I progressed and, therefore, compensate for the take up.
Lisa’s Mirrix loom on which she has her cut pile weaving would work well for this.
So, all the beautiful pick up weaves that I show on my blog and for which I have provided tutorials, can be set up on a variety of looms. They by no means have to be restricted to the backstrap loom.
This has been a wonderful learning experience here! Tomorrow we are going to get into some felting. I would like to learn this and make something for myself but probably won’t get to continue with it back in Bolivia as I can’t get sheep wool where I live in Santa Cruz. And then there is the cut pile weaving. I got Noreen Roberts’s wonderful book on the subject but there is nothing like having someone show you in person. Lisa is still in the experimental stage with this but I am sure that she will be able to give me some good tips.
And look above at what she gave me! – a charka from India. I am thrilled to bits to have something like this from my place of birth. Lisa’s fiber guild friend Katherine came over today and showed me how to use it.
Katherine spinning cotton on my new Indian charka – the parts need a good oiling! At right is Katherine’s own charka made by Bosworth – what a piece of work! Of course she makes it all look terribly easy. Lisa sat quietly by spinning up cotton of sewing thread weight on a takhli supported spindle. So we had a very spindly day and shall be getting back into our pebble weave projects later-Lisa on the 4-shaft loom and me on the inkle.
Katherine sews and also makes card woven bands. She made the pin cushions from felt and then embroidered them and the band, I think, is intended for her husband’s guitar.
I would so love to be in a fiber guild and surrounded by all these talented people. Well, I shall do my best to soak up everything I can from Lisa during my stay here although I have to admit that being in Weavolution gives me access to weavers from all over the world – so I can’t complain – and I only need to go up into the Bolivian highlands to be with wonderfully talented backstrap weavers.
###############################################
I have a band to show you from Ann Littlewood, woven from her own design in supplementary weft technique (see my tutorial here). She is going to use this as a bookmark.
And I also had a fun message over at Weavolution from Marta Madeja in Spain who tells me that she is hiking in the Alpujarras south of Granada and picked up some sticks along the way to make a backstrap loom. She has never tried backstrap weaving before and decided to dive head first into pebble weave and bought my e-monograph. The only “yarn” she had about was embroidery thread and she managed to make a tiny pebble weave band based on lesson 1 in the monograph.
The pin will show you just how tiny this band is. She tells me that she will try lesson 2 with thicker yarn when she gets home. I wonder what she tied up to on the trail. I am waiting to hear more details from her. I think this is really cool!
##########################################
Finishing here with a million thanks to Lisa, Ryan and Jack-in-the Box Joshua, popping into the photo there below, for an amazing time in North Carolina. We are off to Maryland Sheep and WoolFestival this weekend. If you are going, please drop by and say hi. I will be demonstrating backstrap weaving in the rabbit building at the Weavolution meet up point from noon to one pm on both days.
See you there!
Thanks to all who have written to me about the e-monograph. Keep the projects and comments coming. 🙂
I set up my loom yesterday to weave a narrow band – just 28 ends. Once I had made my simple heddles, tied them in a bunch and added the shed loop I realized that my entire loom consisted of just two simple sticks – the two loom bars and that’s all – one attached to a bed and the other to me. My weft was tied in a butterfly – no sticks there. The only other stick involved was a wooden beater to prop open my sheds and beat in the weft. How much simpler can it get?
I filmed the entire process from warping stakes to ready-to-weave if you would like to take a look. (Donna, I made this especially for you!)
So, again I ask you, how much simpler can it get?
Actually it can get simpler! I was in Tarabuco recently and watched a weaver sitting on the ground deftly wind a warp around her hand and foot. She tied one end of the warp around her foot, passed a length of yarn through the end loops at the other end and secured it to her waist. Then she made simple heddles around her hand, added a shed loop and started to weave. Briiliant! All in a matter of minutes.
A weaver in Tarabuco using a “toe” loom
You are probably thinking: okay, a simple loom for a simple weave– but even very complex weaves can be done on a very basic set-up.
A weaver from Tarabuco creating a complex design on a simple loom
You may recognize Felicia above with her sleepy cat from the video in this previous post. She has a shed rod, a heddle stick and some bars between which to stretch her warp. She has just inserted a couple of thin sticks to help with the pick-up but look at the photo at left and see the complex designs that she creates on this simple set up.
Now what about those looms that you see in pictures on the internet and in those Youtube videos? Some of them are loaded up with sticks – all those mysterious sticks – what in the world do they do? Hopefully I can solve the mystery behind at least some of them here. I have to admit that there are Asian looms that I have seen online with a multitude of patterning sticks and that I still haven’t figured out how some of those sticks work.
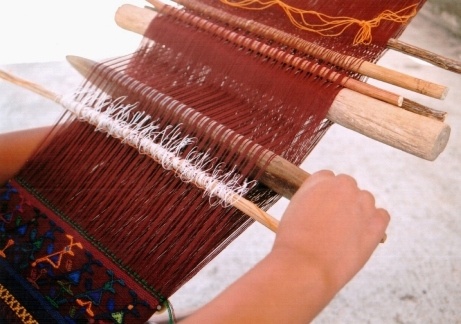
An extra stick added in a second cross in Guatemala
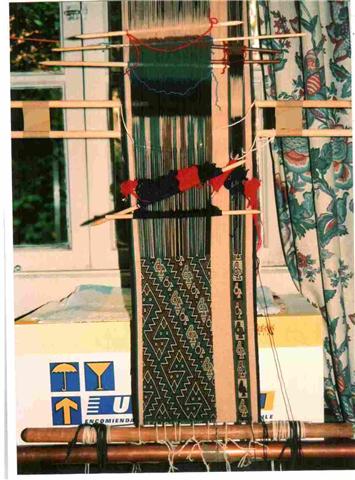
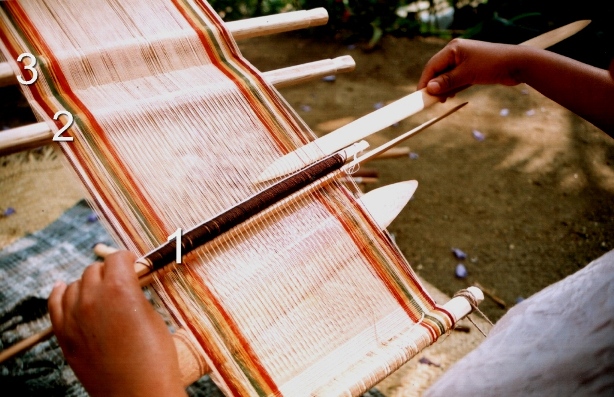
But at least I can let you know a bit about the sticks I have seen here in my travels in Central and South America and what they do. In the picture at right, number 1 is the heddle stick and number 2 is the shed rod. We are familiar with these. But what about number 3? This is an extra stick to hold a second cross. A lot of weavers wind a second cross as they warp. I don’t. I find that the fewer twists and turns I make on the warping board, the easier it is to wind a warp with good even tension. I only use a second cross on narrow warps to stabilize my shed rod which tends to slip from side to side and be a thorough nuisance. Making a second cross and putting a stick within will lock the shed rod into position. It is very easy to create a second cross once your warp is already on the loom. Here are the steps…
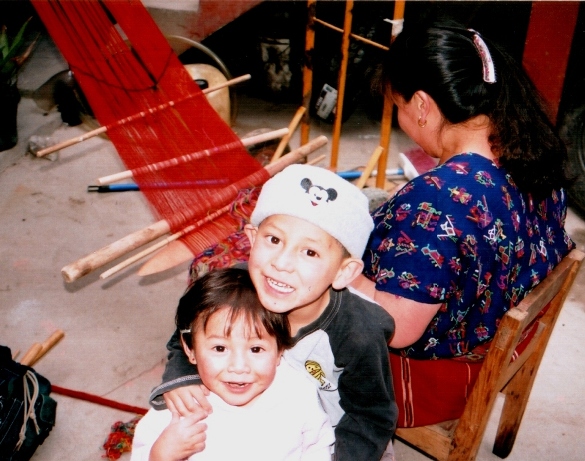
LEFT: Your loom is set up with heddles and a shed rod. RIGHT: Open the shed rod shed, place your beater within and draw it down to the weaving line. Remove the shed rod. It is important that the beater not fall out at this stage as it is saving your shed rod shed. Use a back up safety string if necesary.LEFT:Open the heddle shed and place an additonal stick within. RIGHT: Tilt the beater to open the shed up beyond the heddles and place your original shed rod within. Tie or tape the shed rod and additional stick together.You have created your second cross.Another Guatemalan loom with a second cross installed. The shed rod is pvc pipe which is often used as it can be thick without being heavy. Notice the orange safety string – if disaster strikes (and it most probably will with those 3 little guys hanging about!) and all this weaver’s sticks fall out, the safety string will save her cross. Even the experts use them! Look at the little future weaver there on the left. She is wearing the typical long “corte” skirt and even has her own woven belt.
Some looms have a mind boggling amount of sticks but the reason can be very simple!!
LEFT: The 11 sticks on this upright loom in Ecuador will become heddle sticks. The 22-row design, which is horizontally symmetrical, will be programmed into these 11 heddles. RIGHT: This is one of my own warps set up on my Navajo loom in Chile. As I am using 4 colors in my pebble weave I have extra sticks to separate and keep the colors in order for the pick up.Miguel Andrango’s granddaughter poses with one of the looms. You can see the two shed rods above the heddle stick. The space for the extra shed rod is programmed into the warp by using an extra stake during the warping process.
In Ecuador I saw the use of an extra stick which I have not noticed anywhere else. This is especially useful for wide warps or particularly fine yarns but I saw it being used on warps of all widths and yarn sizes in Ecuador. It is an extra shed rod. I know from my own experience that the shed-rod shed on a wide piece with fine yarns is really difficult to open. It was a very slow and tedious process on my Abba Yohanni piece, for example. The extra shed rod in Ecuador holds every second warp that passes over the main shed rod. This means that half the number of warps can be raised using the extra stick. Then it is very easy to use the main shed rod to raise the rest of the warps.
This is one of Miguel Andrango’s looms. He is a very well known weaver from Agato, a small town near Otavalo. You can watch a video of his work here. Fifty-seven seconds into the video you will get a very nice close up of the two shed rods. You will also see the typical white woven alpargatas he is wearing. I spent some time with an alpargata weaver and hope to blog about that some time. Miguel Andrango is not a large man and, although the piece above is not particularly wide, he weaves some of the widest backstrap woven pieces I have ever seen!
A weaver near Otavalo is preparing to make her string heddles. She is using the extra shed rod on her loom. This rod has a dual purpose as it also serves to stabilize the main shed rod.
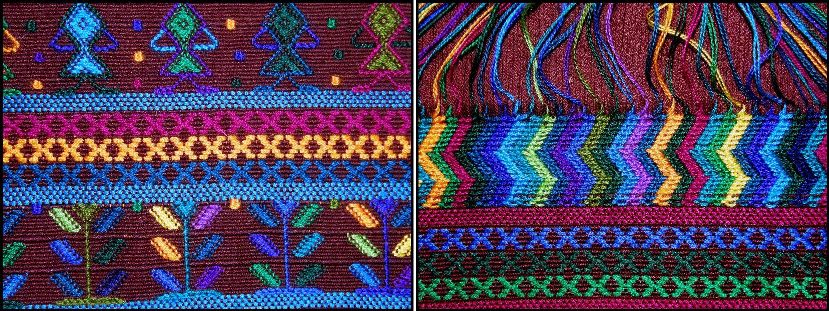
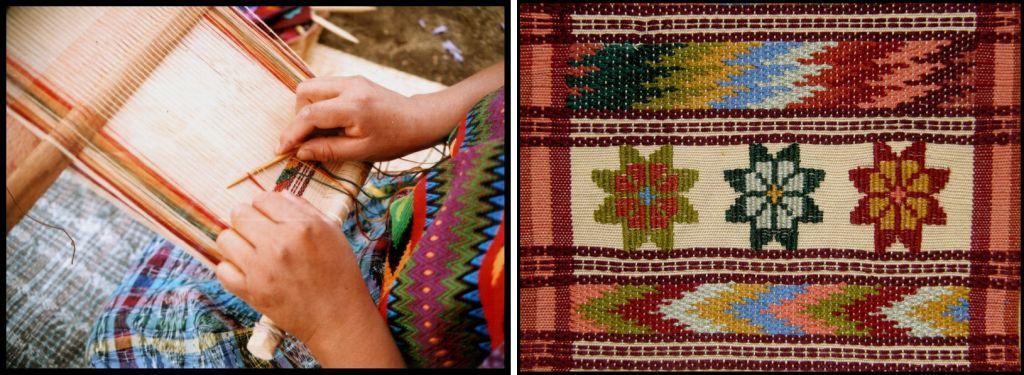
Now we come to the patterning sticks that are used by weavers in Guatemala to create designs using supplementary wefts. The supplementary wefts are either laid in to form block patterns or wrapped around warps to form little figures.
It is not my intention here to teach you how to insert and use these sticks. So, don’t worry if you don’t quite get it. No doubt, I will be doing a tutorial on this in a future post. I just want to take a little bit of the mystery out of it so that when you are looking at weavers and looms in books and on the net you may have a better understanding of what all those sticks do. For now, read on and just enjoy the beautiful textiles!!
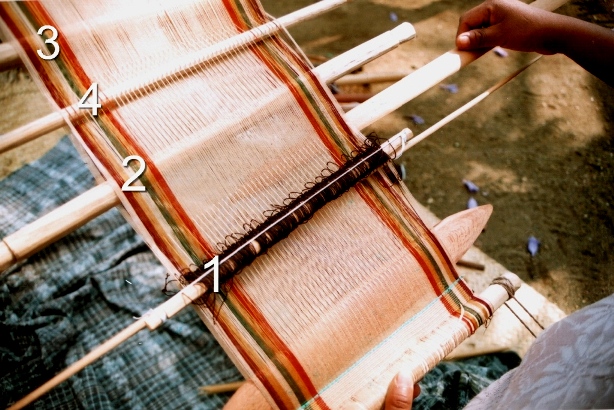
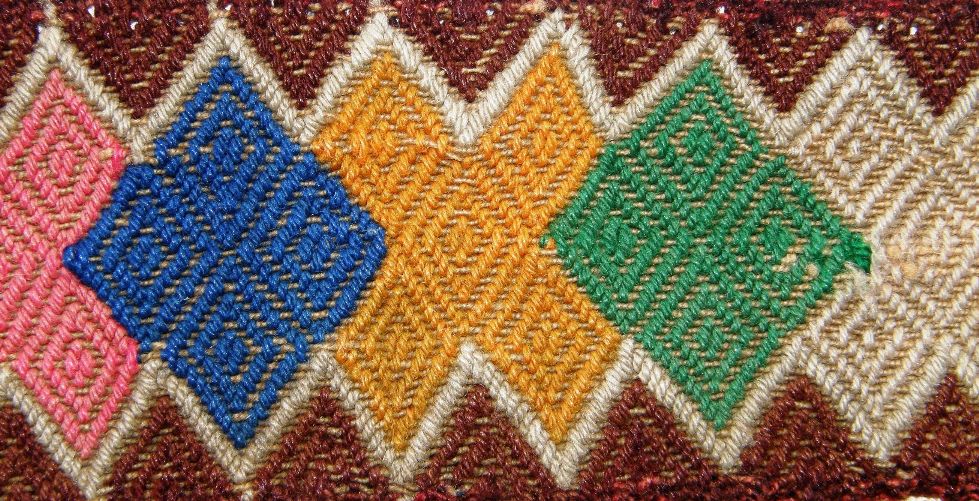
Typical designs of Santa Catarina Palopo.LEFT:Supplementary wefts have been laid in to make designs like the X’s in the center or wrapped around warps to form figures, like the stem of the plant below and the arms of the woman above. RIGHT: The upper design has been woven using the technique employed in making the typical huipil of this town.LEFT: Bands woven using patternig sticks and offered to toursits. RIGHT: The typical huipil of Santa Catarina Palopo. These colors are a relatively recent introduction. Old huipiles in crimson and white can be seen in paintings by Carmen Pettersen. My teacher told me that only the very oldest women in the town may still have the old huipiles.Carmelita is teaching me on this loom in Santa Catarina Barahona. Number 1 is her heddle stick, number 2 her shed rod, number 3 the stick in the 2nd cross and number 4 is her newly introduced patterning stick.
These patterns are created by adding two extra sticks to the loom – the patterning sticks. In Santa Catarina Barahona, the weavers open the shed-rod shed and pick up every fifth warp. They store these warps on a stick – the patterning stick that sits up behind the shed rod.
The heddle shed is then opened and, once again every fifth warp is picked up but in such a way that each picked up warp sits between two that were picked up on the first patterning stick. The warps are stored on another patterning stick which sits behind the shed rod but, this time, under the warp.
Here is how the loom looks with both patterning sticks installed.
Number 1, heddle stick. Number 2, shed rod. Number 3, stick in 2nd cross. Number 4, 1st patterning stick and number 5 the 2nd patterning stick. The patterning sticks are simply drawn down towards the heddles to create sheds for laying in the supplementary wefts.This diagram shows a loom in profile with the positions of the patterning sticksLEFT: Lydia is laying in a supplementary weft in one of the patterning sheds. RIGHT: The patterns at top and bottom were made with the aid of the two patterning sticks.
Sometimes a second pair of patterning sticks is inserted when the weaver wants to change the design. These are only temporary and will have to be removed when she wants to return to the original design.
Take a look at the photo below…can you name all the sticks?!
A sling braid made from llama fiber from the Colca Canyon area of Peru. It comprises a braid with a finger loop in one end and a cradle in which the stone to be hurled sits.
Now to return to the simplicity with which I started this post…………some braiding and edging techniques with few or no tools required.
After having done the tutorial on cross knit looping last week, I remembered another interesting edging that I learned with my sling braiding teacher in Yanque, Peru. We used it to edge the cradle section of an Andean sling braid.
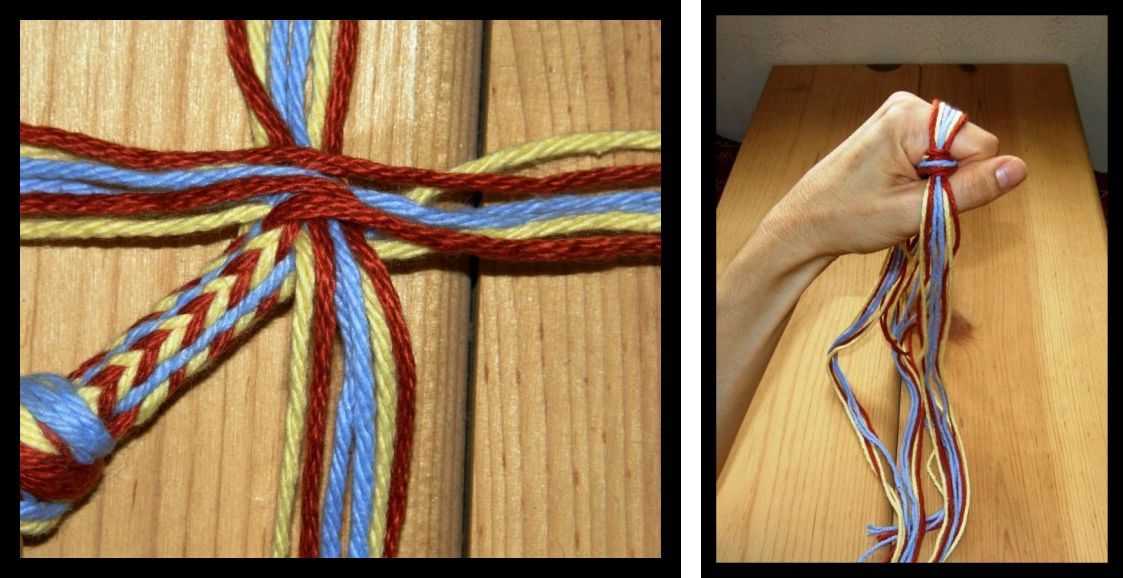
I made one sling with him and he taught me to make three different braids. Men in Peru braid their slings holding all the braid strands in their hands – no other equipment is required – and can quite happily stroll along the road while braiding. Two of the braids I learned had twenty-four strands and the other twelve. I was told that the main use of the slings these days is to hurl stones in order to keep control of animals straying from the herd.
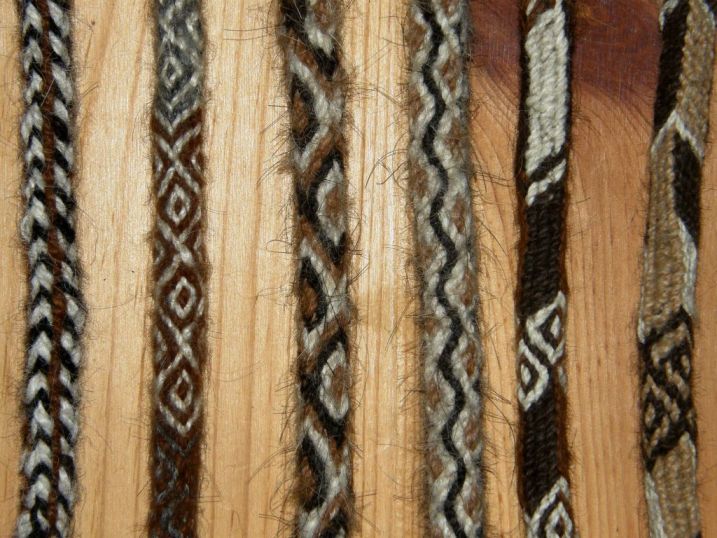
LEFT: The single cross two-color edging that I was taught on my sling. RIGHT: A double cross two-color edging on an Andean sling that I bought.A few of the braids used for Andean slings. Named from left to right…PALMA, MARGARITA (2nd and 3rd),SALSA and CAJAMARCA (5th and 6th)
When making an Andean sling, first, one half the braid is made. The strands of llama fiber are measured from the tip of the nose to the toes and then doubled. The first section usually includes the finger loop. More strands are added to weave the cradle in tapestry technique and then work the braid for the other half.
The cradle is woven on a backstrap set-up tying the braid to the waist while the strands which serve as warp are tied to a fixed point. Then the second half is worked in two braids – first a thick one and then a thin one to finish.
Decorative tassels and edgings are the last things to be put in place. Some of the tassels can be quite flamboyant. My teacher didn’t care at all for the more extravagant decorations!
I love these slings as there are several skills involved. Without even realizing it, this was my very first taste of backstrap weaving and with this one teacher I learned so much. He taught me the Palma and Margarita braid styles and a thin version of the Palma which didn’t seem to have a name, a little tapestry weaving by backstrap as well as tassel making and decorative edging.
LEFT; The very start of the Palma braid with the 4 sets of 6 strands used to make it. RIGHT: My hand in the braiding position. Two opposing sets of strands are interchanged. The braid is then rotated 90 degrees so the other two sets can be worked.
Zacarias was a marvelous teacher with a lot of patience. He would get me started on my work and leave me while he harvested the barley crop – plans were afoot to make some alcohol – moved the animals from one field to another and generally took care of things on his property.
LEFT: My sling braiding teacher, Zacarias on his property near Yanque, Peru. RIGHT: A woman by the shores of Lake Titicaca shows me how to hurl a stone with a sling braid.
I know that backstrap weaving isn’t for everyone and I am so glad that people are still able to make use of the instructions here and at Weavolution and use the techniques and designs on other looms. Ellen Turner, in Denmark, has woven a double weave band on her inkle loom using my tutorial at Weavolution.
She made a celtic design inspired by something she saw on the internet.
I also ran into Jessica’s blog where she has been experimenting with double weave on an inkle loom too. Check it out.
Kristina in Germany wove a double weave band on her inkle loom using her own handspun llama fiber. She commented that it put a lot of stress on her inkle loom so that is one important thing to take into consideration.
So if you have been enjoying the designs and have found the tutorials interesting and tempting but are still hesitating about getting strapped in, remember that you can adapt these techniques to other looms. I have set up warps on my rigid heddle loom and woven bands with string heddles rather than with the rigid heddle.
I have to tell you, though, that for me the backstrap loom wins hands down for the ease with which I can adjust tension with the slightest of body movements.
And, finally, I mentioned above the paintings of Carmen Pettersen. Check if your library has a copy of “Maya of Guatemala-Life and Dress”. Her paintings of Guatemalan people in traditional dress are stunning.
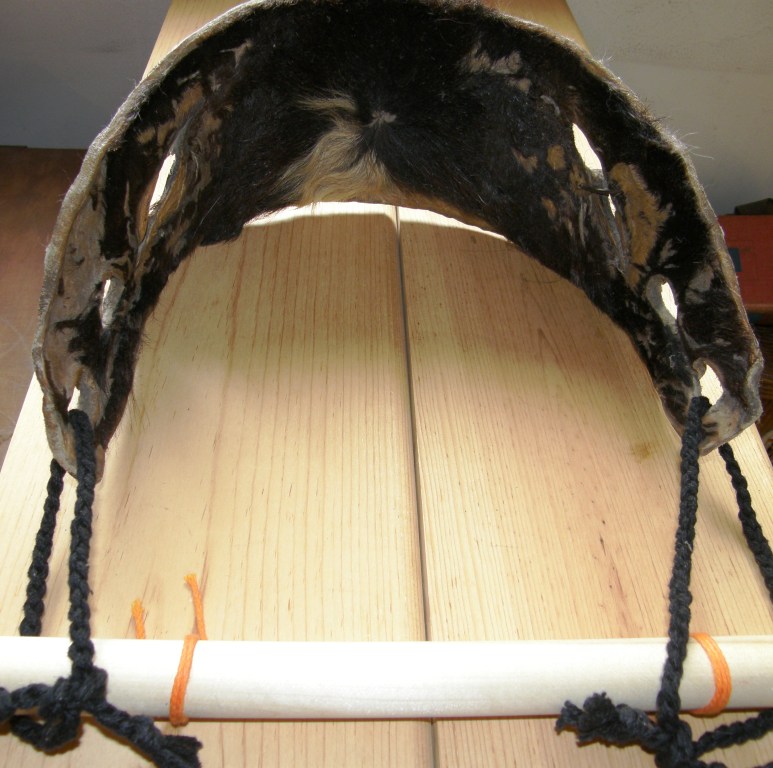
A firm cushion, a stable place to tie up the loom and a broad well positioned backstrap.
SITTING AT MY LOOM…ergonomics
I have been weaving with my backstrap loom for around 14 years now and feel very comfortable with the set up I have here at home-a stable place to tie up the loom, a good cushion and a broad sturdy backstrap. I try to have everything I need – needles, extra dowels etc – placed around me within reach before I get strapped into the loom as well as an emergency unstrapping strategy so that my warp and sticks don’t end up in a tangled mess on the floor when I jump up to answer the door. I always grab the loom bar and hold the warp under tension while I slip off the backstrap cords and then gently place the loom on the floor. Other non-weaving related essentials that need to be on hand include the remote controls for the dvd player and tv, the cd collection on one side and the laptop and snoozing cat on the other. The phone can just ring for all I care! although I do have an answering machine which I sometimes remember to turn on.
I have to say that I have never put much thought into the “correct” way to sit. I feel comfortable sitting with my legs
I am looking and feeling very uncomfortable weaving at Felipe’s loom in Salasaca, Ecuador reaching high and with the backstrap up around my waist. I did like the stake at the bottom of the post for bracing my feet and the baby chickens that would come and sleep on my legs while I wove!
stretched out and my warp angled slightly upward. There are sheets of wood under the bed against which I can brace my feet and I do get up frequently to walk about and stretch. Yet I still don’t know if this is the “healthiest” positon for a backstrap weaver’s body or just something I have gotten used to.
And what about the indigenous backstrap weavers here in South America who have been weaving since childhood? Do they experiment with different positons or does tradition alone dictate the way they sit and weave?
I know that I am usually very uncomfortable at first sitting at other people’s looms when I am learning with my indigenous teachers.
I like to try to do things just as they do but sometimes it’s difficult-either the loom is angled too steeply, the sitting position, sometimes on cold bare concrete, is almost physically impossible for me or the loom has been set up for someone a lot smaller or larger than me.
Felipe, very much at home at his loom with three of his four sons, his wife and mother-in-law.
Let me show you some pictures of other backstrap weavers including some of my teachers, the way they position themselves at the loom and some of their beautiful work.
Valeria in San Roque near Otavalo sits with legs outstretched and feet braced against a block of wood. The looms in the typical weaver’s home will have several blocks of wood like this which can be added to accommodate different warp lengths and the leg lengths of the various weavers in the household. She has just finished what will become the collar for a poncho and is brushing it with thistles that have been mounted on a frame.Valeria’s father, Carlos, weaves the ponchos. His backstrap is a thick twisted cord which he is padding with cloth. I don’t imagine that feels too comfortable. He is about to make the last few weft passes in this four-selvedge piece.For narrower weavings, this piece of hide is the typical backstrap in the San Roque area. It is wonderfully sturdy, broad and comfortable.Margarita is sitting crossed legged on a cushion and weaving this very narrow band with just a piece of yarn passing through the end loops and tied around her waist.The tiny pebble weave bands that I made under Margarita’s tuition.These ladies in Pisac, Peru are obviously a lot more felxible than I am as they kneel while weaving narrow bands which are used as decorative edging for their skirts.A close up of the bands used in Pisac for skirt trim. I believe this is called “buyto”.Catarina in Nebaj, Guatemala sits on a low chair. Hopefully she will be my teacher on my next trip to Guatemala. This looks really comfortable and I would like to have a small chair like this made for myself. I love how she has set up the phone on the table next to her. She is weaving a small huipil for her little daughter. She also wove the blue huipil that she is wearing.Of course it always helps a weaver if there is a visitor to entertain the little guys. This is the little Nebajense who will be wearing the red huipil that is on the loom. The huipiles of Nebaj are amazing and I was fortunate to be there over Easter when everyone was out in the main square in their best outfits. More about that in a future post.Another of Catarina’s beautiful huipiles.In Zunil, Guatemala I learned how to make the typical hair sash of the area. The weaver is attached to a 4-shaft pedal-operated loom by backstrap. I sat for 4-5 hours every morning on a small wooden stool and had to take towels and sweaters for padding after a painful first session. Clara teaches a lot of the teenagers in the town so I was learning along with a 15 year-old neighbor.Clara’s hair sash is on the right with my frst attempt on the left. I also had some of the essential parts for the little loom made by the carpenter in the town, photgraphed and sketched the loom and took measurements so that I can have one built here some day.Clara also weaves this beautiful fabric on a large floor loom which is made into the typical skirt of ZunilMost weavers I saw in Guatemala knelt to weave. This position is impossible for me to maintain for more than 5 minutes and so I would sit with legs outstretched for my lessons with Lidia. When Lidia once tried to sit and weave in my position, she just fell about laughing!
When I was in Guatemala in 2008, I met Karen Piegorsch who is President of Synergo Arts. Synergo Arts works to educate backstrap weavers about ergonomics and is currently introducing their ergonomic bench to weavers and carpenters in Guatemala ” to protect their health while producing more textiles of better quality. As a result, they increase their ability to provide for their families, and also preserve their weaving culture.”. In fact, their aim is to help all weavers and artisans work more comfortably.
In the words of the organization…
“Synergo Arts is a nonprofit, 501(c)(3), tax exempt organization based in Arizona. Our purpose is to help artists and artisans around the world use ergonomics to maximize their health, income, performance, productivity, creativity, and art or craft quality. We do this through a grassroots approach to innovating and delivering resources in ergonomics education, consulting and design.”
Information on the ergonomic bench project and other articles about ergonomics for artisans can be found here and here.
I showed you a picture at the start of this post of Felipe in Salasaca weaving on his porch with his family. I went to Salasaca in 2005 for the frst time and met Felipe’s cousin Anita. I was looking for someone to teach me to weave the supplementary warp patterned belts of Salasaca. Anita is not a weaver although she owns a wonderful set of six beaters of varying sizes made for and given to her by her father when she was a teenager. She doesn’t have any daughters and is waiting for the first grand daughter to pass these tools on to. Anita’s sons work at floor looms producing the tapestries for which Salasaca has become known. The designs include those from Navajo weavings, artwork of M C Escher as well as traditional motifs of Peru.
MC Escher inspired design on a tapestry made in Salasaca
I have read that not one of their tapestry motifs is Salasacan in origin. The tapestries are made specifically to be sold to tourists.
The traditional Salasaca designs can be found on their clothes and it was the frutilla (strawberry) motif belt that I wanted to learn to make. As it turned out, they persuaded me to teach them to weave instead! Anita had me teach her youngest son, Juan and their neighbor Natalia to weave Andean pebble weave which is a story that I will save for future post.
Two of the six beaters in the set that makes up the Salasaca weaver’s tool kit. The small one is used to pick up the warps. The typical spindle is called a “sig sig” after the pampas grass plant stems from which it is made.
Eighteen months later I returned to see how my students were getting on and you will have to wait to hear more about that. It was on this return trip that Anita introduced me to her cousin who happened to have a warp all set up with which he was teaching his youngest sons to weave. This was so lucky for me as it meant that I coud also have classes and not have to worry about messing up someone’s precious belt. The acceptable parts of the belt were going to be salvaged and sold to the local shoemaker who had recently started making sandals using pieces of the traditional woven belts.
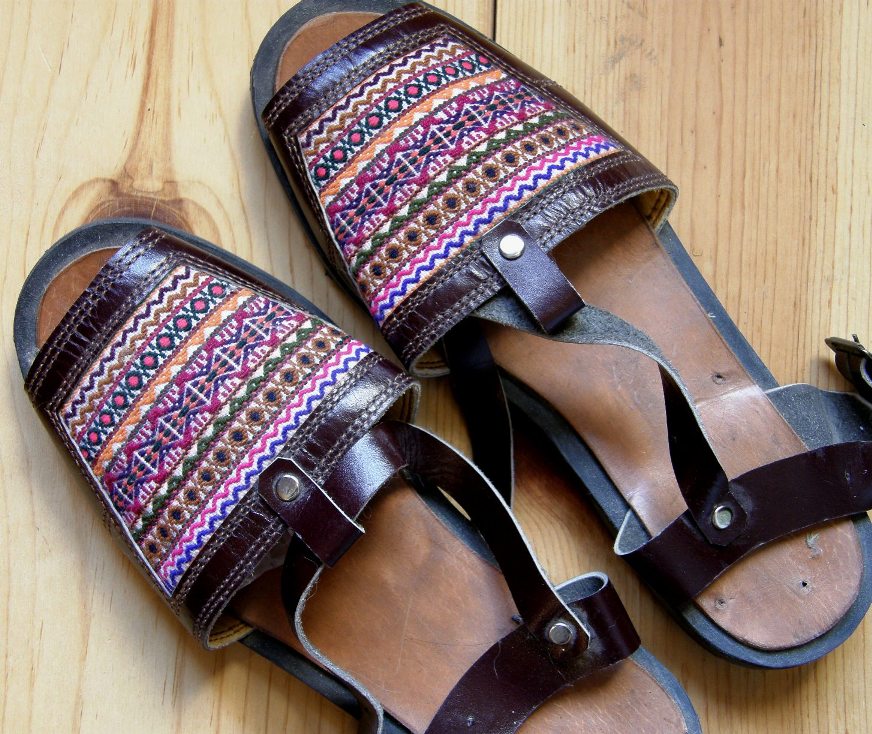
Pieces of the “frutilla” design belt used to decorate sandals.
“Manamay” belt with Anita’s spindle and distaff
Salasaca people are small and it was obvious that even the largest pair of sandals would not do for me. In fact, quite a crowd gathered to watch me trying to stuff my big gringa feet into them. I bought them anyway as this was the only way I would get to have a sample of this textile. I could not persuade anyone to sell me a belt eventhough I jokingly pointed out how unfair this was to Anita as her pig was tethered to the gate with one of her old belts! She did permit me, however, to take photos of her frutilla and manamay belts.
So I spent a few mornings with Felipe and wove on his loom. The trickiest part was remembering to let go of the weft before slamming the gigantic beater down – bruised knuckles to show for the times I forgot! We wove on Felipe’s narrow porch and, as his home is on a hillside, enjoyed a beautiful view over the fields and surrounding countryside.
Front and back of a “fruitilla” belt/
The belt at right belongs to Felipe’s mother-in-law and she kindly allowed me to photograph it. Neither she nor her daughters know how to weave although they are all expert spinners.
I had a lesson in circular warping from Felipe and his youngest son and then came back to Bolivia to document the process in my journal. The warping was quite complicated with several colors traveling at the same time in different directions and being anchored under toes. Then I wove two pieces to be the front and back covers for my journal.
The back cover
The back cover piece on the loomThe front cover. The zig zag designs are called “kingus” and the circular designs are the “frutillas”. As the colored supplementary warps shoud be thicker than the ground weave warps, I used doubled sewing thread for the ground weave and perle cotton for the supplementary warps. In Salasca they use cotton thread for the ground weave and thicker acrylic for the colored warps.Anita, her son Juan and Natalia wanted to pose for a picture. This was on my first visit and I was only able to give them the pictures on my return 18 months later as they don’t have a reliable mailing address. Women in Salasaca wear traditonal clothes everyday-all that you see here in the picture except for the hat and every spare moment is spent spinning. They normally use other kinds of head coverings on a normal day. Juan put on his festival gear especially for the picture. Anita and her family own a store and you can see their floor looms and tapestries in the background.
I have plenty more to tell about the wonderfully friendy people of Salasaca but will save it for another post.
I have some projects from readers to show again this week.
Jeannine made asupplementary weft patterned band from her own design. You can read more about the whole process and see more pictures of her band and her pattern charts on her blog.
Ann finished her supplementary weft patterned band. It looks great with that fringe. Both she and Jeannine are about to embark on another project using this technique.
Stitchwort wove a backstrap following the instructions in my article on WeaveZine and is now weaving what will be a bag for her loom. She is weaving the bag from her own handspun tencel and it looks so wonderfully sleek and shiny on the loom. I have been curious about tencel for a long time having heard so much about it in online groups and seen gorgeous pictures of pieces with wonderful sheen.
I was lucky to be able to organize a swap of woven goodies with a friend in Denmark and my package arrived this week-tencel at my request and a couple of her own spectacular handwoven articles. The tencel is everything I expected and more!
First, here is a photo of Stitchwort’s projects…
She is using her own handspun ramie as weft and I must confess I have no idea what that is. But I won’t give too much away as you can read all about her backstrap projects on her blog. I just love the shuttle she is using.
Tencel, Japanese silk and Argentinean silk
There’s my tencel on the two spools with a ball of silk that a colleague brought for me from Japan along with a skein of raw colored silk from Argentina. The Argentinean silk is a lot thicker than the tencel and the Japanese silk and so I was thinking of using the thin yarns as ground weave and the white silk as supplementary warp. I am terrified that I will mess it up and waste this precious stuff. I will definitely be sampling on a bookmark.
I love how easy it is to warp for backstrap weaving especially after reading and hearing about what is involved with warping those bigger table and floor looms-all that threading! However, finding the place and equipment for warping for the backstrap loom is often the problem. Finding the sticks to put a loom together seems to be relatively easy, making a nice beater takes a little time and thought but where and how to wind that warp-now that can be tricky.
As you can see above, my first weaving teachers in Peru taught me to make tiny bands using a tiny warping board. I learned two techniques with them and was eager when I got back to my home in Chile to incorporate both into one large piece.
Perhaps a little over ambitious but you can see the results of my attempts to wind a longer wider warp. My warping stakes leaned horribly and I ended up with this wonky thing-look at the far loom bar and the tilt on it! Firmly grounded warping stakes are a must.
Well, I persevered and put a lot of work into that piece but it was never quite right. At least I was satisfied that I could weave the techniques without the supervision of my teachers.The piece itself ended up in a box. Recently I got it out and salvaged what I could and am now using it to cover some small photo albums that I take with me on my travels.
The colors and layout were inspired by woven sashes that I had seen on Taquile Island on Lake Titicaca, Peru.
Photo album covers made with the two patterning tecnhiques I learned in Huancayo, Peru.
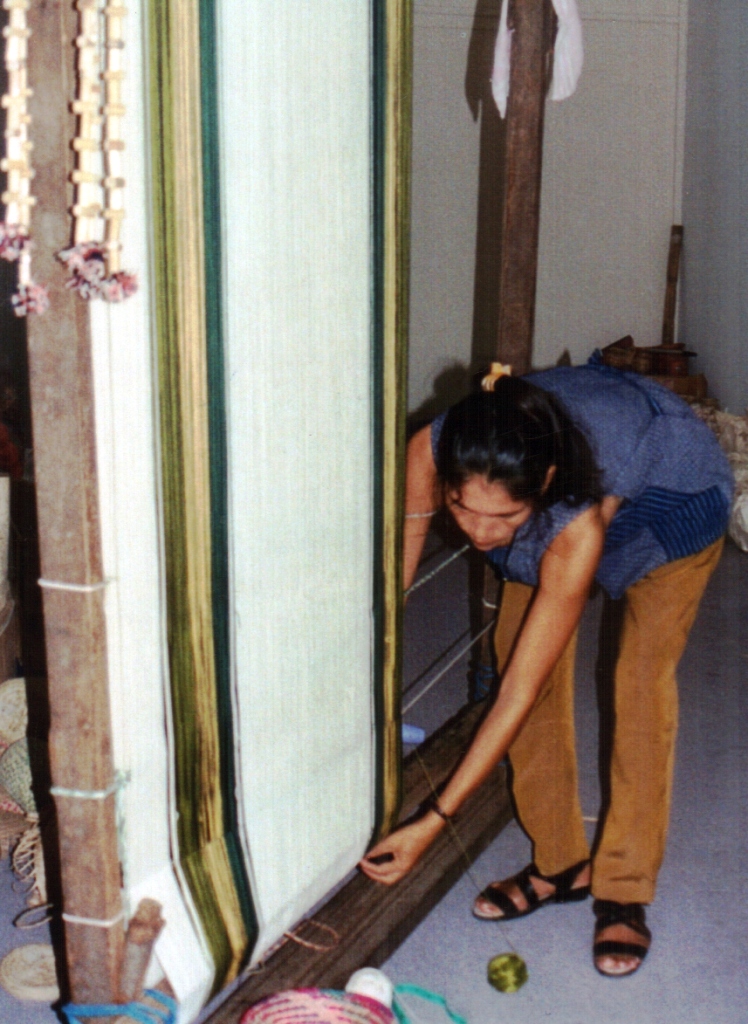
A year later I went to Bolivia and studied with two sisters in Potosi. They weave their large pieces on a staked-out ground loom and only use a backstrap set-up for small bands. I love the way they warp there. Two women seat themselves at each end of the loom and roll the ball of yarn back and forth while winding the figure-of-eight. The only problem–you tend to talk too much and lose count. Neither of us was counting in our native language-Hilda’s being Quechua and mine, of course, English. Between that and the chatting we lost count many times!
We are using respun acrylic yarn in the bright colors that the weavers in Potosi love. With two people, this would be a great way to direct warp for backstrap weaving.
The weaving I worked on in Potosi is almost finished here. It is a four-selvedge piece and there are a couple of inches to go to close the gap. It took all day to weave that last bit!Warping the Potosi way (almost)
Probably nostalgia for the fun I had had with Hilda and her sister Julia in Potosi led me to try the following way of warping when I got back home to Chile.
I can tell you right now that it is not as entertaining to do alone and it is pretty slow and difficult trying to manage two colors at once as you need to do for double weave and complimentary warp weaves.
Neverthless I got this warp done, it was well tensioned and even and I wove a big bold design inspired by designs of the Mapuche people of central Chile and Argentina.
One of the Mapuche inspired designs I wove into the above piece.
I traveled a lot more, met many weavers and saw a lot more ways to warp for a variety of looms and techniques, some of which I’d like to share with you here.
Making a dovetail warp for the collar of a poncho in Otavalo, Ecuador. Note the horizontal bar that helps stop the stakes from leaning in towards each other.In Salasaca, my teacher Felipe wound a mini dovetail warp for me to take home just in case I forgot how to make one for the belt weaving technique he taught me. This was put together hastily. The sticks leaned and the resulting warp was crooked but it was just meant as a reminder and served its purpose..Look at this beauty from Guatemala at a nice height so you can stroll up and down with your yarn.Warping for a hammock in Santa Cruz, Bolivia. This would certainly give you a work out.With my teacher, Trini, looking on I am learning to make a dovetail warp for a mini hammock in Zapote, EcuadorProbably the set-up I would most like to have–just the 5 stakes that my teacher in Santa Catarina Palopo is using here.My favorite way—group warping! We are making a straight warp here with stakes and metal rods driven into the ground-Salasaca, Ecuador.
Probably the most interesting system I saw, which, unfortunately, was impossible to photograph, was near Huancayo, Peru where a woman had stakes embedded in the walls of the hall of her home at chest level so she just had to walk up and down the length of the hall to warp. Now if only I had a longer hall……….
So what do you do if you don’t have a warping board? I have seen a Youtube video where a guy wedges stakes between books in his book case and warps around those.
I was lucky to have this chair to use when I first got settled in here in Bolivia. It was useful for narrow projects- practice bands, small bags and bookmarks.
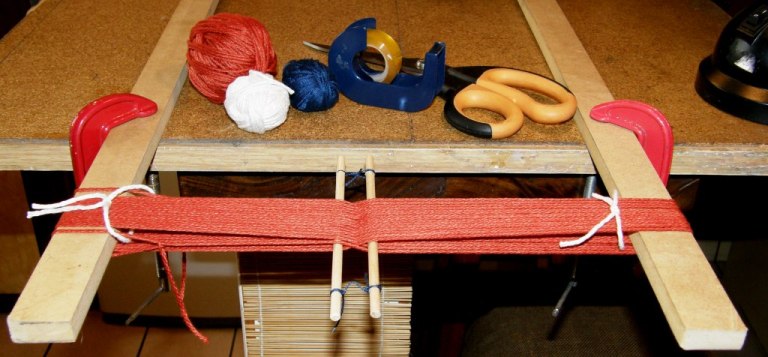
The way that I showed in my WeaveZine article using clamps is fine as long as you can clamp those stakes down really well . Don’t use your good table for this. I have heard of people turning chairs and tables upside down and using the legs. I once used a coat rack in a hostel room where I was staying. Whatever way your creativity and circumstances lead you, just make sure that the stakes or posts are very well grounded and will not lean in at all as you wind your warp. Even the smallest amount of lean will make a difference.
If you see yourself continuing in backstrap weaving and making longer and wider pieces, it will be worthwhile buying a warping board or making something sturdy and more permanent. It doesn’t need to be fancy as you can see from my little ”beauty” here.
This allows me to wind a 36” long warp which I have used to make shoulder bags, sets of three mug rugs, placemats, table runners, pillow covers and wall hangings. For making longer pieces such as belts and guitar straps, I have had to get creative.
Basic warping involves winding your yarn around two stakes, like those seen above, in a simple figure-of-eight path. Your loom bars will replace the two warping stakes and the cross you have created will allow you to set up your two sheds using a shed rod and continuous string heddles. I often put a second cross in once my warp is on the loom. (More about that in a future post)
Warping with a single color
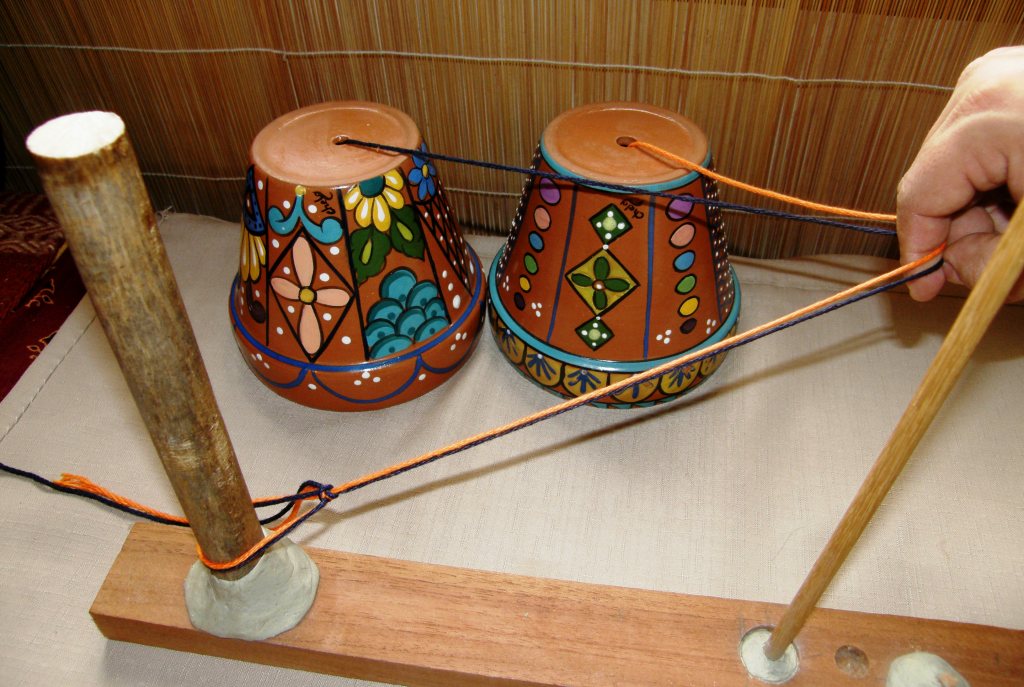
If you want to weave a piece with horizontal stripes in two colors or weave simple warp float patterns or any other complementary warp technique you will need to wind two colors together. Again, this can be done on just two stakes. I like to place my balls of yarn in flower pots so they don’t roll about and get tangled. Other hints and tips will come up in future posts or you can find them in the Backstrap Weaving Group forum at Weavolution.
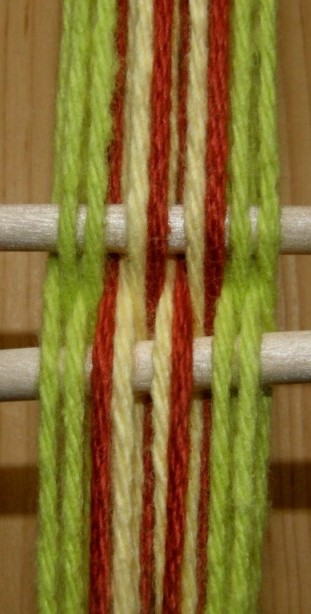
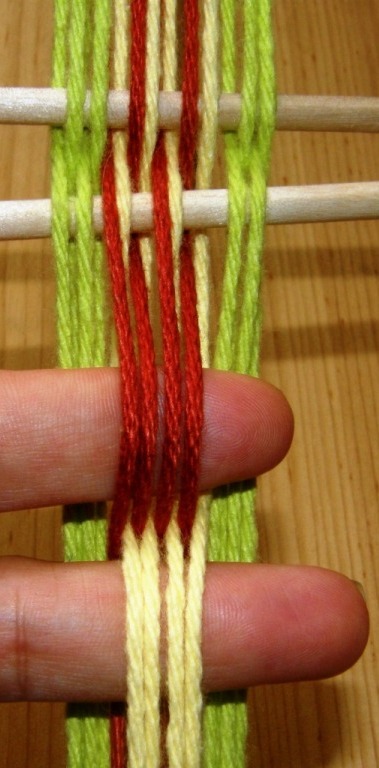
Winding red and yellow yarns togetherPreparing to wind 2 colors together on my smaller warping board. Note the large loop of yarn around the warping stake which can be easily slipped off the stake and onto your loom bar.Warping with 2 colors together will result in a cross like this.The colors on this tiny band can then be rearranged so that the original cross can be replaced by a new one where each color along with the green borders is in its own shed.Many Andean weaves are complementary warp weaves and require an arrangement of warps into sheds of two colors as shown above right. This arrangement of warps will allow you to weave something as simple as horizontal stripes or more complex warp float patterned weaves.
FOR THE ADVENTUROUS!!
The following is a video from my Flickr page which shows how I was taught in Peru to warp with two colors usingfour stakes. The colors are separated– each color into its own shed on the warping board itself as you warp–fast and efficient and especially recommended for wide warps. (The two additional stakes that you see in the video are temporarily fixed to the warping board with ”blu-tack”).
Just to finish off, here is what I am working on at the moment……
Two-weft double weave piece in progress
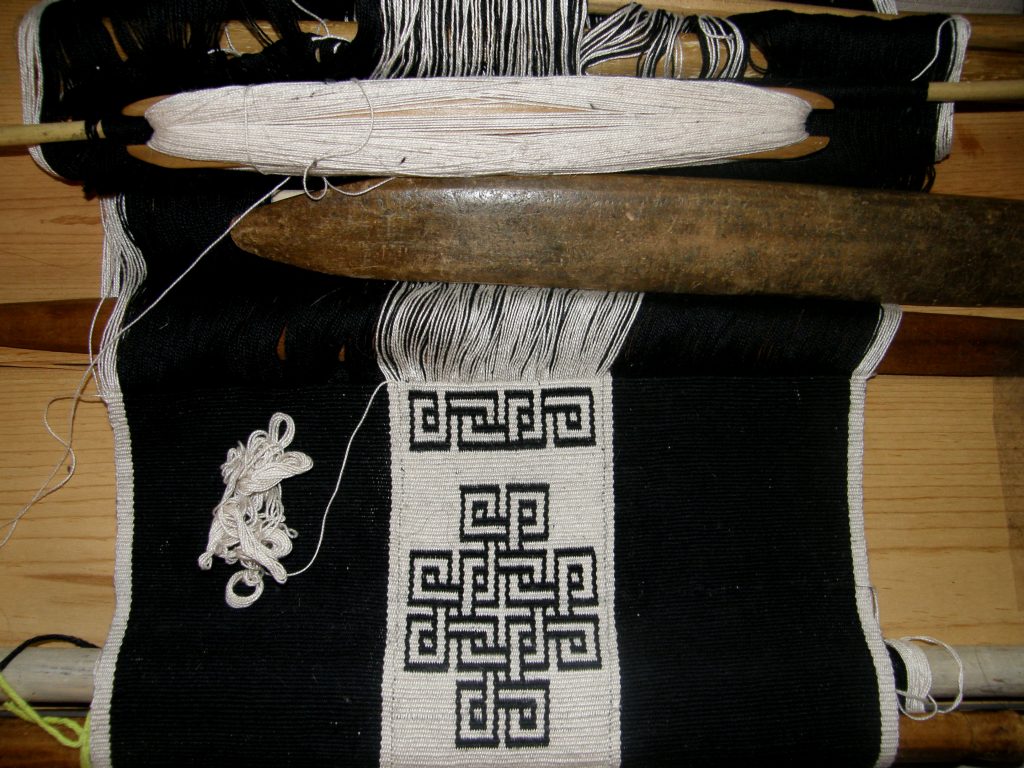
I fell in love with this design the moment I saw it posted at Weavolution. A member had woven a reproduction of a tablet woven curtain that hangs in a cave church in Abba Yohanni, Ethoipia. These curtains were produced and hung in many such churches in Ethiopia in the 17th Century. Rob S, who wove the reproduction, used over 300 tablets. This is just a small part of the overall curtain design. I am weaving it in two-weft double weave. I have a strip of double weave bordered by plain weave. One weft weaves the plain weave and upper layer of the double weave. The second weft weaves the lower layer of the double weave.
This is quite a change after making all those colorful key fobs but now I have to deal with the black picking up every single speck of dust in the house! I hope to now reverse the pattern and weave a white motif on a black base. I am not sure what I will make of this piece. I’ll decide when it is done. 🙂


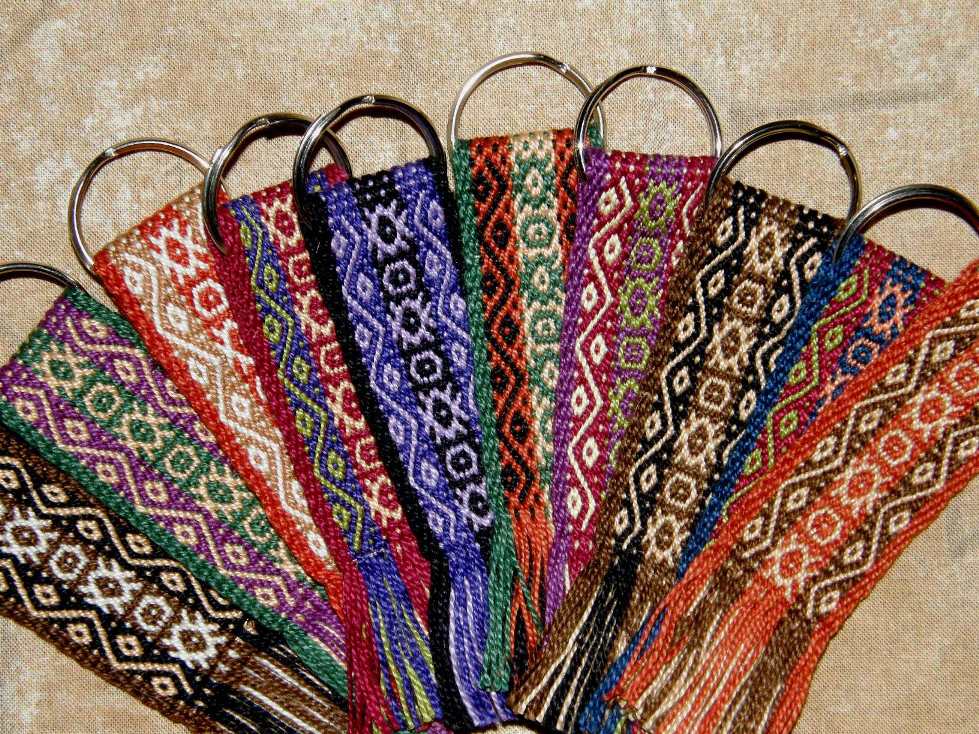 With all the loose ends that needed tying up and the time spent working with Syne Mitchell to get the print version of my monograph ready, I didn’t expect to get any weaving done this week. But then I had an idea and ended up weaving a bunch of keyfobs. I thought it would be fun to give a keyfob away with the first 20 copies of Andean Pebble Weave. So I sat with my basket of cotton thread and had a great time combining all sorts of colors to make the 20 keyfobs to accompany the books. I combined several small pebble weave motifs and now I can definitely see the benefits of weaving the same design over and over as some indigenous weavers do. I could probably weave this with my eyes shut now!! As long as there were new colors to combine it never got boring. Only one or two color combinations are repeated as I made tiny warps and wove one at a time.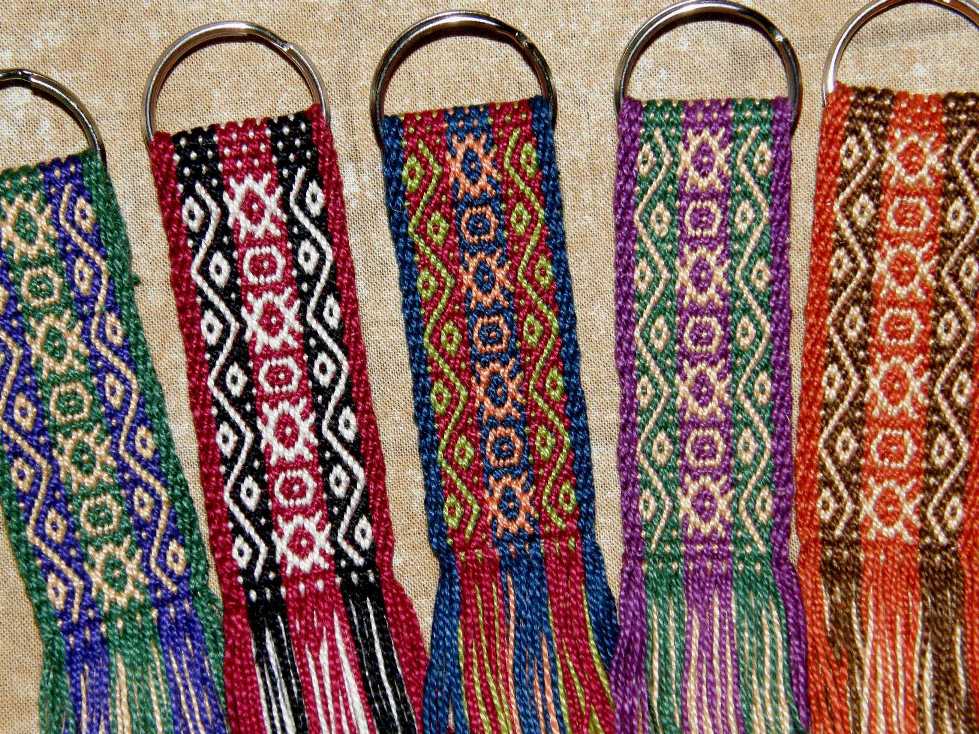


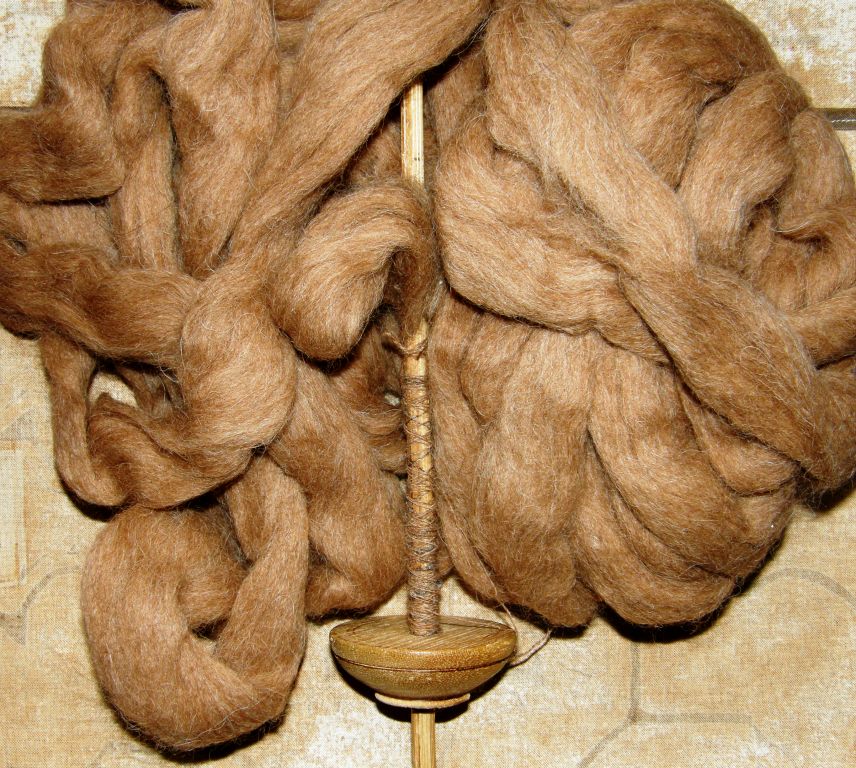 I am also taking my wobbly Bolivian drop spindle and some of the alpaca fiber that my friend Janet gave me on my last visit. I just spun a little to get it started on the spindle and it is so so beautiful to spin! This is not the first alpaca I have ever had to spin. I bought some many years ago in Peru and it was in a dried-out, brittle and filthy state. I lost a good third of it in the cleaning process and I knitted rather than wove with it. Now I have this prepared smooth luscious fiber to work with – what a dream! It almost feels like cheating! I’ll be spinning it to weave with on my backstrap loom.