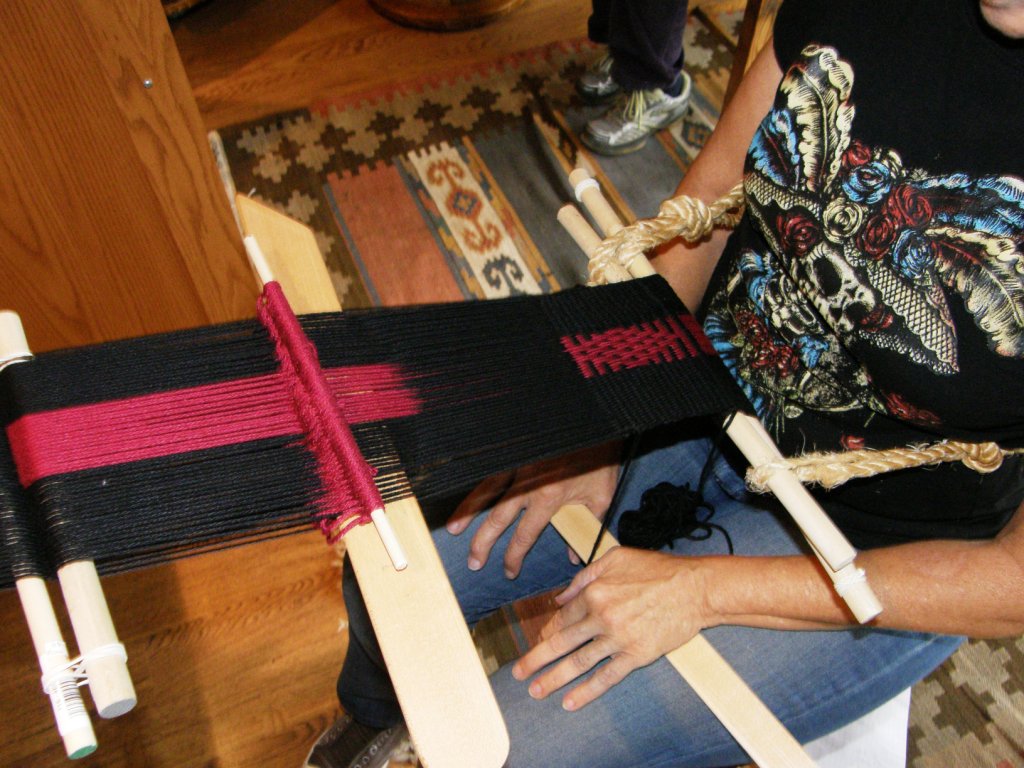
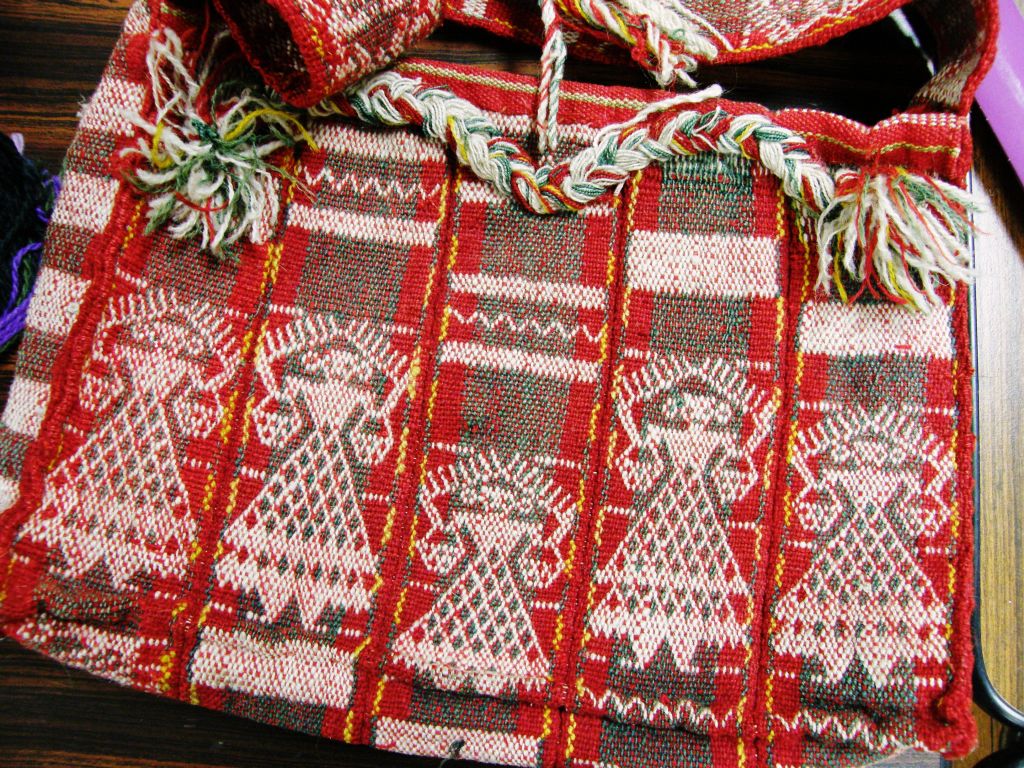
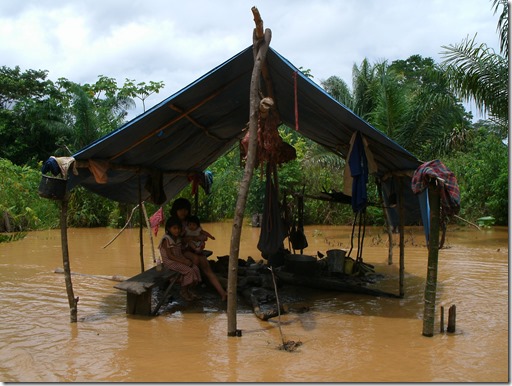
The big rains have more or less stopped here in Santa Cruz. We get a shower about twice a day. Each one has has me holding my breath. The outer wall of my bedroom has been hacked out so that it can dry out and then be filled and repaired and made watertight, we hope. The huge wooden wall unit in my bedroom had one side on the point of collapse when the water soaked through. Now it is being supported by my large weaving sticks. Whine , whine, whine… a picture like this from this blog soon makes you stop. Such is the situation in the province of Beni in Bolivia. No walls at all and sticks support the roof.
I heard from my friend Dorinda up in the highlands in the province of Cochabamba, another of the effected areas, but she did not mention the rains and I am guessing that they are okay. Dorinda had written to let me know that she had mailed the box of woven bands that I had ordered from the weaving cooperative that my teacher Maxima heads. Dorinda blogs about her work with Maxima and the weavers of Huancarani at PAZA Bolivia.
Exciting! As the post office box I use is in someone else’s name, I had to be patient and wait for my treasure to be picked up.
My home is a disaster of warps, yarn and sticks right now. I really had to resist opening the packages straight away, unfolding the luscious bands, and laying them out to view on every available space. Dorinda included a list of the weavers and each band is tagged with the weaver’s name. She also sent me a document with a short story on each of the ladies. It so nice to handle one of the bands, look at the picture of the weaver and read her story.
Once I had put things in order, two days later, I opened the packages and released all those lovely aromas of wool, dyestuffs, and “campo”.
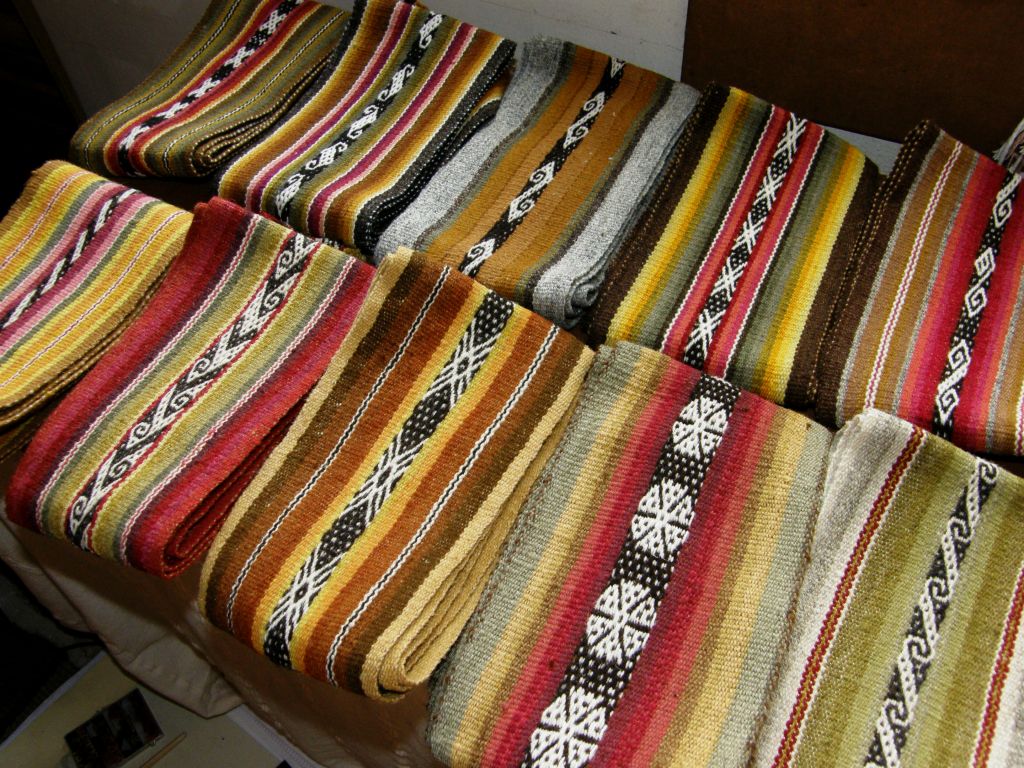
I like to feel the cloth. The yarn is the weavers’ own handspun, most often made with fleece from their own flocks. The colors are all natural and were created from cochineal and local plants.
Which weaver would be considered the best amongst her peers, I wonder. Whose cloth is the stiffest? This seems to be one of the things that the weavers themselves appreciate. I wonder which pattern they would consider the most complex. What different effects did they achieve in their use of warp and weft colors? Who matched the weft color to the edge color and who used a contrast color to create attractive little dots along the edge? Whose color combination was vastly different to everyone else’s?
Did they all get together and decide not to duplicate the patterns or was that just a happy coincidence? Were any made by the teenagers who are still in training?
Without unfolding them, I picked out two which I considered my favorites. I was happy to see that one of the two had been woven my Maxima. I wondered if I had simply recognized her style.
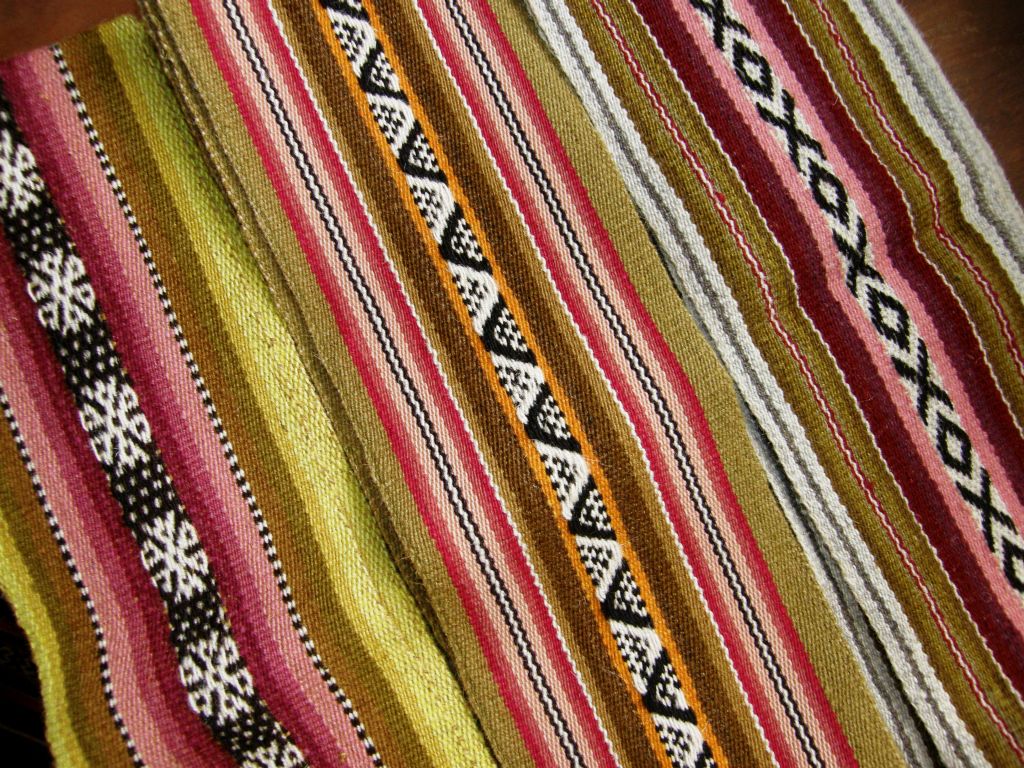
Fifteen different weavers had made the bands with no repetition of color arrangement and just two patterns duplicated. The width of the stripes of color ,and the narrow strips of threaded-in pattern that sometimes separate them, was in a form that was often repeated and could be characteristic of certain communities or even families.
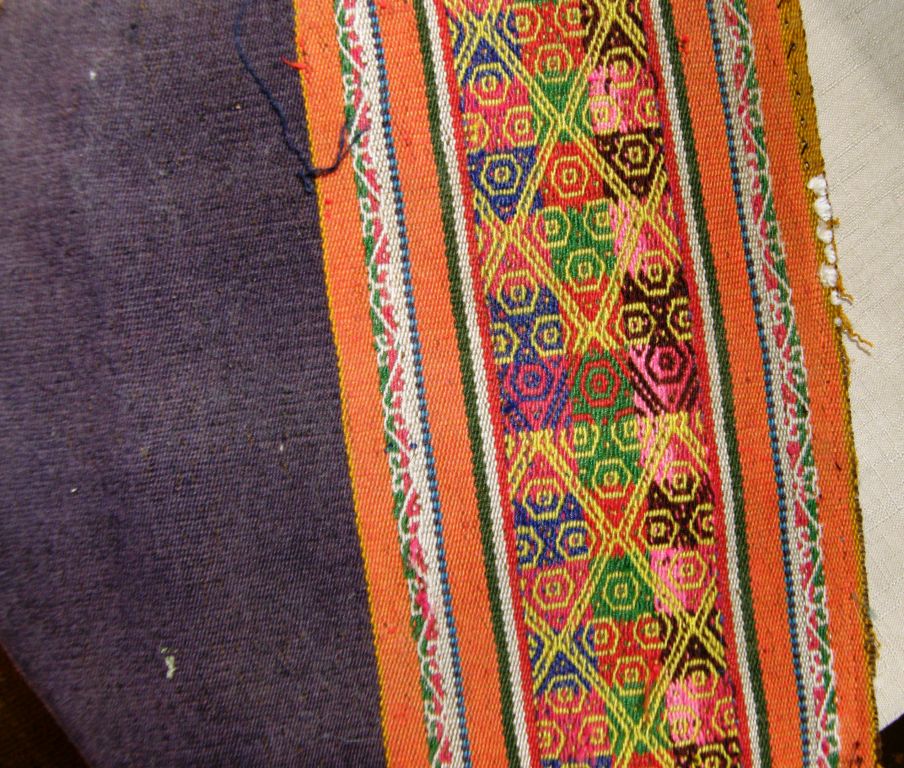
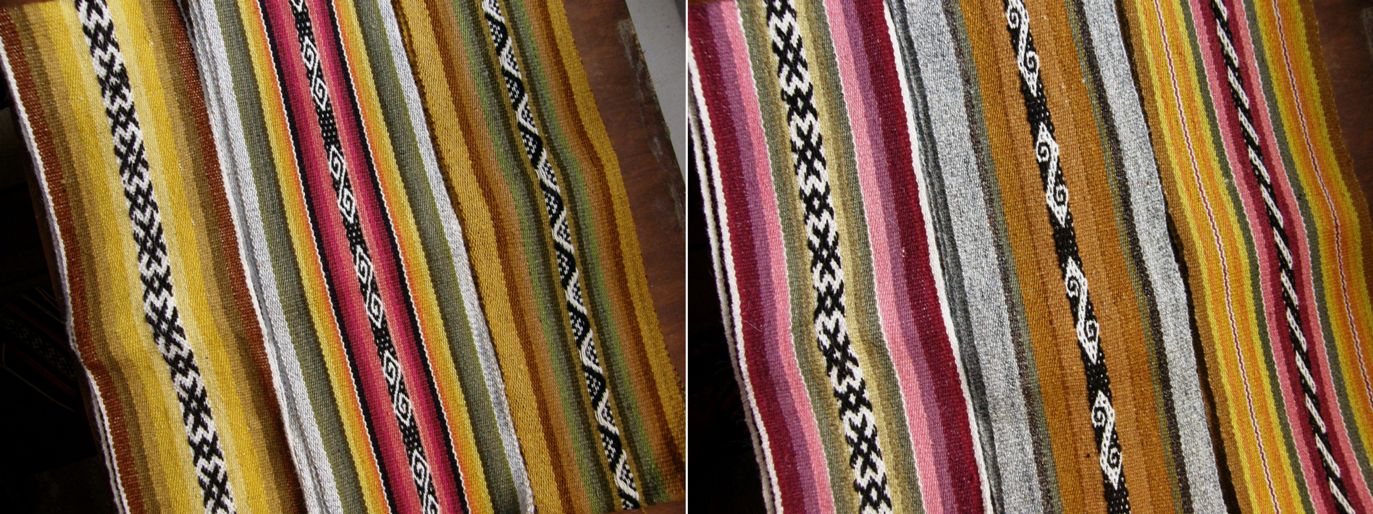
Seventeen bands were patterned with complementary-warp designs and three used a supplementary-warp structure.
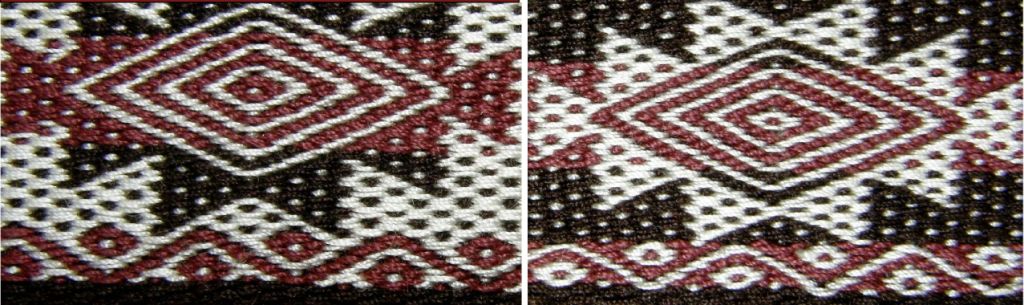
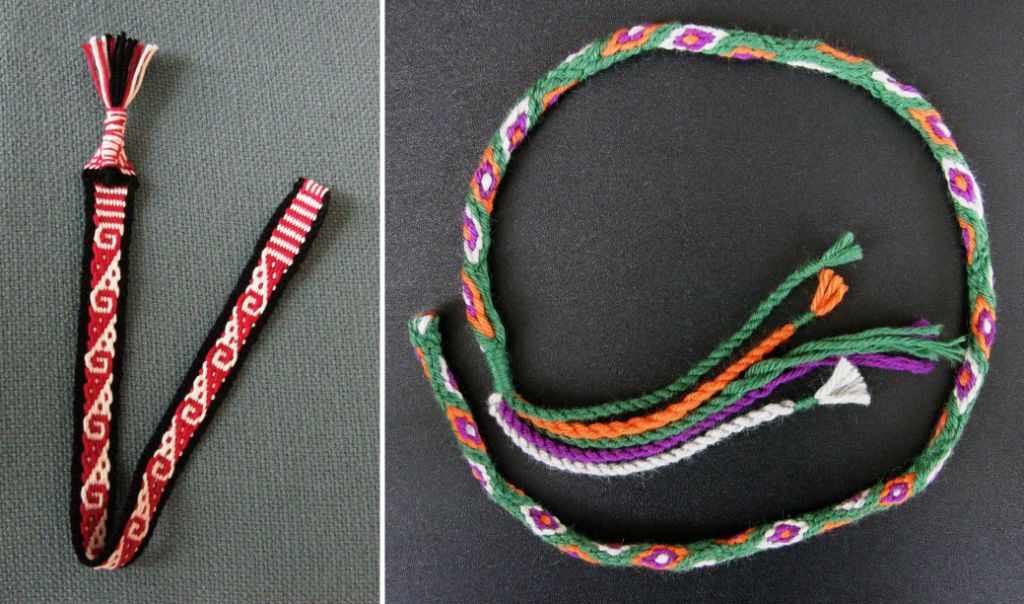
The weavers used a complementary-warp structure to create the patterns on these bands.The band on the right is one of those which was patterned with supplementary warps.
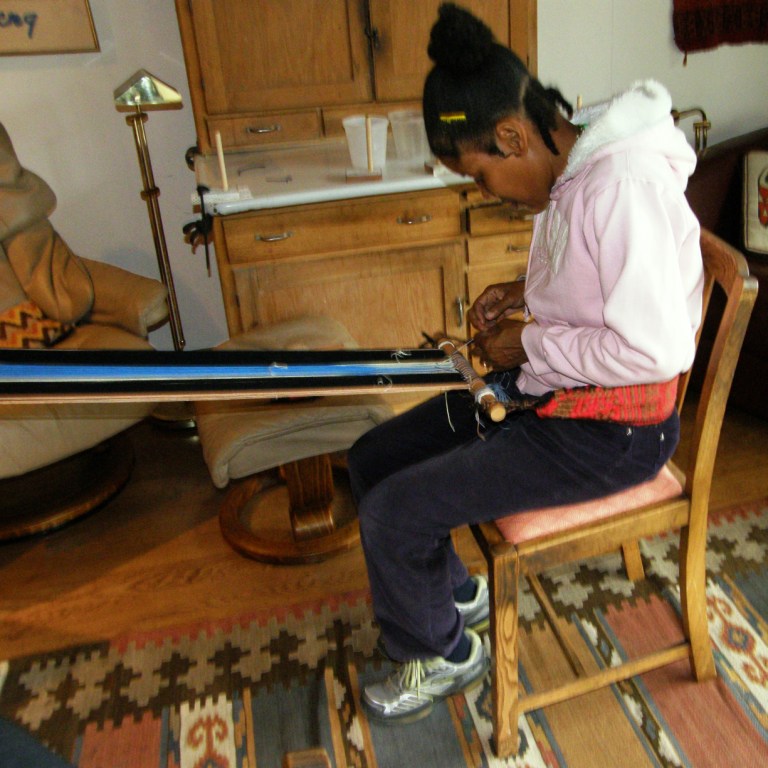
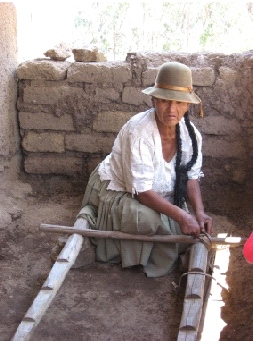
The second of the two bands that I had picked out as favorites was made by Narciza, Maxima’s older sister. I just love Narciza’s color combinations. Below you can see her adding a tubular border to one of her woven pieces. As is done in Peru, she uses a forked stick to hold the cross for this particular type of patterned tubular band. Strangely, younger sister Maxima never learned to weave this kind of tubular band with its distinctive eye pattern and only recently learned it at the Tinkuy in Cusco last year.
Dionicia Crespo is the oldest weaver in Hauncarani still weaving to sell at 82 years old!
Of course, her fading eyesight plays a role in the straightness of her edges, Dorinda tells me.
She doesn’t have glasses. Somebody told me the women are embarrassed to try out reading glasses because glasses are associated with education and the Huancarani weavers are illiterate (Dorinda)
Her edges look good to me!
You can see her at left preparing her frame for warping.
Bands that represent three stages of life….you can see 82-year old Dionicia’s band above on the left. A piece by Vilma, Maxima’s eldest daughter, is in the middle and the band created by the youngest weaver of this collection of bands, 18-year old Adviana, is on the right.
Dorinda tells me that Adviana is one of the few of the younger generation who has learned how to weave.
When she began weaving to sell through PAZA she relied on her grandmother´s assistance, but now weaves on her own. (Dorinda)
Family traits? The band on the left is Maxima’s, daughter Vilma’s is in the middle and older sister Narciza’s is on the right.
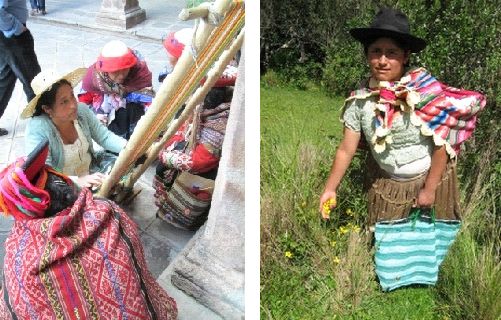
Maxima demonstrating at Tinkuy 2013 and daughter Vilma collecting flowers for the dyepot.
A couple more pictures to finish before I put the bands back in their box….
Enough color? Let me calm things down a bit now with some black and white.
A question was asked in one of the forums this week about what kind of weaving software people use. There are still quite a lot of good old fashioned paper-and-pencil people around amongst those who were excitedly discussing all the ins and outs of the various available programs.
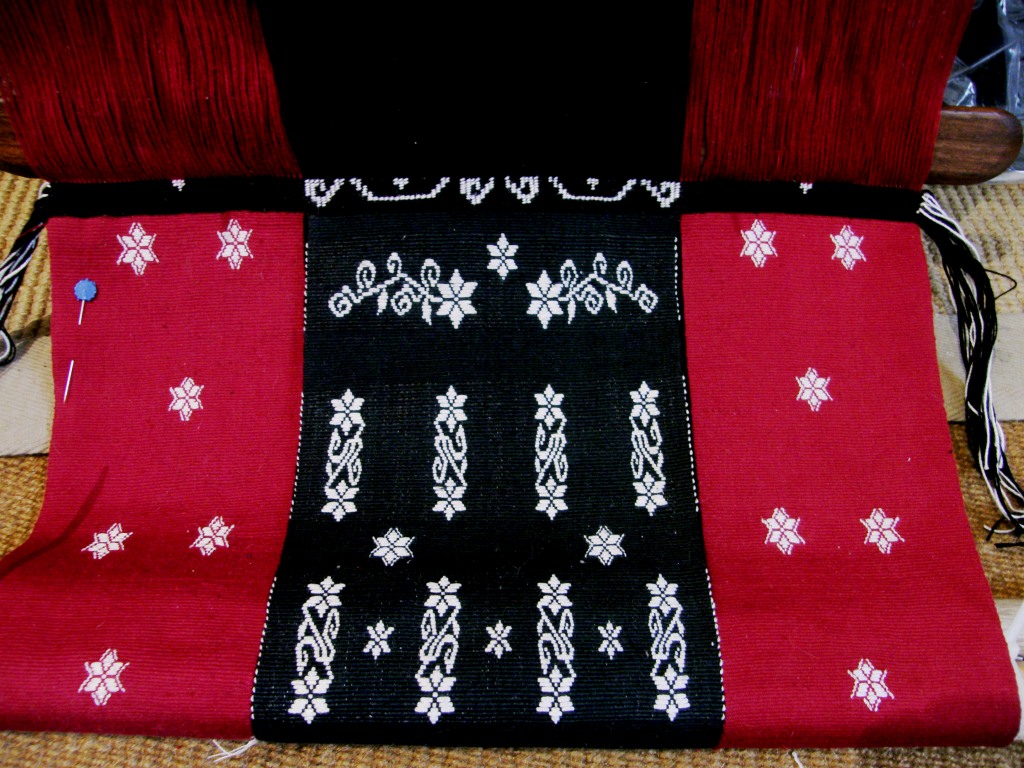
Me? I am a paper-and-pencil gal. That’s the new panel for the wall hanging over which I have been dithering. I love charting this way. It makes me feel like a kid again and it is very relaxing. While a young fellow dangled from a cage outside my window and hacked away at my wall, I calmy colored in cells on my graph paper. Prior to that, I had just as calmly sat and made four sets of string heddles of 353 ends each on that black and white cotton warp.
If you are thinking that that is a weird-looking pattern, you are right! I really have no idea what this will end up looking like even after sampling! I just need to dive in and do it. I fussed over it more than usual….measuring, shifting things about, uncrossing warps, measuring again and finally got the first weft shot in. That always feels good. I am weaving this in double weave. It is embedded double weave as there is a very narrow plain-weave border on either side.
I finished the silk bookmark that was part of the Ravelry event but I am calling it a sample for now. There are several things about it with which I am not pleased and, as I have plenty of warp left, I will start it again with improvements.
The silk is lovely to work with! Using the four sets of string heddles and a pick-up stick I never have to actually touch the threads. I worked with this same silk as supplementary weft last summer and it was horrid to handle with sweaty hands.
The bookmark is light and supple…just the right thickness to slip between pages. I am pleased with all that. Now to fix that other stuff that I don’t like as much.
While on the subject of double weave, Scott has allowed me to show pictures that he posted of his double-weave sample band. He is studying the one-weft version from my tutorial hereand has done a really good job.
Ravelry projects have been coming in as we approach the end of the Sochi Games…
Kim finished her piece and sewed int a small bag for which she also wove a strap. Now she is on the lookout for a button to close it.
Joyful has been converting her flowere doodles into patterns using embroidery floss as supplementary weft on her plain-weave band. Julia will use purple cloth with her finished piece along with her sewing talents to create something useful.
Another week comes to a close. I try and mix it up…a little warping, a little charting, a little weaving for myself. I hope to make some good progress on the wall hanging this coming week.
One of the things I like about the discontinuous-warp technique I have been playing with lately is that it gives me not one, but two opportunities to practice creating four selvedges….a two-fer. So, with the new piece that I warped this week I get two more chances, which makes five in total these last few weeks. I think my skills are improving. At the very least the process is becoming much less intimidating to me. I wonder if one day I will shrug it off and say that it is “normal” as my young teacher from Pitumarca, Peru did.
Four-selvedge bands woven by relatively new weavers…Bolivian teenagers-in-training.The first piece on which I learned the four-selvedge technique in Potosi, Bolivia.
Here’s where I was at last week when I wrote my blog post. I still had the heddles in place and and had just removed the shed rod from the left hand side.
And here is the piece with the gaps closed. There are a few wobbles here and there but I am pretty pleased with it. Next came the tubular edging band and it took me five attempts to settle on the pattern and size. Part of the problem is that I don’t have much of a wool stash and the colors are very limited so, in the end I had to go with a heavier tubular band than I would have liked.
Late night weaving and sewing with poor lighting…not a good idea! I had to unpick a fair bit next day. You can just see near the upper left corner the end of the tubular band. I was left with the problem of what to do with all those warps ends. They are easier to deal with when you sew a tubular band to a bag. The band can be continued down into the bag, its end sewn over and hidden away inside. When you look at an Andean textile that has been finished this way, you have to look hard to find the start and finish of the tubular edging. On all the pieces I have seen, the end has been sewn over and over and the unwoven warps cut. It has been done so neatly that you can barely tell that the resulting blunt end is there. This is something on which I need to work!
So, I wrapped the place where the start and finish of my band collided. It was obvious and ugly and I wanted to hide it. The small bit of wrapping looked pretty awful. My solution was then to extend the wrapping to about an inch and wrap all four corners the same way. This would transform the wrapping into what we weavers like to call, with tongue in cheek, a ”design element”. You can see two of the wrapped parts below.
I created a threaded-in pattern for the tubular band rather than do something with pick-up. I warped the pattern off center so you can see the whole design sitting next to the upper face of the cloth rather than having to tip the edge to view it. The band on the back side of the cloth is in a solid color. Underneath all that you can see this week’s new discontinuous-warp project…another two-fer. It looks like I will be able to use that discarded tubular band warp from last week after all. I think the colors match this new project well.
What am I going to do with these pieces? Nothing! They are samples, practice pieces, notes and lessons in cloth. I would like to have one of the pieces in my wall hanging series represent the ticlla, or discontinuous warp technique, and so, the pieces I am currently weaving are part of my warm-up for that.
I so love sitting in front of a fresh warp like this!…terracotta and natural discontinuous warp in the same Navajo wool warp yarn that I used for the Four Seasons piece. This time I warped for a tiny strip of simple pick-up down the center and re-spun some brown wool to match the twist of the Navajo warp to use as the border color. I wanted to use a complementary-warp technique.
I wanted to decorate this one with supplementary-weft patterns again but I chose a “discontinuous” method this time in that the weft does not travel all the way across the warp to turn at the edge. The weft-turns shadow, or outlines, the motif.
The terracotta supplementary-weft yarn that I used could have been thicker. I didn’t get as good coverage with it as I did with the lighter color. The light bumps at the edge of the terracotta half of the cloth are the main weft turns. I had to go back and forth between white and terracotta weft as I didn’t have enough of either alone to complete the project. Those contrast color weft-turns will get covered by the tubular band later. The turns of the supplementary weft lie beside the motifs in a nice outline.
I wove the pick-up pattern wondering if there was a way I could close the gap between the two woven ends without interrupting the pattern. It was a four-shed pattern and I hoped that I would be able to fix things so that I would be in just the right shed for the last weft pass. I think a lot of it came down to luck in the end. The weaving fairies were with me :-).
It worked! Now, let’s see if I can manage it on the other side. Hey, weaving fairies, don’t go away yet. I am disappointed with how noticeable the change from white to terracotta weft is in the white section…oh well.
I am very happy with my wee bit of pick-up on this piece but, before I get too carried away, here’s a reminder of what the Pitumarca weavers achieve as far as pick-up is concerned….
Granted it is a little easier to weave supplementary-warp pick-up in the small space at the finish of a four-selvedge piece but, oh my gosh, look at that! I would say, and this is just my guess, that the weaver closed the gap at the outer edges where you can see the tiniest fraction of an inch that is without pattern. The natural alpaca colors are so gorgeous. I don’t remember where the start and finish of the tubular band is located on this piece but your eye is certainly not drawn to any obvious spot where the weaver may have finished.
Above you can see a weaver from Pitumarca, Peru nearing the end of the warp. You can see how small the space in which she picks up the patterns and operates the heddles is. One the right you can see how a four-selvedge piece with supplementary- warp patterns (part of a discontinuous-warp piece) has been finished.
While waiting for the brown yarn to dry and have its twist set, I thought about other possible ways to hide the join in tubular bands on these flat woven pieces. Maybe some cross knit looping? I practiced on one of the braided keyfobs that I have been making, the first one which was bit on the loose side. It could be sacrificed for this experiment.
I am not convinced but I will keep it up my sleeve just in case. I think it looks cute, as if I had knitted a wee wool sweater for the braid! I added another Margarita braid to the collection in red and black.
Jennifer finished her stunning hemp piece with pick-up patterns of Chinchero, Peru. I have charted these in my second book. I like to think of complementary-warp structures as two-fers…one weft shot produces pattern on two beautiful faces.
Now she has to choose which face with be the outside of the bag she is planning. I am afraid that none of us in the Ravelry group were helpful when she asked us for opinions. We all liked both sides equally, of course!
And speaking of bags, Julia once again wowed us with her weaving, piecing together and sewing skills….her creativity!
The main fabric was woven on her floor loom and is stunning in itself. CindyQ, also in the Ravelry group, wove the blue supplementary-warp pick-up band and had given it to Julia as a gift. Julia’s idea for making a shoulder pad for the slim tubular band strap is so clever. She wove the band for the strap in tubular form and then wove it as a flat band for a while. She braided the flat band to form the shoulder pad. How cool is that?
Kim Varland, yet another Ravelry weaving buddy, has been playing with the yurt band border pattern that I have charted and explained in one of my tutorials. I love her color combination and she shows more examples on her blog.
Kim has used what I call a simple warp-float technique. While the pattern on the back side of the band is attractive and interesting, it is not truly double-faced. I have shown these patterns to weavers who all love the way it looks on the back.
The other day I was explaining to one of our new Ravelry group members what was meant by a “complementary-warp structure”. I was thinking that surely I had put a description of this somewhere on my blog with lots of pictures. I found it in a post back in 2011 which I had written just before going to Cochabamba to weave with my teacher Maxima. I had promised to start a tutorial page on my return which explained some of these terms which are used for some of the common structures woven by backstrap weavers here in South America.
It turns out that I never did and so , I will copy that portion of the blog post to a new page and will add some other structures to it this week….only two and a half years overdue! Above you can see the double-faced, or two-fer nature of complementary-warp structures.
As I pressed the last creamy silk supplemental weft into place with my Guatemalan pointed stick I was thinking “Okay, that’s enough brocade work for the time being!” I was just finishing the inlay part of the third of my three-panel wall hanging. The black central panel was the last one to be tackled and, in fact, this was my second attempt, the first having been set aside as a “valuable learning experience”.
As is my custom as a new year rolls around, I looked back at my blog posts from the end of 2012 and early 2013 to see what I had been weaving a year ago. I saw that I was up to my eyeballs in supplemental wefts. All in all it was a very “supplemental wefty” year. Here are some of the results…
And, messing about with supplemental wefts brought with it lots of plain weave of the warp-faced variety. With that came the great coil rod adventure and the conquest of the dreaded corrugation, the circular warp experiments and the enjoyment of using fine thread. One of my students during the year told me about a weaving instructor who had urged her students to embrace the challenge of perfecting plain weave. I guess I unconsciously took on that challenge last year…not that I am saying that I have perfected it!! But, I have to admit that I just love the feel of the fine red plain-weave panels in the three-panel wall hanging, the lack of ridging and the evenness of the edges…no fancy floats…just lovely plain cloth.
I am pleased that I chose to weave the panels separately. I want to have those red panels hanging freely to float and sway as they please.
So, as one part of my mind is saying “enough with the weft inlay”, something else inside is sayng “Okay, but what if….”
My bedroom floor says it all! There are certainly advantages to living alone. It allows me to make my bedroom floor my permanent project, ideas and drawing board. I just need to step between stuff anf fall into bed. And, who cares if you wake up at 3am and have the urge to sit amongst the stuff feeling suddenly creative? So, what’s on the drawing board?
There are five projects there, three of which involve supplementary-weft patterning. Clearly I am not done with this and I am not done with seeking the perfect plain weave either. You can see the first “failed” brocade black panel in the lower right corner waiting to be made into something. Buttons and balls of thread stand by.
Then there’s the three-color pebble weave band stetched out that I wove last year (pictured above) which needs to adorn a bag. Meanwhile, two little piles of yarn have formed and are sitting there as the vague beginnings of two new projects. I want to make a scarf with my pale blue indigo-dyed Japanese silk. While I have used silk as a supplemental weft, I have not used it as warp (except for a tiny pebble weave experiment). I am hoping to start a silk-on-silk weft inlay project with that.
The other project involves wool. I was really happy to find how easily I could weave my sister-in-law’s cell phone pouch using wool straight off the skein.
Re-spinning wool is generally recommended for warp-faced weaving so that the “tighter” fiber can better withstand the abrasion of the string heddles and the rubbing of the warps against each other. I didn’t re-spin, yet the wool I used behaved so beautifully.
You do, however, need to have your shed opening technique down…smooth and gentle, no scraping or wrestling… to make his work.
There’s the wee wool drawstring pouch at left (picture kindly taken by my brother after my departure from Australia. He photographed it with some of the pretty colored plastic money that we use in Australia). We really need to find a nice wooden toggle for the bag.
The wool I am planning to use for the next project is finer and more loosely plied. I think it will be more difficult to work with …a challenge.
Why don’t I just respin it? I don’t like the “hardness” of the resulting yarn or the curl that it gives to the finished pieces.
And guess what kind of patterning I want to do on this piece….weft inlay of course! Wool-on-wool.
I made a small pouch a long time ago with left over odds and ends of alpaca that I had spun and decorated it with supplemental weft of the same alpaca. I love the way the alpaca supplementary weft billows out of the sheds to lie fluffy and full on the surface of the cloth. I know that wool will behave the same way.
It seems there are endless possibilities for types of fiber to use for these inlay experiments. One thing I have not yet thought of using is hemp. Jennifer gave me some on one of my visits to Oregon and there it sits in the closet as yet untouched. Meanwhile Jennifer has been weaving with it and showed all of us in the Ravelry group her latest project….
The colors, which Jennifer dyed herself, are gorgeous. They have that sun bleached look that I so love. The complementary-warp patterns are ones from Chinchero which I charted in my second book.Given the very hardy nature of hemp, I am thinking, as I sit here writing this, that I might use mine for the strap of a computer bag that I have been planning. Excuse me while I go fish the hemp out of the closet and toss it onto the bedroom floor! I won’t be using it for a weft inlay project, though.
The eucalyptus-dyed cotton thread awaits its purpose too…
And fr. Kyriakos wrote to me today and gave me a brilliant idea for it which has a suitably Australian theme….thank you!
Meanwhile, before I get too carried away with projects yet to come (well, it’s only natural with the coming of the new year, isn’t it?) there is still something on the loom which needs to be finished. I said that I had finished the weft inlay part of the wall hanging project. You could see in the first image at the top of this post that I have now set up the three finished panels on the one backstrap loom. Now I need to join the panels by twining across the top of all three at once.
So, here you can see the twining underway. Oh my gosh, I had forgotten how SLOW weft twining can be! Thank goodness that muscle memory kicked in and I didn’t have to really refresh my skills. It’s been a while since I have done any major twining. The good thing about it is that this pattern doesn’t need any significant amount of concentration. As I said, muscle memory took over and, after the first row of pattern was in place, the counting was pretty much over and I could put on some music and sing and twine away.
Tanka ch’oro and Andean hook patterns.
Muscle memory… such a handy thing. I never really believed that muscle memory would play a big part in pattern picking until I wove twenty-five tanka ch’oro bands in succession before the ANWG conference last June.
There would be times when my mind was reading the pattern and telling my fingers what to do yet I knew that something was wrong because it just didn’t feel right. I was actually picking the right colored threads in the right order but, because a distraction had caused me to form my picking cross backwards, my fingers were not picking in the way in which they had become accustomed after so much repetition.
I was amazed at how my fingers had memorized the moves and could immediately sense that something was wrong.
As I sit writing this post, a quick sidetrip to Facebook tells me that Radiant Orchid has been announced as the color of 2014. Who decides this and what does it all mean? Shock and horror…none of my planned projects included this color nor do I have any yarn this color in my closet. Oh well, I guess I get to pass another year hopelessly out of fashion 🙂 It is a gorgeous color, though.
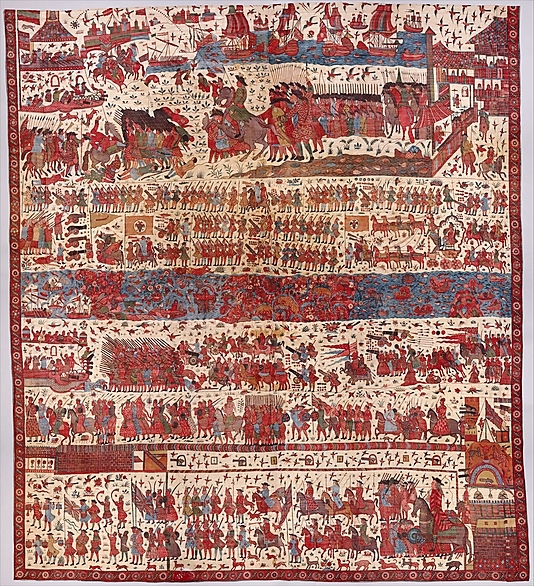
I will leave you here with an image of a textile from the website of the Metropolitan Museum of Art in its current exhibit entitled Interwoven Globe- The World Textile Trade – 1500-1800. (Thanks to Jaina at Wovensouls for making me aware of this exhibit and the fact that it can be enjoyed online).
This cotton piece is labeled Hanging Depicting a European Conflict in South India and is dated before 1763. It is fascinating to me to see a textile depicting something of India in this time period. Some distant family members of mine in England have been tracing our family tree and have gone back as far as my great (x6) grandfather, Pierre Gallyot de la Vilette, who traveled from France to Pondicherry in south India to take up a post as a public notary around 1766.
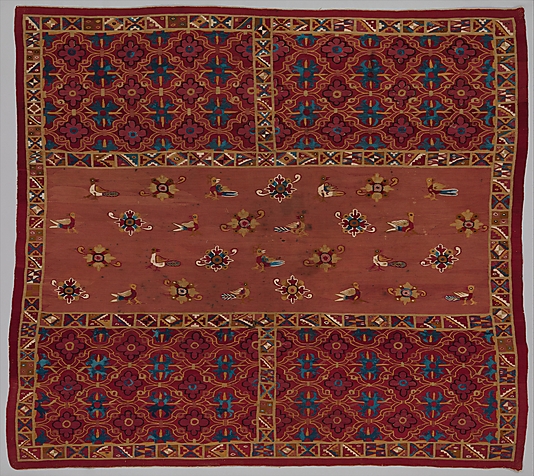
Another piece that I love from the exhibit is this tapestry mixture of Incan motifs (the tocapu design around the edges) and Spanish motifs in a wedding shawlmade in Peru in the late 16th/early 17th centuries…
I love that “big picture” feeling you get from the airplane window. It’s been a long time since I have been able to get a window seat on a coast to coast USA flight in daylight to enjoy the view. The picture below was taken somewhere between Dallas and San Francisco last week.
The view reminded me of the months in the early 90s when I would be sometimes rambling about on top of the Sangre de Cristo Mountains on a peak bagging trip or dropping by rope into the depths of the Utah canyons. From the air you feel so carefree floating over the ever changing landscape like a bird while trying to imagine the thousands of specks of people down there below like ants and what they might be up to.
In a similar way, I made myself step back and admire the big picture before zooming in on the details when Ute brought in a piece of Uzbek silk ikat cloth for me to examine and admire during a visit with her in Northampton.
I got to see the exhibit of Uzbek ikat robes at the Textile Museum in DC a few years ago. Of course, that was a strictly “hands off” affair. And even though I had the opportunity to touch similar fabric from Uzbekistan at the International Folk Art Market in Santa Fe this year, the market simply had far too many interesting things to be able to stop and focus on any one item for any meaningful length of time.
Thanks to Ute, I had time alone with the cloth at left and could examine it to my heart’s content although I found it difficult to capture its true colors on camera.
Ikat fabric I saw at the Santa Fe International Folk Art Market
When I then zoomed in to get an ant’s persepective, I saw what I had named many times, in despair and frustration, during my own ikat experiments on my backstrap loom, the ” dreaded railroad tracks”…
I took extreme measures to keep my warp threads aligned on this piece…that was my goal at the time.
I am talking about those horizontal bars that show that the warp threads have shifted from the original positions into which they had been locked during the tying and dyeing process.
It was always so disheartening for me to be weaving and approaching with excitement the first wrapped area on my ikat warp, eagerly waiting to see how my carefully tied and dyed pattern would appear only to see first, the little specs and then the growing rows of lines of un-dyed thread appearing….those dreaded railway tracks. They told me that the threads had been displaced too much and that my design had been ruined.
But, walk away to the other side of the room and look again at the Uzbek cloth. What do you see? A beautiful pattern with the soft blurry outlines that give ikat its charm and character. Look at the big picture!
I will be trying ikat again when I get back to Bolivia and reminding myself to think like a bird and not an ant!
The same goes for one of my current favorite structures as woven by the Guarani weavers of the lowlands of Bolivia…intermesh.
Stand back and admire the crispness and clarity of the design woven by my teacher Angela.
Closer inspection of motifs on another piece show the feathering that characteristically appears along the edges of diagonal lines.
This has me adjusting and readjusting my pattern charts in an effort to reduce the feathering as much as possible which can sometimes distort the original shape I was striving to create.
Stop fussing and thinking like an ant! The GuaranÍ weavers, as far as I have seen, make no such (unnecessary) effort…they think like birds.
Speaking of intermesh, let me show you Julia’s latest creation in progress in this structure….
Julia tells us that the design comes from a book entitled Japanese Design Motifs. Designs like these with horizontal and vertical lines are ideal for learning this structure and are the kinds of motifs that I have provided with the tutorial in my second book. I used Bhutanese and Mexican patterns for inspiration. The horizontal lines have “saw-tooth” edges and the verticals are crisp and smooth plus the cloth is double-faced!
This trip is drawing to its close. I can look back over the last weeks of weaving with friends, new and old, from a bird’s eye and ant’s eye view and benefit greatly from both perspectives. The ant asks what details can be improved. The bird hovers above to see patterns appearing on bands and cloth, the weavers’ reactions – their smiles and frowns and “aha” moments, changes in their energy levels and receptiveness which their body positions often reveal….and listens to the fluctuating levels of concentrated silence and relaxed chatter.
Here’s a quick whiz through some of the days I spent weaving both east and west on this trip….
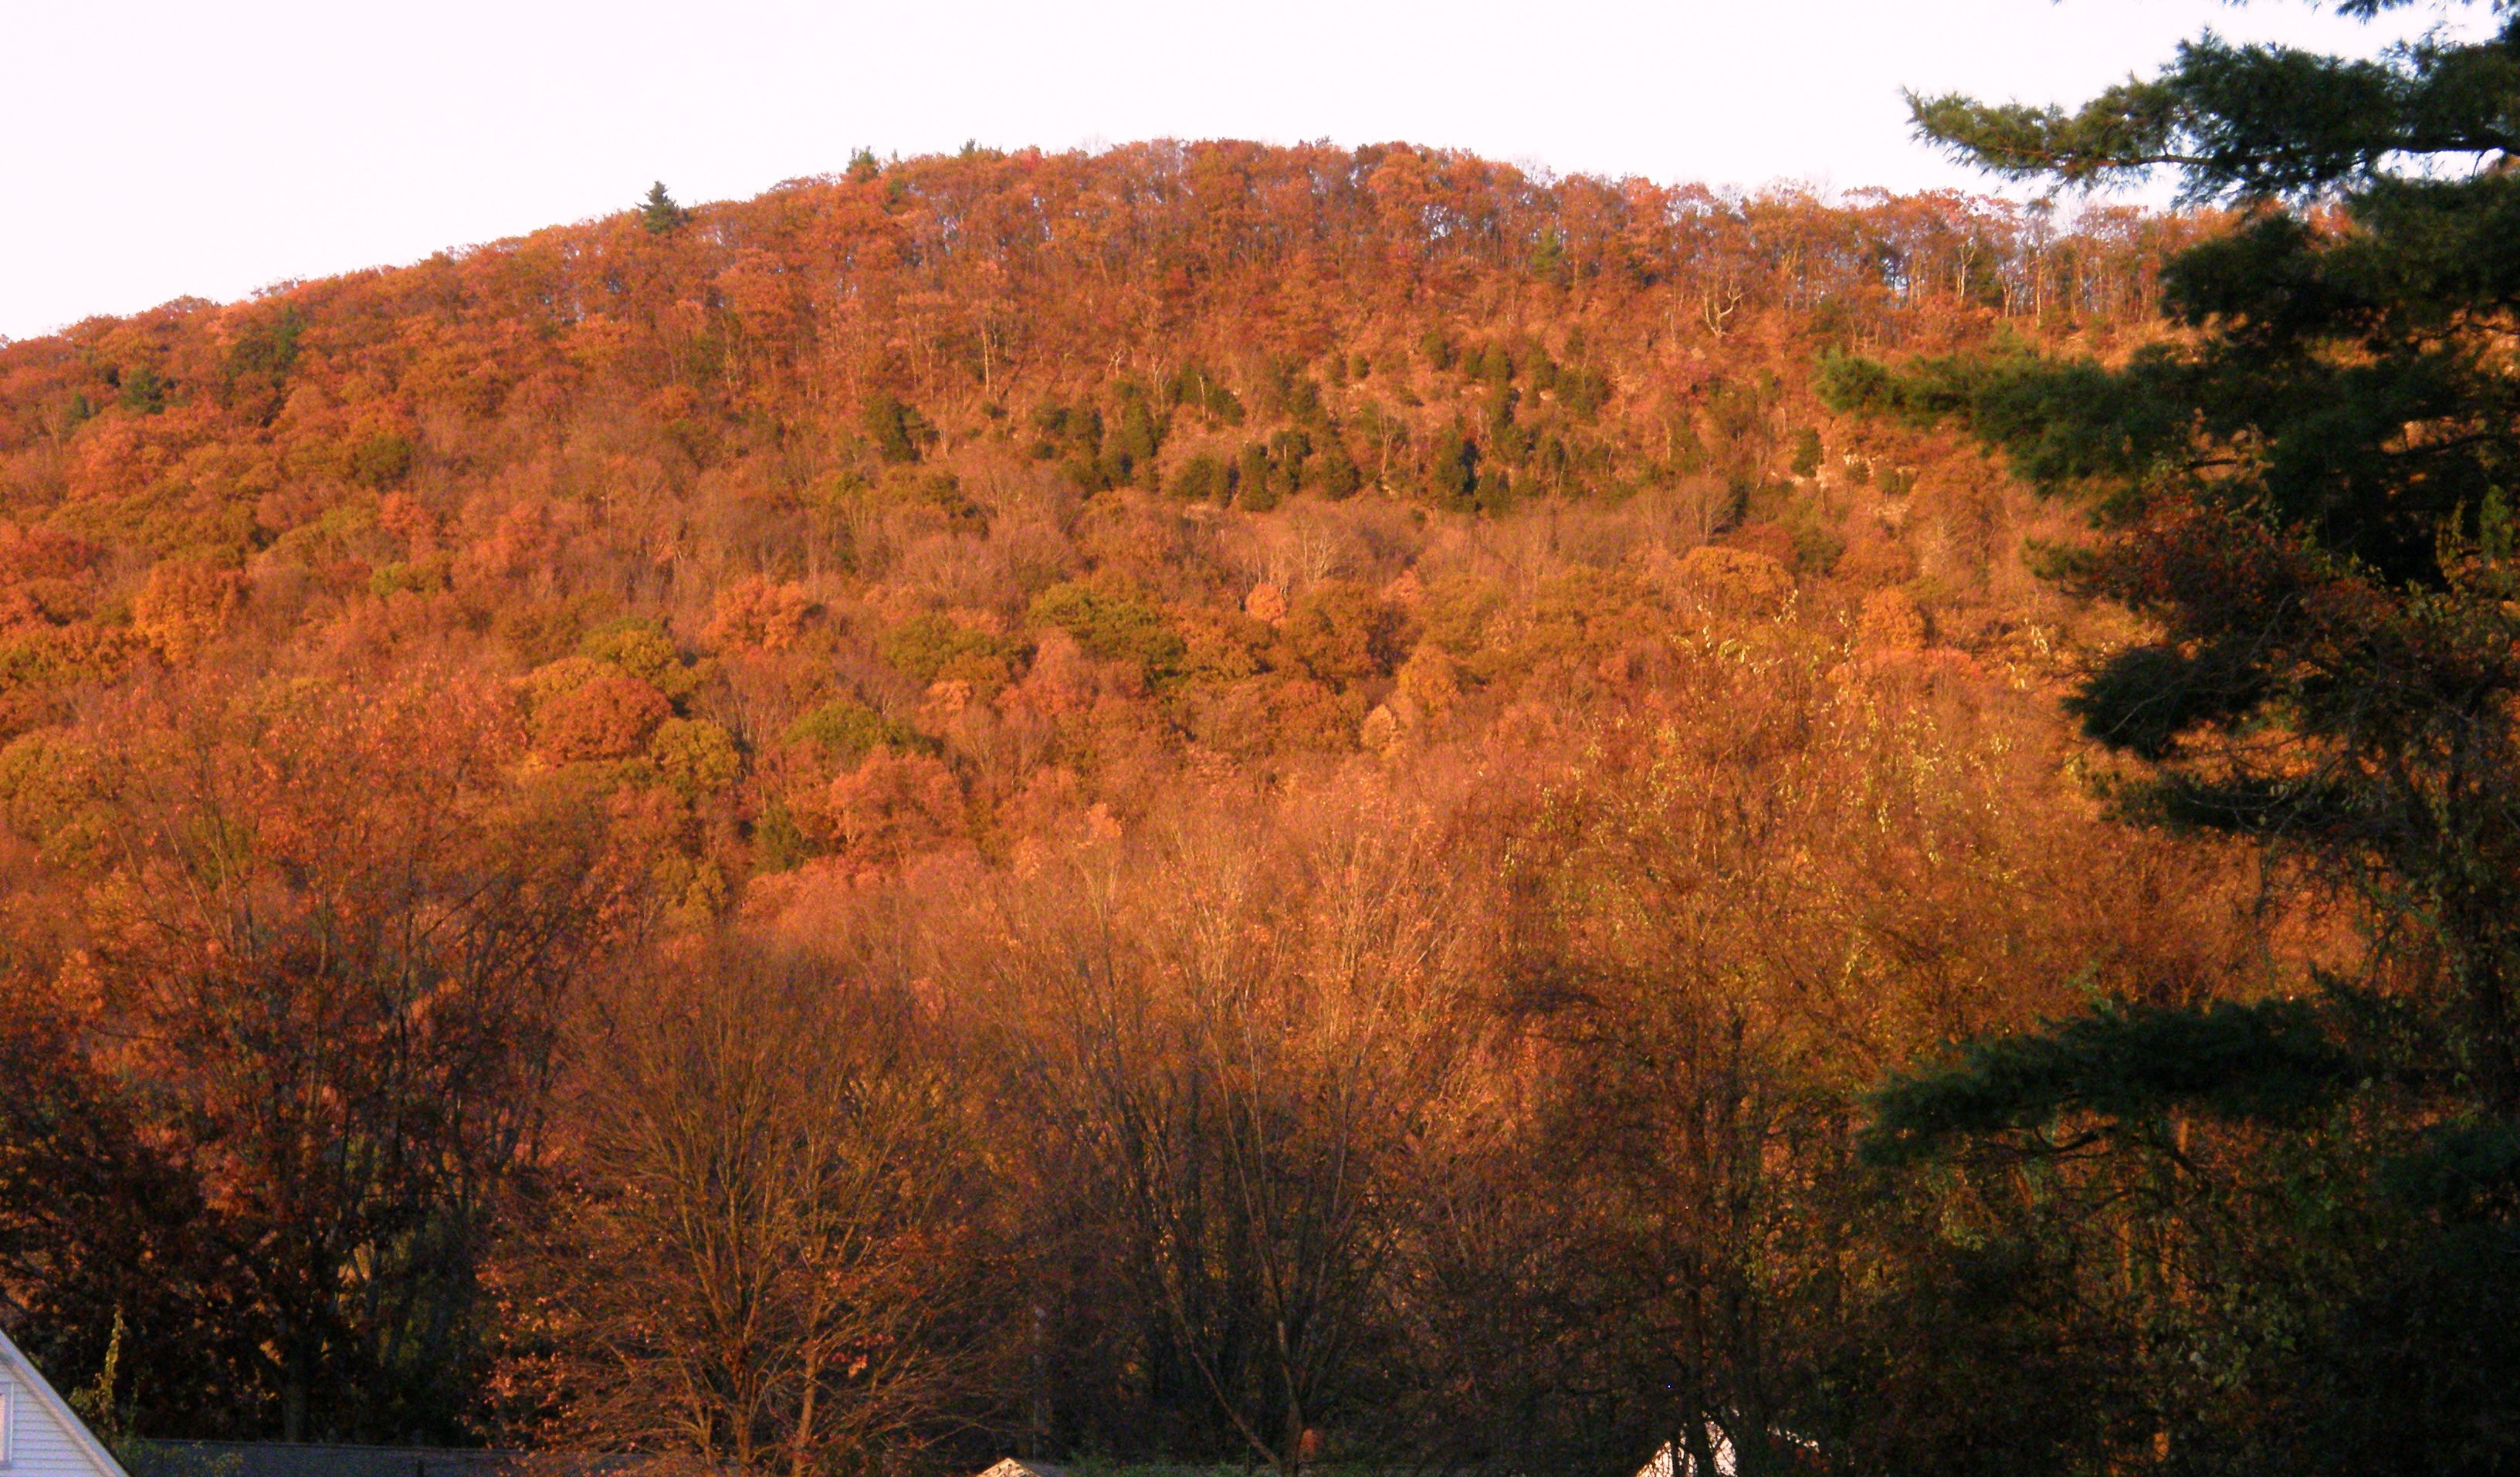
Backstrap weaving with ladies at Yale University…. They have a wonderful weaving room for free time weaving. It is full of floor, table and rigid heddle looms which meant standing room only. Many thanks to Barbara who took me to visit with these ladies. Here they are finding the cross in their warps so that they can make simple heddles.Massachusetts turned on its fall colors for me as we drove home each evening after some weaving in the glow of the setting sun. Here is a shot of what Lausanne in Vermont has dubbed “cinnamon hills”.
And winter was definitely in the air with frosty mornings. Only the brave sat outside for lunch! I was one of them for about 5 minutes.
The round table was a perfect set-up among Liz’s natural yarns and fibers, locally made scarves and shawls and crafts. It was a sweet space in which to weave.
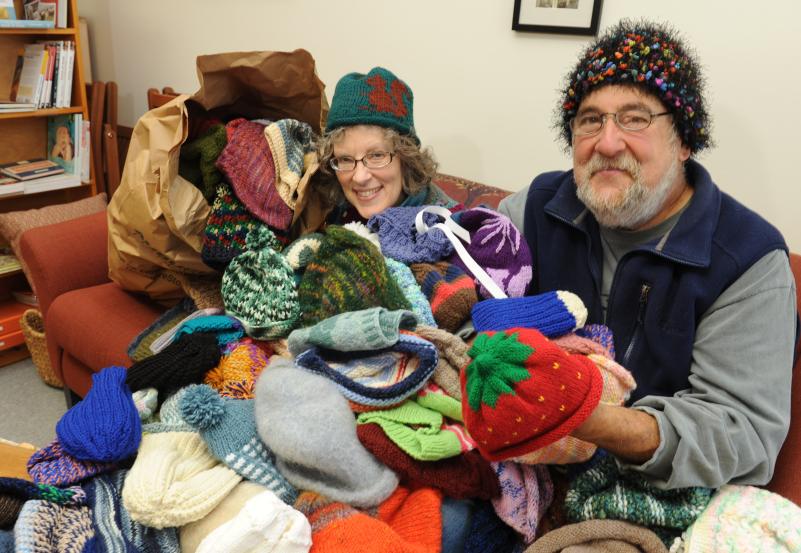
RIght now Liz and her partner John are involved in the 500 Hats event which John came up with to celebrate the 75th anniversary of the Dr Seuss book. You can read more about the project here…there are over 1600 hats so far in their living room.
Moving over to nearby Northampton….here are a couple of things that Chris worked on..
Here you can see her pick-up band finished and decorated with a triangular braid (which I now know how to do….yay!, thanks Chris) as well as her ñawi awapa piece on which she has just about finished twisting and binding the warp ends.
It was a second time weaving with these friends and we did some more pebble weave, made tubular bands and sewed them to pouches which we later dressed up with decorative stitching.
The mouth of a Bolivian woven pouch is decorated, after having been edged with a tubular band, with cross knit looping which is a sewn technique.The hands above belong to Lisa, on the left, seen here weaving a complementary-warp band alongside Mary-Lou. Lisa is wearing one of her own gorgeous deflected double weave scarves.
Barbara invited friends to her home in Connecticut and her fabulous weaving studio for another gathering where we all wove together….
Claudia and Susan decorate a warp-faced band with both single and double-faced patterning techniques.
And here in California yesterday, we gathered to practice setting up for wider projects. Some people in this group were weaving with me for their their third and fifth times while others were on their second time.
Picture by Ruth TempleCookie’s finished piece will be folded into a long narrow bag for a small backstrap loom that she was recently given.
So, we had a group with a variety of experience levels. I think that “experience level” is often most evident in the kind of warp a weaver can create in terms of evenness of tension. Here is where the “short and narrow” mantra comes into play.
Perfect your warping techniques winding short and narrow warps over and over again! SHORT, because you will weave off your project quickly and get another valuable chance to warp again soon. NARROW, because there are different tips and tricks yet to be learned for creating successful wide warps once winding narrow ones with consistent tension has become natural.
The idea was to go wider without necessarily going longer. You can see Ruth’s pretty warp above made from Tahki Cotton Classic onto which she is putting her first set of string heddles. The strip of orange and purple down the middle will be used to create a pattern in the Andean Pebble Weave structure.
She is going to weave the other plain parts using the “thick border” technique described in my first book. This will cause the plain parts to narrow and thicken to match the thickness of her pebble section. Therefore, her finished band will be a lot narrower than the warp appears in this picture. This might become her backstrap.
We needed to refresh some things that are necessary for creating wider pieces, such as putting the string heddles on a stick instead of tying them in a little bunch.
Picture by Ruth Temple. Kathy gets a refresher in heddle making for wider warpsKathy chose to make a backstrap using Plymouth Yarn Fantasy Naturale and a double- faced warp float pattern.Kathleen chose to use overtwisted wool that she got in a class with Jacquetta Nisbet many years ago. She has already made a beautiful backsrap with this wool and knows how it behaves. She wants to make a small pouch with a pebble weave motif and wrote to me about how this warp feels “alive” after having used cotton for some time. As you can see we were in a soothing environment in Betsey’s home surrounded by textiles that she has collected in her travels.Dorothy’s project in Tahki cotton classic is so beautifully arranged. It will have three strips of pebble weave pattern and the color combination is so gorgeous! I am wondering when she will have time for it as she is off to the Tinkuy in Peru this Friday!! We are all so excited for her. Goodness knows what kinds of inspiration she will bring back with her. By the way, Dorothy’s loom is made by Terri at Magical Moons. I hadn’t seen one of these before made by Terri. The loom bars are silky smooth….beautiful work!!
Betsey’s project was the narrowest but with by far the finest thread and I neglected to photograph it, unfortunately. She warped for a pebble weave pattern using the thick borders and her piece will do nicely as a cellphone pouch.
Somewhere in-between all that, Barbara took me to Shelburne Falls Ma to visit Vavstuga Weaving School. That’s a name that constantly comes up in the weaving groups on Ravelry and I was excited to finally be able to see it and meet the staff. I was surprised to find Cindy, one of my backstrap weaving friends, apprenticing there.
What a beautiful location right next to the Bridge of Flowers which even at this late time of year is full of color against its backdrop of cinnamon hills.
Color inspiration anyone? This was in the bridge garden…never seen anything like it!
Becky Ashenden along with her newest apprentice and other Vavstuga staff showed me around. As we chatted at the table, Becky pulled out one gorgeous textile after another to spread on the table.
Not that I know much about Scandinavian weaving, but the textiles were everything I expected and more…rep weave, white on white, linen, crisp and clean, simple, classic, impeccable!
Becky opened a door to a closet which housed hundreds of samples. More samples were draped over loom beams for further inspiration, instruction and guidance but, most importantly, gorgeous handwoven textiles were everywhere to be seen and touched and used in in the house and studio….not just sterile samples to be taken out and studied and then put away. They added warmth and comfort and a lovely sense of home and familiarity. This must be a lovely place in which to learn to weave!
This hanging adorned the wall of Vavstuga student dining room which overlooks the river. I had heard it all before in the online groups…everything at Vavstuga is handwoven. It was wonderful to see it all…. from curtains to hand towels and floor coverings and hangings.
And then there was the band weaving with the typical Scandinavian backstrap set-up…(look at the piece of fabric under the backstrap…that was one of my favorite pieces)
Becky wove that backstrap. Isn’t it gorgeous? She wove one end of the waist band as a tubular band in order to more easily hook on the clever wooden device that holds the warp . Look at that sweet rigid heddle and there is also a lovely wooden smooth shaped sword that completes the set-up. I guess that I just couldn’t hide the smile and delight I felt at seeing all this as, when Barbara and I were about to leave, I was given this mystery package….
No prizes for guessing what was inside!!
Some of the other textiles I met along the way….
Many thanks to Ruth who brought this along to share with me. It is warp-faced double weave cloth, although in many places the warps are quite spread and reveal the weft. A band has been cut into strips and sewn to make this bag. We don’t know its origin but I really appreciated the opportunity to look at it.
Ute always keeps me supplied with textile goodies to photograph and examine. Here is a beautiful presentation of some of her own tablet-woven bands…
And here is a bag from Tibet, owned by Ute, that was made by sewing pieces of a tablet-woven belt together….fabulous motifs for intermesh.
And here I am today in the home of inkle weaver, guitar strap and sash maker Annie. While she is at work I get to rummage through baskets of her colorful bands and sashes and samples….no two alike, so every visit brings forth something new!
Thank you to Kathleen who took me down to ground level to be an ant last weekend. Kathleen is a marine biologist and took me to the beach to go tide pooling…super fun!…While swathes of slumbering and interesting seaweed waited out lowtide above water, we peered into pools and found whole worlds of life and variety and movement and color and cleverness within.
And when we got home, Kathleen’s husband had made this…
I had remarked to Kathleen earlier that day that the vertical pieces of rebar sticking out of the top of the wall would make great warping stakes. It was too bad that they were soon to disappear within another row of blocks. I then told her about the woman in Peru who had warping stakes embedded in the wall of the hall of her house. She would stroll up and down the length of her hall creating her warps. And so, an idea was born.
Those metal pieces of pipe will be locked into place when concrete is poured into the blocks. Then, dowel rods will be placed within the pipes…..a wall warping board. I am jealous! Next will come hooks in the wall to which Kathleen can attach her backstrap. Warm, sunny days outdoors weaving….lovely!
Jennifer Moore, DY Begay and I in Santa Fe in July
Tinkuy is next week!!! I am not going… what will keep me from pining is the fact that I will be over the ocean thinking like a bird on my way to Australia on the14th.
My weaving friends Dorothy and Karen are going. A few of my Argentinian Facebook friends will be there and Jennifer Moore, with whom I backstrap wove in Santa Fe this year, will be going to teach the Peruvian weavers balanced double-weave pick-up. Jennifer wrote to me this morning to tell me that we will be roomies at CNCH next year. There will be some stories to tell!!
I hope that if you go, you will send me stories, reports and pictures that I could share on this blog or links to your own sites that I can include here. Have a wonderful time all of you!!!
Dorinda from PAZA Bolivia (no link as the website is temporarily unavailable.) and my weaving teacher, Maxima, will be going again. Last I heard, Dorinda was also going to take one of the teenagers. Dorinda met her funding needs with many generous donations from a variety of sources. Look out for Dorinda and Maxima there. I wonder if Maxima will outspin the Peruvian ladies in the speed spinning competitions again this time!
Dorinda and Maxima were my roomies at Tinkuy 2010
Jasmin Pitt of Sustainable Bolivia was recently in Independencia with Dorinda and her weaver friends and made a documentary about the weavers. Here is Dorinda’s description from her PAZA newsletter:
Making a documentary with the weavers of Huancarani became reality last April after over a year of talking about the possibility. Thanks to Sustainable Bolivia’s artist in residence Jasmine Pitt, most of the footage was shot in Huancarani in a day. Jasmine directed, filmed, and edited the documentary. The women were ready with their thoughts, comments, and stories about the past, present, and future of their millennium long weaving tradition. More interviews were held in Independencia and Jasmine and Dorinda walked miles so Jasmine could capture the breathtaking landscape on film. The musical group Sacambaya generously granted permission for use of their music. It was a collective volunteer effort. Through Jasmine’s lens you will gain insight into the personalities and lives of the weavers and their concerns for the future of their weaving tradition.
Amongst other things, I have decided to do a little tutorial this week on cutting backstrap woven fabric and covering the raw cut edge with a protective band.
This is my latest favorite way to create the flap on a bag and I was given the courage to try this when I saw some of the work of my GuaranÍ weaving teacher here in Santa Cruz. She makes cell phone pouches with rounded flaps. I don’t know the steps that Angela takes to create these and so, have come up with my own. Possibly I am a bit over-cautious in my ways, but my system works for me and I am pleased with the results.
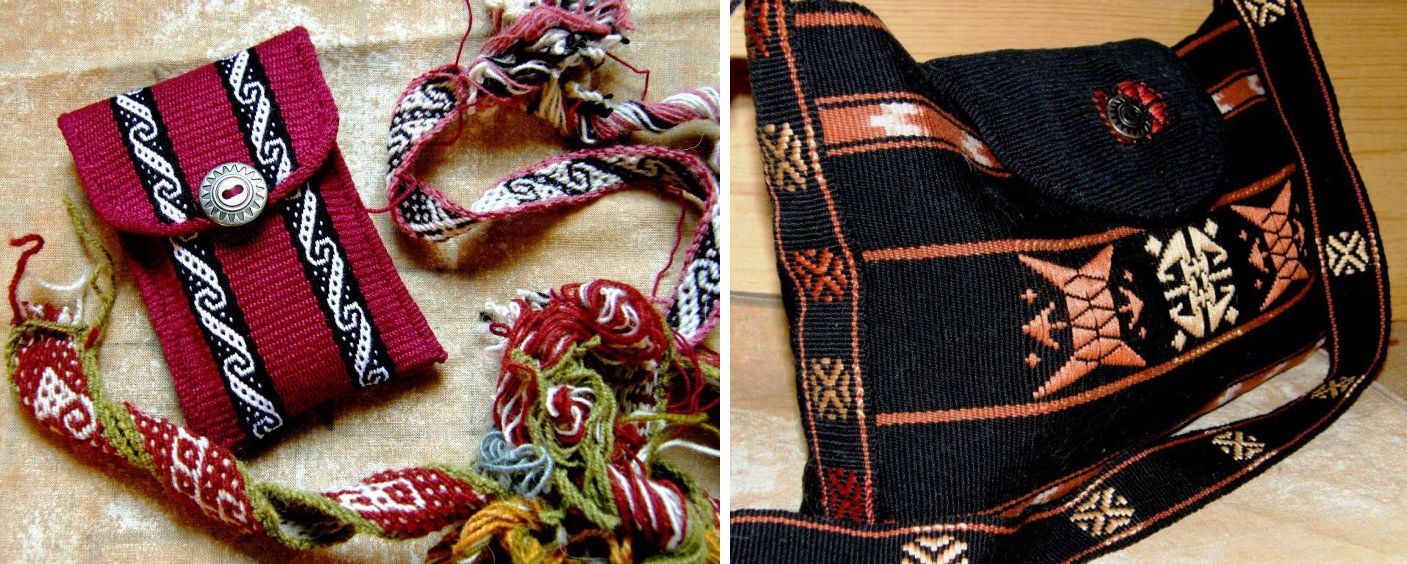
Making cell phone pouches is one of my favorite ways to use a piece on which I have been sampling structures or patterns. You can see the different ways in which I have formed the flaps. This often depends on just how much fabric I have to use. The alpaca sample bottom left, for example, is closed with a drawsting as there was not enough cloth to make a flap. The example at top left has a flap that was cut to shape and then covered with a tubular band.
Here are a couple more examples. The flap on the black bag was woven with quite a lightweight fabric compared to that used for the cell phone pouches. The tubular band, therefore was a bit heavy for it and caused the edges of the black flap to curl inward giving a convex shape. As it turned out that actually had its advantages! When the bag is filled with things and takes on a rounded shape, the flap curves nicely around it.
My latest bag project also has a rounded flap which is edged with a tubular band…
I had been calling this latest project “Tales from the Subcontinent” as it comprises designs from Bhutan and Afghanistan.
However, now it carries an element which has been influenced by Central Asia. Its closure tab was inspired by tablet- woven trim on Uzbek ikat-patterned robes.
I showed you pictures last week of the Uzbek garments that I saw at the International Folk Art Market in Santa Fe NM with their tablet-woven edging bands.
I give many thanks to Ute for writing to me and sharing what she knows about the Uzbek bands as I was about to launch myself onto the wrong path trying to weave one using threads in 4 holes of the tablets. Ute told me that they are created using only two holes. With my limited tablet-weaving experience, I would have been lost without that valuable tip.
The little wristband that I bought at the market is in the center. I changed things a little in my experiments eliminating the dark outer color and altering the way the red stripe was set up. I made a sample in a medium weight cotton to start and then made the final piece for the closure tab on the left. Originally I had wanted to make the entire strap for the bag in this technique but decided that it was a bit too “busy” to play such a major role in this piece which was already highly decorated.
In this picture I just placed a silver button on the closure tab but I was not all together happy with the way that looked.
And then I remembered that I had coins from my trips to Nepal back in the 80s and 90s.
The smaller one would do perfectly and would be in keeping with the “subcontinent” theme.
I just had to polish it up and then get creative in finding a way to attach it.
You can see the more subdued strap pattern, above, that I used in the end. I used the same pattern as that on the edging band for the flap.
So, “Tales from the Subcontinent” is in search of a new name. I won’t say that it is finished yet as I am now thinking….Wouldn’t it be cool to have some black and white ikat patterned cloth with which to line it?….a sort of “inner bag” with a drawstring top…
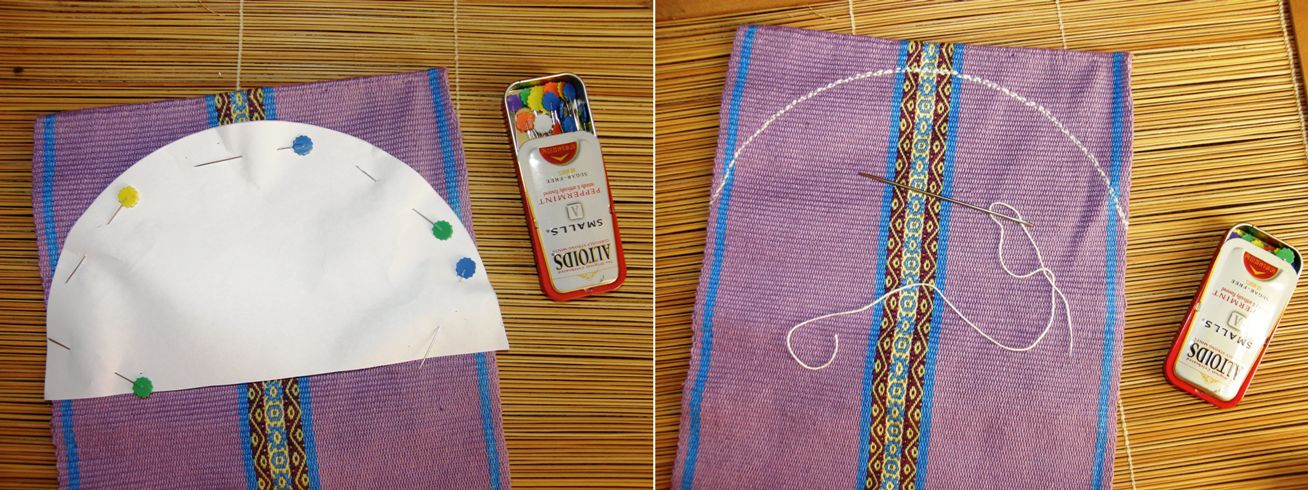
So, now we get to “cutting corners” and transforming a straight-edged flap into a rounded one…
I am using the lavender Andean Pebble Weave fabric that I was on my demo loom during my last trip. I really don’t like it much and decided that I could at least use it for a tutorial…
STEP ONE: Choose the curve…
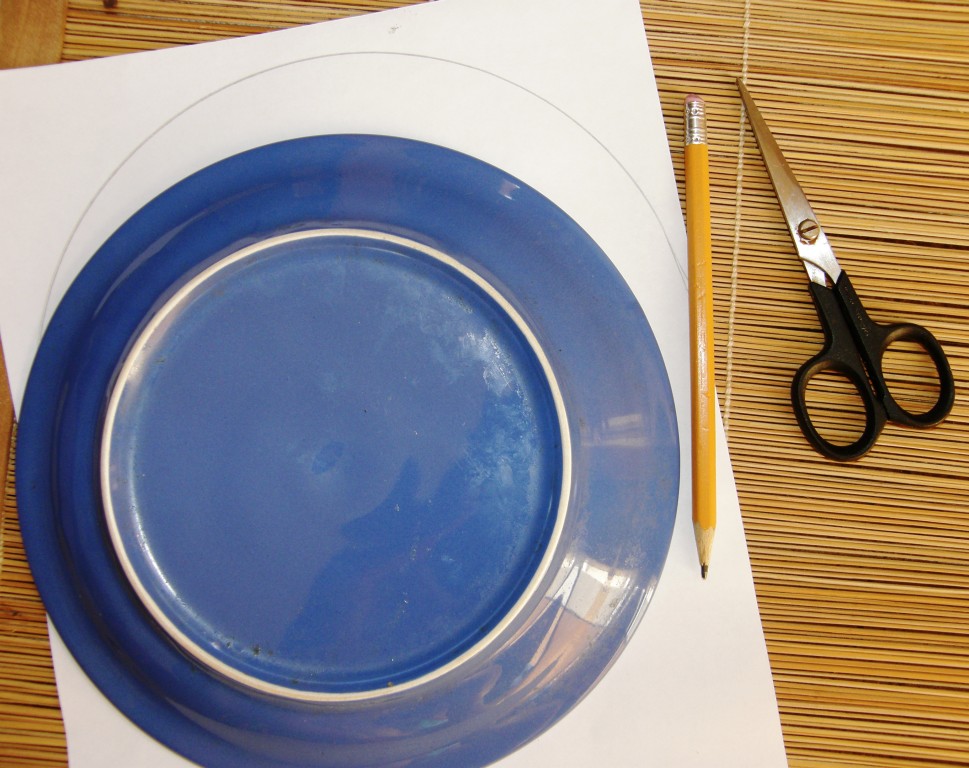
I have a small plate that has the right curve for the width of fabric that I am using. I used it for the black bag and saw that it would also work just fine for the lavender piece.
STEP TWO: Make a template.
I traced the curve on paper and cut it out.
STEP THREE: Pin the template to the fabric and sew along the edge.
I sewed by hand and used crochet cotton for the thread. It’s a good thing that beauty does not count! I backstitched from one end to the other and then returned using a running stitch for extra security.
STEP FOUR: Paint diluted white glue onto the stitches.
I used white glue, or carpenters’ glue, carpi cola , as it is known here. I diluted it with water, painted it onto the stitches on both sides of the cloth and waited until it dried before proceeding.
STEP FIVE: Cut the cloth and glue again.
I cut close to the stitches and then applied more diluted glue along the edge of the fabric. The glue goes on white but dries clear. The fabric I am using is dense and I needed to make sure that the glue got right into the weave. As the glue was drying I pinched the threads along the edge together to seal the edge. Once it was almost completely dry, I gave the edge a final trim (this is easier to do when the edge is still damp and supple). You may need to trim some loose weft ends or tidy up the edge a bit. Once it is dry and stiff, it will be harder to make fine cuts.
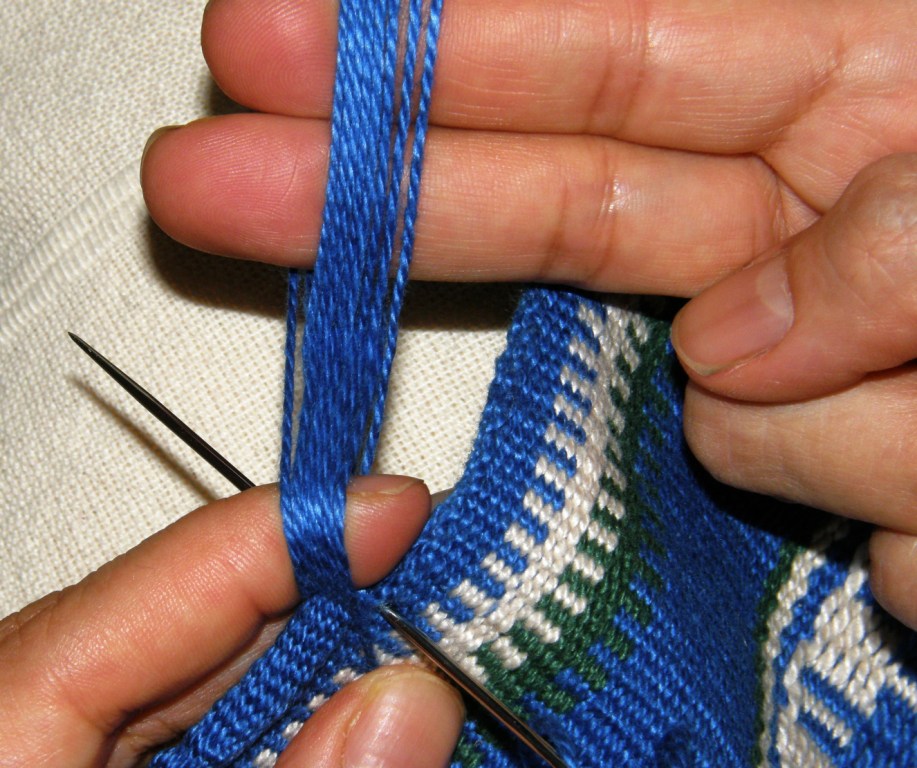
STEP SIX: Weave and sew your band to the edge.
Now you have a nice stiff secure edge to which you can attach a band. See this tutorialfor instructions on weaving and attaching tubular bands.
Judge the width of band needed to bend around the edge and cover the stitches and create a warp accordingly. Note that it is easier and often neater to weave these bands using a heavier yarn and few warp ends than fine yarn with many ends. I used a finer yarn here as I did not have a matching color in my heavier yarns. I used a heavier yarn on my recent black bag project and feel that that band is more attractive.
Make sure that your needle clears the glued stitches on both sides when it pierces the cloth. This way, the stitches will be completely covered by the band. Practice weaving and sewing bands many times on scrap fabric. It takes a while to have them turning out neatly and you don’t want to spoil your good fabric until you feel confident with the technique.
As for what to do with the warp ends when the band is done, I have suggestions for that on the tutorial page.
So, with the black bag finished to the point of being able to use it, I am now supposed to be getting on with the next in the wall hanging series. I had gotten as far as winding the yarn off skeins into balls for warping. And then came a distraction.
I don’t know what it is about arriving home after a trip. I have this urge to get rid of stuff that goes on for about a week. It’s great! It feels so liberating. So, stuff has been given away and ejected. The above piece was the cover of a photo album that I was given.
I removed the album to toss and kept the cloth. It reminded me that it has been a long long time since I last played with three colors in complementary-warp pick-up.
I have done three and four-color pieces (see the header of this blog) which are not double faced.
Here you can see what I mean by “not double faced”. I made this years ago and decided to hang it unfinished on the wall. It also reminds me that I used to get this beautiful fine wool/alpaca yarn when I lived in Chile. I used some leftovers of that yarn when I first came to Bolivia to weave this. How I wish I could get that yarn again.
The piece on the cover of the photo album is double faced. Only two colors show togther on each of the two faces at any one time…color A and B on the upper face and color B and C on the lower one. It is a bright and jolly piece and I love how the weaver flipped colors for just that one small section along the way…you can see how the yellow eyes on the green suddenly change to a red eye in just that one small part. Whether that is the center of the piece, I will never know as it was cut up to make the album cover.
Side ASide B
So, this is what I am playing with and what kept me up past midnight last night. These are the two faces. I wish I could make a smoother transition from the red background to the beige but this defeated me at 12.30am. I suppose it would be easier if my design weren’t continuous. This is a sampler to get my head back around the technique.
#########################################
Some news… Deb McClintock has started setting up her blog again after losing most of her web page content some years ago in some sort of internet glitch…..heartbreaking. It’s all about simple looms in SE Asia and promises to be wonderful. Deb was invited to lecture last month at the Textile Museum in Washington DC about Laos textiles, looms and techniques. Her new blog is entitled Looms of South East Asia.
And, of course, don’t forget my Australian mate Wendy Garrity’s blog about Asian textiles and looms…Textile Trails. Wendy provided a link in last week’s comments to a picture she took of a notched stick on a loom in Nepal that looks very much like the one I was admiring on the backstrap loom from Myanmar at the Santa Fe Folk Art Market. She was also able to extract more information about the tablet woven bands from the Uzbek representatives at the Folk Art Market than I was!
##########################################
More news…..AUSTRALIA!
I will most likely be going back to Sydney for a visit in late November and would very much like to meet other weavers!
The decision to make this trip has been a very recent one which makes getting people together for this a little difficult as it is so close to Christmas.
I haven’t been back in 4 years and am very excited. I’m looking forward to hitching my loom to a eucalyptus tree and weaving while listening to the magpies and kookaburras.
The kookaburra picture at left was taken by my brother.

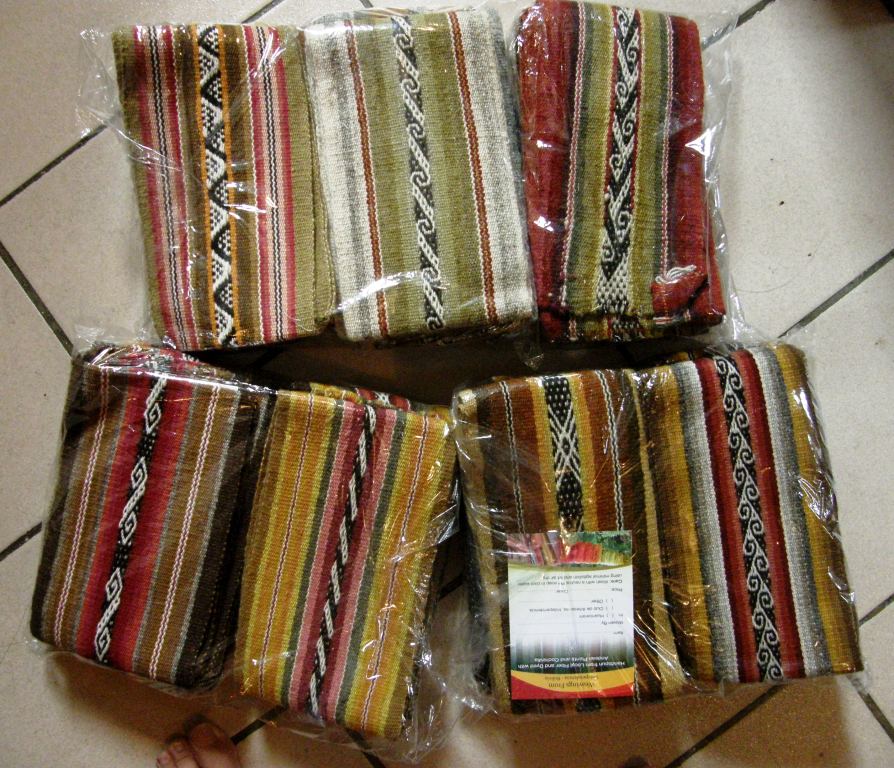 My home is a disaster of warps, yarn and sticks right now. I really had to resist opening the packages straight away, unfolding the luscious bands, and laying them out to view on every available space. Dorinda included a list of the weavers and each band is tagged with the weaver’s name. She also sent me a document with a short story on each of the ladies. It so nice to handle one of the bands, look at the picture of the weaver and read her story.
 Once I had put things in order, two days later, I opened the packages and released all those lovely aromas of wool, dyestuffs, and “campo”.
 Seventeen bands were patterned with complementary-warp designs and three used a supplementary-warp structure.

 Dionicia Crespo is the oldest weaver in Hauncarani still weaving to sell at 82 years old!

 Bands that represent three stages of life….you can see 82-year old Dionicia’s band above on the left. A piece by Vilma, Maxima’s eldest daughter, is in the middle and the band created by the youngest weaver of this collection of bands, 18-year old Adviana, is on the right.
 Family traits? The band on the left is Maxima’s, daughter Vilma’s is in the middle and older sister Narciza’s is on the right.

 Enough color? Let me calm things down a bit now with some black and white.
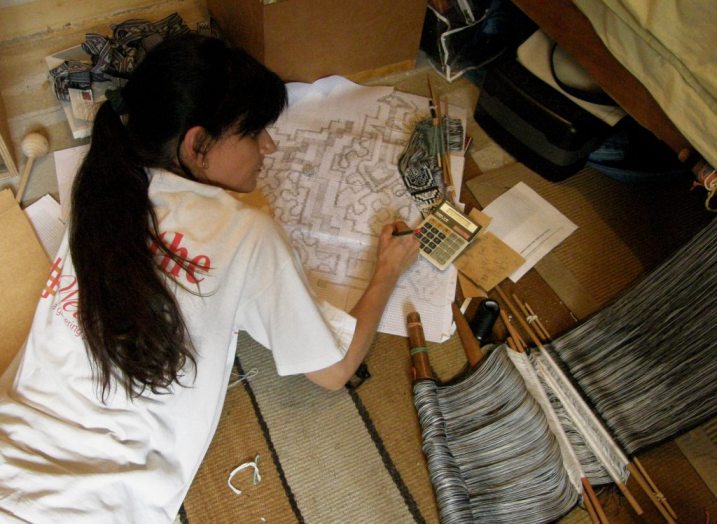
 Me? I am a paper-and-pencil gal. That’s the new panel for the wall hanging over which I have been dithering. I love charting this way. It makes me feel like a kid again and it is very relaxing. While a young fellow dangled from a cage outside my window and hacked away at my wall, I calmy colored in cells on my graph paper. Prior to that, I had just as calmly sat and made four sets of string heddles of 353 ends each on that black and white cotton warp.
 I finished the silk bookmark that was part of the Ravelry event but I am calling it a sample for now. There are several things about it with which I am not pleased and, as I have plenty of warp left, I will start it again with improvements.
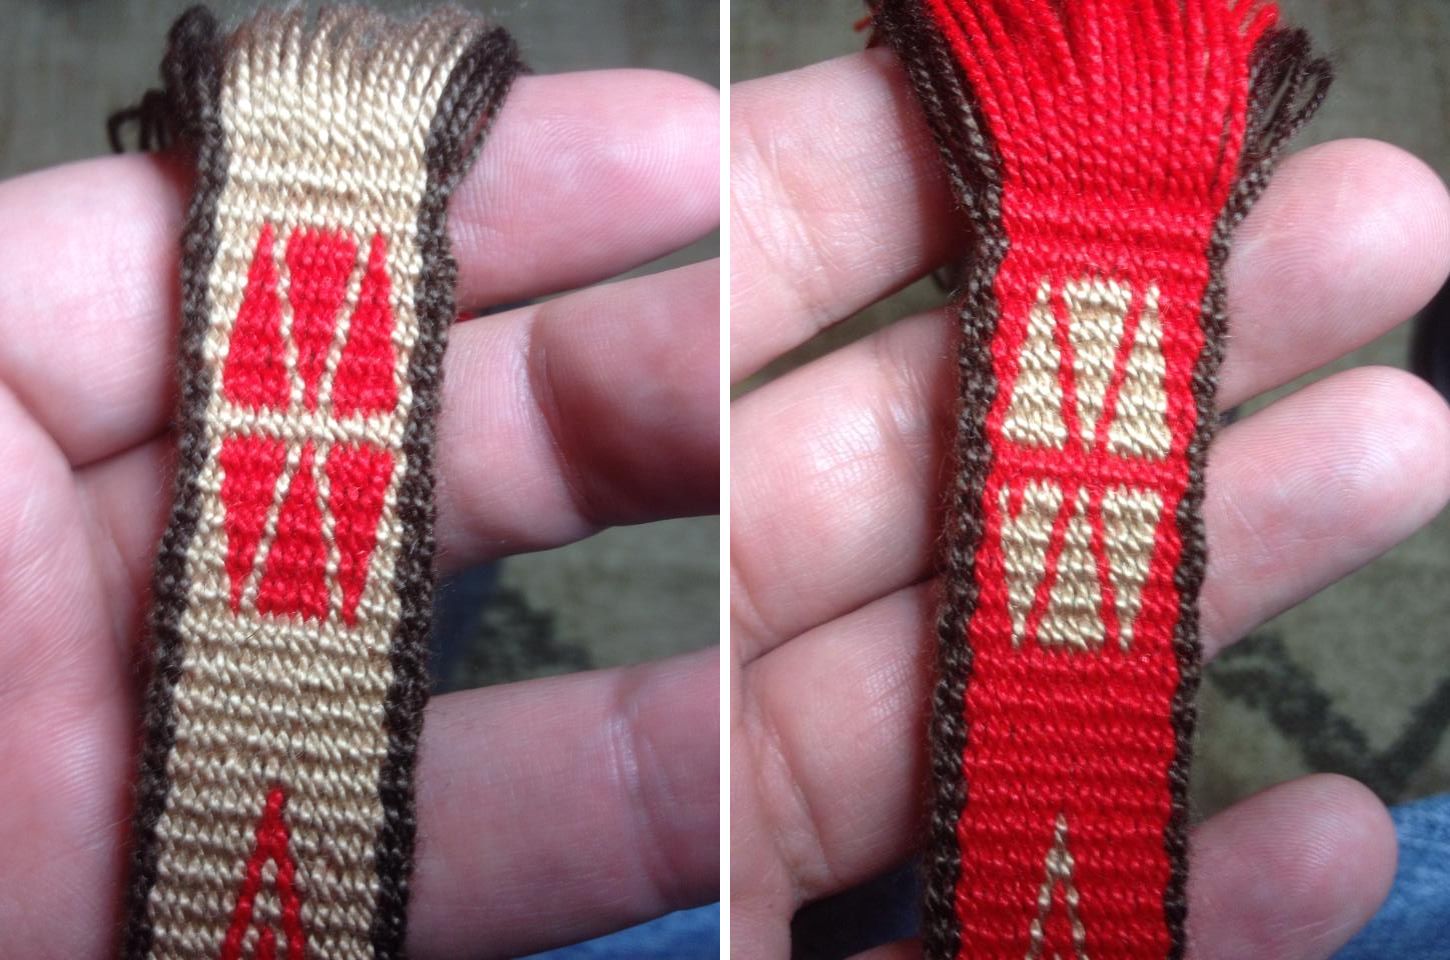 Ravelry projects have been coming in as we approach the end of the Sochi Games…
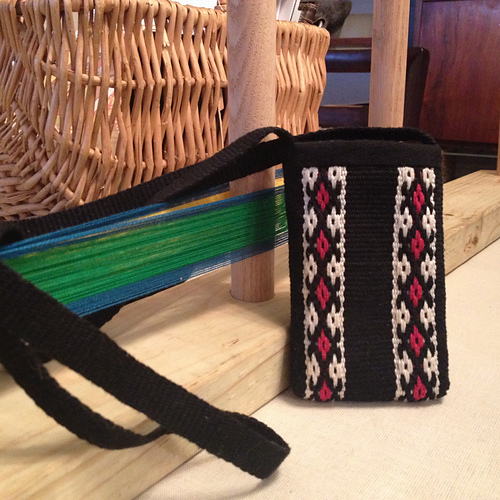 Kim finished her piece and sewed int a small bag for which she also wove a strap. Now she is on the lookout for a button to close it.
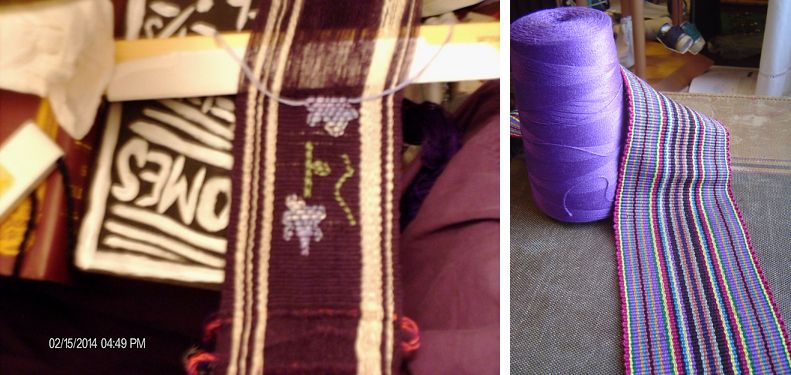 Joyful has been converting her flowere doodles into patterns using embroidery floss as supplementary weft on her plain-weave band. Julia will use purple cloth with her finished piece along with her sewing talents to create something useful.