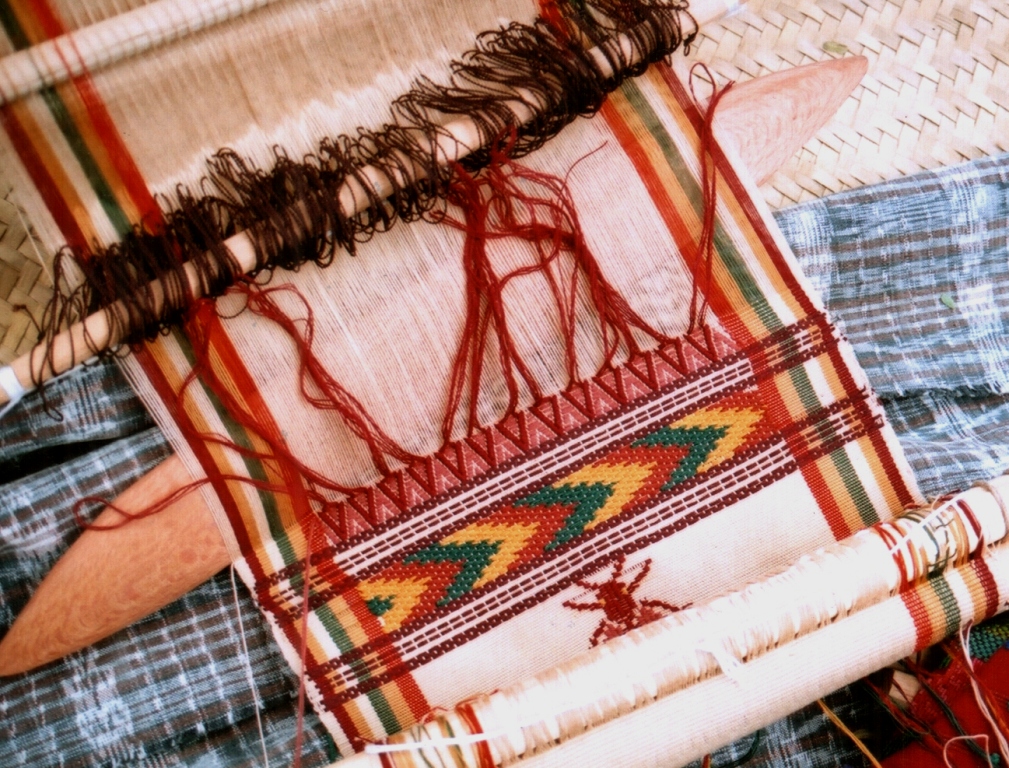
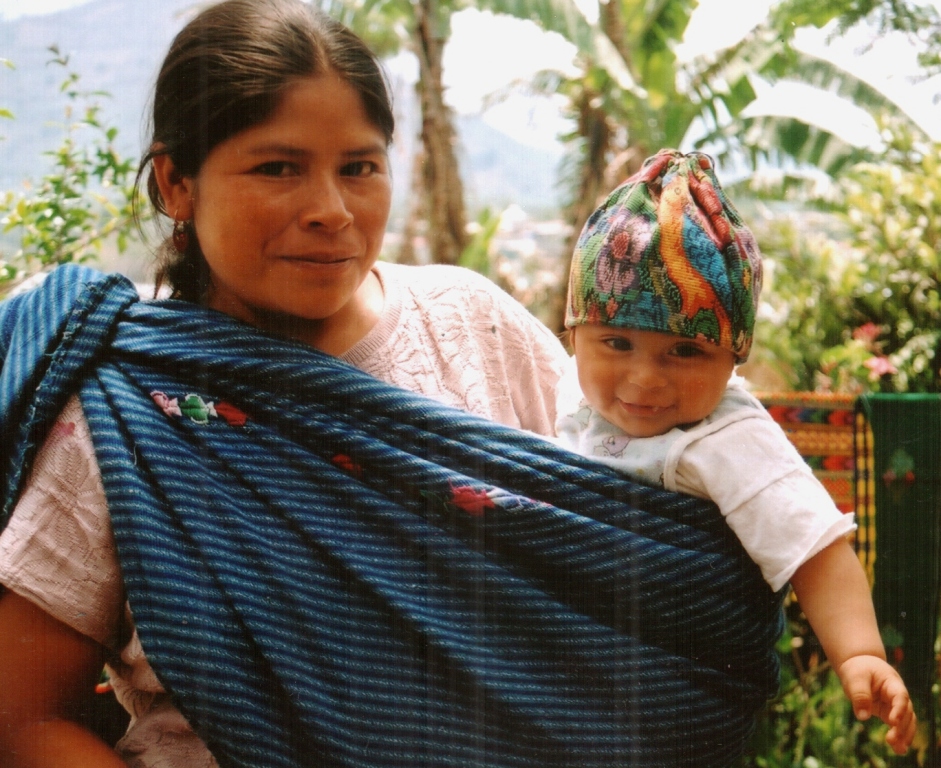
Backstrap Weaving-balanced weave, double weave and balanced double weave

BALANCED WEAVE, DOUBLE WEAVE AND BALANCED DOUBLE WEAVE….

I made some New Year weaving resolutions. What about you? One is to weave at least one balanced weave on my backstrap loom per month. So I got one done in January which I’ll show you later and I am planning February’s project. You will see that I am all about process rather than product for this project as all I know is that I want to weave a shadow weave piece but I have no idea what I want the piece to be. I am counting on an idea developing as I go through my yarn bags.

Another resolution is to weave reproductions of the designs on some pre Columbian textile fragments that I have gathered over the years. How did I get hold of these tiny scraps and fragments? Well, some industrious Peruvian artisans have been recreating Chancay dolls and dressing them in bits and pieces of old textiles.
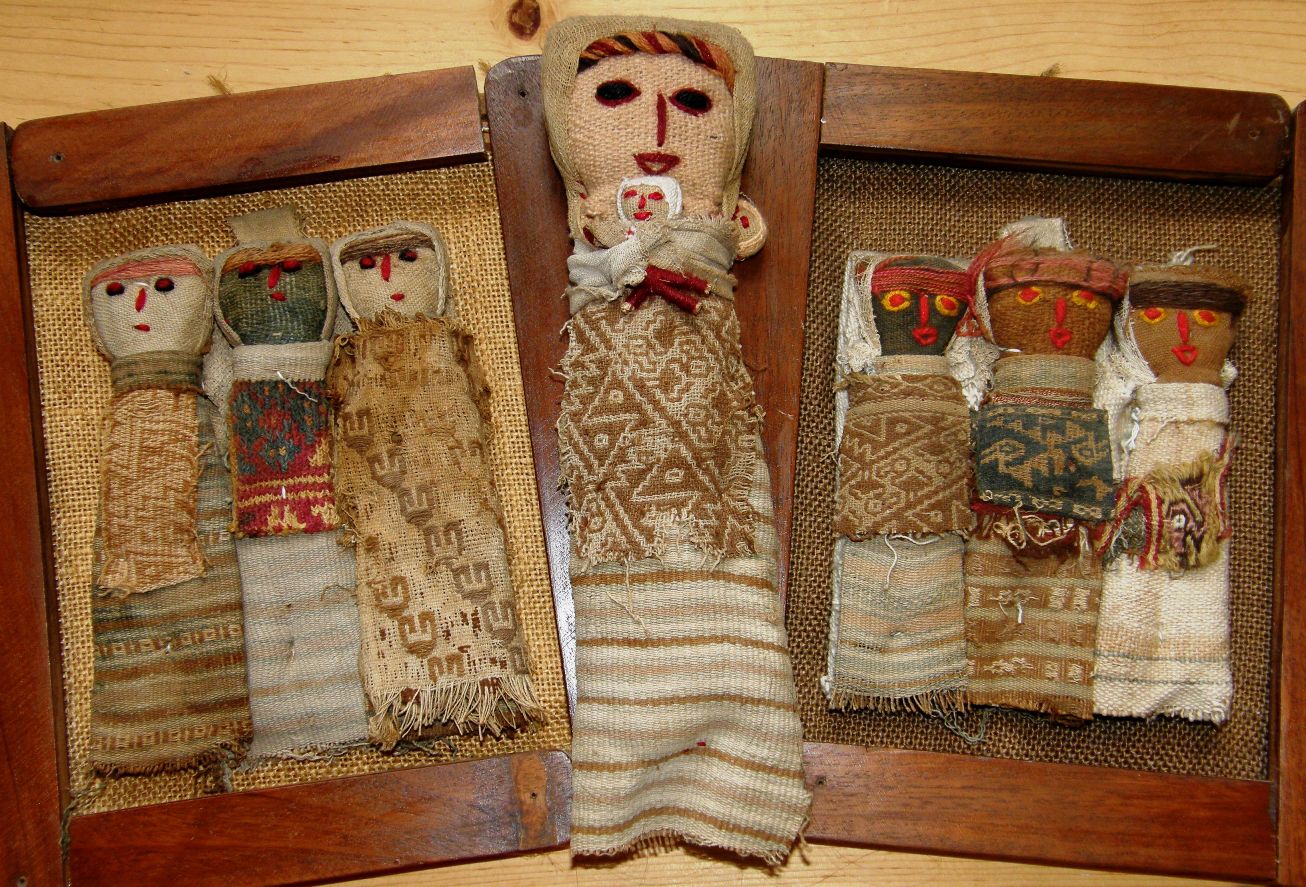
Sets of Chancay doll reproductions

The Chancay culture existed  on the Peruvian central coast from around AD 1000-1476. It is believed to have been conquered and incorporated into the Inca Empire in the mid to late 13th Century. The people of this culture were prolific weavers and, as the central coast of Peru is a particuarly dry area, many of their textiles have survived remarkably well preserved  and are kept in museums around the world.

I was dubious for a long time about the authenticity of the textile pieces. However, it just didn’t make sense that someone would weave structures, some of which are no longer woven in Peru, take all the trouble to stress the fabric in order to make it look old, tear it up, sew the pieces onto dolls and then sell them for very little in the street market.
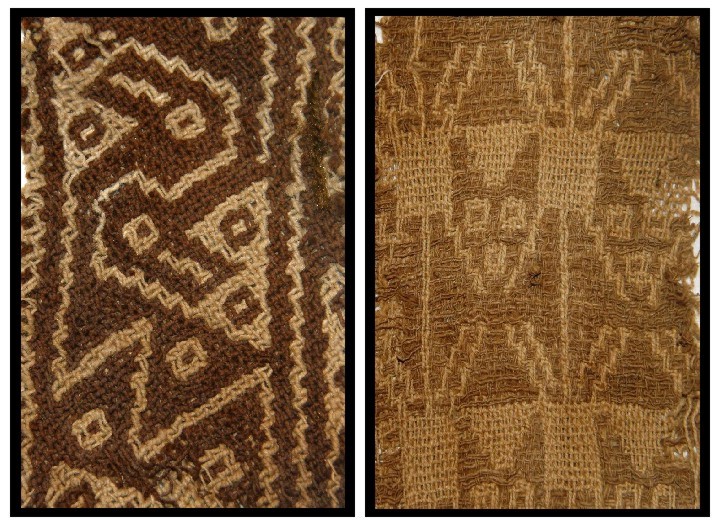
A close look at a couple of the fragments with bird and bat motifs

I have yet to find a good image of an authentic Chancay doll to make a comparison but apparently the originals did not have embroidered faces. Rather, the facial features were woven into a piece of cloth which was wrapped around plant fiber to form the doll’s head. As with most things, I imagine these dolls started out as quite faithful reproductions of the originals and that the quality of the work has since deteriorated.
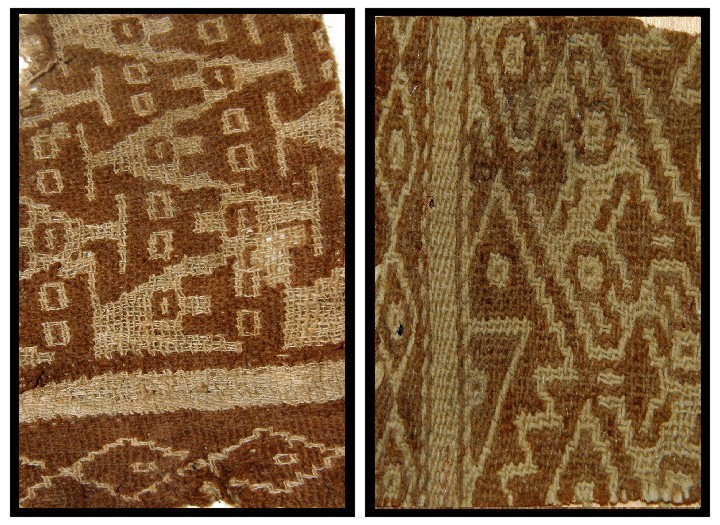
Two more pieces with bird and snake motifs

The original Chancay dolls have been  found in tombs and were possibly funerary offerings. Recently I found an article online which, not only confirms the authenticity of the ancient textile fragments used to dress and decorate the dolls, but also gives information abut the Chancay culture and speculates about the dolls’ purpose. It just gives me chills looking at and touching these pieces-something the museums won’t let you do! and wondering about the weavers, their looms and their lives.
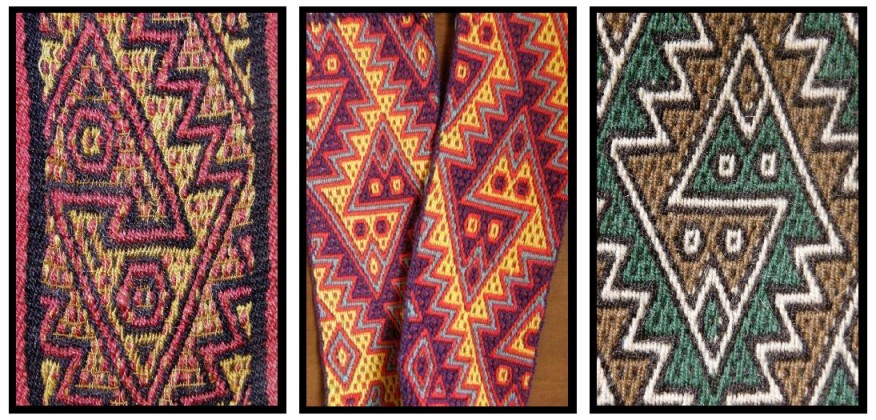
Snake motif in pebble weave

I have been weaving the designs I have seen in photos of museum pieces for years. The two pieces above  center and right were made by me in the 90s. Imagine the thrill when I found a fragment, on the left, with a very similar snake design some years later.
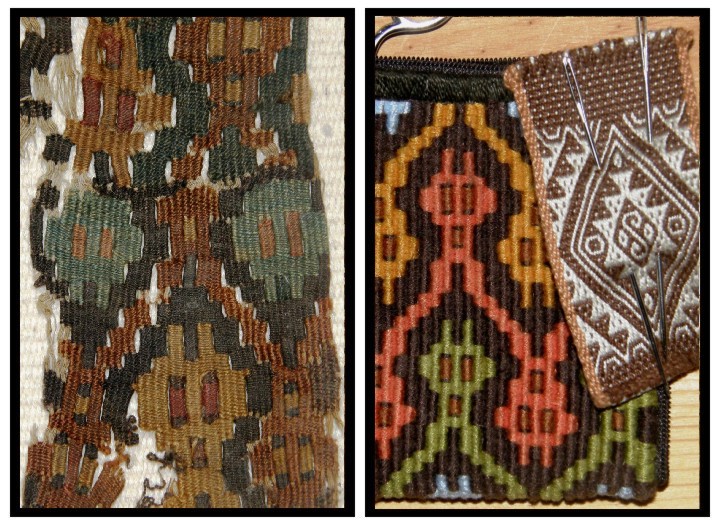
A piece in slit tapestry that I copied on my backstrap loom

I copied the slit tapestry piece at left on my backstrap loom without the slits and made it into a small sewing kit purse with a zip on three sides.

This little purse goes with me on all my weaving safaris. Some people tell me that the design looks like figures from a 1980’s video game!

This was a very slow and tedious weave using split embroidery floss for the weft. I was quite happy to see the end of this one!!

Bird motif in pebble weave

Again, I had woven this little 4-color bird motif many years before finding the little fragment almost completely in tatters on a doll at the Otavalo market. I had to work hard to hide my excitement while cooly bargaining with the vendor-bargaining at the Otavalo market is expected. Although my bird is a little different and was copied from a book, it is still thrilling to see a  similar original piece.

According to the aforementioned article, birds were highly esteemed in these cultures “because of their ability to cross between earth and sky” as well as due to ” their association with water…..and source of guano for fertilizing crops”.
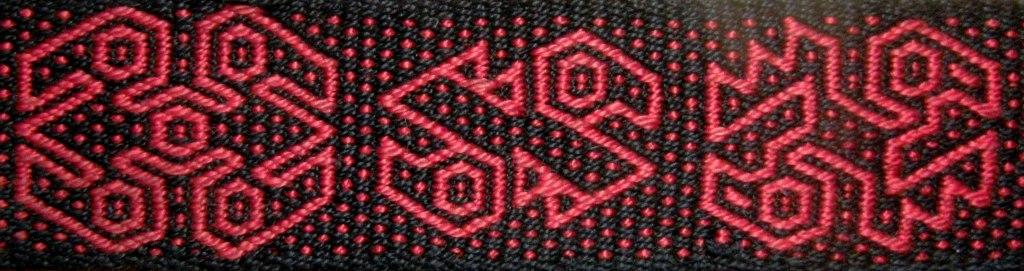
Pre Columbian bird motifs

I love these birds and they find their way into a lot of my weavings.
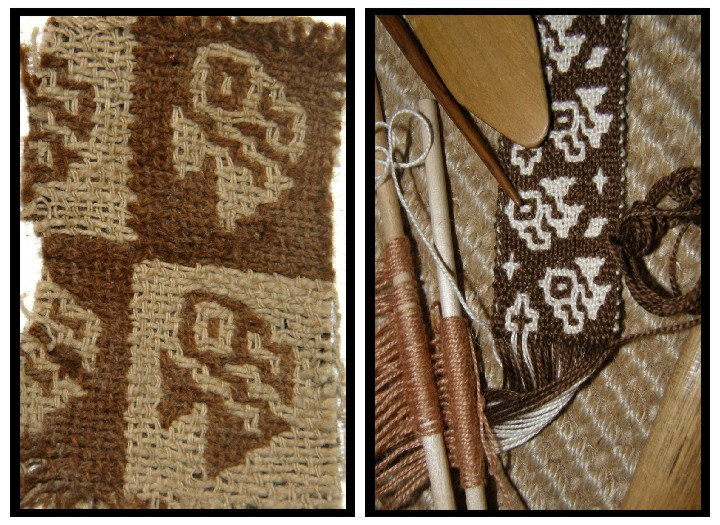
Balanced double weave bird figures

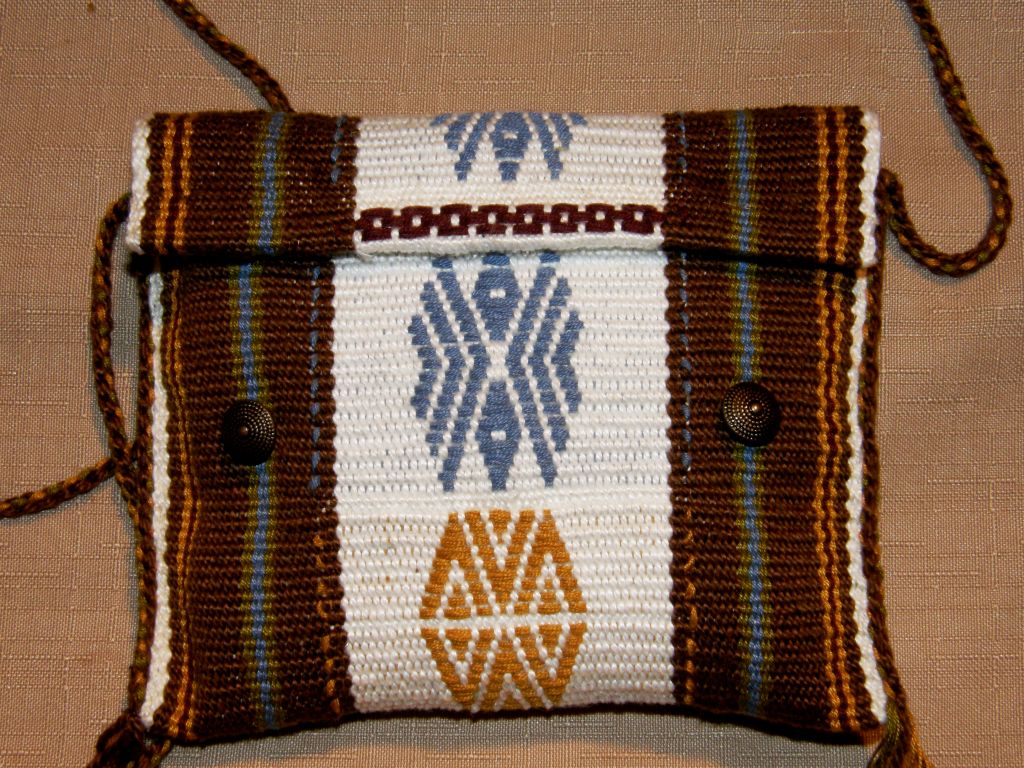
Which brings me finally to balanced double weave and my weaving resolution for the year.  This structure is no longer woven here so there is no one around to teach it to me. I found out that the Huichol people in Mexico weave it and recently got Chloe Sayer’s Mexican Textile Techniques which has pictures of some examples. I had dismissed the instructions by Suzanne Baizerman in Double Woven Treasures of Old Peru as they were written for the treadle loom but recently returned to them to find, to my delight, that I understood them. So I set to and wove the above band using the pattern chart in the book which just happens to be the very same bird motif that I have on a doll fragment.  I used four sets of heddles for this weave and kept the cross sticks in to help spread the warps. This was just a narrow band.  Now I hope to make a large wall hanging incorporating bits and pieces from several of the fragments.
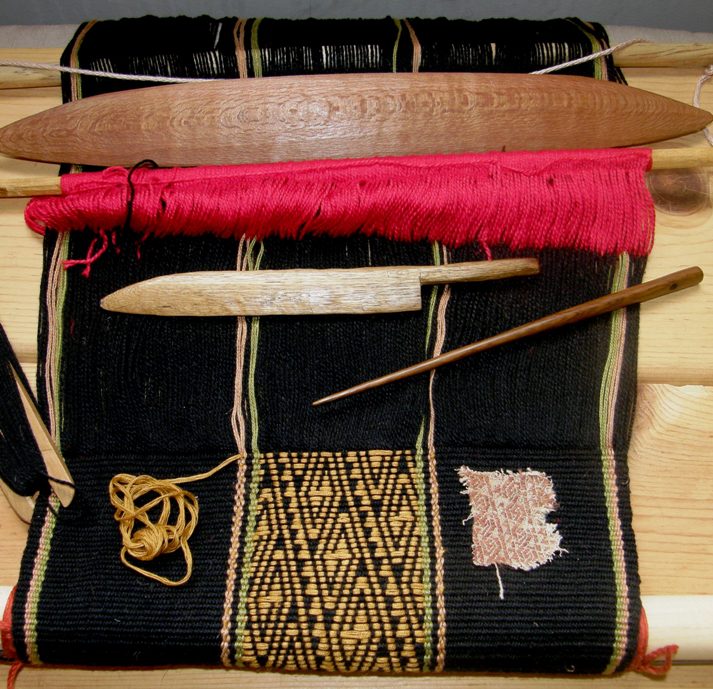
Something that is on the loom at the moment….supplementary weft patterning. You can see the tiny fragment from which I am copying the design on the right. This was another exciting find as, at least here in Bolivia, I have not seen this technique used for anything other than hat bands and on one old chuspa in a book. I would love to know the original use for this piece.

You can find the chart for this design here. I have also put the chart for the Abba Yohanni double weave design from last week’s post here.

This is just a small selection of my fragments. I am sure that more will show up in future blog posts as I strive to reproduce them. There is one technique that I as yet have not been able to identify.

Now what about those balanced weaves? I am still very much into my recently gifted rigid heddles and have been using them to make samples and a few useful pieces.
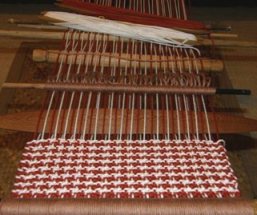
"Strawberries and cream" pinwheel mats

The rigid heddles arrived while I was in the middle of this “strawberries and cream” pinwheel piece. Rather than struggle on with my multiple stick spacers, I added the rigid heddle to the backstrap loom and finished it in no time.

Last month we had a WAL at Weavolution weaving rosepath motifs so I used my rigid heddle as a spacer and beater and used four sets of string heddles for the motifs.
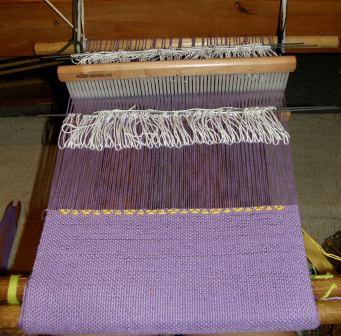
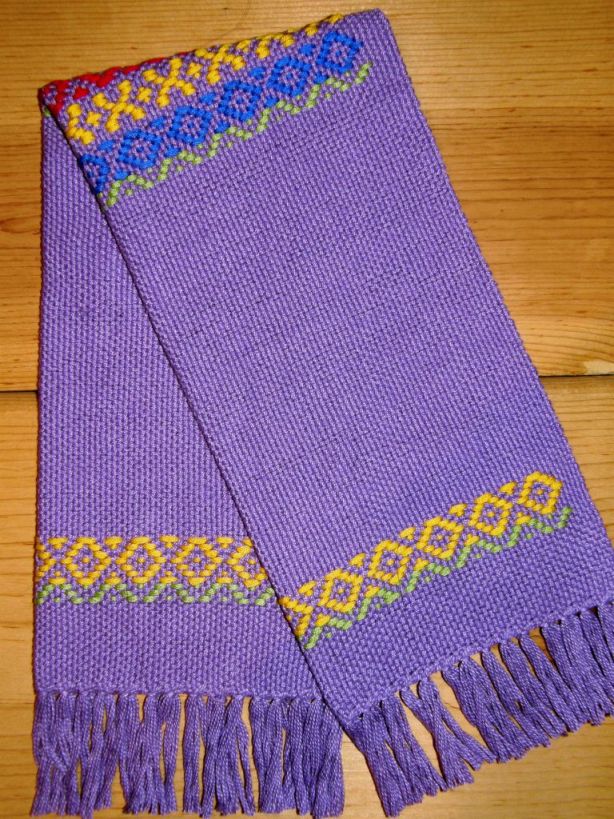
Spring garden table runner
A small log cabin sample

Sometimes I just mess around and make samples trying to discover what is comfortably possible on my backstrap loom. The above log cabin piece was the first balanced weave I tried before my rigid heddles arrived. I thought the squareness of the design would look good as a notebook cover. I’ll take this little notebook along for my next weaving classes wherever that may be. It is nice to find a use for even the smallest of samples. You can see my test piece for the llama bookmark has been padded with foam and made into a pin cushion saddle cloth for the ceramic llama!
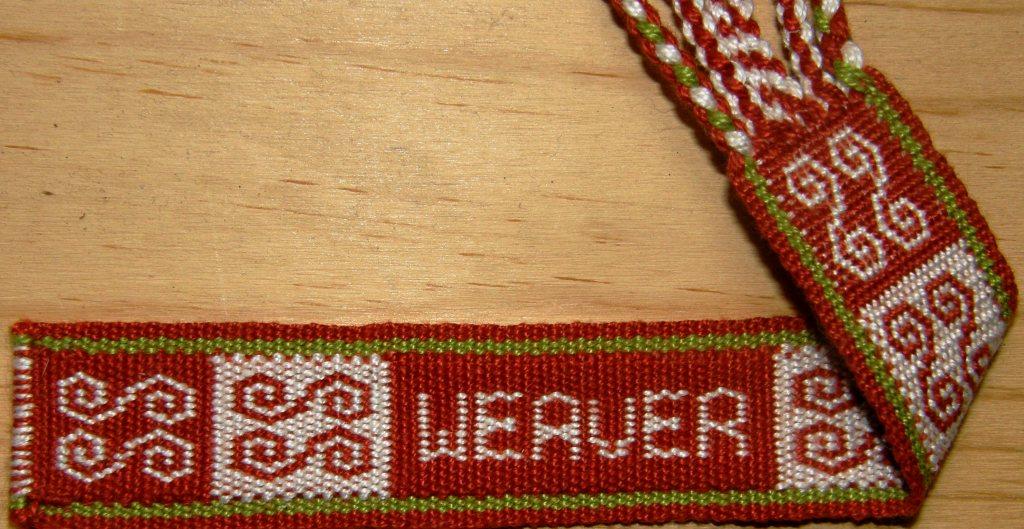
As the title of this post suggests, there is also some warp faced double weave to talk about. The last of my weaving resolutions is to design some nice letters to weave in double weave. I have been very much inspired by Linda Hendrickson’s beautiful book Please Weave Me a Message where she has designed alphabets to weave with tablets. You may have listened to Syne Mitchell’s recent interview with her at WeaveZine. I hope to come up with something like that for double weave. My stick alphabet above looks very humble next to her beauties.

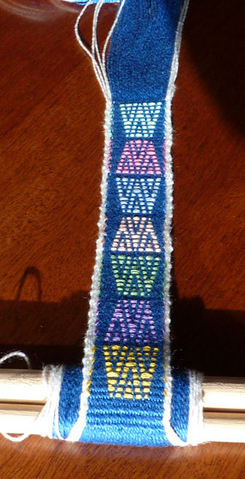
Lastly, I would like to show off some work by one of my blog readers. Ann Littlewood wove a supplementary weft patterned  band using embroidery floss for her supplementary weft. It is a great way to “paint” in designs and play with colors. It absolutely makes my day when I hear from people who have  used my instructions. 🙂
I will leave you with a cheery little Otalavalena, below, at her brightly colored market stall at the enormous Saturday market. Otavalo is a town in Ecuador which has a lively and popular craft market every Saturday and is where I bought some of my dolls. Goods from near and far are sold there such as braids and beads from Peru, molas from Panama and Colombia and belts from Bolivia and Guatemala as well as an enormous variety of weavings and crafts from all over Ecuador. While the market largely caters to tourists, locals also shop there for clothes, footwear and beads.

Thank you for the nice comments last week. I am glad you found the videos useful. One of  the visitors from Argentina, who has a limited understanding of English, had one of those “aha!” moments when she watched the double weave video. I hope to be able to show you one of her weavings soon 🙂
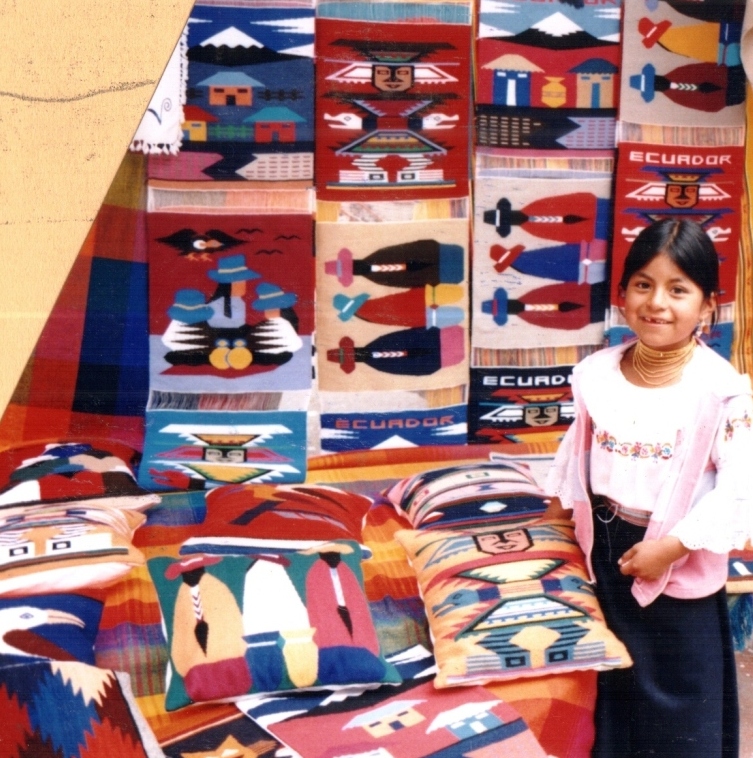
A girl from Otalvalo in typical dress-embroidered blouse, "anku" secured by a woven belt, beads, woven hair wrap and alpargatas

Backstrap Weaving-Coca leaves, chuspas and more double weave

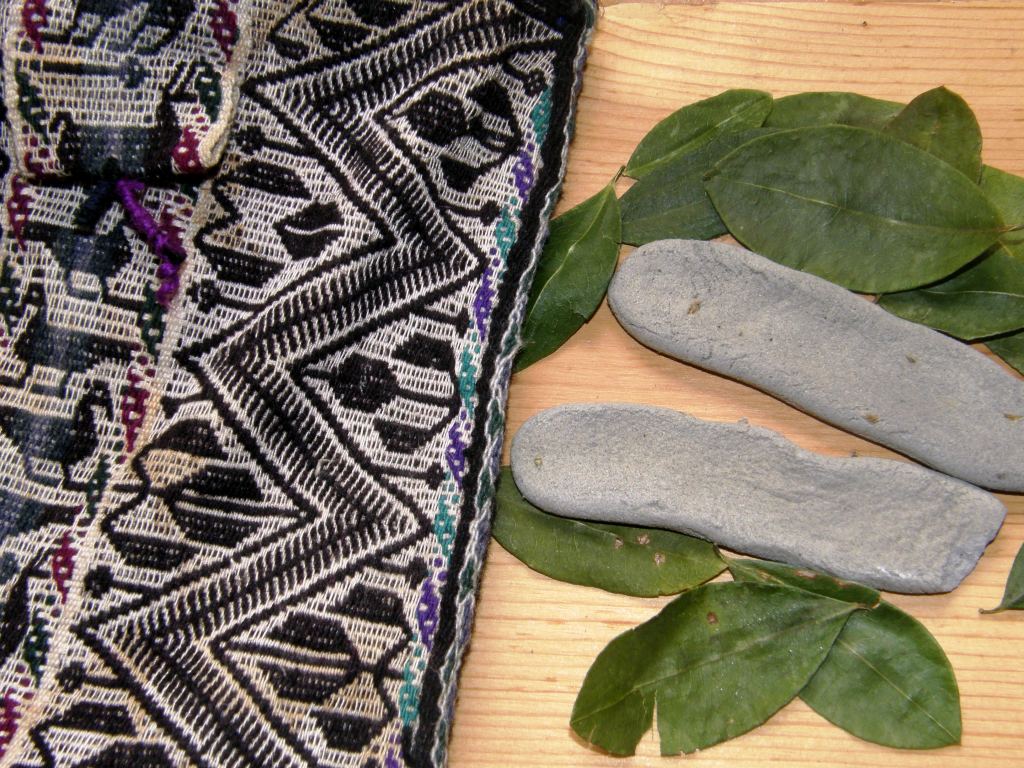
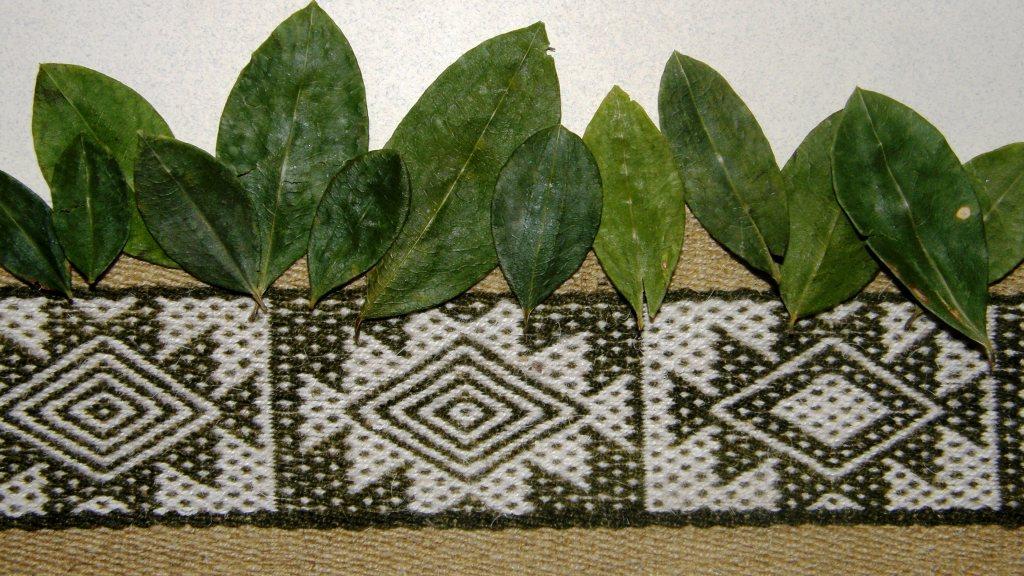
The coca leaf – I have enjoyed it brewed in tea, chewed it on hiking trips and used it to dye my handspun llama fiber above.  However, a  foreigner like myself can not even begin to understand the role that this humble leaf plays in Bolivian life and culture.

Lately there has been a lot more talk than usual about this piece of Bolivian cultural heritage as Bolivian President Evo Morales has recently announced plans to launch a new carbonated energy drink on the market which has the beloved coca leaf as one of its main ingredients. It should make an appearance in the next four months and will be called “Coca Colla” (the ‘olla’ in Colla being pronounced like the ‘oy’ in boy). “Colla” is the word commonly used to describe people from the altiplano of indigenous origins. This is President Morales’s attempt to erradicate coca’s unfortunate association with cocaine and drug trafficking, increase its cultivation and have it  recognized instead, as stated in the new Constitution, as  “cultural heritage, a natural and renewable resource of biodiversity in Bolivia and a factor of social cohesion”.

Coca is used to make tea, plays a part in religious rituals and is chewed in order to suppress hunger, thirst and fatigue as well as to alleviate the symptoms of altitude sickness. I have chewed it myself on hiking trips and I have to tell you that there is knack to getting a wad of it tucked neatly away in your cheek and not all over your teeth thus completely ruining your smile for the day! Bags of coca leaves are sold with lejia-the gray colored bar seen at left, comprising compressed ash and other substances, which is chewed along with the leaves and acts as a catalyst.

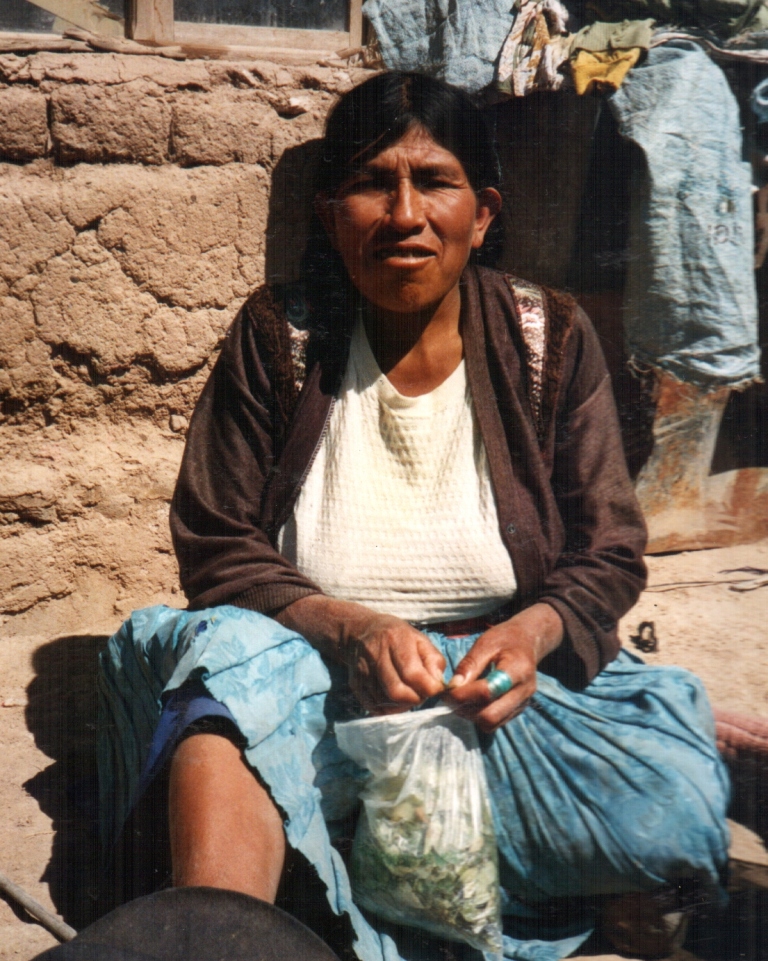
A special woven bag called a chuspa is used to carry coca leaves but I have only seen these in use at festivals and other celebrations. On a normal day, it is more usual to see people taking their coca leaves directly from a regular plastic bag. My weaving teacher, Julia, at right, is taking a break from classes to enjoy some coca.

While Julia and her sister Hilda both know how to weave a chuspa, strangely neither of them actually owns one. When I expressed interest in learning to weave one, they had to consult with each other in order to remember how to wind the warp. What is special about warping for a chuspa is the fact that most chuspas include a small pocket which is designed to carry a piece of the lejia or perhaps a few coins and allowance must be made for this in the length of the warp.

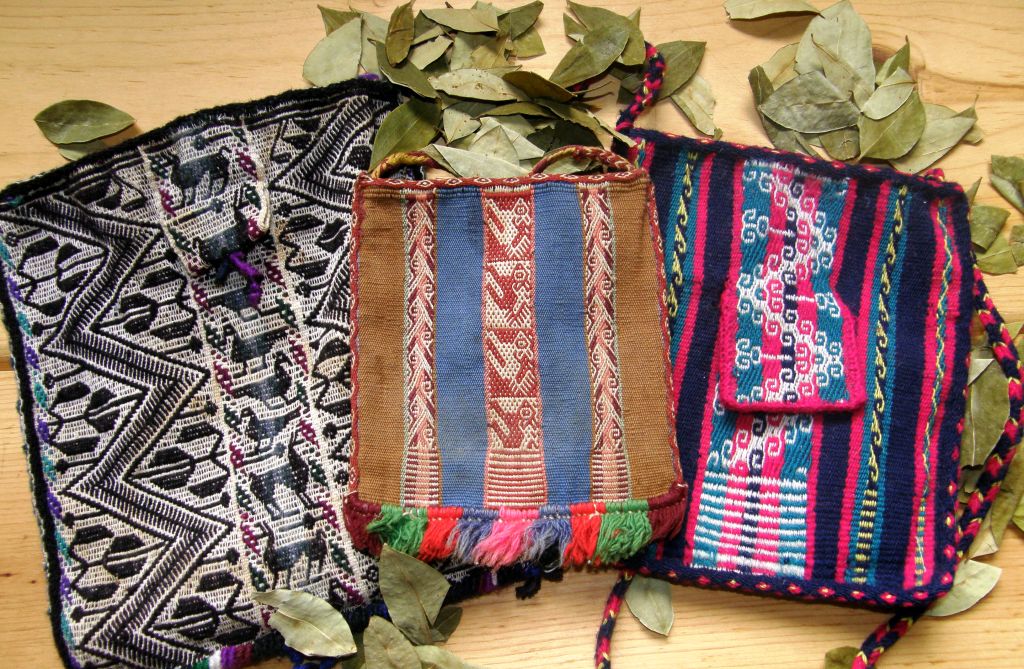
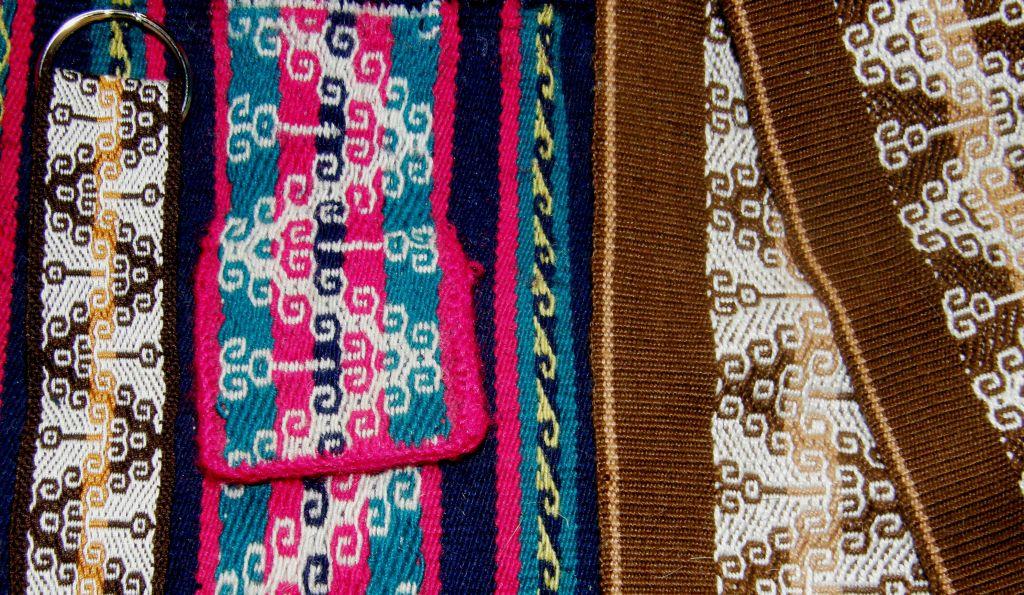
Three Bolivian chuspas, each woven with a different complementary warp technique. The one on the left was made by my weaving teacher in Candelaria and has a pocket. While the one in the middle was bought in Potosi,  I am not sure of its exact origin. It does not have a pocket. The one on the right with a pocket is the one I made in Potosi under Julia and Hilda’s instruction.
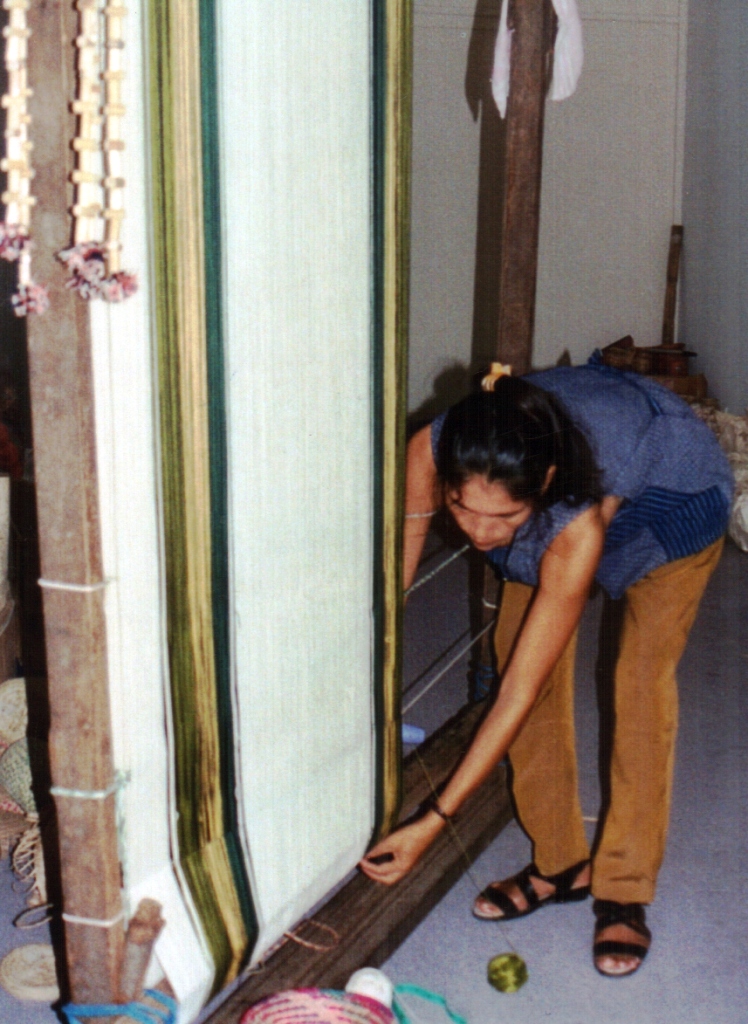
Julia and Hilda are preparing the warp for my chuspa. You can see the extended piece of warp on an extra stake which will become the pocket. We are using the brightly colored respun acrylic yarns that are very popular in this area. 
We are all at work here. I am working on my chuspa, Hilda is backstrap weaving a band while Julia, in the background, is cutting fleece to spin. My chuspa is a four-selvedge piece so I wove from one end, turned the piece around and wove from the other end and then had the usual agony of trying to squeeze weft into those last few rows to close the gap.
Hilda taught me to weave the ”rolling river”design into my chuspa. Once off the loom, the sides and pocket are joined using a variety of decorative techniques.We used triple crossed knit looping to edge and sew the sides of the pocket. This is a very pretty technique that not only binds the sides but also completely curls over and covers the edges.
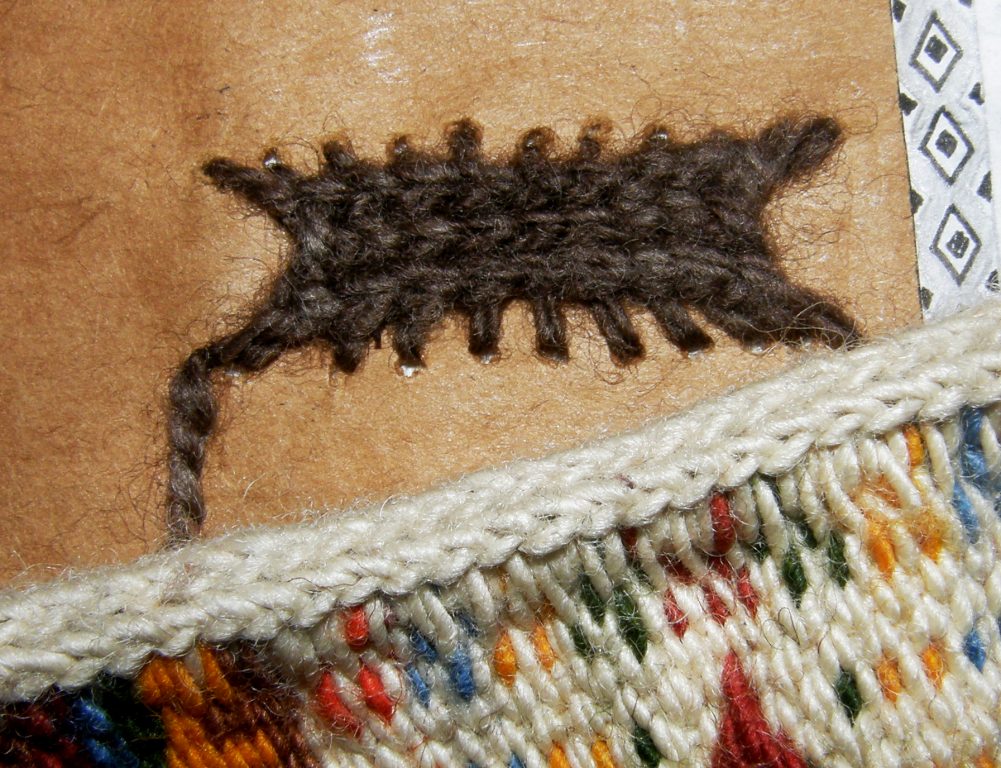
You may be able to see the crossed knit looping more closely here on the edge of another bag that I wove. The brown sample shows how it would look worked flat rather than curled over an edge.
A tubular band was woven with the weft being used to sew it to the sides and base of the bag as it was woven.  A six-strand flat braid was made for the bag strap. The chuspas that I have seen being used in festivals are highly embellished with pom poms, tassels and multi colored fringes.
A small selection from the variety of braids, bands and tassels used to decorate Bolivian chuspas
The ”rolling river” design has since become a great favorite of mine and I have woven it into tool bags, sashes and key fobs on my backstrap loom.

In 1998, I spent some time with a weaver in the village of Candelaria near Tarabuco and learned the weaving technique that is used in their chuspas and carrying cloths.

A Tarabuco style chuspa made by my teacher Felicia . The pocket is so small it is hard to see it being of any real use. The other piece is a small purse which has been woven specifically to be sold to tourists. Note the cute strolling llamas along the bottom.

I returned to Candelaria last year. Felicia is no longer there but the first person I met as I entered the village was Felicia’s cousin-also called Felicia! who took me to her home and graciously allowed me to film her weaving on her oblique loom. The next day I went to the market in Tarabuco where there was a cultural festival and was able to capture a small piece of video of a weaver warping for a chuspa. She was constantly being interrupted by ladies asking her questions so the clip is very short.  I don’t know how well that warp could have turned out with all those pauses. When I warp, no one can speak to me!

So here is the short video (yippy! I have finally figured a way to get around my erratic internet service and upload heavier videos). The first part is the weaver warping for a chuspa with two colors around four stakes. You will see the extra stick she uses on which to warp the extra long part for the pocket.

The second piece is Felicia-keep an eye out for the kitty snuggled in her lap while she picks up those warps with lightning speed!


WHAT’S ON THE LOOM?-AN UPDATE

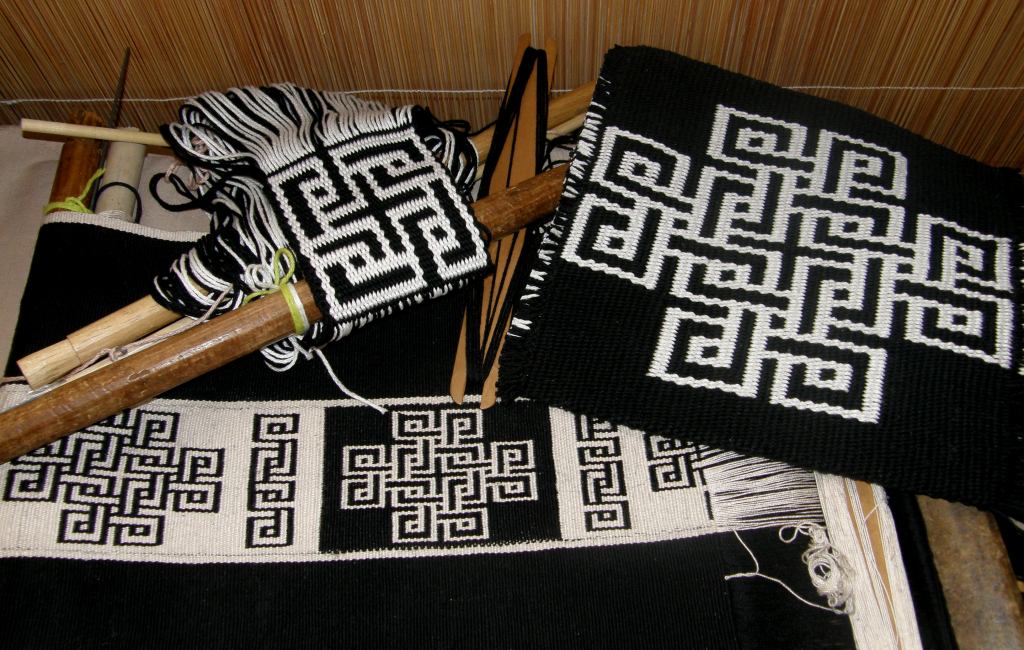
I have been working away on my Abba Yohanni inspired piece and have decided that I am going to make a table set to take as a gift on my next visit to Australia. So, the piece you saw last week will be a table runner. I have made some progress on that and have reversed the design and am just starting the final motif. In the meantime I couldn’t resist seeing how the motif would turn out in 12wpi cotton and so wove it into a (rather large) hot pad using one-weft double weave technique and then wove a small portion of the motif into a mug rug. I am thinking about weaving four placemats to go with the set with a piece of the motif woven with a supplementary weft in the center of each.

Abba Yohanni inspired set in progress


Backstrap Weaving- A Word or Two and a Video on Warping.

I love how easy it is to warp for backstrap weaving especially after reading and hearing about what is involved with warping those bigger table and floor looms-all that threading! However, finding the place and equipment for warping for the backstrap loom is often the problem. Finding the sticks  to put a loom together seems to be relatively easy, making a nice beater takes a little time and thought but where and how to wind that warp-now that can be tricky.

As you can see above, my first weaving teachers in Peru taught me to make tiny bands using a tiny warping board. I learned two techniques with them and was eager when I got back to my home in Chile to incorporate both into one large piece.

Perhaps a  little over ambitious but you can see the results of my attempts to wind a longer wider warp. My warping stakes leaned horribly and I ended up with this wonky thing-look at the far loom bar and the tilt on it! Firmly grounded warping stakes are a must.

Well,  I persevered and put a lot of work into that piece but it was never quite right. At least I was satisfied that I could weave the techniques without the supervision of  my teachers.The piece itself ended up in a box. Recently I got it out and salvaged what I could and am now using it to cover some small photo albums that I take with me on my travels.

The colors and layout were inspired by woven sashes that I had seen on Taquile Island on Lake Titicaca,  Peru.

Photo album covers made with the two patterning tecnhiques I learned in Huancayo, Peru.

A year later I went to Bolivia and studied with two sisters in Potosi. They weave their large pieces on a staked-out ground loom and only use a backstrap set-up for small bands. I love the way they warp there. Two women seat themselves at each end of the loom and roll the ball of yarn back and forth while winding the figure-of-eight. The only problem–you tend to talk too much and lose count. Neither of us was counting in our native language-Hilda’s being Quechua and mine, of course, English. Between that and the chatting we lost count many times!

We are using respun acrylic yarn in the bright colors that the weavers in Potosi love. With two people, this would be a great way to direct warp for backstrap weaving.

The weaving I worked on in Potosi is almost finished here. It is a four-selvedge piece and there are a couple of inches to go to close the gap. It took all day to weave that last bit!
Warping the Potosi way (almost)

Probably nostalgia for the fun I had had with Hilda and her sister Julia in Potosi led me to try the following way of warping  when I got back home to Chile.

I can tell you right now that it is not as entertaining to do alone and it is pretty slow and difficult trying to manage two colors at once as you need to do for double weave and complimentary warp weaves.

Neverthless I got this warp done, it was well tensioned and even and I wove a big bold design inspired by designs of the Mapuche people of central Chile and Argentina.

One of the Mapuche inspired designs I wove into the above piece.

I traveled a lot more, met many weavers and saw a lot more ways to warp for a variety of looms and techniques, some of which I’d like to share with you here.

Making a dovetail warp for the collar of a poncho in Otavalo, Ecuador. Note the horizontal bar that helps stop the stakes from leaning in towards each other.
In Salasaca, my teacher Felipe wound a mini dovetail warp for me to take home just in case I forgot how to make one for the belt weaving technique he taught me. This was put together hastily. The sticks leaned and the resulting warp was crooked but it was just meant as a reminder and served its purpose..
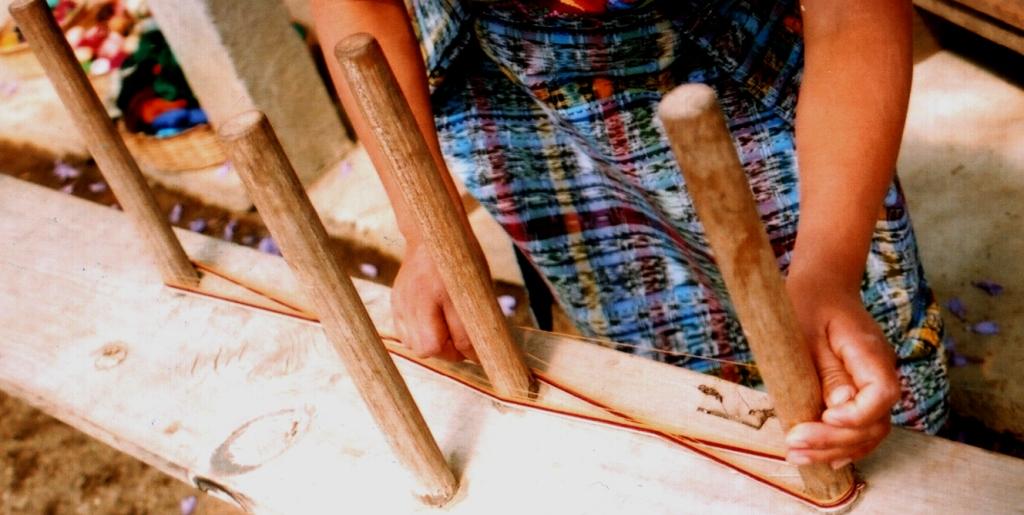
Look at this beauty from Guatemala at a nice height so you can stroll up and down with your yarn.
Warping for a hammock in Santa Cruz, Bolivia. This would certainly give you a work out.
With my teacher, Trini, looking on I am learning to make a dovetail warp for a mini hammock in Zapote, Ecuador
Probably the set-up I would most like to have–just the 5 stakes that my teacher in Santa Catarina Palopo is using here.
My favorite way—group warping! We are making a straight warp here with stakes and metal rods driven into the ground-Salasaca, Ecuador.

Probably the most interesting system I saw, which, unfortunately, was impossible to photograph, was near Huancayo, Peru where a woman had stakes embedded in the walls of the hall of her home at chest level so she just had to walk up and down the length of the hall to warp. Now if only I had a longer hall……….

So what do you do if you don’t have a warping board? I have seen a Youtube video where a guy wedges stakes between books in his book case and warps around those.

I was lucky to have this chair to use when I first got settled in here in Bolivia.  It was useful for narrow projects- practice bands, small bags and bookmarks.

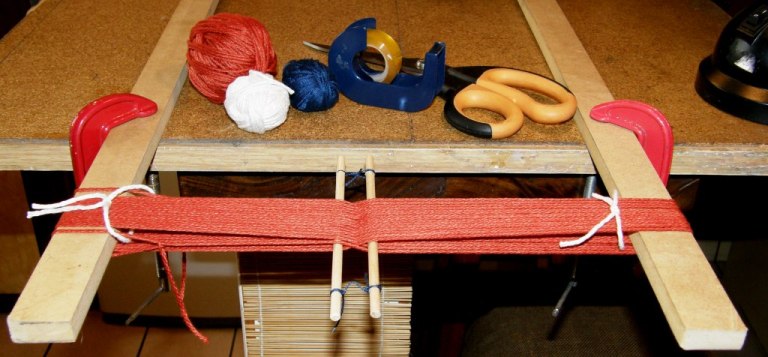
The way that I showed in my WeaveZine article using clamps  is fine as long as you can clamp those stakes down really well . Don’t use your good table for this. I have heard of people turning chairs and tables upside down and using the legs. I once used a coat rack in a hostel room where I was staying. Whatever way your creativity and circumstances lead you, just make sure that the stakes or posts are very well grounded and will not lean in at all as you wind your warp. Even the smallest amount of lean will make a difference.

If you see yourself continuing in backstrap weaving and making longer and wider pieces, it will be worthwhile buying a warping board or making something sturdy and more permanent. It doesn’t need to be fancy as you can see from my little ”beauty” here.

This allows me to wind a 36”  long warp which I have used to make shoulder bags, sets of three mug rugs, placemats, table runners, pillow covers  and wall hangings. For making longer pieces such as belts and guitar straps, I have had to get creative.

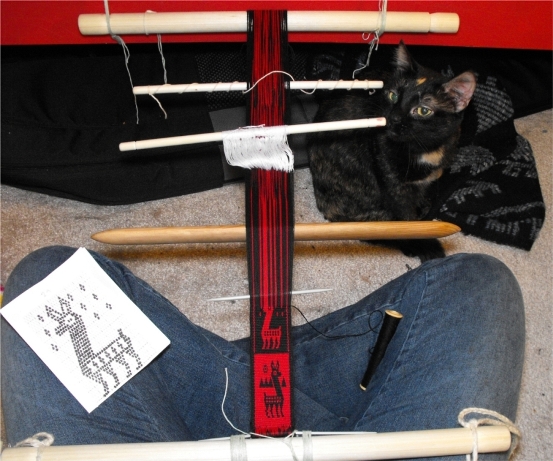
Basic warping involves winding your yarn around two stakes, like those seen above, in a simple figure-of-eight path. Your loom bars will replace the two warping stakes and the cross you have created will allow you to set up your two sheds using a shed rod and continuous string heddles. I often put a second cross in once my warp is on the loom. (More about that in a future post)

Warping with a single color

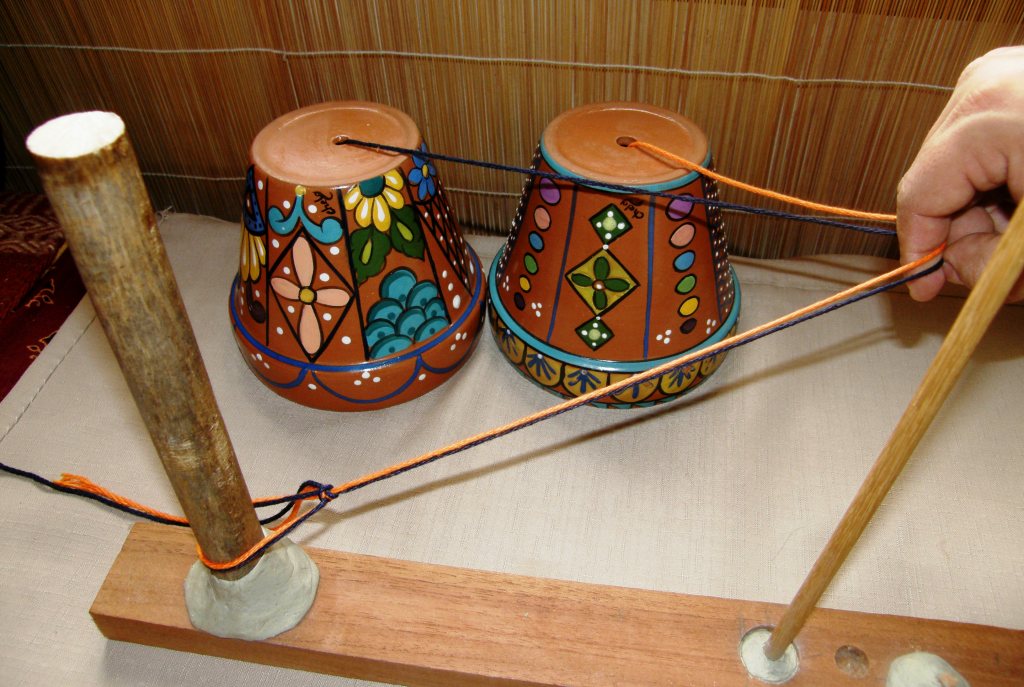
If you want to weave a  piece with horizontal stripes in two colors or weave simple warp float patterns or any other complementary warp technique you will need to wind two colors together. Again, this can be done on just two stakes. I like to place my balls of yarn in flower pots so they don’t roll about and get tangled. Other hints and tips will come up in future posts or you can find them in the Backstrap Weaving Group forum at Weavolution.

Winding red  and yellow yarns together
Preparing to wind 2 colors together on my smaller warping board.  Note the large loop of yarn around the warping stake which can be easily slipped off the stake and onto your loom bar.
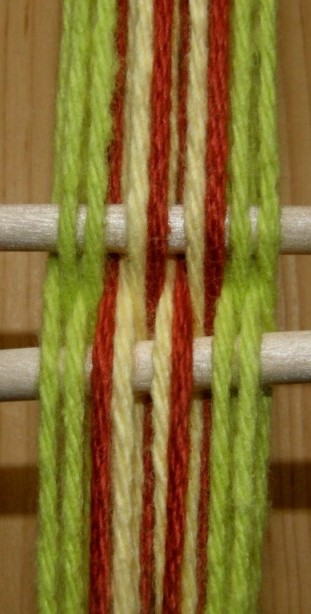
Warping with 2 colors together will result in a cross like this.
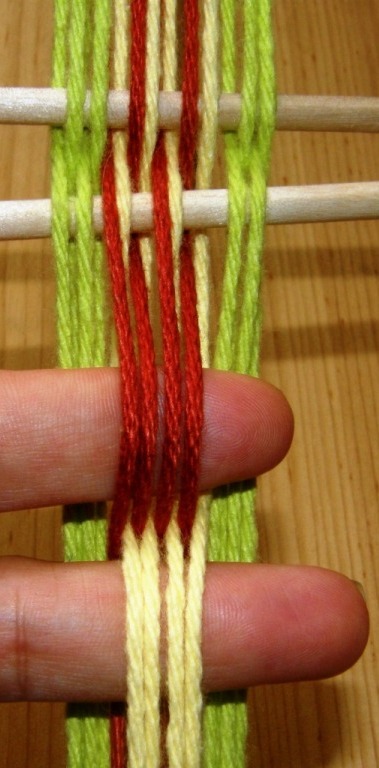
The colors on this tiny band can then be rearranged so that the original cross can be replaced by a new one where each color along with the green borders is in its own shed.
Many Andean weaves are complementary warp weaves and require an arrangement of warps into sheds of two colors as shown above right. This arrangement of warps will allow you to weave something as simple as horizontal stripes or more complex warp float patterned weaves.

FOR THE ADVENTUROUS!!

The following is a video from my Flickr page which shows how I was taught in Peru to warp with two colors using four stakes. The colors are separated– each color into its own shed on the warping board itself as you warp–fast and efficient and especially recommended for wide warps. (The two additional stakes that you see in the video are temporarily fixed to the warping board with ”blu-tack”).

Just to finish off, here is what I am working on at the moment……

Two-weft double weave piece in progress

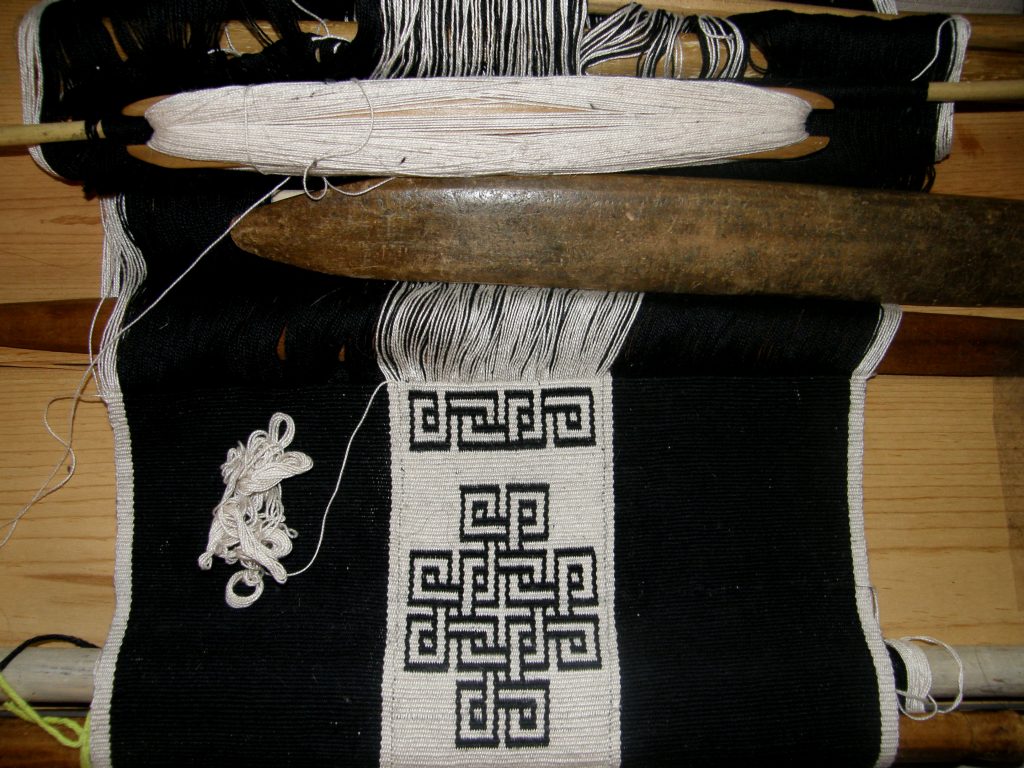
I fell in love with this design the moment I saw it posted at Weavolution. A member had woven a reproduction of a tablet woven curtain that hangs in a cave church in Abba Yohanni, Ethoipia. These curtains were produced and hung in many such churches in Ethiopia in the 17th Century. Rob S, who wove the reproduction, used over 300 tablets. This is just a small part of the overall curtain design. I am weaving it  in two-weft double weave. I have a strip of double weave bordered by plain weave. One weft weaves the plain weave and upper layer of the double weave. The second weft weaves the lower layer of the double weave.

This is quite a change after making all those colorful key fobs but now I have to deal with the black picking up every single speck of dust in the house! I hope to now reverse the pattern and weave a white motif on a black base. I am not sure what I will make of this piece. I’ll decide when it is done. 🙂

Backstrap Weaving-A tutorial and some terrific tiny projects.

SUPPLEMENTARY WEFT PATTERNS-the tutorial.

A motif inspired by a Central Asian design and woven with a supplementary weft
A design inspired by weavings of the Huni Kuin people of tropical Brazil

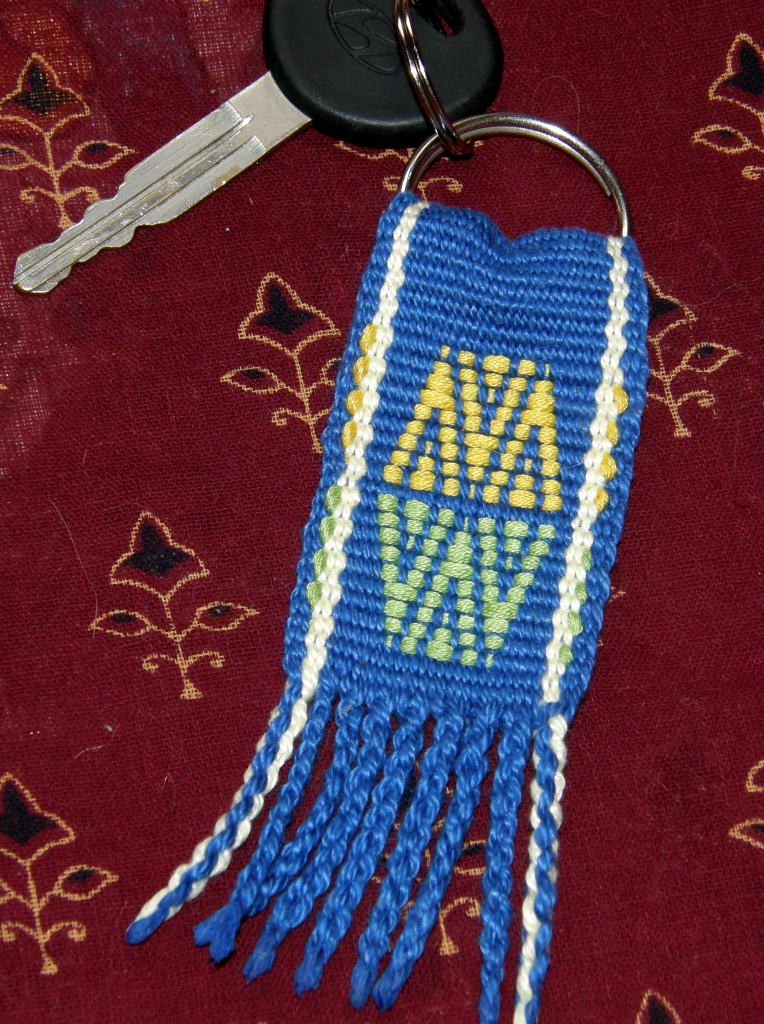
You may remember these designs from a previous post on supplementary weft patterning. Now I am happy to present the promised tutorial on supplementary weft patterning together with a tiny project idea-key fobs.

This technique definitely falls into the category of those which are within the reach of beginners. We weave a simple plain weave band and then ”paint” in some motifs with an additonal weft.

A set of simple key fobs made with techniques suitable for beginners.

Let’s look at the above key fobs-nice beginner projects. A beginner in backstrap weaving will probably start by weaving a plain band like the light blue one on the left, learning to wind an evenly tensioned warp, set up the loom, operate the sheds and keep their edges straight and even. They may then move on to the next band adding some stripes to their warp-getting used to cutting and tying on new colors at the warping board and maintaining an even tension. From there they can try horizontal stripes which involves a rearrangement of the cross on the loom-a new skill.  More complex arrangements will produce staggered horizontal bands or ”combs” as in the red and black  and black and white bands.

And then we come to the two supplementary weft patterned bands on the far right. I aim to show you in the following tutorial how simple this technique is.

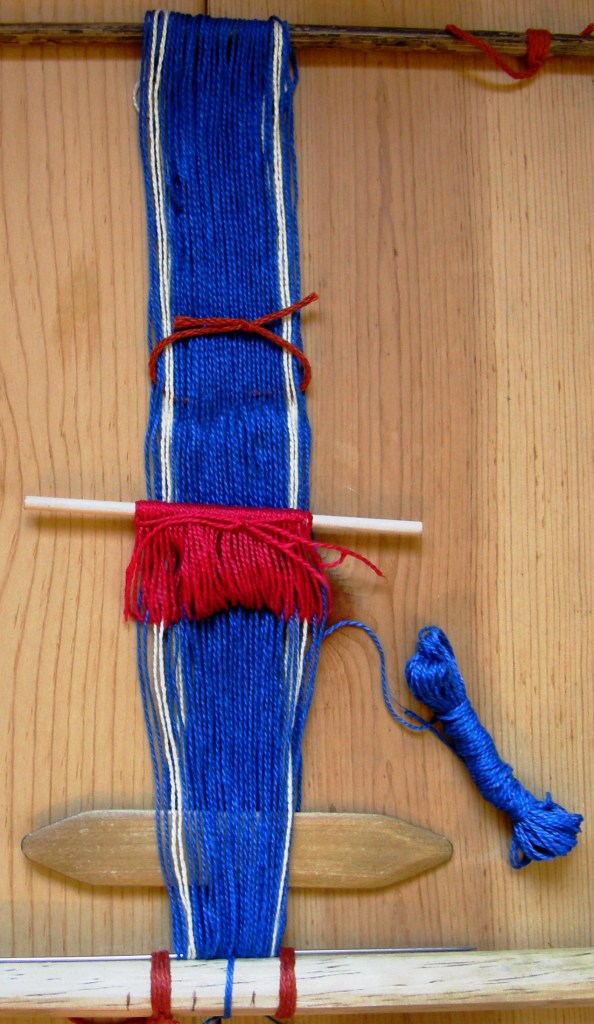
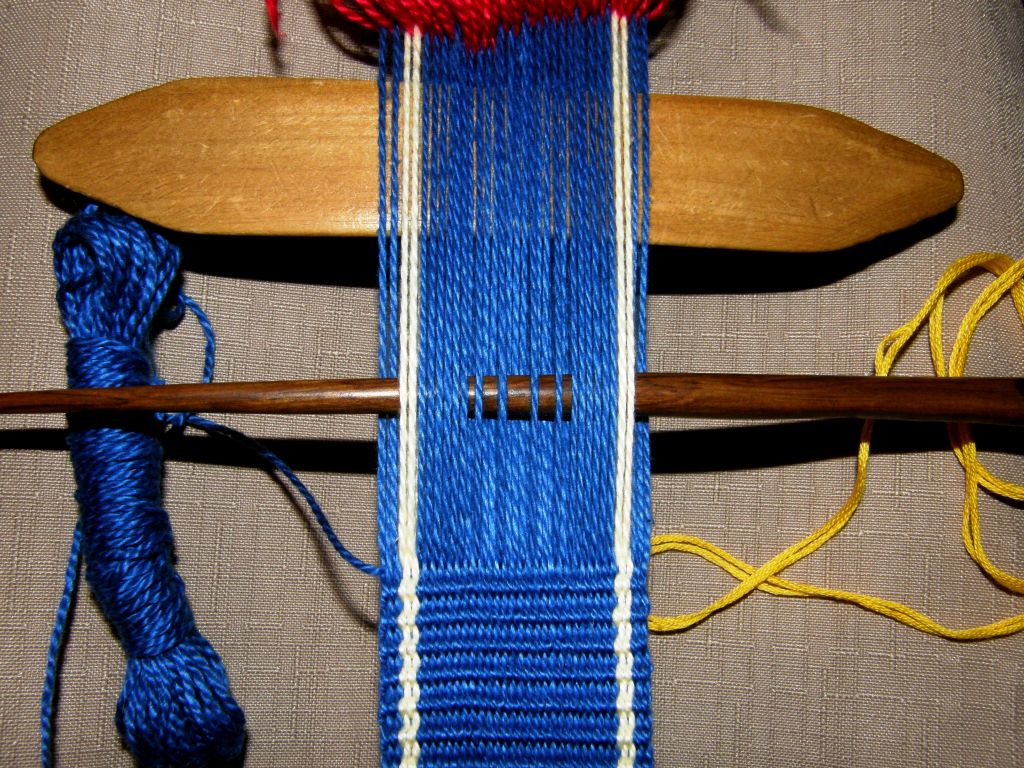
To weave bands decorated with patterns made with a supplementary weft, I start off with a warp prepared for plain warp faced weave. For this tutorial, I have used strong primary colors which show up well in photos. My yarn is 24 wpi mercerized crochet cotton. The blue base, seen below,  has a pale yellow stripe next to each edge. As I used my mini portable warping board, I have  just enough warp to make two key fobs. Instead of a shed rod I am using a simple shed loop and I have put the end loops on a needle to have a smooth rather than fringed start.

You can see more about the needle start in this previous post.

A warp prepared for plain weave. There are two sheds-the heddle shed and the shed loop shed.
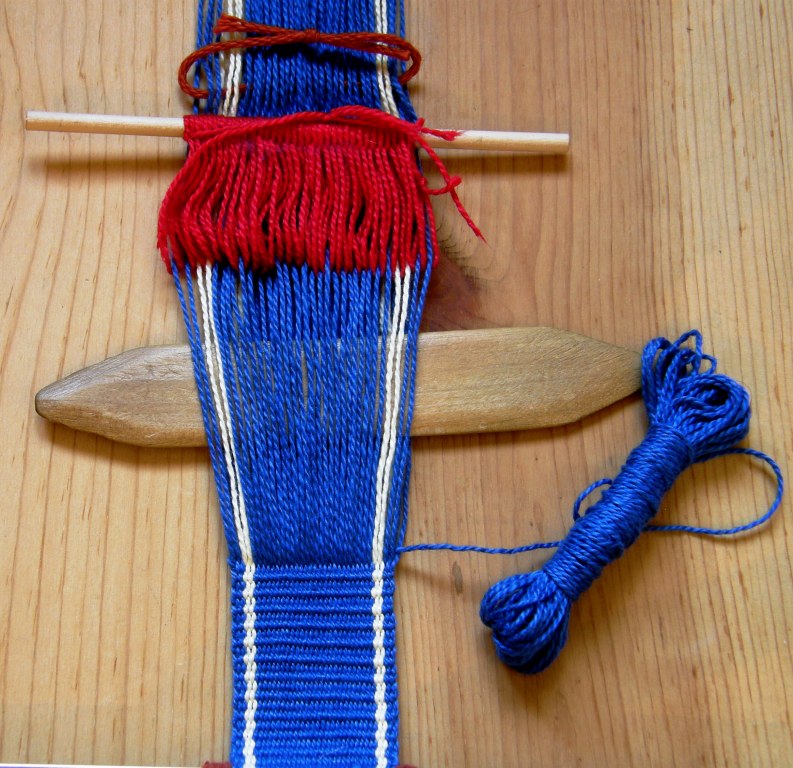
Enough plain weave has been woven to be passed through the key ring, folded and sewn. Now I can begin the pattern.

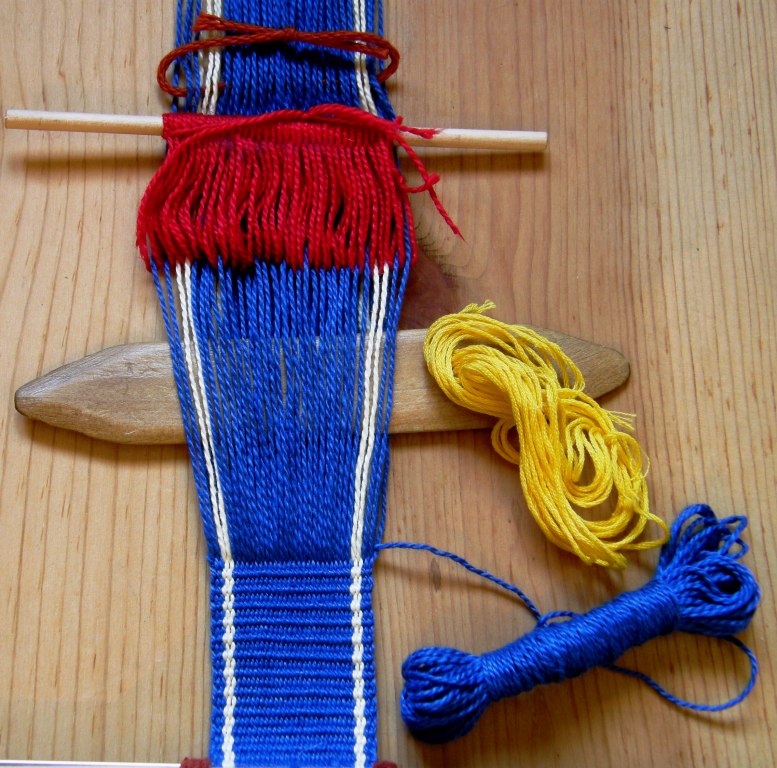
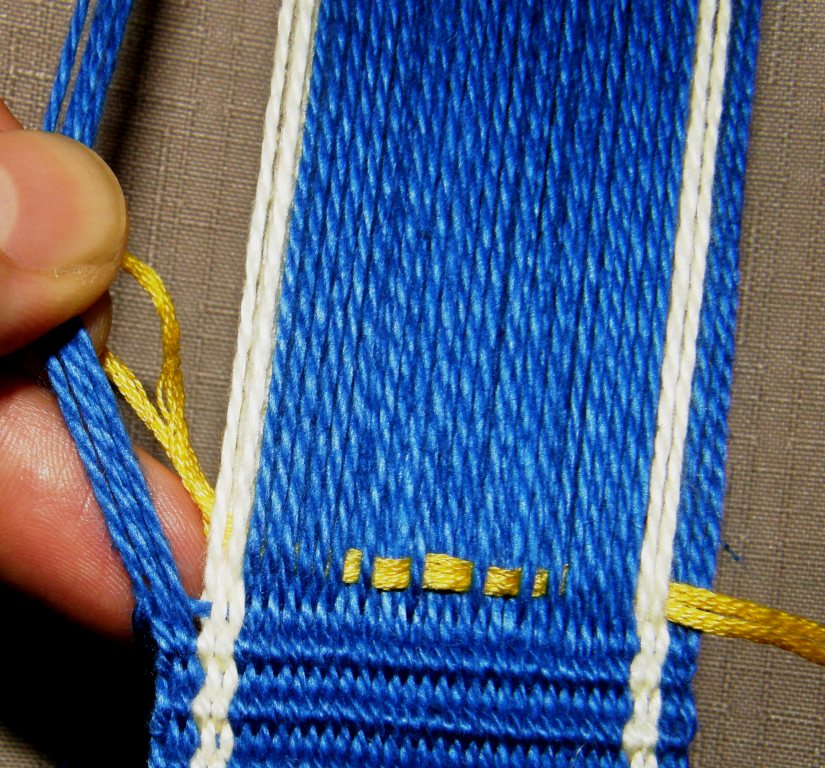
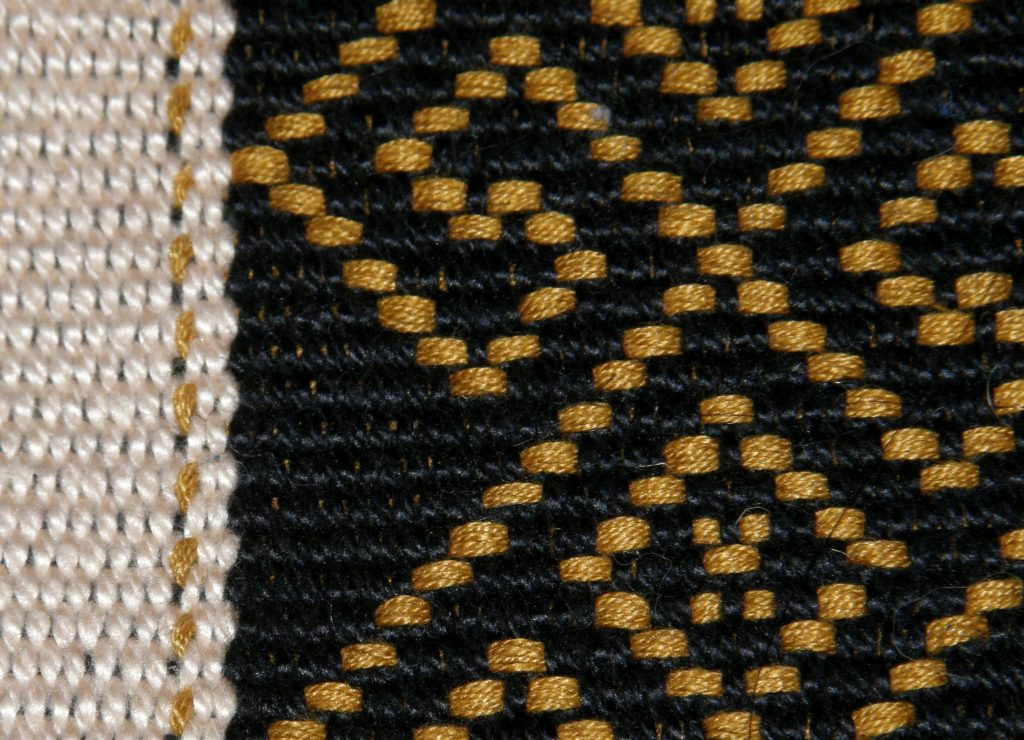
We introduce the color of our choice as the supplementary weft with which to make our patterns. I am using doubled strands of embroidery floss which work really well with the 24wpi plain weave base. The supplementary weft always needs to be a lot thicker than the main weft. Embroidery floss is thick, lies flat and gives good coverage. Looking at the photos below, you will see the difference in width between the blue warp and weft threads and the yellow supplementary weft.  The blue weft will continue to form the structure of the plain weave while the yellow independently forms the motifs.

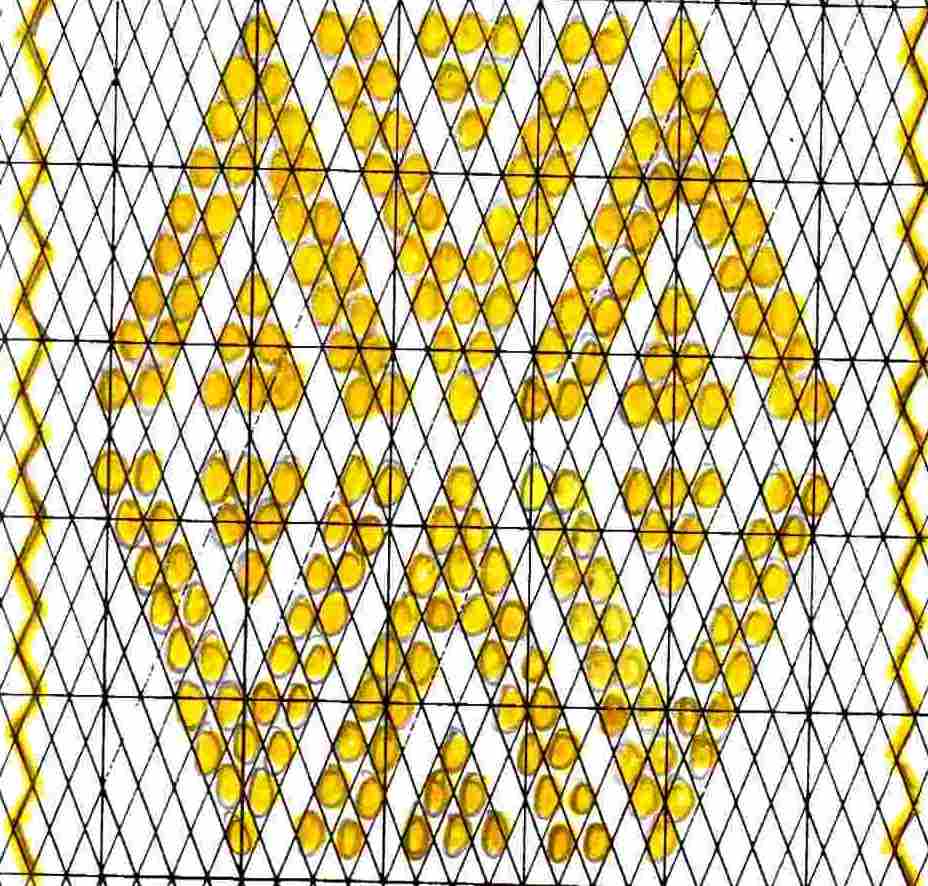
THE PATTERN CHART (All the pattern charts for these projects can be seen here)

Pattern chart for supplementary weft patterning

You may recognize this diamond chart from my double weave projects.

For supplementary weft patterning, we need to look at the chart in a slightly different way. In double weave the yellow spots would indicate the warps that need to be picked.

However, in this technique the yellow spots within the diamonds represent each warp that needs to be dropped in order to expose the supplementary weft.

Now let’s see this in action……..

WEAVING

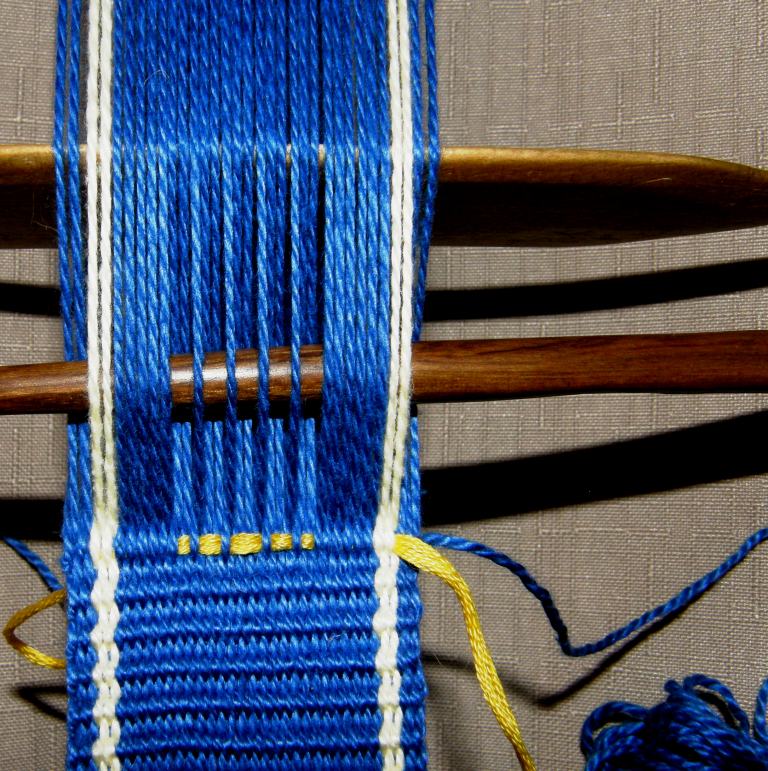
Dropping the warps in the first row of pattern.

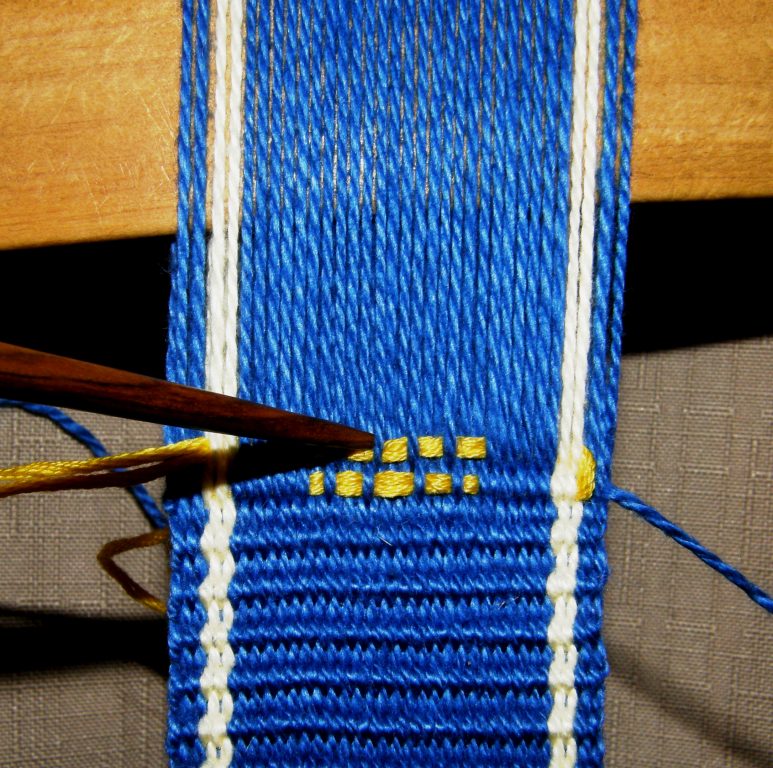
I have opened the heddle shed and placed my beater within and I am using a pointed stick to help select and drop my warps. Reading the pattern chart from right to left and starting at the bottom, I see that I need to keep the first six warps, then drop one, keep one, drop two, keep one, drop three and so on across the row.

Passing the supplementary weft through the shed from left to right. I am separating the warps to show the starting tail which is left hanging out under the weaving and which can be trimmed when the band is finished. You can see that I am laying in the supplementary weft only from one yellow edge stripe to the other rather than all the way across the band.
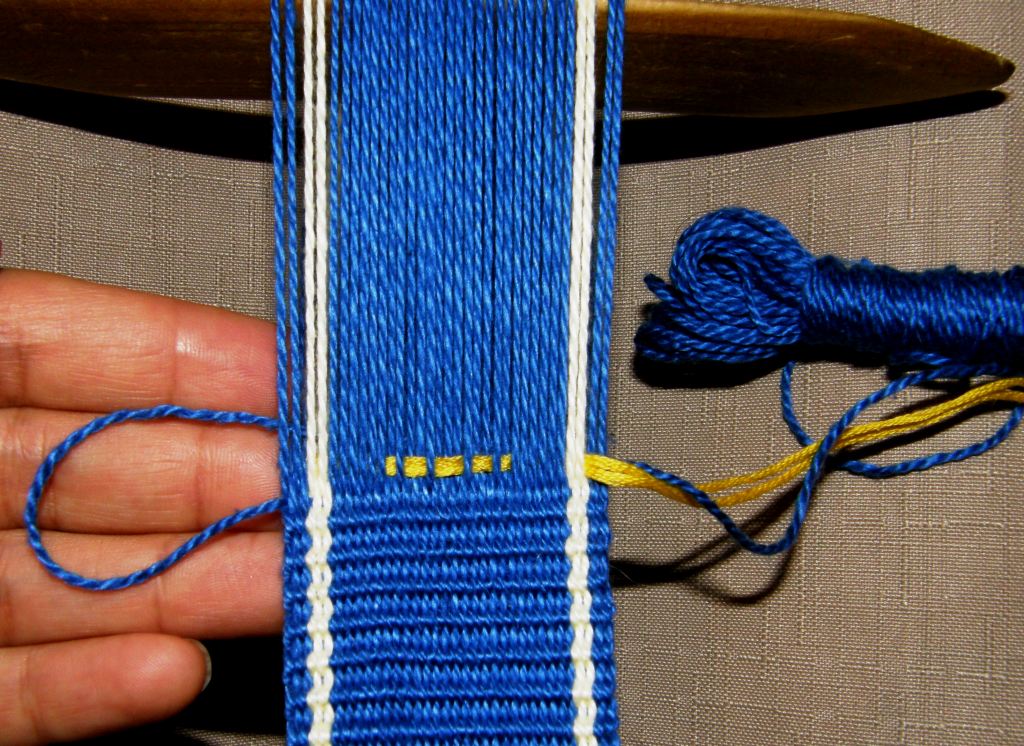
Passing the main weft from left to right under all the warps in the open heddle shed. This completes the first row.
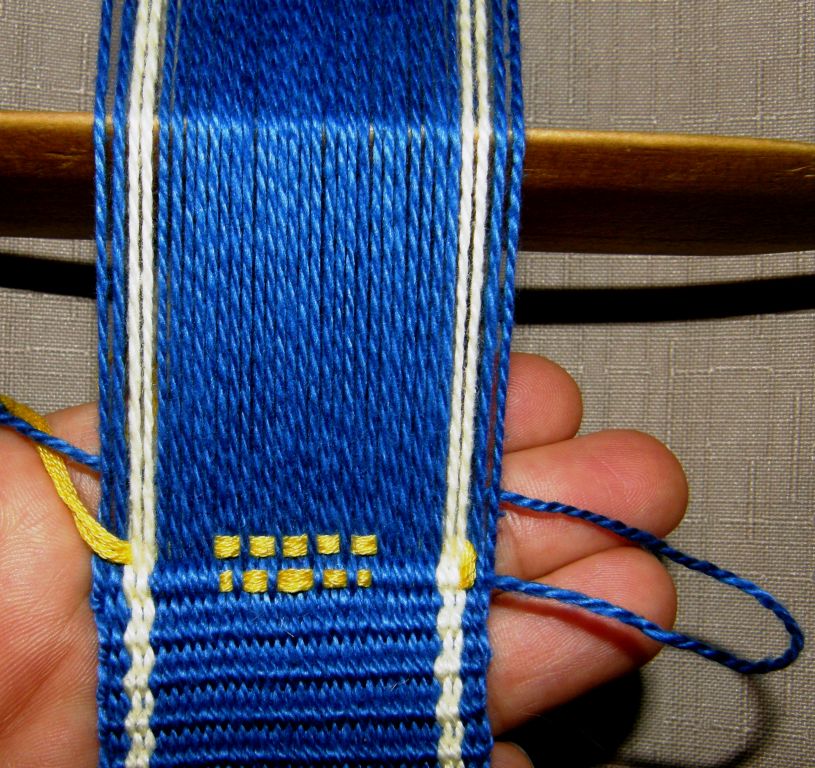
I have opened the shed loop shed , placed my beater within and beaten. Now I am dropping the warps in the shed loop shed according to the second row of the pattern chart again counting the warps from right to left-keep six, drop two, keep one, drop two and so on.
Again, the yellow supplementary weft is passing from the edge of one stripe to the other turning on the surface of the weave. I am laying in the weft loosely and pushing it into place with the pointed stick .
After passing the main weft from right to left under all the warps in the open shed loop shed, I open the heddle shed, place the beater within and beat, ready to do row three.
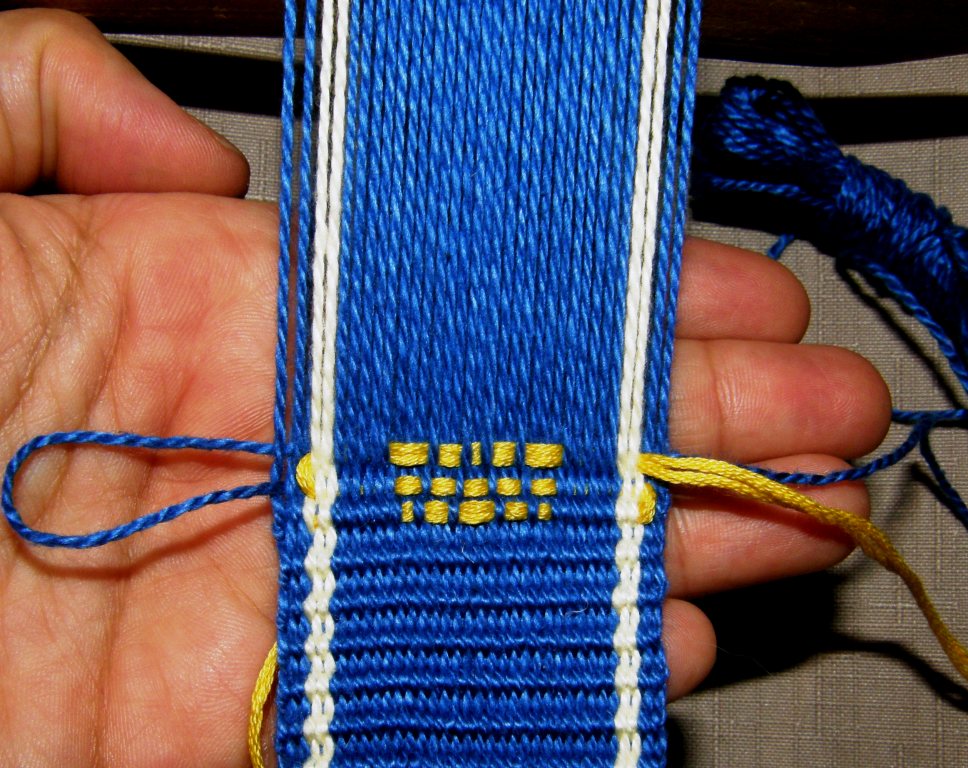
I am finishing the third row. You can see that the yellow weft turns on the surface of the weaving at the stripes. I don't like carrying the supplementary weft all the way to the edge as I don't like the bumpy edge that that creates. I would rather have the weft turning against the stripe and use that as a decorative feature.
One half of the motif is finished. I can continue with the same color or introduce another. The finish tail of the yellow weft will be left hanging out the back of the weaving. If you have packed your wefts in firmly, you will be able to safely snip the tail off when you finish the band.
On this Central Asian design that I made you can see that the turning wefts on the left form their own decorative ''stripe' on the plain weave.
The turns of the pattern wefts in this piece virtually disappear against a stripe of the same color.
Several colors can be used for the motifs within one piece.

I have put the pattern charts for these motifs as well as the Central Asian and Huni Kuin inspired designs on a separate page. You can design and print out your own blank diamond charts here.

If you are planning your own designs, as a general rule, it is best not to have weft floats that span more than four warps. This of course will depend on how fine a yarn you are using and the purpose of the piece you are weaving. You need to consider that long floats on a key fob or bag will easily catch on things whereas on a hatband, for example, they may not be a problem. You should also take in account the fact that floats over a single warp, for example the points of the triangles in my sample design here,  can barely be seen. Try to have your weft floating over a minimum of two warps.

c
I finished the motif in another bright photogenic color and have turned the loom around to weave another key fob on the other end. You can see that the design does not show on the back of the band.

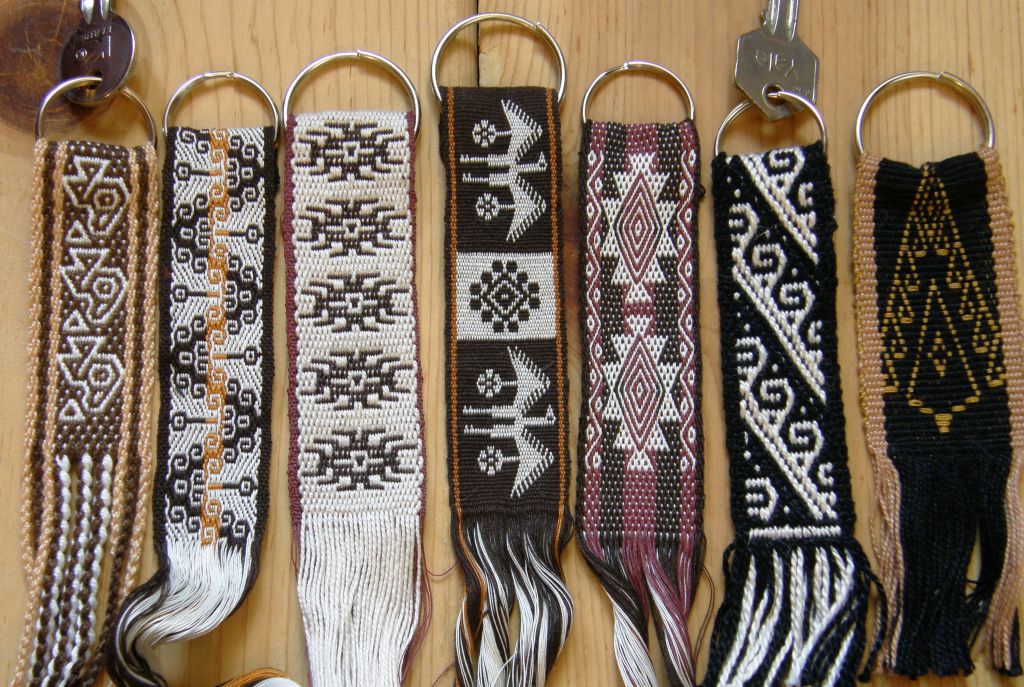
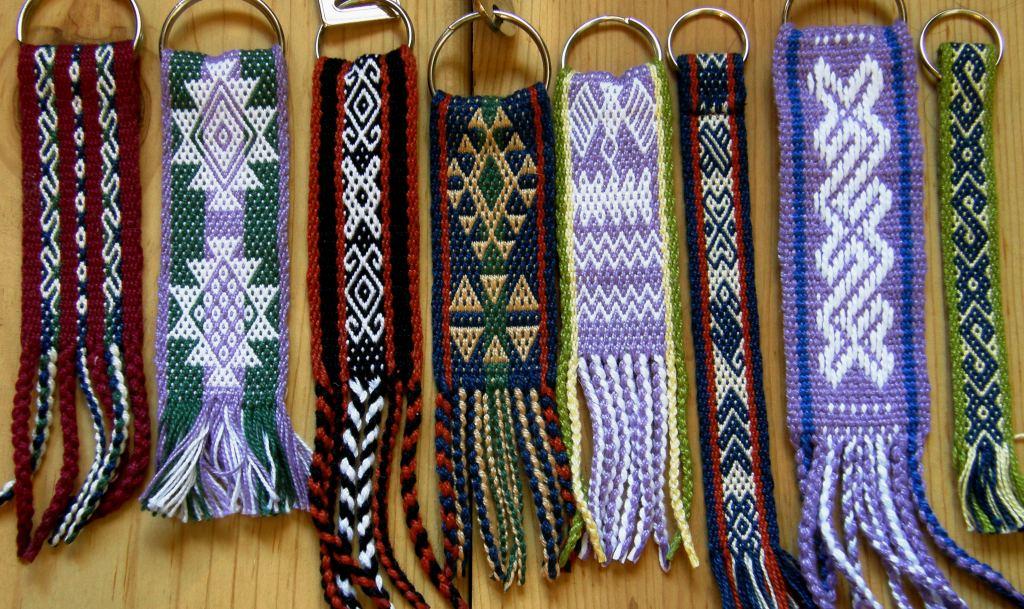
Below are some more key fobs that I have made in a variety of techniques and yarns ranging from 12 wpi mercerized cotton to doubled sewing thread. I weave a few now and then to add to the collection and have them handy as gifts for my friends here, or back in Australia or for other travelers I meet on the road in South America. Some are finished and some are yet to be braided and sewn.

Two can be made on one warp. First I weave one and then I move the shed loop to the other side of the heddles, turn the loom around, pass a needle through the end loops and start weaving from the other end. I cut between the two small weavings when I have finished and then braid the ends or leave them as fringe.

Key fobs in earthy colors
And some in brighter colors.

SO WHAT HAVE YOU GUYS BEEN UP TO?

There’s nothing I like better than to see my instructions and charts put to use!

Here are some things that a couple of blog visitors have worked on……..

Amber's mug rugs look good with black motifs on white.

Amber made one African and two South American motif mug rugs on the one warp. She tied up her loom to the ladder on her sister’s bunk bed which I think is a brilliant tie up place. I am thinking about having a sturdy wooden ladder with several rungs built  and screwed into a wall so that I can have different tie up places at different heights.  When I am not using it for weaving, I can use it to hang things on or display weavings draped over the rungs. Thanks for the idea, Amber.

Courtney tied up her loom to a sofa bed to weave her llama band. You can read more about this project and her furry helper on her blog.

My tutorial for this one-weft double weave technique can be found in the Backstrap Weaving Group at Weavolution.

Courtney's black and red llama motifs.

If anyone else out there is weaving the designs or using the tips from my blog, I would love to hear from you and show off your projects here. Even if you have not woven a project yet, I would  love to see the backstrap loom you have put together. I hope to see what you have created with supplementray weft patterning.

Leave a comment for me here or contact me at Weavolution. You will need to join Weavolution to do so-it’s free!

Once again, thanks for visiting and thanks for all the comments! 🙂
© Laverne Waddington and backstrapweaving.wordpress.com, 2009-2010. Unauthorized use and/or duplication of this material without express and written permission from this blog’s author and/or owner is strictly prohibited. Excerpts and links may be used, provided that full and clear credit is given to Laverne Waddington and backstrapweaving.wordpress.com with appropriate and specific direction to the original content.

Backstrap Weaving-Supplementary weft patterning and learning to weave in Guatemala

SUPPLEMENTARY WEFT PATTERNING

Lately I have been playing with supplementary weft patterning and, once again, have been inspired by Weavolution members. One member joined my Backstrap Group as she is interested, amongst other things, in reproducing a Central Asian yurt band. She has introduced me to many beautiful Central Asian designs and often sends me photos of pieces she has seen at reenactmant events that she attends.

Together we figured out the technique on a yurt band she had bought and even wove it simultaneously- all coordinated by email!

When she sent me this photo (at left) of a Central Asian piece she had photographed at one of the historical events, I couldn’t wait to weave the design into something. The technique wasn’t clear in the photo and, as I wasn’t concerned with reproducing the original technique,  I decided to weave it in either double weave or supplementary weft patterning. I chose the latter as, since studying this technique in Guatemala in 2008, I hadn’t put it to much use.

In this technique, it is really important to get the right balance between the weight of the warp yarn and that used for the supplementary weft and so I quickly wove a sample and then went ahead and made the table runner below in 4/2 cotton (24wpi) warp with 6 strands of the patterning thread that I had brought back from Guatemala as the supplementary weft. You can see that I added a little embellishment of my own to the pattern.

My colors are rather bland compared with the original. I love that orange zigzag next to the main design. Perhaps I will be more adventurous with color next time!

My table runner with a Central Asian inspired design

My other source of inspiration has been a Brazilian member of Weavolution who has generously shared what she knows about the weavings of the Huni Kuin people who live in the tropical forest of Brazil and Peru. They weave with backstrap looms using cotton that they spin and dye themselves. You can see a video of their work here and a photo of a Huni Kuin weaver here. Although they do not use  the supplementary weft technique, I chose to use this method to weave one of their designs into a bag.

A small bag with supplementary weft patterning inspired by a traditional Huni Kuin design.

Here in Bolivia, the supplementary weft technique is used by women to weave bands to decorate their hats. It is in these hatbands that I have seen the widest variety of woven designs. Except for in Calcha, where it seemed that the women had decided on one hatband design to represent their village, I have never seen two hatbands alike.

This Potolo woman is using three hatbands at once.
Hatbands from Bolivia

Sometimes the supplementary weft is used to form the motif as in the small condors on the upper half of the center band above. At other times, it is used to fill the negative space to outline the motif on the ground weave.

From having purchased some hatbands here, I was able to see how they were woven. I made a few sample bands but, as I didn’t get the right warp to weft ratio, I wasn’t too pleased with the results and never really went on to explore this technique further- that is, until I went to Guatemala in 2008 and studied weft patterning with three teachers there. It was my first time in Guatemala and an absolute explosion of color and inspiration was awaiting!

The traditional hair sash of the women of Aguacatan, Guatemala

So I would like to spend the rest of this post introducing you to my first teacher in Guatemala and showing you how I learned supplementary weft patterning with her.

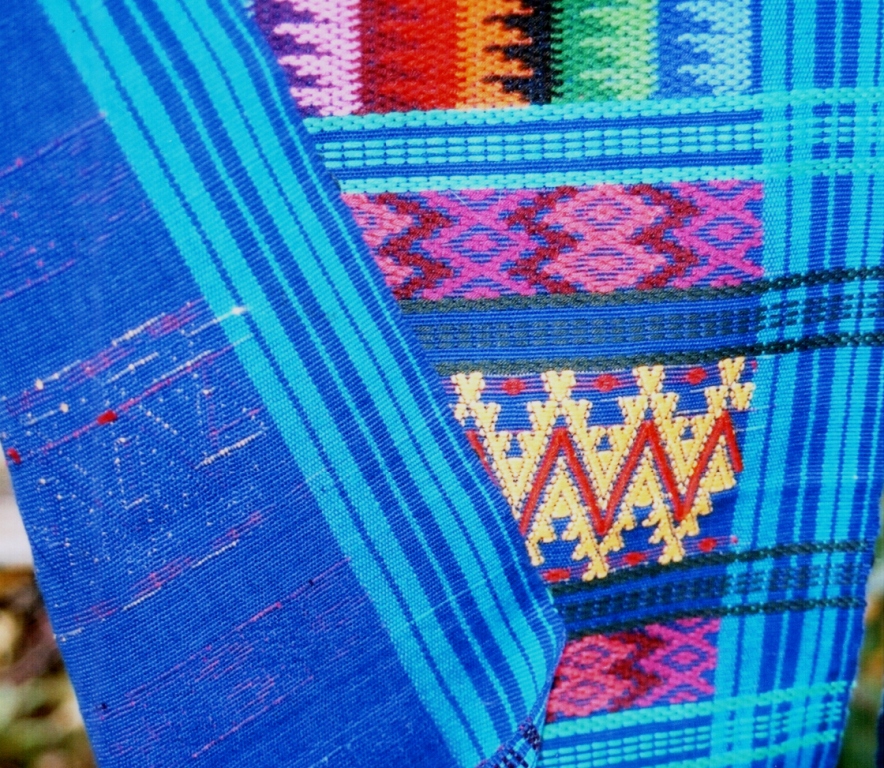
Lidia lives in the very small town of Santa Catarina Barahona near San Antonio Aguas Calientes in Guatemala. The typical blouse, or huipil of the area has designs woven in single and double faced supplementary weft patterning. The large areas of double faced patterning are those that most distinguish the huipiles of this area.

Typical huilpil of San Antonio Aguas Calientes.
Single faced weft patterning. The patterns can’t be seen on the back of the textile.
This double faced patterning looks very much like embroidery. The national bird, the quetzal, is a very popular motif.
Day 1-Lesson 1. I have chosen my colors for my piece and am winding the thread into balls prior to warping
Making a small warp for my lessons
Once the loom was tensioned, the heddles were made.
Lidia’s sister Carmelita showed me how the warps, under which the patterning wefts would be placed, are picked and stored on two additional sticks. The resulting designs are called ”pepenado”.
The first design lesson-Lidia is weaving the ”tijera” (scissors) pattern. She uses a pointed stick to hook theweft tails and pass them under the raised patterning warps.
The finished tijera pattern
Double faced ”abeja”-bee
Three ”abejas” that I wove when I got home

The ”abeja” was topped off with another section of ”tijera” and that completed my second day of classes. Finally, on day three, I learned the ”arcos” (arches) pattern. This is a combination of weft inlay and warp wrapping.

Weaving the ”arcos” designs
The finished ”arcos” design

It looks like my teachers did all the weaving and I just stood around and snapped pictures! Well, I can tell you  that it wasn’t so. Lidia was a very ”hands-on” teacher and she would take over only when I got up to stretch and take photos.

But it wasn’t all hard work. Other family members and neighbors came to visit, we paused to make and eat tortillas, chatted and played with the nieces and nephews in Lidia’s shady yard and walked to town to go yarn shopping.

Snack time. While making my way around Guatemala I learned to recognize the ”slap slap slapping” sound of tortillas being prepared.
Small rectangular pieces are covered with double faced designs and closed with a drawstrig to make a baby’s hat.
Whne I got back to Bolivia I finished off the piece that I had been making with lidia and then wove another sampler to consolidate the weft patterning techniques I had learned.
And I used my lesson piece in the lid of my weaving toolbox.

I went on from Lidia’s home to study with two other weavers in Guatemala but, more about that in another post!

Lidia’s daugther Sara and her cousins

I will be doing a tutorial on suplementary weft patterning with lots of step-by-step photos here on my blog in the following weeks so that you can add designs like the Central Asian and Huni Kuin ones, that I showed you above, to your projects.

I hope you enjoyed this little trip from Central Asia, to Brazil, to Bolivia and onward to my teacher’s home in Guatemala. If you did, I would love to hear from you 🙂