Backstrap Weaving – The tail end of the Tinkuy tale.

MORE FROM THE TINKUY DE TEJEDORES

I have been busy since the last post on the tinkuy – weaving, packing and traveling! Yep, I am on the road again…can you guess in which country?

Golden leaves and pumpkins…a common sight for many of you I am sure but certainly not something we ever see in Bolivia especially not as we roll into summer. More about this trip in next week’s post.

For now I will finish off my tinkuy report and show you what I managed to get up to on my loom in my brief stopover at home in Bolivia.

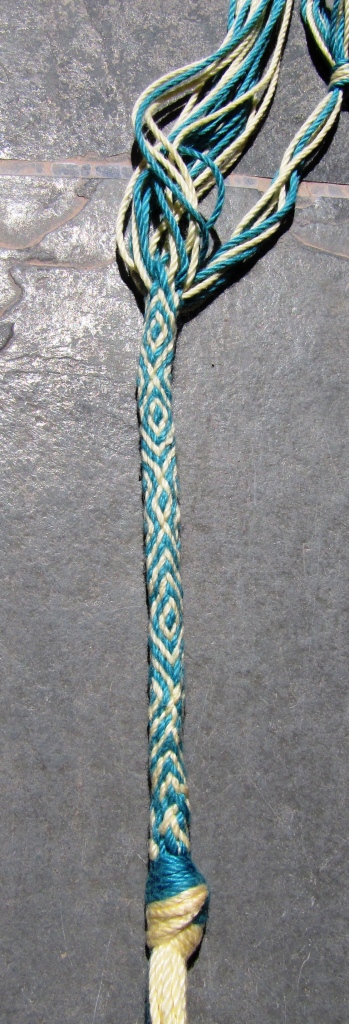
I arrived home with tubular woven bands and discontinuous warps on my mind. I finished off the tubular band that I had started in the tunkuy workshop with Nilda. Nilda was an excellent no-nonsense teacher, commanding our attention and clearly demonstrating and explaining the moves to her twenty-eight participants!. She prepared excellent handouts and got us all up and running on what was a fairly complex sequence of moves which involved, picking up, twisting and diverting warps. We were turning out lovely tubular bands by the end of the session and enjoying ourselves.
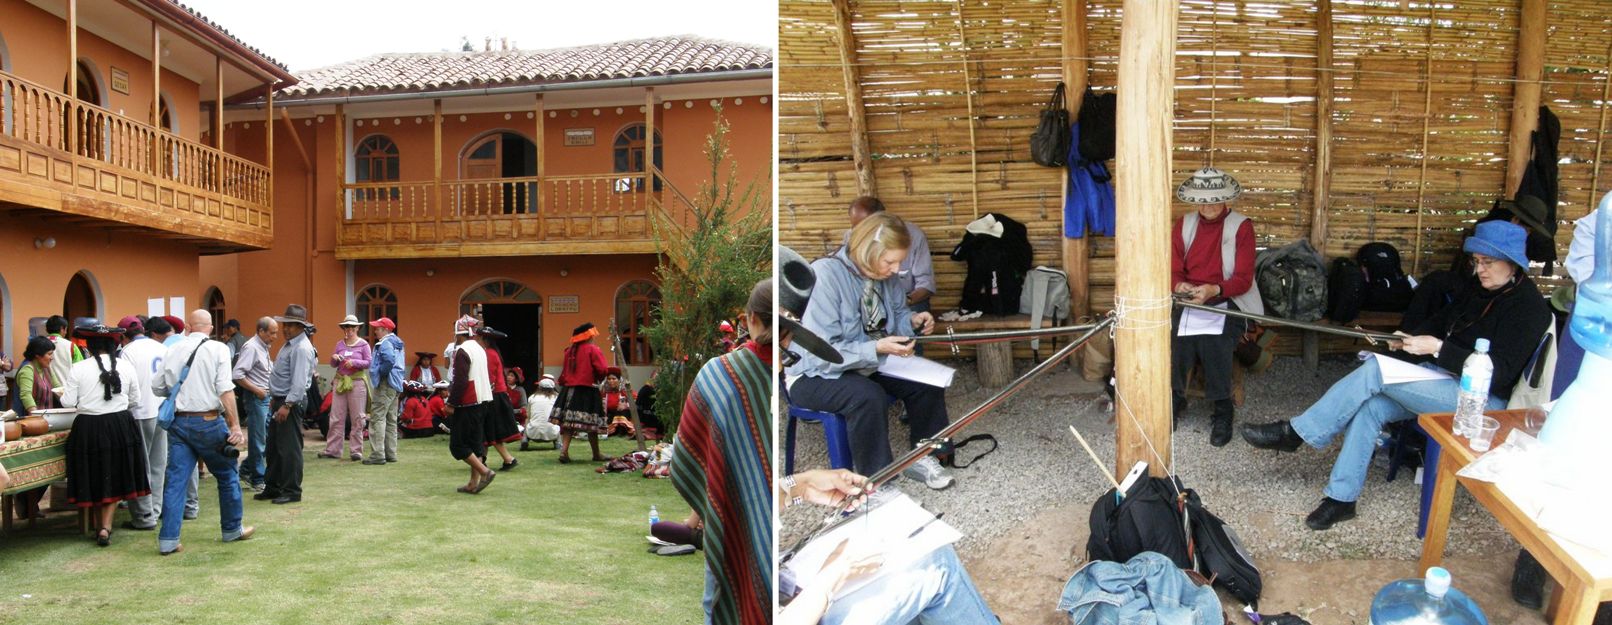
The CTTC has a beautiful center in Chinchero with large courtyards for weaving, warping and dyeing displays, workshop rooms, a store and exhibition area. We were blessed with a gloriously sunny morning and entertained by a sudden and violent change of weather in the afternoon as a storm converted the grassy courtyard to a blanket of white hailstones.
The courtyard where we worked was also alive with the colorful skeins of yarn which had been dyed in the previous day’s workshop.

With the aid of four helpers from the Chinchero weaving community, we all hitched ourselves to posts in the lovely courtyard of the CTTC Chinchero complex and wove away with always someone on hand to help if we got ourselves into trouble and, believe me, we did! Despite Nilda’s clear instructions I managed to start with my warp upside down but, with Jessica’s help, soon got that sorted out and then it was just a matter of following the steps in the well prepared handout.

All were quiet at first as we concentrated on our work only interrupted now and then by pleas for help but, as we became more familiar with the moves and, more importantly, understood better why we were making them, we could relax, chat and compare our progress.

Linda Ligon gets a few tips from one of our good humored helpers.
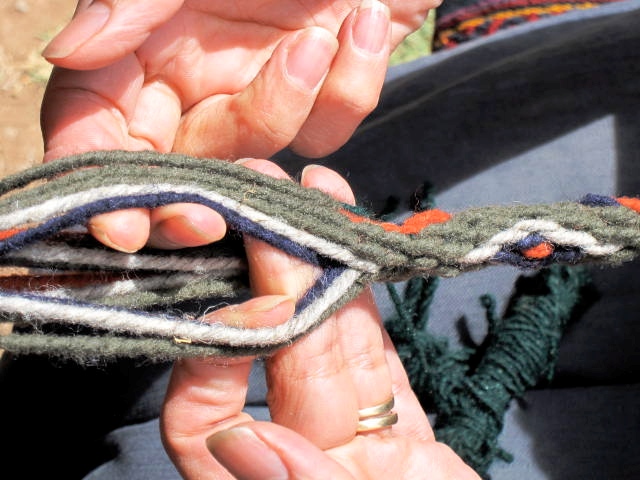
We started out making bands with very thick yarn – easy to see and handle while we learned the moves. D Y Begay took this picture of me at work and sent it to me.
Some of the weavers from Guatemala and Bolivia were among the participants.

Above left you can see our thick practice band and at right a finer one which we warped  in the afternoon session. After lunch we had the choice of weaving a finer tubular band, which I did, or learning to weave and sew a much simpler tubular band to a piece of fabric. The simpler band’s design was contained in its warps and so did not require any pick up, twisting or warp diversion. This was an excellent sample to use for learning how to manage the simultaneous weaving and sewing. Nilda was wise to give everyone a simpler task in the afternoon with all of us feeling a wee bit snoozy after the delicious lunch spread. The storm woke us up though!
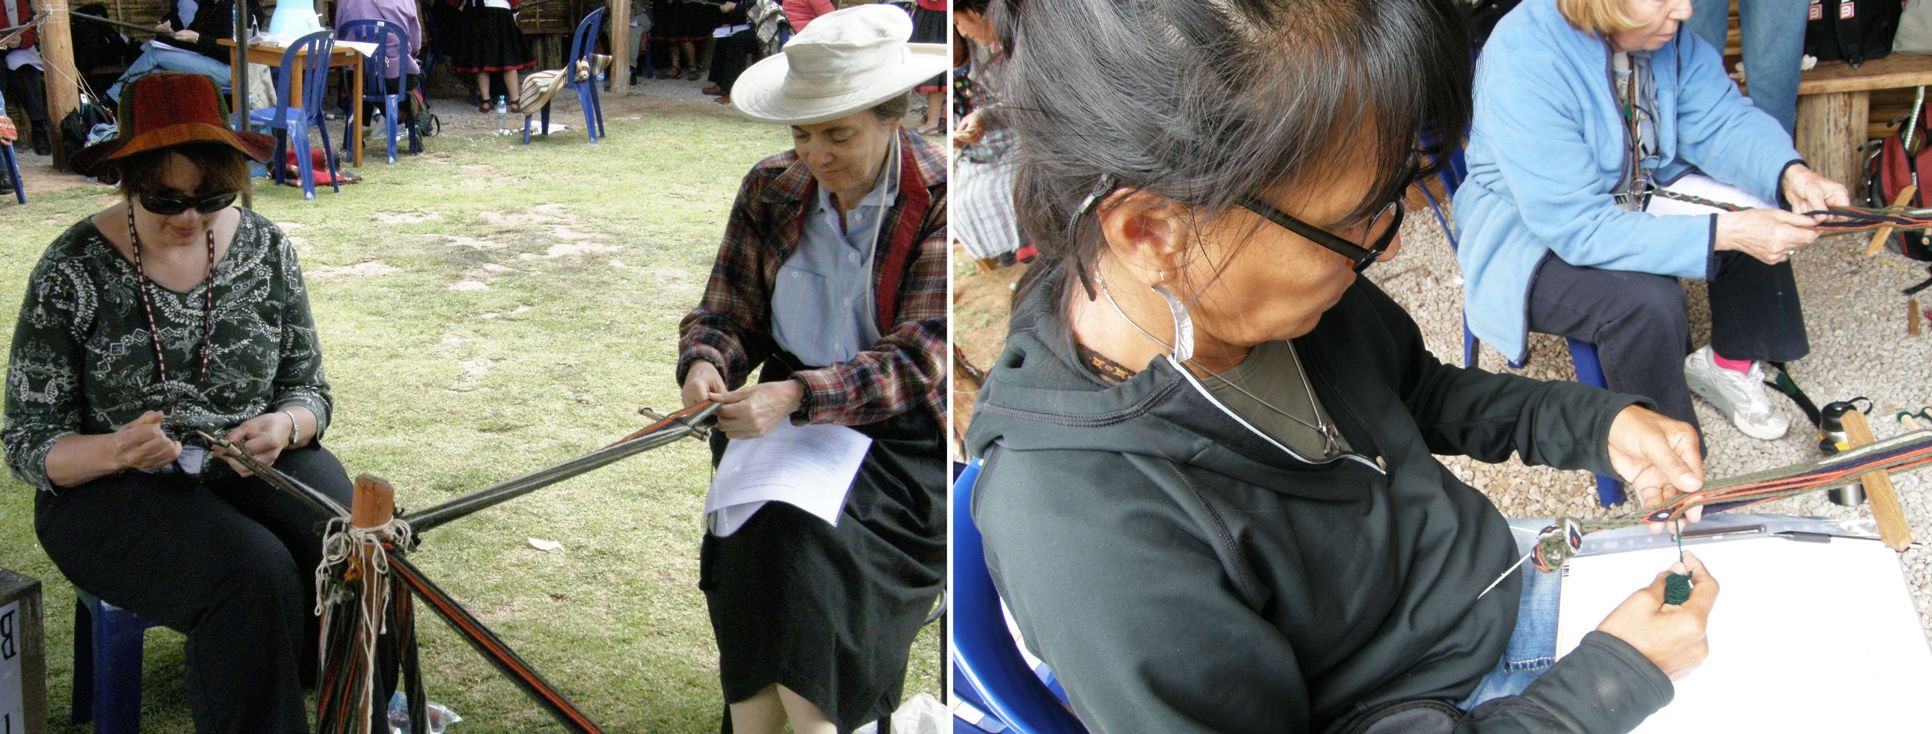
Anita Osterhaug, Ann Rowe, Judith Crosbie and DY Begay at work on their bands. 
Betty Davenport was one of my “pole buddies”.

As for the previous day’s dyeing workshop, I saw the dyestuffs, the drying skeins and all the gorgeous colors and that is about all I can tell you for now…sorry! I am hoping that Dorinda will be able to fill me in on what they used to achieve that beautiful collection of colors. Each participant took home seven skeins.

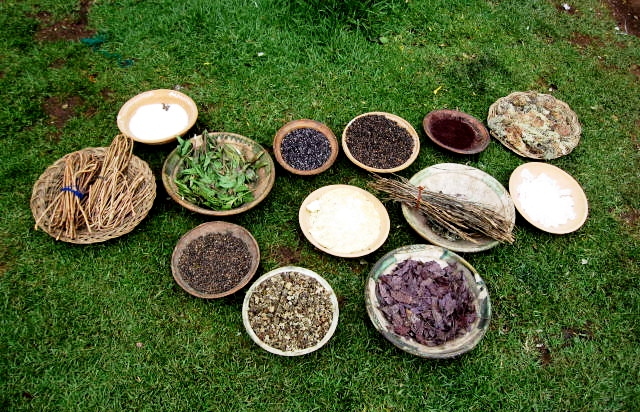
My roommates Dorinda and Maxima participated in the dye workshop as this is precisely something on which Dorinda has been working in Cochabamba in her PAZA project.
And here are the principal dyestuffs that were used.

Another interesting part of the workshop day for me was seeing different warping methods.

I was tickled to see this warping board which is the same as the one I have built for myself at home. This is the one we used for warping our tubular bands.

I was tickled to see this warping board which is the same as the one I built for myself at home. We used this one to warp our tubular bands.

This lady is warping a narrow band around nails driven into to the ground. I noticed that she had the two outer nails leaning very noticeably to the outside to compensate, I would say, for their tendency to lean in as the warping progresses. That is the problem with this kind of warping set up. I am sure that from her vast experience she knows exactly how much to angle the nails when she drives then into the ground.

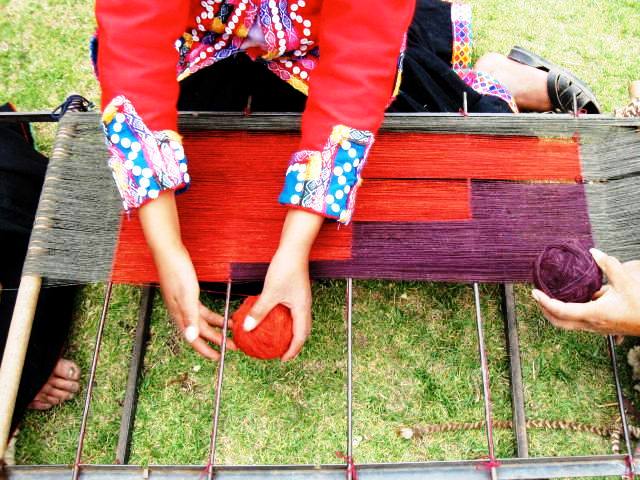
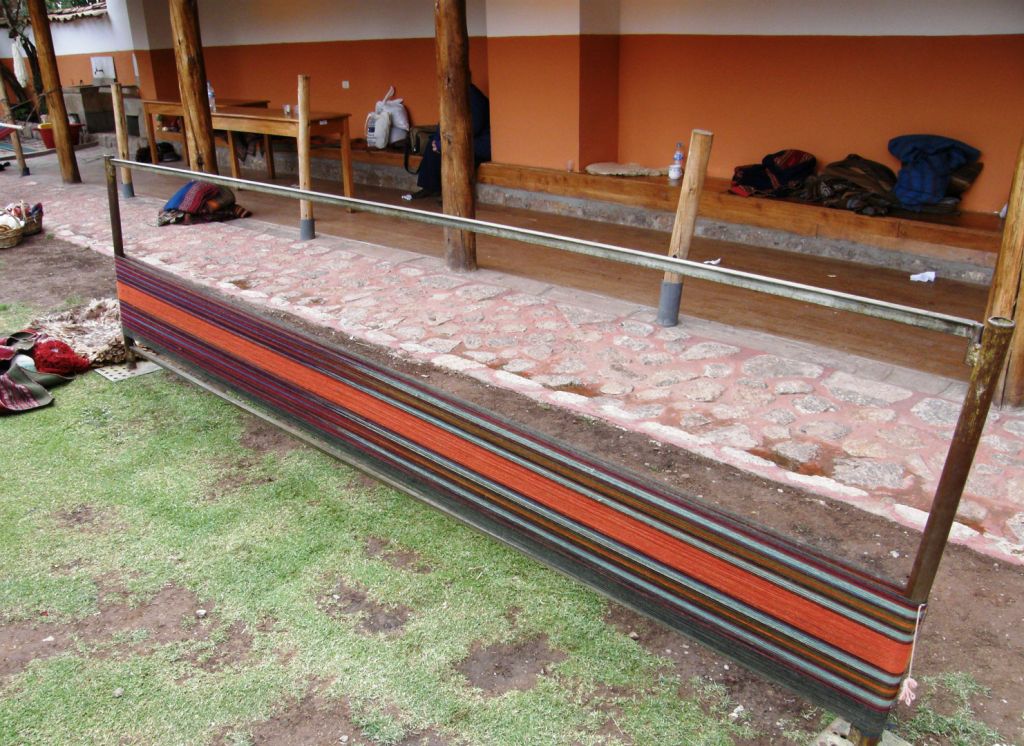
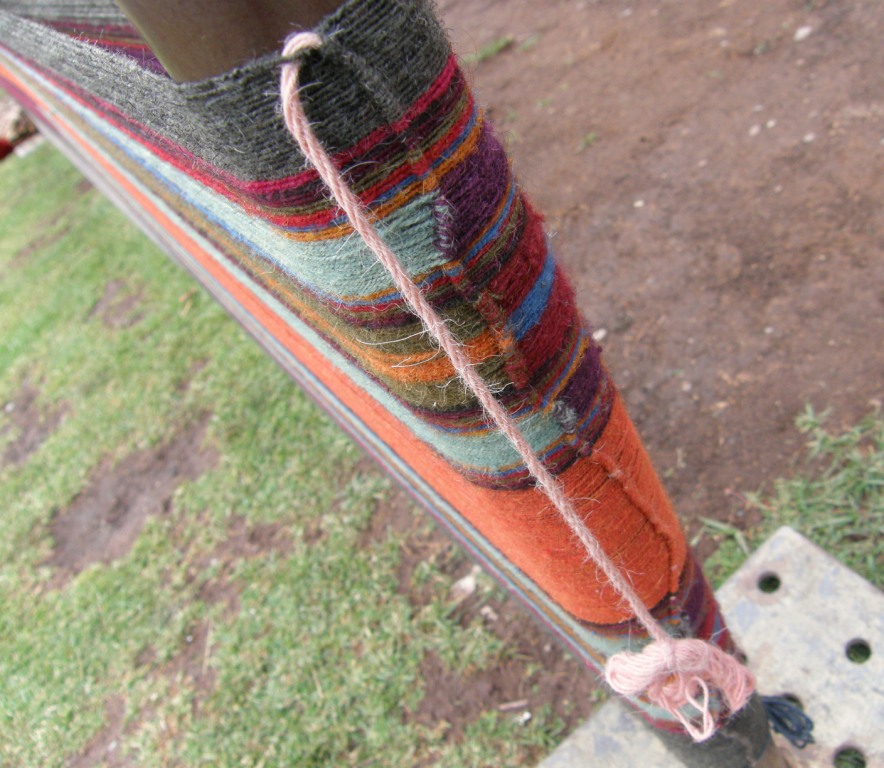
And then there was this large warping set up. Notice the metal bar which extends from one post to the other to stop any possible leaning as the warp is wound up the posts. Judith was watching the weaver warping on this set up and called me over to look. She drew my attention to the fact that the weaver was turning the warps at each end post around a piece of thicker plied yarn. In this way the warps were locked into position and this thick piece of yarn I imagine would be lashed to the loom bars in order to create the third and fourth selvedges.

Judith had been watching long enough to learn how to do it and was then able to help the weaver. I was able to make a short video where Judith shows and explains how it is done.

I am thinking that this would be a great way to wind a warp for ikat.

Here’s a shot of what the warps look like wrapped around this “starter” cord.
So, tubular bands were one item on my weaving list this week and I warped up a few to take away with me. These require nothing more than a string to attach it to your waist while the other end could easily go around a toe. You don’t even need to make string heddles as you work directly from the original cross.

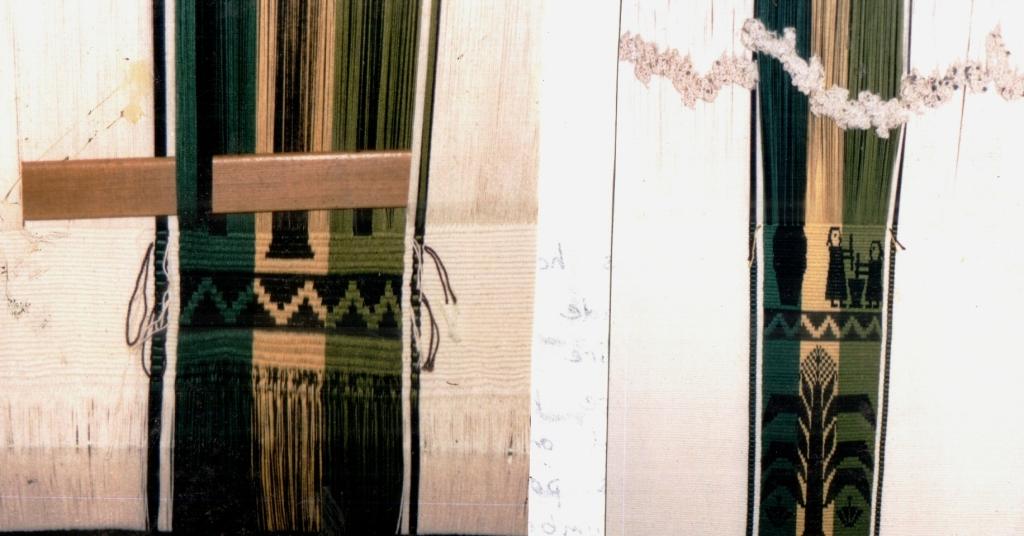
The other thing I was determined to do before I hit the road again was experiment with the discontinuous warp technique. You may have seen the amazing piece being woven by a weaver from Pitumarca in last week’s blog post. She had warped panels of four different warp colors.

I wonder if this technique was born from weavers’ boredom with their warp colors in long pieces. I know what it is like being locked into certain limited colors for the entire length of a warp-faced piece. That is why supplementary weft patterning can be so much fun as you get to change colors as you please.

I got a pretty good idea about how this was warped by looking at the above piece. I also got a good look at Antonia’s piece at Convergence which you can see below and got to talk to her a little about it. This piece is an absolute marvel! She has panels within panels.

This, combined with a very nice photo of warping in progress in Nilda Callañaupa’s book, gave me just enough information to get a project started.

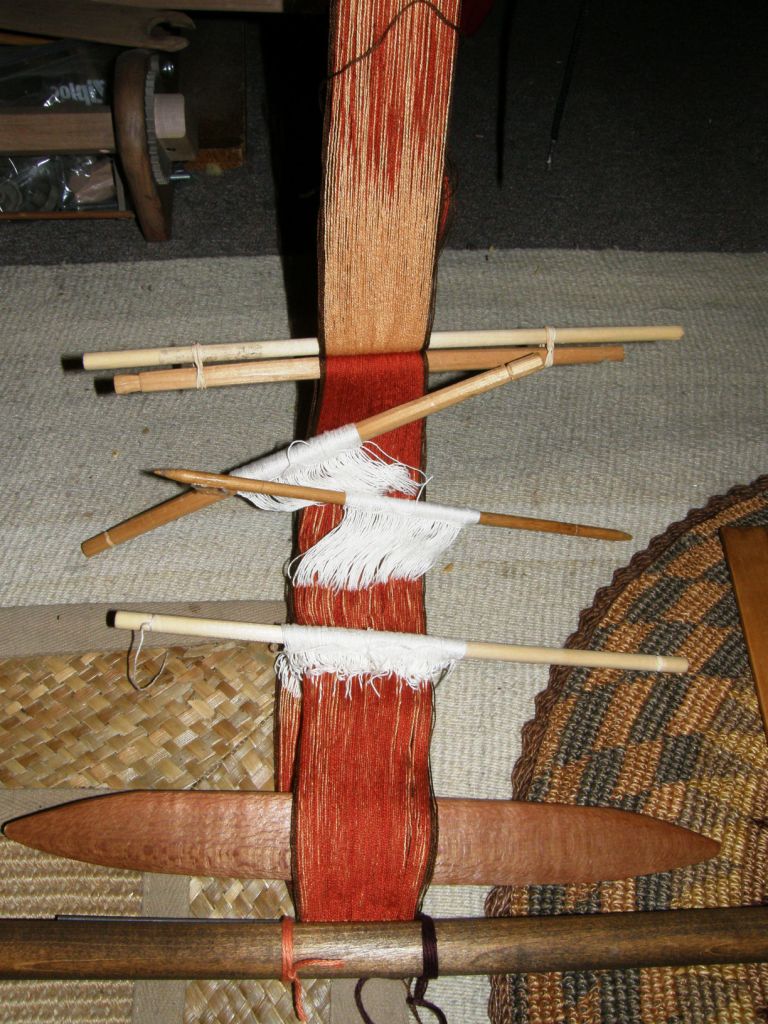
I just happened to have this rough wooden framed which had been abandoned on the terrace of my apartment block about two years ago. Stashed behind the fridge all this time it has finally found its calling! I put nails in it behind which I lodged and then tied the loom bars. I cut a groove into the wooden frame into which I could place a metal rod. This looks very roughly like the frame shown in Nilda’s book. From there it was just a matter of winding two separate figure-of-eight warps which dovetailed around the metal rod. Two people were shown warping in the picture and I must say that I could have done with an extra pair of hands.

Above is my two-panel warp with crochet cotton.

D Y ,whom I met at the tinkuy, went to Pitumarca to check out the warping process after I left Cusco (how I wish I had stayed longer and gone with her!!) and, knowing how interested I am in this, sent me pictures and has kindly allowed me to use them here.
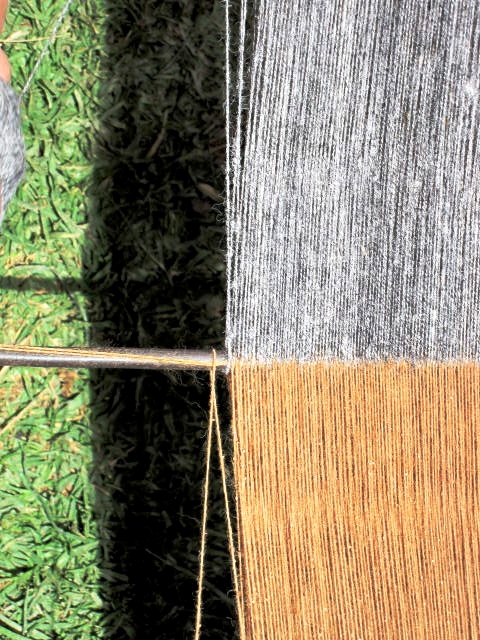
Her picture shows a wool warp in natural colors. You can clearly see how the two yarns take turns encircling the metal rod.

Now here is my piece on the loom…

I was just fumbling around trying to figure it out as I went. It turns out that the winding of the discontinuous warp was not really difficult. What was hard was creating the four selvedges, something which I have not done in years and I have to tell you right now…DON’T EVEN THINK ABOUT DOING IT with cotton!! Creating four selvedges with cotton is horrid!

Just to make clear what this entails, I have made a rough sketch….This is the way I was taught by my teacher in Potosi.

A: You have your loom set up with heddles and shed rod in place.

B: You lash your warps to the two loom bars. I always put a metal rod through the warp ends and lash that to the loom bars.

C:  Weave half to two thirds of the piece.  I have found that the amount woven varies a lot from place to place.

D & E: Turn the loom around so you can start weaving from the other end. You will have to move your shed rod to the other side of the heddles before you do this.

F: Keep weaving with the heddles and shed rod until the space is too small to allow you to continue. Then remove the shed rod and use the heddles to form one shed and needle weave in the other shed. Eventually you will have to remove the heddles and needle weave the last few weft passes.

G: Phew! Finished! Make that a double “phew” . Those last few weft passes are agony!

I had forgotten that the only three times I have ever woven a piece with four selvedges I used hard spun acrylic and wool yarn. These yarns can take the abuse of having the heddles wrenched around when trying to squeeze in weft passes in those tiny spaces and these warps are not so easily pierced and shredded by the needle. Using cotton was a disaster with serious pilling, shredding and breakages. I managed to finish it but it wasn’t pretty. A friend has since told me that over twisted and hard spun wool tends to relax once you take tension off the piece and this better fills out the spaces in the terminal area. Lessons learned.

So, at left is a photo showing only the pretty parts…!! My terminal area is rolled under the loom bar. You can see that I have removed the metal rod and have yarn in its place.

I wove in a pattern using a supplementary weft – a bird which is standing on its head in the picture. The bottom panel has been finished and I have started on the upper one. Of course I didn’t have to make this a four selvedge piece. I could have woven it with fringe at either end. This is perfectly possible with only two panels. With three panels or more you have no choice but to make the center panel/s with four selvedges.

Let’s look at the other more successful four selvedge pieces that I made in the past with sensible hard spun yarns.
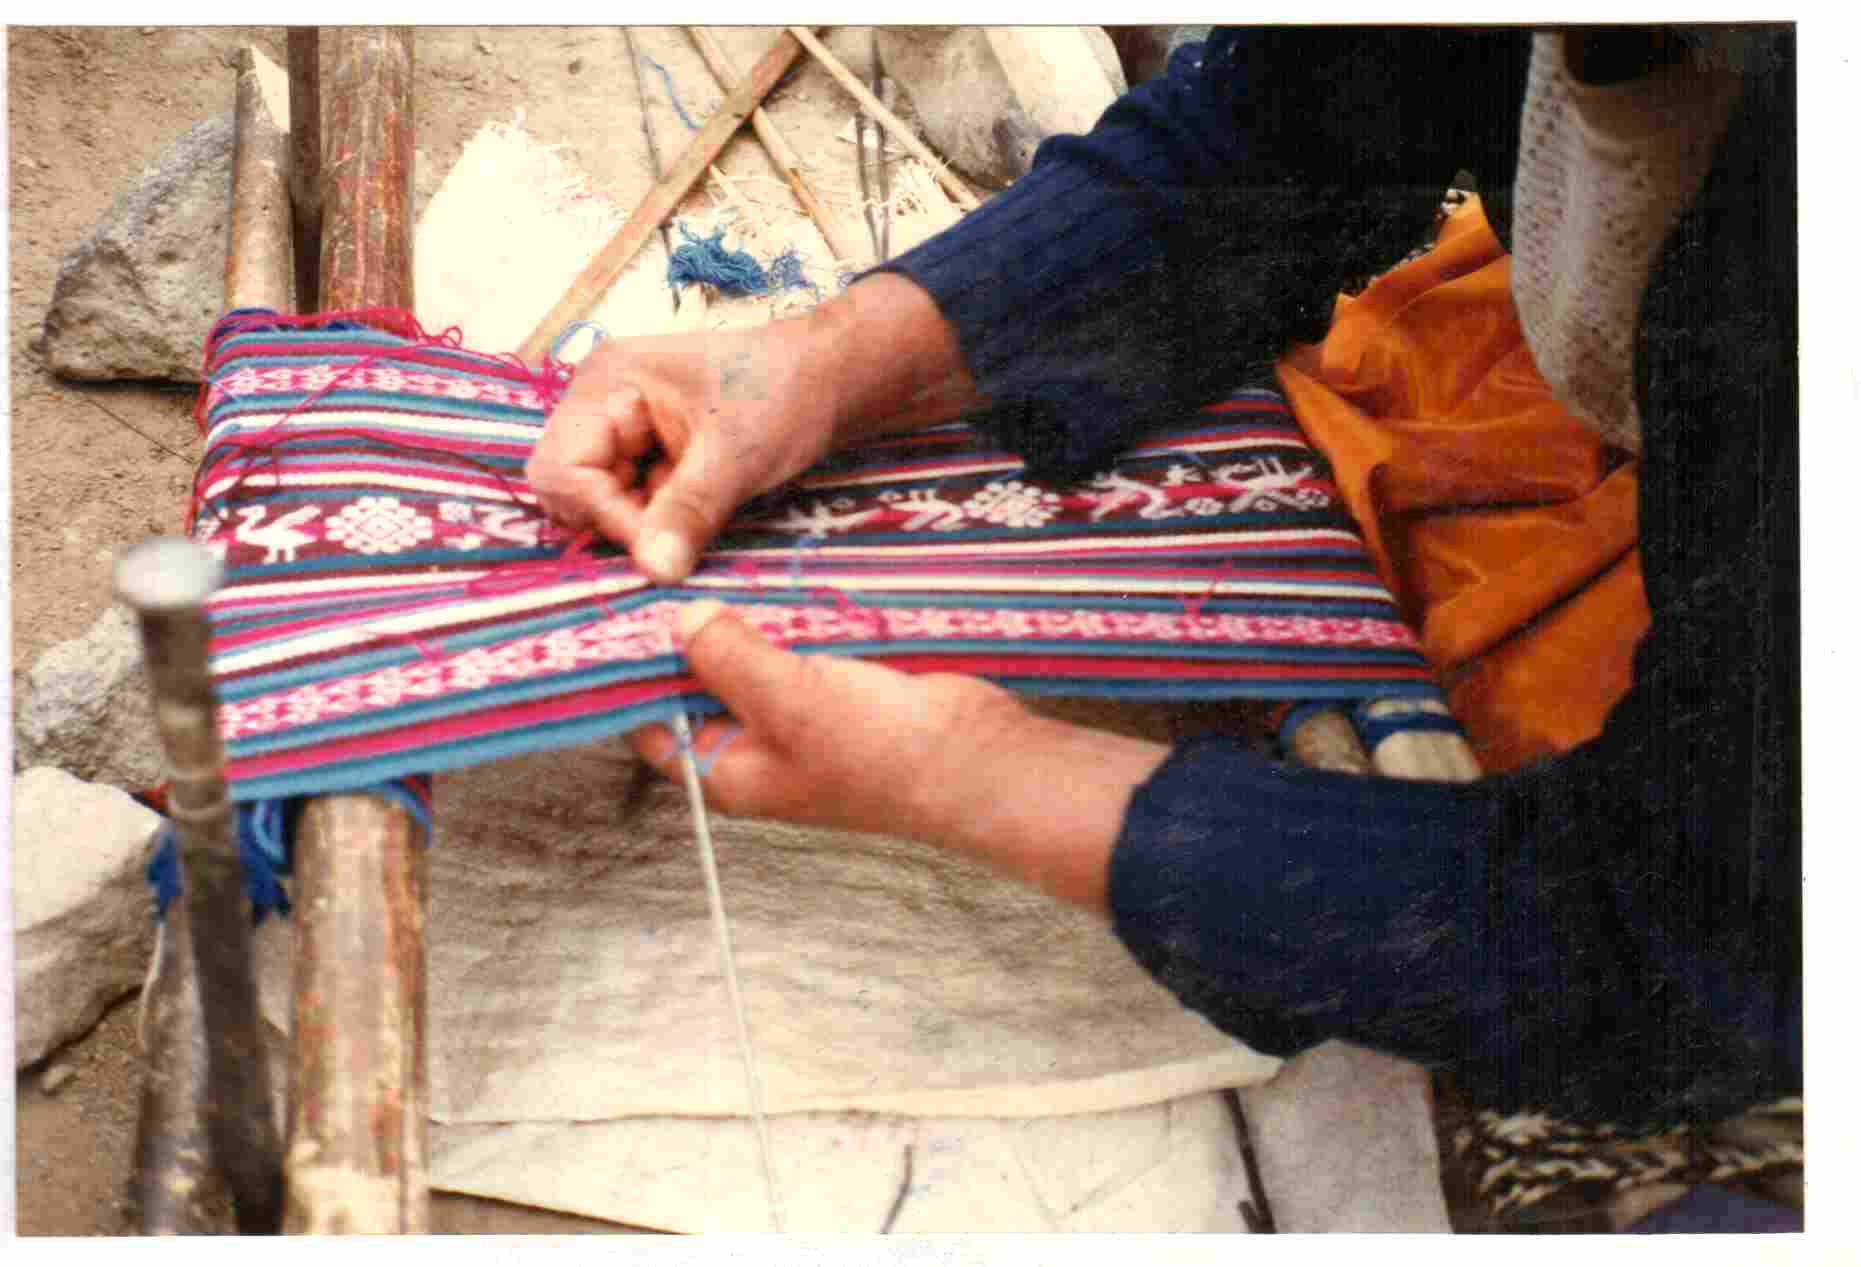
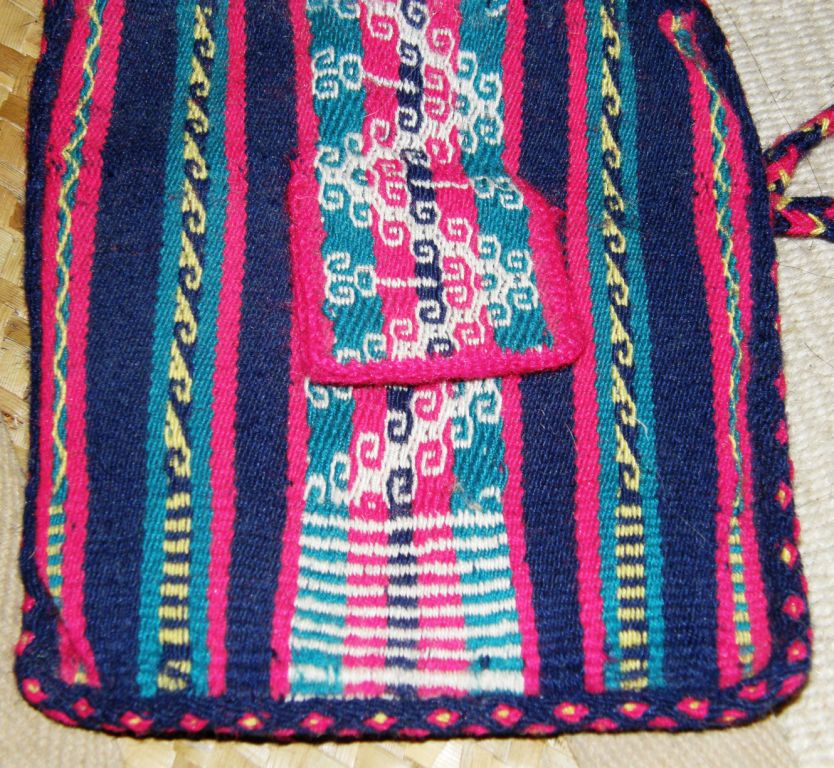
My teacher in Potosi is putting in the final wefts in this piece that I wove under her instruction. This was a particularly difficult piece to finish as it had bands of double weave which meant that we had twice the regular number of warps to needle weave. I wove this with the brightly colored overspun acrylic which is the yarn of choice in this area.
The next project with this teacher was a chuspa, again in overspun acrylic, and I stopped weaving the pattern early in order to make the finishing process a bit easier. The horizontal bands show where I started to close the two ends of the weaving. My teacher left me on my own with this one!

My Bolivian teachers told me that the skill of a weaver is evident in how small she can make the terminal area. The challenge is to continue weaving the pick up patterns as long as possible before having to resort to those final rows of plain weave. My terminal area on the chuspa is enormous. I have seen pieces with mind bogglingly small terminal areas. Weavers in Tarabuco, on the other hand, often weave only one side of their chuspa with pick up design and leave the entire other side in plain weave.

The example above was woven with tightly spun Navajo wool warp. I was weaving a supplementary warp technique. It is a looser weave and was a little easier to finish.

Okay, lessons learned….the next discontinuous warp piece I do will be in cotton with two panels and only two selvedges! It will have fringed ends. Then I will get down to spinning some llama fiber or respinning some commercial wool in order to attempt a four-selvedge piece. Maybe I will do three panels with only the center one having four selvedges. I will ease into to the process this way. For now I will stick to plain weave and supplementary weft patterning and slowly build up to do doing warp pick up patterns.

I would love to do a sold color panel with a pick up patterend panel within it as Antonia was doing above.

Here are some more of the pictures that D Y sent me…
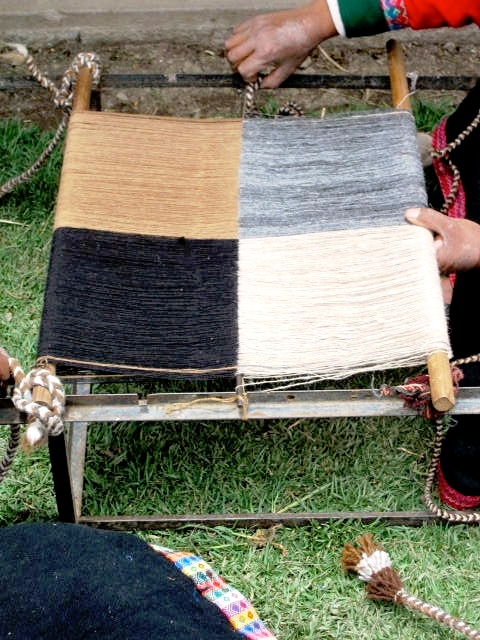
The finished two panel warp with natural wool colors.
A gorgeous warp with multi-level panels.
A closer look.

The metal bars around which the warps dovetail are removed at some point leaving a thick piece of yarn in their place.

D Y told me that the yarn lies alongside the metal rods during the warping process so that when the rod is removed the yarn is there to take its place. You can actually see this in the photo in Nilda’s book. I also received a comment on my blog from Janet Willoughby from Ends of the Earth who made a dvd documenting the discontinuous warp process and other weaving in the Cusco area and she also confirmed that this is the way it is done.

I used the umbrella ribs pictured above (yes, I destroyed my umbrella for this) to pull the yarn through as I didn’t know at the time how else to achieve this.  I also used them to help pull the wefts through the sheds in the needle- woven finish. My umbrella wasn’t destroyed in vain. The umbrella ribs have convenient holes on their ends through which you can thread yarn. I just have to taper the ends somehow so that they are more needle-like and then they will be very handy tools. (Thank you to Gladys Miller who told me about using umbrella ribs years ago).

Of course my visit to Cusco area would not have been complete without a trip to the city to visit the CTTC store and museum. The store is a feast of color and gave us yet another opportunity to watch weavers at work at their backstrap looms.

D Y and I spent a day in Cusco together visiting the CTTC, the plaza and the market to buy spindles as well as strolling around the relatively quiet Sunday streets.  The museum at the CTTC is nicely put together and there we got to see the textiles that had been woven as reproductions of the garments worn by the famous Ice Maiden, the young girl whose frozen body was found in the mountains near Arequipa in 1995. It is believed that she was sacrificed and buried on top of Mount Ampato around five hundred years ago. The story of the weavers’ quest to reproduce these textiles was told in detail  at the tinkuy. A tremendous amount of work went into that project and the weavers told of often being reduced to tears as their early attempts to reproduce the structure of the weave failed. They persevered and succeeded and it was amazing to see the results in the museum. There are pictures of these pieces in Nilda’s book.

And now to finish with a few more videos. There probably isn’t anything here that you haven’t already seen in several YouTube videos but I have edited a few snippets together just to give you an idea of the variety of skills we got to see in action during the course of the tinkuy. They are very short as I was concerned about eating up my memory card.

SPINNING AND PLYING…The first group of women is from Patabamba. In the second and third sequences you will see spinners from Chinchero.

MAKING TUBULAR BANDS AND OTHER WOVEN FINISHES AND A SEVEN STRAND BRAIDED ROPE…. The first weaver from Tarabuco is weaving and sewing a plain weave band to the edge of a chuspa. There is no pick up patterning in this band and so she is simply alternating her heddle and shed loop sheds. You can see that one half of the chuspa is decorated with pick up patterns while the other half has simple stripes.

The second weaver is weaving and sewing a patterned tubular band to a finished weaving. She works from a cross which is held on a forked stick where she picks up, twists and diverts the warps to form the designs. She also uses an auxiliary shed stick which you will see in the video. Look at the speed with which she moves the warps!

The third segment shows a lady braiding a rope using seven strands.

DOING PICK UP…three weavers are seen here showing the different ways they pick up their warps to form patterns. The first weaver from Accha Alta picks up warps to form her patterns at the weaving line. She picks with her fingers to help transfer the warps to a stick as she progresses across the warp.

The second weaver from Potolo, Bolivia creates a temporary picking cross at the weaving line. She has a stick under all the black warps and has opened the shed with all the red ones. She picks up the warps using a stick while reading the pattern right at the weaving line.

The third weaver from Tinkipaya, Bolivia works at a permanent cross which is held by cords up beyond the heddles. She picks using her hands while glancing down at the weaving line to read her pattern.

So many different ways with so many beautiful results!

And last of all, here’s ten-year old Juan Miguel weaving next to his grandma. I love this sequence and like to try to imagine the conversation. I imagine grandma is giving her little grandson some tips which he doesn’t seem to be heeding! I love the obvious amusement and pride in her expression and attitude.

In the second sequence, everyone around Juan Miguel is packing up to go into the conference room and I imagine grandma telling Juan to pack up too. Maybe his response is…”Just one more row abuelita, the lady is filming”.  Juan Miguel continues to concentrate and weave away with a quick glance up at me – a true weaver enjoying his work!! At the very end you hear a commanding voice just as I stop filming. That was mom and, at the sound of her voice, Juan Miguel drops everything and hurriedly packs up.

Helena (Telarahna on Weavolution) in Brazil has been weaving yurt band designs following the tutorials here and here and pattern charts here on my blog. She has put the red and blue, as the yurt band weavers do, very nicely together. Helena never ceases to amaze me. English is not her first language but she has searched the net, bought books and used the information on my blog to teach herself to weave. Most of her resources are  in English and she has been a great source of information on indigenous weaving in Brazil for me too.  I hope she will inspire you all!

Part One of this Tinkuy Tale can be seen here.

If you have enjoyed reading about the artisans in the Cusco region of Peru in my report on the Tinkuy de Tejedores and are interested in the work of the Centro de Textiles Tradicionales de Cusco, I urge you get a copy of Nilda Callañaupa’s book….
Backstrap Weaving – In my own backyard.

IN MY OWN BACKYARD

My weaving explorations seem to be taking me further and further afield these days…outside my city, my country (Bolivia) and even outside the continent and I have found myself visiting SE Asian weavers in the USA and learning about weavers in the Middle East from books.

Sometimes I forget about the treasures that are here right in my own backyard.

I wrote about the Ayoreo people who live in this area and their looped bags in a post a couple of weeks ago and the difficulties I have had in winning their trust so that I could learn more about them and their crafts. I have given up on that for now but hope that I can pursue it again some day. In the same way I was reminded of a Guarani weaver with whom I made contact here over six years ago.

I used to visit Angela, a Guarani weaver, every Saturday morning over a period of a couple of months about six years ago. She had her loom set up in a handcraft store and was warping to make a hammock.

It was such an opportunity to meet up with Angela like this as it is very difficult to find weavers right here in the city let alone a weaver who has a loom and a place in which to use it . Angela’s hometown of Isoso is about twelve hours drive away from here. Angela would weave in the store twice a week. On my Saturday visits I got to see her warp most of the loom, but missed seeing her setting up the heddles. I saw her start the weaving and part of the designs. The white cotton hammock had three bands of green, yellow and black pick up designs. Angela’s motifs included flowers, geometrics, pineapple plants and scenes of people in their typical daily routine.

The motifs are hard to see on my scanned photos. On the right you may be able to make out two ladies “machucando”, that is, pounding plaintains, in order to make “masaco”, a typical Santa Cruz snack.

I would ask Angela where she lived hoping that I could maybe visit her at home and have some lessons. She had told  me that she had a small loom in her house. She would stretch out her arm and say “leeeejos” (“lejos” means far) as if to discourage me from visiting. Unfortunately, her son fell ill before we could really bond and she stopped coming to the store. Eventually the loom disappeared and now even the store is closed. I did manage to give her a copy of the photo of herself and her baby boy before I lost touch with her.

After Angela’s disappearance, I found bits and pieces about Guarani weaving in books and found that the technique she was using to weave her hammock is called Moisy. They also use a pebble weave which in the Guarani language is called Karapepo. I bought a hammock and bag in the Karapepo technique

I was able to copy the deigns from the hammock using Andean pebble weave technique and make this guitar strap.

From books I learned that the earth and the cosmos are represented by the star and snake skin designs. These are pretty much the only designs you will see woven in the pebbled Karapepo technique. In the Moisy technique, however, the weavers have a far greater repertoire and the designs are not like any others that you will see any where else in Bolivia. They speak of the lush tropical fruitiness of Santa Cruz! Leaves, flowers, vines, butterflies, animals and people involved in their daily routines or dancing and celebrating carnival are depicted on the hammocks, wall hangings and bags.

Cell phone pouches made with the Moisy technique with flower and butterfly motifs. A band of horizontal bars serves as the strap and velcro has been sewn on as a closure. A black band was woven and sewn simultaneously to the edges using the weft as the sewing thread to give a very nice neat finish.

And here is the best part of the story…I bought the above cell phone pouches from Angela last weekend at her home. Yes, I found her again, was invited to her home and got to spend the afternoon with her looking at her looms and weaving. The little fellow pictured with her above is now 8 years old and she has since had another son – that makes five sons in all now! Her eldest is married with his own family.

How did I find her? Very much by chance. The English institute where I taught English for eleven years started offering classes in the Guarani language shortly after I left. I recently noticed the loom and weaving pictured at left in the library which had been made and placed there to celebrate the start of the new Guarani program. I asked the receptionists about it they showed me the lovely cell phone pouches that a Guarani weaver had sold them. Fortunately, they had the weaver’s number and it turned out to be none other than Angela.

One of the karapepo cellphone pouches that Angela made for the receptionists – quite a different style to the blue and black ones she made using the Moisy technique.

I was very keen to see how Angela sets up and weaves her pebble weave as well as to learn how to do the Moisy. I was pleased to see that she uses the very same crochet cotton to weave as I do. When I visited her last Saturday, she had just warped up to make a colorful wall hanging on the smaller of her two looms, had just finished a book bag for a university student and was also in the middle of weaving a belt with fighting roosters which had been ordered by a Brazilian business man who mounts the woven pieces on leather and then apparently sells them for a very good price in Brazil. Angela’s enormous hammock loom is there in her patio and she can warp up several small projects on it at a time. She seems to have enough orders to keep her very busy.

She showed us one of her hammocks, the finished book bag, her cell phone pouches, greeting cards depicting carnival celebrations in her hometown of Isoso, pillow covers, belts and purses.

At left, the smaller loom warped for a wall hanging in Moisy technique and at right Angela is warping a narrow band to show me how she sets up for Karapepo technique.

She stretches a cord across the loom around which the start and end loops of the warp dovetail. Except for when she is weaving a hammock, she usually creates a third selvedge by starting her weaving right at the dovetail string.

I filmed her warping, making heddles and weaving the Moisy technique. As usual when I have the camera in front of my face. I find it hard to really absorb what is going on and so I had to come home and watch the movies over and over before I could grasp completely what she had been doing.

I like the way she makes her string heddles chaining them together. You will see her doing this in the video.

Angela’s chained heddles.

She, on the other hand, loved my heddles on their sticks (I had taken my backstrap loom, which she found very amusing, with a double weave piece on it to show her) and so I taught her my way of making heddles.

Here are two short clips of Angela warping using the dovetail string and making heddles. As she makes the heddles she is explaining to me the meaning of the designs on my guitar strap and telling me about the snake skin and how the snake that taught the first Guarani woman to weave in a dream is also embodied in the Parapeti River. Her little boys can be heard chattering in the background in the Guarani language.

In the next video, she is weaving the belt with the fighting roosters in Moisy technique. She has three sets of string heddles and another shed above the cross string. You must see the way she does her pick up. It is quite unique!

The lower of the three string heddles holds a shed through which she simply passes the weft without having to do any pick-up. The two upper heddles hold the separated colors. She pulls on those two heddles working her way from left to right to pick out the colors she needs. Watch her left hand gathering up the selected warps. Her eyes are down at the weaving line watching the design so she knows which colors to pick. Then she opens the shed which the lower string heddle controls. Then she does another row of pick up before opening the shed above the cross string, through which she can pass the weft without having to pick up warps. This shed is a little difficult to open as the warps have become entangled in the string heddles.

So I had to go home and see if I could figure out the Moisy! The best way was to try and reproduce one of her woven motifs. I found that I had to pull the weft really tightly through the shed to have my design look like hers. It makes a very, very sturdy fabric. For those of you who have my Andean Pebble Weave book, I would compare it to the thickness you achieve when you use the three-shed border. In fact, I quickly realized that the three-shed border is the very same structure.

There is my attempt to reproduce the flower on the cell phone pouch. It really helped a lot knowing that we both use the same thread so I knew what width to expect right from the start. I really had to pull the weft tight and force it into that width.

The motif is not exactly the same but I understand the technique.

I tried to chart it and then found my chart was wrong and so ended up just reading it directly off the cell phone pouch which was a really good exercise.

I did notice that Angela is weaving the rooster belt a lot more loosely. .

I confess that, although I started out with my warp set up as Angela showed me with the three string heddles, I found it quite uncomfortable simply because it was so foreign to me…impatient!…  and so I  changed to another set-up after a while with which I felt more at home. I would like to try Angela’s pick-up technique on her vertical loom and hope to visit her again soon. She has invited me to come and see her floral designs on the colorful wall hanging she is making.

In the meantime I will work on my charting as I would like to make a collection of these uniquely Cruceño designs.

###################################

What else have I been up to?

Well I started my double-weave belt using the Bedouin designs that I wove into my wall hanging.


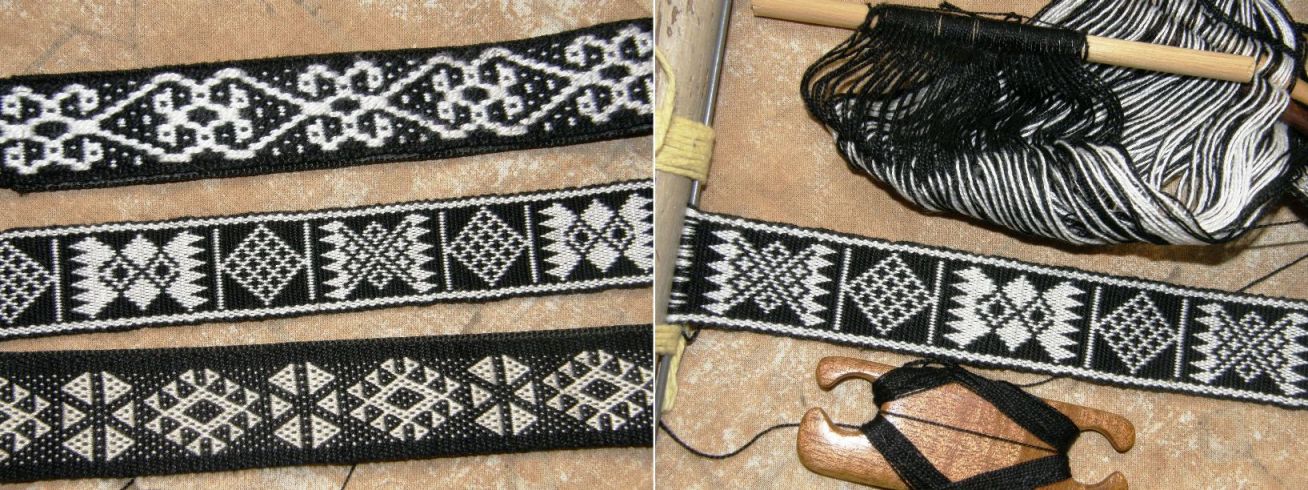
I seem to be gathering a collection of black belts. At least they are all in different techniques with designs from different cultures. The uppermost one is two-color alternating warp floats (my made-up name for it…we could use the Kyrgyz word “terme” for it). The center one is the yet-to-be-finished double woven example with Bedouin designs and the lower one is, as you must all know by now,  Andean pebble weave as taught to me by weavers from Ayacucho, Peru.

I have also been weft twining but using floats this time to make a textured design in one color which is inspired by the alpargatas worked in ply-split darning that I showed you last week.

I am totally unimpressed with the results so far!

I’ll keep at it. Who knows, it may look better as I progress. Maybe I should overlap the floats by two warps instead of just one. What do you think?

What have my online weaving buddies been up to?

Anna, who is cycling down to Tierra del Fuego has turned up in Salta, Argentina and has added braiding to her skills following my instructions for the Margarita braid.

This is one of the two braids that was taught to me by my sling-making teacher in Peru.

I usually advise people to start with the Palma braid first as a skills builder but she jumped right in and, as you can see, has done really well!

I have gathered up all the information on the Palma and Margarita braids that is embedded in various posts here on my blog and put it all together on one page here.

Zacarias in Yanque Peru taught me these two braids which are used to make the typical slings of the area.

Marsha Knox of Pandula Arts Creations has been playing with simple warp floats in two-color alternating pairs on her Gilmore Wave loom and has created some great designs of her own. More designs like these can be seen on the Guatemalan belt in this post.


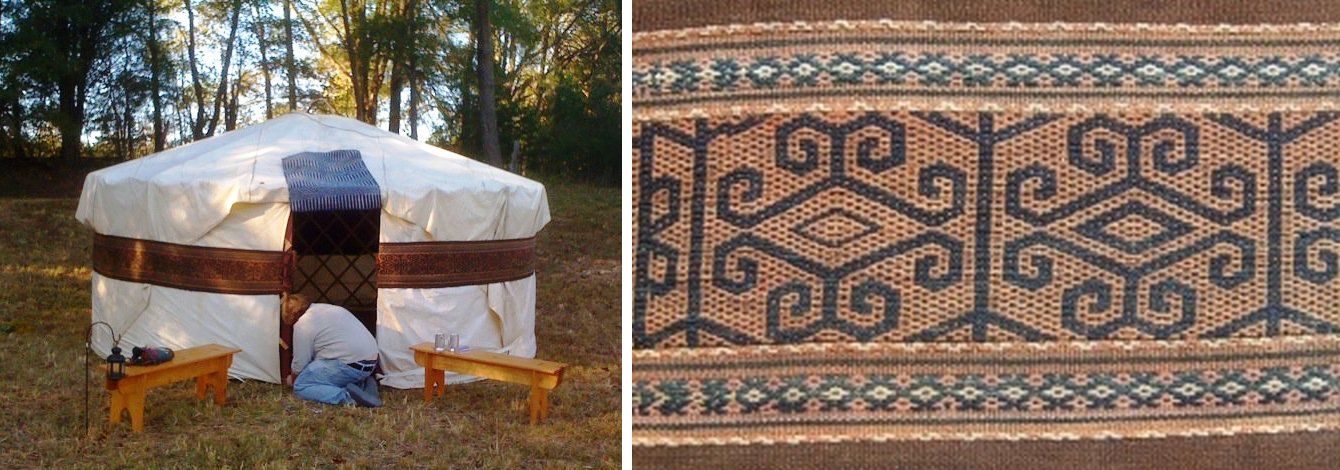
Lisa has been up to her eyeballs in dyeing but took some time out to enjoy a night in her yurt. You will probably recognize the  band encircling the yurt that she was lucky enough to purchase at a reenactment event and which I have shown off many times here on my blog. It is woven in the “terme” technique.

######################################

Finally…you may remember my posting a video some time ago, which had been made in March this year, showing little Melina learning to spin cotton from her aunt in coastal Ecuador. This is the family with whom I stayed in 2007 and learned about the process of weaving cotton saddlebags and the simple warp float technique. I accompanied anthropologist Kathleen Klumpp on this trip and Kathleen has just returned from another trip there with a new video of Melina’s improved skills seven months down the track.

Kathleen tells me that Melina is not yet able to support the weight of the spindle and so rests it on her thigh.

The original video of Melina’s first steps can be seen here. How quickly she has picked up the skills! Aunt Trini and Grandma Luz are master spinners and she is lucky to have such skilled teachers but I think that Melina’s success is largely due to Kathleen’s encouragement. How wonderful too that Kathleen has made and shared these videos so we can all follow this story.

And I have been inspired by a very sweet recent comment from Graciela here on the blog. I don’t know where she is from but she has inspired me to get my act together and put up the tutorials translated into Spanish that I have been promising. Another task for this weekend and I will try try try not to get distracted!

Pssst! There’s a Spotlight article about my backstrap weaving in the latest issue of Handwoven…


Backstrap Weaving- On the Road Again!


A short post this week as I get my sticks, strings, shuttles and spindles together for another trip to the US flying out tomorrow  (Friday the 16th).


Andean Pebble Weave is now in print! It will also be available for purchase in its e-version on the WeaveZine site. (UPDATE: Now it is available in 4 languages at Patternfish.com along with the follow-up book, only in English.)

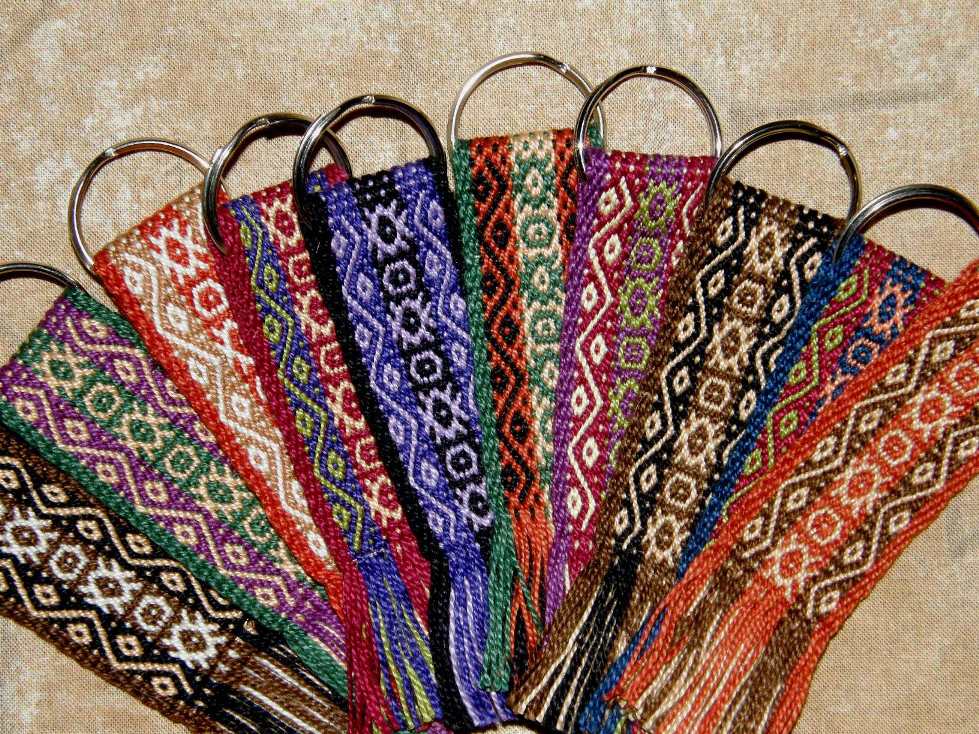
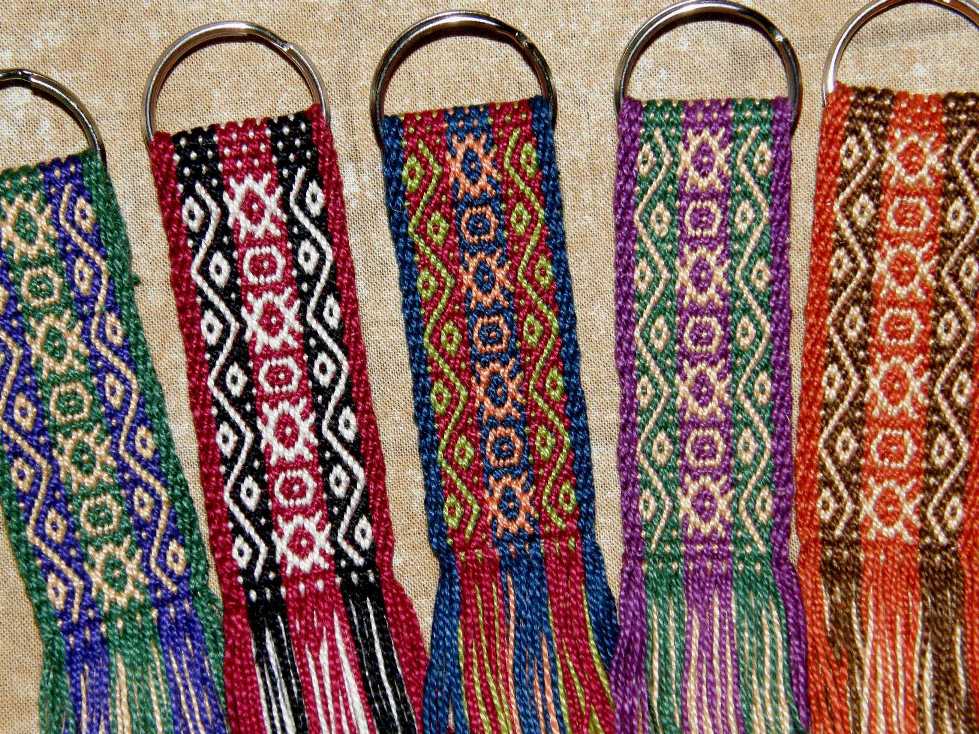
With all the loose ends that needed tying up  and the time spent working with Syne Mitchell to get the print version of my monograph ready, I didn’t expect to get any weaving done this week. But then I had an idea and ended up weaving a bunch of keyfobs. I thought it would be fun to give a keyfob away with the first 20 copies of Andean Pebble Weave. So I sat with my basket of cotton thread and had a great time combining all sorts of colors to make the 20 keyfobs to accompany the books. I combined several small pebble weave motifs and now I can definitely see the benefits of weaving the same design over and over as some indigenous weavers do. I could probably weave this with my eyes shut now!! As long as there were new colors to combine it never got boring. Only one or two color combinations are repeated as I made tiny warps and wove one at a time.

And I didn’t stop at twenty as I thought that these fobs would make nice gifts all year round. I will be weaving these where ever I can find a spot to tie up my loom – in the Vendor Hall and probably to my bunk bed in my hostel!! as I am packing my mini warping board and crochet cottons.

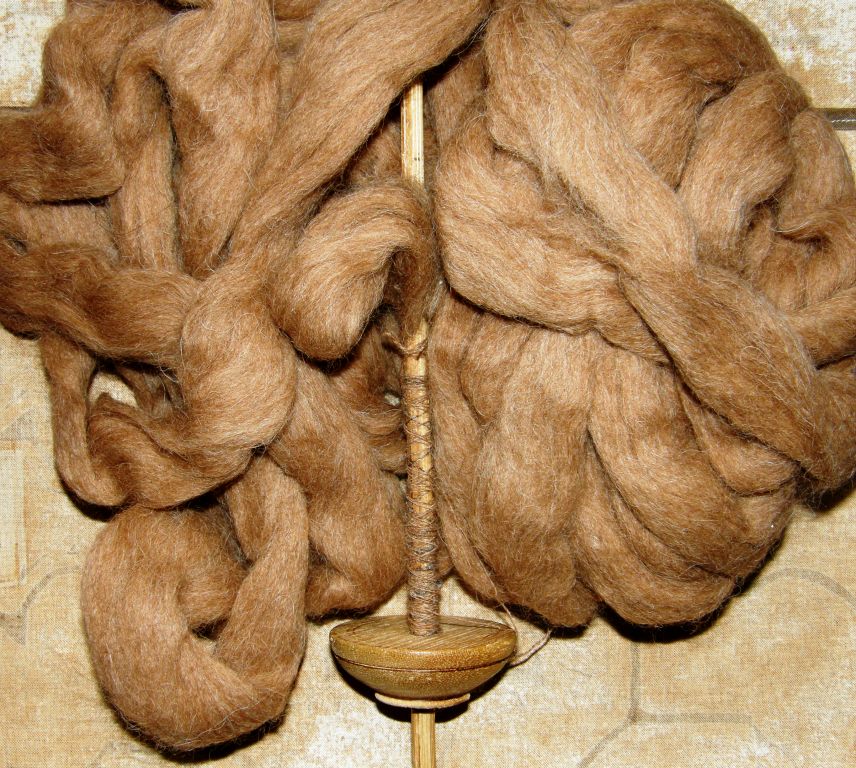
I am also taking my wobbly Bolivian drop spindle and some of the alpaca fiber that my friend Janet gave me on my last visit. I just spun a little to get it started on the spindle and it is so so beautiful to spin! This is not the first alpaca I have ever had to spin. I bought some many years ago in Peru and it was in a dried-out, brittle and filthy state. I lost a good third of it in the cleaning process and I knitted rather than wove with it. Now I have this prepared smooth luscious fiber to work with – what a dream! It almost feels like cheating! I’ll be spinning it to weave with on my backstrap loom.

I am hoping to squeeze some of my smaller weavings into the backpack to show people who drop by the Weavolution booth at Convergence. I am also taking them to show some folks in North Carolina. I found out about a  group of Montagnard people who have a small community in North Carolina. This is wonderfully convenient as North Carolina is on my trip route on my way home after Convergence. My good weaving buddy Lisa lives there and we have been invited to go visit the Montagnard community as there are backstrap weavers among them. What’s more, it seems that they have been recently joined by Karen and Nepali weavers. We hope to share our textiles and backstrap techniques and I am so excited about this opportunity. You can read a bit about the Montagnard people here and watch a video on one of the weavers in the North Carolina community here.

Betsy Renfrew who has been working with the weavers, and who extended the invitation to me after my initial enquiries, has started a blog about the group’s activities.

My backpack will also be full of sticks as I will be staying with one of the Weavolution founders in Washington and she may have some friends over to weave. I have loom bars and backstraps for several people so we can all weave together.


So…come and visit me at Convergence!! I will be with Weavolution founder Alison at the Weavolution booth or wandering about most likely with a bunch of sticks protruding from my tote bag. I would love to meet you and show you my weavings and loom. You can check out the new print version of my book. I hear that there will be a weaver from the Textile Center in Cusco demonstrating backstrap  weaving too so I will definitely be there watching her.

Hopefully next week’s post will be full of Convergence events to report and stories of all the wonderful weavers I have met.


Backstrap Weaving- Crafting “on the road” and a video tutorial

Hopefully, if all my standby flights worked out, at the time this post is published I will be sitting in Robyn Spady’s inkle weaving class at CNCH. (Conference for Northern California Handweavers) My first such event! – very excited. This will be my first experience with an inkle loom and, hopefully, it will be better qualify me to answer those questions I often get about transferring pick-up techniques normally woven on  backstrap looms to inkle looms.

On Saturday, I will be taking Syne Mitchell’s rigid heddle class and the rest of the time I guess I will be looking at all the goodies on display, seeing Weavolution members in the flesh for the first time at the meet-up, perusing the galleries and taking lots of pictures to share with you all here at some stage.

So, as I write this here in Santa Cruz, Bolivia I am thinking it is time for me to get my “on the road” crafting stuff together.

I always take my backstrap gear along with me and, when there really isn’t anywhere I can hitch my loom, I braid or spin.

First the backstrap gear…

Backstrap weaving stuff to take traveling.
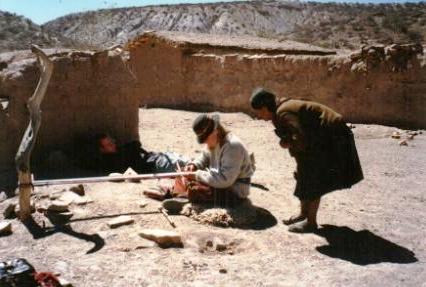
Weaving literally on the road near Potosi, Bolivia. I went with friends to the village of Calcha near Potosi to meet with weavers. On the way back we had to sit for hours on the side of the road waiting for a ride and finally got to travel back to Potosi in the back of a truck. We passed the time by hitching to a convenient dead tree and weaving. We had bought a sheep skin in the market in Calcha so we could pass the night sleeping on the floor in the hospital! This made a nice comfy seat for weaving. One lady who lived right near the main road where we were waiting came along to see and was enchanted!

I see that there is something I forgot to include in the photo – several flat non-stretchy shoelaces to tie the loom bars to a fixed object. I usually take a project already warped up and then my mini warping board goes along for when I get through that and want to start another.

The mini warping board with its removable screw “stakes”  is on the left.  Moving from there to the right, I have several thin dowels for cross sticks and heddle rods, my new shadow weave sewing kit purse, three beaters, a large curved needle, my new belt shuttle (thanks Lydia!), two loom bars and a roll up rod,  metal rods for three-selvedge pieces and my backstrap. I also take a small bottle of white glue so I can finish the braids on keyfobs and bookmarks. I usually pick up yarn on the trip so I can try out new stuff.

As for the braiding…

I was recently sent this image of a Tibetan nomad sling. I am no braiding expert but superficially, at least, the braid on the left looks exactly like the Margarita braid that I learned in Peru.

No, I am not going to pop a marudai, the piece of equipment on the left, into my backpack. Thanks to my teacher, Zacarias in Peru, I can make the nice Palma and Margarita braids used to make slings in Peru (which I first showed you in this post) with those two pieces of equipment on the right.

Of course there are other ways to braid the 24-strand braids without the use of cumbersome equipment. Rodrick Owen shows you in his Braids 250 Patterns from Japan, Peru and Beyond how to make them using notched cardboard squares and circles to keep the strands nicely in order. Perhaps you listened to the recent WeaveZine weavecast with Roderick Owen.

I am going to show you by video today how to work the 24-strand Palma braid as I was taught in Peru by a sling braider. The fiber used in the sling braids is generally llama and the strands are fairly thick and, therefore, easy to manage in the hands. I don’t imagine it would be quite so easy with fine yarns.

The video has been split into two segments. The technique has four parts so you will see parts one and two on the first video and the other two parts on the second one.

The idea of the videos is to show you the movements of the strands. I am not showing you there exactly how my teacher held his hand as he braided as the crossings were not so clear on the video that way so I will show you that in a still shot later.


Two Palma braids made with 12wpi cotton. I am going to use the one on the right as a strap for the bag which you can just see at right.

Getting started on the Palma braid:

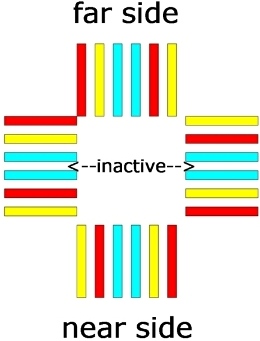
You need eight strands of each of three colors, that is, twenty-four in total. Keep the strands short for your first practice braids – I suggest no longer than 18″. Tie all the ends together in a knot . Hold the knot in your fist having all the strands emerging from the top of your hand and then separate them into four groups. Try to align the strands as closely as possible in the order shown in the following diagram. Organized in this way, you will have red and yellow “Vs” in your braid separated by columns of light blue. It will be impossible to get the strands to stay exactly in this order at first, but don’t worry about that. This is just to get them more or less in place so you can start.


You can also see the strand order in the photo below left. Once you are braiding, only two sets of strands are worked together at any one time. You work with the near and far side sets while the other two sets are hidden in your fist, clasped against the braid itself as you can see in the photo below at right.

LEFT: The four groups of strands. RIGHT: Grasping the strands in the fist.

And now for the videos…They are a bit on the dark side-still haven’t found the perfect spot for movie making…


Well, I hope these video instructions were clear for you. Remember that yellows always pair with reds and vice versa and that you are always working from left to right across the strands. In your very first two moves, you won’t need to think about “uppers” and “lowers” when you work with the blues – just grab any blue and cross it over. Uppers and lowers will become apparent after that. Tug lightly on each strand before you cross it.

Starting is the hardest part as the strands will be loose and wandering about. After the first sequence, however, they will begin to sit naturally in their correct positions.

The picture at left shows how my teacher held the strands while braiding.  All the ends were wound into butterflies and his hand was tilted so the strands all hung down. It looks like a mess and the strands occasionally wrap around each other, but it works! Strands are going this way and that and then you open your fingers to reveal this gorgeous braid. This is the first time I will be using a braid for a bag strap – let’s see how it goes.

I will be braiding on my flight to San Francisco as I am putting some woven pieces in the gallery at the conference and hope to use the braids to hang them. This is one of those things I just didn’t get around to doing so I guess I should stick to four-strand braids for this so I can get them done quickly.

And finally the spinning…

I always take a spindle and a bit of llama fiber along but usually only to show people a

Trini in Ecuador having a go on my drop spindle.

typical Bolivian spindle. The weavers in Guatemala knew nothing about llamas or llama fiber so it was fun to show them pictures of llamas and samples of the fiber as well as some things I had woven with it. Those in coastal Ecuador had never seen drop spinning so it was nice to be able to teach them a little. Spinning, unlike pick-up weaving and braiding, is something I can manage while chatting with people. I do like hunting for typical spindles and unusual whorls on my trips and this usually leads me off the beaten track. Having a spindle on me is always a good ice breaker. Not everyone can weave but in the villages of Bolivia it seems almost everyone can spin a bit or at least use a spindle to respin or ply yarn. They actually think I am a little mad when I say I want to learn – “What is there to learn? Even my four-year old son can do it!” – they tell me.

LEFT: Typical drop spindles sold in the Bolivian markets. RIGHT: A few of the spindles that I have collected in my travels.
LEFT: Spinning in Yanque, Peru RIGHT: Salasaca, Ecuador where the spindle called ‘sigsig’ is made from pampas grass stems. The wool is spun to be woven on floor looms into the cloth from which skirts and shawls are made.
LEFT: Spinning in Otavalo, Ecuador RIGHT: Spinning on the way home from the market, Tarabuco, Bolivia.

And last of all I take my small photo albums with pictures of weavers, looms and textiles from around South America to show weavers and travelers. I also have another album with small samples of various motifs I like to weave. In Salasaca they treated this like some kind of shopping catalog and started  making orders selecting motifs for belts and purses!

Now is there any room left in the backpack for clothes and stuff?

I am going to try my best to continue with my Friday blog posts while on the road. If I don’t don’t get a post out, it will mean I am having too much fun! 🙂

Late addition to this post…here is Stitchwort’s “S” design band from last week’s tutorial on her inkle loom made with her own handspun yarn. So if you have been wanting to try these techniques but have been a bit dubious about getting strapped into a backstrap loom, take a look at the lovely band that she has turned out. By the way, I am in love with her little shuttle and she made that herself – check it out on her blog.

The only drawback with the inkle loom that I can see is width limitations but for a band like this there is no problem. One Weavolution member did mention that these types of weaves put a lot of strain on the inkle loom so that is something to bear in mind – just in case! I am hoping to come back from CNCH a lot wiser about inkle looms!

##################################################

TRAVEL UPDATE…WEDNESDAY: Yay I made it. Both my luggage and I got to San Francisco. I have one day to recover from the trip before the conference. Gorgeous day here today – I even got sunburned.

A little time for some sightseeing…

This is one of the places I wanted to see but, wouldn’t you know it?-it was closed just today to prepare for an exhibition. So I had to satisfy myself with pressing my nose against the window and looking at all the lovely things.
THURSDAY: Dim sum breakfast in lively Chinatown, San Francisco before heading down the coast to Santa Clara. The ocean!-something I miss in Bolivia.
At the Convention Center- meeting other weavers and a lesson on spinning angora rabbit fiber from Janet, a Weavolution friend, using spindles with bead whorls.
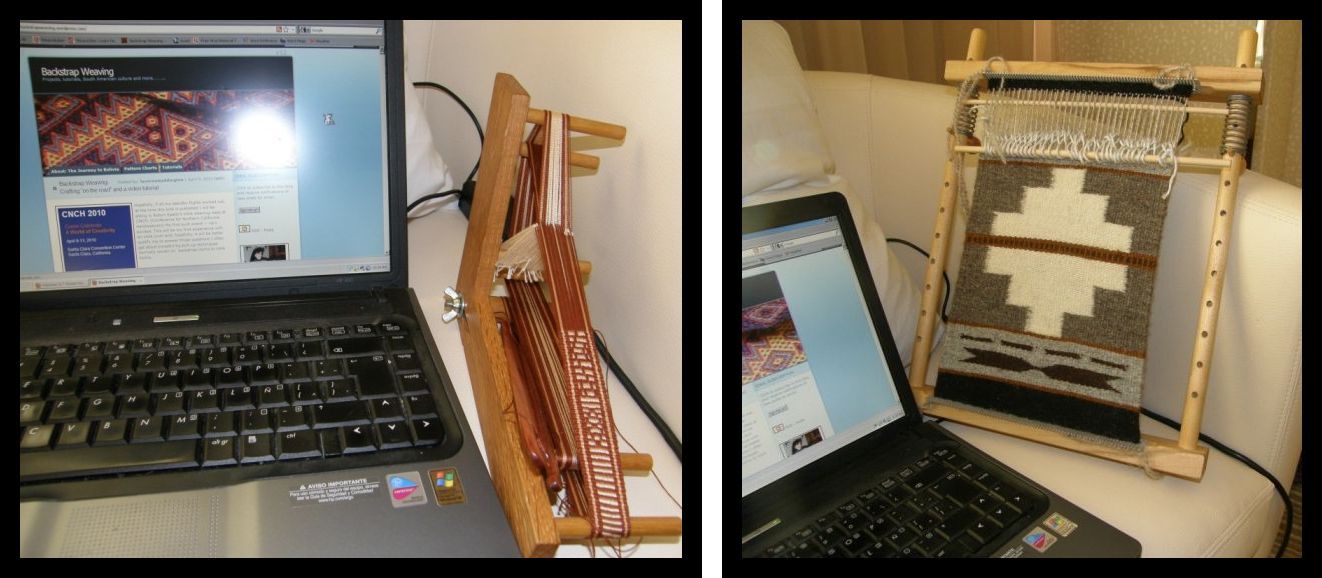
A couple more “on the road” weaving tools belonging to my roomies here at the conference. LEFT: Janet’s mini inkle loom which she let me play on last night. RIGHT: Connie’s cool C Cactus Flower Navajo loom with her cute miniature rug.

It is funny that I have run into this Cactus Flower loom here because I saw one for the very first time last weekend when I was emailing my first weaving teacher – a lady here in the US who taught me Navajo style weaving. This is where I first got my start in weaving back in 1995 and, seeing as I am here once again in the US where it all started, I hope to blog a bit about my first weaving teacher and my adventures in Navajo style weaving next week. I have always lamented having to leave my huge Navajo loom behind in Chile when I moved to Bolivia in 1998. Now you can just pop a Cactus Flower loom in your bag and hit the road!

A buzz of excitement in the air…classes start tomorrow. 🙂