Backstrap Weaving – If I were to do it over….

“If I were to do it over”….

I know that I am trouble if I find myself sitting in front of a warp and saying that phrase before I can even throw the first shot of weft or, in the case of my current ikat project, before I can apply the first tie to the area that will resist the dye. As I set the warp on the loom bars, I was thinking that I would warp it slightly differently “if I were to do it over”.

As I wrapped the warp threads, I was wondering why I had automatically started placing the knots at the edge of the wrap rather than in the center as I had  in past ikat projects where I used cassette tape. Would it make any difference? Yes it did. “If I were to do it over”, I would put the knots in the middle of the wrap. There is far less chance of nicking or cutting a warp thread with scissor tips when unwrapping if the knot is in the center rather than at the edge.

wraps for new ikat project?The wrapping part didn’t take as long as I had thought. It was fun watching the design appear and satisfying seeing it take on the same proportions as my sketches. I had calculated and measured corrrectly…yay. No thoughts about do-overs there.

ikat motif backstrap weaving“If I were to do it over”, I would wash the thread in hot water before starting the project. I have dyed a lot of cotton in my time. I guess it has all been knitting yarn and crochet thread. Those have all dyed beautifully with the Dylon cold water dyes that I buy in small packets. However, my supplier of  the UKI 20/2 weaving yarn that I am using in this project told me that this yarn is finished with a coating of wax. I only found this out by contacting them after my failed attempt to dye the warp black.

That explains the medium shade of blue I got with navy blue dye last week more than the fact that I had used a very watery solution. With this new warp, all I could turn out was an ugly steely grey instead of the black at which I had been aiming. What a waste of dye. I then overdyed it with far more dye than was necessary to ensure that I got black the second time around….another waste.  So, that’s the end of my black dye supply…no do-overs possible for that part of the process.

spots of dye under ikat tapeAs the ikat tape was close to transparent, I was able to see dark spots under the tape before I could even start removing it. That was very disheartening.

Clearly, the dye had seeped under the tape in several places.

However, it wasn’t that bad after all. A very noticeable concentrated spot of color on a group of threads all squished together and tied, turns into a vague smudge when the individual threads are untied and fanned out. It is not like the marks disappeared, but they were something with which I could live. I couldn’t see why those particular parts had allowed dye to seep in, and so it is not a problem that I would expect to be able to eliminate “if I were to do it over”.

ikat motif on backstrap loomIt was time to make heddles, put the shed rod in place and then unwrap. The unwrapping part was nerve-racking….take it easy and don’t snip a warp thread for goodness sake!  And then it was time to weave! And this is where the “if I were to do it over” turned to “when I do it over” and there are several reasons for that.

woven ikat motif backstrap weavingI placed many…too many… thin strips of cardboard within successive sheds to start with. I can see now that not all those strips were perfectly straight and the accumulation of this flaw had the effect of having me start the weaving with a slightly askew weaving line.

I didn’t notice. Iwas concentrating so hard on the ikat motif and the alignment of the warps that I didn’t even notice until the whole motif had been woven. I had to weave in some short rows to get things straightened out for the supplementary weft patterning…NOT GOOD. It looked awful. Then I noticed that the ikat motif itself had also been thrown slightly off center. Oh well.

Maybe only I can see it but it just isn’t good enough. It was time to start the list headed “When I do this over” and get used to the fact that this will go on the sample pile.

However, I have to say that I am really pleased with the way the ikat pattern turned out. I didn’t get any of the dreaded “railway tracks” (my name for repeated single rows of lines and spots of undyed thread that get completely detached from the main motif.) There is fuzziness…perhaps more like a raggedness…it looks like ikat! Yay!

When I fished out my silk thread for the supplementary-weft patterning, it was plain to see that there are many levels of off-white-ness. The UKI thread is closer to white and the silk weft closer to cream. They weren’t going to look good together but I wove some patterns anyway. This piece is now a sampler and I may as well use it to learn as much as I can.

ikat figure with supplementary weft patterning backstrap weavingIn the picture above, I have flipped the loom around and made new heddles so that I can add the supplementary-weft patterns to the other side of the ikat motif. More short rows had to be added to get things straightened out….stupid cardboard strips! grumble, grumble.

So, WHEN I do this again, I shall adopt some different ways of doing things, starting with the warping. Add to the list….don’t forget to dye the weft!! Weft went into the steely grey bath but not the black one which wasn’t such a problem until I broke two warp threads while weaving and had nothing with which to replace them.

ikat tapeI have loads of thread, a lifetime supply of ikat tape, and I think that I could probably get some embroidery floss here to match more closely the color of the UKI thread. What is missing is enough black dye…darn. Do you think that mixing navy blue and dark brown would work?

In the midst of this I had visitors who had not seen my weaving before.

I hate having to feel all squirmish about showing my work to people because I know what kind of questions and reactions I always get from local Santa Cruz people when I do so.

They are fascinated and delighted at first until they eventually ask how much time I spend on this kind of thing. And, when they find out that I don’t intend selling my work, and won’t even be hanging my wall hangings in this home (I am saving them for some vague future home-of-my-dreams!), well, that is the end of the story. Heads are shaken in bewilderment and I am left feeling a little deflated and almost foolish. My explanation of the ikat process was sheer madness to them!

painted tshirt ethnic motifWhich had me thinking once again about process versus product.

Of course this and pretty much all my projects are all about the process.

I want to experience the ikat process and not merely create a large solid white motif on a solid black background. I could, after all,  paint a white motif on black woven  fabric if that is all I wanted,  like my friend Sharon did when she hand-cut stencils and painted a beautiful set of tshirts for me with ethnic motifs.

Or, I could use the warp-faced double-weave stucture which would allow me so much freedom to create motifs on solid-color backgrounds…made up of straight lines that can be put together to resemble curves, like those in my last Shipibo-inspired wall hanging and other projects.

Below, you can see an experiment with curves and Celtic motifs that I made a long time ago.

first-curve-experiments-in-double-weave

abba-yohanni-curtain-and-reproAnd another not-so-curvy one from the archives at left…

Double weave, of course, creates a thick fabric when what you might really be after is something finer and more flowing.

It also does not favor the use of a lot of unpatterned area. The parts of the double-weave fabric that do not have pick-up patterning will sit as separate layers of cloth simply joined at the edges. This can create a sort of ballooning effect over large areas.

The simpler little brother of the warp-faced double weave technique is warp substitution. With this structure, you won’t have to worry about layer separation in large unpatterned areas but most people do not like the awkwardly long floats that  form on the back of the cloth.

Another structure that allows motifs to sit on solid-color backgrounds is intermesh….

bhutan-collage-11It’s a warp-float structure that creates rather dense fabric….not something I would describe as light and flowing. The motifs can be very linear or curvy like the ones below.

intermesh with curved designPatterning with supplementary weft allows you to have a light piece of solid-color fabric patterned with soild motifs. The drawback is that in order to make the woven piece practical, the length of the weft floats needs to be limited and that will restrict the kinds of motifs you can create. Large solid-color areas will need to be broken down into segments of short weft floats.

tubular_band_on_ticlla_pieceAnd then, leaving warp-faced options aside all together, there is always tapestry technique…

greca design on a pillow coverThis is a pillow cover woven on a floor loom by a  member of the Hipolito family of Zapotec tapestry weavers in California. (Which reminds me…my weaving friend Dorothy is currently in Peru studying tapestry techniques with master weaver Maximo Laura… can’t wait to hear more about it).

I love comparing the fine double-weave belt from Argentina, below, with its bold black and white pattern, to the precise black and white ikat work done by the Mapuche weavers of Argentina and Chile…two completely different processes that create superficially similar results.

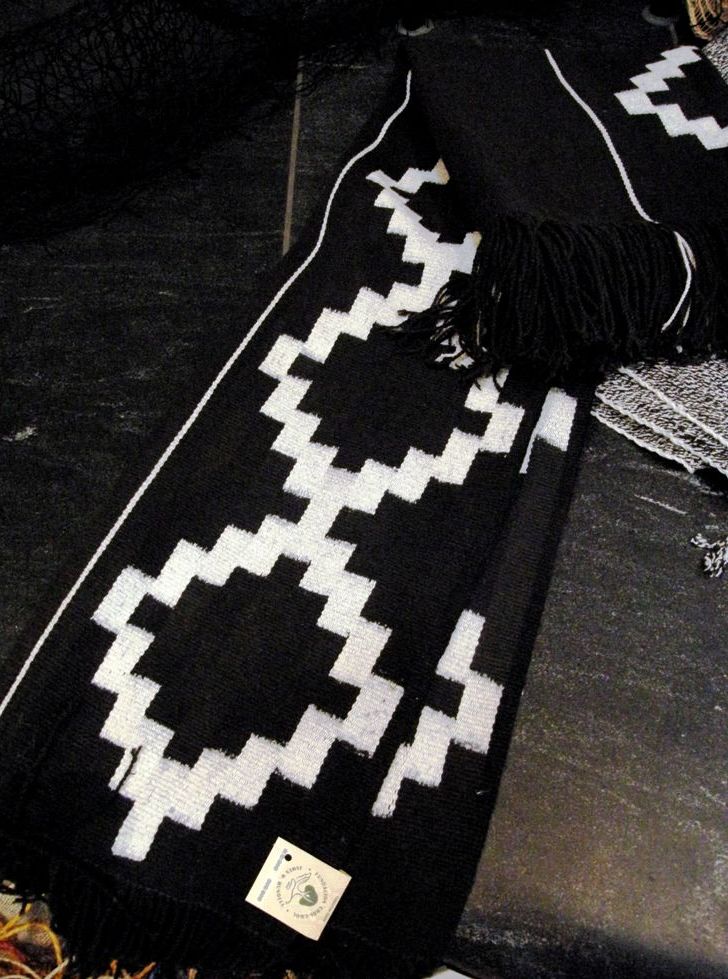
OLYMPUS DIGITAL CAMERA

mapuche-ikat-11And so, I will finish this post this week by showing you a fabulous ikat poncho created by Argentinean master weaver, Guillermina Cabral, from Victorica, La Pampa province and thank the Ministerio de Cultura de la Nación Argentina, to whom the image belongs, for allowing me to show it to you here. I found it on the Facebook page of MATRA (Mercado Internacional de Artesanías Tradicionales de la Argentina). The page has other images of beautiful ikat work along with other exquisite handcrafts of Argentina.

10564839_1546978602191639_385201088_nSo, it’s all about process for me. But, concentrating too much on one particular part of the process can mean carelessness in others which are of equal importance…stupid pieces of cardboard! 😉


Backstrap Weaving – In Focus

In Focus… that’s a funny title for a week that was spent weaving moifs that are meant to be blurry. My camera kept rebelling against my attempts to have it focus on something that was not sharp and my eyes kept rejecting patterns formed by threads that refused to stay in place. I am talking about ikat.

backstrap sample with new cottonI was weaving the wee sample that I started last week with the new-to-me UKI 20/2 cotton. This would give me an idea of the number of ends I needed to wind for the 7 1/2 -inch width of my next wall hanging panel.

At the same time, I was attempting to make this a “two-fer” and try out a new patterning technique using supplementary weft. After finding that my count was off, I unwove the Guatemalan flower pattern I had been creating and then came to the conclusion that a little discipline was needed… a little FOCUS. Sure, I could get a “two-fer” out of this short warp but let’s focus that “two-fer” entirely on the project at hand….ikat with 20/2 cotton.

So, I decided to drop the Guatemalan flower project and use this warp as a width sample and also as an opportunity to wrap a sample ikat motif.

I love how the splintery old frame that I found abandoned up on the rooftop terrace several years ago continues to be so useful. One side of the frame is longer than the other which makes the whole thing rather wonky. Nevertheless, it works well as a support for the stakes and rods onto which I wind my discontinuous-warp projects….172870_203704546310057_3438857_o….as well as a frame on which I can stretch warps before I wrap them with ikat tape…

ikat-on-frame-and-off

ikat sample for backstrap weavingAbove, you can see  the last ikat project I did using cassette tape for wrapping.

Now I am using tape that has been produced especially for this purpose.

I like the cassette tape because it is opaque. You can immediately see white spots peeking through if you have not wrapped a section well and left parts of the warp exposed. The pink-ish color ikat tape that I have is close to transparent which means that  it is far less apparent when I have missed a spot when wrapping.

On the other hand, I am enjoying using the ikat tape because I can split and easily the tear the tape into strips of any width I want. While the cassette tape is strong and holds knots well, the ikat tape is even stronger. I haven’t had any trouble with it snapping if I pull a knot very tightly.

Above, you can see the sample motifs. This is not exactly the pattern that I plan to use in the wall hanging. The whole thing has been an exercise in achieving consistently accurate measurement of really tiny lengths. It hasn’t been entirely successful so far. In the end, I will be interested to see whether the accuracy at which I have been aiming is absolutely necessary. For eaxample, I simply “eye-balled”  the pattern in the project wrapped with cassette tape above. You can see some very obvious differences in the length of the wraps  from one motif to the other but the overall look is quite okay. With this latest attempt at ikat, however, I have been measuring and re-measuring and fussing about a whole lot.

cambodian ikatI have to remind myself to “think like a bird”. I wrote a whole blog post about this once…trying to train myself to walk away and look at this kind of thing from a distance to get the overall effect rather than focusing too much on the finer details.

I have a piece of silk ikat from Cambodia as my guide and inspiration. It has a very simple and tiny pattern of blocks. The warps shifted during weaving and, in some cases, a part of a motif has completely separated itself from the rest. Yet, when you stand back and look at this pillow cover, that’s not what you see. You see a simply gorgeous piece of fabric covered with tiny, even motifs.

So, I had the warps for my hook motifs wrapped as accurately as I could manage. I told myself that even with accurate measurement and wrapping, the warp threads will most likely shift whichever way they please once released from their wraps for weaving.

It was time to stop fussing and move on to the dye pot.

There isn’t much that can go wrong in the dyeing part unless you haven’t wrapped tightly enough. It is obvious from looking at some ikat warps that I have encountered in my travels that some weavers do not consider a bit of seepage a problem.

The ikat warp below, with its blue pattern on white, is from Tacabamba Peru. There is a heck of a lot of wrapping involved there. All those white parts need to be wrapped in order to expose just the small sections which will be dyed blue. I wish I could have seen this warp before the wraps were removed as I am wondering if there is an ideal length for the wraps. Is there a length after which a wrap becomes unstable thus allowing dye to seep in? Should long sections be wrapped as several small sections instead? You can see several dots and spots where the dye has penetrated the wraps.

tacabamba ikat threadsI was told that Mapuche weavers apply a kind of white mud mixture to the sections of the warp where the dye needs to be resisted. Then they wrap them. When I got to see and touch an example on the loom, white dust would fly when I gently strummed the warps in the sections that had been recently unwrapped. I guess this is an added measure against seepage.

mapuche-ikat-11As it turns out, my ikat motifs more closely resemble these Mapuche ones with their sharp straight edges rather than the delightfully fuzzy and feathered outlines that one normally sees in ikat work.

I dyed the piece blue in a watered-down dye bath of navy blue that produced a  shade that I loved. Will I ever be able to produce that shade of blue again?!

ikat after dyeingDarn, I then noticed that I had neglected to add the last wrap on the right to the upper motif. Oh well, it’s just a sample. Above, you can see the warp with its heddles  and on its way…..time to unwrap. I always take lots of pictures of this part because the next part… the weaving… is where things tend not to go so well.

first ikat motifs unwrappedWell, there was no use putting it off…it was time to weave the unwrapped section, while holding my breath…

weaving frst ikat motifSo far so good. Yes, there was a bit of seepage. And I forgot to throw some of the thread in the dye pot to use as weft. Again, never mind, it’s just a sample. I’ll add that to the list of things not to do when I am preparing the real project.

ikat motifs with supplementary weft patternOnce I had woven all the ikat motifs, I used this sample warp to test the number of strands of silk I would need to make a supplementary weft that would be suitable for creating patterns on the 20/2 warp-faced ground cloth. I am hoping to add patterns made with supplementary weft both above and below the ikat section on my wall hanging panel. I love how the buttery-yellow silk weft looks against this particular shade of blue. I must weave something with this color combination soon.

I left this sample project at this stage to wind the warp for the wall hanging panel. I figured out the number of warp ends I would need, sketched and refined my ikat and supplementary-weft designs, and have already started wrapping. But, every now and then, I will stop wrapping to go back and weave some more of the sample warp. I need to take breaks like these in order to stay focused. It is too easy to start getting sloppy about the wrapping if you keep at it for too long. When I start wrapping too loosely, stop measuring well, or stop being able to judge a straight line, I know that it is time for a break.

If I keep weaving the sample warp, I may even be able to turn the finished fabric into something. In that case, it will be a “four-fer”…a width sample, an ikat tape wrapping test, a silk supplementary-weft test, and a useful, or at least pretty, finished product.

wraps for new ikat project?Here is the new warp with a small part of the ikat motif wrapped. I have already had one wake-up call….clumsy handling had me breaking a warp thread right in the middle of a wrap. Luckily it happened now and not while weaving! I was able to replace the thread. It had already been enclosed in five wraps so, those had to be re-done. Can you imagine trying to replace a warp thread once the piece has already been dyed?

My kingdom for a fine-tipped charcoal pencil! I have read in a few places online about ikat pattern “masters” who mark the motif on the warp with charcoal so that a team of wrappers seated around the warp frame can correctly place the ties. Of course, the charcoal must just wash out later.

Now I walk around with static-charged pieces of ikat tape stuck to my clothing. I find it in my bed and in my food!

I have a couple of finished projects from friends with whom I wove on my last trip to show. Elizabeth finished her backstrap with Andean Pebble Weave motifs. It looks thick, cushy and comfortable. She used one of the variegated varieties of Plymouth Yarn Fantasy Naturale  along with off-white in the pick-up section. I don’t think I have seen Andean Pebble Weave done yet with variegated yarn and I think it looks great!

elizabeth tahoeCheryl finished her camera strap with its Andean Pebble Weave motifs. She used the hardware from an old camera to put this together and it’s beautiful!

10561559_10204211964800394_1974920106637256794_nBack to the wrapping frame for me…tearing strips of tape, measuring and wrapping, and standing back to take it all in. While doing so I will think about what I shall make from my wee sample and what I shall weave into the red panels that will accompany the black-and-white ikat one. I have plenty to keep me focused on this one project!

See you next week.


Backstrap Weaving – Simply Red (and Black and White)!

These are the best light conditions I could find for photographing the red-on-red pattern on the two side panels of my wall hanging.

The late, low, winter sun was drifting in through my bedroom window and I looked up from my weft twining to discover how well the light and shadow brought out the relief pattern. I have posed these pieces all over the place…on the floor, on the table, in this room and that…used natural light and flash, held the camera in my hand, and used a tripod, and was not happy with any of the results. All I got was a flat red mass.

And then, there I was, happily seated with my backstrap in place and the warp stretched out before me. The light came to me through the window and gave me the shot at last.

sunlight on red panels backstrap weavingIt was great after all this time to be able to see how the red panels looked beside the center one. The tricky part was lining the three panels up precisely and have them suspended under the same amount of tension so that I could twine across the top of all three at the same time.

I still can’t decide which face of the double weave looks better…

back of double weave panelI used the solid stepped lines and the arrow motif as part of the weft-twined pattern in much the same way as I had in the red panels…

finished weft twining on backstrap loomI need to do a bit more solid black twining to finish. That will be the part that gets clamped within the wooden hanger. Once off the loom, I will decide how to finish the ends of the twined wefts and how I will cut the fringe around those long woven tabs at the other end (see below).I need to contemplate that for a while. Once cut, that will be that, and I want to get it right!

finishing the shipibo backstrap pieceSo, it is time to move on to the next project….a clean slate and a bunch of sticks…exciting!

I bought a large cone of UKI 20/2 cotton for the next project with which I have never woven before. That means it is time to sample the yarn while I play with ideas for the ikat  in the next wall hanging. I’ve been at the sketch book creating hooky designs. Whether I am creating a design that is way beyond my limited wrapping skills, remains to be seen.

First, I need to get an idea of what kind of width I can get with X number of ends in the 20/2 cotton and so I wound a short-ish warp as a sample.

To make it more interesting, I decided that I could play a bit with the silk that I recently bought at CNCH and try a new-to-me supplementary-weft technique that is used for decorating hair sashes from Jacaltenango in Guatemala. Dr Carol Ventura has written a book about the Jacaltenango hair sashes. I have owned this book for years and once dabbled with the technique many, many years ago. As is always the case when using supplemental weft, the success of the project is very much dependent on finding the right kind of material for the supplemental weft for the weight of the ground cloth. While I understood the technique, my sample was downright ugly because my supplemental weft was too “light” for the ground cloth and there were large gaps between the rows of pattern. Then, I got distracted and wandered off in another direction.

I don’t even know where that sample is now. It was obviously not worth keeping. However, seeing a Jacaltenango hair sash that one of my students brought to class in Seattle last spring re-ignited my desire to try this technique….

jacaltenango hair sashI have made mistakes in my new sample and my count is off. I will un-weave this and start again now that I have a better feel for handling and counting these fine warp threads.  Hopefully the next attempt will be better. In the meantime,  this 20/2 white sample will give me a good idea of how many ends I will need to wind for my next wall hanging panel. I like two-fers.

backstrap sample with new cottonAnd, do I feel confident about this next ikat project? No, not at all! My experience with ikat has been quite limited but I figure that I may as well just jump in there. I do know from my own experience that the wrapping and dyeing part, although painfully slow, is relatively easy. For me, the hardest part has been keeping the warps well enough aligned while weaving so that my motif remains recognizable. Yet, I don’t want them to be so rigidly aligned that I lose the feathery outlines that make ikat so charming. This is one of my tiny attempts…

three ikat motifsHere are some narrow strips of ikat that I placed in a piece that includes supplementary-weft patterns…

strips of ikat backstrap weavingAnd finally, this experiment involved dyeing and then removing some of the wraps to dye again for a second color.

ikat book coverWay back in 1998, my weaving teacher in Candelaria, Bolivia showed me the first piece of ikat I had ever been able to handle. It was a  bedspread on which she had been working on and off for several years. This was something she was weaving for herself rather than the usual pieces that she weaves for the store in the museum in Sucre.  She was weaving with rather coarse handspun wool and her name and her husband’s had been worked in amongst the flower motifs..

stitched-ikatI’ve examined the wrapped warps, the finished cloth, and watched the weavers at work in many different places in my travels in South and Central America, trying to capture the secret of limiting the amount of  movement of the warp threads and the resulting image distortion. Below are examples from Chile, Ecuador and Peru.

mapuche-ikat-2

ikat weaver Bulcay Ecuador

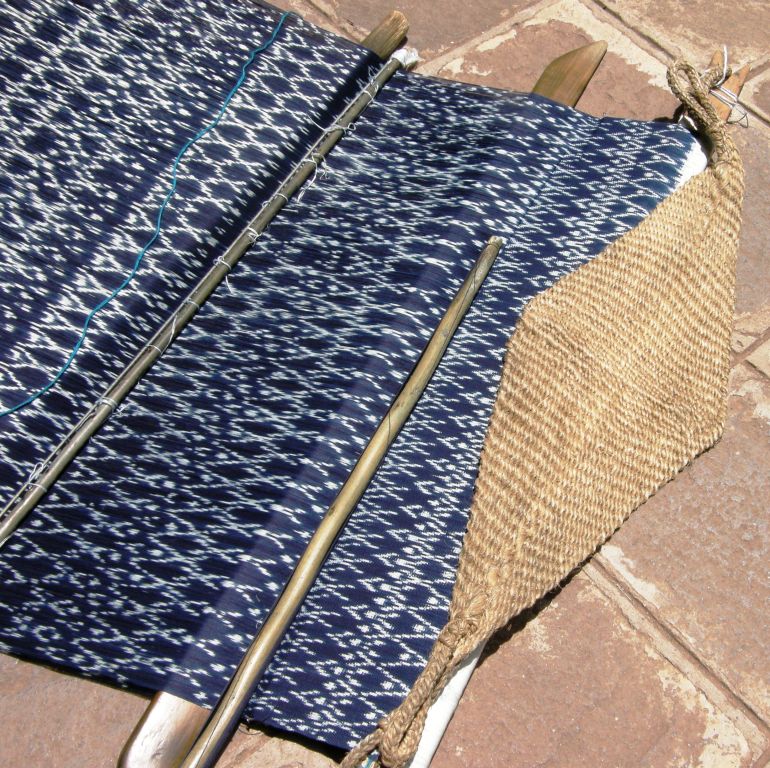
The simple backstrap loom of Tacabamba, Peru on which the indigo ikat-patterned "panones" are woven. They are up to one-meter wide, covered with tiny motifs and have patterns knotted into their fringes.
The simple backstrap loom of Tacabamba, Peru on which the indigo ikat-patterned “panones” are woven. They are up to one-meter wide, covered with tiny motifs and have patterns knotted into their fringes.

So, that is what I have been up to this last week….

Meanwhile, there has been a fair bit of red, black and white appearing online in the various places where band weavers hang out.

Cheryl wove with me last spring and now she is already designing her own motifs and weaving more than just samples.

cheryl (3)She designed the gecko figure and I love the arrow motifs at the bottom which remind me of little boomerangs. This will be a strap for her camera. I showed you some weeks ago the sample bands that she wove in preparation for this project. Here is the completed weaving…

cheryl finished camera strap pebble weave backsrapThe center motif is charted in my second book and is a pattern that I adapted from tablet-woven band by Louise Ström.

Ann Mester created this enticing warp for backstrap weaving which could be used for complementary-warp pick-up techniques like Andean Pebble Weave, or simple warp floats, or just to create attractive horizontal bars of black and white…

ann mester fb (2)Rufio, the kitten (who would look very stylish with a red collar) was rescued from Pet Rescue of Mercer.

Susan AndersonAnd, if you are wondering about what I call “simple warp floats, the technique that I used on the red-on-red panels, Susan Anderson’s example. above, very clearly shows the single-faced nature of this pick-up technique. Susan has floated the warp threads singly. For me, this gives a more delicate yet solid look to the motifs than that which is achieved by floating pairs. The pattern is from Anne Dixon’s The Weaver’s Inkle Pattern Directory. Susan wove this on an inkle loom and has done a beautiful job.

So, it will most likely be all about winding the warp and then finding a comfortable position and set-up for wrapping many many threads for ikat this coming week…

cropped-ikatThis was my first ever attempt, around eight years ago, I would guess. It’s wool warp…Navajo warp…wrapped with cassette tape. The wrapping and dyeing were successful…the weaving was not! This is another sample that has disappeared!…nothing to show for those hours of work except this picture and “experience”.  And I am sure that there will be much more experience to be gained and  many more lessons to be learned in this coming week.

See you next week…


Backstrap Weaving – Kindred Spirits

I meet and get to weave with all kinds of wonderful people on my trips away. Everyone has a tale to tell about their connection to backstrap weaving. Perhaps they took a trip to Guatemala or South America some years ago or know someone who has been there and who brought back beautiful textiles. Maybe they happened upon and bought a backstrap loom in a thrift store or at a garage sale. Some people owned and used a backstrap loom back in the 1970s. I met a 92-year old woman at one of the guild meetings I just attended who was taught to weave on a backstrap loom by a Japanese woman who had studied in Guatemala. She is still using her loom at the age of 92 and weaves woollen warp-faced fabric for pillow covers.

And every now and then I meet what I like to call a “kindred spirit”…someone who has been swept away with their fascination for ethnic textiles and has taken off to far and exotic places to pursue their interest. Even more exciting for me is knowing about people, especially young ones, like the ladies below, who are about to embark on such adventures for the first time.

Backstrap weaving with students at Yale University.... They have a wonderful weaving room full of floor, table and rigid heddle looms which meant standing room only for this impromptu lesson in basic backstrap loom management which followed my talk.
Backstrap weaving with students at Yale University…. They have a wonderful weaving room full of floor, table and rigid heddle looms which they can use in their free time which meant ‘standing room only’ for trying their hands at basic backstrap loom management.

Last fall, my friend Barbara arranged for me to visit with a group of young ladies at Yale University. Barbara teaches weaving on floor, table and rigid heddle looms to this group as a leisure activity on Sundays and I accompanied her on one of the Sundays to meet her students. They were so enthusiastic when they saw my weaving and loom that I ended up staying longer  with them and giving them a chance to try some backstrap weaving basics.

I am so happy to now hear that one of the ladies who has lately been corresponding with me on Facebook  has submitted a fellowship application to study backstrap weaving this summer in Indonesia. Barbara tells me that another is doing the same and hoping to study in Guatemala!

Sometimes I connect with these kindred spirits online and it is a “meant-to-be” connection which has us then getting together all over the place. Wendy has studied and collected textiles from all over South-east Asia and the Indian subcontinent and we met online when I was looking into Bhutanese weaving techniques. When she came to South America, she visited me in Bolivia. We met up again in Santa Fe New Mexico where we spent time at the International Folk Art Market and I hope to go visit her at home in Perth when I go to Australia in June.

Kindred spirit Wendy follows her textile passion around the world from South-east Asia to South America. Here she is making a stop in Bolivia to hang out with me and talk textiles and travel.
Kindred spirit Wendy Garrity follows her textile passion around the world from South-east Asia, the subcontinent and on to the Americas. Here she is making a stop in Bolivia to hang out with me and talk textiles and travel.

And then there’s Taylor who is over in Bhutan right now. She initially wrote to me very happy about learning to make string heddles from my blog to use in her projects in Bhutan. I gathered that she is working in an area where the weavers use tablets hence the lack of information on string heddles.

In her own words...I work for a local NGO on waste awareness issues, which I primarily do through creative reuse.  I tend to work waste materials into local craft techniques, and have attached  a couple of shots of my first plastic wrapper weaving experiments (plastic wrapper as the weft, and cotton thread as the warp).  Pretty basic stuff.  The local ladies are teaching me some belt and brocade techniques, mostly using tablets right now.  I am excited to make some abstract forms with the brocade technique, will keep you posted!

reused plastic bags for weaving in BhutanYou can see a bit more about the loom set-up that Taylor is using here.

My most recent kindred spirit encounter was in Bucks County where I met Laura at a guild meeting She had just returned from 3 months of weaving study in Thailand. I  got to see Show and Tell by weaving guild members. This was all followed by lunch and then a chance for several of us to weave together.
One guild member had brought in the backstrap loom with popsicle stick rigid heddle that she had constructed for her 4H group. Another brought in all kinds of scarves that she had bought from backstrap weavers in Guatemala. The 92-year old backstrap weaver had brought an interesting double weave blanket from Nepal as well as one of her own backstrap woven pillow covers….weft-faced, black and white and gorgeous!  And Laura showed the amazing piece of weft ikat patterned indigo-dyed cotton yardage that she had woven on a  simple two-shaft loom in Thailand. It was stunning but I didn’t photograph it!

I used small strips of warp ikat in this piece to learn about the technique.

You may know from previous posts that I have dabbled in warp ikat and have found that challenging enough.

Weft ikat boggles the mind. The weft threads are placed on a frame and tied and dyed. Some ties are unwrapped and others added as the yarn is placed into a second dye bath to add a second color to the overall pattern. I have watched in videos as the yarn is then carefully wound onto a shuttle ready for the weaving process. Each and every weft thread has to be carefully placed within the shed so that the pattern is properly aligned.

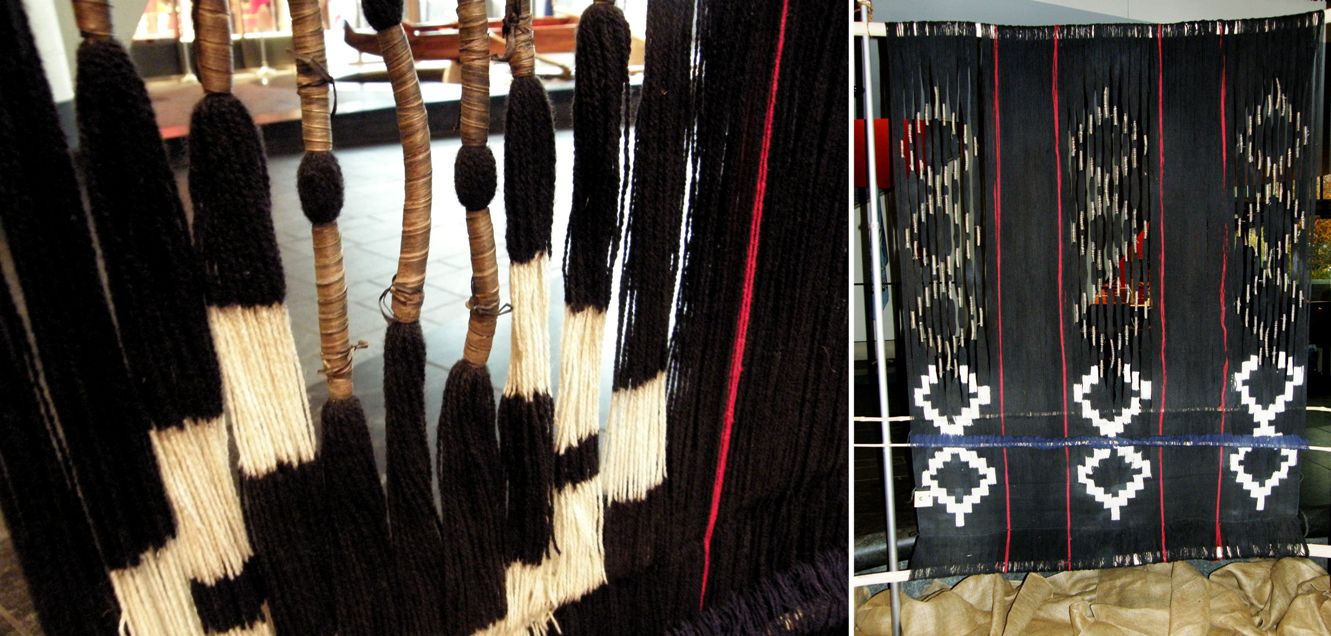
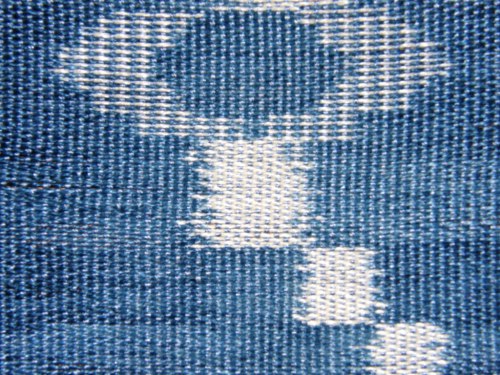
There was a nice display at the Textile Museum in Washington DC that had examples of warp ikat, weft ikat and warp and weft ikat. Below, you can see in the upper oval-shaped motif how the tied and dyed weft threads are exposed in the balanced-weave cloth to create the pattern. The lower square motifs are examples of warp and weft ikat which give the motifs a more solid look.

???????????????????????????????I found this image from Marla Mallett’s website which shows part of the tying process for weft ikat in Thailand…

Thailand-IkatTies-smI have just bought yarn here in the US for my sixth red-black-and-white wall hanging which I hope to weave as a warp ikat piece. Maybe one of these years I will give weft ikat a try.

south jersey group backstrap weaving

I met yet another kindred spirit from years gone by through a folder that Ellen brought on one of the days of backstrap weaving-alongs. That’s the group that you can see above. Trisha and April had come to watch me weaving last summer and suggested I come and weave with them this year.  Camille, who joined in, had already made her loom and backstrap using my Backstrap Basics article. It came out beautifuly in Tahki Cotton Classic. 

Camille_s_1st_Woven_Backstrap_medium2She bought the yarn  at Woolbearers. They carry an extensive range of colors in another favorite backstrap cotton yarn of mine…Cascade Ultra Pima.

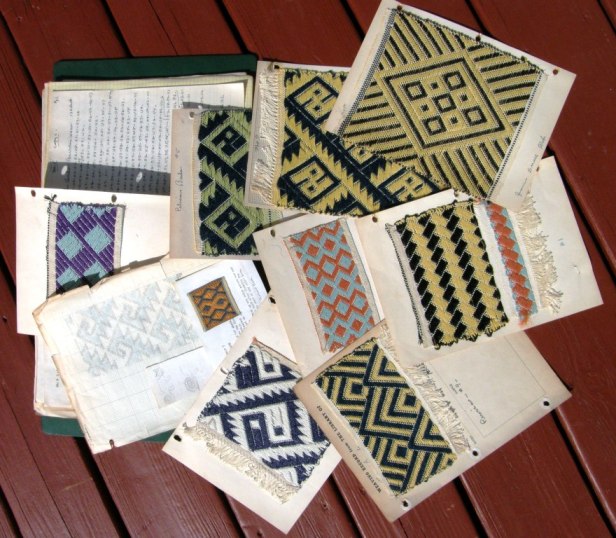
???????????????????????????????Now, back to the folder that Ellen brought for me with its connection to another kindred spirit….. It had belonged to a lady who was living in Florida and contained all her carefully handwritten and typed notes, samples, charts and sketches on her studies of Peruvian brocades. What a treasure. I tried to find dates and found one page marked by hand with “May 64” and other type-written pages dated in the early 70s. I suspect that the folder was donated to a guild on this lady’s passing and it has traveled, being passed from hand to hand, weaver to weaver, until it found me. Well, I can tell you that with me it shall stay and it will be loved.

peruvian brocade study folderHere is the folder with various pages removed so you can see some of the woven samples and sketches. It was nice to meet this kindred spirit from the past. I have to say that I wonder, being childless, what will eventually  happen to this and  my own handwritten journals.

Another little goody that Ellen brought was a ñawi awapa tubular band with its little knob and loop endings. The knob can be pushed through the loop and this makes a neat way to use the woven piece as a necklace or bracelet.I think I can do some experimenting and come up with a way to make a knob like that.

finishes for tubular bands

pam-and-freddy I am going to work on that with my friend Pam with whom I am currently staying.

Pam has invited her weaving friends to come and weave with me several times.  I am enjoying a nice long stretch of days hanging out with her.

Pam is “Number One” kindred spirit on my list! She has been interested in and has studied ethnic weaving techniques for years. She has made several visits to Uzbekistan and has studied other weaving technologies from books, in workshops and online.

On top of that, she is the local loom doctor and teaches floor loom and pretty much any kind of simple loom weaving at her studio.

I see that she is about to set up to experiment with Chilkat twining using Cheryl Samuel’s book for guidance….

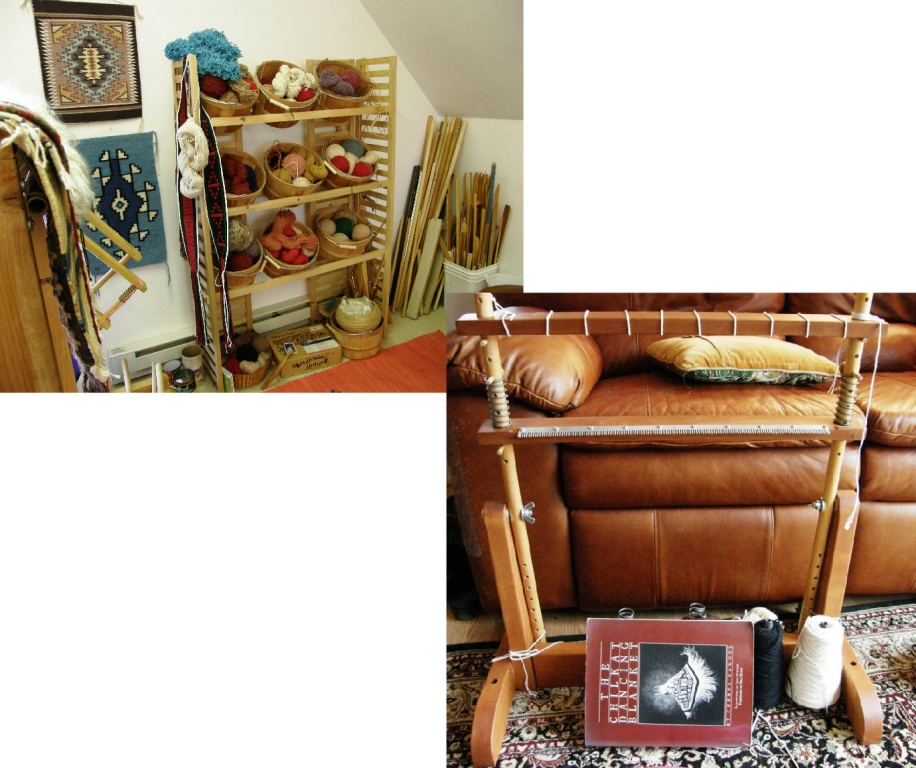
Pams weavingYou can see Pam’s “Navajo corner” in her studio and then her C Cactus Flower Navajo loom which she will use for the Chilkat twining.

Here is her latest finished work…

pams woven wool silk tallit
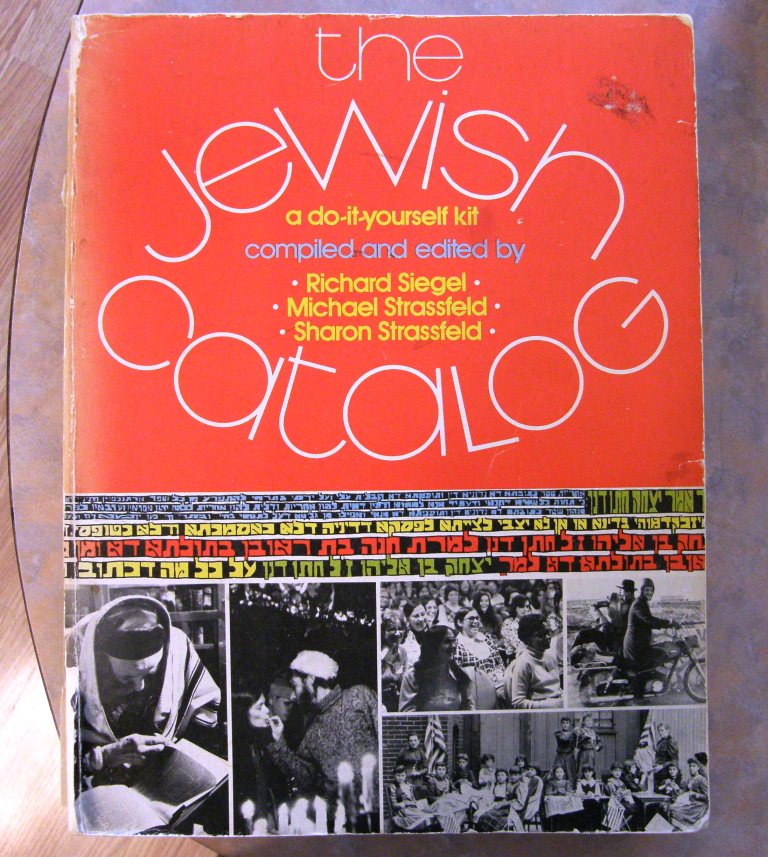
the Jewish CatalogIt’s a wool/silk tallit, a Jewish prayer shawl. Above, you can see it drying after having been wet finished. Pam is making this as a gift for a friend. 

Yes, we had the most spectacular sunny spring day here yesterday, as you can see.

Amelia, the cat, found the warmth after months of snowy winter a bit too much to handle all at once and enjoyed the piece of shade that the drying tallit cast.

I am a little bit more knowledgeable about this item and its use after Pam read to me from the book at left. Right now, as I write this post, she is tying the special “braid” that adorns the four corners of the piece.  There is something significant about the number of wraps, or coils, and knots that are incorporated in each of “braids” which is all explained in Pam’s book.

The books says that tallits were originally made from linen or wool but that now silk is also acceptable. Pam’s is a wool and silk blend and it feels gorgeous….light as air. She used a summer/winter structure to create the patterning in blue and gold and the wool/silk is Zephyr Yarn by Jaggerspun.  She also wove the atarah, or crown, with its gold thread. This is placed on the edge of one side with “the purpose of providing some spatial orientation for the tallit (or tallit-wearer)”. The woven pouch Pam made in which the tallit is stored is yet to be sewn  together.

I will be meeting more fiber people of Springfield this weekend and then heading onward.

See you soon!


Backstrap Weaving – East and West 2…The West Side Story

EAST AND WEST 2 – THE WEST SIDE STORY….

THE HIGHLIGHTS.

This is what happens when you don’t blog for a while! You have to drop the details and limit yourself to the highlights. Since the conclusion of the “West Side Story’ on this trip, I have finished yet another chapter entitled: “Hooray Santa Fe!”. So, as I sit in Miami airport waiting for my flight back to Santa Cruz, Bolivia, I will attempt to capture some of the flavor of just my west coast adventures in this post.

ANWG 2013 logo tapestryThe West Side Story started at the ANWG  Conference in Bellingham, Washington.

It was followed by a stay at my friend Betty’s (author, weaver, traveler, trekking and textiles tour leader, mountain climber, tree farmer, blueberry farmer……!!)  home in Washington state. There I got to meet up with one of Betty’s friends, Judith, whom I had met at the Tinkuy in Peru in 2010, as well as with Bobbie who is in the Ravelry group.

This chapter finished in San Francisco after having spent about ten days at my backstrap weaving friend Janet’s farm in Humboldt County California. Janet arranged two get-togethers with weavers I had met last spring.

This trip has been about many things, one of which was meeting new people and putting faces to online acquaintances…

Here are some of the members of the ANWG Organizing Committee and ANWG instructors at a pre conference get-together. The group includes Marilyn and Linda who took my classes, Sheri, my Bellingham host and my wonderfu roommate, Marie. I am sure that you will recognize some familiar faces amongst the teachers. Here is where I got to meet the ladies with whom I had been corresponding all those months while the conference was being prepared. It was great to meet Holly, Jane, Patrice, Paula ad Marilyn at last.
Here are some of the members of the ANWG Organizing Committee at a pre-conference get-together. The group includes Marilyn and Linda, Sheri, with whom I stayed in Bellingham, and my wonderful roommate, Marie. I am sure that you will recognize some familiar faces amongst the teachers.  It was great to meet Holly, Jane, Patrice, Paula and Marilyn at last.

This was a wonderful conference. Apart from being in one place with over five hundred enthusiastic weavers, I loved the venue, the dorms, the food, our fourth floor weaving room with the view of Bellingham Bay, and all the fun details that the committee had gone to so much trouble to include. I can’t imagine that these events can get any better than this one!

Il oved the handwoven conference logo on the crocheted background which were hung on wondows to mark the rooms which were desgnated classrooms. I kept mine...not sure if I was supposed to...ssshhh! My roommate, Marie was part of teh team responsible for the handwoven pouch and name tag combo. That little piuch was such a cool idea. It held keys and meal card. My backstrap weaving students found it handy for parking their sword/beater. The fabric was so very pretty. Imagine having to make over 500 of these for all the participants!
I loved the handwoven conference logos on the crocheted backgrounds which were hung on windows to mark the rooms which were designated classrooms. My roommate, Marie, was part of the team responsible for the handwoven pouch and name tag combo. That little pouch was such a cool idea. It conveniently held keys and meal card. Backstrap weavers found it handy for parking their sword/beater. The fabric was so very pretty. Imagine having to make over 500 of these for all the participants.

photo (1) mini cropAnd of course, there are one or two special people amongst all those that you get to meet and chat with at such events with whom you have a particularly strong connection.

Marilyn was one of them.

She wove with me on several days, was a committee member, taught four classes and was a whirl of energy. She seems to have an endless collection of beautiful ethnic textiles to wear and I looked forward to seeing what she would be wearing  each day.

At the final banquet, we were asked to wear something handwoven. So, there you see Marilyn in a gorgeous Guatemalan huipil. I simply draped the  Bhutan-inspired scarf that I wove around my shoulders.

(And guess who I bumped into in the plaza in downtown Santa Fe last week as I stopped to buy a fajita?)

The West Side Story is also about meeting some of my online friends from the various backstrap weaving groups as well as reconnecting with weavers from past visits.

Ravelry member Cindy weaving a nawi awapa band in my class.
Ravelry member Cindy weaving a nawi awapa band..

Cindy was also responsible for my spending in the ANWG Vendor Hall. She unearthed some Guatemalan natural dyed cotton at the Mayan Hands booth (on sale) and refrained from buying all of it! She and I bought bags of two colors and swapped. I wonder what she is planning to do with hers.

My backstrap weaving friends from Humboldt County got together in a couple of sessions...Janet, Gina, Autumn, Aceand Linda. We tensioned our warps on poles, floor looms, toes and inkle looms.
My backstrap weaving friends from Humboldt County got together too…Janet, Gina, Autumn, Ace, Pam, Buffy and Linda. We tensioned our warps on poles, the beams of floor looms, toes and inkle looms.

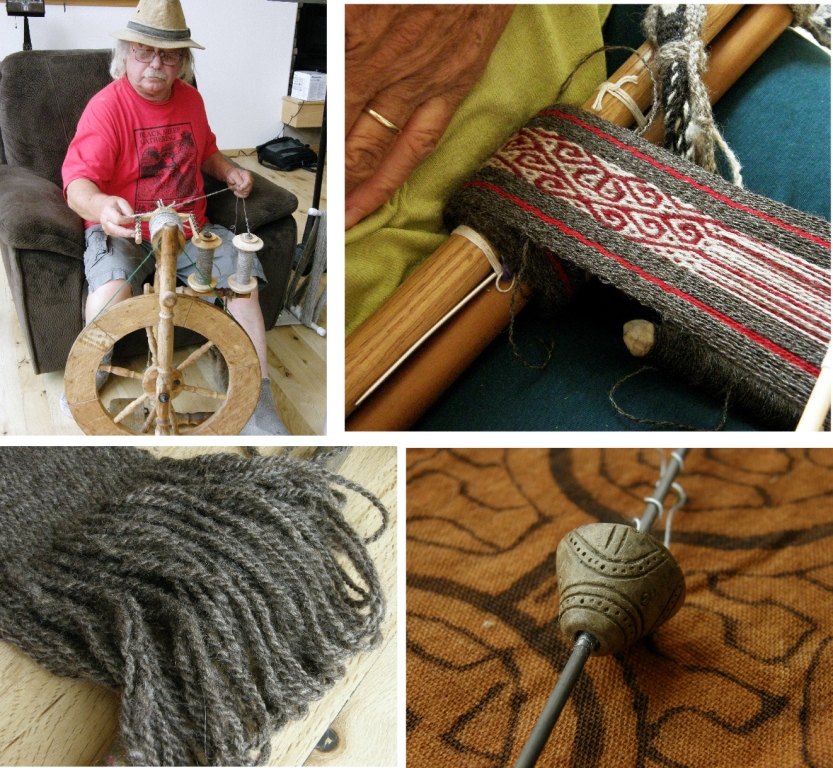
It was about playing with WOOL, something that is not so accessible in my home in the lowlands of Bolivia. And, of course, when I am with Janet and her friends, it is about lots of spinning and plying.

That's Ace at the wheel and below you can see the heavy grey yarn that he spun semi-worsted for his luxury backstrap...a lovely thick, cushy strap. You can see Janet working on a pebble weave band using her own handpsun and a pattern from my second book. And, on the right, there's the wee spindle whorl from coastal Ecuador that I gave Janet last spring. She has mounted it on a knitting needle and has been sponning with it.
That’s Ace at the wheel and below you can see the heavy grey yarn that he spun semi-worsted for his luxury backstrap…it made a lovely thick, cushy strap. You can see Janet working on a pebble weave band using her own handspsun worsted and a pattern from my second book. And, on the right, there’s the wee spindle whorl from coastal Ecuador that I gave Janet last spring. She has mounted it on a knitting needle and has been spinning with it.

Ace is new to backstrap weaving but not to spinning and I gave him a hand with that grey wool project. I have to admit it looked hairy and scary at first! but, it was a breeze to weave with. Who knew that it would weave up so well on a backstrap loom and in a warp-faced fabric? It all comes from the expert hands of the spinner and his/her preparation of the material.

???????????????????????????????I got so carried away with weaving and the enjoyment of working with that lovely thick and even handspun that I wove almost to the end forgetting that Ace would want several inches of unwoven warp ends from which to make braids for his backstrap. Once off the loom he braided the ends and braided a separate cord, from his handspun of course, for the straps.

Aces handspun yarn for backstrap

Some of Janet's beautiful naturally dyed handspun yarn which was destined for warp-faced weaving.
Some of Janet’s beautiful naturally dyed handspun yarn which was destined for warp-faced weaving….no overspin, no kinking!

It was about SUMMER, glorious summer…ripening grapes and berries, fireworks in the night sky, outdoor music, beaches and sunsets.

The view from my bed in Betty's studio looking out on her tree farm and ripening blueberries
The view while lying in bed in Betty’s studio looking out on her tree farm and bushes with ripening blueberries.
Sunset over the mountains in faraway Canada on the final evening of ANWG in Bellingham. The cool and enticing raspberry jungle at Janet's place. My poor, but kind- of -interesting, attempt at photographing the fireworks during my first 4th of July in the US. Beautiful patterns in light and dark sands on the beach at Shelter Cove near Janet's place....Humboldt County...sigh!
Sunset over the mountains in faraway Canada on the final evening of ANWG in Bellingham. The cool and enticing raspberry jungle at Janet’s place. My poor, but kind- of -interesting, attempt at photographing the fireworks during my first 4th of July in the US. Beautiful patterns in light and dark sands on the beach at Shelter Cove near Janet’s place….Humboldt County…sigh!

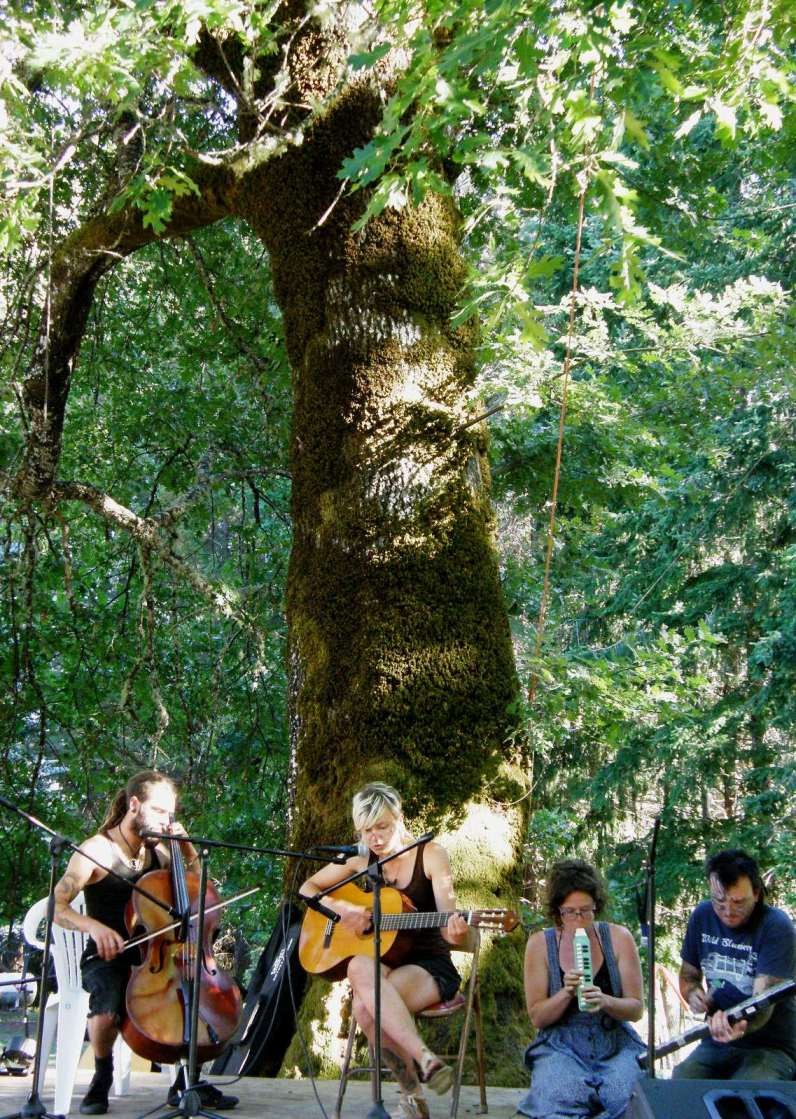
Music under the big ol' white oak...the annual"Strawberry Jam" at Janet's place. I hooked up a warp to my toe, wove and enjoyed the music.

Music under the big ol’ white oak…the annual”Strawberry Jam” at Janet’s place. I hooked up a warp to my toe, wove and enjoyed the music.

And there were textiles!! I was lucky that my visit with Betty coincided with a visit from Betty’s good friend Judith.She had come down from Canada to take a spinning class from Judith MacKenzie McCuin and stopped for a day to visit. She had brought with her the most exquisite textiles from a trip she had taken to Indonesia.

Judith lays out the textiles under the supervision of Trouble the cat.
Woven on a backstrap loom, this piece has both the warp and weft patterned ij the ikat technique. On top of that, the cotton thread was handspun. Judith tels me that this is known as "Magic Cloth" and comes the Tenganan Bali Agai Community in Bali, Indonesia.
Woven on a backstrap loom, this piece has both the warp and weft threads patterned using the ikat technique. The cotton thread is handspun. Judith tells me that this is known as “Magic Cloth” and comes from the Tenganan Bali Aga Community in Bali, Indonesia.

And, speaking of warp and weft ikat, I have to show you the jacket that Linda LaMay enetered in the juried show at ANWG. Linda wove with me over several days. She happened to be in the Gallery on my visit and allowed me to photograph her with her piece that was given the Complex Weavers Award. Her piece also won 1st prize for being the best representation of the conference theme: Crossing Threads, Crossing Borders.

Linda had bought a pre-tied and dyed ikat or, jaspe, warp in Guatemala...one which had been designed for warp faced fabric. Linda, however, wove it as a balanced weave, a twill and, in order to do this, had to dye the weft herself and then carefully place it to match the dyed pattern in the warp....she painstakingly transformed it into warp and weft ikat...amazing.
Linda had bought a pre-tied and dyed ikat or, jaspe, warp in Guatemala…one which had been designed for warp faced fabric. Linda, however, wove it as a twill exposing both warp and weft and, in order to do this, had to dye the weft herself and then carefully place it to match the dyed pattern in the warp….she painstakingly transformed it into warp and weft ikat…amazing.
Another textile in Judith's collection, this one from Sumba, Indonesia...all the stuff I love!...weft twining along the bottom, simple warp floats to create creatures that are mirrored in the central ikat section.
Another textile in Judith’s collection, this one from Sumba, Indonesia…all the elements that I love!…weft twining along the bottom and simple warp floats to create creatures that are mirrored in the central ikat section.

And, speaking of twining, let me show you the ravenstail work that John Beard showed in the Instructors’ Exhibit at ANWG. He kindly gave me permission to show it here….spectacular.

John Beard ravenstail

And, speaking of the warp floats in the Sumba textile, let me show you a textile that ANWG instructor and fellow Australian Kay Faulkner collected in her SE Asian travels. She brought this to ANWG to inform and inspire her students in her workshop entitled “East Meets West”.

We had fun comparing and contrasting spotty pebble-like structures and she came over to my classroom on the last day with Bhakti Ziek so that we could have even more "pebbly" conversation. If you look very carefully at the piece Kay brought you will see that there are weft floats amongst the warp floats.
Both faces of this textile have warp float patterns . Kay and I had fun comparing and contrasting spotty pebble-like structures and she came over on the last day with Bhakti Ziek so that we could have even more “pebbly” conversation.

I just gaze and gaze at this Selendang shoulder scarf of Batuisi, W Sulawesi from Judith’s collection. The colors all come from natural sources. The yarn used was heavier than that used in other Indonesian ikat pieces that I have seen. I really liked the feel of this piece.

selendang shoulder scarf

There are more of Judith’s textiles to show but I think I will save them for another post. Let’s look at the miniature backstrap loom that she got in Indonesia instead. I am always intrigued by new-to-me pieces of equipment that the various backstrap weavers aroud the world use and this loom included such a piece which may hold one of the many secrets of how backstrap weavers go about keeping the ikat-patterned warp threads reasonably aligned.

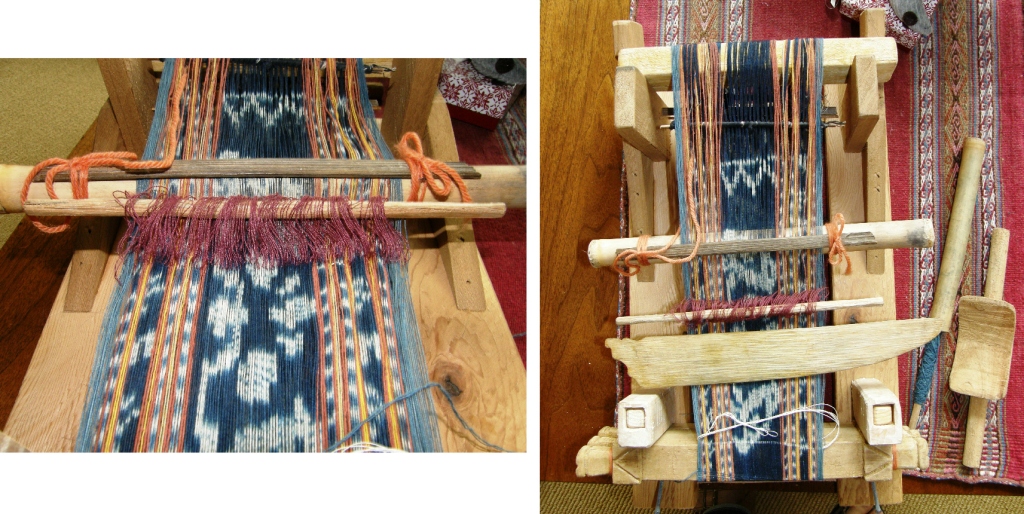
What a sweet little loom with its circular ikat warp in place. It was a great opportunity for me to take a close look at one of the Indonesain backstrap set-ups.
What a sweet little loom with its circular ikat warp in place. It was a great opportunity for me to take a close look at one of the Indonesian backstrap set-ups. The miniature wooden backstrap is so cute!
I love the carved pieces that serve to clamp the circular warp. Beyond the heddles and shed rod, the warps that had been tied and dyed were clamped between two sticks and wrapped. The wrappings seemed to separate the warps nto the sections that had been wrapped. I am wondering if the wraps also serve to squeeze the warp threads into groups and therefore help stop the from moving excessivley.and blurring the design too much.
I love the carved pieces that serve to clamp the circular warp. Beyond the heddles and shed rod, the warps that had been tied and dyed were separated along a stick which was wrapped. The wrappings seemed to separate the warps into the sections that had been tied for dyeing. I am wondering if the wraps also serve to squeeze the warp threads into groups and therefore help stop the from moving excessively and blurring the design too much.

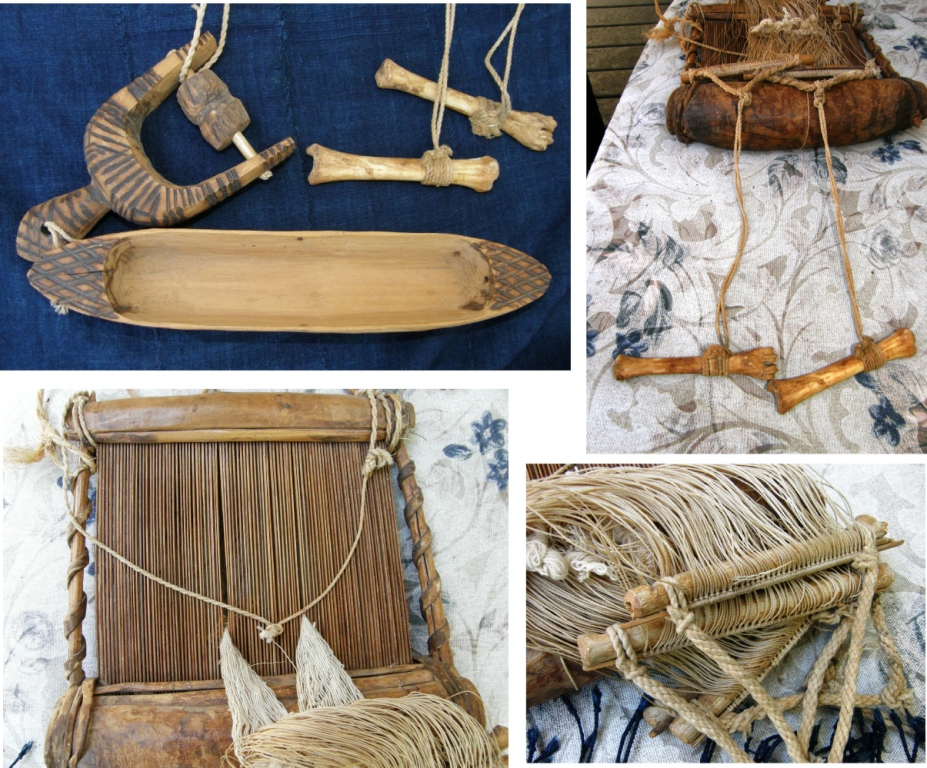
51eM0hePRnL._SX500_And, while on the subject of simple looms from far away places, let me show you a loom that a lady in Arcata, CA  showed us when our weaving get-together group went to the Farmers Market.  A friend had brought it back from Africa for her with accompanying postcards that showed how it was set up. The postcards said Upper Volta and were written in French. This, according to Wiki is today’s Burkina Faso and it seems that the people who use these looms are called the Mossi. The loom pictured at left is from this page.

It has some beautiful parts which include bone foot toggles for operating the shafts and a fine reed framed with what could be wood and horn. The carved wooden pulley system and shuttle were lovely as was the indigo-dyed cloth strips that had been sewn together. I used this as background for one of the pictures. It’s for sale…tempting!

mossi loom

??????????????????????Back at Janet’s I enjoyed a chance to do some weaving of my own.

I got to work on the two warps that I had brought with me.

I have to say  that I was happy to get this one off the loom as I do not care for it at all! I am going to use it to practice and learn some new sewing skills. Maybe I can shape it into some kind of interesting bag.

This is the warp that I wove while visiting at the Mannings’s annual Spinning Seminar last month. The pattern is one that I have woven many a time and observers’ reactions while I was weaving it inspired an addition to my FAQ pages…this new one being about following and ceasing to follow pattern charts.

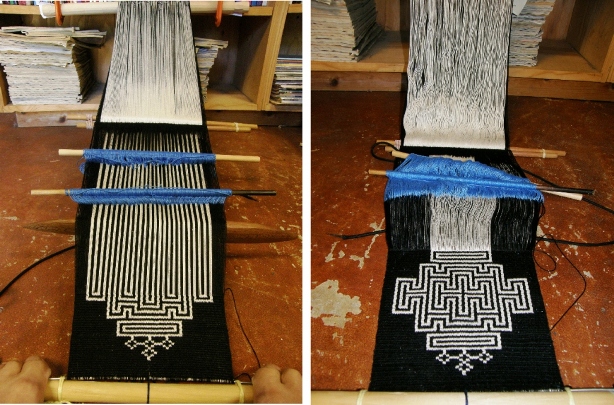
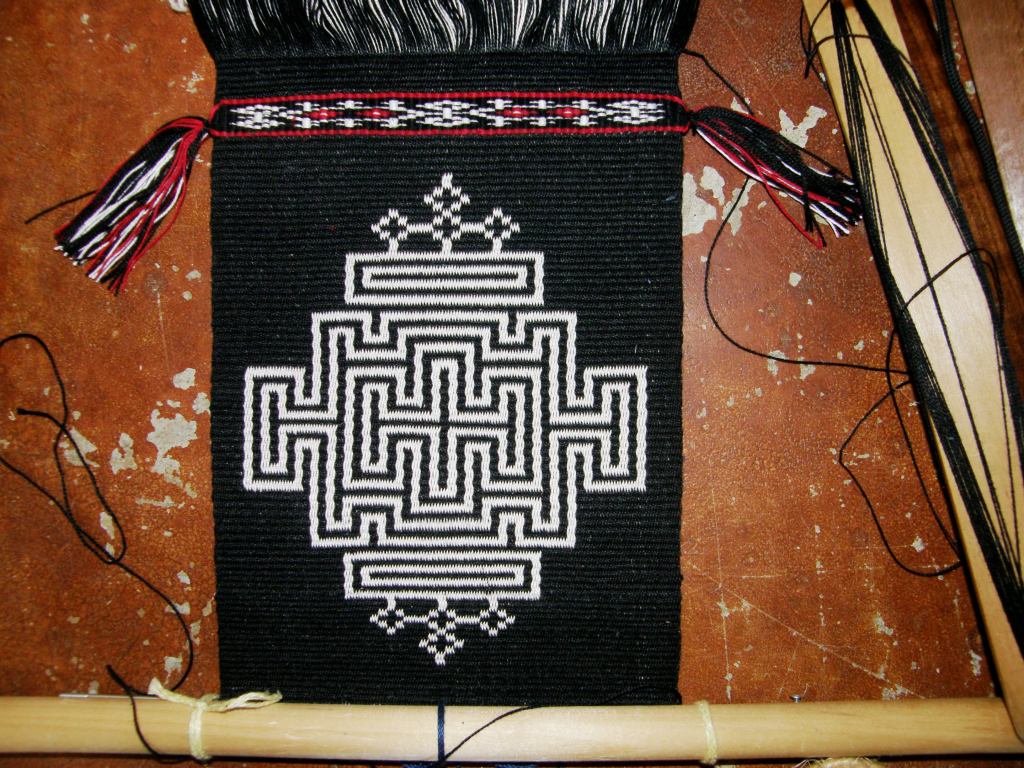
Next up was the piece on which I am weaving a Bhutanese design called “labyrinth”. I am weaving it using the two-heddle intermesh technique that I teach in my second book.

labyrinth design backstrap weavingThe pattern is from David K Barker’s first book of Bhutanese designs. Look at my RESOURCES page to see how you can download this free book. I never plan these ”traveling” warps to actually be anything knowing that my weaving on them is generally so interrupted and disjointed. However, I got to sit and weave on this quite a lot at Janet’s and had it set up in a very similar way to the way I usually like to weave. I lodged the far loom bar behind clamps on a low book shelf and moved the books and magazines around so I could extend my legs within. The angle was just right for me. With a pillow added on the floor, I was right at home.

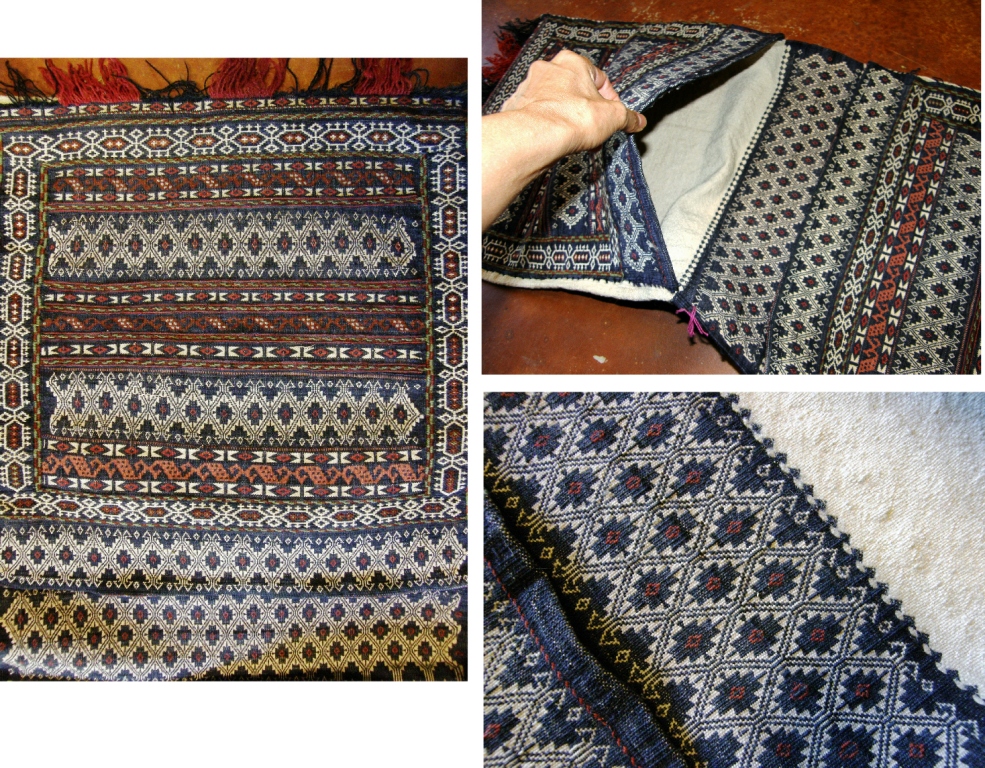
Once the first large motif was complete and I could see that this could actually become something, I had to decide what would come next. Inspiration came in the form of a double-pocket saddle bag quite likely from Afghanistan. Janet bought it in a local shop of ethnic artefacts and it is gorgeous! It is woven with wool and largely patterned using weft substitution technique which results in floats on the back. However, the kinds of  patterns used in this piece do not create overly long or unruly ones. There are all kinds of soumak and warp-wrapped patterns as well. The fabric is incredibly stiff and tight…made to last a long, long time, no doubt.

inspiration for new backstrap weavingThose reds and blues…love them! The back of the bag, which would be against the animal’s back, was not patterned. Janet and I were both astounded when we realized that the plain cloth was not a separate backing but, rather, a continuation of the weaving in an extremely tight and very well balanced plain weave. I would bet that this bag is waterproof.

saddle bagSo, this is pretty much where I am at so far with this latest piece of weaving. I just started some vertical warp-wrapping for the back side which I haven’t photographed yet and I have chosen a motif for the center of the back…it’s going to be a bag (of course!)…black, white and red (of course!) and it is going to get seriously dressed up with tassels and trims. This will be something nice to dive right into when I get back home (that will be soon, I hope. I am writing this in Miami airport).

??????????????????????

Next up on my blog…Santa Fe and the International Folk Art Market…it has been one of my dreams to see this. Visiting Santa Fe also gave me a chance to hang out with several weaving buddies that you will have already met here on my blog. I can’t imagine a better place to have gotten together with them and we are wondering how we can possibly top this!

Of course it inspired all of us but the funny thing is… one of my best ideas came  from something I saw in the American Airlines inflight magazine on the way to Miami…funny how these things work! See you next time.