Backstrap Weaving – Working the Quirks

Welcome 2015!  I just realized that I can now say that I have been weaving for ‘decades’. I have been weaving with a backstrap loom since 1996 but I started weaving with tablets and Navajo-style tapestry in 1995.

Once again, I shout out a million thanks to Gladys Miller in Colorado who picked up this backpacker hobbling about on crutches in Grand Junction, Colorado back in 1995, took her to her home and then to the Navajo reservation to meet her teacher’s family, and sent her back to Chile armed with Navajo weaving tools, yarn, books and just enough know-how to get started.

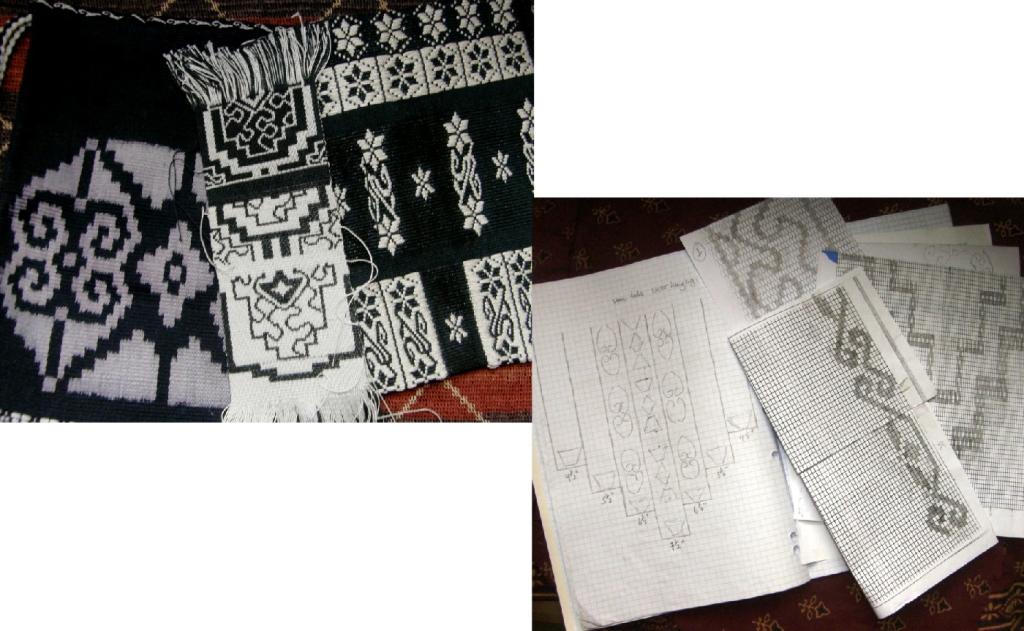
tapestry laverne waddington So, what am I doing on this first day of 2015 two decades down the track? I am sitting with pencil and ruler trying to figure out how to achieve just the right angle so I can split my newest weaving diagonally into two contrasting colored sections.

I remember sitting and doing something similar back in 1995. I was preparing to weave the tapestry piece at left on my Navajo loom in which I needed to have lines traveling at just the right angle so that they met up with others in just the right place. As I plugged away at my calculator, my boyfriend at that time asked me if that was how the Navajo weavers figured out their patterns!

The piece was meant, believe it or not, to be red, black and white but there had been a mix up in my order from Wilde and Woolly in the US which had been brought down to Chile for me by a friend, and I got this pink-ish color instead. Apparently my red, black and white obsession goes way back.

I spent the last couple of weeks of 2014 working on the ikat piece that I mentioned in my last post. I made a new frame on which to stretch the warp for applying the plastic ties and stood it up so I could be seated in front of it for tying. In past experiments I have had the frame lying flat, bending over it to tie, which was rather hard on the knees.

??????????????????????The good ol’ simple wooden bed frame that I bought here in the street market has more than the one obvious use. It is the anchor of my backstrap loom and now also serves to hold my ikat frame. I wanted to tie some big block-like motifs to practice and improve my wrapping technique. What I really want to work on, once I am pleased with my wrapping, is circular shapes and odd angles. I want to create shapes with ikat which I can then fill with pick-up patterns… shapes beyond horizontals and verticals and angles that are fixed and determined by the structure of the weave. Before I get into that, I need to iron out some of the quirks of working with ikat tape and need to figure out the best way to handle wrapping long and large sections of warp.

So, here is the finished piece…

???????????????????????????????I am not there yet with this whole wrapping business. The dye seeped a lot in this experiment so much so that I didn’t even want to photograph the warp when I had removed the ikat wraps. It was a bummer! This would have looked awful if I had woven it off in plain weave. However, I used Andean Pebble Weave in the un-dyed sections and somehow the staining that resulted from the seeping dye is barely noticeable amongst the two and three-span warp floats and hardly shows up in the pictures of the finished piece. It’s there, believe me.

new-techniques-for-weavingAs for the ikat tape, I was given enough for a lifetime, as you can see, by my friend Betty. Someone was asking about places to buy it in one of the forums and a link to a source was provided by one of the members and is much appreciated.

I used to use cassette tape and like the fact that it is opaque. I used cassette tape on the green band at left. The advantage of the ikat tape is that it is very wide and tears beautifully into perfectly straight strips of any width you like.

Now I am wondering how I can ‘work with the quirk’, so to speak. I am thinking that seepage at the edges of the wraps and the resulting staining could give an interesting effect, as if the design that I weave within is emerging from a mist….soft and blurred at the edges and moving gradually into focus….hmmmm….I have some ideas about that.

I edged the horizontals with a cross-knit loop stitch as the typical blurriness of misaligned warps at the edges of ikat motifs, that is so beautiful in plain weave, is not so nice when you are working with two and three-span warp floats. While I really don’t have that much difficulty doing pick-up in black, sewing black on black was a killer! I am lucky in that I don’t yet need glasses for reading and other close work. I figure I should do this stuff while I still have the eyes for it!

So, I am supposed to be moving on to another ikat project but…. I got distracted. I was so pleased with the bird pieces that I decided to do a series of birds. I don’t need to do ikat to be able to create these large block-like shapes and so I warped up for Andean Pebble Weave and started another double bird motif. You can see the spotty pebbled look in the white background. The pick-up design looks rather crazy and confused right now. Hopefully it will start to make more sense when I get to a wider section where the various small scattered elements can come together.

I want to create the same bird motif as on my ikat piece but split the two birds diagonally. That way, I will have white pebble pattern on black on a white background for one bird and then the reverse for the second bird.

bird motif in pebble diagonal line dividing bird motifsAnd that’s where the pencil and the figuring that I mentioned earlier comes into play. The Andean Pebble Weave structure gives me diagonals that are too steep to divide the birds smoothly and so I have to come up with a stepped diagonal instead at just the right angle. I sewed a line between the two birds on the ikat piece, which I will remove later, to help me figure this out.

So, there will be three pieces in this series. I will have one bird piece that is all solid black with a black on white motif….that’s the ikat one that I have just about finished. The second, that I have just started, will be pebbly and half black, half white. The the third will be another ikat one in solid white with a white on black motif….basically, the opposite of the first. This third piece will be the big challenge as I will have to put ikat ties all over a white warp leaving only the bird motif exposed to the black dye.

Textiles that have been created this way, with larger wrapped areas than unwrapped, have always boggled my mind even more so than other kinds of ikat I have seen…all that tying!

blue on white ikatIn the above piece from Tacabamba, Peru, I am guessing that most of that white warp was wrapped to expose a multitude of tiny spots to the indigo dye. You can see the shawl weaver with the many mostly white shawls on display behind her.

ikat shawls tacabambaI think the bird series will be interesting and I am excited about it. I hope I can make it work! Then I will get back to those circular ikat shapes and now have time to think about just what kind of interesting shape to fill with pick-up patterns.

So, a second decade of weaving closes and a third begins. It is fun to look back at the beginnings, although, sadly, I wasn’t as camera-happy back then as I am now and I have little show for it. Lots of things had to get left behind in Chile.

red and green card weaveAt left, is one of the tablet weavings I made while I was waiting for my Navajo loom to be built back in 1995. The rest stayed in Chile when I moved to Bolivia. I like the red and green. I had no idea about any kind of clever way to set this up. I had one end of the warp tied to the leg of the desk in the corner. The warp went over the double bed and was tied to the door knob at the other end of the room. I wove and wove starting standing at the door, and then moving across the bed while adjusting for take-up. I made some samples and a strap for my boyfriend’s binoculars and that was that.

Finally, the Navajo loom was made in time for my birthday in 1995, and I threw myself into that for a while until that order of Wild and Woolly yarn ran out and there was no one to bring me more. I dyed all my left over scraps red for the bottom piece to use up just about everything. You can see all the different tones of red I got from having over-dyed so many different colors.

navajo collageAnd then I went off to Peru in 1996 for that first learning experience with Peruvian backstrap weavers. Below, is the first thing I made when I got back. It was the worst warp ever wound! The stakes leaned inward terribly but I managed to angle the far loom bar and somehow compensate. I combined the two structures that I had studied with my  Peruvian teachers…Andean Pebble Weave and supplementary-warp…it seems that I had a thing for red and green in those days.

first pebble weave warpI didn’t have the confidence to go wider than this with a backstrap loom at that time and so made good use of the Navajo frame for the wide things I wanted to weave. I found some good local wool (how I wish I could find that stuff again…this was in Chile) to use, as well as some of my left over Navajo warp which I dyed…

wool warp faced on navajo loomThe Navajo loom had to be left behind when I moved to Bolivia in 1998 but my backstrap sticks and tools came with me. And now, 20 years on, the loom remains the same, it is all still so very exciting and I struggle to keep up with my ideas. I have come by a few more sticks, a shuttle or two, some swords and reeds.

And it has been nice to come back into contact with Navajo weaving again over the years through a friendship with Navajo weaver DY Begay. Funnily enough, we met in Peru in 2010 and again there in 2012 and I spent time with her in Santa Fe last year where I could a last see her at work at her loom…so inspiring. She did a bit of backstrap weaving too during my visit…

dy-weavingAs for the tablet-weaving, I am happy to watch my weaving friend Cheryl’s adventures in this new-to-her technique and hope to be able to show you some of her work soon.

I look forward to a wonderful new weaving decade and wish you all a Happy New Year.

Backstrap Weaving – Ideas into Action

Sometimes I get ideas for new weaving projects in the oddest places and from the most unlikely sources. While browsing the American Airlines inflight magazine on one of my flights over a year ago, I came across something which planted the seed of an idea. No, it wasn’t an article showing stunning landscapes from some exotic holiday destination, nor was it an article about textiles and fashion or a gallery review. It was a simple image on the title page of the Passenger Information section of the magazine.

???????????????????????????????I didn’t want to have to lug the entire a magazine around with me so, out came the page, and I added the idea to THE LIST…that collection of scribblings in my note pad of ideas for future projects. I liked the idea of having a collection of tiny motifs contained within a shape…not necessarily a hand…but some kind of shape.

Ikat Cat by Budi Satria Kwan fineartamerica.com

Later, while Googling around for ikat images I came across the fun image of a cat on fineartamerica.com.

All those colors contained within a shape on a black background fascinated me. I started to think about weaving motifs in three or four-color pebble weave or brocade within a shape.

I love the way the colors leap out from the solid-color background.

I had made some practice pieces in three and four-color pebble some time ago, trying to use the technique in some unconventional ways…

???????????????????????????????Imagine something like this, a four-color pebble weave, which I wove back in the late 1990s…

OLYMPUS DIGITAL CAMERAcontained within a large circle against a black background.

I would create the shape with ikat. I wondered if anyone else had had the idea of doing pick-up within an ikat shape and Googled to see what I might find. It was pretty funny when my search based on the key words ‘ikat’ and ‘pick-up’ yielded this! (from this page of the Dallas Morning News)…

Michelle Nussbaumer's ikat pickup truck from the Dallas Morning  News
Michelle Nussbaumer’s ikat pickup truck from the Dallas Morning News.

It isn’t quite what I had in mind. This is ikat within a pickup (truck). I want to do pick-up within ikat!

I was silly enough, while working on my most recent wall hangings, to think for a second that I was being innovative by using brocade and ikat on the same piece. Of course I wasn’t!!

ikat and brocade backstrap weavingAnd here’s an example….Chris Buckely was kind enough to send me a copy of the September 2014 issue of Textiles Asia Journal for  which he wrote an article on the the ikat textiles of the Li people of Hainan Island. There on the front cover was Chris Buckley’s image of a Meifu Li skirt with ikat and multi-color brocade…

Textiles Asia Journal September 2014
Textiles Asia Journal September 2014.

There are many things to sample and be decided before I can bring this idea of mine into action. Firstly, what shape do I want to create with the ikat? Here is my first experiment on a narrow warp to see what would be involved with creating a circle and then doing some pick-up within…

pick-up within an ikat circleThe actual ikat process had its usual set of challenges. The black dye seeped and stained some of the white thread yellow. I have gotten purple stains from black dye before, never yellow. But I have to say that I was pretty happy with the circle that I was able to create on a relatively small amount of warp ends.

Now I am preparing a larger warp and a larger shape. I am  keeping the shape simple…no curves or fiddly curls like my other recent experiments below…

ikat ready fo dyeingThis new experiment will have big, bold, simple shapes so that I can simply concentrate on what I need to do to improve the way I apply the ties and reduce seepage.

Here is the new warp ready for tying…

???????????????????????????????I watched a video on ikat artisans in Uzbekistan. One of the design masters marked the pattern on the white warp as a guide for the people who would later apply the ties. He simply eyeballed the spacing and quickly and efficiently touched his marking stick to the warp.

Here is the video if you would like to see for yourself…

Maybe after a few more decades of practice I will be able to do that too! Meanwhile, here I am armed with ruler and set square. I don’t feel I can simply eyeball the pattern even though it is a ridiculously simple one. The thing that drives me crazy is that my eyes do not want to trust what the ruler and set square are telling me and I find myself measuring and marking and then measuring again.

???????????????????????????????I have a new frame for stretching the warp and have set it up so that I can sit in front of it and have it at eye level (as the lady in this picture is doing) rather than having it lie horizontally with me doubled over it.

The ikat frame, above, is one that was on display in the Timor Leste stand at the Santa Fe International Folk Art Market in 2013.

I see a couple more days of tying ahead. I am quite comfortable sitting up in front of my new frame. I am playing with a couple of other things on backstrap looms on the side as the tying is quite tedious and not something I can work on for hours at a time.

Hopefully, I will have this warp on a loom with something to show you next week. Next Thursday…that will be Christmas Day…I almost forgot! I wish you all the very best.

Backstrap Weaving – Plain Tales

There are many things to remind me that I am no longer in the US and am back in the tropics…that we are heading into summer while the northern hemisphere rolls into winter. There’s this picture that was taken by an online weaving friend in Vermont today….


Picture by Susan Anderson

I keep scrolling back to gaze at it as I write my post in the heat. I lived 6 years in ski resorts and can sense the strange way that sound gets muffled when snow has fallen as I look at this picture. I love its cool blueness.

I have been pulling my hair out all day because my internet connection has been particularly horrible…on and off every 30 seconds….while poor Susan in Vermont is without power in a snowstorm. I wonder how my Californian friends are doing with the massive rain storm that was predicted.

It’s been one of those weeks where I spent far more time online than at the loom. That is not such a bad thing. I got a lot done even if it was at a very slow speed. And, while emailing away and doing research, I ran across a very cool video.

embroidery of AyacuchoLast year, while visiting with my weaving friend, Dorothy, (the one who recently studied with Peruvian tapestry artist, Maximo Laura) I saw some of the textiles that she had collected on a previous visit to Peru.

One such piece was a pillow cover with some beautiful embroidery. Both Dorothy and I were curious about the embroidery stitch that was used to create the stems and filled-in areas. I posted pictures in a post following the visit and readers wrote to tell me of the origin of the piece…the province of Ayacucho.

I had been to the city of Ayacucho in 1996. That was shortly after the capture and imprisonment of the leader of the Shining Path movement which had used Ayacucho as the base for its terror activities. The city was a sad, depressed and desolate place at that time with few signs of activity and a mere handful of weavers still at their floor looms in the Santa Ana area. I hear that the city’s artisans have long been back at work producing all kinds of both traditional and contemporary handcrafts.

close up of Ayacucho embroideryMariana Venegas wrote to me immediately after I posted these pictures last year and sent me diagrams of  what she believed the stitch to be. She was right. But it was one of those things that I did not examine very closely, filed away and forgot about. Thank you so much, Mariana! Coming across the aformentioned video reminded me that I had wanted to learn how to do the stitch. In the video it has been named punto crespo.  In Bolivia, hair that is curly or frizzy is described as being crespo so, I guess I could safely say that it is the “curly stitch”.

Anyway, here is the video for anyone who is also curious. I would like to use this stitch in some way in my work.

Ayacucho is one of the places I would very much like to revisit as I see so much beautiful handwork coming from that area online. …not that I want to buy anything, photos will do…I am busy trying to find new homes for some of my things these days!

Here is a picture of some paintings done in Ayacucho from the Facebook page of Folt Bolt. I recommend going to Facebook and “liking” that page. The things that are posted there are a constant source of inspiration.

10801468_875090005865031_7243699615616830850_nHere is Folt Bolt’s description that accompanies the picture…

Sarhua is a village in Ayacucho, Peru. Tablas (boards made from the stock of the century plant) are painted using natural pigments extracted from the earth around the village and also from the leaves/flowers and roots of plants. Each member of the family must be reflected in the tablas, performing their every day work or enjoying a special day or festival. A tradition is gift-giving of a tabla to a friend or family member building a new home. These are usually 6 – 8 inches wide and up to 10 feet long and are attached along a ceiling beam on the second floor for good luck and protection.

???????????????????????????????I do remember these marvelous ceramic churches in Ayacucho. Not only were  miniature versions offered for sale in some of the stores in the city, but large ones sat on the rooftops of many of the houses in the surrounding suburbs. The examples, above, are part of Gay’s collection of textiles and folk art that I saw in her home in San Diego on my recent fall trip. Gay, by the way, is very keen to sell most of the items in the collection and would welcome any enquiries. Just leave me a message here on my blog.

As for the title of this post, Plain Tales,…that is what I have decided to call my second series of three red-black-and-white wall hangings. Why “plain”? Because they are all based on warp-faced plain weave….. a black warp-faced plain-weave panel patterned with white supplemental weft, two bonded layers of warp-faced plain weave, or double weave, and warp ikat, a tie-dyed warp woven in plain weave.

Each has a tale to tell but not only about what was involved in creating it.

??????????????????????Each has a story of the encounters and experiences I have had here in South America, and beyond, learning to weave on simple looms.

From the time spent at a raucous highland festival in the town of Calcha where I first spotted the women’s tiny floral hat bands amongst the dancing and celebration, to my first encounter with ikat in the form of my weaving teacher’s martital bedspread. The tied pattern included her name and her husband’s.

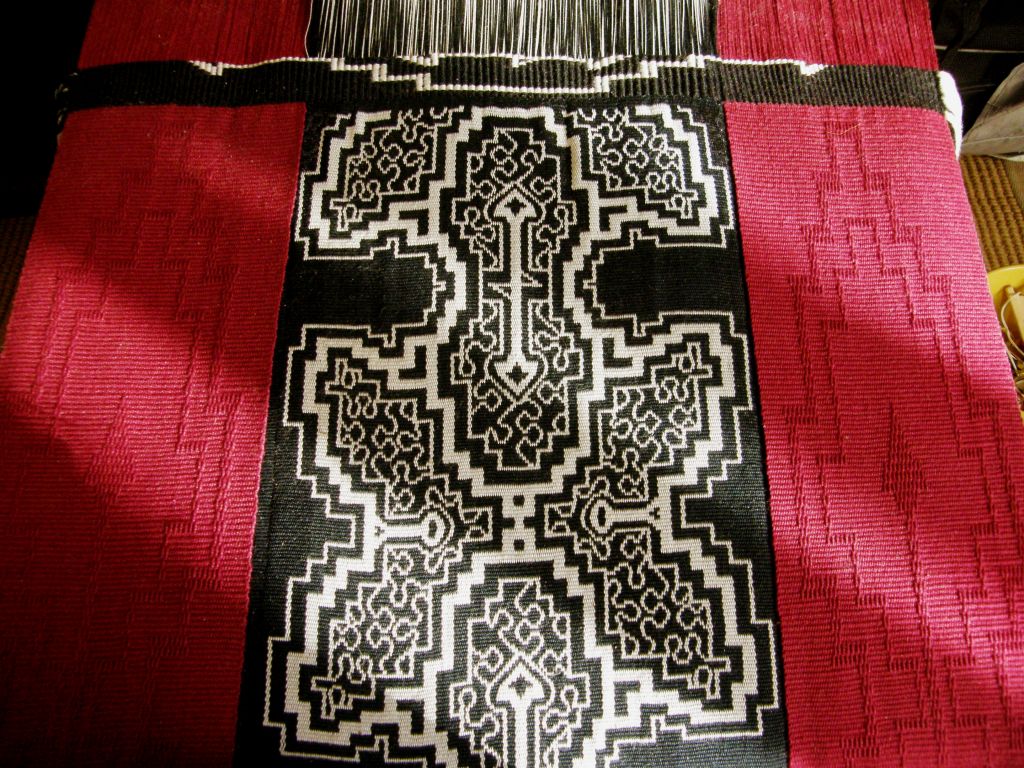
The Shipibo-inspired piece reminds me of the three weeks I spent on my knees doubled over at the horizontal ground loom learning double weave with my teacher laughingly telling me q’ella! (lazy!) and jokingly threatening to slap me when I didn’t beat hard enough!

As I sit twining, I am taken back to afternoons spent with my Montagnard teacher, listening to her stories about her overpowering desire as a child to learn to twine, abandoning her chores and risking her mother’s anger to run off secretly to another village to sit and study with her sister-in-law.

3 plain tales backstrap weavingAll three Plain Tales are off the loom now but not finished. There will be a great deal of tv time spent braiding and twisting fringe.

I re-did the red panels on the first of the three pieces to be completed and had, therefore, to re-do the weft twining that connects the them to the central black-and-white one. Each row of weft twining took 40 minutes! Now all the red panels match in structure and color.

weft twining on forst plain tales hangingIt has been so exciting to see this blank slate….

warp fr doube weave wall hanging

…turn into this…

shipibo inspired wall hanging plain talesAnd to see these experiments….

ikat experimentsbecome this….

ikat and brocade on backstrap loomI keep the woven samples, tests and trials and notes. Some of the samples can be fashioned into something useful, others not…

samples and notesAfter completing the relatively chaotic black-and-white center panels for each hanging it was always been soothing to then be able to sit at the loom and turn out plain red cloth with simple warp-float motifs. These quiet red panels flank the black-and white ones.

red on red panels on backstrap loomWhat’s next?…more ikat!  I am in the process of figuring out a new frame so that I can sit in a more comfortable positon while doing all the tying. I have a new idea for the ikat which will need sampling and I am pretty excited about it as I really don’t know what to expect. I brought back LOTS of black dye from the US this time so there will be lots of room for error and adjustment in the sampling.

I will leave you with a fun original design by David. He wove some star patterns using the Andean Pebble Weave structure based on Guaraní designs that I charted in my second book. Then he went on to use the tutorials on designing to create his own cat motifs. They are adorable!

dave


Backstrap Weaving – Those Other Techniques

This month the winners of the annual weaving competiton run by the CTTC (Centro de Textiles Tradicionales, Cusco) were announced and the weavers were awarded. Many pictures of the evaluation of the textiles and the prize-giving ceremony were posted to the CTTC’s Facebook page. Although it isn’t clear to me which group was the overall winner, there is a wonderful array of pictures of the gorgeous textiles and their proud creators on the page. In the CTTC’s next newsletter we are bound to be told which textiles were judged to be best.

10610503_689671741081744_8141454025465810761_nThis year’s competition was based on four challenges….

1. The creation of a knotted four-cornered hat based on those made in pre-Incan times (you can download a free e-book on these hats here).

met-publication-andean-four-cornered-hats

Here is an extract from page 10 of the book with a basic description of the techniques employed…

Almost all four–cornered hats are made with larkshead knots, variously manipulated for texture and color change.
A major distinction can be made between plush hats, patterned with supplementary pile yarns caught into the knotted foundation, and knotted hats without pile.

This intriguing video from Museo Chileno de Arte Precolumbino shows how the hats are constructed.

Here is a translation of the text that accompanies the video…

The four-cornered hat is constructed from the crown, with a ring formed from the first series of knotted loops. The knots are continued in a spiral pattern, with additional knots added on the diagonals to achieve the square shape of the hat. To make the sides of the hat, more knots are added at different intervals, depending on the shape and type of hat design: The knots are added in a spiral pattern if the hat is a single color, or in sections if more than one color is being used. The lower edge of the hat is finished off with a final row of knots. The “points” on the top of the hat are made separately. The relief designs on monochrome and bichrome hats are achieved by combining “front” and “back” faces of the knot, according to the motif desired. In contrast, the designs on polychrome hats are made using up to nine different colors of yarn, with the knots always tied in the same direction and grouped by motifs or color fields.

2. The creation of pieces inspired by Incan cloaks worn by the ñustas (Incan princesses)


Image of a late 18th century painting from the Museo Inka in Cusco provided by CTTC.


3. Double-weave belts.

4. Tapestry.

A weaver from Pitumarca  taht I watched at Tinkuy 2010 creating a taspestry using a backstrap loom.
A weaver from Pitumarca that I watched at work during Tinkuy 2010 creating a tapestry using a backstrap loom.

The following pictures are from the CTTC’s Facebook page and are used with their kind permission.

Here is one of the tapestries spread out on the floor during the evaluation process. I don’t envy them that job! Every piece must have looked amazing.

tapestry CTTC 2014

10417469_689672474415004_7225471250316288685_nIn this piece, you can clearly see the squares of woven fabric that were pieced together to form the large textile. I am assuming that, as in the competitions in previous years, the weavers were challenged to create 30 x 30cm squares and combine them to create one large piece. That reminds me of the interesting and emotional presentation at Tinkuy 2010 that I attended where weavers from the various communities talked about their experience with these competitions…the difficulties as well as the advantages involved in working as team, the pain of rejection of pieces that didn’t quite fit or meet the standards, the enormous amount of time involved with planning and agreeing on designs that would suit the year’s themes, and the rewards and benefits of participating in these events.

One such rejected square (see below) from the 2010 competition made it into the hands and home of my friend Virginia. I am sure that the pieces that don’t make it into the final work do not get tossed by the weaver or forgotten in a box under the bed. They stand alone as beautiful pieces of work even of they don’t fit within the whole.

??????????????????????

10376922_689671514415100_1698807909188374612_nWhat an experience it must have been to be seated within that courtyard surrounded by those amazing pieces of work and their proud creators.

1920489_686163014765950_455227465195720892_nHere are some of the four-cornered hats displayed for evaluation.

10568795_689672764414975_4096139166593297128_nAn award winner in what could be the Inca cloak section judging by the image on his certificate.

10603682_686163974765854_4113572595310474414_nI am assuming that these are some of the fajas from the double-weave section.

I will leave you to look at all the other pictures in the album on the CTTC’s Facebook page.

This is the first year’s competition  (that I am aware of in my brief experience with them) where different techniques have been highlighted….tapestry, double weave and the knotting technique used in the four-cornered hats.

This made me think about my own future projects and the possibilty of basing  my next wall hangings on some of the non-weaving techniques that I have learned or observed as well as techniques that  involve not only warp-faced pick-up. I suppose my latest ikat project has been a good start towards that.

ikat projects backstrap loomAs you can see, there are two versions on the go. Long story short…I got some black cold water dye from a one-time unexpected source  and was able to unwrap and weave the larger motif.

Large ikat motif backstrap loomI am loving the way this looks with that bit of red in the background as I think about the red panels that will accompany it. I haven’t decide which of the two ikat pieces will eventually be used. It will most likely be the one that came out more brilliantly white.

As for other non warp-faced pick-up techniques that I might use in future wall hangings, I ran across this piece of fabric that I bought from an alpargata-maker in Ecuador. This shaped piece, which  is created around a mold, forms the cover for the front part of the foot.

fabric fro alpargatas Otavalo

boy's alpargatas otavaloWhen I originally posted on this blog about these alpargatas that are used by mostly older men in Otavalo, Ecuador, it was suggested by a reader that the technique used to create the fabric might be called ply-split darning. I spent a day with an alpargata artisan and watched how he created the fabric. I wouldn’t mind trying to include the technique somehow in a wall hanging. I love the textured white-on-white pattern and I could perhaps use  in the red side panels that accompany some other kind of technique from Ecuador.

Another technique that is begging to be explored further is soumak and my greatest inspiration for that has come from Julia Miryam Chavah. I haven’t seen soumak in use here in South America and have no idea if, in fact, it is practiced here. Miryam frequently posts her projects online. I have watched in admiration and wonder as her skills have grown over the years and she attributes it to a humble little booklet (and a lot of hard work and determination, I am sure) that I managed to buy on a recent US trip…

??????????????????????Here is a piece called Double Happiness that she recently posted…

First, a nice close-up of the structure…

julia miryam chavah (1)


The work in progress…

julia miryam chavah (2)

And, the finished piece…..

julia miryam chavah (3)Wow!

I confess that I have never been quite clear about what exactly soumak is. Fortunately I have some books to guide me (and Julia’s work to inspire me)…

Jean Wilson in her Soumak Workbook describes soumak  as  a method of wrapping weft around warp. It is worked on a closed shed. The wefts do not pass through a shed.

However, I have also seen techniques described as soumak in books where the weft is supplemental, that is, a separate ground weft is used to create fabric and another patterning weft creates the soumak. In her book Woven Treasures, Sara Lamb teaches to create soumak using a supplemental weft. Another foundation weft is used to create a ground fabric.

Marla Mallett’s book, Woven Structures, has a section on soumak in which she indicates that reinforcing ground wefts are sometimes used but she says that “the thin ground weft hidden in most allover soumak fabrics exists merely to reinforce the wrapped construction.”

Peter Collingwood in The Techniques of Rug Weaving describes soumak with two wefts…

“One is the gound weft which weaves with the warp to make a normal weft-face structure, the other is the soumak weft which crosses the warp at intervals, wrapping round its ends, more in the manner of an embroidery stitch than of weaving.”

He also writes that the technique can be carried out on a warp-face plain weave background.

stitched-sta-cat-2It seems to be, in that case, that the upper form of patterning on the sampler above, that I studied in Guatemala, could in fact be called soumak. The supplemental wefts follow the path described and diagrammed in my books. (I would be happy if a reader were to enlighten me further!)  There is a warp-faced ground cloth beneath the colored patterning wefts. I think that this would be the technique I would explore further on a backstrap loom because it is something with whichI have had experience in my travels in Guatemala.

And then,  there are the sling braids and edgings that I studied in Peru way back in 1997. I would love to somehow incorporate those in the sets of wall hangings I hope to create.

sling-braid-edgingsTo pick-up or not to pick-up…all kinds of beautiful things can be created on a backstrap loom. Gwen just finished this plain-weave guitar strap for her husband using variegated Plymouth Yarn Fantasy Naturale. It’s only her second project and it is gorgeous. The hardware for the strap is from ASpinnerweaver’s Etsy store.

gwen guitar strap (2)

gwen guitar strap (1) Julia is doing pick-up and is practicing  designs that are charted in my second book that require all pick-up (that is, they are not semi loom-controlled as the Andean Pebble Weave ones are). This one is a sample and I know that she is already on to bigger things using colors with higher contrast.

DSC04807_mediumJane wove with me once and then joined the Weave Wide/Weave Fine challenge group this last spring. Here is her finished project. She made a backstrap using  all pick-up to create the central motif. Jane is totally at home with this and I can’t wait to see what she creates next.

10574436_817321331632239_2699883635988505940_nAhem…as I was typing that last line, Jane was already posting the next project…a camera strap…

1557630_817321921632180_4274413554055257658_nHow cool is that? The interlocking design is one that I adapted from tablet-weaving by Louise Ström and charted for Andean Pebble Weave in my second book. For this project, Jane would have used two sets of string heddles which makes the technique partly loom-controlled. She’s also good at charting patterns from pictures and textiles. A photo of a textile with the cute bear motif appears in Nilda Callañaupa’s book on Traditional Textiles of Chinchero.

I am ablaze with ideas for more wall hangings and have another ikat idea brewing, if I dare…just when it is time to put down the loom and start winding warps. Actually, it is the warp-winding that starts the ideas flowing. It gives me lots of time to think and ponder and, as my warping board is on a table in front of a wall of books, there are plenty of reasons to pause and start leafing through pages.

For now, I will get in a bit of weaving time at the loom, wind some warps, sketch and dream.

Mexico has been working its way into my life recently. I will show you some of things that have been coming my way next time.


Backstrap Weaving – Inspiring Ikat

sunlight on red panels backstrap weaving“Question of the Week” on the Warped Weavers Forum asked us if our finished projects always measured up to what we had envisioned. It is interesting for me to think about this and see how my ideas about the larger projects on which I have been working lately have evolved during the long process of weaving.

I have been spending months planning and weaving these wall hangings, often interrupted by a break of several more months while I travel.

I look back at my notebook with its sketches and glued-in pictures and can see how far the finished pieces sometimes stray from the original idea.

Sometimes it is a technical hitch that does not allow me to create what I had envisioned. For example, I had wanted the Shipibo-inspired piece to comprise only curves but could not manage to form nice smooth curves with the thicker solid lines in double weave. That had almost caused me to abandon the idea. But, I went with a strong angular outline filled with finer curves instead and I really like that contrast.

backstrap weaving Bhutan bagSometimes, in the middle of a project something will catch my eye online, or someone will show me something and I will want to add those ideas to the mix.

That is what happened with my Tales of the Sub-Continent fabric which started with a Bhutanese-inspired motif and spread to Afghanistan, Nepal and beyond.

Sometimes it works, sometimes it doesn’t. When it doesn’t, it goes into the closet. And this is one of the many cool things about backstrap weaving…my half woven projects can be easily removed, still on their metal rods, from the loom bars and stored. I can discover a project months later, pull it out and wonder why on earth I hadn’t liked it! Then it can be easily lashed back onto the loom bars and continued..

It’s like in the old days before digital cameras. I never wanted to process my rolls of film until at least three weeks after my trip. If I got impatient and processed them straight away, I would always be disappointed with the shots. They didn’t live up to my fresh memories of the things I had seen on the trip. The colors would not be as brilliant and they wouldn’t have captured the mood.

However, just a few months later, they would look fantastic as my memory of how things had looked and felt faded.

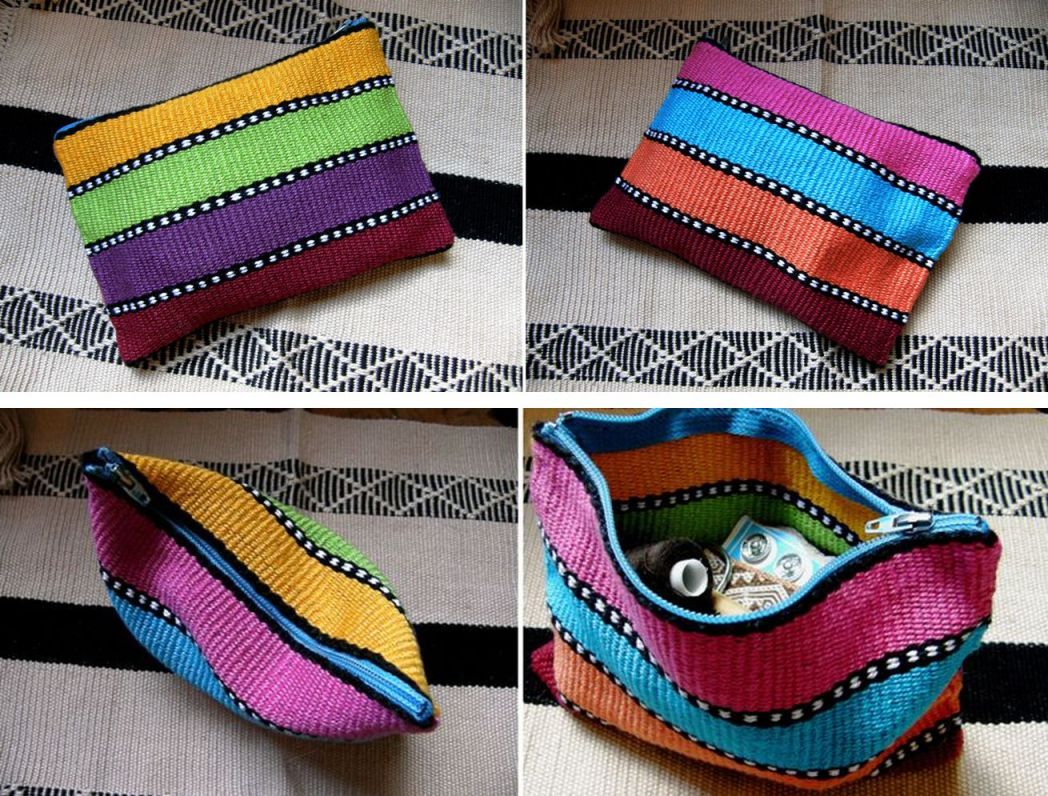
striped-pouch-x-4I detested the above fabric when I first wove it. It was a demo warp that I had hastily put together before a trip. I wanted something fun, bright and cheery in place of the black that I am so often using. It didn’t come out as I had envisioned and I didn’t even take it out of my bag to show anyone as I thought it was so ugly. Now I love the fabric, the original idea has been long forgotten, and the little sewing kit pouch is really useful.

Guatemalan supplementary weft sampler overviewThis fabric has also been living in the back of the closet for the longest time. I wove it to practice what I had learned in Guatemala shortly after returning way back in 2008. Now I love it and need to make something from it.

There have been a few things that simply didn’t work as far as I was concerned and those things got tossed. But, I have to wonder how I would feel about them if I were to uncover them in the closet today. If there isn’t even a picture of it, it means that I must have really hated it!

All this is leading up to my telling you that I have been walking by last week’s forlorn, rejected ikat piece, which has been sitting on a bench in my bedroom all week, and finding myself eventually wondering why I hadn’t liked it. Of course, there’s a whole blog post dedicated to why!  But, I finally decided that I could unweave some parts and improve it somewhat. So, here I am weaving away on that piece again…and not just to get it of the loom and learn more lessons…no, it’s because I actually like it now despite its flaws.

I spent most of the week washing yarn to take of the wax finish, setting it up on a frame and wrapping it for a new slightly larger ikat motif.latest ikat projectI was very excited about this new larger motif and really wanted to weave it. However, I had to face the fact that I didn’t have any black cold water dye left. In the end, I couldn’t resist trying to achieve black by mixing  colors.

Well, it looked black in the bath and even looked black while it hung to dry. However, the rinse water certainly wasn’t black and the dry cloth has a purply reddish glow.  It is kind of like the color of those big, fat, juicy, ripe mulberrries on the tree. They look so black and shiny but your hands and lips stain purply-red (which is why my brother and I could never get away with eating from the forbidden tree in our backyard as kids). I almost unwrapped it but I will wait until I return from my next US trip with fresh supplies of dye and I will overdye this warp black. That warp has to go on the back burner for now. What will be interesting, will be seeing what colors have already seeped under the wraps.

Here’s some online inspiration for more and more ikat experiments…lots of reasons to keep at it!

Photo used with the permission of the Ministerio de Cultura de la Nación Argentina. The ikat poncho was woven by Guillermina Cabral.

Ponchos on and off the runway….

Don Juan Millain shows a ponch woven by Norma Millain. Photo from the Facebook page of MATRA - Ministerio de Cultura de la Nación Argentina.
Don Juan Millain shows a ponch woven by Norma Millain. Photo from the Facebook page of MATRA – Ministerio de Cultura de la Nación Argentina.

And on the loom….

Graciela Salvatierra's work in Catamarca, Argentina from the Facebook page of Ponchos Artesanales  Salvatierra ll
Graciela Salvatierra’s work in Catamarca, Argentina from the Facebook page of Ponchos Artesanales Salvatierra ll

And here’s my wee, wobbly project being slowly fixed…straightened on one side, and now with white embroidery floss for supplementary weft which looks so much better than the creamy colored silk I was using last week.

ikat

Chris Buckley, in Beijing, has shared many images with me over the years from his vast collection of textiles. I was happy to find his Art Southeast Asia page on Facebook recently, via a weaving friend, and see the picture of Li ikat weaving that he had posted. He has just had an article on these pieces published in the September issue of Textiles Asia (I have a copy coming my way). There were a lot of tiny wrapped sections in his piece! and the seeping of the indigo into the white has created a nice effect. Using handspun cotton…now that’s a whole other trip.

chris buckleyHere is his description that accompanies the picture:

The September 2014 issue of Textiles Asia (www.textilesasia.com) includes my article on ikat made by the Meifu Li people of Hainan. The Li make dense, complex and beautiful ikat, using locally grown handspun cotton and natural indigo dye. The designs are tied on the warp threads with small strips of resist, before the yarn is dyed. The dyed threads are woven on a simple backstrap loom, so that the designs appear in white on a deep blue background on the finished fabric. Motifs include geometric forms, human figures and amphibians, such as those in the photo here, which shows a detail of a large sarong. These were mainly for ceremonial use (weddings and festivals). The Textiles Asia magazine is excellent and I recommend it to anyone with an interest in this area.

You can watch a short Youtube video here showing the ikat process with string and masking tape used by some weavers in Argentina.

I think they are very brave to use that heavy marker pen! I tried using a fine-tip marker and the ink bled into the yarn. Now I use faint pencil marks.

A booklet that I have on Guatemalan ikat, known there as jaspe,  says that the person tying the knots marks with a pen the parts that need to be reserved. Most likely they are less prone to making mistakes than I am!

A Guatemalan jaspe warp ready for weaving
A Guatemalan jaspe warp ready for weaving.

Leaving ikat aside for now, let’s look at some other kinds of backstrap woven beauty. Gwen shared with us pictures of the beautiful pick-up weaving that she saw on a recent visit to the Cusco area of Peru.

10305594_10203495499921874_8779412477090214824_nThis is one of the textiles that has inspired her to take up backstrap weaving and she has already woven her own backstrap. Her enthusiasm and obvious enjoyment of the whole process has me remembering the simple pleasure of just sitting at the loom and working the sheds, listening to sticks clack while watching the warp and weft interact and the fabric appear…

gwendolyn facebook (2)I appreciate her having taken this next picture of the process of braiding the ends of the backstrap and inserting the cord. I didn’t use a picture of this in my article and I know that Gwen’s picture will make the process very clear to those who may be unsure.

gwendolyn facebook (3)Some more simple pleasures…

10570318_770325679684468_7800201937456857640_n…weaving outdoors on a warm sunny day. Oscar Vasquez tells me that he doesn’t live in a part of Mexico where backstrap weaving is practiced and so, he has been following the same WeaveZine article that Gwen used (the Spanish translation) to weave a narrow band while out and about.

This coming week, I hope to warp the two red panels that will accompany the central  ikat panel of my planned wall hanging. I will create another red-on-red pattern using simple warp floats. The motif will have elements of that used in the ikat panel.

See you next week.