By Laverne Waddington. My weaving , my inspiration, tutorials and more……..
Author: Laverne Waddington
I am an Australian who has recently returned to Australia after having lived for 32 years in South America where I was teaching English, weaving, writing, and studying indigenous weaving techniques. I have been learning and documenting traditional textile techniques of various Latin American countries with indigenous weavers since 1996. Although I have studied using several types of simple looms, my loom of choice is the backstrap loom.
After many years of largely replicating, adapting and embellishing patterns that had been shared with me by my weaving teachers and friends, I now design my own unique pieces while continuing to employ the woven structures used by my mentors in South and Central America.
In 2009 I decided to leave my English teaching job to focus on weaving and, since then, have self-published eight PDFs on technique and patterns which were sold on various websites over the years. I now plan to sell them here on this blog...coming soon. Please subscribe to this blog for updates.
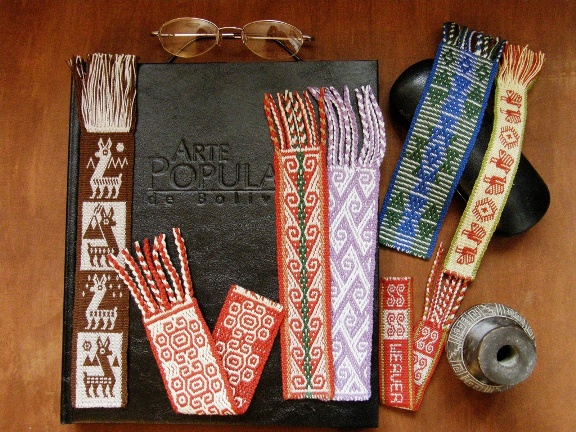
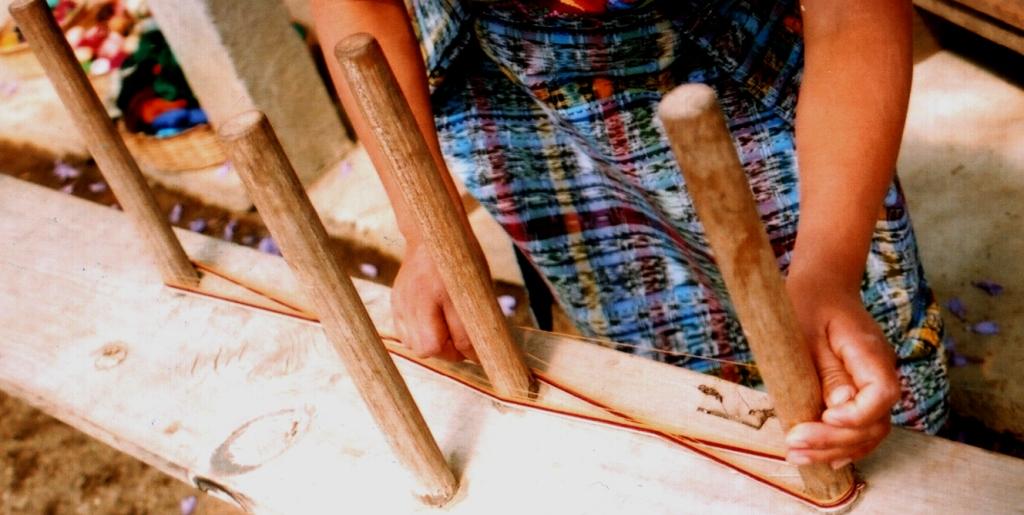
My favorite ”on the road” project is weaving bookmarks. Many times I find myself at night in a deserted hostel in some small town with no internet access and nothing to do so I entertain myself by weaving bookmarks. There always seems to be a bed rail or something to tie my loom up to. I make bookmarks, key fobs and sometimes small coin purses to give away to fellow travelers and weavers that I meet along the way. Often I swap coin purses with weavers and spinners for interesting spindle whorls, small tools or other bits and pieces. I take all my loom rods with me in my backpack as well as a nifty little warping board that I made which was inspired by my very first weaving teacher in Huancayo, Peru. My teacher, Margarita and her daughter used to come into town everyday with their little warping board to teach me.
Warping with a board and nails in Huancayo
My warping board is even smaller than this one. It is basically a flat narrow stick about the thickness of a ruler and I use long screws in place of nails as I can secure them to the board with the nut-no leaning warping stakes. It gives me a warp just long enough to make one bookmark or two key fobs. I use two or three widths of warp from this board to make a coin purse.
I like to start my woven pieces with a smooth edge-that means one less hem, braid or fringe to worry about- and I achieve this by threading a steel needle through the warp ends and lashing that to the loom bar. You need to lash it firmly so it won’t bend when you put tension on the warp. Once off the loom, the needle is removed and I pass the first weft tail through the end loops back and forth two or three times on a large sewing needle. Then I braid the other end or sew over the end and leave a fringe. The book mark sits within the pages of the book with fringe or braids protruding.
Part of my mini warping board. I wrap the screws with paper to stop the warps from catching in the screw threads.Steel knitting pins and lengths of piano wire that I use to create a smooth start for my weavings.Finishing the smooth start by passing the weft tail on a large sewing needle.Finishes for bookmark ends-one has a sewn over edge with fringe and the other has 4-strand braids.Two weavers from Yanque in Peru chose my bookmarks over the coin purses. Even the little guy got one!
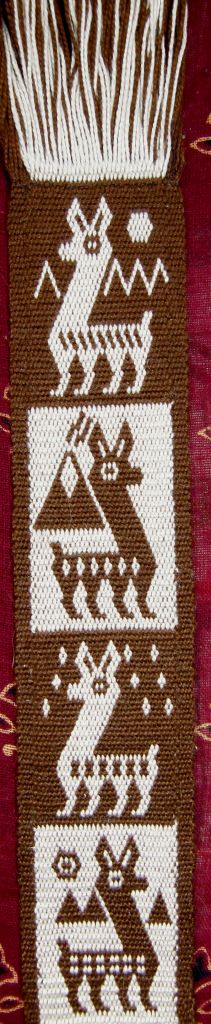
For a nice thin bookmark that is not too bulky within a book, I use a 35wpi crochet cotton and recently used it to make a double woven bookmark with a cute llama motif.
The llama is a much loved symbol of Bolivia and Peru but you certainly don’t need to be trekking down to South America to see this lovely animal anymore. There seem to be more than enough of them being successfully raised in many other countries around the world. I saw many on the outskirts of the city on my last visit to Sydney. There was even a llama festival on at the time.
Here in Bolivia and Peru the llamas have many uses. They are used as pack animals for transporting grains in sacks, often woven from their own fiber, from villages to markets. Their fiber is woven into blankets, coca bags , belts and other accessories as well as braided into slings and ropes.
Their dung is used as a fuel for cooking fires and their meat is often enjoyed as charque-dried meat similar to jerky. The bone from a llama’s lower leg is shaped into a pick up tool and beater-the wichuna-part of a weaver’s basic tool kit. Enterprising locals pose with their beautiful animals for tourists and they are irresistible!
Dried llama fetuses are sold at the market stalls that sell homemade remedies. The llama fetus is buried at the cornerstone of a new house as an offering to PachaMama in the hope that she will bring prosperity to the home owners.
Ladies posing with their llamas near Cusco, PeruLlamas carrying produce on the road near Yanque, PeruProduce at an agricultural festival is displayed in sacks made from llama fiber and wool.You can see the dried llama fetuses hanging up high in this market stall. On the table are drop spindles, llama fiber and wichunas.A closer look at llama ”charque”, llama fiber and two ”wichunas”.Slings, which are beautifully braided from llama fiber, are used, among other things, to hurl stones to help control animals wandering from the herd.
As there are no llamas here in lowland Bolivia where I live, I bought bags and bags of their fiber many years ago when I was in the highlands-enough to keep me occupied spinning and weaving for many years to come. I am no spinning expert and just do as I was taught here. The fiber needs to be spun very firmly to stand up to the weaving of warp faced textiles on the backstrap loom. All the weavers that I have studied with weave with a two-ply yarn and all spinning and plying is done on drop spindles.
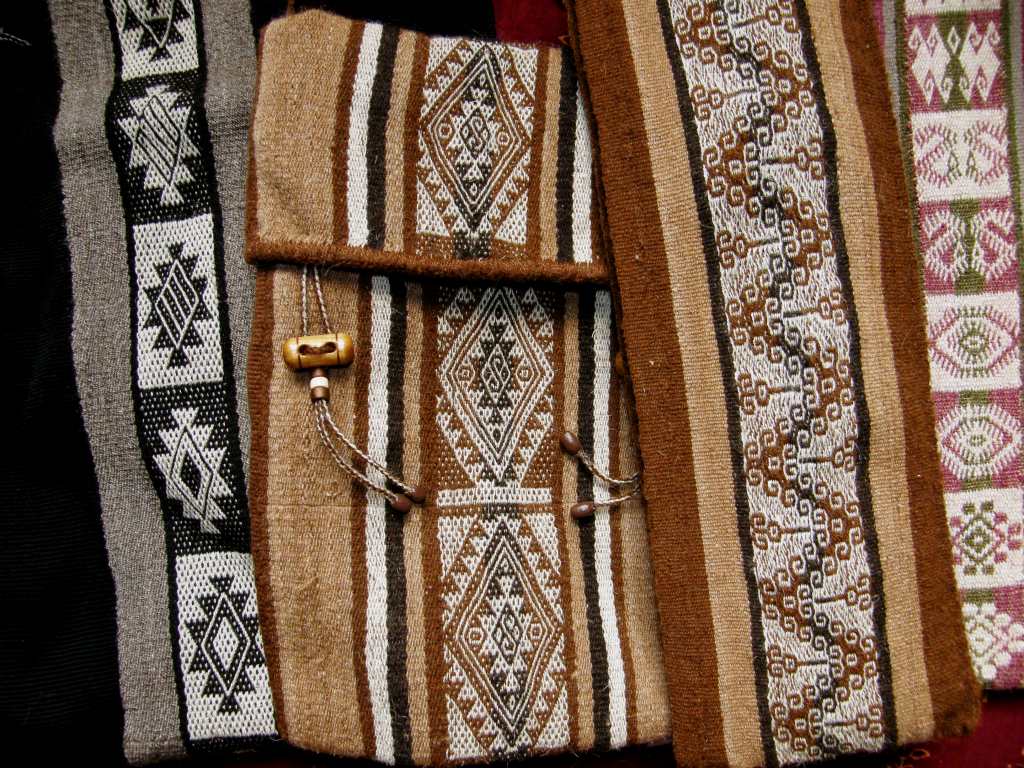
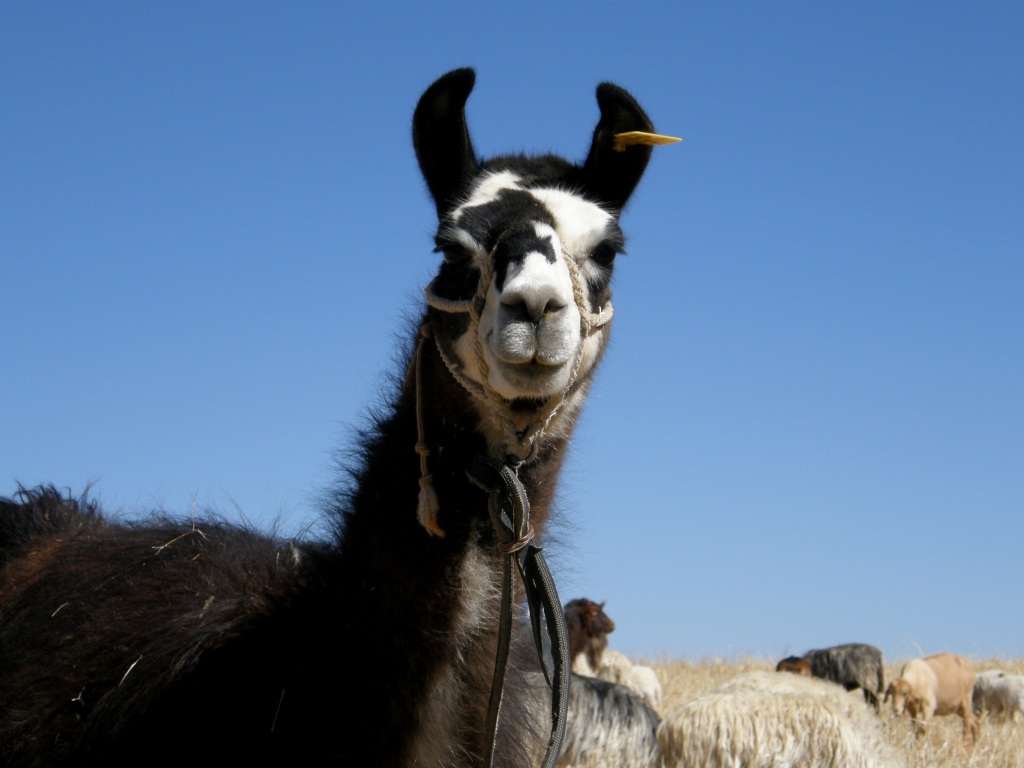
From left to right-two shoulder bags, a tool bag and a band that I used for a journal cover-these are all made from my handspun llama fiber. The yarn for the band was dyed after plying with cochineal, coca leaves and spearmint leaves. The designs are inspired by designs of, from left to right, lowland Bolivia, highland Peru, and highland Bolivia.On the road near Tarabuco, Bolivia grazing alongside sheep, goats and cattle.
A full-page drawing by Guaman Poma de Ayala depicting part of a llama festival where a man is singing to a llama and, apparently the llama is singing back!
Finally, I would like to share with you all a spectacular web site with hundreds of beautiful drawings like the one above.. This is the offiicial site of the chronicles of Guaman Poma de Ayala, an indigenous Peruvian of a noble family who became disillusioned with the treatment of the native peoples of the Andes by the Spanish after the Conquest.
His nearly 1200-page chronicle, written between 1600 and 1615, is addressed to King Philip III of Spain and outlines the injustices of colonial rule. The 398 pages of drawings capture many aspects of daily life in pre and post Conquest Peru-festivals, costume, weaving, spinning, agricultural cycles, Inca royalty, government……..
You can view digital facsimiles of all the pictures in this chronicle here.
Lately I have been playing with supplementary weft patterning and, once again, have been inspired by Weavolution members. One member joined my Backstrap Group as she is interested, amongst other things, in reproducing a Central Asian yurt band. She has introduced me to many beautiful Central Asian designs and often sends me photos of pieces she has seen at reenactmant events that she attends.
Together we figured out the technique on a yurt band she had bought and even wove it simultaneously- all coordinated by email!
When she sent me this photo (at left) of a Central Asian piece she had photographed at one of the historical events, I couldn’t wait to weave the design into something. The technique wasn’t clear in the photo and, as I wasn’t concerned with reproducing the original technique, I decided to weave it in either double weave or supplementary weft patterning. I chose the latter as, since studying this technique in Guatemala in 2008, I hadn’t put it to much use.
In this technique, it is really important to get the right balance between the weight of the warp yarn and that used for the supplementary weft and so I quickly wove a sample and then went ahead and made the table runner below in 4/2 cotton (24wpi) warp with 6 strands of the patterning thread that I had brought back from Guatemala as the supplementary weft. You can see that I added a little embellishment of my own to the pattern.
My colors are rather bland compared with the original. I love that orange zigzag next to the main design. Perhaps I will be more adventurous with color next time!
My table runner with a Central Asian inspired design
My other source of inspiration has been a Brazilian member of Weavolution who has generously shared what she knows about the weavings of the Huni Kuin people who live in the tropical forest of Brazil and Peru. They weave with backstrap looms using cotton that they spin and dye themselves. You can see a video of their work here and a photo of a Huni Kuin weaver here. Although they do not use the supplementary weft technique, I chose to use this method to weave one of their designs into a bag.
A small bag with supplementary weft patterning inspired by a traditional Huni Kuin design.
Here in Bolivia, the supplementary weft technique is used by women to weave bands to decorate their hats. It is in these hatbands that I have seen the widest variety of woven designs. Except for in Calcha, where it seemed that the women had decided on one hatband design to represent their village, I have never seen two hatbands alike.
This Potolo woman is using three hatbands at once.
Hatbands from Bolivia
Sometimes the supplementary weft is used to form the motif as in the small condors on the upper half of the center band above. At other times, it is used to fill the negative space to outline the motif on the ground weave.
From having purchased some hatbands here, I was able to see how they were woven. I made a few sample bands but, as I didn’t get the right warp to weft ratio, I wasn’t too pleased with the results and never really went on to explore this technique further- that is, until I went to Guatemala in 2008 and studied weft patterning with three teachers there. It was my first time in Guatemala and an absolute explosion of color and inspiration was awaiting!
The traditional hair sash of the women of Aguacatan, Guatemala
So I would like to spend the rest of this post introducing you to my first teacher in Guatemala and showing you how I learned supplementary weft patterning with her.
Lidia lives in the very small town of Santa Catarina Barahona near San Antonio Aguas Calientes in Guatemala. The typical blouse, or huipil of the area has designs woven in single and double faced supplementary weft patterning. The large areas of double faced patterning are those that most distinguish the huipiles of this area.
Typical huilpil of San Antonio Aguas Calientes.
Single faced weft patterning. The patterns can’t be seen on the back of the textile.
This double faced patterning looks very much like embroidery. The national bird, the quetzal, is a very popular motif.
Day 1-Lesson 1. I have chosen my colors for my piece and am winding the thread into balls prior to warping
Making a small warp for my lessons
Once the loom was tensioned, the heddles were made.
Lidia’s sister Carmelita showed me how the warps, under which the patterning wefts would be placed, are picked and stored on two additional sticks. The resulting designs are called ”pepenado”.
The first design lesson-Lidia is weaving the ”tijera” (scissors) pattern. She uses a pointed stick to hook theweft tails and pass them under the raised patterning warps.
The finished tijera pattern
Double faced ”abeja”-bee
Three ”abejas” that I wove when I got home
The ”abeja” was topped off with another section of ”tijera” and that completed my second day of classes. Finally, on day three, I learned the ”arcos” (arches) pattern. This is a combination of weft inlay and warp wrapping.
Weaving the ”arcos” designs
The finished ”arcos” design
It looks like my teachers did all the weaving and I just stood around and snapped pictures! Well, I can tell you that it wasn’t so. Lidia was a very ”hands-on” teacher and she would take over only when I got up to stretch and take photos.
But it wasn’t all hard work. Other family members and neighbors came to visit, we paused to make and eat tortillas, chatted and played with the nieces and nephews in Lidia’s shady yard and walked to town to go yarn shopping.
Snack time. While making my way around Guatemala I learned to recognize the ”slap slap slapping” sound of tortillas being prepared.
Small rectangular pieces are covered with double faced designs and closed with a drawstrig to make a baby’s hat.
Whne I got back to Bolivia I finished off the piece that I had been making with lidia and then wove another sampler to consolidate the weft patterning techniques I had learned.
And I used my lesson piece in the lid of my weaving toolbox.
I went on from Lidia’s home to study with two other weavers in Guatemala but, more about that in another post!
Lidia’s daugther Sara and her cousins
I will be doing a tutorial on suplementary weft patterning with lots of step-by-step photos here on my blog in the following weeks so that you can add designs like the Central Asian and Huni Kuin ones, that I showed you above, to your projects.
I hope you enjoyed this little trip from Central Asia, to Brazil, to Bolivia and onward to my teacher’s home in Guatemala. If you did, I would love to hear from you 🙂
A Weavolution member recently introduced me to Teyacapan’s fabulous Flickr page which has hundreds of images of Mexican people with their crafts and weavings. Honestly, you can get lost in that site for hours! I was very much taken by a photo of a weaver doing gauze weave and hope to go to Mexico one day to study with the gauze weavers. Mexico is very high on my list of places to visit and, as I am planning to go to Guatemala again in March or April, it will be easy to duck over the border. If I can spend so long just looking at the images on Teyacapan’s site, imagine how long I will get caught up in Mexico!!
I am lucky to have some great books on Mexican weaving and have been inspired by the images in Joanne Hall’s marvellous book Mexican Tapestry Weaving, to make some more mug rugs with Mexican motifs. I was given this book by my Navajo weaving teacher back in 1995 and made a Navajo style tapestry based on one of the pictures. It is wonderful to see that all these years later, the images in the book are still fresh and inspiring.
So, I am happy to say that I have woven a set of four Mexican themed mug rugs in double weave and have come up with a new double weave project-a hotpad.
hotpad and matching mug rugs
So, it was Mexican all the way for lunch yesterday with spicy beans and tortillas. I think that the hotpad is another perfect double weave project using 12 wpi cotton-it makes a good thick piece to protect your table from hot dishes and casseroles. I wove it on my backstrap loom and is a good project for those of you who are thinking about venturing into wider pieces. Practice on a mug rug set first and then add your matching hotpad.
hotpad and mug rug designs
Although I am very happy with the hotpad design, I think I will make a few changes in the patterns I drew for the mug rugs. Perhaps I will break up some of the large red areas with a bit of black-what do you think? Once I have tweaked the designs and woven another set, I will post the pattern charts here on my blog for you all. In the meantime, here is the chart for the hotpad. I am only posting half of it as it is huge!
double weave pattern chart for the hotpad
If you would like to learn this double weave technique, you can use my free tutorials in the Backstrap Weaving Group on Weavolution. The tutorials have step-by-step photos and links to videos on my Flickr page. Remember that you will need to first join Weavolution and the Backstrap Group to obtain access to them.
Well, as much as I love Mexican food, I don’t think I could manage it every day (although, if I am planning that trip to Mexico……..). Anyway, here is another fun use I found for my new hot pad. It fits perfectly on my breakfast tray where it stops my plate from sliding about and certainly “spices” things up a bit!
spicy breakfast!
I loved designing and weaving this hotpad and I have a bunch of designs in my head for others so you can certainly expect to see more of these in the future. 🙂
MAKING CONTINUOUS STRING HEDDLES………..
I warped up a couple of weeks ago for another set of South American themed mug rugs and used that warp to put together a tutorial on making continuous string heddles. This process is shown on the videos in my WeaveZine article but I have heard from many people on dial-up who have not been able to access the videos. I spend half my time on dial-up as my wifi connection is pretty erratic so I certainly know how it is. I kept all my photo files small for this and I do hope that dial-up folks will be able to enjoy this photo sequence.
I learned this way of making continuous string heddles from my very first weaving teacher, Gladys Miller who taught me Navajo style weaving way back in 1995. I have seen many different ways since then while studying with my indigenous weaving teachers but none have convinced me to change my ways.
First I’d like to show you some pictures of a few weavers I have met and worked with here in South America and Guatemala and how they make their heddles.
Zapote, Ecuador. This weaver is using her flat tenter stick as a spacer around which to wind the heddle string. This helps her to make all the heddles the same length.The spacer will later be removed.
San Antonio Aguas Calientes, Guatemala. Here the weaver wraps the heddle loops around her hand before passing them to a stick.
Santa Cruz, Bolivia. Hammock weavers' warps are so wide that they can't use a heddle stick. They just leave the heddle loops loose and pull them in small groups across the width of the warp to open the shed.
THE TUTORIAL………
Larger and heavier versions of these tutorial photos can be seen here.
For double weave, your cross will look like this. Remember that in this technique you are using doubled warps. The all-black warps will form the black border. You have one white and one black warp in pairs in the area where you will weave your motif.
You will be putting each of the pairs of warps that are passing over stick B in a heddle. Open the shed and pass your heddle string through as shown.
Make a slip knot in the end of the heddle string and place it on you heddle stick. Leave a long tail as shown.
Reach down between warp pair 1 and 2 and pull up the heddle string as shown.
Put a twist in the loop.
Place the loop on the stick and anchor it with your left forefinger.
Put an extra twist in the heddle string forming a small loop.
Put the small loop on the stick and tighten it by pulling on the end of the heddle string.
You can now let go and see that your first warp pair is secured within its heddle.
Moving on.....heddles have been made around the 1st and 2nd warp pair and the heddle string is being pulled up to make the 3rd heddle.
Slip the loop on the heddle stick and adjust its length by pulling on the end of the heddle string. Once you have the length correctly adjusted, anchor the loop on the stick with your left forefinger before making your extra twist.
Continue like this, cut the heddle string and tie the start and end tails together. DONE!
I always use the same yarn that I am using for the warp for my string heddles. A lot of my teachers use thin nylon thread or cord as it is less abrasive on the warps. I can’t stand using nylon but you should experiment and see which kind of heddle string suits you.
Here’s hoping you have found this useful. Maybe you know some rigid heddlers too who will be interested in seeing how to make string heddles so they can add another shed to their looms. Pass it on!
Recently I found myself in the unusual position of having run out of loom rods.
This is because since joining Weavolution in June, I have been completely soaked in new ideas and inspiration for projects that I can adapt to my backstrap loom. Rather than adding them to my woefully long ”to-do” list, I prefer to at least warp up the project, get it started by weaving a few rows and then put it aside so that at any time when the urge hits me, I can just throw on the backstrap and continue weaving. This has resulted in a closet shelf full of loom rods with brightly colored warps attached. The days of one-project-at-a-time are long gone. Fortunately, this is one of the many wonderful things about backstrap weaving-you can warp up a project, roll it up and put it away.
So when I found myself needing to make up several warps for some tutorial pictures, there were no more loom rods to be had. I don’t like borrowing loom rods from unfinished projects so a new set had to be ”found”.
A quick scan of the halls and terraces of my apartment block did not turn up any abandoned brooms or mops whose handles make marvellous loom rods. So I actually had to go out, for the first time, and buy dowels. While doing so, I was reminded of my students and the new weavers in my Backstrap Group who go looking around the house, garden shed or hardware store for bits and pieces to make their first looms and was prompted to write a little piece about putting together a backstrap loom.
I showed the parts for the backstrap loom in my WeaveZine article but space did not allow me to cover the topic in detail and there are a few refinements and tips that I have always wanted to add and a lot more photos that I would love to share. So now that I have woven up some of those closet projects and have loom rods to spare, I have been able to put together a short photo tutorial on the backstrap loom.
First the loom rods……..
loom rods
From right to left….
A pair of my recently purchased 1” dowels;
A pair of 3/4” broom handles;
The next three sets are from Guatemala. The middle set was bought at the stall at the Chichicastenango market pictured above. The other two are the loom rods from the weavings I worked on with my teachers in Guatemala. I brought these back to Bolivia with the unfinished weavings attached.
I weave happily with my broom sticks and mop handles. I simply cut them down to 19” length and I use these as my standard loom rods-even for the tiniest of bands. The shortest of the Guatemalan rods are 14” and these work well for me too although I prefer the longer length. The main feature of the Guatemalan rods is that they have grooves cut into their ends.
grooved loom rods
Personally, I don’t find these grooves particularly useful but my Guatemalan teachers do as they tie up their looms like this……………
tying up the loom in Guatemala
The grooves on the far end loom rod will stop the cords from which the loom is suspended from slipping in to the center of the rod.
So, you can experiment with the ideal length of your loom rods and decide if you like them with or without grooves. In any case, you will need two loom rods.
Cross sticks, heddle rods and shed rods………….
It’s nice to have a good collection of thin dowels and sticks of varying lengths depending on the width of your project. Pencils work well as do chopsticks and kebab skewers and then you can always go out and buy dowel rods. Packages of thin, round craft sticks are ususlly available at the dollar stores and are probably the most useful things I have. These sticks have all sorts of uses-as cross sticks when you are warping, heddlerods, shed rods, their ends can be sharpened so they can be used as pick up sticks and they can be slipped under pesky warps that have gone slack to take up tension.
Those used as shed rods need to be thicker depending on the size of your project. I don’t use anything thicker than 3/4″ for the very biggest projects. I even have a set of cheap touristy pan pipes which are abundant here. This I have dismantled and the hollow bamboo pipes in their different lengths are lightweight and handy for all kinds of things-my apologies to the music lovers!
Above is a random selection of my thin sticks-one, as you can see, even gets used to stir the dyepot. It is very handy to cut grooves in these sticks eventhough my grooves are not exactly pretty.
grooved thin sticks
The grooves will help you tie your sticks togethers securely in the cross on your warping board and loom. They will allow you to secure your shed rod in the shed. Anyone who has had sticks drop out of their loom will know just how important this is!
So, where are we now in our loom construction?
Let’s see our rods and sticks in action!
At left you can see the warp on its loom rods with cross sticks in place. These cross sticks are just that little bit too thin for grooves-I have snapped too many already trying to put in grooves-or maybe I am just not that good with the tools! Anyway, these are simply secured with adhesive tape.
The loom rod on the left with the knotted “start” and “finish” warp ends will be attached to a fixed point-a heavy piece of furniture or a tree (more about these options in a future blog post), while the loom rod on the right will be attached to you by means of your trusty backstrap – speaking of which……..
The backstrap…………….
a selection of backstraps
This is all a matter of personal preference, but for me, the broader the backstrap the better. Those of you who have read my article on WeaveZine will remember the simple homemade backstrap shown there made from a pillow slip and will also recognize the red strap above. The straw one next to it is my all time fave-made for me in Peru and much chewed by my cat. Moving left, you see another one that I wove and, finally, a leather beauty that I bought in Guatemala. Weave your own backstrap-a wonderful first project to go with your homemade loom. Check out my instructions on WeaveZine.
Swords and beaters………..
I collect swords and beaters in my travels and have a ridiculously large collection of them but here are just a few……
The sword acts to prop open your shed so that you can pass your weft. It can also double as a beater to beat the weft into place once you have changed sheds. The bottom sword is my favourite for wide projects-a homemade job, can you tell?! Above it you can see an adapted ruler and, above that, my favorite small beater for bands-this one was made for me in Peru.
Bevel one of the long edges of your flat sticks as well as the ends and round them off as shown so that they will enter the shed easily. The upper stick at left was once a long shuttle for my Navajo loom, hence the “v” cut into its end-this is not necesary for your sword/beater.
I generally prefer to put a lot of tension on my warp and push the weft into place with a pointed stick in addition to some moderate beating and so I have never felt the need for a big heavy beater like those shown in the above photo. Everyone has their method. There is no one ”right” way to do it.
Let’s see another “”sticks-in-action”” shot……
almost ready to weave
“Almost” ready to weave?………What’s missing?
a shuttle and a weft "butterfly"
Shuttles………..
These carry the weft through the open sheds. I have the above home made wooden job made with the help of someone who is handy with tools and a simple “butterfly” of weft. I would love to have a small wooden shuttle too but have been making do with a cardboard cut-out version these last fourteen years! My indigenous teachers simply wrap the weft around and around and up and down a long stick.
Now we are on our way-the string heddles have been made, the shed rod is in place. I have added an extra stabilizing rod from my collection of small dowels. This will stop my shed rod from rolling about in the warp and is placed in a second cross behind the shed rod. I have even managed to weave a few inches. This is where the final part of the loom comes into play-the roll up stick. This should be, preferably, the same size as your loom rod and will enable you to roll up your weaving as you progress so that you are always in easy reach of your heddles, shed rod and weaving line.
By the way, if you have been looking for pick up sticks in these photos, you won’t see any. Pick up sticks are used to lift and hold the warps when you are weaving design motifs in your cloth. My fingers are my nifty pick up sticks although I have a lot of bone and wooden tools for this purpose in my collection.
And now, a few final words from someone who has been watching this whole photo taking process with much interest and who insisted on being in the final picture………..
The Backstrap Loom
Just remember that, although the basic elements are the same, backstrap looms take many different forms in different cultures around the world. There is no one ”correct” way to set up your loom and I have based these descriptions on the looms that I have seen and used with my indigenous teachers here in South America and Guatemala.
Now to finish this green band, make it into something useful and free up another pair of loom rods for the next project!
I hope you have enjoyed this little article and have found it helpful. If you have, let me know-I love to receive your comments.:-)
IN CASE YOU WERE WONDERING………….
The red woven piece on which I posed the loom parts for many of the above photosis a weaving of the Jalq’a people of Potolo in Bolivia. Their weavings are almost exclusively done in red and black and have a chaotic display of figures called khurus, a word which means ”wild” or ”untamable”. Every space on the cloth is filled with strange figures. There are even creatures within creatures and I watched weavers forming the myriad of figures without reference to other weavings or swatches for help or inspiration. Incredible!
A weaving from Potolo, Bolivia
The weavers use a simple oblique frame loom and a long wire to pick up the hundreds of warps which form the patterns in each row. Rather than using a beater, a wichuna-a bone tool fashioned from the leg of the llama- is used to push the wefts into place. The designs are woven into the woman’s axsu-a tunic cinched at the waist with a woven belt.
The typical loom of Potolo
I learned this warp-faced complementary warp technique with my teacher in Potosi, where it is used for a completely different design layout. I have never used the technique to create anything anywhere near this level of complexity!
A weaver working at the ASUR Museum in Sucre, Bolivia
This Jalq’a woman is weaving a piece that will be sold at the ASUR (Antropologos del Surandino) Museum in Sucre.
Simple projects for extending your skills beyond bands
I happened upon a Wikipedia description of a backstrap loom recently and was disappointed to find that the author had limited the description of the loom to one that is used with a rigid heddle for making primarily narrow bands. It is quite likely that this person has only seen the commercially available backstrap loom kits, most of which seem to come with a small rigid heddle and it is true that a lot people use the loom only for making bands. Indeed I have had people ask me on several occasions why one would bother using a backstrap loom at all when an inkle loom can produce the very same bands.Well,I answer them by saying that one of the many beauties of this loom is that you can also use it to go wide. Just how wide? Take a look at some weavers I have met in my travels……….
Cabanaconde, Peru
Gualaceo, Ecuador
San Antonio Palopo, Guatemala
San Roque, Otavalo, Ecuador
Well, you probably don’t want to go that wide at this stage! I certainly haven’t contemplated attempting anything like that (yet!) In fact, the widest of the table runners I have made lately measures only 15 inches but, by branching out beyond band width, there are so many more neat and useful things you can make on your backstrap looms. Just add a litte pick up to a plain weave background to make bags, pillow covers and table ware.
I see a lot of my students learning a pick up technique, weaving a few bands, moving on, learning another more advanced technique, adding to their collection of bands and so on and so on. While there are many beautiful and practical things that can be made with bands, I always hope that they will return some day to the simpler pick ups and use them in wider pieces-exploring and exploiting the techniques and going beyond bands. I think the secret to successfully weaving on progressively wider warps is, first and foremost, to keep it simple. You will notice that all except one of the weavers here are weaving plain weave. The poncho weaver (below) in Otavalo has chosen simple warp stripes, the Guatemalan lady (left) has stripes and strips of ikat in her piece while the weaver in Gualaceo (above) is weaving up her ikat design entirely in plain weave. Only Estela in Cabanaconde is weaving very narrow bands of supplementary warp patterns in her carry cloth.
One of the simplest patterning techiques is the simple paired warp floats that I learned in coastal Ecuador and I think this is the ideal technique to use for the first experiments in wider pieces. You will find my tutorial for this technique here. There are also pattern chartshereon my blog pages should any of you be feeling adventurous. I hope I have inspired you to be so!
Here is what has come off the loom recently………….
placemat and mug rug with a ''knot'' design
Those of you who have seen the tutorial will recognise the simple warp float technique. The mug rug, of course was woven in double weave. I fell in love with this knot pattern on a card woven band and also reproduced part of it on the mug rug.
placemat and mug rug with simple diamond design
You can’t get much simpler than this basic diamond warp float design, yet it looks very effective on this wide piece. Going wide doesn’t necessarily mean increasing the pattern area and, therefore, the amount of pick up you need to do. I did a small amount of supplementary weft patterning in the the center black stripe and wove the mug rug motif based on that. Don’t worry, I will be doing a tutorial here on supplementary weft patterning in the near future!
Here are some other projects to help get you started in simple warp float patterning and then, hopefully,on your way to wider weaves………
warp float patterning on a hat band
coin purse and bookmark with simple warp float patterns
I have short videos and pattern charts on my Flickr page to supplement the tutorial instructions at Weavolution.
And, by the way, I added to and edited that Wikipedia post so no one will miss out on knowing about the versatility and potential of this fabulous loom. 🙂
A LITTLE BACKGROUND……..Learning the simple warp float patterning.
Luz checking the warps selected for the eleven heddles
I stayed with a family of weavers in coastal Ecuador for three weeks in 2007 to study their saddle bag making process. Eighty-six year old Luz is the only weaver in the area who still makes the saddle bags with warp float patterning. Luz and her family prepare the raw cotton, spin it on simple hand spindles, double it and dye it , ready to be wound on the vertical loom and woven into a saddle bag. They were very generous in allowing me to study their techniques and, in fact, insisted that I be involved in every part of the process. It was a wonderful learning experience!
The typical pattern that they use has twenty-two rows and is horizontally symetrical which enables Luz to program half the design on eleven heddle sticks. Luz sets up the heddles and then steps back while her daughters do the the more physically demanding weaving.
The saddle bags would be slung over horse and donkey back and used to carry tools for a day at work in the fields. Men would often carry them on their shoulders on a trip into town. While saddle bags are still used, the cotton ones have been virtually completely replaced now by a plastic version and the art of weaving the warp float patterned bags is on the verge of being lost.
Trini opening the main heddle shed
Quite a bit of strength is needed to open that shed and look at the size of that sword!! Talking while weaving often led to disaster as the order of the eleven heddles would get hopelessly confused. But weaving was a family activity with everyone gathered around in the evening to watch and chat and the inevitable mistake brought laughter and teasing rather than frustration.
Trini and I at the loom with the finished weaving
Finally, Luz’s son Leonardo is modeling the finished saddle bag for us………………..
With saddle bag slung on his shoulder, Leonardo is ready for a a trip to town
while Trini and Catalina head off to the market with one of the new woven plastic versions on the the mule’s back.