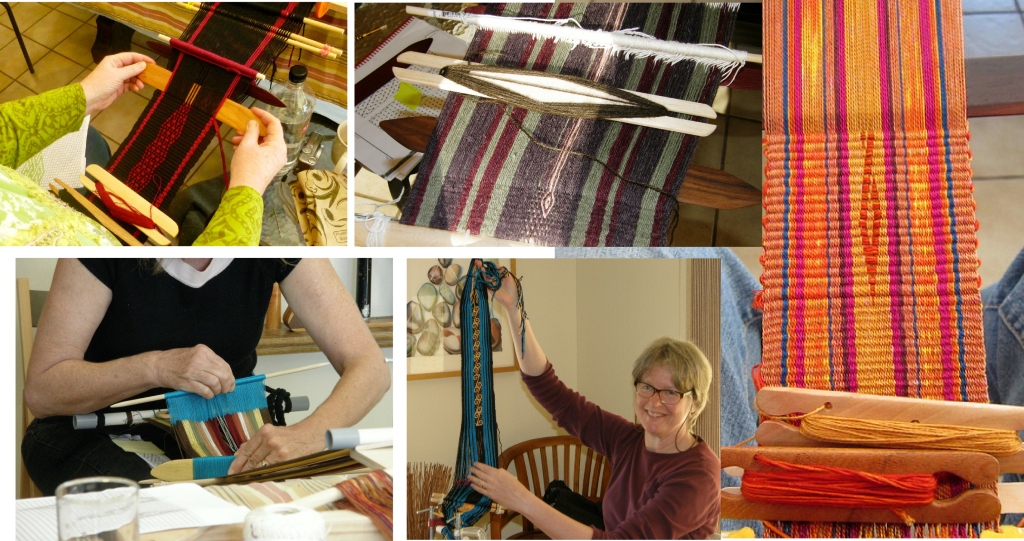
Backstrap Weaving – New Challenges

Laverne WaddingtonI guess I could say that I have a lot of experience with weaving warp-faced fabric on my backstrap loom. Years of practice have led to my having a certain consistent way of handling the weft, a certain amount of tension that I apply to the warp with my body and a certain beat (depending on the structure I am weaving). My weaving has settled.

Therefore, I can use a sample I wove a year ago to give me the reliable information I need for a new project in terms of the number of ends I must measure in order to achieve a certain width. This wasn’t so when I first started backstrap weaving when I would find that my weaving had dramatically changed within the space of a few months and that I couldn’t rely on old samples to give me the information I needed. My notes had to be constantly upated.

Sampling rep weave and various finishes for a larger project.
Sampling rep weave with various finishes for hemming before taking on the larger project.

I don’t depend on a wraps-per-inch type of calculation to tell me the width I can expect from a new yarn. Certainly, it would give me an idea, but there’s no getting away from the need to sample.

I can give an identical warp to eight weavers and each will weave a good warp-faced band of a different width to that woven by their companions. I can’t make a calculation for the yarn based on wraps-per-inch and then expect everyone’s band to turn out exactly the same. Some weavers have the warp threads rammed up tightly next to each other, others have them barely touching or with a hair’s width distance between. The weft will still be concealed and the resulting fabric will be warp-faced. The width achieved from one weaver to the next can vary considerably.

I tend to weave at the more relaxed end of the scale with my warp threads barely touching. The new challenge I am facing now is how to keep that sett consistent across the entire width of the warp when doing plain weave with fine cotton thread. This is what I am dealing with in my latest project.

Cotton from Guatemala.
One of the scarves I wove with cotton from Guatemala.

The other day, I uncovered some Guatemalan cotton in a basin on the shelf. I had dyed it from yellow to red a long time ago hoping I would get a nice deep tone similar to the dark-ish red I usually use in my wall hangings. It came out bright and happy rather than deep and somber. Oh well. It ended up on the shelf where I forgot about it and found some other yarn to use for my wall hanging.

After suddenly coming upon it, I see it with new eyes. Now I am in love with this shade of bright red and have decided to weave a square of cloth on which I can pose some of my small woven samples to show people.. It will make a nice bright splash of color on the table.

I took measurements from two warp-faced scarves that I had woven with this same cotton some time ago and figured that 1472 ends would give me 40 cm, or about 15 3/4″.  That width would sit well on my loom bars and I had several swords of just the right length for it.

The leaf pattern
One version of the leaf pattern.

If I wove this piece in un-patterned plain weave, I know that slight variations in the spacing of this fine thread would not be noticeable. If I had chosen to weave a single narrow column of supplementary-weft figures say, down the center, I doubt that spacing variations would have been an issue either.

Of course, I had to make things difficult for myself by choosing to weave repeated supplementary-weft figures all the way across the bottom. And this is where the variations, at least to my eye as I sit at the loom focusing on picking up tiny threads, become obvious. I am weaving a leaf pattern which I now like to think of as one of my ”signature” ones and I can see the variation in leaf dimensions, ranging from robust to slender, across the width of the warp. Well, I suppose that is the way leaves come in Nature and I shouldn’t let it bother me too much!

supplementary weft leaf patterns I had been aware of this potential problem from other supplementary-weft pieces I have woven with heavier thread and I did try my hardest to have all the threads spread evenly…dragging the point of my pick-up stick across the threads in attempt to have them settle in place as my teacher in Guatemala had done. I even unwove and started again when the leaves on the right were too narrow. I  shall have to seek out a Master and try to capture the secret of getting all those very fine threads evenly distributed. I long for such an opportunity.

What I have woven so far is the bottom border. Only the pattern of three leaves on the far right and left will continue in a column, waving to and fro, until I  finish with a band of leaves across the top to match the bottom. In the space within this border of pattern, I plan to weave scattered leaves.

It will be relatively easy going from here onward as I only have to pick up threads on the two edges. I LOVE sitting in a backstrap loom and using almost the full length of the loom bars. I love picking up those big swords and guiding them through the sheds. I love having to put a little ”oooomph” into opening sheds of fine sticky cotton and beating. I am having a really good time with this project!

As for the ikat circles project that I wrote about in my last post…well, I have created a very unusual looking laptop slip cover with the resulting fabric.

ikat circles backstrap weavingI have mentioned before the fact that when you do pick-up patterning within ikat shapes, you don’t get the delightful fuzzy outlines that are typical of ikat in plain weave. Because warp floats are involved, the outlines of the shapes are broken, disjointed and a little messy…not what I would call attractive. I got creative and decided to edge the shapes with tubular bands in order to cover the irregular outline.

Ikat in plain weave. The motif I created has fuzzy edges due to the shifting of the warp threads while the piece was being woven.
Ikat in plain weave. The motif I created has fuzzy, yet attractive, edges due to the shifting of the warp threads while the piece was being woven.

ikat circleThis is the second circle. Once I had decided that I would use the tubular band edging, I planned a pattern for the second circle that would match the pattern on the ñawi awapa tubular band. I wish I had thought about that for the first circle as well.

ikat circles with pick-up patteringI had to fold the cloth through one of the circles so that it would fit the laptop….let’s call that ”quirky”. Yep, it’s a pretty quirky computer sleeve. I wove and sewed another ñawi awapa tubular band to the sides and around the opening.

Lessons learned….

ikat circles1. I need to create elongated shapes when I apply the ikat tape if I am going to use a warp-float structure. That way, the shapes will contract while weaving to take on the correct proportions. You can see that the woven circles have come out flattened.

2. I should put a bit more thought into the construction of the final product before applying the ikat tape if I seriously want to use the fabric for something in particular rather than just have it as a sample. That way, the ikat shapes will appear in the right place on the fabric.

After all that black and white, let’s finish this post with a splash of color. I have pictures, courtesy of Dorinda and PAZA Bolivia, of my weaving teacher Maxima’s new aguayo. I showed you the ch’uspa she was weaving for her husband, the new Mayor of Huancarani in a previous post. Unfortunately, Dorinda hasn’t shown the finished ch’uspa on the website. That piece was woven in plain weave with embedded columns of figures in double weave.

The aguayo has columns of double weave as well as pebble weave.intenseconcentration

The aguayo is the large cloth which women drape over their shoulders and back and tie at their chest. It is used to wrap and carry their babies and any other bundle that needs to be transported. It is woven in two identical pieces which are usually joined together with decorative stitches. You can see the first finished piece on the ground next to Maxima while she busies herself with the second.

Dorinda writes on the PAZA blog that Maxima took 2 weeks to weave the first panel. Before the weaving could begin, she had to use her drop spindle to add twist to the store-bought yarn to make it strong and smooth enough for warp-faced weaving. She commented that the cheerful colors made the naturally-dyed handspun wool that she has been using in the cooperative look dull and boring. Then she took a break from the high concentration required for the double weave pick-up and wove a plain-weave poncho in only four days. I can understand that need for a break!

MaxThe weavers in this region of Bolivia use leaning vertical looms for large pieces. Narrow bands are typically woven on a body-tensioned loom sometimes using just an index finger and a toe as the warp beams!

aguayocompleteAfter the ”poncho break”, Maxima immediately warped up for the second aguayo panel. The two pieces have been joined with the colorful decorative stitches. It s not quite finished as Dorinda says that Maxima plans on adding a crocheted edging. Please do visit the PAZA blog to read more about Maxima and the spinners and weavers of the Cochabamba region of Boliva.

As I sit happily weaving what I hope will be a red square of a mere 16” x 16”, I have something to which I can aspire in Maxima’s incredible work. One day I would also like to weave two large identical panels and join them. New challenges. I somehow suspect that each one will take me longer than 2 weeks to complete.

Oh, and I am not done with the curved ikat shapes filled with pick-up patterns. I am just taking a break from it, as Maxima did with the poncho, to weave something completely different. 🙂


Backstrap Weaving – Small and Silky

A small post for a few small fun projects.

backstrap weaving toolsIt is nice being back home and in my spot on the floor with the full range of my backstrap weaving tools on hand.

I did some twining and got the three Bird hangings off their looms at last. Then, I rounded up all the sticks and bits and pieces that had been lying about in my ”studio” and put them back into their bins…loom bars, cable ties, heddle sticks, cross sticks, coil rods, metal selvedge rods, beaters, swords, spacers, needles, pick-up sticks, warping stakes and shuttles.

I photographed and made notes on the tiny samples that were too small to be made into anything and then threw them away, and got my notebook up to date. That all felt great. Now I can confidently say that I can put my hand on just the right stick when needed and I am ready for a new session of sampling and weaving.

Those big ikat projects are on my mind and I will soon be tackling those…getting out the frame, the ikat tape and dye, ready for days and days of tying little strips of plastic around warp threads.

But, for now, it is nice to have a variety of small pieces to work on.

silk bookmark and cuffs

wrist cuff in silk backstrap weavingI finished the bookmark in 60/2 spun silk that I had promised a friend and, finding that I had plenty of warp left over, I made another wrist cuff for myself.

I really enjoyed wearing the little cuffs I had made before I left for  my US trip earlier this year. I used an Andean Pebble Weave motif that I charted for my second book.

It is so much more comfortable doing pick-up with this 60/2 silk in this cooler weather. Working with silk with sweaty hands is quite horrible. It is amazing how much the black-and-white one has softened with wear.

Having my basket of silk out of the cupboard with all those lovely little skeins at my fingertips, I got on a bit of a cuff-making roll. I had bought some buttons while in the US and decided to weave another cuff or two using the patterns on the buttons as guides. I want to sew the buttons to the cuffs purely as decoration. One button had a knot pattern and I decided to use a design that I had charted for my second book which was based on motifs found in Kuba cloth.

silk cuff on loom backstrap weavingThat one is still on the loom and there will be plenty of warp left over to try another using the second button. I will use the intermesh structure for that one.

And, while all that was going on, I summoned up the courage to cut into that reeled silk piece that I showed you last week. This is the warp that Sara Lamb let me have to weave…her hand dyed and hand painted colors and her fabulous color arrangement. I figured that I could get two pouches out of that piece. I had measured my friend Betty’s cell phone while I was staying with her and so I was ready to cut the first piece to suit. It wasn’t easy to take the scissors to this piece! It was so lusciously smooth and slinky. I had been enjoying just holding it and letting it slip from one hand to the other.

So, here is the first of the two pouches finished…

reeled silk pouch backstrap weavingI wove and sewed a plain-weave tubular band to the edge and also used that edging to stabilize the cut and shaped flap. One of the buttons I had bought found its place. I am really happy with this little pouch and only slightly disappointed that a lot of the ”slinkiness” has been lost within the confines of the quite rigid tubular band. It does, however, feel lovely to stroke!

I made the second pouch much simpler…a squared off flap and no edging. This one retains its liquid-like characteristics and is free to slink about as it pleases. Sara had given me a small ball of the reeled silk and I was able to make a four-strand braid with it for a strap.

two reeled silk pouches backstrap weaving

So, that’s all from me for this week. I will be setting up to sample some more curved ikat shapes soon. And when I am not doing that, or weaving silk cuffs, or planning maybe something bigger, like a silk scarf, I will be braiding and braiding and braiding. There are several hundred braids to be made on the ends of the three Bird hangings….plenty to keep me out of trouble.

Until next time….


Backstrap Weaving – Thinking Big

Big trees, Big Hill and a couple of weaving gatherings entitled Thinking Big. That’s what’s been going on here in the gold country of California. I passed through a town which holds an annual frog-jumping contest which attracts international competitors, enjoyed the sunsets from the summit of Big Hill where I wove with a group of ladies from Sonora, and walked amongst the big trees that line the historic gold mining ditches.

OLYMPUS DIGITAL CAMERAThe Thinking Big, or the ”Go Wide or Go Home!” gatherings, as Jane liked to call them, were about creating a project using techniques that had already been studied in other get-togethers. The challenge was to take those skills and go bigger in terms of width, length or warp ends. Not everyone chose to weave a product. Some people used the class as a chance to sample or refresh their memories of techniques they had studied long ago.

Here are some of the things that were on the looms at Diane’s place in Grass Valley…

Jan and Shan ,easure their warps for backstrap projects.
Jan and Shan measure their warps for backstrap projects. Jan’s is complete and Shan is securing the cross on hers.
Diane got a head start by warping while I wa staying with her prioir to the class. Here isher warp, heddled for Andean Pebble Weave, and ready to go
Diane got a head start by warping while I was staying with her prior to the class. Here is her warp, heddled for Andean Pebble Weave, and ready to go.  Her project is inspired by the natural dye colors on the Bolivian pieces I had brought to show and will be a pouch for her long swords.
Jean makes heddles for her red-and-black backstrap project. She wove the band in plain weave and decorated it with a supplemental weft.
Thse who were weaving plain-weave pieces, like Sara, here, inserted a coil rod to prevent corregation. Sara is ising reeld silk that she dyed herself and inserted two hand-painted sections.
Those who were weaving plain-weave pieces, like Sara in this picture, inserted a coil rod to prevent corregation. Sara is using reeled silk that she dyed herself and inserted two hand-painted sections.
Kathy used wool from a natural dye workshop she took in Cusco, Peru. The wool was handspun by ladies in Chinchero. Asshe had not woven a sample with the wool, we had to wildly guess at how many ends to wind for her project. We measured a pouch she had bought fromthe weavers in Peru which I now suspect was made with much finer yarn. Kathy's project is coming out way wider than we had expected!
Kathy used wool from a natural dye workshop she took in Cusco, Peru. The wool was handspun by ladies in Chinchero. As she had not woven a sample with the wool, we had to guess at how many ends to wind for her project. We measured a pouch she had bought from the weavers in Peru which I now suspect was made with much finer yarn. Kathy’s project is coming out way wider than we had expected! Here I am giving her some tips on how to clear sheds with  this rather sticky wool warp.
This isStephanie's Andean Pebble Weave piece which is flanked by plain weave.
This is Stephanie’s Andean Pebble Weave piece which is flanked by plain weave.
Janet is weaving an Adnean Pebble Weave piece with thick borders.
Janet is weaving an Andean Pebble Weave piece with thick borders.
Jan wove a complementary-warp pick-up technique which required her to pick up the patern in every single shed. Nevertheless, she zoomed along!
Jan wove a complementary-warp pick-up technique which required her to pick up the pattern in every single shed. Nevertheless, she zoomed along!
I gave Diane some tips on how to open the sheds on a wide two-heddle piece.
Here is Sahn's piece with its Anden Pebble Weave pattern in progress. This is a knotwork motif which i charted for the Andean Pebble Weave structure.
Here is Shan’s piece with its Andean Pebble Weave pattern in progress. This is a knotwork motif which I charted for the Andean Pebble Weave structure.

Further progress…

Jean's
Jean’s supplementary weft pattern, which she adapted from a pebble weave motif in my second book, is progressing beautifully. Kathy’s Andean Pebble Weave motif is emerging while she learns to work with the wool. Diane is operating her two sets of heddles smoothly. Jan shows her progress on her pick-up patterned band and Sara’s reeled silk look luscious with its stranded silk supplementary-weft pattern.

I stayed on longer in Diane’s home and got to watch her progress…

diane progressBefore all this, I had ventured even deeper into gold country and and found myself at the summit of Big Hill with its glorious views and sunsets. My hosts, Anne and Gary, had a group of beginner backstrap weavers in their home from the Sonora area. The evenings brought visits from flying squirrels and a bear while wild turkeys strutted about with their chicks during the day. While the ladies sat and wove, I got to gaze at the view out over the deck.

Sunset view from the deck on Big Hill.
The Sonora group...hooray, I will be back next spring.
The Sonora group.

And then it was onward to the place I have visited most on these weaving safaris over the years…Santa Cruz, California, and another Thinking Big session. Some people went big while others did some guided study of techniques we had studied in previous years or used my books and online tutorials to study something new.

The new venue was fun. We had our warps tied to handrails. Here are five of the eight people in the group. Jane came over from Grass Valley and Marya came up from San Luis Obispo.

OLYMPUS DIGITAL CAMERA

Yonat, Peggy and Anne.
Yonat, Peggy and Anne working on a variety of techniques…Yonat chose to study Guatemalan supplementary-weft with patterning sicks, using a tutorial on my blog. Peggy created a stunning warp with some ikat-dyed sections flanked by Andean Pebble Weave. Anne wove what would make a fabulous hat band using the intermesh structure in 10/2 and 20/2 cotton with an adpated Mexican motif.
Yonat's Guatemalan patern stick supplementary-weft sampler. Jane making heddles for her wide piece afer having completed her sample. Ingrid brushed up on the intermeshstructures from a previous class. Peggy's beautiful ikat and Andean Pebble Weave piece...couldn't take my eyes off it!
Yonat’s Guatemalan pattern stick supplementary-weft sampler. Jane making heddles for her wide piece after having completed her sample. Ingrid brushed up on the intermesh structure from a previous gathering. Peggy’s beautiful ikat and Andean Pebble Weave piece…couldn’t take my eyes off it!
Dorothy wove a bird motif to practice the Andean Pebble Weave structure. She has a warp prepared with three columns of birds flanked by plain weave which is gorgeous. You can see Anne';s green and white intermesh band . The white is 20/2 cotton and the green 10/2 which gives the piece a lot of texture.On the back of the band the green motif rises above the white background. Marya took her first stepsin Andean Pebble Weave while Barbara chse fine thread to weave a series of viscacha motifs and refresh her memory on the Andean Pebble Weave structure.
Dorothy wove a bird motif to practice the Andean Pebble Weave structure. She has a warp prepared with three columns of birds flanked by plain weave which is gorgeous. You can see Anne’s green and white intermesh band . The white is 20/2 cotton and the green 10/2 which gives the piece a lot of texture.On the back of the band the green motif rises above the white background. Marya took her first steps in Andean Pebble Weave while Barbara chose fine thread to weave a series of viscacha motifs and refresh her memory on the Andean Pebble Weave structure.
Peggy's hands at work picking up threads for her pebble weave pattern.
Peggy’s hands at work picking up threads for her pebble weave pattern.
Did I mention that Jane had woven a sample in preparation for this class? Here it is! This sample showed her the width she could expect from this weight of thread and also helped her decide the arrangement of colors and width of stripes for her wider piece.
Did I mention that Jane had woven a sample in preparation for this project? Here it is! This sample showed her the width she could expect from a number of ends in this weight of thread and also helped her decide the arrangement of colors and width of stripes for her wider piece.
This is where Jane was at with her wide piece after having finished her sample and planned and warped and made heddles for the ''real''piece.
This is where Jane was at with her wide piece after having finished her sample and planned, warped and made heddles for the ”real”project.

It’s been a very rewarding couple of weeks!

And here I am saying goodbye until the next post, happy as can be, as Sara gave me one of her reeled silk warps with some of her own hand-painted sections to play with….

Laverne2Many thanks to Diane for sharing this and some of the other pictures that appear in this post.

I did walk along the cliffs this morning to enjoy the big trees and ocean before sitting inside on this pretty day to edit pictures and write all of this!

OLYMPUS DIGITAL CAMERA


Backstrap Weaving – Sunrise, Sunset

Do you know the song ”Sunrise, Sunset” from ”Fiddler on the Roof”? I have had that in my head for a couple of weeks as the hours and days fly by, I travel from place to place and winter becomes spring before my eyes..

From Florida sunrises ro Pennsylvania sunsets and a whole lot of activity in between…

Sunrise at the Florida Tropical Weavers Conference
The ast rays of the setting sun over the creek at The Mannings Handweaving Studio in Pennsylvania.
The last rays of the setting sun over the creek at The Mannings  in Pennsylvania.

Sunrise, Sunset. This is the name of one of the songs that we sang gathered around the table while David played the guitar at the Passover Seder in which I participated at my friend Claudia’s home in Maryland.

10471195_10206350602506701_1973694388140159785_nThat was one of my stops on my way to my current ”home” in Pennsylvania. The journey took me to New York,  Ohio and Delaware.

I attended the monthly gathering of the guild in Wilmington in what is the prettiest meeting venue I have come across so far…Greenbank Mill. As we drove by, I was just about to ask Carol if we could stop to take a picture of the mill and its wheel and then I realised that this was the meeting spot and I would have all day to enjoy and explore it. It was a short stay in Wilmington and I left with images and stories of Dupont, grain and textile mills and lively, gushing, cascading creeks and a desire to return and see more.

greenbank millInside Greenbank Mill along with all the preserved mill equipment – stones, wheels, cogs – a hefty post surrounded by plenty of open space allowed us to hitch up our backstrap warps and stretch out like wheel spokes.

???????????????????????????????A visit to the Hagley Museum the previous day brought us to an unexpected sort of ”yarn bombing” of the entry gates…

yarn bombing Hagley Museum

In Ohio, at Tracy’s home, I knew I had come to the right place when I saw this…

???????????????????????????????Tracy’s warp weighted loom stands like a work of art in her living room along with the Tonkinese cousin of my own cat back in Bolivia.

warp weighted loomI got to throw a couple of shots of weft, just enough to see how to operate the the two sheds. I realised pretty quickly what hard work it is on the shoulders to be standing and reaching up to pass the weft and beat with an upward motion.

We wove together at the Canfield Fair Grounds, home of the largest county fair in the US. I have never been able to plan my visits to coincide with a county fair in the US and would love to go to one.

Tracy and Marjorie had woven with me a couple of years ago. They worked on their own projects while the rest of the ladies tackled simpler projects.

??????????????????????????????????????????????????????????????Tracy had bought some Harrisville Highland wool on that trip to The Mannings and had saved it for a backstrap. The red and green are the Harrisville Highland wool (the kind that is sold washed in skeins rather than on cones). The grey is a mystery  wool which is slightly heavier than the other two. It gave Tracy’s Andean Pebble Weave design a nice three-dimensional look. This wool was really fabulous….not at all sticky…a real pleasure to work with. Tracy is using it here to weave a backstrap. It’s the perfect weight for that. She chose a pattern from my second book.

???????????????????????????????Marjorie went to the other end of the yarn weight spectrum with a very fine alpaca yarn that she bought on giant cones on one of her trips to Cusco. This is not what I would call easy yarn to work with and I have all my fingers crossed for the success of this project. She also worked on a backstrap using Plymouth Yarn Fantasy Naturale mercerized cotton but, at the same time, was curious to see how the alpaca behaved.

Marjorie also brought in this marvelous llama bone tool that she had acquired in her travels in Peru. I have never seen a carved one like this….how beautiful!

???????????????????????????????Here’s Tracy’s backstrap off the loom, braided and finished…

???????????????????????????????In the evenings, I had tatting lessons with Tracy and I got the chance to be a student,  which is always a useful experience. I would be going along with a nice rhythm convinced that I had it all down and then suddenly completely lose the plot and create an ugly string of knots instead of hitches.

My friend Vonnie in Sacramento had also taught me to tatt but Tracy showed me a different way to hold and manage the shuttle which doesn’t require the ”flip”. It is is less elegant but it is nice to have options. I was sent off with a couple of shuttles and thread. I hope to go back to Ohio some time and learn bobbin lace with Tracy. Those of you who are into lace will probably already know Tracy in her former business as The Lace Maker. She was even at Convergence in 2010 in Albuquerque as a vendor when I was there. I had been attracted to her stand because of the small warp-weighted loom she had on display but we didn’t meet.

In fact, Tracy’s home was a showcase of all the fiber activities and techniques in which she has been involved. I enjoyed the opportunity to learn a bit about the Theo Moorman technique from the runner on her dining table. You all know that I am a big fan of supplemental weft…

??????????????????????????????????????????????????????????????I’m hoping that she will feel confident enough and find the time to use the handspun and naturally dyed yarn that she got when she attended the Tinkuy in 2010 in Cusco.

Yes, we were both there in 2010 and had a brief encounter. It’s about time we spent some more time together.

She has a large supply of the handspun dyed yarn in her plastic hamper as both she and her boyfriend took the natural dye workshop at the Tinkuy and I know that she will do something spectacular with it.

Hands have been busy and continue to be so as I move along from place to place. It is always great to hear from people as I move on and find that they have been working at their warps.

Here are some shots of busy hands at the loom. This first picture was taken by Sara Norine James at the Florida Tropical Weavers Conference and shows Berna expertly working the two sets of string heddles to open a shed on her Andean Pebble Weave warp…

berna FTWG by Sara Norine James

???????????????????????????????It was nice to meet Facebook friend, Alison, who came down from Ontario, Canada to weave with me. She wove the leaf pattern and then continued on her own to weave it as a negative image. In the picture you can see her busy hands selecting threads under which to pass her supplemental weft. Alison has been weaving using my books in her home in Canada and has made some lovely Andean Pebble Weave pieces….

???????????????????????????????And whose hands are these? Well, those are mine with the silk Andean Pebble Weave cuff on wrist.

Laverne at the ManningsAnd now….no hands…not even any arms!

Laverne in huipilWe guessed that this must be a child’s huipil. I just managed to get my head through the opening but there was no way my arms would pass through those armholes. Yet the piece is so big! All that purple and green work is embroidered. Amazing.

Kristen got herself set up with a pillow case as an improvised backstrap. She said that she was challenging herself to let go of the pattern chart by guessing what came next in the pattern by reading the cloth and then confirming by looking at the chart before passing the weft. Her cat helped, as cats like to do, by lying on the chart.

kristenHere’s Sarah, amongst the looms and spnning wheels, using hands and head to figure out the next step in the process…

???????????????????????????????I have a whole week staying here at the Mannings. You can be sure that there is no shortage of things to do and see when you are practically living in a yarn store. Linda and Carol dropped by on Tuesday to weave with me. Linda had read both my books cover to cover without touching a piece of yarn. Yet, she had somehow absorbed the technique and I needed to just to give her a little guidance before she was underway weaving lovely Andean Pebble Weave patterns. I figure that she must have amazing powers of visualization.

???????????????????????????????Here she is preparing her warp with its second set of heddles.

???????????????????????????????Carol came with something completely different in mind. She had been given an ikat warp from Guatemala. The warp had been wrapped and dyed and was ready to go on a floor loom. Carol wanted to weave it on a backstrap loom. She had put a similar warp on her floor loom and woven it as a balanced plain weave cloth creating a mobius shawl. Although the threads shifted more than she probably would have liked, I think that the finished piece is lovely. I hesitated over posting a picture of her shawl as my picture really does not do it justice.

??????????????????????

Carol is no stranger to ikat having studied weft ikat in Thailand and bringing home her dyed thread to weave stunningly fine cloth on her floor loom. She came  on Tuesday with the idea of putting the Guatemalan warp on a backstrap loom and weaving it into a warp-faced piece of fabric. We spent a great part of the day getting it sorted onto loom bars as it had somehow become almost hopelessly tangled. Here’s Linda holding one end of the warp while Linda and I try to straighten things out. The original warp was multi-colored and the several colors were bundled and wrapped together to create the motifs.

???????????????????????????????

???????????????????????????????Now it’s starting to look like something but there is still a long long way to go and with each handling those threads are shifting.

???????????????????????????????Carol has just inserted the cross sticks. That horizontal line at the start will be helpful but it remains to be seen if the upper layer and lower are well aligned. There are many many string heddles to be made before weaving can begin.

On other days, I decided to work on a ”three-fer”, that is, one project with three purposes. I wanted to get my hand back in with a Bolivian embellishment technique that I call the ”coil stitch”. This project would give me practice in something that I am not doing all that often, provide an additional technique sample, as well as a little slip case for my new iPod. One of my online studnets who has become a dear friend, along with her husband, gave me this iPod. I have never owned one before and am thrilled.

Bolivian embellishment coil stitchesYou can see some of the handwoven fabric made from naturally dyed handspun yarn that I use as technique samples. I had a small leftover piece that was just the right size for the iPod. I have started by edging it with coil stitches and will dress it up with all kinds of doo-dads. I love doing that and it gives me practice in the various techniques. Next, I’ll make a pouch for the charger and cable using the fabric with the cochineal tones that you can see above.

bolivian embellishments coil stitchesI am using Cascade 220 superwash yarn for the sewing and the colors match so well. It’s a fun little project which mostly keeps me out of the yarn store where there are too many lovely things to buy.

???????????????????????????????I have one more fun thing to show you.

I was persuaded to buy new sneakers and got a kick out of the laces on the ones I chose which have a classic little inkle weaving pattern which matches the strap on my own woven handbag.

Now I will be able to hike some light trails when I am invited. Hiking was such a huge part of my past and I miss it.


I will leave you with a shot of the sun casting its golden glow at The Mannings. Another day ends and I enjoy my time in this lovely peaceful place before I start bouncing again across the country

??????????????????????


.


Backstrap Weaving – Tying Up Loose Ends

It will be just a short post this week as I tie up loose ends on projects and get ready to travel.

unfinushed projects backstrap weavingThere are buttons to be sewn on cuffs, warp-ends to be braided on key fobs, books to be glued and weaving to be finished. I need to break down the two extra weaving stations that sprouted and grew during this latest homestay of mine…the ones in the living room and kitchen… which were needed for keeping up with  a weave-along while I worked on my usual large projects in the bedroom. I must clear away the various project piles with their balls of yarn, books with colored fingers of protruding Post-it notes, sketches and pattern charts so that all can be covered and kept dust-free in my absence.

The first thing I attacked was the journal-cover project. Once the weaving was done, the scary part, which involved gluing the cloth to the book covers, had to be faced. Fortunately, I had one rejected book cover piece which served as test fabric for the glue. You can see the rejected piece in the upper corner of the picture above. Would the glue soak through the cloth and appear as an ugly stain on the upper face? It didn’t! Now I can add a zipper to that test piece and turn it into a little pouch.

inside cvers of journals with backstrap weavingYou can see how I turned the end of the weaving over to the inside of the covers. The piece of cloth in the picture is still on the metal rod which I used to create a selvedge. I glued the fabric there and then used colored paper to completely cover the inside. Precisely positioning that colored paper while using a contact glue was probably the hardest part of the whole process. I also used a line of glue along the point where the book cover bends to open.

initials woven into spine of journalsI bought another journal and made a fourth cover. You can see the recipients’ initials on the spines. It is fun discovering that you can make recognizable letters with so few threads in such little space.

Here’s the fourth one set up and ready to go. I love seeing a fresh warp like this stretched out in front of me.

backstrap loom with two shed set up and coil rodI used a motif inspired by Guaraní textiles with snakes and a star…

backstrap weaving woven journal coversThen I settled into finishing the third panel in the Bird series with its ikat bird shapes filled in with three-color pebble weave. That was followed by a rather tedious session of sewing black on black as I lined the irregular edges of the ikat shapes with cross-knit looping…

ikat bird shapes filled with pick-upThese panels really fall into the category of ”samples” as I used them to learn much about tying warps for ikat. In the first panel, the dye leaked a lot under the ties, staining the threads within, which gave a surprisingly attractive softened look to the motif, especially around the edges, once the pick-up patterning had been finished. In the third panel, my tying skills had improved and the ikat shape had crisp, sharp outlines with the white threads within the ties completely untouched by dye. The bird shape in the third panel is brilliantly white as a result and leaves me wondering in the end which ”look” I actually prefer.

ikat bird shapes filled with pebble weave backstrap weavingWth this experience behind me, I shall have a lot of time in my travels to ponder the next ikat project that I want to start on my return. The aim has always been to create flowing curved shapes in ikat rather than the rigid block-like ones in the Bird samples. I want to fill beautiful curved shapes with pick-up patterns. I have two such shapes in mind and I will, no doubt, stumble across something while I am away that will inspire a third.

As you can see, the three panels above are still on their looms. So, I am not completely finished with this project. I have yet to decide how exactly I want to finish them in terms of weft twining, fringe or braids. Should I introduce some red in the first two panels? I will launch myself into that when I return.