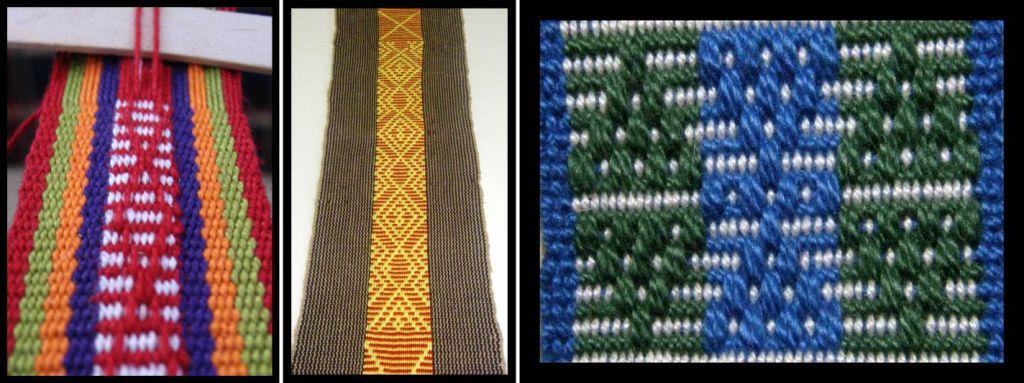
Backtrap Weaving – Hidden Treasures

I love looking at the four-selvedge textiles that the weavers here in Bolivia and Peru make. They give away some of the little secrets and “back stories”. The terminal area can give information about how the weaver set up the sheds on her warp as well as tell stories about how patient, tenacious and skilled he or she may have been. It generally goes that the smaller the terminal area is, the higher the weaver’s skill level was.
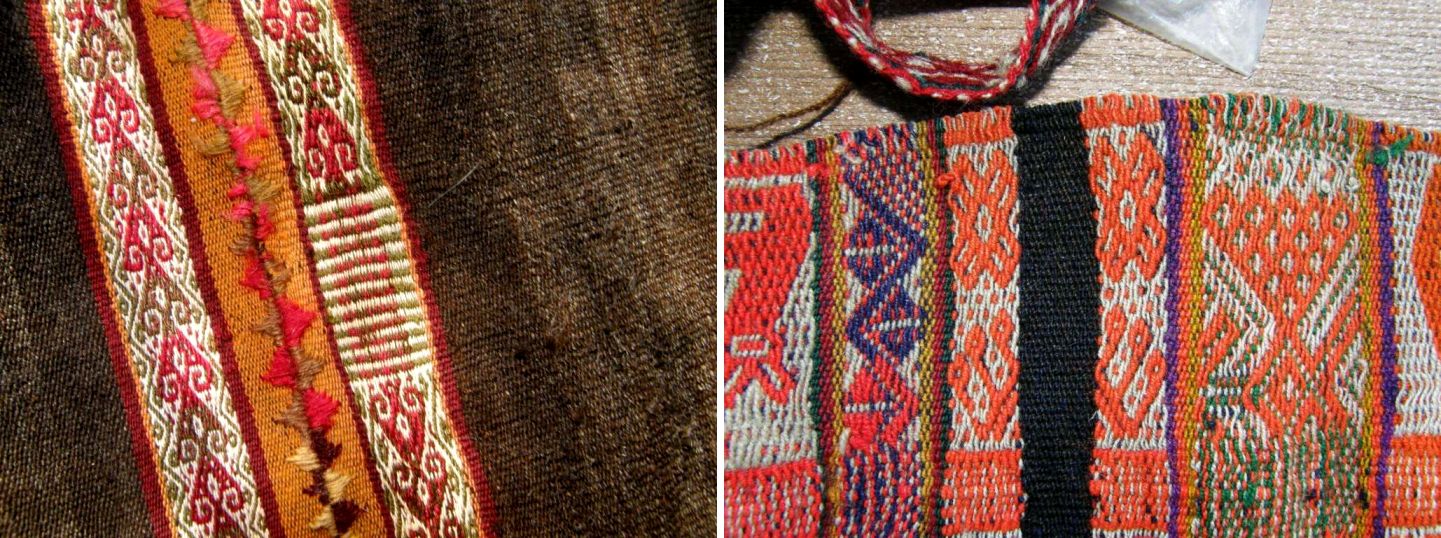
The terminal area is the part on a four-selvedge piece where the weaver finishes. The hand manipulated pick-up patterning suddenly ends and changes to rows of weaving where the weaver is simply passing the weft through the two sheds created by the heddles and shed-rod.

The weaver will have started working at one end of her warp, woven a certain distance and then turned her warp around to start weaving from the other end. As the weaving progresses, the distance between the two ends of woven fabric slowly decreases.

The weaver would eventually come to a point where there was so little space in which to work that it would be impossible to continue picking the patterns by hand. At this point he or she would simply open the two sheds without any patterning manipulations and pass the weft while substituting increasingly thin rods for the big shed stick. It’s the point at which the weaver decides that he or she simply cannot continue picking up warps by hand to form the pattern that shows the weavers skill or perhaps just his or her sheer tenacity.

Some weavers just weave from one end and finish the weaving when they reach the other loom bar.

Eventually the shed rod is removed and only the heddles are raised to open the tiniest gap through which the weft can be fed. The threads for every other shed must be painstakingly picked up one by one. The last few weft passes are actually needle woven. Good eyesight, patience, pride in one’s work and a strong desire for perfection are required.

The terminal area on a plain-weave four-selvedge piece created by a skilled weaver will be difficult to spot.

For people like me who like to look at textiles and figure out how they were woven, the information in the terminal area is a gift.

This fact came to mind this week as I was trying to figure out why the edges on the Bolivian double-weave belts that I have are so much neater than the double-weave pieces I make myself.

I do everything my teachers in Potosi taught me yet there is something missing. Some weavers seem to have some special secret that enables them to create those sharp straight edges. My edge warps have a tendency sometimes to roll off the sides as the weft passes from the upper layer to the lower. This can at times produce bumpy edges although, as my boyfriend likes to point out, I am possibly the only one on this planet who notices them. I think all weavers know how that goes!

Now the problem with examining belts is that they are most often not four-selvedge pieces. The ones I have from Potosi have three selvedges and end in tight braids and there is, therefore, no terminal area. No secrets or treasures of information are given away.

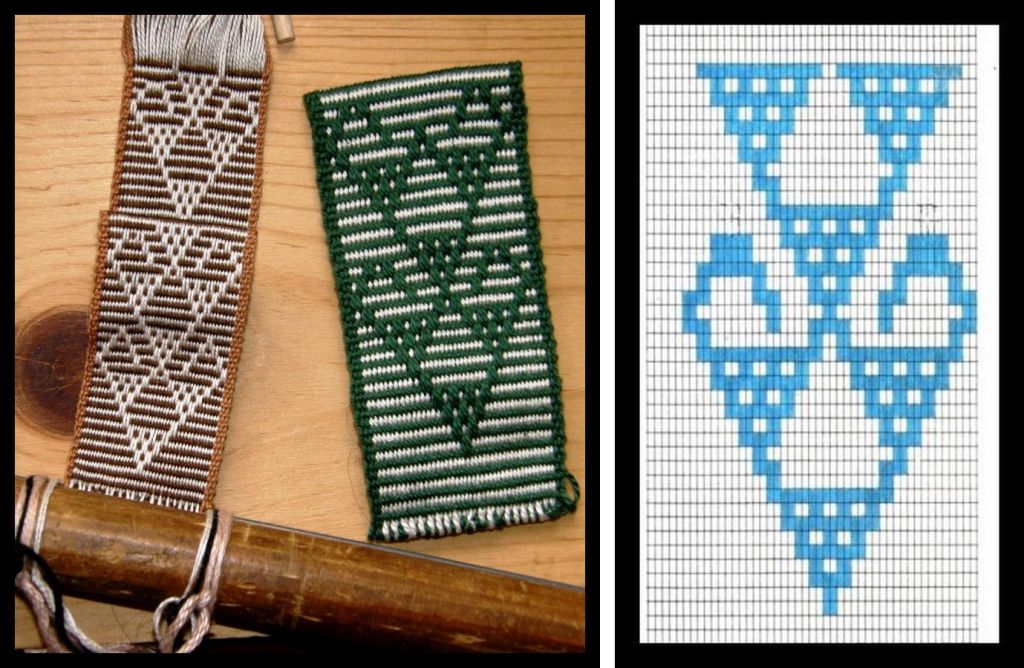
So, this is what I did.  I took a deep breath and chopped the braid off one of my Bolivian belts to un-weave and  find the hidden treasure. Sorry! Anyone who has done warp-faced double weave will know that un-weaving it is not fun. I made a mess and I won’t even show it to you but the good news is that I think, and I stress “think” I found the secret. I will probably be traveling up to the highlands next month where I hope to meet a weaver who can confirm this.

I have been weaving a double-weave sample this week to see if I can improve the edges and also to see how the Bhutanese motifs that I wove last week with supplementary wefts look when woven in this technique.


The motifs look so much more sumptuous woven with the supplementary wefts. That is how they were woven on the original textile from which I copied them but it was fun to see how they looked in double weave and also gave me something interesting to do as I wove my sample. I am pretty happy with this sample and shall have to find something I can use it for. I do believe the edges on the double weave piece look better than those I normally produce or is that just my imagination trying to justify my chopping up that poor belt?!

I finished the fourth  and final placemat in my set and was just about to celebrate when I found yet another lovely Mexican pattern in this warp float technique. But, no, that’s enough for the placemat project. I can use that pattern for something else.

The fourth pattern comes from a storage bag from south west Iran which I saw on this site.
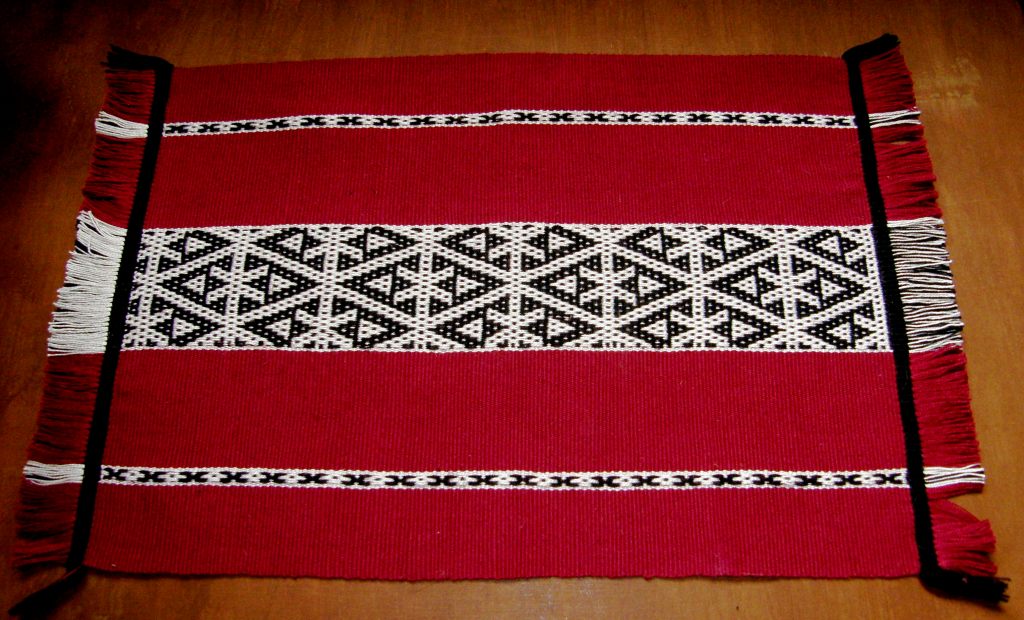
So here is the complete set…


Last week I showed you the blue one and its design which was inspired by Central Asian yurt band patterns. Verena, who wove with me on one of my US visits, has taken classes on how to construct a yurt and she gave me the link to the website of her teachers in Nova Scotia. The web page has wonderful pictures of lessons in traditional weaving in Kyrgystan with images of the warping, set up and weaving.

What’s next on the loom? The ideas are swirling around. Lately I have seen some lovely handmade bags which have incorporated all kinds of nifty compartments and pockets and so, I have decided to try and use the technique that my Bolivian teachers taught me for constructing a chuspa, (a bag for carrying coca leaves) with its little built-in pocket to make a bag and pocket all in one piece. I haven’t woven one of these since I studied with Julia and Hilda and so I have had to get out the giant journal to consult.
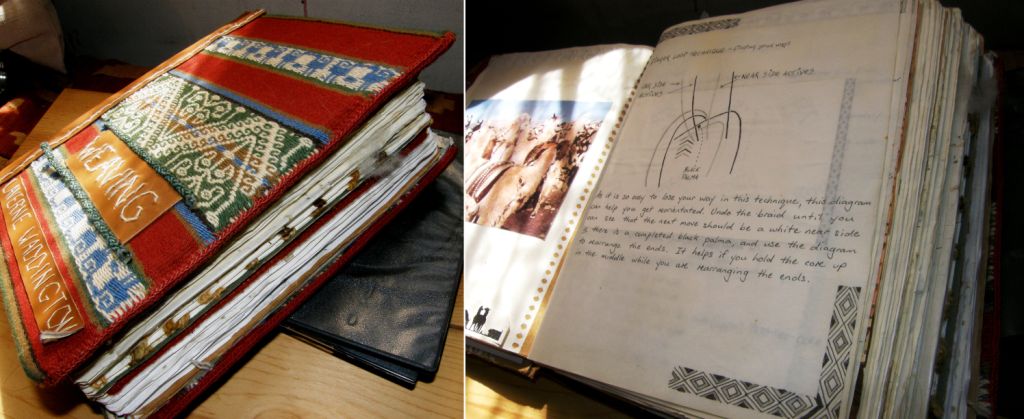
Hopefully I have done a good job of documenting the process. Sometimes when the memory of the process has started to fade, I return to my written instructions and find that I didn’t include as much detail as I should have. What I normally do is try to consolidate everything immediately on my return by weaving more examples and then I repeat the process at intervals and add to and improve my written instructions.

So, my aim is to  make a bag with a pocket all in one piece. A lot of the chuspas here are woven with such pockets. Some of the pockets are so tiny that it is obvious that they were woven as a decoration and couldn’t possibly have any sort of practical use. I guess it is included in many cases simply because it is customary to do so.

This is the chuspa that I made with my teachers. You can see the wee pocket which has been edged with cross knit looping.

The pocket on the traditional chuspa is only accessible from the inside of the bag. I want to have a pocket that I can get into on the outside so that I can easily reach keys, a cellphone or any other treasure that I need to have hidden but in easy reach. When I turn my chuspa inside out I have such a pocket. It was fun seeing the other side of this weaving with its reversed colors for a change which hasn’t seen the light of day since 1997 when I wove this piece.
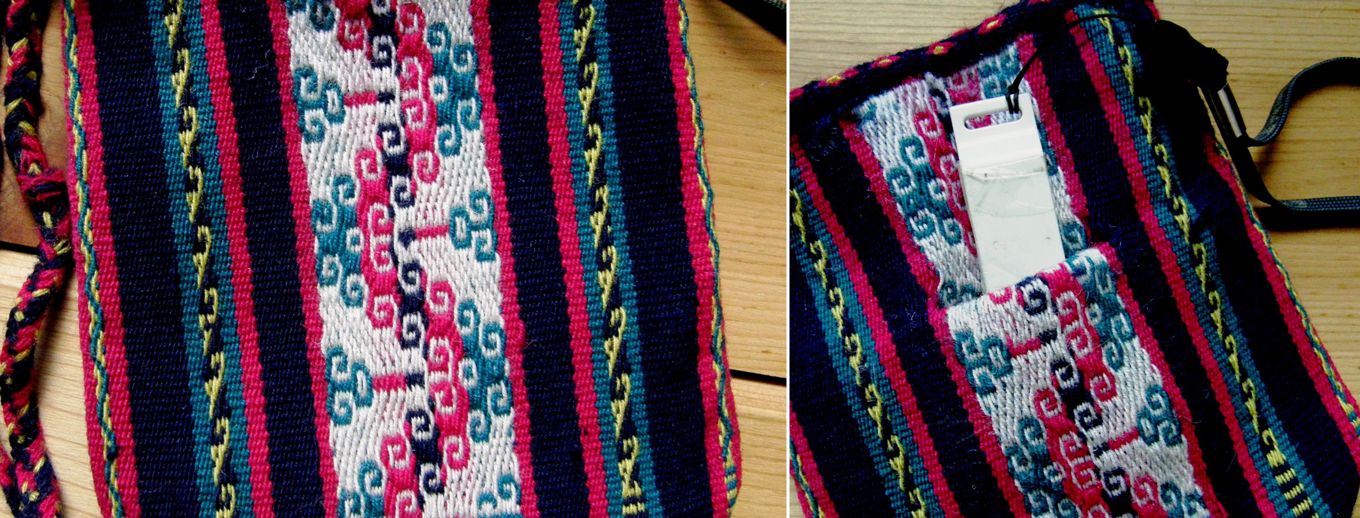
This probably seems like a ridiculously complicated way to go about having a pocket in a bag but remember that I am pretty much all about process rather than product and this exercise will serve more than one purpose. I would like to weave this bag in the traditional way I was taught by my Bolivian teachers and see if my written instructions are up to scratch. The chuspa I wove in Potosi is a four-selvedge piece. The one I plan on doing now won’t be! Well, not this time anyway. Maybe I will do that later when I have enough handspun. I am going to weave a simple plain test bag first in cotton..

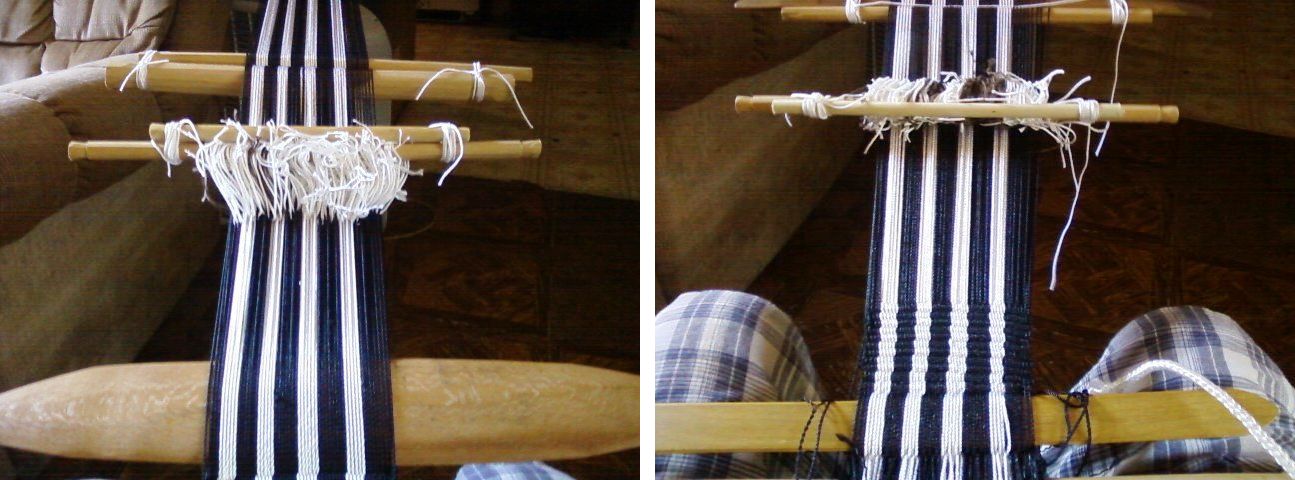
It was interesting to see that even my weaving teachers were forgetting the process and there was much bickering between the two sisters over how it should be done! Here are their two pairs of hands at work setting up the horizontal loom.

As I have been playing around with double-weave this week, I am going to try and put together a tutorial on the two-weft version for the blog next week. I made a tutorial for this on Weavolution ages ago and I think it could use some better photos and an update. The two-weft version allows you to weave bands of double-weave patterns next to regular plain weave.

This piece from Charazani, Bolivia, which is part of Yonat’s textile collection, has been woven in such a way. Motifs can be woven on narrow bands with the smooth solid color background that double weave produces. The bands sit within fields of solid color and stripes which are regular warp-faced plain weave. You can clearly see the terminal area. Finishing a four-selvedge double-weave piece is particularly hard as you have twice the amount of warps to deal with. Trust me, I have done it! This is the technique I wove on the very first four-selvedge piece I made. My teacher and I shared the burden of finishing the piece.

I will leave you here with some projects from online weaving friends and people I wove with on my US trip last spring.

Dwayne was having some problems getting his very first project underway. He didn’t have a nice smooth cotton yarn to work with and was struggling with making the string heddles. Now he is weaving using inkle-type heddles clamped between two dowels. Let’s weave! The continuous string heddles can be practiced later! He has a lovely Guatemalan loom to use.
I showed Kathi’s Saori-style project in its early stages last week. Kathi  was using a rigid heddle segment on a backstrap loom and look what she has made…
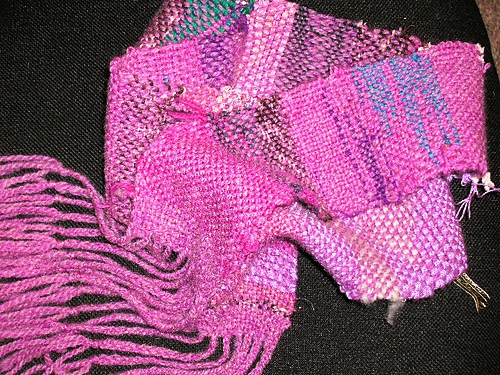
This almost makes me wish I lived in a colder climate so I too can make scarves.

Yonat wove supplementary weft patterning with me in California and has just showed me her band made with #10 crochet cotton on which she has been practicing the technique. She really has this down! I also have a tutorial on this in Spanish.
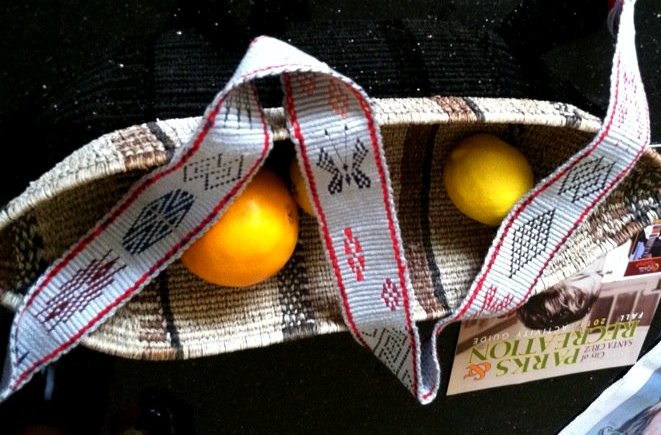
And Verena has been busy with pebble weave….
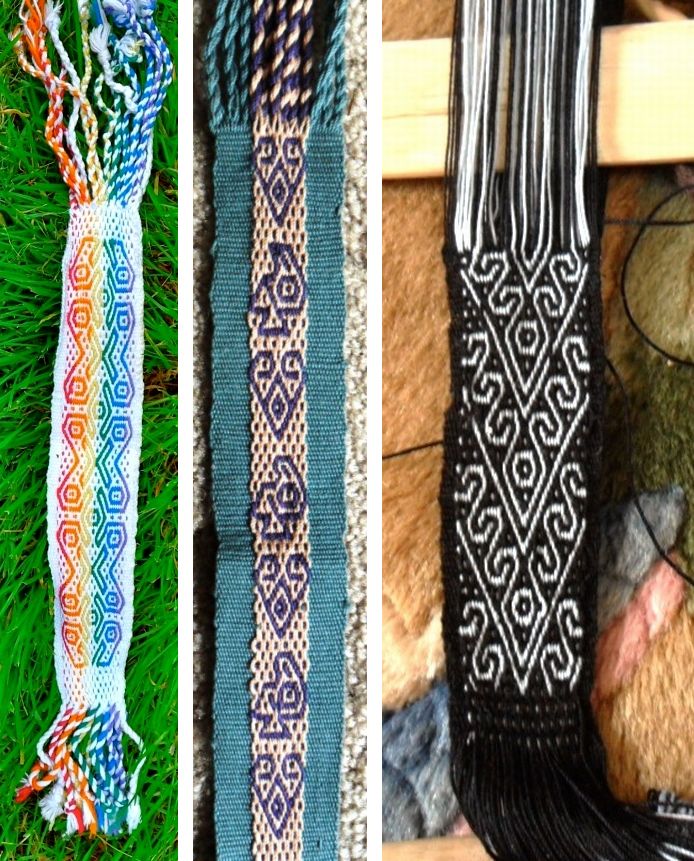

And that’s it for another week. Now to get my chuspa idea under way. There are bound to be lots of lessons learned in this project!


Backstrap Weaving – What IS backstrap weaving?

What is “backstrap weaving”?

I have been weaving on my backstrap loom way too long now to be able to remember what my ideas about backstrap weaving were before I actually started doing it. For me now “backstrap weaving” is just that: weaving on a backstrap loom, and it doesn’t matter what size, shape or form the finished piece of fabric takes.

For some people it may bring forth visions of narrow warp-faced bands decorated with pick-up patterns. Others may think of the white airy gauze weaves of Mexico or the brightly colored supplementary weft patterned pieces of Guatemala,  fine Asian silk inlay or the heavy woollen ponchos of Ecuador.

Many of the weaving techniques I have learned here in South America were taught to me by weavers who use backstrap looms while with others I learned on either vertical, oblique or staked-out ground looms. I adapt all the techniques to my loom of choice – the backstrap loom.

So, “learning to backstrap weave” to me is all about learning to warp, set up and operate a  loom which uses the weaver’s body as the tensioning device rather than being defined by or confined to any one technique.

Whether it be narrow or wide, plain or patterned, balanced, weft faced, weft twined or warp faced, heavy or fine, made of wool, silk or cotton…it’s all backstrap weaving to me. I even did a tapestry piece once on my backstrap loom (the brown square purse with the orange, red and green figures in the upper right corner – not in a hurry to do more of that! and I know of someone who did knotted pile on hers.)

Being in online weaving groups got me interested in trying some of the more “conventional” weaves (for want of a better word) and so I tried some simple color and weave balanced-weave things like log cabin and shadow weave. I had fun doing the red and white pinwheel and the rosepath patterns using a rigid heddle, string heddles or both on my backstrap loom.

What has me thinking about all this is the arrival of a new non-weaving member to the Backstrap Weaving Group on Ravelry. She was gifted a LeClerc “Mayan” backstrap weaving kit and is looking for tips on how to get started.  If you had been thinking that backstrap weaving is all about narrow warp-faced bands you would have gotten quite a shock on opening the box.

The loom is surprisingly wide, around 24″ I am told, and comes with a rigid heddle.

Here are some ladies at Convergence having their first backstrap weaving experience using the Harrisville Designs kit that also comes with a  rigid heddle. Dawn is on the left and Kim on the right. I have shown some of the bands that Kim has gone on to weave here in previous posts.

So I am hoping that all of us there in the group on Ravelry can help our new weaver to decide on a suitable first project on her Le Clerc loom and give her some tips on yarn choices for the rigid heddle she has (not my area of expertise due to limited yarn variety here in Santa Cruz!) . I take it that the loom comes with a booklet that will show her how to warp it. So it is not only a case of what she perceives backstrap weaving to be but also what ideas she has about weaving as this will be her first adventure with warp and weft.

This is not my first encounter with a new weaver jumping into a backstrap loom. Esmecat showed up in the Backstrap weaving Group on Weavolution last year after having been given a rigid heddle and all the bits necessary to set up a backstrap loom. Her friend helped her get warped up and ready to go. She was well underway with her weaving when she joined the group and her first project, which is gorgeous, was a loom bag made from sock yarn.

You can see the first post about esmecat’s experience with this on her blog and follow on from there. It wasn’t all smooth sailing – most first projects aren’t –  but look at the beautiful result.

Nancy Peck wrote to me recently about her own experiences using a rigid heddle on a backstrap loom. Of course Nancy is by no means new to weaving!!
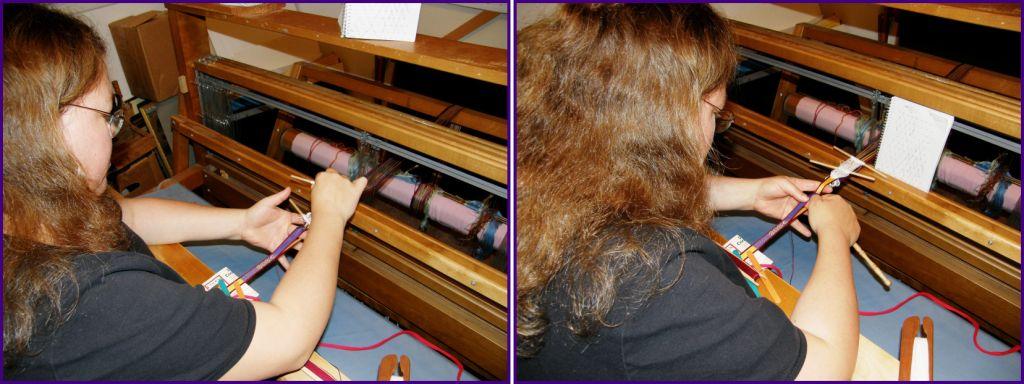
She shared some pictures with me of one of her projects with this set up.

So you can see that it is fun and intriguing for both new and experienced weavers. Weaving in an armchair…how nice is that?! And I enjoy using the rigid heddle on my backstrap loom too. It is a nice change of pace from doing pick-up and beating away at warp-faced pieces, inching my way along from day to day. Weaving with the rigid heddle zooms along!

All the rigid heddle loom manufacturers that I know of sell rigid heddles separately or you can buy small rigid heddle segments here. You can make your own…Alaa (weave2 on Rav and Weavo) gave me a link to some instructions for making your own. Ruth MacGregor makes what she calls  a semi rigid heddle which you can see at left and read about here.

I have two Ashford ones that were given to me and a Schacht which I bought.

As far as warping goes, as I said last week, there is no one “right” way. I just did what seemed logical and comfortable to me given the small space that I work in but there are most likely much better ways to go about this.

I wound a narrow piece on my warping stakes just to show you what I do.


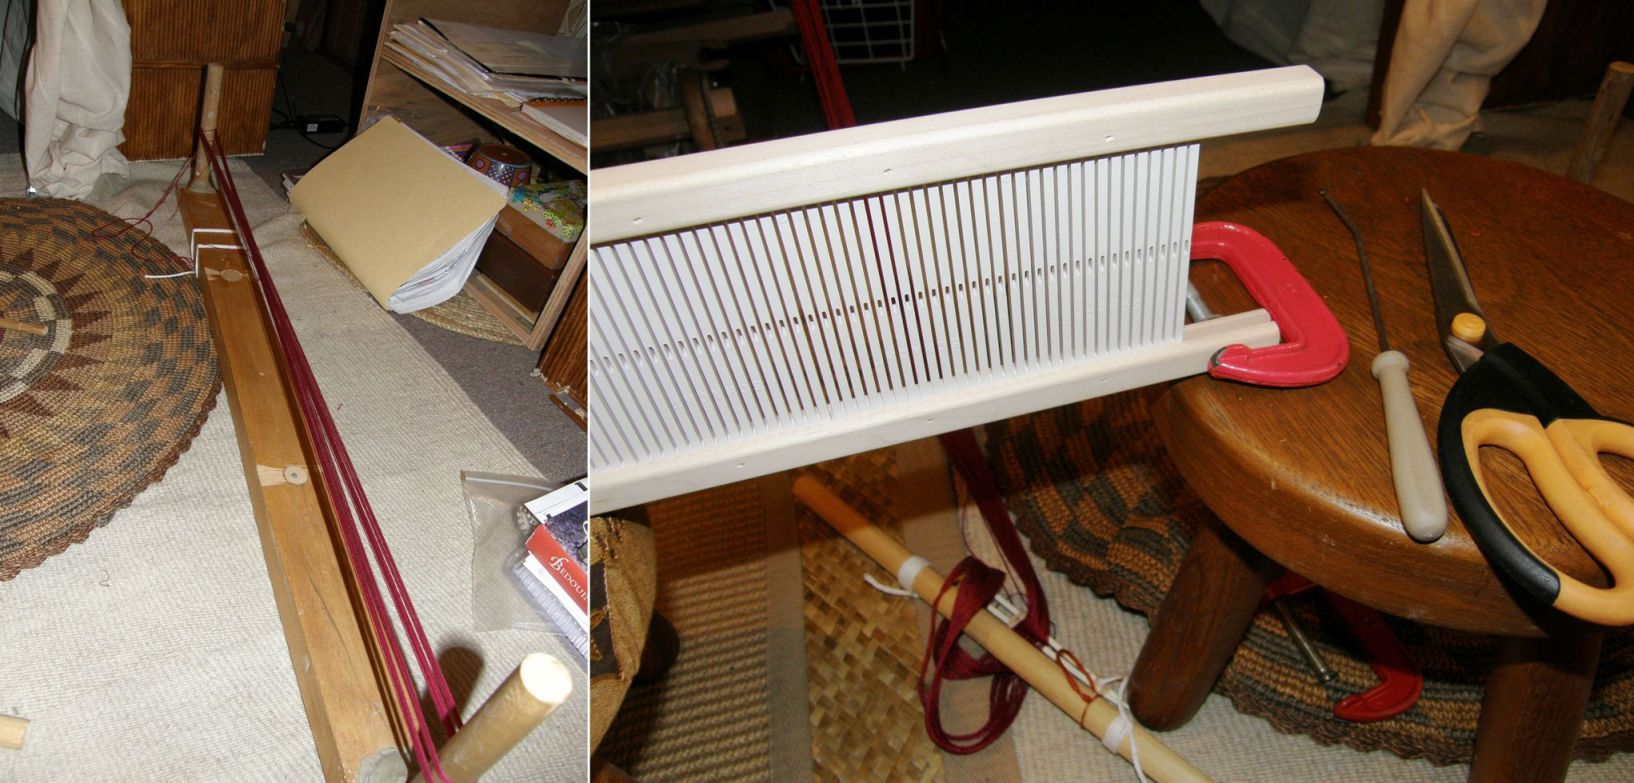
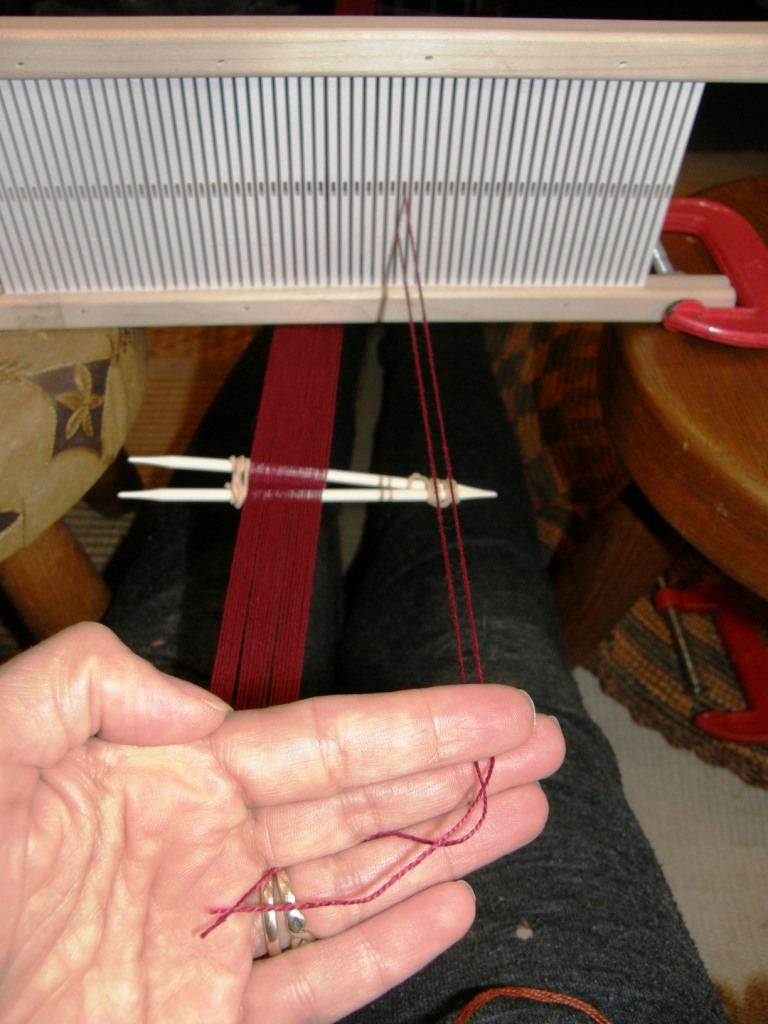
So I warp up as usual on my warping board, transfer the warp to my loom bars and get into my backstrap to tension the warp. I have the rigid heddle suspended over the warp within easy reach. It sits on two small stools and is propped up with a clamp. I use the threading tool that came with my rigid heddle loom but I have also used a needle when I couldn’t find the tool (not so nice that way).

From here I cut an end loop on the loom bar in front of me, and thread the pair of ends, one thread through a hole and one through a slot. Call me crazy, but I like to tie each pair of threads together with a  knot as close to the end as posssible and then transfer it to another loom bar on the floor beside me. Most weavers will tie a group of ends together. Actually I usually put the knotted threads on a steel knitting needle which I later lash to a loom bar.


There’s the first pair of threads in their hole and slot.

So this is my way.

It is probably a whole lot easier laying the whole thing out on a table but I don’t have this luxury!

Besides I am very comfortable there on the floor in my backstrap.

I used to work in ski resorts and spent nine months of the year for 5 years on skis. Those long planks used to feel like they were part of my feet and that is how my backstrap loom feels now – a part of my body.

And away it goes…

And some of the results…

But I always go back to my great love –  warp faced, pick up patterned pieces and ethnic themes. Speaking of which…I finished the amulet bag I was working on last week with a crossed warp band for the strap.

I started looking at the different finishes on the various chuspas (coca leaf bags) that I have and decided to try one out on another amulet bag.


I may have used too much yarn for my version on the right. The weaver had woven and sewn a tubular band with diamond or “eye” patterns along one side of the chuspa. When she got to the bottom of the bag she continued weaving and sewing but, at the same time, lodged strands of yarn between the woven tube and the bag before passing the weft and sewing the tube to the cloth. So I did the same. The strands of yarn form a fringe.

I noticed that the weaver wove the tubular band in plain weave where it was covered by fringe…wise move… why spend all the time making the pattern when it was only going to get covered. Actually I was surprised how nice the plain weave band looked when I wove it due to the unusual arrangement of the warps for the diamond pattern. Silly me forgot to photograph that part.

When finished, the tufts of fringe are bound, sewn to the tubular band and then trimmed. It is a nice finish.

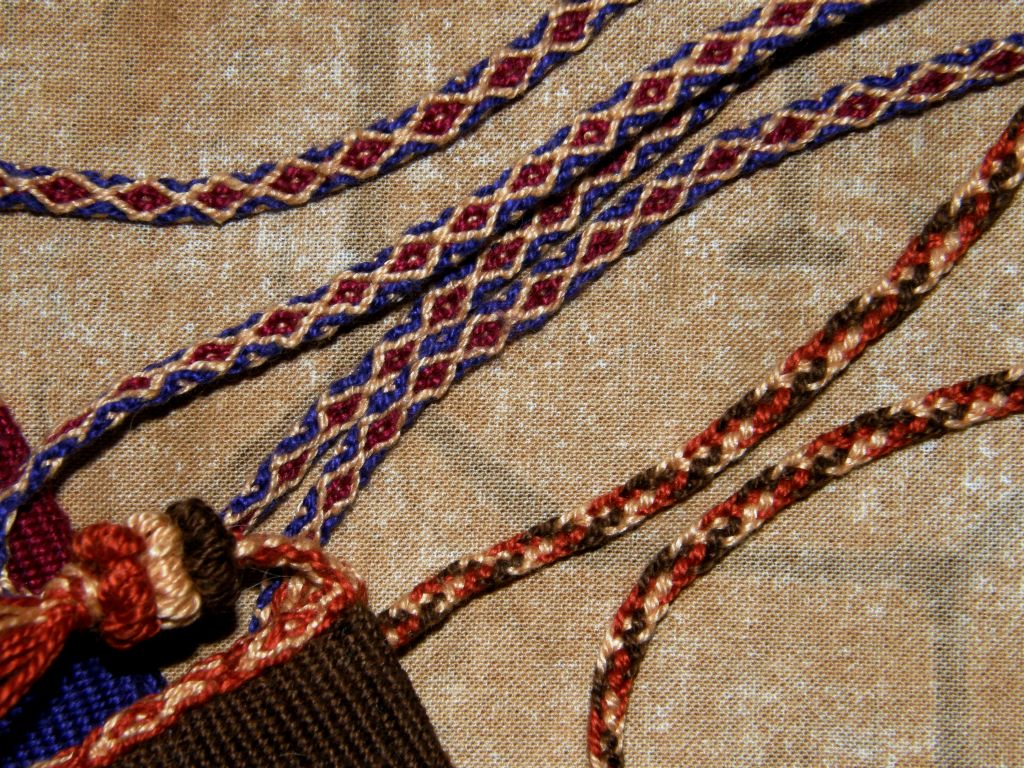
For this amulet bag I wove the tubular band in only two colors just to see how that would look and made a braided rather than woven strap. The braid is a six-strand finger loop braid that my weaving teacher in Potosi taught me. It looks very different on its two ”faces”.


Done! Tiny projects like these are good for practicing new techniques. I have more chuspas to examine and more finishes to try.

As you are reading this I should be in Cusco or Urubamba attending the tinkuy, the gathering of handweavers organized by Nilda Callañaupa and the Traditional Textiles Center in Cusco (CTTC). It runs from November 5th -8th with presentations and demonstrations on the 5th and 6th followed by workshops on the 7th and 8th. I know I will be able to catch up with some people I met at Convergence and I know that at least three people I have met through this blog will be there too and then there will plenty of new weavers to meet…all in such a short time!

Navajo weaver D.Y Begay was here in Boliviarecently and I was disappointed to have missed her. Just last weekend we discovered that we will both be at the tinkuy and will be in the same hostel.  She has been exchanging weaving know-how with indigenous weavers in Guatemala and Bolivia and maybe other places too that I don’t know of. She will stay on in Peru for some weeks working with the CTTC.

Here’s someone I met through this blog and if you are a regular visitor you will have already met her here a couple of times…”Cycling Anna” is still on the road in Argentina and heading south and I have a picture to show you of her braiding the ends of her double weave band while taking a break in Chile. Recognize those llamas? She has picked this up super fast.


Marsha Knox has been moving along with her experiments in simple warp floats, floating both colors and getting more and more creative with her patterns.

One last piece of news: I have just submitted the Spanish translation of my Backstrap Basics article to WeaveZine and hopefully that will go up on the site soon.  Only the videos will remain in English. That, combined with the tutorials I am slowly translating here on the blog, will hopefully make information about backstrap weaving and the weavers of Latin America accessible to even more people.

See you all after tinkuy. I’ll be back with cracked lips (super dry air up there) and bleary eyes (my reaction to the altitude is insomnia) and ready to weave after all the amazing things I saw and heard there. I’ll be back on the 11th to answer comments and emails.

EDIT: Yay I have wifi in my hostal in Urubamba and so am able to post this picture that Helena sent me of the band she made using one of the Bedouin techniques that I used in my wall hanging.

She used the threading from the last page of this article that she found by Joy Totah Hilden. It is a simple and very effective design which has long floats on the back.

And here’s a view from the plane somewhere between La Paz and Cusco today….


Backstrap Weaving: Looms, MORE looms and southern hospitality.

Spring has sprung in North Carolina! I am spending some time here in Lincoln County with my online buddy Lisa and her family. Lisa’s father owns and runs the local newspaper and is a wealth of information on local history and its colorful characters and has kept me highly entertained with stories throughout my stay over breakfasts and dinners of typical southern treats. He tells me that North Carolina, while being one of the ten most populous states in the US, is also one of the most forested. This town looks like a gorgeous well manicured and landscaped park in which people have been graciously allowed to place their homes – luscious, expansive  green front lawns, azaleas in full bloom, majestic oaks, show-case flower beds and vegetable and herb gardens abound. You can barely see the houses amongst the trees and shrubs – so gorgeous!..so spacious! Oh, and I heard a mocking bird yesterday! – To Kill A Mockingbird is my favorite book.

And I have been treated to helping upon helping of southern hospitality. I am so tickled everytime someone calls me ma’am!  I was eager to try some typical southern food – all those names that we hear in movies and TV shows and have no clue about –  so Lisa’s husband made me a batch of “biscuits” which we enjoyed with Lisa’s homemade berry jams. We have biscuits in Australia but our biscuits are what people in North America call cookies.

LEFT: Homemade buttermilk biscuits…RIGHT: A good southern breakfast.

We went out for a good southern breakfast. The largest plate in the above picture is mine! – biscuits with gravy, corn grits and country ham. I still can’t believe I ate all that! I asked about chitlins as I have always wondered about those but the general reaction at the table made me think that I would be better off not trying them!

For something different, Lisa and Ryan took me to their favorite Thai restaurant as I had mentioned that south-east Asian food is something that I miss in Bolivia.

On entering the restaurant, Lisa and I were drawn immediately to the textiles that decorated the walls and tables. The owner was so pleased by our interest in Thai weaving that he gave us each a woven bag from Thailand!

So, what has been planned for my visit apart from eating? – lots  and lots of fibery fun! Lisa and I met online through a discussion on her fabulous yurt band which you may remember from a previous post. Finally my little yurt band border bands get to meet their inspiration. You can see them there at right next to the huge forty-eight foot yurt band. There is nothing like seeing something like this “for real” after having admired it for so long online. The colors are so much richer and I am suprised at how loose and flexible the weave is compared to South American bands which are beaten hard into a stiff firm fabric.

So Lisa and I met on Ravelry where she was trying to figure out the structure of the yurt band weave to see if she could reproduce it. Photos were flying back and forth in cyber space and it was only after seeing the back side of the textile that I finally recognized it as simple warp floats. We then set about weaving a tiny reproduction – the “s” motif  on which I made a tutorial here. We laugh about the fact that a chica in South America helped a gal in North America figure out a weave from Central Asia – and all online! And thus  a friendship was formed.

By the way, my friend Caroline in Australia has been doing her own investigation into other kinds of yurt band construction which you can read about here. She wove a three-color reproduction band recently.

Inkle, cardboard, tapestry, card, backstrap, frame and rigid heddle looms!

Lisa is a felter, spinner, knitter, painter, braider, weaver and loom gatherer. In an attempt to clear some space so we could use her four-shaft floor loom, we pulled no less than fourteen looms out of her studio!  Now what am I , the backstrap weaver doing on a four-shaft loom? I will tell you more about that little adventure later on.

In the meantime, check out Lisa’s fabulous felt work above. Lisa is in the local fiber guild and SCA group and so her projects tend to involve historical reproductions with her SCA companions as well as work with the fiber guild which gives her an outlet for more contemporary pieces.

Lisa’s felted pouch and inkle loom woven strap. I can’t wait to make one and decorate it with a backstrap woven band. The yurt design cell phone pouch I wove for Lisa is next to it with her iphone inside – a perfect fit.

The piece above on the left has a Scythian design. The Scythian people existed on the Central Asian steppe around 500 BC and a feature of their animal motifs is the twisted hindquarters.

The piece above on the right is a Viking design.

There are a lot of felted pieces in Lisa’s home. I am seated on a felt cushion with my feet on a felted rug and, hopefully, if time permits, Lisa will teach me to make a felted pouch like the one at left. I will do a South American motif – shock! – and weave a strap on my backstrap loom.

I have my fingers crossed for a cut pile lesson or two while here too! Lisa has one started on her Mirrix loom which you can see on the left. The felt rug in the center is one she bought and is from Kazakhstan and I think it is splendid. At right, check out her grin as she peruses her newly arrived catalog from the “Secrets of the Silk Road” exhibition currently at the Bower Museum in Santa Ana.

Did I mention that she is also a terrific spinner? Here are a few of her most treasured spindles –  Turkish and Tibetan styles, phangs from Ladakh, a Kundert, which is her workhorse spindle, and sentimentally valuable ones gifted by her husband as well as a bead whorl crafted by 5 1/2 year-old Joshua.

Lisa loves to teach and share and I got to see her in her element at an Earth Day Festival last weekend, where she showed and taught her crafts.

Lisa has taught me that finger loop braiding need not be limited to short braids as I had thought. She has a nifty way of hooking the end around her toe and an even niftier way of tamping down the braid which I will show you in a video. Here, she is teaching a five-strand braid to girl scouts, Carolie and Julia who had a ball with it.

When my weaving tecaher in Potosi  taught me a six-strand finger loop flat braid, I would make the braid while she would tamp it down using the side of her hand with a slicing action. So it seemed that two people were required to work together to make the braid nicely. Not so… check out Lisa’s cool foot action in this video!

I got to demonstrate backstrap weaving and that was a lot of fun. There was a convenient pole in our area to which I could tie up.
There was music and the weaver eye, forever on the lookout, spotted the ikat guitar strap

I wove pebble weave to promote my new e-monograph and it was quite a different experience to weaving at CNCH where my audience was largely weavers.

At this Earth Day event a lot of the people had never seen weaving demonstrated in any form and we attracted quite a lot of onlookers.

Lisa was spinning and explaining the felting process while I knelt on the floor and wove.

Caught up in the excitement of it all, I completely forgot that that kneeling position is not something I can maintain for longer that five minutes at home! I sat there happily for a couple of hours!

Kids were kept busy painting Earth Day flags. I was quite taken with a lady who was selling cards on recycled paper with photographs of her cats-eye-glasses-1960’s youth and with a wicked sense of humor. She gave a pair of cats-eye sunglasses to her vistors and that led to this photo op with me there in the center. Becca, from Shiele Museum, who was making paper flowers with kids, kind of caught the whole sunny spirit of the day with her colorful clothes and radiant smile.

The next day I was invited to visit with British couple Maurice and Ursula. Those of you who are on Weavetech may know Maurice and the superbly crafted looms he made for himself. Maurice, on hearing that there was another “British Subject” in town, promptly invited me to tea and then lunch and a visit with his four and eight-shaft floor looms and weaving studio. Ursula’s passion is quilting.

Maurice in his studio. He also built the spinning wheel in the center. Ursula posed with her quilt which she has finished piecing together but has yet to quilt. She is still experimenting with designs on her recently purchased quilting machine. Maurice and Ursula can work side by side on their fiber pursuits in the studio. The photo does not show the true colors unfortunately. The main colors are deep purple and apple green and they are stunning together.

Since putting out my e-monograph on Andean Pebble Weave, I have had a couple of enquiries about whether the technique can be worked on a four-shaft loom. Sadly, I didn’t feel qualified to answer those questions well and so I was determined to get educated about that on this part of my trip and Maurice was extremely helpful. I had never seen a four-shaft loom “in person” and I don’t think that Maurice was all that familiar with a backstrap loom. So together we muddled through and came up with a possible way to get the pebble weave going on this kind of loom if you simply didn’t have any other kind of loom to work with.

Here Lisa and I are ready to attack this project. I got a lesson in warping one of these looms with this tiny narrow warp. We warped front to back with Lisa sitting on a stool behind the harnesses while I fed the yarns to her. We only used two harnesses and set up the pebble sheds in those.
All set up and on our way. We used a pair of string heddles in front to form the picking cross and removed the reed and away we went. All went very smoothly starting off with plain pebble weave. We are using an eight-revolution warp which gives us sixteen warps from which to pick patterns. This wee band looks quite funny on this large loom.
The first motif is started and Lisa’s smile says it all.
More motifs start to take shape and all is working well, The tension is just right as the motifs are not elongated and there is enough room to get hands and sticks in to do the pick up.
Opening the heddle sheds to form a picking cross and then using a stick to pick up the pattern warps.
More motifs. This center one is a “viscacha”, a rabbit-like creature with a long tail found at high Andean altitudes . The pattern charts for these are in my e-monograph.

So, we had fun with this. Lisa learned to make patterned bands (she had graciously tested my instructions for plain pebble weave before I published my e-monograph) and I learned a little about the workings of a four-shaft floor loom. What a lovely wide shed those harnesses create with the minimum of effort.

EDIT…..As I get more familiar with this loom and its workings, I have had the famous aha! moment and figured a way to do away with the string heddles and get everything into the four shafts. However it won’t make the actual weaving any faster. It is still, after all, a pick up weave and individual warp threads need to be handled. When I get back here from MSWF and a short stay in DC, I shall get another band on this loom.

Lisa is not the only weaver in this household. Above you can see five-year old Joshua making a scarf on an Easy Weaver rigid heddle loom. The scarf has been finished and hopefully he will find it so I can show it to you here before I publish this post.

I had another encounter with this Easy Weaver loom this week as Brian Jones in England sent me a picture of an Andean pebble weave band he has been weaving following my e-monograph. I can’t tell you all how ecstatic I am about seeing the monograph being put to use!! 🙂

LEFT: Brian’s warp set up on his Easy Weaver loom. He is weaving a band from lesson 2. RIGHT:Jennifer Jordan made a key fob with the plain pebble weave band in lesson 1.

I told you before that Lisa pulled out her collection of looms so that we could get at the four-shaft one and this gave me a chance to play with and think about looms, other than backstrap ones, on which pick up bands can be woven.

You may know Franco’s clipboard loom at left. Lisa also has a somewhat sturdier frame loom on which she has been weaving a band with simple warp floats.

If some kind of tensioning system could be rigged on these so that tension could be eased off as weaving progressed, they would be wonderful. As is, the amount of take up in the warp makes it increasingly difficult to open the shed and pick the warps as weaving progresses.

I set up a warp for Andean Pebble Weave on Lisa’s frame loom to see what it would feel like and wove some pre-Columbian birds. The pattern charts for these are in my e-monograph.

As I warped up quite firmly, I think I will only be able to weave half this warp before everything gets too tight. I think it is a nice loom for sampling and short bands.


Here are some pick up bands on inkle looms. The one on the left above was made by Karren from the Weavolution Backstrap Weaving Group some time ago. She made this into a cell phone pouch. This motif is charted in my e-monograph.
On the right is Lisa’s “s” yurt band design on her inkle loom. I warped up a narrow pebble weave band on an inkle loom when I was in California and enjoyed doing all manual pick up. I have just started winding a warp for a wider one on one of Lisa’s looms and will use additional string heddles this time. I’ll keep you updated on that.
Above, you can see a picture that Ellen sent me from Denmark where she is weaving one-weft double weave on her inkle loom following my tutorial on Weavolution.

Carolyn sent me these pictures of her first Andean pebble weave band, following lesson one in my e-monograph, which she lashed to her rigid heddle loom.

Then there are tapestry looms, or this Navajo loom onto which I lashed a four-color pebble weave warp. My Navajo loom has a tensioning device so I could ease off on the tension as I progressed and, therefore, compensate for the take up.

Lisa’s Mirrix loom on which she has her cut pile weaving would work well for this.

So, all the beautiful pick up weaves that I show on my blog and for which I have provided tutorials, can be set up on a variety of looms. They by no means have to be restricted to the backstrap loom.

This has been a wonderful learning experience here! Tomorrow we are going to get into some felting. I would like to learn this and make something for myself but probably won’t get to continue with it back in Bolivia as I can’t get sheep wool where I live in Santa Cruz. And then there is the cut pile weaving. I got Noreen Roberts’s wonderful book on the subject but there is nothing like having someone show you in person. Lisa is still in the experimental stage with this but I am sure that she will be able to give me some good tips.

And look above at what she gave me! – a charka from India. I am thrilled to bits to have something like this from my place of birth. Lisa’s fiber guild friend Katherine came over today and showed me how to use it.

Katherine spinning cotton on my new Indian charka – the parts need a good oiling! At right is Katherine’s own charka made by Bosworth – what a piece of work! Of course she makes it all look terribly easy. Lisa sat quietly by spinning up cotton of sewing thread weight on a takhli supported spindle. So we had a very spindly day and shall be getting back into our pebble weave projects later-Lisa on the 4-shaft loom and me on the inkle.

Katherine sews and also makes card woven bands. She made the pin cushions from felt and then embroidered them and the band, I think, is intended for her husband’s guitar.

I would so love to be in a fiber guild and surrounded by all these talented people. Well, I shall do my best to soak up everything I can from Lisa during my stay here although I have to admit that being in Weavolution gives me access to weavers from all over the world – so I can’t complain – and I only need to go up into the Bolivian highlands to be with wonderfully talented backstrap weavers.

###############################################

I have a band to show you from Ann Littlewood, woven from her own design in supplementary weft technique (see my tutorial here). She is going to use this as a bookmark.

And I also had a fun message over at Weavolution from Marta Madeja in Spain who tells me that she is hiking in the Alpujarras south of Granada and picked up some sticks along the way to make a backstrap loom. She has never tried backstrap weaving before and decided to dive head first into pebble weave and bought my e-monograph. The only “yarn” she had about was embroidery thread and she managed to make a tiny pebble weave band based on lesson 1 in the monograph.

The pin will show you just how tiny this band is. She tells me that she will try lesson 2  with thicker yarn when she gets home. I wonder what she tied up to on the trail. I am waiting to hear more details from her. I think this is really cool!

##########################################

Finishing here with a million thanks to Lisa, Ryan and Jack-in-the Box Joshua, popping into the photo there below, for an amazing time in North Carolina. We are off to Maryland Sheep and Wool Festival this weekend. If you are going, please drop by and say hi. I will be demonstrating backstrap weaving in the rabbit building at the Weavolution meet up point from noon to one pm on both days.

See you there!

Thanks to all who have written to me about the e-monograph. Keep the projects and comments coming. 🙂

Backstrap Weaving-Simple Warp Floats: a little less simple, a lot more stunning!

SIMPLE WARP FLOATS – a little less simple, a lot more stunning!

I have been playing around with simple warp float patterns this week looking for new designs in books and on weavings that I have bought in my travels. I found a nice one in a photo of a textile fragment from the north coast of Peru in Ann Pollard Rowe’s Warp Patterned Weaves of the Andes which I will show you later. I also pulled out a belt full of warp float patterned motifs which had been sadly neglected at the bottom of my box of Guatemalan textiles. I guess it had been ignored and forgotten as it is a simple black and white piece looking very humble and plain next to the wildly colored  weft patterned pieces that are so typical of Guatemala.

What is strange is that I bought this belt in the same town where the women wear a particuarly wide and richly decorated hair sash – it is quite a contrast to see the two pieces together. I wonder if they are both woven by the same weavers.

Belt and hair sash of Aguacatan

As you can see, the belt does not have a continuous design, rather, a series of small motifs. No two motifs are exactly the same. As I pull the belt through my hands to examine the motifs, I can almost imagine the fun this weaver had deciding what motif to display next on her 9-foot 3-inch canvas! There are mistakes. There are motifs that obviously didn’t go quite the way she had planned but I get a feeling of playfulness from this belt that I just don’t get from the heavily ladened hair sash.

I have been thinking about what elements can make this simple warp float patterning more interesting and fun for weavers. I have written a tutorial for this technique here but it is a technique that never seems to get fully explored – just a “stepping stone” on the way to the more advanced techniques.

Here are a few ways, for starters, to make a piece patterned with this technique a little more stunning.

Three pieces woven using a simple warp float technique.

On the left and in the center are two pieces made by members of the Backstrap Weaving Group at Weavolution. Historicstitcher used bands of bright and lively colors alongside her warp float pattern. She used single rather than paired floats to give a more delicate look. In the center, Jeannine designed her own sunny warp float pattern and wove it beside a more somber border of vertical stripes. I think it looks amazing! And on the right is part of a bookmark that I made using three colors across the width of the design rather than two as is more usual.

As the name implies, this is a simple technique. If you imagine looking at a warp in profile, you will see in the following diagram exactly what is going on in this technique as it is woven.

A profile view of a warp where green warps are “floated” over a base of red and green stripes to form the patterns.

Let’s take another look at the black and white Aguacatan belt and see the different motifs the weaver has created – from very simple to not-so-simple.

As you can see, it all starts on the left with a base of black and white stripes. Then the weaver can decide which color she wants to float over the surface to make her designs. Her first design has been made with black floats, the next design to the right has been made with white floats. Moving along, she has made a quick succession of black and white float designs.

On the left, the weaver is again swapping from black floated designs to white, and back again. The one on the far left has an almost three dimensional effect. On the right she has started to combine black and white floats within the one motif. This means that in one weft pass she will be floating black warps. In the very next weft pass she will float white ones. When I went to weave this it took me a while to get my head around it!

She is getting increasingly adventurous now with her combination of black and white floats all within the one motif. Those designs on the left really play tricks with my eyes!

But, of course, things don’t always go to plan. On the far left it looks like she was trying to combine single warp floats with pairs but ran ino a few problems. Next to that, she didn’t manage to get the white design centered. While I don’t find mistakes in my own work terribly amusing, I do like to look at these little mishaps in other weavers’ pieces and imagine what was going on to cause the lapse in concentration. Perhaps her husband was telling a funny story, a neighbor dropped by for a chat or one of her kids was swinging off her loom. In any case, my examination of this band makes me really want to meet this weaver!

On the right is a different band where the horizontal stripes in one part are not evident at all as the entire surface has been covered with black warp floats.

All of this finally led me to my project of the week…

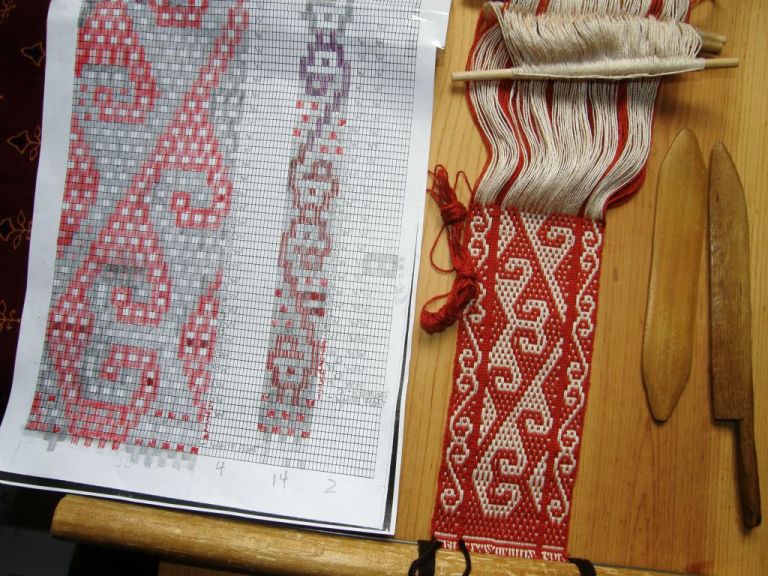
Simple warp floats used to reproduce a yurt band design.

This piece has been woven with the simple warp float technique using floats in both colors in one continuous motif. The horizontal stripes cannot be seen as the entire surface of the weaving has been covered with warp floats – the same simple three-span floats shown on the Aguacatan belt. Where the outline of the design changed direction, I had to use five-span floats.

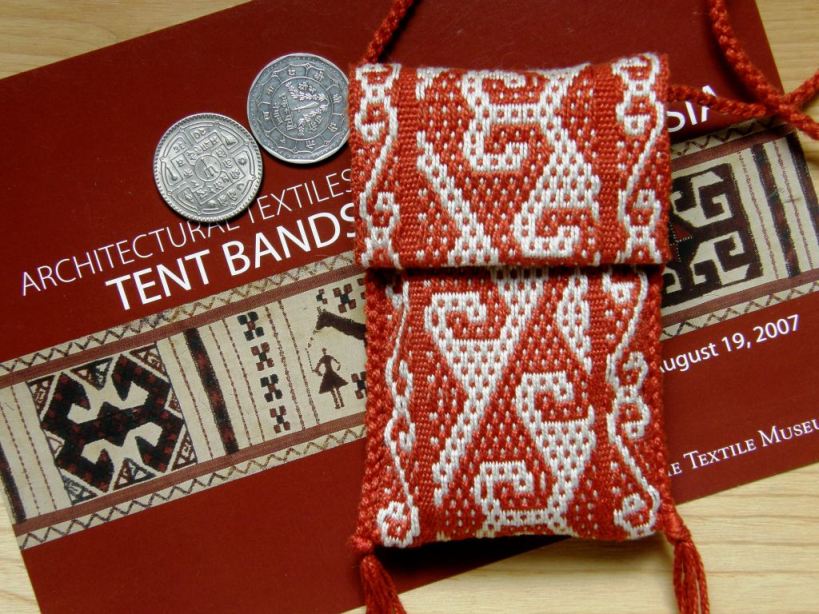
A cell phone pouch for Lisa

I charted the design from a photo of a yurt band that was sent to me by Lisa Matthews of North Carolina. Ever since Lisa and I met on Ravelry back in June last year, she has been sharing  not only photos of Central Asian weavings with me, but also her love and enthusiasm for all the textile and fiber crafts of that region so I thought it would be a great idea to make this piece into a cell phone pouch for her.

On the turned edge of the flap you can just make out the horizontal stripes where I started this piece. From there on the stripes got covered by floats.

I edged the pouch and made a strap using a four-strand braid. Although I learned this braid a long time ago,  my weaving teachers in Potosi taught me a new and really fun and quirky way to do it by looping the braid strands on my fingers. I have made a tutorial for this with step-by-step photos and a video which you can see here.

Lisa writes a fascinating blog about her explorations into the crafts of Central Asia and has kindly allowed me to use photos of her yurt band here. In her own words here she describes her passion:


“I’m extremely interested in the cultures of Central Asia both past and present.  Within the context of the historical reenactment group I participate in I am attempting to learn how to portray the daily life of a 10th to 11th century Steppe Nomad.  To do this I have been learning how to make yogurt, cook flat bread, camp in a yurt, felt, spin, and weave so far.  I’m very interested in both felting and weaving and feel that weaving on the Nomadic ground loom brings the ability to weave fantastically patterned pieces to even the novice weaver with a very, very small outlay of cash to set up the loom and get weaving.  The versatility of the ground loom is that you can weave anywhere you go and anything from fabric for clothing to tent bands to cut pile rugs and kilims on the same loom.  Yurt bands are something that especially interest me and I am in the process of learning how to weave them.  My husband and I were lucky enough to purchase a 48 ft long band thought to have been woven by the Krygyz and its handmade beauty has really inspired me.”


I love the simple border motifand I am thinking thatI may be able to do a tutorial on that here next week so you can all learn to do the two-color floats.

At first glance, you may think that this weave is Andean pebble weave, but a look at the back of the weaving will show you that it is not. Andean pebble weave is double faced, that is, the same warp float motif appears on the back of the weaving with its colors reversed. On a simple warp float piece, however, the warps that float on the upper surface create a gap on the lower surface through which the weft is revealed.

LEFT: The front and back of an Andean pebble weave motif. RIGHT: The back of a simple warp float motif reveals the red weft.

I was really fortunate to run into Lisa online but this wasn’t my first encounter with these Central Asian tent bands. I was lucky to happen to be in Washington DC when there was an exhibition of these pieces at the Textile Museum in 2007. This certainly made up for my initial disappointment at not finding any Andean weavings in their permanent displays. On top of that, I had a wonderful time sitting on the floor with a pile of books in their bookstore and spent hours in their library. Meeting Ann Rowe there was the icing on the cake!

The finished pouch on the Textile Museum’s post card. I still haven’t found a suitable closure for the pouch – open to suggestions!

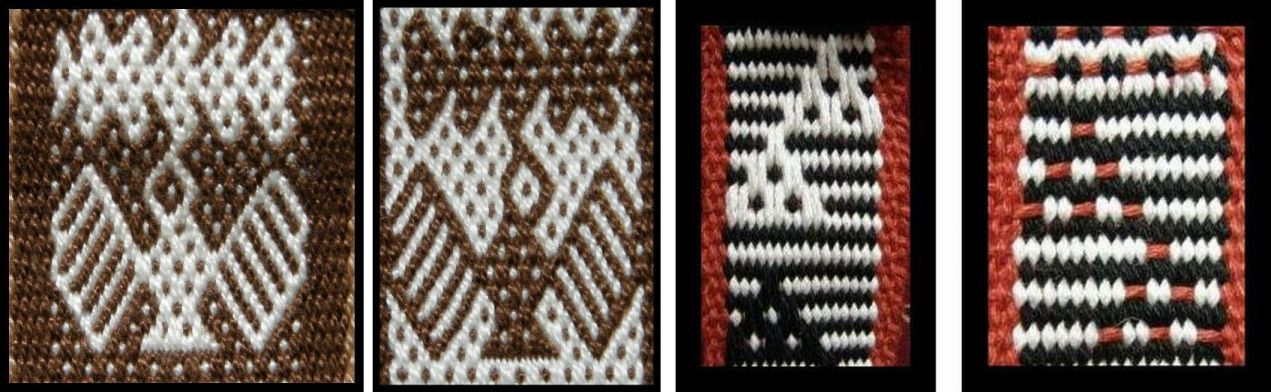
Here is the new pattern that I charted from the old Peruvian textile fragment. There are several woven versions here as the picture in the book was not very clear. I finally decided on the motif on the upper left hand side. A larger version  of the chart is here.

Warp floats of brown and white cover the surface of the weave.

Above, the motif is woven on a background of horizontal stripes. If you were to cover the surface completely with floats, it would look like the photo at left.

According to Ann Rowe in Warp Patterned Weaves of the Andes, no archaeological examples of this two-color float weave have been found in the Andes although twentieth century ponchos have been made with this technique in Northern Argentina. There is a  photo of one such poncho with bold geometric motifs in Ann Rowe’s book

#####################################################

A few bits and pieces to finish off…I received some comments from people last week about how difficult it is to find a suitable place to tie up their backstrap looms at home. I know what this is like! I am fine here at home, but when I go to visit my mother in Sydney (my backstrap loom goes everywhere with me!) there is nowhere to tie up my loom so I braid in the evenings when we are sitting about and chatting. My brother and sister-in-law have been kind enough to put some hooks into the side of a large dresser in their guest room in their home so that I can slip a dowel in and weave away.

Here are a few photos of some tie-up options…


LEFT: Tied to a STRONG doorknob. Not the best option for narrow warps as the warp will slip on the rods and cause the loom to tip from side to side. RIGHT: Hooks in a piece of heavy furniture.
LEFT: The loom bar can be lashed to a heavy piece of furnture, a stair or porch rail, or the ladder on a bunk bed. RIGHT: The loom bar can be wedged behind a pair of clamps.

If you are at all into DIY, you should check out Sharon’s (aka Rose Goldilocks) blog where she has invented a nifty seat, footbrace and tie-up place all in one.

#################################################################################

One more thing…

Sharon emailed me last weekend to tell me about a new Interweave publication – a magazine called Knitting Traditions 2010. Apparently it has instructions for Peruvian needle knitting, or cross knit looping, for making finger puppets. I would love to learn how to make three dimensional things with this technique. Well, that is definitely going on my shopping list for my up and coming trip to the US.

There are some gorgeous knitted finger puppets  for sale in the craft markets here but they are made in regular two- needle knitting as far as I can tell. All kinds of animals are made and they are pretty hard to resist.


LLama and sheep finger puppets
Front and back of my “knit” pre-Columbian fragment

And while we are on the topic of knitting, I  found some information about one of my pre-Columbian fragments, once again, in Ann Rowe’s book. Apparently these pieces, which are constructed with what look like knit stitches and which are very thick, were used as straps and belts by the Incas and were made using a 4-strand warp twining technique. No evidence has been found yet to explain how exactly this was achieved…but it’s nice to know at least this little bit about one more of the fragments on my little Chancay dolls.

At right I’d like to show you the pencil pouch that siseltikva, from the Weavolution group, wove on her backstrap loom and edged with cross knit looping. It’s a really nice project idea for a narrow band and , as always, I am thrilled to see my tutorials being put to use.

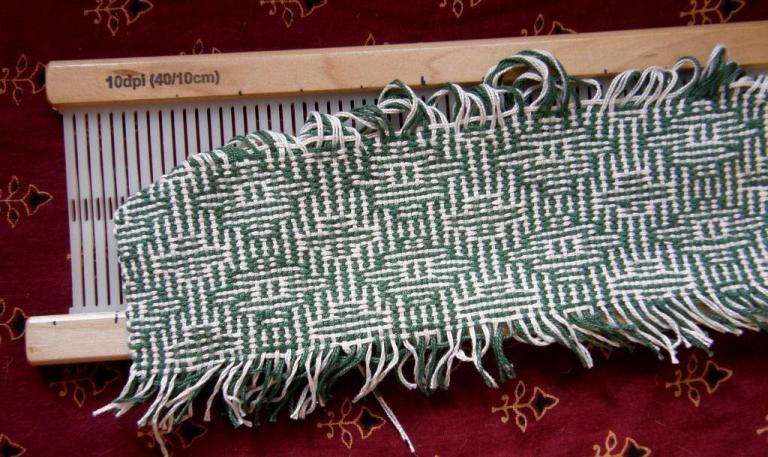
My shadow weave sample using a 10dpi rigid heddle on my backstrap loom

Let me leave you with this picture of my latest experiment with balanced weaves on my backstrap loom. I wove this tiny shadow weave sample  using four sets of string heddles and a rigid heddle as a spacer. I can’t say that I am crazy about it! There are a few examples of careless heddle lifting there. I have been told that this looks great done in four colors – two contrasting colors for the warp and two tones of those colors for the weft. I really enjoy doing these balanced weaves – they are a nice change of rhythm and beat so I will choose my colors carefully and see if I can make something I like better from this weave.


Backstrap Weaving: what’s on the loom?

I GOT MAIL!

I did an equipment swap with  another weaver at Weavolution.com. When I went up into the highlands a few months ago, I bought a bunch of Bolivian drop spindles at the market and then offered them at Weavolution in return for stuff that I can’t get here in Bolivia.

An offer was made to adopt my last drop spindle and we negotiated the swap-cotton sliver in indigo, terracotta and natural. I learned to spin cotton in Ecuador a couple of years ago and have gone through my small quantity of raw material. Santa Cruz used to be an important cotton producing region in the old days but not a single boll to be found now. So I jumped at the chance to get this sliver in such gorgeous sounding colors!

My package arrived and this is what I found!

the contents of my spindle-swap package
The contents of my spindle-swap package

Okay, now you can see why I am so excited! Yes, I got my gorgeous sliver. The white stuff in the middle is, in fact, tussah silk!  A teeny spindle was included and there below……..TWO RIGID HEDDLES!!

It is like she read my mind. I have been wanting to weave with a rigid heddle on my backstrap loom for a long time. WHY?-when I know all these wonderful intricate pick-up weave techniques? What I wanted to do was show knitters, spinners and other never-ever weavers that backstrap weaving is not only about warp-faced fabrics with pick up patterning. You can also weave balanced weave textiles and produce kitchen towels, scarves, table runners, placemats-all the things that we like to make on our rigid heddle looms. I was also aware that most of the ready-made backstrap kits available come with a rigid heddle- so I really wanted to try it out.

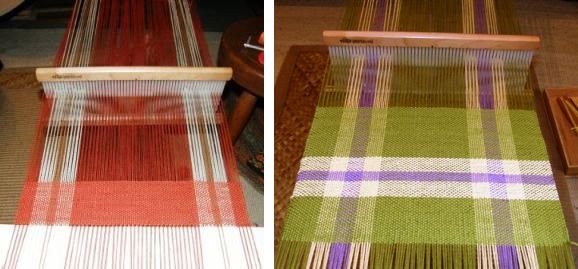
First project-a red table runner in plain weave
Second project-green placemat

Now, I have tried balanced weaves on my backstrap loom without a rigid heddle with success-a log cabin piece, a simple pin wheel and a twill using three heddles but it is really fussy. You have to be constantly watching the warps as they want to stray over into warp faced. You end up unweaving and adjusting as the width varies too. Yes, it is do-able but the word TENACITY springs to mind.

It was a breeze with the rigid heddle. I used 8/2 thread doubled in the 10dpi heddle and made two lovely cloths. I am stupidly excited about being able to make something that feels like ”cloth”!-as opposed to my complementary and supplementary warp-faced weaves which are more on the stiff side.

The two cloths off the loom

Yes, those fringes are a bit unruly but they will be trimmed. I have already found good use for these two projects.

A ''camba''/ ''gaucho'' breakfast

”Camba” is the name for people from Santa Cruz. The green cloth lines my basket of ”cunape”. These cheesy bread rolls are a typical breakfast or tea time snack. The ”gaucho” or, Argentinean, part of this set up is the ”yerba mate” . Yerba mate is a kind of tea typical of Argentina and Uruguay. You put the leaves in the small silver pot, add hot water and sugar and sip it through the wodden straw. There are many different ways to prepare it. I can take it or leave it but some Argentineans are totally addicted to it and go around everywhere with their pot and thermos. The pot is usually shared with a group-passed around with each person taking a sip.

And here is the red cloth in action………….

achahairu with red cloth
achachairu-every good ''camba's'' favorite fruit!

This fruit is in season now, but beware, they are very acid. My teeth ache for days after eating these!

So, if you are thinking of taking up weaving and are interested in trying the portable, inexpensive backstrap loom, you can add a rigid heddle for under $30 to your equipment and make these lovely balanced weave pieces.

Here’s a place that sells rigid heddle segments-just a few inches wide- for under $10 in three sizes-

http://www.villagespinweave.com/IBS/SimpleCat/Product/asp/hierarchy/060A/product-id/373082.html

Now to get back to the highlands, get more spindles and see what other goodies show up in the mail!