Backstrap Weaving – Tinkuy de Tejedores 2010

TINKUY DE TEJEDORES 2010 URUBAMBA, PERU

The Tinkuy de Tejedores 2010 is over and I am back home in Bolivia wondering what hit me! There were four intense days of colors, sounds and new experiences… meeting up with old acquaintances, putting faces to online user names and making new friends while trying to absorb everything around me and learn as much as I could with a head spinning from a combination of altitude and information overload.
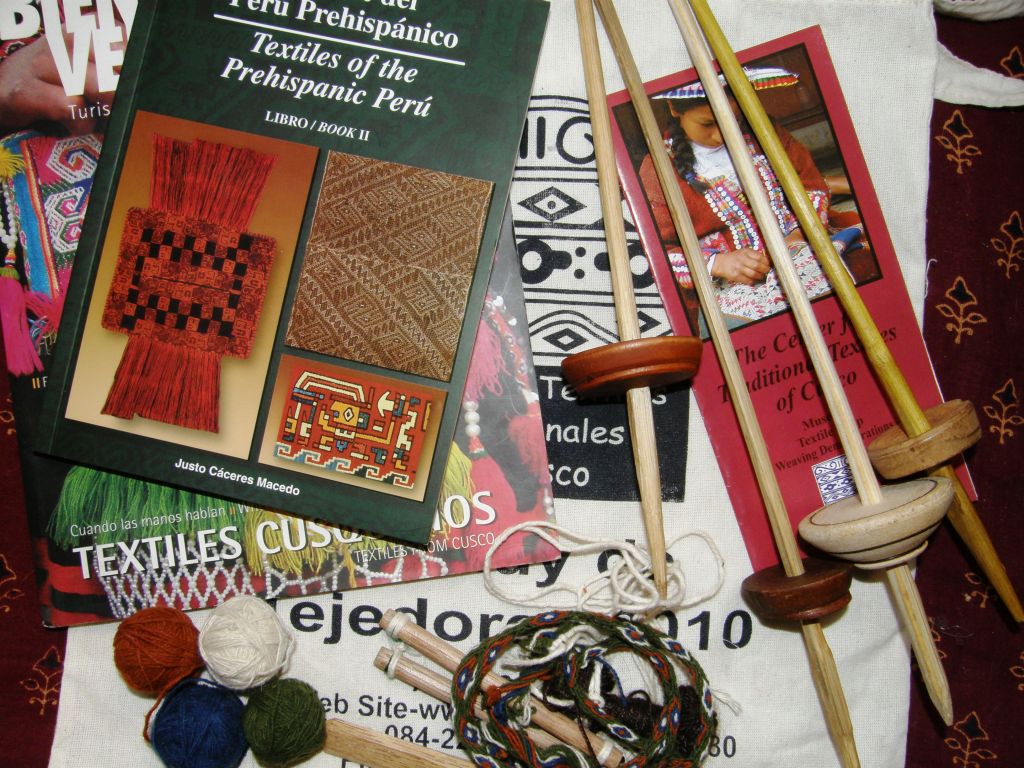
I didn’t bring back much in the way of physical souvenirs…the shoulder bag which was part of our registration package, a couple of spindles that I got in the Cusco market, two more which I swapped for one of my amulet bags with Maxima, a Bolivian weaver from Cochabamba, a locally published book on textiles which I bought at the airport while trying to use my leftover Peruvian Soles and some balls of handspun yarn left over from the workshop I took.

I didn’t buy any textiles but I did come back with a new weaving skill and lots of ideas about making textiles with discontinuous warps. I plan to warp for a very narrow  plain warp faced piece with discontinuous warps in the next few days which I hope to decorate with supplementary wefts as this will be the easiest technique to start with. If that is a success, I will attempt a complementary warp technique. It was great having the opportunity to get a close look at some of the discontinuous warp pieces on the loom being woven by the ladies of Pitumarca. From what I can tell, the grey and brown warps dovetail around a metal rod when the loom is being warped. The pick-up pattern appears to cover the entire length of the grey panel with no terminal area – mind boggling, really! I wish I had spent more time with this weaver. This was the most amazing thing I saw at the tinkuy.

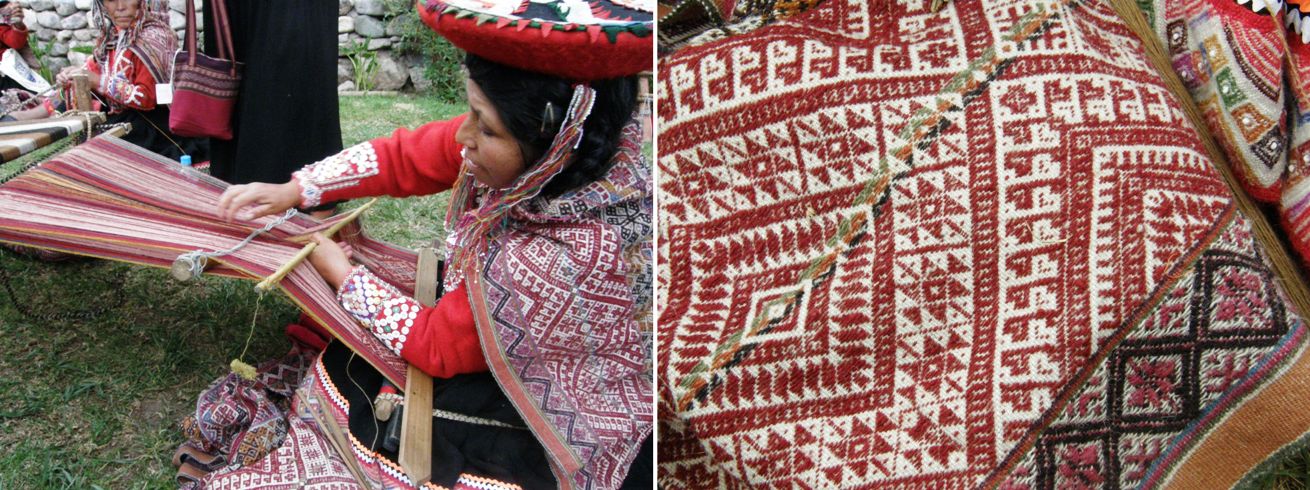
This piece has one of its four color panels complete. Done in all natural wool colors it is going to be spectacular. The unfinished areas are those that have been rolled up on the loom bar nearest the weaver.

It’s interesting that she has woven the grey panel, turned the loom around, and now seems to be working her way back. She has just started the bottom of panel three. Perhaps she will then turn the loom around once again to weave the other end of this panel and then go filling in the space in between. There are so many questions that I forgot to ask this weaver, like, at what point the metal bars around which the discontinuous warps dovetail, are removed and replaced with yarn. Well I shall just have to experiment and see for myself.

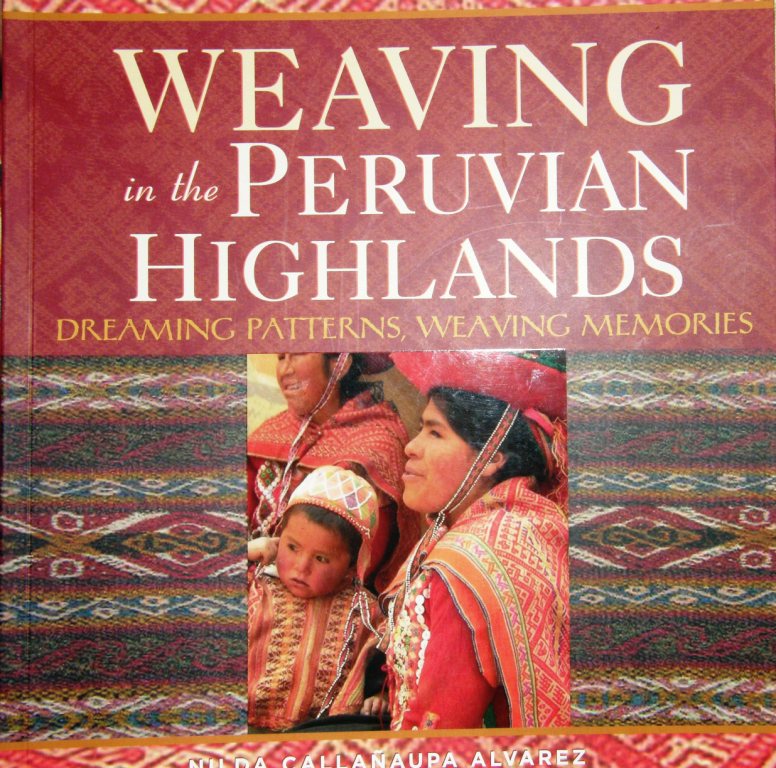
I am constructing a warping board for myself for my piece based on a picture in Nilda Callañaupa’s book pictured above.
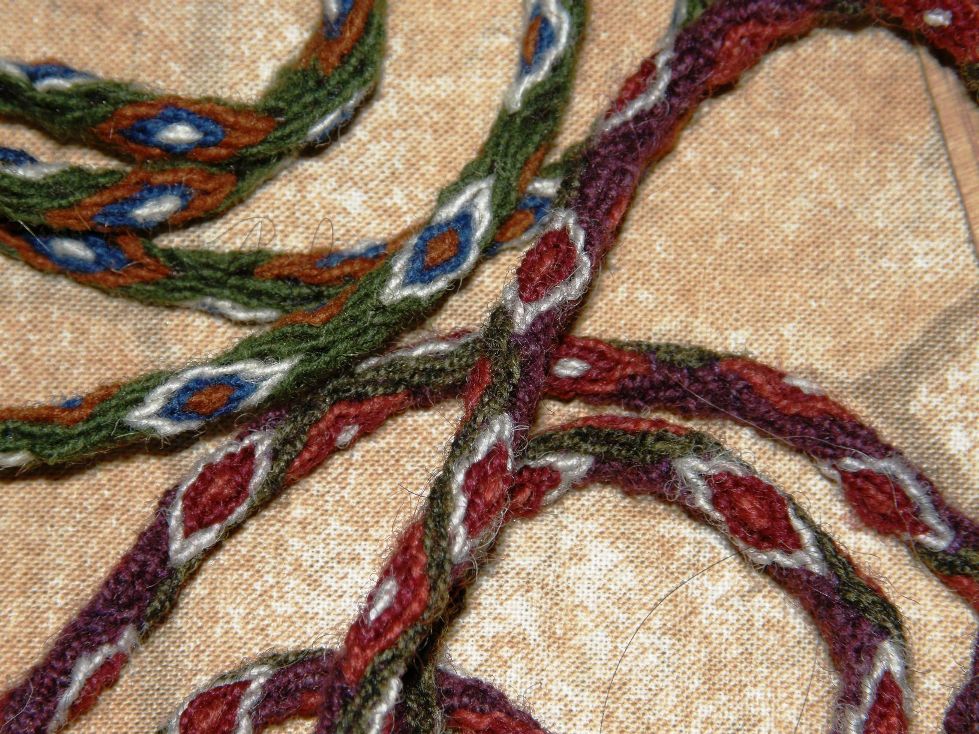
So, as far as weaving skills go, I brought back ideas about the aforementioned discontinuous warp pieces  and I learned the tubular woven bands of Chinchero and Patabamba in the workshop I took. If you have read my last two blog posts  you will know that I recently learned how to make these tubular bands or ñawi awapa from instructions in Adele Cahlander’s book. I strongly suspect that Adele Cahlander figured these bands out by pulling them apart and studying the structure rather than by learning from the weavers themselves and she has been able to give instructions so that one can reproduce them.

EDIT:  I have since been pointed to an article which says that Cahlander based her instructions on a partly woven specimen that had a complex arrangement of string heddles and shed loop so obviously the tubular woven bands were or are woven somewhere using this set up. As I said recently in a previous post…”There is no one “right” way”.

I find it amazing that she was able to analyze the specimen, compile excellent instructions for its reproduction and share all that with those who can’t travel to Peru and learn it themselves from the weavers.

However, the way we were taught in Chinchero by Nilda is SO MUCH easier!!

I took a partly woven band which I had warped up according to the Cahlander instructions with its string heddles to show the weavers and they were quite astonished by this strange set up. The green band above is the one I started in the workshop and finished at home. The red one was a gift for the workshop participants.

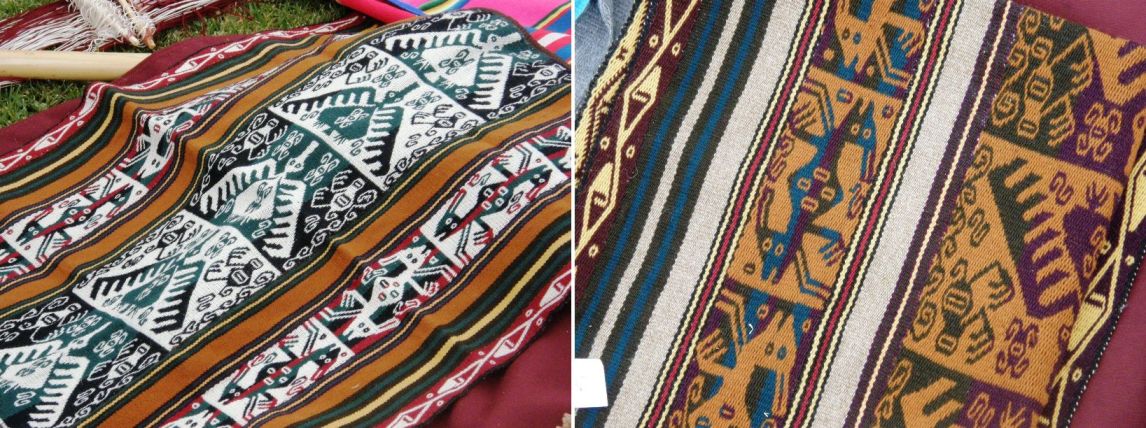
Another thing I took away from the tinkuy for my own weaving was lots of inspiration for color and design as well as a new respect for supplementary warp patterning (a technique of which I have never been a big fan) after having seen the amazing ponchos of the Chahuaytire and Accha Alta communities. A weaver from Accha Alta with her piece profusely patterned with supplementary warp patterns can be seen below. She is rolling the heddle stick towards her while pushing down on the warps behind in order to open the heddle shed.
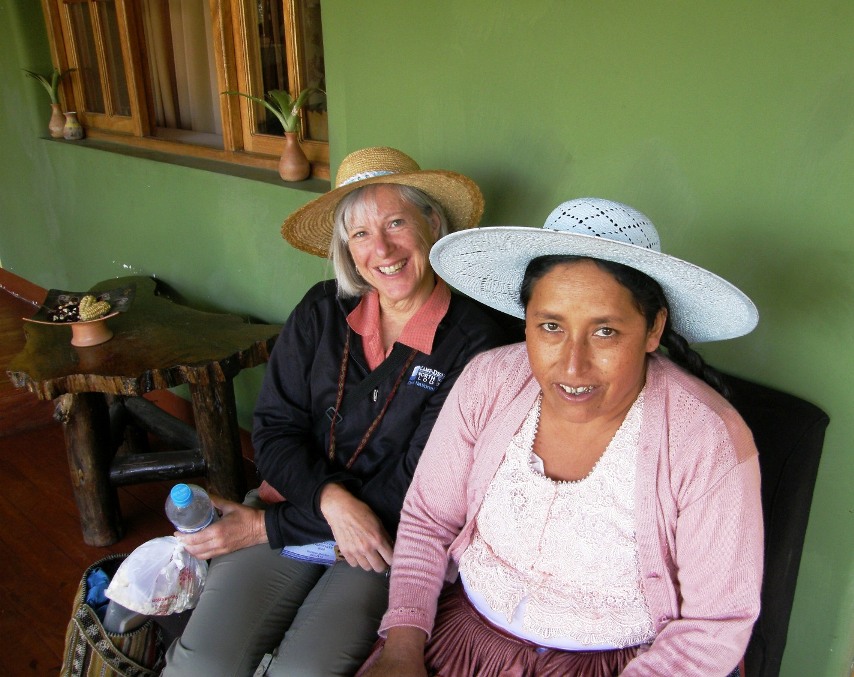
I can’t believe that I am sitting here now at home in the tropical heat of the Bolivian lowlands while just one week ago I was making my way to Urubamaba at 2863 meters in the Peruvian highlands. I would say that of all the trips made by international visitors to the tinkuy mine was probably the shortest…just a one-hour flight from Santa Cruz to La Paz with enough time to stroll around outside the airport and take pictures of impressive Mount Illimani. In La Paz I met up with Dorinda and Maxima who were to be my roommates in Urubamba. I had met Dorinda Dutcher through WARP connections over a year ago and had corresponded with her by email. This was our first face-to-face meeting. Dorinda founded PAZA (Project Artesania Zona Andina) in the town of Independencia, Aypopaya province, an organization which she describes as  “a Peace Corps project which became life’s calling”. She raised funds to be able to bring master weaver and PAZA coordinator Maxima Cortez with her to the tinkuy. The non-profit organization KURMI in Cochabamba also provided funding for a group of weavers to attend so we traveled from La Paz to Urubamba as a group of fourteen.

Witnessing the group’s reactions to all they experienced on this trip and at the tinkuy was another wonderful aspect of this whole journey. Please read Dorinda’s reports on the PAZA  blog to learn more about her goals, challenges as well as volunteer opportunities with PAZA.

These ladies had been traveling literally for days! First, an eight-hour bus trip to Cochabamba followed by an overnight bus trip to La Paz before they could even get on the fifty-minute flight to Cusco. Then came the inevitable mess of paperwork on landing in Peru but no one’s spirit was dampened.

Are we there yet?

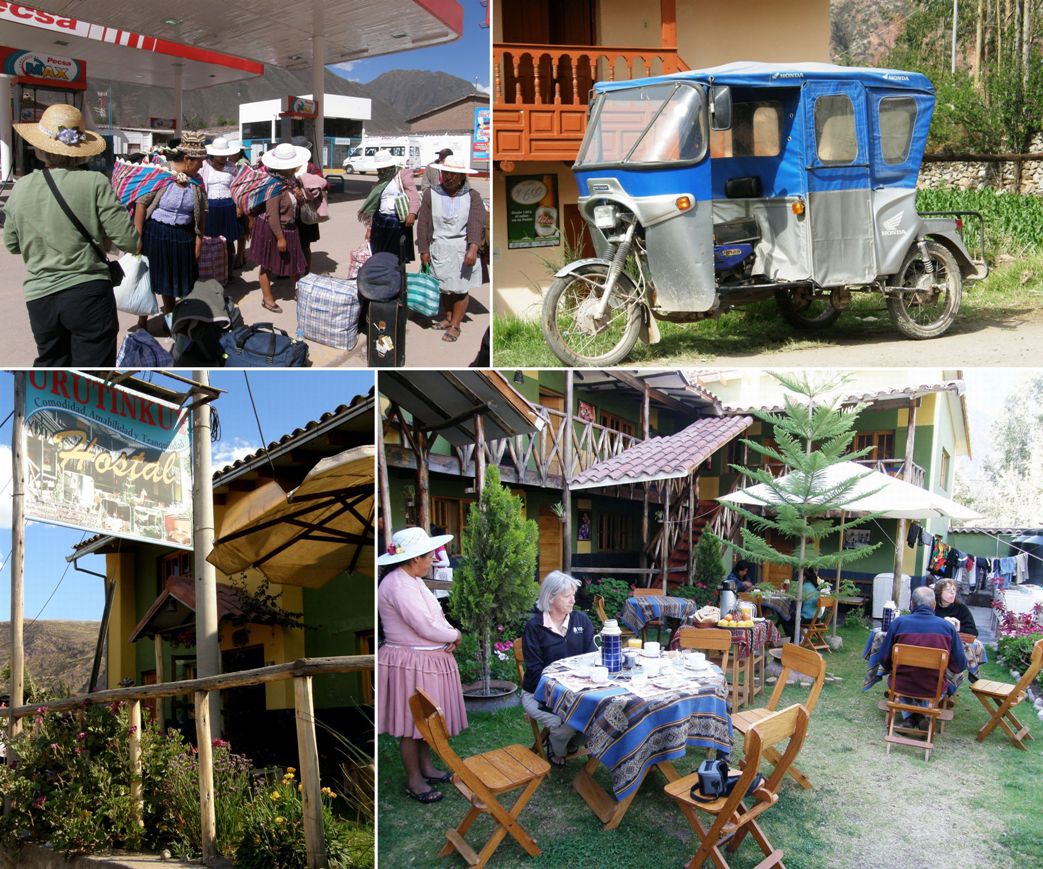
So when we got to Urubamba and made the mistake of getting off the bus too early, the ladies just took it in their stride, wrapped their luggage in their carrying cloths, hauled them onto their backs and took off up the road while I struggled along with bags in hand and dangling off my shoulder. Below you can see us lost at the gas station at the wrong end of town.

A hot, dusty and wind-tousled group finally arrived at the Hostal Urutinkuy that afternoon.

At the hostal I met lovely D.Y Begay, a Navajo weaver who had been invited to present at the conference. D.Y and I had been corresponding by email for some months and it was great to finally meet her. She was slated to be the first presenter of the conference and was a little inconvenienced by the fact that her luggage had not shown up.

The tinkuy comprised two days of conference with an incredibly heavy schedule of talks and presentations with breaks for drinks and snacks and weaving demonstrations. Lunch was followed by more weaving demonstrations and opportunities to buy textiles. If you were wise enough to arrive early in the morning you had the chance to mingle in a bit more leisurely way with the local weavers and spinners and avoid a bit of the chaos.
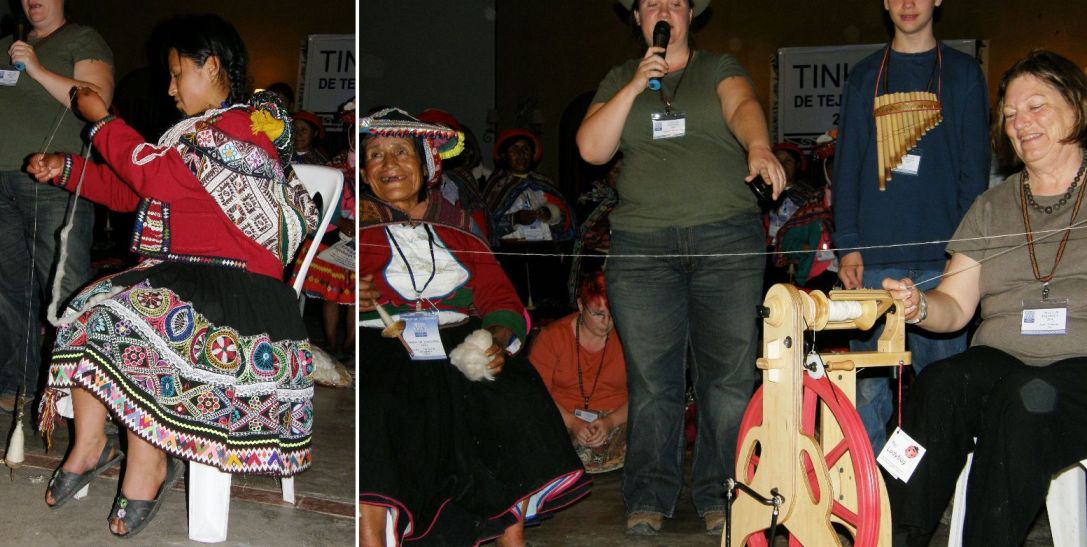
We gathered in the evenings in the conference auditorium for dancing, music, singing, spinning competitions, which were narrated  by Abby Franquemont, and lots of laughter. Beth’s (of The Spinning Loft)  young daughter competed on her wheel with a local spinner on a  drop spindle as did Judith MacKenzie. I honestly don’t remember who won but I do remember that the Bolivian ladies from Cochabamba really strutted their stuff in speed spinning the following night and my roommate Maxima took home a prize having spun over six meters in two minutes.

I am just going to show you here now a selection of captioned photos which, I hope, will give you a feel for what went on in those two days and just how much we managed to pack in!

It all started with a ceremonial offering to Pachamama performed by an Andean priest accompanied by the sounds of the pututus, (conch shells), which were also blown to announce the start and finish of each guest speaker’s presentation. Everything was translated into three languages – Quechua, Spanish and English and the Quechua translator with his strong, clear dramatic tone of voice was a joy to hear.
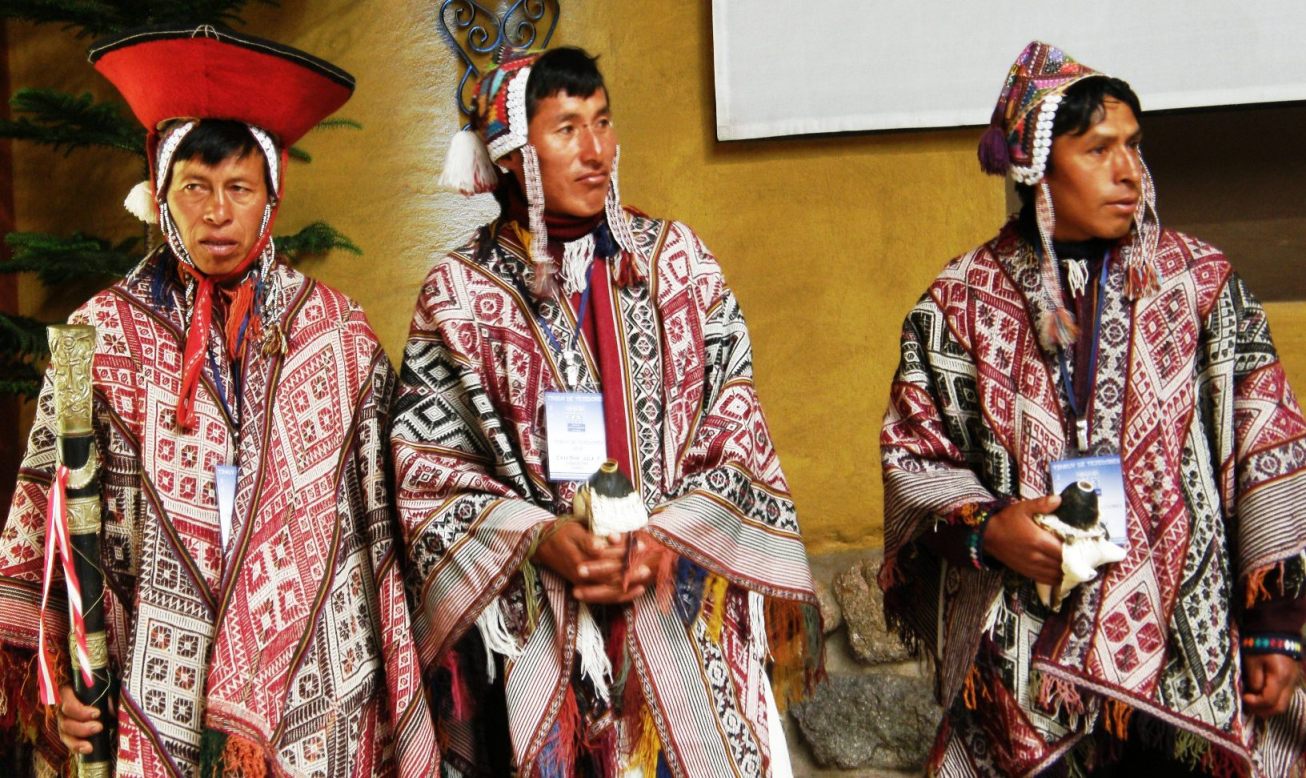
High-ranking community members with conch shells in hand took part in the opening ceremony.
Just a few of the foreign invited guest speakers: Luisa Govea of San Luis Potosi, Mexico, weaver of fine silk ikat shawls using designs from the 17th, 18th and 19th centuries. Ann Pollard Rowe - I met her in 2007 at the Textile Museum in Washington, a meeting which led me to a wonderful weaving and spinning adventure in coastal Ecuador and it was lovely to have the opportunity to see her again. She gave a presentation entitled "Looms of the Americas". D.Y Begay who spoke on the traditions and practices of Navajo weaving. Judith MacKenzie's talk was entitled "Fibers of the Americas". Luz Maria Andrango of Otavalo, Ecuador demonstrated the Great Wheel and brought textiles to show from the workshop of her famous father, Miguel Andrango.

There were at least two dozen national and international presenters over the two days. I was especially pleased to have been able to meet Mary Frame who spoke about Inca geometric figures called tukapu. I am determined to learn three color double weave so I can use some of those designs in my pieces.

In the talks we were taken on journeys from Mexico and Guatemala to Bolivia and around Peru from pre Incan and pre Hispanic times to present and taught about techniques from weaving and dyeing to administration and marketing.

Maiwa Productions showed us a wonderful video on indigo dyeing in India.

Some of the presentations I most enjoyed were those by the weavers in the communities that are involved in the Centro de Textiles Tradicionales de Cusco (CTTC). They spoke of their lives before and after their experience with CTTC, their struggles, successes, accomplishments, frustrations and failures while trying to revive their lost weaving traditions. The talk I enjoyed most of all was that given by a group of weavers who described the impact of weaving competitions on their motivation to continue weaving and improving, their self esteem and ability to solve problems and work as a team.

We witnessed the winning weavings and the prize-giving ceremony for the 2010 weaving competition.
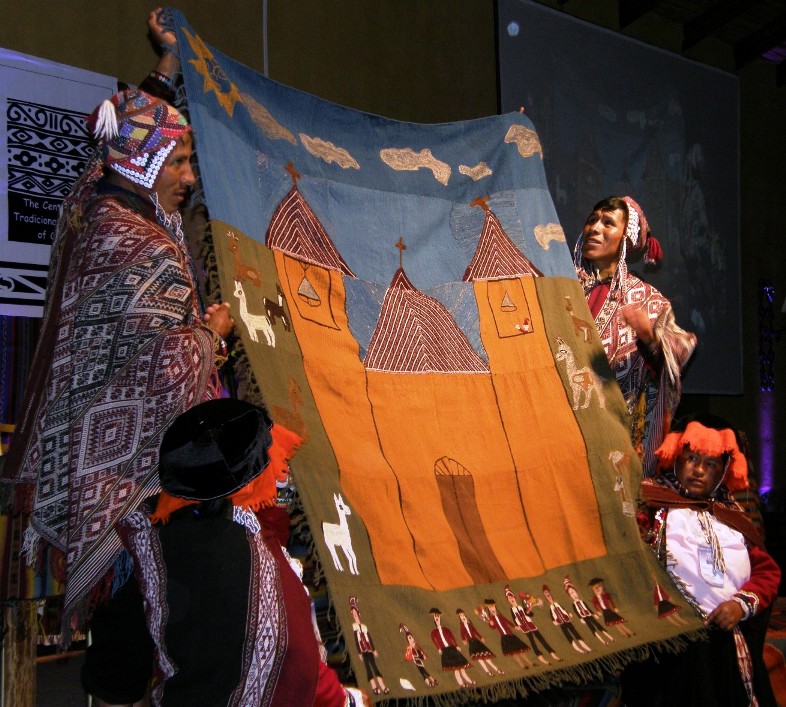
 

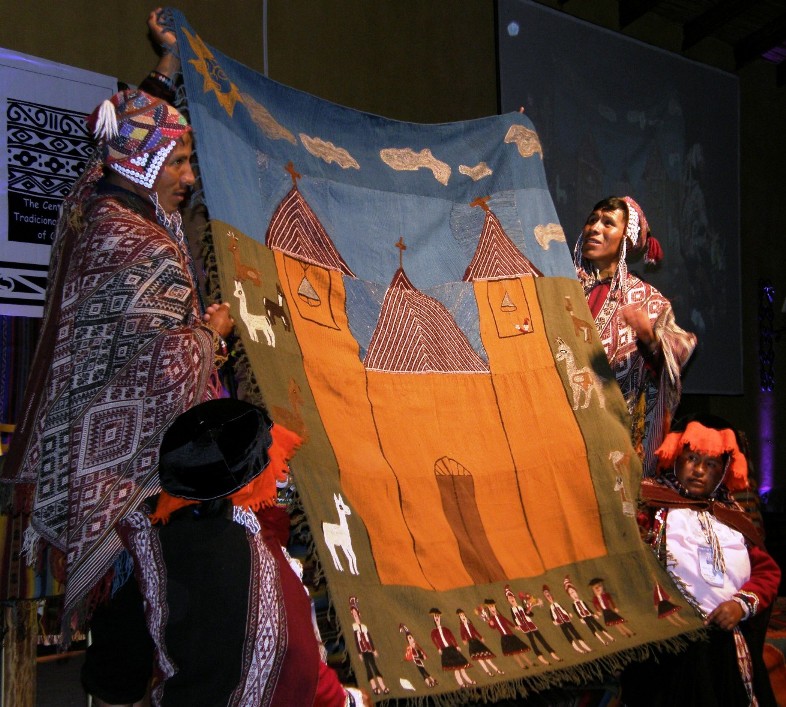
This is the winning piece by the weavers of Chahauytire community and is entitled "matrimonio". I have to admit that this had me scratching my head at first wondering about something so relatively plain from weavers renowned for their intricate pick up patterns until I realized that this piece is made up of thirty-six individual squares of thirty by thirty centimeters, each woven by a different weaver. Imagine!! I can't even begin to imagine how difficult it would be to create a four-selvedge piece that came out exactly thirty cm long. And thirty-six weavers had to turn out pieces with the same level of exactitude so that they could be pieced together with no puckering or stretching...AMAZING!! How difficult it must have been to match the diagonal lines on the two panels that form the church roof!!

Two other prize-winning pieces are shown below. All pieces had to meet the same requirements and have their thirty six panels of thirty centimeter squares. Every weaver has their own tension which means that no standard warp length can guarantee a thirty-centimeter finished length. The weavers who gave the presentation about the competitions let us in on some of the difficulties and disappointments they had to deal with in these projects and the problems they faced and overcame working as a groups rather than as individual weavers.

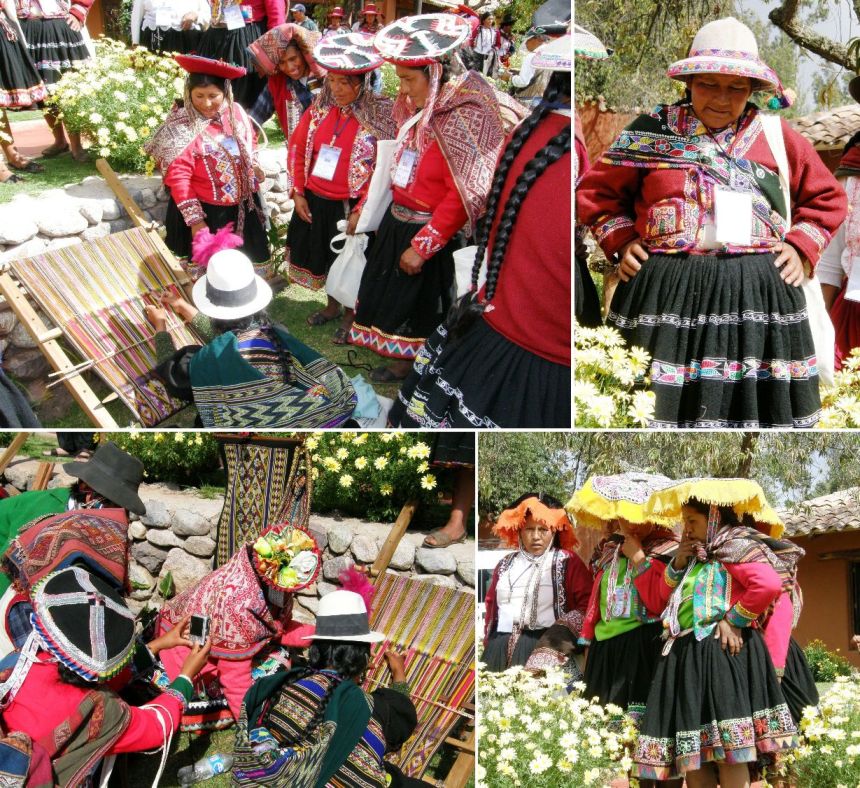
The following pictures were taken during the coffee and lunch break demonstrations and first thing in the morning when the weavers would be arriving early from their communities.
There was plenty to fascinate everyone...not only the foreign visitors but also the local Peruvian weavers. During this lunch break many couldn't take their eyes off the loom and weaving of a Bolivian weaver from Tinkipaya, near Macha, in Potosi, Bolivia. They stood and watched her from every possible vantage point and some were just as camera happy as we were.
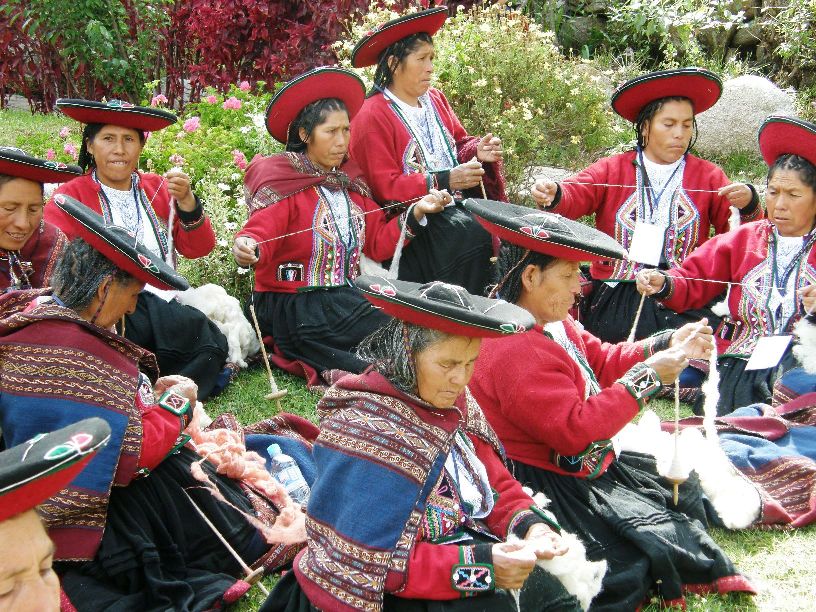
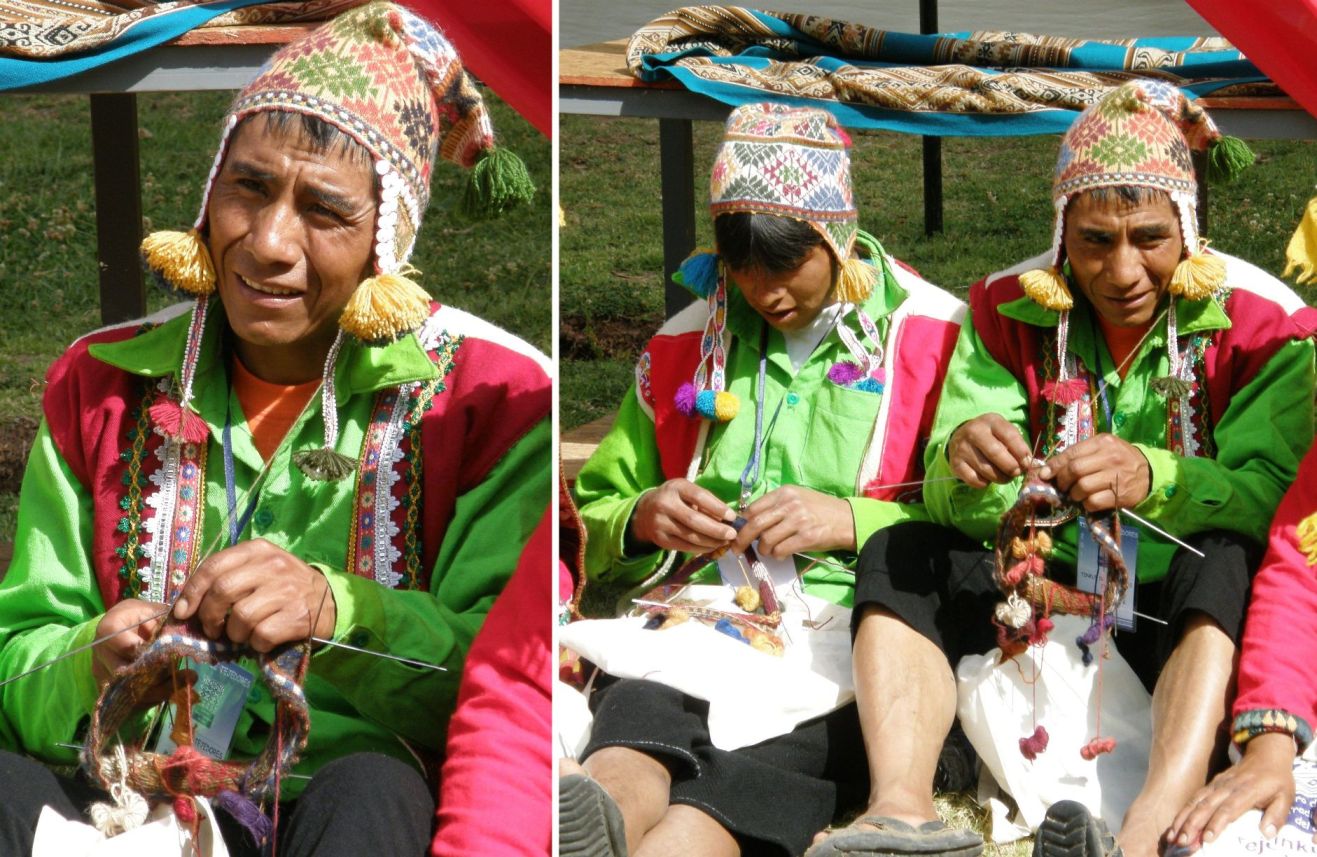
The weavers, spinners and knitters would arrive by bus early in the morning, some coming from communities as far as five hours distance from Urubamba (and some maybe even further). Time was easily passed by sitting in groups spinning, knitting and chatting.
Knitters from Sallac community pass the time before the start of the conference.

There were many kinds of looms and weaving techniques to be seen….

A Guatemalan weaver from Santiago Atitlan on the left makes designs with supplementary wefts and a Bolivian weaver from AAA, la Asociacion de Artesanos Andinos from Cochabamba, Bolivia props her loom against a low wall to weave complementary warp pick up patterns.
A group of weavers who work with ASUR in Sucre came including this Jalq'a woman from Potolo. At right is a weaver from Accha Alta weaving a supplementary warp technique.
Tapestry techniques from South and North America. I am sorry that I didn't find out which community this gentleman is from but it was wonderful seeing him weaving tapestry on a backstrap loom. At right, D.Y Begay demonstrates Navajo weaving on her vertical loom.
Weavers from Accha Alta on the left and Santo Tomas on the right. While the weaver from Accha Alta uses a stick to pick up his warps I noticed that quite a few weavers pick up the threads with their hands as I prefer doing.
I have just updated this post to add this photo not originally included as I did not know from which communities these two weavers are from. Now I see in a magazine that I picked up in a street book fair in Cusco that the lady on the left is most likely from Ccachin. I don't know about the weaver on the right. The colors in their outfits are so intense!
Luz Maria Andrango of Otavalo, Ecuador created a lot of interest with her demonstration of spinning on a Great Wheel (walking wheel?).
Ten year-old Juan Miguel of Acopia community started weaving in August and is doing pebble weave here while his grandma watches. The wee girl on the right is even younger I think and is weaving a tapestry on a floor loom where her little legs can barely reach the peddles.
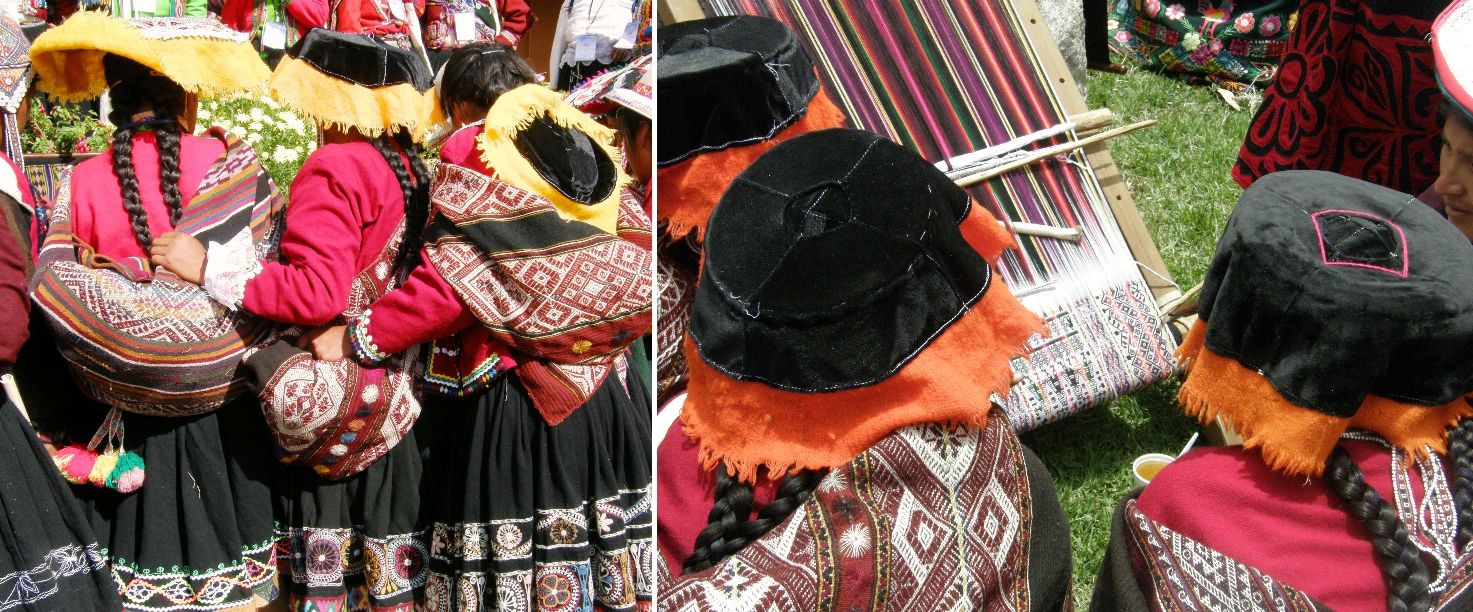
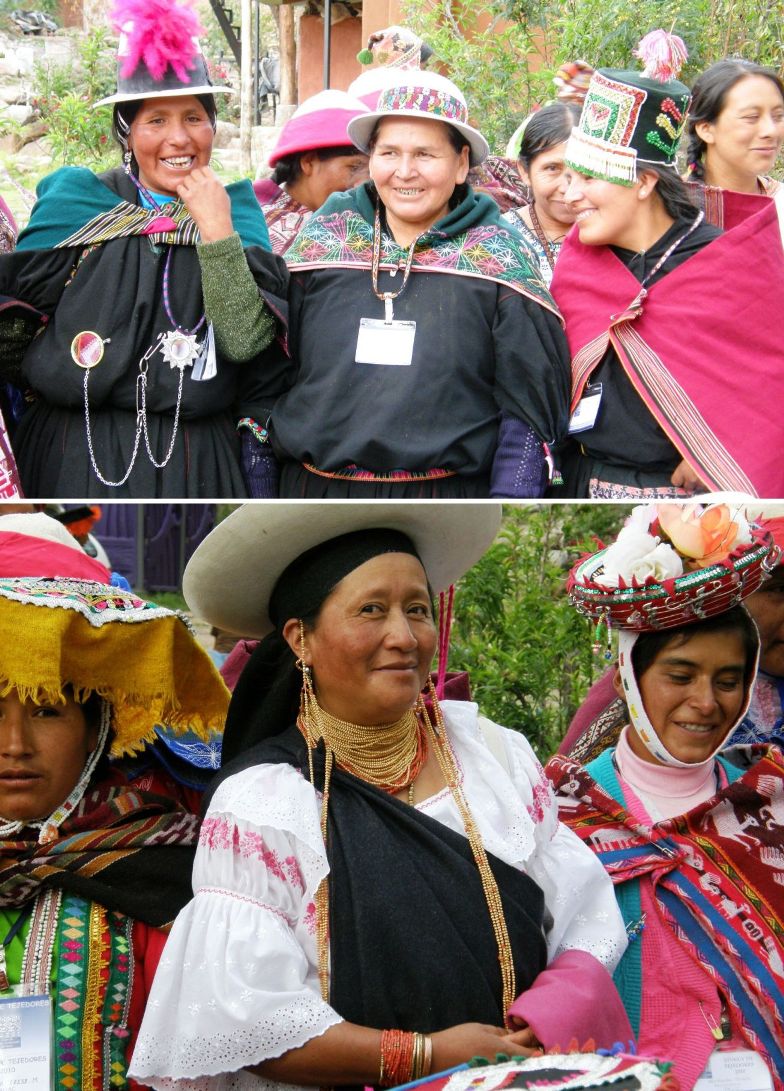
Watching the watchers...while the weavers gathered around to watch the demonstrations, I stood back and admired their gorgeous outfits. On the left is a group of ladies from Sallac community and on the right from Chahuaytire.
Bolivian textiles...a jalq'a weaving with its strange khurus, double weave belts in handspun and naturally dyed yarns made by the weavers of PAZA, Cochabamba, a weaver from Tarabuco adds a woven edging to a finished weaving, a bag made with the typical zig zag and "eye" motif of Tinkipaya and Macha in the Potosi area.
Rosa Choque, an Aymara weaver, gave a presentation at the conference on projects in which she is involved which aim to preserve the textile traditions of Moquegua, Peru. I think that these are some of the textiles which she brought but I could be mistaken. I would love it of someone would confirm this for me.

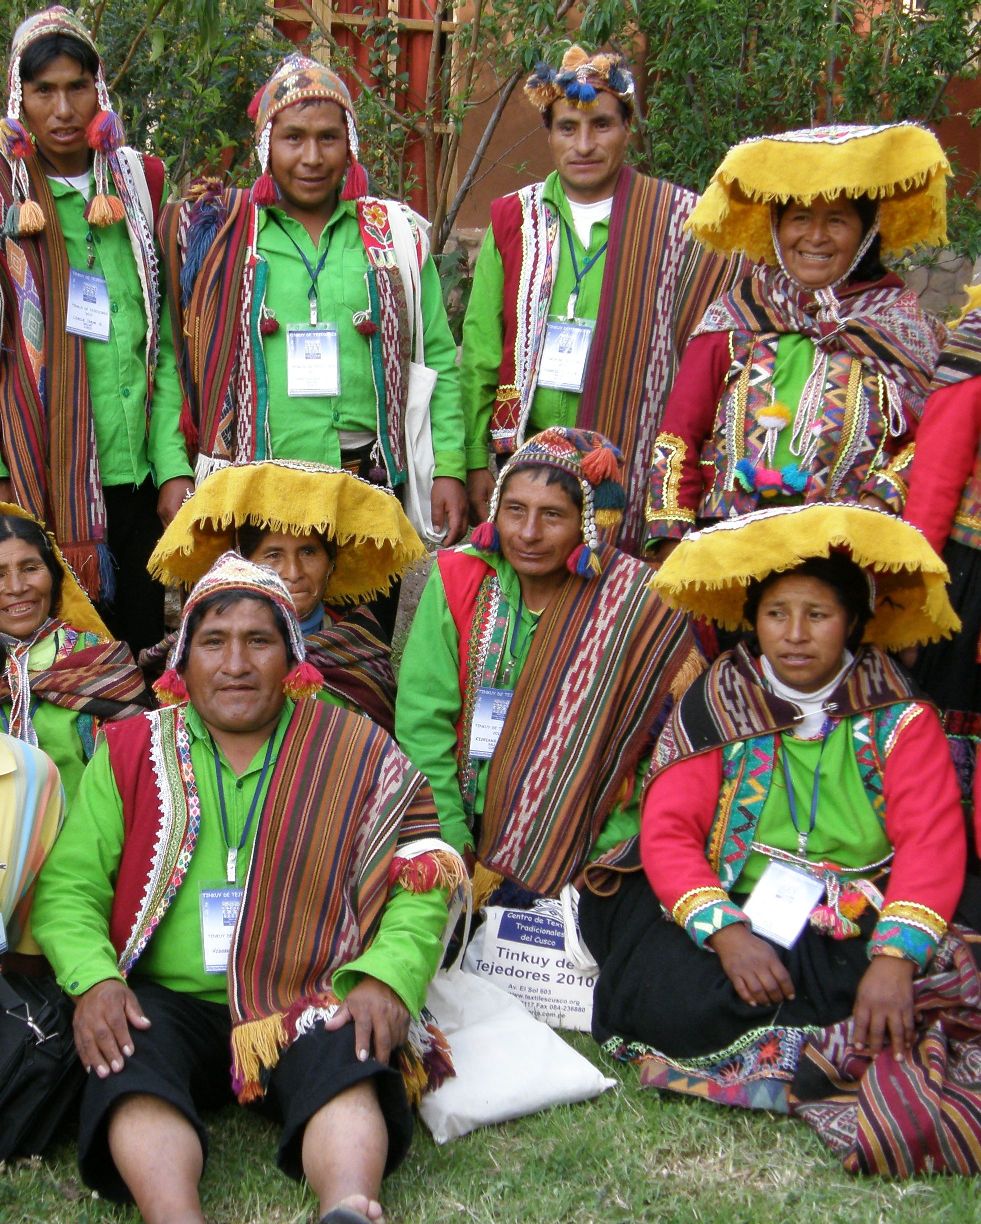
On both days during the afternoon break, the local weavers gathered in groups which gave us all plenty of nice photo opportunities as well as a good chance to learn the names of the different communities and, therefore, be better able to recognize their members by their outfits.

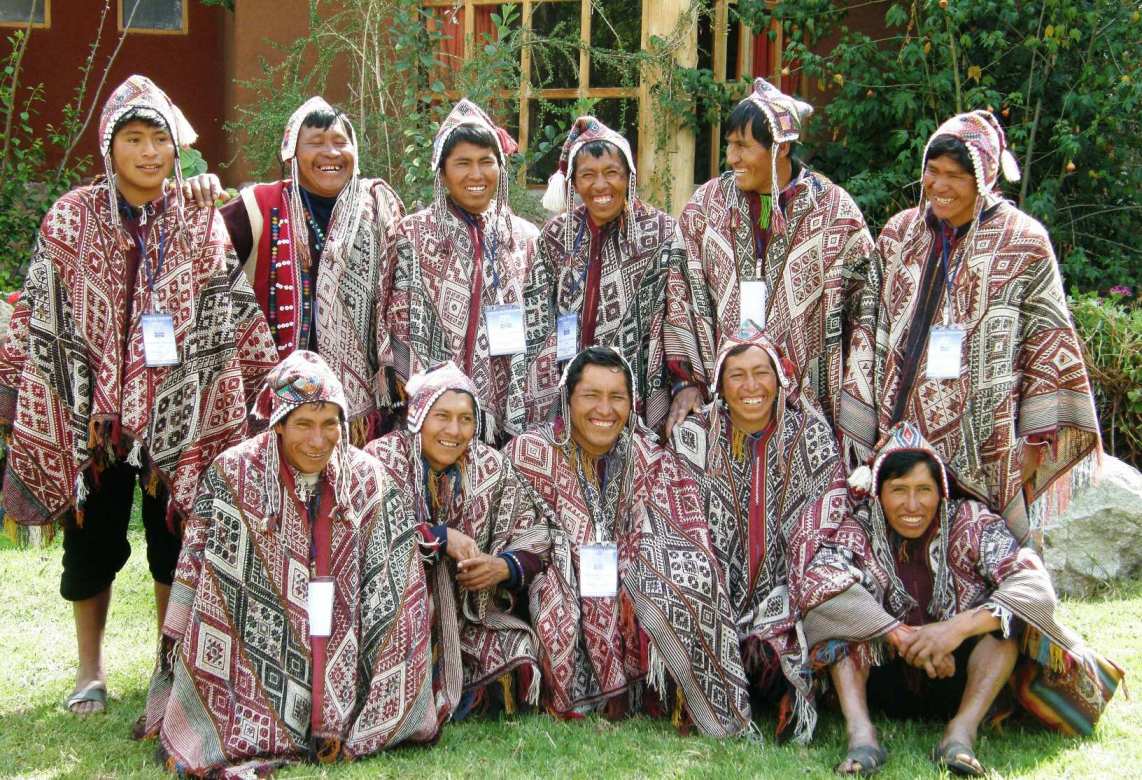
Men from Chahuaytire.
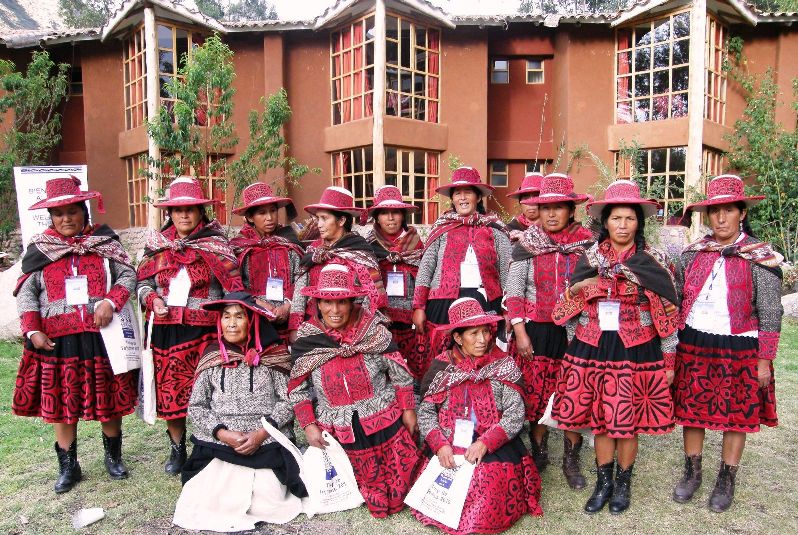
Women from Santo Tomas - we all loved their boots.
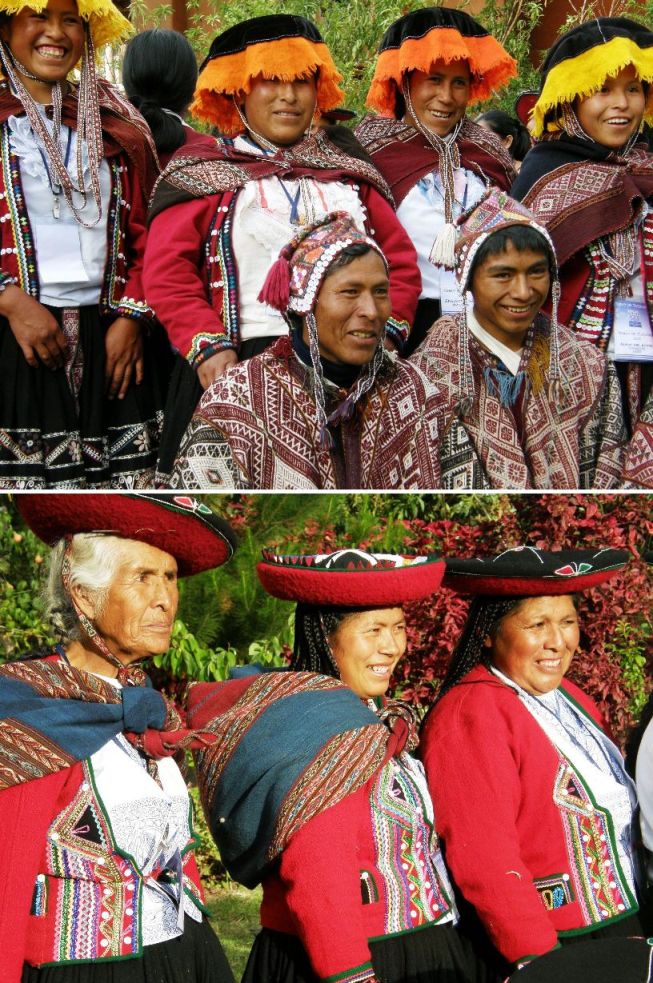
A group from Chahuaytire above and from Chinchero below. I believe, but I could be mistaken, that the distinguished lady on the left is Nilda's mother, Doña Guadalupe.
Three weavers from Bolivia above. Luz Maria Andrango of Ecuador below with two Peruvian ladies.

Artisans of Sallac. Their ponchos include panels of patterns created with resist dyeing techniques.

A young weaver-to-be and a little fellow with his pututu

Well that was a “taste” of the daytime activities. The nightime dancing and spinning competitions were a little harder to capture on film with the dim lighting but I did get some video. All the video I shot of weaving, spinning, braiding and dancing will be on next week’s blog.

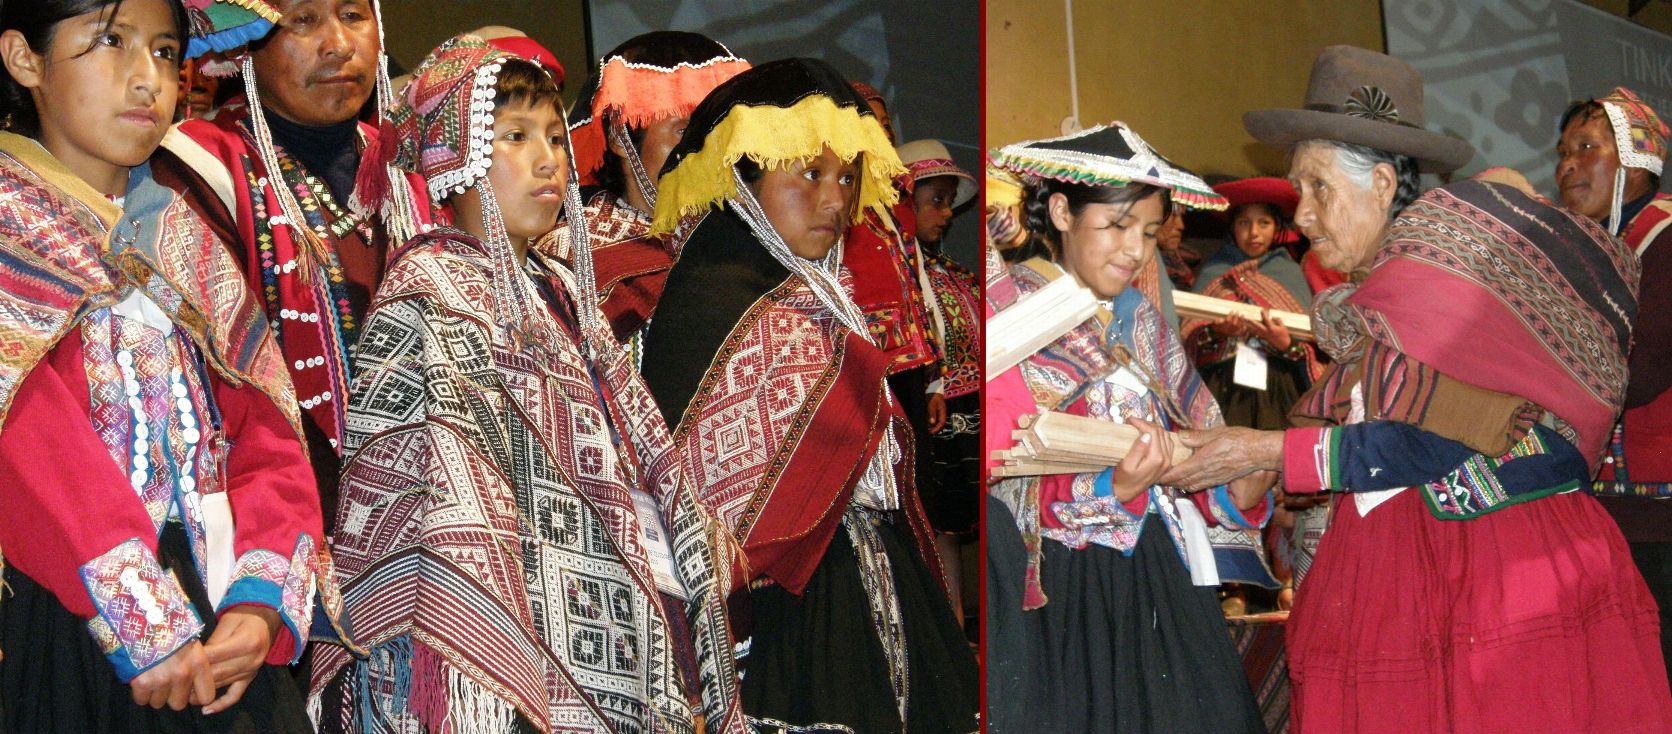
The conference closed with a very emotional ceremony which served to honor all the elders of the various communities who were given certificates and medals of recognition as well as gifts.

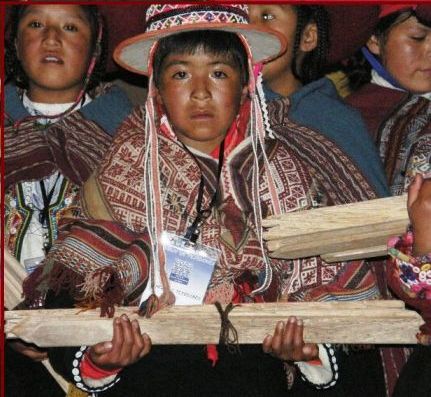
This was preceded by another ceremony in which the elders were invited to hand over sets of weaving tools to the youngsters in their communities.

Youngsters lined up waiting to receive their weaving tools. An elderly weaver passes a set of new weaving tools to a young girl in her community. The young girl's smile says it all.

So that was the two days of conference. Then came the workshops which I am saving for next week’s blog post along with the videos. And next week I will tell you about the other folks I met up with, some of whom I have been corresponding with by email or through my blog and others whom I met at Convergence. Betty Davenport, who is always lots of fun, was my companion in the little “down” time we had and we took the same workshop. Folks from Interweave were there too. The workshop days were more intimate and gave a lot of us a chance to chat and catch up. More about that next week.

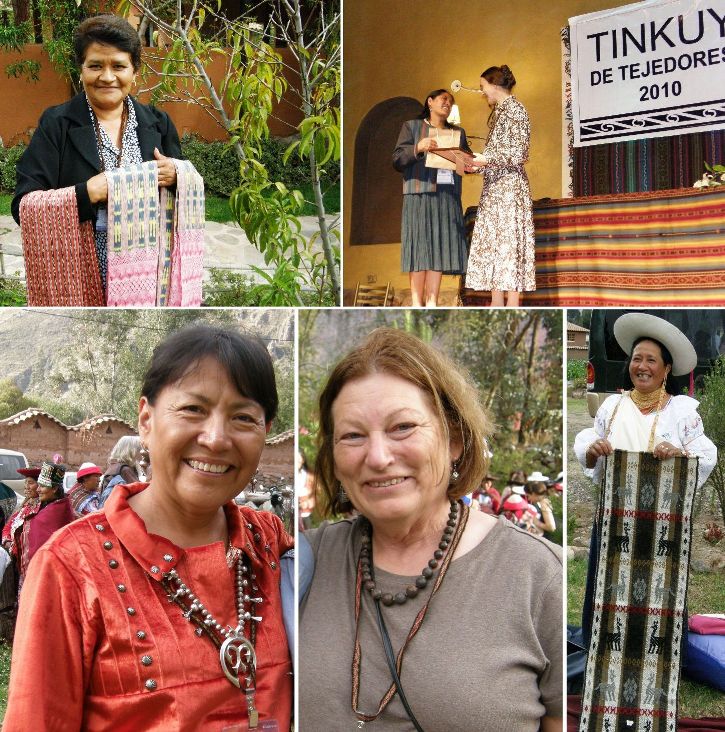
And here is the amazing woman with the brilliant smile who is behind this unique event. It was not an ideal situation to meet Nilda for the first time. She was so busy and I don’t believe she stood still for a moment. Yet I learned a lot by watching her in action and seeing the warm affection she has for those who are lucky to be her friends, her passion for the CTTC and its goals and her love for her country and her people. Hopefully I will be able to go back one day to meet her again.

Part Two of my Tinkuy Tale can be seen here

#########################################

One last message…

My Backstrap Basics article is now on the WeaveZine site in Spanish. The videos remain in English but are, hopefully, self explanatory.

Mi articulo “Backstrap Basics” (El Telar de Cintura) ya se puede leer en español en la pagina de WeaveZine. El audio de los videos sigue en ingles pero las imagenes son suficientes para entender.


Backstrap Weaving-A Bolivian winter of flowers and sunshine and a Guatemalan tree (Part 2)

While people in my online weaving groups are posting pictures of lilies, poppies and butterflies in celebration of the northern summer, here in the southern hemisphere winter is in full swing. The Bolivian President Evo Morales suddenly declared June 21st, the winter solstice, Aymara Day and a national holiday.  Bolivia is now known as Estado Plurinacional de Bolivia rather than La Republica in recognition of the various indigenous groups which it comprises and this has me wondering if we will be having Guarani and Quechua Days as national holidays too.


However, it is hard to believe that we are in the middle of winter here in Santa Cruz, Bolivia where I sit at my laptop in tshirt and shorts wondering whether I should turn on the air conditioner as the suns comes around the building and throws golden rays through my bedroom window.
The highlands are experiencing their dry season and it is COLD. I spent most of one July and August up in Potosi at 4000 meters in a shabby room in a backpacker hostel – bare cement floor, pinned down in my bed under kilos of thick hand woven blankets and still cold! I remember trying to squeeze myself into the thinnest possible package in order to fit under the tiny trickle of hot water that came out of the electric shower head. The lowest possible water pressure was the only way to get  hot water. Washing clothes in the cold water brought tears to my eyes!
At left you see dry, dusty and sparsely vegetated Potosi with its landmark mountain Cerro Rico whose silver deposits sustained the Spanish economy for centuries.

LEFT: Miners keep effigies of the devil, whom they call El Tio, in various places within the mines as they believe that he is the owner of the minerals and needs to be appeased with offerings of cigarettes, coca and alcohol. RIGHT: You can beat the winter chills with a soak in the thermal waters of the volcanic crater lake at Tarapaya. I must confess that this photo was taken on a second visit to Potosi in January when it wasn’t so cold. Rumors that there are whirlpools in the center of the lake which suck people in keep most visitors in the cement pools in the valley below. I kept close to the edge of the lake at all times!
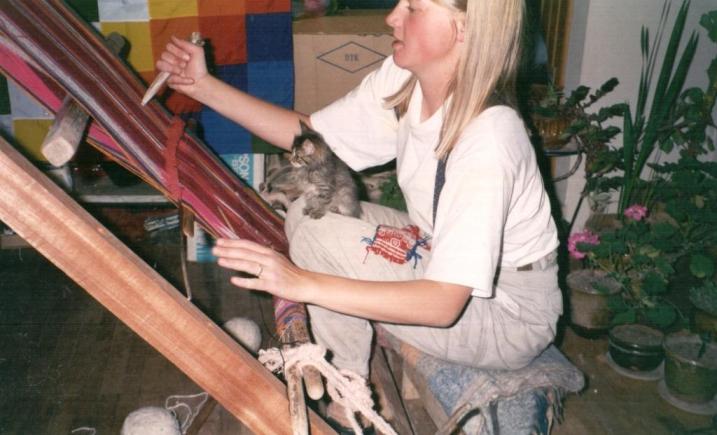
On my first visit to Potosi in 1997, I met Ulla, a Danish girl who was staying on in Potosi after having spent a year there as an exchange student. We learned to weave together with sisters Julia and Hilda. As Ulla didn’t have a patio, she set up an oblique loom in her warm little apartment and was able to weave comfortably there. It certainly beat having to bend over the grond loom. On her lap, apart from the kitten, you can see the “saca” or little woven sample that the weavers use to help them remember how to weave the designs.
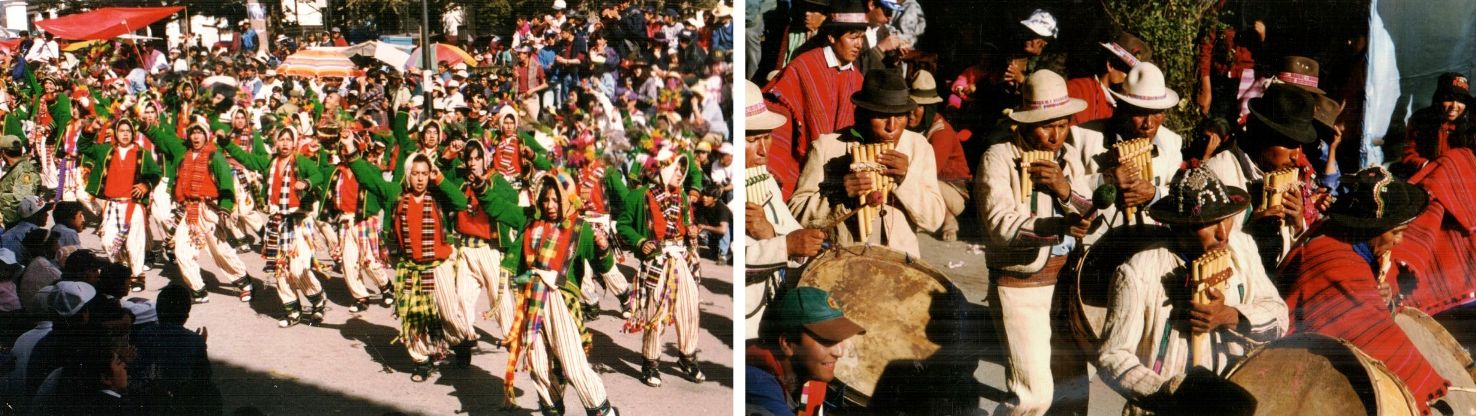
I was fortunate to be in Potosi on August 31st for the Chu’tillos festival which celebrates San Bartolome. Dancers in typical costume from all over the province of Potosi parade in the street on the first day followed by dancers from all over Bolivia on the second. The best part is actually the weeks leading up to the festival as the groups rehearse late at night in the empty streets and laugh and chatter and have a lot of fun while doing so.

Bolivia extends from the dry, dusty highlands to the lush green lowlands known as the “oriente”, where I live. They are like two totally different countries in so many ways. In recognition of that, Bolivia has not one but two national flowers,  the patuju from the oriente (below left) and the kantuta from the highlands (right).

Both contain the colors red, yellow and green, the colors of the Bolivian flag. Santa Cruz abounds in flowers, trees and greenery at all times of year. It just never really feels like winter. Electric cables disappear within mazes of tree branches and it sometimes feels like the city is on the verge of being swallowed by the jungle that lurks on its outskirts.

The “tajibo” and “torobochi” trees that line the streets.
The pattern barely shows on the back of supplementary weft patterned pieces

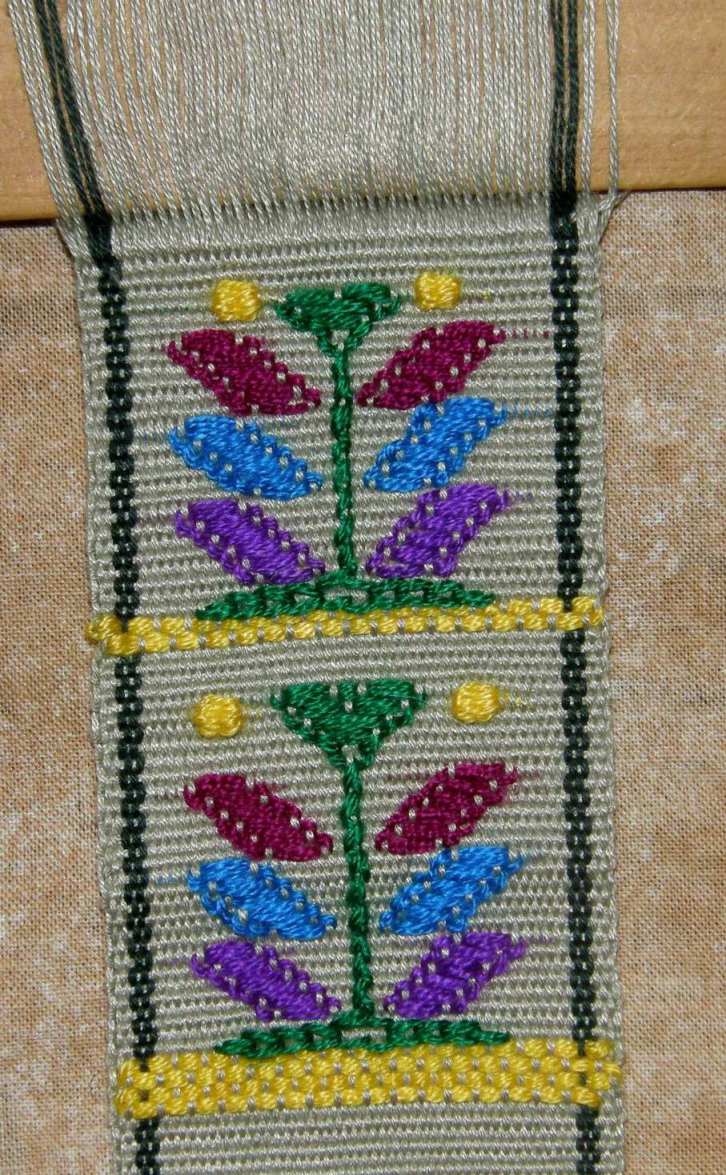
So with all this in mind I have been weaving some sunny tree and flower designs in the single face supplementary weft patterning  technique that I learned in Guatemala in Santa Catarina Palopo.

This is a fun technique with little or no counting involved which allows you to play freely with shapes and colors.

The resulting weaving looks like a piece of embroidered cloth except that the “stitches” only appear on one side of the fabric.

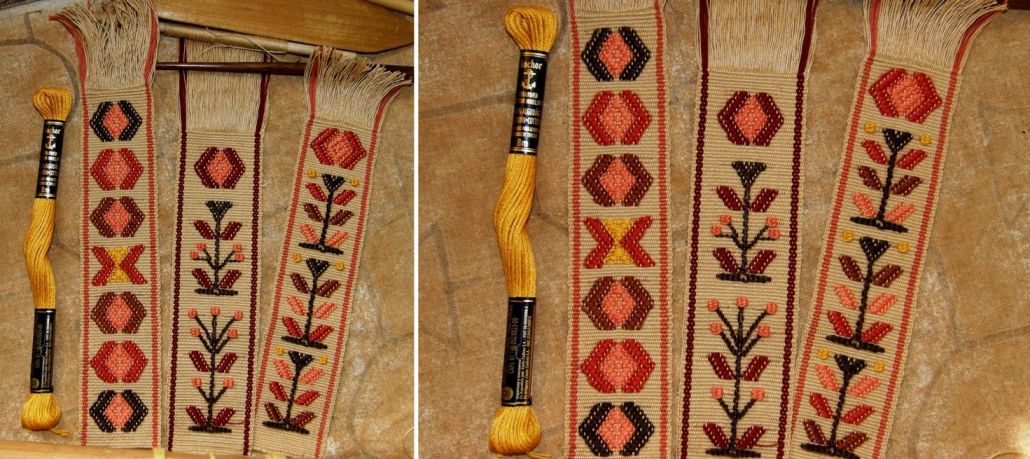
Bookmarks made with Guatemalan tree and sun motifs

Last week when I started the tutorial on this technique, I was using acrylic threads that I had brought back from Guatemala to create bright mutlicolored trees on a green background, pictured at left.

I decided to buy some embroidery floss to work with and it took some time to get just the right thickness to go with my chosen ground weave warp. The ground weave is a 50 wpi cotton and I used 4 strands of embroidery floss to do the patterning.

The 50 wpi warp produces a wonderfully thin cloth just right for bookmarks although the pattern wefts do add some bulk.

So, let’s continue with the tutorial.

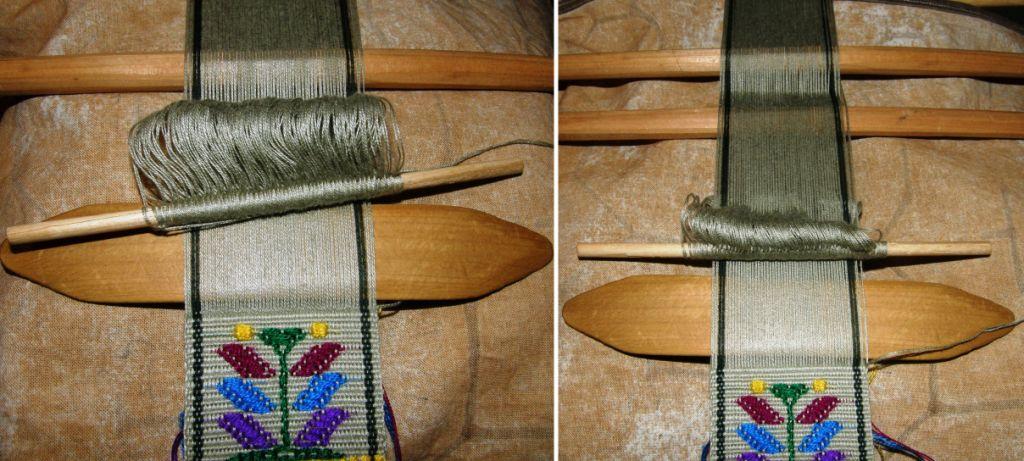
I have done a recap of what I showed you in Part 1 of the tutorial last week on a video. I have used  thick cotton and only a few warps to demonstrate the picking of the warps for the two patterning sheds, the placement of the patterning sticks in the loom, the technique for opening the patterning sheds and the weaving sequence. I don’t recommend using such thick yarn for your own supplementary weft project!

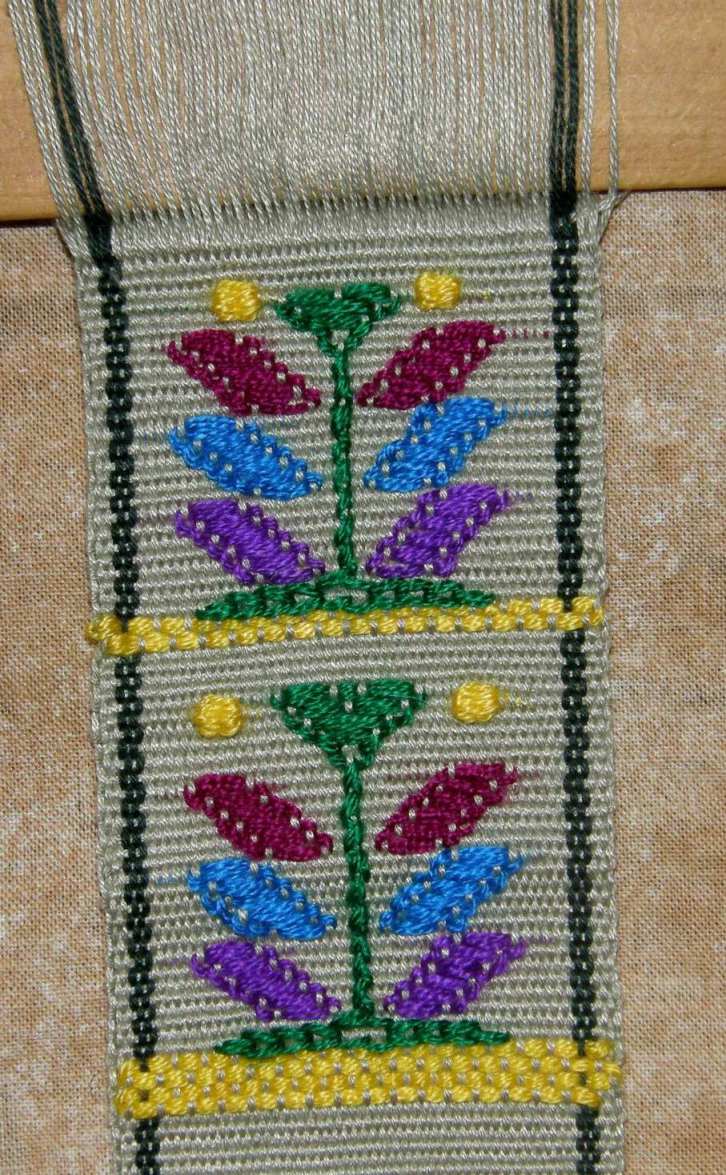
All the colored wefts that form the patterns pass under or wrap around the warps in the two patterning sheds. This green piece has 86 ends between the dark green border stripes.

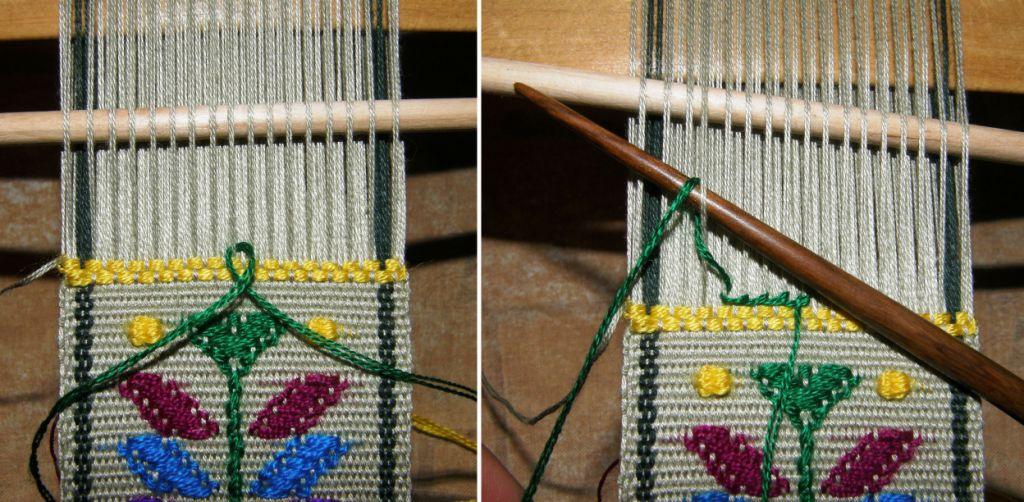
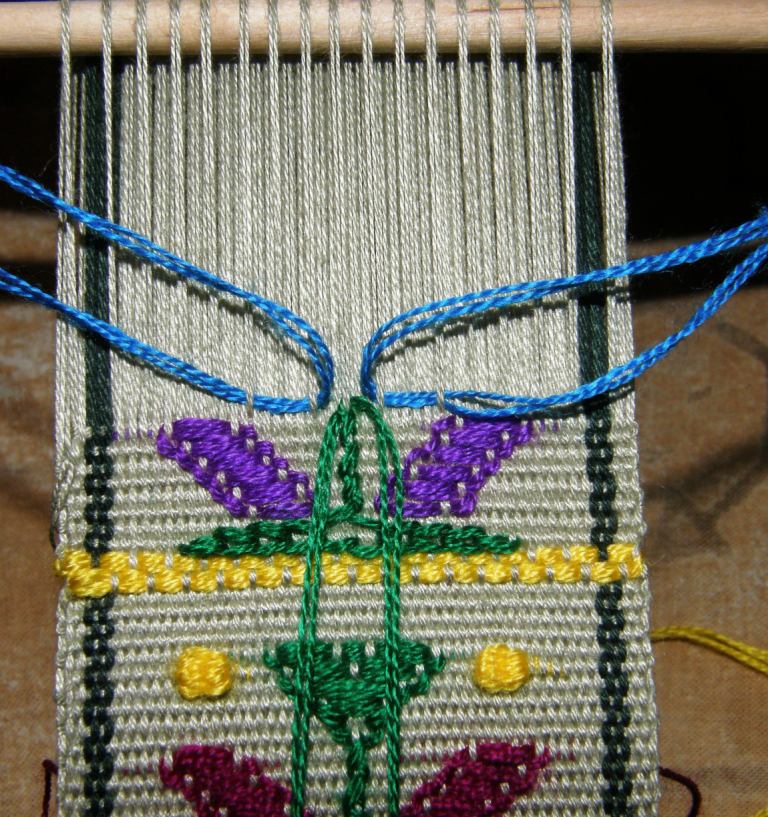
The base of the little Guatemalan tree is a double horizontal line. STEP ONE: To form this, place a strand of around 40cm/16″ of supplementary weft under the central patterning warp. The two ends on either side should be of equal length. The central warp in my set up just happens to be in patterning shed 2 so I have started in the heddle shed.
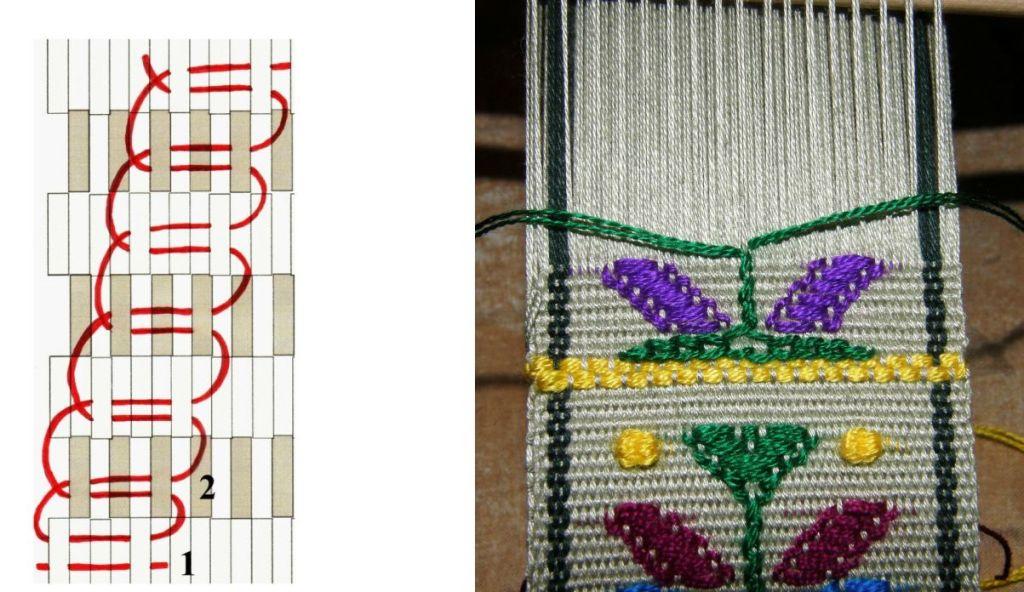
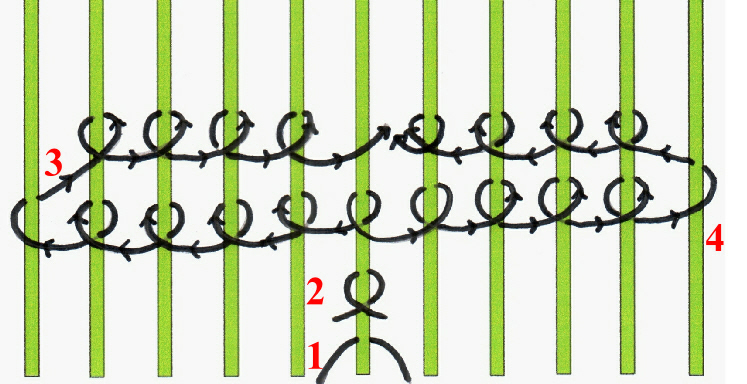
STEP TWO: Cross the ends of the supplementary weft. STEP THREE: Start wrapping the left hand end around the 5 warps to the left of the central warp and return wrapping around 4 warps. The diagram below shows how this is done.
The steps for horizontal wrapping are shown here. The left end of the weft wraps to the left and returns and the right end wraps to the right and returns. These four steps all take place in the same pattern shed. The wefts wrap around four warps on their return journey to the center. STEP 5: Pass the main weft through the complete shed.

Open the next shed, which is, in my case, the shed rod shed and pass the main weft.

Open the heddle shed and raise the patterning warps in patterning shed 2.

Patterning shed 2 contains my central warp.

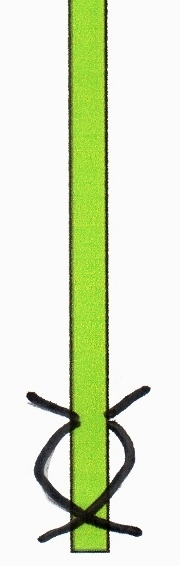
Every time I raise the warps in patterning shed 2, I will wrap my green tree base weft around the central warp to form a stem. The drawing at left shows the very simple vertical wrapping method.

The stem, therefore, is woven only in every second shed.

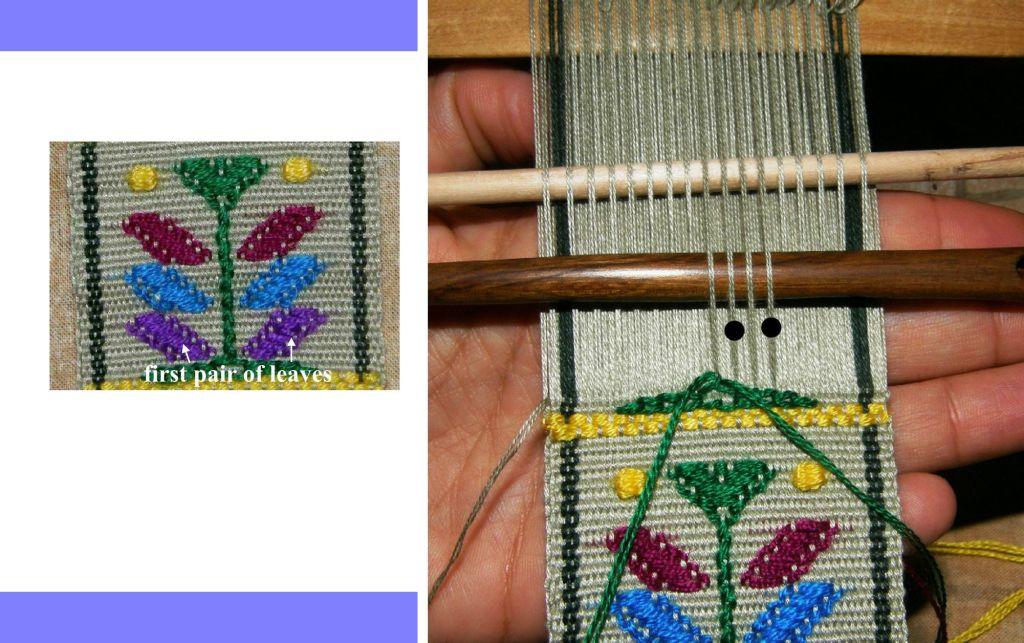
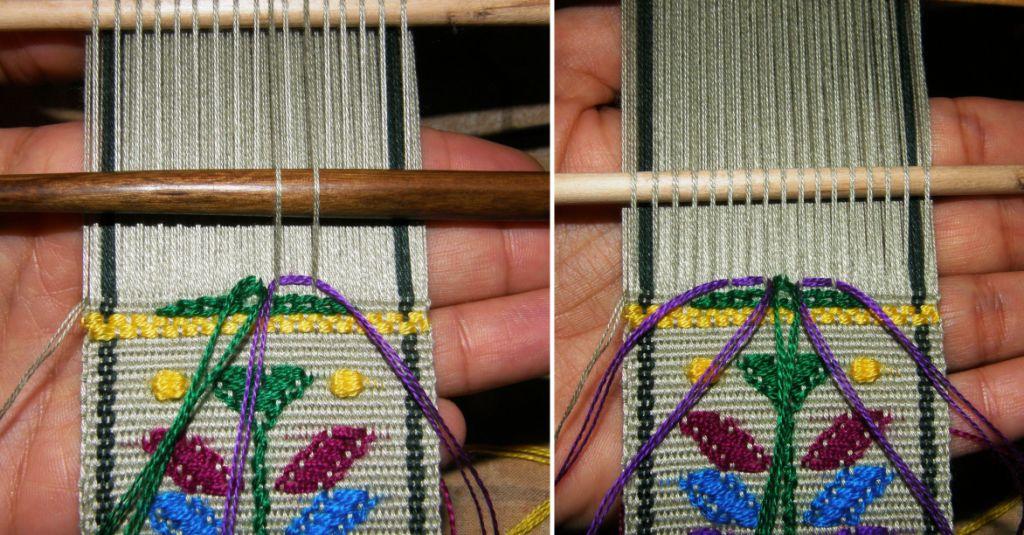
In this shed I will lay in the wefts to form the first pair of leaves.

Cut two lengths of weft around 24cm/9 1/2” long for the two leaves.


Starting the second leaf.

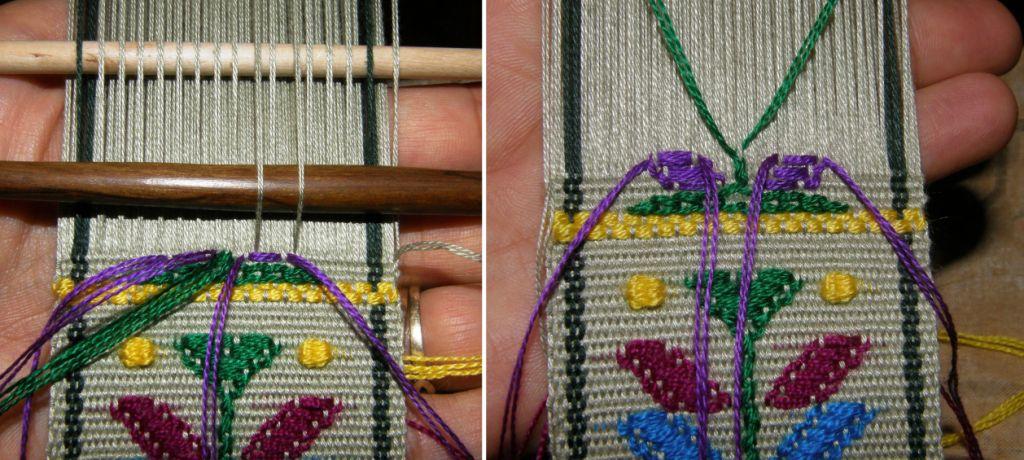
The little Guatemalan tree has three pairs of leaves and the stem continues growing until it eventually widens out into the tree top.

Once you have woven your six leaves, I am sure that it will be very easy for you to see how the tree top is formed.

You are weaving your stem with two strands of weft – one will start traveling to the right and one to the left while filling in the tree top in the same way that you filled in the leaves.

Finally there are the little spots that the Guatemalan weavers like to use to fill in blank spaces between motifs. I used them in my bookmarks as flower buds. You can see two yellow spots in the photo above.


To make a spot, you use two adjacent patterning warps as shown in the drawing above left. Use a strand of weft half the thickness that you would normally use. Around  12cm/5″ length should be plenty. First pass the weft behind the warp on the right as shown. Then join the two ends together and go wrapping them back and forth in the same shed about six times. Pass the ends through the main shed and out the back of the weaving.

The drawing above right shows how to make a diagonal line for a branch.

It is very easy to improvise with this technique. Have fun with it!

#############################################

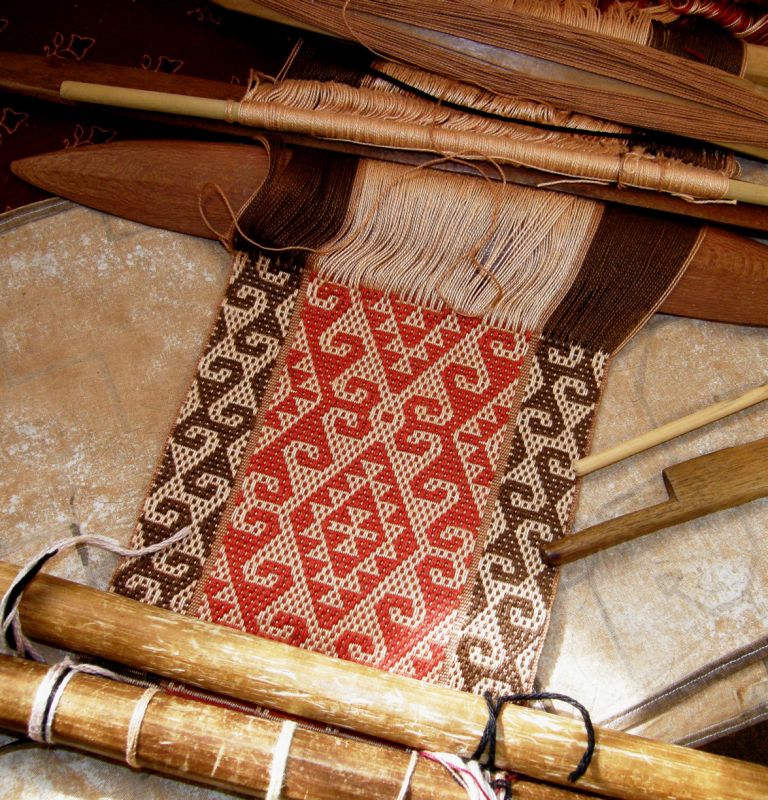
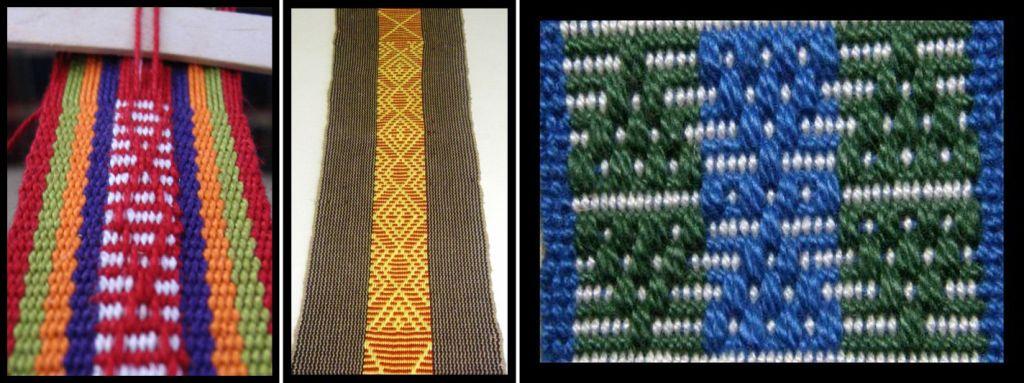
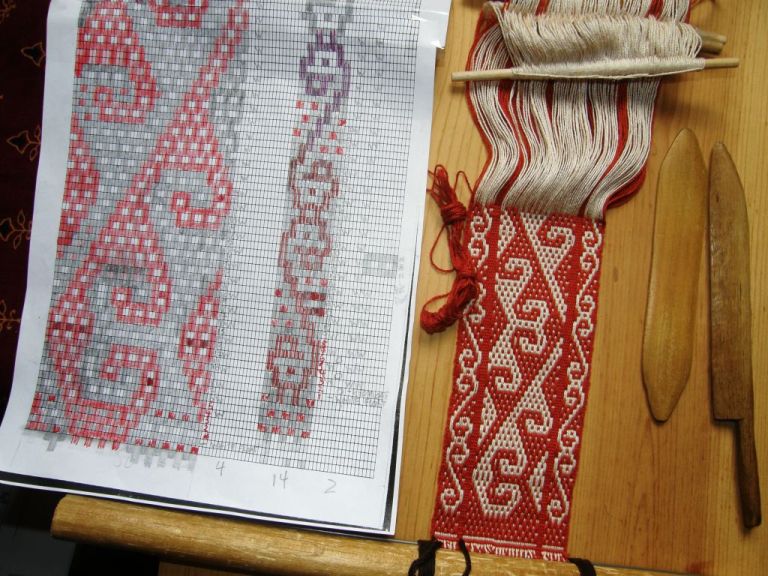
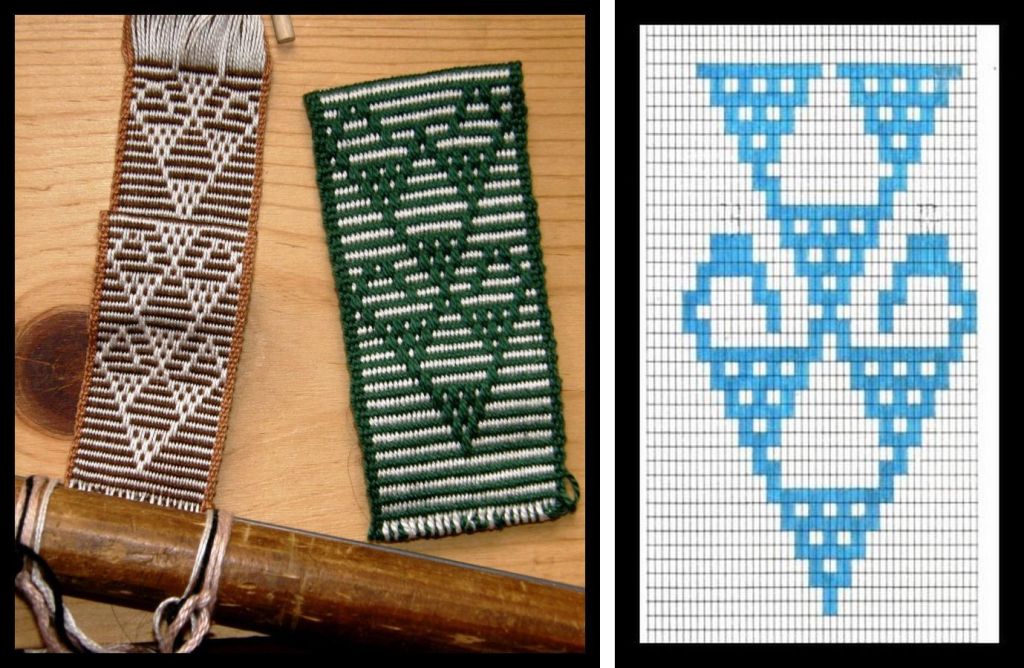
It seems I was in the mood for autumn colors as I got back to work on the yurt band piece that I started a while ago and really had a good time picking that up again. At first I found it very confusing after having spent so much time on Andean pebble weave lately. Usually one is picking up light warps on a dark background or viceversa  but in this technique you pick up lights for one weft pass and then darks for the next. This is a simple warp float technique ( see this tutorial and this one) that can look a lot like Andean pebble weave but is totally different in structure. I copied the design from an image of a Turkoman yurt band that my friend Lisa had showed me on the net,

The original Turkoman band on the left next to my reproduction. I left out the triangles that run down the sides separating the two main pattern areas.

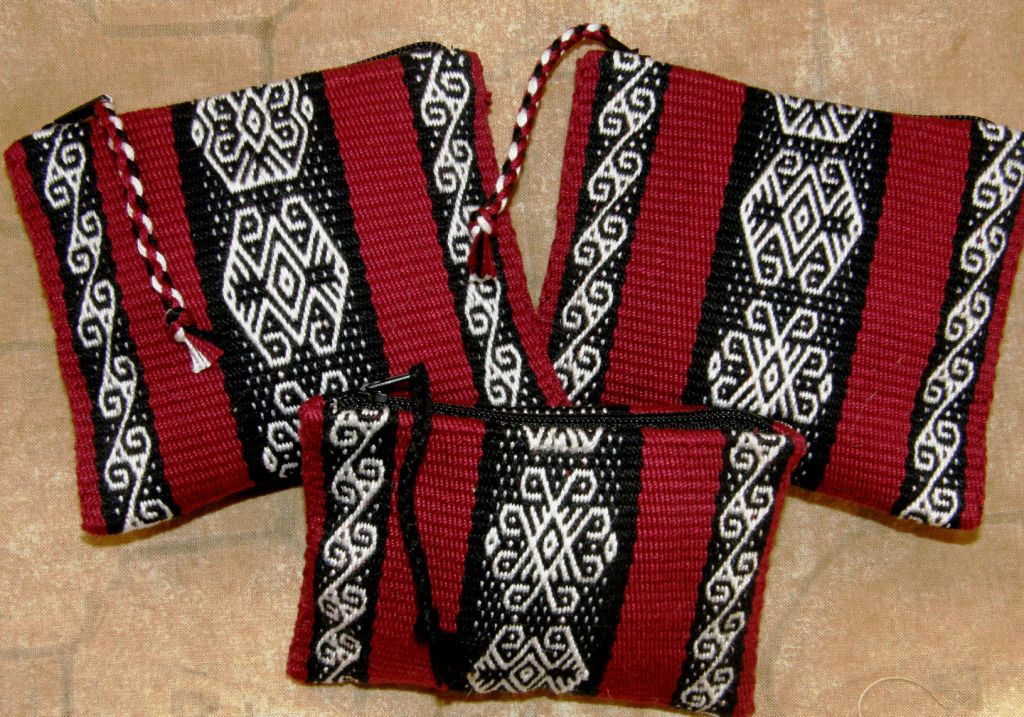
The other project I worked on this week was finishing off the red and black piece, sewing it up into three coin purses and putting in those dastardly zips! I believe that I am actually getting the hang of these zips now.

Three coin purses with North and South American motifs in Andean pebble weave.

#####################################################

AND THE BIG NEWS IS…

Today, (July 1st), the appendix to my e-monograph with instructions for weaving Andean pebble weave on a four-shaft loom went out!

Those who have already purchased my monograph will automatically receive it and it will be included in all future downloads of the monograph from now on at no extra cost.

My testers have made some lovely things on their four-shaft looms which I have been showing here on my blog over the last few weeks.

Lisa wove a band with several small motifs. Lydia made a wall hanging with a bird motif of Huancayo and Jennifer is going to turn her piece with the design from one of the Russian Old Believer belts into a backstrap.


########################################################

Finally I would like to show what Helena, who is in the backstrap weaving group at Weavolution, has made  in supplementary weft patterning using various colors and Mexican designs. Beautiful!


Backstrap Weaving- Putting Down Roots and Weaving a Guatemalan Tree (Part 1)

Celtic knot motifs in Andean pebble weave on my backstrap loom

PUTTING DOWN ROOTS AND WEAVING A GUATEMALAN TREE (PART ONE)

It is exciting how much interest there is out there in backstrap weaving. Some people are attracted to all the beautiful pick-up patterns they have seen on ethnic textiles around the world many of which have been woven on  backstrap looms. Others are attracted to the loom itself – its simplicity, portability and  low cost. Some people are interested in the products they can produce using up their yarn stash with this inexpensive piece of equipment while others are more intrigued by the processes involved in the “slow cloth” it produces.

I think that some people may be unaware that most of the pick-up patterning techniques do not need to be limited to the

My boyfriend learning Andean pebble weave on my rigid heddle loom

backstrap loom and can be set up and woven on other looms. I have heard from quite a few people in the time that I have been active in the online weaving groups who have jumped headfirst into backstrap weaving and attempted some of the more complex pick-up techniques as first projects only to become frustrated and disappointed.

A few have managed to succeed and I am always reminded of the Spanish girl who wrote to tell me how she had taken my monograph on a hiking trip, picked up some sticks along the way, and woven a band in Andean pebble weave as her first ever backstrap loom project. She blew me away!

Unfortunately, I have heard more stories of people falling in love with the llama motifs on my blog, getting some dowels for a backstrap loom and attempting double weave as a first project. The poor backstrap loom now sits under dust on the shelf.

Jorge made a key fob and quickly got the hang of operating the two sets of heddles.

I would like everyone to be as in love with the backstrap loom as I am but, if you are really more interested in the patterns than the loom, why not lash your warps to other looms as I did for my boyfriend above? Now I have to tell you that Jorge had no particular urge to learn Andean pebble weave. He has been listening to me beat away at my loom for many years now with no desire to get down on the floor and join in but I needed to do a  timed test run for a lesson I had planned and he kindly obliged –  and very well he did too. He even allowed me to post this picture! He is pretty confident that the fellow members of his heavy metal rock band don’t read my blog. 🙂

For those of you who love the loom and want to get down and beat away, I have put together a kind of tutorial on what I would call the “Steps to Success”. It is a list of all the tutorials that I have put out there and the order in which I would recommend doing them. “Putting Down Roots” would be another good name as, taking it slowly, and following these steps will give you a firm foundation, develop your skills and have you well prepared for all those lovely pick-up patterns that we all want to weave. You will find the list here. It is worth checking out as you may have forgotten how many tutorials there were out there amongst WeaveZine, Weavolution and this blog. I have gathered up  seven that I would list in the beginner category.

Tool bag fabric almost ready to come off the loom

I wove like mad all weekend as I was determined to get two projects off the loom. I have several others churning around in my head and I needed to free up some loom bars. Above you can see the purple fabric that I have been weaving for a tool bag set. This is what always happens when I do pebble weave –  I turn the fabric over and then can’t decide which side I like best. Fortunately I have enough fabric to make two bags so I can have one with each of the sides showing.  Before I declare this project complete, there is the horrid zipper sewing task to get through. I have one bag finished so far.

The smaller of the two purple bags has not been sewn up yet. I would like to make more in these rich colors.
This came off the loom too this week. I should be able to make three coin purses from this - more zips, sigh...This was a yarn test for the Aunt Lydia number 10 crochet cotton. The black is the Brazilian brand crochet cotton that I get here. There was a small amount of pilling on the heddles in the black sections but virtually none in the red.

###################################################

You may remember that I had planned to go to Guatemala on my way home from my recent visit to the US. I didn’t go as the US trip had been so long and I really needed to get home. It turns out that it was just as well as Guatemala City soon after was affected by a volcanic eruption which caused havoc. I would normally choose to avoid Guatemala during hurricane season but volcanic eruptions can happen at any time of year.

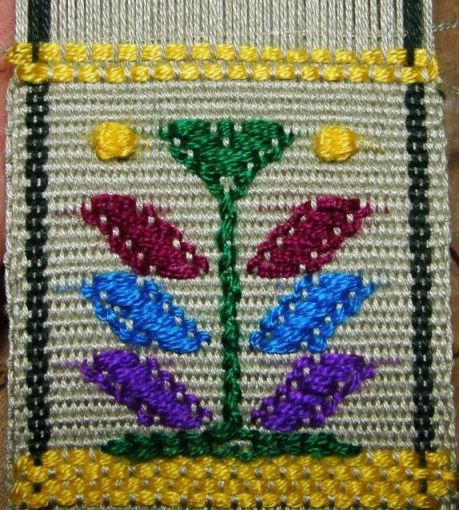
Guatemalan tree designs woven with acrylic supplementary wefts on a fine cotton ground weave

Anyway, I thought that we could do a little virtual trip to Guatemala in the meantime. I still have the bag of bright Guatemalan acrylics on the shelf and am no nearer to getting down to respinning them to use as warp.

I decided I would use them for some supplementary weft patterning, as they were originally intended, instead.

I wove a tree design using the various warp wrapping and inlay techniques that the Guatemalan weavers employ and this was fun as I hadn’t done any of this since 2008 immmediately after my return from my first visit there.

I learned these techniques with my teacher Martine and her daughter Carmen in Santa Catarina Palopo on the shores of Lake Atitlan. I met Martine in Panajachel where she sells textiles in the street market. She took me to her home and spent one morning setting up the loom and then her daughter took over weaving and teaching me for the next week or so. She was a good teacher. Each motif was repeated six or seven times across the cloth. Carmen would show me five times what to do and then would let me weave the last one or two motifs to practice what she had shown.

The weavers set up their looms with great care. Martine was obviously more skilled at doing this and Carmen only took over when everything was set to go. The warp is wound with two crosses. The second cross helps hold the shed rod in place.

LEFT: The basic loom set up with shed rod and string hedddles in place. RIGHT: An extra stick is placed in the second cross to hold the shed rod in position.

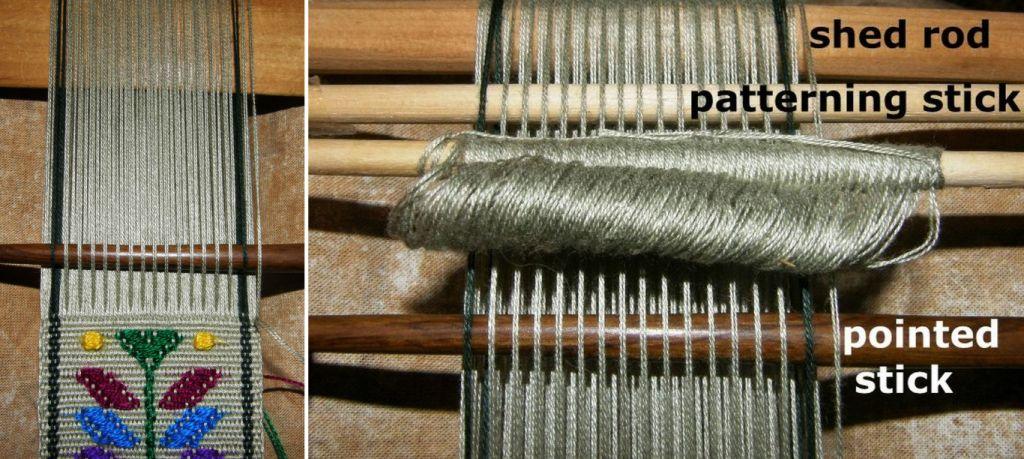
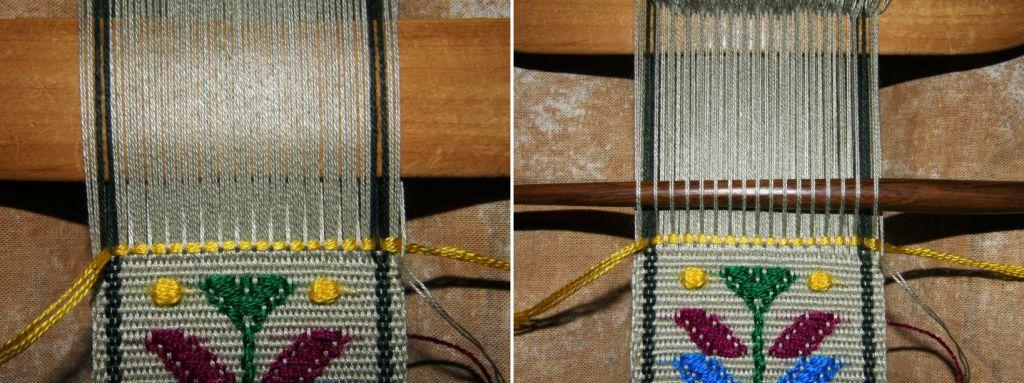
In order to create the patterns, two extra patterning sticks need to be inserted and stored up beyond the shed rod. One is stored on top of the warp and the other underneath.

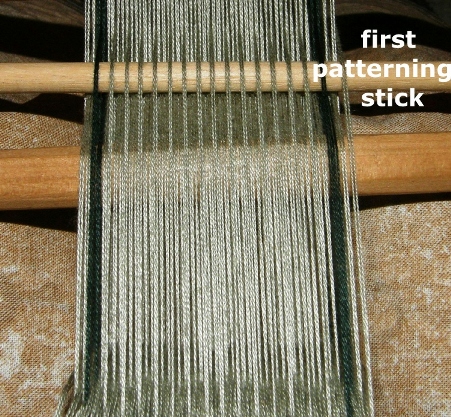
LEFT: To set up the patterning sticks, the shed rod shed is opened and the first set of patterning warps are picked up. Pick one, drop two, pick one, drop two across the width of the warp.. The weavers use a pointed stick to do this. RIGHT: The pointed stick is inserted under all the picked warps and then pushed up toward the heddles. This will raise the picked up warps on the other side of the heddles. Another stick is then placed under the warps on the other side of the heddles. This is the first patterning stick.
The first patterning stick sits up beyond the shed rod until called into use.
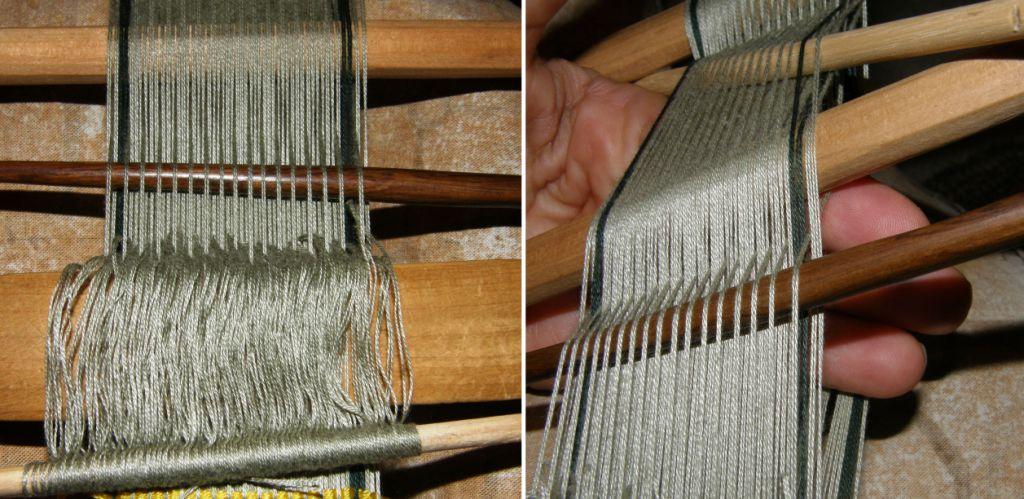
LEFT: A colored weft is placed under the warps in the first patterning shed. This serves as a reference to make picking up the warps for the second patterning shed easier. RIGHT: The heddle shed is opened and the warps in the second patterning shed are picked up. Between each warp in the first patterning shed, there are three warps. You need to pick up the middle one of these three warps. You will pick one, drop two, pick one, drop two all the way across the warp. The pointed stick is inserted under all the picked up warps.
LEFT: The pointed stick is moved up toward the heddles which will raise the picked up warps on the other side of the heddles. RIGHT: A stick is placed under the warps on the other side of the heddles. Both the stick and the shed rod are raised and this creates a new shed underneath the two. I have my hand within this shed and will replace it with the second patterning stick.
Here you can see the two patterning sticks in place up beyond the shed rod.
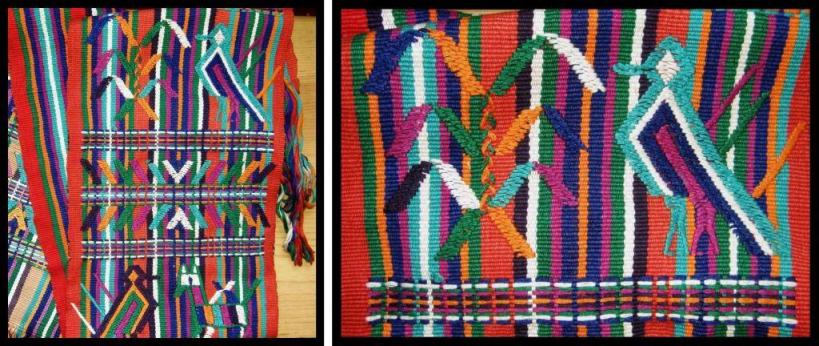
Two wefts are used to weave the above typical patterns of Santa Catarina Palopo: a red weft is passed through the two main sheds (shed rod shed and heddle shed) to weave the ground weave and the brightly colored supplementary wefts are passed under or wrapped around the patterning warps to form the motifs. These are samples that I wove when I returned from Gautemala.
Motifs are usually started and ended with four rows of supplementary wefts in the patterning sheds forming a brick-like design. The colored pattern weft (in this case yellow) is passsed through the pattern shed and then the main weft (in this case light green) is passed through the main shed.
To open pattern shed one, the patterning stick is simply drawn down to the heddles. This will raise the pattern warps and a stick can be placed under them on the near side of the heddles. The yellow weft can then be passed through this shed. Then the shed rod shed will be opened and the green weft passed. RIGHT: To open pattern shed two, the patterning stick is also drawn down to the heddles (under the warp). The pattern warps won't pop up quite so easily for this shed so it helps to have your beater in the heddle shed and tilted as shown. Like this the pattern warps will be more apparent and you can slide a stick under them.The yellow weft is passed under these warps and then the green weft is passed through the heddle shed.
In this picture I have laid in the first pass of yellow supplementary weft in patterning shed two. The beater is in the heddle shed and I have just passed the main green weft through.

Here concludes Part One of this tutorial on Guatemalan single face supplementary weft patterning. So far we have looked at how to pick the two patterning sheds and store them on sticks up beyond the shed rod, how to open the patterning sheds and how to weave the basic brick design which separates the motifs on a piece. We also looked at the weaving sequence, that is, first passing the supplementry weft and then the main weft.

In Part Two, next week, I will show you how to create the outlines of shapes by wrapping the supplementary weft around warps and fill them in by laying in supplementary wefts. The Guatemalan weavers create all kinds of bird, plant and human figures. They even include some of their weaving tools, for example, a swift.

To finish off here, let me show you my weaving teacher and her family and some places around beautiful Lake Atitlan where they live.

RIGHT: Carmen is asking for guidance from her mother Martine. LEFT: Carmen's younger sister and niece and nephew. The little niece was so sweet in her tiny huipil, corte and belt.
Santa Catarina Palopo is oe of many settlements on the shore of beautiful Lake Atitlan. The sign outside the library shows words in the Kaqchikel language.
I hitched a ride another 20 minutes down the road to the smaller town of San Antonio Palopo and visited with some backstrap weavers making incredibly wide pieces on their looms and some siblings all dressed in the same typical colors of the town. It was a nice quiet place to stroll and hear the sounds of warps being beaten from within the walls of the homes and see the warping boards out in the patios. From there I took a launch ride on the lake back to Panajachel.
I went across the lake to Santiago Atitlan for the Sunday market. This town is known for its superbly hand embroidered clothing. I saw older women in the market wearing hair sashes wrapped around their heads. The men wear three quarter length loose white striped pants which are often covered in embroidered birds.
I sat by the roadside and tried to photograph the parade of people in their gorgeous embroidered and ikat dyed clothing as they walked by.
In San Juan La Laguna a women's weaving cooperative is producing items for tourists using only their own cotton thread dyed with natural substances.

Strolling back to San pedro La Laguna from San Juan I met Roi from Israel who was attempting to cycle around the world. I have never heard of him since. I wonder if any of you have run into him in your travels? The lady at right is from San Jorge La Laguna, high up on the hillside above the lake shore, which is known for its ikat woven fabric. Here she is demonstrating spinning the natural brown “cuyuscate” cotton which is highly prized and costly in Guatemala.

Speaking of epic cycling journeys, I was contacted through this blog by a lady who is cycling from Alaska to Tierra del Fuego. She stopped off in Huancayo and had weaving classes with the very same weaver who taught me. Funnily enough she told me that Margarita is no more vocal in her instruction than she was with me fourteen years ago! I can just imagine this lady cycling about with her backstrap loom on the back of her bike. If we can get our timing right, she will come to Santa Cruz to visit me and have some more classes.

Last week I showed you what Jennifer , one of my four-shaft loom testers for Andean pebble weave was making on her floor loom. Well now it is finished and here it is!!

Stand by for the four-shaft loom appendix to my e-monograph….:-)

And Karren has been weaving more bookmarks in simple warp float technique with all her own designs.

Backstrap Weaving- Easter colors in Guatemala and a new tutorial

Easter is upon us. Here in Santa Cruz, the stores stock aisles of chocolate Easter eggs but people have not really warmed to this tradition so we usually see these same Easter eggs sitting forlornly at the check out well into October when they are replaced with Halloween goodies. Now Halloween is something  that has really taken off here.

The night of Holy Thursday here has its own special tradition. All the streets of the downtown area get closed off to traffic and become a gigantic pedestrian walkway full of strolling families and teenagers out and about socializing, eating – there are food stands set up every few yards – and stopping in at the various churches. The idea is to visit nine churches. My mother tells me that this was the tradition amongst Catholics in India too when she lived there.

In Guatemala it is a very different story. So let’s see what activities and traditions surround Easter there. Of course as soon as Guatemala is mentioned, you know what to expect…

################# LOTS OF GLORIOUS COLOR #############

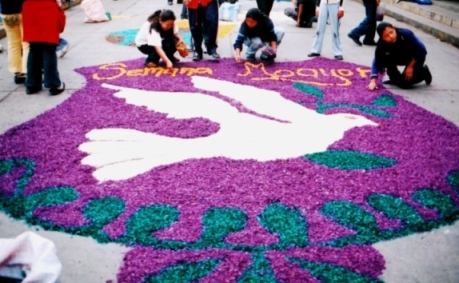
A sawdust "alfombra" laid out in wait for the Good Friday procession in Huehuetenango

Easter weekend was my final one on my trip to Guatemala in 2008. I don’t usually move around all that much when I travel. I like to find two or three nice places and a few weaving teachers and stay put but, as all my weaving classes were over, I was taking the opportunity to visit as many spots as possible before heading back to Guatemala city for my flight on the Monday after Easter. This meant that I got to take in the Easter celebrations in three different places.

I arrived in the city of Huehuetenango the Wednesday before Easter hoping to travel further into the highlands the following day. Little did I know that the whole of Huehuetenango would be shut down on Holy Thursday as an unofficial "hang over" day after Huehuetenango Day celebrations on the Wednesday night - food and music including a "battle of the marimbas" in the main plaza until the wee hours. So there was no transport to be had and Thursday was a very dull day indeed. BUT, I woke up to the preparation of these fabulous sawdust "alfombras" on Good Friday morning.

Now, Antigua is THE place to be in Guatemala  if you want to see the most spectacular sawdust alfombras. People come from all over, the city is packed to the gills and prices rise so I was determined to avoid Antigua for those very reasons. I had no idea the alfombra tradition was carried out in almost every city, town and village in Guatemala and so I got to enjoy a smaller but no less colorful version of it in Huehuetenango. 

Alfombra means carpet in English and the tradition is to create these fantastic carpets from colored sawdust on top of which the Easter processions will pass. Other carpets are made from pine needles , flowers, stones and even vegetables. Large metal and wooden stencils are used to form the shapes and designs and the entire carpet is intermittently sprinkled with water to weigh down the dust and hold it in place. The themes are most often religious and once the procession passes they are completely destroyed.

What amazed me most was how quickly and efficiently the designs were measured out and put into place. Everyone worked quietly on what is, after all, a somber day but it was very hard to feel somber with all those gorgeous colors about. Watching the whole process was irresistible and I had to drag myself away to take my bus into the highlands. I was actually glad that I wasn't around to see all that hard work destroyed.

Read an excellent article here which gives a lot of information about the origin, history and significance of the alfombra-making tradition. To quote just a little…

“HISTORY

The custom of making carpets was brought from Spain and the Canary Islands. However, it is believed that in pre-Hispanic times the Maya made carpets for various ceremonial reasons. Possibly the carpets were used in altars to induce positive energies and absorb negative ones. Thus the constant destruction of the carpet is necessary to remove bad energies and bring new positive ones with the construction of a new carpet or offering.”

The church in the main square of Nebaj with an effigy of Judas hanging on a noose above the main door. In the afternoon young men came to shoot at it.

Next stop was Nebaj, a small town of adobe dwellings tucked away in a highland area known as the Ixil triangle. There I was also treated to splashes of color but in this place the color came in the form of the women’s traditional huipiles (blouses) and cortes (skirts).

People from the neighboring villages of Chajul and San Juan Cotzal had come into town for Easter to see and be seen in their very best hand woven huipiles decorated with animal and geometric figures in supplementary wefts and warp wrapping.

The typical scarlet jacket decorated with black embroidery worn by the men of Nebaj for festivals. Apparently the jacket is modeled on that of Spanish officers from colonial times.

Good Friday was no somber occasion here. The atmosphere was festive with even a ferris wheel set up near the market and cotton candy, icecream and balloon vendors strolled amongst the crowd. The older men too, were wearing their festival gear – scarlet jackets embroidered in black. In this way I got to see the traditional clothes of all three areas in one place. All I had to do was sit in the plaza and watch it all go by while trying to discreetly snap a photo or two.

The icecream vendor is wearing one of the typical backstrap woven hair sashes of the area complete with enormous tassels-quite a weight to be carrying around. So much decoration and color on every huipil!

Finally on Saturday when things had settled back to normal I visited the artisans market and met two of the coolest weavers and vendors there. Such a shame that I was at the end of my trip and couldn't spend more time with them. We swapped heddle making tips and weavings.
This is a lively Nebaj textile that I received as a friendly swap for one of my own weavings. I would have loved to have stayed longer in Nebaj but it was time to move on to Chichicastenango.

Colorful in its own way, the market town of Chichicastenango is more a tapestry of sights, sounds and smells. It was even more chaotic than usual on Easter Sunday. It was my second visit there and I could really tell the difference as this time the locals who had come into town for the Easter Mass far outnumbered the tourists. The Easter celebration was a strange and interesting mixture of  Catholic and indigenous rituals.

One of the clogged market alley ways on the left - spot the tourist! Fortunately there are some places where one can escape the madness. The Hotel San Tomas allows you stroll around its beautiful colonial-style courtyards and enjoy the marimba music.
Of course I had to revisit my favorite stall - guess which one!
LEFT: Thread which the vendors were calling "seda" (silk) - only available in green and pink. Why only these colors? I was told quite simply that these are the colors of Chichicastenango. RIGHT: The steps of the church gave a nice high vantage point from which to survey all the activity until I nearly got run down by the emerging Easter procession.

After all this frantic travel and activity I went to Guatemala City and onto Miami where I spent three nights stuck in the airport waiting for a flight back to Bolivia – the hazards of stand-by travel!

##################################################

FROM A FRENZY OF COLOR TO BASIC BLACK AND WHITE…

The double "S" band on the loom

As promised, I have  made a tutorial on weaving another of the yurt band border designs using simple warp floats. I used this design on the cell phone pouch that appeared in this previous post. I warped up this week to weave the design with the tutorial in mind. However, there were obviously other things on my mind as well as, instead of warping up the required fourteen warps, or seven pairs, I warped fourteen pairs and so ended up with a warp twice as wide as necessary. So I wove the “S” border design in two columns as mirrored images and found that it was the perfect width for a belt.

THE TUTORIAL…

You will find the tutorial here.

Continuing with the black and white theme, you may remember the Abba Yohanni piece that I showed you in this previous post.

The cross motif taken from a curtain in an Abba Yohanni cave church in Ethiopia

Here I can show you the table runner finished (which I think I am going to turn into a wall hanging) but I mostly wanted to revisit this topic as Alexis Tancibok in London, whom I met on Weavolution, recently emailed me with some interesting background information on these motifs and the curtains on which they were woven. (which I quote below). I am very grateful for this as I had not been able to turn up much on the net about it and was mistakenly under the impression that these curtains dated only as far back as the 17th Century…

“Curtains like this were a common feature of churches in N. Africa & the
Middle east from at least the fourth century. They were often devotional
items commissioned or donated by individuals making a vow, fulfilling a vow,
or as an act of piety.
Similarly fabric woven with religious motifs – such as Abba Yohanni’s cross,
and stylised scenes from the Gospels, and Apocryphal texts were designed and
worn by people at all levels of society as talismans – the V&A has a rather
decent collection, so too does the Louvre. The best extant versions are
Coptic (Egyptian) which is relevant to the Abba Yohanni piece because the Coptic church and the Ethiopian church have strong historic links…

Early christian art motifs are still extant in the Eastern tradition and in many cases almost unchanged from when they first emerged. The shape of the cross for example is commonly made in twisted leather both in Ethiopian and Coptic pendants.

Devotional curtains/veils/textiles serving different functions in Eastern Christian settings are still used today – especially in Ethiopian churches and shrines.”

################################################

I couldn’t keep away from the colors for too long….

I have another wonderful thing to share courtesy of a new online acquaintance. Chris Buckley in Beijing has generously allowed me to use images of his yurt band pieces. Those of you who saw the X and O yurt band border design in the tutorial on simple warp floats last week will recognise it here on this piece worked in two colors…


I am excited to have yet another yurt band design to chart and attempt to weave. Chris tells me that these Kyrgyz yurt bands were cut and sewn together to make mats and that he acquired them on a trip to far Northwestern China. I have only just started exploring his fascinating blog.

And here is another gem from Chris…

Here is a slight variation of the 'S' design featured in this week's tutorial! Ah...the colors!! If only I could get red and blue to work together so well for me!

######################################

And to finish, a contribution from a blog reader. Sharon finished her first mug rug in one-weft double weave with her own butterfly motif…

I have seen the rest of her butterfly charts and they are so pretty. Hopefully we will get to see the whole set of mug rugs as they come off the loom.

Oh… and I spied Grace Hatton on her blog working on the yurt band border from last week’s tutorial. She has a fun post entitled “Loom Porn – Size Doesn’t Matter” where you can see a photo of her band and other small looms.

Enjoy the new tutorial and keep the projects coming…remember, I love to hear from you all! 🙂


Backstrap Weaving-Simple Warp Floats: a little less simple, a lot more stunning!

SIMPLE WARP FLOATS – a little less simple, a lot more stunning!

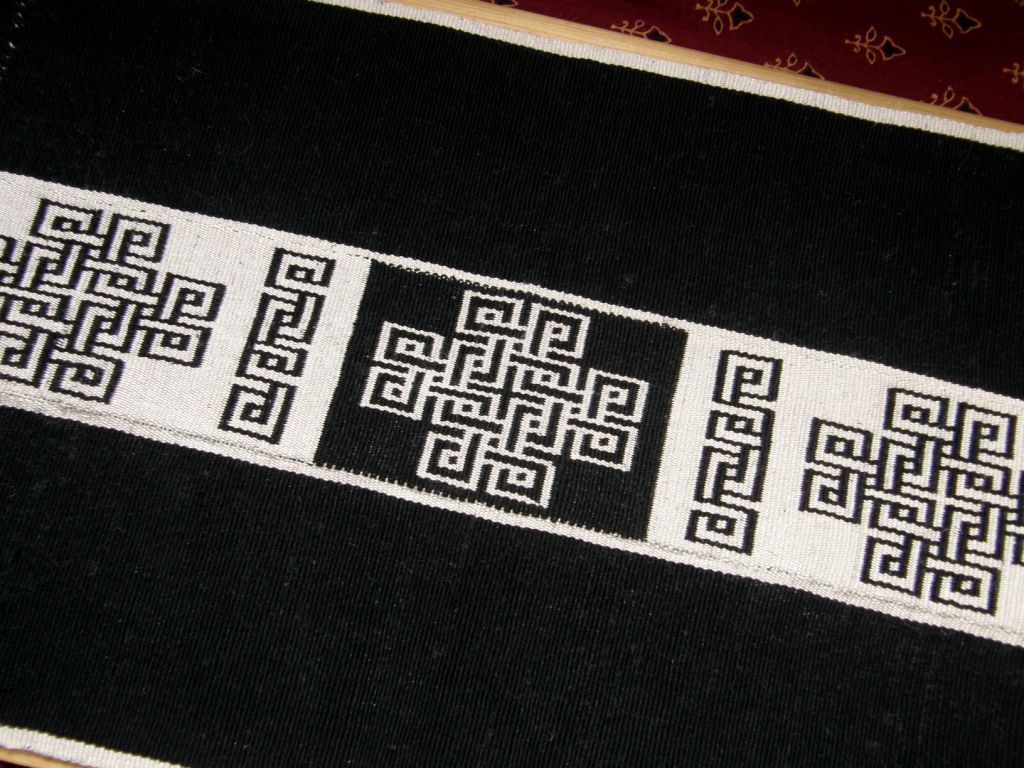
I have been playing around with simple warp float patterns this week looking for new designs in books and on weavings that I have bought in my travels. I found a nice one in a photo of a textile fragment from the north coast of Peru in Ann Pollard Rowe’s Warp Patterned Weaves of the Andes which I will show you later. I also pulled out a belt full of warp float patterned motifs which had been sadly neglected at the bottom of my box of Guatemalan textiles. I guess it had been ignored and forgotten as it is a simple black and white piece looking very humble and plain next to the wildly colored  weft patterned pieces that are so typical of Guatemala.

What is strange is that I bought this belt in the same town where the women wear a particuarly wide and richly decorated hair sash – it is quite a contrast to see the two pieces together. I wonder if they are both woven by the same weavers.

Belt and hair sash of Aguacatan

As you can see, the belt does not have a continuous design, rather, a series of small motifs. No two motifs are exactly the same. As I pull the belt through my hands to examine the motifs, I can almost imagine the fun this weaver had deciding what motif to display next on her 9-foot 3-inch canvas! There are mistakes. There are motifs that obviously didn’t go quite the way she had planned but I get a feeling of playfulness from this belt that I just don’t get from the heavily ladened hair sash.

I have been thinking about what elements can make this simple warp float patterning more interesting and fun for weavers. I have written a tutorial for this technique here but it is a technique that never seems to get fully explored – just a “stepping stone” on the way to the more advanced techniques.

Here are a few ways, for starters, to make a piece patterned with this technique a little more stunning.

Three pieces woven using a simple warp float technique.

On the left and in the center are two pieces made by members of the Backstrap Weaving Group at Weavolution. Historicstitcher used bands of bright and lively colors alongside her warp float pattern. She used single rather than paired floats to give a more delicate look. In the center, Jeannine designed her own sunny warp float pattern and wove it beside a more somber border of vertical stripes. I think it looks amazing! And on the right is part of a bookmark that I made using three colors across the width of the design rather than two as is more usual.

As the name implies, this is a simple technique. If you imagine looking at a warp in profile, you will see in the following diagram exactly what is going on in this technique as it is woven.

A profile view of a warp where green warps are “floated” over a base of red and green stripes to form the patterns.

Let’s take another look at the black and white Aguacatan belt and see the different motifs the weaver has created – from very simple to not-so-simple.

As you can see, it all starts on the left with a base of black and white stripes. Then the weaver can decide which color she wants to float over the surface to make her designs. Her first design has been made with black floats, the next design to the right has been made with white floats. Moving along, she has made a quick succession of black and white float designs.

On the left, the weaver is again swapping from black floated designs to white, and back again. The one on the far left has an almost three dimensional effect. On the right she has started to combine black and white floats within the one motif. This means that in one weft pass she will be floating black warps. In the very next weft pass she will float white ones. When I went to weave this it took me a while to get my head around it!

She is getting increasingly adventurous now with her combination of black and white floats all within the one motif. Those designs on the left really play tricks with my eyes!

But, of course, things don’t always go to plan. On the far left it looks like she was trying to combine single warp floats with pairs but ran ino a few problems. Next to that, she didn’t manage to get the white design centered. While I don’t find mistakes in my own work terribly amusing, I do like to look at these little mishaps in other weavers’ pieces and imagine what was going on to cause the lapse in concentration. Perhaps her husband was telling a funny story, a neighbor dropped by for a chat or one of her kids was swinging off her loom. In any case, my examination of this band makes me really want to meet this weaver!

On the right is a different band where the horizontal stripes in one part are not evident at all as the entire surface has been covered with black warp floats.

All of this finally led me to my project of the week…

Simple warp floats used to reproduce a yurt band design.

This piece has been woven with the simple warp float technique using floats in both colors in one continuous motif. The horizontal stripes cannot be seen as the entire surface of the weaving has been covered with warp floats – the same simple three-span floats shown on the Aguacatan belt. Where the outline of the design changed direction, I had to use five-span floats.

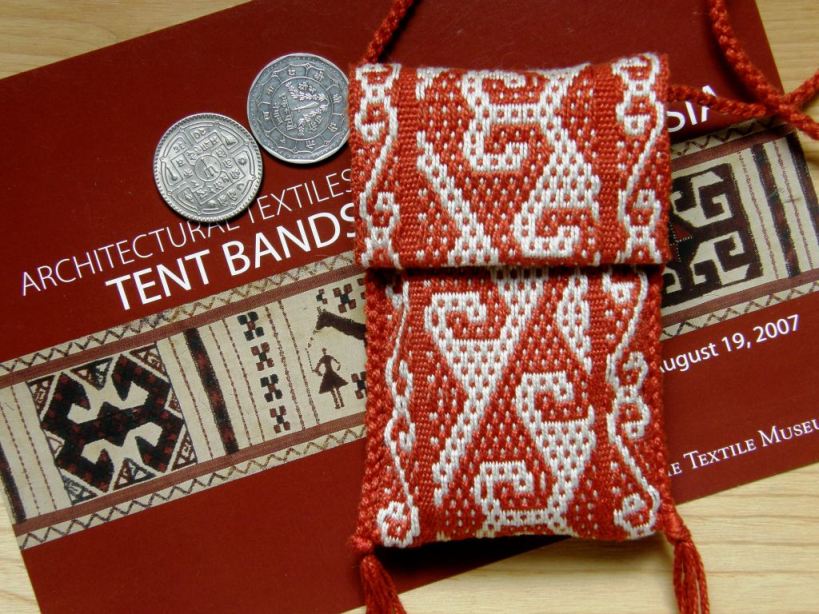
A cell phone pouch for Lisa

I charted the design from a photo of a yurt band that was sent to me by Lisa Matthews of North Carolina. Ever since Lisa and I met on Ravelry back in June last year, she has been sharing  not only photos of Central Asian weavings with me, but also her love and enthusiasm for all the textile and fiber crafts of that region so I thought it would be a great idea to make this piece into a cell phone pouch for her.

On the turned edge of the flap you can just make out the horizontal stripes where I started this piece. From there on the stripes got covered by floats.

I edged the pouch and made a strap using a four-strand braid. Although I learned this braid a long time ago,  my weaving teachers in Potosi taught me a new and really fun and quirky way to do it by looping the braid strands on my fingers. I have made a tutorial for this with step-by-step photos and a video which you can see here.

Lisa writes a fascinating blog about her explorations into the crafts of Central Asia and has kindly allowed me to use photos of her yurt band here. In her own words here she describes her passion:


I’m extremely interested in the cultures of Central Asia both past and present.  Within the context of the historical reenactment group I participate in I am attempting to learn how to portray the daily life of a 10th to 11th century Steppe Nomad.  To do this I have been learning how to make yogurt, cook flat bread, camp in a yurt, felt, spin, and weave so far.  I’m very interested in both felting and weaving and feel that weaving on the Nomadic ground loom brings the ability to weave fantastically patterned pieces to even the novice weaver with a very, very small outlay of cash to set up the loom and get weaving.  The versatility of the ground loom is that you can weave anywhere you go and anything from fabric for clothing to tent bands to cut pile rugs and kilims on the same loom.  Yurt bands are something that especially interest me and I am in the process of learning how to weave them.  My husband and I were lucky enough to purchase a 48 ft long band thought to have been woven by the Krygyz and its handmade beauty has really inspired me.”


I love the simple border motifand I am thinking thatI may be able to do a tutorial on that here next week so you can all learn to do the two-color floats.
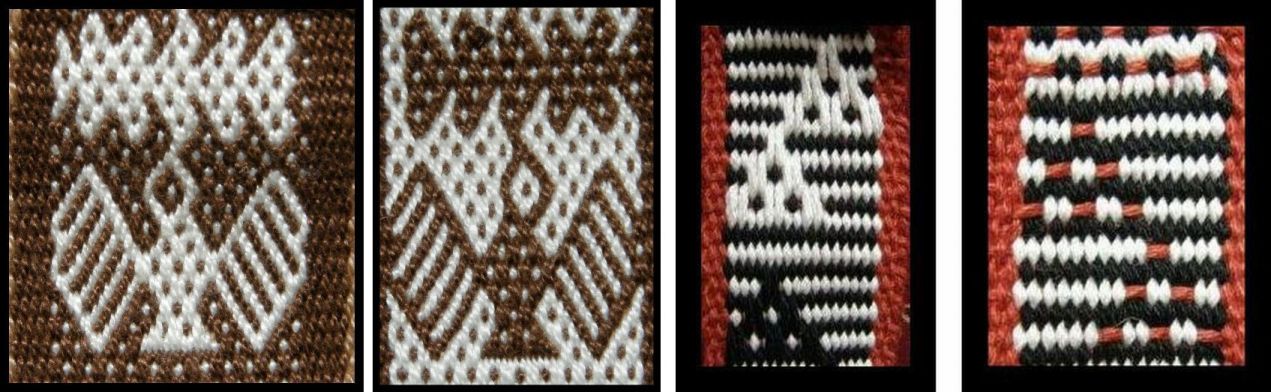
At first glance, you may think that this weave is Andean pebble weave, but a look at the back of the weaving will show you that it is not. Andean pebble weave is double faced, that is, the same warp float motif appears on the back of the weaving with its colors reversed. On a simple warp float piece, however, the warps that float on the upper surface create a gap on the lower surface through which the weft is revealed.
LEFT: The front and back of an Andean pebble weave motif. RIGHT: The back of a simple warp float motif reveals the red weft.

I was really fortunate to run into Lisa online but this wasn’t my first encounter with these Central Asian tent bands. I was lucky to happen to be in Washington DC when there was an exhibition of these pieces at the Textile Museum in 2007. This certainly made up for my initial disappointment at not finding any Andean weavings in their permanent displays. On top of that, I had a wonderful time sitting on the floor with a pile of books in their bookstore and spent hours in their library. Meeting Ann Rowe there was the icing on the cake!

The finished pouch on the Textile Museum’s post card. I still haven’t found a suitable closure for the pouch – open to suggestions!

Here is the new pattern that I charted from the old Peruvian textile fragment. There are several woven versions here as the picture in the book was not very clear. I finally decided on the motif on the upper left hand side. A larger version  of the chart is here.

Warp floats of brown and white cover the surface of the weave.

Above, the motif is woven on a background of horizontal stripes. If you were to cover the surface completely with floats, it would look like the photo at left.

According to Ann Rowe in Warp Patterned Weaves of the Andes, no archaeological examples of this two-color float weave have been found in the Andes although twentieth century ponchos have been made with this technique in Northern Argentina. There is a  photo of one such poncho with bold geometric motifs in Ann Rowe’s book

#####################################################

A few bits and pieces to finish off…I received some comments from people last week about how difficult it is to find a suitable place to tie up their backstrap looms at home. I know what this is like! I am fine here at home, but when I go to visit my mother in Sydney (my backstrap loom goes everywhere with me!) there is nowhere to tie up my loom so I braid in the evenings when we are sitting about and chatting. My brother and sister-in-law have been kind enough to put some hooks into the side of a large dresser in their guest room in their home so that I can slip a dowel in and weave away.

Here are a few photos of some tie-up options…


LEFT: Tied to a STRONG doorknob. Not the best option for narrow warps as the warp will slip on the rods and cause the loom to tip from side to side. RIGHT: Hooks in a piece of heavy furniture.
LEFT: The loom bar can be lashed to a heavy piece of furnture, a stair or porch rail, or the ladder on a bunk bed. RIGHT: The loom bar can be wedged behind a pair of clamps.

If you are at all into DIY, you should check out Sharon’s (aka Rose Goldilocks) blog where she has invented a nifty seat, footbrace and tie-up place all in one.

#################################################################################

One more thing…

Sharon emailed me last weekend to tell me about a new Interweave publication – a magazine called Knitting Traditions 2010. Apparently it has instructions for Peruvian needle knitting, or cross knit looping, for making finger puppets. I would love to learn how to make three dimensional things with this technique. Well, that is definitely going on my shopping list for my up and coming trip to the US.

There are some gorgeous knitted finger puppets  for sale in the craft markets here but they are made in regular two- needle knitting as far as I can tell. All kinds of animals are made and they are pretty hard to resist.


LLama and sheep finger puppets
Front and back of my “knit” pre-Columbian fragment

And while we are on the topic of knitting, I  found some information about one of my pre-Columbian fragments, once again, in Ann Rowe’s book. Apparently these pieces, which are constructed with what look like knit stitches and which are very thick, were used as straps and belts by the Incas and were made using a 4-strand warp twining technique. No evidence has been found yet to explain how exactly this was achieved…but it’s nice to know at least this little bit about one more of the fragments on my little Chancay dolls.

At right I’d like to show you the pencil pouch that siseltikva, from the Weavolution group, wove on her backstrap loom and edged with cross knit looping. It’s a really nice project idea for a narrow band and , as always, I am thrilled to see my tutorials being put to use.

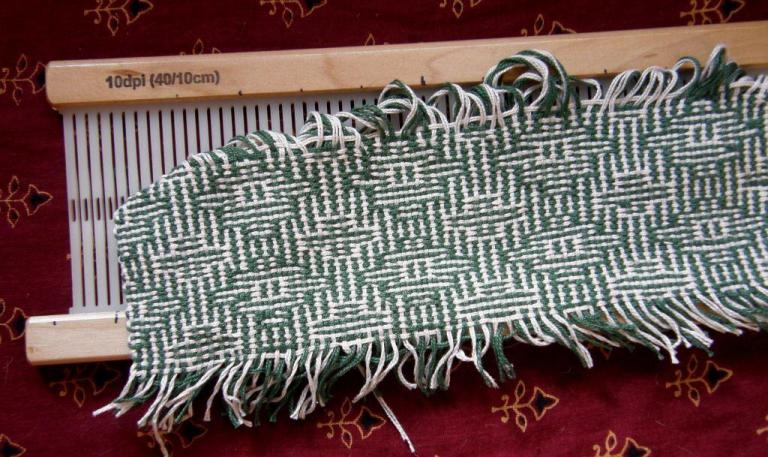
My shadow weave sample using a 10dpi rigid heddle on my backstrap loom

Let me leave you with this picture of my latest experiment with balanced weaves on my backstrap loom. I wove this tiny shadow weave sample  using four sets of string heddles and a rigid heddle as a spacer. I can’t say that I am crazy about it! There are a few examples of careless heddle lifting there. I have been told that this looks great done in four colors – two contrasting colors for the warp and two tones of those colors for the weft. I really enjoy doing these balanced weaves – they are a nice change of rhythm and beat so I will choose my colors carefully and see if I can make something I like better from this weave.