Backstrap Weaving – There is no one “right” way

THERE’S NO ONE “RIGHT” WAY….and A NEW TUTORIAL

I went to visit Angela again (see last week’s post) one morning this week to see how she has been progressing on her wall hanging and give her copies of some of the photos I had taken during the previous visit.

She had several projects going at once and was very pleased as she had just been given an order for 1500 woven greeting cards from her regular Christmas customer. Now she is planning a trip to her hometown of Isoso to organize the other weavers there to help complete the order. She told me that when she took on this task last year she had been able to weave ten cards a day.  Imagine!

The smaller of her two looms is occupied with this gorgeous wall hanging which I watched her warp on my last visit. As I told you last week, the designs that the Guarani women weave in the Moisy technique are nothing like anything you will see anywhere else in Bolivia.

And here is something else she is working on in the Moisy technique…


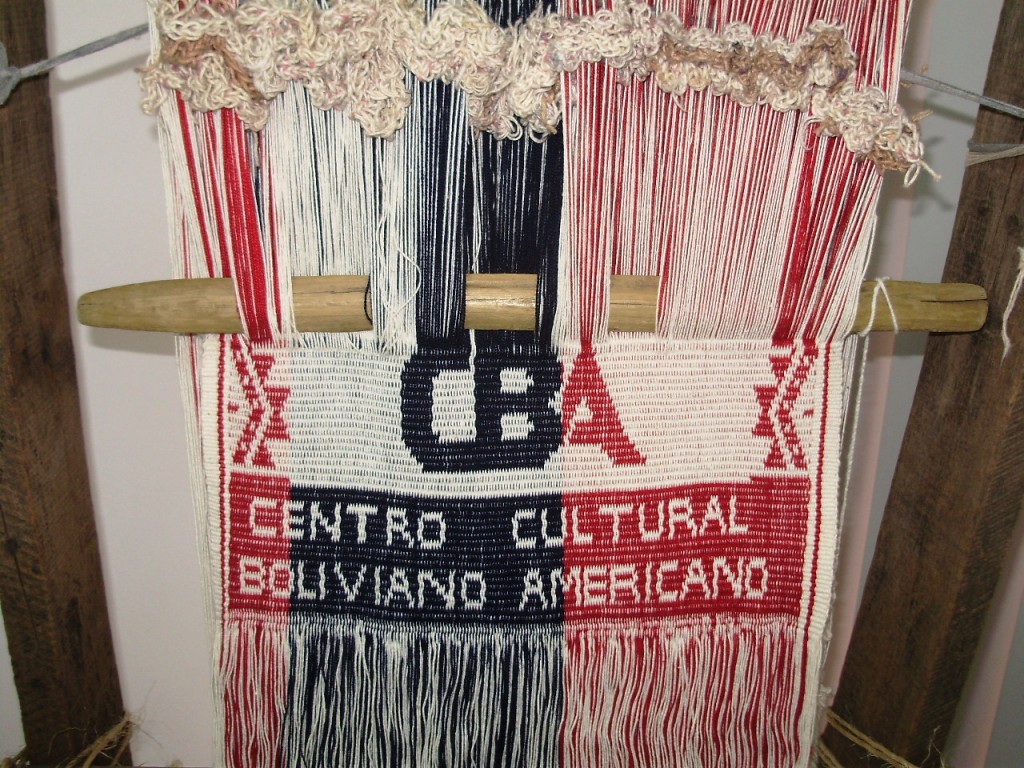
The band says Centro Cultural Boliviano Americano which is the institute where I taught English for eleven years. The teachers are wearing these around their necks to hold their ID cards. Gee, I wish we had had these when I was there! The band includes a small snake skin design. There are over sixty teachers there and so I imagine that this task is keeping her somewhat occupied as well!

Lettering! I was excited to see that but haven’t taken a good enough photo to get a really detailed look.  I think I will ask her to weave me an alphabet band if she ever has the time!

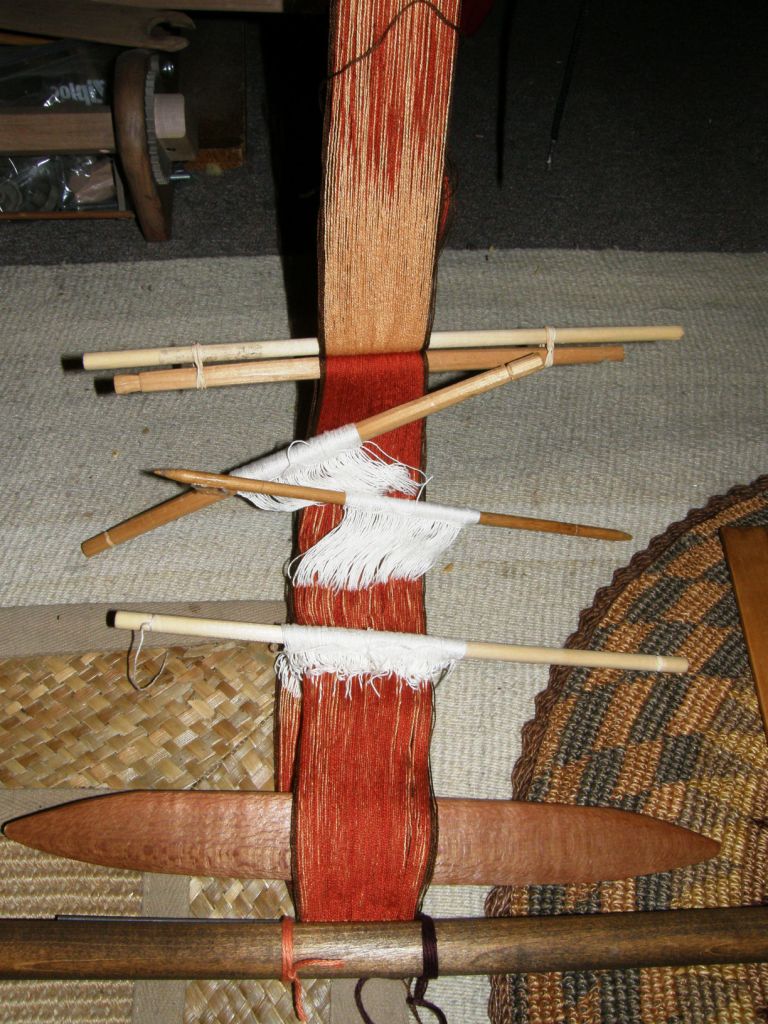
Another thing about which I am very tickled is that she has put one of her sets of heddles on a stick (see photo above). She had asked me to teach her how to do it on my last visit and now here she is using it. If you watched the pick up video in my last blog post you will see that opening the lower of the three sheds is a little tedious with the loose string heddles that she makes. So now she is using the stick on this lower heddle with the extra hitch as I showed her.

The actual stick that she is using as her heddle stick is a large wooden needle which she uses to pass the weft when she is weaving a four-selvedge piece. When she is closing the final piece of weaving and there is very little room in which to manipulate the sheds, she passes the weft under and over each warp with this needle until there is so little room that she has to use a regular steel needle. I loved this needle and, as she has three, she offered to sell me one.

And then I remembered to ask her about spinning. Yes, of course she knows how to spin cotton and she had a tiny bit of cotton to demonstrate. Just a touch of saliva on the spindle tip got her started. Of course, she is usually seated when she spins. This was just a quick demo. She told me that in Isoso both white and brown cotton is still cultivated (there is not a single boll to be found around Santa Cruz although it used to be a very large and important cotton growing area) and that several women still spin and ply their own cotton and carry their spindles about with them when they are plying.

However, she told me that those who grow the cotton are very careful to keep their hold on the small market and won’t sell it with the seeds. Sounds good to me! Deseeding cotton is not a fun task. I did a bit of that in Ecuador although it was fun there as we sat together in a chatty group and worked.

Angela’s whorl is plastic and a spindle that I bought years ago from the store where she used to work has what appears to be a piece of the sole of a shoe as its whorl. However she tells me that in Isoso, clay whorls are used. Guess what I have asked her to bring me from Isoso when she returns next Wednesday.
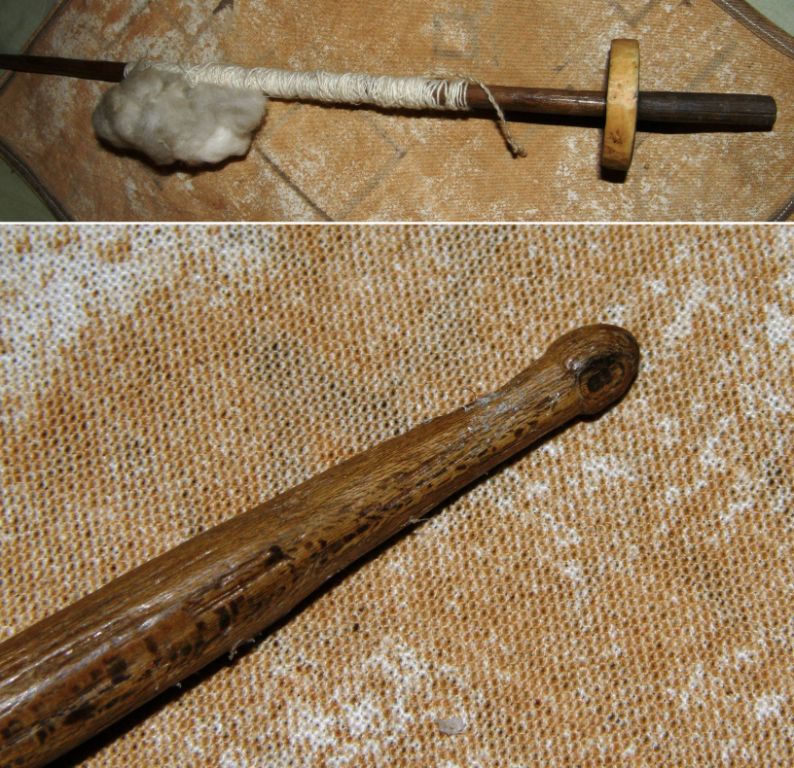
Above you can see the spindle I bought here in the city. The shaft is essentially the same as that on Angela’s spindle. I love the little knob carved into its end.

I also took home the yellow and black sample pebble weave band that Angela was warping up in the video that I put in last week’s post. She has warped this and set up the heddles quite differently to the way I was taught in Peru and so I can take a closer look at it now at home.

And this is kind of what I am alluding to in the title of this post. There is no one “right” way to do these things and I am constantly astounded by the similarities and differences I see in the way people are setting up their looms and weaving as I travel around. I had never seen anyone make string heddles the way Angela does and she was keen to learn the way I had been taught by my Navajo weaving teacher years ago. There is always room to learn something new and adapt your techniques. I am looking forward to a chance to try Angela’s way of doing pick up. It doesn’t work on the backstrap loom, believe me I tried it!

I wish I could do a tutorial on all the ways I have been shown to make string heddles so that you can try them all and see which way you prefer. Making the string heddles takes practice…string and fingers all over the place and then you just get them done and find that there are some that are woefully short…

I ran into Jamie’s blog last weekend where she had been battling to make string heddles following my video. It’s a good thing that resourceful Jamie came up with her own solution to the problem, made some heddles and wove a pebble weave piece.

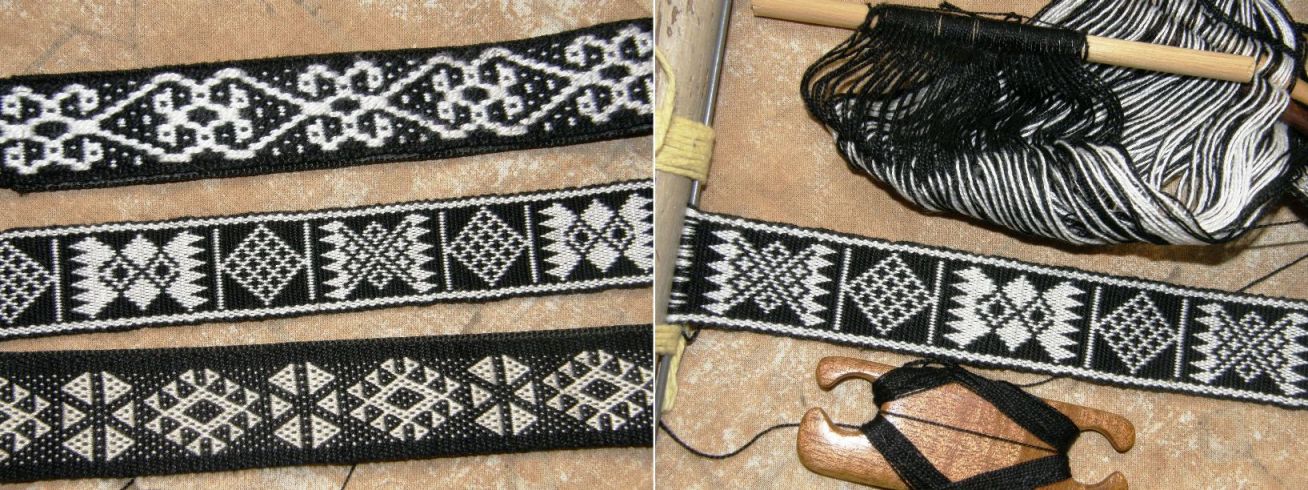
Above right you can see the individual string heddles that she made and successfully used on her warp. She says that this way is much faster. Well, I had to tease her about that because I disagree 🙂 but I can definitely see that these are much easier in that you get guaranteed even length heddles. If you are an inkle weaver you probably already have a bunch of these heddles lying around that you can use. If you don’t, Jamie made a nice tutorial on her blog showing you how to make them.

Above left you can see Helena’s (telarahna on Weavolution) solution with her nifty re-useable heddles. She says she needs to clean them after a project as bits of yarn fluff adheres to them but then they are good to go.

So, if you have been trying to make heddles the way I have shown it here and have been getting frustrated, there you have two nice solutions. Try different ways and see which you prefer and, as Jamie so rightly says in her blog, it’s easy “once you get the hang of it”.

Speaking of “getting the hang of ” something, I spent a great part of last weekend trying to get the hang of tubular woven bands and am pleased to say that I succeeded!…eventually.

This is kind of my warm up for the tinkuy (gathering of weavers) which I will be attending in Cusco next week. I signed up for a class on tubular woven bands but, as it is only a morning session I have doubts about whether we will have time to cover the tubular band that I really want to learn.

I used Adele Cahlander’s booklet pictured above. It is still available out there for under ten dollars. I have had this book for at least thirteen years and have never made the tubular bands. I guess I tried at one point as I have scribblings in the margins and have penciled in the colors that I was using but it seems I gave up as I have nothing to show for it.

The book has two versions of the band that I wanted to make. One has a sequence of six steps and the other eight. The problem is that there is not a picture of what the six-step version is supposed to look like. It is in fact a slightly imperfect version of the eight-step one and I spent a lot of time trying to figure out why my six-step band did not look like the bands on the cover of the book. I did not feel encouraged to try the eight-step version if I could not even get the simpler version right but in the end I decided I would just go ahead and try it.

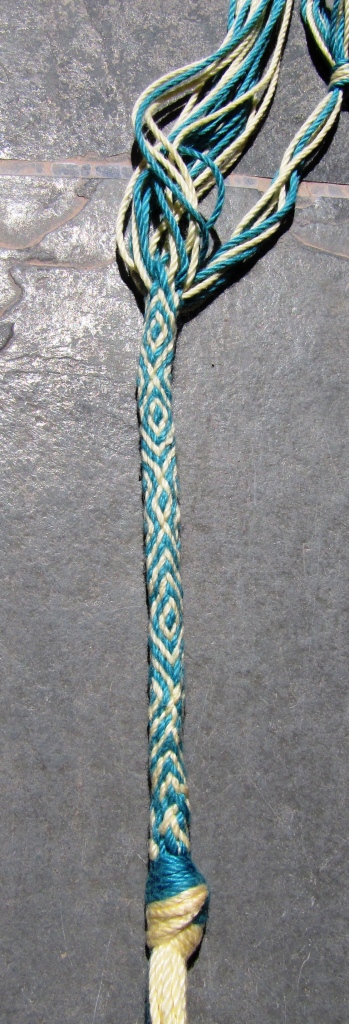
In the pictures above you can see the eight-step version on the left. See how it has two neat diamonds enclosing a center spot. In the six-step version the diamonds are not quite so neat and well defined, they overlap and cross and they actually get progressively messier as you proceed. This is just so you know what to expect if you buy the book and have a go yourselves.

Once I had this sorted I had the crazy urge to edge everything I could get my hands on with this tubular braid! I learned a tubular braid here in Bolivia many years ago but it is a very much simplified version of this one and looks nowhere near as nice.

This is one of those bands that are generally simultaneously woven and sewn to the edge of a textile using the weft as the sewing thread. So this is what I did with my Tarahumara bag and I love it!

I was so excited about having learned how to make these bands that I could have quite easily dug out everything I have woven and edged them all with them . But I resisted and decided to weave a miniature piece where I could put several finishing techniques to use. The Cahlander book also has instructions for crossed warp bands which are very interesting. So I decided to make  a small amulet type of bag, edge it with a tubular band and make a crossed warp band as a strap.
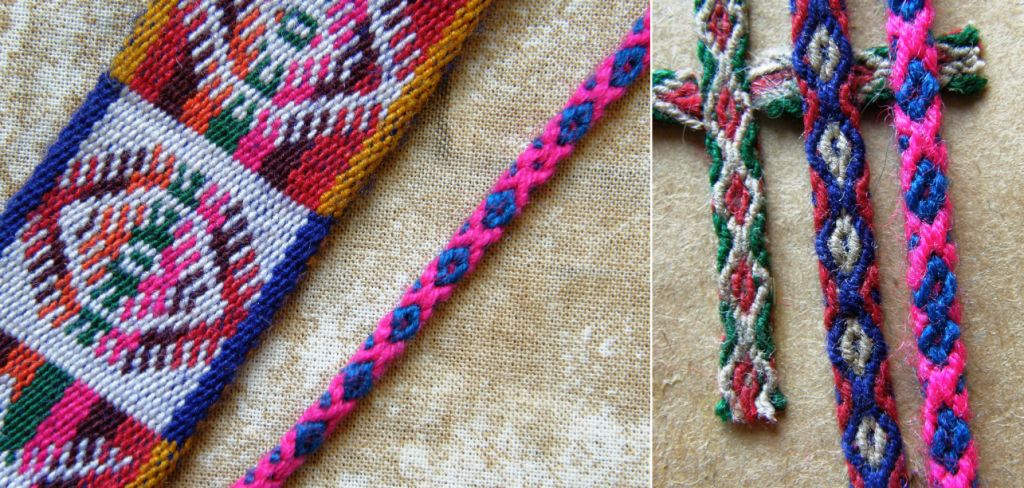
Crossed warp bands are used here in Bolivia as ties on the ends of belts like the one from Potosi seen above left and as chin straps for hats like the two wider bands on the right.
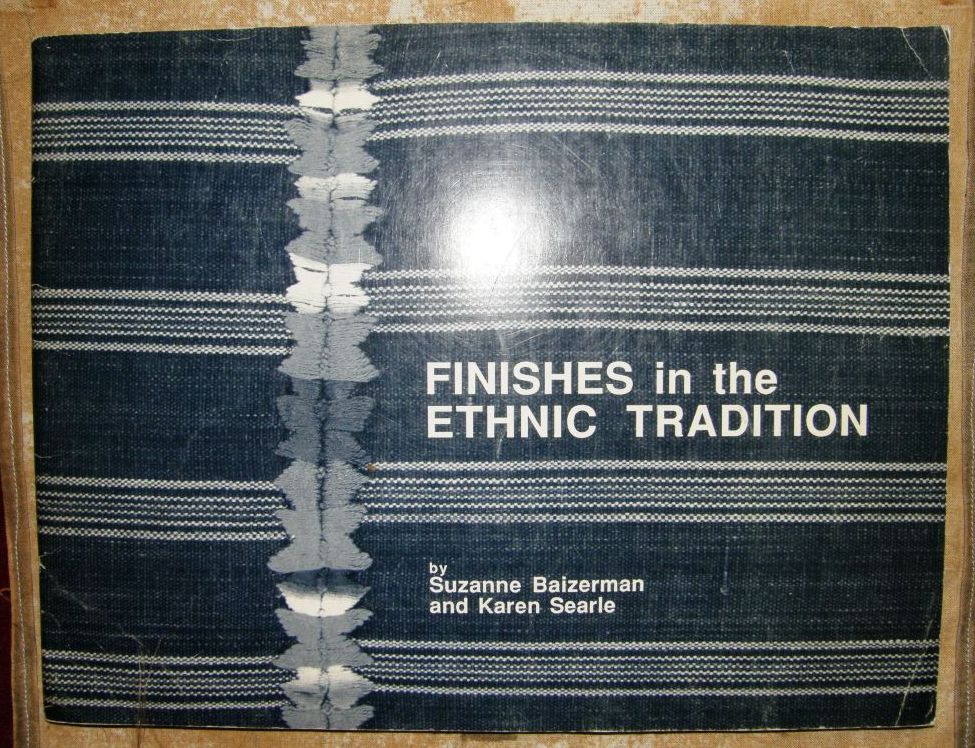
And then I fished out Karen Searle and Suzanne Baizerman’s wonderful work on finishing techniques and found the instructions for Bolivian pompoms I had made years ago to decorate my zampoña.

This book is full of all kinds of useful finishing techniques from around the world

First I had to brush up on the crossed warp techniques.

Then I wove the wee bag. I decided to keep it simple and warped up for plain warp faced weave so I could weave in a small motif with a supplementary weft (see the tutorial here).
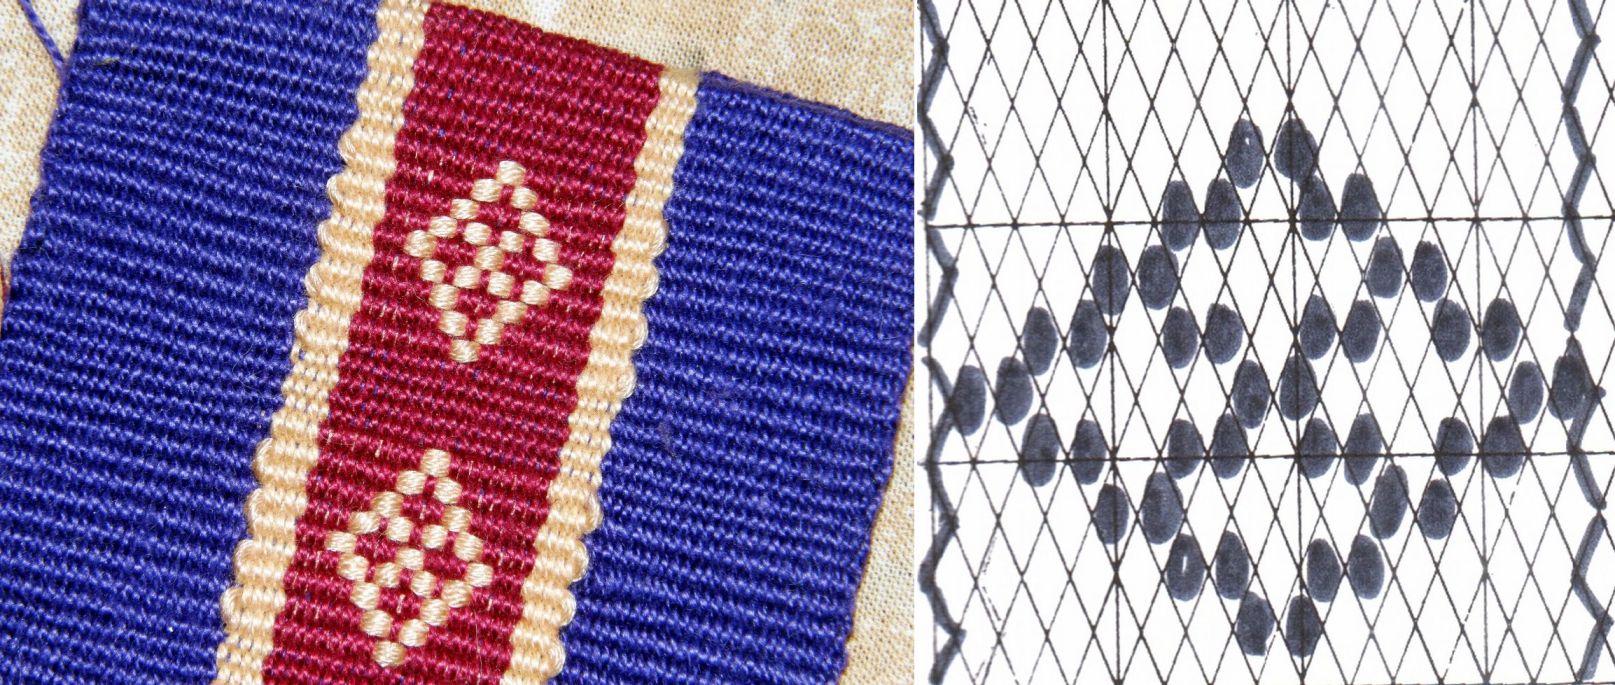
A very simple design and there’s the pattern chart for you if you would like to use it.

Next I wove and sewed on the tubular band.
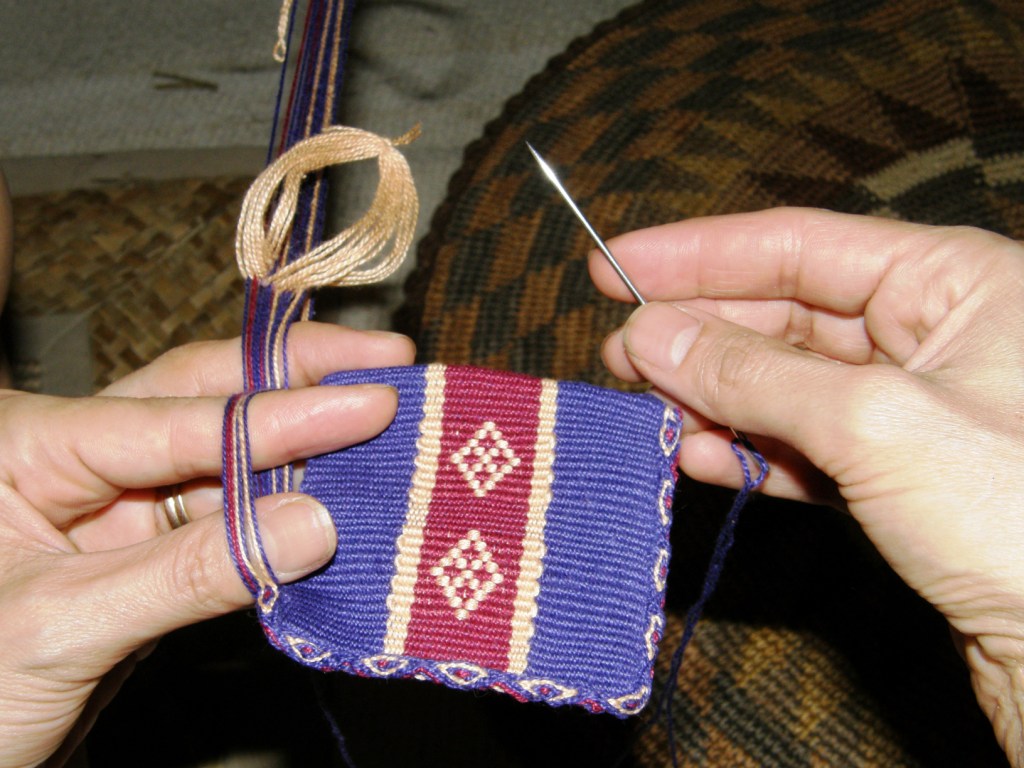
And I had fun making and attaching the tiny Bolivian pompoms.

But darn, I didn’t have time to make the crossed warp band for the strap so I have just placed thread there in the photo so you can get the idea. I am thinking of doing cross knit looping as an edging for the top of the bag too. Now I am mad for not thinking about this earlier. I think that these would have made nice gifts to take to the tinkuy- bags covered with little Bolivian techniques (although the suplementary weft motif is not Bolivian).

However I did find time to put together a NEW TUTORIAL. This one is on warp faced weaving with warp substitution which is the technique I used to weave the band with Bedouin designs that I showed you a couple of weeks ago.

Below is the sample band I wove in order to put together a set of instructions for you.

This is a great stepping stone to one-weft double weave.

You will learn the kind of pick up you need to do for one-weft double weave without having to deal with the extra manipulations and steps involved with weaving the doubled layers.

If you are interested in Bedouin weaving Helena (telarahna on Weavolution) gave me a link to an article by Joy Totah Hilden, author of the book on Bedouin weaving from which I got a lot of these designs.

Alaa (weave2 on weavolution and Ravelry) also gave me two great links to follow on this topic here and here.

And for the Spanish-speaking visitors to my blog, I have put up one tutorial so far in Spanish – the one on simple warp floats (although I haven’t found a way to say “simple warp floats” in Spanish. The literal translation sounds ridiculous!). There is a tab on the header photo and side bar.

Para las personas que hablan español he traducido el primero de los tutoriales que puedan ver aqui. De vez en cuando pueden chequear haciendo “click” en la pestaña “tutoriales en español” en la parte de arriba de la pagina. Alli podran ver si he traducido algun otro tutorial mas.

I may have time to squeeze in one more post before I go to Cusco on November 4th, but if you don’t hear from me you will know where I am 🙂

Backstrap Weaving – In my own backyard.

IN MY OWN BACKYARD

My weaving explorations seem to be taking me further and further afield these days…outside my city, my country (Bolivia) and even outside the continent and I have found myself visiting SE Asian weavers in the USA and learning about weavers in the Middle East from books.

Sometimes I forget about the treasures that are here right in my own backyard.

I wrote about the Ayoreo people who live in this area and their looped bags in a post a couple of weeks ago and the difficulties I have had in winning their trust so that I could learn more about them and their crafts. I have given up on that for now but hope that I can pursue it again some day. In the same way I was reminded of a Guarani weaver with whom I made contact here over six years ago.

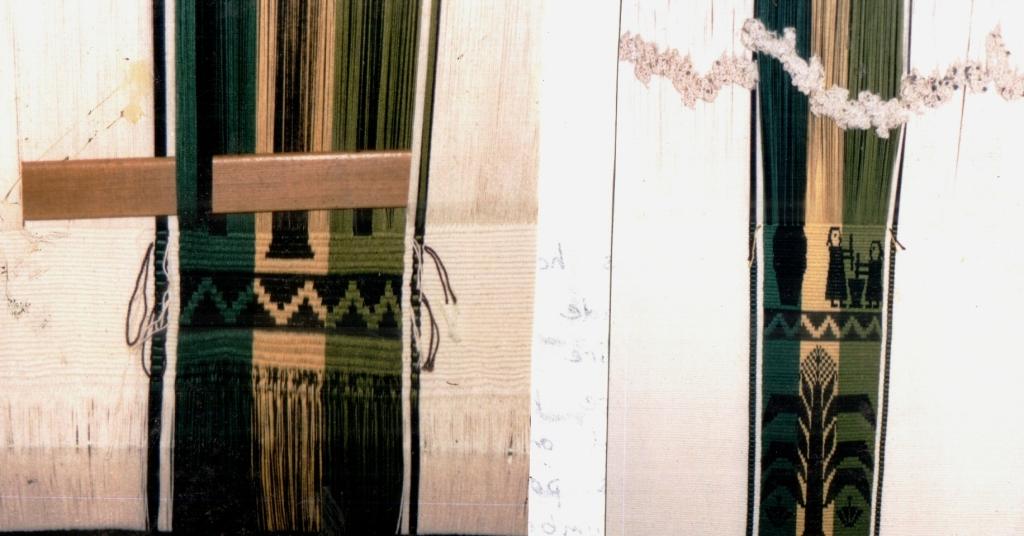
I used to visit Angela, a Guarani weaver, every Saturday morning over a period of a couple of months about six years ago. She had her loom set up in a handcraft store and was warping to make a hammock.

It was such an opportunity to meet up with Angela like this as it is very difficult to find weavers right here in the city let alone a weaver who has a loom and a place in which to use it . Angela’s hometown of Isoso is about twelve hours drive away from here. Angela would weave in the store twice a week. On my Saturday visits I got to see her warp most of the loom, but missed seeing her setting up the heddles. I saw her start the weaving and part of the designs. The white cotton hammock had three bands of green, yellow and black pick up designs. Angela’s motifs included flowers, geometrics, pineapple plants and scenes of people in their typical daily routine.

The motifs are hard to see on my scanned photos. On the right you may be able to make out two ladies “machucando”, that is, pounding plaintains, in order to make “masaco”, a typical Santa Cruz snack.

I would ask Angela where she lived hoping that I could maybe visit her at home and have some lessons. She had told  me that she had a small loom in her house. She would stretch out her arm and say “leeeejos” (“lejos” means far) as if to discourage me from visiting. Unfortunately, her son fell ill before we could really bond and she stopped coming to the store. Eventually the loom disappeared and now even the store is closed. I did manage to give her a copy of the photo of herself and her baby boy before I lost touch with her.

After Angela’s disappearance, I found bits and pieces about Guarani weaving in books and found that the technique she was using to weave her hammock is called Moisy. They also use a pebble weave which in the Guarani language is called Karapepo. I bought a hammock and bag in the Karapepo technique

I was able to copy the deigns from the hammock using Andean pebble weave technique and make this guitar strap.

From books I learned that the earth and the cosmos are represented by the star and snake skin designs. These are pretty much the only designs you will see woven in the pebbled Karapepo technique. In the Moisy technique, however, the weavers have a far greater repertoire and the designs are not like any others that you will see any where else in Bolivia. They speak of the lush tropical fruitiness of Santa Cruz! Leaves, flowers, vines, butterflies, animals and people involved in their daily routines or dancing and celebrating carnival are depicted on the hammocks, wall hangings and bags.

Cell phone pouches made with the Moisy technique with flower and butterfly motifs. A band of horizontal bars serves as the strap and velcro has been sewn on as a closure. A black band was woven and sewn simultaneously to the edges using the weft as the sewing thread to give a very nice neat finish.

And here is the best part of the story…I bought the above cell phone pouches from Angela last weekend at her home. Yes, I found her again, was invited to her home and got to spend the afternoon with her looking at her looms and weaving. The little fellow pictured with her above is now 8 years old and she has since had another son – that makes five sons in all now! Her eldest is married with his own family.

How did I find her? Very much by chance. The English institute where I taught English for eleven years started offering classes in the Guarani language shortly after I left. I recently noticed the loom and weaving pictured at left in the library which had been made and placed there to celebrate the start of the new Guarani program. I asked the receptionists about it they showed me the lovely cell phone pouches that a Guarani weaver had sold them. Fortunately, they had the weaver’s number and it turned out to be none other than Angela.

One of the karapepo cellphone pouches that Angela made for the receptionists – quite a different style to the blue and black ones she made using the Moisy technique.

I was very keen to see how Angela sets up and weaves her pebble weave as well as to learn how to do the Moisy. I was pleased to see that she uses the very same crochet cotton to weave as I do. When I visited her last Saturday, she had just warped up to make a colorful wall hanging on the smaller of her two looms, had just finished a book bag for a university student and was also in the middle of weaving a belt with fighting roosters which had been ordered by a Brazilian business man who mounts the woven pieces on leather and then apparently sells them for a very good price in Brazil. Angela’s enormous hammock loom is there in her patio and she can warp up several small projects on it at a time. She seems to have enough orders to keep her very busy.

She showed us one of her hammocks, the finished book bag, her cell phone pouches, greeting cards depicting carnival celebrations in her hometown of Isoso, pillow covers, belts and purses.

At left, the smaller loom warped for a wall hanging in Moisy technique and at right Angela is warping a narrow band to show me how she sets up for Karapepo technique.

She stretches a cord across the loom around which the start and end loops of the warp dovetail. Except for when she is weaving a hammock, she usually creates a third selvedge by starting her weaving right at the dovetail string.

I filmed her warping, making heddles and weaving the Moisy technique. As usual when I have the camera in front of my face. I find it hard to really absorb what is going on and so I had to come home and watch the movies over and over before I could grasp completely what she had been doing.

I like the way she makes her string heddles chaining them together. You will see her doing this in the video.

Angela’s chained heddles.

She, on the other hand, loved my heddles on their sticks (I had taken my backstrap loom, which she found very amusing, with a double weave piece on it to show her) and so I taught her my way of making heddles.

Here are two short clips of Angela warping using the dovetail string and making heddles. As she makes the heddles she is explaining to me the meaning of the designs on my guitar strap and telling me about the snake skin and how the snake that taught the first Guarani woman to weave in a dream is also embodied in the Parapeti River. Her little boys can be heard chattering in the background in the Guarani language.

In the next video, she is weaving the belt with the fighting roosters in Moisy technique. She has three sets of string heddles and another shed above the cross string. You must see the way she does her pick up. It is quite unique!

The lower of the three string heddles holds a shed through which she simply passes the weft without having to do any pick-up. The two upper heddles hold the separated colors. She pulls on those two heddles working her way from left to right to pick out the colors she needs. Watch her left hand gathering up the selected warps. Her eyes are down at the weaving line watching the design so she knows which colors to pick. Then she opens the shed which the lower string heddle controls. Then she does another row of pick up before opening the shed above the cross string, through which she can pass the weft without having to pick up warps. This shed is a little difficult to open as the warps have become entangled in the string heddles.

So I had to go home and see if I could figure out the Moisy! The best way was to try and reproduce one of her woven motifs. I found that I had to pull the weft really tightly through the shed to have my design look like hers. It makes a very, very sturdy fabric. For those of you who have my Andean Pebble Weave book, I would compare it to the thickness you achieve when you use the three-shed border. In fact, I quickly realized that the three-shed border is the very same structure.

There is my attempt to reproduce the flower on the cell phone pouch. It really helped a lot knowing that we both use the same thread so I knew what width to expect right from the start. I really had to pull the weft tight and force it into that width.

The motif is not exactly the same but I understand the technique.

I tried to chart it and then found my chart was wrong and so ended up just reading it directly off the cell phone pouch which was a really good exercise.

I did notice that Angela is weaving the rooster belt a lot more loosely. .

I confess that, although I started out with my warp set up as Angela showed me with the three string heddles, I found it quite uncomfortable simply because it was so foreign to me…impatient!…  and so I  changed to another set-up after a while with which I felt more at home. I would like to try Angela’s pick-up technique on her vertical loom and hope to visit her again soon. She has invited me to come and see her floral designs on the colorful wall hanging she is making.

In the meantime I will work on my charting as I would like to make a collection of these uniquely Cruceño designs.

###################################

What else have I been up to?

Well I started my double-weave belt using the Bedouin designs that I wove into my wall hanging.


I seem to be gathering a collection of black belts. At least they are all in different techniques with designs from different cultures. The uppermost one is two-color alternating warp floats (my made-up name for it…we could use the Kyrgyz word “terme” for it). The center one is the yet-to-be-finished double woven example with Bedouin designs and the lower one is, as you must all know by now,  Andean pebble weave as taught to me by weavers from Ayacucho, Peru.

I have also been weft twining but using floats this time to make a textured design in one color which is inspired by the alpargatas worked in ply-split darning that I showed you last week.

I am totally unimpressed with the results so far!

I’ll keep at it. Who knows, it may look better as I progress. Maybe I should overlap the floats by two warps instead of just one. What do you think?

What have my online weaving buddies been up to?

Anna, who is cycling down to Tierra del Fuego has turned up in Salta, Argentina and has added braiding to her skills following my instructions for the Margarita braid.

This is one of the two braids that was taught to me by my sling-making teacher in Peru.

I usually advise people to start with the Palma braid first as a skills builder but she jumped right in and, as you can see, has done really well!

I have gathered up all the information on the Palma and Margarita braids that is embedded in various posts here on my blog and put it all together on one page here.

Zacarias in Yanque Peru taught me these two braids which are used to make the typical slings of the area.

Marsha Knox of Pandula Arts Creations has been playing with simple warp floats in two-color alternating pairs on her Gilmore Wave loom and has created some great designs of her own. More designs like these can be seen on the Guatemalan belt in this post.


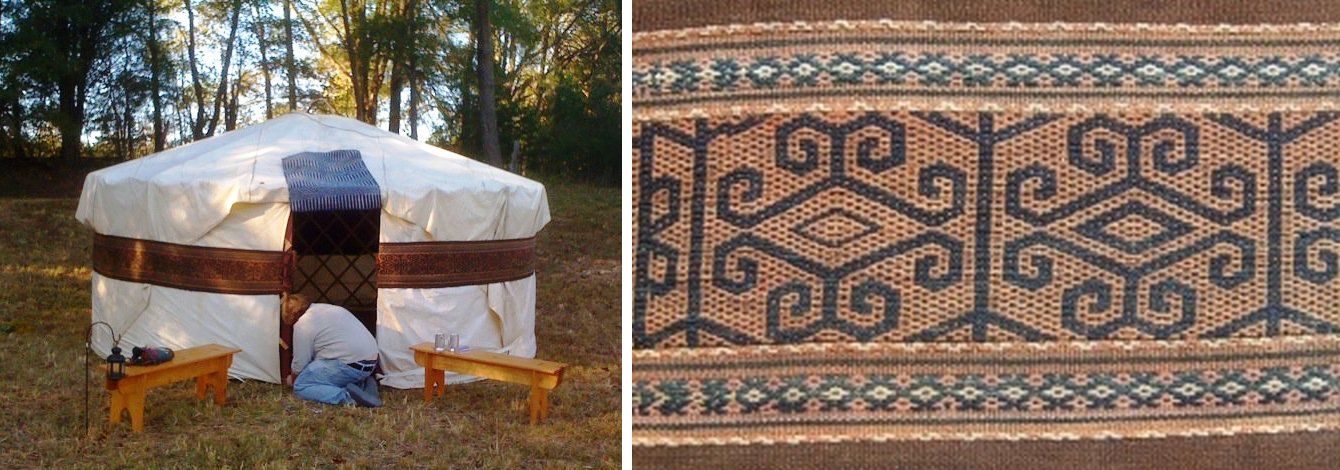
Lisa has been up to her eyeballs in dyeing but took some time out to enjoy a night in her yurt. You will probably recognize the  band encircling the yurt that she was lucky enough to purchase at a reenactment event and which I have shown off many times here on my blog. It is woven in the “terme” technique.

######################################

Finally…you may remember my posting a video some time ago, which had been made in March this year, showing little Melina learning to spin cotton from her aunt in coastal Ecuador. This is the family with whom I stayed in 2007 and learned about the process of weaving cotton saddlebags and the simple warp float technique. I accompanied anthropologist Kathleen Klumpp on this trip and Kathleen has just returned from another trip there with a new video of Melina’s improved skills seven months down the track.

Kathleen tells me that Melina is not yet able to support the weight of the spindle and so rests it on her thigh.

The original video of Melina’s first steps can be seen here. How quickly she has picked up the skills! Aunt Trini and Grandma Luz are master spinners and she is lucky to have such skilled teachers but I think that Melina’s success is largely due to Kathleen’s encouragement. How wonderful too that Kathleen has made and shared these videos so we can all follow this story.

And I have been inspired by a very sweet recent comment from Graciela here on the blog. I don’t know where she is from but she has inspired me to get my act together and put up the tutorials translated into Spanish that I have been promising. Another task for this weekend and I will try try try not to get distracted!

Pssst! There’s a Spotlight article about my backstrap weaving in the latest issue of Handwoven…


Backstrap Weaving – In pursuit of all things pebbly

A wee milestone to mark today: One year since the publication of my very first weaving article – BACKSTRAP BASICS in WeaveZine. I am hoping that this is the kind of article that will never look “dated”! Backstrap weaving is, afterall, an ancient practice and the project I presented in the article, a backstrap, is not exactly a fashion accessory! I hope that people will continue to find it useful for many years to come.

A million thanks to all those who have used the article and shared pictures of their woven backtraps with me. Some have been content with that one backstrap weaving experience while others have gone on to learn more and have created lovely pick up bands. I have made new online friends through that article and even gotten to travel and meet them. It really is a personal milestone worth marking.

This all comes on the very day that Syne Mitchell, editor of WeaveZine, has announced the details of her exciting new steps onward in the world of publishing.

I have had a couple more articles out since then in the WARP newsletter and Shuttle, Spindle and Dyepot and am working on some things at the moment as deadlines approach which means that this week’s post is a bit shorter than usual. My fingers have been a little bit busier at the keyboard than at the loom these last days but, of course, there was time for weaving (I would go mad if there wasn’t!)

Last weekend I decided to launch into another pebble weave project. You may remember that I showed you some images in a previous post of belts woven by the Tarahumara orRaramuri (he who walks well) people of Mexico…

The belt above in the lower right corner belongs to my friend Annie MacHale. She was wearing it one day at Convergence. The others belong to anthropologist Martha Graham. This was another of those chance meetings. She was at Convergence too and stopped by the Weavolution stand where I was displaying my backstrap woven pieces including some of my pebble weave work. She returned the following day with some of her Tarahumara belts to show me and allowed me to photograph them.

The zig zag design with its adjacent triangles reminded me very much of designs in the weavings of the Guarani people here in lowland Bolivia where I live (pictured at left). The Guarani design is said to represent patterns on snake skins. There are motifs on both the Guarani and Tarahumara pieces that resemble stars. According to an article in National Geographic (November 2008 ) “Each star in the night sky is a Tarahumara Indian whose souls – men have three and women have four, as they are the producers of new life – have all, finally, been extinguished.”

I am, of course, only guessing that the motifs on the Tarahumara weavings are, in fact, meant to be stars. I haven’t been able to turn up much information online about the weavings but am in the process of purchasing an article from the Journal of Anthropological Research. The National Geographic article has a picture of men in ritual costume where you can just catch a glimpse of the woven belts under brightly colored cloth that they also wrap about their waists. I also found images of a women weaving on horizontal wooden frames which they hold on their laps while resting the other end on a rock. There does not appear to be any kind of tensioning device on the loom.

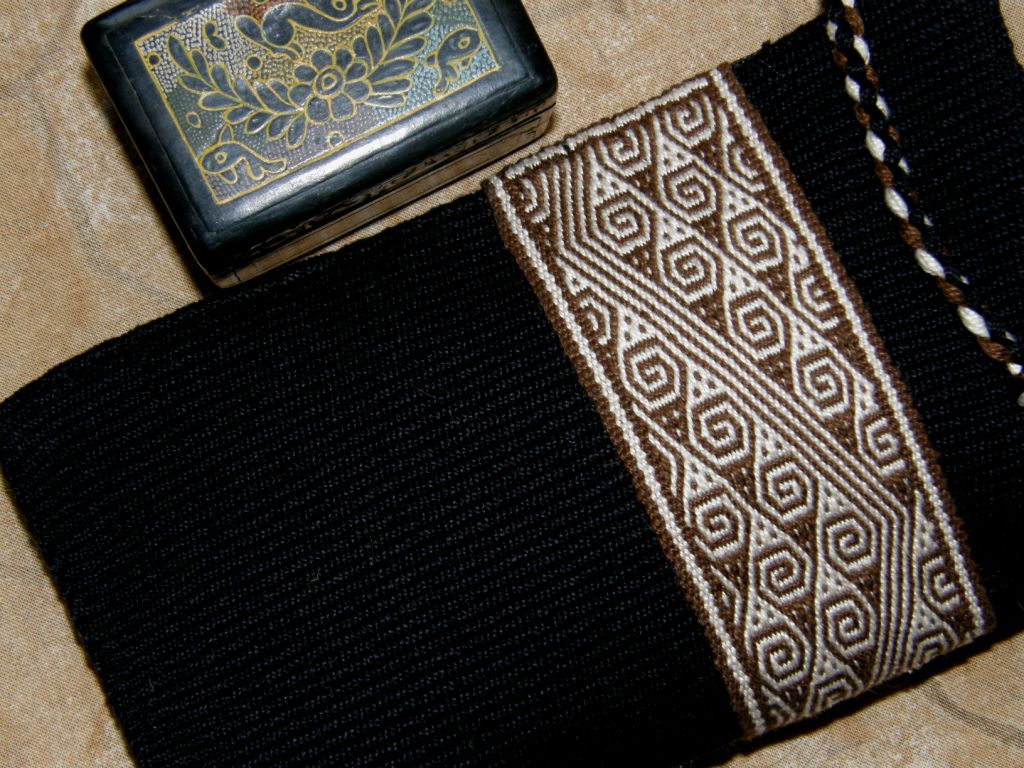
I found an image of a woven  belt that I particularly liked which had been collected in the 1890s and set about charting it. When you  see the design you will understand that after about an hour of this I was not only seeing squares when I shut my eyes from the charting paper but also swirling spirals!

These belts, from what I have seen, are generally 2 – 3 1/2 meters in length but I warped up on one of my shorter warping boards to sample.

Normally, I would weave something like this as a sample and, if I liked it, would then plan a project in which I could incorporate it. Not in this case! Weaving this was hard work!! The spirals went this way and that and I found it impossible to leave the chart and just weave. Just as I got accustomed to weaving spirals in one direction, they would change course so it was a very slow process and I decided that this effort must be put to some use. Fortunately I had a piece of black woven fabric that had been left over from another warp and the band looked pretty good on top of that.

And here is the end result…(as if you hadn’t already guessed! just love sewing in those zippers!)

Having the band separate from the body of the bag allowed me to play around a bit with the placement of the pattern and I decided that it looked nicest off to one side.  I have found other Tarahumara bands with unusual designs so I will get down to charting those so that I can incorporate the designs in  larger projects.

Here’s the long band which started out on Lisa’s four-shaft floor loom and then came home with me to go onto the backstrap loom to be finished. I was hoping to make this into a guitar strap for a friend in Utah. However, it seems that  the standard strap hardware does not come any wider than two inches so I have kind of dropped that idea. Roger didn’t know that he was about to get a guitar strap and he doesn’t read my blog so sshhh! we won’t tell him. Now I am thinking “loom bag”.

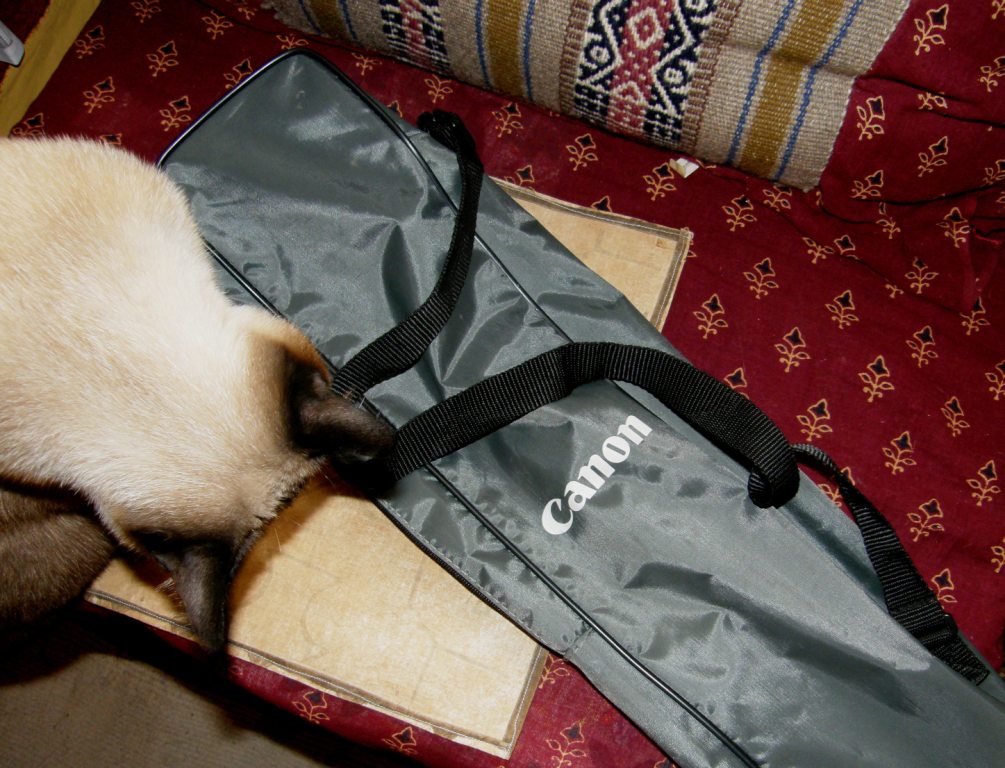
This is my current nifty loom bag, my tripod case. It is perfect with a zippered top and shoulder strap. It is just the right length for a loom and some tool bags and my backstrap. My portable warping board fits in there too but, maybe after all these years, I really need a woven loom bag and I have this one as a model. So I need to weave some plain fabric onto which I will sew my green band or maybe the band could be the sides. I just can’t seem to figure what color fabric would look good with that band.

Ah, so many new projects to get into and I continue to gather up information slowly but surely on past investigations like the woven belts used by the Russian Old Believers. Bits and pieces of information fall into my hands often sparked off by a random comment in a conversation with someone. I love how these things happen!

Here is something  that popped into my inbox the other day…

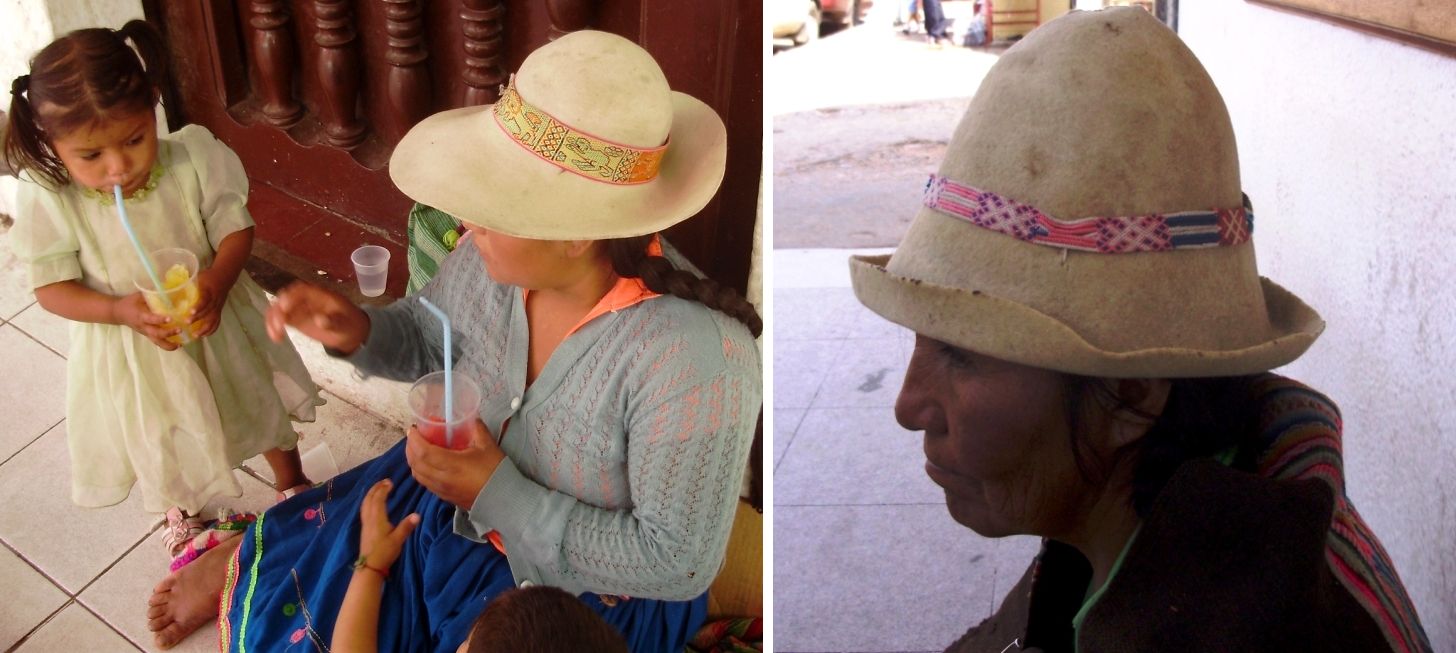
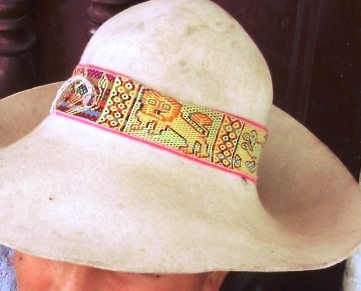
A friend of mine who was out and about snapped a couple of pictures of  ladies in their typical highland felt hats with some interesting hatbands.

You can see that the one at left definitely has a pebbly surface but I strongly suspect that these are factory produced bands. I would so love to talk to this lady and find out more about her hat band. If it is, in fact, factory made I am wondering if there is a growing trend to buying bands now rather than hand weaving them. I had always found the hatbands to be one of the most individual of woven pieces with widths and designs varying greatly.

The other band above has a series of single  woven motifs each separated by braids which is kind of interesting. I can’t get a close enough look to see what kind of weaving it is but it is certainly not the supplementary weft work which is usually used to decorate hat bands here.

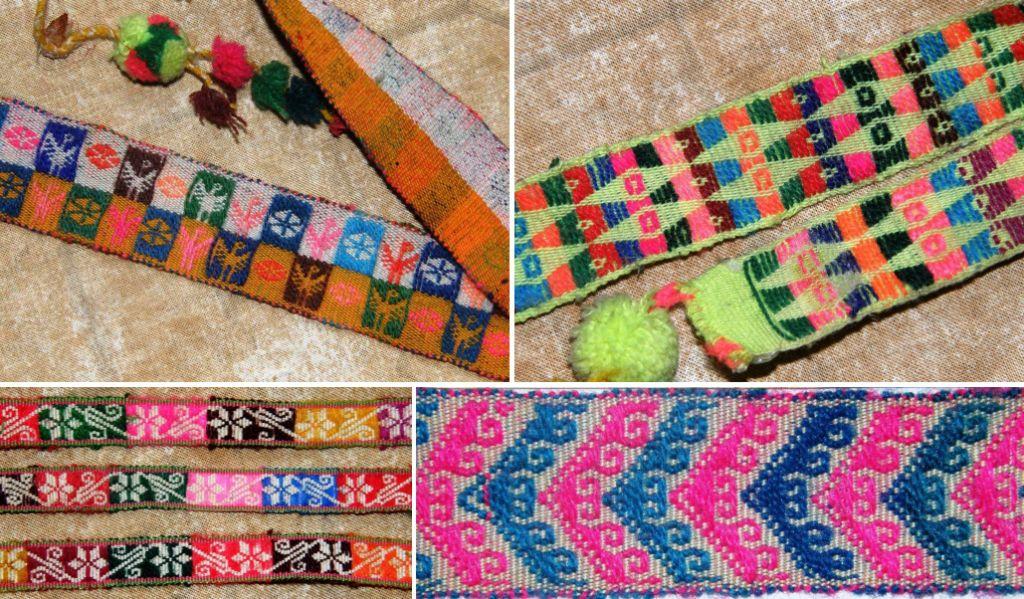
These are the more typical hatbands woven with very fine ground warp thread and decorated with supplementary wefts

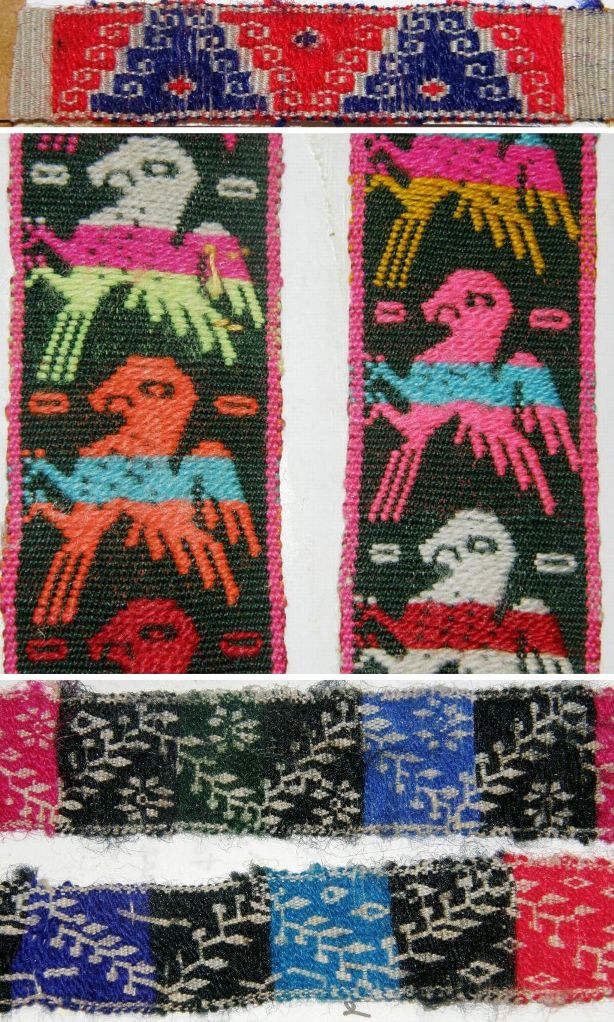
More hatbands with their colorful supplementary wefts above. You can see in the top example that the weaver used different weight threads. The red is heavier than the blue and gives better coverage. They key to success in this technique is to find the right weight ratio between your ground warp and main weft and the supplementary weft. Many of these designs are created using very long floats which could be a problem on an item that was destined to be handled a lot. The floats would catch on things. On a hatband this is not such a problem.

You can see that sometimes the supplementary weft creates the motif and other times it is used to fill in the negative space.

A tutorial on this technique (pictured above) can be seen on my blog here.

Here are some pictures from online companions who have been following my tutorials…

Heidai from Norway wove this band in one-weft double weave for the school bell with the school’s name included. She used  four-strand braids to finish it.

Amineko72 in France is  weaving a band from my Andean Pebble Weave book using her inkle loom. If you would like to try this on your inkle loom too, I recommend heading to the Inkle Loom Weavers group on Ravelry where there are a few people working on this together at the moment. Look for the Andean Pebble Weave thread. There is also a larger group working together on another thread called Pick-up using various books to make nice pick-up bands on their inkle looms. They have a very nice helpful community going there.

I just spotted Evelyn Oldroyd’s post on her blog showing one of the large pebble weave designs in my book on her inkle loom. She has made a very interesting warp with a comb design on the edges of the pebble pattern and the colors are gorgeous! I wish I could have posted the picture here but I haven’t gotten her permission yet as I just spied the post. Check it out on her blog.

And now… back to my pebbly pursuits!

Backstrap Weaving- Andean Pebble Weave-my ebook

Well here’s a surprise midweek post!

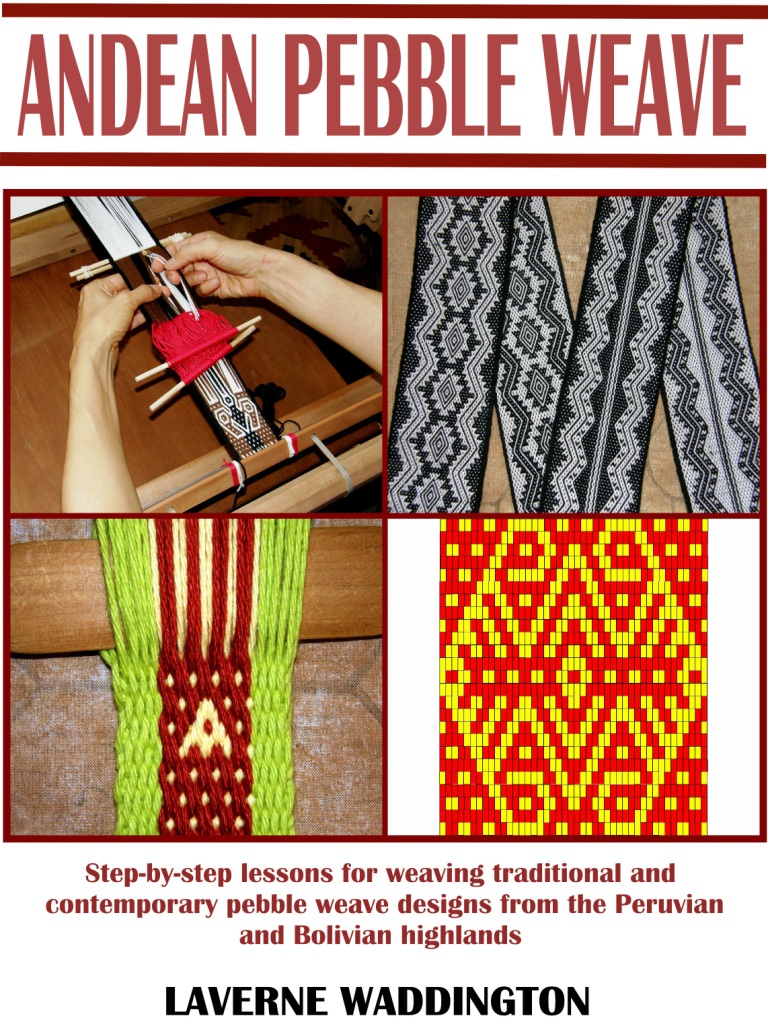
Syne Mitchell, editor and publisher of WeaveZine, after working closely with me for quite some time, announced last night that all was in place and ready to go on the WeaveZine site to sell my first ebook tutorial on my number one favorite South American pick up technique…(now available at Taproot Video.)

ANDEAN PEBBLE WEAVE


Today was a travel day for me – I took  the train down from Humboldt County in Northern California with its majestic redwood forests and turbulent rivers through wine country with distant snow capped peaks to bustling San Francisco  so I had to wait all day to be able to tell you all about this.

Andean pebble weave – this was the first pick up technique I learned with my  teacher Margarita in Huancayo, Peru back in 1996 and it really is my favorite for the flexibilty in the designs you can create as well as for the fact that it weaves up a lot faster than the other pick ups that I know.

It is partly loom controlled so only every second row requires a manual manipulation of the warp threads.

You will recognize pebble weave easily by its spotty “pebbled” background on which the indigenous weavers of Peru and Bolivia place a myriad of traditional and contemporary motifs.

It is also double faced so that both sides of the textile show the same motifs with their colors reversed.

You may remember from my blog post last week that this was the technique that I taught to Juan in Salasaca who wanted to learn something about his Bolivian weaving heritage and now I get to teach it to all of you.

The e-tutorial is really crammed with step-by-step photos – once I decided that it would be an ebook, I went to town with the pictures! There are over thirty pattern charts too.You can see that it is too huge to have here on the blog – it just kept growing!!

I have woven it on my backstrap loom, as Margarita taught me, as well on my rigid heddle loom by lashing the warp to the warp sticks. For some time I was lashing the warps to my Navajo loom in Chile as you saw in my last post. More recently I have been playing with it on an inkle loom using my fingers as a picking cross. Once I get home to Bolivia and unpack my inklette and get it set up I will see about installing two sets of string heddles and see how it goes – shall keep you posted on that.

So, it can be woven pretty much on any kind of sturdy frame that allows for tension adjustment and gives you enough working space to get your hands in to pick the pattern warps.

My e-book shows you how to wind the warp and arrange the threads in a cross ready for weaving. It is then up to the reader to decide how they would like to suspend and tension the warp. That could be by attaching one end of the warp to the body and the other to a fixed point (backstrap-style) or by lashing the`warp to the frame of a rigid heddle or other loom.

This is what Andean Pebble Weave looks like with its spotted or “pebbled” background…

Pebble weave Guarani designs from lowland Bolivia that I wove into a guitar strap.
A pebble weave motif from highland Peru woven in my handspun llama fiber. This was made into a shoulder bag.

I have used it on very narrow and wide pieces like guitar straps, belts, bag straps, purses, bookmarks, keyfobs, table runners and wall hangings. The e-tutorial takes you through four lessons from the narrowest plain bands to introductory patterning and then on to wider pieces with more detailed motifs and leaves you with pages of pattern charts of pre Columbian and contemporary designs.

My friend Janet inside a redwood!

I am still on the road with lots to tell which I am saving for Friday’s post – a new braid tutorial along with some other great videos and photos. I have had all sorts of unexpected weaving encounters up in the redwood forest area of Northern California with my buddy Janet and now find myself with a little quiet time here in the Youth Hostel in San Francisco. Just what I need to get all my pictures together and write my post.

See you all on Friday. I hope you like my e-tutorial and I get to see your own pebble weave projects soon. 🙂

Thank you to all who have downloaded it so far.

Backstrap Weaving – an introduction

WELCOME TO THE FIRST POST ON MY BACKSTRAP  WEAVING  BLOG.

My name is Laverne Waddington and I have been learning the traditional weaving techniques of South America since 1995.

I wove the above piece on my backstrap loom as a wall hanging for a friend of mine in Utah. The designs are typical of the Guarani people of lowland Bolivia where I live. A snake skin design adorns the outer bands while the center is made up of stars. Each star has a slightly different inner pattern some of which are my own.  This piece has been woven in pebble weave -a complementary warp technique which I learned in Huancayo, Peru with my very first indigenous weaving teacher.

my first teacher in Peru.
Margarita –  my first teacher in Peru

I plan to frequently contribute to this blog with stories of my experiences learning to weave and live here in South America as well as with details of my current projects and aspirations.

Santa Cruz-my home in Bolivia

I hope you will learn something here about the simple joy of backstrap weaving and maybe even be inspired to try it yourself.

weaving the Guarani design piece
At my loom weaving the above Guarani- design piece.